5360 GA - Saw SKIL - Free user manual and instructions
Find the device manual for free 5360 GA SKIL in PDF.
| Technical Specifications | SKIL 5360 GA circular saw, 1200 W power, 190 mm blade diameter, no-load speed 5000 rpm. |
|---|---|
| Usage | Ideal for cutting wood, particle boards, and similar materials, suitable for DIY and construction work. |
| Maintenance and Repair | Regularly check the blade condition, clean the housing and ventilation openings, replace the blade if necessary. |
| Safety | Equipped with a blade guard, safety switch, and ergonomic handle for better control. |
| General Information | Weight: 4.2 kg, 2-year warranty, included accessories: saw blade, parallel guide. |
Frequently Asked Questions - 5360 GA SKIL
User questions about 5360 GA SKIL
0 question about this device. Answer the ones you know or ask your own.
Ask a new question about this device
Download the instructions for your Saw in PDF format for free! Find your manual 5360 GA - SKIL and take your electronic device back in hand. On this page are published all the documents necessary for the use of your device. 5360 GA by SKIL.
USER MANUAL 5360 GA SKIL
Compact multi-material saw 5360 INTRODUCTION
- This tool is intended for lengthways and crossways sawing of wood, chipboard, plywood, aluminium, tiles, stone, plastic and lightweight construction materials held in a fixed position
- This tool is intended for making short cuts only
- This tool is not intended for professional use
- Read this instruction manual carefully before use and save it for future reference ④
TECHNICAL DATA①
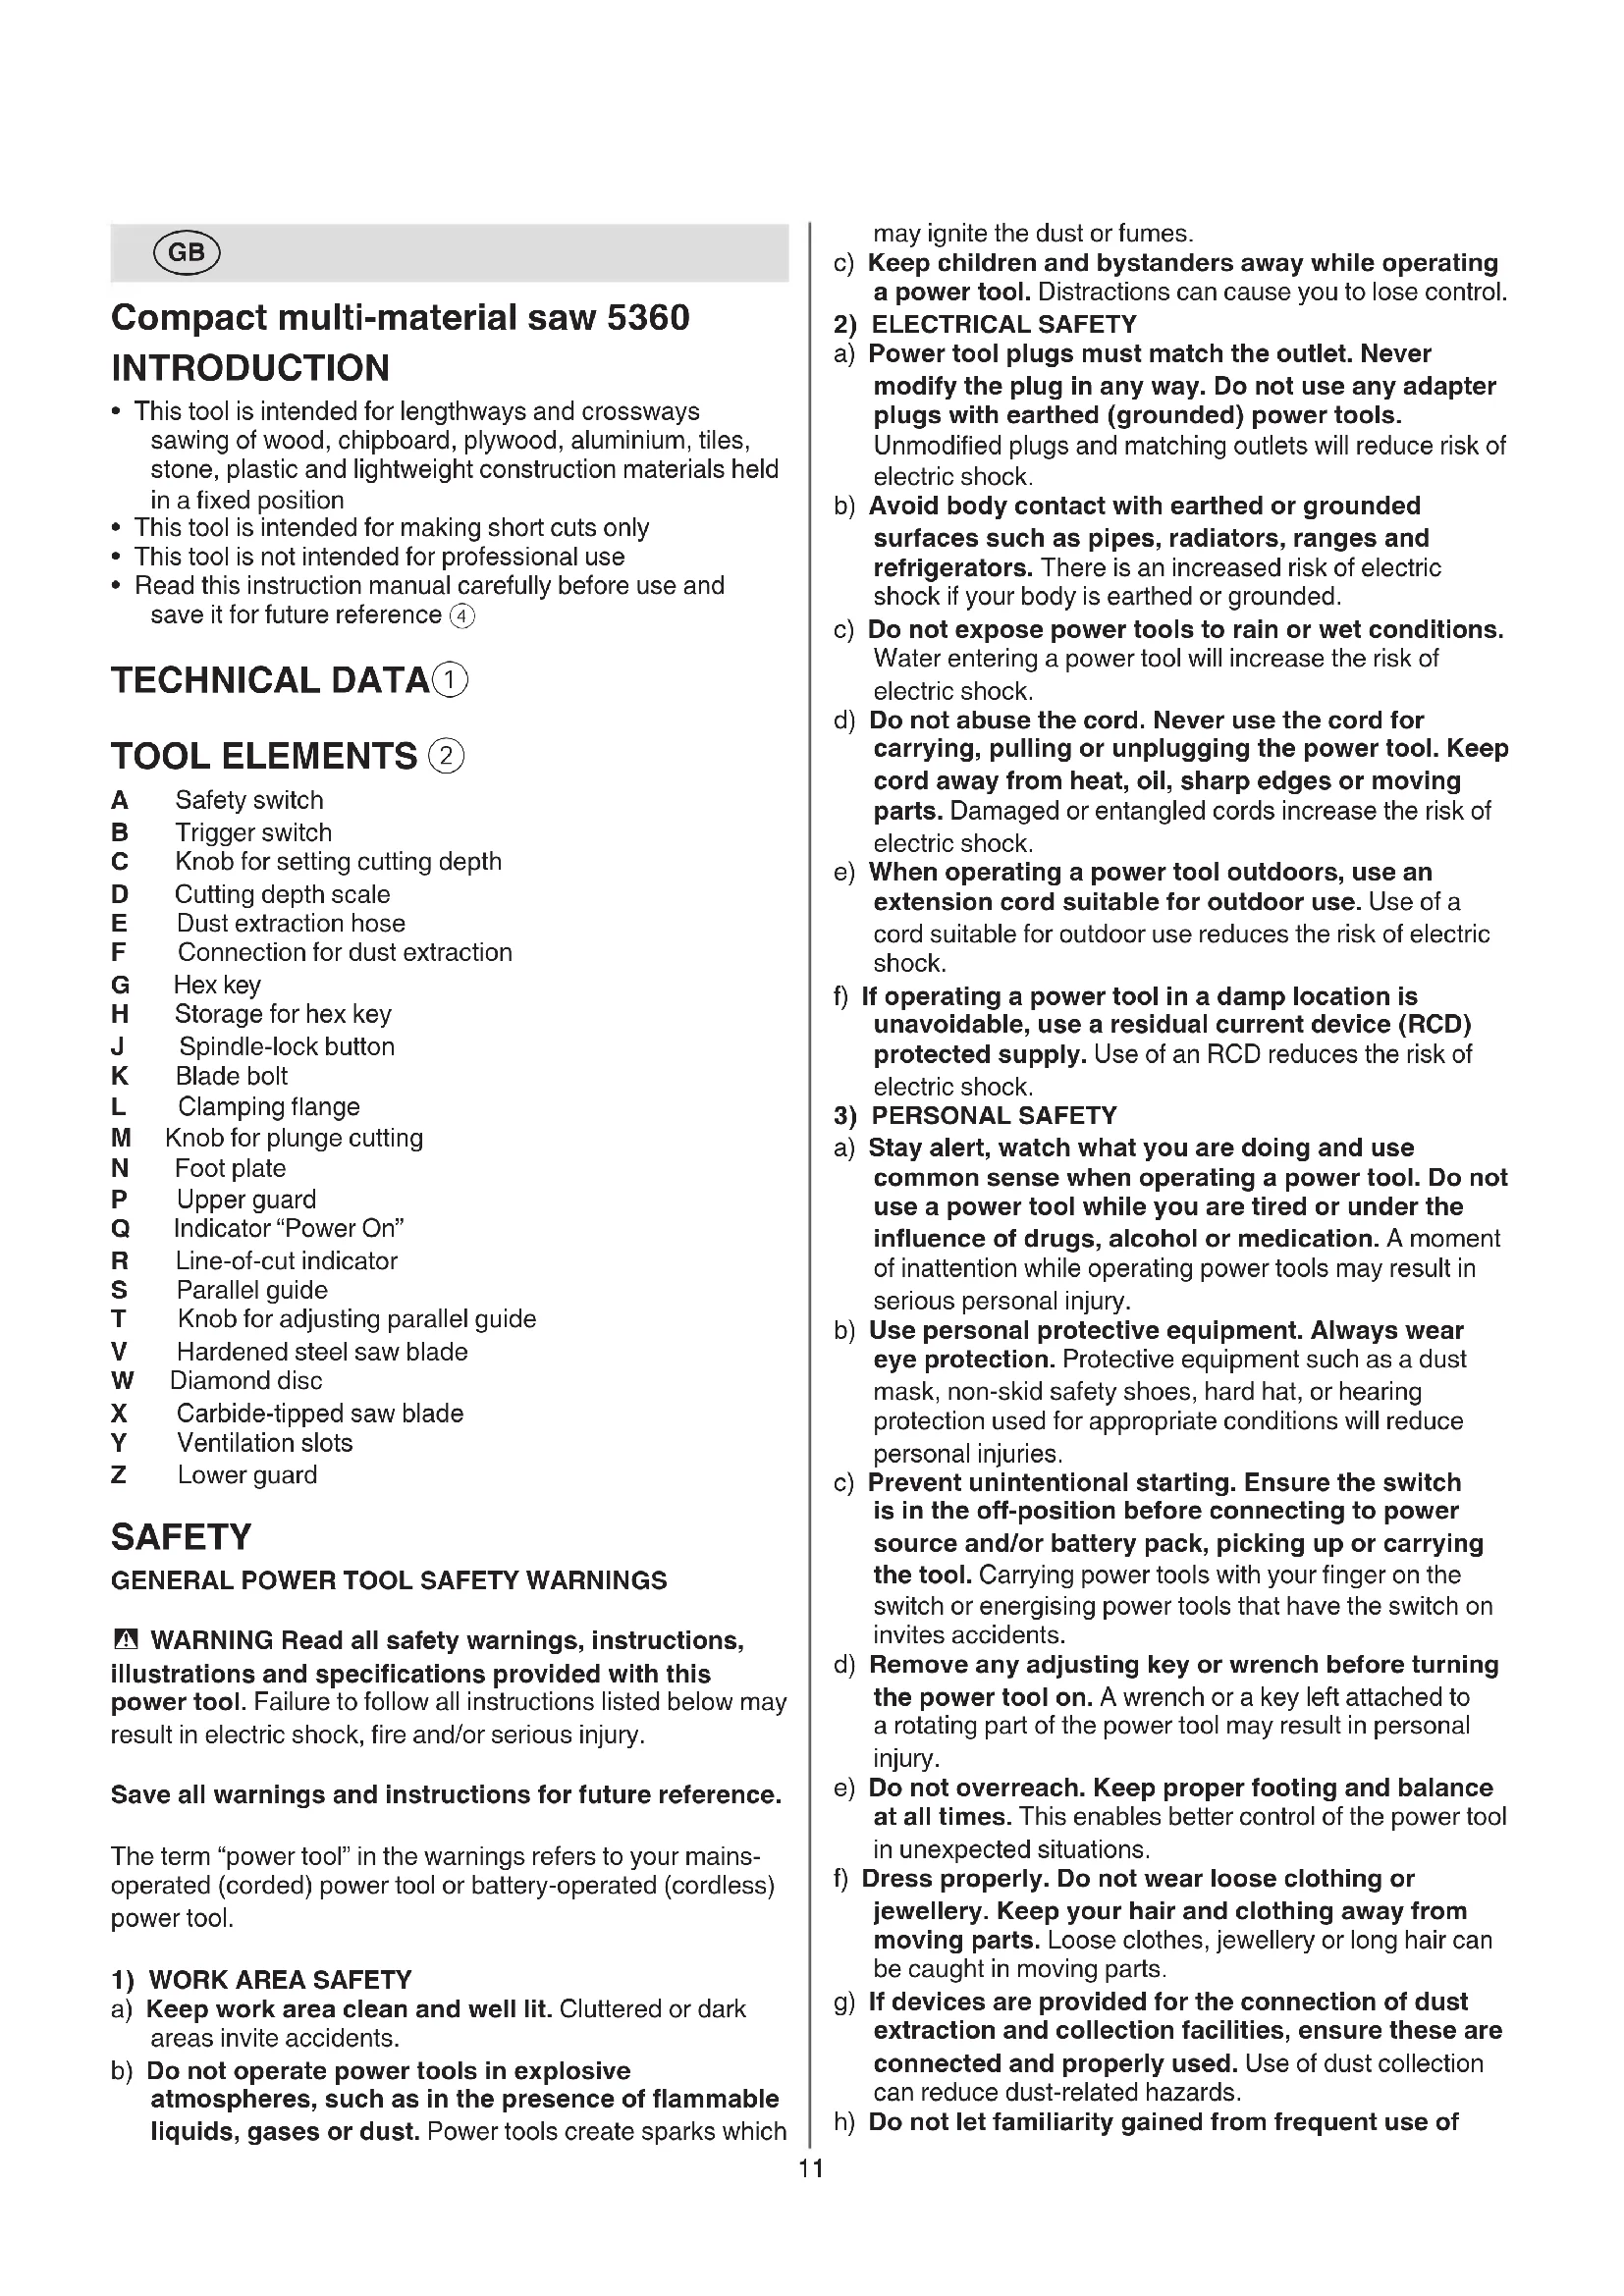
TOOLELEMENTS ②
A Safety switch
B Trigger switch
C Knob for setting cutting depth
D Cutting depth scale
E Dust extraction hose
F Connection for dust extraction
G Hex key
H Storage for hex key
J Spindle-lock button
K Blade bolt
L Clamping flange
M Knob for plunge cutting
N Foot plate
P Upper guard
Indicator "Power On"
R Line-of-cut indicator
S Parallel guide
T Knob for adjusting parallel guide
V Hardened steel saw blade
W Diamond disc
X Carbide-tipped saw blade
Y Ventilation slots
Z Lower guard
SAFETY
GENERAL POWER TOOL SAFETY WARNINGS
WARNING Read all safety warnings, instructions, illustrations and specifications provided with this power tool. Failure to follow all instructions listed below may result in electric shock, fire and/or serious injury.
Save all warnings and instructions for future reference.
The term "power tool" in the warnings refers to your mains-operated (corded) power tool or battery-operated (cordless) power tool.
1) WORK AREA SAFETY
a) Keep work area clean and well lit. Cluttered or dark areas invite accidents.
b) Do not operate power tools in explosive atmospheres, such as in the presence of flammable liquids, gases or dust. Power tools create sparks which
c) Keep children and bystanders away while operating a power tool. Distractions can cause you to lose control.
2) ELECTRICAL SAFETY
a) Power tool plugs must match the outlet. Never modify the plug in any way. Do not use any adapter plugs with earthed (grounded) power tools.
may ignite the dust or fumes.
Unmodified plugs and matching outlets will reduce risk of electric shock.
b) Avoid body contact with earthed or grounded surfaces such as pipes, radiators, ranges and refrigerators. There is an increased risk of electric shock if your body is earthed or grounded.
c) Do not expose power tools to rain or wet conditions. Water entering a power tool will increase the risk of electric shock.
d) Do not abuse the cord. Never use the cord for carrying, pulling or unplugging the power tool. Keep cord away from heat, oil, sharp edges or moving parts. Damaged or entangled cords increase the risk of electric shock.
e) When operating a power tool outdoors, use an extension cord suitable for outdoor use. Use of a cord suitable for outdoor use reduces the risk of electric shock.
f) If operating a power tool in a damp location is unavoidable, use a residual current device (RCD) protected supply. Use of an RCD reduces the risk of electric shock.
3) PERSONAL SAFETY
a) Stay alert, watch what you are doing and use common sense when operating a power tool. Do not use a power tool while you are tired or under the influence of drugs, alcohol or medication. A moment of inattention while operating power tools may result in serious personal injury.
b) Use personal protective equipment. Always wear eye protection. Protective equipment such as a dust mask, non-skid safety shoes, hard hat, or hearing protection used for appropriate conditions will reduce personal injuries.
c) Prevent unintentional starting. Ensure the switch is in the off-position before connecting to power source and/or battery pack, picking up or carrying the tool. Carrying power tools with your finger on the switch or energising power tools that have the switch on invites accidents.
d) Remove any adjusting key or wrench before turning the power tool on. A wrench or a key left attached to a rotating part of the power tool may result in personal injury.
e) Do not overreach. Keep proper footing and balance at all times. This enables better control of the power tool in unexpected situations.
f) Dress properly. Do not wear loose clothing or jewellery. Keep your hair and clothing away from moving parts. Loose clothes, jewellery or long hair can be caught in moving parts.
g) If devices are provided for the connection of dust extraction and collection facilities, ensure these are connected and properly used. Use of dust collection can reduce dust-related hazards.
h) Do not let familiarity gained from frequent use of
tools allow you to become complacent and ignore tool safety principles. A careless action can cause severe injury within a fraction of a second.
4) POWER TOOL USE AND CARE
a) Do not force the power tool. Use the correct power tool for your application. The correct power tool will do the job better and safer at the rate for which it was designed.
b) Do not use the power tool if the switch does not turn it on and off. Any power tool that cannot be controlled with the switch is dangerous and must be repaired.
c) Disconnect the plug from the power source and/ or remove the battery pack, if detachable, from the power tool before making any adjustments, changing accessories, or storing power tools. Such preventive safety measures reduce the risk of starting the power tool accidentally.
d) Store idle power tools out of the reach of children and do not allow persons unfamiliar with the power tool or these instructions to operate the power tool. Power tools are dangerous in the hands of untrained users.
e) Maintain power tools and accessories. Check for misalignment or binding of moving parts, breakage of parts and any other condition that may affect the power tool's operation. If damaged, have the power tool repaired before use. Many accidents are caused by poorly maintained power tools.
f) Keep cutting tools sharp and clean. Properly maintained cutting tools with sharp cutting edges are less likely to bind and are easier to control.
g) Use the power tool, accessories and tool bits etc., in accordance with these instructions, taking into account the working conditions and the work to be performed. Use of the power tool for operations different from those intended could result in a hazardous situation.
h) Keep handles and grasping surfaces dry, clean and free from oil and grease. Slippery handles and grasping surfaces do not allow for safe handling and control of the tool in unexpected situations.
5) SERVICE
a) Have your power tool serviced by a qualified repair person using only identical replacement parts. This will ensure that the safety of the power tool is maintained.
SAFETY INSTRUCTIONS FOR MULTI SAWS
1) CUTTING PROCEDURES
a) DANGER: Keep hands away from cutting area and the blade. If both hands are holding the saw, they can not be cut by the blade.
b) Do not reach underneath the workpiece. The guard cannot protect you from the blade below the workpiece.
c) Adjust the cutting depth to the thickness of the workpiece. Less than a full tooth of the blade teeth should be visible below the workpiece.
d) Never hold the workpiece being cut in your hands or across your leg. Secure the workpiece to a stable platform. It is important to support the work properly to minimize body exposure, blade binding, or loss of control.
e) Hold the power tool by insulated gripping surfaces only, when performing an operation where the cutting tool may contact hidden wiring or its own
cord. Contact with a "live" wire will also make exposed metal parts of the power tool "live" and could give the operator an electric shock.
f) When ripping always use a parallel guide or straight edge guide. This improves the accuracy of cut and reduces the chance of blade binding.
g) Always use blades with correct size and shape (diamond versus round) of arbour holes. Blades that do not match the mounting hardware of the saw will run eccentrically, causing loss of control.
h) Never use damaged or incorrect blade washers or bolt. The blade washers and bolt were specially designed for your saw, for optimum performance and safety of operation.
2) KICKBACK CAUSES AND RELATED WARNINGS
- Kickback is a sudden reaction to a pinched, bound or misaligned saw blade, causing an uncontrolled saw to lift up and out of the workpiece toward the operator
- When the blade is pinched or bound tightly by the kerf closing down, the blade stalls and the motor reaction drives the unit rapidly back toward the operator
- If the blade becomes twisted or misaligned in the cut, the teeth at the back edge of the blade can dig into the top surface of the wood causing the blade to climb out of the kerf and jump back towards operator
- Kickback is the result of power tool misuse and/or incorrect operating procedures or conditions and can be avoided by taking proper precautions as given below.
a) Maintain a firm grip with both hands on the saw and position your arms to resist kickback forces. Position your body to either side of the blade, but not in line with the blade. Kickback could cause the saw to jump backwards, but kickback forces can be controlled by the operator, if proper precautions are taken.
b) When blade is binding, or when interrupting a cut for any reason, release the trigger and hold the saw motionless in the material until the blade comes to a complete stop. Never attempt to remove the saw from the work or pull the saw backwards while the blade is in motion or kickback may occur. Investigate and take corrective actions to eliminate the cause of blade binding. Avoid cutting nails or screws.
c) When restarting a saw in the workpiece, centre the saw blade in the kerf and check that saw teeth are not engaged into the material. If saw blade is binding, it may walk up or kickback from the workpiece as the saw is restarted.
d) Support large panels to minimise the risk of blade pinching and kickback. Large panels tend to sag under their own weight. Supports must be placed under the panel on both sides, near the line of cut and near the edge of the panel.
e) Do not use dull or damaged blades. Unsharpened or improperly set blades produce narrow kerf causing excessive friction, blade binding and kickback.
f) Blade depth and bevel adjusting locking levers must be tight and secure before making cut. If blade adjustment shifts while cutting, it may cause binding and kickback.
g) Use extra caution when sawing into existing walls or other blind areas. The protruding blade may cut objects that can cause kickback.
3) GUARD FUNCTION
a) Check guard for proper closing before each use. Do not operate the saw if guard does not move freely and enclose the blade instantly. Never clamp or tie the guard so that the blade is exposed. If saw is accidentally dropped, guard may be bent. Check to make sure that guard moves freely and does not touch the blade or any other part, in all angles and depths of cut.
b) Check the operation and condition of the guard return spring. If the guard and the spring are not operating properly, they must be serviced before use. Guard may operate sluggishly due to damaged parts, gummy deposits, or a build-up of debris.
c) Assure that the base plate of the saw will not shift while performing the "plunge cut" when the blade bevel setting is not at 90^ . Blade shifting sideways will cause binding and likely kickback.
d) Always observe that the guard is covering the blade before placing saw down on bench or floor. An unprotected, coasting blade will cause the saw to walk backwards, cutting whatever is in its path. Be aware of the time it takes for the blade to stop after switch is released.
ADDITIONAL SAFETY WARNINGS
GENERAL
- This tool is not intended for use by children and persons with reduced physical, sensory or mental capabilities, or lack of experience and knowledge, unless they have been given supervision or instruction concerning use of the tool by a person responsible for their safety
- Before using the tool for the first time, it is recommended to receive practical information
- This tool is not suitable for wet cutting ③
Always disconnect plug from power source before making any adjustment or changing any accessory - Never use the tool for side grinding
- Never use the tool when the cord is damaged; it must be replaced by a specially prepared cord available through the service organization.
- Do not operate the power tool stationary (it is not designed for operation with a saw table)
- Do not work materials containing asbestos (asbestos is considered carcinogenic)
- Do not saw ferrous metals (red hot chips can ignite the dust extraction)
- When working stone, use dust extraction; the vacuum cleaner must be approved for the extraction of stone dust (using this equipment reduces dust-related hazards)
- Dust from material such as paint containing lead, some wood species, minerals and metal may be harmful (contact with or inhalation of the dust may cause allergic reactions and/or respiratory diseases to the operator or bystanders); wear a dust mask and work with a dust extraction device when connectable
- Certain kinds of dust are classified as carcinogenic (such as oak and beech dust) especially in conjunction with additives for wood conditioning; wear a dust mask and work with a dust extraction device when connectable
- Follow the dust-related national requirements for the materials you want to work with
ACCESSIONS
- SKIL can assure flawless functioning of the tool only when original accessories are used
- Use only saw blades that correspond with the characteristic data given in these operation instructions and that are tested and marked in accordance with EN 847-1
- Use only accessories with an allowable speed matching at least the highest no-load speed of the tool
- Use only saw blades/cut-off wheels with a minimum diameter of 85mm , a maximum diameter of 89mm and a spindle hole of 10mm
- Never use grinding discs with this tool
- Handle and store accessories with care
BEFORE USE
- Always check that the supply voltage is the same as the voltage indicated on the nameplate of the tool
- Avoid damage that can be caused by screws, nails and other elements in your workpiece; remove them before you start working
- Be familiar with the controls and the proper use of the tool
- Remove all obstacles on top of as well as underneath the cutting path before you start cutting
- Secure the workpiece (a workpiece clamped with clamping devices or in a vice is held more securely than by hand)
- Use suitable detectors to find hidden utility lines or call the local utility company for assistance (contact with electric lines can lead to fire or electrical shock; damaging a gas line can result in an explosion; penetrating a water pipe will cause property damage or an electrical shock)
- Use completely unrolled and safe extension cords with a capacity of 16 Amps (U.K. 13 Amps)
DURING USE
- The noise level when working can exceed 85 dB(A); wear ear protection
- Always keep the cord away from moving parts of the tool; direct the cord to the rear, away from the tool
- Never use the tool without the original protection guard system
- Do not attempt to cut extremely small workpieces
- Do not work overhead with the power tool (sufficient control of the power tool is not ensured in this working manner)
- In case of jamming or electrical or mechanical malfunction, immediately switch off the tool and disconnect the plug
- If the cord is damaged or cut through while working, do not touch the cord, but immediately disconnect the plug
AFTER USE
- When you put away the tool, switch off the motor and ensure that all moving parts have come to a complete standstill
After switching off your circular saw, never stop the rotation of the saw blade by a lateral force applied against it
EXPLANATION OF SYMBOLS ON TOOL
4 Read the instruction manual before use
⑤ Double insulation (no earth wire required)
⑥ Wear protective glasses and hearing protection
⑦ Do not dispose of the tool together with household waste material
WHEN CONNECTING NEW 3-PIN PLUG (U.K. ONLY):
- Do not connect the blue (= neutral) or brown (= live) wire in the cord of this tool to the earth terminal of the plug
- If for any reason the old plug is cut off the cord of this tool, it must be disposed of safely and not left unattended
USE
- On/off (8)
-switch on tool by first pressing knob A forward and then pulling trigger switch B
-switch off tool by releasing trigger switch B
Adjusting cutting depth (0-28,5 mm) ⑨
-loosen knob C
-set desired cutting depth using scale D
-tighten knob C
-for an optimal quality cut the saw blade should not extend more than 3mm below the workpiece
! only when using blades with a diameter of 89mm, cutting depth corresponds with value on cutting depth scale D (for actual depth of cut use table ⑩ as reference)
! always make trial cuts first to verify actual line of cut
Dust suction 11
-connect vacuum cleaner hose E to connection F and vacuum cleaner as illustrated
I never let the vacuum cleaner hose interfere with the lower guard or the cutting operation
! do not use vacuum cleaner when cutting metal
- Changing saw blade 12
! disconnect the plug
! ensure that the blade has come to a complete standstill
-set cutting depth to the maximum
-take hex key G from storage H
-push spindle-lock button J and hold it while you remove blade boltK by turning hex key G CLOCKWISE (= in same direction as arrow printed on saw blade)
! push spindle-lock button J only when tool is at a standstill
-release spindle-lock button J
-remove flange L
-press knob M with your thumb
-lift up foot N and remove saw blade
! change saw blade with saw teeth and arrow printed on saw blade pointing in same direction as arrow on upper guard P ② b
-mount flange L
-firmly tighten blade bolt K by turning hex key G COUNTER-CLOCKWISE while pushing spindle-lock button J
-release spindle-lock button J
- Operating the tool 13
-set desired cutting depth
-connect plug to power source (light Q turns on indicating that the tool is receiving power) 14
-press knob M with your thumb
-place tool with front end of foot flat on workpiece
-tilt tool forward with line-of-cut indicator R lined up with desired line of cut marked on the workpiece
! ensure that the saw teeth are not engaged into the workpiece
-switch on the tool
! be aware of the sudden impact when the tool is switched on
! the tool should run at full speed before the blade enters into the workpiece
I do not force the tool (apply light and continuous pressure in order to avoid overheating the blade tips and, in case of cutting plastics, melting the plastic material)
! while working, always hold the tool at the greycoloured grip area(s) 15
-after completing the cut switch off tool by releasing trigger B
! ensure that the blade has come to a complete standstill, before you lift the tool from the workpiece
Plunge cutting 16
-switch on the tool
! the tool should run at full speed before the blade enters into the workpiece
-press knob M with your thumb
-tilt tool forward with line-of-cut indicator R lined up with desired line of cut marked on the workpiece
-gradually move tool forward
I never pull tool backwards
- Parallel guide S ⑦
-for making exact cuts along a workpiece edge
-can be inserted in either side of foot
Adjusting parallel guide
-loosen knob T
-adjust to desired cutting width by using parallel guide scale (use line-of-cut indicator R as 0-reference)
-tighten knob T
APPLICATION ADVICE
Only use sharp saw blades of the correct type 18
-use hardened steel saw blade V(2) for cutting wood, aluminium, plastic and all sorts of laminated wood
-use diamond disc W ② for cutting ceramics and tiles
-carbide tipped blades X ② stay sharp up to 30 times longer than ordinary blades
Cutting large panels 19
-support panel close to the cut either on floor, table or workbench
! set cutting depth so that you cut through panel and not through support
-in case parallel guide does not allow desired width of cut, clamp or nail straight piece of wood to workpiece as a guide, and use the left side of the foot against this guide
- Splinter-free cutting
-always face the good side of the workpiece down
-fasten a straight piece of wood on the workpiece by means of 2 clamps
For more information see www.skil.com
MAINTENANCE / SERVICE
- This tool is not intended for professional use
Always keep tool and cord clean (especially ventilation slots Y ②)
I disconnect the plug before cleaning
Always keep the area around lower guard Z ② clean (remove dust and chips by blowing out with compressed air or with a brush)
- Clean saw blade immediately after use (especially from resin and glue)
-
If the tool should fail despite the care taken in manufacturing and testing procedures, repair should be carried out by an after-sales service centre for SKIL power tools
-
send the tool undismantled together with proof of purchase to your dealer or the nearest SKIL service station (addresses as well as the service diagram of the tool are listed on www.skil.com)
-
Be aware that damage due to overload or improper handling of the tool will be excluded from the warranty (for the SKIL warranty conditions see www.skil.com or ask your dealer)
ENVIRONMENT
- Do not dispose of electric tools, accessories and packaging together with household waste material (only for EU countries)
- in observance of European Directive 2012/19/EC on waste of electric and electronic equipment and its implementation in accordance with national law, electric tools that have reached the end of their life must be collected separately and returned to an environmentally compatible recycling facility
symbol will remind you of this when the need for disposing occurs
NOISE / VIBRATION
- Measured in accordance with EN 62841 the sound pressure level of this tool is 91.5dB(A) and the sound power level 102.5dB(A) (uncertainty K = 3dB ), and the vibration (triax vector sum; uncertainty K = 1.5m/s^2 )
*cutting wood 2.6 m/s²
*cutting metal 2.4 m/s²
-
The vibration emission level has been measured in accordance with a standardised test given in EN 62841; it may be used to compare one tool with another and as a preliminary assessment of exposure to vibration when using the tool for the applications mentioned
-
using the tool for different applications, or with different or poorly maintained accessories, may significantly increase the exposure level
- the times when the tool is switched off or when it is running but not actually doing the job, may significantly reduce the exposure level
! protect yourself against the effects of vibration by maintaining the tool and its accessories, keeping your hands warm, and organizing your work patterns
F
Scie compacte polyvalente INTRODUCTION
5360
WAARSCHUWING Lees alle
1) SIKKERHET PÅ ARBEIDSPLASSEN
2) ELEKTRISK SIKKERHET
3) PERSONSIKKERHET
VEDLIKEHOLD / SERVICE
MANUTENÇÂO / SERVICO
Cpok cnkybI n3eJnna coCTaBnre7 7 let. HpeKoMeHdyETcK kcnlyaTaunn no ncteehnn 5 letXpaHeHHN C DaTbI n3rOToBLeHHN 6e3 npedBaPHTelbHO npOBepKn (DaTy n3rOToBLeHHN CM. Ha 3tIKKeTke).
IpeueHb Kpntuuechnx OTHa3OB uOUn6OuhbIe DeICTBnNEPcOHaJIuN NIOlb3ObaTeJI
-HeNCNoJIb3OBATcNOBpeHJDeHHoynyHOaTkoHnINIOBpeHJDeHHbIM3aUHTbIMKOHyXOM
-He HcnoJb3OBAtB PnI NOABLeHnN DbIma HeNoCpeDctBeHHo N3 Kopnyca N3DeJIa
-He HcNoJIb3OBATb C nepe6HTbIM HIN OROJIeHHbIM 3JIeKTpHueCKHM Ka6JeM
-He IcNoIb3OBAtB Ha OTKpbITOM IPOCTpaHCTBE BO BpemrdoJRA (B paCnblraMeoB OBe)
-He BHKIOUaTb npn nonadAHIN BOdbI KOpnyc
-HE INCIOJIb3OBAtB pIN CNJbHOM NCKpeHIM
-He IcNoJIb3OBAtB PnI NOBLeHmN CnJIbHO Bn6paun
Kpntepnn ppeelbhbix coctoHn
-ηepeTep TnN NOBpeKdEh 3JIeKtpueeckn Ka6eIb
-NOBpeKdEN KOpnyc N3deJInr
Tn n nepnoDnHocTh TexHnueChoro 06cnyHnBaHn
PeKOMeHdyETcOuHCTnTb HNCTpymENT OT nbJIN NOcNE KaKDOrO NcNoJIb30BaHH.
XpaHeHne
-Heo6xOIMO XpaHnITb B CyXOM MecTe
-Heo6xOdmo XpaHnTb BdaJN OT NCTOCHKOB NOBbIeHHbIX TempeaTyp n BO3JeICTBnA COJIHeHbIX Lyuei
-πρι xρaHeHην Heo6xOДmΟ η36eRaTb pe3KOrO nepenada TemnepaTyp
-xpaheHHe 6e3 ynaKOBn He dOnyckaETcA
-NoDpo6HbIe Tpe6oBaHnR K yCLOBnM XpaHeHnR cmOTpnte B FOCT 15150 (YcIOBne 1)
TpaHcnpOpBbKa
-KaTeOpnueckn He DonyckaeTcnaJeHne nIIObIe MExaHueckne Bo3deNCTBnHa yPaKOBky npi TpaHCnpTIpOBKe
-πρn pa3rpy3ke/NoIpy3ke He donyucaeTcNcnoJIb3OBAHne IIO6oBOra BnDa TeXnKn,pa6OtaUoSeiNo npInuNy 3aKHMa yNaKOBKN
-NoDpO6HbIe Tpe6oBaHnK yCIOBnAM TpaHCnpTIpOBKn CMOTpnte B FOCT 15150 (YcIOBne 5)
BHIMAHHE!
B CJIyuae BO3HnKHOBeHHnepe6oB pa6oTe
3NeKtpOnHCTpyMeHTa BCLeDCTBne NOHOrO nn
YactnHoro npekpaeeHH 3Heproch6KeHH nIN NOBpeJdeHHI cENN ynpabJIeHH 3Heproch6KeHHem YCTaHOBNTe BbIKIOUaTeIb B noLOKeHHe BbIKI, y6eINBwncb, yTO OH He 3a6JIOKIpOBan (pni erO HAIuHH) N OTHIOUHTe CteEByIO BUNKy OT PO3ETHN IIN OTCOeHNHTe CbEMhBI aKHymyIaTOp (3TNM pPeDnTbpaaetcH eKOHTPOJIpyEmBI NOBtOPHBI 3aNyCH)
BBEDEHNE
ДаньиИнстументпрднэнчehДЯпоДьнOH I NOpeyuHoi pe3KN DepeBa, DepeBOPTbI, FaHEpbI, AJIOMHHa, KaFeJIA, KaMHra, ПlaCTNka N JERKIX CTponTeJIbHbIX MaTePnaJIOB BФИКСИРОВAHHOM NOLOKeHHN
- 3TOT INHCTpyMeHT npeHa3HaueH ToIbKO dIa KopoTKHX cpe3OB
-Данн布局HCTpyMeHT He NOxOuT dЯ npOMbIJIeHHORIOcnoJb3OBaHnA
Ipeed nCnoB3OBAHnEM np6opab BnHMaTeJbHO O3HaKOMbTecb C daHHo INHCTpyKneH coXpaHHTe ee DIA NOCEyUoEro NcNoB3OBAHnH ④
TEXHnueCHe DAHHbIE ①
CTPAHA N3ΓOTOBJEHЯ
CdeIaHO B KITae
DETAJIHHCHTPymeHTA②
A 3aunTHbI BbIKIOuTeIb
B KypkoBbI nepeKIOHcATEJIb
C Pyka perylinpoBKN rnybHb pe3Kn
D ⅢKaIa rIy6HbI npOIIa
E ⅢaHrOTcOca nIIN
F CoeHHeHne IJIa OTCocA IIJIIN
G HIOU-WeCTnIpaHHN
H OTdelenHe IJI WecTnIpaHHoro KJIIOHa
J KhoNka 6IOKHPOBKn IINHdJIa
K BoNT KpeHJIeHnpeJyUeRo DNcKa
3aHHMHOJΦNaHeu
M Pyka dIra Iy60KOro nnHeHH
N OnopHnIOBepxHOCTb
P BepxHnKoHuyX
Q HndnKaTOp "TntaHne BkIHOeHo"
R yka3aTeIb IHHn npoHnla
S IpoOJIbHaHnPaBlaUoJyA JInHeJa
T T OJIOBHa dIa peryIinpoBn HAnpaBIAUoJe INaHKn
V Je3Bne n3 3aKaJIeHnHO CTaJIi
W AIma3HbI dNcK
X NIIbHoe DNCK TBePDCNlaBHBIMnIaCTHHKaM
Y BeHTnIaUNHOHbIe OTBepCTN
Z HnKHee orpaKaHdEHHe
BE30NACHOCTb
OBUHNEYHA3AHNIOTEXHNIKEBE3ONACHOCTN OB-PAUENC3JEKTPOHNCHTPMENTAMN
BHHMAHNE! Cneyet O3HaOMnTbcr CO BCEMN npaBnIaMn TexHnn 6e3oNaChocTN, HNCTpyHcIaMn, NJIIOCTpaunmN TexHnueckmN daHHbIMN, coDEpHaunmncB npnaIraembIX K 3tOMy
3JIeKTPoHHCTpyMeHTy MaTePnaJax. Heco6JIoJeHne HHepeueHCJIeHHbIX INHCTpyKmB I NOJIHOM O6beMe MOKeT IOBLeYb NOPaKeHne 3JIeKTPuYeCKM TOKOM, POJap N/INC cepBe3HyIO TpaBMy.
CoxpaHnTe 3TN HNCTpyKuNN uYka3aHHa dJa 6yduyueero nCNOb3OBaHHa.
IcnoB3OBAHHOe B HAcToAunx HNCTpyKunx yKa3aHnX
NoHrTne "JleKTPOINHCTpymeHT"pacnpoctpaanreTCra Ha
3JeKTPOINHCTpymeHT C NtAHmEOT cETn (C Ka6JIem
NITaHnO T 3JeKTPoCeTN) nHa aKKyMylrTOpHbI
3JeKTPOINHCTpymeHT (6e3 Ka6eYnPiTaHnO T
3JeKTPOCeTN).
1) B3ONACHOCTb PA6OYERO MECTA
2) ΘJEHTPNUECKA B3OINACHOCTb
a) Co6IIOJaTe YnCTOTy n NOdEepHbAitte HaJIeHaSyIO OCeUeEHHOCTb Ha pa6OeM MeCTe. BeCnpJdoK Ha pa6OeM MeCTe IIN erO IIIOXoe OCBeUeHHe MOrT pNBEcTn K HeCuaCTHbIM CnyaAM.
b) He nCnoJb3yIte C 3JeHTpOHnCTpyMeHToM BO B3pbIBOONaCHO cpe, T.e. B HENOCpeIcTBeHHoB 6JIH3OCTN OT IeRHOBCnlaMeHAnUxxCn HNDIOCTe, ra3OB nII nblIN. B npouecce pa60TbI 3JeHTpOHnCTpyMeHT NCKPIT N NCKPbIMORyT BOCnlaMeHHTb Ra3bl NblNB.
c) Пи pa6ote c 3JIeHTponHCTpyMeHTOM He DonychaTe DeTei HIn NoctopOHnX Ha BaWe pa6ooye MecTo. OTBJIeHeHne BaWero BHMaHnЯ MOKeT npHBecTI K NOTepe KOHTpOJI NaD pa6oToI 3JIeKTPonHCTpyMeHTa.
a) 3JIeHTPOHCTpyMeHTa DOJINHa COOTBeTCTBOBaTb PO3eTHe 3JIeHTPOcETn. He BHOcHTe HNKAHN N3MeHEN B KOHCTpyKuHIO BVILn. He NcNoJIb3yIte aAnTopbl DnA 3JIeHTPOHCTpyMeHTa C 3aUHTbIM 3a3EmLeHHeM. 3aBOdCKHe 3JIeTcEBHbIE BVILN IN COOTBETCTBYIOUne IM CeTeBbIe pO3eTKn CyUeCTBeHHO CHNHAOT BEPOrTHoCTb 3JIeHTPOwoka.
b) Избeraитмexahnuechnx HOHTaHToB c TaHHM 3a3eMJIeHHbIM NOBepXHOCTaMH, KaH Tpy6OpBOdbl,CnCTembl OTOnJIeHHa NNtbl NxOJIOJIbHNKn.Прс copnKOCOBehn HeLOBeka C 3a3eMJIeHHbIM NpeDMTaMH BO BpEma pa60bl INHCTpyMeHTOM BepoTHOCTb 3JIeKTPoWHa cyuecTBHeHBO3paCTaET.
c) 06epeaTe 3JeKtpOnHCTpymeHT OT BO3dEicTBnI DOxN I BlaRn. PonaDaHne BOdbI B 3JeKtpOnHCTpymeHT NOBbIiAeT BepoTHocTb 3JeKtpnueckoro ydapa.
d) NcnoJb3yIte Ka6eJIb cTporo no Ha3HaueHIO. He donyucaetc TnHytB n nepeDburatb 3JeHTponHCTpyMeHr 3a Ka6eJIb nn HcNoJb3OBaTb Ka6eJIb Ira BbITraHbAHnBnHn H3 PO3ETN. O6eperaTe Ka6eJIb HcTpyMeHr oT BO3deIcTBnBn BBICOHx TemnepaTyp, Macla, OCTpbIX KpOMOH nn DBrHuxCqAteT eKeHTponHCTpyMeHr. NOBpeJdeHHb nn CnyTaHHb Ka6eJIb NOBbIaET BO3MOXHOCTb 3JeKTPnuCeCKOrO yDapa.
e) Pn pa6ote Ha yIInCe IcNoIb3yIte Ye dIINHtTeIb, npedHa3NaueHHbI dIpa6Otbl BHe NOMEeHn. IcnoIb3OBaHHe TaKOrO yIINHtTeI CHNkaeT
BepoTHOCTb 3JIeKTPnueckoro ydapa.
f) EcIn HeBO3MOHHO H36eHaTb npMHeHnAJIeKTPoHNCTpyMeHTa B cBIpOM NOMEueHn, TO yCTaHabINBaIte yCTpOJCTBO 3aunTbI OT yTeHN B 3emLIO. IcNoJIb3OBAHne yCTpOJCTBa 3aunTbI OT yTeKNB 3emLIO CHNJaET pNCK 3JIeKTPnueCkOrO nopaKeHn.
3) JIYHAR BE30NACHOCTb
a) BydTe BHNMaTeIbHbI, CneIte 3a TeM, YTO BbI DeJaTe N BbINOnHnTe pa6Oy 06dymaHNo. He noJb3yInTecb 3JeHTponHcTpymeHTOM, ecNb Bby UCTaII IN HaxoNDTEcb NOd BO3DeIcTBHe M TpaKNBnIH3aTOPOB, aNHOrOJI IN MmDnUHCHNX npenapaToB. CeKHyndHa nOTepa KOHcETpauIN B pa6Ote C 3JeHTponHcTpymeHTOM MOKeT npVBecTN K cepBe3HbIM TpaBMam.
b) NcnoJb3yIte cpeCTBa HnHnBnDyaJIbHOH 3aunTbI. 3aunTHbIe OCHN O6ra3aTeNbHbI. CpeCTBa INHdINbYdaJIbHOH 3aunTbI, TaKHe KaK npOTNBOnbIeBOH peCnpaTOp, HeckOJIb3aJaa 3aunTHaR O6yBb, IJIem-Kacka, CpeCTBa 3aunTbI opraHOB Cnyxa npIMHeHrTOc B COOTBeTCTByIOUHX yCLOBnM pa60TbI OBCToRrTeJIbCTBax IMHHmN3npyIOT BO3MOHHOCTb NOlyeHn TpaBM.
c) PpeodotbpaaaiTe HnpeDHaMepeHHoe BkIIOueHne 3JIeKTPoHnCTpyMeHTa. Npeep NOdHIIOueHem 3JIeKTPoHnCTpyMeHTa K 3JIeKTPoHnTAtHHIO H/INn H aHHyMyJATopy y6eINTecb B BbIKHOueHHOM COCTOAHNN 3JIeKTPoHnCTpyMeHTa. EcIn Bbl npu TpahCnpOpTnPOBKe 3JIeKTPoHnCTpyMeHTa DePKeTI NaLeU Ha BbIKIOUaTeJe INN BkIIOueHHbI 3JIeKTPoHnCTpyMeHT NoDkHIIOuaTe K cETn NITAHNA, TO 3TO MOKeT pINBecTn K HecCaCTHOMy ClyuAIO.
d) Bo n36eKaHHe TpaBm nepeB bKnIoueHnem 3JIeHTponHcTpymEHTa ydaJInte peryInpOBOHybI IIN raeuHbI KIIIOU H3 BpaauoueJcYacTn 3JIeHTponHcTpymEHTa.
e) He nepeoueHbAaTe cBOH BO3MOHocTn. TBePcToIte Ha Horax n ydePHBaIte paBHOBeCne. B TaKOM NIOJKeHNn Bbl CMOKeTe LyUWe KOHTpOJInpoBaTb 3JIeKTPoHHCTpyMeHT B HEOJNdaHHbIX CNTyaunx.
f) HcnoIb3yIte noxOaHcyo pa6oyu OeHdy. He naeBaIte Cbo6oHyIO OeHdy uYkpaWeHHa. DepeHnte BOLOcbl N OeHdy BdaII ON DBNHyUxxCaCTe. Cbo6oHaJ OeKDa, yKpaWeHHn IIN dINHHbIE BOLOcbl JERKO MOrTy NOnActb B DBNKyUneCe Yactn 3JIeKtpOnHCTpyMeHTa.
g) Pn HAnuHn NbIeOTcabIBaIOxN nBle6OpHbIX npncnoo6JeHn y6eIntecbBTOM, YTO OHN NOCoEHNHeHbI NcNoJIb3yIOTcHaJNeKaUm 06pa3OM. PpImeHHe NbIeOTcoaMOKET CHN3NTb ONaCHOCTN, CO3DaBaEMbIe NbJIbIO.
h) XopoOoee 3HaHHe 3JeHTpOHcTpyMeHToB, NOJyueHHoe B pe3yJIbTaTe YacTOrO Hx NCNoIb3OBaHH, He DoJIHKHO pNBoDHTb K CaMOyBepeHHocTH u rHOpnpOBaHHo TexHNK6e3OnacHocTH o6paSeHHc 3JeHTpOHcTpyMeHtAMn. OdHo He6peJHXoe DeiCTBne 3a DOLIO CeHyHDbI MOKeT PpNBecTH K CepBe3HbIM TpaBMam.
4) 3HCNJIYATAUIN YXOD 3A 3JEKTPOHNCTPYMEHTOM
a) He neperpynaTe 3JeHTponHCTpyMeHT. HcnoIb3yIte TOT 3JeHTponHCTpyMeHT, KOTOpBIM
npeHa3HaueHJaDaHHoPa6Otbl.CnoxOJaUM 3JIeKTPoINHCTpymENTOM BbI BbINOJIHInTe pa6Oty IyUHeNHaDeJHHeN,NCIOJIb3yB Becb DnApa3OHero BO3MOXHOCTeN.
b) He ИсноьзуITE Альгтponнстум ent C HeHcnpaBHBIM BbIKNIOyATEJem.ИHCTpymeHT C HeHcnpaBHBIM BblKIIIOyATEJem ONaceH INODJIeXHT peMOHTy.
c) Do Haçaλa HaJaAŋn 3JIeKTPoHnCtpymeHTa, 3aMeHbI npHaJaeKHoCTe HIn npeKpaueHna pa6Otbl OTKnIOuAte WTeNCeBHyO BnKy O T pO3ETN Cetn H/INn BbIHbTe, ECIn 3TO BO3MOxH0, AHHyMylrTop. DaHHa Mepa npeOcTOpOHHocTn npeDToBpauaet CnyaHHO BnIOUeHne 3JIeKTPoHnCtpymeHTa.
d) XpaHnTe HeHCNoB3yEmbI 3JIeHTPOHHCTpyMeH T B HeOCTynHom dJa DeTeN MecTe H He N03BOJnTE HcNOJb3OBaTb erO IuCaM, He yMeIOUHM C Hm O6paatbcra Hn He O3HaHOMJIeHHbIM C HnCTpyKUHe N O3HCnJIyaTaUHN. 3JIeKTPOHHCTpyMeHTbl PpeDCTaBIAOT cO6o OnaCHocTb B pyKaX HeONbITbIX NOb3OBaTeJeN.
e) TuaTeNbHO yXaHnBaHTe 3a 3JeKtpOnHCTpyMeHTOM n npHaJdJIeHHocTm. IpOBepaIte 6e3ynpueHOCtBfOHHcIN NOdBnHHbIX qAcTei, IerHOCTbHX XoJa, cEIOCTHOCTb BCEx qAcTei HOTCYTCTBHe NOBpeHNDeHNI, HOTOpBIE MOrYT HeratNBHO CHa3aTbcra Ha pa6ote INHCTpyMeHTa. Pn O6hApUHeHHN NOBpeHNDeHNI CdaITe INHCTpyMeHT B peMOHT. BoJIbWoE YNCIo HeCuaCTbIX ClyuAeB CBra3aHO C HeyDoBJIeTBOpHTeJIbHbIM yXODom 3a 3JIeKTPOnHCTpyMeHTOM.
f) PeKyuIe YacTH NHCtpyMeHTa Heo6xOdHMO NOAepHXBaTb B 3aToUeHHOM N UcCTOM COCToRHH. PnHaJIeKaIeM yXoJe 3a peKyuIIMN PnHaJIeKHOCTaMn C OCTpbIMN KpOMKaIMN OHn peKe 3aKIIINHBAIOCTa N INCtpyMeHT JyUe IPOdaETcR KOHTpOJIIO.
g) NcnoJb3yIte 3JIeKTpOHnCTpyMeHT, npHnAdJeKHOCTN, 6HTbI n T.D. B COOTBeTCTBnC DaHHbIMN NHCTpyHcHmN, HCXoJn H3 ocObeHHocTeY cNoBn H xapaHTepa BblOnHReMo pa60tI. NcnoJIb3OBAHHe 3JIeKTpOHnCTpyMeHTa He IIO Ha3HaueHnIO MOHeT pPbECTn K ONaChbIM NocJeDCTBnM.
h) DepeHnTe pyuHn HOBepxHOCTn 3axBaTa cyXHMn HnCtBIMn, CJIeInte YTO6bI Ha HNX YTO6bI Ha HNX He 6blIO XnDHOH Nn KOHCnCTeHTHOm cMa3Kn. CKoJIb3KHe pyuKn HOBepxHOCTn 3axBaTa npenrTCTByIOT 6e3OpanChOMy ObaaJeHHIO C INHCTpyMeHToM n He DaIOT HaJeHHO KOHTpOJInpoBaTb erO B HEnpeDbNdeHHbIX CNTyaqIrx.
5) CEPBnCHOE OBCJyHnBAHNE
a) NpepaBaiTe 3JeKtpOnHCTpyMeHT Ha cepBnCHe o6cIyHHBaHne TOIbHO HBaIIHmIupOBaHHOMy nepcoHaIy, nCIOJIb3yIOUeMy TOIbHO IOJINHHbIe 3aIacHbIe YAcTn. 3To OBeCpeHT COxpaHEnHe 6e3OJaCHOCtN 3JeKtpOnHCTpyMeHTa.
IPABNIA TEXHNH B3OJACHOCTN JIA MHOROΦYHKUHOHAJIbHOI NJIbI
1)PACINIOBHA
a) ONACHOCTb:He nOcTaBnIe pyH B 30Hy
TINLEHNA H K TINHBOMy DNCHy. EcNn Bbl OBeHMn pyKaMn DEpKHTe TINJy, TO TINJBHbIM DNCK He MOKeT paHNtB nX.
b) He noDCOBbIbAte pyKn noN 3dEIne. OrpaKdEHe. He 3aunuaeT OT Je3Bn rNoN 3dEJIInem.
c) Otperynpyte rIy6Hny npoHna B COOTBcTbHn CToLsHOB 6pa6aTBiBaEM NOBepxHocTH. TaKIM 6pa3OM, YTO6bl NJIbHbI DNCK BbICTyNAI H3-NOd 6pa6aTBiBaEM NOBepxHocTH He 6OJee, Yem Ha rIy6Hny erO 3y6UOB.
d) HnHOrDa He DepeKHTe 6bpa6aTbIBaEMyO Detalb B pyKe HnHa Hore. HadeXHo KpEnNTe 6bpa6aTbIBaEMyO 3aROTOBky. JnA CHNKeHnONaCHOCTn COpNIKOCHOBEHn C TeIOM, 3aKInHnBaHnINILbHOro DnCKa NnI NOTePn KOHTpOJa BAHHo XopoIo 3aKpeNITb 6bpa6aTbIBaEMyO 3aROTOBky.
e)ДеркнiteЗлentponHcTpymeHTToIbHo3a 3OJInpOBaHHbIe NOBepxHOCTn pyKoTOn,ecIn BblBbIOJIHReTe pa6Otbl,prn HOtOpBX pa6OuH NHCtpmEn MOHeT Nonactb Ha ChpbityO 3JIENTpONpOBoDHy HIN HA Co6CTBeHHbI ShHyp nHTaH.NoHTaKT C TOKOBeUzHM IpPOBODOM 3apJXaeT TaKHe IMetaJIuYeCKHe YAcTHN 3JIENTpOHcHtpymeHTa IN BeDeT K NopaKeHIO 3JIENTpUeCKM TOKOM.
f) Pn nnIke no BOLOKHy nCnoJIb3yIte HAnpaBIAIOUyIO pnaHky IIN HAnpaBIAIOUyO C npAdbIM Kpaem. 3TO NOBbIaAeT TOHOCt b NIIKN I COkpaAsAE TBO3MOXHOCTb 3aeHaHry.
g)Применгte Bcerda nHbHbIe DnCHn C npabHbHbIMn pa3MepaMH n C COOTBeTCTBYIOUHM NOcaOuHbIM OTBepCTHEM (3Be3DOo6pa3HOH nH KpyrIoN φOpMbI).ПиьHbIe DNCKH, He NOxOJaUne K KpeJHKbIM DeTaJIaM NJIbI, BpauAioTCa 6BHeHEm N BeDyT K NOTepe KOHTPOJI NaH INHCTpyMeHToM.
h) HnKOrda He nCnoJb3yTe u3HoWeHHbIe HnI NOBpeHdEHHbIe Wai6bl HnI BoNTbl dIaJe3Bn. 3TN DeTaIcneuaJIbHO npEdHa3HaueHbI dIa BaIHX Je3Bn IJa ONTImaJIbHOkCnJIyaTaUIN I 6e3OnaCHOCTN.
2) OTDAUH - INPNUHbI H COOTBETCTBYIOUHE YKA3AHN
- Oτιαγέη ḤαδύνβεAeTcB Hεε3aŋHαρpeaKπμη πρι 3axBaTe, 3aeΩaHΠι ηιπι CmΕιθη έλεβυ Πιπι, KOTOPaŋ πρινΟβιπΚ ΚHEKOHTpOJIpyEΜΟΥ ΦΟΗΜΑΗΝΙΟ Πιπι Πι3 έπελησιν B Hαπραβληνικόν ΚοπeραTopy
- Pn CnIbHOM 3axBaTe NIN 3aeDAHN Nc3BnN Ipn 3aKpbIBAHNN npONIIa,Je3BNE OCTaHaBJIINBaETCa, a pa6OtaUoN MToP OTBOINT INCtpyMeHT Ha 6OJIbwoi CKOpocTN B CTOpOHy ONepaTopa
- Ecnn Ie3Bne nepekocheHO nn CmeoHO B npOnnJe, 3y6b8 BA 3aHHe yactn nIbMoYr 3acTpB B BepxHei NOBepxHOCTn DepeBa, YTO pNBeTeK BbITaIKBaHIO Ie3BnI N3 npOnnla HOTCKaHNBAHIO B CTOpOHy onepaTopa
- O6paTbIy yIap IaBIIeTcI cIeIcTBnEM HeIpaBnIbHoro HcNoIb3OBAHHaJIeIKTpOHnHCTpyMeHTa IIIN OUIN6Kn onepaTopa. Ero MoKHO npEIoTbPaTITb NODxOJaUIMM MepamN ppeOCTOpOKHOCTN, ONNCaHHbIMN HIXe.
a) Kpenno nnaeHHo ydepHnBaIte HnCTpyMeHT o6eHMn pyHAMn, pacnoJaray nx taHm 06pa3om, YTO6bl npedotBpArTb otDauy. TeNo, npN 3Tom, DOJIHHo pacnoJaratbcra c IIO6oY yO6HO CTOpOHbI
3)ФУHHцИЗ 3AUHTHOrO HOKByXA
OT Dncha, HO, HN B Hoem Cnyuae, He NO ODHo JHHH C HMM. T.K. OTdaua MoKeT OTbocntb NnJy Ha3aI, HO Cnla OTdauu MoKeT KOHTpOJIPOBaTbCn POJIb3OBAteJeM, ecIn COOTBcTCTByIOUne MepeI IpeDIOCTOPOXHOCTn CO6JIIODeHbl.
b) Pn 3aedan nn ne3Bn nn npnppepbBaHnn nIkn no Kaon-1n6o npnue He OCBO6OHTe Tprrrep n DepKNTe Nny B MaTePnaJe HenoDbHHo, NOHa nHa He octaHOBTc NoIHOCTbIO. HNkorDa He BbIHMaTe Nny N3N3dJIInn H He OTBOJNTe e Ha3aD Bo Bpem BpaSeHn nnbl, T.K. 3TO npNBedeT K OTaue. NaIte npuHnHy 3aeDAHN n OcyseCTBnTe Heo6xoIMMbIe DeIcTBnI Inerero yCTpaHeHn. N36eraTe NIIKN IO rBO3dM IN BVHTam.
c)ПиВнluочEHIN NInbI B n3deHn yCTaHOBHTe NIny B ceHTpe npOnHna HnpOBepbTe, YTO6bl 3y6bHe 3axBaTbIBaOT MaTePnA.I. B npOTnBHom clyae npN 3aeDAHIN NInbI BO BpeM e ee 3anycKa eE MoKET OTToJKNHyTb Ha3ad INI NOT DaTb OT n3deJIIN.
d) 06ecneyte onopy dny 6oIbIuX naHeJeI yctpaHEnn pncHa 3axBaTa n OTaun. BolbNe IaHJIIO bUHIO npOBncaIOT nOc CO6CTBeHHbIM BECOM. Onpbl HyKHO pa3MeaTb nOd naHEnbIO nO o6 cToPOhBI OKOLO liHNn npOnnla n OKOLO Kpa naHeJI.
e) He nCnoJb3yTe TynbIe Hn nobpeHdEHHbIe Ie3Bn. He3aToeHHbIe Hn HeBepHO yCTaHOBJIeHHbIe Ie3Bn DaOT y3Kn npOnII, co3DaBaI N36bITOuHoe TpeHne, 3axBaT n OTdaHy ne3BnI.
f) NpeH naHOM pa60TbI pbUarH dIa3npuHnra Tny6HbI n CHOca Ie3BnH Heo6XoHMo 3aTARNBaTb HaeHHo. EcJN BO BpeMpa60Tb Ie3BHe cMeCTHTcR, 3TO npBedeT K 3aeDaHIO IOOTDAye.
g) Bydte o06eHNO octopOHbI npn paCnIOBKe B CTeHax HIN dpyrnx HnPocMaTPnbAembIX yacthax. Pn pacNIOBKe B cKpbTbIX 6bEHTAX nORpyHaembl B O6bEKT NIIbHbIM DnCK MoHeT 3a6LOHPOBaTbCn BBi3BaTb pIKoWet.
a) HauDbI pa3 nepeI pa60To npOBepnTe 6e3ynpeHocb7 3aHpbITn8 3aunTHoro KOHyxa. He pa6oTaIe C nIoO, ecn 3aunTHbI KOnHyX He nepemEuTc8 CBO6oDHO n He 3aHpbIBaETc Cpa3y. HKnOrDa He 3aHmMaTe n He npNB3bBaIte 3aunTHbIKoHyx; nHaue nnBbHbIMnKHe 6ydet 3aunSeH. PnCnhyaHOM NaDeHHN nNbl 3aunTHbIKoHyx MoKeT cOrHyTc8. Y6eDInTEc8, yTO 3aunTHbIKoHyx CBO6oDHO nepemEuTc8 n He Kacaetc nNlBHorO dNcKa nII dpyrnx DeTaJIe NHe3aBNCMO OT yrna n rny6nHbI paCnIla.
b) PpOBeBte COCTOHNHe N yHHNHOHaIbHyCnOC6HocTb npyHnHb 3aunTHoro KOHyxa.Ecnn3aunTHbI KOnHyx n npyHnHa HncnPabHbI, INX Heo6XoJMo OTPeMOHTnpoBaTb, npexKeYMaHnHaTb pa60TaB C 3JeHTponHCTpyMeHToM. BcneCTBHe NOBpeKdEHNr DeTaJIeN, KLeHnxOTLOKeHn IIN cKOpJIeHN CTpyKHi HnKHi3aunTHbI KOHyx 6yDeT, BO3MOJHo, DBnRaTbcIInbOueHb Tyro.
c)ПиN"NORpyHHompacnINBaHH”,KOTOpoe BbIOJNHeTcH He NOd npAIMbIM yrIOM, 3aФИKcHpyTe OOnpHyIO pHTy,YTO6bl OHa He CmecTHIacbBCTOPOHy.CmeUeHne pJIITbI B CTOpOHy MOHET PnIBeCTN K 3aKJIINHBAHIO pINlbHOrO dNCKa N pIKoWSeTy.
d) IpeHJe Yem NOLOHNb Nnly Ha BepCTaK NnHa nOJ, y6eHTecb, qTO 3aunTHbI KOnyX 3aKpbIBaET nnHBiDnCK. HEnpNkpbITbI NnHBi DnCK, HaxoJaSicB COCToHm INHePcNoHOro BblEra, OT6paCsbIAeT Nnly npOTNb HAnpaBLeHn paCnINBaHn I paCnINBaET BCE Ha CBOe Mny. O6paTNe pnp 3tOM BHMaHne Ha npOdoJIKeTeJIbHOCTb INHePcNoHOro BblEra Nnbl.
DONJIHINTEJIbHbIE YKA3AHNIO TEXHNHE B3ONACHOCTH
OBUEE
3TOT INHCTpyMeHT He npedHa3NaueH dIaTeeIN IInC OOrpaHnueHHbIMN fH3NueCKHM, CEHCOPHBIMN JIn YMCTBeHHbIMN cNoOC6HOCTaMn, a TaKHe JInu, He IMeOux DoCTaTOUHORO ONbTa n 3HaHn, 3a NcJIbOHeHem ClyuaEB, KOrDa INHCTpyMeHT NCNOJb3yETcPOd HaD3OpOM JInu, OTBeuaIOUeRO 3a 6e3OnaCHOCTb, INI NO npoxoJeHN COOTBeTCTByUoUeRO INHCTpyKTaKa.
Ipeed HcnoJb3ObaHHeM INHCTpyMeHTa B nepBbI pa3 peKOMeHdyETcN oJIyUHTb IpaKTnueckyIO INHΦOpMaIHO
-3TOT INHCTpymEnHT He nprirodeH Dnpe3Ku CmauBaHnem ③
- Ipeed peryulnpOBHOn nIu cMeHO npHaJleKHOCTe O6a3aTeBHO BbIHbTe BnHy H3 ceTeBOI po3ETKn
3anpeaaetcnaonb30BaTb HNCTpyMeHT dIa 6OKOBORO
HnKOrda He noJIb3yITeCb HNCTpyMeHTOM C NOBpeKdEHHbIM Ka6eJEM NITaHINr; eO Heo6XoDmO 3aMeHNtB CneUaJIbHbIM Ka6eJEM NITaHINr, 06paTnBUnncB B cepBnCHyIO opraHn3aunHO.
3anpeaaetcnaonb3oBaTdaHHbI 3JIeHTPOHnCTpyMeHBT KaueCTBe HeNoDBHXHO MaunHbIOHHe npHa3HaueH DnA nCnoB3OBaHn COBMecTHOCINlbHbIMCTOLOM
He 6b6a6b6a8e MaTePnaBlc cOepKaHnem ac6ecTa (ac6ecTcHTaetcKaHeporeHom)
3anpeaetcnnHtB cepHbIe MeTaJIbI (packaJIeHHa CTpyKkMA MoKeT BOCIIaMeHHTb Nblb)
- PnO6pa6ToHe HAMH Heo6XoHMo HcNoJb3OBaTb nbIeYdaIHOuIe yCTpoIc7Ba. B nbIeCoce DoJIHHa npCyTCTBOBaTb BO3MOxHOCb y6OpHN KameHHoN nbIIN (NCNoJb3OBAHne DaHHoro 6OpyDObAHNA CHNJaET yRp03bl, CBy3aHHbIe C nbIbHO)
- Пыль OT TAKINX MaTePnaIIOB,ΚΑΚ CBNHcOBOcoDEpKaUaJ Kpacka, HeKOTOpbIe NOpOdbI DepeBa, MInHepaJI b I MetaJI, MoKET 6bITb BpeHa (KOHTaKT C TaKoI PblbIO HIIe ee BDbIXaHne MOKeT CTaTb PnHINHOI BO3HHKHOBEHnY ONEpaTOpaN HaxOJaUxNXcPraOM IuC aJIleprHueCKHX peAChn N/INI pecnnpaTOPbIX 3a6OJIeBAHn); NaEBAIte pecnnpaTOP n paOtaIte C nbILEydaJIauOuIm yCTpoiCTBOM npn BkJIIOUeHN INHCTpyMeNTa
HeKOTOpbIe BnDbl nbIIN KJIacCSHcHcNpUpyOTcKa KaHcEpeoHHbIe (HaNPmep,dy6OBaH nn 6yKOBaI nbIb),OC6eHHoB COeTaHnC Do6aBkAmn dJa KOHNIOHOPOBaHnA DpeBecnHb; HAdeBaHTe pecnnapTo np pa6otaTe c nbIeYdaJIAOuIm yCTpOJCTBOM pnp BnIIOueHnn HnCTpyMeMa
CneyIe npnHbIM B BaWei CtpaHe Tpe6oBaHnA M/ HopMaTHBAM OTHOCHTeNbHO PbIN DNr Tex MaTePnaIOB, C KOTOpBM BB Co6HpaeTecb pa60TaTb
PINHADJIENKHOCTN
SKIL obecneuBaet HadeKHyIO pa60Tu INHCTpyMeHTa TOJIbKO npn INCNoJIb3OBAHN COOTBeTCTByIOxN npncnoc6JIeHNI
-ПиMuMeHЯIteToJIbKOIIJIbHbIeIINcNcnapaMeTpamn, yKa3aHHbIMN B 3TOM pyKOBODCTBe NO 3KcnJyTaUIn, KOtOpBIE IcNbITaHbI NO EN 847-1 n NmEIO T COOTBETCTByIOUe eO603HaueHne
IcnoIb3OBAbToJIbKO npHaJNeJXHOCTN, ppeJeIBHO DOnyCTUMa CHOPoCTb BpaUeHnRA KOToPbIX He MeHbUe, cem MaKcImaJIbHaR ChOPoCTb BpaUeHnRA pIn6opa Ha XOIOCTOM XOy
- HcnoIb3yIte ToIbHO peJxUne IuCKn/OTpe3HbIMn KpyramN dHaMeTpOM OT 85 do 89 MM n c OTBepCTHeM uHHJeI dHaMeTpOM 10 MM
B DaHHOM HnCTpyMeHTe He DoNYcKaeTc npMHeHne ⅢINΦOBaJIbHbIX KpyrOB
- 06paaTeScb n xpaHnTe npHaJaJIeKHOCTn OCTOpOHHO PEPEDNCIOJIb3OBAHHEM
- 063aTeIbHo y6eIITecb, qTo HApJKeHHe NHTAHn COOTBeTCTByET HApJKeHIO, yKa3aHHOMy Ha ΦnpMeHHOM wTemne IHHCTpyMeHTa
I36eRanTe NOBpeHKeHn, KOtOpbIE MOrYT 6bITb BbI3BaHbI BVHTaMn, rBO3dMyN INPOChIM NJIeMeHTaMn, HaxOJaUcIMNCB O6pa6aTbIBaEMOM ppeMeTe; nepei Haayalom pa6oTb Ix HuyKHO ydaIITb
O3HaKOMbTecb CO cpeCTBaMn ynpaBHeHn I nopAekom pa60TbC INHCTpyMeHTOM
- PpeKHe Yem npHcTynNTb K pe3Ke, ydaJIte BCE npenIaTcBnHa TpaEHTOpne pe3aHn I NOd Hei
3aKpenTe 6bpa6aTbIbAeMyo DeTaIb (6bpa6aTbIbAeMaJ DeTaJIb, 3aФнКсИрОВаHHa NOcpeIcTBOM 3aHIMHbIX yCTPoIcTB HIN TnCtOB, 3aKpenJIReTc IyUHe, HeKeJI npI NOMOu pyK)
IcnoIb3yIte noXoJaIe MeTaJIIOTeHTOpbl InHaxOHJeHHa CHPbITbIX nPOBOOHO CHa6HeHH Nn HabeDIne CnpaBHN B MeCTHbIX npeApNATHX KOMMyHaJIbHOrO XO3AICTBa (KoHTaKT C 3JIeKTPoPBOOHDKO MoKeT npINBeCTN K IOKapy N 3JIeKTPnueCKOMy ydapY; NOBpeJDeHne Ra3ONpOBoDA MoKeT npINBeCTN K B3pbIBY; NOBpeJDeHne BOJOnpOBoDA MoKeT npINBeCTN K IOBpeJDeHHIO IMyUecTBA Nn BB3BaTb 3JIeKTPnueckHm ydap)
- NcnoJb3yIte NOHOCbIO pa3MOTAHHbIE 6e30nacHbIyDINHITeJI, paccHTaHHbIE Ha TOK He MeHee 16 A BO BPEM IcNOJb3OBAHN
- Pockolbky ypoBeH yMa npn pa6oTe daHHoro HhCTpyMeHTa MoKeT npeBbIaTaB 80 dB(A); BCerda HcNoJIb3yIe 3auNTy dJa ywei
CneIte 3a TeM, yTO6bI ceTeBOH uHyp He HaxOuINcR pAOM C DBNHNUMCRA DeTALMN INHCTpyMeHTa; HxHHo Bcerda HaNPabJIaTB 3JeKTPnueckn IuHyp K 3aJHeu YacTN INHCTpyMeHTa, NCHIOUqAe ERO 3aXBaT INHCTpyMeHTOM
3aIpeaaeTcHcnoJIb3OBAb HNCTpyMeHT 6e3 WtTaHOH CNTEmbl 3aUINTHbIX UINTKOB
He nbTaTecbpe3aTb cNlUKOM MaIeHbKne 3aROTOBKn
- Ppna pa6ote He noDnHmaIte 3JeHTponHCTpymEnT Bblwe yPOBnraToIOBbl (TaKoe nOLOKeHne He o6ecneuBaet DOcTaTOOHOr KOHTpoJnHCTpymEnTa)
B Cnyae 3aednna nn Kaon-16o 3eKtpuecckoi nn MexaHuecko HncnpabHocTn HeMeJeHNO OTHIOHTe IHCTpyMeHT N BbIHbTe BNlky n3 po3eTKN
- PnIOBpeKJdeHnn Hnn pa3pe3aHnn CeTeBOrO 7Hypa BO Bpempa60TbI He npKacaiTecb K Hemy, H HEmeJeHHo BblHbTe BnIKy N3 po3eTKn
NOCJIIEHCIOJIb3OBAHNA
- Ipepe TEm KaK NIOHOHTb HNCTpyMeH, BbIKIOUHTe DBnIaTeJIb N y6eINTEcB TOM, YTO BCE DBNKHyUneCJ DeTaJIH NOJIHOCTbIO OCTaHOBNLNCb
HeOnyckaeTcnoCte OTHIOUeHnI NCKOBOINbI OCTaHaBnBaTb BpaueHne peKyuIero DNCA, npHKlaDbBaR K Hemy 6OKOBoe ycInie
IORCHEHNE K YCJIOBHBIM OBO3HAUENM HA HNCTPYMEHTE
④ IpepeIncnoJIb3OBAHHeM O3HaKOMbTEcB C pyKOBOdCTBOM NO 3KcIIyatauIN
⑤ДВонагиЗOLЯЦИ(3a3eMnIQUIIN pOBOQH He Tpe6yeTc)
⑥ OndeBaIte 3aIHTbIe OUKN CpeIcTBA 3aIHTbI BOLOC
⑦ He BBIKnIbIbaiTe HNCTpyMeHT BmecTe C 6bITOBbIM Mycopom
ИСПОЛьЗОВАне
Bkn/Bbikn ⑧
-BHIOUeHHe INHCTpyMeHTa OcUeCTBnIeTcnyTeM npOaun pyuKn A Bnepei nHaKaTuHa raWetky B
-BbIKIOUHTe INHCTpyMeHT OTNcyTINB KypKOBbi BbIKIOUHaTeIb B
- PerylnipOBka rIy6nHb npOnnla (0-28,5 MM) ⑨
-OTnycTne TReIOnOBky C
-ycTaHOBnTe Tpe6yEmyIO rIy6nHy npOnnla C NOMOuBIO kaibl D
-3aTAHHTe TOnOBHy C
-ДЯ obecneeyHЯ ONTIMaJbHOrO KaueCTBa pe3apeKyuIyIeN He DoJIKeH BbICTyNaTb N3 3aROTOBKn60JIbIe Yem Ha 3 MM
!Tolbno npn HcNoB3OBaHHN DnCHOB dNaMeTpom 89 MM rIy6HnHa pe3aHncooTBeCTByeT 3HaueHnHO hkaane rIy6HbI pe3aHnD (paKTHueckyIO rIy6Hny pe3aHn MOHHo y3HaTb, noJIb3yAcb Ta6Hnuei
!npOBepHn paHTnueChOH JINHH npOnHa 6o3aTeIbHO cJeJaTe npo6hbi pe3
-OTcacbBAHHe nbIIN ①
-NotcoeHNHTe IJnAHr nbIeoca E K coeHHeHIO F nIbIeocOy, KaK NOKa3aHo Ha KapTINHKe
! He donychaIte, TTo6bl IlaHr nbIeCocMaewan HnHHemy uHTky nI npoueccy nIleHn
! He nCnoB3yIe nbIeococ npn pa6ote c metaannm
- CmeHa peKyuIero IINcKa 12
!pa3beHNHTb wTeNceIbHbI pa3bEM
!y6eHTbcra, YTO TORO, HAN DNCK NOJHOJ OCTAHOBHN
-ycTaHOBnTe rIy6Hny npOnnHa MaKaHcIMyM
-DocTaHbTe KIOU-WeCTnIpaHHK G n3 Iaunka H
-HaHMMTE KHNky 6IOKINPOBKN UHHNDEJ N ydePbNAeTe ee HaKaToB BCE BpEmr, Noka BbIHMaTe KpeEnKhBi 6oTt peKHyUeero DnCkA MOHTaHHbIM KIIHOOM-WeCTnFpaHHNKOM G NO
YACOBOCTPEJHE (= B HappaBHeHn,yKa3aHHOM CTpeJIkoHa peKyuem dncke)
! NaHmMaTe KHonKy UINHdJIa J ToIbHO npn NOHOn OCTaHOBKe HNCTpyMeHTa
-OCBO6OIndTe 6LOKINPOBOHyU KHOHKy UINHdJIa J
-CHIMMTe ΦnaHeu L
-HaKMITE Ha KHOHKy M 6OJIbUIM naJIbUeM
-NOHMHTe pNHHMHyIO nlaCTnHy N n CHMNTe peHuyu nnck
! 3aMeHHepeJxuN dNCH; 3y6bI NJIbI nCTpeJHa, HaHeceHHa H aNCH, DOJHHbI 6bITb HAnpaBJeHbI OOnHaHOBO co cTpeHIOH h BepXhem KOxye P 12 b
-ycTaHOBnTeΦlaHeu L
-KpEnKO 3aTnHHe KpeEneKHHb 6oJt peKyUero Dncha KMOHTaXHBIM KJIIOYOM-WeCTNrpAHNNKOM G NPOTNB YACOBOCTPEJHN, ydePKHBa HKaToI KHOINky 6loKnipOBKN uINHdJIa J
-ocbo6oNDte 6loKnpoBOOHyKHOHky WnHHdJIa J
- IcnoIb3OBAHHe INHcTpymeHTa 13
-ycTaHOBtTe Tpe6yEmyIgIy6nHy npOnnla
-NOHIOHTe WTeNCEIb K NCTOCHNY NIHTAHNA (3aropaeTcJ lamnoUka Q, yKa3bBaJ Ha To, YTO INHCTpyMeHT BKNIOUeH) 14
-HaKMTe Ha KHOHky M 6OJIbUIM nAJIbUeM
-IOCTaBbTe INHcTpymENT NpeDnHM KOHcOM OCHOBaHN Ha 3aTOBky
-HaHIOHHe HNCTpyMeHT BnpeEd, COBmecTbYka3aTeIb IHHIN npoIIra R pa3MeueHHOHa3arOTOBKe Tpe6yEmOJIHHe npoIIla
!y6eHNTecb,HTO 3y6bI HJIbI He HacaOTcA 3aROTOBK
-BKJIIOUHTe INHCTpymENT
I octeperaTecb Bhe3anHoro yapa npn BkIOUeHHN HCTpyMeHTa
I INHCTpymEnT He OJHeH pa6oTaTb Ha noJIHoN ChOpocTH, NOKa peHyuN DNcK He BOJDeT B 3arOTOBHy
!He npHKnlaBbAitE HNHCtpyMeHTy qpe3MepHbIX
ycnni (HaHN MdoJIHeh 6bIT bIeKHM N
paBHOMepHbIM, YTO6bl OcTpnaJe3BnR
He neperpeInCb n, B cIyue pa3pe3aHH
IIaCTnHObIX DeTaJIeH, He Haayan PJIaBntbcn
IIaCTnH)
! BO Bpempa60tbl, BcerdaepnHTe HhCTpyMeH 3a Mecta npabHbHoro XbTa, KOTopbIe 0603HaueHb cepbIM UBeTOM 15
-NOOKOHuaHnpe3KNOTKIOUHTe INHCTpyMeHT, OTnyCTNBpeekIIOuateB
I nepey ydaenHem HnctpymeHa c 6o6pa6aTbIBaEMOn NOBepxHOCTN y6eHTecb B IIOHO OCTAHOBKe IOn
-Γny6okoe nIeHne 16
-BKJIIOHTe INHCTpyMeHT
I HNCTpymEn He DoJIHeH pa6oTaTb Ha noJIHoH CKOpocTH, NOHa peHyuIN DNCK He BOJDeT B 3aROTOBHy
-HaKMTe Ha KHOHky M 6OJbUIM NaJIbUeM
-HaHIOHHe HNCTpyMeHT BnpeEd, COBMeCTNB yHa3aTeJIb IINHH pnpNla R c pa3MeueHHO Ha 3arOTOBHe Tpe6yEmoJ LInHne npOnla
-IOCTeHNOIepMeaHTe HcTpyMeNTBpe
!HnB KOem cnyae He OTBOIDTe HNCTpyMeHT Ha3a
- PpOdoBna HnpaBnIoua IINHeNka S 17
-πpeɪnHa3HaueHaДЯ BbɪnOJIHHeHŋ ToUHOI pe3KINBdoJIb KpOMKn 3aTOrTOBKN
-MOJET 6bITb yCTaHOBJIeHa C IIO6oN CTOPOHBI OCHOBAHIN
PeryInpOBKa npOJbHn HnpaBJIoue JInHeKn -OTnyCTnte roIOBky T
-C NOMOUBIO WkaIbI npoJolbHOH HnpaBIAUOeIINHeKNOTpeRyIpyTe Tpe6yEmyU WpInHy pe3Kn
(нспьуteуkaателлни npoиla R kacheCTBe HnyeBOI 6a3bl)
-3aTAHNTe roJIOBky T
COBETbI NO HcNoJIb3OBAHHIO
ПовьзунтсьТолбкОOCTpblmpeKуцIMNДИСКAMN HдлесиацeroTINa 18
-NCNoB3yItepeHcyuIN DnCK H3 3aKaJIeHHoC TcAIn V ② IJNA Hape3Kn DepeBa, aIIOHMHNIA, PNaCTNKA IN BCEX BUNOB CLONCToI dpeBeecnhbl
-pe3Kn KepaMnN KaΦeJbHOn NlNTKn NOIb3yntecb aIma3hblm peKyuIm dNcKOM W ②
-peKyuHnCTpyMeH T TBepDOcNlaABHbIMn nlaactnHaMx ② cnyHNT B 30 pa3doJIbWe o6bIHyoro
- Pe3ka 60JIbuxn panHei
-c03aTe onopy IJI naHeJI OKOJIIO IINHn npOnHa HJ NOJI, Ha cTOne JIn HA BepCTake
! yctahOBHTe rIy6nHy npoHnla TaHm o6pa30M, qTO6bl npope3aTb naHeIb, Ho He npope3aTb onopy
-ecn npdoIbHa HaPablaIOaJ He no3BOJIaTe YCTaHOBt JHeJaEMy IO WpInHy pe3Kn, pNkpeINe K 3aTOBKe CTpy6UHAM N IIN rBO3dMn DepeBHHyIO nlaHky I npKImaTe K 3ToI NMnpOBuHropBaHHO HaPablaIOueJ NeByIO CTOpOHY OCHOBaHn
- PpOnnIb63 paCzepnJIeHnIa
-BceRda peXbTe NO npOTnBOIOnIOxHON (TbJIbHO) CTOpOHe MaTePnAna
-3aKpeNTe nprMoN OTpe3OK DepeBa Ha n3deJINC NOMObIO DByX 3aXHMOB
- Pioopoe Hee Ha caIte www.skil.com
TEXO6CJYKINBAHNE/CEPBNC
JaHbI HcTpyMeHT He NOxOaNT dIa IpOMbIeHHORIOcNoJIb30BaHnI
Bcerda coepKHTe HnctpyMeHNT ero shyp B nchtote (oco6ehHO BEHTINJUIOHHbIE OTBepCTN Y ②)!pepeq uCTKO INcTpyMeHTa BblbTe BnIHy n3 po3eTN
CodepKHTe 0bactb Bo3ne HnHHeRo Koxyza Z B YnCTOTE (yaJnTe PbIb nCTpyKHy npn NOMOu CHaTOro BO3dyxa nn nEeTKn)
-ПОНЗВОДИТЕЧИСТКУ рекицero ДИССА СРAZУ КЕ NOСЛ
НСПОЛБ30ВАHИА (OCO6EHHO OТ CMOLI N KLEЯ)
EcnHCTpyMeHT,HEcMOTpHa TuaTeIbHbIe MeToDbI H3ROTOBLeHnH NcBtAHn, BbiJETn3CTPOr,TO peMOHT CJIeDyET IPOU3BOIDnTb CNlaAMn ABTOPN3OBAHHo cepBnCHOn MaCTepCKOn dIa 3JeKTPONHCTpyMeHTOB fnpMbI SKIL
-OTnpaBbTe hep3o6paHbI INHCTpyMeHT CO CBnTeJIbCTBOM NOKyNn BaWemy DInIepy IIN B 6LnxKaIyUO CTAnuIO ObcnyHbAHnA HIpMbI SKIL (adpeca n CXema O6cLyHbAHn INHCTpyMeHTa npNBedeHb B Be6caIte www.skil.com)
IpnmTe K CBeHEnIO, YTO NOBpeJcEHn BcJIeCTBHe neperpy3HN nn HeHaJNeJhaUeO oBaUeHHaC nHCTpyMeHTOM He 6ydy TBKJIuOeHbI B rapaHTNIO (ycNoBHraPantn SKIL cm. Ha caTte www.skil.com nn y3HaTe y dInepa B BaWeM perNohe)
OXPAHA OKPYKIAIOUeN CPeIbI
He BbIKNbIBaIe Te 3JIeKTPoHnCTpyMeHT,
PnHaJLeHIOCTN yNaHOBHy BmecTe C 6bITOBbIM MycopoM (ToIbKO dIa CTpaH EC)
-BO INCNOJHHeHne EBPONeIckOДIpEeKTHBbI 2012/19/ EC 06 yTnIN3aUHN OTCnyHUNBWeERO CBOI cPON 3JIeKTPnueCHoro N 3JIeKTPoHnHO O6OpyDObAHN I B COOTBETCTBnC DeIcTBYIOUIM 3aHOHOdaTeJIbCTBOM, yTnIN3aUHN 3JIeKTPoHnHCTpyMeHTOB pOnI3BODITCn OTDeIbHo OT dpyNX OTXODOB Ha npeIpnrTnx, COOTBETCTBYIOUHX YCLOBnM 3KOJIOrHEeCHOI 6e3ONaChOCTn
-3HaOK ⑦ HAnOMHIT Bam o6 3TOM, KOrda NoBHTc HEO6xOJIMOCt b CdaTb 3JIeKTPoINHCTpyMeHT Ha yTuIN3aUIO
WYM/BNBPaUN
Corglacho n3MepeHnB COOTBeTcBn c EN 62841 ypoBeH 3ByKOBOrO daBJIeHnA 3TOrO IHCTpyMeHTa coCTaBnIeT 91,5D(A), ypoBeH 3ByKOBoM OoHocTn -102,5D(A)(norpeuHocTb K = 3D), a Bn6paun* (BeKToPHa cymma no TpeM ocam; norpeuHocTb K = 1,5 M/c²)
pacnINbAHne DpeBecnHb 2,6 M/c²
pacnHnBaHne MeTaJIa 2,4 M/c²
- UpoBHeB Bn6paunn 6bI IN H3MepeH B COOTBETCTBUN CO CTaHdapTn3HnpOBaHHbIM NcblTaHHem, COepeKaUIMCBA EN 62841; daHHaY xaPaKTEpcntka MoKeT IcNoJIb3OBAtbcr IJr CpaBHeHn OHOro IHCTpyMeHTa C dpym, a TaKHe IJr PpeDbAPntbHoN OueHKN BO3JeCTBnBn6paunn PnI NcNoJIb3OBAHn DaHHORO IHCTpyMeHTa IJy kA3aHHbIX ceJeN
-πPn IcNoIb3OBAHm INHCTpyMeHTa B dpynx ceJAX NIN C dpYrIMN/HEncIpaBHBIM BCNOMoRAteJBhIMN npICNO6ObIeHNMy ypOBeHb BO3DeIcTBnB BV6paCm MOKeT 3HaunTeJIbHO NOBbUaTbCra
-B nepnoDbI, KOrda HnHCTpyMeHT OTHIOueH NIN ΦyHKcNoHnPyTe 6e3 paKTHueCKoR O BbINOJIHeHnra paOToB, yPOBeH BO3DeIeCTBnB Bn6paunm MoKeT 3HaHTeJbHO CHNHaTbCRA
!3aunauTece6oTBO3deIcTBnBn6paun,noDepHnBaHnCTpyMeHTNeroBCnOMoratelbHbIe npncnocO6JeHHnBNCnpaBHOM COCToAHn,noDepHnBaRpyKnBTeJIe,a TaHHe npaBnJbHO orpaHn3OByraCboipa6ouH npoueecc
UA
KoMaTHa nIka dJa Hapi3Kn 5360 pi3HomaiTHnx MaTepiJIb
BCTYN
Ley iHCTpymEnT np3HaYeHn DnI NO3doBxHbOra Ta nonepeuHoro po3nIIIOBaHHaDepeBHH, fAhepn, aIIOMiHO, kaxlIO, KameHIO, NlaCTNkTa IerKnx 6ydiBeBHNx MaTepiAniB y ikcoBaHomy noIOKeHHI
Ley iHcTpymeHT npu3HaueHn TilbKn DIn BnKoHaHH KopoTHnx 3pi3IB
- LcienhctpymeHT He npuaTHn IaI npomncIOBOB0 BnKOpNCtAHH
- Ipeed BnKOpNCaHHm npuIaMy yBaXHo npOHTaTe daHy IHCTpyKciU 3 ekCnIyatauIi N 36epKeHtB ii dIra nOdaJIbWoRO BnKOpNCaHHa ④
TEXHIYDAHI ①
EJEMEHINHCTPYMEHTA ②
A ABapiHn BmNKaU
B HypkoBni nepemnka
C Pyka BCTaHOBJIeHHr IIN6Hn Bp3aHH
D ⅢkaJa rIn6HHBpi3aHH
E ⅢlaHr BiDCMOKToBaHHnIy
F 3'εДнанн Дд BiDcMOKТУВаHHЯ NINy
G WectnprpanHHN KIOU
H KOnTeiHep dIa 36epeKeHHa IecTnrgpaHoro KIOUa
J KhoNka 6IokyBaHHa IINHdJIa
K BoNT KpinIeHH pIHyOro Dncky
L 3aTnckHnΦlaHeu
M Pyka dIy Bpi3Horo nIIHH
N POKOB3eHb
P Bepxhi uHTOK
Q IIndikatop "KHBnEHHyBIMKHeHe"
R Nokakquk liHHi pi3aHH
S HanpaBraIoua IHaHka
T Puyka dIaBCTaHOBIOBaHHHaHpaBIAHOOoi IaHKn
V Ie3o nnin 3 3arapTOBaHOi cTaji
W AIma3Hn DNCK
X TbePocnlaBHeJe3o
Y BeHTnlauiHi OTbOpN
Z HnKHiO6MeKyBaay
BE3NEKA
3AΓΑЛbHI BKA3IBHи 3 TEXHIHи БE3NEHINOBODKEHHI 3 EJEKHTPOIHCTPYMEHTAMN
NIOPEDEHEHHYBaHHO BBUBytB 3aNo6iHHI 3axoHa Ta iInocTpaui, a TaOH npOHTaHTe Bha3IBHn TaTexHiYMOBn, uO BXoAryb HOMnEHT NOCTABHN cboRo eJeHTpoIHcTpymEtHy. HeDoTPMaHHH HnKHepeJIeHnx BkA3iBOK y NobHOMy o6craMoKe CnpuHHTu ypaHexHH eJeKtpuHm CTpyMOM, POHexKy Ta / a6o cepno3Hy TpaBMy.
Dio6pe 36epiraTe Ha MaB6yTHc i nonepeJHHeHHa BHa3iBn.
Пи Д NOНТТМ "еLEКТРОПРИАД"В УХ NONЕрДжЕнгЯ MaETbCS HA yBa3i eLEKTKPONPPIAID, со пацIOE BiD Мер经I (З eLEKTKPOKa6eJIem) a60 BiD akymЛТOPHOI 6aTapei (6e3 eLEKTKPOKa6eJIIO).
1) B63NEHA HA POBOOYM MICLI
a) PpmaTe cBc oPo6Oe Micce B YnCTOTi Ta np6bpaTe Noro. Be3naI a6o noraHe ocBtJIeHNHa po6OHy MlCi MoKyTb Pn3BOdHTn Do HeuacHINBnAaKIB.
b) He npaioTe 3 npnaIam y cepeobnci, de icHyc He6e3neKa B6byx BhaCJIIOH npncyTHOCTI ropounx piinr, ra3iB a6o nnly. EJeKTPoPnlaDN MOHyTb NopOJyBaTu iCKPi, BiJ RAHX MoJx MoJx 3aImaTnca nnl a6o napu.
c)Пд уac npaцOBAHн 3npILAam He nipnychaTe Do po6oYoro Micya DiTe Ta iHxN IIOeB. Bn MOKeTe BtpaHTn KOHTpOJb HAD npILAam,Якso BaWa yBara bye BiDbepHyTa.
2) EJEKTPNHA BE3NEHA
a) TtenceIb npnlaNy noBNHeH nacyBaTH Do po3eTHN. He do3BOLIeTbcra 0o-He6ydb MInrHb Wtenceli. IpaO6OTn 3 npnlaadam, 0o MaHOb 3axNChe 3a3emLeHH, He BHKOpNCTOByte aadantepn. BHKOpNCTaHH opriHaJIbHorO wTeCenJa Ta HaJIeJHoI po3eTKMehUye pnsK ydApy eJeKTPnuHM CTpyMOM.
b) YHnHaTe KOHTaHTy YacTei TiJa i3 3a3eMJIeHMn NOBepxHAM, JI HAp., Tpy6am, 6aTapeA MOnaJIeHH, neAmu Ta XOJIOJIbHNKAm. KOn BaWeTiIo 3a3eMJIeHe, icHyE 36IbIbWeHa He6e3NeHa ydApyeJIeKTPnUHm CTrpymOM.
c) 3axuatae npnaad BiD douy Ta BOIOnn. IonaanHb BOIN B eJeKtpoiHCTpyMeHT 36ilbUye pN3NK yIapy eJeKtpuHm CTpyMOM.
d) He BnKOpncToByyTe Ka6eIb IJIa nepeHecEHn npHaay, niDiBiWyBaHHa 6o BHTaRyBaHHa Tcncel3 po3eTHN. 3axuatae Ka6eIb BiJ hapn, onii, roctpnx KpaIB Ta deTalei npHaay, zo pyxaoTbc. PoiKOHeHn a6o 3akpyeHn Ka6eIb 36ilbye pnsNK ydpay eEKeTpHm cTpyMOM.
e)ДЯЗOBHixpo6ITO6OB'3HOBOBnHOpNCTOByTe LHe TAHN NOOBHyBaU,TO DOnyuSeHn DnA 3OBHixpo6IT.BHKOpNCTaHHNoDObKByBaU,po 03paxOBaHnHa 3OBHsiHIpO6OTn,3MeHUpE pN3NK ydApyeJIeKTPnHIM CTpyMOM.
f) Ano He MoKa 3anO6irTu BnOpncTaanHoo eNtponpnaIy y BoIoromy cepedOBnIi, BnOpncTOByTe npncptpi 3axnctTy BiD BnToKy B 3emLIO. BnOpncTaHHa 3pncptpo 3axnctTy BiD BnToKy B 3emLIO 3MeHJyepn3NK ydpay eNtPnHMM CTpyMOM.
3) B63NEHA JIODEI
a) BybTe yBaHHMn, cIiHynte 3a Tm, IIO Bn po6nte, Ta po3cydlnBO NOBdTecn iIac po60Tu 3 eIeHTponpnaIam. He KopncTyItec npnaIam, RaIoo Bn CTOMJIeHi a6o 3haxOITecn iI d iEIO HApHOTnHIB, CNHPTHNX HANOIB a6o IiH. MItb HeyBaXHoCTi pN KOpNCyBaHHi pNlAOM MoHe np3BOHTn Do cepNo3HNx TpaBM.
b) BДЯгаTe OOC6NcTe 3axnche cnopdHeHH Ta o6OB'3HOBO BДЯгaTe 3axnChi OHyJIApn. BДяганн OOC6NcTOrO 3axnCHOrO cnopdHeHH, RaHap., -B3aJIeJHKoCTi BiD BVdu pObiT -3axnCHOI MACKN, CpeC3yTTT, lo He KOB3aEbC4, KaCKn a60 HabyuHnKIB,3MeHwye pn3nck TpaBM.
c) YHnKaIte HeHaBMnCHOrO BMnHaHH. Nepw HIX BMnHaTH eJeHTpOpnpHnAad B eJeHTpOMepeHy a6o BCTPOMJrTH aHymyTOpHy 6aTaPeU, 6paTn Horo B pyKn a6o nepeHoCHTn, BneBHITbcN B TOMy, 0e JeKTPOpnpHnAD BmKHyTN. TpMaHH naJIbca Ha BMnKaHi niD qac nepeHeceHH eJeHTpOpnpHnAdy a6o BCTPOMJHnB pO3eTKy yBIMKHyTO rPiHaMy MoHe np3BOuNTn Do TpaBM.
d) Ipeed THM, HK BMHKaTH npHnAid, npn6epiB HanaRoDHyBaIbHI IHcTpymeHTn Ta raHOBn KIOU. 3haxoJxHeHH HaIarOHyBaIbHO rIHcTpymeHTa a60 KIOUca B DeTani, 10 o6epTaetbcra, MoKe npH3BOIDNTN Do TpaBM.
e) He nepeoiciHouTe ce6e. 36epiraTe ctiHe noloxenHa Ta 3aBKn 36epiraTe pIBHObary. Lcdo3BOInTb Bam kpaue 36epiratn KOHTpoIb HaI npnilaOM y HecnoiBaHnx CNTyaicix.
f) BdraTe npdaTHn oJr. He BdraTe npocstopn
OJr Ta npnKpacn. He ndTabIe BOLOccn OJr DO Detale, 0p yxaotbcr. IpocToPiOn OJra, npKpaccn Ta DOBc BOLOCCM MoKyTb nonaTaH B deTani, 0p yxaOTbcr.
g) RaHIO icHyc MOHINBicb MOHTyBaTHn NIOBIDCMoHTyBaJIbHI a60 NIOLOYNOBIOBAJIbHI npNCTpoI, nepeKHOaTEcA, 06 BOH 6yJN Do6pe NiD'EDHaHI Ta npABHbHO BHKOpNCTOByBaIHc. BHKOpNCtAHnRA NIOBIDCMoHTyBaJIbHO rnpCTpO MoKe 3MeHUnTI He6e3neKn, 3ymOBJIeHi NlOM.
h) Do6pe 3HaHH eJektpoiHcTpymeHTiB, OTPMaHe B pe3yIbTaTi YacToR IO BHKOpNCTaHH, He NOBHHo npn3BOAnTH Do camOBneBHeHOcti I rHopyBaHH npnHcnnib TexHikn 6e3NeHN. Heo6epeKHa dIra MoKe B ONDHY MNTb pN3BecTn DO BAKKOITpaBMn.
4) INPABINbHE IOBOJHHeHHTA KOPNUCTYBAHH EJEKTPONPHJADAMN
a) He nepeBaHTaHyTe npnlaD. BnHOpncToByTe TaHn npnla, 30 cneiaIbHo npn3HaueHn dIe neBHOi po6OTn. 3 npndaTHm npnlaDom Bn 3 MeHsIM pN3HKOM OTPMaTe Kpaui pe3yJbTaTn po6OTn, Rkso 6ydeTe npaIOBaTn B 3a3HaueHomy diaNa3OHi notyKHOCTi.
b) He KopncTyIeTcA npnlaDom 3 noWkoJHHeHM BmHKaeyem. Ppnlad, JnH He MoKHa yBIMKHyTu a6o BmKHyTu, e He6e3neuHm i NOro Tpe6a BiDpemOHyBaTu.
c) Npeed TmM, Ra peryIIOBAtu 0o-He6yDb Ha npHnadi, mHrtu npHnadA a6o XOBaTH npHnad, BHTarHtB wTeNceJIb i3 po3eTN Ta/a6o BHTarHtB aKymyIaTOpHy 6aTapeIO, RaHIO BOHa 3HimaetbC. Li nonepedKyBaJIbHi 3axOJN 3TexHIn K 6e3neKn 3MeHNyIOTb PN3IK HeHaBMCHOrO 3anyCKy npHnady.
d) 36epiraTe eIeHTpnpnlaHn, IAHmN Bn came He HOpncTyTecb, daJIeHO BiD iTeH. He Do3BOJaTe HOpNCyBaTHc eIeHTpnpnlaHOM Oco6am, 0o He 3HaJomi 3 NOro pOboTOIO a6o He YHTaH N C bHa3IBHN. Y pa3i 3actocyBaHHr HeNoCbiDuYeHMn Oco6amn npnaHn HeCyTB Co6i He6e3neKy.
e) CtapaHNO dOrJaIaTe 3a eJeKtpoiHcTpymEntamn i npHaadm. IpebipTe, uo6 pyxomi detani npHa dy 6e3dorAHNo npauOBAHn Ta He 3aIdaHn, He 6yIn nolamaHmN a6o HactiNbHn NowkOHeHMn, uo6 ue MORIO BnlnHyTu Ha FyHKnioHyBaHH npHa dy. NooHDHeHi detani Tpe6a BiDpemOHtBuTn B aBTOpH3OBaHm MaNCtePHi, nepu HIN HMM MoHNa 3HOBy HOpNCTyBaTHc. BeInka KJIbKicThb HeUacHnx BnAikIB cnpuHReTbcra NoraHm DOrJaDM 3a eJeKTPoPnlaDamn.
f) Tpmaite pi3aIbHI iHCTpymeHTn do6pe HAROCTeHHMn Ta B uHcTOTi. CTapaHNO dOrJIaHyTI pi3aJIbHi iHCTpymeHTn 3 rOCTpIM p3aJIbHM KpaEM MeHwe 3aCTPraHtB Ta ix IeIgWe BEcTH.
g) BnHOpNCTOByIte eIeHTpOpiJaI, npJlaIaIdo Hnx,po6oqi IHcTpymEnTn T.i. BiIDNOiDHO do cIHX BHa3IbO. Bepitb Do yBaru npu cBOMy yMOBn po60Tu Ta CneUPhiHy BnHOhyBaHOi po6OTn. BnKOpNCTaHHeIeHTpOpiJaIb DnIpo6IT, dIra KINX BOHN He nepeIb6aueHi, MoKe pN3BOIHTn Do He6e3NeuHx cnTyaui.
h) TpmaTe pyKoTn i nobepxHi 3axBaTy cyXmH i nCTHMn, cIiKyIte, 06 Ha Hnx He 6yNo OINBn a6o rctoro maTnla. CIn3bKi pyKoTn i nobepxHi
3axBaTy yHemOHJIINBIIIOITb 6e3neUHe NOBOJKeHHA 3 eIeHTPOIHCTpyMeHrTOM Ta IIOrO KOHTPOJIIOBAHHA B HeoikyBaHn CXtuaJrx.
5) CEPBIC
a) BiДаВаite cBi npIlaH na peMoNT Iиwe KBaIiΦiKOBaHmФaxiBcYMa Ta Iиwe 3 BnHOpNCTaHHaM opRiHaNbHx 3aunactH. Lc 3a6e3neuTb 6e3neuHicTb npIyHa DoBriu Yac.
IPABNlA TEXHIKN BE3NEKn DJIABARATOyHKIOHAJIbHOI NIIJKN
1)PO3NJIIOBAHHI
a) HE6E3NEKA:He πiδctabJIte pyuB 30Hy po3πnIIOBaHHa i πiD πnJIbHm dNcK. JaKuo Bn 6ynde Te oboma pykam TpmaTncs 3a nnky, Bn 3axnCTnte pyu Bi nopaHeHHa.
b) He npocobnyTe pykn n iD Bnpi6, zo po3nnHIOeTbcra. O6mekyBaay He 3axnCTnTB Bac BiJ le3a niD Bnpo6om.
c) BiDperyIIOte rIIN6Hny po3nHny BiINObIaHO do TOBunHH Bnpo6y, 0o po3nHIOCTbcra. 3y6ci nnn MaOTb IInue YacTkoBO BnIaTaN 3-niD Bnpo6y.
d) Hikoln He TpmaTe po3nnIObAHy DeTaIb B pyu i a6o Ha KoIiHax. 3aΦiXcyIte o6po6IObAHy DeTaIb y cTa6IbHomy KpinIeHHI. Uo6 3MeHUnTI np3NK 6yTN 3auePHeHM, 3acTpaBaHHa NIIJIbHOro DnCKa a6o BtpaTH KoHTpOio HaN HM, BaKJIbBO, Ioo6 o6po6IObHa deTaJIb 6yla Do6pe 3akpInIeHa.
e)Пи рбOTax,ноли рбОчи iNcTpymeHT MoHe 3aueHNTn 3axOBaHy eIeHTpOPOBOHy a6o BlaacnH uHyp HNBLeHn,TpImaTe eIeHTponPnlaad 3a i3OJbOBAhi pyHOrTHn. 3aueHnHЯ eIeKTponpOBOKn 3apAHyE MeTaNBei YactHn eIeHTponPnlaady i npu3BOdntbdo ydApy eJIeKTPnHIM CTPymOM.
f)Пдчac no3doBHHbOro po3nHIOBaHHaBHN BnHOpNCToByTe cnPMAOBYu nlaHny a6o cnPMAOByBaU KpaIB.Le noKpaUye ToHicTb po3piTy Ta 3MeHwye BiporidHCTb 3aIdaHHaHa
g) 3aBKn BnHOpncToByte JnWe NnJIbHi DnCHN npabHbHoro po3mipy i 3 BiNobiHIO φOpMoI NOcaOuHoro OTbOPY (Hanp., 3ipyactoi a60 hpyrIoI φOpM). NnJIbHi DNCKN, 10 He nacyIOTb DO MOHTaXHHx DeTale NnIKN, OepeTaIObC HepIBHO I npn3BOJrTb Do BTPaTI KOnTpOJIIO.
h) Hikoln He BnOpncToByte yuHodKeHi a6o HeBIDNOBIDHI wa6b a6o 6oHTN, 0o TpIMaOTb Ie3o. Wai6n, 10rTpMaIObIe3o, Ta 6oITb 6yIn cneiaJIbHO po3po6JIeHi y BiINOBiHOCti Do BaWoI nII IN dIra 3a6e3NeueHHOn OTMAmJIbHOI eFeKTNBHOCTI Ta 6e3NEKII iEcknlyataui.
2) BIDDAUA - PPNHNTA BIIOBIDHI BHA3IBHN
BidaHaa - ue HeoikyBaHa peakui Ha 3aueMHeHH, 3aIaHnA 60 HnpabNbHe cHTpyBaHH ne3a nnIn, 10 BnKlnKae HeKOHTpOJIbOBaHnx pyx nnn Brropy BiD Bnpo6y, 10 po3nnIOETbcra, Ta B Hanpymky onepaTopa
KolnJe3o 3aueMJIe He a60MiuHO 3acTpRIO y po3pii DepeBHH, BOHO nepeCTa O6epTaTncb, ToX MOTOP cnpuHHe WbIDKn pyx IHcTpymeHTa Ha3aD B Hapmky onepaTopa
JaKuo Ie3o 3irHynoC Bpo3pii a6o noraHO BiIeHTPOBaHe, 3y6uB 3aHHi cactnHi NnN MoHyTb rIb6Oko BXoDHTB NOBepxHIO DepeBHN, B pe3yNbTaTi
YOROJe30BHXoNDtB3po3pi3yTaBiDnITaeHa3aB HAnpMkyonepatopa
CinaHnIepe3yIbTaTHe npabNlBHOEcknlyaTaui a6o nOMnIOK npu p6oTi 3 eJeHTpOnpnlaDom. Iomy MoHHa 3anobir 3a DonomOrHO HaJIeHHx 3anobiHHx 3axoIB, UO ONicaHI HNKye.
a) O6oma pykamn miuho Tpmaite nny, npknlaadoon 3ucnnla dna 3anobirahn Bidnai. Ctiite 360ky BiD cTolna, a He Ha odHni LiHH 3 ne3om.B pe3yIbTaTi BiDaqui nla moKe cTrn6HyTu Ha3ad, aane onepaTop MOHe KOHTPOBAtn CNly BiDaqui 3a YMOBN BKNBaHN BiINOBiHNX 3axOdiB 6e3neKn.
b) RaHIO ne3o 3acptpRnlo, a60 RaHIO po3nnIOBaHHa 6yIoo 3yINHeHO 3Akoicb npuHN, BiDnycITb TpHrep Ta 3aIIwTe HepyXOMy NnLy B MATEpiA1i Do NOBHOI 3yNNHn Ie3a. HiKOn He HamaraTecr 3a6paTHNly BID BnPo6y a60 BNTaTn II Ha3aD, RaHIO ne3o ige pyxaetbcra, a60 MoKnIBa BiDa4a. IpeBipTe BnPi6, 1o po3nnIOEcbra, ta yCyNbTe npuHHy 3aIdaHnIe3a. 3anobiraTe po3nnIOBaHHIO CB8xIB a60 RBHTIB.
c) Pn NOBTOPHOMy BCTaHOBJIeHHI NIN Ha Bnpi6 BiDcHTpyTe Ie3o NINB Po3piTa BnEBHITbcA, 0o 3y6ci NIN He 3actpargIn B MatepiAi. Kaio Ie3o 3actpargIO, iD yac YbIMKHeHHra NIN BOHO MOKe pyXaTcB BROPy a6O BHKJHKaTH BIDaCy.
d) 3a6e3neuTe DoaTHOBy onopy BeHHnx naHeJe, 10o MinimizyBaTN pN3NK TORO, 10o Je3o 3acTprHte Ta BnKlnHaC BiDauy. BeNki nAHeI MoKyTb npOrnHaTncr NiD BlaCHO BarOIO, ToK NiD nAHeJI 3 06ox 6okIB 6iJa LiHII po3pi3y Ta 6iJa KpaIO nAHeJI Tpe6a noCTaBHTn OnOpN.
e) He BnKOpNCToBMyTe nyTi a6o yuHODHei Ie3a. He 3aToUeHi a6o HnPaBnIbHo BCTaHOBJIeHi Ie3a yTBOpIOuTb By3bKn pO3pi3 Ta BnKIINaIObTaHaIMipHe TepT, cnpNCHNOCh 3aIDaHHJaE3a Ta BiDauY.
f) 3aTnckhi BaKei peryIIOBAAHr rN6HH Ta Haxnly Ie3a MaOTb 6yTN Do6pe Ta 6e3neHo 3aTnRHeHi, nepu HIX npCTynatNo po3nny. Jkuo nac po3nnIOBAHH HAcTPOHa Je3a 3MiHOcTBc, ce MoKe BHKInKaTH 3aDaHHJe3a Ta BiDauy.
g) BydTe oO6JIbNO 06epeHHI npn po3HIOBaHHI B CTINAX a6o B iHNx Micx, B Aki BN He MoHeTe 3a3nHyTH. Pn pO3HIOBAHHI B nPnxOBAHx 06'KTx 3aHypeHHI NIIJIbHNI DnCK MOHe 3a6JOKyBaTHcI CnPNuHHIT pIKoWET.
3)ФУнкцИЗ AXИСHО HOЖУXA
a) HoKHH pa3 nepeD po6oToIO nepeBipnTe 6e3dOraHHe 3aKpNBaHHa 3axnCHoro KOxhya. He npauOHTe 3 nIIHOIO, RaIoo 3axnCHH KOxHy H nepeCyBaCTbCBAIbHO I He 3aKpNBaCTbCMAttcBO. HiokHI He 3atncHyTe I He npNB'3yUte 3axnCHH KOxHY; aIKe BHaClIOH cboRO NIIABHN DnCK 6yde He3axnSeHH. RaIoo nIIKa HeHapOHOM BnAede, 3axnCHH KOxMy MoHe NorHyTcH. PepeKoHaITecG, 10 3axnCHH KOxHy pyXaETbcB CaIBHO i He TOpHAeTBcRAIINbHO DnCKa He3aJIeHXHO BiD KyTa i rIi6Hn PO3nnlHOBaHH.
b) NpebeipTe cTah i fynkuioHaIbHy 3daTHicTb npyHnH 3axncHoro KOhyxa. Hkso 3axncnHn KOhyx i npyHnHa HecnpaBHi, ix Tpe6a BiDpemOnTuBaTn, nepu HIX NOUHaTn PpaOBoTaN 3 npuaJom. BhacliIOK noWKoDKeHHa DeTanei,
KLeiKHX HaJIInaHb a6o cKOnIueHHcTpyKHN 3axnCHNI KOKyX MOKe pyxatnc JINWE dyKe Tyro.
c)Пи "3aRJIbHOMy po3nJIIOBaHHi",ЯHe BnHOHyETbcr He nId npAmm Kytom,3aΦiHcyTe OOnOpHy PnHTy NnHN, 06 BOHa He 3CyHylacr y6iK. 3CyBaHHra NNITy y6iK MoKe npN3BecTn Do 3aCTpRABaHHra NNJIbHOrO DnCKa Ta pIKoWety.
d) Nepw HIX NOKIacTN NINHy Ha BepCTaH a6o Ha NiIyory, nepeHOHaTecra, 0o 3axncn HoKyx 3aKPNBaE NNJIbHN Dnch. HenpNkPHTNIINJIbHN I nck, 0o 3haoDITbcR B cTaHi iHeptHorO BV6iRy, BiDtOBxye INIKy IpOTn HAnpMHy po3NNIOBHaHH I pO3nnIOE BCE Ha CBOeMy WJlaxy. 3BaJaTe Ha TpNBaIcTb IHepuINHO BV6iRy NINKn.
ДОДATHOBIBHA3IBH3 TEXHIKBE3NEH
3AΓΑJIbHE
Ley iHCTpymeHT He MoKe BnKOpNCTOByBaTncB iITbMn iOC6aMn 3 o6MeKeHHmN fI3uHmN, CEHCOPHMn a6o pO3yMOBnMn 3di6HOCTaMn, a6o OC6aMn, rKi He MaOTb DOCTaTHbO D0CBiDy Ta 3HaHb, 3a BnKIOUeHHm BnnaIKiB, KOJI BOHn PpaQIOb TpiHarJIAOM a6o npoiWln iHCTpykTaH zoDo BnKOpNCtAHHr iHCTpymeHTy 3 6OKy OC6b, Jka BiIDNoBidae 3a ix 6e3neKy
-Перд ВИКОПСТАнгМ ИСТРУМУВЕРшИ разраимо OTPIMATи паKTTHHy INФOPMaцio
Ley iHCTpyMeHT He nIXoDnTb dIa MOKporo po3HHIOBAHH ③
Ipeep peryloBaHnA a6o 3amHO npnaDra o6OB'3HOBO BnMIb BNHy i3 ciTboOoi PO3eTHN
3a6bOpHReTbcBnKOpNCTOByBaTH iHCTpyMeHT dJI 6iHoro uifyBaHH
Hateropnno 3abopohreTbcKOpncTybaTnca IHCTpymeHTOM npn nookdokeHHI eKeTpnHoro shypa; 3amHa Ha aHaIogIHNI iDROTOBJeHN IHyp nobHHa npoBODNTNcOprahizaeIO 3 o6ClyroByBaHH.
3a6bOpOHReTbcBnHOpNCTOByBaTH daHNeIeKtpoHCTpyMeHT BЯHOCTi HepyXOMoIMaunn (BIn He npuHaueHH NByBnKOpNCTaHH 3pO3nJIIOBAJIbHHM CTOJOM)
He 6o6o6bIte MaTepiA, uO miCTb ac6eCT (ac6eT BBaKaTbcra KaHcepeoReHHm)
3a6bOpOHHeTbcNnJIaTHuOpHMeTaHn (po3neueHa CTpyKHa MoKe 3aIaNHTn Nl)
- PnO6pO6ci KAM'AnHx MaTepiAIB Heo6XiHOBHKOpHCTOByBaTH NIOBuaJaIauOHy IpnCTpi.BiN NOBHeH MaTH FyHHcIO 3 MoHNbICTo np6HpAHHa Kam'HOrO NHy (BNKOpHCTaHH DaHOrO 6bnHaHH 3HnKYe 3arpo3u, Nob'a3aHI 3 NlOM)
ПИЛ BID TAKINx MaTepiAJIb, RA CBNUHcOBOyTpMHyIOUa
ФAP6a, DeRi NopoIy DepeBa, MHepaIy MeTAl,
MOKe 6ByTN WkIДNIBM (HOHTaK I3 TaKIM ПИLOM
a60 NOro BdNxAHN MoKe CTaTN pPunHNOO
BHNKHeHH B ONePAToPa a60 oCtio, lo nepe6yBaIoTB
nopyu, aIepriHnx peakui i/a60 pecnPipaTopHIX
3axBopUBoAhb); HndraIte pecnipatop i npauOte 3
ПИLOBDAJIYQUHm PnCtPoE m NiD qac yBimKHeHH
IHCTpyMeNTa
- DeaKi BnI NnIy KlaIcnIkyIObCra JK KaHcpeoreHHI (HaepKlaid, dyobBni a6o 6yKOBni nII), Oco6blBO B cNoJyHeHHI 3 Do6abKaAMn IJI KAHOuOBHn HpeBnH; HnraTe pecnipatop i npauOte 3 nnOBdaIauOum npncTpoem niJ qac yBIMHNHn IHCTpyMeHTa
CldyTe IHcTpuyiM no po6oTI 3 MaTepiAAMN, npOduyUOCHMN PII
AHCECYAPN
SKIL rapaHTye naHny po6Oy iHCTpymeHa TJIbKn npn BHKOpNCtAHHi BiNObiHoro npna
BnKopncToByTe Ine nIJIbHi DNcH,IO BIDIOBAIOb XapaKTepNCtHKam,3a3HaueHM B cIM IHCTpyKci, nepeBipeHi 3a EN 847-1 Ta MaIOb BiINOBiDHe MapkipyBaHHa
BnKopncToByTe InIe npnaIaIpy, npynycTIma WbNdkicTb 6eptTaHHraKOrO KMIHIMyM BiINOBiJaHa HauBnuiWbNdkoCTi IHcTpymEnTa 6e3 HabaHTaKeHHA
BnHOpncTObyIteJe3aNnH/BiDpi3HnxKpyrib diametpom Bi 85do 89 MM Ta OTBOPOM HneJIO diametpom 10 MM
Hikon He BnKOpncToByTe B cBOMy iHcTpymEnTI 1iYBaIbHi DnCKN
- Ipeepo60toIO nepeBipTe BiINOBiHicThb Ctpymy B Mepeki i3 Ctpymom, No3HaueHi Ha iNCTpymentI
He donyckaIte noikokHeh, kIMoKytb HaheCTN Wypyn, cBaxn iHni elemEnTHBaWOMBy BnpOby; BuDaiTb ix neped novatkom po6OTn
O3haHOMTecb i3 3ac06amn KepyBaHH Ta nopdHOM p6oTu 3 iHCTpyMeHTOM
Iepw hix noatn po3nnIObAHn, BndaITb BcI nepeukoHa noBepxHi Ta nid liHieO po3nnly
3aφiKcuyte 6oPb6IOBaHy DeTaIb (6oPb6IOBaHa DeTaIb, 3aΦiKcOBAHa 3a DOnOMOIO 3aTnCKHnx npicTpoIB a6o JeuaT, 3aKpInIHOETbcra Kpaue, HIX BpyHy)
BnKOpNCToByte npndaTHi nowyKobipnnaDn 3haxoJKeHHaXOBaHnx B6ydiBNI Tpy6 Ta Ha6eJIb a6o 3BepHiTbc 3a donomoroB MicceBe NiInpnemCTBO eJeHTpo-, ra30-Ta BOJOnocTayHHa (3aeyenHHe neEeKTPoPBOdKn MoKe np3BOdNt Do noKeHt Ta ydpA eJeKTPuHm CTpyMOM; 3aeyenHRe Ra3OBoI Tpy6n MOKe np3BOdNt Do BV6yxy; SaeyenHRe BOJOpBOdHOI Tpy6n MoKe 3abATn ShKOdy MaTepiAlbHm UinhOCTm a6o np3BOdNt Do ydpA eJeKTPuHm CTpyMOM)
BnKOpNCToByuTe NOBHCIOPO3rOpHeHmShHyp NODOBKyBaHa, RKn MOKe BHTPmMyBaTu HaBaHTaKeHHA B 16 Amnep
ПД YAC BIVKOPNCTAHH
PibenIymy npi po6oTI moKe nepeBnUyBaTu 85 n6(a); BIKOPNCOByuTe HaBuSHNk
He Do3BOJnTe 乌Hpy KINBLeHHaCTNKaTNC3 pyXOMMn qactnHaMn IHCTpymeHTy;3aBKnBnKlaJaIte 乌Hyp 3a 3aHbIO qactnHOIO IHCTpymeHTy
Hikoln He BHKOpncTOByte ue iNCTpyMeNT 6e3 opnHaIbHOI CNCTEm 3axnCHNX 06MeKyBauiB
He HamaraiTeca p03piAtn DyKe MaIeHbKi BpuO6N
Ipnpo6oTi He nDhimaTe eEnkTpoHcTpymeHT Bnue pIBH roBn (TaKe IIOJKeHHr He 3a6e3neye DOCTaTHbOTo KOHTpolIO iHcTpymeHTa)
- Y BnnaHy eJeKtpnHoi QI MExaHiHoI HeCnpaBHOCTI HeraHOB BnMKHITb IHCTpyMeHT Ta BnMIb BnIKy 3 po3eTKN
-Якшунур пошджениablo npopizahn npno p60ti, He doTopkaHTEcra Do Hboro i HeraHBOBHTyNHO 3 po3eTKI
NICJI BHKOPNCAHH
KoHn BN 3aHcHnHnpo6Otu 3 iHCTpyMeHToM, BmHKHiTb MOTop i nepekoHaHTecra, 00 BcI pyxomi YactHHN
IOBHICTU 3yINHINNCRA
-ПисяВИМКHEHнДИСКОВIПИИNHIKOKIN He HamaraTeCЯ3YnHHInO6ePtaHnHNoIe3a, 3aCTOCOBYIOUdIo HbOrO 60KOBI 3yCnIIJIa
IORCHEHHA DO YMOBHNX N03HAQOK HA IHCTPYMEHTI
④ Npeed BnKOpNCTaHHm npOHnTaIe IHCTpyKciIO i3 3aTocyBaHHA
⑤ PódbiHa i3oJauj (3a3eMJIIOUOy nIpoBID He nOTpi6E)
⑥ Ondrae 3axnchOkyIpy Ta 3acobn 3axncty BOIOCC
⑦ HeBnKndaIteiHCTpyMeHTpa3OM3i3BnuaHmCMITTAM
BHKOPNCTAHH
BkN/BnKn ⑧
-BKIIHueHHI INCTpyMeHTy 3diINCHIOeTbCRA WJHXOM noaichi pyuHN A Bnepei I HAIncHeHH Ha raWetky B -BIMKHITb IHCTpyMeHT BiDnycTHBwN KypKa-NEpeMnKaHa B
-PeryHOBaHHraIIN6HHnPo3NHy(0-28,5MM)9 -BiDnyCtITb pyHy C
-Haatayte6aKaHy rIbHy Bpi3aHn 3a Donomoroo shkaJN D
-3aTnHbpyKyC
-ДлгОТРИМАнгОNTIMаЛьНоIЯКоCTiPo3ПИЛIOВАнн
ЛeЗО ПИПИН He NOВИНHOВИЯДАТN 3-NiД BИрOБу,Цо
po3ПИЛIOEТсЯ,бИльш,нЖHa 3 MM
!KoHnBnHOpNCTOBYIObCnaIaMeTpom89 MM,rN6nHa Bpi3aHHc nibnaaac 3i 3NaueHHMa Ha shkanI rN6HHn Bpi3aHH D(JnBaN3HaueHHFaHTNuHOI rN6HHn dVB.Ta6nUioDndoBIDn)
! 3aBKn cnOaTHy po6Itb npo6Hi po3nHn, o6 nepeBipHTn liHIO npOnnly
- NIOBIOBIOBAHH ⑪
-πiKlIOuHTb ⅢaHr NIIIOcoca E do 3'eHaHHF iNIIIOcoca, RA KOKa3aHO Ha pncyHky
!He do3B0JHnTe WlaHry NINOCoca 3aBaHaTn
ФунцioHyBaHHIO HNHHbOrO O6MeHyBaay a6o
po3nHIOBaHHO
! He BnHOpNCTOByTe NIIococ npi pi3aHHI MetaIy
3amHaJe3a nnH ⑫
! BnHrTH BnHky 3 po3eTHN
I nepehoHaTecb, 0o nHa oCTaTOHc3yHHlaC
-BCTaHOBtIgHbHbByp3aHHHaMaKcMym
-Bi3bmitb WeCTnIpaHHN KJIIOU G 3 KOHTeHepa H
-HaTNCHTb KHOHKy 6JIOKByaHHN WnIHdJIa J TaYtPmMyTe II, DOKH He 3HIMe 6oNT Je3aK, NOBepTaIOH MOHTaHHN IeCTIgPaHHN KJIIOH
3ATODHHHKOBOIOCTPIIHOIO(=yHaNPaMky cTpiIKN,3o6paKeHoiHaJeziPiKn)
!HaTnchaTe KNONky 6JIOHYBaHHa J, TInbKn KOIN JOHn eneMeHT INCTpyMeHa He pyxactbcra
-BiDnyctItb KhoNkHy 6IOnkyBaHnHa 7nnHdJIa J
-BndaJIbΦIaHeuL
-HaTnCHyTu Ha pyuKy M BeJInkM nalbEm
-πiHIMITb npHTnCKHy nlaCTnHy N Ta 3HIMITb Ie30I INIKI
I 3amHIOte Ie30 NnN, BCTaHOBIOUOHy Noro TAHM YINOM, 0o6 3y6ci Ta cTpiHa Ha ne3i BHA3yBaHn B TOMy H HanpMaHy, 0o N cTpiHa Ha BepXhBomy UHTky P ⑫ b
-BCTaHOBtB ΦaHeuL
-MiCuHO 3aFikCyTe 6oTJe3a K MoHTaHHHM WeCTnIpaHHN KIOU G IPOTN FOINHHNKOBOI
CTPIJHKH,HaTNCaIOUKNKHOKNy6JIOKYBaHHaNNHeJ
-BiDnyctIb KhoNHy 6NoKyBaHHaUINHdJIa J
BnKOpncTaHHIhCTpyMeHTy 13
-BCTaHOBiTb Heo6xIDHy rIi6HHy Bpi3aHH
-πiKIOUItbIteNceBdoJxHepeLaHnBHeHHa (3aropaeTbcraamnoOkaQ,yKa3yOuHaTe,io iHCTpyMeHT yBIMKHeHn) 14
-HaTnchTu Ha pyuKy M Bélnknm NaIbIeM
-IOCTaBTe IHCTpyMeHTepeHbOu qactnHOI npNTnCKHOI pAACTnHN Ha Bnpi6, 0o po3nnHoETbcra
-Haxniltb hctpymEnype TaKIM YHOM, 06
nokakuk liiipi3aHHra CnibnaDana 3 liHieO
heo6xndoro po3piy, Ra Ka Bi3NaeHa Ha po6oMy
MaTepiaI
!pepehoHaTeCn,0o3y6ci nHnHe 3aCtpraTn B Bnpo6i
- yBIMKHiTb iHCTpymeHT
!6ydbTe roTOBI do pNBHa iHCTpyMeHTa npu yBIMKHeHHI
! nepw, hix ne3o nnTOpKHeTbCn Bnpo6y, IHCTpyMeHT Mae npaObaTH Ha nobHy wBnDnictb
! BnHOpncToBMyOu nIhctpyMeHT, He DoKnaaTe NaMipHoro 3ucnnla (3ucnnla MaE 6yTu NomipHm Ta noCTiHnM, 0o6 3ano6irTu neperpiBaHHIO BicTpra le3a Ta, RaHIO po3pi3aOTbcr PnactNtKOBI dTaJI, PnabLeHHIO nnactNa)
! nié yac po60n, 3aBHN TpHMaIe iHCTpyMeHT 3a
yactHH 3axBaTy ciporo KOlbopy 15
-BNHOHABuIN pO3nI, BmKHiTb IHCTpyMeHT, BiDnyCTBwTN TpRep B
! napeB vndaIaHnHm iHcTpymEnTy 3 o6pO6JIbHOoi NOBepxHi nepeKoHaItecB, IIO NHla OCTaTOUHO 3ynHHJaCb
Bpi3He nHnraHH 16
-yBIMKHiIb IHCTpyMeHT
I nepu, HIX Ie3o nnHn TopKHeTbCn Bnpo6y, IHCTpyMeHT Ma c npauObaTH Ha NOBHy WbNdkHcTb
-HaTnchTu Ha puKy M BélnkIm NaIbIeM
-Haxniltb hctpymEnypeed taKIM qHOM, 0o6 nokaknkiinii pi3aHHra CnibnaJana 3 liHIEO heo6xIDHOPO3pi3y, RaKa BiD3NaueHa Ha po6oHMy maTepiaJI
-IOCTyNOBO NepemuaTe IHcTpymeNTBnepeI Hikoln He BiTaryte IHcTpymeNT Ha3a
- HanpaBnIoua nlaHka S ⑦
-ДЯTOHOrO pO3nIIOBaHHB INo BcI NOrO DOBHNi
-MOJKe 6yTN BCTaHOBJIeHa 3 06ox 6oKiB npITnCKHoi INaCTHH
BcTaHOBJIIOBaHHHaIpaBIAIOHoiIIaHKn
-BiDnyctitb pykTu
-BNKOpNCTOBHyUHnKaIy HAppaBIAIOI
IIaHKn, BCTaHOBIb Heo6XiHy UINpHHy po3NIny
(BNKOpNCTOByTe NOKaKuK liHHpi3AHRe R RaK OCHOBy
dIra pIBHOrO npOnnly)
-3aTARHITb pykny T
-IMcMyKBaHeHa npaxa 1
-cBbpxKeTe MapHya Ha npaxocmykaKhata E KbM CbeDnHeHneTo F n npaxocmykaKhata, KaKTo e NOKa3aHO
!BnMabaTe Tpb6aTa Ha npaxocMykaKaTa Da He npeuHa DoJIHHa npedna3HTe IIN Ha onepaunraHa p3aHe
! He n3no3BaIte npaxocmyhauHaTa, KOraTo peHete MetaI
- CmHa Ha peKeuJn DaNc 12
!n3KIOUeTe 电encela
!pepeheunrT dnck E b nbeH nokoi
-yCTaHOBeteIbJIbOuHaTaHa p3aHe Ha MaKcMym
-B3eMeTe 电CTOCTEHNIGKIOU GOT KOMJIeKTA H
-HaTnchTe 6yToHa 3a 6loHpaHe Ha IINHdela Jnro 3aDpBkTe DOKaTO OTcPaHnte 6oJTa Ha INscha,K KaTO BbPTIne WeCTOCTEHN KIIOU G NO
YACOBHINHOBATACTPEJIHA(=BCbIaTaNoCOKa KaHTo e noka3aHo CbC CTpeIka BbpxpeKeuiaNCK)
!HaTnCHete6JIOHnpaunBbptHeTo 6yToH J camo KOrato HnCTpyMeHTbTe HaNbJIHO CnPraJ
-OCB06oTe 6JIOKnpaunBbPteHTo6yTOH J
-и3BaTeTeФlaHeuaL
-HaTnchTe 6yToH Mc napea
-IOBmHHeTe KpaKa N n cBaJe Te upkyIpa
I noDMeHete peHHeu nck cbc 3b6nte n CTpeHaTa Bbpx DnchA, COueuB eHa n Cbua NocOHa CbC CTpeHaTa Bbpx rOpHn npedna3EH KOHyx P 12 b
-NotabeTe Φlaheua L
-3aTeHHeTe 3dpaBO 6oJIta Ha dIscKa, K KaTo BbPTNTe IecTOCTeHHN KIOU G OBPATHO HA YACOBHnHOBATA CTEPLHA, DOkato HATNC 6yToHa 3a 6JoknPaHe Ha nnHdeJa J
-OCB06oTe6IoknpaunBbPteHToJ
Pa6oTa CnHcTpymeHTa 13
-3aainTe JekHaHaTa DbIbOuHa Ha pra3aHe
-πbXHeTe ΣeNcEla B KOHTaTα (INHdNkAToptbT Q Μe CBeTHe, COeHKn, Ye INHCTpyMeHTbT NOLyHaBa eHepn) 14
-HaTnCHTe 6yToH Mc najeua
-NOCTaBeTe INHCTpyMeNTa C npeHaTcA cT Ha ONopTa TnBTHO Bbpxo6pa60TbAHnJeTaI
-HaHIOHeIHHCTpyMeHTa KbM IINHnraHa HnHnKaTOpBt Ha IINHnTa Ha p3aHe R nOpaBHeCKeJHaHaTa IINHnHa pr3aHe, MapKnpaHa Ha 06pa6oTBaHn npOdyKT
! yBepTe ce, Ye 3b6nte Ha unpHkyIpa He ca onpeHn B o6pa6oTBaHn DaTaHn
-BKJIIOUeTe INHCTpyMeHTa
!npn BKNIOUBAHe Ha HNCTpyMeHTa BHIMaBaIte 3aBHE3aHHydpHn Nn TnaCbun
I npedn pekeuHT nck Da Bne3e B deTaJa, HNCTpymEntbT Tpr6Ba da pa60Tu Ha nbJHa ckopocT
!He HacnlaBte HNcTpymeHTa (npHIOXeTeJeKn HENpeKbChat HaTNC,3a Da He IperpeT BbpxOBete Ha peKeIe NTe OCTpna n B Clyuay,Ce peKe NlactMaCA - Da He ce TOnn MaTePnaLTbT)
! no Bpeme Ha pa6ota, BuHa rIpbXte ypea 3a ouBeteHata(nte) B CnBO 3OHa(n) 3a Xbaahe
-СлдзаБршван ha ряЗануTo,ИЗнluЧeTe
Инстум enta Уретocбождаван ha cnycьka B
!npedn da BndHrte HNCTpyMeNTa OT DeTaJa ce yBepete,pepeeunrT Dnck E B nBJeH nOKoI
- P3aHe Ha BbTpewHn npope3n 16
-BKJIIOUeTe INHCTpyMeHTa
I npedn pekeeunrT dNcK da Bne3e B deTaJla, HNCTpymEnbT Tp6Ba da pa60Tu Ha IIbIHa CKOPOCT
-HaTnchete6yToH Mc napea
-HaKIOHeTe INHCTpyMeHTa KbM LInHnraTa Ha
INdKaToptbT Ha LiHHraTa Ha p3aHe R NopaBHeN
CKeJHaHaTa LInHnHa pr3aHe, MapKnpaHa Ha
O6pa6oTBaHHn IpoDyKT
-NoteHnO npuDnKHe Te HNCTpyMeHaPe
!HnKora He nbpnaTe nHCTpyMeHTa Ha3aI - PpeIa3nTeI npOTnB pa3KbCbaH e S ⑦
-3a n3BpWbAHe Ha TOUHN p3aHnNo npOdbJKeHne Ha p6a Ha deTaNla
-MOKe Da ce NocTaBn Ha DBeTe CTrpaHn Ha ONopaTa HAcTpoHa Na IpeDna3nteI npOTNB pa3KbCBAHe -pa3xla6te KOnHeTo T
-perylnpaTe do HeLaHaTa 申PnHa Ha p3aHe, KaTo n3No13BaTe cHaJaTa Ha npedna3nteI npOTNB pa3KcbAHe (n3No13BaIte HndkaTopa 3a JInHnHa Pa3aHe R KaTo O-etanoH)
-3aTerHete konHeto T
YKA3AHN3A PABOTA
-
IN3noI3BaIe caMo ocTpN peKeuIN dNcKOBe OT NOxOJaTn 18
-3n013BaIte npKyIpy OTO 3aKaIeHa CTOMHa V②
3a p3aHe Na dbpBO, aIyMnHn, nlaCTMaCa n BCnHn BNDObe lamHHpaHO dbpBO
-и3noI3BaIteДиamHaTeHДИСК W② 3a рЯЗаHe Ha KepaMnKa IПLOUKN
-ДИСКOBЕ CTbbpOcPnlaBHa peKHea nlaCTnHa X2
OCTaBaT OCTpN Do 30 nbTH No-DbIro OT o6nKHOBeHn DnCKOBe -
P3aHe Ha rOJIeMn Ta6Na 19
-NotabeTe Ta6Ito Ha cToHka 6JIIn3O Do MAnCTOTO Ha Pn3aHe NIN Ha NoJa, Macata NIN Te3raXa
!HacpoTe Dbl6OuHaTa Ha p3aHe TaKa,Ye dapehe Tpe3 Ta6Ito,a He npe3 cToiHaTa
-B Clyuaye napaleHnHT BODaH He No3BOJBA
KeHaHaTa hpnaHa Ha p3aHe,CTerHete HIN
PpIKOBETe npaBO napye DbPBO KbM O6pa6oTBAHn
DeTaN KaTO BODaH N3POJ3BaIe JIABaTa CTpaHa Ha
NHCTpyMeHTa CpeUy To3N BODaH - Pязане 6e3 pa3цeпВанe
-ⅡIeBaTa CtpaHa Ha O6pa6oTbAHn IeTaHn BnHaHn Tp8Ba Da COHy HADOly
-3aHpeTe npaBo napYe IbpyB Vbpypa6oTHna MaTePnA C nOMOuTa Ha 2 cKobn - 3a noBee uHΦopMaζu BvKTe www.skil.com
PONAPbXHa/CEPBn3
To3n INHCTpyMeHT He e npedeHa3Haueh 3a npocecnoHaHa ynoTpe6a
IopdbpkaHte BnHaH eneKtpounHcTpymEnta n 3axpaHbauuKa6eJ uNCTn (ocObeHO BeHTnlaUOHHTe OTBOpN Y②)
!npennoocmbneH3KIOUeTe cencena
BnHaHn noIbpbKaIte YIcTa 3OHaTa OKoIOnHn
npeDna3nteZ ② (OTCTpAHeTe ype3 6yXBaHe cbc CbCTeH B3dyx HnC YETKa npaxa nCTbprTInHTE)
-Почистовпец ржесьднck HeNoCpeDCTBeHcCneДуnotpe6a (ocObeHo OT CMOna n IeNINO)
AkoBbnpEnIpeu3HOTOpON3BOcTBON BHMaTeJHO 3nNTBaHe Bb3HNKHe NOBpeJa, INCTpyMeHTa Da ce 3aHece 3a peMOHT B OTOpu3pAH CepBu3 3a eJeKtpoHHCTpyMeHTHa SKIL
-3aHeceTe INHCTpyMeHTA B Hepa3rIIO6eHN BnD 3aeHcO CdoKa3aTeJICTBO 3a NOKyIKNaTa My B TbPROBCKN O6eKt,OTkbJeTO CTe rO 3aKyniIN,INB Hn-B6ln3KnR cepBn3 Ha SKIL (adpecTe, KaTTo n CXemata 3a cepBn3HO o6ClykBaHe Ha eJKeKTPoHnCTpyMeHTA, MOKeTe Da Hamepnte Ha aDpec WwW.skil.com)
IImaTe npedBnD, ye nobpeDa npopaN npetOBapBaHe nn He npabuHNO MaHnnynpaHc C nHCTpyMeHTa Ue 6bDaT N3KIOUeHN OT rapaHua (3a ycNoBnTa Ha rapaHuaTA ot SKIL BnK Ha nHTepHet aApec: www.skil.com nn nonntaTe Baunn DnIbP)
ОПАЗВАЕ HA OKOLHATA CРEDA
He n3xBbPnIte eIeKtpoypeInte, npncnoc6JIeHNrTa n OAnHOBHTe 3aEHDc 6HtOBu OTnaDbu (cAmO 3a cTpaHn ot EC)
-cb6pa3Ho DnapeKTHBaTa Ha EC 2012/19/EG OTHOCHNO3HOCEH eJELKTPNueCKN eJELKTPOHNu ypeNnOTpa3RABaHETo B HauNoHaJIHOTo 3aHOHaTeJICTBO N3HOceHHTe eJELKTPOUpeDNcJeDba Da ce Cb6npaTOTdElnHO Ida Ce npedabat 3a peuKnIpaHe cnopeN3NCKBAHnraTa 3a ONa3BaHe Ha OKoJIHaTa CpeDa
-3a TOBA yKa3Ba CnMBOJbT⑦ TORaBA KOraTO Tp6Ba Da 6bDat yHnOKeHH
UYM/BNBPACIN
- I3mepeHO B cBoTBcTcBHe c EN 62841, HNBOTo Ha 3ByKOBOTo HAJIraHe Ha TO3n IHCTpyMeHT e 91,5 dB(A), a HNBOTo Ha 3ByKOBaTa MOuHocT 102,5 dB(A) (HeonpeJeIeHocT K = 3 dB), n Bn6paunrta * (TpnaKcnHa BeKTOpHa cyMa; HeonpeJeIeHocT K = 1,5 m/s²)
pr3aHe Na DbpbO 2,6 M/c²
pr3aHe Ha metan 2,4 M/c²
HnBotoHa npdaeHnTe Bn6paun e n3mepeHo BCbOTBeTCTBne CbC CTaHapTN3npaHn TecT, ONpeJeH B EN 62841;TO MOHe Da ce n3noJ3Ba 3a cpaBHeHne Ha eHN HnCTpymENT C dpyr N KaTo ppeBapNTeHa OueHHa Ha NOJaRaHEo Ha Bn6paun npn n3NoJ3BaHeTo Ha HHCTpymEnta 3a NocOeHnTe npnIOKeHn
-ⅢNOL3BaHETO Ha HNCTpMeHTa 3a pa3JIuHn OT Te3n PpIIOJKeHn IIN C DpyrI, IIN LOIO NOIDbPkaHN AHCceOapn MOHe 3HaUHTeJIHO da NOBUN HNBOTo Ha KOEt OTe NOJIOKeHn
-ηπeHODIte OT BpeMe, KOraTo INHcTpymeHTa e N3KIOUeH IIN CbOTBeTHO BKNIOUeH, HO C Hero He Ce pa60TN B MOMeHTa MORaT 3HaunTeJIHO Da HamaJIrT HIBOTO Ha KOeTO CTe NOJIOKeHN
!npedna3BaIte ce ot efeKTHnte OT Bn6paunnte, KATO NOdIbPHaTe NHcTpymeHTa N aKcecoapnte My, na3HrTe PbueTe cN TOnJI N opraHn3Hpate BaunTe MoJEN Ha pa6ota
SK
Kompaktná pila na viacero druhov materialu
5360
UVOD
Tento nastroj je urceny na pozdizne a uhlopriecne pilenie dreva, dewotrieskovych dosiek, preglejok, hlinika, obkladaiek, kamea, plastov a lakhych konstrukcnych materialov v zafixovanej polohe
Tento nastroj je urceny iba na kratke rezy
- Tento nastroj nie je vchodny pre professionnelle pouzitie
Pred pouzitim si dokladne precitajte tento navod a uchovajte ho pre pripad potreby v buducnosti 4
TECHNICKE UDAJE ①
CASTINASTROJA ②
A Bezpečnostné spínač
B Prepinač
C Koliesko na nastavenie hibky rezu
D Stupnica hibky rezu
E Hadica na odsavanie prachu
F Pripojka na odsavanie prachu
G Imbusov k'luc
H Ulozné miesto pre essthranny kluc
J Gombik na uzamknutie vretena
K Skrutka
L Upinacia priruba
M Gombík na zapichovacie rezanie
N Základná platna
P Horny kryt
Q Indikátor "Zapnute"
R Ryska rezu
S Voditko pre pozd'zne rezanie
T Gombik pre nastavenie pozd'neho rezania
V Pilovy kotuc z tvrdenej ocele
W Diamantovy kotuc
X Pilovy kotuc zo spekanych karbidov
Vetracie strbiny
Z Spodny ochranny kryt
BEZPECNOST
VSEOBECNE BEZPECNOSTN UPOZORNENIA TYKAJUCE SA ELEKTRICKEHO NARADIA
DODATNA SIGURNOSNA UPUTSTVA
OPSTA
- Ovaj alat nije namenjen da ga koriste deca ili osobe sa smanjenim fizickim, senzorskim ili mentalnim sposobnostima ili sa manjkom iskustva i znanja, a ako im osoba zadužena za njihovu bezbednost不同程度i pruzilā odgovarajuća pomoć i uputstvo kako koristiti alat
- Pre prvog korišćenja elektrčnog alata, preporučuje se da dobijete praktiće informacije
-
Ovaj alat nije podesan za vlažno sečenje ③
-
Obavezno iskopcjte alat iz elektricne uticnice pre nego sto izvrsite bilo kakva podesavanja ili zamenu pribora
- Nikada nemojte da koristite alat za bočno brusenje
- Nikada nemojte koristiti alat kada je kabl oštećen; on mora da se zameni posebnim kablom koji je dostupan u servisnoj organizaciji.
- Nemojte koristiti elektrichi na lat u stacionarnom položaju (nije predviden da se koristi na stolu za rad)
- Ne obradjute nikakav materijal koji sadrži azbest (azbest važi kao izazivać raka)
- Nemojte seci neobojene metale (parci ci crvenog uzarenog metala mogu da zapale izvučenu prasinu)
- Prilikom obrade kamena, koristite izvlacenje prasine; usisivač mora da bude odobren za izvlacenje kamene prasine (korišcenje ove oprem smanjuje opasnosti u vezi sa prasinom)
- Prašina od materijala, kao što su koja sadrži olovo, neke vrsteDRVeta,mineraliimetal,moze bitopasna (dodir iluidisanje praseine moze prouzrokovati alergjske reakcije /ili respiratorna oboljenja rukovaoca i lica u blizini);nosite masku protiv praseine iradite uz uključeni uredaj za ekstrakcjuprašine kada radite na mestima gde ju je moguce priključiti
- Odredene vrste prasine su klasifikovane kao kancerogene (kao sto su prasina hrastovine i bukovine), posebno u sadejstvu sa aditivima za priremu driveta; nosite masku protiv prasine i radite uz uključeni urežaj za ekstrakciju prasine kada radite na mestima gde ju je moguce priključiti
- Prati nacionalne propise vezane za prasinu koja se proizvodi prisikom rada na obradivanim materijalima
PRIBOR
- SKILMZe priznati garanciju samo ukolko je korijscen originalni pribor
- Upotrebljavaje sam listove testere, koji odgovaraju karakteristikama koje su navedene u ovom uputstvu za rad i prekontrolisani prema EN 847-1 i odgovarajuce obelezeni
- Koristite samo pribor Čija je dozvoljena brzina u najmanju ruku Jednaka najvećoj brzini pri praznom hodu elektricnog alata
- Koristite isključivo listove testere/diskova za rezanje minimalnog prečnika 85 mm, maksimalnog prečnika 89 mm, i sa otvorom za vreteno širine 10 mm
- Uz ovaj elektricni alat nikad nemojte da koristite brusne tockove
- Păžljivo rukujte i Čuvajte pribor
PRE UPOTREBE
Uvek se uverite da je napon struje isti kao i napon naveden na pločici sa nazivom alatu
- Izbegavajte ostecenja od šrafova, eksera i drugih predmeta na vašem području rada; uklonite ih pre nego sto započnete rad
- Upoznajte se sa komandama i pravilnim korišćenjem alata
- Pre Ngo što započnete sećenje, uklonite sve preprekna vrhu, kao i ispod putanje sećenja
- Obezbedite radni predmet (radni predmet stegnut pomocu stega ili neceg slicnog je mnogo stabilniji neko kada se drži rukom)
- Koristite odgovarajuće aparate za proveru dali se u zidu koji busimo nalaze skrivene instalacije, ili za taj posao nadite odgovarajuće preduzeće (kontakt sa elektrčnim vodovima moze izazvati požar ili elektrčni udar; oštecenje gasovoda moze izazvati eksploziju;
probijanje cevi sa vodom uzrokuje stete ili moze izazvati elektrichi udar)
- Produžni kabl koji koristite mora da bude sasvim odmotan i siguran, sa kapacitetom od 16 A
TOKOM UPOTREBE
APKALPOŠANA / APKOPE
- Sis darbariks nav paredzets profesionālai lietošanai
Uzturiet tiru instrumentu un elektrokabeli (ipasiventilacijas atveres Y ②)! pirms instrumenta tirisanas atvienojiet to noelektrotikla
Vienmér raugieties, lai vieta ap apaksejo aizsargu Z ② butu tira (savaciet puteklus un skaidas, tos aizpušot prom ar saspiestu gaisu vai saslaukot ar slotu) -
Pec ripzaga lietosanas nekavejoties attiriet tā asmeni (ipasi no svekiem un limes paliekam)
Ja, neraugoties uz augsto izgatavošanas kvaliti un rupigo pecražošanas parbaudi, instruments tomér sabojajas, tas jánogādā remontam firmas SKIL pilnvarota elektroinstrumentu remonta darbnica -
nogadajiet instrumentu neizjaukta veida kopariegades dokumentiem tuvakaja tirdzniecibas vietavai firmas SKIL pilnvarotapeciegades apkalosanas un remonta iestade (adreses un instrumenta apkalosanas shema ir sniegta interneta vietne www.skil.com)
-
leverojet, ka garantija neietilpst parslodzes vai nepareizas instrumenta eksplaatacijas izraisitiie bojajumi (SKIL garantijas noteikumus skatiet www.skil.com vai versieten pie izplatitaja)
APKARTEJAS VIDES AIZSARDZIBA
- Neizmetiet elektroiekartas, piederumus un iesainojuma materialus sadzives atkritumos (tikai ES valstim)
TECHNINIAI DUOMENYS ①
PRIETAISO ELEMENTAI②
A Apsauginis jungiklis
B Gaiduko jungiklis
C Rankenèle pjovimo gylui nustatyti
D Pjovimo gylio kalé
E Dulkiy ištraukimo Žarna
F Dulkiy ištraukimo Žarnos jungtis
G Sešiabriaunis raktas
H Deklas verzliarakciui
J Suklio blokavimo mygtukas
K Diskovarztas
L Prispaudžiamasis flansas
M Rankenèle jleidžiamajam p jovimui
N Atrama
P Virsutine apsauga
Q Indikatorius "Jungta"
R Pjuvio zymeklis
S Lygiagreti atrama
T Rankenèle lygiarecios atramos nustatymui
V Grudinto piieno pjuklo disko
W Deimantinis diskas
X Pjuklo disko su kietlydinio plokstelémis
Y Ventiliacines angos
Z Apatinis apsauginis gaubtas
SAUGA
BENDRIEJI ELEKTRINIU IRANKIUGAUGOS ISPEJIMAI
b) He nocerhybajTe noMaTepeHjAnot HoJ ro 06pa6oTyBaTe.3aHTnTHNOT MExaHn3am He MoKe da Be WTITN Oc CeHnIO noD pa6OThNOT npocTOp.
c)Длбочината на ceeyebeTo noodeceTe ja Ha De6eHHaTHa pa6oTHNOT npocTo.ПоД pa6oTHNOT npocTo Tpe6a Da ce rIeDa nOmaHky od ueI 3a6eU ha ceuIIOTo.
d) HnHoraaw He dpxheTe ro napyeTo 3a pa6oTa BO paue nn npeky hora. Obe36eTe cta6nHa nobpunHa 3a napyeTo 3a pa6oTa. BaJHo e da nMaTe cta6nHa notnpa Bo TeKOT Ha pa6oTa 3a da ce HaMaJI N3IOXyBaHe Ha TeIOTO, KOHTaKT CO CeYNBOTO nn 3ary6a Ha KOHTpOlaTa.
e)Фанajte ro eIeKtpnHnot anapat cmo 3a n3OJInpaHNTe paKN, KORA n3BpUyBaTe pa6OTn KaDe aIaNtOT 3a ceueHe moKe Ja doJde BO KOHTaKT co HNCTaIauHN nn Co CONCTBeHNOr Ka6eI. KOHTaKTOT co eIeKtpnHa nHCTaIauNiJa IcTO TaKa rN npABu N3IOKeHNTe MeTaJIHn DeIOBn Ha aIaNtOT HaeIeKtpn3IpaHN mOKe Da IOBeDe Do CTpyEn yAp.
f) Pn cehe, cekoraH KopncTe 3awTHTHa orpa da Hm MexaHn3am 3a 3anTtHa Ha pamHn pa6obn. Taka Ke ja noo6pnte npeun3HOCTa Ha ceeheTo NKe ro HamaJInte pnsIKOT od 3arIabyBaHe Ha ceHHIOTO.
g) Cekoraaw KopncTeTe ceuHa co COoDBeTHa rolemnHa n 06nn 3a OTbOpnte BO BpeTeHOTO (obnHa nnjamant nnn Kpyr). Ceunata kon He ce COoDBeTHn Co xapDbetop 3a noctabyBaHe Ha nlaTa, HnpabnHo Ke ce BpTaT n Ke npedn3BnKaat r6beHe Ha KOHTpoJa.
h) HnKorau He KopncTeTe OwTeTeHN HIn HenCnpaBn 3anpaHnIu pe3nBa 3a ceyHa. 3aunHnIte n pe3nBaTa 3a ceynla ce noc6Ho nn3ajHnpaHn 3a BaWata Nila, 3apaN ONTMaJIHn nepOpMaHcN i 6e36eHNOCT np paKyBaHe.
2) ПИЧИН 3A NOBPATEH YДАР И NOBP3AHN INPEДУПЕДУBAHA
IIOBpaTHNOT ynap npetCTaByBa n3HeHaJaPeakunja Ha npo6bVaBe, yap nnNoI IOso NopamHeTo CeuHnO Ha nnlaTa, Koj npeDn3BnKyBa HEKOHTpOJInpaHO MPdaHe Ha nnlaTa OJ MeCtOTO Ha pa6oTaTn IPOdNHyBaBe KOH OHOJ KOj paKyBa CO nnlaTa
Kora ceuHIoTO Ke npOBe nIi CnIHO Ke yDpi 3a BpeMe Ha 3aTbOpaHe Ha 3aceKOt, CeuNIOTo 3actaHyBa IMOTopoT 3a6p3aHo ja BOi eDNHnCaTa KOH OHOJ KoJ paKyBa co anapatot
Донону ceynloto ce BOBJIeue HaBHaTpe nHe e nopamHTo CO nobpunHaTa Koja ce ceye,3aIuTe Ha 3aDHnOT pa6 Ha ceynlOTO MoKe Da ce 3a6JaT BO rOpHaTa NOBpUnHa Ha npBoTO n Da npEiN3BnKaaT dInraHBe Ha ceynloto Od 3aceKOT n OTCKOKHyBaHbe KOH OHOJ KOj pakyBa co aIaTOT
IIOBpaTHnOT ynap e pe3yntaT ha HenpabunHa ynoTppe6a Ha aIaNt N/nn HecOoDBeTHa paobTHa nocTAnka nn yCIOBn, a MoKe Da ce N36erHe aKO rN ppe3emTe HeONXoDHnTe 6e36eHOnCHn MepKn KaKo uTo e
NOCOUEHNOJy.
3)ФУHHLUNJAHA3AùTHTATA
a) Ubpcto dpHeTe ja paHata Ha nHaTa, co DBe paue, n NOCTaBete rna paute TaKa wTo da MOHeTe Da ro n3dpHnTe nobpaTHnOT yAp. TeIoto Tpe6a Da ce HAOra od edhata CTpaHa Na CEHNOTO, a He BO IHHJa CO CEHNOTO. NobpaTHnOT yAp MoKe Da npEiN3BnKa nHaTa Da OTCKOHne Ha3aD, Ho CnlaTAt Ha NobpAHTNoT yAp MoKe Da CE KOHTpOJInpa Camo DOKOLHy Ce pEB3eMaT PpaBnIHnTe MepKn Ha npetNa3JIbOcT.
b) Kora ceuHIoTO He ydpn HIn DoKoNky Dojde Do npekHH Ha ceYeBeTo OD 6HIO KOja npChHa, OTnyWTeTe FO OPO3OT N DpKHe ja HeNoDBeHHaTa Hnla BO MaTePnJaOT, Ce DOeHa CeuHIoTO COCema He 3actane. Hnkoraaw He ce ObNyBaJte da ja OTCTpaHHTe HnIata OD MeCtOTO HaDe pa6OTHe Hn Da ja NOBLeHETe HnIATA HaHa3aD KORA ceuHIoTO Ce DBHHn HndoAfo NobpaTe Ydap. IcNITyBaJte n IpE3eMeTe ONpeDEJIeHN aKcHn 3a HcnpabaHe, 3a Da rH eJeMmHnPate pnpHInTe 3a ydap Ha ceuHIoTO. H36erHyBaJte ceYeHe Ha KInHcN i WTPaΦOBn.
c) Kora NOBTOPOKe ja cTapTyBaTe NHaIa KaJa ce HaorHa MeCTOTO KaPe pa6OTNe, ZeHTpnpajTe ja NNlata BO 3aceHOT N OCHypajTe Ce 3anuTe Ha NNlata Da He BneryBaat BO MaTepnjAnot. DOKOLHy CeHHIOTo yDnpa, MoKe Da DoJde DO OTCHOHyBaHe OD MeCTOTO KaDe ce pa6OTn, INNdo NOBpaTeH yDap, KORA NNlata NOBTOPOCe BnlyCyBa.
d) IoI roJIemnte nIOOu cTabeTe notnopa 3a da ro HamaJIte pN3NKOT od npo6NBaHe Ha CEuHIoTO n IOBpaTeH yIap. IToJIemnte nIOOu hMaat TeHDeHcUJa Da ce BNTkaAT NOI CONCTBeHaTa TEKINHa. NtOpata Mopa Da Ce CTABN NOI nIOUaTa, Od DBeTe CTPaHN, 6bN3y Do IINHjata Ha CEeHeTo n 6bN3y pa6Ot Ha nIOUaTa.
e) He HopncTeTe TaNo Hn OwTeTeHo CeuNo. HehaoUtpenHn HnepaBnHo NocTaBeHn CeuJa MoKe Da DoBeaT Do TceH 3aceK I da PpeDu3BnKaat PpeKymepHO TpneHbe, yDnpaHe Ha CeuNlOTo Hn NObpaTeH ydap.
f) Pauchte 3a 3aHnyyBaHbe Ha dIa6OuHaTa Ha ceYeBeTo I NOdecyBaBe Ha KocHHaTa Mopa Da 6bDat cBpCTn N OBe36eDeHN, PpeI NOcETOKOT Ha ceYeBeTo. DOKOLky NOdecyBaHcTe 3a CeYBOTo CE npOMEHn 3a Bpeme Ha ceYeHcTe, MoKe Da DoJde Do yDnpaHe N DO NOBpaTeH yap.
g) O6pHete ocO6eHO BHNMaHHe Kora ceYeTe co nHaTa BO NOCToJHn SINOBN HIN dpyr cIeN o6laTn. CeHIoTO wTo npOn3JIerByBa MoKe da Ipeceye objektu KOHtO npEdu3BnkyBaAT NOBpaTeH ydap.
a) IpoBepete daHn 3aHTntata e do6po 3aTbOpeHa nped cekoja ynotpe6a. He BnlyuyBAjte ja nIJaTa aHO 3aHTNTata He ce dBNHN CIO6oHDn H He rO onFaHa Behdaw CeHHIoTO. HnHorau He cterajTe nn He Bp3yBaJte ja 3aHTNTata Ha NaHn CeHHBO da OCTaHe N3LOHeNo. 3aHTNTata MOHe da CE CBHTKa aHO nIJaTa CnyajHo naHe. IpoBepete daHn 3aHTNTata ce DnHHn CIO6oHDn Hne Hn DoNIPA CeHHIoTO nn HeKoJ dpyr DeI NO CIne arHn dIaNabOCHN 3a CeYeHe.
b) IpoBepete rna pa6oTata n coctoj6ata Ha noBpaTHNOT NOBpaTHNOT fep Ha 3aHTnTa. Ako 3aHTnTaHa fepot He pa6oTa npabHIO, Mopa da ce cepBncnPaat nped ynotpe6ata. 3aHTnTa
Ke pa60n 6abH0 3apaDi OwTeTeHN DeIobN,JeIINBn OCTaTOU IN HAToJIOXeH OTNaDeH MaTepnjAn.
c) 06e36eTe OCHOBHa TnOa Da He Ce DnHn HdoEHa "ceye Co 3a6OyBaHe" H Kora NoCTaBHata 3a 3aKoCeHOCT Ha CeyINoTo He e Ha 90^ . PpoHnInTe 3a MeHyBaBe Ha CeuNtO To Ke DoBEdaT Do BHTKaHe N BepoJTHo Do NObPaTeH yAp.
d) CeHoraW BHNMaBajTe 3aWTHTaTa Da ro noKpne ceHnIoTo nped Ja ja cnyuTHe pHa HKnyn Ha NoDor. He3aHTHTeHnot pa6 Ha ceHnIoTo Ke DOBeDe Do NOBpaTeH'OD Ha PnIaTa, ceeJKe ce Ha NaTOT. BHNMaBajTe Ha BpeMeTo KOeWTO e NOTpe6Ho Da 3actaHe ceYnBOTo OTKaHO Ke ce OTnyuTn npEHHyBaHT.
DONOJIHNTEJIHN BE36EDHOCHN NPEyPDEyBAHa
ONHTN
OBoj aIaT He e HameHET 3a yNoTepe6a od cTpHa Ha Deua n Iuca co HamaJIeHn FIn3NcH, CEN3OpHN IIN MeHTaJIHn CnOCo6HoCTn, 6e3 NCHyCTBO n IO3HaBaHa, OCBEN aKO He CE NOd HaN3Op IINI aKO He CE oByeHn 3a yNoTepe6aTa Ha aIaTOT OD cTpHa Ha IINIe Koe wTO e OJROBOPHO 3a HNBHaTa 6e36eHNOCT
- PpeI npBOTO KOpNCTeHHe Ha eJelKtpuHnO t aHaT, Ce npenopayBa da do6neTe npaHTnUHn HhOpMaun
- Oboj anat He e nopecen 3a ceuehe Bo npncyctbo Ha Bjarra ③
- 06e36eTe ce aIaTOT da e ncknyeh od ctpya nped da Bpwnte 6nlo KaHBO noDecyBaHe nn 3ameHa Ha npnbopot
- Hikorai He KopicTeTe ro aIaTOT 3a cTpaHnHo 6pyceHe
HikoraH He KopncTeTe ro aIaTOT Kora Ka6eIOT e OwTeTeH; ToJ Mopa Da ce 3aMeHN co CneuJaIHO noIroTBEN Ka6eI DoCTaEN IpeKy opraHn3auJaTa Ha ycLyrN.
He BnIyBajTe ro aIaTOT npuBpTeH 3a eNHO MeCTO (He e HameHeTe 3a pa6To Ha Maca 3a NIIeHBe)
He 06pa6otyBajte HnHaHOB MaTepnjA HoJ CoDpHN a36ecT (a36ecTOT BaHK 3a npEiN3BnKByBaH Ha paK)
He cehe MeTaHn Co HeJe3o (UpBeHnTe BpeHn OTΦpJIeHN DeIOBn MoKe Da ro 3aIaNAt OTCTpaHyBaHbETo 3a npaunHaTa)
KopncTeTe ro OTCpaHyBaHbeto 3a npaunHa Kora pa60ntte co kamen. PpabocmykAnHaTMAopaHa mHa yHHnju 3a OTcpanyBaHe Ha KaMeHaTa npaunHa (co ynoTppe6a Ha OBaa onpema ce HamaNyBa pnsIKOT NOBp3AH CO npaunHaTa)
- PpaunHaT O MATEpnaJn KaO 6oJa Koja CoDPnn OIOBO, HcON BINOBN DPO, MNHepaN N MetaJN, MOKe Da 6nDe WTeTHa 3a 3Pabjeto (KoHTaHTOT CO PpaunHaTa NN HeJ3HNO TO BnUyBaHbe MOKe Da Wpeu3BnKa aIepnN N/NN 6OleCTNa DNshHte OprAHN 3a OHOJ KOJ pa60TN CO aNATOT NIN LyreTO BO 6In3nHa); Hocete MacHa 3a PpaunHa n pa60TeTe co npabocmykaiHn DOKOHLMy MoKeTe Da rN NOBp3eTe
- Hekon BINOHa Ha npaunHa ce KaHeporeHn (KaKo Ha npimep npaunHaTa oD da6 nIn 6yka), Oco6eHo 3aeEDHO co aINTBn 3a ODPKByBaHe Ha dpBOTo; HOCTe MacHa 3a npaunHa n pa6Ote Co npabocMykAKn DOKOLky MoKeTe Da rN Nobp3eTe
CneJeTe rnpoueDpynte Ha BaWata 3emJa 3a npaunHaTa Koja ce jabyBa KaKo pe3yIITa OMaTePnJaJIInTe co KOn pa6OTnTe
ПИБОР
OBJACHYBAHcE3A CHMBOJNTe 3A AJATOT
SKILMOHeJa npu3Hae rapaHunja cAmOdoKoJky e KopncTeH opuHaJIen np6Op
KopncTe cAmo InCTOBn 3a nnla, KOI OndroBapaat Ha HabeHHeNTe NpdaToCuN BO Oba yNaTcTBO 3a yNoTpe6a nn Ce npobepen Cnped EN 847-1 n ce cooDbetHo 03HaueHen
- KopncTeTe cAmo npn6Op Yna Jdo3BOJeHa 6p3Ha e BO HajMaIpaHa eDHaKBa Ha HajroJeMaTa 6p3Ha npn npa3eH Od Ha eEneKTpuHHOT aIaT
HopncTeCeMo CeuBa 3a nnH/ndcKOBn 3a ceyebe Co MHHMaJen HNJametap O85 MM, co mKcnMaJen HNJametap O89 MM n OTBOp Ha o6oDoT O8 10 MM
- HikoraH He KopncTeTe DnCKOBu 3a CtpyraBe co OBOj aJat
BHHMaTeJHo paKyBaJTe N CyBaJTe np6Opot IPEd yNOTPEBA
Cekoraw npOBepyBajTe HanoHOT da e nCT co OHOJ KOJ e Ha3NaueH Na IIOUkata Ha aIaTOT
- 136erHyBajTe OwTeTyBaHa oJ WTPaΦOBu, wajKn I pyrN ppeMEn BO MeCTOTo Kaide pa6oTHTe; TprHHeTe rI nped Da noyHete co pa6oTa
3aNo3HajTe ce co KOHTpoJIte n co npabInHaTa ynoTpe6a Ha KocNlKaTa
- PpeIa NoHHeTe CO ceYeHe,OTCTpaHHe Tn CHTe npueKHa H NOD MeCToTO KaDe CeYeTe
3aucbctete ro MaTepnjanoT KoJ ro 06pa6oTyBaTe (O6pa6OTka Koja e 3auBpCTeHa CO CTErn HIn BO MeHreMe e NObe36eHa OTKOnKy da ja dpKHTe co paue)
- KopncTe CooDBetHn DeTeKTopn 3a HaoRahe Ha cHrpneHH Hhctalaauu nn NobHajte COoDBetHa HOMnaHja 3a NOMOw (HOHTaKTOT CO eNEKtpnHIne LHNMOKe Da DOBeDe Do CTpyeH ydap; OWTeTyBaHbata BO racoBODHa ueBka MOKe Da pe3yItnpa Co EKCnlo3nja; NeHeTpnpaBe BO BDOBODHa HhCTalaauJa MoKe da DOBeDe Do OWTeTa Ha PpeDMeTHn NN eNEKtpnH en ydap)
- Пюдолженnot Кабел Ковпстinte, мора за бида сокема оdmotан и бeзбени, с калачитET od 16 A BO TEKOT HA YNOTPEBATA
HnBToHa6yabaD0eKa pa6oTne MoKe da H3HeCyBa noBeKe od 85 dB(A); HocTe 3aWtTa 3a yuInTe
Kabenot cekoraaw dpkeTe ro noaJeKy od deNoBHTe Ha aIaNtOT KOn CE DnHnat; Kabenot dpKeTe Ro Ha 3aHaTa CtpaHa, Ha cTpHa oJ anATOT
- HnKoraaH He KopncTeTe eJeKtpuH eJat 6e3 opunHaJIeH CNTem 3a 3aHTTa
He ce obuBajTe da ceyeTe MHORY mAn MaepnjaI
He pa6oTeHa rIaBaTa co aIaTOT (co OBOJ HaHHa pa6OHa He ce 0e36eYBa 3aIOBOJIHTeJIHa KOHTpOlaBp3 aIaTOT)
Bo cIyuj ha aTINuHNO OndecyBaHbe nIHN HeNo3HaTN 3Byu, BeHaU NCKLyHeTe rO aIaTOT uN 3BLeHeTe rO 1TEKePoT oEJIeKtpnHnO TpNKlyHOK
Ako Ka6eIOT ce OwTeH Nn IpceYe 3a BpeMe Ha pa6oTaT, BeDaH WckNHyTe Ro H He Ro DoNnpajTe NO YNOTPE6A
Hora ke ja 3aBpuHTe pa6oTaTa co aIaTOT, ncknyte ro MOTOPOT IN pOBepTe daJI N CHTe NOdBnKHN DeJIOBN CE 3actaHaTH
- IIO NCKIyUyBaHbTeHa UzIpKuJapHaTa NIIa, HNKOraW HeMoJTe Da rO cOnnpaTe BpTeHbTe Ha NIIaTa CO Cnla
④ IpeynoTpe6a npoHTajTe ro npupaHnKOT 3a ynoTpe6a
⑤ДBojHaи30laquja(He e nTope6Ha 3a3EmHa Jxua)
⑥ Hocete 3aunTHn OyIna n 3aunTa 3a yUnTe
⑦ He pIajTe ro anatOT 3aeHNO co pyrnot OTnad ODAOMaKINCTBOTO
YNOTPEBA
BknyeHO/IVcknyeHO 8
-BKnyteTo aIaNt npBO co npNTnCKaHBe Ha KOnyTeO A Hanpei n noToa noBleYeTo ro npEKNHyBaHT 3a aKTHBnpaHe B
-NCNnyeTe ja MaunHaTa co nyuTaBe Ha npkeKHyBaOT 3a aKTbBpaBe B
-Подесувае Ha ДлабочинагаHa ce�еbeTo (0-28,5 MM) 9
-nywTeTe ro konyeTo C
-NotaBeTe ja cKaHaTa Ila6OuHa 3a ceYeIpeKy ckaJaTa D
!HnHoraW He Do3BOJyBajTe UpeBOTO Ha npaBocMyHaJIHaTa Da JoJe BO DOINp CO DoJHNOr 3aHTHe MExaHn3am HIn Co OepaunJaTa Ha ceYeBe
! He KopHcTeTe npaBocMyHaJIhata Kora ceYeTe MeTaI
3aMeHa Ha ceuJaTa Ha NJIaTa 12
!n3BleyeTe ro npnKnyyOHO Ka6eIOT
I npOBepTe daHn e dojdeHo do ceJeocen npeHH Ha pa6oTaHa ceuNlOTo
-NotabeTe ja IlaobouHHaTa 3a CeueHe Ha MaKCHMym
-3emTe xekcaroHaJIeH Knyu G od cHlaDoT H
-πPHTNCHETe KONHTO 3a 3aKJyBaHBe Jn dpHeTe Ro DoDeka ja OTCpaHyBaTe HABPTkata 3a pa3Ja6aBvBaHbe Ha ceYbTOK eEN Kpyr co nH6yc G BO PPABEL HA CTPEJIHNTE HA YACOBHNKOT (
BO HCTNOT IpaBeU KAKO N CTpeJIkata OTneuTaHa Ha CEYIBOTO)
I konyeto 3a 3aKnyuBaHe Ha BpeTeHOTo J npTnCHete ro Kora eJekTpnuHnot aNat ceJochoKe 3actaHe
-nyuTeTe ro koyeTo 3a 3aKnyuBaHe Ha BpeTeHOTo J
-OTCTpaHete ro wHTHnKOT L
-πpntncheTe ro konyeto M co naneot
-ПОДИНЕТе ja ochOBaTa Nи n3BaIeTe ro ceHInIoTo Ha nIIaTa
! cmeheTe ro ceuBoto 3a nHnata Co 3anHTe n CTpeHhata OTneHaTeHa CeuBoto HacOeHn BO hCT npabeC kako n CTpeHkata Ha rOpHnOt wTtTHnK P ② b
-Noctabete UTNTHNIK L
-UBPCTO CTERHETe ja HABPTKaTa Ha CEHNBOTo K CO INh6yc G OBPATHO OD CTPEJKNITE HA YACOBHHOTdoEkaT0 6yTKaTe KOINHTo 3a 3aKnyBaHe J
-nyuTeTe ro kOuyTo 3a 3aKlIyBaHBe Ha BpeTeHoTo J
Pa60a co aIaTOT 13
-NoodeceTe ja cakaHaTa Ina6OunHa 3a ceYeHe
-NOBp3eTe Ro WTeKePOr CO npHKnIyOkoT 3a cTpya (ce BKNlyuBa CBeTlOTo Q, O3HaCyBajKn DeKa aIaNt HMa cTpya) 14
-πpntncheTe ro konyeTo M co naJeouT
-NotabeTe ro eIeKtpnHnO t anat Co npedHnO t Kpaj Ha pAMHOTo HNBO Ha MeCTOTO Kaede pa60NTe
-HaBaIeTe ro aIaNToT npaBnHNO co BN3npoT 3a LInHjaTa 3a ceYeBe R napaIeHNO co cakHaTa LInHja Ta 3a ceYeBe O3NaYeHa Ha pa60THNoT npEdMeT
!npOBepTe 3aIuTe Ha nHaTa Da He Ce 3aHauEH Ha MeCTOTo KaDe ce pa6OTn
-BKJyTeToaTOT
! BHHMaBajTe Ha nobpaTHaTcNla od anaTOT npn BKnyBaHe
! eIeHTpHNNOT aJat 6n Tpe6aNo da ce Haora BO NOHa 6p3Ha nped ceyNlOTo da dojde BO dOnnp co MeCTOTO KaJe ce pa6oTu
! He npimehybajte cnla Bp3 aIaTOT (npimehete IeceH N KOHTnHyupan npITUCOH 3a Da n36erHeTe pperpeBaBe Ha BPBOBITE Ha CeuNbata N BO ClyujHa CeueHe pNactHa, ToneHe Ha PnactnHnot MaTepnjaI)
!doeKa pa6OTHe,ceHOraU dpHeTe ro aIaTOT 3a MeCTOTO (MeCTaTa) KOe (HO) ce O3HaueHN Co cNba 6oja 15
-INO 3aBpyBaHbTo Ha CeuehBeTo, INKlyuyeTe Ro aIaTOT co NyTaHe Ha opo30T B
!nped Da ro noDnHete eIeHTpUHNOt aHaT OMeCTOTO KaHe ce pa6oTH, npOBepTe daHne dojdeHo Do ueIoocen npekHH ha pa6oTaHa CeuJIoTO
-Длбнскеу He 16
-BKnyteToaIaTOT
! eIeHTpHNNOT aJat 6n Tpe6aIo da ce Haora BO NOHa 6p3Ha nped ceuNlOTo da dojde BO dOnnp co MecTOTO KaJe ce pa6oTu
-πpntncheTe ro konyeto M co naneot
-HaBaIeTe ro aIaNToT npaBnHNO co BN3npoT 3a LInHjata 3a ceYeBe R napaleLNo CO cKaHaTa LInHja 3a ceYeBe O3NaYeHa Ha pa60THNt IpEDEM
-NoteneHO HanpeyBajTe co aIaTOT
!HnKorawHe TpykajTe ro anaTOT KOH Ha3a
- CtpaHnHa orpaJa S ⑦
-3a npabeHe Ha ToCHN 3aceu Hn3 pa6oT Ha MaTePnaJIoT KoJ ce o6pa6OtuBa
-MOKeJaCe BMeTHe Ha 6NIO KoJa CToPaHa Ha HnBOTO
IodecyBaHe Ha cTpaHnHaTa orpada
-nywTeTe ro konHTo T
-NoodeceTe ja cakaHaTa WInpoUHa 3a CeYeHe CO NOMOW Ha caJaTa Ha CtpaHnUHaTa OrpaJa (ynOTpe6yBaJte Bn3np 3a LInHja 3a CeYeBe R KaKo HylTa noIooK6a)
-πpncBpcTeTe ro koncheTo T
COBETN 3A IPNMEHA
- KopnCTe cmo octpn ceuHa, od cooDBeteh BnD 18 -KopnCTe TcBpCTO yeHNUHO ceuHIO 3a nHa V2 3a ceuehe dpBO, aIyMNHyM, INaCTNka N CHTe BNIOBn Ha lamHHaTH
-KOpNCTe TE DnjamAHCTKN DnCK W② 3a ceuehekepaMnKa nIIOUKn
-ceHnata co Kap6nIeB BPX ② octaHybaat ocTpN 30 nATn nooJiro oD o6uHnTe ceHna - Ceuehe Ha rolemn nloyn 19
-IOCTaBeTe ja IIOUaTa 6IIN3y CeueHbETo Ha IIO, Maca HII pa60Ha maca
! nodeceTe ja dna60uHnata Ha ceheTo Taka uTo Ke ceyeTe Hn3 nloyata, a He Hn3 NOTnopata
-BO Clyaj CTpaHnHaTa OpradaJa He ja OBO3MOJyBa CaKaHaTa ⅢnpOuHna 3a CeYeHe, CO cnPera nn Co KInHeC 3aKaueTe DpBeH DeI Ha MeCTOTO KaJe Ce pa60Tu, KaKo BOdNlKa, N KopNCTeJe Ja JeBaTa CTrpaHa Ha HNBOTo CO OBaa BOdNlKa - Cechhe6e3nOTKpWeHn paobOB
-JIUeTO Ha MaTePnJaIOT e CBpTeHO HAdOly Ha pa60THOTO MecTo
-3aTeHHeI npabo napye dpBO Ha MaTepnjaJot 3a 6bap60Ha co 2 cTEn - 3a noBeKe INΦopMaζην BνIeTe Ha www.skil.com
OДРЖУBAHБ/CEPBИСИРАНБ
- Oboj aIaT He e HameHET 3a npofoecnoHaJHa ynotpe6a
- AnatOT n Ka6eIOT cekoraa da ce OdpHyBaat YnCTN (ocobeno OTbOpnte 3a naJehe Y②)
!npedHcTeHe n3BaTeTe ro aIaTOT O npnkyoKOT
- Cekoraw OdpKyBajTe ja o6laCTa OKolydoJHNOt WHTTHNK Z ②YnCTa (OTcTpaHeTe rnpaunHaTa N Деланнite Co pa3dByBaHBe CO KOMPpIMpapn BO3dyX NIN CO YETKa)
- CeuHIOTo Ha NIIaTa HcHcTeTe rO HenocpeHNO KOpHcTeHbETo (OCo6eHo Od CMOna I JenaK)
-ДOKOLNY anatOTи NOKpaj BHNMaTeHTo pa6oTeHe n KOHTpOla HeKOraW OTKaHe, NonpaBkata Mopa da ja n3BpShn HeKoj OblaCTeH SKIL cepBnc 3a eJekTpHuAn aIaTn
-BO Cnyaj Ha npimeM6a, HcnpaTeTe ro aIaTOT Hepachlnonen, 3aeHNO CO cMeTHONOtBpdaTa, Do Baunot npodabay Hauh J6ncknOT SKIL cepBnc (adpeCNTe ce HabeDeHN Ha www.skil.com)
- Имajte пedingдениоштетуваhto HabTaHato 3apadn npeontobapybahe nInn He npabuHIO paKyBaHe co aIaTOT ja oTfPna rapaunjata (BnTe Ha www.skil.com nInn npawajte ro npodabaqot 3a ycNoBHTe ha rapaunjata ha SKIL)
3AHTITA HA JHBOTHATA CPEINHA
He ce ocno6odybajte od eIeKTHnHaIaTn, ypei nn am6aIaHa npeky HNBHO ppahe BO domaHHTO ry6pe (cAmo 3a 3emjnte Ha EY)
-cnopeE BpOncaTa DnpeKTHBa 2012/19/EC 3a ocNo6bOyBaHe Od eJeKtpnHa N eJeKtpoHcKa ONpeMa HNeJ3nHa NMJIeMeHTaunJa BO COrIaChocT CO HaOnHaHInTe 3aKOH, eJeKtpnHInTe aJaTH KO I GoDCTHHaJIe KpaJOT Ha CBOJOT JINBOTeH BEK Mopa Da 6nDat Co6paHn Noce6Ho N da 6nDat BpaTeH N BO
COOdBeteh 6ojeKT 3a peuzklnpahe
-CNMBOJOT ⑦ Ke Be NOTcetyBa Ha Oba Kora Ke Dojde Bpeme aIaTOT da ro foPJIHTe
БУСАВА / ВИБРAUЦИ
- Измени в сорлachocт co EN 62841, НИВОТо на 3БУЧЕн питусок на оваа щалда e 91,5 dB(A) и НИВОТо на 3БУЧА мokhoect 102,5 dB(A) (нecИгурhoect K = 3 dB), и ВИБрациjsята * (Трпакс BeКТорна сума; НecИгурhoect K = 1.5 m/s²)
*cehehe Ha npbo 2,6 M/c²
*ceheHa metan 2,4 M/c²
HnBoto Ha emtupaHe Ha Bn6paun Koe e HabeedeHo Ha 3aDHNO7 DeI Ha OBA ynaTCTBO e N3MepeHO BO corlaCHOCT CO tAHdapm3npaHNO7 TcTe DaEN BO EN 62841; MoKe da ce Kopnc73a da ce cnopeEn eDeHa aIat Co npyr, I KaKo npBvHbO uEHHa 3a N3LOXeHOCTa Ha Bn6paun Kora ce Kopnc7aIaTOT 3a CnOMEHaTHTe npimehi
-KopncTeHeTo Ha aIaTOT 3a pa3Hn npImeHn, HIn CO pa3JIuHn HIn HePaBUNHO CyBaHN DeIOBN, MOKe Da IOBeDe IIOHaJHO 3roJeMyBaHe Ha HIBOTO Ha N3IOKeHOCT
-Kora anatot e NCHnyeh HnH Kora anatot e Bknyeh HO He BpHn HeKaHb pa60Ta, MoKe Da Dojde 3HaHTeHnHO HamanyBaHe Ha HNBOTo a nIIOKeHOCT
! 3aHTTeCe oJ eΦeHTte Ha Bn6paunTe npEny OndpHvBaHe Ha aIaNToN HerOBtE DeIOBn, ODPHyBaBe Ha TOnJIiHaTa BO BaUnTe paue, n OprAHn3HpAbe Ha BaWata pa6ota
AL
Sharre kompakte per materiale 5360 tendryshme
HYRJE
Kjo vegel eshte e projektuar per prerje gjatësore dre tērthore nè dru, panel me ashkla druri, kompensate, alumin, PLLaka, gur, plastikë dhe materiale ndertimi te lehta të shtrenguara nè një pozión fiks
Kjo pajisje ehte projektuar vetem per prerje te shkurtra
Kjo vegel nuk ehte projektuar per perdorim profesonal
- Lexoni me kujdes kete manual udhezimesh para perdorimit dre ruajeni per reference ne te ardhmen ④
TÉDHÉNAT TEKNIKE ①
ELEMENTETVEGEL ②
A Celesisi sigurise
B Celesi aktivizimit
C Celes per vendosjen e thellesise se prerjes
D Shkalla e thelesise se prerjes
E Tubi shkarkimit tpluhurave
F Lidhja per shkarkimin e pluhurave
G Celesi heksagonal
H Vendi iruajtjes se celsit heksagonal
J Butoni i bllokimit tē boshtit
K Buloni i thikës
L Filanxha shtrenguese
M Celesi per prerje me zhytje
N Pllaka e kembës
P Mbrojttesja e siperme
Q Treguesii "Ndezjes"
R Treguesi vijes se prerjes
S Regullatori parallel
T Celesi per rregullimin e vizores gjatessore
V Lama e sharrres prej celiku te perforcuar
W Disku i diamantit
X Lama e sharrés me maior karbidi
Y Te carateajrosjes
Z Mbrojtësja e poshtme
SIGURIA
PARALAJMERIME TEPERGJITHSHME TESIGURISE PPER PAJISJET ELEKTRIKE
EN 1Ae 2d A 2d A 2d A 2d A 2d A 2d A 2d A 2d A 2d A 2d A 2d A 2d A 2d A 2d A 2d A 2d A 2d A 2d A 2d A 2d A 2d A 2d A 2d A 2d A 2d A 2d
j 100000000000000000000000000000000000000000000000000000
y
a 1
()
B 100
42 45 aag jiaaba 10 gles 4a bji jjai j
①
中
8,15 a0b3 2,1g 1,4a+2 g d0y jg Jolcs jgs 4j1 jg1 jg1
S OBC = S COD + S BOC - S BOC
a 1
S_ OBC = 12 · CO · BC = 12 × CD × 5
y
S W
JLd aae 1 Jg
wai jie ayu wao
Jus
,10,10
150500,54e1b0 59,59,1,2004
www.skil.com 1
L
wllio 4
(1)Yggsjglgjgss
1 1
Lg g y 1
()
1j11,Lo g jyogaaa) a 00LaiwJg JgJg
L
a a a a a a a a a a a a a a a a a a a a a a a a a a
SKIL g y sLg jy g jy Looj y Jy 1y
2g
jyoo jyj L aaiiyg y aayy JyaoaayjL ayaaayj
jy jy y 10000000000000000000000000000000000000000000000000000
www.skil.com
L L 15 L J aB aL aJ g L aJ aJ aJ aJ aJ a
gIL SKIL LLa 1j gL (g) j
(1) 且 且 且 且 且 且 且 且 且 且 且 且 且 点 ·s . = www.skil.com
S_ OBC = S_ COD + S_ BOC
gLoJLjLoljLjLjI gaiy gaiy gaiy gaiy gaiy
aessalblaJlaai,ayjaoLgJlsj
aJolc aigj ay jai as giloj baid J Cnnn nnis Jd yed
s0j1JUcaosoo
L
100000000000000000000000000000000000000
12y10g 2L1N
0u 1
PgIgBla 5gJLd a
15
4G 1K
4yie 1 J 1
Lw
(1)
aai jolg jao
JdA 100000000000000000000000000000000
⑥ (g)
1J 1M 1s
2y
00s 00c00c00g00g00gR00g00g
sL a
iiilj j 50s aab j 0j gla iiaas 4
中
gL a 2jg j g
!gj
()
gLgSg yjN L gLg jy 1y 1y 1y 1y 1y 1y 1y 1y 1y 1y 1y 1y 1y 1y 1y 1y 1y 1y 1y 1y 1y 1y 1y 1y 1y 1y 1y 1y 1y 1y 1y 1y 1y 1g yjN L gJg Jg Jg Jg Jg Jg Jg Jg Jg Jg Jg Jg Jg Jg Jg Jg Jg Jg Jg Jg Jg Jg Jg Jg Jg Jg Jg Jg Jg Jg Jg Jg Jg Jg Jg Jg Jg Jg Jg Jg Jg Jg Jg Jg Jg Jg Jg Jg Jg Jg Jg
Lalzio
SKIL
Lg 0000000000000000000000000000000000000000000000000000000000000000000000000000000000000000000000000000
1 1
1 1
1 1
1 1
1 1
1 1
1 1
1 1
1 1
1 1
1 1
1 1
1 1
1 1
1 1
1 1
1 1
1 1
1 1
1 1
1 1
1 1
1 1
1 1
1 1
1 1
CwI aaiogol
Lg 12000000000000000000000000000000000000000000000000000000000000000000000000000000000000
J 10 10 10 10 10 10 10 10 10 10 10 10 10 10 10 10 10 10 10 10 10 10 10 10 10 10 10 10 10 10 10 10 10 10
J 1 J 1 1 1 1 1 1 1 1 1 1 1 1 1 1 1 1 1 1 1 1 1 1 1 1 1 1 1 1 1 1 1 1 1 1 1 1 1 1 1 1 1 1 1 1 1 1 1 1 1 1 0000000000000000000000000000000000000000000000000000000000000000000
11 11 11 11 11 11 11 11 11 11 11 11 11 11 11 11 11 11 11 11 11 11 11 11 11 11 11 11 11 11 11 1
goc Lgl
Lgai
Lgai
Lgai
Lgai
Lgai
Lgai
Lgai
Lgai
Lgai
Lgai
Lgai
Lgai
Lgai
Lgai
Lgai
Lgai
Lgai
Lgai
Lgai
Lgai
Lgai
Lgai
Lgai
Lgai
Lgai
Lgail
Lgoljaf
j 1 j 1 j 1 j 1 j 1 j 1 j 1 j 1 j 1 j 1 j 1 j 1 j 1 j 1 j 1 j 1 j 1 j 1 j 1 j 1 j 1 j 1 j 1 j 1 j 1 j 1 j 1 j 1 j 1 j 1 j 1 j 1 j 1 j 1 j
g0g0g0g0g0g0g0g0g0g0g0g0g0g0g0g0g0g0g0g0g0g0g0g0g0g0g0g0g0g0g0
yjg jg0e e 11 jj 11 jj 11 jj 11 jj
WwUuJyAulp -bUg
①Xgsslll 1
a
19 0sLLg
-
1.2015年JL3
gaoLo aJLg -
a a
0io Juao 10aill 100 100 100 100 100 100 100
aahal
zai jia -jai
- 2
WWW
aod1/ai
Yaggall Lngaog)lllgal
B = 21, D = 20.
①ZJALIJIJIJIJIJIJIJIJIJIJIJIJIJIJIJIJIJIJIJIJIJIJIJIJIJIJIJIJIJIJIJIJIJIJIJIJIJIJIJIJIJIJIJIJIJIJIJIJIJIJIJIJIJIJIJIJIJIJIJIJIJIJIJIJIJIJIJIJIJIJIJIJIJIJIJIJIJIJIJIJIJIJIJIJIJIJIJIJIJIJIJIJIJIJIJIJIJIJIJIJIJ
(a)
( 5, - 2)
ailllllglg 10 aoe sfoa wol gdo
:SKIL s
g 111111111111111111111111
91.0g 0f2810000000000000000000000000000000000000000000000000000
A.1J LALaAeBao 121g J J JJJJJ
Jjj1
LaiiJIJIJIJI
LolgMjJlE
1JiJ 1Jai JjN LcR aai
Jai gabalgulil jinwglil
b P gJJI Jc gJJI aJl alj j
LaiJIJI 5j
01 1 G wll
Jjgagac Ja jgc Jaaal gao Lwif yLac
JjzI JaaJJg
()
glalglgai jocinol
121 j 11110000000000000000000000000000000000000
12 (a)
LolgMJJLeJia
aal 10 aolal alal alal alal alal alal
Ia 2019g Ia Jc R Jalbll Jia jiao Jao po aolai jaiolai po
Joell zohe Jc uu wghg h
Jaei 1
a1 = 23,a2 = - 43,b2 = 58,b3 = 79
1 !
JaeIe 1
1
LwJgabai Jyag.ayalaf aig-suWJla
()
jI 1
10
B Jiei jil 1 ciao jie jie jie jie jie jie jie jie jie jie jie jie jie jie jie jie jie jie jie jie jie jie jie jie jie jie jie jie jie jie jie jie jie jie jie jie jie jie jie jie jie jie
JaaJI aai J 1
①
S OBC = S COD + S BOC - S BOC
JaeJI aIbI g oJau Juaa Jaua aLoLc aJaua Jaua j
LolgMjJlJeIe
100000000000000000000000000000000000000
Jaeill ae hie jil
1
1
S W
Jaeell aelb aol alol lc ae bcb cullac Jgssll
paal wlg jw gglg alls!
gblj
TgA
pssu) gblal jlae wglal glaal
( s,q,0 > y > 0) R 邮件
Tjglal jai jao
p#
A
gagagagagagagagagagagagagagagagagagagagagagagagagagagagagagagagagagagagagagagagagagagagagagagagagagagagagagagagagagagagagagag
i 1
:
- 1.
albo 1
puii 1
:Laal Jaa aagk a a.
S OBC = S AOB + S_ BOC
·
jdoJggl aag Joc ae bclwJoo
( L2 - L1) + ( L2 - L3) = 0
Jg 150
y
aaiyss aasgl clll g y
olacgSoo 1ywlposiw
(ωk)
plwcl
L
1
jglg
·
1
gjg jlaa 21 gglc gag g a lglg jg j
(0ao Jaoai 2yj Bo yds
jg 1281 jiee ie g 5iLg 0g 1g jg 5 Jg g
JyJI J
S APQ = S AQP + S_ PQR
5g
p1234567890
s281 g00 aegj 00 Slig j31 Juea agj Llae o581 gian Loaic
pJ 5 aS
aaijie aaijlo agg psswly J
0181 jL 02gj1j03
gaiyaiyaiyaiyaiyaiyaiyaiyaiyaiyaiyaiyaiyaiyaiyaiyaiyaiyaiyaiyaiyaiyaiyaiyaiyaiyaiyaiyaiyaiyaiyaiyaiyaiyaiyaiyaiyaiyaiyaiyaiyaiyaiyaiyaiyaiyaiyaiyaiyaiyai
a_4 = 0.2a_3
aLoell LogleI Jg 1000000000000000000000000000000000000000000
#
iio 1
glll lal 1020 pssu 2
Lagaa aee eae aegw 1111 1111 plasnl Lc pi3
aaiiaiaiaiaiaiaiaiaiaiaiaiaiaiaiaiaiaiaiaiaiaiaiaiaiaiaiaiaiaiaiaiaiaiaiaiaiaiaiaiaiaiaiaiaiaiaiaiaiaiaiaiaiaiaiaiaiaiaiaiaiaiaiaiaiaiaiaiaiaiaiaiaiaiaiaiaiaiaiaiaia
:
oLo wgiuuiuui uugiuuiuui luc laaiuio plauuuiu Jaoi
Jle!g sodl aLwI gIyI y) ayd1 yell jai
Jus Jus Jus Jus Jus Jus Jus Jus Jus Jus Jus Jus Jus Jus Jus Jus Jus Jus Jus
()
ailllll llllgl aalao gallolgai
Jg j 11 Jg j g j Jg j Jg j Jg j Jg j Jg j Jg j Jg j Jg j
a + b ≤ 11a + 2b + 11
gaiyaiyaiyaiyaiyaiyaiyaiyaiyaiyaiyaiyaiyaiyaiyaiyaiyaiyaiyaiyaiyaiyaiyaiyaiyaiyaiyaiyaiyaiyaiyaiyaiyaiyaiyaiyaiyaiyaiyaiyaiyaiyaiyaiyaiyaiyaiyaiyaiyaiyai
a 1
JJIJIJI JIOIgolssnaiy 8 gill aylygSsI aai ( C I J I J I J I J I J I J I J I J I J I J I J I J I J I J I J I J I J I J I J I J I J I J I J I J I J I J I J I J I J I J I J I J
12 = 9
:
·
()
①
①olglg
A :Lo21
B
C. g1h2 = 1
D. b - Al
E
F L
G
H
J
Ko
L
Mubie
N
5gL P
aillJI Joo Q
ghai jia
S
glal glall JIaia T