
GET 55125 Professional - Sander BOSCH - Free user manual and instructions
Find the device manual for free GET 55125 Professional BOSCH in PDF.

 FR
FR
 BG
BG
 CS
CS
 DA
DA
 DE
DE
 EL
EL
 EN
EN
 ES
ES
 ET
ET
 FI
FI
 HU
HU
 IT
IT
 KK
KK
 KO
KO
 LT
LT
 LV
LV
 MK
MK
 NL
NL
 NO
NO
 PL
PL
 PT
PT
 RO
RO
 RU
RU
 SK
SK
 SL
SL
 SV
SV
 TR
TR
 UK
UK
| Product type | Random orbital sander |
| Brand | Bosch |
| Model | GET 55125 Professional (GET 55-125) |
| Rated input power | 550 W |
| No-load speed | 3300 – 7800 rpm |
| No-load oscillation rate | 6600 – 15600 osc/min |
| Sanding pad diameter | 125 mm |
| Oscillation amplitude | 3.5 mm |
| Weight (according to EPTA 01:2014) | 2.4 kg |
| Voltage | 230 V |
| Protection class | II |
| Oscillation speed preselection | Yes (6-position thumbwheel) |
| Mode selector (coarse/fine) | Yes |
| Dust extraction connection | Yes, diameter 35 mm |
| Additional handle | Yes, removable (right/left) |
| Edge protector | Yes |
| Application | Dry sanding of wood, plastic, metal, filler, varnish; polishing |
| Sound pressure level | 86 dB(A) |
| Sound power level | 97 dB(A) |
| Vibration (sanding normal) | 5.5 m/s² |
Frequently Asked Questions - GET 55125 Professional BOSCH
User questions about GET 55125 Professional BOSCH
0 question about this device. Answer the ones you know or ask your own.
Ask a new question about this device
Download the instructions for your Sander in PDF format for free! Find your manual GET 55125 Professional - BOSCH and take your electronic device back in hand. On this page are published all the documents necessary for the use of your device. GET 55125 Professional by BOSCH.
USER MANUAL GET 55125 Professional BOSCH
General Power Tool Safety Warnings
WARNING
Read all safety warnings, instructions, illustrations and specifications provided with this power tool.
Failure to follow all instructions listed below may result in electric shock, fire and/or serious injury.
Save all warnings and instructions for future reference.
The term "power tool" in the warnings refers to your mains-operated (corded) power tool or battery-operated (cordless) power tool.
Work area safety
- Keep work area clean and well lit. Cluttered or dark areas invite accidents. Do not operate power tools in explosive atmospheres, such as in the presence of flammable liquids, gases or dust. Power tools create sparks which may ignite the dust or fumes.
- Keep children and bystanders away while operating a power tool. Distractions can cause you to lose control.
Electrical safety
Power tool plugs must match the outlet. Never modify the plug in any way. Do not use any adapter plugs with earthed (grounded) power tools. Unmodified plugs and matching outlets will reduce risk of electric shock. Avoid body contact with earthed or grounded surfaces, such as pipes, radiators, ranges and refrigerators. There is an increased risk of electric shock if your body is earthed or grounded. Do not expose power tools to rain or wet conditions. Water entering a power tool will increase the risk of electric shock. Do not abuse the cord. Never use the cord for carrying, pulling or unplugging the power tool. Keep cord away from heat, oil, sharp edges or moving parts. Damaged or entangled cords increase the risk of electric shock. When operating a power tool outdoors, use an extension cord suitable for outdoor use. Use of a cord suitable for outdoor use reduces the risk of electric shock. If operating a power tool in a damp location is unavoidable, use a residual current device (RCD) protected supply. Use of an RCD reduces the risk of electric shock.
Personal safety
Stay alert, watch what you are doing and use common sense when operating a power tool. Do not use a power tool while you are tired or under the influence of drugs, alcohol or medication. A moment of inattention
while operating power tools may result in serious personal injury.
Use personal protective equipment. Always wear eye protection. Protective equipment such as a dust mask, non-skid safety shoes, hard hat, or hearing protection used for appropriate conditions will reduce personal injuries. Prevent unintentional starting. Ensure the switch is in the off-position before connecting to a power source and/or battery pack, picking up, or carrying the tool. Carrying power tools with your finger on the switch or energizing power tools that have the switch on invites accidents. Remove any adjusting key or wrench before turning the power tool on. A wrench or a key left attached to a rotating part of the power tool may result in personal injury. Do not overreach. Keep proper footing and balance at all times. This enables better control of the power tool in unexpected situations. Dress properly. Do not wear loose clothing or jewelry. Keep your hair and clothing away from moving parts. Loose clothes, jewelry, or long hair can be caught in moving parts. If devices are provided for the connection of dust extraction and collection facilities, ensure these are connected and properly used. Use of dust collection can reduce dust-related hazards. Do not let familiarity gained from frequent use of tools allow you to become complacent and ignore tool safety principles. A careless action can cause severe injury within a fraction of a second.
Power tool use and care
Do not force the power tool. Use the correct power tool for your application. The correct power tool will do the job better and safer at the rate for which it was designed. Do not use the power tool if the switch does not turn it on and off. Any power tool that cannot be controlled with the switch is dangerous and must be repaired. Disconnect the plug from the power source and/or remove the battery pack, if detachable, from the power tool before making any adjustments, changing accessories, or storing power tools. Such preventive safety measures reduce the risk of starting the power tool accidentally. Store idle power tools out of the reach of children and do not allow persons unfamiliar with the power tool or these instructions to operate the power tool. Power tools are dangerous in the hands of untrained users. Maintain power tools and accessories. Check for misalignment or binding of moving parts, breakage of parts, and any other condition that may affect the power tool's operation. If damaged, have the power tool repaired before use. Many accidents are caused by poorly maintained power tools.
- Keep cutting tools sharp and clean. Properly maintained cutting tools with sharp cutting edges are less likely to bind and are easier to control. Use the power tool, accessories, and tool bits, etc., in accordance with these instructions, taking into account the working conditions and the work to be performed. Use of the power tool for operations different from those intended could result in a hazardous situation.
- Keep handles and grasping surfaces dry, clean and free from oil and grease. Slippery handles and grasping surfaces do not allow for safe handling and control of the tool in unexpected situations.
Service
Have your power tool serviced by a qualified repair person using only identical replacement parts. This will ensure that the safety of the power tool is maintained.
Safety Warnings for Sander
Only use the power tool for dry sanding. Water entering a power tool will increase the risk of electric shock. Ensure that no persons are at risk due to flying sparks. Remove combustible materials from the surrounding area. Flying sparks are created when sanding metals. Warning: Danger of fire! Avoid overheating the workpiece and the sander. Always empty the dust collector before taking a break from work. Sanding dust in the dust bag, microfilter, paper bag (or in the filter bag or vacuum cleaner filter) can spontaneously combust under certain conditions, for example if flying sparks are created when sanding metals. This risk is increased if the sanding dust is mixed with paint or polyurethane residue or with other chemical substances and if the workpiece is hot as a result of prolonged work. Clean the air vents on your power tool regularly. The motor's fan will draw the dust inside the housing and excessive accumulation of powdered metal may cause electrical hazards. Hold the power tool firmly with both hands and make sure you have a stable footing. The power tool can be more securely guided with both hands. Always wait until the power tool has come to a complete stop before placing it down. Secure the workpiece. A workpiece clamped with clamping devices or in a vice is held more secure than by hand.
Products sold in GB only:
Your product is fitted with a BS 1363/A approved electric plug with internal fuse (ASTA approved to BS 1362).
If the plug is not suitable for your socket outlets, it should be cut off and an appropriate plug fitted in its place by an authorized customer service agent. The replacement plug should have the same fuse rating as the original plug.
The severed plug must be disposed of to avoid a possible shock hazard and should never be inserted into a mains socket elsewhere.
Product Description and Specifications

Read all the safety and general instructions. Failure to observe the safety and general instructions may result in electric shock, fire and/or serious injury.
Please observe the illustrations at the beginning of this operating manual.
Intended Use
The power tool is intended for dry sanding of wood, plastic, metal, filler and varnished surfaces.
Power tools with electronic control are also suitable for polishing.
Product Features
The numbering of the product features refers to the diagram of the power tool on the graphics page.
(1) Orbital stroke rate preselection thumbwheel (2) On/off switch (3) Extraction pipe (4) Extraction outlet (5) Auxiliary handle (insulated gripping surface) (6) Screw for auxiliary handle (7) Handle (insulated gripping surface) (8) Sanding sheet (9) Hex key (10) Screw for sanding pad (11) Sanding pad (12) Corner protection (13) Threaded hole (14) Mode selector switch (15) Release button A) Accessories shown or described are not included with the product as standard. You can find the complete selection of accessories in our accessories range.
Technical Data
Random orbit sanders GET 75-150 GET 55-125
| Article number | 3601B57 1..3601B57 0.. |
| Orbital stroke rate preselection ● ● | |
| Rated power input W 750 550 |
12 | English
Random orbit sanders GET 75-150 GET 55-125
| No-load speed n0 | min-1 | 3300-7300 3300-7800 |
| No-load orbital stroke rate min | 1 | 6600-14,600 6600-15,600 |
| Sanding pad speed during coarse sanding min | 1 | 290-640 200-480 |
| Orbit diameter mm 4.5 3.5 | ||
| Sanding pad diameter mm 150 125 | ||
| Weight according to EPTA-Procedure 01:2014 | kg 2.6 2.4 | |
| Protection class | 回/II /II |
The specifications apply to a rated voltage [U] of 230 V. These specifications may vary at different voltages and in country-specific models.
Noise/Vibration Information
| GET 75-150 GET 55-125 | |||
| 3601 B57 1.. 3601 B57 0.. | |||
| Noise emission values determined according to EN 62841-2-4. | |||
| Typically, the A-weighted noise level of the power tool is | |||
| Sound pressure level | dB(A) | 85 | 86 |
| Sound power level | dB(A) | 96 | 97 |
| Uncertainty K | dB | 3 | 3 |
| Wear hearing protection! | |||
| Vibration total values ah (triax vector sum) and uncertainty K determined according to EN 62841-2-4: | |||
| Grinding: Normal mode | |||
| ah | m/s2 | 5.5 | 5.5 |
| K | m/s2 | 1.5 | 1.5 |
| Grinding: Turbo mode | |||
| ah | m/s2 | 6.5 | 6.0 |
| K | m/s2 | 1.5 | 1.5 |
| Polishing | |||
| ah | m/s2 | 7.0 | 7.5 |
| K | m/s2 | 1.5 | 1.5 |
The vibration level and noise emission value given in these instructions have been measured in accordance with a standardised measuring procedure and may be used to compare power tools. They may also be used for a preliminary estimation of vibration and noise emissions.
The stated vibration level and noise emission value represent the main applications of the power tool. However, if the power tool is used for other applications, with different application tools or is poorly maintained, the vibration level and noise emission value may differ. This may significantly increase the vibration and noise emissions over the total working period.
To estimate vibration and noise emissions accurately, the times when the tool is switched off or when it is running but not actually being used should also be taken into account. This may significantly reduce vibration and noise emissions over the total working period.
Implement additional safety measures to protect the operator from the effects of vibration, such as servicing the power tool and application tools, keeping their hands warm, and organising workflows correctly.
Assembly
Pull the plug out of the socket before carrying out any work on the power tool.
Changing the Sanding Sheet
To remove the sanding sheet (8), lift it from the side and pull it from the sanding pad (11).
Remove dirt and dust from the sanding pad (11), e.g. with a paintbrush, before attaching a new sanding sheet.
The surface of the sanding pad (11) is fitted with a hook-and-loop fastening, allowing sanding sheets with a hook-and-loop backing to be secured quickly and easily.
Press the sanding sheet (8) firmly onto the underside of the sanding pad (11).
To ensure optimum dust extraction, make sure that the punched holes in the sanding sheet (8) are aligned with the drilled holes in the sanding pad (11).
Selection of the Sanding Plate
The power tool can be fitted with sanding pads of various hardnesses, depending on the application:
- Extra soft sanding pad: Suitable for polishing and sensitive sanding even on curved surfaces. - Soft sanding pad: Suitable for all sanding work, universal application. - Hard sanding pad: Suitable for heavy sanding on flat surfaces.
Changing the Sanding Pad
Note: Replace damaged sanding pads (11) immediately.
Remove the sanding sheet or polishing tool. Unscrew the screw (10) completely and remove the sanding pad (11).
Attach the new sanding pad (11) and retighten the screw so that it is finger-tight.
Note: Pads with diameters of 150 mm and 125 mm have different carriers. The pads can only be fitted to the right power tool.
Note: When attaching the sanding pad, make sure that the teeth of the catch mate with the recesses in the sanding pad.
Note: Damaged sanding pads must only be replaced by an after-sales service centre authorised to work with Bosch power tools.
Dust/Chip Extraction
The dust from materials such as lead paint, some types of wood, minerals and metal can be harmful to human health. Touching or breathing in this dust can trigger allergic reactions and/or cause respiratory illnesses in the user or in people in the near vicinity.
Certain dusts, such as oak or beech dust, are classified as carcinogenic, especially in conjunction with wood treatment additives (chromate, wood preservative). Materials containing asbestos may only be machined by specialists.
- Use a dust extraction system that is suitable for the material wherever possible.
- Provide good ventilation at the workplace.
- It is advisable to wear a P2 filter class breathing mask.
The regulations on the material being machined that apply in the country of use must be observed.
- Avoid dust accumulation at the workplace. Dust can easily ignite.
When sanding, it is recommended that you connect the power tool to a dust extractor. The power tool has no blower of its own; dust bags cannot be used.
External Dust Extraction
Connect the extraction hose (accessory) either to the extraction pipe (3) or directly to the extraction outlet (4) of the power tool.
Note: The extraction pipe (3) consists of antistatic material. If an antistatic extraction hose (accessory) is used in addition, this will prevent an electrostatic charge from building on the tool, which can happen on occasion when sanding.
When working without dust extraction (e.g. polishing), you can remove the extraction pipe (3). To do this, press the release button (15) and pull the extraction pipe (3) backward out of the power tool.
The dust extractor must be suitable for the material being worked.
When extracting dry dust that is especially detrimental to health or carcinogenic, use a special dust extractor.
Auxiliary Handle
The auxiliary handle (5) enables comfortable handling and optimum power distribution, with a high sanding removal rate in particular.
Secure the auxiliary handle (5) in the thread (13) on either the right or left of the housing.
To achieve better control of the power tool during sanding applications, it is recommended that you place your other hand on the front hand rest. The auxiliary handle (5) may exert lateral forces which could cause the power tool to wobble. This can result in damage to the surface to be sanded, as well as the pad.
Corner protection
The corner protection (12) protects the sanding pad when sanding areas close to edges. Fix the corner protection (12) onto the power tool from the front. To remove it, pull the corner protection (12) forward and off by one end.
Operation
Starting Operation
Pay attention to the mains voltage. The voltage of the power source must match the voltage specified on the rating plate of the power tool. Power tools marked with 230V can also be operated with 220V . ▶ Products that are only sold in AUS and NZ: Use a residual current device (RCD) with a nominal residual current of 30 mA or less.
Switching On/Off
Make sure that you are able to press the On/Off switch without releasing the handle.
To switch on the power tool, push the on/off switch (2) forward.
To switch off the power tool, push the on/off switch (2) backward.
Preselecting the orbital stroke rate
You can even preselect the orbital stroke rate during operation using the necessary orbital stroke rate preselection thumbwheel (1).
1-2 Low orbital stroke rate
3-4 Medium orbital stroke rate
5-6 High orbital stroke rate
The required orbital stroke rate is dependent on the material and the work conditions and can be determined using practical tests.
The Constant Electronic keeps the orbital stroke rate at no load and under load virtually consistent, guaranteeing uniform performance.
After working at a low orbital stroke rate for an extended period, you should operate the power tool at the maximum orbital stroke rate for approximately three minutes without load to cool it down.
Selecting the Material Removal Rate
Two operating modes with different material removal rates are available. For coarse sanding, push the mode selector switch (14) forward; for fine sanding, push the mode selector switch (14) backward until you hear it click into place.
Do not change the operating mode while sanding! This poses a risk of injury.
Coarse Sanding Operating Mode (Positive Drive Control)
This operating mode has a very high sanding removal rate and is recommended for machining extremely rough and non-sensitive surfaces, as well as for rough polishing. The positive drive control of the sanding pad achieves a consistent eccentric and rotational movement.
Fine Sanding Operating Mode (Free Running)
This operating mode is recommended for handling sensitive surfaces, as well as for fine polishing. The free running of the sanding pad achieves a rotational movement that is dependent on the contact pressure with a constant eccentric movement. In addition, the sanding removal rate can be varied by changing the contact pressure.
Working Advice
Pull the plug out of the socket before carrying out any work on the power tool. Always wait until the power tool has come to a complete stop before placing it down. Do not put the power tool down on its side. This could permanently warp the sanding pad. This power tool is not suitable for bench-mounted use. It must not be clamped into a vice or fastened to a workbench, for example.
Sanding Surfaces
Switch the power tool on, place the entire sanding surface against the surface of the workpiece and apply moderate pressure as you move the sander over the workpiece.
The material removal rate and sanding result are primarily determined by the choice of sanding sheet, the preselected orbital stroke rate level and the contact pressure.
Only immaculate sanding sheets achieve good sanding performance and make the power tool last longer.
Be sure to apply consistent contact pressure in order to increase the lifetime of the sanding sheets.
Excessively increasing the contact pressure will not lead to increased sanding performance, rather it will cause more severe wear of the power tool and of the sanding sheet. Do not use a sanding sheet for other materials after it has been used to work on metal.
Use only original Bosch-sanding accessories.
Rough Sanding
Attach a coarse grit sanding sheet.
Apply only light pressure to the power tool so that it runs at a higher orbital stroke rate and a higher material removal rate is achieved.
Fine Sanding
Attach a fine grit sanding sheet.
You can reduce the sanding plate orbital stroke rate by lightly varying the contact pressure or changing the orbital stroke rate level; the random orbit motion will be retained.
Move the power tool with moderate pressure flat on the workpiece in a circular motion or alternately along and across it. Do not tilt the power tool in order to avoid sanding through the workpiece, e.g. veneers.
Switch the power tool off after completing operation.
Polishing
Note: For polishing, you can remove the extraction pipe (3); this will enable you to handle the tool more easily without damaging the workpiece.
For polishing weathered lacquers and redressing scratches (e.g. acrylic glass), the power tool can be fitted with an appropriate polishing tool, e.g. lambswool bonnet, polishing felt or polishing sponge (accessory).
Select a low orbital stroke rate (level 1-2) when polishing in order to avoid heating up the surface excessively.
Apply the polish to an area slightly smaller than the area which you intend to polish. Using the appropriate polishing tool, work in the polish with either linear or circular movements and with moderate pressure.
Do not allow the polish to dry out on the surface; this may damage the surface. Do not expose the surface which you intend to polish to direct sunlight.
Clean the polishing tools regularly to ensure good polishing results. Wash the polishing tools with mild detergent and warm water; do not use thinning agents.
Clean the extraction outlet (4) regularly; this will ensure perfect dust extraction for subsequent grinding applications.
Maintenance and Service
Maintenance and Cleaning
Pull the plug out of the socket before carrying out any work on the power tool. To ensure safe and efficient operation, always keep the power tool and the ventilation slots clean.
In order to avoid safety hazards, if the power supply cord needs to be replaced, this must be done by Bosch or by an
after-sales service centre that is authorised to repair Bosch power tools.
After-Sales Service and Application Service
Our after-sales service responds to your questions concerning maintenance and repair of your product as well as spare parts. You can find explosion drawings and information on spare parts at: www.bosch-pt.com
The Bosch product use advice team will be happy to help you with any questions about our products and their accessories.
In all correspondence and spare parts orders, please always include the 10-digit article number given on the nameplate of the product.
Australia, New Zealand and Pacific Islands
Robert Bosch Australia Pty. Ltd.
Power Tools
Locked Bag 66
Clayton South VIC 3169
Customer Contact Center
Inside Australia:
Phone: (01300) 307044
Fax: (01300) 307045
Inside New Zealand:
Phone: (0800) 543353
Fax: (0800) 428570
Outside AU and NZ:
Phone: +61 3 95415555
www.bosch-pt.com.au
www.bosch-pt.co.nz
Great Britain
Robert Bosch Ltd. (B.S.C.)
P.O.Box 98
Broadwater Park
North Orbital Road
Denham Uxbridge
UB95HJ
At www.bosch-pt.co.uk you can order spare parts or arrange the collection of a product in need of servicing or repair.
Tel. Service: (0344) 7360109
E-Mail: boschservicecentre@bosch.com
Ireland
Origo Ltd.
Unit 23 Magna Drive
Magna Business Park
City West
Dublin 24
Tel. Service: (01) 4666700
Fax: (01) 4666888
Republic of South Africa
Customer service
Hotline: (011) 6519600
Gauteng - BSC Service Centre
35 Roper Street, New Centre
Johannesburg
Tel.: (011) 4939375
Fax: (011) 4930126
E-Mail: bsctools@icon.co.za
KZN - BSC Service Centre
Unit E, Almar Centre
143 Crompton Street
Pinetown
Tel.: (031) 7012120
Fax: (031) 7012446
E-Mail: bsc.dur@za.bosch.com
Western Cape - BSC Service Centre
Democracy Way, Prosperity Park
Milnerton
Tel.: (021) 5512577
Fax: (021) 5513223
E-Mail: bsc@zsd.co.za
Bosch Headquarters
Midrand, Gauteng
Tel.: (011) 6519600
Fax: (011) 6519880
E-Mail: rbsa-hq.pts@za.bosch.com
Armenia, Azerbaijan, Georgia
Robert Bosch Ltd.
David Agmashenebeli ave. 61
0102 Tbilisi, Georgia
Tel. +95322510073
www.bosch.com
Kyrgyzstan, Mongolia, Tajikistan, Turkmenistan, Uzbekistan
TOO "Robert Bosch" Power Tools, After Sales Service Muratbaev Ave., 180
050012, Almaty, Kazakhstan
Service Email: service.pt.ka@bosch.com
Official Website: www.bosch.com, www.bosch-pt.com
Disposal
The power tool, accessories and packaging should be recycled in an environmentally friendly manner.

Do not dispose of power tools along with household waste.
Only for EU countries:
According to the European Directive 2012/19/EU on Waste Electrical and Electronic Equipment and its implementation into national law, power tools that are no longer usable must be collected separately and disposed of in an environmentally friendly manner.
Français
Robert Bosch (France) S.A.S.
Robert Bosch Argentina Industrial S.A.
Calle Blanco Encalada 250 - San Isidro
B1642AMQ
Calle Robert Bosch No. 405
C.P. 50071 Zona Industrial, Toluca - Estado de Mexico
Tel.: (52) 55 528430-62
Tel.: 800 6271286
The power tool is intended for the application of light and heat transfer in the electric field.
This ensures maximum machine safety.
Bosch Service Center
Telegrafvej 3
2750 Ballerup
At www.bosch-pt.dk, spare parts can be ordered online or a repair order can be created.
Service Center phone: 44898855
Fax: 44898755
E-Mail: vaerktoej@dk.bosch.com
Disposal
Power tools, accessories, and packaging should be recycled in an environmentally friendly manner.

Funds in EU countries:
Bosch Service Center
Telegrafvej 3
2750 Ballerup
Denmark
Tel.: (08) 7501820 (within Sweden)
Fax: (011) 187691
Disposal
3601B571..3601B570..
Robert Bosch Sp. z o.o.
Bosch Service Center PT
K Vapence 1621/16
692 01 Mikulov
On www.bosch-pt.cz you can order the repair of your machine or spare parts online.
The noise level and vibration emission values are specified for the main types of work with the power tool. However, if the power tool is used for other work with accessories not specified by the manufacturer or for technical maintenance, the values may not comply with the specifications.
The vibration emission value may be underestimated. This can significantly increase the overall vibration level during the entire working period.
To accurately assess the vibration emission during a defined time interval, you must also consider the time when the tool is switched on but not running. This can significantly reduce the vibration emission over the total working time.
Take additional safety measures to protect the operator from the effects of vibration, for example: maintenance of the power tool and working tools, measures to keep hands warm, and organization of work processes.
Assembly
Before using the power tool, pull the plug out of the socket.
Replacing the sanding sheet
To remove the sanding sheet (8), lift it from the side and remove it from the sanding plate (11).
Before installing a new sanding sheet, remove dirt and dust from the sanding plate (11), e.g., with a brush.
The surface of the sanding plate (11) consists of a hook-and-loop fastener, which allows you to quickly and easily attach sanding sheets with the corresponding backing.
Dust from some materials, such as paints containing lead, some types of wood, minerals, and metals, can be harmful to health.
Contact with dust and inhalation of dust can cause allergic reactions and/or respiratory diseases of the operator or nearby persons.
Certain types of dust, e.g., oak and beech dust, are considered carcinogenic, especially in combination with additives for wood treatment (chromate, wood preservative). Material containing asbestos may only be processed by specialists.
- If possible, use a suitable dust extraction system. - Ensure good ventilation of the workplace. - It is recommended to use a respirator with a filter class P2.
Observe the regulations applicable in your country for the materials to be processed.
The tool is intended for professional use. The tool may ignite easily.
For dust extraction, it is recommended to connect a vacuum cleaner to the dust extraction system. The power tool does not have its own dust bag; using a dust bag is not possible.
External dust extraction system
Connect the extraction hose (accessory) directly to the dust extraction outlet (4) of the power tool.
Note: The extraction hose (3) is made of antistatic material. When using an antistatic extraction hose (accessory), electrostatic charging of the tool is prevented, which in some cases could otherwise occur during grinding.
For dust extraction with a vacuum cleaner, the extraction hose (3) can be removed. To do this, press the release button (15) and pull the extraction hose (3) off the power tool, pulling it downwards.
The vacuum cleaner must be suitable for the material being worked on.
Use a special vacuum cleaner for removing hazardous dusts that may cause cancer or dry dust.
Auxiliary handle
The auxiliary handle (5) provides comfortable handling and optimal distribution of force, especially during heavy grinding. Attach the auxiliary handle (5) on the right or left side of the housing in the thread (13).
For better control of the power tool during grinding, it is recommended to place the second hand on the front handle. The auxiliary handle (5) can create lateral forces that may change the position of the power tool relative to the workpiece. This can damage the workpiece and even cause injury.
Edge guard
The edge guard (12) protects the grinding disc when grinding edges. Slide the edge guard (12) onto the front of the power tool. To remove the edge guard (12), pull it off by one end.
Working with the tool
Switching the power tool on
Pay attention to the voltage in the network! The voltage of the power supply must correspond to the data on the factory plate of the power tool. Power tools rated for 230 V can also operate at 220 V.
Switching on/off
Make sure you can switch the tool on and off without releasing the handle.
To switch on the power tool, push the on/off switch (2) forward.
To switch off the power tool, push the on/off switch (2) backward.
Setting the oscillation frequency
Using the oscillation frequency setting wheel (1), you can preselect the required oscillation frequency, even during operation.
1-2 low oscillation frequency, 3-4 medium oscillation frequency, 5-6 high oscillation frequency
The required oscillation frequency depends on the material and the working conditions and can be determined by practical testing.
The electronic control system keeps the oscillation frequency constant at no load and under load, ensuring uniform working performance.
After prolonged work at low oscillation frequency, the power tool should be run at maximum oscillation frequency at no load for approx.
3 minutes for cooling.
Selecting the sanding rate
There are two working modes with different sanding rates for the material. For coarse sanding, push the working mode switch (14) forward; for fine sanding, push the working mode switch (14) backward until it clearly engages.
Do not change the working mode during sanding!
The durability of the abrasive.
Working mode and tool
The productivity of the work and the characteristics of the surface depend mainly on the selected abrasive material, the set number of oscillations, and the sanding stroke.
Only flawless abrasive materials ensure good productivity and extend the life of the power tool.
Ensure uniform pressure to increase the service life of the abrasive material.
Excessive pressure does not lead to increased productivity, but to more severe wear of the power tool and the abrasive material.
Do not use abrasive material that you have used for metal for processing other materials.
Use only original Bosch accessories.
Coarse sanding
Use abrasive material with a coarser grit.
Lightly press the power tool so that it works with high oscillation frequency and achieves a high material removal rate.
Fine sanding
Use abrasive material with a fine grit.
By slightly varying the pressure or switching the oscillation frequency, you can reduce the number of oscillations and the sanding stroke while maintaining the eccentric motion.
Move the power tool with moderate pressure over the entire surface in circular motions or alternately in longitudinal and transverse directions over the workpiece. Do not tilt the power tool, as this may lead to cutting into the workpiece, for example, in the case of panels.
To turn off the process, switch off the power tool.
Polishing
Note: The polishing tube (3) can be removed to facilitate working with the power tool and to avoid damaging the workpiece.
For polishing painted surfaces, the power tool can be fitted with suitable polishing accessories, such as a polishing cap with a felt pad, a polishing sponge with a felt pad, or a polishing cap with a lambswool pad.
Select a low speed setting (stage 1-2) for polishing to avoid excessive heating of the surface.
Apply the polishing agent to a slightly smaller area than you intend to polish. Work the polishing agent in with the supplied polishing tool, either in a criss-cross pattern or in circular motions, applying gentle pressure.
Do not let the polishing agent dry on the surface, as this may damage the surface. Do not expose the polished surface to direct sunlight.
Regularly clean the polishing tools to achieve good polishing results. Clean the polishing accessories with a mild detergent and warm water; do not use solvents.
Regularly clean the dust filter (4) to ensure efficient dust extraction during subsequent sanding.
Maintenance and Service
Maintenance and Cleaning
Before any work on the power tool, pull the plug out of the socket. To ensure safe and efficient operation, keep the power tool and its ventilation slots clean.
If the power tool needs to be replaced, to avoid hazards, it must be handed over to Bosch or an authorized Bosch service center for power tools.
Sales of the product are permitted in stores, departments (sections), pavilions, and kiosks that ensure the preservation of the product, excluding exposure to atmospheric precipitation and sources of elevated temperatures (sharp temperature fluctuations), including direct sunlight.
The seller (manufacturer) must provide the buyer with the necessary reliable information about the product, ensuring the possibility of its correct choice. Information about the product in the mandatory order must contain the data, the list of which is established by the legislation of the Russian Federation.
If the product is consumed and there is a deficiency (shortage), the consumer must be provided with information about this.
During the sale of the product, the following safety requirements must be met:
- The seller must inform the buyer of the full name of their organization, its location (address) and working hours; - Product samples in retail premises must provide the opportunity for buyers to familiarize themselves with the inscriptions on the products, excluding the possibility of independent actions by buyers with the products that could lead to their activation, except for visual inspection; - The seller must inform the buyer of information about confirmation of compliance of these products with established requirements, analysis of certificates or declarations of conformity; - The sale of products is prohibited if there is a lack (loss) of identification features, expired shelf life, or batches without instructions (manual) for operation, mandatory certificate of conformity or mark of conformity.
Service consulting on application issues
The service department is responsible for all your questions regarding repair and maintenance of your product, as well as spare parts. An illustration with an exploded view of the device and spare parts information can also be viewed at: www.bosch-pt.com
The Bosch team of employees, providing consultations on the use of the product, with
pleasure will answer all your questions regarding our product and its accessories.
In all requests and orders, please always indicate the 10-digit product number from the product nameplate.
Component illustration
The numbering of the illustrated components refers to the illustration on the graphics page at the beginning of the manual.
(1) Oscillation frequency adjustment knob (2) Ventilation slots (3) Blower tube (4) Exhaust pipe (5) Additional handle (with insulated gripping surface) (6) Screw for additional handle
(7) Handle (with insulated gripping surface) (8) Sanding plate (9) Hex key (10) Sanding plate support (11) Sanding plate support (12) Clamp (13) On/off switch (14) Mode selector switch (15) Unlock button
A) The illustration or description of accessories does not necessarily include them in the standard delivery. The full range of accessories is described in our accessory program.
Technical data
Selection of sanding performance
For rough sanding, set the sanding stroke (14) forward; for fine sanding, set the sanding stroke (14) backward so that the sanding plate is in the correct position.
Do not continue to use a damaged sanding plate! There is a risk of injury from the sanding plate.
Sanding mode "rough sanding" (with dust extraction)
This mode of operation with high material removal is used for processing very coarse, uneven surfaces, as well as for sanding with a coarse grit. Due to the forced dust extraction, the sanding plate is kept evenly eccentric and oscillating.
Guide: When sanding, hold the power tool with both hands on the housing (3) so that the eccentric motion is not hindered and does not damage the workpiece.
For spare parts and accessories, please use the 10-digit order number on the product nameplate.
Warranty service and repair of the power tool are carried out in accordance with the requirements and standards of the authorized territory of all countries in the
authorized service centers of Robert Bosch. WARNING! Use of non-original products is unsafe and may have negative consequences for health. Manufacture and distribution of non-original products is prosecuted under administrative and criminal law.
Ukraine
Bosch Service Center for Power Tools, Kyiv
02660 Kyiv
Tel.: +380 44 490 2407
Fax: +380 44 512 0591
E-Mail: pt-service@ua.bosch.com
www.bosch-professional.com/ua/uk
116|Ka3aKa
Addresses of regional warranty service centers are indicated in the national warranty card.
Utilization
Electric tools, accessories and packaging should be sorted for environmentally friendly recycling.

Do not dispose of electric tools into household waste!
Only for EC countries:
According to the European Directive 2012/19/EU on waste electrical and electronic equipment and its transposition into national law, used electric tools must be collected separately and handed in for environmentally friendly recycling.
Kazakh
Eurasian Economic Union (EAEU) member states
Instructions for use and safety: Read the instruction manual carefully before using the tool. Keep the manual for future reference. If you pass the tool on to third parties, always include the instruction manual. Follow the safety instructions and warnings. Refer to the relevant sections for maintenance and troubleshooting.
Safety instructions
The safety instructions are part of the tool. Read them carefully before first use (or before using the tool after a long period of inactivity). If you pass the tool on, always include the safety instructions. The safety instructions must be followed to avoid hazards.
Intended use
- For drilling in wood, metal, and plastic - For driving screws - For impact drilling in concrete, masonry, and stone
Technical data
The housings of the explosion-proof electric motor, the terminal box and the terminal box cover are made of cast iron.
Cooling fins
- For the terminal box and the cover of the terminal box
Service life and storage
- After the end of the service life, the product must be disposed of.
Storage
The product must be stored in a dry, clean, and ventilated area, protected from exposure to high temperatures and direct sunlight. During storage, the temperature must not exceed the limits specified in GOST 15150 (clause 1) for the storage conditions. The storage temperature range is from -50°C to +40°C. The relative humidity must not exceed 80%.
Transportation
During transportation, the product must be protected from mechanical damage and direct exposure to precipitation. It is not allowed to drop or throw the product during loading and unloading. The transportation conditions must comply with GOST 15150 (clause 5). The ambient temperature during transportation must be within the range from -50°C to +50°C. The relative humidity must not exceed 100%.
Safety instructions
General safety instructions for electrical equipment
WARNING
This electrical equipment
must be serviced only by qualified personnel.
Failure to follow the instructions may result in damage to the equipment or injury to personnel.
OKbHb3. BapnbK TeXnKaIbK Kayinci3dik
HcyckaynbkTapbHOpbHdAmay TOKtbH COfybHa, optKaHe/ Hemece aybp kapaKaTTaHynapfa anbIN Kenyi MymkiH.
BonaawkXymbicTap yinH kayinci3ik HycKaynbikTapbI Me h ckeptnenepei caTan KOnb1b13.
Kayinc3ik HcckaynbkTapbHa nadanaHbIfA 3neKtp KpaanataybHbH JekiEh KyaT aIaNbH 3neKtp KypandaBHa (xeniniK Kabeni MeHe) XeHe aKyyMnTOpdH KyaT aNbH 3neKtp KypandaBHa (xeniniK Kabeni K0K) KaTbcIb6ap.
XymbicophbiHbKayinci3diri
KymbicOpbHHTa3aXheXapbIKyCTaHbI3.LactaHaH XeHeKapaHfblKaanapda catciOKfHanap6onyblMmKiH.
3NeKtp KpybIYbcih XapblaTbIH ATMocpepa naDanaH6aHbI3, MbIcAbl, XaHaTbIH cyBbIKtbI, Ra3 Hemece WAn 6ap 6onFaHda.3NeKtp Kypal YWKbIHapabJxacaiDbI, an onap WAn Hemece 6ynapdbI XaHdbIpby MymkiH. Bananap MeH 6aKbInayMbInapDbI 3neKtp KypanbHa anbc yctah3. Andahynap 6akblay kofanybHa anbin Kenyi MymkIn. Ka6bik TyMbICTbIK KaFdaNapda, KOMMePcHnBik aMakTapda XHe KOFaMbIK KepIepDe, 3HnDbI XHe Kayinti eHidipictik paKTOpnap KOK KIIi 3neKtp TybHybI 6ap eHidipictik aMakTapbHa Dx MybIC iCtey yuH apHaHaH.
3nekt kayinci3iri
3NeKtp aHbIpnapbpo3eTKaFca cai 6oynbTnic. Ablpbl ewkaanewkauhdai Tepi3de e3reptneH3. Kepre kocbInfah 3NeKtp KypanapbIMeH aanTep aHbIpaBn HnDanaH6aHbI3. 3eRtinmeren aHbIpaNAP MeH caikec po3eTKanap 3neKtp tybIKTaIybiHbIH KayinIH TeMeHNTeJI. Ky6bIpyap,paHATOpnap,nnHTanap MeN cyblkbWtap CnAaTbIXePRe KocBInFaH 6etTepe THeH3. DeHeH3 Xepre KocBInFaH 6oNaCa KofapbI TOK cOy Kayini naJa 6oanaJI. 3NeKtp Kypanapdbj KaH6bpJa Hemece binfanbI Kopwayda naa dananhaB13.3NeKtp KypanbHa Kipreh Cy TOK COFy KayinIH KOFApbnataDbI. Ka6enbdi Tnicti 60nmaHan peTne naDanaH6aH3. Ka6enbdi 3eNktp KypanbH Tacy, KeTepy Hemece TOKtaH WbIFapy yWIn naDanaH6aH3. Ka6enbdi BCTbIKbIK, Mai, eTKip KbpInap XHe XbINkbIMaBb 6enweKeTpdeH anbc YcTaMaHb3. 3aKbIMdaJFaH Hemece 6bITbcIn KeTKeH Ka6enb Tok Cofy Kayinih KOfapblataDbI. 3NeKtp KypalbH cbiptTn naDanaHaNaDa cbiptKbI XaNap yuH cai Ka6enbdi naiDanaHbH3. CbPTTa naDanaHyra Jkapamdbi Ka6enbdi naiDanaHy TOKcoFy KayinIH TEmHeDi Erep3neKtp KypaIbH bINFaIbI Kepe naIaIaHy Kepek 60ncA, OHda KopraIbTH eWipy KypbInfbicB (RCD) apKbIbI KpFaNFAH TOK XeniciH naIaIaHbIb3. RCD naIaIaHy Tok cory KayinIH TeMeHdTeJI.
KekeKayincizik
3NeKtp KypanbI naDanaHyda 6aBn 60nbHb3, Xymbicblb13bl 6akblnaHb3 Xane npacatbl naDanaHbHb3.3NeKtp Kypanbl WapwaraH Ke3de Hemece eciptki, ankorolb Hemece dapi acep etken Ke3ne naDanaHb3.3NeKtp Kypanbln naDanaHy Ke3iHe aHcbIdbk aybip JKeke japaKaTTaHyf aInbN Kenyi MymkiH. KeKopraTbH Xa6dbIKTapbl nainanahBhl3. 0paBIM K03 KopraHbcih TaftbHl3. HaMaCKacbl, cbipFaH6aHTbH Kayinci3ik aR KIMdepi, IeM HeMece cty KopfaHbITapbl CnAaKbTI KOpfaBllXa6dbkTApbl
TnicjKaFaDnapDa KOnJaHbIn JeKe KaPaKaTTaHynapDbI KEmeHTei.
Ke3neCOKicke Kocbinydbn anDbn any. Tok Ke3iHe XeHe/Hemec6BaTapeJnap XHHaHbHa KocydaH anDbn, KypanDbk KeTepy Hemece TacydAn dbn Eipriu wik Kynde 6onybHa Ke3Ketki3i3.3NeKtp KypaBnCayCaKtBtEwipriuKE KoBnTacy Hemece KockblbKocybl3JeKTP KypaBnTOKKa KOCy cTci3 OKFaFA anBn Kenyi MYMkh.
3NeKtp KypaBbH KocyDAn anDbH KeRhen pettey cbHaCbH HeMece KINTI anBn KOBbHbI3.3NeKtp KypaBbHbH aHanaTbH 6eniriHde KaFan H KINT HeMece cbHa JKeke KapakatHa fA anbN Kenyi MymKIn.
Ken kyw icTeTneH3. 0pdaBIM Tnicti TaHHbW neH ten canMaKaBtBnIKtBlc CaTaHbI3. Bykytinmeren KaFdaNapda 3neKtp KpaanBh6aKbnaHyh caKaTaNbl.
Thicti KIM KINH3. Boc KIM MeH aWekeeNepdi KIMMeH3. WAsbHb3 6en KIMdEepj XbInXbImaBb 6eWekTepeAnbcYctAHy3. Boc KIMdep, aWekeeNep Hemece y3bH WAs WxblXbImaBb 6eWekTeapApKbIb TaTbNybl MyMkiH.
ErepwHbIrapbnKHHayXa6bIbIkapbiHaKocy KpybIbIbApbl6epnireh 60nca,Onda onap Kocynbl 6onybHa Xane Tnicti pette KondahybHa Ke3 xetki3iH. WAn HHHaybI naJanaHy wHaFa 6aJIaNaHbIcTb 3NHNapDbKeMeTeJI.
AcananTapbI Kni nai danahnBn Jkacb6inreHHen coH macaipan KeTne Kayinc3ik npHHunTePH eneme OtbIPMaHb3. A6aCb3 apeket cekyHd iwiHde aybip JkapakatHaYfa anbIn KenyIMMKIH.
HA3AP AYDAPbIbI3! 3heprnmeH k6dbkTaydbH TObIKaH He XeKeene ToKtaTbInybe Hemece 3heprnmeH k6dbkTaydbI 6ackapy ti36erHH aKaynahybCaandapbIHah 3neKtp KpaIbIHbH JxmbcIBHa Kipic NaDa 6onFaH XaFdaJa, 6yattanmaFAHbIFbHa Ke3 Xetkiin (6onFa H XaFdaJa) 6apBn, axbipatkbITb Bbl. (Owipy) KaNbHa KeTIpii3. Keniik awAHb Po3etKaadn IbIfapbHbI3 Hemece anbl - canMaBl aKKMyJrTOpblA xkbipaTbHbI3. Ocbpeket apkbbl 6akblaHaBn KaTa icke Kocblnydbn anbln anacbl.
Atanmbi naiDanaHy XehHderi HcyaNkca CnKec 6iniKti Kbi3MeTKePnep KypaMbHa 3neKTP KpaBn peTey, MOHTaXdAy, KOJaHaBcKa eHri3y XHe OFaH Kb3MeT KepeTy epeKETepIme TaHbC Tyflanap KaTaBl.
3JnKtp KypaIbIme HxMblc icTeyre 18 Xacka tonFaH, TexHnKaIbIK CnAATTaMaHbI, naDanaHy XeHiHderi HcyKayIbIbI JxHe Kayinci3ik epexenepiH Okbin IbIKKaH TynFaNapF pyKcat etinei.
IeHe,ce3im HeMeCe aKbIn-0i KaBineTepi WeKeTeyni HemeCe TaXipn6eci MeH 6inimi XeKtinikci3 adamap OanpdbH KAYINC3di rYiw H KAYaANTb TYFaHBH 6akblaybHa 6oImaca HeMeCe 3neKtp KypabH naiDanaHy 6oBbHwa Hyckay anMaFaH 6oNca, 6yIMDbn naDanaHbaybTnic.
KypanbIa cakon kkyTeMeH3. KymbcIbIb3 ywIn XapaMbI 3neKTP KypalbI H naJaHaHbIb3. KapaMdbI 3neKTP KypalbIMeH KepeKTi Kymblc aHaMaFbIHda Dpybc api ceHimdi Kymblc icTeic3.
Axbipatkbbldypbicemec3neKtp KypanbH naDanaan6aHbI. Kocyfa Hemece eWipyre 60nMaHTbH 3neKtp KypanblKayinti 60bn, OHbl KeHdey KaKet 60naBbl.
Ka6dbikapdbpeTey,6enuekTepiH anMaCTbipy HEmec3neKtp KypanadpbH KOIMaFA KOIO anDbHda, aHaHb KyAT Ke3iHe AKBipAtpHB13 KHe/Hemec e AKKyMnIaTobpAl anMaBc-CanMaBc 60nc, OHb 3neKtp KypabHahAnbInTacTaHb3. Byn caTbIK apeketi 3neKtp KypandbH 6aKaaycb3 KocblNyBaHa Konl 6epMeHJI.
Painanahbimaih3neKtp Kypanapdb6anapan kOJIxKETNEHJkaFARoBihI3.Ocbnapdb 6inmeTIN HeMece Ocbl eckepTnepej0kBImaHa aamdpfa 6yn Kypandbi nainanaHyfXon 6epmeh3. TaXipi6eci3 aanMdpKoBnHa 3neKtp KypanapbKayinTi 6onaBl.
3NeKtp KypanapbHm Meh Kepek-JkapaTapbH ykbintbI KYTHi3. Ko3FaMnAbI 6eWKeTepiN Kepepric3 icteyine Xane Kentenin KaMabyHa, 6eWKeTepiN aKaycbI3 Hemece 3akBIMdAmMaFah 6onybHa, 3NeKtp KypanbIH, 3AkBIMdAmMaFahbHa K03 JeTKi3iH3. 3aKbIMdAnFah 6eWKeTepi 6ap KypanDbI naDanaHyDAn anDbH XeHDeH3. 3NeKtp KypanapbHbIH, dYpbIC KytINMeyi Ka3aTaBIM OKfAanapFa ce6en 6ObnXataDbI.
Keckiw acnantapdbI etkip khe Ta3a Kyide caKaTah3. Dpybc KytireH XaHe Keckiw KneKTepi etkip Keckiw acnantap a3 KeNTenin, Kecinetih 6eKe OHa8 6afblTanaDbI.
3neKtp KypaIbH, Xa6dbIKTapIbI, anMaIbI-caMnbl acnantapblXane T.6.0cbI HcyKaaynapfa ca naiDaIaNbIbI3. CohIMeH Kymbic 7apTTapBImeOpbIHdAHTbH apKeTepre Ha3ap ayapbIbI3.3neKtp KypaIaIbpH aPhaIMaFaH KymbICTapda naJaIaNahy kayinti.
KontyTKanap MeH KapMay 6eTepiH KypfKa, Ta3a XHe MaM MeH NaCTAH Ta3a YCTAh3. CbipfHaK KonTyTKanap MeH KapMay 6eTepi KyTINmReH XaFaIaNapda ceHIMdi KOJaHy MeH 6akblayfa Kon 6epMeNdi.
This electric current is necessary for the proper functioning of the device. This electric current must be maintained without interruption.
Electrical safety: To prevent electric shock, do not allow water to enter the electrical enclosure. The safety devices must be checked regularly. Cable materials
must be suitable. Metal parts must be grounded.
Do not use damaged or worn-out protective materials. The shield must be free of dents and cracks. If the shield has cracks, microcracks, or damage (whether from impact or from the welding process), it must be replaced. The shield should only be used for protection against splashes and molten metal splatter. Electrical safety requirements must be strictly observed. The turbine housing and metal parts can conduct electricity. When using electrical equipment, it must be properly grounded. Electrical equipment must be operated with two hands. Do not touch electrical equipment with wet hands. Be careful. If the equipment is damaged or has been dropped, do not use it and have it repaired.
Safety instructions

Before using the equipment, read all instructions. Before using the equipment, read all instructions carefully. Keep these instructions for future reference.
Keep these instructions.
Refer to the diagrams at the beginning of the instructions.
Intended use
This electrical appliance is intended for cutting wood, plastic, and laminated panels.
Only use electrical appliances with electronic speed control.
Ventilation slots
The appliance has ventilation slots. Do not cover them.
(1) Speed control dial (2) Trigger (3) Lock-on button (4) Lock-off button (5) Auxiliary handle (6) Auxiliary handle mounting hole (7) Handle (8) Base plate
(9) Blade guard (10) Blade mounting hole (11) Blade (12) Safety guard (13) Mounting hole
(14) Parallel guide (15) Dust extraction adapter. Use only standard accessories recommended by the manufacturer. Non-standard accessories may cause injury.
Technical data
| 3Kcцentprnkткerticteyiiu GET 75-150 GET 55-125 | |||
| Оним Немipi | 3601 B57 1.. 3601 B57 0.. | ||
| Тербенихелемин тандay денгeleri ● ● | |||
| Кесимд Куаты пайдалиу Вt 750 550 | |||
| Бос icтey ai hyалымдар саны n0 | MH-1 | 3300 - 7300 3300 - 7800 | |
| Бос ai hyалдау bier tepбенис саны мин | -1 | 6600 - 14600 6600 - 15600 | |
| Терicteу тэрелкесi ai hyалыmдар саны дөрекi tericteудe | MH-1 | 290 - 640 200 - 480 | |
| ТербениkoHTypынын диаметри MM 4,5 3,5 | |||
| Терicteу тэрелкесiinн диаметri MM 150 125 | |||
| Салmarы EPTA-Procedure 01:2014 Кухатын саï | кr 2,6 2,4 | ||
| Сактыксынсын� | 回/II /II | 回 | |
The tool is designed for 230 V AC. Do not use the tool with other voltages.
| GET 75-150 GET 55-125 | ||
| 3601 B57 1.. 3601 B57 0.. | ||
| EN 62841-2-4 60布局Hua ecentenre Huyin 3Miccncsbcn HkcpctkiuTepi. | ||
| 3NeKtp KypalbHn AmPiHTya 60布局Hua ecentenre Huyin DeHre i adette Kelecei de BoaIbI | ||
| ДыбICTbK KbICbIM DeHrei | ДБ(A) | 85 86 |
| ДыбICTbK Kyat DeHrei | ДБ(A) | 96 97 |
| Кдэсizdiri | ДБ | 3 3 |
| Кунak KoprAnbcsbH TarbHbI3! | ||
| Жалпдірін мәнdepi a, (уш 6afblttbH BeKTopbI KocbHbIcBi) XeHe Kdənci3di, EN 62841-2-4 60布局Hua ecentenre: | ||
| Axxapnay: kanyntb Jxmbic pexnmi | ||
| ah | M/c2 | 5,5 5,5 |
| K | M/c2 | 1,5 1,5 |
| Axxapnay:"Typ60" Jxmbic pexnmi | ||
| ah | M/c2 | 6,5 6,0 |
| K | M/c2 | 1,5 1,5 |
| Жыntbipaty | ||
| ah | M/c2 | 7,0 7,5 |
| K | M/c2 | 1,5 1,5 |
| Осы hyckaynapda KeTTipinre Hdpin DeHre i XeHe Shybl эмCSSCByHn Kcpctkiiiz 3anDy eonwe y adici bohHna элшeHre Nxe OlanDy anektp KypalDapbH bip-bipimeH caIbCTbpy Ushn naɪdānhyfa 6oJadbl. OlanMeH alDhFbI Tep6eny XeHe Shy shyfapdy bafanayfa 6oJadbl. | Берінг Ter66ny DeHre i MeH u7bIn 7bIfapy Məni 3neKtp KypalbHn Heri3ri JxmbicTapbI yuHn 6bpInreH. Erep 3neKtp Kypal backa JxmbicTap yuHn 6baka anmaJIb-camMaJIb acnantap MeHn HeMece JeTeIMCI 3Kytymen naɪdaNaHbIca dipindeY deHre i MeH u7bIn 7bIfapy Məndepi 3eRepei. Byn | |
Before using the device, read the instructions carefully.
This instruction manual contains important safety and operating instructions for the device. Keep this instruction manual for future reference.
To ensure safe operation, follow the safety instructions below: e.g., do not touch the device with wet hands, do not use it near water, do not expose it to rain or moisture.
Warning
Before cleaning, unplug the device from the power outlet.
Adjusting the display
To adjust the display, press the adjustment button (11).
The display adjustment button (11) can be used to adjust the display brightness, contrast, etc.
Press the adjustment button (11) repeatedly until the display is clear and stable.
The display (8) is located below the adjustment button (11).
Optimal display settings can be achieved by adjusting the buttons (8) with the adjustment button (11).
Adjusting the display
The device can be adjusted using the adjustment button on the back of the device.
Test tape and Kymcak: The test procedure and the test object are described, the purpose is to test the tape. -Test tape Kymcak: For all test tubes, the sample is placed. -Test tape Katy: For the test object, the test procedure is used.
Test procedure activation
Instruction: Close the test tape (11) immediately after activation.
The test result or the control result is evaluated. (10) The full control strip is the test
Tape (11) is removed. When the test tape
(11) is placed in the holder.
Instruction: The cartridges are for 150 tests and 125 tests. The tests are only for the specified electrical devices.
Instruction: The test tape and the control tape are inserted into the test tape holder without touching.
Instruction: After closing the test tape, only use the second service opening for the Bosch electrical device.
Clean the surfaces and connectors
It is possible that some materials, minerals and metals may be harmful to health. When cleaning, use protective gloves and safety glasses to avoid chemical reactions and/or toxic fumes.
Some cleaning agents (e.g., alcohol, alcohol-based cleaners, or alcohol with non-ionic surfactants, or alcohol with corrosion inhibitors) may be used only through the manufacturer's instructions.
Do not use the material if it is damaged or scratched. Do not use sharp objects. Do not use the device if the power cord is damaged.
Do not use the material if it is damaged or scratched.
The device is protected against dust and water. The device is suitable for use.
The electric crane control panel is powered by electricity. The electric crane is designed for operation; the cable must be grounded.
Wire brushes
Connect the grounding wire (grounding conductor) to the grounding terminal (4) of the electric crane.
Note: The grounding conductor (3) is made of insulating material. If the insulating wire (cable) is damaged, during operation the crane may become live, and there is a risk of electric shock.
The transformer must be connected to the power supply. For safety, you must install a transformer for the control circuit and lighting.
Cable gland
The cable gland (5) must be tightened with a wrench to the optimal torque, especially when the cable is subjected to vibration.
Insert the cable gland (5) into the hole on the right or left side of the housing (13).
Before connecting the electric cable, make sure the power is off. The cable gland (5) should be tightened with a wrench; they are supplied with the electric cable. This connection must be done by a qualified electrician.
Ground terminal
The ground terminal (12) is used to connect the grounding conductor to the protective earth. Connect the ground wire (12) to the electric cable. To install the ground terminal (12), pull it out by pulling the tab.
Grounding
Grounding connection
Danger! High voltage! The electric crane must be connected to a 230 V AC power supply. Do not connect to a 220 V DC supply.
The control buttons of the cybernetic device are located on the front panel.
Press the control button (2) to turn on the electric crane.
Press the control button (2) to turn off the electric crane.
Selecting the vibration mode
The vibration mode selector (1) allows you to set the desired vibration mode.
1-2 low vibration mode, 3-4 medium vibration mode, 5-6 high vibration mode
The number of vibration modes may vary depending on the material being processed.
The electronic control unit automatically determines the vibration mode during operation and adjusts it accordingly.
When using the electric crane, it is necessary to add 3 minutes of rest time to the vibration mode for safe operation.
Selecting the cleaning mode
There are two types of cleaning modes: manual and automatic. For manual cleaning, turn the selector (14) to the left; for automatic cleaning, turn the selector (14) to the right and press the button.
Do not switch the mode during operation!
Warning: read carefully.
Manual cleaning mode (manual control)
Byj Kymblc Typi Jxofapbl WeiImMeH 60bn, 6yblp ce3imci3 6eTepdi Ehdeye Re Xaapan KaBnBipatyfa YcblnaBl. Axapnay TapeIkeCIN Mx6ypen yctay apKbIblkxcuENTPIK Xahe potaunlBkapeket 6bpEn 60bn caKTanabl.
Dan terictey naaanahy typi (6oc xypic)
Byj Kymblc Typi ceimTan 6eTepdi eHneTre ic XblbtpaYra apnHa. Akapay TapeKecinH boc kypici apkblb cayra baNaHbCTb potaunnbIkepeket 6ipde caKaTanabH EKcUeHTpNik KypicneH xetinei. Bacyda e3repy apkblb weuIMDi KocbIMwa Meuopepey MmKiH.
PaiDanany HycKaynapbi
BapnbKxmbCTapdaH andbH 3neKtp KypaibHbH Xeiniik aibpbiH po3eTkaah HbIFapbiHbI3. 3NeKtp KypalbH Xepre KOIOaH anDbH OHbIH TOKtaybH KyTih3. 3NeKtp KypalbH XaHa KoMaHbI3. Terictey TApelkeci H3aK YaKaBITi DeOpMaUHaLyHybl MyMkiH. 3NeKtp Kypanbl TypaKbl naHdanaHyfa apHaMaFaH. OHbl, MbCaIbl, KbickblH HeMece Bepctakke 6eKiTy MymkiH emec.
AimakTapDbI tericTey
3NeKtp KypaBbIN KocBbIN TonBbIK axapnay 6etIH eHdeneTIN Jepre KoBbIN KyIeN H KaTTbI 6acBbIN DaBbIHdAmy YcTIHeH XblNkBbITbHbI3.
Keiipy DeHrei XeH TericTeRe HcT canacb tericTey DnCKIH TaHay, TaHdAnFaH Tep6EnyNep cHbXHe 6acy Kuyi apKblpeTenei.
Tek minci3 terictey dinckimeh faHa dypbc tericteye, con apkblbl anektp KpaIbH cakTayfa 60ana.
Akapnay DnckinH Kbi3MeT Mep3iMH y3apTy yuih 6ipkanbntb6acyra TaanbHbHb3.
Te KaTb 6acy 3eKtp KypaB MeH TericTey NnckinH Te3 To3ybH TydbipaBl.
Metann eHderen terictey dncKin backa MaTePnAnap yuHn naDanaH6aHb3.
Tek TynHcycka Bosch akapnaFbI W KepeK-JkapaKTapbH naJdaHaHbHb3.
Iipi rericrey
IpiTnyipwikntiiktik akapnay DnckiciH opHaTBbI3.
Electric current can cause burns, so follow the safety instructions carefully and use the appropriate materials.
Before starting work
Before starting work, read the operating instructions.
It is possible to reduce the required amount of work by using the required amount of work, if the eccentric is used.
When using electric current, be careful not to touch the wires. To avoid electric shock, disconnect the electric current. Use the device only after reading the instructions.
Cleaning
For cleaning, remove the plug (3) and clean the filter without damaging it and without closing the opening.
121 Kazakh
If the filters are dirty or clogged, they can be cleaned with a soft brush or sponge (cloth) using a vacuum cleaner.
Before cleaning, reduce the required amount (first 1-2) and remove the cover.
The appliance must be unplugged before cleaning. After cleaning, do not immerse the appliance in water or any other liquid.
If cleaning is not possible, the appliance may be closed. Clean the appliance with a dry cloth.
Do not use sharp objects or cleaning agents that may damage the appliance. Clean the appliance with a soft cloth or sponge, do not use abrasive materials.
For further use, remove the plug (4) and clean the appliance with a dry cloth.
Technical data and service
KbImTe KepCeTy XKeH e Ta3anay
BapnbKxmbicTapdAndbH 3neKtp KypanbHbH Xeninik aibpbH po3eKaadn bIfapbHb13. Kakcbi api cehimdi kymbic ictey yuih 3neKtp Kypanbl MeH KeIeTkiw TecikTI Ta3a YCTahbl.
Erep6aHaNaHbCbIMbH aImactbpyKaKet 6oNca, Kayinci3nIKTHemHeinyIe KOn 6epMey yuHIOcbXyMbIC TeBosch KOMnHaHcB HeMece Bosch 3NeKtp KypaJapbl 6oBuHwa eKeIeTTi KbI3MeT Kepcety optaIbIKTapbHda Kypri3inyTnic.
Ohimdepoi onapbih CaKtbfbi KaMTamacbi3 etetih, ehimdepre atmocpepaibk kaybih-uaaibHHbIH TIOHHe KHe ackbH TEMepaTypa Ke3epiH (TempepaTypaHbIH yFbI e3repiciH), coBH iWIIHne Kyh caynenepiH acep etyHie KoBepMeTIH dyKeHNepde, bemdepe (ceKunnapda), naBnboHAp MeH Knockinepe caTyfa 60ana.
Catyubi (eHdpuyi) catbIn anybifa eHimdepTypabkaxetti Xehe uhaia knapaTb6epin, hHimdepTiNticiHwTe TaHday MmKihirin KamTaMaCb3 etYe mHDetTI.0HIMdepTypaBIAknapaMnDeTTypTe Tizimi PecefepaunacbHbH 3aHaMaCbIme BEnrineReHMniMeTepdi KaMybTuic.
ErepTybHyybCatbIn anaTbH OHIMdep Ankeaah naDanaHbIHaH Hemece eHIMepde akaynbk (akaynbkTap) KoiBnFaH 6oNa, TybHyybIf 6yN TypaIbI aknapar 6epinyi Tnic.
ThHmDepn caty npouecinH aacbHda TEmeHderi Kayinc3dk TaanTapbiOpbHdanyblTnic:
-Catyu bI cTbIn anyu bIaYbMbHbIN hPmAbIK aTaybl, opHaIacKaH Jepi (MeKeHkaB) KHe KymbcpeKnMI typabI mAmimetep bepyre mIdetTI;
-Cayda6emepiHderiEHIMdepincbHamaIapcI catbn anybifa 6yibmnapdabfka3a6anapmeH TaHcyfa MymkiNik bepyi kHe Bn3yAnbTeKcepicten BaKa 6yibmnapdbicke KocbnybHa aeKeletin, catbn anybnap 036etihwe opbHdaTbH eKahdai apekeTepre kon 6epmeyi Tnic; -CatybIocb6yHbIMapdbHbENrIneHReHtanAnTapFa cKecTirIHpactamcB,cepTHnHKaTTapdbHHeMece cKecTKxEHINderiMaNIMdEmenepDb6ap60nybI typabaknapatbCatbnanybifa6bpeMIndTt; -ⅡeHTnФKauNlBk CnTtApbl JOK (XOFaIFaH), KapaMdbInbIK Mep3iMi EtIN KeTKeH, 6y3bIy6Benrinepi 6ap XHe NaIaNanHy BoHbHa HcayAynfBi (KITANacbl), MINETTI cAnKeCTIK cepTHnKAtb HeMece cAnKeCTIK 6enricj KO hIMdePdI CaTyfa TbMbim CaNbHaBl.
TytbHybfa Kbi3MeT Kepcety XaHe naJaAnaHy Kehectepi
Kb3MET KepcTeOpTaBfBtHmDiJxHEnyKeHNeOFAh TEXnKaIbIK Kb3MET KepcTe, COHaai-AK KocanKi
6eIweKTeP TypAlb CypaKTapra KAYAN Bepei. Kypamdac 6eIweKTeP BoBInHa Keckin MeKocalkb6eIweKTeP TypAlb MAnimetTep TEmHeDi MEKeHkai BoBbHsa KOJKeTImi: www.bosch-pt.com
Bosch KbI3MeTtIK KeHec 6epy To6bl 6i3in EHHmep JxHe onapdbIH KepeK-KapaKTapbl Typanbl CypaKTbIp bI3ra Xayan 6epepi.
CypakTap KOIO XaHe Kocalkb6eWKeTepre Tancbipbc 6epy Ke3Hne MiHdETTI TypE eHIMHHfHpMaIbIK TaKtaaacbHaBf10 TaHbAeHm Hemipih 6epiH3.
HniPyiTiIaIITapbMeH HopMaIapbIHbIH CaKaTJyBIMe 3nEkp KypabH XeHDey XHe Keinii Kbi3Met KepcTeY 6apblK MemKeETep ayMaftbHaTeK "Poepr Boi" HpMaIbIK HeMece ABTopn3aunHaNfAH Kbi3Met KepcTeY opTaJIbKTapbHdaOpbHdAnaDb. ECKETpy! 3aHcb3KoJlmEH ekEnIhRe HEmIDepPi naiDaIaNay KayInTI, DeHCaybIFbHb3Fa 3nH KeNTipyi MyMKH. HImIDepi 3aHcb3Kacay XHe tapaty EkIMwiik XHe KbIMbICTbIK Taptin 60bHua 3aMn KyaIaHaHa.
Kazakhstan
The body authorized to receive complaints about the use of goods:
"Robert Bosch" KUJC
Almaty
Republic of Kazakhstan, 050012
Muratbaev K., 180 y
"Teremets" 60.7 cable
Tel.: +7 (727) 331 31 00
Fax: +7 (727) 233 07 87
E-Mail: ptka@bosch.com
You can obtain more information about service organizations and collection points, as well as about the device itself, on the website: www.bosch-professional.kz
If the device is damaged due to improper use, it must be repaired by a specialist.
In case of damage caused by non-compliance with the requirements, the following may occur:
- mechanical damage; - signs of breakage of plastic parts due to overload; - signs of impact, impact of foreign objects, or falling; - signs of damage to electrical wires or cables; - signs of unauthorized opening.
Do not use the device in the following cases:
Do not use the device without the protective cover; - do not use the device without the protective cover on the electrical outlet.
To reduce the risk of electric shock, the following precautions must be taken when using the device:
-Use a residual current device (RCD) with a rated residual current of 30 mA or less; - use a socket outlet that is earthed, and use a plug that is suitable for the socket, and ensure that the device is connected to a socket that is properly earthed; - do not use the device with a damaged cord or plug. (If the cord or plug is damaged, it must be replaced by the manufacturer, its service agent, or similarly qualified persons in order to avoid a hazard.)
Cleaning and maintenance
Before cleaning or maintenance, disconnect the device from the power supply.

Do not immerse the device in water!
For EU countries only:
Electrical and electronic equipment waste must be disposed of separately, in accordance with Directive 2012/19/EU and national regulations. Do not dispose of electrical equipment with household waste.
Safety instructions
Power tool service
Strada Horia Macelariu Nr. 30-34, sector 1
013937 Bucharest
Information about changing the plug
Note: Replace the plug only if it is damaged.
N3dbpnaTe NCTa Kypka, pecn. nonnpaoto nataHO. Pa3BnTE DOKpa BnHTa (10) n 3BaTe UINFOBaunu DNCK
(11).NCTaBete HOBnIuHΦoBaIINCK (11)NOTHOBO HA-BNITe N3ATERHETe BHTa Ha pbka.
Yka3aHHe: BodaunTe ca pa3nUnn 3a 0150 noJnojKnn
0125 noJIOKKn. IIOJNOKKe Me ORa Da Ce MOHTnpat cAmOBbpyx CbOTBETHO NOXODAUIE NkTPOHCTpMeHT.
Yka3aHHe: PnnoocTabraHe Ha WlnfoBaunqI NCK BHNMaBaJIte 3b6NTE Ha BOdaqA da nonaHaT B KaHaJIte Ha DnCKa.
Yka3aHne: Onycka Ce 3amHaTa Ha HoceMaTa onopa Ha WnfoBaIg DaCe N3BbPbBa CaMo BOTOp3npaH cepBn3 Za eNkTPOHCTpyMeHTn Ha Bo.
Cnctema 3a npaxoynaBHe
PpaxObe,OTdienaIc npn 6pa6oTaHaTo Ha MaTePnaH KAto CbDbpKaaOnoBO 60N, HAKON BnOBe DbpBecHa, MHepaH N MetaH Morat Da 6bDat onacn 3a 3dpaBeto. KOtAKTbTO KOKATA HIN BnWBAHeTO Ha TAKBa PpaxObe Moar TaPipeHN3BnKAT aeprHuN peAkunu H/nn 3abonlaBaHnHa dNXaTeHnTe PbTHUa Ha pa6oTeuN C eEnkTpOHnHCTpyMeHTa Hn HAmpaui Ce Habn3o nua.
OnpeeneHnpaxOBe,Hanp.OTdienaIte ce npn o6paobotBaHe h6yK ndb6,ce cHTAT 3a KaHcpeoreHHo,OCObeHO B KOMbHaunC XHMKaHn 3a TpeTnPahe Ha DpbBecnHa (XpoMat,KOHcepBaHTnN..).DOnycka Ce o6paobotBaHeto Ha cbDbPkaaun a36ct MaTepann Camo OT cbOTBeTHno obyuHKnBaNPhu npn Hnua.
-ПО ВБЗМоЖНСТИЗПОЛЗВАЕ ПОДХОДЯЗа 3a 06pa6OTBAHIN MATEРДAN CNTEMA 3a npaxOунавHe. - OcnrypBaIe do6po npOBetpBaHe Ha pa60THOTo MRCTO. -ПpenopbUba ce n3noI3BaHTo Ha dnxATEHa Macka cФнTbp OT knac P2.
CnabaiTe BaHINHTe BbB Baata CTpaHa 3aKoHOBn pa3npope6n, BANHN npn 6pa6oTbaHe Ha CbOTBeTHne MaTePnaHn.
136HBAHTe HATpynBaHe Ha npax Ha pa60THOTMOCTO.
PpaxbT MoKe IeCHO Da ce caMOBb3IIaMeHH.
3a ⅢHΦoBaHe ce npenopbBa eNEKtpOHnCTpyMeHT Ta Ce CbBpKe KbM npaxocMykaKa. ENEKtpOHnCTpyMeHTbT HMa CO6CTBeH BeHTnAToP, npaxoyNoBHTeHH Top6n He MoRat Da ce H3NON3BAT.
BbHnHa cncTeMa 3a npaxoynaBHe
Connect the vacuum hose (accessory) to the tube (3) or directly to the opening (4) on the power tool.
Note: The tube (3) is made of antistatic material. When using an antistatic hose (not included in the standard accessories), electrostatic charging of the power tool is prevented, which could otherwise occur in certain situations.
When working without dust extraction (e.g., for drilling), you can remove the tube (3). To do this, press the release button (15) and pull the tube (3) back off the power tool.
The dust extraction system used must be suitable for working with processed materials.
If, during work, particularly harmful dust or carcinogenic dust is released, use a specialized dust extraction system.
Auxiliary handle
The auxiliary handle (5) increases comfort when working and allows for optimal distribution of the applied force, especially during intensive sanding.
Slide the auxiliary handle (5) as needed over the clamping neck (13) and secure it.
For better control of the power tool when sanding, the auxiliary handle (5) can be positioned at the front. The auxiliary handle (5) can be adjusted to the required angle, which could damage the sanding surface and the workpiece.
Protection against kickback
The kickback protection (12) protects the sander and the disc when sanding in the area of the workpiece. The kickback protection (12) is located on the power tool. To remove the kickback protection (12), pull it in the direction of the arrow.
Working with the power tool
Starting operation
Connect to the mains voltage! The mains voltage must match the data on the rating plate of the power tool. Devices marked with 230 V can also be connected to 220 V.
Make sure you can activate the trigger switch without releasing the handle.
To switch on the power tool, press the trigger switch (2) forward.
To switch off the power tool, press the trigger switch (2) backward.
Adjusting the vibration frequency
With the adjustment wheel (1) you can adjust the vibration frequency continuously during operation.
1-2: low vibration frequency
134|Bulgarian
3-4: medium vibration frequency
5-6: high vibration frequency
The optimal vibration frequency depends on the material being processed and the working conditions and is determined by trial.
The electronic control module keeps the vibration frequency constant under load, ensuring consistent productivity.
After prolonged work at low vibration frequency, cool down the power tool by letting it run at idle for 3 minutes at maximum vibration frequency.
Selecting the material removal intensity
You can choose between two operating modes with different material removal intensities. For coarse sanding, select the operating mode (14) forward, and for fine sanding, select the operating mode (14) backward until it clicks into place.
Read the operating instructions before sanding! There is a danger of injury.
Rough sanding (hard sanding pad)
This operating mode with intensive material removal is used for processing not perfectly flat surfaces, such as for rough corrections. Thanks to the hard transmission of movement to the sanding plate, a constant eccentric and rotary movement is ensured.
Fine sanding mode (free movement)
This operating mode is used for processing soft surfaces, as well as for fine corrections. Thanks to the movement of the sanding plate in free motion, the rotation speed depends on the contact pressure, while the eccentric movement remains constant. You can easily control the material removal by varying the contact pressure.
Operating instructions
Before performing any work on the power tool, disconnect it from the mains. Before leaving the power tool, switch off the motor and let it stop. Do not place the power tool on the sanding disc. The sanding disc can deform due to heat. The power tool is suitable for stationary use, e.g., it should not be clamped in a vice or mounted permanently on a workbench.
Sanding flat surfaces
Switch on the power tool, place it with the sanding surface on the workpiece and apply moderate pressure on the surface to be machined.
The removal rate and surface quality are determined mainly by the choice of sandpaper, the preset oscillation frequency and the contact pressure.
The sandpaper itself ensures good dust extraction and protects the power tool from premature wear.
During work, press the power tool evenly to increase the service life of the sandpaper.
Excessive contact pressure does not increase the removal rate, but only leads to faster wear of the sandpaper and the power tool.
Do not use sandpaper that has been used for metal processing for sanding wood or similar materials.
Use only original Bosch sandpaper.
Instructions for use
Apply the sheet of sandpaper with medium grit.
Electric tools are very light, so they can work at higher vibration frequency, which ensures more intensive removal of material.
Sanding
Apply the sheet of sandpaper with fine grit.
By adjusting the sanding plate pressure, e.g. by adjusting the selected vibration frequency, you can limit the vibration frequency of the tool, while the total amplitude remains constant.
Guide the power tool over the workpiece surface in constant circular or back-and-forth movements. Be careful not to tilt it, so as not to damage the workpiece surface, e.g. by gouging.
After finishing work, switch off the power tool.
Polishing
Note: With polishing you can achieve the required gloss (3), which is easier to work with and does not damage the polished part.
For polishing of painted surfaces or plastic (e.g. acrylic glass), the power tool can be fitted with a polishing accessory, such as a polishing pad, polishing sponge or polishing cloth (not included in the scope of delivery).
When polishing with low vibration frequency (levels 1-2), avoid overheating of the polished surface.
Apply the polishing paste to a smaller surface area when you intend to polish. Spread the polishing paste using a suitable polishing tool with crosswise movements and apply light pressure in circular movements with moderate pressure.
Do not allow the polishing paste to dry on the polished surface, as this may damage it. Do not expose the polished surface to direct sunlight.
To ensure good results when polishing, regularly clean the polishing accessories. Clean the polishing accessories with a mild detergent and warm water, do not use solvents.
Power tools are designed to operate over a long period of time with minimal maintenance. Continuous satisfactory operation depends upon proper tool care and regular cleaning.
Maintenance and service
Maintenance and cleaning
Before any work on the power tool itself, remove the mains plug. For safe and proper working, always keep the power tool and the ventilation slots clean.
If the replacement of the supply cord is necessary, this has to be done by Bosch or an authorized customer service agent for Bosch power tools in order to avoid a safety hazard.
After-sales service and application service
Our after-sales service responds to your questions concerning maintenance and repair of your product as well as spare parts. Exploded views and information on spare parts can be found under: www.bosch-pt.com
The Bosch application service team will be happy to help you with any questions regarding our products and their accessories.
In all correspondence and spare parts orders, please always include the 10-digit article number given on the type plate of the product.
Bulgaria
Robert Bosch SRL
Service sculelectric
Strada Horia Macelariu Nr. 30-34, sector 1
013937 Bucuresti, Romania
Tel.: +359(0)700 13 667 (Bulgarian)
Fax: +40 212 331 313
Email: BoschServiceCenterBG@ro.bosch.com
www.bosch-pt.com/bg/bg/
Disposal
Power tools, accessories and packaging should be sorted for environmental-friendly recycling. Please dispose of them properly.

Do not dispose of power tools into household waste!
Only for EU countries:
According to the European Directive 2012/19/EU and its implementation into national law, power tools that are no longer usable must be collected separately and disposed of in an environmentally correct manner.
Macedonian
Safety Notes
General Power Tool Safety Warnings
WARNING
Read all safety warnings, instructions, illustrations and specifications provided with this power tool.
Failure to follow all instructions listed below may result in electric shock, fire and/or serious injury.
Save all warnings and instructions for future reference.
The power tool is intended for cutting metal and is equipped with a safety switch. It can be used with a power cord (corded) or with a battery (cordless).
Work area safety
Keep the work area clean and well lit. Cluttered or dark areas can lead to accidents. Do not operate power tools in explosive atmospheres, such as in the presence of flammable liquids, gases, or dust. Power tools create sparks that may ignite the dust or fumes. Keep children and bystanders away while operating a power tool. Distractions can cause you to lose control.
Electrical safety
The power tool plug must match the outlet. Never modify the plug in any way. Do not use any adapter plugs with earthed (grounded) power tools. Unmodified plugs and matching outlets will reduce risk of electric shock. Avoid body contact with earthed or grounded surfaces, such as pipes, radiators, ranges and refrigerators. There is an increased risk of electric shock if your body is earthed or grounded. Do not expose power tools to rain or wet conditions. If water enters a power tool, it will increase the risk of electric shock.
Do not abuse the cord. Never use the cord for carrying, pulling or unplugging the power tool. Keep cord away from heat, oil, sharp edges or moving parts. Damaged or entangled cords increase the risk of electric shock. When operating a power tool outdoors, use an extension cord suitable for outdoor use. Use of a cord suitable for outdoor use reduces the risk of electric shock. If operating a power tool in a damp location is unavoidable, use a residual current device (RCD) protected supply. Use of an RCD reduces the risk of electric shock.
Personal safety
Be careful, pay attention to how you work and work sensibly with the power tool. Do not use the power tool if you are tired or under the influence of drugs, alcohol, or medication. A moment of inattention while working with power tools can lead to serious personal injury. Use personal protective equipment. Always wear eye protection. Protective equipment such as a dust mask, non-slip safety shoes, hard hat, or hearing protection used for appropriate conditions will reduce personal injuries. Prevent unintentional starting. Ensure the switch is in the off position before connecting to the power source and/or battery pack, picking up or carrying the tool. Carrying power tools with your finger on the switch or energizing power tools that have the switch on invites accidents. Remove any adjusting key or wrench before turning the power tool on. A wrench or a key left attached to a rotating part of the power tool may result in personal injury. Do not overreach. Keep proper footing and balance at all times. This enables better control of the power tool in unexpected situations. Dress properly. Do not wear loose clothing or jewelry. Keep your hair and clothing away from moving parts. Loose clothes, jewelry, or long hair can be caught in moving parts. If devices are provided for the connection of dust extraction and collection facilities, ensure these are connected and properly used. Use of dust collection can reduce dust-related hazards.
Do not let the comfort gained from frequent use of the tool make you complacent and ignore the safety principles. A careless action can cause severe injury within a fraction of a second.
Use and care of power tools
Heron pontobapyajte enektpnHnot anat. Koristete soodveten enektpichni anat za namenata. So soodvetniot enektpichen anat, poebedno i pobrzo ke ja izvrshite rabotata za koja e namenet. Ne koristete enektpichen anat ako ne mozhete da go vkluchite i iskluchite so pomosh na prekinuvachot. Sekoj enektpichen anat koj ne mozhe da se kontrolira so prekinuvach e opasen i mora da se popravi. Iskluchete go enektpichniot anat od struja ili izvadete go od setot na baterii, ako se vidi, pred da pravite kakvi bilo popravki, menuvate dodatenata oprema ili skladirate enektpichniot anat. So ovie preventivni bezbednosni merki se namaluva rizikot od sluchajno vkluchuvanje na enektpichniot anat. Чuvajte gi enektpichnite anti podaleku od ogan i ne dozvoluvajte lica da rabotat so enektpichniot anat ili da se zapoznaeni so rabotata so istiot. Enеktpichnite anati se opasni vo racete na neobucheni korisnici. Odрzhuvajte gi enektpichnite anati i dodatenata oprema. Proverete go pravilnoto funkcioniranje i prikluchuvanjeto na podvizhnite delovi, spojot na delovite i drugi uslovi shto mozhe negativno da vliijat vrz funkcioniranjeto na enktpichniot anat. Ako e oштeten, odnesete go enktpichniot anat na popravka preda go koristite. Mnogu nesreki se predizvikaani zaradi neсоodvetno odрzhuvanje na enktpichnite anati. Ostrete i chistete gi anati za seчење. Soодvetno odрzhuvanje na anati za seчење se odрzhuva ostar i se kontrolira podobro. Enеktpichniot anat, dodatenata oprema, alati itn., koristete gi vo soodvetnost so оvaа upatstvo, vnimavajte na rabotnite uslovi na rabotata koja ja vрshite. Koristenjeto na enеktpichniot anat za drugi nameni mozhe da dovede do opasni situacii. Racete i povrshinite za drzhење odрzhuvajte gi suvi, chisti i bez masnoтии. Racete i povrshinite za drzhење, ako se lizgaat, ne ovozmozhuvaat bezbedno rakuvanje i kontrola na anatiot vo nepredvidlivi situacii.
Servisiranje
Enеktpichniot anat servisirajte go kaj kvalifikuvano lice koe koristi samo originalni rezervni delovi. So оva se ovozmozhuva bezbedno odрzhuvanje na enktpichniot anat.
Bezbednosni nаpomeni za brusilki
Connect the power tool to the power supply via a residual current device. The presence of water in the power tool increases the risk of electric shock. Be careful that the plug is not in danger of being damaged by sparks or heat. Keep the material away. When grinding material, there is a risk of sparks and heat. Caution, fire hazard! Avoid overheating the workpiece and the grinding disc. Before starting work, always empty the dust container. Always grind in the dust container, micro dust particles, the dust bag (or the filter bag, etc.) can be sucked up by the extraction system, as with e.g. grinding metal. Do not use sparks when grinding metal. There is a particular risk when the grinding dust is mixed with residues of lacquer, polyurethane or other chemical materials and when the workpiece being ground is heated by prolonged work. Regularly clean the ventilation openings of the power tool. The fan motor draws dust into the housing, and the collection of a large amount of metal dust can cause electrical hazards. When working, hold the power tool firmly with both hands and ensure a stable stance. You can control the power tool safely if you hold it with both hands. Always disconnect the power tool from the power supply before pulling the plug. Switch off the workpiece being processed. When you finish with cutting or changing tools, the workpiece being processed is held securely by the clamping device.
Product description and specifications

Read all safety warnings and instructions. Failure to follow
the safety warnings and instructions may result in
Technical data
| Ekcentropy Na 6pycnikga GEX 75-150 GEX 55-125 | ||
| Бpoj Ha den/avtnknl | 3 601 B57 1.. 3 601 B57 0.. | |
| Празховен Ибор на бpoject на осцILAци • • | ||
| HominaHa jaunHa W 750 550 | ||
| Бpoj Ha вретжи ВО праzen od n0 | MHN-1 | 3300 - 7300 3300 - 7800 |
| Бpoj Ha осцILAци ВО праzen od мин | -1 | 6600 - 14600 6600 - 15600 |
| Бpoj Ha вретжи на врсанnot дисубо 6pysebe | MHN-1 | 290 - 640 200 - 480 |
Bosch Power Tools 1609 92A 5FZ | (13.01.2020)
138|Macedonian
Eccentric sander GEX 75-150 GEX 55-125
Diameter of the sanding plate mm 4.5 3.5
Diameter of the sanding disc mm 150 125
Weight according to EPTA-Procedure 01:2014 kg 2.6 2.4
Protection class

The rated voltage is 230 V. However, the actual voltage may vary depending on the local power supply.
Information about the manufacturer
| GEX 75-150 GEX 55-125 | ||
| 3601B57 1.. 3601B57 0.. | ||
| Врешистце за(emисида}); на боча в ce odpréduваат соглесно EN 62841-2-4. | ||
| Новото на звк на лесtripриниот等相关对象 co A, тпчно поизhecува | ||
| Звuchен питисок | dB(A) | 85 |
| Звuchа щачина | dB(A) | 96 |
| Несигуrchост K | dB | 3 |
| Hocete заштоа за сухот! | ||
Declared vibration emission value (vector sum for three directions) and declared dust emission according to EN 62841-2-4:
| Брасев: Нормално paбOTеьe | |||
| ah | m/s2 | 5,5 | 5,5 |
| K | m/s2 | 1,5 | 1,5 |
| Брасев: БраZO paбOTеьe | |||
| ah | m/s2 | 6,5 | 6,0 |
| K | m/s2 | 1,5 | 1,5 |
| Полигаьe | |||
| ah | m/s2 | 7,0 | 7,5 |
| K | m/s2 | 1,5 | 1,5 |
The vibration emission value and the dust emission value have been measured in accordance with the standard measurement methods and may be used for comparison of one electric tool with another. It may also be used for a preliminary assessment of the vibration emission and dust emission.
The declared vibration emission value and the dust emission value represent the main applications of the electric tool. However, if the electric tool is used for other applications, with different accessories, or is poorly maintained, the vibration emission and dust emission may differ. This may significantly increase the vibration and dust emission over the total working period.
For an accurate estimation of the vibration emission and dust emission, the periods when the tool is switched off or running idle, and not actually in use, should also be taken into account. This may significantly reduce the vibration and dust emission over the total working period.
Identify additional safety measures to protect the operator from the effects of vibration, such as: maintaining the electric tool and accessories, keeping hands warm, and organizing work patterns.
Assembly
Before any intervention on the electric tool, remove the mains plug from the socket.
Changing the sanding sheets
Press the sanding sheet clamp (8) down and pull it out of the sanding disc (11).
Before placing a new sheet, remove any dirt or debris from the sanding disc (11), e.g. with a brush.
The surface of the sanding disc (11) consists of a hook-and-loop fastener, so the sanding sheet can be attached quickly and easily.
Press the sanding sheet (8) firmly onto the bottom side of the sanding disc (11).
To ensure optimal dust extraction, make sure that the holes in the sanding sheet (8) align with the holes in the sanding disc (11).
Selecting the sanding disc
Depending on the application, the electric tool can be equipped with sanding discs of different grit sizes:
- Extraction of brush discs: advice for proper brushing and surface care - Brush discs: advice for installing the discs, supplied universal - Brush discs: advice for high-quality brush discs and surface care
Replacing the brush discs
Warning: Remove and replace the brush discs (11).
Remove the brush disc from the holder. To do this, turn the locking ring (10) counterclockwise and pull out the brush disc (11). Insert the new brush disc (11) and then tighten the locking ring by hand.
Warning: Follow the instructions for 150 mm and 125 mm discs. Use only the appropriate electrical tool.
Warning: When installing the brush disc, make sure that the locking ring is inserted into the openings of the brush disc.
Warning: The brush disc must only be replaced by an authorized service center for Bosch power tools.
Removing the dust
Dust from materials such as lead-based paint, some types of wood, minerals, and metals can be harmful to health. Contact with or inhalation of such dust can cause allergic reactions and/or respiratory diseases in the user or bystanders.
Some dust, such as oak or beech dust, is carcinogenic, especially when combined with wood treatment additives (chromate, wood preservatives). Materials containing asbestos should only be processed by specialists.
- Therefore, whenever possible, use a suitable dust extraction system for the material being processed. - Ensure good ventilation of the work area. - It is recommended to wear a protective mask with class P2 filter when sanding.
Pay attention to the relevant regulations in your country for the materials you are processing.
Avoid collecting dust at the workplace.
Dust can easily ignite.
For sanding, it is recommended to connect the power tool to a vacuum cleaner. The power tool does not have its own blower; it cannot be used for dust removal.
Connect the suction hose (optional) directly to the suction hose (3) or directly to the suction hose (4) on the electric device.
Note: The suction hose (3) is made of antistatic material. With the additional use of the antistatic suction hose (optional), the electrostatic charge that may occur in rare cases during vacuuming is prevented.
When working without suction of dust (e.g., polishing), remove the suction hose (3). To do this, attach the release button (15) to the suction hose (3) and remove it from the electric device.
The suction power must be matched to the material of the workpiece being processed.
When suctioning dust that is particularly hazardous to health, carcinogenic, or dry, use a special suction device.
Additional handle
The additional handle (5) enables comfortable handling and optimal distribution of the load, especially when removing large amounts of material during sanding.
Attach the additional handle (5) to the right or left of the tool holder (13).
For better control of the electric tool, it is recommended to place the front plate on the front support when sanding. The additional handle (5) can reduce side forces that may cause vibration of the electric tool. This can damage the sanding surfaces.
Workplace safety
The protective guard (12) protects the sanding tool during sanding of metal parts from work. Attach the protective guard (12) to the front of the electric tool. For removal, pull the protective guard (12) forward by one edge.
Use
Switching on and off
Make sure the mains voltage of the power source matches the voltage specified on the rating plate of the electric tool. Electric tools marked with 230 V can also be used with 220 V.
On/off
Check that you can turn the device on/off without releasing the trigger.
To turn on the device, press the on/off switch (2) forward. To turn off the device, press the on/off switch (2) backward.
Preselecting the number of oscillations
With the end of the oscillation number setting (1), you can select the required number of strokes during use of the device.
1-2 Low number of oscillations 3-4 Medium number of oscillations 5-6 High number of oscillations
The required number of oscillations depends on the material and working conditions and can be determined during practical application.
Constant electronics maintain the set number of oscillations under load and enable the same stroke rate during operation.
After prolonged work with a low number of oscillations, to turn off the device, let it run in the direction of the arrow with the maximum number of strokes.
Selecting the sanding sheet
Two working modes with different sanding capacities are available. For coarse sanding, set the mode selector switch (14) forward, and for fine sanding, set the switch (14) backward. Do not switch while the device is running.
Do not change the working mode during sanding! There is a risk of injury.
Working mode for coarse sanding (with eccentric drive)
This working mode with high sanding capacity is recommended for fast removal of coarse, insensitive surfaces as well as for sanding with polishing. With the eccentric drive, the sanding disc performs a constant eccentric and rotary motion.
Working mode for fine sanding (free-running)
It is recommended to use the tool for work on sensitive surfaces, as well as for fine polishing. With the free rotation of the brush disc, rotational movement is achieved depending on the pressure, with constant eccentric movement. By changing the pressure, the polishing capacity can be additionally increased.
Commissioning
Before any intervention on the electric tool, pull the plug out of the socket. Wait until the electric tool has completely stopped before touching it. Do not leave the electric tool unattended. This can permanently deform the brush disc.
The electric tool is not suitable for stationary use. It must not, for example, be clamped in a vice or attached to a workbench.
Polishing surfaces
Switch on the electric tool, place it with the polishing surface on the surface to be processed and move it with light pressure over the workpiece.
The polishing capacity is mainly determined by the choice of brush disc, the selected number of oscillations, and the pressure on the surface.
The self-sharpening brush discs can provide a high polishing capacity and maintain the performance of the electric tool.
Pay attention to the uniformity of the pressure to increase the service life of the tool being used.
Excessive pressure on the surface leads to increased polishing capacity, but also to faster wear of the tool and the brush disc.
Do not use the brush disc that you have used on metal for other materials.
Use only original Bosch brush accessories.
Rough polishing
Set the brush disc to coarse grit.
Apply light pressure with the pneumatic tool to work with a higher number of oscillations to achieve a higher polishing quality of the material.
Finishing
Polish the workpiece after grinding.
With this variable speed adjustment, the number of oscillations can be changed. The number of oscillations of the brush disc can be adjusted while the eccentric disc is running.
The disc is driven electrically and with uniform pressure over the entire surface, without changing the load on the workpiece being processed. Do not tilt the electric disc to avoid burning the workpiece, e.g., by tilting.
After finishing the work process, switch off the electric disc.
Polishing
Note: When polishing, you can remove the extraction guard (3) to work more easily with the tool and not damage the workpiece.
For polishing painted surfaces or for polishing scratches (e.g., on acrylic glass), the electric disc can be equipped with appropriate polishing accessories such as polishing felt, polishing sponge, or polishing fleece (accessory).
When polishing, select a low oscillation rate (stage 1-2) to avoid excessive heating of the surface.
If you want to polish, apply the polish to a small area. Apply the polish with a suitable polishing accessory using crosswise circular movements with light pressure.
Allow the polish to dry on the surface, then it can be polished. Never expose the polished surface to direct sunlight.
Regularly clean the polishing accessories to ensure good polishing results. Clean the polishing accessories with a mild detergent and water; do not use solvents.
Regularly clean the extraction guards (4) to ensure optimal dust extraction for the brush discs.
Maintenance and service
Maintenance and cleaning
Before any intervention on the power tool, remove the plug from the socket and open for ventilation, so that you can work well and safely.
If you need to use an extension cable, then use it only with a suitable and specialized plug for power tools, to avoid endangering safety.
After-sales service and advice on use
The after-sales service will answer your questions about the repair and maintenance of your product and spare parts. You will also find information about spare parts at: www.bosch-pt.com
The Bosch advice team will help you if you have questions about our products.
For all questions about spare parts, you can find them by the 10-digit number from the type plate of the product.
North Macedonia
D.D. En Engineering
SabaKovski 47b, no. 3
1000 Skopje
E-mail: dimce.dimcev@servis-bosch.mk
Internet: www.servis-bosch.mk
Tel./fax: 02/2467610
Mobile: 070595888
D.I.T.Y "RODKA"
1000 Skopje
E-mail: servisrojka@yahoo.com
Tel: +389 2 3174-303
Mob: +389 70 388-520, -530
Disposal
Electrical appliances, packaging and packaging waste must be disposed of in an environmentally friendly manner.

Do not dispose of electrical appliances in household waste!
For EU countries only:
According to the European Directive 2012/19/EU on electrical and electronic equipment and its implementation in national law, electrical appliances that are out of use must be collected separately and recycled in an environmentally friendly manner.
Serbian
Chapter Summary
Bosch on Bosch
(A)
(6)
(7)
(8)
10
(11)
12
φ ω φ ω′ (13)
15
Sahba Technology Group
1
+964(0)7901930366:
+971 (0) 4 422 1898:
duraid@sahbatechnology.com
Roots Arabia
UJ11623 Ula
110068:
+962 6 4398990:
bosch@rootsjordan.com
16 a b g 1 iio a ciioi yg wll da bio
3
24810844:
24810879:μ≤l9
josephkr@aaalmutawa.com:JgS!
aJlal Jllasiw p g aow ojao dgg sssu
.
gul ggluI Bosch.
J 1
auiuuluyofoiaagjgS
Joo bao aao ayu jol ool lc beo
aaljjj jg ggl gglg
. do LJJ
auiul
dacluluoyoiaagjgus
jue j baoJIgog g buuJgguI JUo
(suill) jia 12.1
.ij jSbaw aigw uiil
Jy jill no jol aalu ygl qaliil ola llb
gulll oJl kJll Jgl. gaiyogai j
dsjg aiaa bao doJIo gai osc JloosuW
aui sl gl auiuio
aLg 2j
aawl ldl dalsy gocjal baowll jz.
.0uUJ uuaui
Jalal pblio Jsu Jauall scc aai jlc jpal
JUeI. JauJI 1 aJUa 1uJUc UgauJI
2jlll lollg aJdLoo cbbu oJy Jaa
D. Since AD = AQ, therefore PQ = AQ.
+9611255211
service-pt@tehini-h
U
Robert Bosch Morocco SARL
53gjooo ojol
20300JJ
+212529314327
outillage@ma.b
Jlac
(A) (C) (D) (E) (F) (G) (H) (I) (J) (K) (L) (M) (N) (O) (P) (Q) (R) (S) (T) (U) (V) (W) (X) (Y) (Z)
(6)
(gLc gSgSj) aWs (7)
(8)
10LssSgJ slj
.15s 15s g a jj1 j1 s
.
jglj sglgu dsguue cclwio jy 0laiw jiuuiabIg jolkiw
.
SijbsjS jogggbjI gji jgi jai
guiuai g0gj
JjI JIoggbo
j
Jus 1 Jus 1 Jus 1 Jus 1 Jus 1 Jus 1 Jus 1 Jus 1 Jus 1 Jus 1 Jus 1 Jus 1 Jus 1 Jus 1
oJal g d jg JgS wJus Jd aLolai g yjgl Jd as sdi olw JyJl alg Jlaim J
jloiaowl osc
.iiS JSLjJ CwJd j
. cwl sljba a jg g jlgui
4.sis Cjgo
Sjto slcawd d swhbgo iiaaa. sisi g o jL g a o g dssw g jI J I c b g d s iS C . siu o y . uis p 1s u f g w j l
Josuwolab 1sluw
| GET 75-150GET 55-125 | الإستعمال | |||
| 3601 B57 1..3 601 B57 0.. | الإستعمال | |||
| ● | ● | W750550 | الإستعمال | |
| 7800-3300 | 7300-3300 | \( ^{1}d\ddot{a}\ddot{b}\ddot{c}\ddot{a}\ddot{a}\ddot{b}\ddot{c}\ddot{a}\ddot{a}\ddot{b}\ddot{c}\ddot{a}\ddot{a}\ddot{b}\ddot{c}\ddot{a}\ddot{a}\ddot{b}\ddot{c}\ddot{a}\ddot{a}\ddot{b}\ddot{c}\ddot{a} \) | n.d.l. | |
| 15600-6600 | 14600-6600 | \( ^{1}d\ddot{a}\ddot{a}\ddot{b}\ddot{c}\ddot{a}\ddot{a}\ddot{b}\ddot{c}\ddot{a}\ddot{a}\ddot{b}\ddot{c}\ddot{a}\ddot{a}\ddot{b}\ddot{c}\ddot{a}\ddot{a}\ddot{b}\ddot{c} \) | \( ^{1}d\ddot{a}\ddot{a}\ddot{b}\ddot{c}\ddot{a}\ddot{a}\ddot{b}\ddot{c}\ddot{a}\ddot{a}\ddot{b}\ddot{c}\ddot{a}\ddot{a}\ddot{b}\ddot{c}\ddot{a}\ddot{a}\dddot{a}\ddot{a}\ddot{b}\ddot{c}\ddot{a}\ddot{a}\ddot{b}\ddot{c}\ddot{a}\ddot{a}\ddot{b}\ddot{c}\ddot{a}\ddot{a}\ddot{b}\ddot{c}\ddot{a}\ddot{a}\ddot{b}\ddot{c}\dddot{a}\ddot{a}\ddot{a}\ddot{b}\ddot{c}\ddot{a}\ddot{b}\ddot{c}\ddot{a}\ddot{b}\ddot{c}\ddot{a}\ddot{b}\ddot{c}\ddot{a}\ddot{b}\ddot{c}\ddot{a}\ddot{b}\ddot{c}\ddot{a}\ddot{b}\ddot{c}\ddot{a}\ddot{a}\ddot{b}\ddot{c}\ddot{a}\ddot{b}\ddot{c}\ddot{a}\ddot{b}\ddot{c}\ddot{a}\ddot{b}\ddot{c}\ddot{a}\ddot{b}\ddot{c}\ddot{a}\ddot{b}\ddot{c}\ddot{c}\ddot{a}\ddot{b}\ddot{c}\ddot{a}\ddot{b}\ddot{c}\ddot{a}\ddot{b}\ddot{c}\ddot{a}\ddot{b}\ddot{c}\ddot{a}\ddot{b}\ddot{c}\ddot{a}\ddot{b}\ddot{c}\ddot{c}\ddot{c}\ddot{a}\ddot{b}\ddot{c}\ddot{a}\ddot{b}\ddot{c}\ddot{a}\ddot{b}\ddot{c}\ddot{a}\ddot{b}\ddot{c}\ddot{a}\ddot{b}\ddot{c}\ddot{a}\ddot{b}\ddot{b}\ddot{c}\ddot{a}\ddot{b}\ddot{c}\ddot{a}\ddot{b}\ddot{c}\ddot{a}\ddot{b}\ddot{c}\ddot{a}\ddot{b}\ddot{c}\ddot{a}\ddot{b}\ddot{c}\ddot{a}\ddot{b}\ddot{b}\ddot{b}\ddot{c}\ddot{a}\ddot{b}\ddot{c}\ddot{a}\ddot{b}\ddot{c}\ddot{a}\ddot{b}\ddot{c}\ddot{a}\ddot{b}\ddot{c}\ddot{a}\ddot{b}\ddot{c}\ddot{a}\ddot{c}\ddot{a}\ddot{b}\ddot{c}\ddot{a}\ddot{b}\ddot{c}\ddot{a}\ddot{b}\ddot{c}\ddot{a}\ddot{b}\ddot{c}\ddot{a}\ddot{b}\ddot{c}\ddot{a}\ddot{b}\ddot{c}\ddot{b}\ddot{c}\ddot{a}\ddot{b}\ddot{c}\ddot{a}\ddot{b}\ddot{c}\ddot{a}\ddot{b}\ddot{c}\ddot{a}\ddot{b}\ddot{c}\ddot{a}\ddot{b}\ddot{c}\ddot{a}\ddot{b}\ddot{C}\) | \( ^{1}d\ddot{a}\ddot{b}\ddot{c}\ddot{a}\ddot{b}\ddot{c}\ddot{a}\ddot{b}\ddot{c}\ddot{a}\ddot{b}\ddot{c}\ddot{a}\ddot{b}\ddot{c}\ddot{a}\ddot{b}\ddot{c}\ddot{a}\ddot{b} \) |
| 480-200 | 640-290 | \( ^{1}d\ddot{a}\ddot{b}\ddot{c}\ddot{a}\ddot{b}\ddot{c}\ddot{a}\ddot{b}\ddot{c}\ddot{a}\ddot{b}\ddot{c}\ddot{a}\ddot{b}\ddot{c}\ddot{a}\ddot{b}\ddot{c}\dddot{a}\ddot{a}\ddot{b}\ddot{c}\ddot{a}\ddot{b}\ddot{c}\ddot{a}\ddot{b}\ddot{c}\ddot{a}\ddot{b}\ddot{c}\ddot{a}\ddot{b}\ddot{c}\ddot{a}\ddot{b}\ddot{c}\ddot{a}\dddot{a}\ddot{a}\ddot{b}\ddot{c}\ddot{a}\ddot{b}\ddot{c}\ddot{a}\ddot{b}\ddot{c}\ddot{a}\ddot{b}\ddot{c}\ddot{a}\ddot{b}\ddot{c}\ddot{a}\ddot{b}\ddot{c}\ddot{c}\dddot{a}\ddot{a}\ddot{b}\ddot{c}\ddot{a}\ddot{b}\ddot{c}\ddot{a}\dddot{a}\ddot{a}\ddot{b}\ddot{c}\ddot{a}\ddot{b}\ddot{c}\ddot{a}\ddot{b}\ddot{c}\ddot{a}\dddot{a}\ddot{a}\ddot{b}\ddot{c}\ddot{a}\ddot{b}\ddot{c}\ddot{a}\dddot{a}\ddot{a}\ddot{b}\ddot{c}\ddot{a}\dddot{a}\ddot{a}\ddot{b}\ddot{c}\ddot{a}\dddot{a}\ddot{a}\ddot{b}\ddot{c}\ddot{a}\dddot{a}\ddot{a}\ddot{b}\ddot{c}\ddot{a}\dddot{c}\ddot{a}\dddot{a}\ddot{b}\ddot{c}\ddot{a}\dddot{a}\ddot{b}\ddot{c}\ddot{a}\dddot{a}\ddot{b}\ddot{c}\ddot{a}\dddot{a}\ddot{b}\ddot{c}\ddot{a}\dddot{a}\ddot{b}\ddot{c}\ddot{a}\dddot{a}\ddot{b}\dddot{a}\ddot{b}\ddot{c}\ddot{a}\dddot{a}\ddot{b}\ddot{c}\ddot{a}\dddot{a}\ddot{b}\ddot{c}\ddot{a}\dddot{a}\ddot{b}\ddot{c}\ddot{a}\dddot{a}\ddot{b}\ddot{c}\ddot{c}\ddot{a}\dddot{a}\ddot{b}\ddot{c}\ddot{a}\dddot{a}\ddot{b}\ddot{c}\ddot{a}\dddot{a}\ddot{b}\ddot{c}\ddot{a}\dddot{a}\ddot{b}\ddot{c}\ddot{a}\dddot{a}\ddot{c}\ddot{a}\dddot{a}\ddot{b}\ddot{c}\ddot{a}\dddot{a}\ddot{b}\ddot{c}\ddot{a}\dddot{a}\ddot{b}\ddot{c}\ddot{a}\dddot{a}\ddot{b}\ddot{c}\ddot{a}\dddot{a}\ddot{a}\ddot{b}\ddot{c}\ddot{a}\dddot{a}\ddot{b}\ddot{c}\ddot{a}\dddot{a}\ddot{b}\ddot{c}\ddot{a}\dddot{a}\ddot{b}\ddot{c}\ddot{a}\dddot{a}\ddot{b}\ddot{c}\ddot{a}\ddot{b}\ddot{c}\ddot{a}\dddot{a}\ddot{b}\ddot{c}\ddot{a}\dddot{a}\ddot{b}\ddot{c}\ddot{a}\dddot{a}\ddot{b}\ddot{c}\ddot{a}\dddot{a}\ddot{b}\ddot{c}\ddot{c}\dddot{a}\ddot{a}\ddot{b}\ddot{c}\ddot{a}\dddot{a}\ddot{b}\ddot{c}\ddot{a}\dddot{a}\ddot{b}\ddot{c}\ddot{a}\dddot{a}\ddot{b}\ddot{c}\ddot{a}\dddot{a}\ddot{b}\ddot{d}\) | \( ^{1}d\ddot{a}\ddot{b}\ddot{c}\ddot{a}\ddot{b}\ddot{c}\ddot{a}\ddot{b}\ddot{c}\ddot{a}\ddot{b}\ddot{c}\ddot{a}\ddot{b}\ddot{c}\ddot{a}\ddot{b}\ddot{c} \) | |
| 3,5 | 4,5 | \( ^{1}d\ddot{a}\ddot{b}\ddot{c}\ddot{a}\ddot{b}\ddot{c}\ddot{a}\ddot{b}\ddot{c}\ddot{a}\ddot{b}\ddot{c}\ddot{a}\ddot{b}\ddot{c}\ddot{a}\ddot{b}\ddot{c} \)\( ^{1}d\ddot{a}\ddot{b}\ddot{c}\ddot{a}\ddot{b}\ddot{c}\ddot{a}\ddot{b}\ddot{c} \) | \( ^{1}d\ddot{a}\ddot{b}\ddot{c}\ddot{a}\ddot{b}\ddot{c} \) | |
| 150125 | \( ^{1}d\ddot{a}\ddot{b}\ddot{c}\ddot{a}\ddot{b}\ddot{c} \) | \( ^{1}d\ddot{a}\ddot{b}\ddot{c} \) | ||
| 2,4 | 2,6 | kg | EPTA- m.b.l.a.l.a.l.a.l.a.l.a.l.a.l.a.l.a.l.a.l.a.l.a.l.a.l.a.l.a.l.a.l.a.l.a.l.a.l.a.l.a.l.a.l.a.l.a.l.a.l.a.l.a.l.a.l.a.l.a.l.a.l.a.l.a.l.a.l.a.l.a.l.a.l.a.l.a.l.a.l.a.l.a.l.a.l.a.l.a.l.a.l.a.l.a.l.a.l.a.l.a.l a l.a l a l a l a l a l a l a l a l a l a l a l a l a l a l a l a l a l a l a l a l a l a l a l a l a l a l a l a l a l a l a l a l a l a l a l a l a l a l a l a l a l a l a l a l a l a l a l a l a l a l a l | |
Lolw Lalos Bosch.
Therefore m = 3/11
240
150
320
180
400
C470
best

Wood+Paint



Rough/Remove
40
60
Medium/Prepare
Fine/Finish
220
120
240
150
320
C430
expe

Wood+Paint


Rough/Remove
40
60
80
Medium/Prepare
Fine/Finish
240
F355
best

Coatings+Composites



Rough/Remove
80
Medium/Prepare
Fine/Finish
240
320
400
Very fine/Finish
600
1200
GET 55-125 Hard 2608601331 Medium 2608601332 Soft 2608601333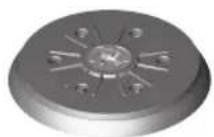
GET 75-150 Hard 2608601334 Medium 2608601335 Soft 2608601336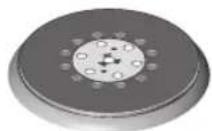
GET 55-125 2608000689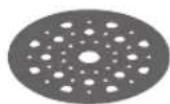
GET75-150 2608000690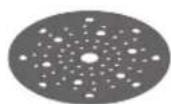
3608610000(2x)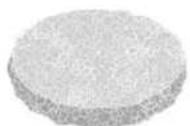
GET 55-125 2608601126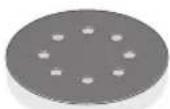
GET 75·150 2608601127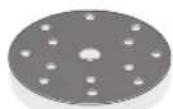
3608604000 (2x) 3608604001 (2x)
GET55-125: 2607017496 GET75-150: 2607017497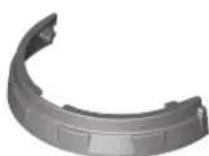
2607017500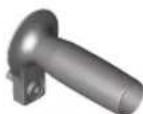
1600A012G2
1600A01B72
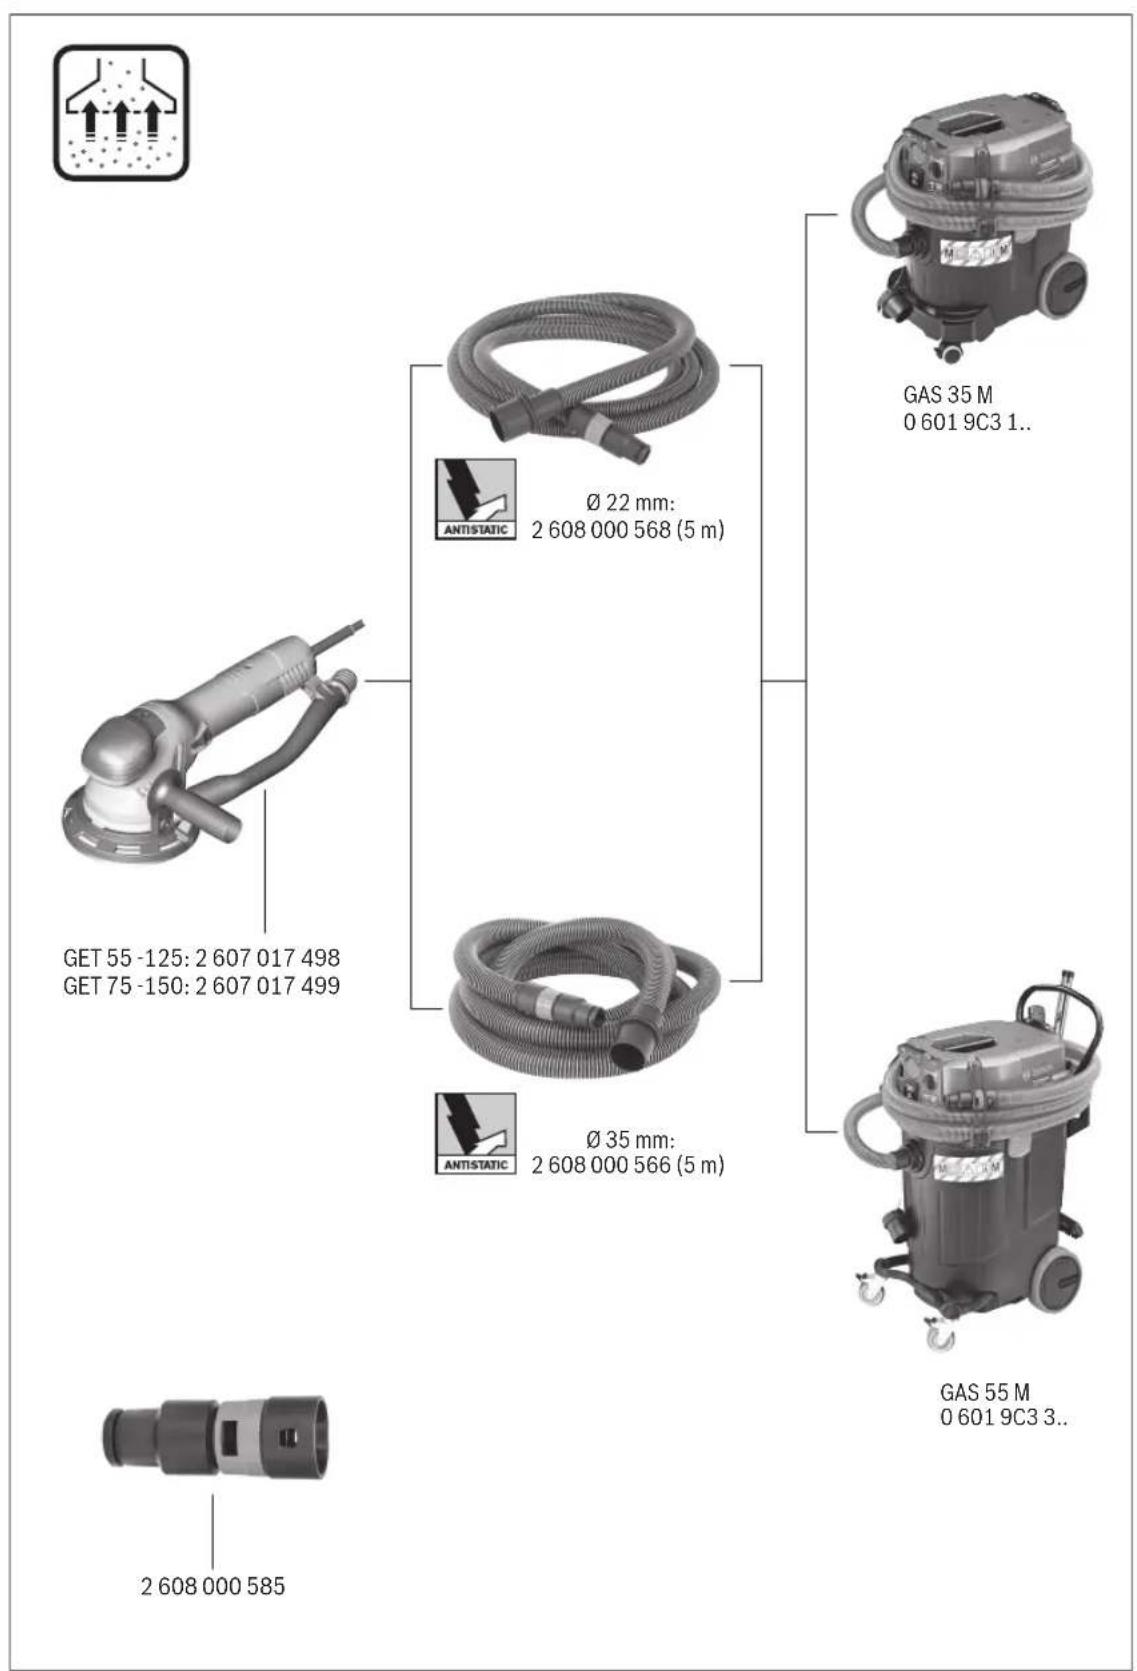
| de | EU-Konformitäserklärung | Wir erklären in alleiniger Verantwortung, dass die genannten Produkte allen einschlagigen Bestimmungen der nachfolgend aufgeführten Richtlinien und Verordnungen entsprechen und mit folgenden Normen übereinstimmen. Technische Unterlagen bei: * |
| Exzenterschleifer Sachnummer | ||
| en | EU Declaration of Conformity | We declare under our sole responsibility that the stated products comply with all applicable provisions of the directives and regulations listed below and are in conformity with the following standards. Technical file at: * |
| Random orbit Article number sanders | ||
| fr | Déclaration de conformité UE | Nous déclarons sous notre propre responsabilité que les produits décrits sont en conformité avec les directives, règlements normatifs et normes énumérés ci-dessous. Dossier technique auprès de: * |
| Ponceuse excen- N° d'article trique | ||
| es | Déclaración de conformidad UE | Declaramos bajo notre propre responsabilité que les produits nombrados cumplen con todas las disponeciones correspondientes de las Directivas y los Reglamentos Mentionados a continuación y está en conformidad con las siguides normas. Documentos tíricos de: * |
| Lijadora excénti- N° de articulo ca | ||
| pt | Déclaration de Conformidade UE | Declaramos sob esta exclusiva responsabilité que os produits mencionados cumprem todas as disponções e os regulamentos indicados e está em conformidade com as seguintes normas. Documentação técnica pertencente à: * |
| Lixadeira excén- N.° do produits trica | ||
| it | Dichiarazione di conformità UE | Dichiariamo sulla nostra piena responsabilità che i prodotti indicate sono conformi a tutte le disposizioni pertinenti delle Direttive e dei Regolamenti elencati di seguito, nonché alle seguenti Normative. Documentazione Tecnica presso: * |
| Levigatrice ro- Codice prodotto toorbitale | ||
| nl | EU-conformiteitsverklaring | Wij verklaren op eigene verantwoordelijkheid dat de genoemde producten voldoen aan alle desbetreffende bepalingen van de hierna genoemde rechtlijnen en verordeningen en overeenstemmen met de volgende normen. Technisch dossier bij: * |
| Excenterschuur- Productnumber machine | ||
| da | EU-overensstemmelseserklaering | Vi erklær som eneansvarlige, at det beskreve produit er i overensstemmelse med alle galdende bestemmelse i følgende direktiver og forordinier og opfylder følgende standarder. Tekniske bilag ved: * |
| Excentersliber Typenummer | ||
| sv | EU-konformitetsförlarking | Vi föklarar under eget ansvar att de námnda produkterna uppyller kraven i alla gällande bestämmeri i de nedan angivna direktiven och forordinargar nas och att de stämmer överens med följande normer. Teknisk Dokumentation: * |
| Excenterslip Produktnumber | ||
| no | EU-samsvarserklaering | Vi erklær under eneansvar at de nevnte Produktene er i overensstemmelse med alle relevante bestemmelse i direktivene og forondningene nedenfor og med følgende standarder. Teknisk Dokumentasjon hos: * |
| Eksenterlsper Produktnumber | ||
| fi | EU-vaatimustemmukaisuusvakuutus | Vakuutamme tätten, etta mainitut tuotteet vastaavat kaikkia seuraavien direktivien ja asetusten asiaankuulvia vaatimuksiia ja ovat seuraavien standardinen vaatimusten mukaisia. Tekniset asiakirjat saatakana: * |
| Epäkeskohiomakone Tuotenumero kone | ||
| el | Δηλωση ποτόπας EE | Δηλωνουμε με σακλεισική μας ευθύνη, διτα σαναφρόμενα προίντα αντιστοχουνν Ελετις σαχεικέδιταξεις των μο κατωναφαρόμενων σθημών και κανονιμών και ταυτιζόνται με τα ακόλουθα πρότιμα. Tekviika éγγραρα στη: * |
| 'Εκκεντρο τριβείο Αριθμός ευρετηρίου | ||
| tr | AB Uygunluk beyani | Tek sorumlu olarak, tanimlanan urünün asagidaki yönnetmelik ve direktiflerin geçerli buttün hülköumlimerine ve asagidaki standartlara uygun olduguñu beyan ederiz. Teknik belgelerin bulundugu yer: * |
| Eksantrik zimpa- Ürün kodu ra makinesi | ||
| II | ||
| pl | Deklaracja zgodnosci UE | Oswiadzamy z peña odpopiewiazinalnosci, ze nineiesze produkty odpopiada-ja wsystkim wymaganiom ponižej wyszczególniych dyrektyw i Rozporjad-zen, oraz ze są zgodne z następućymi normami. Dokumentacja techniczna:* |
| Szilfierka mi-mośrodowa | Prohlasujeme na výhradní zoypadźvodnost, ze uvedený výrobek splůje všech-na príslušná ustanovení ninee uvedenych směrnic anaženi je vsvouladu snás-ledujúcimi normami: Teknicke podklady u:* | |
| cs | EU prohlásení oshodé | Vyhlasujeme na výhradní zoypadźvodnost, ze uvedený výrobek splůna všetky prislušné ustanovenia ninee uvedenych směrnic anaïzeníaje vsuladu snáš-ledujúcimi normami: Teknicke podklady má spolocnost:* |
| Excentrická brus-ka | Evy hylaseenie ozhode | |
| Excentrická brús-Vecné císoka | Vyhlasujeme na výhradní zoypadźvodnost, ze uvedený výrobek splůna všetky prislušné ustanovenia ninee uvedenych směrnic anaïzeníaje vsulade snáš-ledujúcimi normami: Teknicke podklady má spolocnost:* | |
| hu | EU konformitási nyilatkozat | Egyedūl felǒséggel kijelentjuk, hagy a megnevezett termék megfelelnek az alábbiakban felsorolára kerüló irányelvek és rendeleket valamennyi ide-vágó elóirásainak és megnefelelnek a következő szabványoknak. Mûszaki dokumentumok megörzési pontja:* |
| Excenteres csis-zológép | 3a7b9nme o cootbetctbni ECMb1 3a7b9nme pod nau ly eynohinnyu OTBETCTBEHOCTB,уTO Na3BaHNbIe npoduk'tb l COOTBETCTBYOT BCEM DečTBYUONM PIDEINCAHNIM HIXEYKAZAHNBJX DIPKETNB I PACNOPJENH, a TAKJE HIXEYKAZAHNBJX HOPM.Texhnučeká DOKUMENTAùn xpaHNTC y:* | |
| ru | 3a7b9nme o cootbetctbni ECMb2 | Mbl 3a7b9nme pod nau ly eynohinnyu OTBETCTBEHOCTB,уTO Na3BaHNbIe npoduk'tb l COOTBETCTBYOT BCEM DečTBYUONM PIDEINCAHNIM HIXEYKAZAHNBJX DIPKETNB I PACNOPJENH, a TAKJE HIXEYKAZAHNBIx HOPM.Texhnučeká DOKUMENTAùn xpaHNTC y:* |
| 3a7b9nme o cootbetctbni ECMb2 | 3a7b9nme pod nau ly eynohinnyu OTBETCTBEHOCTB, su nau bAHNI BIVOBNI BIDNOBIDAIOBTYCIM QUNHNM PONOJENH NIIIEO3HAUENHX DIPKETNB I POKPNDJXH, a TAKJX HIXEYKAZAHNBJX HOPM.M.Texhnučeká DOKUMENTAùn 36EBIPACTCBY a:* | |
| uk | 3a7b9nme plo bIDNoBIDNICTB ECMb2 | Mn3a7b9nme plo nau ly oDIOOSOCBOV BIDNOBIDAIOHBICB, su nau bAHNI BIVOBINAIOBIAIOBTYCIM QUNHNM PONOJENH NIIIEO3HAUENHX DIPKETNB I POKPNDJXH, a TAKJX HIXEYKAZAHNBJX HOPM.M.Texhnuča DOKUMNTAùn 36EBIPACTCBY a:* |
| 3a7b9nme o cootbetctbni ECMb2 | 3a7b9nme pod nau ly eynohinnyu OTBETCTBEHOCTB, su nau bAHNI BIVOBINAIOBIAIOBTYCIM QUNHNM PONOJENH NIIIEO3HAUENHX DIPKETNB I POKPNDJXH, a TAKJX HIXEYKAZAHNBJX HOPM.M.Texhnuča DOKUMNTAùn 36EBIPACTCBY a:* | |
| kk | EO cαηκεctik maglumdamacbi | θ3 kayankepiwiikiŋ ten 63 ataflanfah Θmɪdɛr TOMeHnde J3bɪŋfaH |
| 3a7b9nme o cootbetctbni ECMb2 | DIPKETNKALAP men KajpNbIKIapdbIy TINCTI KAFɪdʌapbIha NaiKeCTɪŋ J3a | |
| 3a7b9nme o cootbetctbni ECMb2 | TOMeHndeɪ ROPMʌapRa Cai Ekeni B 6iDipem i. | |
| ro | Declaratie de conformitate UE | Declaræ pe proprie raspundere cä produselementionate corespend tuto-r dor disposziţilor relevante ale directiveler ág reglementarìr enumerate in ce-lece urmeazá santi n in conformitate cu umrataorele standarde. Documentatie tehnica la:* |
| 5lefutor cu ex-centric | C nbIHa OTROBOPHOCT HNE DEKLAPRAME, ye nocochenite ppojdKTHO TLOBAPRAT Ha BCNUKN BAIINDH N3IKNKBAHN Ha DIPKETNBITE I PASTPOE6BHTe no-DOLY I CBO TBETCTBA Ha CLEDNITTE CTANDAPI.Texhnučka DOKUMNTAùn pri:* | |
| bg | EC DeKnapaunza 3a cboTBeTCTBVE | Co ŒLHa OTRBOBOPHOCT HNE DEKLAPRAME, ye nocochenite ppojdKTHI |
| 3a7b9nme o cootbetctbni ECMb2 | OTRBOBAPRT Ha BCNUKN BAIINDH N3IKNKBAHN Ha DIPKETNBITE I PASTPOE6BHTe no-DOLY I CBO TBETCTBA Ha CLEDNITTE CTANDAPI.Texhnučka DOKUMNTAùn 36EBIPACTCBY a:* | |
| 3a7b9nme o cootbetctbni ECMb2 | Co ŒLHa OTRBOBOPHOCT HNE DEKLAPRAME, ye nocochenite ppojdKTHI | |
| mk | EU-N3jaba 3a coo6pa3noct | Co ŒLHa OTRBOBOPHOCT H3aJByBAMe, DeKa OTHaANHTE ppoɪn3BODi CE BO coTlAChOCT co CHTepeLBAAHTNIG OPeDβHnHa CLEDNITHE perUlaTBNI n |
| 3a7b9nme o cootbetctbni 6pycnkka | I pOPInci N I CE BO coTlAChOCT co CHTepeLBAAHTNIG OPeDβHnHa CLEDNITHE HOPM.N.Texhnučka DOKUMNTAùn 36EBIPACTCBY a:* | |
| sr | EU-izjava o usaglašenosti | Na sopstvenu odgovornost izjavljuemo, da navedeni proizvodi odgovaraju |
| Ekscenter brusili-ka | svin dotovičnir odredbama nakhadn onavedenih smernica u uredaba i da su u skladu sa sledecim standardima.Tehnicka dokumentacijs kod:* | |
| sl | Izjava o skladnosti EU | Izjavljamo pod izkliučno odgovornostjo, da je omenjen izdelek v skladu z vse-mi relevantnimi dolocili direktiv in uredb ter ustreza naslednjim standardom.Tehnicna dokumentacijs pri:* |
| Ekscentrični Številka artikla | Pod punom odgovornošć u izjavljuemo da navedeni proizvodi odgovaraju | |
| brusilnik | svin relevantnir odredbama direktiva i propisima navenedenima u nastavku i da su skladu sa sledecim normama.Tehnicka dokumentacijs se moze dobiti kod:* | |
| hr | EU izjava o skuladnosti | Pod punom odgovornošć u izjavljuemo da navedeni proizvodi odgovaraju |
| Ekscentarska Kataloški br. | svin relevantnir odredbama direktiva i propisima navenedenima u nastavku i da su skladu sa sledecim normama.Tehnicka dokumentacijs se moze dobiti kod:* | |
| et | EL-vastavusdeklaratsoon | Kinnitame ainuvastutajatena, et nimetatud tooted vastavad järgnevalt loetletud direktiviide ja märuste kõikidele asjaomastele nõuetele ja onkošolas |
1609 92A 5FZ | (13.01.2020) Bosch Power Tools
III
| Ekstsentriklihija Tootenumber järgmiste normidega.Tehnilised dokumendid saadaval:* | |||
| Iv | Deklaracja par atbilstibuES standartlem | Mś ar pilnu atbildibu pazinojam, ka šeit aplūkotie izstrādājumi atbilst visiem tālák minētajās direktivās un ríkojumos ietvertajām saistošajām nostādnēm,kā ari sekojosiem standartiem.Tehniskā Dokumentācija no:* | |
| Ekscentra slip-lzstrādājuma numursmašina | |||
| It | ES atitikties deklaraciJa | Atsakingai pareiškiame, kad išvardyti gaminiali atitinka visus privalomus ze-miau nurodytu direktvyū ir reglamenti reikalavimus ir šiuos standartus.Techniné dokumentacija saugoma:* | |
| Ekscentrinis šli-fuoklis | Gaminio numeris | ||
| GET 75-150 | 3601 B57 1.. | 2006/42/ECEN 62841-1:2015 | |
| GET 55-125 | 3601 B57 0.. | 2014/30/EUEN 62841-2-4:2014 | |
| 2011/65/EUEN 55014-1:2017 | |||
| EN 55014-2:2015 | |||
| EN 61000-3-2:2014 | |||
| EN 61000-3-3:2013 | |||
| EN 50581:2012 | |||
| BOSCH* Robert Bosch Power Tools GmbH(PT/ECS)70538 StuttgartGERMANY | |||
| Henk BeckerHelmut HeinzelmannHead of Product Certification | |||
| Chairman of ExecutiveManagement | |||
| JürgenBeöiV. H. W. | |||
| Robert Bosch Power Tools GmbH, 70538 Stuttgart, GERMANYStuttgart, 28.11.2019 | |||


- WARNING
- WORK AREA SAFETY
- ELECTRICAL SAFETY
- PERSONAL SAFETY
- POWER TOOL USE AND CARE
- SERVICE
- SAFETY WARNINGS FOR SANDER
- PRODUCTS SOLD IN GB ONLY
- PRODUCT DESCRIPTION AND SPECIFICATIONS
- INTENDED USE
- PRODUCT FEATURES
- TECHNICAL DATA
- NOISE/VIBRATION INFORMATION
- ASSEMBLY
- CHANGING THE SANDING SHEET
- SELECTION OF THE SANDING PLATE
- CHANGING THE SANDING PAD
- DUST/CHIP EXTRACTION
- EXTERNAL DUST EXTRACTION
- AUXILIARY HANDLE
- CORNER PROTECTION
- OPERATION
- STARTING OPERATION
- SWITCHING ON/OFF
- PRESELECTING THE ORBITAL STROKE RATE
- SELECTING THE MATERIAL REMOVAL RATE
- COARSE SANDING OPERATING MODE (POSITIVE DRIVE CONTROL)
- FINE SANDING OPERATING MODE (FREE RUNNING)
- WORKING ADVICE
- SANDING SURFACES
- ROUGH SANDING
- FINE SANDING
- POLISHING
- MAINTENANCE AND SERVICE
- MAINTENANCE AND CLEANING
- AFTER-SALES SERVICE AND APPLICATION SERVICE
- AUSTRALIA, NEW ZEALAND AND PACIFIC ISLANDS
- GREAT BRITAIN
- IRELAND
- REPUBLIC OF SOUTH AFRICA
- KZN - BSC SERVICE CENTRE
- WESTERN CAPE - BSC SERVICE CENTRE
- BOSCH HEADQUARTERS
- ARMENIA, AZERBAIJAN, GEORGIA
- KYRGYZSTAN, MONGOLIA, TAJIKISTAN, TURKMENISTAN, UZBEKISTAN
- DISPOSAL
- ONLY FOR EU COUNTRIES
- FRANÇAIS
- FUNDS IN EU COUNTRIES
- REPLACING THE SANDING SHEET
- EXTERNAL DUST EXTRACTION SYSTEM
- EDGE GUARD
- WORKING WITH THE TOOL
- SWITCHING THE POWER TOOL ON
- SETTING THE OSCILLATION FREQUENCY
- SELECTING THE SANDING RATE
- DO NOT CHANGE THE WORKING MODE DURING SANDING
- WORKING MODE AND TOOL
- COARSE SANDING
- SERVICE CONSULTING ON APPLICATION ISSUES
- COMPONENT ILLUSTRATION
- SELECTION OF SANDING PERFORMANCE
- SANDING MODE "ROUGH SANDING" (WITH DUST EXTRACTION)
- UKRAINE
- KA3AKA
- UTILIZATION
- ONLY FOR EC COUNTRIES
- KAZAKH
- EURASIAN ECONOMIC UNION (EAEU) MEMBER STATES
- SAFETY INSTRUCTIONS
- COOLING FINS
- SERVICE LIFE AND STORAGE
- STORAGE
- TRANSPORTATION
- GENERAL SAFETY INSTRUCTIONS FOR ELECTRICAL EQUIPMENT
- BONAAWKXYMBICTAP YINH KAYINCI3IK HYCKAYNBIKTAPBI ME H CKEPTNENEPEI CATAN KONB1B
- XYMBICOPHBIHBKAYINCI3DIRI
- NEKT KAYINCI3IRI
- KEKEKAYINCIZIK
- VENTILATION SLOTS
- ADJUSTING THE DISPLAY
- TEST PROCEDURE ACTIVATION
- CLEAN THE SURFACES AND CONNECTORS
- WIRE BRUSHES
- CABLE GLAND
- GROUND TERMINAL
- GROUNDING
- GROUNDING CONNECTION
- SELECTING THE VIBRATION MODE
- SELECTING THE CLEANING MODE
- MANUAL CLEANING MODE (MANUAL CONTROL)
- DAN TERICTEY NAAANAHY TYPI (6OC XYPIC)
- PAIDANANY HYCKAYNAPBI
- AIMAKTAPDBI TERICTEY
- IIPI RERICREY
- BEFORE STARTING WORK
- CLEANING
- TECHNICAL DATA AND SERVICE
- KBIMTE KEPCETY XKEH E TA3ANAY
- TYTBHYBFA KBI3MET KEPCETY XAHE NAJAANAHY KEHECTEPI
- KAZAKHSTAN
- CLEANING AND MAINTENANCE
- FOR EU COUNTRIES ONLY
- INFORMATION ABOUT CHANGING THE PLUG
- CNCTEMA 3A NPAXOYNABHE
- BBHNHA CNCTEMA 3A NPAXOYNABHE
- THE AUXILIARY HANDLE (5) INCREASES COMFORT WHEN WORKING AND ALLOWS FOR OPTIMAL DISTRIBUTION OF THE APPLIED FORCE, ESPECIALLY DURING INTENSIVE SANDING
- THE KICKBACK PROTECTION (12) PROTECTS THE SANDER AND THE DISC WHEN SANDING IN THE AREA OF THE WORKPIECE. THE KICKBACK PROTECTION (12) IS LOCATED ON THE POWER TOOL. TO REMOVE THE KICKBACK PROTECTION (12), PULL IT IN THE DIRECTION OF THE ARROW
- CONNECT TO THE MAINS VOLTAGE! THE MAINS VOLTAGE MUST MATCH THE DATA ON THE RATING PLATE OF THE POWER TOOL. DEVICES MARKED WITH 230 V CAN ALSO BE CONNECTED TO 220 V
- ADJUSTING THE VIBRATION FREQUENCY
- BULGARIAN
- SELECTING THE MATERIAL REMOVAL INTENSITY
- ROUGH SANDING (HARD SANDING PAD)
- FINE SANDING MODE (FREE MOVEMENT)
- OPERATING INSTRUCTIONS
- SANDING FLAT SURFACES
- INSTRUCTIONS FOR USE
- SANDING
- BULGARIA
- MACEDONIAN
- SAFETY NOTES
- USE AND CARE OF POWER TOOLS
- SERVISIRANJE
- BEZBEDNOSNI NАPOMENI ZA BRUSILKI
- ECCENTRIC SANDER GEX 75-150 GEX
- INFORMATION ABOUT THE MANUFACTURER
- CHANGING THE SANDING SHEETS
- SELECTING THE SANDING DISC
- REPLACING THE BRUSH DISCS
- REMOVING THE DUST
- ADDITIONAL HANDLE
- WORKPLACE SAFETY
- USE
- SWITCHING ON AND OFF
- ON/OFF
- PRESELECTING THE NUMBER OF OSCILLATIONS
- SELECTING THE SANDING SHEET
- WORKING MODE FOR COARSE SANDING (WITH ECCENTRIC DRIVE)
- WORKING MODE FOR FINE SANDING (FREE-RUNNING)
- COMMISSIONING
- POLISHING SURFACES
- ROUGH POLISHING
- FINISHING
- AFTER-SALES SERVICE AND ADVICE ON USE
- NORTH MACEDONIA
- SERBIAN
- CHAPTER SUMMARY
- J
- AUIUL
Brand : BOSCH
Model : GET 55125 Professional
Category : Sander