
PS 216 L - Jigsaw AEG - Free user manual and instructions
Find the device manual for free PS 216 L AEG in PDF.
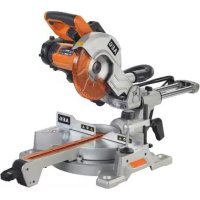



| Brand | AEG |
| Model | PS 216 L |
| Product Type | Radial Miter Saw |
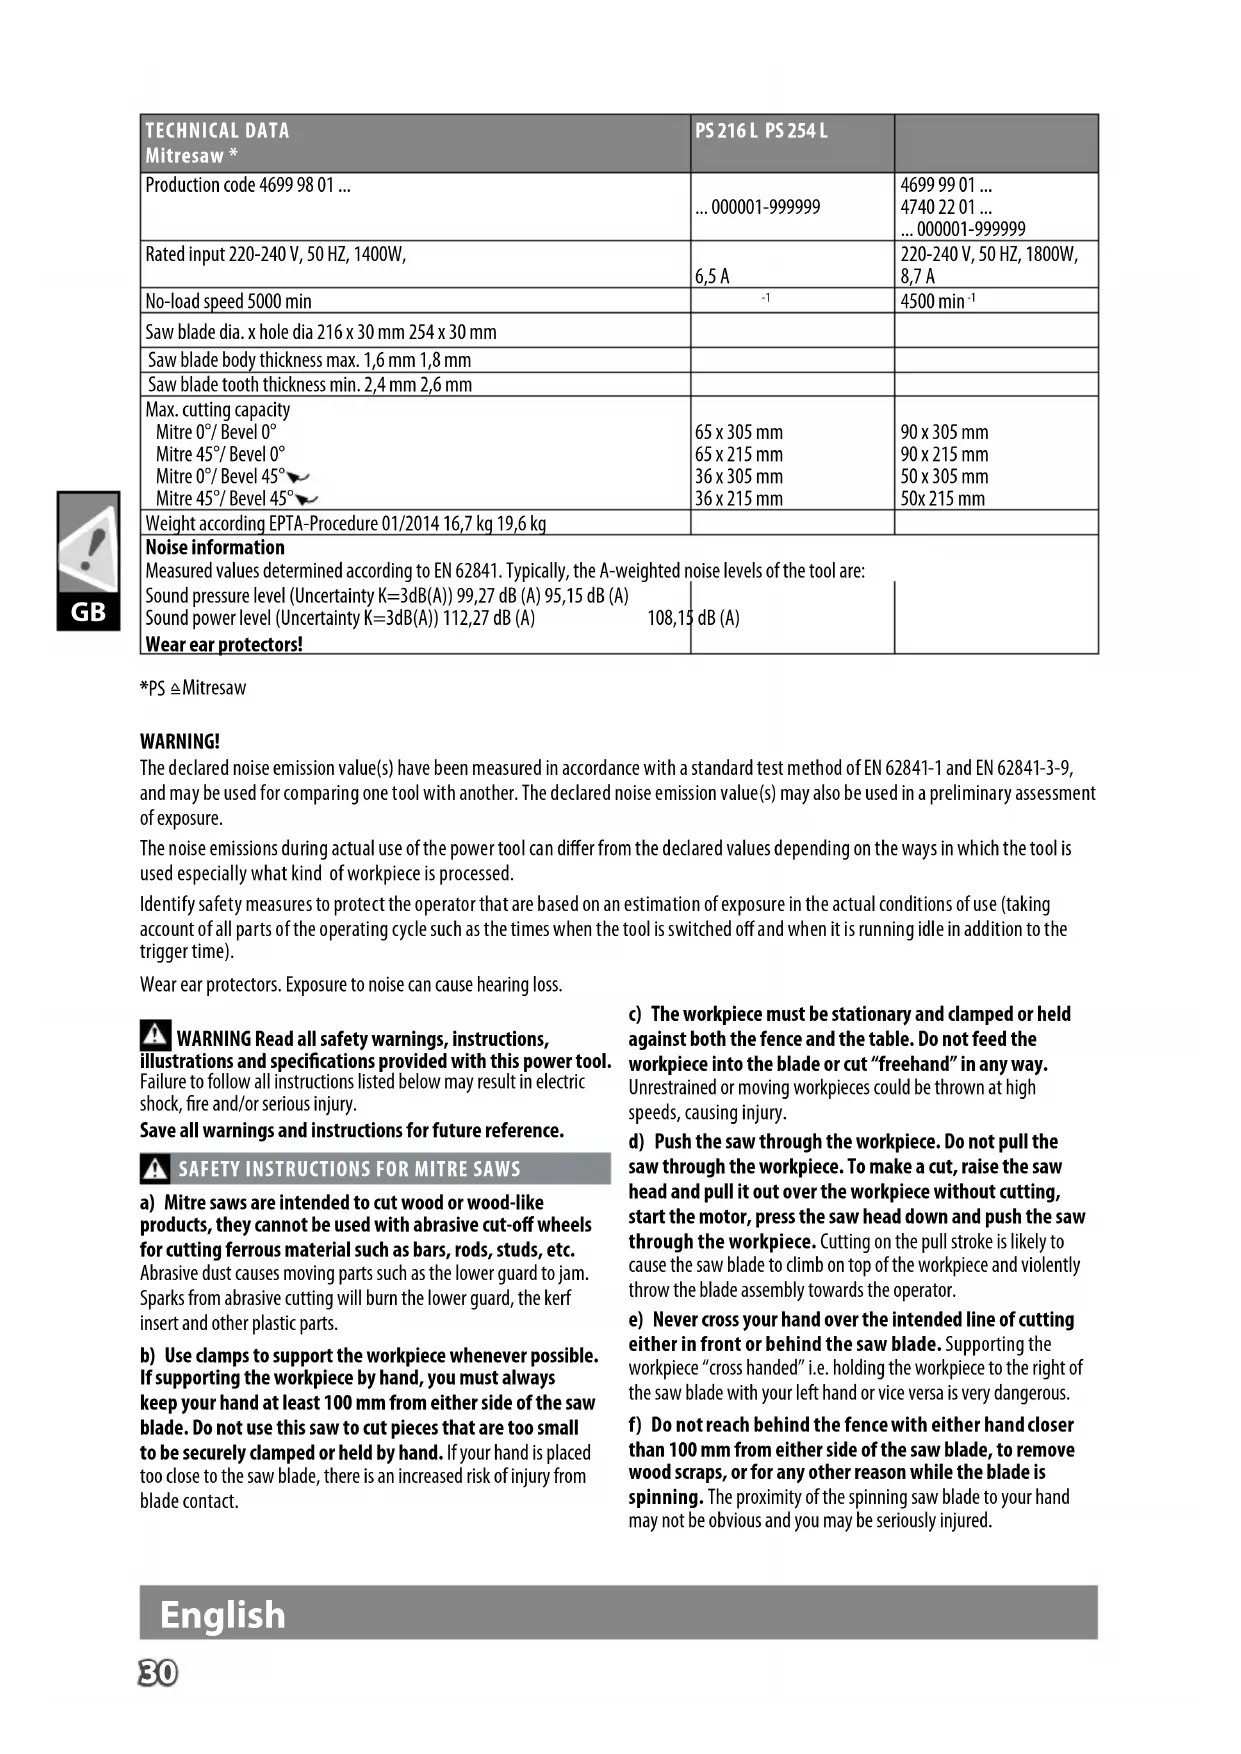
| Power Supply | 220-240 V ~ 50 Hz, 1400 W, 6.5 A |
| No-Load Speed | 5000 min⁻¹ |
| Blade Diameter | 216 mm, bore 30 mm |
| Max. Blade Body Thickness | 1.6 mm |
| Min. Blade Tooth Thickness | 2.4 mm |
| Cutting Capacity (0°/0°) | 65 x 305 mm |
| Cutting Capacity (45°/0°) | 65 x 215 mm |
| Cutting Capacity (0°/45°) | 36 x 305 mm |
| Weight (according to EPTA 01/2014) | 16.7 kg |
| Sound Pressure Level | 99.27 dB(A) (uncertainty K=3 dB) |
| Sound Power Level | 112.27 dB(A) (uncertainty K=3 dB) |
| Protection Class | II (double insulation) |
| Main Functions | Mitre cut, bevel cut, compound cut; sliding guide; class 2 laser; LED light; adjustable depth stop |
| Safety | Lower guard, brake, on/off switch, linear rod stop button, bevel angle lock |
| Maintenance and Cleaning | Clean with a brush or vacuum; do not use compressed air; replace worn blades; repairs by an authorized center |
| Spare Parts and Repairability | Saw blade EN 847-1/0216x030x2.4/48T; kerf plate; parts available via AEG after-sales service |
| General Information | Intended use: sawing wood and similar materials; CE certification; includes instruction manual |
Frequently Asked Questions - PS 216 L AEG
User questions about PS 216 L AEG
0 question about this device. Answer the ones you know or ask your own.
Ask a new question about this device
Download the instructions for your Jigsaw in PDF format for free! Find your manual PS 216 L - AEG and take your electronic device back in hand. On this page are published all the documents necessary for the use of your device. PS 216 L by AEG.
USER MANUAL PS 216 L AEG
Original instructions
It is included in the delivery.
Not included in standard equipment. Not included in standard equipment. Not included in the delivery.
a
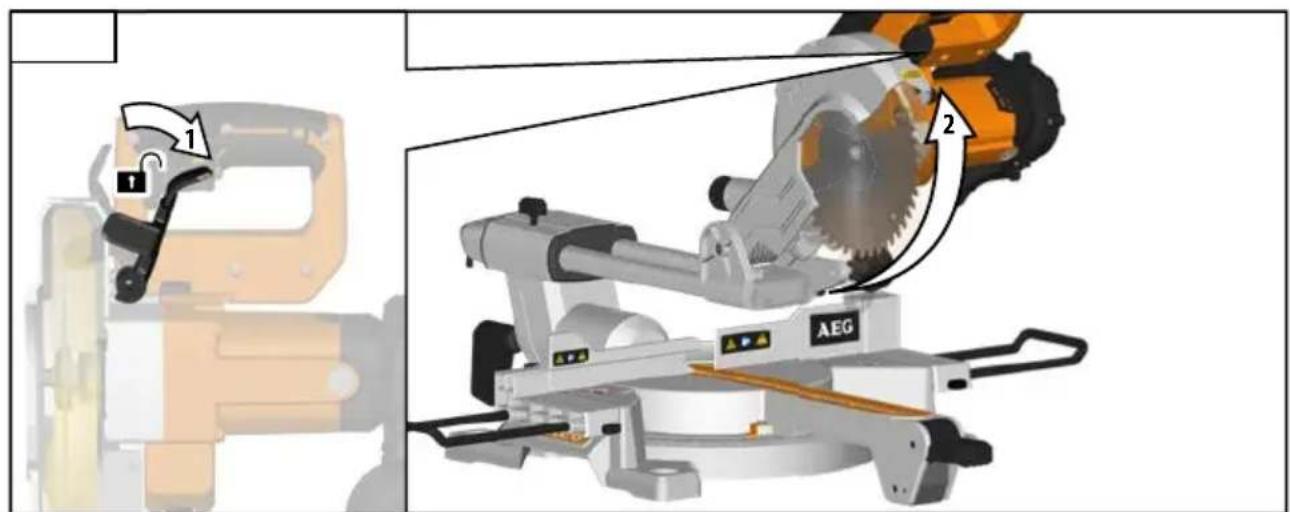

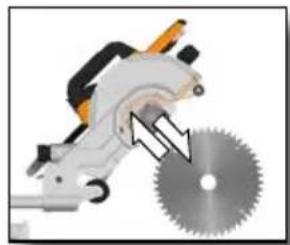







Insulated gripping surface
Insulated handle surface
Insulated gripping surface
Insulated gripping surface
Insulated handle surface
Insulated handle surface
aJg jao Jaijai
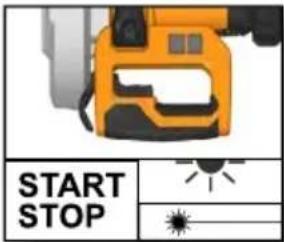



LASER 2
A:650nm;PS1mW EN 60825-1:2014
START STOP XII
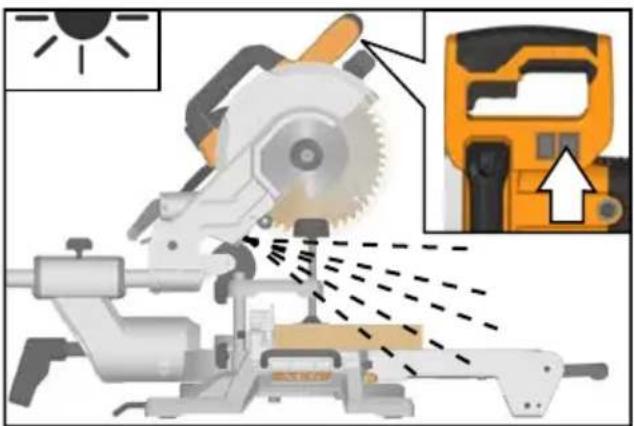
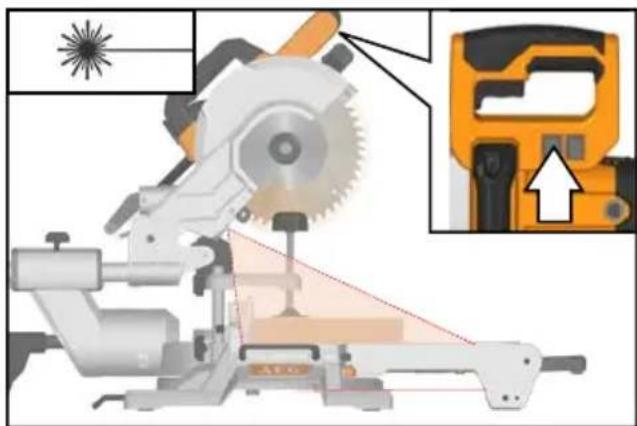
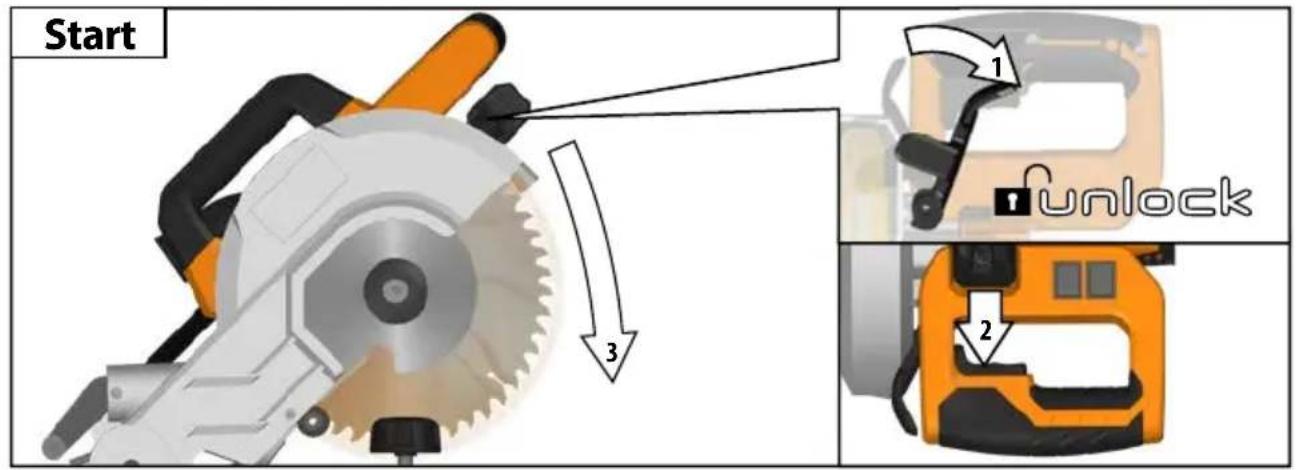
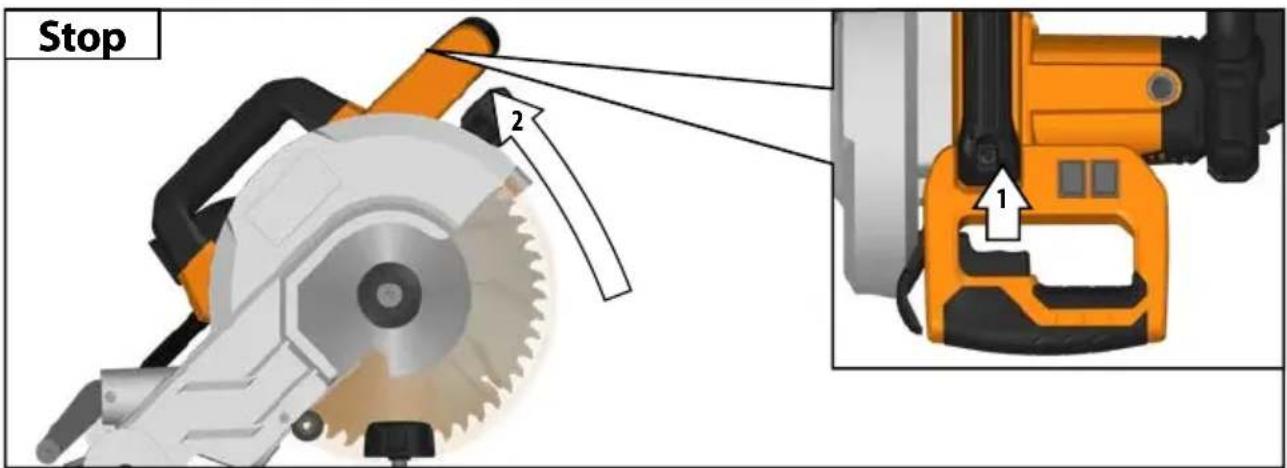
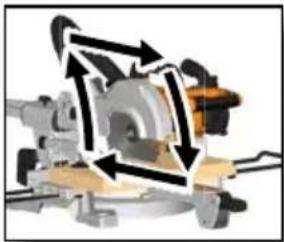


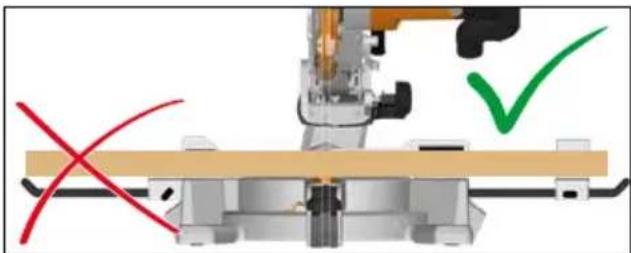
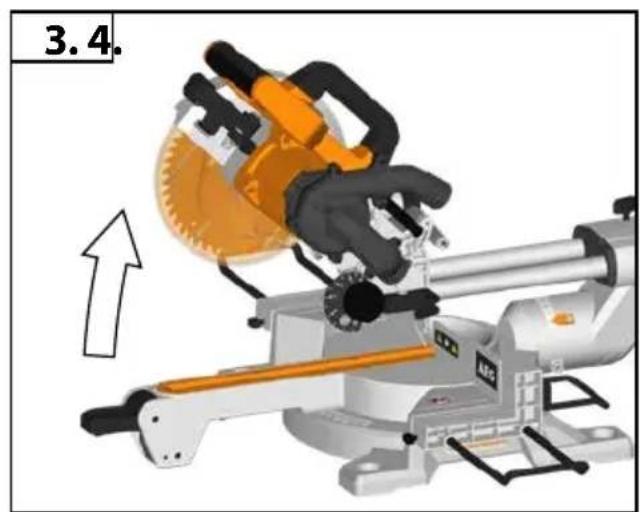
1. 2.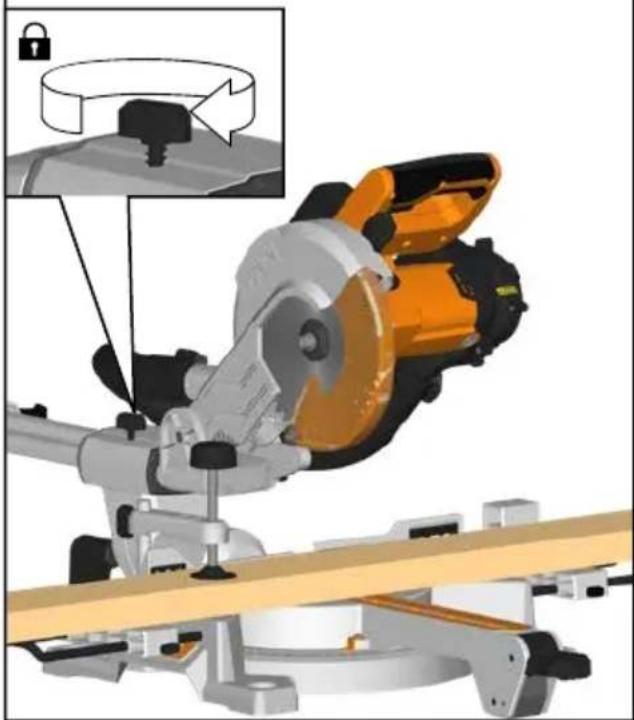
Start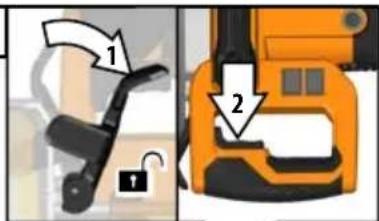
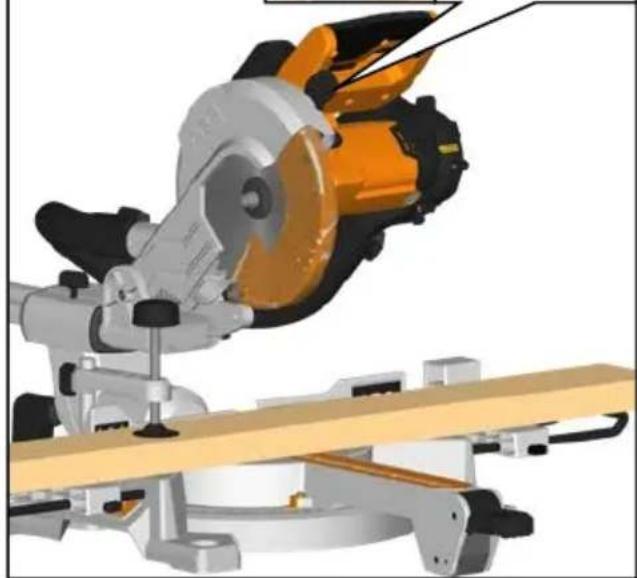
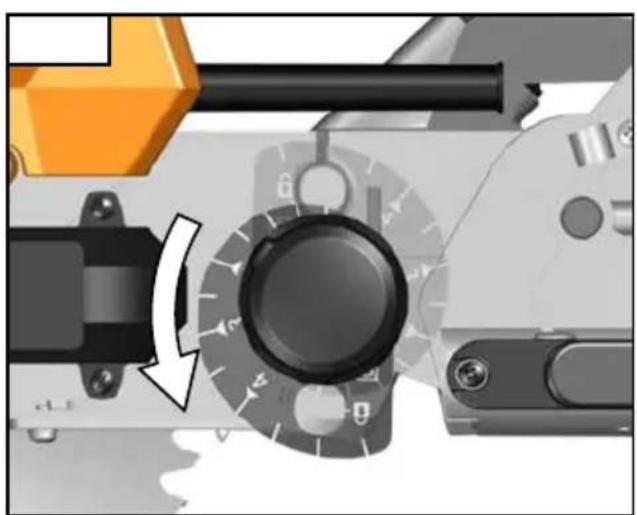
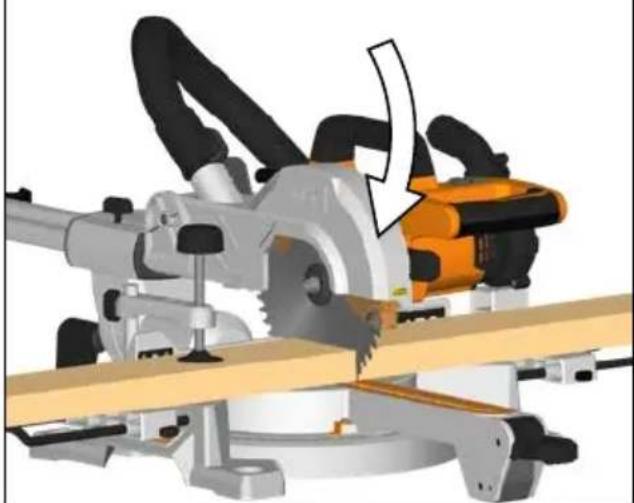
3.
4. STOP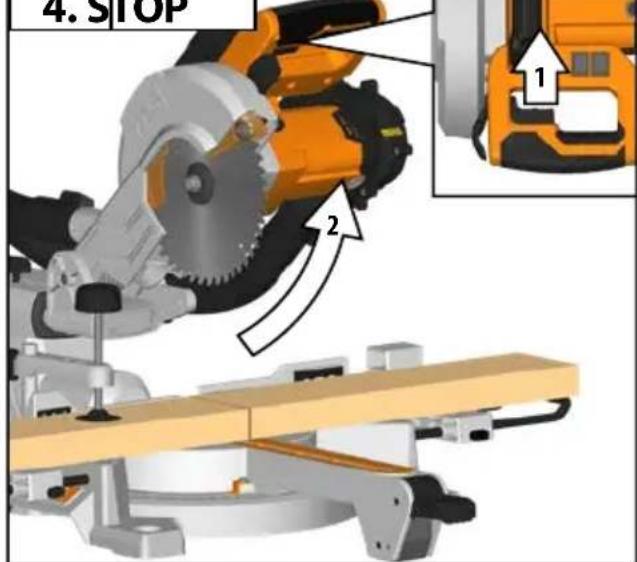
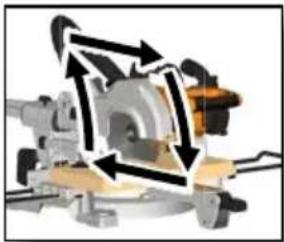


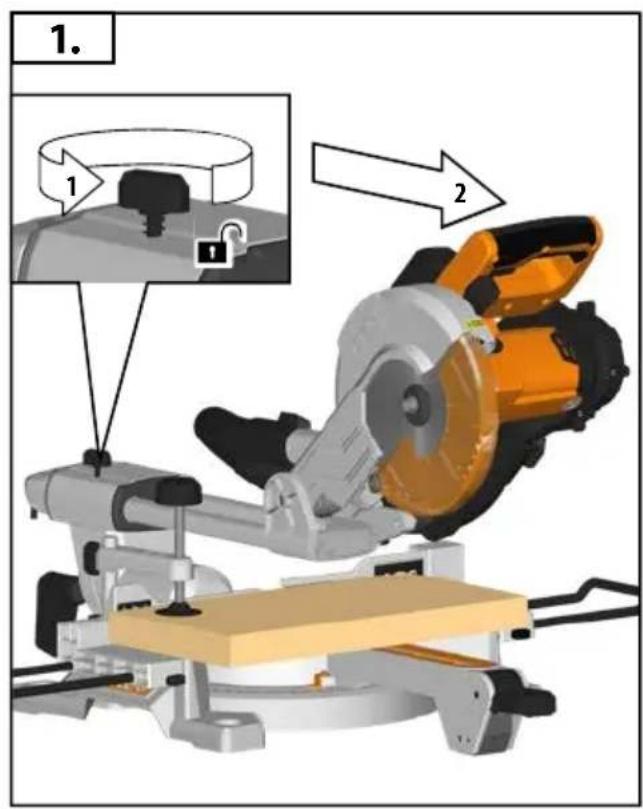
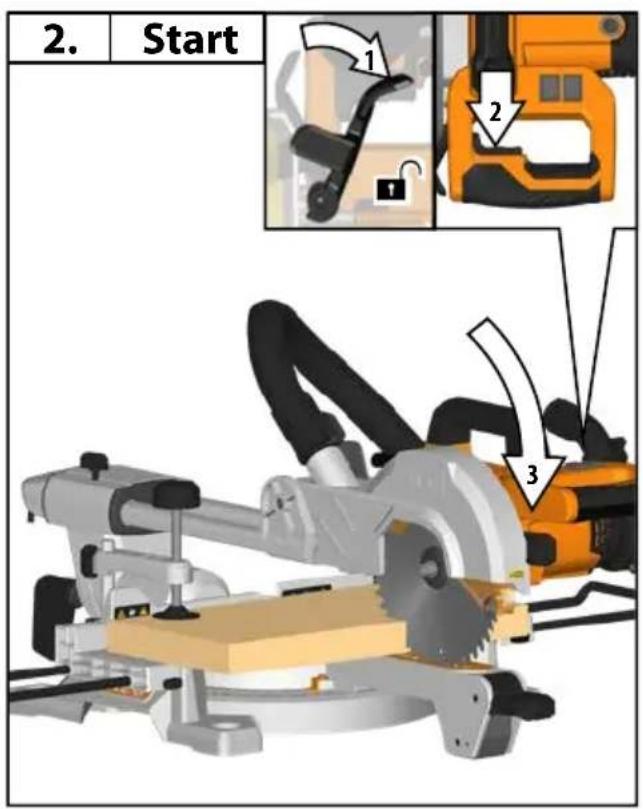
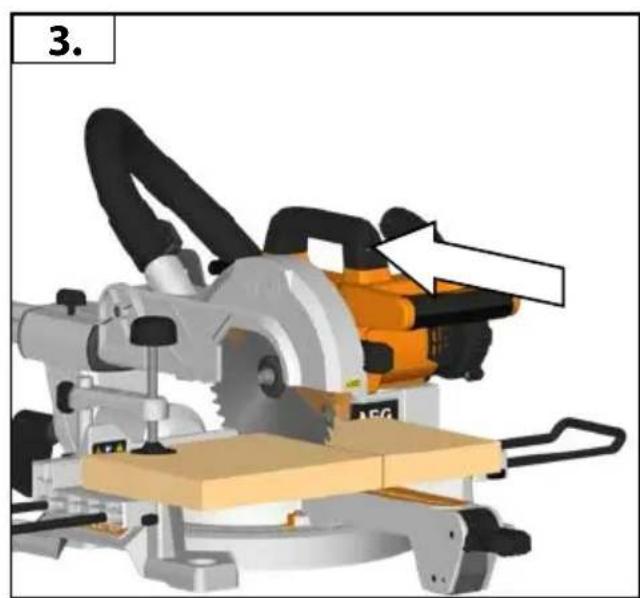
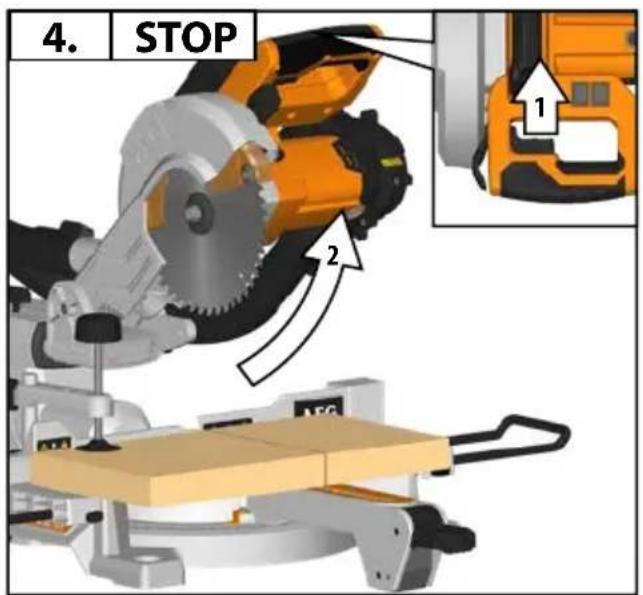
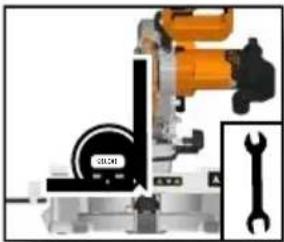
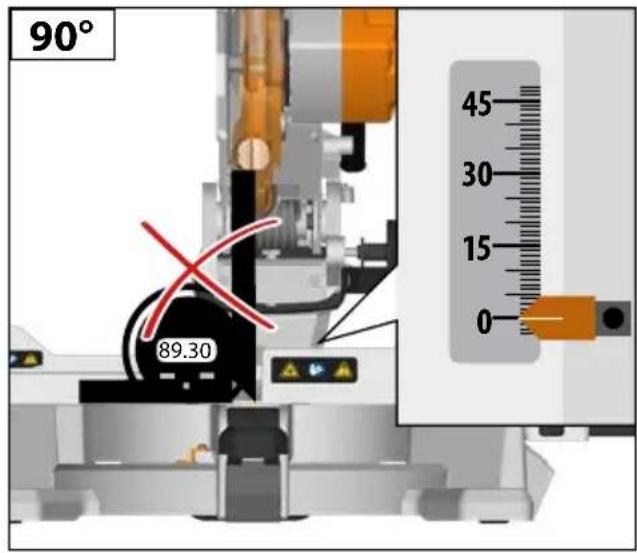
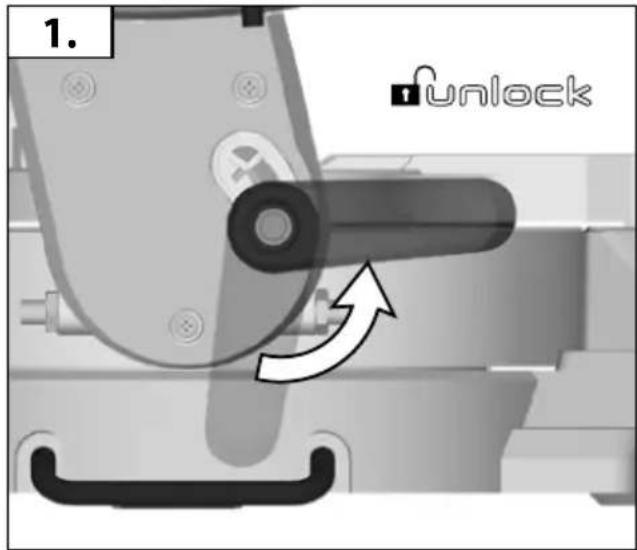
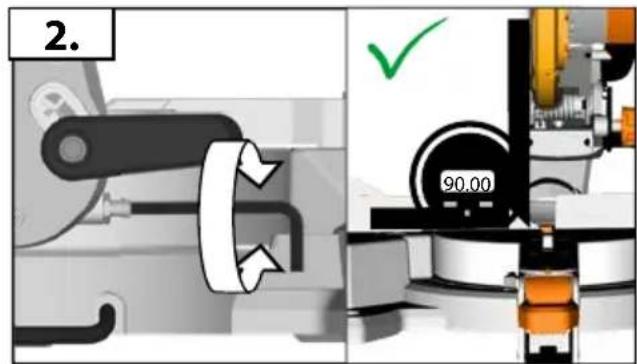
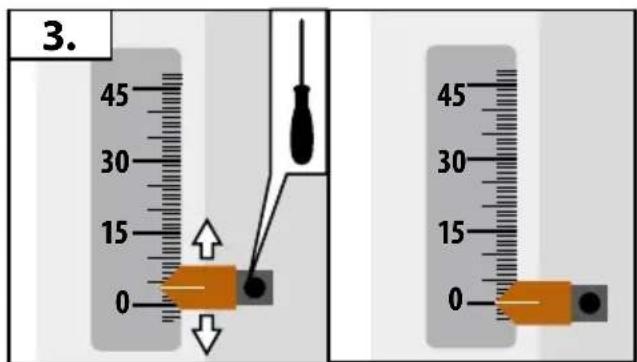
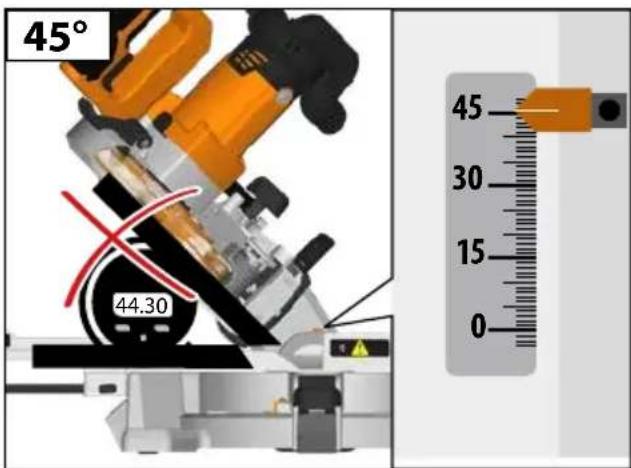
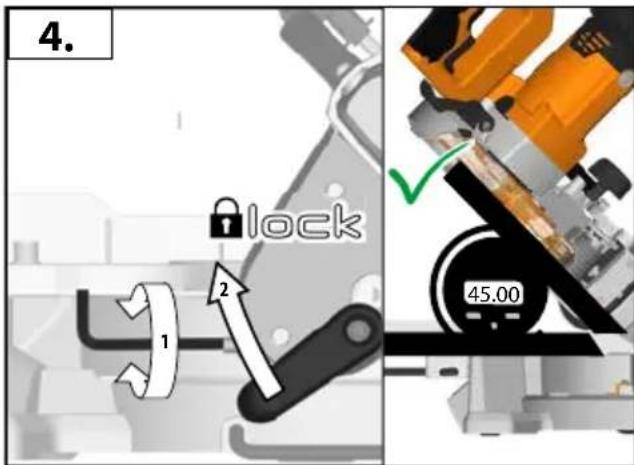
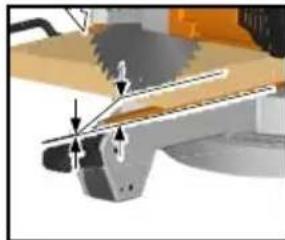
If a correction of the 90° angle of the guide-plate to the saw blade is necessary, use the correction screw.
The declared noise emission value(s) have been measured in accordance with a standard test method of EN 62841-1 and EN 62841-3-9, and may be used for comparing one tool with another. The declared noise emission value(s) may also be used in a preliminary assessment of exposure.
The noise emissions during actual use of the power tool can differ from the declared values depending on the ways in which the tool is used especially what kind of workpiece is processed.
Identify safety measures to protect the operator that are based on an estimation of exposure in the actual conditions of use (taking account of all parts of the operating cycle such as the times when the tool is switched off and when it is running idle in addition to the trigger time).
Wear ear protectors. Exposure to noise can cause hearing loss.

WARNING Read all safety warnings, instructions,
illustrations and specifications provided with this power tool.
Failure to follow all instructions listed below may result in electric shock, fire and/or serious injury.
Save all warnings and instructions for future reference.

SAFETY INSTRUCTIONS FOR MITRE SAWS
a) Mitre saws are intended to cut wood or wood-like products, they cannot be used with abrasive cut-off wheels for cutting ferrous material such as bars, rods, studs, etc. Abrasive dust causes moving parts such as the lower guard to jam. Sparks from abrasive cutting will burn the lower guard, the kerf insert and other plastic parts.
b) Use clamps to support the workpiece whenever possible. If supporting the workpiece by hand, you must always keep your hand at least 100mm from either side of the saw blade. Do not use this saw to cut pieces that are too small to be securely clamped or held by hand. If your hand is placed too close to the saw blade, there is an increased risk of injury from blade contact.
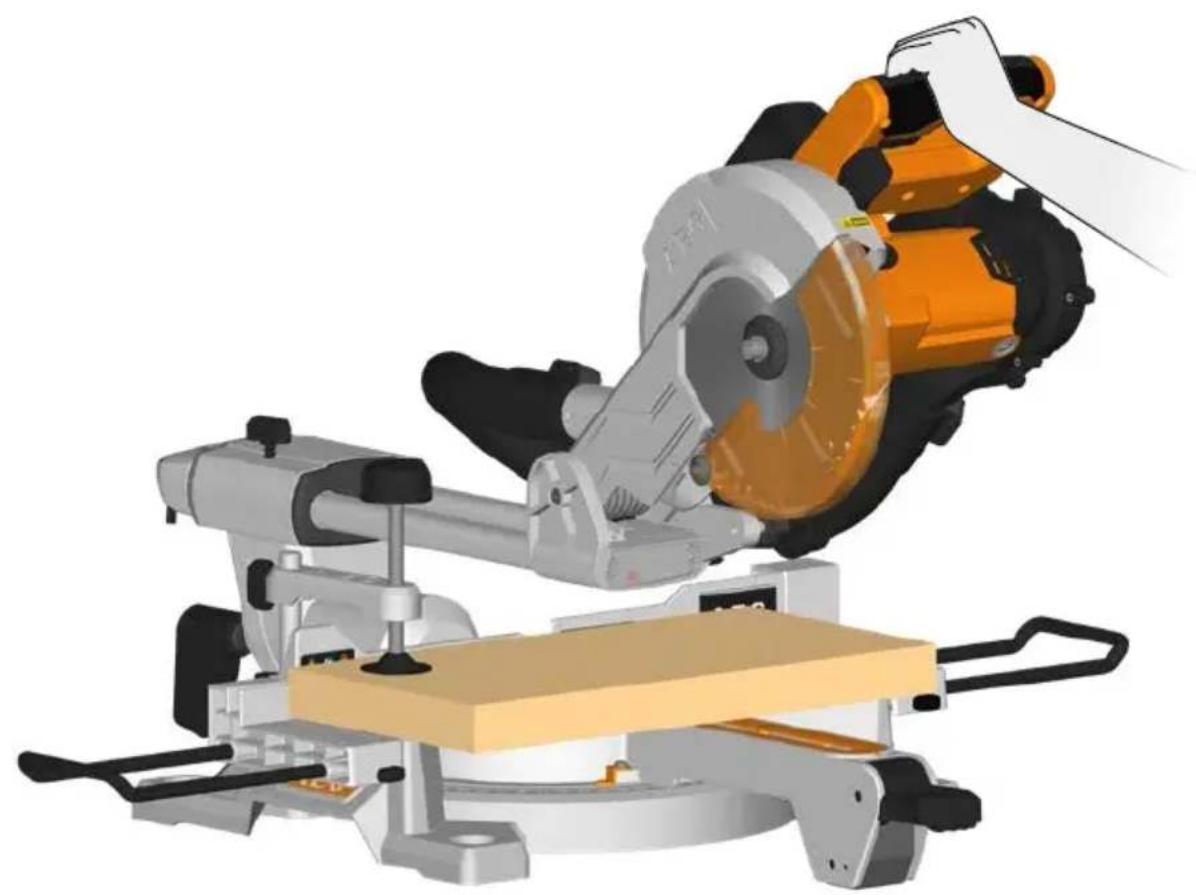
c) The workpiece must be stationary and clamped or held against both the fence and the table. Do not feed the workpiece into the blade or cut "freehand" in any way. Unrestrained or moving workpieces could be thrown at high speeds, causing injury.
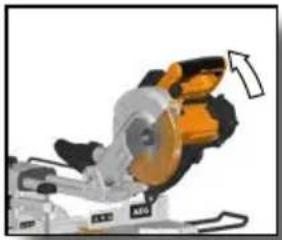
d) Push the saw through the workpiece. Do not pull the saw through the workpiece. To make a cut, raise the saw head and pull it out over the workpiece without cutting, start the motor, press the saw head down and push the saw through the workpiece. Cutting on the pull stroke is likely to cause the saw blade to climb on top of the workpiece and violently throw the blade assembly towards the operator.
e) Never cross your hand over the intended line of cutting either in front or behind the saw blade. Supporting the workpiece "cross handed" i.e. holding the workpiece to the right of the saw blade with your left hand or vice versa is very dangerous.
f) Do not reach behind the fence with either hand closer than 100 mm from either side of the saw blade, to remove wood scraps, or for any other reason while the blade is spinning. The proximity of the spinning saw blade to your hand may not be obvious and you may be seriously injured.
g) Inspect your workpiece before cutting. If the workpiece is bowed or warped, clamp it with the outside bowed face toward the fence. Always make certain that there is no gap between the workpiece, fence, and table along the line of the cut. Bent or warped workpieces can twist or shift and may cause binding on the spinning saw blade while cutting. There should be no nails or foreign objects in the workpiece. h) Do not use the saw until the table is clear of all tools, wood scraps, etc., except for the workpiece. Small debris or loose pieces of wood or other objects that contact the revolving blade can be thrown with high speed. i) Cut only one workpiece at a time. Stacked multiple workpieces cannot be adequately clamped or braced and may bind on the blade or shift during cutting. j) Ensure the miter saw is mounted or placed on a level, firm work surface before use. A level and firm work surface reduces the risk of the miter saw becoming unstable. k) Plan your work. Every time you change the bevel or miter angle setting, make sure the adjustable fence is set correctly to support the workpiece and will not interfere with the blade or the guarding system. Without turning the tool "ON" and with no workpiece on the table, move the saw blade through a complete simulated cut to assure there will be no interference or danger of cutting the fence. l) Provide adequate support such as table extensions, saw horses, etc. for a workpiece that is wider or longer than the table top. Workpieces longer or wider than the miter saw table can tip if not securely supported. If the cut-off piece or workpiece tips, it can lift the lower guard or be thrown by the spinning blade. m) Do not use another person as a substitute for a table extension or as additional support. Unstable support for the workpiece can cause the blade to bind or the workpiece to shift during the cutting operation pulling you and the helper into the spinning blade. n) The cut-off piece must not be jammed or pressed by any means against the spinning saw blade. If confined, i.e. using length stops, the cut-off piece could get wedged against the blade and thrown violently. o) Always use a clamp or a fixture designed to properly support round material such as rods or tubing. Rods have a tendency to roll while being cut, causing the blade to "bite" and pull the work with your hand into the blade. p) Let the blade reach full speed before contacting the workpiece. This will reduce the risk of the workpiece being thrown. q) If the workpiece or blade becomes jammed, turn the miter saw off. Wait for all moving parts to stop and disconnect the plug from the power source and/or remove the battery pack. Then work to free the jammed material. Continued sawing with a jammed workpiece could cause loss of control or damage to the miter saw. r) After finishing the cut, release the switch, hold the saw head down and wait for the blade to stop before removing the cut-off piece. Reaching with your hand near the coasting blade is dangerous.
WOOD CUTTING BLADE SAFETY WARNINGS
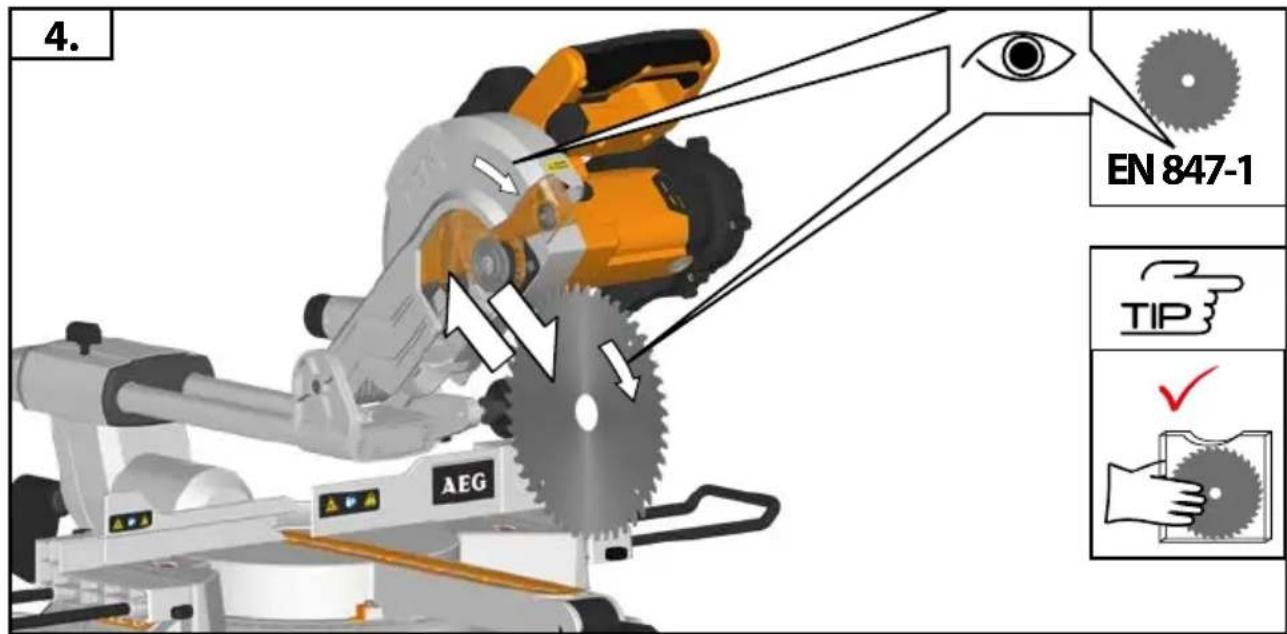
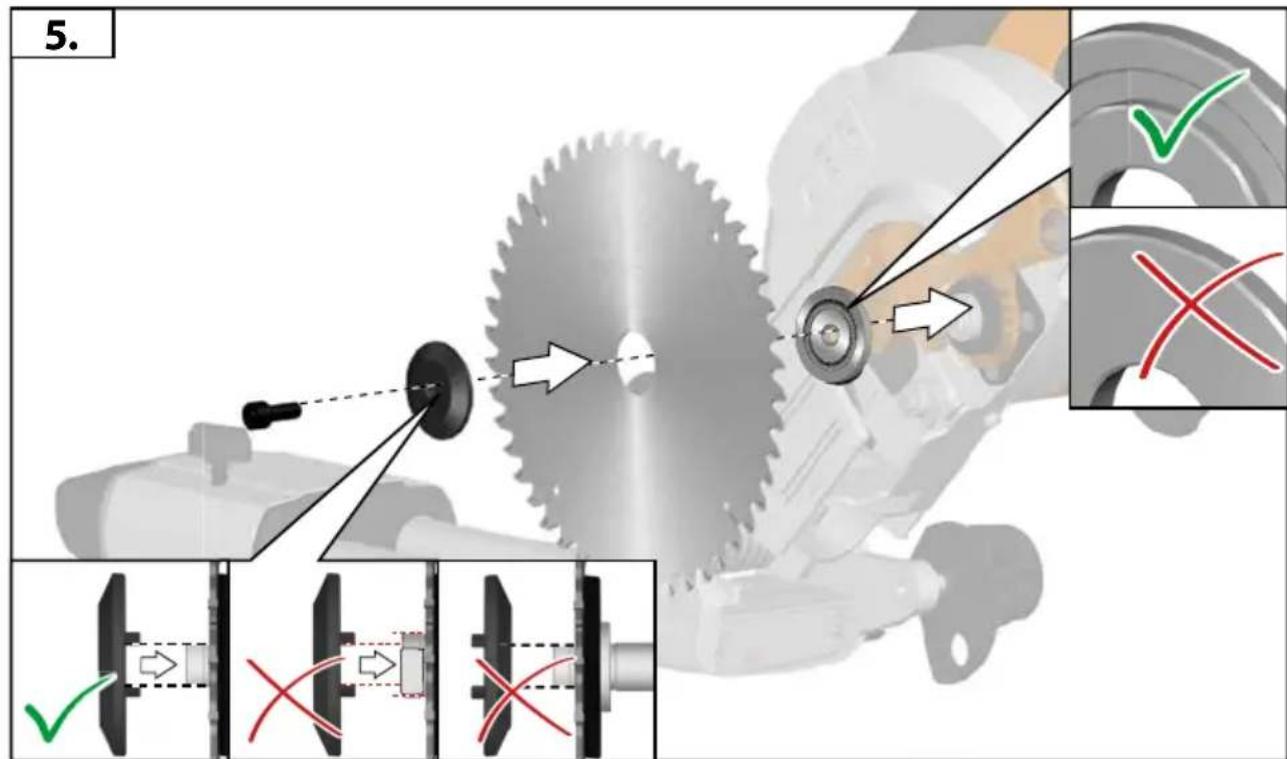
s) Hold the handle firmly when making an incomplete cut or when releasing the switch before the saw head is completely in the down position. The braking action of the saw may cause the saw head to be suddenly pulled downward, causing a risk of injury. Please read the manual and instructions carefully before using the saw blade and the machine. The machine must be in good condition, the spindle without deformation and vibration. Do not use the saw without the guards in position, keep guards in good working order and properly maintained. Ensure the operator is adequately trained in safety precautions, adjustment, and operation of the machine. Always wear goggles and ear protection when using the machine. It is recommended to wear gloves, sturdy non-slip shoes and apron. Before using any accessory, consult the instruction manual. The improper use of an accessory can cause damage and increase the potential for injury. Use only blades specified in this manual, complying with EN 847-1. Observe the maximum speed marked on the saw blade. Ensure the speed marked on the saw blade is at least equal to the speed marked on the saw. Always use blades with correct size and shape of arbour holes. Blades that do not match the mounting hardware of the saw will run eccentrically, causing loss of control. Do not use blades of larger or smaller diameter other than recommended. Do not use any spacers to make the blade fit onto the spindle. Check the tips of the saw blade for damage or abnormal appearance before each use. Tips that are damaged or loose can become flying objects in use and increase the chance of personal injury. Do not use cracked or distorted saw blades. Do not use saw blades which are damaged or deformed. Scrap the saw blade if damaged, deformed, distorted or cracked; repairing is not permitted. Do not use HSS blades. Ensure the saw blade is mounted correctly, tighten the arbor nut securely before use (tightening torque approx. 12 Nm). Fastening screw and nuts shall be tightened using the appropriate spanner, etc. Extension of the spanner or tightening using hammer blows is not permitted. Make sure the blade and flanges are clean and the recessed sides of the collar are against the blade. Make sure the blade rotates in the correct direction. Before work, make a dummy cut without the motor turned on so the position of the blade, operation of the guards with respect to other machine parts and workpiece may be checked. Never leave the machine unattended. Do not apply lubricants on the blade when it is running. Never perform any cleaning or maintenance work when the machine is still running and the head is not in the rest position. Never attempt to stop a machine in motion rapidly by jamming a tool or other means against the blade; serious accidents can be caused unintentionally in this way. Disconnect the saw from the mains supply or remove battery pack before changing blades or carrying out maintenance.
English

Pay attention to blade packing and unpacking, it is easy to be injured by the sharp blade tips.
Use a blade holder or wear gloves when handling a saw blade.
Keep and store the blade in original packaging or other suitable packaging, keep in dry conditions and away from chemicals which may damage the blade.
ADDITIONAL SAFETY AND WORKING INSTRUCTIONS
Always clamp the workpiece safely and securely.
Ensure that the machine is always stable and secure (e.g. fixed to a bench).
Wear ear protectors. Exposure to noise can cause hearing loss.
Always wear safety goggles when using the machine. It is recommended to wear gloves for handling blades and rough material, as well as sturdy non-slip shoes which also protect the feet from workpieces that may fall from the cutting area.
Always make sure the power plug has been removed from the mains power source before making adjustments, lubricating or when doing any maintenance on the product.
Only plug-in when machine is switched off.
Never reach into the area near the blade, unless the blade has completely stopped.
Before use, thoroughly check the tool for any damage or material fatigue. Repairs should only be carried out by authorised Service Agents.
Always use the guards on the machine. Do not use the machine if the guards are not in place and working correctly.
The lower blade guard should only open when the blade is lowered to the workpiece and must always be able to move freely and close automatically.
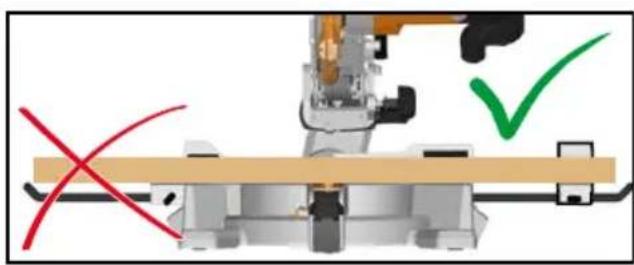
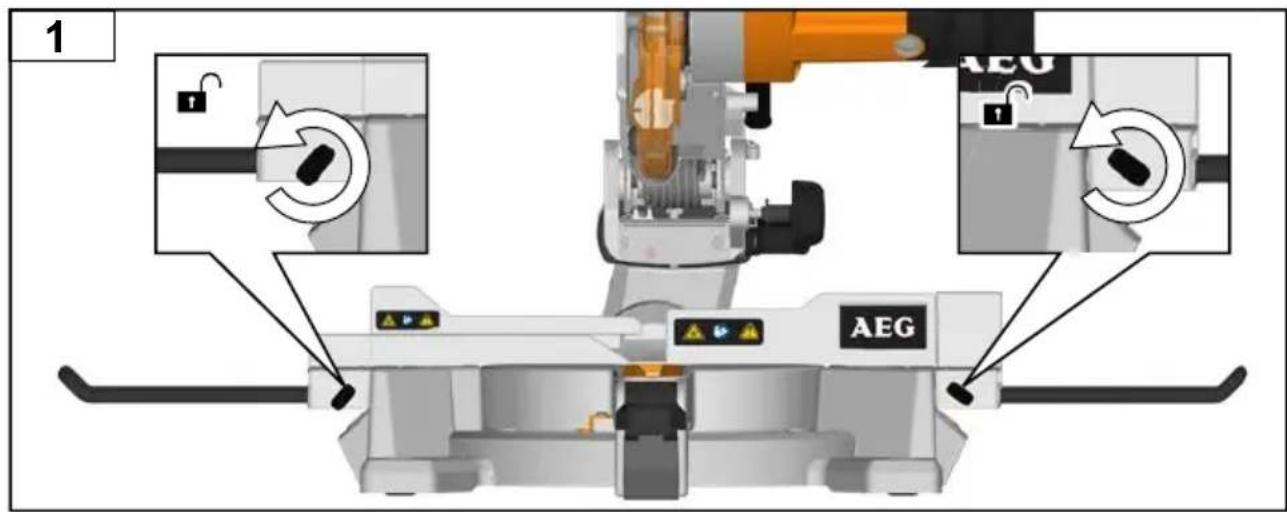
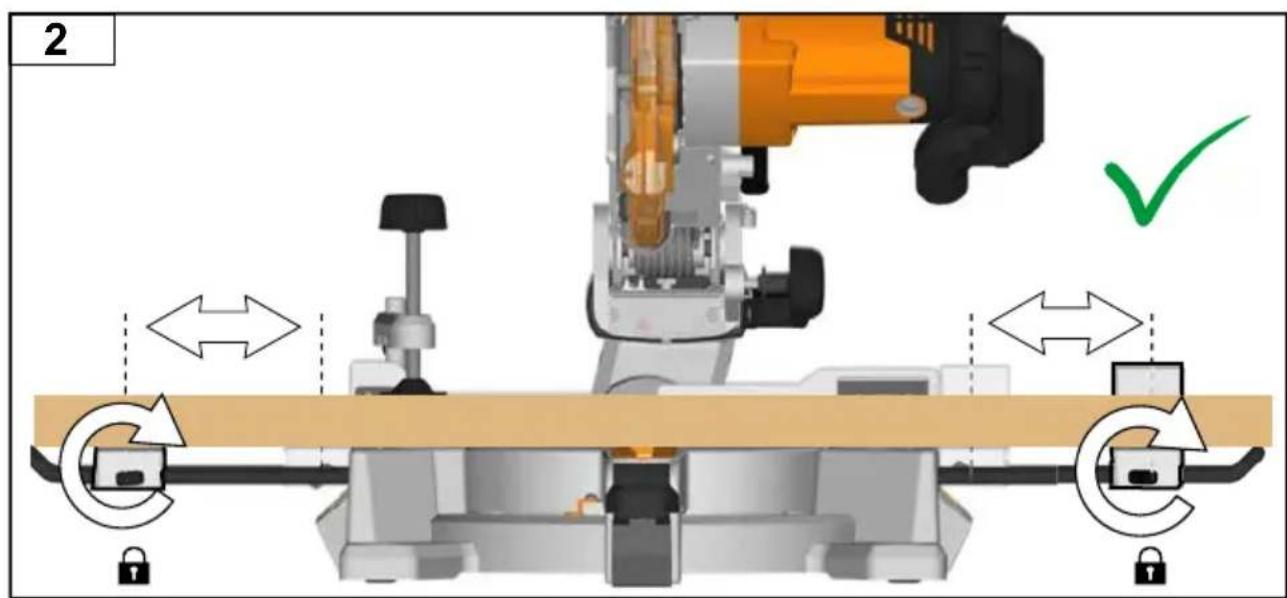
Always fix and use extension bar holders for workpiece support during operation.
Never alter or modify the saw or its function. Your safety may be compromised.
Do not use saw blades which are cracked, damaged, or deformed.
Do not use saw blades made of high-speed steel.
Only use saw blades which are sharp. Replace blunt blades with a new replacement.
Always use blades with correct size and shape of arbour holes.
Blades that do not match the mounting hardware of the saw will run eccentrically, causing loss of control.
Use only woodworking blades specified in this manual, which comply with EN 847-1.
Do not use any flanges, washers, and nuts to secure the saw blade other than those supplied or indicated in the instruction manual.
It is necessary to select a saw blade which is suitable for the material being cut. Never use the product to cut materials other than those specified in the intended use section in this manual.
It is important to avoid overheating the blade and melting the plastic workpiece when cutting.
It is essential to adhere to the maximum speed specified on the saw blade. Only use saw blades that are marked with a speed equal to or higher than the speed marked on the tool.
Replace the table insert when worn or damaged.
Before work, make a dummy cut without the motor turned on so the position of the blade, operation of the guards with respect to other machine parts, and workpiece may be checked.
When performing miter, bevel, or compound miter cuts, adjust the sliding fence to ensure the correct clearance from the blade.
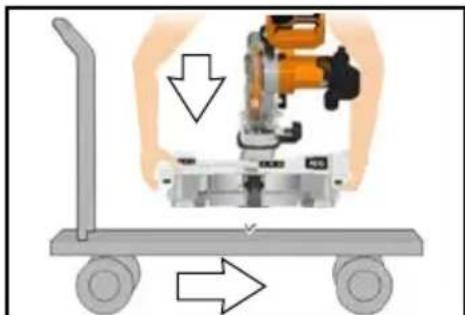
The bracket stop must always be engaged when transporting the product.
Keep the floor area free of loose material, e.g., chips and cut-offs.
Refrain from removing any cut-offs or other parts of the workpiece from the cutting area while the machine is running and the saw head is not in the rest position.
Long workpieces must be adequately supported. The working area of the saw includes the whole extent of the workpiece. The operator should secure this area from accidental contact by other persons or objects that may move the workpiece during operation.
The dust produced when using this tool may be harmful to health. Do not inhale the dust. Use a dust extraction system and wear a suitable dust protection mask. Remove deposited dust thoroughly, e.g., with a vacuum cleaner.
Do not replace the LED or laser with a different type. Any repairs must only be carried out by the manufacturer or an authorized service agent.
A power spike causes voltage fluctuations and may affect other electrical products on the same power line. Connect the product to a power supply with an impedance equal to 0.3Ω to minimize voltage fluctuations. Contact your electric power supplier for further clarification.
The laser radiation used in this saw is Class II with maximum P ≤ 1mW and λ:650nm wavelengths. Do not view directly with optical instruments. Failure to comply with the rules could result in serious personal injury.
Do not stare into the beam during operation.
Do not project the laser beam directly into the eyes of others. Serious eye injury could result.
Do not place the laser in a position that may cause anyone to stare into the laser beam intentionally or unintentionally.
Do not use optical tools to view the laser beam.
Do not operate the laser around children or allow children to operate the laser.
Do not attempt to repair the laser device by yourself.
Do not attempt to change any parts of the laser device by yourself.
Any repairs must only be carried out by the manufacturer or authorized service agent.
Do not replace the installed laser with a different type.
SPECIFIED CONDITIONS OF USE
The slide compound miter saw is intended for sawing solid and bonded wood with or without glued veneer, plastics, and materials similar to wood.
The slide compound miter saw is intended to be used only by adult operators who have read the instruction manual and understand the risks and hazards.
The slide compound miter saw is designed to be fixed at the base to a solid bench top. If the base is not securely fixed, the whole machine may move during cutting operations, which increases the possibility of serious personal injury.
The slide compound miter saw is designed to make bevel and miter cuts. The capacities for the various cuts are provided in the product specifications in this manual.
The slide compound miter saw is to be used in dry conditions, with excellent ambient lighting and adequate ventilation.
The slide compound miter saw is intended for consumer use and should only be used as described above and is not intended for any other purpose.
RESIDUAL RISK
Even when the slide compound miter saw is used as prescribed, it is still impossible to completely eliminate certain residual risk factors. The following hazards may arise and the operator should pay special attention to avoid the following:
- Risk of contact with uncovered parts of the rotating saw blade.
- Kick-back of work pieces or parts of work pieces due to improper adjustment or handling.
- Catapulting of faulty carbide tips from the saw blade.
- Damage to the respiratory system.
NOTE: Wear respiratory protection masks containing filters appropriate to the materials being worked.
Ensure adequate workplace ventilation. Do not eat, drink or smoke in the work area.
Damage to hearing if effective hearing protection is not worn.
WARNING
Dust from certain paints, coatings and materials may cause irritation or allergic reactions to the respiratory system. Dust from wood such as oak, beech, MDF and others are carcinogenic. Material containing asbestos should only ever be worked or processed by qualified specialist operators.
WARNING
Injuries may be caused, or aggravated, by prolonged use of a tool. When using any tool for prolonged periods, ensure you take regular breaks.
KNOW YOUR PRODUCT
See page A.
- Handle, insulated gripping surface
- Switch trigger
- Safety lock lever
- Outer flange
- Saw blade
- Lower guard
- Fixed fence
- Kerf plate
- Turn table lock handle
- Top handle
- Upper guard
- Dust chute
- Linear rod stop knob 14.Clamp
- Bevel angle lock lever
- Sliding fence 17.Workpiece holder
- Extension bar
- Mounting holes x4
- Turntable
- Mitre scale
- 45° bevel angle adjustment screw
- 90° bevel angle adjustment screw
- LED switch
- Laser switch
- Spindle lock button 27. Cutting depth adjustment plate
- Cutting depth adjustment knob
REPLACEMENT LIST
- PS 216 L: Mitre saw EN 847-1/ø216 x ø30 x 2.4 / 48T / HW / n max. 7000 min-1 (Page A: No. 5)
- PS 254 L: Mitre saw EN 847-1/ø254 x ø30 x 2.6 / 48T / HW / n max. 7400 min-1 (Page A: No. 5)
- Kerf plate (Page A: No. 8)
MAINS CONNECTION
Connect only to single-phase AC system voltage as indicated on the rating plate. It is also possible to connect to sockets without an earthing contact as the design conforms to safety class II.
Appliances used at many different locations including wet room and open air must be connected via a residual current device (FI, RCD, PRCD) of 30 mA or less.
Only plug in when machine is switched off.
Keep mains lead clear from working range of the machine. Always lead the cable away behind you.
Before use check machine, cable, and plug for any damages or material fatigue. Repairs should only be carried out by authorised Service Agents.
A power spike causes voltage fluctuations and may affect other electrical products in the same power line. Connect the product to a power supply with an impedance equal to 0.3Ω to minimize voltage fluctuations.
Contact your electric power supplier for further clarification.
MAINTENANCE
Do not modify this saw in any way or use accessories not approved by the manufacturer. Your safety and that of others may be compromised. Do not use the saw if any switches, guards or other function of this saw does not work as it is intended to. Return to an authorised service centre for professional repair or adjustment. Do not make any adjustments whilst the saw blade is in motion. Always make sure the power plug has been removed from the mains power source before making adjustments, lubricating or when doing any maintenance on the product. Before and after each use, check your saw for damage or broken parts and keep it in top working condition by replacing parts immediately with spares approved by the manufacturer. The blade is very hot after use, wear gloves or allow to cool before maintenance or cleaning procedures. Clean out accumulated dust using a brush or vacuum cleaner. Do not use compressed air. To assure safety and reliability, all repairs, including changing brushes, should be performed by an authorised service centre. Clean tool and guarding system with dry cloth. The ventilation slots of the machine must be kept clear at all times. If the replacement of the supply cord is necessary, this has to be done by the manufacturer or his agent in order to avoid a safety hazard. Use only AEG accessories and spare parts. Should components need to be replaced which have not been described, please contact one of our AEG service agents (see our list of guarantee/service addresses). If needed, an exploded view of the tool can be ordered. Please state the Article No. as well as the machine type printed on the label and order the drawing at your local service agents or directly at: Techtronic Industries GmbH, Max-Eyth-Straße 10, 71364 Winnenden, Germany.
EC-DECLARATION OF CONFORMITY
We declare under our sole responsibility that the product described under "Technical Data" fulfills all the relevant provisions of the directives
2011/65/EU (RoHS)
2006/42/EC
2014/30/EU
and the following harmonized standards have been used.
EN 62841-1:2015
EN 62841-3-9:2015+A11:2017
EN 55014-1:2017
EN 55014-2:2015
EN 61000-3-2:2014
EN 61000-3-11:2000
EN IEC 63000:2018
Winnenden, 2019-03-08
Alexander Krug / Managing Director
Authorized to compile the technical file
Techtronic Industries GmbH
Max-Eyth-Straße 10, 71364 Winnenden, Germany
SYMBOLS

CAUTION! WARNING! DANGER!

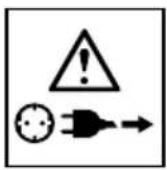
Always disconnect the plug from the socket before carrying out any work on the machine.

WARNING - To reduce the risk of injury, user must read instruction manual!

Always wear goggles when using the machine.

Wear ear protectors!

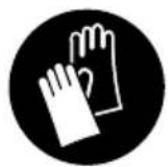
Wear gloves!

Always keep hands away from the path of the saw blade.

This tool is only suitable for indoor use. Never expose tool to rain.

Dust chute connection port

Cut wood only.

Do not stare into beam.
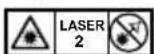
This product corresponds to the laser class 2 in accordance with EN 60825-1:2014.
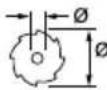
Saw blade dia. x hole dia

Rotation direction

Blade teeth

Width of cut

No-load speed

Voltage

AC Current

Class II tool. Tool in which protection against electric shock does not rely on basic insulation only, but in which additional safety precautions, such as double insulation or reinforced insulation, are provided.
There being no provision for protective earthing or reliance upon installation conditions.
Do not dispose of electric tools together with household waste material. Electric tools and electronic equipment that have reached the end of their life must be collected separately and returned to an environmentally compatible recycling facility. Check with your local authority or retailer for recycling advice and collection point.


European Conformity Mark

Ukraine Conformity Mark

EurAsian Conformity Mark
English
GET TO KNOW YOUR PRODUCT.
See page A.
Alexander Krug / Managing Director
Max-Eyth-Straße 10, 71364 Winnenden, Germany
German
SYMBOLS

GET TO KNOW YOUR PRODUCT
See page A.
Alexander Krug / Managing Director
Max-Eyth-Straße 10, 71364 Winnenden, Germany
SYMBOLS

ATTENTION! WARNING! DANGER!
Max-Eyth-Straße 10, 71364 Winnenden, Germany.
Alexander Krug / Managing Director
Max-Eyth-Straße 10, 71364 Winnenden, Germany
SYMBOLS

ATTENTION! WARNING! DANGER!
Alexander Krug / Managing Director
Max-Eyth-Straße 10, 71364 Winnenden, Germany
Spanish
SYMBOLS

ATTENTION! WARNING! DANGER!

Alexander Krug / Managing Director
Max-Eyth-Straße 10, 71364 Winnenden, Germany
SYMBOLS

ATTENTION! DANGER!
Before performing any work on the machine, unplug it from the power outlet.
FAMILIARIZE YOURSELF WITH YOUR PRODUCT
See page A.
Alexander Krug / Managing Director
Max-Eyth-Straße 10, 71364 Winnenden, Germany
SYMBOLS

CAUTION! WARNING! DANGER!
GET TO KNOW THIS PRODUCT
See page A.
Alexander Krug / Managing Director
Max-Eyth-Straße 10, 71364 Winnenden, Germany
SYMBOLS

IMPORTANT! WARNING! DANGER!

Alexander Krug / Managing Director
Max-Eyth-Straße 10, 71364 Winnenden, Germany
SYMBOLS

CAUTION! WARNING! DANGER!

Dust extraction port

Only saw wood.

Do not look into the laser.
The product corresponds to laser class 2 according to EN 60825-1:2014.
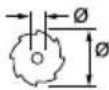
Saw blade - x hole -

Direction of rotation

Blade teeth

Cutting width

No-load speed

Voltage

Alternating current

FAMILIARIZE YOURSELF WITH YOUR PRODUCT
See page A.
Alexander Krug / Managing Director
Authorized to compile technical documentation.
Techtronic Industries GmbH
Max-Eyth-Straße 10, 71364 Winnenden, Germany
SYMBOLS

CAUTION! WARNING! DANGER!

Alexander Krug / Managing Director
Max-Eyth-Straße 10, 71364 Winnenden, Germany
SYMBOLS

CAUTION! WARNING! DANGER!

Max-Eyth-Straße 10, 71364 Winnenden, Germany
SYMBOLS


Alexander Krug / Managing Director
He is responsible for preparing the technical documents.
Techtronic Industries GmbH
Max-Eyth-Straße 10, 71364 Winnenden, Germany
SYMBOLS

CAUTION! WARNING! DANGER!

No-load speed

Voltage

Alternating current

Max-Eyth-Straße 10, 71364 Winnenden, Germany
SYMBOLS

CAUTION! WARNING! DANGER!

SAFETY AND WORKING INSTRUCTIONS
CE- DECLARATION OF CONFORMITY
Max-Eyth-Straße 10, 71364 Winnenden, Germany
SYMBOLS

WARNING! DANGER!

Before any work on the machine, pull the plug out of the socket.

WARNING - To reduce the risk of injury, the user must read the instruction manual.

Always wear safety goggles when working with the machine.

Wear hearing protection!

Alexander Krug / Managing Director
Max-Eyth-Straße 10, 71364 Winnenden, Germany
Polish
Pol
SYMBOLS

WARNING! DANGER!

Alexander Krug / Managing Director
Max-Eyth-Straße 10, 71364 Winnenden, Germany
Mag
SYMBOLS

WARNING! CAUTION! DANGER!
USE IN ACCORDANCE WITH THE INTENDED PURPOSE
Alexander Krug / Managing Director
Authorized to compile technical documentation.
Techtronic Industries GmbH
Max-Eyth-Straße 10, 71364 Winnenden, Germany
SYMBOLS

WARNING! CAUTION! DANGER!
OTHER SAFETY AND WORKING INSTRUCTIONS
Always clamp the workpiece securely.
Max-Eyth-Straße 10, 71364 Winnenden, Germany
SYMBOLS

WARNING! CAUTION! DANGER!

KZageshanas plaksnite (Lappusi A: No. 8)
TIKLA PIESLEGUMS
Piesegt tikai vienpola mainstravas tiklam un tikai spiregumam, kas noradits uz jaudas panela. Pieslegums iespejams ari kontaktligzdam bez aizsargkontaktiem, jo runa ir par uzbuvi, kas atbilst II. aizsargklasei.
Alexander Krug / Managing Director
Pilnvarotais tehniskas dokumentacijas sastadiisana.
Techtronic Industries GmbH
Max-Eyth-Straße 10, 71364 Winnenden, Germany
SIMBOLI

UZMANIBU! BISTAMI!

Pirms jebkadiem darbiem, kas attiecas uz masinas apkopi, masinu noteikti vajag atvienot no kontaktligzdas.

UZMANIBU-Lai izvairitos no savainojumiem, lietotajam jiazlasa instrukcija!

Stradajotarmasinu,vienmerrjanesaizarsgrilles.

Nesat troksha slapetaju!

Javalka aizsargcimdi!

Raugieties, lai rokas vienmér butu arpus zaga diska zonas.

The instruments are intended for indoor use only. Protect the instrument from rain.

Max-Eyth-Straße 10, 71364 Winnenden, Germany
SYMBOLS

WARNING! CAUTION! DANGER!

Before performing any work on the device, unplug it from the outlet.

WARNING - To avoid injury, be sure to read the instruction manual!

Always wear safety goggles when working with the device.

Wear hearing protection!

Wear protective gloves!

SAFETY AND OPERATING INSTRUCTIONS
Always secure workpieces safely and firmly.
SPECIAL SAFETY INSTRUCTIONS FOR LASER
Alexander Krug / Managing Director
Max-Eyth-Straße 10, 71364 Winnenden, Germany
SYMBOLS

WARNING! ATTENTION! DANGER!

Before any work on the machine, pull the plug out of the socket.

The machine must be in good condition, the spindle must be undamaged and run without vibration.
Do not use the saw if the protective guards are not installed; keep the protective guards in proper condition and perform the necessary maintenance.
Make sure that the operator has received proper training in safety techniques, adjustment, and operation of the machine.
When using the saw, always wear protective glasses and hearing protection. It is recommended to wear gloves, non-slip footwear, and work clothes.
Before using auxiliary accessories, see the corresponding instructions and manuals. Incorrect use of auxiliary accessories can cause damage to equipment and increase the risk of injury.
Use only saw blades specified in this manual or conforming to standard EN 847-1.
Observe the maximum rotation speed indicated on the saw blade. Make sure that the speed indicated on the saw blade is at least equal to the speed indicated on the saw.
Always use saw blades with the correct dimensions and corresponding holes and guards.
Do not use blades with a diameter larger or smaller than recommended. Do not use any spacers to mount the blade on the spindle.
Before each use, check the saw blade teeth for damage or deviations from the shape.
Damaged or deformed teeth can break during operation and increase the risk of injury.
Do not use cracked or bent saw blades. Do not use damaged or deformed saw blades.
If the saw blade is damaged, deformed, cracked, or has broken teeth, do not use it; repair is not allowed.
Do not use any blunt blades from the quick-change stand.
Make sure that the blade is installed correctly.
Before use, tighten the nut on the arbor (tightening force approx. 12 Nm).
Tighten the fastening bolts and nuts using a suitable hex key or similar tool.
Extending the hex key for tightening by hammer blows is not allowed.
Make sure that the saw blade has a smooth surface and that the side surfaces of the body are in contact with the blade.
Make sure that the blade rotates in the correct direction.
Before working, perform a trial run with the machine disconnected to check the setup, blade position, and safety devices, taking into account other machine parts.
Never leave the machine unattended.
Do not apply lubricant to the blade while it is rotating.
Never perform cleaning or maintenance work while the machine is still running and the head is not in the off position.
Never attempt to stop a running machine by pressing tools or other objects against the blade; this can lead to accidents.
Before performing maintenance, disconnect the machine from the power supply and remove the battery.
Be careful when unpacking and packing the blade; you can easily injure yourself on the sharp teeth of the blade.
When installing the blade, always use the blade mounting device or wear protective gloves.
Store the blade in its original packaging in a dry room, protected from chemical substances that could damage the blade.
ADDITIONAL SAFETY INSTRUCTIONS FOR WORK
Always secure the workpiece in a safe and reliable manner.
Make sure the machine is always in a stable position (for example, clamped to a workbench).
Use ear protection! Exposure to noise can lead to hearing loss.
Always work with the tool wearing protective goggles. When working with blades and pipe materials, it is recommended to wear gloves, as well as sturdy non-slip footwear that protects your feet in case a workpiece falls from the cutting area.
Before adjusting, lubricating, or performing any maintenance operations on the product, always unplug the tool from the power outlet.
Insert the blade into the socket only when the tool is switched off.
Never move your hand towards the blade until it has come to a complete stop.
Before use, always carefully check the tool for damage or signs of material wear. Repair of damaged parts may only be carried out by a specialized service center.
Always use the protective guard on the tool. Do not use the machine if the protective guards are not installed or are not working properly.
Open the lower protective guard of the blade only when the blade is lowered and resting on the workpiece. The guard must always move freely and close automatically.
To support the workpiece during operation, always secure it using the clamping device or the extension arm.
Never modify the saw or its functional elements. This could compromise safety.
Do not use saw blades if they are damaged, deformed, or have cracks.
Never use blunt saw blades.
Use only sharp blades. Replace dull blades with new ones.
Always use saw blades with the correct dimensions and the appropriate arbor hole.
Use only blades for woodworking as specified in this manual and conforming to standard EN 847-1.
For fastening the saw blade, use only the flanges and nuts that are included in the delivery or specified in this manual.
Choose a saw blade suitable for the material to be cut. Never use the product for cutting materials not specified in the 'Intended Use' section of this manual.
It is important to avoid overheating the blade when cutting plastic workpieces.
Observe the maximum speed indicated on the saw blade. Use only blades rated for the spindle speed (see marking) equal to or higher than the speed indicated on the tool.
Replace the plastic guard if it is worn or damaged.
Before working, perform a trial cut with the power disconnected to check the workpiece, blade position, and safety devices, taking into account other parts of the machine.
For miter cuts at forty-five degrees, bevel cuts, or complex angled cuts, adjust the sliding fence to set the necessary clearance from the blade.
When transporting the product, always engage the arbor lock.
Remove chips and material residue, such as sawdust and shavings.
Do not remove sawdust or other parts of workpieces from the cutting area while the machine is running and the saw blade is not in the neutral position.
The workpiece must be supported appropriately. The area of the blade refers to the entire surface of the workpiece. The operator must monitor this area, preventing contact with other parts of the workpiece or protecting it from objects that could move the workpiece during operation.
The impact, which occurs during operation with this tool, can cause damage to the blade on the body.
The tool is equipped with a protective cover. Carefully remove the folding blade (e.g., with a vacuum cleaner).
Do not replace the light source with devices of another type. All repair work must be carried out by the manufacturer or an authorized service representative.
A sharp increase in load leads to voltage fluctuations, which can affect the operation of other electrical appliances connected to this power supply. Connect the device to a power source with a total resistance of 0.3 Ω to minimize voltage fluctuations. For detailed explanations, contact your electricity supplier.
RECOMMENDATIONS FOR LASER SAFETY
The laser radiation used in this device belongs to class II at maximum power P≤1 mW and wavelength λ:650 nm. Do not look directly into the beam with optical instruments. Failure to follow these rules can lead to serious injury.
Do not look into the beam during operation.
Do not point the laser beam directly into the eyes of other people. This can lead to eye injury.
Do not position the laser in such a way that anyone could accidentally look into the laser beam.
Do not use optical instruments to look at the laser beam.
Do not work with the laser near children and do not allow children to operate the laser device.
Do not attempt to repair the laser device yourself.
Do not attempt to replace any parts of the laser device yourself.
All repair work must be carried out by the manufacturer or an authorized service representative.
Do not replace the built-in laser with a laser of another type.
The compound miter saw is intended for cutting wood and glued wood blanks with or without an applied laminate layer, and for cutting materials similar to wood.
The compound miter saw is intended for use exclusively by adult operators familiar with the instructions and understanding the risks of danger.
The compound miter saw is intended for fastening to a base. If the base is not secured properly, the entire saw may tip over during cutting, increasing the risk of injury.
The compound miter saw is intended for making crosscuts and miter cuts. The cutting capacity for miter cuts is given in the product specifications in this manual.
The compound miter saw is intended for use in dry, well-lit indoor areas.
The compound miter saw is intended for use by the end user only in the manner described; any other use is prohibited.
RESIDUAL RISKS
Even if the compound miter saw is used in accordance with the instructions, it is impossible to completely eliminate certain residual risk factors. The hazards listed below may arise, and the operator must pay special attention to avoid them.
Risk of contact with unguarded rotating blade parts. - Pay attention to the workpiece and its parts. Improper adjustment or careless handling can cause the saw blade to break. - Possible damage to the respiratory system. NOTE: Wear protective respirator masks with filters suitable for the materials being processed. Ensure adequate ventilation of the work area. Do not eat or drink, and do not smoke in the work area. Without the use of effective hearing protection, hearing damage may occur.
WARNING
Dust from some types of paints, coatings, and materials may cause irritation or allergic reactions of the respiratory system. Dust from materials such as oak, beech, MDF, etc., has carcinogenic properties. Work with material containing asbestos or its processing may only be carried out by qualified specialists.
WARNING
Injuries may also be caused by improper use of the tool over an excessively long period. If you use any tool for too long, take regular breaks.
H3yUHTECBOI PPOdyKT
See page A.
- Handle, grooved surface
- Angle lock lever
- Switch button
Alexander Krug / Managing Director
Authorized to compile technical documentation.
Techtronic Industries GmbH
Max-Eyth-Straße 10, 71364 Winnenden, Germany
Symbols

WARNING! CAUTION! DANGER!

Before any maintenance or servicing of the tool, always remove the plug from the socket.

WARNING! Before using the tool, read the instructions!

When working with the tool, always wear protective goggles.

Use the protective device.

Wear protective gloves!

Never put your hands in the area of the saw blade.

The device can only be used indoors. Do not leave the device in the rain.

Blade diameter x hole diameter

Parallel guide

Tooth of the saw blade

Cutting width

No-load speed

Voltage

Rated current

Power tool with protection class. Power tool in which protection against electric shock depends not only on basic insulation, but also on the fact that additional protective measures are taken, such as double insulation or reinforced insulation.

There is no device for connecting a protective conductor. Electrical devices must not be disposed of with household waste. Electrical and electronic devices should be collected separately and handed over to a specialized recycling company for recycling in accordance with environmental protection regulations. Information on recycling centers and collection points can be obtained from local authorities or your specialized dealer.

Eurasian Conformity Mark

Ukrainian Conformity Mark
Certificate of Conformity No. TC RU C-DE rn86,B,00224

Certificate of Conformity valid until 23.06.2020. LLC "RUSSIAN ELECTRIC MACHINES". Certificate address: 141400, Russia, Moscow Region, Khimki, Leningradskaya Street, building 29
Transportation:
Categorically do not allow any mechanical impact on the packaging during transportation. During loading/unloading, do not use any lifting equipment that operates on the principle of gripping the packaging.
Storage:
It is necessary to store in a dry place. It is necessary to store away from sources of elevated temperatures and exposure to sunlight. During storage, it is necessary to avoid sharp temperature changes. Storage without packaging is not allowed.
Service life of the product:
The service life of the product is 5 years. It is not recommended for use after 5 years of storage from the date of manufacture without prior verification.
Date of manufacture (date code)
Stamped on the surface of the product body.
Example:
A2015, where 2015 is the year of manufacture
A - month of manufacture
The dependence can be determined according to the given table.
A-January
G-July
B-February
H-August
C-March
J-September
D-April
K-October
E-May
L-November
F-June
M-December
Electronic Industry FM6X
Thermal, 71364, Vienna,
| TEXHNUVECKI DAHNI Цркулар сuzлкуларни диска ржеси по тгьл "Mitrešaw" * | PS 216 L PS 254 L | |
| ПОНЗВODICTVEN HOMER | 4699 98 01... ... 000001-999999 | 4699 99 01... 4740 22 01... ... 000001-999999 |
| Номинална консуmpрана мошноct | 220-240 V, 50 HZ, 1400W, 6,5 A | 220-240 V, 50 HZ, 1800W, 8,7 A |
| Оворота на праzerххod | 5000 min-1 | 4500 min-1 |
| Ø на ржесидаххххххххххххххххххххххххххххххххххххххххххххххххххххххххххххххххххххххххххххххххххххххххххххххххххххx | ||
| Добелina на тялOTO на сизуларни дись Мамс. | 1,6 mm | 1,8 mm |
| Добелina на збцITE на сизуларни дись МИн. | 2,4 mm | 2,6 mm |
| Мамс. КалачтET на рязанe Нakлон xористално 0°/ Habлон Вerteшилно 0° Нakлон xористално 45°/ Habлон Вerteшилно 0° Нakлон xористално 0°/ Habлон Вerteшилно 45° Нakлон xористално 45°/ Habлон Вerteшилно 45° | 65 x 305 mm 65 x 215 mm 36 x 305 mm 36 x 215 mm | 90 x 305 mm 90 x 215 mm 50 x 305 mm 50x 215 mm |
| Тergл съласно пpoцедураета EPTA 01/2014 | 16,7 kg | 19,6 kg |
| Информача зашma Изmedenite стойостпс с поочени съобразно EN 62841. Oценино с А НИвно нашima на уреadingе съотовно: Равшице на звкового налаягде (HesirypnoctK=3dB(A)) Равшице на мошноства звека (HesirypnoctK=3dB(A)) | 99,27 dB (A) 112,27 dB (A) | 95,15 dB (A) 108,15 dB (A) |
| Да с пося п探测но сөдөдөдөдөдөдөдөдөдөдөдөдөдөдөдөдөдөдөдөдөдөдөдөдөдөдөдөдөдөдөдөдөдөдөдөдөдөдөдөдөдөдөдөдөдөдөдөдөдөдө德天鹅�а! |
*PS Unpkynp c uNkynpHn ncka pekeu noD bTbn "Mitresaw"
WARNING!
The declared vibration values have been measured in accordance with the standard test methods EN 62841-1 and EN 62841-3-9 and may be used for comparing one tool with another. The declared vibration values may also be used for a preliminary assessment of exposure.
The vibration emission during actual use of the power tool may differ from the declared values depending on the ways in which the tool is used, especially in relation to the type of workpiece.
Be sure to identify safety measures to protect the operator that are based on an estimation of exposure in the actual conditions of use (taking into account all parts of the operating cycle, such as the times when the tool is switched off and when it is running idle in addition to the trigger time).
Wear hearing protection. Excessive noise can lead to hearing loss.

WARNING Read all safety warnings, instructions, illustrations and technical data provided with this power tool. Failure to follow all instructions listed below may result in electric shock, fire and/or serious injury.
Save all warnings and instructions for future reference.
CIRCULAR SAW SAFETY WARNINGS

a) Circular saws are intended for cutting wood or wood-like products; they cannot be used with abrasive wheels for cutting ferrous materials such as bars, rods, pipes, etc. Abrasive dust causes jamming of the lower guard. Sparks from abrasive cutting will burn the lower guard, the kerf insert, and other plastic parts.
b) Use clamps to support the workpiece whenever possible. If supporting the workpiece by hand, you must always keep your hand at least 100 mm from either side of the saw blade. Do not use this saw to cut pieces that are too small to be securely clamped or held by hand. If your hand is placed too close to the saw blade, there is an increased risk of injury from blade contact.
c) The workpiece must be stationary and clamped or held firmly against both the fence and the table. Do not feed the workpiece into the blade or cut "freehand" in any way. Unrestrained or moving workpieces can be thrown at high speeds, causing injury.
c) The processed workpiece must be completely immobile during the entire operation. Do not hold it against the sharp edge and do not cut it in any way. Unexpired or damaged workpieces may be ejected at high speed, causing injury.
d) Press the saw blade through the workpiece. Do not press the saw blade through the workpiece. To make a cut, lower the saw blade head onto the workpiece without cutting, start the motor, press the saw blade head down and push it through the workpiece. The blade may cause the workpiece to lift and could throw the cut piece towards the operator. e) Never place your hands near the cutting area or the saw blade. Hold the workpiece firmly, with your hands positioned on either side of the saw blade, or vice versa, as this is extremely dangerous. f) Do not place your hands closer than 100 mm from either side of the saw blade to remove wood debris or for any other reason while the blade is spinning. The proximity of the spinning blade to your hands may not be obvious and could cause serious injury. g) Secure the workpiece before cutting. If it is tilted or deformed, hold it with the tilted side facing the fence. Always check that there is space between the workpiece, the fence, and the table along the line of cut. Deformed workpieces can twist or shift and may bind on the spinning blade during cutting. There should be no nails or foreign objects in the workpiece. h) Do not use the miter saw until the workpiece is clear of all tools, wood offcuts, etc. Small offcuts or other objects in contact with the saw blade can be thrown at high speed. i) Cut only one workpiece at a time. Stacked workpieces cannot be adequately clamped or secured and may bind on the blade or shift during cutting. j) Ensure that the miter saw is mounted or placed on a stable, firm work surface before use. A level and firm work surface reduces the risk of the miter saw becoming unstable. k) Plan your work. Every time you change the bevel angle or the miter angle from 45°, ensure that the fence is adjusted correctly to support the workpiece and that it does not interfere with the blade or the fence system. Without turning on the saw and without a workpiece, move the miter saw head through a simulated cut to ensure there is no interference or risk of the fence being struck.
I) Always use the correct support for the work piece, extending it to the work piece, supporting the structure for the circular saw, etc., for work pieces that are wider or longer than the table. Work pieces that are longer or wider than the circular saw table can tip over if not securely supported. If the offcut or the work piece tips over, it can lift the lower guard or be thrown out by the rotating blade. m) Do not use another blade as a substitute for the work piece support or as an additional support. An unstable work piece support can cause the blade to jam or the work piece to shift during cutting, pulling you or your bystanders toward the blade. n) The offcut or waste piece must be free to fall or be pushed away from the rotating blade of the circular saw. If it is blocked, e.g., by a stop, the cutting tool can jam and the blade can be thrown out with force. o) Do not use clamps or a holding device that is designed to support the work piece correctly, such as a fence or a guide. The guides have a tendency to turn during cutting, causing the blade to "grab" and throw the work piece together with your hand toward the blade. p) Keep the blade at a sufficient speed before contacting the work piece. This will reduce the risk of the work piece being thrown back. q) If the work piece or the blade becomes jammed, switch off the circular saw. Wait for all moving parts to stop and disconnect the plug from the power source and/or remove the battery. Then free the jammed material. Attempting to cut with a jammed work piece can cause loss of control or damage the circular saw. r) After finishing the cut, release the button, hold the circular saw with the head tilted upward, and wait for the blade to stop before removing the offcut. Handling with your hand while the disc is still spinning is dangerous. s) Keep a firm grip with both hands until the cut is complete or when releasing the button, and ensure the circular saw is completely tilted upward. The sudden action of the circular saw could cause the head to jerk upward unexpectedly, which could lead to a risk of injury.
CIRCULAR SAW FIRST SPECIAL SAFETY INSTRUCTIONS
Read the operating instructions carefully before using the circular saw and the machine.
The machine must be in good condition, without deformation, and must not vibrate.
Do not use the circular saw without the guards being in the correct position; check that the guards are in good working condition and properly serviced.
The operator must be adequately trained in the safety measures and the operation of the machine.
Wear protective glasses and hearing protection when using the machine. Avoid wearing loose clothing, gloves, or non-slip safety footwear.
Before using any accessory, consult the operating instructions. Incorrect use of an accessory can cause damage and increase the risk of injury.
Use only the saw blades marked in this manual that comply with EN 847-1.
The cutting speed marked on the DNCK insert must be equal to the speed marked on the circular saw blade.
Use only circular saw blades with a diameter corresponding to the spindle speed. Circular saw blades that do not fit tightly on the shaft may cause loss of control of the tool.
Do not use blades with a larger or smaller diameter than recommended. Do not use spacers to mount the blade on the spindle.
Check the condition of the saw blade for damage or cracks before each use. Damaged or cracked blades may break during use and increase the risk of injury.
Do not use cracked or deformed saw blades! Do not use blades with teeth that are damaged or deformed.
Discard the saw blade if it is damaged, deformed, cracked, or broken; repair is not allowed.
Do not use saw blades made of high-speed steel.
Ensure that the saw blade is mounted correctly, tighten the flange nut before use in the prescribed manner (tightening torque approx. 12 Nm).
Tighten the bolts and nuts only after they have been tightened with the appropriate wrench.
Use of the wrench for tightening is not permitted.
Ensure that the arbor and the flange are clean and that the bore of the blade matches the arbor.
Ensure that the arbor is rotating in the correct direction.
Before starting work, perform a test run without engaging the motor, so that you can check the position of the arbor, the operation of the safety devices, and other parts of the machine and the workpiece.
Never leave the machine unattended.
Do not touch the saw blade while it is rotating.
Never start the machine when the work area is not in a safe position.
Never attempt to start the machine quickly, using the brake or the tool or by any other means; such action may result in serious injury.
Disconnect the plug from the power source or remove the battery before changing the saw blade or performing maintenance.
Be careful when packing and unpacking the saw blade; it is sharp and may cause injury from the sharp edges of the blade.
Use the handle for the sharp or pointed tools when handling saw blades.
Store the saw blades in the original packaging or in a suitable packaging, in a dry place, away from chemicals, to prevent damage to the sharp edges.
ADDITIONAL INSTRUCTIONS FOR WORK AND SAFETY
Always secure the workpiece safely and firmly.
Make sure the machine is placed stably (e.g., secured to a workbench).
Wear hearing protection. Noise can lead to hearing loss.
When working with the machine, wear protective goggles. Wear gloves when handling sharp materials, such as blades, to avoid cuts from the workpiece that may occur in the cutting area.
Always disconnect the plug from the socket and ensure it is isolated from contact before performing adjustments, changing accessories, or when performing any maintenance on the product.
Connect the machine to a socket with the switch in the OFF position.
Never place your hands in the space around the sharp blade, unless the blade has come to a complete stop.
Before use, carefully check the tool for damage or wear on the material. Damaged parts should be repaired only by a specialist.
The machine is designed to be used for its intended purpose. Do not use the machine if the guards are not in place or do not function properly.
The upper guard for the saw blade must be lowered only when the blade is lowered toward the work piece and must be able to move freely, and must close automatically.
Always secure and use the guides and fences as supports for the work piece during work.
Never bypass or disable the guards when they are in their proper function. Your safety may be at risk. Do not use guards that are damaged, worn, or deformed.
Do not use saw blades made of high-speed steel.
Use only sharp and properly set saw blades. Replace dull blades with new ones.
Always use circular saw blades with the correct size and shape of the mounting hole.
Circular saw blades that do not fit the spindle may cause loss of control and may cause injury to the operator or damage to the power tool.
Use only saw blades for wood, marked according to the instructions, which comply with EN 847-1.
For fastening the circular saw blade, do not use any flanges, washers, or nuts other than those provided with the tool as described in the operating instructions.
Select the appropriate saw blade for the material to be cut. Never use blades for cutting materials other than those specified in the "Intended Use" section of this manual.
It is important to check the blade guard for proper operation before each use.
Observe the maximum speed marked on the saw blade. Do not use blades with a speed rating lower than the maximum speed of the tool.
Replace the blade guard when it is worn or damaged.
Before starting work, perform a trial run without engaging the motor, so that you can check the position of the blade, the operation of the guards, and other parts of the machine and the workpiece.
When adjusting the base, of course, for the combination of cutting, regularly check the prescribed distance to keep the disc at the correct distance.
When transporting the device, the protective cover must be closed.
Check the cutting blade and material - for example, the blade and the cutting residue.
Do not remove cutting residue or other parts of the material while the machine is running and the saw head is not at rest.
Try to position the parts appropriately. The working area of the circular saw covers the surface of the working part. The operator should always keep this area clean of other parts or materials that could interfere with the working part or working time.
When working outdoors or when the machine may be exposed to moisture or dust, it is recommended that the device be connected through a residual current device with a maximum trip current of 30 mA.
Do not replace the light bulbs and lasers with those of a different type. Any repair must be carried out only by the manufacturer or an authorized service.
Thus, increased voltage can affect the device and may cause electric shock. For the lowest possible voltage, connect the device to a power source with a resistance of 0.3 Ω. For more information, contact your electricity supplier.
SPECIAL SAFETY INSTRUCTIONS FOR LASER
The laser radiation used in this circular saw is Class II with max. P≤1 mW and wavelength λ: 650 nm. Do not look directly into the optical aperture. Failure to follow these rules could cause serious injury.
Do not look directly into the beam during operation.
Do not point the laser beam directly at the eyes of other people.
This could cause serious injury to the eyes.
Do not place the laser in a position that could injure anyone, intentionally or accidentally, by looking into the laser beam.
Do not use optical instruments to look into the laser beam.
Do not operate the laser when you have anything to do with it, and do not allow the laser to operate.
Do not attempt to repair the laser device yourself.
Do not attempt to replace any parts of the laser device yourself.
All repairs must be carried out by the manufacturer or an authorized service.
Do not replace the laser of the power tool with a laser from another model.
INTENDED USE
This power tool is intended for cutting hard wood or wood-based materials, plastics, and similar materials.
This power tool is intended for use only by trained operators who have read the operating instructions and understand the risks and hazards.
This power tool is intended for fixing to a stable work surface. If the base is not securely fixed, the machine may tip over during cutting, which increases the risk of serious injury.
This power tool is designed for performing bevel cuts and cuts at an angle. The possibilities for different cuts are described in the product specifications and operating instructions.
This power tool should only be used in dry conditions, with adequate ambient lighting.
This power tool is intended for consumer use and should only be used as described above and is not intended for any other use.
RESIDUAL RISKS
Even when the power tool is used as prescribed, it is not possible to eliminate all residual risk factors. The following hazards may arise, and the operator should pay special attention to avoid the following:
Risk of contact with unguarded parts of the saw blade. - Kickback of the workpiece or parts of it due to incorrect adjustment or handling. - Ejection of defective hard metal parts from the saw blade. - Damage to the dust extraction system.
3A6EENKKA: Dust protection mask, containing filters, suitable for processing materials.
Use protective gloves when working with the machine. Do not smoke, eat, or drink while working with the machine.
Hearing damage may occur if effective hearing protection is not used.
WARNING
Dust from sanding, sawing, grinding, and material can cause irritation or allergic reactions in the respiratory tract. Dust from beech, oak, plywood, and medium-density fiberboard (MDF) and other materials is carcinogenic. Asbestos-containing materials must be processed or handled only by qualified operators and specialists.
WARNING
Prolonged use of the tool may cause hand-arm vibration syndrome. When using any tool for extended periods, take regular breaks.
GET TO KNOW THE PRODUCT
Inlet air vent
- Handle, padded surface for gripping 2. Trigger switch
- Safety lock
- Front flange 5. Circular saw blade 6. Lower guard
- Fixed guard 8. Base plate
- Handle for locking the rotating blade
- Handle grip
- The tool is intended for cutting wood and wood-like materials.
- End cap for the left side of the saw
- Tja
- Locking knob for adjusting the miter angle
16. Saw blade guard 17. Workpiece support 18. Sawdust bag 19. Mounting holes for table 20. Saw blade 21. Bevel scale 22. Adjustment knob for bevel angle 45° 23. Adjustment knob for bevel angle 90° 24. Key for LED indicator 25. Key for laser 26. Button for locking the spindle 27. Plate for adjusting the cutting depth 28. End cap for adjusting the cutting depth
LIST OF SPARE PARTS
PS 216 L: Circular saw blade for cutting wood "Mitresaw" EN 847-1/0216 x 030 x 2,4 / 48T / HW / n Max. 7000 min-1 (page A: No.5) PS 254 L: Circular saw blade for cutting wood "Mitresaw" EN 847-1/0254 x 030 x 2,6 / 48T / HW / n Max. 7400 min-1 (page A: No. 5) Cutting table (page A: No.8)
PROTECTION OF THE DEVICE DEPENDING ON THE LOAD
It must be connected only to a single-phase alternating current and only to the mains voltage, especially according to the factory plate. It is also possible to connect to a socket that is not of the "WyKo" type, provided that the construction is protected class II.
The contacts in the supply part must be equipped with a protective residual current device (FI, RCD, PRCD). This complies with the installation regulations for the electrical installation. Observe this when using your device.
Connect the machine only to such a contact in the switched-off position.
The connection cable must be laid outside the working area of the machine. The cable must be led away from the machine backwards.
Before each use, check the device, the connection cable, the battery pack, the extension cable, and the sensor for damage or wear. Damaged parts must be repaired only by a specialist.
A slight voltage fluctuation in the mains can increase the speed of electric tools connected to the mains. For the smallest possible voltage fluctuation, connect the device to the power source with a resistance of 0.3 Ω.
For more information, contact your electricity supplier.
Bulgarian
SUPPORT
Do not modify the circular saw in any way or use accessories that are not approved by the manufacturer. The saw blade and the blade guard may be at risk.
Do not use the circular saw for cutting, grinding, or other functions that the saw is not designed for. Contact an authorized service center for professional repair and adjustment.
Do not remove any guards while the circular saw is in operation.
Before checking that the saw blade is disconnected from the power supply, when removing the guards, lubricate the device or when removing any part, do not damage the product.
Before each use, check your circular saw for damaged or worn parts and keep it in good working condition. Replace damaged parts with original spare parts approved by the manufacturer.
The sharp blade should be handled carefully after use to avoid injury or damage.
After use, clean the saw with a brush or vacuum cleaner. Do not use compressed air.
To ensure safety and reliability, all repairs, including replacing the blade, must be carried out by an authorized service center.
Use the device only for its intended purpose with a dry cloth.
Keep the machine clean and well-maintained.
If the saw blade needs to be replaced, it must be done by the manufacturer or its representative to avoid safety risks.
Only use AEG accessories and spare parts. Elements not described in this manual should be considered as spare parts and should be obtained from AEG service (see the brochure "Warranty and Service Addresses").
If necessary, you can contact your service center or directly Techtronic Industries GmbH, Max-Eyth-Straße 10, 71364 Winnenden, Germany, for spare parts in case of breakdown, and provide the machine type and serial number from the rating plate.
CE DECLARATION OF CONFORMITY
Hereby, we declare under our sole responsibility that the product described in the technical data complies with all relevant provisions of the Directives
2011/65/EC (RoHS)
2006/42/EC
2014/30/EU
The following harmonized standards have been applied:
EN 62841-1:2015
EN 62841-3-9:2015+A11:2017
EN 55014-1:2017
EN 55014-2:2015
EN 61000-3-2:2014
EN 61000-3-11:2000
EN IEC 63000:2018

Winnenden, 2019-03-08
Alexander Krug / Managing Director
Techtronic Industries GmbH
Max-Eyth-Straße 10, 71364 Winnenden, Germany

WARNING! PRECAUTION! DANGER

Before starting work on the machine, remove the plug from the socket.

WARNING: To reduce the risk of injury, read the instruction manual carefully before use!

When working with the machine, wear protective goggles.

Wear protective equipment for the eyes!

Wear protective gloves!

Be careful that your hands do not get caught in the blade of the saw.

The device is intended for use only in dry conditions. It must not be used outdoors.

Exhaust for dust extraction port for connection

Only use the first speed.

Do not point at the laser.
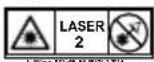
Complies with laser class 2 according to EN 60825-1:2014.
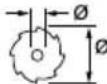
On the back of the device

Waste electrical and electronic equipment

Disposal

Cutting width

Reverse switch

Voltage

Rated current

Power tool protection class II. Power tool in which protection against electric shock does not rely solely on basic insulation, but in which additional safety measures are provided such as double insulation or reinforced insulation.

Our device for connecting a protective conductor.
Electrical devices must not be disposed of as unsorted waste. Electrical and electronic equipment must be collected separately for recycling in accordance with the regulations for environmental protection. Please inform yourself at the local authorities or the local specialized trade regarding collection points and recycling centers for waste.

European Conformity Mark

Ukrainian Conformity Mark

Eurasian Conformity Mark
Alexander Krug / Managing Director
Authorized to prepare the technical documentation.
Techtronic Industries GmbH
Max-Eyth-Straße 10, 71364 Winnenden, Germany
Ro
SYMBOLS

DANGER! WARNING! CAUTION!

Always remove the plug from the socket before performing any work on the machine.

Alexander Krug / Managing Director
Authorized to compile the technical documentation.
Techtronic Industries GmbH
Max-Eyth-Straße 10, 71364 Winnenden, Germany
SYMBOLS

WARNING! CAUTION! DANGER!

Before carrying out any work on the machine, disconnect the cable from the mains.

WARNING: The user must read the instruction manual to avoid the risk of injury.

Check the appliance for damage.

Wear protective gloves.

Check for damage!

Never insert the device into the disc slot for seeds.

This device is exclusively for indoor use. Never expose the device to rain.

Right channel

First connect the device.

Do not look into the laser beam.
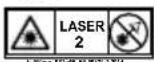
This product complies with Class 2 laser according to EN 60825-1:2014.
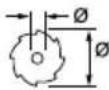
Beam diameter x aperture diameter

Rotation speed
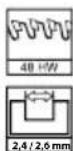
Safety device

Adjustment

Pressure
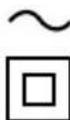
Nominal flow

Electrical tools are protected against electric shock not only by the basic insulation but also by additional protective measures such as double insulation or reinforced insulation.
There are no residual rights to claim for any damage.
Electrical appliances should not be disposed of together with household waste. Electrical and electronic appliances must be collected separately and taken to appropriate collection points for recycling in accordance with national regulations for environmental protection. Inform yourself at your local authorities or at the specialized trade representative about the possibilities for recycling and collection points.

European conformity mark

Ukrainian conformity mark

Eurasian conformity mark
| TEXHIIHIXAPAOKTEPNCIKI Topuzobalha Ta Bycopi3Ha Pnllka* | PS 216 L PS 254 L | |
| Homep biro6b | 4699 98 01 ... ... 000001-999999 | 4699 99 01 ... 4740 22 01 ... ... 000001-999999 |
| Homina hcb nojmba ha nojxhi ctb | 220-240 V, 50 HZ, 1400W, 6,5 A | 220-240 V, 50 HZ, 1800W, 8,7 A |
| Kilbkictb oseptib xoloctofo xody | 5000 min-1 | 4500 min-1 |
| ø PnllkOBoro dincky x ø OTbOp | 216 x 30 mm | 254 x 30 mm |
| TobuHima Tila PnllbHoro PnIoTHa Maks. | 1,6 mm | 1,8 mm |
| TobuHima 3ubic BnllbHoro PnIoTHa MIn. | 2,4 mm | 2,6 mm |
| ПрочкгИВистб рizань макс. 3'EDHANHЯ Pid roctpIM KytOM 0°/ HaxIN 0° 3'EDHANHЯ Pid roctpIM KytOM 45°/ HaxIN 0° 3'EDHANHЯ Pid roctpIM KytOM 0°/ HaxIN 45° 3'EDHANHЯ Pid roctpIM KytOM 45°/ HaxIN 45° | 65 x 305 mm 65 x 215 mm 36 x 305 mm 36 x 215 mm | 90 x 305 mm 90 x 215 mm 50 x 305 mm 50x 215 mm |
| Bara 3rdno 3 npoedypoi EPTA 01/2014 | 16,7 kg | 19,6 kg |
| lncopmaia pro wum Bvimiprni 3naeHnra Bv3naeHeni 3riJHO 3 EN 62841. Ribenb shymy "A" npinaduy stahOBITb B TINOBOMy Bnpaiky: Pibeh 3BykoBOrO TnCKy (nox6ka K = 3 nb(A)) Pibeh 3BykoBoi noTyXhOCTi (nox6ka K = 3 nb(A)) BvknorpctOBvBaTn 3ac6b 3axNCTy opranivb cnUxy! | 99,27 dB (A) 112,27 dB (A) | 95,15 dB (A) 108,15 dB (A) |
*PS ≡ Topical and visual mark
WARNINGS
The declared vibration value marked with the symbol was tested in accordance with the standardized test method EN 62841-1 and EN 62841-3-9 and may be used for comparison of one tool with another. The declared vibration value may also be used for a preliminary assessment of exposure.
The declared vibration value depends on the way the tool is used, especially on the type of workpiece being processed.
Identify safety measures to protect the operator based on an estimate of exposure under actual conditions of use (taking into account all parts of the operating cycle, such as the times when the tool is switched off and when it is running idle, in addition to the trigger time).
Use the auxiliary handle. Loss of control can cause personal injury.

Read all safety warnings, instructions, illustrations and specifications provided with this power tool.
Failure to follow all instructions listed below may result in electric shock, fire and/or serious injury.
Save all warnings and instructions for future reference.

a) Circular saws are intended for cutting wood and wood-based products; they cannot be used with abrasive cutting discs for cutting metal materials, such as bars, rods, tubes, and the like. Abrasive discs lead to jamming of moving parts, and the lower guard may be damaged. Sparks from cutting with an abrasive disc will cause the lower guard to break, the insert, and other plastic parts.
b) Whenever possible, secure the workpiece with clamps. If you hold the workpiece by hand, always keep your hand at a distance of at least 100 mm from both sides of the blade. Do not cut a workpiece that is too small to be safely clamped or held by hand. If your hand is too close to the blade, there is an increased risk of injury from contact with the blade. c) The workpiece must be firmly fixed with clamps or held by hand against the stop. Do not feed the workpiece toward the blade and do not perform any cutting operation "freehand". Unfixed or moving workpieces during operation at high speeds can lead to injury. d) Push the saw forward, away from yourself. Do not pull the saw toward yourself. To make a cut, lift the saw head, place it on the workpiece without cutting, switch on the saw, lower the saw head, and push the saw away from yourself. If during cutting you pull the saw toward yourself, the saw blade may climb onto the upper part of the workpiece, and due to the force of rotation, the blade may be thrown back toward the operator.
Ukrainian
e) Never put your hands on the saw blade path when cutting, or in front of or behind the blade. Do not hold the workpiece with your hands too close to the blade, as this is unsafe. f) When the saw is running, do not place your hands closer than 100 mm to either side of the blade, to avoid accidental contact with the blade or for any other reason. It is difficult to judge how close your hand is to the running blade, and you could suffer serious injury. g) Always support long or wide workpieces. If the workpiece is warped or deformed, place it with the convex side against the fence and secure it with a clamp. There should be no gap between the workpiece, the fence, and the table. Warped or deformed workpieces can twist or shift, and during cutting they may catch on the blade and be thrown. There should be no nails or foreign objects on the workpiece. h) Before using the saw, remove all tools, wood scraps, and other objects from the workpiece. The saw can eject small foreign objects at high speed, causing injury if they come into contact with the blade. i) Cut only one workpiece at a time. A stack of multiple workpieces cannot be securely clamped or held, and they may catch on the blade or shift during cutting. j) Before use, make sure the saw is properly installed and secured on a level surface. The work surface must be stable and firm to reduce the risk of vibration. k) Plan your work. Each time you change the cutting angle, check that the fence is correctly set to support the workpiece and not interfere with the saw blade or the safety system. Without turning on the tool or placing the workpiece on the table, run the blade through the intended cutting path and make sure it does not hit the fence or damage it. l) If the length or width of the workpiece exceeds the table size, use additional support, such as extension tables or stands. Without proper support, the workpiece may tip over. If the overhanging part of the workpiece tips, it could hit the lower guard or be thrown by the blade. m) Do not ask another person to hold the workpiece for you. Improper support can cause the blade to bind or the workpiece to shift during cutting, and you or a helper could be pulled into the blade.
n) It is forbidden to press the cut part with your fingers while it is being cut out, especially when it is not completely separated. If the part being cut out is clamped, for example with the help of a stop pin, it can shift the operation of the saw and may be thrown under the saw blade. o) To fix round materials, for example drills or pipes, use clamps or special fastening devices. Drills tend to rotate during cutting, through which the workpiece can be caught and pull in your hands to the saw blade. p) Before cutting the workpiece, it must be fully secured. This reduces the risk of the workpiece being thrown. q) In case of jamming of the saw or workpiece, turn off the saw. Wait for all moving parts to stop, unplug from the power outlet and/or remove the battery. Then remove the material that blocks the operation. If you continue working when the workpiece is jammed, you may lose control or damage the saw. r) After cutting, turn off the switch, lower the saw head and wait for the saw blade to stop before removing the cut part. Do not put your hands near the saw blade, as it may still be moving, which is dangerous. s) Keep your hand away when you make a full cut or when you turn off the switch, before the saw head is fully raised to its upper position. Under the influence of inertia, the saw head may suddenly move forward, which poses a risk of injury.
SAFETY INSTRUCTIONS FOR CUTTING WITH THE MITER SAW
Before using the saw or the machine, carefully read these instructions. The machine must be in good condition, the saw blade must not be damaged and must rotate without vibration. Do not use a saw blade that is not properly installed; keep the blade clamp in good condition and perform the necessary maintenance. Make sure that the operator has received proper safety training and is familiar with the operation of the machine. Always wear safety goggles and protective gloves when using the machine. It is recommended to wear non-slip gloves, safety shoes and a dust mask. Before using auxiliary equipment, refer to the corresponding instructions and manual. Incorrect use of auxiliary equipment may cause damage to the workpiece and increase the risk of injury. Use only the saw blades specified in this manual that comply with standard EN 847-1. Do not exceed the maximum rotation speed for the saw blade. Make sure that the speed indicated on the saw blade is at least equal to the speed indicated on the saw. Use saw blades of the required size and with the appropriate mounting hole. Saw blades that do not fit the mounting parts of the saw will run unevenly and lead to loss of control.
Ukrainian
Do not use saw blades with a diameter larger or smaller than recommended. When installing, do not use any spacers.
Before each use, check the teeth of the saw blade for damage or deviation from the norm. Damaged or deformed teeth can fly out during operation and increase the risk of injury.
Do not use damaged or deformed discs! Do not use discs that are scratched or deformed.
If the disc is scratched, deformed, or has a cracked matrix, dispose of it; repair is not allowed.
Do not use discs that are warped.
Check that the blade is installed correctly. Before use, tighten it with a wrench (tightening torque 12 Nm).
Tighten the locking screws and nuts using the appropriate wrench or similar tool.
Tightening the locking key by hitting it with a hammer is not allowed.
Check that the blade and the flange have a clean surface and that the side of the blade is pressed against the flange.
Check that the blade rotates in the correct direction.
Before starting work, make a trial cut with the machine running idle to check for runout, taking into account the protective devices and these details.
In case of emergency, do not stop the machine without load.
Do not touch the blade while it is rotating.
In case of emergency, do not perform maintenance on the machine until it has come to a complete stop and the power is disconnected.
In any case, do not attempt to stop the machine by pressing the tool or any other object against the blade, as this can lead to accidents.
Before changing the blade or performing maintenance, unplug the machine from the power supply and remove the battery.
Be careful when unpacking and packing the saw; you can easily injure yourself on the sharp teeth of the saw.
Always use the tool with the protective guard for cutting.
Store the tool in its original or provided packaging in a dry place, away from chemicals that could damage it.
OPERATING INSTRUCTIONS FOR TECHNICAL MAINTENANCE
Secure the workpiece with clamps.
Ensure the machine is stable (e.g., clamped to a workbench).
Use hearing protection. Exposure to noise can cause hearing damage.
When working with the machine, always wear protective gloves. When working with the tool on abrasive materials, it is recommended to wear gloves and also safety goggles to protect your eyes from dust and debris from the cutting area.
Before starting, adjusting, or performing any maintenance operations on the product, unplug it from the power outlet.
Connect the machine to a suitable power outlet only when it is switched off.
Always move the tool away from you until it comes to a complete stop.
Before use, always check the tool for any damage or signs of material wear. Repair of damaged parts should only be done by qualified professionals.
Always use the safety equipment provided. Do not use the machine if the safety guard is not installed or is not functioning properly.
Open the lower safety guard only when the tool is lowered and resting on the workpiece. The guard must move freely and close automatically.
For cutting workpieces, always secure the workpiece and use the auxiliary handle.
Never make any modifications to the design or functional components. This could affect your safety.
Use only sharp blades. Do not use deformed or damaged blades.
Do not use blades that have been damaged by impact.
Use only sharp blades. Replace dull blades with new ones.
Use blades of the required size and with the appropriate hole for mounting.
Blades that do not fit the mounting details work unevenly and lead to loss of control.
Use only blades for woodworking, specified in this manual, that comply with standard EN 847-1.
For mounting the blade, use only the flanges and nuts included in the delivery set, as specified in this manual.
Select the blade according to the material being processed. In any case, do not use products for cutting materials not specified in the section "Intended Use" of this manual.
It is important to avoid overheating and melting of the workpiece during cutting.
It is necessary to maintain the maximum number of teeth indicated on the blade. Use only blades intended for the number of teeth (see marking).
Balance the tool to avoid vibration.
Replace the blade if it is worn or damaged.
Processing of materials should be carried out with increased attention.
To avoid injury, the blade and the workpiece must be properly secured. The tool is intended for use by trained operators who are familiar with this manual and are aware of the risks.
Adjust the guide and set the blade height.
The machine has been adjusted so that the cutting tool is installed with the correct gap for processing. Based on the actual hardness. If the base is not secured
Transporting the product to the countertop can be done.
The nozzles must not be clogged with material. The cutting tool is designed for cutting corners and edges. For different thicknesses of cuts
Do not damage the structure or other parts of the workpieces, especially when the machine is running and the saw blade is not in the correct position.
For workpieces, it is necessary to support them. The operator must ensure that the workpiece surface is clean. The cutting tool is designed to cut the entire area, preventing contact with other parts and protecting against objects that may be present. It is forbidden to use any tools and move the workpiece during operation. Necessary.
It complies with safety requirements during operation, and the operator must be trained.
Use personal protective equipment and follow the instructions. The cutting tool must be used with a protective mask. The operator must follow the instructions and be properly trained. It is possible that the operator may be exposed to laser radiation. The operator must pay attention to the indicated risks and follow the safety instructions.
All repairs must be carried out by a qualified representative of the service provider.
Short circuits can cause voltage fluctuations or electrical surges. These can be minimized by using a power supply with a total resistance of 0.3 ohms.
Short circuits. Additional information can be obtained from your dealer. For cutting carbide teeth, contact the manufacturer.
LASER SAFETY INSTRUCTIONS
Laser processing is used only for class II with maximum power <1 mW and must be at 650 nm. Do not look directly into the beam.
Do not look directly into the beam with optical instruments. Doing so can cause serious injury.
Do not use the laser during operation.
Do not point the laser beam directly at people or animals. This can cause eye damage.
Please position the laser so that the required number of laser treatments can be performed.
Do not use optical instruments to look at the laser; it may only be performed by qualified specialists.
Do not work with the laser near people and do not allow untrained persons to operate the laser device. Remember to use
Do not attempt to repair the laser device yourself if it is damaged. If the instrument is used for a long time, do not attempt to replace any parts yourself; it is mandatory to perform regular laser device maintenance. Warning.
Repair work must be carried out by the manufacturer or an authorized representative for maintenance.
Do not replace the built-in laser with another one.
INTENDED USE
The composite shear is intended for cutting solid wood, glued wood blanks with a laser attachment, and plastic wood-like materials.
The composite shear is intended for use including by trained operators who have read this manual and understand the risks.
The composite shear is intended for cutting based on solid wood. If the base is not covered with a new material, the entire machine may be in operation during cutting, which increases the risk of injury.
The composite shear is intended for performing straight and angled cuts. The cutting thickness for various cuts is specified in the product manual.
The composite shear is intended for use in dry rooms with general lighting and ventilation.
The composite shear is intended for cutting wood materials as described in this manual; it is forbidden to use it for any other purpose.
SAFETY WARNINGS
Read the entire manual carefully before using the composite shear. It is mandatory to understand all safety warnings and risk factors. The indicated risks may occur; the operator must pay special attention to avoid them.
Do not touch the blade with unprotected parts of the body.
Turn the product over and place it on a flat surface for proper adjustment.
Inserting damaged carbide teeth from the saw blade.
Check the operation of the remote control system.
NOTE: Use respiratory protection with filters suitable for the materials being processed.
Provide adequate ventilation in the work area. Do not inhale dust and fumes, do not work in a confined space.
Failure to use effective hearing protection may result in hearing damage.
WARNINGS
Dust from certain paints, coatings, and materials may cause allergic reactions or respiratory issues. Dust from such materials may be carcinogenic. Work with asbestos-containing material should
only be performed by qualified specialists.
Prolonged use of the tool may cause hand-arm vibration syndrome. If the tool is used for extended periods, take regular breaks.
WARNINGS
Ukrainian
Learn about the product
See page A.
- Handle, 30° angle contact surface
- Switch button
- Locking lever of the protective element
- Outer flange
- Blade for cutting
- Lower blade guard
- Fixed guard for the cutting line
- Locking lever of the stop
- Upper handle
- Upper blade guard
- Dust extraction adapter 13. Handle for adjusting the cutting depth 14. Clamp
- Locking lever for the cutting angle
- Guide rail
- Extension plate 18.
- Mounting holes X4 20. Swivel 21. Scale of cuts 22. Screw for adjusting the cutting angle and tilt 45° 23. Screw for adjusting the cutting angle and tilt 90°
- Switch for work light 25. Laser switch 26. Lock button for spindle 27. Plate for adjusting the cutting depth 28. Handle for adjusting the cutting depth
SPARE PARTS LIST
PS 216 L: Saw blade for wood and chipboard EN 847-1/ø216 x ø30 x 2.4 / 48T / HW / n max. 7000 min-1 (page A: No.5) PS 254 L: Saw blade for wood and chipboard EN 847-1/ø254 x ø30 x 2.6 / 48T / HW / n max. 7400 min-1 (page A: No.5) Plastic guard (page A: No. 8)
CONNECTION TO MAINS
Connect to single-phase AC mains voltage as indicated on the rating plate. Connection to non-earthed sockets is possible, but the construction provides protection class II.
Sockets outside the premises and at a distance from them must be equipped with an automatic circuit breaker that responds to fault currents (FI, RCD, PRCD). These are absolutely necessary for installation instructions for your electrical system. Keep this in mind when using our devices.
Connect the machine to the socket only in the switched-off state.
Keep the connecting cable away from the working radius of the machine. Lead the cable behind the machine.
Before each use of the device, check the connecting cable, plug, and socket for any signs of damage. Repair of damaged parts should only be carried out by qualified personnel.
Short voltage drops can cause voltage fluctuations and may affect other electrical devices in the same circuit. Disconnect the device from the power supply to minimize voltage fluctuations.
The correct form can be obtained from your energy supplier.
MAINTENANCE
If the device is not used in accordance with the manufacturer's specifications, use only accessories approved by the manufacturer. This may affect your safety and the safety of others.
Do not operate the device if any switches, controls, or other functional elements are damaged. Have the device repaired by an authorized service center or a professional repair service.
Do not perform any operations on the device if it is not working properly.
Before cleaning, maintenance, or any operations on the product, unplug it from the electrical outlet.
Before each use, inspect the device for visible damage and keep it in proper working condition. Do not use damaged devices; contact the manufacturer for replacement parts.
After use, the device may have a very high temperature. Perform maintenance or cleaning only after it has cooled down.
Use the device only as intended. Do not use it for other purposes.
For safe repair work, including replacement of parts, it is necessary to contact an authorized service center.
Keep the device dry and clean.
Ensure ventilation openings are not blocked.
If the power cord needs to be replaced, it must be done by the manufacturer or its representative to avoid hazards.
Use only original accessories and spare parts. If any parts are worn out, replace them only with original spare parts from the manufacturer (see the brochure "Warranty / Service Center Addresses").
If necessary, you can request a drawing showing the device's parts in perspective view. For this, please contact your service center or directly Techtronic Industries GmbH, Max-Eyth-Straße 10, 71364 Winnenden, Germany, and provide the machine type and six-digit number from the rating plate.
CERTIFICATE OF CONFORMITY
We declare under our sole responsibility that the product described in the "Technical Data" complies with all applicable provisions of the Directives
2011/65/EU (RoHS)
2006/42/EC
2014/30/EU
To the national harmonized normative documents:
EN 62841-1:2015
EN 62841-3-9:2015+A11:2017
EN 55014-1:2017
EN 55014-2:2015
EN 61000-3-2:2014
EN 61000-3-11:2000
EN IEC 63000:2018
Winnenden, 2019-03-08
Alexander Krug / Managing Director
Authorized to compile the technical documentation.
Techtronic Industries GmbH
Max-Eyth-Straße 10, 71364 Winnenden, Germany


Before use, check the machine for damage and read the instruction manual carefully.

If damaged, replace the risk of injury. The user must read the operating instructions!

Use the machine with protective goggles.

Use hearing protection!

Wear protective gloves!

Hands must never be in the area of the saw blade.

Adjust the cutting depth before use, do not adjust the cutting depth while the machine is running.

Disconnect the plug before adjusting.

Cutting hazard.

Do not touch the laser beam.
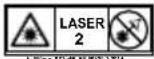
The product complies with laser class 2 according to EN 60825-1:2014.
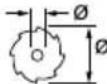
From the saw blade to the opening

Rotation direction


Idle speed

Voltage

Alternating current

Power tool protection class II. A power tool in which protection against electric shock is provided not only by basic insulation, but also by additional safety measures such as double insulation or reinforced insulation.

Connection to the mains supply.
Electrical appliances must not be disposed of with household waste. Electrical and electronic appliances must be collected separately and handed over to specialized companies for recycling, which is not harmful to the environment. Contact local authorities or your dealer to obtain the address of a recycling center and a collection point.

CE conformity mark

Ukrainian conformity mark

Eurasian conformity mark


Alexander Krug / Managing Director
Techtronic Industries GmbH Max-Eyth-Straße 10, 71364 Winnenden, Germany
| ### | ### | ### |
| A ### | ### | ### |
| ### | ### | ### |
| ### | ### | ### |
| ### | ### | ### |
| ### | ### | ### |
| ### | ### | ### |
| ### | ### | ### |
| ### | ### | ### |
| ### | ### | ### |
| ### | ### | ### |
| ### | ### | ### |
| ### | ### | ### |
| ### | ### | ### |
| ### | ### | ### ### |
| ### | ### | ### |
| ### | ### | ### |
| ### | ### | ### |
| ### | ### | ### |
| ### | ### | ### |
| ### | ### | ### |
| ### | ### | ### |
| ### | ### | ### |
| ### | ### | ### |
| ### | ### | ### |
| ### | ### | ### |
| ### | ### | ### |
| PS 216 L | PS 254 L | |
| 4699 99 01 ... 4740 22 01 ... ... 000001-999999 | ... 000001-999999 | |
| 220-240 V, 50 HZ, 1800W, 8,7 A | 1400W, 6,5 A | |
| 4500 min -1 | -1 | ### |
| ### | ||
| ### | ||
| ### | ||
| 90 x 305 mm | 65 x 305 mm | 0° ###/0° |
| 90 x 215 mm | 65 x 215 mm | 0° ###/0° |
| 50 x 305 mm | 36 x 305 mm | 45° ###/0° |
| 50x 215 mm | 36 x 215 mm | 45° ###/0° |
| 01/2014 EPTA ### | ||
| : | ||
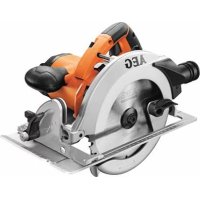

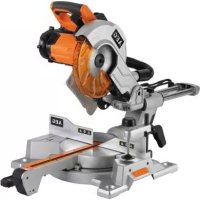
- INSULATED GRIPPING SURFACE
- SAFETY INSTRUCTIONS FOR MITRE SAWS
- WOOD CUTTING BLADE SAFETY WARNINGS
- ADDITIONAL SAFETY AND WORKING INSTRUCTIONS
- SPECIFIED CONDITIONS OF USE
- RESIDUAL RISK
- WARNING
- KNOW YOUR PRODUCT
- SEE PAGE A
- REPLACEMENT LIST
- MAINS CONNECTION
- MAINTENANCE
- EC-DECLARATION OF CONFORMITY
- SYMBOLS
- ENGLISH
- GET TO KNOW YOUR PRODUCT
- ATTENTION! WARNING! DANGER
- FAMILIARIZE YOURSELF WITH YOUR PRODUCT
- CAUTION! WARNING! DANGER
- GET TO KNOW THIS PRODUCT
- SAFETY AND WORKING INSTRUCTIONS
- CE- DECLARATION OF CONFORMITY
- WARNING! DANGER
- POLISH
- WARNING! CAUTION! DANGER
- USE IN ACCORDANCE WITH THE INTENDED PURPOSE
- OTHER SAFETY AND WORKING INSTRUCTIONS
- TIKLA PIESLEGUMS
- SIMBOLI
- SAFETY AND OPERATING INSTRUCTIONS
- SPECIAL SAFETY INSTRUCTIONS FOR LASER
- ADDITIONAL SAFETY INSTRUCTIONS FOR WORK
- RECOMMENDATIONS FOR LASER SAFETY
- RESIDUAL RISKS
- H3YUHTECBOI PPODYKT
- TRANSPORTATION
- STORAGE
- SERVICE LIFE OF THE PRODUCT
- DATE OF MANUFACTURE (DATE CODE)
- WARNING READ ALL SAFETY WARNINGS, INSTRUCTIONS, ILLUSTRATIONS AND TECHNICAL DATA PROVIDED WITH THIS POWER TOOL. FAILURE TO FOLLOW ALL INSTRUCTIONS LISTED BELOW MAY RESULT IN ELECTRIC SHOCK, FIRE AND/OR SERIOUS INJURY
- CIRCULAR SAWS ARE INTENDED FOR CUTTING WOOD OR WOOD-LIKE PRODUCTS; THEY CANNOT BE USED WITH ABRASIVE WHEELS FOR CUTTING FERROUS MATERIALS SUCH AS BARS, RODS, PIPES, ETC. ABRASIVE DUST CAUSES JAMMING OF THE LOWER GUARD. SPARKS FROM ABRASIVE CUTTING WILL BURN THE LOWER GUARD, THE KERF INSERT, AND OTHER PLASTIC PARTS
- CIRCULAR SAW FIRST SPECIAL SAFETY INSTRUCTIONS
- ADDITIONAL INSTRUCTIONS FOR WORK AND SAFETY
- INTENDED USE
- GET TO KNOW THE PRODUCT
- LIST OF SPARE PARTS
- PROTECTION OF THE DEVICE DEPENDING ON THE LOAD
- BULGARIAN
- SUPPORT
- CE DECLARATION OF CONFORMITY
- WARNING! PRECAUTION! DANGER
- DANGER! WARNING! CAUTION
- WARNINGS
- SAFETY INSTRUCTIONS FOR CUTTING WITH THE MITER SAW
- OPERATING INSTRUCTIONS FOR TECHNICAL MAINTENANCE
- LASER SAFETY INSTRUCTIONS
- SAFETY WARNINGS
- LEARN ABOUT THE PRODUCT
- SPARE PARTS LIST
- CONNECTION TO MAINS
- CERTIFICATE OF CONFORMITY
Brand : AEG
Model : PS 216 L
Category : Jigsaw