Big Zapper 00040072 - Remote control HAMA - Free user manual and instructions
Find the device manual for free Big Zapper 00040072 HAMA in PDF.
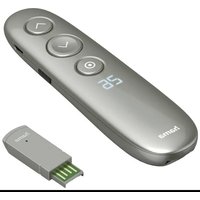
| Product type | Universal remote control |
| Brand | Hama |
| Model | Big Zapper 00040072 |
| Dimensions (approx.) | 20 x 5 x 2 cm |
| Weight (approx., with batteries) | 100 g |
| Power supply | 2 AA batteries (LR6/Mignon) |
| Infrared range | Up to 10 m |
| Code memory | Retained even after battery change |
| Main functions | Universal control, code programming, manual/automatic search, learning function, Punch-Through (channels and volume), Macro Power |
| Energy saving function | Automatic shutdown after 15 seconds of holding a key |
| Compatibility | TV, set-top boxes (STB), and other audiovisual devices via built-in codes |
| Care and cleaning | Clean with a soft, dry cloth, do not use abrasive products |
| Safety | Do not expose to moisture, heat sources, direct sunlight; keep out of reach of children; observe battery polarity |
| Spare parts and repairability | Not planned; do not attempt to repair yourself |
| General information | Universal remote control with learning function and energy saving; includes a code list for many brands |
Frequently Asked Questions - Big Zapper 00040072 HAMA
User questions about Big Zapper 00040072 HAMA
0 question about this device. Answer the ones you know or ask your own.
Ask a new question about this device
Download the instructions for your Remote control in PDF format for free! Find your manual Big Zapper 00040072 - HAMA and take your electronic device back in hand. On this page are published all the documents necessary for the use of your device. Big Zapper 00040072 by HAMA.
USER MANUAL Big Zapper 00040072 HAMA
Thankyouforchoosinga H amaproduct.
Takeyourtimeandreadthefollowinginstructionsand informationinfull.Pleasekeeptheseinstructionsina safeplaceforlaterreference.
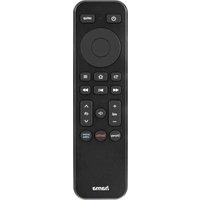
Functionbuttons
1.ON/OFF/L EDindicator
2. Buttonsfordeviceselection
3. Vol+/Vol-: Volumecontrol
4. Muteswitch
5.Numberbuttons0-9
6.-/--Switchtotwo-digitchannelnumbers
7. Setup—R emotecontrolsettings
8. Menu—O pendevicemenu
9. AV – Select external AV source
10. Confirmselection
11.Exit— Confirmselection
12.CH+/-— P rogrammeselection
1. Explanationofwarningsymbolsandnotes
Warning
This symbolised to indicate safety instructions to draw your attention to specific hazards and risks.

Note
This symbol is used to indicate additional information or important notes.

2. Supplied package
- Universalremotecontrol
- Listofcodes
• Theseoperatinginstructions
3. Safetyinstructions
- Donotusetheuniversalremotecontrolindamp environmentsandavoidcontactwithsplashingwater.
- Keeptheuniversalremotecontrolawayfromheat sourcesanddonotexposeittodirectsunlight.
- As with all electrical products, the universal remote controlshouldbekeptoutofthereachofchildren.
- Thisproductisintendedforprivate,non-commercial useonly.
-
Usetheproductonlyfortheintendedpurpose.
-
Protect the product from dirt, moisture and overheating and use it indry room only.
- Donotusetheproductinareasinwhichelectronic productsare notpermitted.
- Donotdroptheproductanddonotexposeittoany majorshocks.
- Do not modify the product in any way. Doing so voids the warranty.
- Keepthepackagingmaterialoutofthereachof childrenduetotheriskofsuffocation.
- Disposeofpackagingmaterialimmediatelyin accordancewiththelocallyapplicableregulations.
- Donotoperatetheproductoutsidethepowerlimits specifiedinthetechnicaldata.
- Donotopenthedeviceorcontinuetooperateitifit becomesdamaged.
- Donotattempttoserviceorrepairtheproduct yourself. Leave any and all service work to qualified experts.
- Onlyusethearticleundermoderateclimatic conditions.
Warning- Batteries

- Wheninsertingbatteries, notethecorrectpolarity (+and- m arkings) and insertthebatteries accordingly. Failure to do so could result in the batteriesleakingorexploding.
- Onlyusebatteries(orrechargeablebatteries)that matchthespecifiedtype.
- Before you insert the batteries, clean the battery contactsandthepolaritycontacts.
- Donotallowchildrentochangebatterieswithout supervision.
- Donotmixoldandnewbatteries,orbatteriesof differenttypesorfromdifferentmanufacturers.
Warning-Batteries

- Removethebatteriesfr omproductsthatar e not beingusedforanextendedperiod(unlessthesare beingkeptreadyforanemergency).
- Donotshort-circuitbatteries.
- Donotchargebatteries.
- Donotburnbatteries.
- Keepbatteriesoutofthereachofchildren.
- Neveropen, damageorswallowbatteriesorallow themtoentertheenvironment. Theycancontain toxic, environmentallyharmfulheavymetals.
- Removespentbatteriesfromtheproductand disposeofthemwithoutdelay.
- Avoidstoring, charging and using in extreme temperatures and at extremely low atmospheric pressures (such as at high altitudes).
4. Firststeps- Insertingthebatteries

Note
- Alkaline batteries are recommended. Use two batteriesofthetype"AA"(LR6/Mignon).
- Removethebatterycoveronthebackofthe universalremotecontrol(A).
- Insertthebatteries, observingthe" +/-"marksfor polarity(B).
- Closethebatterycompartment(C).
Note: Codememory

- Thisremotecontrolsavesthesettingsevenduring a b atterychange.
Note: Energysavingfunction

- Ther emotecontr olswitchesitselfoffautomatically ifa b uttonispressedforlongerthan15seconds. Thisprolongsthelifeofthebatteriesiftheremote control is stuck in a place where the buttons are pressedpermanently, e .g.betweensofacushions.
5.Setup

Note
- For proper infra-red transmission, always hold the remotecontrolintheapproximatedirectionofthe devicetobeoperated.
- Ifnoentryismadewithin30seconds, SETUPmode isautomaticallyterminated. TheLEDflashessix timesandthengoesout.
- You cannot operate a device with the universal remotecontrolwhileitisinSetupmode.ExitSetup modeandselectthedevicetobeoperatedusing thedeviceselectionbuttons.
- Pleasenotethatheremotecontrolemitsinfra-red signals. These are not visible to the human eye.
5.1 Directcodeentry
A c odelistisincludedintheuniversalremotecontrol's extentofdelivery. T hecodelistcontainsfour-digitcodes forsettingtheremotecontrolltoworkwithmostTV/STB equipmentmanufacturers.
For easy orientation, the codes are sorted first by type of device (TV, STB) and within the type of device alphabeticallybybrandname.
5.1.1 Switchthedeviceyouwishtooperateon.
5.1.2 Pressthe "SETUP" button until the LED lightsup continuously.
5.1.3 Usethedevicebuttontoselectthedevicetobe operated(e.g.TV). If theselectionissuccessful, theLEDflashesonceandthenlightsup permanently.
5.1.4 Search the codelist for the brand and type of the device to be operated.
5.1.5 Enter the corresponding four-digit code using the number buttons 0-9. The LED confirmstheentry of each digit with a short flash and goes out after the fourth digit.
5.1.6 Thentesttheremotecontrolandcheckwhether thedesiredfunctionscanbecontrolled.Itis possiblethatthefirstcodeisnotthemost suitable,andpossiblynotallfunctionsare available.Inthiscase,trythenextcode mentionedfortheselecteddevicetype/brand fromthelist.
Note
• A v alidcodeisautomatically saved.
- Ifthecodeisinvalid, theLEDflashessixtimesand thengoesout.Repeatsteps5.1.1to5.1.5,oruse anothermethodtoenterthecode.
Theuniversalremotecontrolhasaninternalmemory thatalreadycontainsupto350codesperdevicetypefor the most common AV devices. You can go through these codes until the device to be operated shows a response. For example, thedevicetobeoperatedswitchesoff ("POWER" button) or changeschannel("CH+/CH-" buttons).
5.2.1 Switchthedeviceyouwishtooperateon.
5.2.2 PresstheSETUPbuttonuntiltheLEDlightsup permanently.
5.2.3 Use the device button to select the device to be operated (e.g. TV). If these selection is successful, the LED flashes once and then lights up permanently.
5.2.4 Pressthe"POWER" or "CH+/CH-" buttonoscroll through the preset codes until the device to be operated shows a response.
5.2.5 Press "MUTE" to savethecode and exit the decode search. The LED goes out.
5.2.6 Thentesttheremotecontrolandcheckwhether thedesiredfunctionscanbecontrolled.Itis possiblethatthefirstcodefoundisnotthe mostsuitable,andpossiblynotallfunctionsare available.Inthiscase,repeatsteps5.2.1.-5.2.5. Thecodesearchstartswiththenextcode followingthelastonesaved.
Note
- A m aximumof350codesofthemostcommon devicescanbestoredintheinternalmemory. DuetothenumerousAVdevicesavailableon themarket,itmayhappentatonlythemost commonmainfunctionsare a vailable.Ifthisisthe case,repeatsteps5.2.1to5.2.5tofinda more compatiblecode.A c odemaynotbeavailablefor somespecific d evicemodels.

5.3 Automaticcodesearch
Theautomaticcodesearchusesthesamepresetcodes asthemanualcodesearch(5.2).However, the universal remotecontrol automaticallysearchesthecodesuntilthe device to be operated shows a response. For example, the devicetobeoperatedswitchesoff("POWER"button)or changeschannel("CH+/CH-"buttons).
5.3.1 Switchthedeviceyouwishtooperateon.
5.3.2 Pressthe"SETUP" button until the LED lightsup continuously.
5.3.3 Usethedevicebuttontoselectthedevicetobe operated(e.g.TV). If theselectionissuccessful, theLEDflashesonceandthenlightsup permanently.
5.3.4 Pressthe"CH+/CH-"or"POWER"button to start the automatic codesearch. The LED flashes once and then lights up permanently. It takes 6 seconds for the universal remote control to start the first search.
Note: Settingthesearchspeed
- Thedefaultsettingforthesearchtimepercodeis 1 second. If this does not suity you, you can change to a search time of 3 seconds per code. To switch between search times, press "CH+" or "CH-" within the 6 seconds before the automatic code search starts.
5.3.5 TheLEDconfirmstherespectivecodesearches with a singleflash.
5.3.6 Assoonasthedevicetobeoperatedshowsa response, pressthe"MUTE" buttontosavethe codeandexitthecodesearch. TheLED goesout.
5.3.7 Thentesttheremotecontrolandcheckwhether thedesiredfunctionscanbecontrolled.Itis possiblethatthefirstcodefoundisnotthe mostsuitable,andpossiblynotallfunctionsare available.Inthiscase,repeatsteps5.3.1. -5.3.6. Thecodesearchstartswiththenextcode followingthelastonesaved.
5.3.8 Tocanceltheautomaticsearchduringthesearch process, press the "EXIT" button.
Note
- Ifallcodeshavebeensearchedwithoutsuccess, theuniversalremotecontrolexitstheautomatic codesearchandautomaticallyreturnsto operatingmode. Thecurrentlystoredcoderemains unchanged.
5.4Coderecognition
Coderecognitionoffersyoutheabilitytodeterminea codeyouhavealreadysaved.
5.4.1 Pressthe"SETUP"buttonuntiltheLEDlightsup continuously.
5.4.2 Usethedevicebuttontoselectthedevicetobe operated(e.g.TV). If theselectionissuccessful, theLEDflashesonceandthenlightsup permanently.
5.4.3 Pressthe"SETUP"button.TheLEDflashesonce andthenlightsuppermanently.

5.4.4 Pressoneofthenumberbuttonsfrom0 to 9 to searchforthefirstdigit.TheLEDflashesoncefor thefirstdigitofthefour-digitcodenumber.
5.4.5 Repeatstep 5.4.4 for these second, third and fourth digits respectively.
5.4.6 You can then enter the determined code in the table below if you need to again a 1 atertime (e.g. after accidentally deleting theremote control settings).
| CODES | |
| TVSTB | |
6.Specialfunctions
6.1 Channelpunch-through
With the channel punch-through function, the CH+ or CH-command scan bypass the currently controlled device and changethe channel sofa s econd device. All other commands are u naffected.
Toactivatethechannelpunch-throughfunction:
- Pressthedesireddevicebutton(e.g.TV).
- Pressandholdthe"CH+"button.
- Pressthedesireddevicebutton(e.g.STB).
- Releasethe"CH+"buttonagain(theLEDflashesonce whenthesettingisactivated).
Todeactivatethechannelpunch-throughfunction:
- Pressthedesireddevicebutton(e.g.TV).
- Pressandholdthe"CH-"button.
- Pressthedesireddevicebutton(e.g.STB).
- Releasethe"CH-"buttonagain(theLEDflashestwice whenthesettingisdeactivated).
6.2Volumepunch-through
With the volume punch-through function, the VOL+or VOL- command scan bypass the device currently being controlled
andadjustthevolumeofa s econddevice. All other commands are u naffected.
Toactivate the volume punch-through function:
- Pressthedesireddevicebutton(e.g.TV).
- Pressandholdthe"VOL+"button.
- Pressthedesireddevicebutton(e.g.STB).
- Releasethe "VOL+" buttonagain(theLEDflashes oncewhenthesettingisactivated).
Todeactivatethechannelpunch-throughfunction:
- Pressthedesireddevicebutton(e.g.TV).
- Pressandholdthe"VOL-"button.
- Pressthedesireddevicebutton(e.g.STB).
- Releasethe "VOL-"buttonagain(theLEDflashes twicewhenthesettingisdeactivated).
6.3 MacroPower
Macro Power allows you to switch two AV devices on/offsimultaneously.
ToactivatetheMacro Powerfunction:
- Pressthedesireddevicebutton(e.g.TV).
- Pressandholdthe"POWER"button.
- Pressthedesireddevicebutton(e.g.STB).
- Releasethe"POWER"buttonagain(theLEDflashes oncewhenthesettingisactivated).
TodeactivatetheMacro Powerfunction:
- Pressthedesireddevicebutton(e.g.TV).
- Pressandholdthe"POWER"button.
- Pressthedesireddevicebutton(e.g.STB).
- Releasethe"POWER"buttonagain(theLEDflashes twicewhenthesettingisdeactivated)
7. Learningfunction
Thisremotecontrolisequippedwitha l earningfunction. Thisallowsyoutotransferfunctionsfromyouroriginal remotecontroltothisuniversalremotecontrol.
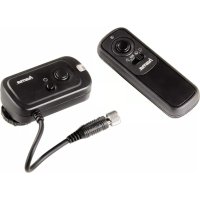
7.1 Before you start the learning function
- Make sure that all batteries used in both remote controls are in p erfectcondition. Changethemif necessary.
- Placeyouroriginalremotecontrolandtheuniversal remotecontrolnexttoeachothersothattheinfrared diodesoftheremotecontrolsare directlyopposite eachother.
- If necessary, correct the height of both remote controls to achieve optimal alignment.
- Thedistancebetweenthetworemotecontrolsshould beapprox.3 c m.
BIGZAPPER

ORIGINAL
ca.3cm
Note

- Donotmovetheremotecontrolsduringthe learningprocess.
- Make sure that the room lighting is not fluorescent tubesorenergy-savinglamps, asthesecouldcause interference and thus hinder the learning process.
- Thedistancebetweenthetworemotecontrolsand thenearestlightsourceshouldbeatleast1 m etre.
- The learning process is terminated without saving if nobutton is pressed on signal is received for 30 sec. while learning mode is activated.
- Inlearningmode, eachbuttoncanonlybeassigned onefunction.A newfunctionoverwrites the functionpreviouslytaughtonthisbutton.
- The TV, STB and Setup buttons cannot be assigned newfunctions.
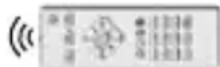
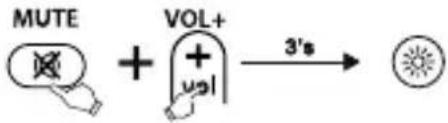
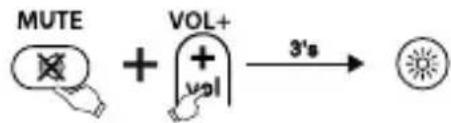
7.2 Activating the learning mode
- Pressandholdthe[MUTE] and [VOL+] buttons simultaneously for approx. 3 sec. until the statusLEDlightsupcontinuously.
chemical
Chemical reaction diagram showing MUTE and VOL+ ion interaction with 3' s time point2.Enterthecode[9][8][0],thestatusLEDflash-es2 timesandthenlightsuppermanently.
- The universal remote control is now in learning mode.
7.3Transferringthebuttonfunction
-
Pressthebuttonontheoriginalremotecontrol whosefunctionyouwanttotransfer. To confirmthatthecommandhasbeenreceived, thestatusLEDoftheuniversalremotecontrol flashes.
-
Now pressthebuttonontheuniversalremote controltowhichthefunctionistobetransferred.
-
The function LED of the universal remote control flashes 3 times for confirmation and then lights up permanently again. Then new function is now saved.
-
Totransferthefunctionsofadditionalbuttons, repeatthesesteps.
-
Pressthe[SETUP]buttontosavealltaught-in functionsandexitthelearningmode.
Note
When changing the batteries of the universal remote control, the function of thetaught-in buttons are retained.

7.4 Deletingtaughtfunctions
7.4.1 Deleting a t aughtfunction
- Pressandholdthe[MUTE] and [VOL+] buttons simultaneously for approx. 3 sec. until the status LED lightsup continuously.
chemical
Chemical reaction diagram showing MUTE and VOL+ ion addition to a product with 3' s time-
Enterthecode[9][8][1], thestatusLEDflashes 2 timesandthenlightsuppermanentlyagain.
-
Pressthebuttonwhosefunctionyouwishtowantttodelete. ThestatusLEDflashes3 times andthedesiredfunctionisdeleted.
7.4.2 Deleting alltaught functions
- Pressandholdthe[MUTE] and [VOL+] buttons simultaneously for approx. 3 seconds until the status LED lightsup continuously.

chemical
Chemical reaction diagram showing MUTE and VOL+ ion interaction with 3' s catalyst-
Enterthecode[9][8][2], thestatusLEDflashes 2 timesandthenlightsuppermanentlyagain.
-
Pressthe[SETUP]button, thestatusLED flashes3 timesandalltaught-infunctionsare deleted.
8. Maintenance
- Neveruseoldandnewbatteriesintheuniversal remotecontrolatthesametime,asoldbatteriestend toleakandcanleadtoa lossofperformance.
- Nevercleantheuniversalremotecontrolwith scouringagentsorharshcleaningagents.
- Keeptheuniversalremotecontrolfreeofdustby cleaningitwitha drysoftcloth.
9.Troubleshooting
Q.Myuniversalremotecontroldoesnotwork!
A. Check the AV device. If themains switch on the device is off, the universal remote control cannot operate the device.
A. Check that the batteries are inserted correctly and that the polarity has been observed.
A. Check that you have pressed the appropriate device button for the device.
A. Replacethebatteriesifthebatterylevelislow.
Q. If there are multiple device codes listed for the brand of my AV device, how do I select the correct device code?
A. TodeterminethecorrectdevicecodefortheAV device, testthecodesoneaftertheotheruntilmostof thebuttonsworkproperly.
Q.MyAVdeviceonlyrespondstosomebutton commands.
A. Try other codes until most of the buttons work properly.
Q. The brand of my AV device is not mentioned in the codelist.
A. In this case, use the manual codesearch (Section 5.2) or the automatic codesearch (Section 5.3). During the code search, all codes for a device type are tested across manufacturers, e.g. all codes for STB receivers regardless of the manufacturer.
Q.I h avetriedalltheavailablecodesforthebrandofmy AVdevicefromthecodelist,butnoneofthecodes mentionedwork.
A. In this case, use the manual codesearch (Section 5.2) or the automatic codesearch (Section 5.3). During the code search, all codes for a device type are tested across manufacturers, e.g. all codes for STB receivers regardless of the manufacturer.
10.Warrantydisclaimer
HamaGmbH& C o K G a ssumesnoliabilityandprovides nowarrantyfordamageresultingfromimproper installation/mounting,improperuseoftheproductor from failure to observe the operating instructions and/orsafetynotes.
11. Recycling information
Noteonenvironmentalprotection:
Following the implementation of European Directive2012/19/EUand2006/66/EUinto thenationallegalsystems, the following applies: Electricalandelectronicdevices aswellasbatteriesmustnotbedisposed ofwithhouseholdwaste. Consumers are obliged by lawtoreturnelectricalandelectronicdevicesaswell asbatteriestothedesignatedpubliccollectionpoints ortothepointofsaleattheendoftheirservicelives. Detailed informationonthistopicisdefinedin the nationallawsoftherespectivecountry. This presence of the abovesymbolontheproduct, operating instructions or package indicate that the product is subject to these regulations. By recycling, reusing the materials or other forms of utilising old devices/batteries, you are making an important contribution to protecting our environment.
chemical
Chemical reaction diagram showing MUTE and VOL+ ion addition to a product with 3' s timechemical
Chemical reaction diagram showing MUTE and VOL+ ion interaction with 3's catalystchemical
Chemical reaction diagram showing MUTE and VOL+ ion interaction with 3' s timechemical
Chemical reaction diagram showing MUTE and VOL+ ion interaction with 3' s timechemical
Chemical reaction diagram showing MUTE and VOL+ ion interaction with 3' s catalystchemical
Chemical reaction diagram showing MUTE and VOL+ ion interaction with 3' s timechemical
Chemical reaction diagram showing MUTE and VOL+ ion interaction with 3's catalystchemical
Chemical reaction diagram showing MUTE and VOL+ ion addition to a product with 3' s time1.AAN/UIT/ I ed-indicator
6.1 Zender-punch-through
6.2 Volume-punch-through
- Voerdecode[9][8][0]in, destatus-led knippert2 k eerenbrandtdanpermanent.
- Deuniverseleafstandsbedieningstaatnuin deleermodus.
chemical
Chemical reaction diagram showing MUTE and VOL+ ion addition to a product with 3' s timechemical
Chemical reaction diagram showing MUTE and VOL+ ion interaction with 3' s, producing a productchemical
Chemical reaction diagram showing MUTE and VOL+ ion addition to a product with 3' s timechemical
Chemical reaction diagram showing MUTE and VOL+ ion interaction with 3's time pointchemical
Chemical reaction diagram showing MUTE and VOL+ ion interaction with 3' s time pointchemical
Chemical reaction diagram showing MUTE and VOL+ ion addition to a product with 3' s timechemical
Chemical reaction diagram showing MUTE and VOL+ ion interaction with 3' s time pointchemical
Chemical reaction diagram showing MUTE and VOL+ ion interaction with 3' s timechemical
Chemical reaction diagram showing MUTE and VOL+ ion interaction with 3's catalystchemical
Chemical reaction diagram showing MUTE and VOL+ ion interaction with 3' s, producing a product6.1 Punch-Throughposturi
chemical
Chemical reaction diagram showing MUTE and VOL+ ion interaction with 3' s time pointchemical
Chemical reaction diagram showing MUTE and VOL+ ion addition to a product with 3' s timechemical
Chemical reaction diagram showing MUTE and VOL+ ion addition to a product with 3' s timechemical
Chemical reaction diagram showing MUTE and VOL+ ion addition to a product with 3' s timechemical
Chemical reaction diagram showing MUTE and VOL+ ion interaction with 3's catalyst11. Pokynyk likvidaci
- Zadajtekód[9][8][0], stavováLEDdvakrát bliknea p otomsvietitrvale.
- Univerzálny dialkový ovládač je teraz v režime učeniasa.
7.3 Prenosfunkcietlačidla
chemical
Chemical reaction diagram showing MUTE and VOL+ ion addition to a product with 3' s timechemical
Chemical reaction diagram showing MUTE and VOL+ ion interaction with 3' s, producing a productchemical
Chemical reaction diagram showing MUTE and VOL+ ion interaction with 3' s timechemical
Chemical reaction diagram showing MUTE and VOL+ ion interaction with 3's catalystchemical
Chemical reaction diagram showing MUTE and VOL+ ion addition to a product with 3' s labelInformation: Kodminne

6.1 Kanal-punch-through
chemical
Chemical reaction diagram showing MUTE and VOL+ ion addition to a product with 3' s timechemical
Chemical reaction diagram showing MUTE and VOL+ ion interaction with 3's catalystchemical
Chemical reaction diagram showing MUTE and VOL+ ion interaction with 3's time pointchemical
Chemical reaction diagram showing MUTE and VOL+ ion interaction with 3's time pointchemical
Chemical reaction diagram showing MUTE and VOL+ ion interaction with 3' schemical
Chemical reaction diagram showing MUTE and VOL+ ion interaction with 3's time pointchemical
Chemical reaction diagram showing MUTE and VOL+ ion interaction with 3' s, producing a productchemical
Chemical reaction diagram showing MUTE and VOL+ ion interaction with 3's catalystchemical
Chemical reaction diagram showing MUTE and VOL+ ion interaction with 3' s time pointchemical
Chemical reaction diagram showing MUTE and VOL+ ion interaction with 3' s time pointchemical
Chemical reaction diagram showing MUTE and VOL+ ion interaction with 3' s time pointchemical
Chemical reaction diagram showing MUTE and VOL+ ion addition to a product with 3' s shiftchemical
Chemical reaction diagram showing MUTE and VOL+ ion interaction with 3's catalystchemical
Chemical reaction diagram showing MUTE and VOL+ ion interaction with 3' s time pointchemical
Chemical reaction diagram showing MUTE and VOL+ ion addition to a product with 3' s timechemical
Chemical reaction diagram showing MUTE and VOL+ ion interaction with 3' s catalyst86652Monheim/Germany
Service& Support

www.hama.com

+499091502-0
D GB

All listed brands are trademarks of the corresponding companies. Errors and omissions excepted, and subject to technical changes. Our general terms of delivery and payment are applied.