
FOLD BL MAT/A/52 - Vacuum group ELICA - Free user manual and instructions
Find the device manual for free FOLD BL MAT/A/52 ELICA in PDF.
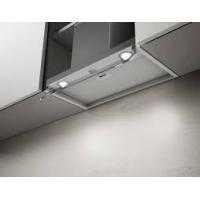
| Product type | Cooker hood (extractor unit) |
| Brand | ELICA |
| Model | FOLD BL MAT/A/52 |
| Power supply | 220-240 V ~ 50 Hz |
| Main functions | Air extraction in ducted or recirculating mode ; 3 motor speeds + intensive speed ; LED lighting ; touch controls ; timer |
| Minimum installation height (electric cooking) | 45 cm |
| Minimum installation height (gas/mixed cooking) | 65 cm |
| Grease filter | Metal, washable monthly (by hand or dishwasher at low temperature) |
| Charcoal filter (recirculating version) | Replaceable cartridge every 4 months OR washable filter every 2 months (depending on version) |
| Lighting system | Integrated LED, not user-replaceable |
| Grease filter saturation alarm | Indicator L5 on after 40 hours of operation; reset by long press on T1 |
| Charcoal filter saturation alarm | Indicator L5 flashing after 160 hours; activation/deactivation available |
| Temperature alarm | Sensor activating speed 3 in case of overheating; can be exited via button T1 or T2 |
| Energy consumption | Compliant with standards EN 50564, IEC 62301 (energy class not specified) |
| Noise level | Compliant with EN/IEC 60704 (values not specified) |
| Duct connection diameter | Same as connection ring diameter (not specified, estimated 150 mm) |
| Weight | Not disclosed (estimated 15-25 kg) |
Frequently Asked Questions - FOLD BL MAT/A/52 ELICA
User questions about FOLD BL MAT/A/52 ELICA
0 question about this device. Answer the ones you know or ask your own.
Ask a new question about this device
Download the instructions for your Vacuum group in PDF format for free! Find your manual FOLD BL MAT/A/52 - ELICA and take your electronic device back in hand. On this page are published all the documents necessary for the use of your device. FOLD BL MAT/A/52 by ELICA.
USER MANUAL FOLD BL MAT/A/52 ELICA
EN -Warnings and installation
The product is designed for the extraction of cooking fumes and steam and it is for domestic use only.
Strictly observe the instructions in this manual. No liability shall be accepted for any inconvenience, damage or fire caused to the product as a result of not following the instructions given in this manual.
The device may have different aesthetic features with respect to the illustrations in this handbook, however the operating, maintenance and installation instructions remain the same.
- It is important to keep all the manuals accompanying the product so that they can be consulted at all times. If sold, transferred or moved, make sure it remains with the product. - Read the instructions carefully: they contain important information on installation, operation and safety. - Check the integrity of the product prior to its installation. Otherwise, contact the dealer and do not continue with the installation.
GENERAL SAFETY
-
Do not make electrical or mechanical changes on the product or on the exhaust pipes. - Before doing any cleaning or maintenance work, disconnect the product from the mains power supply by removing the plug or turning off the mains switch. - For all installation and maintenance operations, always wear work gloves. - The product can be used by children over the age of 8 and by people with reduced physical, sensory or mental capabilities or without experience or the necessary knowledge, as long as they are properly supervised or have been instructed on how to safely use the device and understand the inherent dangers. - Children must be supervised to make sure that they do not play with the product.
-
Cleaning and maintenance must never be performed by children unless they are properly supervised. The room must have sufficient ventilation when the product is used at the same time as other appliances burning gas or other fuels. The product must be cleaned frequently both inside and out (AT LEAST ONCE A MONTH); always follow the instructions given in the maintenance manual. Failure to comply with the rules indicated for cleaning the product and replacing/cleaning the filters may result in the risk of fire. It is strictly forbidden to cook food on the flame under the product. Warning: When the hob is on, the accessible parts of the product may become hot. Do not connect the product to the electrical power supply until the installation is complete. The regulations laid down by local authorities must be strictly followed with regard to the technical and safety measures to adopt for fume extraction. The extracted air must not be conveyed through the same ducts used to extract the fumes generated by gas combustion or other types of combustion products. Do not use or leave the product without appropriately installed lamps, as this may result in the risk of electric shock. The product must NEVER be used without the grille correctly fitted. The product must NEVER be used as a support surface unless expressly indicated.
-
Range hoods and other cooking fume extractors may adversely affect the safe operation of appliances burning gas or other fuels (including those in other rooms) due to back flow of combustion gases. These gases can potentially result in carbon monoxide poisoning. After installation of a range hood or other cooking fume extractor, the operation of flued gas appliances should be tested by a competent person to ensure that back flow of combustion gases does not occur.
-
To replace the lamp, only use the lamp indicated in the maintenance/lighting system section of this manual. • Using a naked flame may damage the filters and cause a fire hazard, and must therefore be avoided under all circumstances. • Extra care must be taken when frying to prevent the oil from overheating and catching fire. • In case of doubt, contact the authorised service centre or similar qualified personnel.
INSTALLATION SAFETY
- Use the fixing screws supplied with the product only if suitable for the surface; otherwise purchase the correct type of screws. Check for accessories (e.g. bags containing screws, warranty certificates, etc.) inside the product (placed there for transport reasons). If there are any, remove them and keep them safe. Warning: Failure to install screws and fasteners in accordance with these instructions may result in electrical hazards. The exhaust pipe is not supplied and must be purchased. The diameter of the exhaust pipe must be equivalent to the diameter of the connecting ring. For installation of the product on the hob, respect the height indicated in the drawings. The minimum distance between the surface of the container supports on the cooker and the lowest part of the range hood must not be less than 45 cm (not less than 65 cm only for Australia and New Zealand) for electric cookers and 65 cm for gas or mixed cookers. If the installation instructions of the gas cooker specify a greater distance, take it into account.
Please note! Do not use with a programmer, timer, separate remote control or any other device that activates automatically.
USE
The extraction system can be used in the duct-out version with external evacuation, or in the recirculating version with filtering and internal recirculation.
Duct-Out Version:
Vapours are evacuated outside through an exhaust pipe attached to the connecting flange.
CAUTION! If the product features one or more carbon filters, they must be removed.
Connect the product to wall-mounted exhaust pipes and holes with a diameter equivalent to the air outlet (connecting flange).
The use of pipes and outlet holes in the wall with a smaller diameter will reduce the extraction performance and drastically increase the noise level.
All responsibility in this regard is therefore denied.
- Use a ducting pipe with the shortest length necessary.
- Use a ducting pipe with the least number of bends possible (maximum bend angle: 90^ ).
- Avoid drastic changes in the ducting pipe diameter.
Recirculating Version:
The suctioned air will be degreased and deodorised before it is sent back into the room. To use the product in this version, it is necessary to install an additional activated carbon filter system.
ASSEMBLY BEFORE INSTALLATION
- Check that the product is the right size for the installation area.
- Remove the activated carbon filter(s) if supplied (see also relevant paragraph).
- It(they) must be reinstalled if the product is used in the filter version.
- If there are panels and/or walls and/or wall units on the sides, make sure that there is enough space to install the product and that it is always possible to access the control panel easily.
- The product is equipped with fixing plugs suitable for most walls/ceilings. However, it is necessary to consult a qualified technician to make sure that the materials are suitable for the type of wall/ceiling. The wall/ceiling must be strong enough to support the weight of the hood.
ELECTRICAL CONNECTION SAFETY
-
The mains voltage must correspond to the voltage indicated on the label found inside the product. -If it features a plug, connect the product to a socket that complies with current standards, located in an area accessible even after installation.
-
If it does not feature a plug (direct connection to the mains) or the plug is not located in an accessible area, even after installation, apply a standard double pole switch that ensures complete disconnection from the mains in category III overvoltage conditions, in accordance with the installation rules. - Warning! The power cable must be replaced by the authorised technical support service or by a person with similar qualifications.
-
Please note! Before reconnecting the circuit to the mains power supply, make sure that it is working correctly, always check that the power cable is correctly installed.
MAINTENANCEWARNINGS
- Cleaning: For cleaning, simply use a cloth moistened with neutral liquid detergents. Do not use cleaning tools or instruments.
- Avoid the use of abrasive products. DO NOT USE ALCOHOL!

For product maintenance, see the images at the end of the installation marked by this symbol.
-
Anti-Grease Filter: The metallic anti-grease filter must be cleaned once a month with non-aggressive detergents, manually or in a dishwasher on a short wash at low temperatures. To remove the anti-grease filter, pull the spring release handle.
-
The Anti-Grease Filter traps the grease particles produced during cooking. When cleaned in the dishwasher, the metal grease filter may discolour, but its filtering characteristics remain unchanged.
- XBCarbon filter (for filter version only): The cartridge must be replaced at least every four months. It CANNOT be washed or regenerated. As indicated in the drawings section: remove the anti-grease filters, apply a carbon filter on each side and attach it to the product. Put the anti-grease filters back in place.
- The carbon filter retains any unpleasant odours produced during cooking. - The saturation of the carbon filter can occur
after somewhat prolonged use depending on the type of cooking and how regularly the grease filter is cleaned.
. × B Washable activated carbon filter (for filter version only):
The carbon filter can be washed every two months (or when indicated by the filter saturation system - if included in your model). As indicated in the drawing section: remove the grease filter, remove the carbon filter and wash using hot water and suitable detergents or in a dishwasher at 65^ (if washing in a dishwasher, carry out the complete washing cycle without dishes inside). Remove any excess water without damaging the filter, then place it in the oven for 10 minutes at 100^ to dry it out completely. Put the anti-grease filters back in place.
Replace the foam layer every 3 years and each time the cloth appears damaged.
Illumination
- Lighting system : The lighting system cannot be replaced by the user, contact Customer Service in case of malfunction.
- The lighting system is based on LED technology. LEDs provide optimal illumination, last up to 10 times longer than conventional lamps and save 90% of electricity.
OPERATION


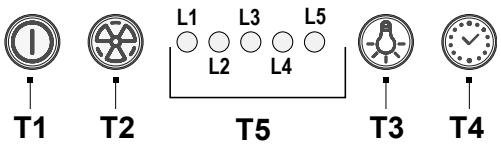
T1 Motor ON/OFF
Press the button to start the hood at speed 1.
Press the button during operation to switch the hood OFF.
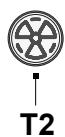
T2 Increase speed
Press the button to switch the hood from OFF to speed 1.
Press the button (with hood ON) to increase the motor speed from speed 1 to intensive.
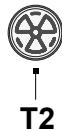
With each speed, the respective LED lights up.
Speed 1 LED L1
Speed 2 LED L2
Speed 3 LED L3
Intensive speed LED L4 (flashing)
Intensive speed is timed. Standard timing is 5^ , after which the hood switches to speed 2.
To deactivate the function before the time expires, press T2; the hood will switch to speed 1; press T1 to switch off the hood.
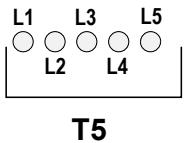
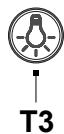
T3 Lights ON/OFF
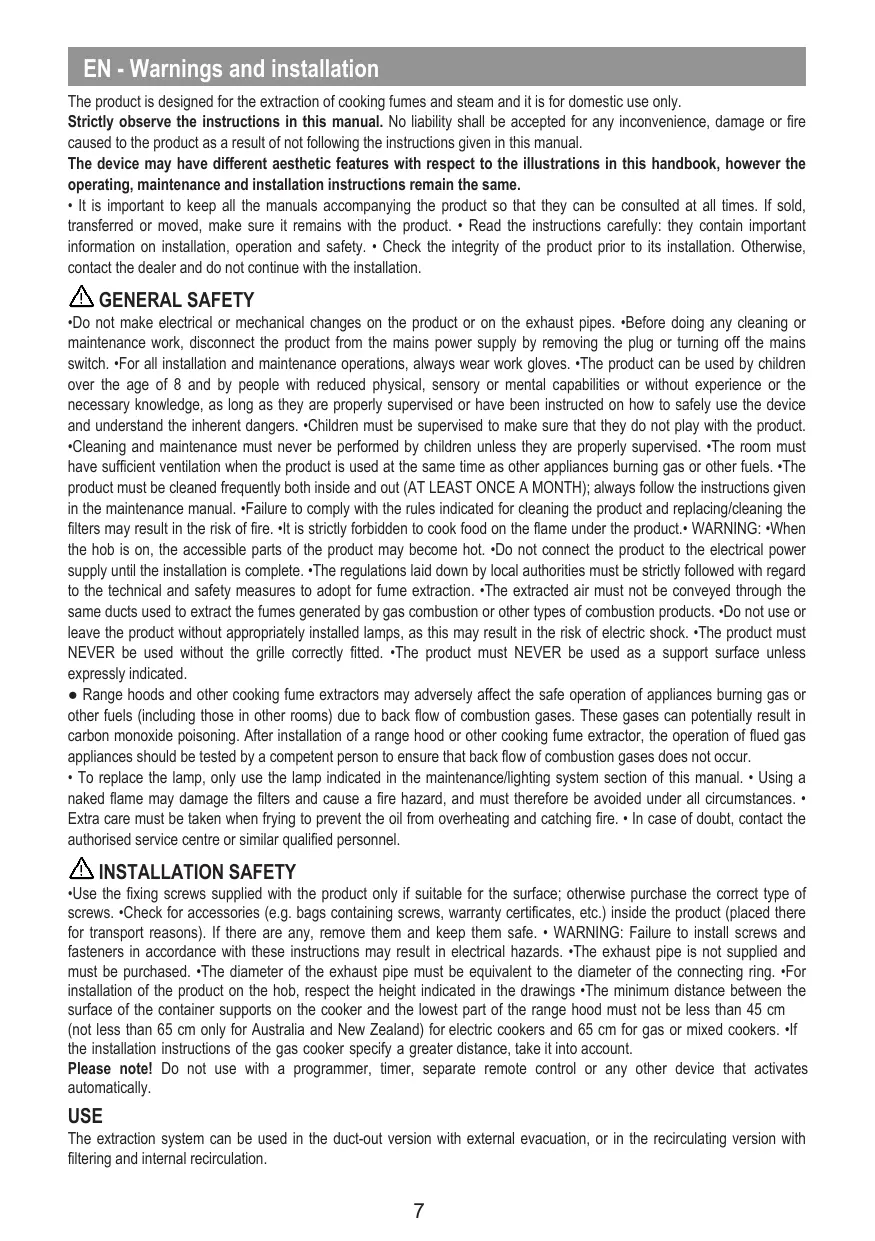
T4 Speed timer
T5 Operating status indicator.
Speed timer
The speed timer is enabled by pressing T4; after the set time, the hood switches off.
Timing is subdivided as follows:
Speed 1 - 20 minutes (LED L1 flashing)
Speed 2 - 15 minutes (LED L2 flashing)
Speed 3 - 10 minutes (LED L3 flashing)
Intensive speed - 5 minutes (LED L4 flashing).
During timed operation, press T1 to switch off the hood; press T2 or T4 to make the hood go back to the set speed.
Grease filter warning
After 40 hours of operation, LED L5 lights up.
When this warning appears, it means that the installed grease filter needs to be washed.
To reset the warning, press and hold key T1 for 3^
Carbon filter warning
After 160 hours of operation, LED L5 flashes.
When this warning appears, it means that the installed carbon filter needs to be replaced.
To reset the warning, press and hold key T1 for 3".
In the event that both warnings appear at the same time, LED L5 will alternately indicate the alarms by remaining on for 3" and then flashing 3 times.
This condition can be reset by performing the procedure described above twice.
The first time resets the grease filter warning, the second time resets the carbon filter warning.
In standard mode, the carbon filter warning is not active.
If the hood is used in the filter version, it is necessary to enable the carbon filter warning.
Carbon filter warning activation:
Switch the hood OFF and simultaneously press and hold keys T1 and T4 for 3".
The LEDs L1 and L2 will flash for 5^
Carbon filter warning deactivation:
Switch the hood OFF and simultaneously press and hold keys T1 and T4 for 3".
The LED L1 will flash for 2".
Temperature alarm
The hood is equipped with a temperature sensor that activates the motor at speed 3 if the temperature in the control panel area is too high.
The alarm condition is indicated by the LEDs L1, L2 and L3 flashing in sequence.
This condition remains until the temperature drops below the alarm threshold.
It is possible to exit this mode by pressing T1 or T2.
Every 30^ , the sensor checks the temperature in the control panel area.
OPERATION
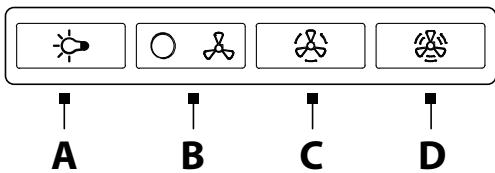
A=ON/OFFlight switch.
B= ON/OFF switch and select speed 1 (in case of little steam and smoke).
B + C = Select speed 2 (in case of medium amount of steam and smoke).
B + D = Select speed 3 (in case of a lot of steam and smoke).
END-OF-LIFE DISPOSAL

This device is marked in compliance with the European Directive 2012/19/EC - UK SI 2013 No.3113, Waste Electrical and Electronic Equipment (WEEE). Make sure that this product is disposed of correctly. The user helps prevent potential negative consequences for the environment and for health.
The symbol on the product or accompanying documentation indicates that this product should not be treated as household waste but should be handed over at a suitable collection point for the recycling of electrical and electronic equipment. Disposal of it in accordance with local regulations for waste disposal. For further information about the treatment, recovery and recycling of this product, please contact your local authority, the collection service for household waste or the shop from where the product was purchased.
RECOMMENDATIONS FOR USE
Recommendations for correct use in order to reduce the impact on the environment: When cooking begins, the device should be turned on at minimum speed, and left on for a few minutes even after cooking is complete. Increase the speed only if there is a large quantity of fumes and steam, using the Booster function only in extreme cases. To keep the odour reduction system running efficiently, replace the carbon filter/s when necessary. To ensure the high performance of the grease filter, clean it when necessary. To improve efficiency and minimise noise, use the maximum duct diameter indicated in this manual.
REGULATIONS
Equipment designed, tested and manufactured in compliance with safety regulations: EN/IEC 60335-1; EN/IEC 60335-2-31, EN/IEC 62233. Performance: EN/IEC 61591; ISO 5167-1; ISO 5167-3; ISO 5168; EN/IEC 60704-1; EN/IEC 60704-2-13; EN/IEC 60704-3; ISO 3741; EN 50564; IEC 62301. EMC: EN 55014-1; CISPR 14-1; EN 55014-2; CISPR 14-2; EN/IEC 61000-3-2; EN/IEC 61000-3-3.
NOTES

: the parts marked with this symbol can be purchased separately from specialised dealers.

: the parts marked with this symbol are optional accessories supplied only with some models and can be purchased the websites www.elica.com and www.shop.elica.com.
IPOEIOIOIHSEIIGA TH SYNTHPHSH
Kaapioos: TAOKABAPIOXpOoiOTIEAOTKAEOTIKA EVA BpeyEvo TAVI ME ouBETepo Uypo aatouvi. Mn XpOoiOTIEEPyAeia n unxavnata yia Tov Kaapioo.
Atropuyete Tn xipon Tpoiovtw Tn Tepiexou Aevtikc ouieC. MHN XPHZIMONIOIEITE OINOFINEYMA!

Tia n ouvtnpnou Tou pioovtoc deite Tc Eikovec Tou aokolouoov teta v kataaon kai Tou einnmaivovtai e auto to suofo.
X A iItpo Katakapatnans Aitouc: To eTAAIko pfIATPO katakpatnans liouc npTei va kaBapetai ia opa to mya e n tEITIKa KaHApIaTIKA, OTo xepi n ot TIAUVTHIO TAIATuw ot XaJNAe thepOkaiaic kai OTov auvTOKku. Ia Tnv aqapeon Tou pIATPOAitouc taBnTEt n laan attaPdAlianc me To elatnpio.
To PiaKpAaNc AIOUs Ouykpei ta oWpatia AIOUcs TPOePovra aTO to payeipma. To eAkkio pItpo [katakpantnC AITAPw ouoiw] OTN PEPIWnTou mTeI OTO NauVTnpio Tiatwv MTOpei va EbaeI. Nap' oA auta ta XapaktnpiAtika PIAtpapiauoc Tou napaevouv avaaloiota.
BΦiλtpo avθpaka (móvo yia ekdoon φiltpapioaoc): Ataiteiravitakataoan tou quayiyiou kαte tεoepic μηνεος avwtpo. ΔEN πρεπειν έλevetai nvaayevvatai. OTwC uTOδεIKVεTai OTNv Evoteta μe Ta oxéidia: apaipoeTe ta φiltpa katakpatnong lntouc, totoetneote eva φiltpo avθpaka av Tlεupa kai OTEPEWOTe oTo tpoiδ. Etavatantoθetntate ta φiltpa katakpatnong lntouc.
To i t avthetaa aixmuawtici ts duapeoteos oues Tou TPOepxovta ato to mayeipea. O kopeaoc tou pfItpou avthetaa yivetai utepa ato yevikw s napatetauevn xpnoan avaloya me tov tuto kouziva c kal n ouxvoiota kaapiaou tou qiltpou liouc.
BIIeVOpEvoEvpyoavpaka (movo yiaeksoon pIAtpapiaqato):
INSTALLATIONSsAKERHET
VEDLIKEHOLDSADVARSLER
- Rengjoring: I forbindelse med rengjoring ma man kun bruke en fuktig klut med skansomt vaskemiddel. Ikke bruk instrumenter aller annet vaskeutstyr til rengjoring.
- Ikke bruk slipendeprodukter. IKKE BRUK SPRIT!

CkopocT 2-15 MNHyTN (INHdkaTop led L2 Mmrau)
Ckopoct 3-10 MmHytn (HnDnKATop led L3Mnrau)
OBUINE IPNABUNI TEXHNI B3ONACHOCTN
· H e BHOCTe N3MeHENH H N B 3eKTPUeCKyIO, H N B MExAHueckyo cactb N3eJINr NIN BbIXONHbIE TpybI. Ipeep BbINOHNHEm IIObix Opeaunn PO OHCTke INI IN TeXoBcLNYKBAHINO OTKIOHTNE I3dEInne OT3eKTPocETN, BByHBV BNIKY INIOTKIOUVB IIbHAVBI BbIKIOUATEJIb JxIIOLO POMeUeHNA. · Ira BbIOHNHEH N0Epaunn NO yCTAOHBKe INTEXOcLxyKBAHINO IcNOIb3yTe paOObYe nepuATKn. · YcTPOCTBOM MOYr NIOb3OBaTcBcAETn CTAPe8 8 letn IINCA C ORpAHueHHBMn FImNUeCKIMN, CEHCOPbIMN u YMCTBeHHBMn CnOC6BOCTAMn, a TAkKe IINa 6e3 ONbTA ININ C HeDOCTaTOCHBM UPOBHeM 3HaHIN, pN rCIOBIM, YTO OHN HAXODTc NO pINPCMOTPOM ININ NOCE NOLUYENH NIM INHCTpyKUnn PO 6eONACHO 3KcIIpyATAUNn Pnpbopa nUCBOEHN C BAYAHbIX C NHM NOTEHuaNBHX PNCOKB. · Heo6XoDMo CLEITb, YTObI DETn HE IRPAINCB C 3tMn I3dEInm. · He pAsseMaTe DETM BbIOHNbTb OUYCTKY INEXOCLYKBAHINE 6e3 PnICMOPTa. · POMESEHNE DOnKHO 6bIBbO6OpDBOHAHO DOCTaTOOH 3ΦΦeKTNUHBO CNCTEMO BENTNIIAUM, ecn pNp6Op IcNoIb3yETcOgHOBPEMeHNO C dpyrHMn UcTPOCTBAMn, pa60taOUIIMn HA ra3y INI INpyROM TOINIBE. · N3eJNe CLEdyet Nocuape K BYTPn, taN Chapykn (MHINMYM ODNIH PA3 B MECRLI). B IObom Cnyae, CneJyTe yKa3aHnIM, pNpBEDeHNbIM B pyKOBODCTBE NO TeXoBcLNYKBAHINo. · Heco6IIOHeN IpabIN OUYCTKN I3dEInN, nepiOnuHOCTHn ZAMeHbI N OUYCTKN FInlbTPOB BLJEET 3a CO60 OnaCHOCTB BO3ROPANH. · KateropuCeCK 3AnPeUeNo pNiroTOBLeHne Niun Ha OKpbTOM ORhe ND N3dEInm. · BHIMAHVE: Ppi pa60te BapOH NoPAHEn ee DOctynhble quchn MOYt CTAOBHbCRAPOHM. · He NIOKlOUaTe pNp60 K 3eKTPueeCKo CETN Do NOnHO 3ABepSeHn EOnpauny UcTAHOBKn. · YTO KACAETCMep 6eONACHO t NEXHuecknx MeP, npEDYCmOTpeHHbIX DnBlyNCs DaIMOB INCNAPenH - CTOPO PrNDepXKBaTECb PpeINCaHN MeCThIX bOMKMTeHTNHx UypeJeHN. · OTcCabBaEMbl BO3dy XHeJIb3y HApBaJIbTB B KaHaN, INCOIb3yEmbl DnT OTOBaDA bIMa N3 UcTPOCTB, CxIRaOuIX Ra3 INI INpDyRo TOINIBo. · He INCIOnb3yTe n He OCTabJIte BeITJxky Be3 NaDHexaUM o6pa3OM UcTAHOBHehBX lamn, Nocokby 3TO MoKET cTaB pNpHiHO NopaxeHn 3eKTPOTOKOM. · HN B KOEM CLYUAE He NOnb3yTeCb pNp6Opom 6e3 npabInbHo yCTAOBHeHH PeWetKn. · N3eJNe HN B KOEM CLYUAE HeNb3a IcNoJIb3OBaTbkak ONOPHyIO NOBepxHOCTB, eCIN 3TO He Yka3aHO BAHIM OBa3OM
CBOPKA IPEPeI YCTAHOBKOI
- Y6eIntecb, yTO npIO6peTeHHoe n3dJeHne IMeet pa3MebpI, IOxOJaIeNe IJy Bb6paHHo 30HbI yCTaHOBKn.
-CHIMITE nIbtp(b)cAkTNBnPoBaHbIM yJIeM,ecNI OHN NOCTaBJIaOTc (CM. TAKKe COOTBeTCTByIOUan pa3deJ).
Ero Heo6xOIMO yctaHOBt, TOnbKO ecN Bbl XOTHe NcNoJIb3OBaTb I3dJeIe BΦJIbTpUOSeI BepCm. - EcnmHeOTc 60KOBbIe naneHn HnHn HabeChble uKafo, npOBepbTe, doCTaTOHO mecTa dnyctahOBKn n3dEINN u Bcerda nn Bo3MOKeH IerKnn DoCTyn K naHEny ynpabLeHn.
- BbITKka Ochaeta HIO6JIaMMI, IIOxOJaUaMMI DnI 60JIbUHINCTBa CTeH/NOTOKOB. OHaHO Heo6XoJMo C8Ba3aTbC KBAJINФИцPobAHHHIM CNEUaNICTOM, YTO6bI y6eJNTCBa B COOTBETCTBm MaTePnaOB TtNy CTeH/NOTOKA. CTeHa/ NOTOLK DOJXKnIb 6bITb DoCTaTOHNO PPOHybIMN, YTO6bI BbIDepKImBaTb BEc BbITKKn.
TbPNIPOIKKIOUOHEHINK3JEKTPOCETN
*Hanpajxehne cetn doJxho COOTBETCTBOAbT ha nprajkeHHU, yka3aHHOMy Ha Ta6JIuHKe C xapaKTePcIHKAMn, paCNOJXeHHo BHTpyn H3dEJIIN. *EcIn npOuykT OCHaIeHN BILKO, POnKIOHNe IPOyKT K PO3eTKe, COOTBETCTByUOeI deNCTBYUzHM Hopmam, n paCNoJIOXeHHoB B 30He, DOctYHHO N NOcNE 3abePseHNA yCTaHOBKn. · EcIn BILKAt OTCyTCTByET (nprrMo noDkiHouHne K cTeN) INI BNILKa HaxODITCB N HeDcOteYHOM MecTe N NOcNE yCTaHOBKN, pPIMEHNTe COOTBETCTBYUOIN cTaNaptAm bINOpIrpHb IpeKIIOuaTeB, KOtOpb I obecneHbAe TIOHoe OTKIOUChENe OTEcN BUCOBHX III Kateropn nepeHaprajxehn, B COOTBETCTBN C npabINaMn UCTaHOBKn. · BImaHne! 3aMeHa Ka6eI NaTHAH NdoJxHa npOn3BOIDtBCa ABTOpN3OBaHHO CNyKbO TeXHueckO NMOUIN INI INI CM O C aHaONuHON KBaIINФИKauCneI.
BhImaHne!peep noBToPbI mnoKKnIOUeHnem cenm K cetn nTAnHn IpnOBepkn ee npabInbHoro fHKuHOpOBaHn CnEduET BcERda npOBepaTb, YTObbl cTeBoi KaBeJI bbl CMOnTHIpOBaH npabInbHo.
UKA3AHNIAIPOTEXHNUECKOMYOBCLNYKUBAHIO
- Ounchka: Дя OuchCTKи ИСПЛьзуITE TOЛБКМЯКУТКИ,СMOЧЕНЧИ КнБ,СМОЧЕНCHYКИ HeТраJIьHыM MOHQUIM CpeДСВOM. He npIMeHЯг Te INHCTpyMeHTbI Ил КAKHe-ПбОпсINOCOБLEHЯДЯ OUCHCTKn.
-ИзбэрайтЕ Исплььзовая abpa3aNBbIX cpeintВ. HE ИСПОЛьЗУITE CПМТ!

IyxoJa 3a IzdeJeHm Cm. I3o6paKHeHn Iocne yCTaHOBKn, OTMeueHHbIe 3TNM CMMBONIOm.
XJkpoynablnbaoosn pbltp:MeTalnnueckn JkpoynaBnaBaOosn pbltp noIpeKHT nCTKn pa3 B MecaC npImeHHeM He eKnx DeTeprntOB. Ero moxho Yncntb BpyHyno nB NOcydomoeHoi MaunHe B peximeH3KHX Temepatypc KopoTkMn cKlom. TOb6bI ChraTb JkpoynablnbaOosn pbltp, notaHnte 3a pyky paacpeneHnC npyknHO.
KInpoynablnbaiooenni pInbtp cnyknt npy dapejxna hna yactn ic npa3yooxxc npnpnpiroTOBlennni. Pn MoKe B nocydmoeHNO MaunHe MeTaNueckn XInpoynablnbaiooenni pInbtp moKet oBeecuBtntbcra, Ondako ero pInbtpryoune xapaKTepncNk COBpeHNo He n3MeHnTcR.
BByroIbHbIyIbTp (ToIbKO IaIyIbtpUyoIe BepuN) Heo6xOJIMo 3aMeHЯr bKapTpIIX He pKege OndHO rpa3a B vTeIpe MecaIa. Ero HEBO3MOXHO NOMbITb IINpereHepePnpOBAtB. KaK yKa3aHO B pa3dene UeptexKei CHMIMTE XIOPOYNAIBNAIBAOUIne FIOBtpr, yCTAHOBITE NO OJHOmy YTOJIbHOMY FIOBtpy C KaXdoI CTOpOHbI npIKpeNITe erO Kn3deJIINO. ChoBa yCTAHOBITE XIOPOYNAIBNAIBAOUIne FIOBtpbl.
- YrolnbHnIbTp Cnyknt dny UyepkaHnH HenpnaTbIX 3anaxOB, opa3yUxxC9 npn pnproTOBHeHH Nm. HacbIeHne yrolbHorO pfNbTPa npocXoNDt nocNe dInTeJIbHOrIO nCNOJIb3OBAHnR B 3abNCMOCTN OT TnPa KUYHN I perynpHOctn OuchKn XmpoUaNbHaOJero Fnltpa.
BΦnIbTp cakTNbropoBaHHbIM yrgneM MOUcniCs (TolbKO dIyΦnIbTpryuoiéBepcn):
YrOlbHbI FmNtPO MoKHO MblTb KaKdIbe DBA MeCya (INN KOrDa CnCTema INHΦOpMnPoBaHN O 3aqr3HeHH mNtPoB -ecn OH ppeUcMTopeHa B Waei MOeJI - Yka3bIaEaT Ha 3Ty Heo6XoDImocb).Kak Yka3aHO B pa3dJe I3o6paKeHN: CHMMTE JxnpOylnabInBaOuOe Iqnltpb,CHMMTE yToLbHbI FmNtPn BblMOte B rOpue H BoDE C NOxOaIzIMn MOUcIMn CpEcdTBAMn INB NocyDoMoEChn MaunHe npn Temnepatype 65^ (pnpMbItBe B nocydoMechno MaunHe BblOnHtne PONHbI cKn MoKN 6e3 NoCydb).YdaNite LInhHO Body, He NobpeINB FmNtP, aTeM NomectHTe erO B neHb HA 10 MNHT npn Temnepatype 100 ^ C dnn oKOHnatelbHO cywn. ChOba yctahOBITE XkpoylnabInBaOuOe Iqnltpbl.
3aMeHaiTe KOBpK KaJdbIe 3 roDa I BCaKm pa3, KOrda TkaHb NOBpeKeJaHa.
Поцветка
CnCTema nOcbETKn: POnIb3OBaTeJIb He MoKET npOn3BOaNTb 3aMeHy CnCTeMbl NOcCBETKn. B cIyuae HEnoJaOK CBraBbAteTcB co Cnykbo TExHueckO noDepKKn.
CnCTema ocBeueHnO cHOBaHa Ha CBeToIOIOH ToTexHOIoNn. CBeToIOIOBJI rapaHTpyOT ONTMaJIbHOe OCBeueHne, IMeHT cPcK cIyXbI Do 10 pa3 DoJIbWe, Yem y TpaIauIIOOHbIX lamM, N IO3BOJIAOT c3KOHOMITb 90 %JNEKTOPO3Heprn.
PABOTA YCTPOINCTBA


T1 BKNBbIKI dbratena
Пи Нжати КНОКИ ВБТЯKKA BKHIOVAETСHA KOKOCTN1.
Ckopoctb 2-15 mHyT (HnDnKaTop L2 Mraet)
Ckopoctb 3-10 MnHyT (HnDnKaTop L3Mnraet)
INdkaTopbL1nL26yUrMnraTbBTeueHne5c.
OtkioueHne Hndkaun yroIbHoro fIbItpa:
IpeBvTe BbTjKBy BpXmBblkI, OndHOBpeMeHNo HaxMte N yDexKxBaTe KhoNt T1 n T4 TeHeHne 3 ckyHd.
HdkaTop L1 6ydt MraTaB TeueHe 2 c.
AbarinHbI CNrHaN TEMpepatypbI
BbIyKka OcHaueHa DaTChKOM TemnepaTypbI, KOtOpbI BKnIOuAeT DBrIaTeIb Ha CkOPOCTN 3 B CnIyae, ecnI TemnepaTypa
Pnpctpi MoKe MaTn IHmN 30BhiHm BnIaI, HIX ToI, 3o 36paXeHn Ha MaJIOHkAxBi iHcTpkyuII, Ondak Bka3iBKn 3 BnKOpncTaHH, 06ClyroByBaHn I BCTaHOBLeHn 3aIIuaObTcR TaKMM J CaMIM.
Baxnbo 36epiratu Bci nocibnki, 0c npobodkybT briip, 0o6 Matn mojnlmbictb 03naHOMNTC3 HmN B 6yIaKnyac. Y BnnaKy npodaxy, nepeaui abo nepemiueneHH nepekoahtec, 0o nocibnk 3aNilntbcpa3om 3 npictpoem. yBaxno npoutaite IHCTpykui: BOH mictb Baxnby iHOpmaui 3i BCTaHOBNEHH, BKNOPCTaHnTa 6e3neKn. Ppekoahtec y BiCyTHOCTi noKOJXeHb npucptoio need BCTaHOBNEHHM. Ipiix HAABHOCTi 3BepHITbcdo npodabua i He npodBXuyte yctAHOBky.
3AΓΑJIbHI IPIPABUNIa TEXHIKIN BΕ3ΠΕΚN
· He BnOcBte 3mH Hi B eEnktpnHy, Hi B mexaHHy qactHy Bnpo6y a60 BnXlonHi Tpy6h. · Ppe9 dyBb-kaMm OuyIeHHaM abo 6ocnyrobyBaHNHM, BiKIOuHTb npncpti Bid Mepexj eEnkTPOXINBHeHNN, BNTAHyBUNBHKy a60 BmMKHyBUN 3araIbn H BmNKAU pnmIeHH. · Iicac BxcI onepauJIO n BCTAHOBENHIO TA o6cLyROByBAHNO BnOKOpCTOBuyTe pykabNCH. · Pnpctpoem Moxyt b KOPCTyBaTnca DITn BIKOM He MeHne, HIX 8 pokib, a TAKOXOC63 6mbemHIM MfIChHMM MOxJIbBOCTAMn, CenCOPHMM a6o pozymOBHMM, a6o taKi, 10 He MaOTb DocBIDy a60 3nh, ane NIIe ne iHaHARJADOM, a6o nicra TORO, Jk BOHn OTPMAN BIDIOBHDIn HCtpyKlI 50do 63neHORO BVKnOPcTAnHH. pncstpO Ta 3pOzumHIn yCIO Hebe3NeK, NO'3AHO 3NOrO BVKnOPCTAHHH. · Heo6XiDHO HarglaATn 3a DItBM, 106 BOHn HE rpaIcn3 TprnaDM. OOnuHn Ta 6cLNYROByBaHH naPnAdy He MoKE BVKNHYBaTnca DITbMn Be3 HargIy. · PpmiueHHMaE 6ytN o6IaHaHene DoCnTb eefKTHBOHO CNTeMOIO BEHTNIAJI, kIIO npnIad BVKnOPCTOBYBCsO NDHOACHO 3 INHIMM npncTPOAMn, 10 npaTOHB Ha rasy a60 ihuomy naNBi. · Pnpiaad cnid noactiye ouuataHn JK ycepeHHi, ta i3obHI (MIHIMY PA3 HA MICALB). Y 6yb-kyOMy BVnAky, cnidyte Bka3IBKM, pnBeDEHM B KepiBnUTBI noTexo6cLyBOvBaHNIO. · HeDopTMaHHn npabIN OHuENHn pnpaNDy, a TAKOX npabIN ZAMHN I OUYuHnn H fIbTrib TgRHe 3a Co6oH No63NeKy 3aMannH. · KateropnuH No6bOpENHO npriOtBuHN Hix HA BIDKPNOMy BorH niD BuPoBOM. YBAFA: KoN Bapnlha NoberpXHa YbIMKHeHa, Doctyni NaCTHN npnaNDy moKyTB HarpBatNCr. · He NiKIOuAte npnIaN do eEnkTpuHoi MEpeKdo NOOBHO 3abepeHHN onepaQy UCTAHOBK. · 10 CTOCyETbc zaxoJD 63neKn I texHInx 3axoIDB, neped6auchnx DnI BnNUCKy DMIB i BNAPiB - CTPoro DotpmyTEcsr pnpinCIB MCIeBXN KOMNETEHNX yCTAHOB. YCMOKTuBaHE NoBITPr He MoXHa BVBoHTN B KaHAp, kIHN BVKnOPCTOBYETCB Da I BIDBeEHN DmMOBNx ra3iB, 10 rehepyoTbc npncTPOAMn DnI CnAIOBANH RA3y a60 ihuNX BNDIB naNba. · He BVKnOPCTOBYte Ta He 3aNilaaite BttJkky Be3 HanExHHM YINHom BCTAOBHeN X lamn, ocklbkn ce moke npnsBeCTNI do ypaKeHHe ENEKTOPCTpymom. HI B YAKOMY PA3I He KopcTuyTeec npnlAodm 6ez npablnbHO BCTAOBHeHO PeuTIkn. · Bpiip Hi B YAKOMY PA3I He moxHa BVKnOPCTOBVBaTn IA ONOpHy nobepHXIO, kAsO ce He BKa3aHO RBNHM YINOM.
-Дязами ВИКОПСТОВЕТI;
-Дязами ВИКОПСТОВЕТI;
-Дязами ВИКОПСТОВЕТI;
-Дязами ВИКОПСТОВЕТI;
-Дязами ВИКОПСТОВЕТI;
- Jkso Bn cymhbaeTec8, 3BepHitb8 Do aBtOpn3ObaHoro cepbichoro ceHTpy abo BiDnOBiHoro KbaNiΦikobaHoro nepcoHaIy.
TБДЛМОHTAKHINXPOBIT
BnKOpNCTOByIte TlBKnTi KpInnblHr BHTnT, kki NoctabnHtobc3 npinadom IJra IHO rYcoHbKn, a6o, npin ix BiCyTHocTI, pnpBaIte RbHNT BiNDOBHDoro Tyn. PepeKoHaTeCS, 06 ycepeDHI BPOby He 6yo (Ia 3pyuHocti TpaHCNOptyBaHH) MATEpiAIN, 10 BxOaTb B KomPNeKT (HanprknaD, nakETmIB 3 rBNHTAMR, rapaHIT i T.D.); npn HBaHBOCTi, iX CnID BtARHytn i 3eepiratn. . PIONEPEIXKEHH: HenpabnBHa YcTAHOBA rBNHTI b KpinnbHnx BPO6B, He y BiNDOBHDto do xh IHCTpykui, moKe npns3BeCtNo To He6e3neKn ypaKeHH eJeKTPnuHm CTpyMOM . BvBiDHa TpyBa He NOCTaueBcTaB K ComNLeKTi IO NobHua 6Byt npndBaHa OKpEMo. Diametp BvBDIOI tyb NObINHeH dopIBHOBatn DIaMeTy 3cEnyBaHbHorO KInLZ. . Dny cYtaHOBKn BPOby NaHd BapnilbHOIO NobEPXHeO DotpmyTEcB BOCOTN, 3aHaueHOHa KpcSeHNH X MiHM. BiCTaNb Hb IDonopHOIOBEXH NocUdyNH HoKHOpO I HNKHoIO UactTHIO HO BtAAKKn dJkyOHb NOBHHO 6Byt He MeHsE 45 cm B pa3i eneKTPnuHx PnIT, I He MeHs 65 cm B pa3i ra3OBHx A60 3MiHaHO TnHy. Jkso B INCTpyKuII no YCTAHOBU rAzOBOI pnnTN Bkazao 6Ilbuy BiCTaNb, ce Heo6xIdHO BraxOByBatn.
Ybara! He BnKOpNCToBvIe npIiad 3 npOrpaMAtopOM, TaMepOM, OKpeMM dNCTaHcIIHMM KepyBaHHaM a6o 6ydb-RAKM iHMM npICTOeM, kynakTbByEcABTomTuHO.
BVKOPNCAHN
CnCTemy BnTjKm MoJHa BnKOpNCtOByBaTH B pexNMI BCMOKtYBaHHa Ta BiBBeHHe Ha3OBHi a60 y pexNMI φiNbTpαii 3 BHyTpIiUnbOIO peuPKyIJIcIeHO.

Bapiaht i3 BCMOKTyBaHHaM:
Пара ВьвODиТьса НAZOBHИ Урета BNTЯЖHy TrуБy,ЗakpinЛену на 3'EDHyBaIbHOMу Фпанцi.
YBAIg! JaKIO Bnpi6 OcnaeHbByrJIbHmФiIbTpOM(-AMN),IOro/Ix Heo6XiDNO BvdaJInT.
IiD'eHaIte Bnip6 do BnTjXnX Tpy6 i OTbOpBIB CtiHi, IIO MAOTb Diametp, AKN DopiBHIoE Diametpy BnXiHOrO OTbOpy (CnOnyUHOrO pAnu).
BukopncTahnIpy6 I hactiHnHex BnuCkHx OTbOpIB MeHIoTO diAmTepa npin3Bepe Do 3MeHWeHH npOdyKTHBHOCTI BCMOKTyBaHH i pizko 3biJbWeHH pibu My.
BcbyomBynpaKByBnp6HmK He Hece JoDHOi BiNobiaJIbHOCTI.
BVKOpncToByTe KaHaI MinImaIbHo Heo6xIdHOI DOBXHn.
BnKOpncTObyIte KaHaJI 3 RaKOMOra MeHSoIO KJIbKICTO BnHnHB (MaKcMmaJIbHn Kyt: 90^
- YHnKaIeTe pi3Knx 3mH B npepezi KaHaNy.

IHTeHcBHa 5WBnKicTb-5XbINHH (CbiTIOiO L46mMaec).
IiD cac po60Tn i3 3anporpamOBaHIM YacOM npn HATNCKaHHI KHOJKN T1 BNTXKKa BIMNKAeTBcA, a npn HATNCKaHHI KHOJKN T2 a6o KHOJKN T4 BNTXKka
IOBepTaεTbCЯ Do 3aDaHoi WbUKnKoCTi.
CnHai3aiaiphiinbtpy3atpMknKnyp
Yepe3 40 roin npoobtn cnaiaxye cbitnoioL5.
PnnoBcIbO rCnHany Heo6xHNO IpomTN BCTaHOJIeHN JxIpOnOrnHaIOuN HjIbTp.
Lio6 cknhytn cihranl3auiio, trpmaite hahtchytoK honky T1 npotrrom 3 cek.
CnHani3aiaByrInbHoro pinbtpy
Yepe3 160 roDInH pOBoTn iDnKaTOp L5 noUHae 6JIImaTn.
KJIO 3'ABNCTbC TAKNI CnHAn, HeO6XiIDHO 3aMInHTu BCTAHOBJeHN ByrIbHn FIpIbTp.
L06 cKHyTn CmHan3aJIO, TpImaIte HaTHCyTO KHOKy T1 npOtaROM 3 cek.
Y pa3i odnoachoro cnpaobvbaHHn CnHaniiaazii dnia o6ox fInbtprib cbItnoioL 5 6ynde noeproBO bIDobpaxatn CnHANI, BMKauOuCb
Ha 3 cekyndn, a notim 6bnmaohc 3 paan nocnilb.
CknadnH BnKOnHyEbC8 2-pa3oBOrO noBTopeHn BnIeOnncAHO npOeDpy.
Cnoatkyckndaetcbcgrhan xhponorlnnaohoryo fipbtpa, a bpyre ckiadaetcbcgrhan Byrilhoro pfibtpa.
B cTahapTHOMy pexkmi CnHaniaJByrInbHoro pIbtpy He akTbByeTbcra.
Jaio BV BnBokopncTOByeTe BToTAAKBy PexmI pInbTpauJI, Heo6XiIO AO kTNbByBatn CnHAnia3aIO ByrInbHorO pInbtpy.
Aknbaia ciunhaliaaui Byrnilhoro foIbtpy:
BCTAHOBITb BVTRKky B NOIOKEnHBA BMK i yTpMMyTe KHOKN T1 i T4 oNHOacHo HATNCHTMN IpOTAROM 3 ckyHd. Cbitnoioi L1 ta L2 6ydyb6nIMatn npotarom 5 ckyHd.
BmKHeHn CnHnIaui ByrInbHoro fInbtpy:
BCTAHOBITb BVTRJKBy B NOIOKHeHH BUMK i yTpIMyTe KHOKN T1 i T4 ONDHocHo HATNCHTMn IpOTAROM 3 cekyHd. CbitIOjO L1 6NIMatme 2 cekyHdi.
AbaipiHn CnHan TemnepaTpy
Bntjka OchaueHa DaTtukom Tempeatypn, kN BkIIOUaE DnHyH Ha WbNdkocti 3, kUO Tepepatypa B obnafti naHeli KepyBaHHaHTo BVcoka.
Ha cTaN TpNBOrB KAc3ye NocJIIOBHe 6IIMaHnR CbITNOIOJB L1, L2, L3.
Lcien CTan 36epiraetcbdo TnX np, nOKn TeMnepaTpya He Bnaade HnKHe npOry cnpaBObvBaHn CnHnlaizui.
Bn moXeTe BmTn 3 cIbO peKxIMy, HATnCHyBUn KHOJkTy T1 a60 T2.
KoXHi 30 cekyHd daTnIK nepeBipRe TEMpeaTypu HABKOImuHbOro cepeDoBmua B 3Oni naHeni ynpablinHH.
POBOTA IPIPUCTPOIO

A=BIMNKauchOCBITNeHnBKJI/BIMK.
B= Bmikay BKI/BMk Ta B6ip wBnKocti 1 (y pa3i HeBEnko i KInbKocti napi ta Dmy).
B+C=Bn6ip Swbukocti 2 (y pazi cepeHboi kInbKocti napi ta dmy).
B+D=Bn6ip SwbNdkocti 3 (y paazi BeNikoi KjIbKocti napi Ta dmy).
YTNJI3AUJI NICJI 3AKIHUYH H TEPMIHY CNYK6N

Ley anapat mapkobann knaucipkauiHm cmbonom BiNJOBiHO do NipeKTbN Bu 2012/19/EC - UK SI 2013 No.3113, Pp biXOneEeKtpuHOro ta eNeKtpoHOrO obJaHaHnra (WEEE). KoHTpOJIouyU, uO6 ue npOdyKT yTNI3yBaI HaneJxHM YINOM. KopncTyBauchonomae 3aNo6iRtn MoKJInBm HeratNBHM Hacniikam dIpy HABKOINHbOro cepedobuIua i 3doPOb'ry.
CmboHn ha cAmomy Bnpo6i abc npobodkyuoyi Dokymentauii Bkayc, 00 npn ytni3aui daHoro Bnpo6y 3 HmH MeKHa NOBODNTNcra k 3 bdy kkmn iHWMn nobyTOBmBbIXOamn. Hatomictb noI rno ciid BiIDabATn y BiNDobHn nyHKt npmy eeneKtpnuHoro ta eneKtpOnHoro oblaHannr nnaonbwoi ytni3aui. Ytni3yte noR BoBDnHO do MicueBXx npabn ytni3aui BiXoJIB. 3a biBw doknadniwoi infOpmaiejo npo npabIna nobOxhenr 3 TakIMn Bnpo6amn, ix ytni3aui ta nepepo6kn 3BeTatncsB MicEbi oprAHn BnaDn, B cnYk6y no ytni3aui BiXoJIB a6o B Mara3HN, B kOMy 6by pndabHn danH pnctpi.
PEKOMEHDAUJI 3 BUKOPUCTAHNIA
Iopadn dna Hanexhoro Bknpocctaan Hb zijnx 3HjkeHHBnInBy Ha HABKOLINHe cpeodBuie:Ha noatky npiroTsybaHH yBIMkhItb npinaad Ha MihimalbHy Swdkictb Ta 3aJInTe ii yBIMKeHOo Ha deekn qac Takok nicra 3akinueHH npiroTsybaHH. 36iNbuyte Swdkictb TinbKn B pazi BeNkoi KjkbOci Tdmy i napri, BknpocCTOBuOny fynkuio booster linwe B OKpemx Bnuadkax.ДЯ niDTPmKn efeKTNBcHcTi CNTEm N DnA 3MeHsHenn 3aNaXb, 3amHtN npi Heobxidnocti ByrInbHni/ iΦilbTp/n.Дя NiDTPmKn efeKTNBcHoi poBoTN JkpOBOro fiNbtpa, OunuYte Noro B pazi notpe6n.ДЯ onTImiaqii efeKTNBcHcTi ta 3HjkeHHa PIBn ShyMy, BknpocCTOBuyte MaKcMaJIbHni DiAmetp cntEmN nobitropnpobodib, k Onncaho B cybomy nocihny.
HOPMATUBHI DOKYMEHTN
UcTaKbBaHnC npOeKToBaHo, npOTcToBaHo Ta BnroTOBHeNo 3riDn 3 TaKIMN cTaNapTaMn 6e3neKn: EN/IEC 60335-1; EN/IEC 60335-2-31, EN/IEC 62233. Po6oJi xapaKeptncn: EN/IEC 61591; ISO 5167-1; ISO 5167-3; ISO 5168; EN/IEC 60704-1; EN/IEC 60704-2-13; EN/IEC 60704-3; ISO 3741; EN 50564; IEC 62301. EMC: EN 55014-1; CISPR 14-1; EN 55014-2; CISPR 14-2; EN/IEC 61000-3-2; EN/IEC 61000-3-3.
#

: detani, n03naeHi cHm CmBONOM, moXHa npD6aTn OKpEm y cneJIaI3OBaHN dInlePb.

:: DeTani, No3NaYeHcI Nm CmBbONlOM, E DoaTkoBIMn AkceCyapAMn, IIO NoCTaHaOTbc IInSe B DeAeKnx MoJeRax Ta Byt Bytn PnpDcbani Ha Be6-caiTx www.elica.com n www.shop.elica.com.
KK - Eckeptynepe xhe opnaty
Bny KpybIy TaMaK Nicipy Ke3iHde 8yIaTbIH TYtH MeH 6yDbI CopbIn, CbIPTKa 8yIFapyFa JHe TK Ynde KOJaHyFa apHaJFaH.
OcbHcyckaybIKTa 6epinre HcKaynapbl KaTah KadaFanaHbI3. Bi3 ocbl HcKaybIK Ta KeTIpiInre HcKaynapbl OpbHdamay HETINKeciHde 6yibIMFA KeTIpiInre Ke3 KeIReH KOaJIcB13bIK, 3aKbIM HeMece ept YwIH KAYAN 6peMmI3.
Byn eHm okyblkTaBcypetTepde 6epinrenHHe 3ewe 3ctekkanblk cyHKunnapra ne 6onybl MyMkiH, aanaJa, xMyblic icteyi, texHKanblk KbI3Met KOpceTy XHe opHaty 6ipDe bOlaBb.
-БуHMnEH 6ipre 6epinH 6apblk HcckaybIKTapbl KaKet Ke3e Kon actbHa 6onatbHdJ Kepde caKTAY MaHb3bl. Caty, 6epy Hemece Xblkbity KaFdaBbHDA onapdbH EhIMmEH 6ipre 6epiH3. -Hyckaynapbl MyKmT OKbHb3: OHda opHATyfa, icke Kocfyf XaHe KayinciaDikke KaTbCTbl MaHb3bl aknapat 6epinei. -OpHatnac 6ypbH eHIMHi TOnblkTBfHIn TKcepH3. BONMaca dInnepre xa6apnAcbl, opHAtybl ToKtTaHb3.
JKAJIbI KAYINCI3IK
OhimHHHemece uIbIrapy K6bIpnapbIbH 3neKtpnIK JeinelepiHe Hemece KypblmbImHa e3repicTepehri6eHiz. Ke3 KeIreH Taanay Hemece TexNkAIBK K13Met KepcTy aIbIbHa de HEmiD pOaTkaH da cybpHbI3 Hemece KockbltB eUipHiz. BapIbIK OphATy XHE KYTIM KepcTy KymblCTapbH OPbIHDAfAH Ke3de epKaWah Kymblc KOnra6bHkiH3. Byn EHMdi 8 Jaxtah aCAn APanap, coHdai-AK fN3kAIBK, ce3y Hemece Akl-oi Kaibetepi WeKeTtenr H aamdp Hemece KypblfbHb naaidanany Toxipnbci Hemece KaKETTI biNIMJ KOaAMDP anLapDbH Kayinc3irine Jxayan 6epetih BacKa aadMbnB 6akblaybHcb3 Hemece KypblfbHb Kayinc3 naadanaHy xeHe OHIn KayinTINIR TycHy typanab Hyckaynap anMbnBbHa kondaHbaykep. BanaanapdbH oCbEHHMeonHAMaybH kaDaranaHb. Taanay Xe He KcpTeY XMybCTapbH 6anaLapTNicti 6bkblaycb3 OPbIHDMaynapbI KePE. Erep EHM ra3bl Hemece 6aca OTbHbX KaFbTH Bap yKaITBa Tc, 6eJIme JeKtinikTI typDe JxienTeiny Kepe. OhimHH iui De, cIptbH da xni taanan otbypek (KEMIHDE BIP AINDA BIP PET); apKaWah naadanahy HcyKaylbFbHa beipren H nyckaynapdbOpbIHb3. HmDi ta3apTy XeHe cy3irepdi ayltby / taanay XeHNDeri HcyKaykbTbH opbIHdAmaybi ept Kayihe eKenly MyMKH. Byn EHMdi XaBnHBbOtnen TAMK niciprende naadanahy Ra KaTaN bim CaNbHaB. ECKEPTY: Ohim KocynbBoFAN HONKETIMBIe NIKTEPe I b3In kTeyi MyMKH. OPhATy XMybCTapbToBik aRtanFaHwa, KypblfbHb 3neKTPKeNici He KocnaHb3. KeprinKi 6nIK opraHand bp 6ekitKeH, TyTH WbIpyfa BaunahbcTb Kayinc3dk TexNkacbs XeHe Kayinc3ik Wapapanbp bObnHwa epxelep katah caTanybepek. UbiFapblraH ayra XaFbTH KypblfbnAP he baca Da KaFy KypblfbpaI TybpTaBH TYtHi dKO Yo YuH nain danahnbltaH Kybpnap apKbIbXiebpiny Kepe. Ehimdi Dpybc opHaTbnMaFAH amdarmen NaadanaHbaH 3 Hemece KaIbIpbMaHb3, c6ebi 6y Tok cory Kayine MymKH. Topbl dypc bc opnatNaBnHa, byn EHMdi EILKAUAH naadanaHbAs. Erep Backanaa aiKbH type pyKcat etinmece, himmid tipeuyi 6bet peHH DE ULKAAUAH naadanaHyfa 6oImaBl.
- Uamdbaybctbyy ysih ocbnyckaynbIK Kbi3MeT KepeTy/kaebkTaHbipy kyeic6eimihde Kepcetinre h am tyipin fana naandaanbHbI3. OTbI naandaany cy3riepdi 3aKbIMdaybIXehe pT kayin H Tybpyb MyMKIN, coNDbIKaTH OHdai KaFdaRa eWkaaHxon bepiMeyi keek. Ma KaTbI Kb3bn Ketin, ePteHyHe kon bepmey YsiH Kybpy Ke3iHde aca cak bofra HKeH. Kymen Bofra JxKInETTI Kb3MET KepeCy optaBfImeh He mece con CnAKTb biikTi MamaHmeh xaabapnaCbHbI3.
OPHATY KAYINCI3IINI
Ohimdi opnaty yuhi onbImen biPre 6epinetih 6ekitkiw 6paandanapdbI TK nicti 6tke fana naandaahlbH3; 6oJmaca, dpybc 6paanda Tpyneipin catbn anbH3. OhimnH iuiHderi (TacbMaIay MaKcatbHa caBnHaf) kepekXapaTAPdbIH (MbicabI, 6paHanap cacBnHAF KanTaawbIKTap, KeiNlik KyanikTe xHe T.6) 6ap-koFbHaKe3 xekTsiH3.Erep OHaH npceep Bonca, onapbl anbin, kayinc3 Kepde cakTAbH3. ECKEPTY: 5paannap men blicpmaapanDb oc Hcykapnapra cai opnatnacBa3, 3eKtp Torb Kayni opbn Anyb MyMkn. 1bIfapy Kybfpbi 6prbeepmndi xeon oBeneK catbn anbHy bepek. CopfBx KbybpDn HnAmetpi KaNaRaBbCaNaHaBn DnAmeTpine caKenyi kepek. Ohimdi pnta YcTHe opnatkAn Ke3e, cb36anapda Kepcetiren 6nKiTikTi cKaTaH3 PIniTadaBb IdbCTbH, 6ti MeH TYTHCOFBHIN TMehri Bemiri apacBHaDaBMHNMaDbl apakaawbKTbIK 3eKTP PnTTanapabi YuHH KEMHDe 45 cm, an ra3 hemce apanac neWtep ywiin 65 cm 60nybl kepek. Erep ra3 PnTTacBn OPAHTy HcckaybfbHda 6dyan yIkenipek apakaawbkbTbIKTap Kepcetiren Bonca, onapbl caKaTaH3.
EckepiH3! ABToMaTbI Tpyde icke KocblIaTbIH 6afdapnAmaybImeH, TaMepmH, 6eIek nyltneH Hemece Ke3 KeIreH 6acka KypblfIme NaaidanlaHaBhl3.
ПАДАЛАНУ
ByTt HbIrapy Kmyecin Mypxkbln HycKaada Hemece cy3rini XaHnblmbi 6ap peuPKyraJnblK HycKaada Kondahyfa bonaabi.
Belihein 6y knaey faneueine 6ekitiren aya copy K6bipyapKblnb cyiptka uHapbladbl.
CAK 50JIbIHbI3! Erep eHim 6ip Hemece 6ipHeue Kemip cy3rinepeImen Ka6blkTaIFaH 6oJa, OlanDbI aIbIn TaCTay KepeK.
HIMdi DnAmEtpi aya ShyBfBiCbHa (KaNray fPhaHei) caN KeNETIH Ka6bipraFa opHaTbInFaH copfbls K6bipnapfa XeHe CaHbIaynapra KAnFaHbI3.
Ky6bipnap MeH Ka6bipFaadaFbI 7aFbIH DnAmTePNI 7bIfbc TecikTepdi naDanaHy TYTH CopFbIHTbIH TNIMdiNirIH TEmHeTeDiJxHE HeJeHreIH KpyrAptTbIpaDbI.
Ocbifah 6aIbHaBcTb 6apbIK kayanKePwnikTepeH 6ac TaTpblnAbI.
Aya copaTBH sbHFapatbIH Ky6bp MymKIN 6oJca 6apBHa Ka 6oFaHbI XeH.
Ky6bipdaBf6pybIbIcTapHerpypbHbA36oJFaHbJxHn(MAKcImaNdbiiny6pybIbIb:90°)
Ky6bip dnaMeTpiniH KypT e3repyiHe Jc0n 6epMeHi3.

PeuzpkyraaHbIK HycKa:
CopbInFaH aya 6eIImere eTnec 6ypbH MaJdAn JxHe nCtepeH Ta3AnaHaBJI. HcHmDi ocbl Hcckada naJaHaHy KocbIMsa 6bcNcHdiPipinre Hkemip cy3ri kyyieciH opHaty KaXeT.
OPHATyIbI BACTAMAC B¥PbIH K¥PACTbIPY
- ΘHIMHI ΕΙΙΑΜΕπερι ΜρΑΤΙΑΤΙΗΟβΙΝΑ ΚΑΝΚΕ ΚΕΝΕΤΙΗΕ ΚΕ ΚΕ ΚΕ ΚΕ ΚΕ ΚΕ ΚΕ ΚΕ ΚΕ ΚΕ ΚΕ ΚΕ ΚΕ ΚΕ ΚΕ ΚΕ ΚΕ ΚΕ ΚΕ ΚΕ ΚΕ ΚΕ ΚΕ ΚΕ ΚΕ ΚΕ ΚΕ ΚΕ ΚΕ ΚΕ ΚΕ ΚΕ ΚΕ ΚΑ
- Bencenhdipinren Kemip cy3rici(nepi) 6epinren 60nca, OHb anbIn TactaHb3 (TnicI tapayda KaapaHb3).
Erep EHHcY3rImeK KOJdaHbIInca, OHbl (Oanapbl) KaHTa opHaTy KepeK.
Erep kah-KaftbHa n aHanBep KHe/Hemec Ce Ka6bIpaIap KHe/Hemec Ke Ka6bIpa 6JOKTapbl 6oJca, EHMdi opHAtyfa KekJIiKtiOpBH bap eKeHHe XHe Backapy TaKTcbiHa oPdaiBIM OaH KOI XeKTI3yE 6OlaTbHbHa Ke3 XeKTI3iH3. - Byn eHim KENTereH Ka6bipraIapra/Te6beIepre JkapamdbI 6eKity TbfbHApabIMe Hza6dbIKtanFAH. DereHMeH, MATEpnaIap Ka6bipra/Te6eHiTpyHe CcHKeC KeletiHKe3 XeKt3y yuH 6ilKiTm MaMaHMe HKeHcy KepeK. Ka6bipra/ Te6e MATEpnaIb CopFbIbTH CanMafBHy KETepy YuH XeKTIkiT De HeReJe MbIKtB 6OlyBe KepeK.

3JIEKTPIIK BAIJIAHbICTAP KAYINCI3IITI
· Kyat ke3iHderi kepehydiin cinnattamanapbl eHimHi iuiHde opHanackaH depeKTepr JAncbIpmacbHaBfkephey CnattamapanabHa cAkec kenyi kepek. · Erep eHIM KyaT cbMbI aawacbIme Hx6bIKtanraH 60nca, Ohbl KOnDaHbCTaBf bctanapTtapa cAkec Keetin HKehe opHatKaHHaekH de KOJ XeTIdI 60NaTbH po3EtKara KocbHb3. · Erep eHIMH Kya ataaCb 60lmaca (3neKtp JeNicine TikeJe NocbIaTbH 60nca) Hemece Kyat aWacbl Kon JETneTIN Xepderi pO3EtKara XaunFaHaTHbCOnca, TiTI opHatKaHHaek H Kein De, cTAHdpTTbE kniIOCTI axbipTaII-KockblTbOpHATy epKelepihe cAkec cai KocbIMwa opHaty apkbll lI ICAHTaFbApTBKepHey 60Lnran KaFAaInapda KpyblfHbIXeJIeH ToIbIK ABybIpaTy MyMkiHir KamTamaB3 etih3. · Eckepy! Kyat kaBeJIH aybIcTbipybl yekinett TeXnkaJIbIK KOnday Kb1Meti Hemece biiktiniri oAH caI aad Jx3ere acbybKepek.
- Ecihi3e 6oncbH! 3neKtp Jxenicihe Kaia T Kocnac 6ypbH, OHbH Dpybc Xymbic icTeiTihHe Ke3 JeKti3iH3, ePkaaH Kyat KaebiniH dypbc OphAblraHbH TKcepiH3.

TEXHNIKAJIbIK KbI3MET KΘPCETYPEKATblCTbl ECKEPTYJEP
Tataanay: Tasaanay yuHn TEK 6eHTapan cybIK JyFbI KocnaFa mabHfA nblkbl Nj6epeKti naDanaHbHbI3.
Ta3anay Kypanapbih Hemece acnantapbih naiandaan6aHbI3.
- A6pa3nBtI 3aTtapbI naIdaanH6aHbI3. CπIPTTI PAIДАнAHYFA BOJIMAIbI!

ThIMRE texHnKaIbIK KbI3MeT Kepcety yuiH opHaty coHbIHda ocbI taHbAmeh 6enrJIeHReH cypETepdi KaPaHbI3.

MaifacpbCy3ri: Maifacpbmetaill cy3ri aibihapb pet arpeccnti emec kyyfbl 3aTAPMEH, KOIMeh e bIbcjyFbll MaunHada KbICKa yaBbTTa TeMeH TeMnepatypada KyybIyIkep. Maifacpb cy3rihi bin any yuih, cepinnehen 6ocaty TTKacBH TaTbpHb3.
- Maifa Kapcbl cy3ri tamak nicipy ke3ihe naiaa shaibpaTbH ma6nleekterih yctan kanaDb. b1dbic xyfbiTa Ta3aHaHaHaH KeHH Metann MaCy3ricHi Tyci OHbIn KETyi MymkiH, 6ipak OHbIH cy3y CnnaTamaIapbl e3repicc3 Kaanda.
Kemip cy3ri (tek cy3rini hcyka yuin): Kaptnjdki keimnde tep aida 6ip pet aybictbyk kajet. Ohi kyyfaheme kaibiha kentipyre BOIMAIdbI. Cypetep 6eiminde kpcetirende: maia kapcbi cy3inepdi anbin tactahbi, eki kafiba hA kemip cy3ricin canbln, onbl eHIMRE 6ekiiH3. Maia Kapcbi cy3inepdi opbHapbHa Kaeta opHaTbIHbI3.
·Kemip cy3rici tamak nicipky ke3iHne naJa 6oJbTH JkaFbIMcB13 nicepej yctan KaJaNJI. ·Y3aK yaKbIT KOJaHaHHa KeIH KEMIP cy3ri nicepre KaHbIybl MyMKIH, 6yn niCipinetIH tamak typiHe XaHe MaJ cy3ricHiMaJdaH KaHsaJIbIKTb JxN ta3aHaTaBHbHa 6aanhaHCTbl.
XyblatbH 6eIceHdpinreH Kemip cy3rici (tek cy3rini Hycka ywiH):
Kemip cy3ricih eki a caibin (erep ci3deri yniride 60nca-cy3riHIN KaHbIy Kjyneic KepeTKe HKe3e) Jybin OTbipyfa 60anblc. Cb36bnap 6enimHde KepcetireHne: MaCy3ricH anblbH3, Kemip cy3ricH anblbH3 XHe bictbIK cyMeH, NaBkTbJyFbI W KocnapanMeH KOnlan Xyblb3 Hemece bldbc xyfblta 65^ TempepaYpaJa Xyblb3 (b1blic XyblTa Jyy Ke3iHte TOnblK Jyy uKNIH bldlc-aAKTapcb3 opbHdaH3). AptbIK cyblc cy3rHi 3akbImdAm aNlHb3, codan KeHH Obl ToIbFbIMeKentipy ysiH neuke 100^ TempepatypaHa 10 MInytKa KoIbH3. MaRa KapcbI cy3rIepdi opbHdpHa KaTApohatblb3.
Ke6iTeCEmDi 3XbIcaiBHXeMeMaTaHbI 3aKbIMdaHaFbI 6aKaFaHcaiBihaybcIpbHbI3.
KapbikTaNDbipy KypanDapbi
KapbikTaHbipy JyNeci: KapbIK TaHbipy JyNeci naiJaIaHybI aybictbpa anMaIdbI, erep on Kymbc icTeMece, TybIHybIbApFa KbI3Met KepeSy opTaIbFbHa xaabaplacIbI3.
XapbikTaHbipy Kjyeci IIOUAMAPFA Heri3dIeRHe. IIOUAMap OHTaIbI JkapbIKaHbpydb KaMTaMaCbI3 etedi, kapanabim UAMapFA KaparaHa 10 ece y3ak Kb3MeT etedi Xhe 3neKtp 3eepnacBbHn 90% YhemdeJi.
PAAJANAHY
T1 MToPdIb KOCY/ThIIPy
TyTIN TAPTKbIITb1-ksbnamdbkta 1cke KOCY yuH ocB tyMeHi 6acbHbI3.
TyTn TaptKbiWtBi ΘIIPy ywih Kymbic 6apbcHda ocbi TyMeHi bacHBi3.
T2 XbIaDmbkTbI apTbIpy
TyTih TAPKbIUtBt ΘUIPYII KyiHEn 1-KybIaMdbIKKa Kocy YuIH OcBi TYMeHi 6acblh3.
Motop XbIaMdbIbH 1-XbIaMdbIKTaH KapKbIHbI XbIaMdbIKKa aybICTbIPBn KOCy ysiH ocbl tyMeHi 6acbHb3 (TytH TaPtkbl KOCyJb60nfAeKe3de).
Op kblanamblk yuhi e3hiH Tnicti IAMbl kanaabi.
1-xbiIaMdbIKUAMbl:L1
2-Жылдандыкшамы:L2
3-Жылдандамдьк LlAMbl: L3
KapkbldbjXbIaamdbikUAMbl:L4(XbIbIbIKtaIbbl)
Kapkblblx kblamdbkblh yakbltbi wkeTtenre. Ctahandptbl yakbit - 5 MNHT. Ocby yakblttah KeinH tytin Tapkbl 2- kblamdbkka aybica#.
Byn fyHKunHbOcbyakBtAaKtanMaI tybpIn eWippy yuH H T2 TYMecin 6acbHb3; coHa JbIaMdbK 1-re aybcab; TyTH TAPKbIbTbe Wippy uH H T1 TYMEcH 6acbHb3.
T3 ⅢaMdaPbI KOCY/ΘIIPy
T4 KbIJaDAMbIK TaHMepe
T5 Kymbc KyiHnINDKaTOPbI.
KbIaMdbk TaHMepi
XbIaMdbIK taMepi T4 tyimecin 6acy apkblibicke kocblanbi; opHaBtbnfah yaKbIt eTKeH coH TYTHAPKbI W EeJI.
Yakby Keleci dei 6einei:
1-Жындамдьк - 20MHNYT (L1 WAMblжындытайды)
2-KbIJaMdbk-15MHyT(L2WAMbI KbIbIbIKTaIbI)
3-xbiIambik-10 MNHT (L3 IAMbl xbiIbIbIKtaIbI)
KapkblHdbjXblnDAMdbiK-5MnHyT(L4UAMblXblnbIbTkTaHdbI)
YakbITnEH Kymbcictey 6apbcibHa Tytih TaptKbIbTbe eijpy yuiH T1 tymecin 6acblb3; TyiH tapKbIbTb
opHaTbIrfan XblnDAMbIKKa KaTapy YuHIN T2 HemeC T4 TYMeciH
6acblHb3.
MaCy3ricinH eceptyi
40 caFat xymbcic icTeerH coH L5 WAMbl xhaHaJIb.
OcbeckepTy KeipHce,OpHaBtJnFaH MaI Cy3ricH KyyKepeK.
EckepTy KyiH KanBbHa KeTipty yuH T1 TyMecH 3 ckyHd 6acblbHbI3.
Kemip cy3riHH eceptyI
160 cafattbIK XyMbICTaH KeiH L5 IAMbl KbinblntaBbl.
Ocbeckey Keipireh Ke3e, opHaBfJFaH KEmip cy3riHi aybictbype Kepek.
EckepTy KyiH KanBbHa KeTipty yuH T1 TyMecH 3 ckyHd 6acblbHbI3.
Eki eckey De 6ip yaBitta KeipHren KaFdaJa, L5 UAMbl eckeynepi
3 cekynd khanfah Knyde KaNy, cocbH 3 pet kblblkTay apkblk Ke3ekneh Kepcetei.
Byn kyyi zofoapbda cinnattanfah npoeypaehb i eke pet opbHday apKblb KaannbHa KeTIPyre 60ana.
Bipinui pette Ma cy3ricih eceptyi, ekini pette Kemip cy3ricih eceptyi KaJIbHa KeTIpiinei.
Ctanhaprtbip ezmimde kemip cy3rici tpyanblc eckepty Kocynbl6oJmaNb.
ErepTyTih TAPKbIbTH cy3ici bap Hcckacbi KOnaHbInca, KEmip cy3rici TypaBlc EcepeTydi icke Kocy KepeK.
Kemip cy3rici typabiecekptyi icke Kocy:
TyTIN tapKbIITb eWipin, T1 xHHe T4 tyMmeepin 6ip yaKbItTa 3 cekHy 6acBIn typbHbI3.
L1xHe L2 WAMapbI 5 cekynd 60nI xblnbIKTaNbI.
Kəmip cy3rici TpyaIb eckepTydi ewiPy:
Tytin tapTkbiWtbeiomegaipin, T1 kHe T4 tyImepein 6ip yaKbTTa 3 ckynd 6acbin typbHbI3.
L1UAMbl2cekynd60bIxblbIKtauBl。
Temnepatypa da6bIblb
BytTaptkbltemnepatypa cehcpbIme Jka6kbTanfHa.Erep 6ackay TaKTacbHbH aMafbHdaFbTe mtnepaTpa TbIM Kofapb6oJca,cehCop K03FaTKnbl3-KbIqDAMbKTA icke
KocabI.
Ja6bIkyi L1, L2 JeHene L3 WAMdapbIbHbIb 6ipihen coH 6ipi JbIbIbIbIKTaybIme 6iiHedj.
ByKyTEmnepaTypa da6bJI WcHHeN TEmeH TYCKHeIe CaKTanadJI.
Бул пекимнен T1 Неме T2 Тумecinб acу apьыblы sbуга bОлады.
Cencop backapy taKtacbHbH aMafbHdaFb TeMepaTypaHb 30 cekHyd caBbH TKcepei.
PAAJANAHY

A=UaMbdi KOCY/ΘUIPy teriri.
B=KOCY/ΘUIPY tetiri jxhe 1-xbldAmdbkTbTaHday (kiukehe by xhe Ttyi h bikca).
B+C=2-ksbnamdbkTbTaHaanbH3 (opTaasaMmIwepde6yKHeTyTInh bikca).
B+D=3-KbIJaMdbIKbTaHaDaHbI3(Ken6yJxHeTyrHtMbIKca).
MEP3IM COHbIHDA TACTAY

Bny KpybInfbl KonlaHbInFaH 3JNeKtpOndbik XHe 3JNeKtpnIK KpybInfbInapFa (WEEE) KaTbIcTb1 2012/19/EC - UK SI 2013 N3.3113 EyponaBik DnpeKtmbacbHa cai TaHbanaHFaH. Ocbi eHimDi Tactaydbi TnicTi Tpyde opbIdaHbI3. Ocbinaa naJaIaNahUbI KoPsaFah opta MeH deHcaybIKka JxabIMCbI caIapDbIH anDbIH anyFA KEMeKTEceneI.
Ohimderi He Iinecne Kxkattapdafo cso Ta6b 6yn OhimHIn TpyMbCTbIK KaIbIKnEN bipre TactaImai,3NeKtp XeHe 3NeKTPoHdIK Xa6bIKTAPdb Kaia Ta nlaanany yuih Tnicti xinay nyKTTepine Xjbepiy iKepektirin biDipede. Ohbl
JKeprilnki KOKlc Tactay epekeepine cKaekc tacTaHb3. Byn Ehimdi naIadanhy, KaIIbn KeTIpy XHe KaIIbHa KeTIpy TypaIb KocbIMsa aknapat any yuH JKeprinikti yekinetti Meekemere, TyPbICTbIK KaIdbKtapblXnHay KbI3MeTI He Hemece EHMdi catbI anfah dyKeHre xaabapnaCbHb3.
ДУРБИ ПАДАЛAHY YСынбICTAPВI
KopuraH optaFa Keetin aeepi yuih duanahy Hcaynapb: Tamak nicipdi bactaHa Ke3de KypblfHbE hAz kbldamblkKa Kocy kepk xhe Obl ni cyapy aektanfaHHa KeiH de 6ipheMe MNHTka Kocylb Kynde KaandpblH3. XbldAmblKTbI TK tyTHm EBy Ken Bonca rana, uYfbJx KaFainapda rana Te3dty (Booster) FHKUraCb apkbln apTbipblH3. Vici a3aTy xyeciniH TImDi xmbicn cakTAY yuH, KEMIP cyricih(nerPi) KaKet 6oBFAHa aybcTpbln TybH3. Mai cyrici xakcbx ymbic ictey iuyi OHb KaKetIHWe Ta3aan Tpyblb. TImdiNikti apTbipIn, uSybla a3aTu yuiH, ocb HcKayblkTa KpcetinreH MAcMmaHbl KybpDnamepin naDaanHbH3.
EPEXEKINEP
Бул Крьлбы Мын Kayinciaдк Stандарын epexeilepe He caikec kacanbl, cyhalndbl Jhe eHdpildi: EN/IEC 60335-1; EN/IEC 60335-2-31, EN/IEC 62233. Θhimdniri: EN/IEC 61591; ISO 5167-1; ISO 5167-3; ISO 5168; EN/IEC 60704-1; EN/IEC 60704-2-13;EN/IEC 60704-3; ISO 3741; EN 50564; IEC 62301. MY: EN 55014-1; CISPR 14-1; EN 55014-2; CISPR 14-2; EN/IEC 61000-3-2; EN/IEC 61000-3-3.
ECKEPTNIENP

ocb TaH6aMeH 6eIJIeHRe H 6eIeKTepei MaMaHaAaHbIpBfA H dIJIepnepEn 6eNek catbn anyFa 6oNaB.

: 6yn taHbAmen 6bninHren 6bnKtep TeK KeBip moEnbepmH bpre XeKtizetIH KcBIMsa Kepek-XapaKTapIn tablaaIbXeHe OlanpblwWww.elica.com XeHe WwWshOp.elia.com caTtapbHaH catbin anyFa 6oJabl.
Ohu valjatombega version
HOOLDUSEGA SEOTUD HOIATUSED
- atrums, gaismas diode L1
- atrums, gaismas diode L2
- atrums, gaismas diode L3
Intensiva atruma gaismas diode L4 (mirgo)
Intensivajam atrumam ir noteikts laiks. Standarta laiks ir 5 sekundes, kuru beigas tvaika nosucejs darbojas ar 2. atrumu.
Lai deaktivizetu funkciju pirms laika beigam, nospiediet pogu T2, tvaika nosucejs noregulesies ar 1. atrumu, nospiezot pogu T1, tvaika nosucejs izslegsies.
T3 gaismu IESLEGSANA/IZSLEGSANA
T4 atruma laiks
L1 ve L2 led lambarari 5" yanip söner.
Karbon filtré bildiriminin etkinliginin kaldirilmasi:
Davlumbazi KAPALI konuma getirip, T1 ve T4 toughness aynianda 3" basili tutun.
L1 led lambasi 2" yanip söner.
Sicaklik Alarmi
a a a a a a a a a a a a a a a a a a a a a a a a a a
j_4 = 1( 201)
5
aolal 1000000000
Ae 1 1 1 1 1 1 1 1 1 1 1 1 1 1 1 1 1 1 1 1 1 1 1 1 1 1 1 1 1 1 1 1 1 1 1 1 1 1 1 1 1 1 1 1 1 1 1 1 1 1 0
i 1
alal alol alol
a 1234567890123456789012345678901234567890123456789012345678901234567890123456789012345678901234567890123456789
S ACD = S COD + S_ CDF
y
p1
a a a a a a a a a a a a a a a a a a a a a a a a
b1 = 2,b2 = 3

- 1234567890123456789012345678901234567890123456789012345678901234567890123456789012345678901234567890123456789
(1)
- Julli 103 25 26
u 1
90: 125 125
J
a 1
()
jll jll plll 100000000000000000000000000000
a
J 1
1
100 100 100 100 100 100 100 100 100 100 100 100 100 100 100 100 100 100 100 100 100 100 100 100 100 100
aolal oai plaiol ai
Jus 15
.
aalaa
Jusll puiu 1. aie 10 10

jlll jlll jlll jlll jlll jlll
A
B.
B.
a_5 = 12
The versatility of features that range from lighting, to suction and cooking, helps create products that were born to amaze. High-quality materials, careful attention to detail, strong passion for design each in their core essence play a leading role in our products capable of transmitting emotions.
Elica, aria nuova

FRAME AND
DISCOVER

- EN -Warnings and installation
- GENERAL SAFETY
- INSTALLATION SAFETY
- USE
- Duct-Out Version:
- Recirculating Version:
- ASSEMBLY BEFORE INSTALLATION
- ELECTRICAL CONNECTION SAFETY
- MAINTENANCEWARNINGS
- × B Washable activated carbon filter (for filter version only):
- Illumination
- OPERATION
- T1 Motor ON/OFF
- Speed timer
- Grease filter warning
- Carbon filter warning
- Carbon filter warning activation:
- Temperature alarm
- END-OF-LIFE DISPOSAL
- RECOMMENDATIONS FOR USE
- REGULATIONS
- NOTES
- IPOEIOIOIHSEIIGA TH SYNTHPHSH
- INSTALLATIONSsAKERHET
- VEDLIKEHOLDSADVARSLER
- OBUINE IPNABUNI TEXHNI B3ONACHOCTN
- CBOPKA IPEPeI YCTAHOBKOI
- TbPNIPOIKKIOUOHEHINK3JEKTPOCETN
- UKA3AHNIAIPOTEXHNUECKOMYOBCLNYKUBAHIO
- Поцветка
- PABOTA YCTPOINCTBA
- T1 BKNBbIKI dbratena
- AbarinHbI CNrHaN TEMpepatypbI
- 3AΓΑJIbHI IPIPABUNIa TEXHIKIN BΕ3ΠΕΚN
- TБДЛМОHTAKHINXPOBIT
- BVKOPNCAHN
- Bapiaht i3 BCMOKTyBaHHaM:
- CnHai3aiaiphiinbtpy3atpMknKnyp
- CnHani3aiaByrInbHoro pinbtpy
- Aknbaia ciunhaliaaui Byrnilhoro foIbtpy:
- AbaipiHn CnHan TemnepaTpy
- POBOTA IPIPUCTPOIO
- YTNJI3AUJI NICJI 3AKIHUYH H TEPMIHY CNYK6N
- PEKOMEHDAUJI 3 BUKOPUCTAHNIA
- HOPMATUBHI DOKYMEHTN
- #
- KK - Eckeptynepe xhe opnaty
- JKAJIbI KAYINCI3IK
- OPHATY KAYINCI3IINI
- ПАДАЛАНУ
- PeuzpkyraaHbIK HycKa:
- OPHATyIbI BACTAMAC B¥PbIH K¥PACTbIPY
- 3JIEKTPIIK BAIJIAHbICTAP KAYINCI3IITI
- TEXHNIKAJIbIK KbI3MET KΘPCETYPEKATblCTbl ECKEPTYJEP
- KapbikTaNDbipy KypanDapbi
- PAAJANAHY
- KbIaMdbk TaHMepi
- MaCy3ricinH eceptyi
- Kemip cy3riHH eceptyI
- Kemip cy3rici typabiecekptyi icke Kocy:
- Temnepatypa da6bIblb
- MEP3IM COHbIHDA TACTAY
- ДУРБИ ПАДАЛAHY YСынбICTAPВI
- EPEXEKINEP
- ECKEPTNIENP
- Ohu valjatombega version
- HOOLDUSEGA SEOTUD HOIATUSED
- Sicaklik Alarmi
- 1
- aalaa
Brand : ELICA
Model : FOLD BL MAT/A/52
Category : Vacuum group