USER MANUAL ROTAK 37 LI BOSCH
Power Tools Division
70745 Leinfelden-Echterdingen
Germany
www.bosch-pt.com
F 016 L70 576 (2008.11) O / 405 UNI

ROTAK
34 LI | 37 LI | 43 LI

BOSCH
de Originalbetriebsanleitung
en Original instructions
fr Notice originale
es Manual original
pt Manual original
it Istruzioni originali
nl Oorspronkelijke gebruiksaanwijzing
da Original brugsanvisning
sv Bruksanvisning i original
no Original driftsinstruks
fi Alkuperäiset ohjeet
el PpwtuO obnywXpnons
tr Original isletme talimati
pl Instrukcja oryinalna
cs Puvodni navod k použivani
sk Póvodný námod na použitie
hu Eredeti hasznalati utasitas
ru OpunHaIbHoe pyKOBOdCT-BO ITO 3KcIaYatauHH
uk OpnrHaIbHa iHCTpyKciI 3 ekTnayataqii
ro Instruetiuni originale
bg OprnHaHa HNcTpkyKun
sr Originalno uputstvo za rad
sl Izvirna navodila
hr Originalne upute za rad
et Algupärane kasutusjuhend
Instrukcijas originalvaloda
It Originali instrukcija

Deutsch . 7
English. 22
Français. 36
Espanol. Pagina 51
Portugués. 67
Italiano.. 82
Nederlands.. 98
Dansk. Side 112
Svenska Sida 125
Norsk. Side 138
Suomi. .Sivu 151
Elambdaivka. 2eaiδa 164
Türkce . Sayfa 181
Polski. Strona 195
Cesky Strana 211
Slovensky. Strana 225
Magyar. Oldal 240
Pycckn CtpaHnca 255
YkpaHcbka. CtopiHa 272
Romana . 288
Быларски ... Cтравиц 303
Srprski. Strana 320
Slovensko. Stran 334
Bosch Lawn and Garden Ltd., PT-LG/EAE,
Stowmarket, Suffolk IP14 1EY, England
2008
Dr. Egbert Schneider Senior Vice President Engineering
Dr. Eckerhard Strötgen
Head of Product
Certification

i.v. Moju
17.09.2008, Robert Bosch GmbH, Power Tools Division D-70745 Leinfelden-Echterdingen
Montage
Zu Ihrer Sicherheit
Warning! Read these instructions carefully, be familiar with the controls and the proper use of the machine. Please keep the instructions safe for later use!
Explanation of symbols on the machine

General hazard safety alert.
Read instruction manual.

Pay attention that bystanders are not injured through foreign objects thrown from the machine.

Keep bystanders a safe distance away from the machine.

Sharp blade(s). Beware of severing toes or fingers.

Switch off and remove isolator key before adjusting, cleaning and before leaving the product unattended for any period.

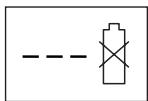
Not applicable.

Wait until all machine components have completely stopped before touching them. The blades continue to rotate after the machine is switched off, a rotating blade can cause injury.

Do not use the machine in the rain or leave it outdoors when it is raining.

Beware electric shock hazard.

Keep supply flexible cord away from cutting means.
Battery charger contains a safety transformer.

Operation
- Never allow children or people unfamiliar with these instructions to use the machine. Local regulations may restrict the age of the operator. When not in use store the machine out of reach of children.
This appliance is not intended for use by persons (including children) with reduced physical, sensory or mental capabilities, or lack of experience and knowledge, unless they have been given supervision or instruction concerning use of the appliance by a person responsible for their safety. Children should be supervised to ensure that they do not play with the appliance.
- Never mow while people, especially children or pets, are nearby.
The operator or user is responsible for accidents or hazards occurring to other people or their property.
Do not operate the machine when barefoot or wearing open sandals, always wear substantial footwear and long trousers.
Thoroughly inspect the area where the machine is to be used and remove all stones, sticks, wires, bones and other foreign objects.
Before using, always visually inspect to see that the blades, blade bolts and cutter assembly are not worn or damaged. Replace worn or damaged blades and bolts in sets to preserve balance.
Mow only in daylight or in good artificial light.
-
Avoid operating the machine in wet grass, where feasible.
Walk, never run.
-
Never operate the appliance with defective guards or shields, or without safety devices, for example deflectors and/or grass catchers in place.
Working on banks can be dangerous.
- Do not mow excessively steep slopes.
Always be sure of your footing on slopes or wet grass.
- Mow across the face of slopes - never up and down.
Exercise extreme caution when changing direction on slopes.
Use extreme caution when stepping back or pulling the machine towards you.
- Never mow by pulling the mower towards you.
- Stop the blades if the machine has to be tilted for transportation when crossing surfaces other than grass and when transporting the machine to and from the area to be mowed.
Do not tilt the machine when starting or switching on the motor, except if the machine has to be tilted for starting in long grass. In this case, do not tilt if more than absolutely necessary and tilt only the part which is away from the operator. Always ensure that both hands are in the operating position before returning the machine to the ground.
- Switch on the motor according to the instructions with feet well away from rotating parts.
Do not put hands or feet near or under rotating parts.
Always stand clear of the discharge zone when operating the machine.
- Never pick up or carry the machine while the motor is running.
Remove the isolator key:
- whenever you leave the machine,
before clearing a blockage,
- before checking, cleaning or working on the machine,
- after striking a foreign object. Inspect the machine for damage and make repairs as necessary,
- if the machine starts to vibrate abnormally (check immediately).
Maintenance
- Keep all nuts, bolts and screws tight to be sure that the machine is in safe working condition.
- Check the grass catcher frequently for wear or deterioration.
Examine the machine and replace worn or damaged parts for safety.
Ensure replacement cutting means of the right type are used.
Ensure replacement parts fitted are Bosch approved.
Always wear gardening gloves when handling or working near the sharp blades.
Recommendations for Optimal Handling of the Battery
Ensure the switch is in the off position before inserting battery pack. Inserting the battery pack into machines that have the switch on invites accidents.
- Keep the battery charger away from rain or moisture. Penetration of water in the battery charger increases the risk of an electric shock.
- Recharge only with the charger specified by the manufacturer. A charger that is suitable for one type of battery pack may create a risk of fire when used with another battery pack.
- Do not charge other batteries. The battery charger is suitable only for charging Bosch lithium ion batteries within the listed voltage range. Otherwise there is danger of fire and explosion.
- Keep the battery charger clean. Contamination can lead to danger of an electric shock.
Before each use, check the battery charger, cable and plug. If damage is detected, do not use the battery charger. Never open the battery charger yourself. Have repairs performed only by a qualified technician and only using original spare parts. Damaged battery chargers, cables and plugs increase the risk of an electric shock.
- Do not operate the battery charger on easily inflammable surfaces (e.g., paper, textiles, etc.) or surroundings. The heating of the battery charger during the charging process can pose a fire hazard.
- Use only battery packs intended specifically for the machine. Use of any other battery packs may create a risk of injury and fire.
- When battery pack is not in use, keep it away from other metal objects like paper clips, coins, keys, nails, screws, or other small metal objects that can make a connection from one terminal to another. Shorting the battery terminals together may cause burns or a fire.
Under abusive conditions, liquid may be ejected from the battery; avoid contact. If contact accidentally occurs, flush with water. If liquid contacts eyes, additionally seek medical help. Liquid ejected from the battery may cause irritations or burns.
Do not open the battery. Danger of short-circuiting.
Protect the battery against heat, e. g., also against continuous sun irradiation and fire. There is danger of explosion.
Do not short-circuit the battery. There is danger of explosion.
In case of damage and improper use of the battery, vapours may be emitted. Provide for fresh air and seek medical help in case of complaints. The vapours can irritate the respiratory system.
Protect the battery against moisture and water.
- Store the battery only within a temperature range between 0^ and 45^ . As an example, do not leave the battery in the car in summer.
- Occasionally clean the venting slots of the battery using a soft, clean and dry brush.
Functional Description

Read all safety warnings and all instructions. Failure to follow the warnings and instructions may result in electric shock, fire and/or serious injury.
Intended Use
This product is intended for domestic lawn mowing.
Delivery Scope
Carefully remove the machine from its packaging and check if the following parts are complete:
- Lawnmower with handle assembly
- 1 Handle bottom
- 2 Bolts
- 2 Wing nuts
- 2 Screws
- 2 Grassbox parts (Rotak 34/37 LI)
- 3 Grassbox parts (Rotak 43 LI)
- 2 Cable clips
- Battery Charger
- Isolator key
Battery(s)*
- Operating instructions
* product specific
When parts are missing or damaged, please contact your dealer.
When fully assembled the machine weighs approximately 12.8 - 13.8kg . If necessary, obtain assistance to remove from packaging.
Take care when removing from packaging or carrying the machine to the lawn, as the blades are sharp.
Product Features
The numbering of the components shown refers to the representation of the machine on the graphic pages.
1 Switch lever
2 Safety button
3 Handle top
4 Grassbox
5 Deflector guard
6 Handle bottom
7 Battery cover
8 Battery
9 Ventilation slots
10 Wheels
11 Grass comb
12 Height of cut lever
13 Button for charge-control indicator
14 Battery charge-control indicator
15 Temperature control indicator
16 Charging compartment
17 Battery charger
18 Red LED indicator on the battery charger
19 Green LED indicator on the battery charger
20 Power plug**
21 Serial number
** country specific
Accessories shown or described are not part of the standard delivery scope of the product. A complete overview of accessories can be found in our accessories program.
Technical Data
| Lawnmower | | Rotak 34 LI | Rotak 37 LI | Rotak 43 LI |
| Article number | | 3 600 H81 ... | 3 600 H81 ... | 3 600 H81 ... |
| Blade width | cm | 34 | 37 | 43 |
| Height of cut | mm | 20-70 | 20-70 | 20-70 |
| Grassbox, capacity | I | 40 | 40 | 50 |
| Weight (max.) | kg | 12.8 | 13.0 | 13.8 |
| Serial number | | See serial number 21 (type plate) on the machine |
| Battery | | Li-Ion | Li-Ion | Li-Ion |
| Article number | | 2 607 336 107 | 2 607 336 107 | 2 607 336 107 |
| Rated voltage | V | 36 | 36 | 36 |
| Charging period (battery dis-charged) | min | 60 | 60 | 60 |
| Number of battery cells | | 20 | 20 | 20 |
| Battery Charger | | AL 3640 CV Professional | AL 3640 CV Professional | AL 3640 CV Professional |
| Article number | | 2 607 225 ... | 2 607 225 ... | 2 607 225 ... |
| Rated voltage | V | 36 | 36 | 36 |
| Charging current | A | 4.0 | 4.0 | 4.0 |
| Allowable charging tempera-ture range | °C | 0-45 | 0-45 | 0-45 |
| Weight according to EPTA-Procedure 01/2003 | kg | 1.0 | 1.0 | 1.0 |
| Protection class | | ☐/II | ☐/II | ☐/II |
Rotak 34/37 LI
Measured values determined according to 2000/14/EC (1.60 m height, 1.0 m distance away) and EN ISO 5349.
Typically the A-weighted noise levels of the product are: Sound pressure level 81 dB(A); Guaranteed sound power level lower than 90 dB(A). Uncertainty K = 0.74 dB.
The hand-arm acceleration is typically below 2.5m / s^2
Rotak 43 LI
Measured values determined according to 2000/14/EC (1.60 m height, 1.0 m distance away) and EN ISO 5349.
Typically the A-weighted noise levels of the product are: Sound pressure level 81 dB(A); Guaranteed sound power level lower than 91 dB(A). Uncertainty K = 0.74 dB.
The hand-arm acceleration is typically below 2.5m / s^2
Rotak 34/37 LI
We declare under our sole responsibility that the product described under "Technical data" is in conformity with the following standards or standardization documents: EN 60335, EN 50338 (battery powered product) and EN 60335 (battery charger) according to the provisions of the directives 2006/95/EC, 2004/108/EC, 98/37/EC (until 28 Dec 2009), 2006/42/EC (from 29 Dec 2009), 2000/14/EC. 2000/14/EC: Measured sound power level 90 dB(A). Conformity assessment procedure according to Annex VI.
Rotak 43 LI
We declare under our sole responsibility that the product described under "Technical data" is in conformity with the following standards or standardization documents: EN 60335, EN 50338 (battery powered product) and EN 60335 (battery charger) according to the provisions of the directives 2006/95/EC,
2004/108/EC, 98/37/EC (until 28 Dec 2009), 2006/42/EC (from 29 Dec 2009), 2000/14/EC. 2000/14/EC: Measured sound power level 90 dB(A). Conformity assessment procedure according to Annex VI.
Notified body:
SRL, Sudbury, England, Nr. 1088
Technical file at:
Bosch Lawn and Garden Ltd., PT-LG/EAE, Stowmarket, Suffolk IP14 1EY, England
C 2008
Dr. Egbert Schneider Senior Vice President Engineering
Dr. Eckerhard Strötgen
Head of Product Certification


17.09.2008, Robert Bosch GmbH, Power Tools Division D-70745 Leinfelden-Echterdingen
Assembly
For Your Safety
Warning! Switch off, remove the isolator key and the battery before adjusting, cleaning or if cable is cut, damaged or entangled.
The blades continue to rotate for a few seconds after the machine is switched off.
Caution - do not touch the rotating blade.
Battery Charging
Observe correct mains voltage: The voltage of the power source must agree with the voltage specified on the nameplate of the unit. Equipment marked with 230V can also be connected to 220V or 240V .
Use only the charging unit supplied. Only this charging unit is matched to the lithium-ion battery used in the product.
The battery is equipped with temperature monitoring that allows charging only in the temperature range between 0^ and 45^ . In this manner, a high battery service life is achieved.
Note: The battery is supplied partially charged. To ensure full capacity of the battery, completely charge the battery in the battery charger before using your power tool for the first time.
The lithium ion battery can be charged at any time without reducing its service life. Interrupting the charging procedure does not damage the battery.
The lithium-ion battery is protected against deep discharging when used in the product. When the battery is discharged the product is switched off by a protective circuit and the product no longer operates.
Do not continue to press the On/Off switch after an automatic shut-off of the machine.
The battery can become damaged.
Charging Procedure
The charging procedure starts as soon as the mains plug of the battery charger is plugged into the socket outlet and the battery 8 is inserted into the charging compartment 16.
Due to the intelligent charging method, the charging condition of the battery is automatically detected and the battery is charged with the optimum charging current, depending on battery temperature and voltage.
This gives longer life to the battery and always leaves it fully charged when kept in the charger for storage.
Meaning of the Indication Elements
Control of the charging procedure is indicated via the charge control LEDs 18 and 19:
Rapid-charging Procedure
The rapid-charging procedure is indicated by flashing of the green charge control LED 19.
During the charging procedure, the three green LEDs light up one after the other and briefly go out. The battery is fully charged when the three green LEDs light up continuously. The three LEDs go out again approx. 5 minutes after the battery has been fully charged.
Note: The rapid-charging procedure is only possible when the battery temperature is within the allowable charging temperature range, see section "Technical Data".
Battery Charged
Continuous lighting of the green charge control LED 19 signals that the battery is fully charged.
Additionally, a signal tone sounds for approx. 2 seconds, which acoustically indicates that the battery is fully charged.
Afterwards, the battery can be removed for immediate use.
With no battery inserted, continuous lighting of the green charge control LED 19 indicates that the mains plug is plugged into the socket and that the battery charger is ready for operation.
Battery Temperature below 0^ and above 45^
Continuous lighting of the red LED 18 indicates that the battery temperature is not within the rapid-charging temperature
range of 0^ - 45^ . As soon as the allowable temperature range is reached, the battery charger automatically switches to rapid charging.
When the battery is not within the allowable temperature range, the red battery LED lights up when inserting the battery into the battery charger.
No charging procedure possible
If a different malfunction of the charging procedure is present, this will be indicated through flashing of the red charge control LED 18.
The charging procedure can not be started and the battery cannot be charged (see "Troubleshooting").
Charging Advice
With continuous or several repetitive charging cycles without interruption, the charger can warm up. This is not meaningful and does not indicate a technical defect of the battery charger.
A significantly reduced working period after charging indicates that the battery is used and must be replaced.
Battery Cooling (Active Air Cooling)
The fan control integrated in the battery charger controls the temperature of the inserted battery. When the battery temperature is above 30^ , a fan cools down the battery to the optimal charging temperature. The switched-on fan produces a fan noise.
The battery temperature is within the optimal charging temperature range when the fan is not running, or the fan may possibly be defective. In this case, the charging time of the battery extends.
Assembly
Do not connect the battery and/or the isolator key before product is completely assembled.
Ensure the cables are not trapped when folding/unfolding top/bottom handles. Do not drop the handles.
Handle assembly A
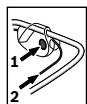
1 2 Insert the handle bottom 6 into the holes provided and secure with the screws.
Note: The handle top 3 is height adjustable. Fix handles in desired position I or II.
Attach the handle top 3 with the bolts and wing nuts 22 to the handle bottom 6.
Note: Ensure that the cable clips supplied are used to fix the cable to the handle.
Inserting the Battery 3
Lift the battery cover latch 23 and lift up battery cover 7.
Fit battery 8, when correctly fitted a „click“ will be heard.
Fit the isolator key 24 as shown. Ensure correct location.
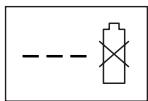
If the mower is not going to be used immediately fit isolator key 24 as shown in the storage position.
Close battery cover 7.
Removing the Battery
Lift the battery cover latch 23 and lift up battery cover 7.
Remove isolator key 24, refit in storage position.
Lift the battery cover latch 23.
Remove the battery 8.
Snap together the grassbox
Rotak 34/37 LI C
Snap the grassbox top on the grassbox bottom by pushing all the "snap fits" together around the edges starting at rear and working towards the front.
Rotak 43 LI D
Snap the grassbox bottom halves together by pushing all the "snap fits" together around the edges starting at rear and working towards the front.
Snap together both top and bottom half of the grassbox.
Grassbox fitting/removing
Lift the deflector guard 5 and hold up, fit or remove the grassbox 4.
For non grass collection the mower can be used without the grassbox 4 in position, with the deflector guard 5 in the down position.
Adjusting the Cutting Height F
- Stop, release switch lever and wait until the motor stops before adjusting height. The blades continue to rotate after the machine is switched off, a rotating blade can cause injury.
Caution - do not touch the rotating blade.
For the first cutting of the season, a high cutting adjustment should be selected.
The lawnmower can be set to 7 cutting heights between 35mm and 70~mm .
For this purpose, press the height of cut lever 12 inwards then lift or push down the mower until required height is selected.
The lawnmower may be used to cut down to 20mm by removing the blanking plate 25 as shown.
Using the height of cut between 20 - 30mm will shorten the battery duration.
Operation
Starting
The blade continues to rotate for a few seconds after the machine is switched off. Allow the motor/blade to stop rotating before switching "on" again.
Do not rapidly switch off and on.
Note: To aid starting push handle down to lift front wheels.
Fit the isolator key 24.
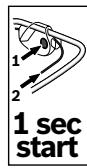
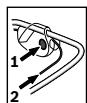
Starting

1 sec start
Press and hold the safety button 2.
- Squeeze the switch lever 1 towards the handle.
Release the safety button 2.
Note: There is a short delay in the motor starting after engaging the switch lever 1.
Stopping
Release the switch lever 1.
If the mower is not going to be used immediately fit isolator key 24 as shown in the storage position.
The machine is fitted with a blade brake. This safety feature stops the blade from rotating in a few seconds.
Mowing H

Protect the battery from heat, for example continuous exposure to sun radiation and fire.
Product will not function if temperature is below 0^ or above 45^
Do not leave the battery in the product in direct sunlight.
When working do not allow the motor to labour particularly in heavy conditions.
When the motor labours the speed of the motor drops and you will hear a change in the motor sound, when this occurs stop working, release the switch lever 1 and raise the height of cut.
Failure to do so will reduce area of cut and/or could damage the product or battery.
The grass combs 11 allow a very close cut to the wall or edge. Beware of running combs 11 into objects while cutting close to walls/edges.
Working Advice
Battery Charge-control Indication (see main figure)
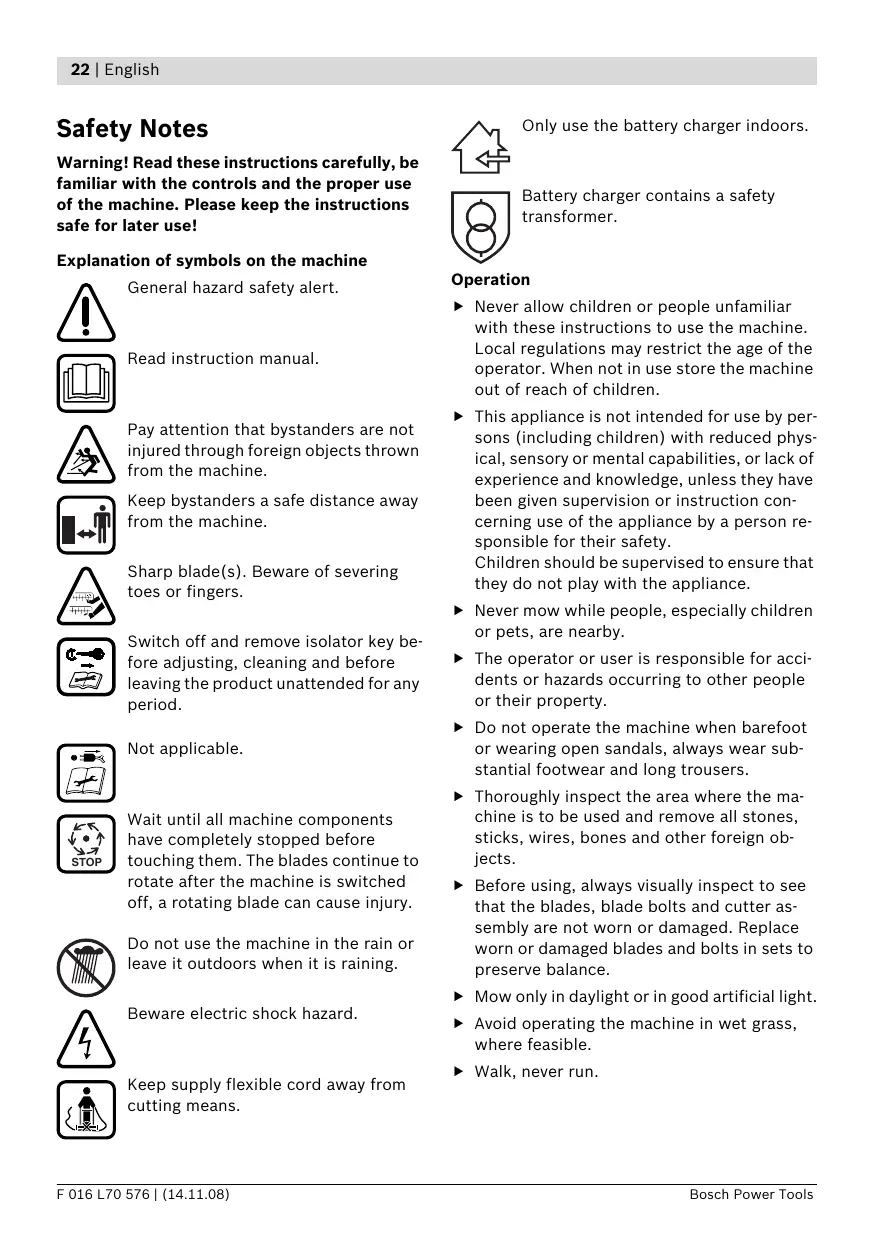
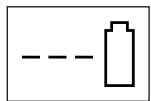
The battery 8 is equipped with a charge-control indicator 14 which indicates its charge condition. The charge-control indicator 14 consists of 3 green LEDs.
Press the button 13 to actuate the charge-control indicator 14. After approx. 5 seconds, the charge-control indicator goes out automatically.
The charge condition can also be checked when the battery is removed.
| LED Indicators | Battery Capacity |
| Continuous lighting of 3 green LEDs | ≥ 2/3 |
| Continuous lighting of 2 green LEDs | ≥ 1/3 |
| Continuous lighting of 1 green LED | ≤ 1/3 |
| Flashing of 1 green LED | Reserve |
When no LED lights up after actuating the button 13, the battery is defective and must be replaced.
For safety reasons, the charge condition of the battery can only be checked when the product is at a standstill.
During the charging procedure, the three green LEDs light up one after the other and briefly go out. The battery is fully charged when the three green LEDs light up continuously. The three LEDs go out again approx. 5 minutes after the battery has been fully charged.
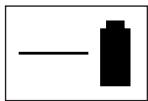
Temperature Control Indicator (see main figure)
The red LED 15 signals that the battery or the electronics of the product (with battery inserted) are not within the optimum temperature range. When this occurs the product will not operate or not at full capacity.
Temperature Control of the Battery
The red LED 15 flashes when pushing button 13 or pressing the On/Off switch 1 (when the battery is inserted): The battery is not within the temperature range for operation of -10^ to +60^ .
The battery switches off at a temperature above 70^ until the optimum temperature range is reached again.
Temperature Control of the Product Electronics
The red LED 15 lights up continuously when pressing the On/Off switch 1: The temperature of the product electronics is below 5^ or above 75^ .
At a temperature above 90^ , the electronics of the product switch off until the temperature is within the allowable temperature range again.
Area of Cut (Battery Duration)
The area of cut (battery duration) depends on lawn conditions, grass density, mositure content, grass length and height of cut.
Switching the machine on and off frequently during cutting will also reduce the area of cut (battery duration).
To improve the area of cut (battery duration) it is recommended to cut more frequently, raise the cutting height and walk at a normal pace.
The example below shows impact of conditions against run time, for one battery.
Cutting Conditions
| Very light, dry grass | Light, dry grass | Medium, dense grass |
| 6cm 4cm | 8cm 4cm | 15cm 4cm |
| Area of cut (Rotak 34 LI) |
| up to 300 m2 | up to 150 m2 | up to 100 m2 |
| Area of cut (Rotak 37 LI) |
| up to 300 m2 | up to 150 m2 | up to 100 m2 |
| Area of cut (Rotak 43 LI) |
| up to 300 m2 | up to 150 m2 | up to 100 m2 |
To increase the run time an additional battery can be purchased from an authorised customer service agent for Bosch garden products.
Troubleshooting
The following chart lists problem symptoms, possible causes and corrective action, if your machine does not operate properly. If these do not identify and correct the problem, contact your service agent.
Warning: Switch off and remove the isolator key before investigating fault.
| Problem | Possible Cause | Corrective Action |
| Machine fails to operate | Possible clogging | Check underneath the machine and clear out as necessary (al-ways wear gardening gloves) |
| Battery not fully charged | Battery Charging |
| Battery not inserted (properly) | Inserting the Battery |
| Fuse faulty/blown in isolator key | Contact Service Agent |
| Grass too long | Increase height of cut and tilt machine to reduce starting load |
| Motor protector has activated | Allow motor to cool and increase height of cut |
| Battery too hot/cold | Allow to cool/warm |
| Isolator key not inserted cor-rectly/fully | Fit correctly |
| There is a short delay in the mo- tor starting after engaging the switch lever | Hold switch lever for 1-3 s to start motor |
| Motor starts and stops immedi-ately | Battery not fully charged | Battery Charging |
| Isolator key not inserted cor-rectly/fully | Fit correctly |
| Battery not inserted (properly) | Inserting the Battery |
| Battery too hot/cold | Allow to cool/warm Increase height of cut |
| Machine functions intermittently | Internal wiring of machine damaged | Contact Service Agent |
| Motor protector has activated | Allow motor to cool and increase height of cut |
| Machine leaves ragged finish and/or Motor labours | Height of cut too low | Increase height of cut (see “Adjusting the Cutting Height”) |
| Cutting blade dull | Replacing the blade (see“Blade Maintenance”) |
| Possible clogging | Check underneath the machine and clear out as necessary (al-ways wear gardening gloves) |
| Blade fitted upside down | Refit blade correctly (see“Blade Maintenance”) |
| Area of cut (battery duration) not large enough | Height of cut too low | Increase height of cut and walk slower |
| Grass too high | Increase height of cut and walk slower |
| Grass wet or damp | Wait until grass is dry and walk slower |
| Grass is dense | Increase height of cut, walk slower and cut more frequently |
| An additional battery can be purchased from an authorised customer service agent for Bosch garden products | Contact Service Agent |
| Cutting blade not rotating while machine switched on | Cutting blade obstructed | Switch off machine Clear obstruction (always wear gardening gloves) |
| Blade nut/bolt loose | Tighten blade nut/boltn |
| Excessive vibrations/noise | Blade nut/bolt loose | Tighten blade nut/boltn |
| Cutting blade damaged | Replacing the blade |
| No charging procedure possible | Battery contacts contaminated | Clean the battery contacts (e.g.by inserting and removing the battery several times) or replace the battery |
| The battery is defective, due to a disconnection in the battery (individual cells) | Replace the battery |
| The charge control LEDs 18 and 19 respectively, do not light up after inserting the mains plug into the socket | Mains plug of battery charger not plugged in (properly) | Insert mains plug (fully) into the socket outlet |
| Socket outlet, mains cable or battery charger defective | Check the mains voltage and if necessary, have the battery charger checked by an authorized customer service station for Bosch power tools |
Maintenance and Service
Maintenance and Cleaning
Warning! Switch off, remove the isolator key, battery and grassbox before adjusting or cleaning.
Always wear gardening gloves when handling or working near the sharp blades.
Note: To ensure long and reliable service, carry out the following maintenance regularly.
Regularly check for obvious defects such as loose, dislodged or damaged blades, loose fixings, and worn or damaged components.
Check that covers and guards are undamaged and correctly fitted. Carry out necessary maintenance or repairs before using.
If the machine should happen to fail despite the care taken in manufacture and testing, repair should be carried out by an authorised customer service agent for Bosch garden products.
In all correspondence and spare parts orders, please always include the 10-digit article number given on the type plate of the machine.
Blade Maintenance 1
Warning! Switch off, remove the isolator key, battery and grassbox before adjusting or cleaning.
Always wear gardening gloves when handling or working near the sharp blades.
Turn the machine on its right side and inspect the blade; if blunt or damaged, replace.
Use the following procedure to remove and replace the blade:
Insert a screwdriver into hole 26 to lock the drive. Hold the blade 30 using gardening gloves (not provided) and use a spanner (not provided) to remove the blade bolt 29, blade washer 28 and blade 30.
Fit the blade 30,blade washer 28 and the blade bolt 29. Ensure that the blade is the correct way up (so that this symbol can be seen located as in figure I) and tighten the bolt 29 firmly.
Ensure the screwdriver is removed before attempting to turn the machine on.
Do not lubricate blade or blade bolt during refitting.
Battery Maintenance
Warning! Switch off, remove the isolator key, battery and grassbox before adjusting or cleaning.
Always wear gardening gloves when handling or working near the sharp blades.
Use the following procedures to enable optimum usage of the battery:
- Protect the battery against moisture and water.
- Store the battery only within a temperature range between 0^ and 45^ . As an example, do not leave the battery in the car in summer.
- Do not leave the battery in the product in direct sunlight.
- The ideal storage condition for the battery is 5^ C .
- Occasionally clean the venting slots of the battery using a soft, clean and dry brush.
A significantly reduced working period after charging indicates that the battery is used and must be replaced.
After Usage/Storage
Clean the exterior of the machine thoroughly using a soft brush and cloth. Do not use water, solvents or polishes. Remove all grass and debris, especially from the ventilation slots 9.
Turn the machine on its side and clean the blade area. If grass cuttings are compacted in the blade area, remove with a wooden or plastic implement.
Always wear gardening gloves when handling or working near the sharp blades.
Store the machine in a dry place. Do not place other objects on top of the machine. To save space, fold up the handle fully.
Ensure the cables are not trapped when folding/unfolding top/bottom handles. Do not drop the handles.
The machine can be stored with the grassbox disassembled.
Accessories
Blade
Rotak 34 LI. . . . . . . . . . . . . . . . . . . . . . . . . . . . . . . . . . . . . . . . . . . . . . . . . . . . . . . . . . . . . . . . . . . . . . . . . . . . . . . . . . . . . F 016 800 288
Rotak 37 LI. . F 016 800 277
Rotak 43 LI. . . . . . . . . . . . . . . . . . . . . . . . . . . . . . . . . . . . . . . . . . . . . . . . . . . . . . . . . . . . . . . . . . . . . . . . . . . . . . . . . . . . . . . . . . . . F 016 800 278
After-sales Service and Customer Assistance
Our after-sales service responds to your questions concerning maintenance and repair of your product as well as spare parts. Exploded views and information on spare parts can also be found under:
Our customer consultants answer your questions concerning best buy, application and adjustment of products and accessories.
Great Britain
Robert Bosch Ltd. (B.S.C.)
P.O.Box 98
Broadwater Park
North Orbital Road
Denham
Uxbridge
UB95HJ
Tel. Service: +44 (0844) 736 0109
Fax: +44 (0844) 736 0146
Australia, New Zealand and Pacific Islands
Robert Bosch Australia Pty. Ltd.
Power Tools
Locked Bag 66
Clayton South VIC 3169
Customer Contact Center
Inside Australia:
Phone: +61 (01300) 307 044
Fax: +61 (01300) 307 045
Inside New Zealand:
Phone: +64 (0800) 543 353
Fax: +64 (0800) 428 570
Outside AU and NZ:
Phone: +61 (03) 9541 5555
www.bosch.com.au
Transport
The battery is tested according to UN document ST/SG/AC.10/11/Rev.3 Part III, subsection 38.3. It has effective protection against internal overpressure and short circuiting as well as devices for the prevention of violent rupture and dangerous reverse current flow.
The lithium-equivalent content in the battery is below applicable limit values. Therefore, the battery is not subject to national or international regulations pertaining to dangerous mediums, neither as an individual component nor when inserted into a machine. However, the regulations governing dangerous goods may be relevant when transporting several batteries. In this case, it can be necessary to comply with special conditions (e.g., concerning the packaging). For more information, please refer to the instruction sheet (in English) under the following Internet address: http://purchasing.bosch.com/en/start/Allgemeines/Download/index.htm.
Disposal
The machine, accessories and packaging should be sorted for environmental-friendly recycling.
Only for EC countries:

Do not dispose of power tools into household waste!
According the European Guideline 2002/96/EC for Waste Electrical and Electronic Equipment and its implementation into national
right, power tools that are no longer usable must be collected separately and disposed of in an environmentally correct manner.
Battery packs/batteries:
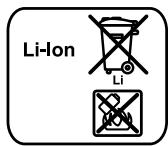
Li-ion:
Please observe the instructions in section "Transport", page 34.
Do not dispose of battery packs/batteries into household waste, fire or water. Battery packs/batteries should be collected, recycled or disposed of in an environmental-friendly manner.
Only for EC countries:
Defective or dead out battery packs/batteries must be recycled according the guideline 91/157/EEC.
Batteries no longer suitable for use can be directly returned at:
Great Britain
Robert Bosch Ltd. (B.S.C.)
P.O.Box 98
Broadwater Park
North Orbital Road
Denham
Uxbridge
UB 95HJ
Tel. Service: +44 (0844) 736 0109
Fax: +44 (0844) 736 0146
Subject to change without notice.
Bosch Lawn and Garden Ltd., PT-LG/EAE, Stowmarket, Suffolk IP14 1EY, England
C 2008
Dr. Egbert Schneider Senior Vice President Engineering
Dr. Eckerhard Strötgen
Head of Product Certification


17.09.2008, Robert Bosch GmbH, Power Tools Division D-70745 Leinfelden-Echterdingen
Montage
Pour votre sécurité
Robert Bosch (France) S.A.S.
Expediente的技术ico en: Bosch Lawn and Garden Ltd., PT-LG/EAE, Stowmarket, Suffolk IP14 1EY, England
C 2008
Leinfelden, a 17.09.2008
Dr. Egbert Schneider Senior Vice President Engineering
Dr. Eckerhard Strötgen
Head of Product Certification


17.09.2008, Robert Bosch GmbH, Power Tools Division D-70745 Leinfelden-Echterdingen
Montaje
Para su seguidad
Bosch Lawn and Garden Ltd., PT-LG/EAE, Stowmarket, Suffolk IP14 1EY, England
C 2008
Dr. Egbert Schneider Senior Vice President Engineering
Dr. Eckerhard Strötgen
Head of Product Certification


17.09.2008, Robert Bosch GmbH, Power Tools Division D-70745 Leinfelden-Echterdingen
Montagem
Para sua segurarca
Bosch Lawn and Garden Ltd., PT-LG/EAE, Stowmarket, Suffolk IP14 1EY, England
C 2008
Leinfelden, li 17.09.2008
Dr. Egbert Schneider Senior Vice President Engineering
Dr. Eckerhard Strötgen
Head of Product Certification


17.09.2008, Robert Bosch GmbH, Power Tools Division D-70745 Leinfelden-Echterdingen
Montaggio
Technisch dossier bij: Bosch Lawn and Garden Ltd., PT-LG/EAE, Stowmarket, Suffolk IP14 1EY, England
C 2008
Dr. Egbert Schneider Senior Vice President Engineering
Dr. Eckerhard Strötgen
Head of Product Certification
Accukoeling (Active Air Cooling)
Bosch Lawn and Garden Ltd., PT-LG/EAE,
Stowmarket, Suffolk IP14 1EY, England
C 2008
Dr. Egbert Schneider Senior Vice President Engineering
Dr. Eckerhard Strötgen
Head of Product Certification

17.09.2008, Robert Bosch GmbH, Power Tools Division D-70745 Leinfelden-Echterdingen
Montering
Akku-koling (Active Air Cooling)
Ventilatorstyringen, der er integreret i ladeaggregatet, overvager temperaturen for den isatte akku. Ligger alkutemperaturen over 30^ , koles akkuen til den optimale ladetemperatur vha. en ventilator. Den taendte ventilator producerer en ventilatorlyd.
Bosch Service Center
Telegrafvej 3
2750 Ballerup
Tel. Service Center: +45 (4489) 8855
Fax: +45 (4489) 87 55
E-Mail: vaerktoej@dk.bosch.com
Transport
Akkuen er testet iht. UN-manualen
ST/SG/AC.10/11/rev.3 del III, underfnsit 38.3.
Dr. Egbert Schneider Senior Vice President Engineering
Dr. Eckerhard Strötgen
Head of Product Certification


17.09.2008, Robert Bosch GmbH, Power Tools Division D-70745 Leinfelden-Echterdingen
Montage
För din sakerhet
Bosch Service Center
Telegrafvej 3
2750 Ballerup
Danmark
Tel.: +46 (020) 41 44 55
Fax: +46 (011) 187691
Transport
Endast for EU-lander:
Tekniske underlag hos: Bosch Lawn and Garden Ltd., PT-LG/EAE, Stowmarket, Suffolk IP14 1EY, England
C 2008
Dr. Egbert Schneider Senior Vice President Engineering
Dr. Eckerhard Strötgen
Head of Product Certification


17.09.2008, Robert Bosch GmbH, Power Tools Division D-70745 Leinfelden-Echterdingen
Montering
Batteri-avkjoling (Active Air Cooling)
Bosch Lawn and Garden Ltd., PT-LG/EAE,
Stowmarket, Suffolk IP14 1EY, England
C 2008
Dr. Egbert Schneider Senior Vice President Engineering
Dr. Eckerhard Strötgen
Head of Product Certification


17.09.2008, Robert Bosch GmbH, Power Tools Division D-70745 Leinfelden-Echterdingen
Asennus
Turvallisuussyistä
IIInpoopoeic yia OpuBo kal dovnoeiC
Rotak 34/37 LI
Oi Tipecetponc eXakpiBwOnkav ouuPwvae Tnv 2000/14/EK (1,60 m uoc, 1,0 m anoTaon) ka Tnv EN ISO 5349.
H ouφwva μe tnv kaμnλn A ektiμnθeiα
XapaktnploTikn σaθμn akouotiknc niεoanc tou
μnxavμatoc avρxetai o8 1 dB(A).
EyyunuevnoTaθμnakouotiknicpioc90 dB(A).Avoaaλeia μetpnoc K=0.74dB
H xapaktnpiotikn dovnon xepiou-mpaTou eiva u kpoTe np 2,5 m/s2.
Rotak 43 LI
Dr. Egbert Schneider Senior Vice President Engineering
Dr. Eckerhard Strötgen
Head of Product Certification

i.v. Mo7gc
17.09.2008, Robert Bosch GmbH, Power Tools Division D-70745 Leinfelden-Echterdingen
Συναρολόγηση
TnV aopaleoa
Ppoooxi! Piv ano ka9e epyaia ouvtnpnnc n kaapiaou npenei va teeteto mnxavma ektoc leitoupyiac,va luveteto biakotn nkeptikou kukawatoc kalva apaipite tnv mnatapia.To ibio toxuei kai otav to nkeptikokalwio unootei zmuia, konie i npep6utei.
MetaTn 0eAn Tou unxavnpatoc EKTc Aetoupyia Ta paaxaiia ouvexizouv va nepiotpeovtai yia peikad eutepoAent aKoI.
Poooxi- ayyicTe to nepioptpeoepoevo maiaip konnc.
Φoption μnatapiac
e npooxoh otyn taon biKtuou: H taon nnc mnync peumuoc npenei va tauticetai me tn y taon nou avaypafetai otyn ivakida kataokeuaotn tou unxavnuatoC. Mnxavmuatae xapaktnpioikn taon 230 V mnpoov va xpnoipointhetaov ka e taon 220 V/240 V.
Na xpnaiomoiie to ophiotn nou nepiexetai otn ouakeuaia. Movo autoc o ophiotnc taipiaei otn mnatapia 1ovtwv laiou nou xpniomoiieitai oto unxavnua ocac.
H natapia diathetai iia diatae n eithnpnonc tnc
0eepokpaiaac n onoia einnpeenei tn foopion oovo
otnv nepioxh 0C kai
45 ^ C .Etai etiuyyxavetai ia meyaln diapkeia
zwnc tnc matapiaac.
YnOeIeN: H npatia npaabiEtae peikw c oopTiaevn. Ia va eaoqaioete Tnv nnpno txu Tnc mataiac npenei va Tnv ophiote OTO ophiotn npiv Tnv xpoanouoe Tya npwn opa.
H mntapia iovtwv A thiou mtopei va optioatei ava naa stiyh. H diaokonn tnc optionc dev annte iyn mntapatia.
H mntapatia iovtwv A10iou npoateueta anotuxov oaoxepn ekpoption. Otav n mntapatia aedeae n npoataeutik diataE n diakonte t N aeitoupyia tou unxavmuoc to onio dev mnpoei nleov va xpnoionoinhei.
Na nvyexioe va natate to diakontn ON/OFF meta tnv autoupatn diakonntc Aetoupyiac tou mxavmuatoc. Mnopei va unootei zeta n npatapia.
Φoption
H φóptiān apxizé μoλic tonoθeτnθei σtnv πiça
to φiç δiktúou tou φóptiσŋ kai n μπatapia 8
tonoθeτnθei σto kaváλi φóptiαnc 16.
Xapn tyn eunyn diabikaaia poptionc avayvwpicetai ameocn kataoan poptionc tnC umatapiac n onoiakolouwocpoptietai, avaloya me tn oepokpaia kai tny taon tnC,pe apio to peuma poptianc.
Eto n matapia npoateueta kai, otav dev apaipoei ano to optioatn, napaeivei diapkwc eTvawc optioeyn.
Oeon oε λειroupyia G
1 Pahtote kai kpatntote natauve to koupi aoppaaleia 2.
PnntoTo moXIo ZeUeNc 1 enavw oTo eLaaMaTnL aBnC.
Teknik belgelerin bulundugu merkez: Bosch Lawn and Garden Ltd., PT-LG/EAE, Stowmarket, Suffolk IP14 1EY, England
C 2008
Dr. Egbert Schneider Senior Vice President Engineering
Dr. Eckerhard Strötgen
Head of Product Certification


17.09.2008, Robert Bosch GmbH, Power Tools Division D-70745 Leinfelden-Echterdingen
Montaj
Güvenliginiz icin
Bosch San. ve Tic. A.S.
Ahi Evran Cad. No:1 Kat:22
Polaris Plaza
80670 Maslak/Istanbul
Müsteri Danismani: +90 (0212) 335 06 66
Müsteri Servis Hatti: +90 (0212) 335 07 52
Nakliye
Dr Egbert Schneider Senior Vice President Engineering
Dr Eckerhard Ströttgen
Head of Product Certification

i.v. Mo7gc
17.09.2008, Robert Bosch GmbH, Power Tools Division D-70745 Leinfelden-Echterdingen
Montaż
Dla wlasné bezechyenstwa
Robert Bosch Sp. z o.o.
Bosch Lawn and Garden Ltd., PT-LG/EAE,
Stowmarket, Suffolk IP14 1EY, England
C 2008
Dr. Egbert Schneider Senior Vice President Engineering
Dr. Eckerhard Strötgen
Head of Product Certification


17.09.2008, Robert Bosch GmbH, Power Tools Division D-70745 Leinfelden-Echterdingen
Montáž
Pro Vaši bezpečnost
Bosch Service Center PT
K Vapence 1621/16
692 01 Mikulov
Tel.: +420 (519) 305 700
Fax: +420 (519) 305 705
E-Mail: servis.naradi@cz.bosch.com
www.bosch.cz
Preprava
Bosch Lawn and Garden Ltd., PT-LG/EAE, Stowmarket, Suffolk IP14 1EY, England
C 2008
Leinfelden, dña 17.09.2008
Dr. Egbert Schneider Senior Vice President Engineering
Dr. Eckerhard Strötgen
Head of Product Certification

i.v. Mo7gc
17.09.2008, Robert Bosch GmbH, Power Tools Division D-70745 Leinfelden-Echterdingen
Montáž
Bosch Lawn and Garden Ltd., PT-LG/EAE, Stowmarket, Suffolk IP14 1EY, England
C 2008
Dr. Egbert Schneider Senior Vice President Engineering
Dr. Eckerhard Strötgen
Head of Product Certification

i.v. Mo7gc
17.09.2008, Robert Bosch GmbH, Power Tools Division D-70745 Leinfelden-Echterdingen
Összeszerelés
Az OnBiztonsagsaert
TIOCHENH K CHMBOAM Ha arperate

O6uee yka3aHne Ha HauHne OtnaCHOCTn.

Yka3aHnI IOITHMaBHomy 6paueHHIO c aKKymyAToPOM
Ypeed yctahOBKO aKKymyAToPa TPOBepbTe, BvIKLIOUeH AN HNCTpymeHT. UcTahOBKa aKKymyAToPa BO BKLOUeHbI INHCTpymeHT MOKeT IPrINBeCTn K HeCuaCThblM CAYaAM.
3aunuate 3apnHoe yctpoCTBO OT DOXN H cyloctn. IPOHKnHOBeHne BOAb B 3apnHoe yctpoCTBO IOBbIaET pck Topaxhen 3eKTPOTOKOM.
3apjkaTe aKKymyAToBt ToIbKO 3apJHbIMn yCTpoiCTBaMn, peKOMeHAYemblm H3ROTOBHTeAm. NcTIOJIb3OBAHHe 3apJdHO rO yCTpoiCTBa, IpeDyCMOTpeHHOro DAn OITpeDeIeHHOro BVda aKKymyAToPobC dpyrHMn aKKymyAToPamN BLeueT OTaCHOCTb BO3HKnHOBeHn ITOkapa..
He 3apxaa Te aKKMyAToPbI Apynx n3rotOBHTeEe. 3apdHoe yctpoCTBO IpiroADHO TObKO DAA 3apdKAn AHTN-NOHbIX aKKymAToPob CnpMb Bosch c yka3aHbIM B TexHNueCKNX DaHHbx HaIPXKeHem.B IPTNBHOM CAYae BO3HnKaet ONaCHocTb IOKapa N B3pbBa.
CoapedKHTe 3apAnHoe yctpoHCTBO uHCToTe. 3aqr3HeHn Bbl3bBaHOT ONaCHOCTb IopaxHeHn 3AekTPOTOKOM.
Перед Кадын Истовимповеряпулдьгьк
3ардьгь усторьк, кабьи
штейсалын ВИКу. He Палытесь
Зардьгь усторьсвом собарухени
TOВрждени.
НБСКРБИВачte camo-
STОТЯБно 3ардьгь усторь,
a Пору-
чайе ремоNT KBAИнФицрован_HOMY cTe-
цHAHCTU и TOльКО C OPИНHAынBMIM 3аПа-
нБIMЧАCTМ. ПOBрждени зардьгь
yсторь,
Kab6ьи Stelпсалын ВИКа
ПОБышaitPиСК ПОраженэАЕКТРOTOKOM.
He cTabBe 3apAHOe yCTpoHCTBO BO BkAIOUcEHHom COCTOAHn Ha AERKO BOCIIaMeHIOUoIeCe MaTePhaIb (HaTPmEp, 6ymary, TeKCTNaIb I T.I.) HAn PdOM C TROPuHMN BeueCTBaMn. HarpeB 3apAHOro yCTpoHCTBa TIPN 3apAKe CO3daet ONaCHocTB Bo3HNKHOBeHnI ToXapa.
Ппмени в Инстументх.Toько
ТpeДуСМOTрЕНье AkКуМУАТорbl.
ПпменидpyгХаKKуMУАТОРВ может
ПпвECTи K ТраВмИ OпАCHOCTH
ВОЗнKHOBЕНЯ TЮЖ.apa.
3aunuTe HeNcToB3yeMbI aKKymyTOp OT KaHueApcknx CkpePOK, MOHeT, KLIoue, RBO3Dei, BnHTOB IN APyrNX MaLeHbKx MetaAnueCckNx PpeDMetOB, KOtOpBle MOrTy3aKOpOTb POIAOca. KopotKoe 3aMbIkaHne TIOUOCB aKKymyTOpa MoKeT PpNBecTNI OXoRam NHI ToKapy.
PnHHePpAaHbHom HcIOa3OBaHnn H3 aKKymyITopa MoXeT IOTeYb XNkOcTB. H3- 6eRaTe cOpnKocHOBeHH C Hei. PnC LyuayHOM KOnTaKte IIpOMoYe BODoE.EcAn 3Ta XNkOcTB IToJaET B rAa3a,TO AOIoHnTEaBHO O6paTHTeCB 3a TOMoUbK Bpauy. BblTeKaIoUaA kKymyITopHaJ XNkOcTB MOxet PnpBeCTn K pa3dpaKeHNIO KOxN Nn K OXKOrAM.
He BCKpbIbAaTe aKKymyAaTOp. Pn3Tom BO3HNKaET ONaCHOCTb KOPOTKOTO 3aMbIKAHIA.
3aunuatae akkymyAToPOT B03deCTBnBbICOKNX TempeaTp, HAp., CNbHoroCOaHaOrHa. 3TO CO3daet OIaCHOctbB3pbBa.
He 3ambikaTe hakopoTko aKKymyIaTOP. 3To co3daet OIaCHoCTb B3pbIbA.
Ппп ПОВрждени И Heнадlexашем
ИСТЮБЗОВАнNH aKKуМУЯТОРа может
БыДeАNTьсЯ RA3.ОБспчБte пптOK
СБжero BO3ДуХа И Пп ВОЗнКHOВЕни
Жало6 obpaTHTecb K BpaCy. Гa3bl MOryT
БыЗВaТь pa3Драхжене дыIXaTeMbHbIXpyTeI.
3aunuainTe aKKyMaTOp OT BAnH BOAbI.
XpaHnTe aKkyMnyTOp TOIbKO B dHaIa3OHe TemIepaTp oT 0^ do 45^. He ocTaBIAJTe aKKyMnyTOp IeKaTb AetOM B aBTOMMO6nIe.
BpemO T BpeHn IpoUHuaTe BeHTNIAuONHbIe Ipope3n aKKyMylAToPa MraKo, cyXoH uHCToKoH.
OtticaHne yHKcnn

Пючтente BCE указань Инchristукцип ТЕХИКе 6e3ОпасноCTN.
YnyueneHn,doNyueHHbIe npi
co6IIODeHn yka3aHn I
HnCTpyKcN ITO texHnke
6eOITacHOCTN,MOyT cTaTb
IpiuHNOIopaxeHn 3AekTpuecK
KNM TOKOM,IIoXapa N TjKeAbx
TpaBM.
TpImeHHe NTo Ha3HaueHHIO
ArperatIpeHa3HaueHdA cKaunBaHHa TpaBbHa yacTHbIXra3OHax.
KOMIIeKTIOCTaBKn
Octopokno pacaKaYte HOXHNuIb IAA KyCTOB INIpoBepTe HauHnue CLeDyUOnx UacteN:
- Ra3OHOKOCnAka c pyKoTkoJ
- 1 HIXHЯ Yacb pyKoRTKn
-2BnHTa
- 26apaawkoBbieraKn
- 2 BnHTa DIA ANCTOBORO MetaMa
- 2ПОLOВИнblТраВOCборнka(Rotak34/37Ll)
- 3 ПОLOВИнbl Траьсборнka (Rotak 43 LI)
- 2 ka6eIbHbIe KIITcbl
3apraHoe yctpoiCTBO
-прөрьВатaelыэлктprческовцели
- aKKymyIaTOp/aKKymyIaTOpbl*
pyKOBoADTOI03KcIIyatauIN
\*B3ABNCMOCTHOTIPOADyKTA
Пи HeOCTaue Hn ПОвржdeHnЧаTei 6bpaTHeCb, TOKaAуcTa, K PpOdaBuy.
BIOOAnocTbIO CO6paHHOM COCToHnArperat BeCNT OK.12,8-13,8 Kr.IPn Heo6xOaMocTn BbIHMaIte arperat n3 yIaKOBKn BdBOeM.
AaHHbIe TIO WcMy N Bn6paunN
Rotak 34/37 LI
Измерение 3нauчениполучениВ COOTВЕТСВИС 2000/14/EC (ВblcoTa 1,60 M, pacctOЯнne 1,0M)иENISO5349.
A-B3BWeeHHbI yPoBeHb IyMa O T aRperaTa 06bHuHO: yPoBeHb 3ByKOBOrO DaBaHenra 81 A5(A); rapaHTnpoBaHHbI yPoBeHb 3ByKOBoMooHocTHn HnKe 90 A5(A).PiOrpeuHocTb K=0.74 A5.
B3BeWeHHe yckOpEnHe, o6bIuHo, MeHee 2,5 M/c².
Rotak 43 LI
Texhueckan DOKymeHTaunxpaHNTcay: Bosch Lawn and Garden Ltd., PT-LG/EAE, Stowmarket, Suffolk IP14 1EY, England
C 2008
Dr. Egbert Schneider Senior Vice President Engineering
Dr. Eckerhard Strötgen
Head of Product Certification

i.v. Mo7gc
17.09.2008, Robert Bosch GmbH, Power Tools Division D-70745 Leinfelden-Echterdingen
C6opKa
AaBawei 6e3oNaChOCTn
BHHMaHHe!IpeaBcEm pa6oTaMnIO ouNCTKe HAnTexO6cayXHBaHNIO BbIKIoUaTe IprH6Op,OTKIoUaTe IpepbBaTeA3eKtpnuecko ceHn H BbIHMaTe aKKyMaTApHyo 6aTapeIO.3TN Otepaun Heo6xOaHMo IpoDeAIBaTb TaKxe H B TOM CAYae,ecAn cTeBoi Ka6eA bIOBpeXdEh,Obpe3AH HAn 3aTyTaN.C
Послевыкluоченя arperaTa HOxн eшeckoьco cekyHД ПроДОЖаHTВрацatbca.
OcToPoJxHo - He KacaiTeCb BpaaIooeroCnHOxa.
3apAkaakyMaTopa
YuHTbIbAaTe HApJxHHe cTe:HaPjaXeHHe
HCTOUYHKA TOKa DOAnKHO COOTBcTcBOBaTb
DaHHbIM Ha TnTOBoi Ta6AnUke INcTpymeHTa.
3LeKtpoINHcTpymeHTb I Ha 230 B pa6OtaIoN IIpN
HaPjaXeHnn B 220 B/240 B.
ПпмениToIbKOIOCTaBIAReMoEBMecTe c
ИНСТРМЕNTOM3apRdHoeyCTpoIcTBO.ToIbKO
ЗTO3apRdHoeyCTpoIcTBOCOBMeCTMоC
AANTHeBO-NOHHbIMakKymyIaTOpOMBaUero
ИНСТРМЕNTa.
AkkymyIaTOP Oshaen ycTpoiCTBOM KOHTPOIaTeMIIepaTypbI, KOTOPOE IO3BOIaNET IPOUN3BOIaNTb3apNkY ToIbKO B IIpeDeIax TeMIIepaTypbI OT 0^ Do 45 ^ C .3TNM DOCTHraETcIPOOIAKHTeALbHbI cPOK cAYX6bI aKKymyIaTOPa.
Yka3aHne: AkkymyIaTOp TIOCTaBIAeTcH He IIOANHOCTbIO 3apJXKeHHbIM. AIO obeCteueHnI IOHO MOUHOCTn aKKymyIaTOpa 3apJAnTe eRO IIOHOCTbIO TEpeD TEpBbIM PIPmHeHHeM.
IHTN-HoHbI aKKyMylrTop MoKET 6blTb3apJxhen B IIO6oe Bpem8 6e3 cokpaueHnCpoka Cnyk6bl. IpekpaueHne Ipocecca3apJdKn He HaHocNT BpeDa aKKyMylrTopy.
IHTN-HOHHbAkkymyIaTOp 3aunuHepn
3KcIIyaTaunB Ipr6opeOTgAy6oKoPa3pArKn.
Pi nppa3pJxKeHNOM aKKymyIaTope pnp6op
OTKaUoaeTc6laOaaprCxEme 3auntbI
6oAbwe He MoKet NcTOAb3OBAtbcra.
Tocane aBTOMaTHueCKORo BbIKAIOUeHn HcTpymEnTa He HaxmMaTe 6ObWe Ha BbIKAIOuTeA. AkkyMnyTop MoKet 6bITb TOBpeXKeH.
Tpocecc3apAkn
Пюоecс зарядн haunhaeTc npa3y, KaK TOnbko Bnka cetn 3aprAnHO yctpoiCTBa 6ydet BCTaBHeHa B wTeNceIbHyIO po3eTKy n aKKymyIaTOp 8 6yTeYctaHOBaIeH B 3aprAnHoe rHe3do 16.
INHOBaUNHOHbM MeTOd 3aprAKn aBTOMaTHuecKn OITpeAeET COCTOAHHe 3apra aKKyMyAToPa 3aTtAa TpeE N B 3aBnCmOCTN OT e0 TEMIepaTpyb I HaIIpJxKeHna 3apAka OCyUeCTBaReTcA COTTNMaAlbhIM TOKOM.
3To ⅢaADHT aKKMyAHTOp, pInxpaHeHH B 3apAHOM yCTpoINCTBe aKKMyAHTop 6laOdaP 3TOMy BCerDa TIOHOCbIHO 3apJKeH.
3haueHne 3aemeHToB HnKaTopa
AkkymyIaTOp He 3apJXaetcA
EcH3apAka HeBO3MOxHa TIO
pIpuHHe HHOH HeTLOaKn,
pa3DeIbHo CBeTOdNoA 18.
Пюцecc зарякн He haunHaeTcR, И зарядka aKKyMMyTOpa HeBO3MOxHа (cM «ПOnCK HeNCnpaBHOCTeR').
Yka3aHHI IO 3apAKe aKKyMylAToPA
При HeпрьИВьIx ИИ МногOKpaTHO
TOBTopЯБмIx UKKλx 3apДки 6e3 ПeрьИBa
3apДhoe yCTpoIcTBО можET HarpeTbС. 3TO,
ODHaKO, He Bbl3bIBAe TОпасEHи N He yKa3bIBAeT
Ha TeXHnueCKyU HeNcPpABHOCtB
3AeKTPoINHCTpyMeHTa.
3HaunTeIbHoe cokpaueHne IpoDoJXnTeIbHOCTn pa6OtbI TocLe 3apraDa CBnDeTeIbCTByeT O CTapeHHn aKKyMylrTOpOB n Yka3blBaet Ha Heo6xOdHMOCtB INX 3aMeHbl.
Oxλακθεην ΑκκγμλγΤΟρa (Active Air Cooling)
BcTpoEHHOe B 3apAHOe yctPoIcTBO
yIpaBHeHne BEHTnAITOpOM KOHTPOIpyETemTepaTyPycTaHOBLeHHoro aKKMyAITopAp.
EcIn TeMTEpATypa aKKMyAITopAp IpeBbIaet 30^ ,BEHTnAITOp OXaJxdaet ero DO
OTTHMaAbHOJ AIA 3apAKn TEmTepaTpbl.
BkIoUeHHBI BeHTnAITop N3daet IIpn pa6Ote
XapaKTePbIe Wymbl.
EcHnBeHTnAToPHe3aTpyckaeTcH,TO
TeMTpepaTypaakKymyAToPaHaxOAnTCB
ITpeEALXOTTMmaIbHOToTeMTpeaTyphoro
DnHaTa3oHaHnBeHTnAToPHeNCpRaBeH.B3tOM
Clyuae Bpem3apAKnakKymyAToPa
yBeMaNuBaetc.
C6opka
YctaHaBnBaIe AkkymyAITOp Hnn npepbIbATEAb 3AEKtpnuecko cTIN,TObKO KOrDa pN6Op TNOHocTbO co6paH.
Pn dEmoHTaxe H MoHTaxe BepxHei/ HnKHeJ qactn pyKoRTKn CLeaNTe 3a Tem, QTO6bl He 3axaTb UHyp PtntAHn.
MOHTaXpyKoTKnA
1 乙TaHOBHTe HNKHIOU YaCTb pyKOaTKn 6 B IpeyCMOTpeHHbIe OTBepCTnI N3aKpeTTe BNHTaMn DAA ANCTOBO MetaMa.
Yka3aHHe: AnHy BepxHe yacTn pyKoRTKn 3 MoXHO peRyInpoBaTb. YcTaHOBtpe pyKoRTKy B IIOAOKeHHe I nn II.
C TOMOUBBOBUNb6apaWkoBbIXraek22
IIpIKpyTHe BepxHIOU cactb pyKOATKN 3K
HNXHeu cactn pyKOATKN6.
Yka3aHHe: TpOBepe, yTo6bl Zhyp 6bln
TpiKpePAnE C TOMObIb I pIiAraHOuXxC
Ka6eBbHbIX KNIITC KpyKoTKe.
YctaHOBKa aKKymyIaTopa
1 Φ ΠOTaHnTe BBePx pbIaR KpbIuKn aKKyMyAITopa 23 BBePx IIOAHmIte KpbIuKy7.
BCTaBbTe aKKyMMyrTop 8 Do cblshmOrO ueuka (KnK).
BCTaBbTe IIpepbIbATEb 3AeKTpUeckO ueHIN 24, KaK IIOka3aHO Ha pnc. Y6eHITcB TOM, UTO OH yCTaHOBaeH B IpaBnHbHom IIOAOxHeHHN.
EcIbBHeHaMepeHbHCIOb3OBaTb ra3OHOKoCNky PpRAO Ceuac, PpINBeNTe IpepbBaTeA 3eKTPnueckO ueN 24 B TOLOXKeHne TOKO, KaK TOKa3aHO Ha pucHyKe.
3aKpOTe KpbIuKy aKKymyAToTa 7.
H3BaeHne aKKyMaIaTopa
Pn BbICTe cKaunBaHHa 20-30 MM cokpaaaetc npk pa6oTbI aKKymyAToPA.
Pa6ota c HcTpymeHTOM
BkIoueHne
TocLe BbIKIOUeHn arperaTa HOxN eue HeCKoAkbKO CeKYHa TPOdoAxAHO BrpaatbCra. IpeXdYe HcIOBTOpHO BkIOUHTb arperaT, IOAOXdTe, TOKa ABnRaTeNb HOXN IOAHOCbIO He OCTaHOBbTcR.
HeIb3A BbIKIAOaTb H BKAIOaTb HNCTpymENT 6e3 IppomexyTOHOro IpepebIBa.
Yka3aHHe: UTo6bl AerYe TpoHyTbC a MeCTa, CJIeKHa HAdaBHTe Ha pykoTky, UTo6bl IIpIIToADHrTb IpeEHNHe KOleca.
ChOBa BCTaBbTe IIpepbIbATEAe b 3AekTpnuecKo 24.
Bkluoyene G
1 sec start
Hakmte Ha KhoTky 6e3oTnOCTn2 n depKHe ee haxaToi.
Пижмпе рычаг улареня 1 К руковск.
OTnyctnte KhoNk6e3oNacHOCTn 2.
Yka3aHHe: TIOcA IpiBVeHnB D AeCTBHe pIyUra yIpaBaHEnH 1 DBrIaTeIb 3aTycKaeTcA C He6OaBWM OTO3aHHeM.
Bbikluoyehne
OTnyCTnTe KHOIIKy 6e3OtnaCHOCTn1.
EcnBbHe HamepeHbI NcTIOb3OBaTb ra3OHOKOCnky IprMo CeIuac, IpeBeAHTe IpepbBaTeMb 3eKTPnueckoIeN24B TIOLOKeHne TOKo, KaK TOKa3aHo Ha pncyHke.
Arperat Ochauen TOPMO3OM ABnraTeA.3To 3aunTHoe yCTPOINCTBO OCTaHaBnBaET HOX B TeueHHe HeCKoAKnx CekyHd.
CkaunBaHne H

3aunuatae aKKyMaTOpOT B03dEChTBnBbICOKNX TemTepaTp, HAnpMep, CNbHOrO COAHeuHOro N3AyueHn OrHa. INcTpymEt HpepaTaet Pn TeTMepaType Hxke 0°CNHn Bblse 45°C!
PnPnPnMOM COIHeHOM OCBeueHn Hc octaBnTe aKKyMaTOp B n6ope.
Пп рабоTeВOCOБенHO TЯжелынИЗЛУЧENH He TeperpykaTe ABURAteIb.
Yka3aHHI IO IITpIMHeHnIO
HnAkaTop coCToHHa 3apXeHHocTH aKKMyAToPA (CM. rAaBbI pncyHok)
AkkymyIaTOp 8 OchaueH HdNkaTOpOM 3apJxHeHHoCTn 14, KOTOpb IIOka3bIbaeTe rO CTePiEh 3apJxHeHHoCTn. INdNkaTOp 3apJxHeHHoCTn 14 COcToNT n3 3eAleHbIX CBETOAnODOB.
Aa kTNb3aunn HnNkAtopa 3apJKeHHocTn 14
HaKMNTe KHOITky HnDnKaTopa 3apJKeHHocTn 13.
Pp6I. uepe3 5cekyHnDnKaTop
3apJKeHHocTn rachet cAmOCToTeNbHO.
CTeIeHb 3apJxHeHHoCTM MoXHO IpoBepaTb N Ha BbIHyTOM aKKyMaTope.
| СbvETOДИОДHA
нДИКAZИА | Емкость
аKKуМУЛТOPA |
| Нeчръвhoe сbvеене
3 зeльъх СbvETOДИОВ | ≥2/3 |
| Нeчръвhoe сbvеене
2 зeльъх СbvETOДИОВ | ≥1/3 |
| Нeчръвhoe сbvеене
1 зeльноу СbvETOДИОДa | ≤1/3 |
| Миганne 1 зeльноу
сbvETOДИОДa | PeЗерВ |
EcnPiocHe HkaTnKHOPTKn 13 He 3aRopaETcH N OAnH N3 CBeTOADNOOB,3To 3NaHT, YTO aKKyMylrTop HeNCTPpABEH IIOAeXHT 3aMeHe.
I3 coo6paqehn 6e3oPacHocTn IpoBepka CTeTIeHN 3apJKeHHOCTHn AKKyMMyTOpa MOXET IpOIN3BOADHTbCra TOIbKO Iprn Hepa6oTaHOeM Ipn6ope.
Bo Bpempiocecca 3apAdkn 3aIopaoTcN IOAD 3 3eIeHbIX CBeTOAnOda n rachyT ha KopoTkoe Bpem. AKKymyIaTOp IIOHocTbIO 3apJxKeH, ecM 3 3eIeHbIX CBeTOAnOda ropr TIOCToAHNO. PIn6hIm3nteBHO uepe3 5 MmN IOOKHuaHHN 3apAdkn aKKymyIaTopa 3 3eIeHbIX CBeTOAnOda rachyT.
HnAkaTop KOHTpoAa TEMpeaTpybI (cm. rAaBHy pncyHOK)
KpaChnB CBeTODNoHANKaTopa KOHTpOaTeMTpePAtpyb15CnHaN3nPyeTO TOM,TOaKKymyAToPmH 3LeKTPoHnKa Ppi6opa (PpHycTaHOBaeHHOM aKKymyATope) HaxoJrTc3aTpeJaAMn OTTMaMbHOrO TeMTpePaTyphoroDnHaTaoHa.B TaKOM cLyae Ppi6Op He pa6otaet nn Pa6otaet He Ha TOnHyIO MoUHocTb.
KoHTpoIb 3a TempepaTpyo aKKymyIaTopa
KpaChbI CN15 MmraeT npn HaaTnHa KHOITky 13 mN BblkIOUaTeIb 1 (pnp yCTaHOB- aeHHOM aKKMyATope): Tempepatypa aKKMyATopa 3a ppeDeIamPi paOoe INaIa3oHa ot -10 ^ C DO +60^
При Temперatype Вьиpe 70°C akкумларot OKКluoayetca на Время, кOTOPoe Tpe6yeTcДАВОЗВрашени B DOПУСТИМын TemперatypeРны ДиаПа3OH.
KoHTpoB 3a TeMIIepaTypoJ 3AeKTpOHHKn IprH6opa
KpaCnbl CBeTODIOA 15 3aRopaetc npn HaxaTnHa BbIKIoUaTeIb 1 n rOpHT, He Mmra: Tempepatypa 3eKtpoHKn pnp6opn HnxE 5 ^ C nnBblse 75^
При Temперatype Вьиse 90°C Νаektpoнka OTKluyaetcRa Н Врем, KOTopoe Tpe6yeTcR DAЯ BO3Врашени B DOПуCTИмь TemперatypeРыДиаПа3OH.
3ΦΦEKTHBHOCTb CkaUNBaHn
(PPOdoJXHTeBHOCTb pa6oTbI aKKyMMyATopa)
3eKTHBHOCTb CkaUNBaHn
(PPOdoANKHTaHbOcTb pa60tbl aKKyMAYrTopa)3aBNCNT OT CBOIcTB r3oHa, HAp., rYCTOTbl TpaBbl, BLAAxHOCTn, DAnHbI TpaBbl, a TaKxBe BbICOTbl CkAunBaHHa.
Yactoe BkIoUeHne N BblKIoUeHne arperaTa BO Bpemr CkaunBaHHra TaKke TOnHJaet 0fKeTnBHOCTb CkaunBaHHra (IpoDoAnKHeBHOCTpb a6Otbl aKKymyATopa).
AONTHMn3aun eΦeKtNBHOCTHcKaWNBaHn(IPOdoANKHeBHOCTn pa6OtbI aKKyMaTopa)peKOMeHNyETcYaSe KOCHTb, yBeLNHTb BbICOTy cKaWNBaHnN ABnTaTbcr CymepenHei CKOPoCTbIO.
HnKePnBVeDeHHbI PnMep TOKa3bBAeT 3aBnCmOcTb MeKdY BbICOTOn CkAunBaHnI eΦΦeKTnBHOCTbIO CkAunBaHnI ITO OTHoHeHIO K 3aprAke aKKyMylATopa.
YcObna cKaunBaHHa
yI. Tmnpra3eBa, 65A-020
TeA.: +375 (17) 254 78 71
TeA.: +375 (17) 254 79 15
TeA.: +375 (17) 254 79 16
a c: + 375 (17) 2547875
E-Mail: bsc@by.bosch.com
TpaHcnpr
AkkymyIaTOP nCtblTAn IIO pyKOoBDCTBY UN ST/SG/AC.10/11/n3d. 3 yacTb III, IIOpa3deA 38.3.AkkymyIaTOP oCHaSeH eΦeKTHBHOJ 3aIHTOJ PTOHB BVHTpeHHero I36bIToCHORo DaBHeHn I KOPOTKOrO 3aMbKaHn, a TaKxe YcTpoCTBaMn dA I PteDoTbPaUeHn CTaTneCko I3lOMa IIOA BO3DeIcTBHeM pa3OBoH Ha- rpykN i Otnachoro 06paTHORo Toka.
3KBNBaHToe KOInueCTBO AaKKyMaIaTope HnKe COOTBeTCTBHyOnx IIpeDeA hBix 3HaueHn. IIO3ToMy Ha aKKyMaIaTOp, KaK OTaEaBHyUoactb, TaK IN BO BCTPoEHOM B INCHTpymeHT CoSTOHH, He paCIIPOCTpaHAnOTcR HaaONHaBhBiE mMeXdyHapOaHbIe IpaBnla DAn OTaChbIX BeuectB. ODAKO IIpaBnla dAry OTaChbIX BeuectB MOrY IIpno6pctN CBoE 3NaueHne IIpi TpaHCIIOPtnOpOBKe HeCKoA bKnX aKKyMaIaTOpOB. B TakOM cLyuae MoKet CtA Tb Heo6XoDnMbIM
co6bIaTbOc6bIe yCIOBn(HaIpiMep,AynyIpaKOBKn).PiOp6bHocTn Bbl MoXeTe HaHTn B aHrIaNcKoPiMaTKe ITO CLeAduOuSeMy aDpeCy BV INtepHe: http://purchasing.bosch.com/en/start/Allgemeines/Download/index.htm.
YTHAN3aHNA
OTcIyXnBWeCBOIpCpOK 3eKtpOnHCTpyMeHTbl, TIPINHaAeXeHOCTn UYtaKOBKn CaeDyET CdaBaTb Ha 3KOLOrHueCKn YnCTTu pekyIpeaNIO OTxOoB.
ToAboAaCTpaH-ueHOB EC:
He Bb6paCbBaIe 3eKtpoHnCTpyMeHTbIB 6bITOBbIe OTxOdbI! CoIaChO EbpOneNcKoI NpEeTnBe 2002/96/EC o cTapBx 3eKtpnuecknx I 3eKtpoHHbIX INCTpyMeHTax I pIn6opax, a taKke O
IpTeBOpEHN 3ToH DnpeKTHBbI B HaauHOHaBHoE ItpaBO,OTcLyXNBWHne CBoi CpO KsLeKTPoHNCTpyMeHTbI DOAnKhbl OTdAeLbHO Co6HpTaBcN i CdaBaTbCra HA 3KoANOHueCKN UChTyU yTHMa3aUnIO.
AkkymyIaTopbi,6aTapeH:
Li-Ion:
TpoKaaIyIcTa, yuHTbIbAteYka3aHHe B pa3dEe «TpaHcIopT», cTp. 271.
He BbIbpaCbBaIte aKkyMMyTOpbl/6aTapeN B 6bIbTOBm MyCop, He 6pOcaIte INX B OOrH bIb B BOy. AkkymyTOpbl/6aTapeN cLeyeT CObnpaTb I CdaBaTb Ha peKyIepaunIO IIN Ha 3KOLOrHuCeCKn UcHCTUO yTHUN3aUnHO.
ToAboAaCTpaH-ueHOB EC:
HeNCIpaBHeI HnI pniueAWe B HeRoADocb aKkyMaTOpb/6aTapeu DoJXhbl 6bItb yTHMa3oBaHbCoIaCHO AnpekTnBe 91/157/E3C.
Bo3MOxHbI n3MeHeHHa.

ME77
Bka3iBkn 3 Texhikn 6e3neKn
Ybara! Ybaxho IpounTaIe HxKyeNoaHIBkazBKn. O3HaonMTeC3 0prahamnUppaBInHHI I ppaBnBnHM KOpNCTyBaHHmTpnaAdom. D06pe 36epiraTe IHcTpyKciO 3EKCtAYaTaCiI DAЯ NOaBWoTO KOpNCTyBaHHHeIO.
TOnCHeHHIooO CmMbOaIB Ha pHaai

3araIbHa BkazIBKa Ha He6e3neKy.

He donyuckaTe TOTpaHnHHuHypa KINBaeHHIiHOxKi.

BnKopncToBnyTe 3apAHNPiPnaAd
IWe y cyxnx PpIMiueHnX.

3apAHHI pIpcTpi O6aHaHnH 3axHCnM TpaHcΦopMaTOPOM.
Ekcnayataui
Hi Bykomy pa3i He do3BOJnTe KOpNCyBaTncI pPnlaaOM dITram iOC6am,IO He 3NaHOMI 3 cIMN IHCTpyKcIaMn. HaioHaJIbHI pPnTncMoKyTB o6MeKyBaTH DoynCTmN BIK KOpNCyBaay. JKIo Bu came He IpaToe 3 pPnlaaOM, 36epiraiTe NOro B HeDOCTYTHOMy AIA dITE Micui.
LcEI pInlaA He Ipn3HaueHn dAA BnKOpNCTaHHO Oc06aMn (BkIAUoauOuN DIteR) 3 OBmExeHnMI TcNchiUHnMI, UyTTBeHMn A60 POzYMOBHMn 3dATHOCTAMn A60 HeIOCTaTHIM DOCBIOM Ta/a60 HeIOCTaHIMN 3HaHHMa - Ye DO3BOJAEbCp o6bTu Nlwe y TOMy BVIIaKy, RaIO 3a HmM CTOCTepirae Oc06a, 10o BiIDIOiAe 3a iXHIO 6e3TKeY, a60 BOHN OTPMHyOTb BiI HeI BkAzIBKn 10DO TORO, kCIAID BnKOpNCTOBYBaTH INPuaAD. Heo6XiDHO CTOCTepiratn 3a DIbMn, 106 TepeKohATncra, 10 BOHN He rpaOtB 3 PInlaAOM.
HikoNHe cKoWyIte TpaBy,KoNPi6An3y 3HaXoArybCnIoA,3OKpeMa dITn,a6o DomaHi TBapHH.
3a HeuacChi BnTApKn, TiLeChi YsKoDKeHHI HxN XIODei I IOsKOdKeHHyUxKOrO MaHa BiTOBiae KopncTyBa.
He IpaioIte 3 npHaaOM 6ocOHx a6o y BiDKpHTnx caHaAIAx. 3aBXn MaITe Ha co6i MiHe B3yTTI DOBRI wTaHn.
YBaJHo OOrIaHbTe dIaIaHky, Ha aKiB Bn 36IpaεTecr IpaucBoAtn, i IprnbepiB kAmiHn, dpoukN, ApOTn, KICTKn iInu cyjxopiDi Hi pEaMeTn.
IpeepKopncTyBaHHramra30HOKocapkoIO 3aBXnIPOADNBAAITecra,UNHe3HOcnNcI UH He IOWKOJKeHI HOKI,TBHNTu HOXIB I HOKOBnBy3oA.1O6yHNKHTynDn6baHaCy, HOKiI TBHNTNuHOXIB,2O3HOcnNcA6O TOWKOJKeHI,3aBXnMIHnTeYci pa3OM.
CkouyTe TpaBv Inue Pnp DeHHOMy CbITaI a6o Pn D06pOmy WtUHOMY OCBITaENHI.
3a MoJANBICTU He KOpNCTyIeTecb PpHAnoM Ha MOKpiI TpaI.
3aBxDn NdiTb CIOKINHM KPOKOM, HIKOAN He 6iXiTb.
HikoH He KopnctyTeCpIaDM 3 TooKOJKeHMN 3axNCHMN pIncTPOMNI KpnKamn a60 6e3 3aIObIXHNx pIncTpoIB, RaHap., 6e3 AeEkeKTopa Ta/a60 6e3 KOuHKa DAn CkOSeHOI TpaBn.
CkOuByaHnHa Kocoropax MoKe 6yTu He6e3PeyHM.
He ckooy Te TpaBy Ha 3aHaTO KpyTnx CXnIax.
- Ha cxnax Ta ha MOKpii TpaBi 3aBXd n cIikynte 3a Tm, 0o6 Bn CTiIKO CTOA H a Horax.
Ha cxnax 3aBxnn Kocitb ra3oH nOpek, a He BVropy-Bn3.
- RaKsO Bn IpaIooTe Ha cxHuaX, 6yDbTe oco6bNO b6epexHHmHa TOBopoTax.
BybTe OcO6nBO O6epeXnMn, KOAN Bn 3aKyeTe a6o TnHete npnaad 3a co6oNo.
PnCKoUyBaHHI TpaBn 3aBxAn WToBxaIte PpuaA IOpePeCe6e i HikoAn He TargHItb Ioro do Ce6e.
HaxnAHTn pinnad nn Horo npeBe3eHHn, npeB03NTn noRo uepe3 roaiiHNKn,a taKoX do micu,de Bn 36npaetc bCKoUyBaTH npaby, a6o 3 TaKOrO Micua Do3BOAerTbc AnIwe, KOAN HOKi CTOrTb.
Pn3aIyScy pIpyi BMnKaHHi MoTopa He haxnIaIe IpiIaD-3a BnHrTkOM THX BnTaIaKIB, KOIe Heo6xIaHO 3BaJauOuHa H BnCOKy TpaBy. Y TaKOMy BnTaIaKy IIaHImaIte MaunHy, PpNTNcKaIOU pyKOaTKy, AnIse HacKiBKnCe Heo6xIaHO i IaIe 3 IpoTnLeXHo Do BAC 60ky. KoIb6yTe Oynckatn PpIyA,d, cIaKyIte 3a TmM, 106 BaWi pyKn 6yIh Ha pykoTci.
BmkaTe PnlaA, JK OINcaHO B INCTpykii 3 ekCnayatauii, i CIAkyte 3a Tm, 06 BaWi HOrn 6yH N DoCTaTHbO DaLeKO BiD HoXiB, 0o 0eptaIOTBcI.
HePiDCOByTe pyKni HOrnPiIaTeaI,IO o6eptaioTbCra, i He TpImaTe P06An3y BID TaKnx DeTaAeI.
TpImaTeCnHa BiDCTaHi BiB BKNHIOI 3OHN, KOIN IIpaUoTe 3 IIpuHaADOM.
HikoAn HePiHimaiTe i He IpeHeocbTe PnAa, KOAn IpaUcE MOTop.
BiDmkaitepo3'εdHyBauchpymy:
- 3aBxAn, KOAn Bn 3bupaTeEc b 3aHnHTn PnHaA,
- IpepeTMM,ЯK 3BIAbHHTIshITIaO3aCTPRAH,
-пегд.THM,як перевірNTи a60 пючNTИпплад, a60 вкогати якісь рбOTи HaHbOMy,
IICIA 3ITKHeHHH 3 yXOpiHNM TiOM. HeraHNo IpeBipTe PnHa Ha IIpeMet IOsKOxKeHb i 3a Heo6XiHicTIO BiApemOHTuYTe,
- JAKUO IIINAAIIOUaB He3BuaHbIBpyBaTH (HeraiHo IpeBipTe).
Texhihe 06cayrobyaHHA
IpeBipRyIe BcI raiKn, IporOHnHi I RBHnHa IIpeMetMiUHOITPOCaADKn, 0o6 3a6e3PeuHTN 6e3PeuHn po6OuN cTah IIpIIaLy.
Peryaepno TepebipnTe cTah i BiCythicTB CIAIB 3HOWeHnHa KOoNkDy TpaBn.
- IpeBipRyTe PpNlaD i Ha BCaKN BnTaDOK mHryTe 3NoWehi a6o NtowKOkeHi deTai.
BukopncToByteIneHoxi,IOpeEbaueHi AIAIPIHAAy.
CaikyTe 3a TmM, IO6 HOBI dTaI bYbN BiD Bosch.
BdraTe 3aXdn caoBi pykabuizi, JaKIO Bn 36npaetecb opdyBaTH a60 IpaucOBaTH nO6An3y roctpnx HoxIB.
Bka3iBKN 0oOo OTTHMaIbHOro IOBOxKeHHa 3 akymyAToPOM
TepeaTHM,AK BCTaBAHTn akymyAToTpy 6atapeo,pekeohaiTeCra,io pInnaB BMKHeHO.BcTpOMAAHHa kymyAToTporHOi 6atapei y BBIMKHnytn pInnaMoKe np3BOADHTNO HeuacNHx BNJaKDIB.
3axnauTe 3apAHHH pncptpi BiaDouy i BOLOr. TpapAAHHB OAn B 3apAHH pncptpi 36iAlwye pn3NK ydapy eNeKtpnuHm CTpyMOM.
3apJxte aKymyAToHpi6aTaepi AHe B 3apJHnX PnCTpOx, 0pekomeHdoBahi BnTOBIAOBaem. 3apJHn PnCTpi MoKe 3aMaTNCs, RKIO B HbOMy 6yDyTb 3apJxatnc Hepepe6auehi akymyAToHpi 6aTaepi.
He 3ap4aKaIte akymyAToptHi 6aTapei iHnX Bnpo6HnKIB. 3ap4aHn IpiCTpi IpHaTHn IInIe dAJI 3ap4aKaHn AITcBOioHHnx akymyAToptHnx 6aTapei Bosch 3 HaIIpyroIO, 3aHaueHO B TexHicHnx DaHnx. B IpoTHBnOMy BnTaKy icHyE He6e3neKa Toxexki Bn6yxy.
TpmaTe 3apAHHI pHCTPIB uHCTOTI. 3a6pyAHeHHI MOKytb IIpN3BOHTN DO yAdpy eAEKTPuHHM CTpyMOM.
KoKHN pa3 TepeA BnKOpncTaHnM TepeBi pIe 3apAHH nPnCTpi, Ka6eI b I wTeNceIb. He KopnCTyItec3 aPraHm PnCtpoE, AkuO NiMitIe TOnkOaXeHH. He po3- KpNBaIte 3apAHH nPnCTpi camocTiHo; peMOHTyBATH NOrO AO3BOAETbcA LHe KBaAiofIKOBaHH m AxibuM 3 BnKOpncTaHnM opHInHaBnX 3aTnactH. ToWKoJKeHH 3apAHH nPnCTpi, uHyp a6o wTeNceIb 36IbWye pn3NK ydApy eLeKTPnuHm CTpyMOM.
He KopnctyItec3aPAnHM PtncTpoem Ha ochoBi, 10 MoKe Aergko 3aMmTaHcR, (HaTp., Ha Panepi, TeKCTbHnx MaTepiaAax TooO) a6oB Tropoyomy cepeobu. HarpibaHHa 3aprHOTo PtncTPOIO iD yac 3apxKaHHa MOKe PtIN3BOaHTN Do ITOkeKi.
BHKOPNCTOBYTe B PnHaDax Anwepepe6auehi akymyAToptHi 6atapei. BHKOpNCTaHHI INHINX akymyAToTPhNX6atapei MoKe Ipn3BOAnTH Do TpaBM iHe6e3TEKn TOnKexi.
36epiraTe akyMaTOpHy 6aTapeo, zo came He 3actocOByeTbCBAdaAik BID KaHueAerpcBkX CKpIitOK, MOHeT, rHnHTiB Ta iHux HeBeAknKx MetaLeBHX TpeMetIB, IO MoKyTB cPnUnHrTH NtepeMKHeHHa KONTAKtIB. KopOTke 3amKnAHm iK X KOHTaKTAmn akyMaTOpHOi 6aTaapei MoKe Ipn3BOADHTNo oTIky a60 ITOxExki.
Pn HnepaBnHOMy BnKOpHCTaHHi 3 aky MyAToPHO6aTapei MoKe noteKTn pIdHa. YnKaIe KOnTaKTu 3 HeIo. Pn BNnAkoBOMy KOnTAkTI pOmnTe BiAnoBIAhe Micue BOIO. AkiO pIDHa TOTpaTHa B oui, DOaTkoBO 3BepHItcAo IaKApA. AkMyAToT OPha pIDHa MoKe ctnpUHHrT NOppa3- HenHn ShkpN a6o OnIKn.
He BiKpnBaIte akymyAITOPHy 6aTapeIO. IChye He6e3IeKa KOpOTKOrO 3AmKHaHHa.
3axnauTe akymyAToPHy 6aTaPeIO BiCtKeN, 3OKpeMa, HApI., BiD COHAnHX TpOmeHIB, a TAKOX BiD BORHIO. IChye He6e3TKeA BV6yxy.
He moxha 3akopooybTaH akymyaTOpHy 6atapeu. IChyE He6e3IeKa Bn6yxy.
Пп пошкохжн i a60 He npabHbHi ekCnAyaTaui akymyAToPhoI 6aTapei мож eBxOaHTn nap. Bnyctt b CbiKe TOBITp i - y pa3i ckapr - 3BepHtbcra Do Aikapr. Nap MOKe ПОДpa3HOBaTH n DnxAaHHi IIAxN.
3axnuaTe akymnyTOp bID BOIOrn i BOAn.
36epiraTe akymyIaTOp Inse IIpn TeMIIePaTyPi BiD 0^ Do 45^ 3OKePema, He 3aIiShaIeTe akymyIaTOp BAIITKy B MaunHi.
Yac BiD acy npouuMaTe BeHTnAuiHi OTBOPn akymyIaTopa M'JkHM, uHCTHM i CyXm PHeH3AnKOM.
OttncnHnnPpHnHnny po60TH

IpouHTaTe BcI TopeEaXeHHa I Bka3iBKn. HeoedePkaHnH TTopeAKeHb i Bka3iBOK MOKe IPrN3BOaNTn Do ydApy eAleKtpnUHm CTPyMOM, Tokeji Ta/a6o cepNo3HNx TpaBM.
TpH3HaueHH TpHAAy
KoIb6ydeTe BnMaTn PpHaa3 3 yPaKOBKn a60 TepeHocHTN NOrO DO rA3OHy, 3BaJkaIte Ha roCTpi HOxI.
3o6paxehi KOMTOHEHTN
Hymepaui 3o6paXeHHKOMTOHeHTIB TocHaTeBcHa 3o6paXeHHI PrnAdy Ha CTOpIHci 3 MaHOHKOM.
1 Baxiab
2 3aio6ixHa KhoIIKa
3BepxHa yacTHHa pykoTkn
4KoWNKdAraTpaBn
5 DeΦaekTop
6 HxKHa yactHa pykoTkn
7 Kpnuka akymyIaTOPHOI 6aTaapei
8 AkymyAToPHa 6aTape
9 BeHTnAriHi 1iAHnH
10 Koniata
11Gamma
12 BaxiA BCTaHOBaeHHBNCOTNCKOuBaHH
13 KhoIIka iHdkaTopa 3apAkeHocti akymyIaTropHOi 6aTaapei
14 IHHaTOp 3apAKeHocTi akymyTOpHOI 6atapei
15 IHANKaTOP KOHTPOIIO 3a TEMIIePaTPOIO
16 3apAHe rHizdo
17 3apAHHn IIpncTpii
18 UepBoHn CbiTIOAoHa 3aPAnOMy PnCTpoi
19 3eIeHn CbITIoIOJIO Ha 3aprAHOmy npncTpoi
20 1tTeTceA**
21 CepiHnH Homep
\*\*B3aIeXHocTi BiA KpaIHN
3o6paXeHe a6o ONHcAne pHnAAaJa HE BxOaHTb B cTaNapTnHm 6ocr nocTbKn. NOBHN acOpTmEnT pHnAAaBn 3HaIaTe B haui nPpOrpami pHnAAaJa.
TexhiHi daHi
Texhiuhi DokymeHTN B: Bosch Lawn and Garden Ltd., PT-LG/EAE, Stowmarket, Suffolk IP14 1EY, England
2008 Leinfelden, 17.09.2008
Dr. Egbert Schneider Senior Vice President Engineering
Dr. Eckerhard Strötgen
Head of Product Certification

i.v. Mo7gc
17.09.2008, Robert Bosch GmbH, Power Tools Division D-70745 Leinfelden-Echterdingen
MOHTAX
AaBawoi6e3neKn
Ybara! TepeaTexhiuHm 06cLyroByBaHHa m a6o ouHsueHHM BmKHiTb IIpHaad, BiKIOUOTb po3'eHyBauch ctpMy i BnIMt b akymyAToPHy 6aTaPeO. Ce came Mae nnHnicb i JAKIo eAEKtpoka6eIb TOWKOxHeH, HApri3aHN a6o 3aTIyTabcN.
PicBnMkHeHHI pHnAdy HOxIe DeKiAbka cekyHd o6epTaIObC.
06epexHo - He TopKaItecA Do HOxa, 0o 06epTaetbcra.
3apAxDkaHHaKymyToppa
3BaKaIte Ha Haupyry y MepeKi: Haupyra B
dKepei CTpyMy IOBHHa BiIOBiaTaN DaHIM Ha
3aBOcBki T6AunuCi IprnAay. PpHaAn,
po3paXoBaHi Ha 230 B, MoKyTB IpaUobatn
takox i BiD 220 B/240 B.
KopnctyTeCn AaOaHm 3apAHN mPnCTpoem. AaHe Na cei 3apAHN PnCTpi pO3paxoBaHn AiTEBO-iOHn aKyMaTOp, oBnKopnCTOBYeTBcN y BaWoM npnaadi.
AkymyIaTOPHa 6aTapeMa eIeMeHT A
KoHTPOIAO 3a TeMIIepaTyPOIO, KKN DOnyCKaE
3apAAHHA HwE B TeMIIepaTyPhOMy DiAPA3OHi
BID 0^ DO 45^ . LIm 3a6e3neuyeTbcs
TpBaHn ekCnIyatauiHn pe3epB akymyIaTopa.
Bka3iBka: AkymyIaTOp TocTaayeTbCyaacTKOBO 3apJxehnM. Lio6 akymyIaTOp mir peaIiyBaTH CBOIO IOBHy EMHicTb, Ipeep TM, JIK IepShn pa3 IpaUOBaTH 3 IprnaAOM, akymyIaTOp Tpe6a IOBHcHIO 3apJaHTN y 3apJHOMy IpnCTpOi.
AitieBO-iOHnn akyMnyTOp MOxHa 3apJXaTH KOAn 3aBROdHO, ce He cKopoUye Horo ekTlya-tauiHn pecypc. IepepBaHHIpouecy 3apJXaHH He IOsKOJyE akyMnyTOp.
AitieBO-oHnn akyMnyTOp Pn Horo BVKOPNCaHHI B pHaadi 3axnuehen BiD rN60KOro po3prJxKaHHa. Pn po3prJxKeHomy akyMnyTOp i pHaad 3abJKN cxemi 3axncty BmNkaTebca, i 6iNbwe He npauoe.
TicAABOTMATNCHOROBHMKHANHITPNAAy 6iAbheHaTHCKyIeHaBMMKaU.Je MoKe TPOWKODHTN aKymyAaTOp.
3apAkaHH
Пюес Зарджань ПОчн�аТбс,КоMHМерекништпсалзардогорпирстpo6уdeВстрм_LEHиВ розетк,аakymлг�трна6ataper86уdeВстрм_LEHa yЗардhe ГИЗД 16.
3aB4Kn iHTeAireHtOcTi IPOeApyr 3apJxHaHH CtyPiHB 3apJxKeHocTi akymyIaTOPHO6bataei aBTOMaTHUHO p03Pi3HaETbCra Ta 3apJxKaHH 3dIChHOETbCRA OTTMaAlbHmC TpyMOM B 3aLeXHoCTi BiD TEMpePAtPyr Ta HApYrN akymyIaTOpa.
Lc36epirae akymyAToPHy 6aTaapeH, i - ppr ii 36epexehHi y3aprAnHomy pIncTpoi - BOHa 3aBXdN 6yde IOBHCtIO 3apxKeHa.
Функци iHнkaTopiB
Ipo cTah 3apAnKaHn CnHaI3yIbTcBItAoIOHi IHNkAToPn 18 a6o 19:
WBnKe3apAxAHH
ПришвИдКOMуЗарДханHi Mнга 3еLEHс CBITLOДIOHn iHДКaTOp 19.
Piic 3apxKaHH WbHKO 3aTOpHbC8 OHN 3aOHNIM IOTIM rachYb Tprn 3eHei CBiTIOIOHN. AkymyAToPna 6ataper IOBHCtIO 3apxKeHa, Rkso 6e3IpepeBHO CBITbC8 Tprn 3eHei CBiTIOIOHN. Pp6b. Upe35 XbHnn NICARTO, Jk akymyAToPna 6ataper 6yde IOBHCtIO 3apxKeHa, Tprn 3eHei CBiTIOIOIN 3HOBy rachYb.
BkaizbKa: LwBnAke 3apAxAaHH MoXAnBe AHe B TOMy BnTApKy, RkIo TeMtepaTypa aKymyAToPHOi 6aTaPei 3hAxOHTbcB Mekax DOIpyCTHMOro TeMtpaTyphoro DiIa3OHy 3apAxAHH, DnB. p03dI «TexHicHi daHi>.
AkymylaTOpHa 6aTape3apxkeHa
БeЗпepeрВе CBiTINH 3eIeHOrO CBiTIoAIOHOro iIhNkatopa 19 CBiDHTb IPo Te, lo aKymyAToPHa 6aTapeR IOBHiCTU 3apAuaCra.
DoatkoBOIpoTAROMIpi6A.2cekyHNDoAeTBcA 3ByKOBN CnHnA,JKN CBiDHTb IPO NOBHy 3apJXeHicThbakymyTOpHo6baTapei.
TicA yBOrO aKymyAToPHy bTaapeIO MOxHa BnHrTHi Opa3y J BnKOpNCTOByBaTH.
JaKuo akyMlyAToHa 6aTapeH He BCTpOMeHa, 6e3IepeBHe CBiIHn 3eAeHO rCBiTaoIOHO iHNkAtopa 19 CbiDHTb IPO Te, 10 WoTeNceAb BCTpOMeHn y po3EtKy i 3apAHn pInCTpi rotOBn Do pO6OTn.
Tempepatya akymyantopho6aapei Hxua 0°C a6o Bnca 45°C

БeЗПЕЕРВЕ CBITINHЯ
ЧЕРBOHOrO CBITAOIOAHORO
iДИКаТopa 18 CBIДЧТь ПЮТе,
Цо TemпepaТура akмУАтropНоI
6aTaapei 3HaXoDnTbCra 3a MExaMn TempepatyHOrO iaIa3oHy WBnKoTO 3apJxKaHHr O 0^ - 45^ TlBKn-Ho 6yde DoCRAHTN DOnTyCTHMn TEMpepatyni DiIa3oH 3apJxKeHH, 3apADHn IIpNCtpi ABToMaTHNO IpeKeAIOHTbCn Ha WBnKe 3apJxKaHH.
JaKIO TeMIIePaIyapaKMyAITOpHO6aTapei 3HAXOHTbCra 3a MeJAMN DOnYCTHMOrO DA 3apXKaHHiaIaTaoHy, PnB BCTPOMAAHHI aKMyAITOpHO6aTapei B 3apRAnHn PnIcTpi 3aToprAeTBcYepBOHn CbitAoID 6aTapei.
3apAxAHHHe 3aiiChIOeTbcA
Itpn iHux HeoAkaX 33apJxKaHHaM MHae cepBoHn CBiTaoioHDn IHdkatop 18.
Пюес зардханг He може розпочся iЗардханг akумларtophoбатapei hemokxИBE(ДИВ.«Пошук Нecрпавностe).
Bka3iBkn 0oDo 3apxKaHHA
При постийнх уклax 3арджання a60 taKnx,
ио 6e3перетрьноTOВТОюТьс OДИN 3a OДИМ
deКьka pa3iB, 3apdHn Ппстг може
harpiTSC. OДнak се He He he6e3пчнm i He
cBi4ЧТь по ТхнiчHy HeCпрabHicTb 3apdHOrO
ПрСТpoH.
3aHaTTo KOPOTKa TpHbAicThpo60TN PICAR 3apJxAHn CBiDuHTb IPO Te, IIO aKymyAITOp BnuepTnab Ce6e i Noro Tpe6a POMiHTn.
OxOAnDKeHnAkyMnyTOpHoI 6aTapei (Active Air Cooling)
B6ydoBaHe B 3apnHn TpncTpi ynpaBInn HBeHTnAToPc C1kkye 3a TempepaTpoIO BCTpOMLeHOi akymyAToPnoi 6aTaapei. JKuo TempepaTypa akymyAToPnoi 6batapei Tepe6iBwye 30^ ,akymyAToPna 6ataper
OXOLOXKYeTbCBeHTNIArTOPOM DO OINTMaIbHOI TEMIIepaTyPi 3apJxKaHHy. YBIMKHyTNI BEHTNIArTOP CTBOPIOE IyM.
JaKIO BeHTNIArTop He BMnKaEtbcra, 3e 3HaunTb, 10 TeMtnepaTypa akymyAITropHOi 6aTaapei 3HaxoNDBCB OOTnMaIbHOMy dIaIa3OHi a6o BeHTNIArTop BnIwOB 3 IaMy. B TaKOMy pa3I TpNbAICIb 3apJxKaHHa kymyAITropHOi 6aTaapei 36iAbWeytcbra.
MOHTAX
He BHKOPHCTOByTe aKymaHTopHy 6aTapeo Ta/a60 po3'cNDyBaU cTpyM yO Tnx iip, pKn PpHaad He 6yde IOBHCtO 3i6paHn.
KoH6yTe pe03KaadaTH a6o cKaadaTH BepxHIO qaCTnHy pyKOaTKn, cIAkYte 3a TmM, uO6 He 3aTnCHyTHuyp XNBaeHH. He KHaTe pyKOaTKy.
MoTAtk pyKoRTKn A
BCTpOMITb HxHxu actHy pyKoTKn 6 B Ipepe6aueHi AaI cyBOrO OTBOpn Ta 3akpiITb II TBnHTamN DAn MetaLy.
Bka3iBka:BvCota BepxHbOJ yactHH pykoTkn 3 peryIIOeTbcra. MoHTyIte pykoTky B IIOLOXKeHHI a6o II.
PnKpyTb BepxHIO qactHy pyKoTKn 3a DOnlOMOrOIO rBHTIB i raNok-6apAHuNKiB 22 Do HXHhBoI qactHNI pyKoTKn 6.
Bka3iBka: He 3a6yAbTe 3akpiHnT uHyp Ha pykoarTu 3a DOnOMoTO OdaHnx Ka6eAhnx 3aTnCKauiB.
BcTpOMaHHa akymyAToPHoI 6aTaapei
10TnHITb BaxiB KPNKKn akymyANTOPHOI 6bataei23 Brpy TaPiHIMtB KPNKny akymyANTOPHOI 6bataei7.
BCTaBte akymyAToPHy 6batapeo 8 TaKIM uHOM, 106 BOHa yBiMla B 3auePiEHHN (IOnyETbCRA «KLaU»).
BCTaBTe po3'εΔHyBauchtpmy 24,якпokazHoHaMaIohky.YpeBHItbCByTOMy,io Bn BCTaBnIhno IpabHbHO.
量 RaKIO Bn He 6ydeTe Oda3y KOpncTyBaTnCra3OHOKOcApkoH, PpNBEdIb po3'EDHyBaCTpyMy 24 y pe3epBHe TIOLOXeHHr, kTOKa3aHO'Ha MaIIOHky.
3akpnTe KpnKy aKymaTOpHo 6aTapei7.
BnMaHHa akymyIHTopa
TIOIaHITb BaxkIb KpnIck aKymyAHTOPHOI 6bataei 23 Brpy Ta IIhIMtB KpnIky aKymyAHTOPHOI 6bataei 7.
BiKIAIOHTb po3'EDHyBaU cTpyMy 24 Ta IIpNBBeiTb Ioro y pe3epBHe IIOLOXKeHHJ.
ПOTЯгнITь Вадлб Кршкп akумларtophoI 6atapei 23 Brropy.
BnMiTb akymyIaTOPHy 6aTapeo 8.
36npaHHKoWNKaA TpaBn
Rotak 34/37 LI C
3'εΔHaIte BepxHIO uactHy KOUHKa Dλ TpaBN 3 HNKHbOIO, CTNCyBUn «R3NcKn » IIO KpaX. IouHaIte 33aDy i IpeCyBaITeCγ yIpeδ.
Rotak 43 LI D
3'εΔHaηTe 0nbDi ΠολOBnKn HnKhbOi yactHn KoUnKa Dλ TpaBn, CTncHyBùn «R3nKn» ΠO Kpαx. ΠoynHaŋte 33aDy i IpeceyBaɪTecə yIpeρd.
3'εΔHa'Te IIOLOBnK KooNka TpaBn.
MOHTaK/DeMOHTaK KOUHKA DA TpaBn E
PiHimItb DeepAeKTop 5 i TpMaIte NOro B cBomy PNOLOXeHHi, 06 BCTaBnTH a6O 3HrTH KOWIK DAn TpaBn 4.
JaKIO Bn He XOyete 36npaTH CkOweHy TpaBy, ra3oHOKOCAPKO MOxHa KOpNCTyBaTHcI 6e3 KOuHKa DnT TpaBN 4. Pn cybOMy DeΦLeKTOp 5 IOBHNen 6ytN OpyeHm DOH3y.
PeryAIOBaHHB BNCOTN CKOswyBaHHa TpaBN F
TepeA peryIIOBAHHAM BNCOTN CkOswBaHHa TpaBn 3yINHITbCRA, BiDnyCTITb BaxiAb i 3aueKaIte, POKM MOTOP He 3yINHHTCB. Picra BmKHeHHa MOTopa HOki ue PPOdoBxuyoTb o6epTaTncr i MOxytB PIn3BeCTN DO TOpaHeHb.
06epeXHO - He TopKaITeCra Do HOxa, 0o 06epTaCTbcra.
3HRAWNI KPNKy 25, RA TOKa3aHO Ha MaHOHKy, MOXHa 3MeHHTN BNCOTy CKOUByAHHr DO 20 MM.
Pn Bncoti ckowybaHH 20-30 MMCKopooyeTbca TpHbAicTb po6oTHaKymyATothropoi 6aTapei.
Ekcnnyataia
Touatok po60tn
Пицал ВИМКЕннглрпалу HOк iе DekeiIbka cekyHd o6eptaOTbcr.пepш hIX 3HOBy BMKATN pRnlaA,3aueKaJITe,TOKN MOTOP Ta HOxI He 3yINHArTcR.
He BMHKaHTe 3aHaTTo WbHAno TICAN BmHKaHHa.
Bkaibka:IooIepepyuHTn3micya, HATNCHITbHa pykoTky,IO6PiADHrtnpeepaHki KOeca.
3HOBy BCTaBTe po3'εdHyBaU CTpyMy 24.
BMnkaHn
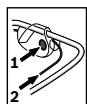
1 sec start
HaTnchIb Ha 3aio6ixkHy KhoIky 2 i TpImaIte II HaTnChyToI.
Пи捜нсіть Вахіль 1do pyкоRTК. BiДуNTСТь 3aNo6iЖHy KhONkY 2.
BkaibKa: TicAHaTnCKaHH Ha BaXiNb 1 MOTop 3aTnyCKaETbC3 He3HaUHOIO 3aTpMkoIO.
BMMKHeHH
BiDnyctiB BaxiNb 1.
YksoBnHe6yDeTeOpa3yKopncTyBaTnca ra3oHOKocapko,piPBeiTb po3'EdHyBaCtpMy 24 y pe3epBHe TIOLOXKeHHa,JK TOKa3aHOHa MaIIOHky.
Motop ra3oHOKocapKn 6bAHaHn raBmOM.
Lei 3axncn IIpncptpi rAaMyE HIX IIpoTgrom
dekiibkox CekyHd.
CKowyBaHHa H

3axnauTe akymyIaTOpHy 6aTaapeo BiD CTeKn, 3OKpeMa, HAp., BiD COHyaHnx TpOMeHIB, a TAKoX BiD BORHIO. PpHaad He Ipaioe Ipn TemtepaTypi HxKue 0^ a6o Bnue 45^!
PnI nToTpaIIaHHi Ha IpnIaAD pIpAmNX coHauHHx IpnOmeHb He 3aMuaTe akymyIaTOphy 6aTaapeIO B IpnIaDi.
Ппс кошуВанні TrpaВи B OOCБИВ BaxKnx yMOBax He TepeBaHTaXyIe MOTOp. ПпперазытackeHHi KInbKICTb 6OeptIB MOTopa 3MeHwetybCЯ I yWM BiD MOTOPa MIneTbCЯ.В TAKOMY pa3i 3yINHITbC, BiDnTyCITb BaxKIAb 1 i HAcTpOJe 6IaBwy BnCOtCy cKOswyBaHNHa. B ITOPnBHOMy BVNTaKaPy pIaNbHa 3dAThICtB (TPnbALICTb Po60TN aKymyAITropHoI 6Taapei) MoKe cKopOTnTncb i/a60 MoKe TIOsKOAnTncb IpnAAu AkymyAITopHa 6bTaapei.
3aB4Kn rpa6AAM 11 MoKHa CkOuByTu TpaBy 6An3bKO Do CTi I KytI. Ppi CkOuByBaHHi TpaBN ITO KpaIO CIAkYte 3a Tm, Ioo He 3aueHNTncr rpa6AAMN 11 3a IHwi IpeMetn.
Bka3iBkn 0oDo pO6OtN
IHNKaTOP 3apAxxeHocTi akymyAToTPHOI 6aTapei (ANB. rOAnBm MaIOHOK)
AkyMylTOp 8 6bHaHn iHdkaTOpom cTaHy akyMylTOpHOi 6aTapei 14, kKn IIOka3ye CTyPiHB 3apJxHeOcTi akyMylTOpa. IHdkaTOp cTaHy akyMylTOpHOi 6aTapei 14 cKlaDaetbcra 3 3 3eIeHNx CBITIoADioiB.
HaTnCHiB Ha KHOIIky iHAnKaTOpa cTaHy akymyAToTPOHi 6aTapei 13, 106 aKTHByBaTu iHAnKaIIO CTaHy akymyAToTPOHi 6aTapei 14. Ipi6JI. uepe3 5ceKYHd iHAnKaToP 3apJxKeHoCTi akymyAToTPOHi 6aTapei rache camOuHHo.
Ctynih3apJxKeHocTi MoKHa IpeBiprTaKoK i KOnn akymyAToP BnHrtn.
| СbvITLOAOHн
iHNKATOp | ЕMHICTb
akymyAЯTopa |
| СbvICHNY 3 зеленого
сbvITLOAOda | ≥2/3 |
| СbvICHNY 2 зеленого
сbvITLOAOda | ≥1/3 |
| СbvICHNY 1 зеленого
сbvITLOAOda | ≤1/3 |
| Мнагнny 1 зеленого
сbvITLOAOda | peЗерВ |
IaKIOPiHaNTNCKaHHHa KHOINy 13 Hi OAnH CBiTLOIOA He 3aTropEbCaykMylrTop BnioB 3 LaNy i Noro Tpeba POMiHrtn.
3 MIPkyBaHb TexhIKN 6e3IeKN OINTyBaTH CTaH 3apJxHeOCTi aKymyIaTOPa MOXHa IuIe IIpN 3yINHeHOMy pIIaI.
Piicac3apxKaHH WbNkO 3aTOpAIOBc0dHn3aODHM iIOTIM rachYb Tprn 3eAlehi CBiTaoiOn. AkymyAToPna 6bAtpera IOBHiCTo 3apxJKeHa, RkIo 6e3TepepBHO CBiTbCra Tprn 3eAlehi CBiTaoiOn.Ipn6L. Upe35 XbHnH NicA toro, Jk akymyAToPna 6bAtpera 6yde IOBHiCTo 3apxJKeHa, Tprn 3eAlehi CBiTaoiOn 3HOBy rachYb.
IHANKaTOP KOHTPOAIO 3a TeMTEpaTPOIO (ANB.ROAOBHmMaIOHOK)
UePBoHn CbITAOIO iHNKaTOpa KOHTPOIIO 3a TeMIIepaTyPOIO 15 cunHaJI3ye, JAKIo aKymyAIONTO
a6o eLekTPOHika PpHnAky (PpN BCTPOMHei
akymyAIONTOHn 6aTaapei) 3hAxOAdTBcN 3a
MexAMn OITINMaIbHOrTeMIIpeaTyPhoro
dIaIaNohy. B TaKOMy BVnAky PpHnAad He Ipaioe
a6o ppaIOE He Ha IOBHI NtOytXHoCTI.
KoHTpoIb 3a TeMIIepaTpyIO aKymyIHTopa
UeRBOHn CbITAOIOd 15 MInaE Ppi HaTNCHeHHI Ha KHOIIky 13 a6o Ha BmIKaU 1 (PpN BCTpOMLeHn AkyMIAJTOPHI 6aTaapei):akymyAHTOP3HaXOANTbC3aMeKAMN DOITUMORO DAn 3apAJaKaHHI DiIa3OHy po6ooi TempepaTyPi BID -10 ^ C Do +60 ^ C
При Temператури понад 70°C acумлготь ВIMнkaétьсдTOх пр,пOKи Temпература He BCTaHOВИТьсВ МжaxdoПУСТUMОДiaПа3OHy.
KoHTpoB 3a TempepaTypo eNeKTPOHIKn TpHaAdy
UePBoHn CbITAoIOA 156e3nepepeBHO CBITbCra PnHaTNCHeHHi Ha BmNKaU 1: Tempeparpa eKeTPOHIKn PpNlaMy MeHsa 3a 5^ a6o 6Ib7a 3a 75^
При Temперату рлona 90°C eелктуонika
Трпалду Вимнакaelсяdo ТИХ Пир, ПOKИ
Temперату的老 BCTaHOBtbcRь Мекх
ДOTусТMuRO DiIITa3OHy.
PiaaHa 3aTHICTb (tpHbAicTb po60tn akymyAToptHOi 6aTapei)
PiaaHa 3aTHiCTb (TpBaIcTb po60tn akyMaTropHo 6atapei) 3aLeXntb BiD JKOcTi ra3OHy, HApR. rCyToTn TpaBN, BOLOrN, DOBXHH TpaBN i BNCOTN CkOswyBaHn.
YacTe BmHKaHH Ta BmHKaHH IpIaMy IiA cacCKoUyBaHH TpaBn TakoX CKOpOuye piaIbHy 3dathicTb (TpBaIcTb po60tn akymyIaTOPHOI 6bTaapei).
LIO6 OINTMIm3yBaTn pi3aIbHy 3aTHiCTb (TpNbAICIb po60tn akymyAITOPHOI 6aTaapei), peKoMeHdEybcra cactiie KOcHTn ra3OH, 36iABWHn BNCOTy CkOswyBaHH Ta IpaUOBaTH 3 BiIDIOBIAHOI WBNDKICTIO.
Habehen HnKue PnKnaIPOka3ye B3aEMo3B'3OK MIX BnCOTOIO CkOswBaHHi p3aIbHOIO 3aATHiCTHO B 3aIeXHOCTi BiD CTyTneHO 3apJxHeOCTi akMyAITopHOi 6atapei.
BtBHTbCByTOMy,IO BVnPn6paNN BnKpyTknypeep3aYCKOM PnAaY.
Пелег мотжем He зmaшуг Te HIX Ta TBиHT HOxa.
Dorla3a akymyAToPO 6aTapeeIO
Ybara!PepeTexHcHMMo6cLyroBvBaHHa 60 ouHsEHHM BmKHiTb PnHaA, BiKaIOuHtB po3'cHyBauchtpymy,BhIMiTb akMyAToPHy 6atapeIo Ta 3HIMiTb KoWN KAA TpaBN.
BdraTe 3aBXn caoBi pykabuizi, JaKIO Bn 36npaTeceb opyDyBaTH a60 IpaUOBaTH nO6Am3y roctpnx Hoxib.
3BaKaIte Ha Taki BkazIBKn Ta 3axOdn, Ioo6 3a6e3neuHTn ONTImaBHe BkOpncTaHHaKymyAToPHOi 6atapei:
3axnauTe akyMnyAToP BiD BOIoRi BOAn.
36epiraTe akymyAHTop Imwe npi Tempepatyi BiD 0^ Do 45^ 3okpema, He 3aIIwaIte akymyAHTop BAIkTy B MaunHi.
- Ppi nIOTpaIIaHHi Ha PpIaAD PpIaMIX coHnHX IpOMeHIB He 3aIiShaTe akymyAToPHy 6aTapeIO B PpIaAdi.
OttmaHa TempeaTpya 36epiraHHn akyMaTOpHO6atapei ctaHObntb 5^
- Yac BiD yacy npouHuaTe BeHTnAuiHi OTBOpH aKymyAToPa M'RAKM, UcTm i CyXM TEH3AnKOM.
3aHaT0 KOpOTka TpNbBaIcTb po6Ot nIicA 3apJxKaHH CBiDuHTb Ipo Te, IIO aKymyAITop BnuepeTnBce6 i Noro Tpe6a NiomiHrtn.
Ticra po6otn/36epirahna
IpyHTOBHO IIPOUHCTIb IIpIIaAD 30BHI M'AKOIO UItouKOIO I raHcipKOIO. He BnKOpNCTOByTe BOy, PO3UnHHNKn Ta IpoIpyBaIbHi peuOBHN. BnDaIITb yci CKoTIINHn TpaBn I 3a6pydHEnb, OcO6ANBO KOLO BEHTNuaJiHNx OTBopIB 9.
TOKlaIb ra3oHokocapky Habik i Ipoounctitb 3ohy hoxa. CkoSeHy tpaBy, lo nOhaBnBaIacra, BnMItb WMaTKOM depeBHH a60 IaCTmacn.
BdraTe 3aBXn caoBi pykabuci, JaKIO Bn 36npaTeCb opyDyBaTH a60 IpaIIOBaTH nO6Am3y roctpnx HoxIB.
36epiraTe pnnAaB cyxomy Micu. He cTaBe iHnX ppeMetiB Ha pnnAaL. Lio6 He 3aImatu 6araTo Micu, IOBHicTIO CKAAiTb pykoTKn.
KoH 6yTe pe03KaadaTH a6o cKaadaTH BepxHIO qaCTnHy pyKOaTKN, cIAkyte 3a THM, iO6 He 3aTnCHyTN hyp XNBaeHH. He KnaTe pyKOaTKy.
TiiAvac36epirahHHI npHauy KoUHK DnTpaBn 3Himaetbcra.
Pnnaa
Hix
Rotak 34 LI. .F016800288
Rotak 37 LI. .F016800277
Rotak 43 LI. . F 016 800 278
Cepbicha Maictephn i o6cAyroBbHn KJIeHTiB
B cepbicihmi MaCtepHi Bn OTPMaTe BiIIOBiBaHa BaWi 3aHHTaHHCTOCOBHO pemOHy i TexHiuHoro 06cLyROByBaHHBaWoO IPOdykTy.
MaIOHKn B DeTaIaX i IHΦopMaIiO Ioo 3aIuaCTNH MoKHa 3HaTn 3a aDpecoIo:
KoHcybTaHTn Bosch 3 paAdicTIO DOIOTMOXyTB Bam npn 3aINTaHHx CTOCOBHO KyniBIA, 3aCTOCyBaHN i HaaIaOdKeHn IpoDyktIB i pnnlaADo HNX.
YkpaHa
Bou CepBic LcHtp EeKtpoiHCTpyMeHTiB ByI. KpaHra, 1, 02660, KnIB-60
TeA.:+38(044)5120375
TeA.:+38(044)5120446
TeA.:+38(044)5120591
ΦaKc: +38 (044) 5 12 04 46
E-Mail: service@bosch.com.ua
Aapeca PeriohaBnHex rapaTniHnx cepbichix MaNCTepeHb 3a3HaueHa B HaioHaBHomy rapaTniHOMy TaIoHi.
TpaHcnoptyBaHHA
AkymyIaTOp IpeBipEHH BiIDIOiHO IO iHCTpykuiO OH ST/SG/AC.10/11/peA.3, u. III, pIaP03dI 38.3.BiH Ma eefekTHBn 3axnct BiD BHyTpIHbOHaDHOPMaIbHO TnCKy i KOpOTKO 3aMnKaHH, a TAKoX BiD CTaTHUHO 3aMyIpi Da II pa3OBOrO HabaHTaKeHH i BiD He6e3NeuHoro 3BOPOTHORO CTPMy.
KilbkiCTe EKBiBaIeHTa IITIO, 10MiCtNtbcB AkyMylarTopi, MeHwa 3a BiIDIOHy rpaHnHy BELnHny.3 ieiI pInuHN aKymyAITop - aHI cam TIO co6i, aHI 6dyuH BcTpOMLeHm y PInuAd - He TiADRAe HauioHaBHM i MIXKaHApOdHM PPINICam 5oDo He6e3TeuHHx BaHTaxiB. ODAk IprnIN-CN 5oDo He6e3TeuHHx BaHTaxiB MoKyTB Ha6yTH uHHHOCTI II Prn TpaHCnOpTyBaHHi DeKiABKOx aKymyAITopIB. B Takomy pa3i MoKe CTaTH Heo6XiHm DOTPMyBaTHc TEBHnx YMOB (HaIP., CTOCBOH YoTakOBKn). BiIbIeTaBHiWy IHΦOpMaIIO MOKHa OTPMaTHn 3 TaM'YrTKn aHrAiCbKOHO MOBOIO B lHTepHeTI 3a Tako o aDpecoIo:
http://purchasing.bosch.com/en/start/ Allgemeines/Download/index.htm.
BndaIeHHa
EeKToPiuIaI, IpuIaIaIy I yIaKOBky Tpe6a 3aBAHT Ha eKOIoIcHOn YIcTsy IOBTOPhy Ipepeo6ky.
Lambda KpiaH EC:
He BnKaaIte eAekTPOIIpHAnB TIO6yTOBe CmITTIA
BIDIOIHO DO EBPONIEcboi DIPeKTHBN 2002/96/EG IPO BIDPauCboBaHi eAEKTPo-i eAEKTPoHHI PnIIaH i II PepeTBOpEHN B
HaioHaBHomy 3aKoHOaBCTBi eKeKtpOnpHaaN,
IO BnIbIa 3 BxHBaHHra, IOBbHHi 3DaBaTHcA
OKpeMo i yTHaI3yBaTHcRA ekOAnoriuHo YnCTM
CtocO6om.
Akyumyantopn/6atapeien:

Aitiebo-iohhi:
BybIaacka,3BaKaIteHa Bka3iBKNBpO3diI «TpaHcnpToYBaHHA, cTOp.286.
He BnKaJaTe aKymyAToPn/6aTapeeKn B nObyTOBe CmITT, He KnaTe iX y BOrOhb a6o BDOy. AkymyAToPn/6aTapeeKn TOBHHI 3daBATNC OKpEm Ha IIOBToPHy Ipepeo6ky a6o BnDaJI-THcN IHWM EKOLOIQUHO uHCTM CNOCo6OM.
Lambda KpaH EC:
BiIIOBIHO do AnpeKTHBn 91/157/EWG IIOsKOJKeH i a6o BiIpaIbOBAhi akymaTOpn/6aTapeiKN IOBHHI 3aBaTncn Ha IOBTOpy Ipepeo6ky.
MOXANBI 3MiHn.
Bosch Lawn and Garden Ltd., PT-LG/EAE, Stowmarket, Suffolk IP14 1EY, England
C 2008
Dr. Egbert Schneider Senior Vice President Engineering
Dr. Eckerhard Strötgen
Head of Product Certification


17.09.2008, Robert Bosch GmbH, Power Tools Division D-70745 Leinfelden-Echterdingen
Montare
Pentru siguranta dumneavoastr
Accumulator incarcat
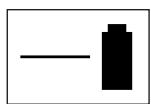
Bosch Service Center
Str. Horia Macelariu Nr. 30-34,
013937 Bucuresti
Tel. Service scule electrice: +40 (021) 4 05 75 40
Fax: +40 (021) 405 7566
E-Mail: infoBSC@ro.bosch.com
Tel. Consultanta tehnica: +40 (021) 4 05 75 39
Fax:+40(021)4057566
E-Mail: infoBSC@ro.bosch.com
www.bosch-romania.ro
Transport
Accumulatorul este testat conform manualului UN ST/SG/AC.10/11/Rev.3 fascicula III, subparagraful 38.3. El beneficiza de o protectie deficienta la suprapresiune interna si scurtcircuitare fiind deasemeni prevazut cu dispositive de protectie care impiedica ruperea forata si curentul invers periculos.
He n3IIOVABaiTe HnH He n3IaRaTe eAEKTPoINHCTpyMeHTa Ha DbJd.
TpeDn3BaIte ce ot TOKOB yap.

ApbXte 3axpaHbAunna Ka6eHa 6e3oTachO pa3ctOaHne OT HOKobTe.
N3IPOA3BaIte 3aPAnHOTO yCTpOnCTBO CAMO B CyXn TOMeUeHHJ.
3apAnHOTo yCTpoCTBOe cBOpBXeHO C npEa3eH TpaHCΦopMaTOp.

06cAyxBaHe
HeIIO3BOIABaIte B HnKaKbC Lyuayc MaunHaTa Da pa60Tt Deua Hn Hnca, He3aIO3HaTH C TOBa pbKOBOCTBO 3a ekCIIoAtaunr. Bb3MOxHO eBb3pactTa Ha pa60TeUHTe C MaunHaTa Da e OrpaHueHa OT HaUNOHaHOTo 3aKOHODaTeAChTO. Korato He N3IOA3BaTe MaunHaTa, Ra cxpaHraBaiTe TaKa, Ye Da e HeDOCTbTnHa 3a Deua.
To3n eKeTPOHnCTpymeHT He e PpeHa3NaueH Da 6bde IIOA3BaH OT Iua (BkAUHnTeHHO Dea) C TcNHXuHH, CEH3OpHN H NdUyBeHn OrpaHueHn, KaKTO n OT Iua 6e3 DOCTaTbueH ONIT H/INI 3HaHH, OCBeH B CAYuHTE, B KOnTO Te Ca IoD HeIOCpeADCTBeHH KOHTPOH Ha OTROBOPHO 3a 6e3OtAnCHOCTTa H M Iua Hn Ce 6bYabat OT Hero KaK Da IIOA3BaT eKeTPOHnCTpymeHTa. Deeta Tp8Ba DA 6bDaT CLeDeEHn Da He INrpaT C eEKeTPOHnCTpymeHTa.
B HnKaKbB CnyaH He KocTe,doKaTo B HeIocPeAeCTBeHa 6An3OcT Ce HAMpaT pyrH Anca,Oco6eHO Dea HN DOMaWHJXIBOTHN.
OTROBOpEN 3a TpaBMn Ha ApyrN IuIa IuIa 3a MaTePnaIaH N IeTn e pa6OteuIyT C TpeBOKocauKaTa.
He n3IIOIABaIte MaunHata,doKaTO cTe 6ocn HnC OTBOpEHn CaHaN. BnHaR pa6oTe CbC 3ApaBN, 3aTBopeHn ObyKn NbAbr TaHTaON.
IpnKAnBOIpoBepBaTeIpeBaPHTeHOb6pa6oTbHaHATAIIoUHOTcPaHBAIKeKaMbHN,IpbuKN,KOKaUNnDpyrNyXJNTeAa.
BnHaRnIpeAn yIpOte6a IpoBepraBaHTe,daHn HoxOBeTe,3actoTIOpRABaunTe BnHTObe IN pexKeuNT MoyA He ca IOBpeDeHN NnN 3HOceHN.3aMeHnTe N3HOceHN NnN IOBpeEHN HOXOBe IN 3actoTIOpRAaUN BnHTObE BnHaRn BV KOMIIeKt,3a Da N36eHHeTe 6neHe IIO BpeMe Ha paObaTa.
Kocete BnHaHn Ha DHeBHa CBeTnHa Hn Ipiu MHOrO Do6pO N3KyCTBeHo OCBeTaHne.
IIO Bb3MOXHOCT He pa6oTeC MaunHaTa, KOraTO TpeBaTa e BAnxHa.
Pa6oTeTe BnHaH CbC CnOKoEH XoA, HNKoRa He xoAte 6bp30.
Hnkora He pa6oTeTe c MaunHaTa, aKo HMa TOBpeDeHN IpeDnA3HN CbOpBxKeHry, KaTaNn 6e eAleMeHTne 3a CNyprHoc7 Kato IpeDnA3HaTn PAactnHa Nn KOWa 3a TpeBa.
Pa6oTaTtno HepaBeH TepeH MoKe Da 6bDe OTTaHa.
HeKoceteOc06eHO CtpbMHCNCKAOHOBe.
HaCKLOHOBe HIMIINPNI BIAJNATpeBa BHIMaBAHTe BUNHaIg Da CTcCTbTBATe CTA6HNO.
ItoHaKIoHOHeN TepeH KocTe BnHaRn HAppeHo HaHaKLoHa, HNKOra HaDoLy HArope.
IpnO6pbuHaHaTOcOKaTaHaDbIXKeHHe IIOCKHOHOBe 6bTeOc6eHO BHNMaTeAHH.
Korato Ce dBHXHTe Ha3aH N TcAHTe MaunHaTa 6bTeOc6eHO BHNMaTeAHN.
При Косец Виаги 6утATE Maшнота
Нпгд, НКога Heя Дрпайte KBМ TАLOTO сN.
Korato IIpiIpiHacnHe Tp6Ba DaHaKaLoHnTe MaunHaTa, KOrato IIpeKocBaTe 3oHn, He3acaedeHN C TpeBa I Korato TpaHCIOPTnPate MaunHaTa KbM IOT 3oHaTa, KOrTO IIe KOCHTe HoxOBete Tp6Ba Da ca HEIOdBHXKn.
He haklahaTe MaunHaTa Pn BkUoyBaHe Ha eIeKtPOdBnraTeA,OCBeH aKO TOBa He e HEO6XoDmO BCLeCTBne HAunHTo Ha MHOrO BnCoka TpeBa. B TaKbB CnyaH IOBdHHTe OTdaJeHuHaTcTpaHa Ha MaunHaTa, KaTO HaTNCHe DpbKkTaHaDoAly, n To cAmO KOlKOT e HEO6XoDmO. Korato TyCKaTe MaunHaTa, RaDpbXte 3ApaBO CDbete pbue.
Bkluoyete eIeKtponHCTpyMeHTa, KaKTo e OITncaHO BpbKOBOdCTBOTo 3a ekTlOaTaun, KaTO BHMmAbate KpaKaTa Bn da ca Ha 6e30NaCHO pa3cTOrHne OT BbPTaUnte ce eAeMeHTN.
He IIOCTaBnTe pBcTe Hn KpaKaTa Cn B 6An3OCT Hn IOA BbPTaUN Ce AeMeENTn.
Korato pa6oTnte c MaunHaTa, CToIte Ha pa3CTOJHHe OT 3OHATA Ha N3XBpAHe Ha OTIIaDbuNTe.
HnKora He IOBAnrAte HnI pHeacrTe MaunHaTa Pn paOteu eEKeTPODaBnraTeA.
CbIeCTByBa OITaCHOCT OT IOXap H
ECKTIAO3H.
IopAdbpKaaIte 3apAHOto yctpoiCTBO
CbIeCTByBa OITaCHOCT OT Bb3HnKBAHe
Ha TOKOB Ydap BCaEdCTBHe Ha 3aMbpcraBaHe
Ha 3apAHOTo yCTpoiCTBO.
BnHaHn Ipeayn ynoIope6a npoBepaBaIte
3apdHOTO yctpoiCTBO,3axpaHbuaaia
6eI n eIeIeA. He H3IOaBaiTe 3apdHOT
yctpoCTBO B cLuya, ye OTKpneTe IOBpeAn.
He OTBaPraIte 3apAHDTo yCTpoCTBO, OCTa
Bete peMOHTIe Da 6bDaT N3BbPwBaHn
cAmO OT KBaHΦHπρaHn TEXHπu H C O
TINHAAHn pe3epBn YacTH. TOpBpeNHa
3apdHOTyUcTPOCTBO,3axpaHbauNka6eN
HANIeTcEaYBEaHaBaT ONaCHOCTTaOT
TOKOB yap.
He nocTABaIte 3apAHOTo ycTPOiCTBO Ha
AeCHO3aIIaIIMMa IOBbpxHOCT (HaTp. XapTN
TEKCTHn H dp. I) Hn B Aecho3aTaNMa
cpea. CbIeCTByBa OTaCHOCT OT Bb3HnKBAHe
Ha TIOXap BCIAECTBHe Ha HApRABaHcTo Ha
yctpoiCTBOTO TO BpeMe Ha 3apeKDaHe.
N3TOn3BaIte cAmo TpeBnEHNTe 3a To3NeleKTKpOHNCTpyMeHt AkyMylaTopHn
6aTepeHH. H3TPOAN3BaHeTo Ha dpyrH
akymylaTopn6aTeprn MoKe Da IpeDn3BnKa
TpyoBn 3IoIOyKn n/Hnn Toxap.
Korato akymyataophata 6aTepe n e H3BbH
eNeKtpOnHCTpyMeHTa,ЯApbXTe Ha
6e3oTacHO pa3cToHHe ot KlaMepn,
MOHETN, KAIIOUOBE, TINPOHN, BUNTOBE HAN
dpyrMaKmTaAHN TpeDMETn, KONTO
MOraT Da IIpeAn3BnKAT KbCO CbeAnHeHne.
TIOcAeCTBnraTAtO KbCO CbeAHHeHne MeXdY
KAEMHTe Ha akMYaTOpHata 6aTeDnM ORat
aδbαdHTapaHЯBaHnHnHnNoXap.
Pn HnPabHnO n3nOaBaHe oT aKyma
Topha 6aTePnI OT HeI MoXe Da I3Teue
eAekTpoANT. 368raBte KOHTaKtac Hero.
Ako BbIpeKToBaHa KoxaTa Bn IotaDne
eAektpoANT, H3IIaKHeTe MrcTOTO 6bHaO C
B ODa. Ako eAeKtpoAMT IOTaDHe B OuHTe Bn
He3a6abHO ce 06bphete 3a TOMOu KbM
OeHekap. EKeKToPAnTbT MoXe Da
Ipei3BnKa n3rapHnHa KOKaTa.
He otBapnTe akymyAatopHaTa 6aTePn.
CbueCTByBa ONaCHOCT OT Bb3HnKBaHe Ha
KbCO CbeHHeHne.
PpeIa3BaIe aKymyIaTOPHaTa 6aTePnA ot
TpeprBaHe, BkA. Hnppmep ot Tpoa
bAXKHTeHbVB3dEChTBHe Ha cAByeBHTe
AbyH MAN OTOrbH. CbIeCTByBa ONaCHOCTOT
EKCPTTAO3H.
BHHMaBaIe Da He TpeAn3BnKaTe Kbco
CbeHHeHne MeKdY KLeMnTe Ha akymyA
Tophata 6atepna. CbuectByBa OtnaCHOCT OT
EKCTTIAO3HA.
PnTOBpeKdaHe HneTpbaHHa ekTlOa
taunrO takymylatopnata 6atepna MoT a
ce OTdAeTnapn. TpoBetpe TomeueHne
TO H, aKo CE TOnyBCTBaTe Hepa3NoLoXKeHN,
Ttbpcte Aekapca TOMOu. Napte morat
da pa3pa3HrT dNxAteHnTe PbTuHa.
- PteIpa3BaIe aKymyAtoPnHaTa 6aTePnAOT
BlaRa N BOda.
CbXpaHbAaTe aKymaTopHaTa 6aTePnA
cMoB TEmTepaTpHnIaIa3OH oT 0 °Cdo
45 °C. HAp. He octaBaiTe akymyAaTophata
6aTePnIpe3AANTOBAbTOMoBnHa cIbHc.
- IepnoDnHNO IOuNCTBaIte BeHTnlaaHOnHHnte OTBOPHa aKymyIaTOPHaTa 6aTePnca MeKa Yncta n Cyxa YeTka.
Функционано описнee

ПючeteВьнмателно BCnHKn yka3aHa. HeCпаЗBaHeto Ha npBveDEHnTe TО-DoIy yKa3aHnMoKte Da DoBeDe Do TOKOB yApap, ToXkap H/In TeXkN TpaBMn.
Ппдназнauthеные насыктуонстур金融机构
EeKtpOnHCTpyMeHtB tpeHa3Haueh 3a KOceHe Ha TpeBa B DOMaShn YcObNia.
OKOMTAEKTOBka
BHHMaTeHNO 3BaDeTe eNeKTPoHnHcTpymeHa OTOIaKOBKaTa H PpOBepTe DaAN OKOMTIAEKTOBKaTa My e TbHA:
- RaHcKa TpeBOKocaKc C AbroBa pkoXBaTka
-1DolHa yacHT Ha dpbKkata
-2BnHTa
- 2 KpHuaTn RaKn
- 2 BnHTObe 3a lamapHa
2ПоловиниHaКошаЗaТревa (Rotak34/37Ll)
3Пловини на Коша за тpeBa (Rotak 43 Ll)
- 2 ckobn 3a ka6eI
3apraHNO yctpOcTBO
-Ппекьсван ha ekeTpnueckaTа Верпгa
- AkymyλatopHa 6aTepeRy/akymyλatopHn 6aTepeRn*
- PbkoBOdCTBO 3a ekTnAoTaunr
\*B3aBCHMOCT OT MOeLa
Ako HMa HnTcBaun Hn TOBpeHEn eIeMeHTn, Moa, o6bpHeTe ce KbM Baun TaProBeu.
BHaTbIbHO CgIo6eHO CbCToHHe MaunHaTa TeKu Ipi6A.12,8-13,8 kg.Ipn Heo6xOaMocT IOTbPcTe POMOi, 3a Da N3BaDHTe MaunHaTa OTaKOBKaTa.
Korato n3BaKaTe MaunHaTa OT OtnaKOBKaTa HnIy IpeHacrTe Do AnBaDaTa, BHmAbaYte 3a OCTpnte HOXOBe.
H3o6pa3eHH eAeMeHTn
HomepupaheTo Ha n3o6pa3eHnTe eIeMeHTn Ce OTHacrdo n3o6paXeHHeTo Ha eIeKtpOnHCTpyMeHTa Ha cTpaHnCata C fHypnte.
1 AOCT 3a BKAIOUBaHe
2Ipea3eH6ytoh
3 Togha yact Ha dpbkkkata
4Kou3aTpeBa
5 PtpaHa TnHa
6 OHa YacT Ha pbKOxBaTkata
7 KaTak Ha akymyMaToPHaTa 6aTePnIa
8 AkymlyaTopHa 6aTePnA
9 BeHTnlaaioHnn OTBOpN
10 Konega
11 rpe6eHH
12 Aoc3a peryInpaHe Ha BncoHnHa np3aHe
13 Bytoh 3a Ioka3BaHe Ha CTeIeHTa Ha 3apeHocT Ha aKymlaatOpHaTa 6aTePn
14 CBeTnHHeHnDnKaTOp 3a CbCToRHeTo Ha aKymyAtoPnHaTa 6aTepe
15 CBeToaIOo3aTeMtpaTyPnH KoHTpoA
16 THe3do 3a 3apeKdAHe
17 3apAHO yCTpOHTBO
18 UcpBcBToaHoHa 3apAHOyUCTPOICTBO
19 3eIeH CBeTOAnOHa 3aPAnHO yCTPOIcTBO
20 ⅡeπceHa3aprHTo ycTpoiCTBO**
21 CepneH Homep
** B 3aBCHMOCT OT ḠbpxKaBaTa, B KÖTOR CE DoctabRa
H3o6pa3eHNTe Ha ΦhrypHTe H OTHcaHNTe DoTbλHNTeAH NπPCTOco6λeHn He Ca BKλIOUeHN B CTAHaApT
HaTa OKOMTλEKTOBKa H a ypeAa. N3eρTAteH eN CTNcBk
Ha DOTTaHNTeAH NT EπPCTOco6λeHn MÖXeTe Da
HAMEPTE CbOTBeTHO B KATAλOra H N 3a DOTTaHNTeAH NπPCTOco6λeHn.
TexHHueckn daHHN
| Градинска Травокосоча | Rotak 34 LI | Rotak 37 LI | Rotak 43 LI |
| Каразожен homep | 3 600 H81 ... | 3 600 H81 ... | 3 600 H81 ... |
| Широчина на hochа | cm | 34 | 37 |
| Височина на рязANE | mm | 20-70 | 20-70 |
| Овem, кош за Траве | I | 40 | 40 |
| Маса (масc.) | kg | 12,8 | 13,0 |
| Серень homep | Вижто серийниnomер 21 (табелka на[elektroponhaltусан'tа) на машинатa |
| Актуларога батерия | Li-lon | Li-lon | Li-lon |
| Каразожен homep | 2 607 336 107 | 2 607 336 107 | 2 607 336 107 |
| Номинално напгөөөнne | V | 36 | 36 |
| Вреши за зарөдаме (припaltыно пазendeнаakтуларогабатерия) | min | 60 | 60 |
| Бrosи на кletкиcope вakтуларогабатерия | 20 | 20 | 20 |
| Зэрдно устюстvo | AL 3640 CVProfessional | AL 3640 CVProfessional | AL 3640 CVProfessional |
| Каразожен homep | 2 607 225 ... | 2 607 225 ... | 2 607 225 ... |
| Номинално напгөөөнne | V | 36 | 36 |
| Зэрдөн тok | A | 4,0 | 4,0 |
| Довүст'm Temпөратyperдамалдән на зархдае | °C | 0-45 | 0-45 |
| Маса сөлалсnoEPTA-Procedure 01/2003 | kg | 1,0 | 1,0 |
| Клас на зашита | ☐/II | ☐/II | ☐/II |
HnΦopMaun 3a n3λbUbaH wum nBn6paunn
Rotak 34/37 LI
CTOHOCTHe ca OIpeAeHEn CbIaCHO 2000/14/EO (BncoUHa 1,60 m,OTcToHne 1,0m) n EN ISO 5349.
PabHnIeToAHa rHeepnPaHnIOT MaunHnTa 7yM
O6nKHOBeHo e: paBnIe Ha 3BykoBTO HaIraHaHe
81 dB(A); rapaHTnpaHTo paBnIe Ha
3BykoBaTa MoHocTe IIO-MaKo OT 90 dB(A).
HeOppeAeHocT K=0.74 dB.
ПпебаанITE на рьцete Вибрацио obнковенocа пс-саби ot 2,5 m/s².
Rotak 43 LI
CtoHocHTe ca oTpeAeHn CbIaCHO 2000/14/EO (BncoUHa 1,60 m, oTcToHne 1,0m) n EN ISO 5349.
Ouehenoto paBnIe A Ha reHepnpaHn OTeleKtponHCTpymEnTa yM obNkHObeHo e: paBnIe Ha 3ByKObTO haIraHe 81 dB(A); rapHaTpnpaHaT a MoUHoc T Ha 3Byka e IIO-MaKaOT 91 dB(A). HeonpeDeAeHoc T K =0.74 dB.
ПпебаанITE на рьцete Вибрациообнковецca пс-сабиот 2,5 m/s².
Dr. Egbert Schneider Senior Vice President Engineering
Dr. Eckerhard Strötgen
Head of Product Certification


17.09.2008, Robert Bosch GmbH, Power Tools Division D-70745 Leinfelden-Echterdingen
Mоntиранe
3a Bawaata cnrypnoct
BHHMaHHe!IpeAn Da H3BbPbBaTe texHnuecko 6cbayXBAhe nn da TOnHCTBaTe eKTPoHNcTpyMeNTa,To cPiPeTe, n3KluOte IpeKbcBaVa Ha eEeKtpuYeCKaTa Bepnra N3BaDeTe aKyMyLaTopHaTa 6aTePN. CbIoTO BaXn n aKO 3axpaHbAunrKa6eN 6bDe POBpeDeH, Ipep3aHnn ce ycye.
CaeH3KIAOyBaHeTo Ha MaunHaTa HoxOBeTe IPOaBxAkBaT Da Ce BbPTAT HkoAko CeKyHAn To Hnepn.
BHHMaHHe-He DoIHpAaTe BbPTraunCe HOX.
3apekdahe Ha akymylaTopHaTa 6aTePnA
CnTa3BaIte H3NcKBaHnra 3a 3axpaHbAio
HaIpxeHenHe: HaIpxeHenTo Ha 3axpaHbAian
H3TOUHNK Tp6Ba Da CbBtAa C daHHnte,
H3TINCaHN Ha Ta6eKaTA Ha eEKeTPOINHCTpyMeHTa.
ELeKTPoINHCTpyMeHTn, 6o3HaueHN c 230 V,
MOrat Da 6bDat 3axpaHbAHn n c 220 V/240 V.
I3TIO3BaIte cMo BkIoUeHToB OKOMIIeKTOBkaTa 3apAHO yCTpoHCTBO.CaMo To e C IapaMeTpN, IOXoAJn 3a I3IOIABaHaTa IIpn BaIIN eEKeTPOHNCTpymENT AHTHeBO-IOHHa akymyIaTopHa 6aTePn.
AkyMaIaTOPHaTa 6aTepeHIMa TeMIIepaTpeH KOHTPO, KOITIO3BOIABa 3apeXdaHeTO caMO B dHaIa3OHa MeKdy O 0^ n 45^. TaKa ce yBeIuHaBa DbIroTpaiHoCTTa Ha aKyMaIaTOPHaTa 6aTepeH.
YtBaHe: AkymylatopHaTa 6aTePnCe DoCTaBvacTnUHO 3apeDeHa. 3a Da DCtHrHeTe PbHnKaIpaNTeT Ha akymylatopHaTa 6aTePn, IpeiNbPbOTO N3IOAmBAHe r 3apeTe DOKpaB 3apADHO YcTPOINCTBO.
ANTeBO-NOHHaTakymyIaTOPHa6aTePnMoKe Da 6bDe3apeKdHaNIOBCaKO BpeMe,6e3TOBa Da CbKpaUaBA DbIroTpaHNoCTTa N.IpeKbcBaHe Ha 3apeKdaHeTo CbIo He N BpeiN.
AkymylaTohpHa7 6aTepeHn 3apeHeHa
HenpebchaToTO CBeteHe Ha 3eHnra CBetoAnoA 19
Ioka3Ba,ye akymlyaTopHaTa 6aTePnE e 3apeDena HaTbHNo.
BdoIbIaHHeN B IpoIbIXeHHe Ha IIpIbI.2 cekyHAn CE yBa 3ByKOB CnIHHa, KOITo Yka3Ba IIbHOTaapexKaDaHe Ha aKyMaTaOpHaTa 6aTePna.
Beda TOba akymyata 6aTepe MoKe Da 6bDe n3BaedeHa, 3a Da 6bDe IOn3BaHa.
CBeTeHeTo C HeIpeKbChaTa CBeTAnHa Ha 3eHenHcBetoAoHoa19, KOraTO HMa IIOCTaBeHa akymaTopHa 6aTePnA, POKa3Ba, Ye IeNTceIbT e BkIoUeH n 3apraHOTo yCTpoCTBO e rTOBO 3a pa6ota.
Tempepatpata Ha akymylaTophata 6aTepehna ITOA 0^ HnHa4 45^
HnpeKbchata CBetHa Ha uepBeHHa CBtoHOa 18
IOKa3Ba, Ye TeMnepaTypata Ha akymyAtoPnHaTa 6aTepe n e
I3BbH dHaIIa3OHa 3a 6bp30 3apeKdaHe OTO 0^ - 45^. BeHaHa, cAeKaTo
TeMTepaTypaHa 6aTepeHraTIpOaHe B To3n INHTepBaA,3apAnHOTo yCTpoiCTBO Ce IpeBkIoUBa Ha 6bP3o 3apeKdaHe.
Ako Tempepatypata Ha akymylaTophata 6aTeprn e N3BbN DOPTYCTHMNA HnAIIa3OH 3a 3apeKdahe, IpiNIOCTaBHeTO B 3aprHOTO yCTpOiCTBO CBETBa UepBeHHa CBETOADHa akymylaTophata 6aTeprn.
He e Bb3MOxHo 3apexKahe

Ako Ima Dpyra IpruHa IpoueCbT Ha 3apeXdaHe Da He MoXe Da 3aIOUHe, TOBa Ce Yka3Ba Upe3 MtraHe Ha uePBENH CBETOHOd 18.
Пюцьт ha заразждаhe He може DA 6bde CTapТиран И заразжданTo Ha akymуларонata 6aTeРпЯ He e Bb3MoЖHo (ВИЖTe «ОТстраняВаHe Na DeФЕКТN»).
Yka3aHn3a3apeKdaHe
При Heпгекьсато 3apexДанe, респ. При
неколковратно последовateлho 3apexДанe Ha
akymlyaTopn6bTeprn6be3прксванe
Зардно усточь може д ce harpee. Това
e HopMaNo И Нуka3Ba 3a НannuHeTo Ha
TEXHnueckNdeФeКТHa 3apdHOTO ystpoCTBO.
CbueCTBeHO cbKpaTeHO BpeMe 3a pa60Ta cIeA3apeXdaHe IIOKa3Ba, ye akymyAtopHata 6aTePnE en3xa6eHa n Tp8Ba Da 6bDe 3aMeHena.
OxλaKaHa ha akymyLaTophata 6aTeprHa (Active Air Cooling - AkTHBHO Bb3AuyHooXaKaHa)
BrpadeHaTa BakymaToPnHaTa 6aTeepn CnCTema3a Bb3dyuHo OXaXaDaHe CLEdN TeMtpaTpya T.AKO TeMtpaTpya Ha akymaToPnHaTa 6aTeepnHaDbuHn 30 ^ C ,ce BkIoUyBa BeHTnAToP, KOITOrOxlaJDo OITnMaHa 3a 3apeKdaHeTeMtpaTpa. BkIoUeHnT BeHTnAToPreHepnpca Caa6 yum.
Ako BeHTnlaTopbT He pa60TH, TemtepaTypaHa Ha akymlaTophata 6aTeprn E B OTTMaHnna Hn 3a 3apeXdaHe HnBHTnlaTopbTe IOBpeDeH. B IocLeHncaUyai BpeMeTo 3a 3apeXdaHe Ha akymlaTophata 6aTeprn ce yDbXkaBa.
MOnTnpaHe
Tocabete akymyataopnata 6atepna H/nn Ipekbcbaca Ha eAeKtpnueckata Bepna eBA cEA KaTO eAeKtpoHcTpymeHTbTe crAo6en HATbAHO.
Pn pa3rI06BaHe n crIo6BaHe Ha roPHaTn DOAnHata YacT Na DpbXkata BHNMaBaiTe Da He IOBpeIne 3axpaHbAun Ka6eA. He dOnyckaIte pbKoxBatkata da Taada.
MoHTnpaHe Ha pbKOXBaTKaTa A
1 2 IocTaBeTe DoHaTa qact Ha pbKoXBaTkata6 B IIpeBnDEHnTe 3a ueTa OTbOpnЯ 3aCTOToPeTe C BNtOBeTe 3a lamapnHa.
YtBaHe: FopHaTa yacT ha pbkoXBaTkata 3 MoKe Da ce peRyInpa IIO BnCOuHnA. MoHTnpaTe R B IIO3nIur I nI I.
MoHTnpaTe rOpHaTa yAcT Ha pbKoXbTkata 3 C TOMOuTa Ha BnHTOBete N KpHuaTHe raKn 22 KbM DOHaTa UaHra 6.
YtBtBaHe: 3axBaHTe 3axpaHbAunЯ Ka6eI KbM pBkoXBaTKaTa C BkAnOyeHnTe B OKOMIIeKTOBkTa cKo6n.
ToctabaHHe Ha akymlyaTophata 6aTepna
1 3aBpTnTe HaRope loCTa 3a KaTnKaHa akymlaTophata 6aTepey 23 n IOBAnHete kaTnA 7.
TocTaBeTe akymyIaTOPHaT6aTePn8, TaKa Ye Da Ce Uye OTeTANBO IpeUpaKBaHe (KAnK).
AaTe KOHTaKT C PpeKbCBAca 3a
eNEKTPnueckata Bepnra 24, KaKTo e TOKa3aHo Ha
fHypata. YBepTe ce, ue PpeKbCBAut E B
TpaBnHaTa PO3nua.
Korato He n3IIOA3BaTe HeIOCPeAcCTBeHO TpeBOKOCAkata, IpeKbCBAte KOHTaKTa Upe3 IpeKbCBAva Ha eAEKTPnueckaTa Bepnra 24, KaTO rO IOCTaBnTE B I03Nnra 3a IapKnpaHe.
3aTbOpTe KaIaKa Ha aKymlaatOpHa7 6aTePn7.
H3BaXdaHe Ha akymyIaTOPhata 6atepna
I3bPnAte Haoge loCTa 3a KaTaka Ha aKyMaIatopHata 6aTepeRn 23 nIOBAnrHeTe KaTaka 7.
Ocbo6oDeTe IpeKbCBAu3a eIeKtpnueckaTaBepnra 24 n ro IIOCTaBeTe B IIO3nua 3aIapKnpaHe.
N3dbpnaTe Haorope IocTa 3a KaIpaKa Ha akymyAtoPnHaTa 6aTeprn 23.
H3BaTe aKymyIaTOPHaT6aTePn8.
Ako cIeHaTnCKaHe Ha 6yToHa 13 He CBeTu HHTO eEHN CBTeoAnO, akymlaTopHaTa 6aTeprna e IOBpeHa H Tp8Ba Da 6bDe 3ameHeHa.
Ako chepbeHHAT CBETOAnoAD 15 Pn HAHTNCKaHe Ha TnyCKOBnI PKeKbCBaay 1 CBETn C HENPeKbChata CBETMnHa: TEMTepaTypaHa eEeKTPoHnKaTa Ha eEeKTPoHnCTpyMeHt a EIO-HnCKa ot 5^ CNI IOBnCOKa OT 75^
При Temпера typа на 90 °C[elektroнкata на eelenktronHCTpymeHTa ce n3KAnuBa,doKaTo DOCTnHE OTHOBO DoNTHMRA TempeTypeH INTEPBaal 3a pa6ota.
Пюньовдenteанован (Врeme за pa60ta ha akymlyaToPHaT6aTePN)
ПюнзводтелноctТаHa рязаHe (Времето 3a pa6obTa Ha akymулатогнata 6aTeprи) 3abnCn OT CBOHCTBaTHa TpeBaTaNp. TbCTOTATA N, BλЖHOCCTTЯ,ДБλЖИнота И, KaKTo I OT BHCQUHnAHa Pa3aHe.
ПюньодenteанocтетаHa рзанe(ВрemeTo 3a pa60taHa akymytaTophata 6aTeprn)Cbto Taka HamaЯBa Ппс YeCtO BkHouBaHe И N3KlHouBaHe Ha eEKeTpOnHCTpyMeHTa ПО ВpeMe Ha Kocene).
3a OTHMn3npaHe Ha IPOIN3BOADHTeALHOCTTa Ha p3aHe (BpeMeTo 3a pa6oTa Ha aKymyAtoPpHaTa 6aTePn) Ce IpeIopbUba IO-yeCTOTo KocHe, yBeMnUbaHTo Ha BnCOUnHaTa Ha p3aHe n pa6oTaTc yMepeHa cKOpocT.
TIOOCUHHTI0-DOUYIPIMeP IOKa3Ba 3aBUNMOCTTaMeKdy BINGOHNHaTa Ha pR3aHe I IPOIN3BOADNTeALHOCTTa C eEDHO 3apeKDaHe Ha akymyAToHPaTa 6aTePnJ.
| Условnia на рязанe |
| MHORO Тьнka
суха тpeва | Тьнka суха
тpeва | Норmaльna
гьста тpeва |
| 6cm
4cm | 8cm
4cm | 15cm
4cm |
| Пюпзводптелноct на рязанe (Rotak 34 LI) |
| do 300 m2 | do 150 m2 | do 100 m2 |
| Пюпзводптелноct на рязанe (Rotak 37 LI) |
| do 300 m2 | do 150 m2 | do 100 m2 |
| Пюпзводптелноct на рязанe (Rotak 43 LI) |
| do 300 m2 | do 150 m2 | do 100 m2 |
3a da yBVeHnHTe BpeMeTo 3a pa6oTa, MoKTe Da 3aKyIInTe DOITbAHTeHa aKymyAToPHa 6aTePnA OT OTOpN3nPa TbProBeu 3a eLEKTPoINHCTpyMeHTn Ha BoW.
OCTpaHbAhe Ha deΦeKTH
Ta6AnuTa TIO-DOy IOKa3Ba CmITOMn Ha AeOeKTH N KaK MoXeTe Da CN IOMOrHeTe, aKO eNEKtPOHHCTpymeHTb BV IIpeCTaHc Da pa6OTn HOpMaHNo. AKO He MOxeTe Da OTKpHHeTe N OTCpaHInTe IPO6MeMa, KATO CLeABeTne INCHPTpykUnHe B Ta6AnuTa, ce ObbPHeTe KbM OTOpN3npan CepBn3 3a eNEKtPOHHCTpymeHTn.
BHMMAHHe: PpeDn Da 3aIOuHeTe TbpcHe H OTKpNBaHe Ha DeEeKTH, N3KIAOueTe eektpoHHCTpyMeHTa N PpeKbChEte KOHTaKTA C PpeKbCBaHa Ha eAekTpHuCeKaTa BepHa.
| СИМПТOMN | Вьзможна причина | ОТстраимвае |
| Машината не започва на paботи | Вьзможно e машината на e 3ацалда и 6лokирана | Огеладытmaшината OTДOLу и прин HeobхoДмocTя почиспесу (разоветe Виоги с п dedпазни рькавици) |
| Актулatorsрна батерия на e Заредения напьалho | Заредаян ha akтулatorsрна 6атерия |
| Актулatorsрна батерия на e поставенha (правлиho) | Поставаян ha akтулatorsрна 6атерия |
| Постава та впоксвача на[elektroческata верига e пов徕ен/нзгорял | Постсөтөпомошь оторизран сөрbingizazа elektroponнсчрмени |
| Трава та впьрд e дүгära | Настоштп loламma височина на рязашип нахлоныт Maшината, за дэ hamalnte сьлрOTINBaleHηETO при ВКLOUчbaHoTo Ž |
| Зашлatingа на[elektroduВига teля ce e задействаа | Изучайт eхлajdaHTO ha elektroduВigatelЯ и hasтоштп lo-rolamma височина на рязаши |
| Актулatorsрнабатерия e Тьрдс STUDENI/ROPEIIa | Оставete akтулatorsрна 6атерия да се ЗATOПAN/Oxlaadi |
| Пексывчт ha[elektroческata верига на e в правлина тлозич/Ne e Bkapan правлиho | Поставete ro правлиho |
| С_LEд задействае на loctа за в BKLOUCHане[elektroduВига teля тс ВКLOUCHа C MaKko 3akbchenhoe | За д Stapтura te elektroduВIGATELЯ, нахштete loCTA в пroidыжени на прибл. 1-3 s |
| СИМТTomи | Възможна причина | Остразимьанe |
| Ельекторвигалей сесторпа и ведна сад това сизлочва | Актумалогнata батерия не e зарedingу наhaltьано | Зарedingу на akтумалогнataбатерия |
| Пъсясвачт ha elektropоческая ведна не e в правлины лозию/н e вкаран правлиho | Пъсясвete го правлино |
| Актумалогнata sbaterия не e поставена (правлино) | Пъсясне ha akтумалогнatable6атерия |
| Актумалогнata sbaterия e Тьрдс STудаха/ ropецca | Остberе akтумалогнatable6атерия да ce заюл/oxладиНастойтпг-rolямВисочина на рязache |
| Машината пботи спъковсвани | Наршени ha elektropочесka Вььзka Вьтpe B машината | Пърсete помои bOTориизран серви заeledжронценти |
| Зашата ha elektrodkвогелая се e зашиства | Изчakierte oxлajdaheto haelektrodkвогелая и састойтпг-rolямВисочина на рязache |
| След машинatura OCTава Неравно okocesa на trева u/uliЕльекторвигалей пботиTekko | Височинatura ha рязane e Tьрдс малka | Настойтпг-rolямВисочина на рязane (Вижт«Perugларе на височина на рязane») |
| Hoxobete ca 3aMbпehи | Сма на hoховетe (Вижт«Падьжka на hoховетe») |
| Вьзmosьно e машината д e зашипана и 6лokирара | Оледайт машината OTДОУипriи Нeoобхдимостя почистete (разбетete в纳аги с п徳пазни рькови) |
| Hoxьт e мontиран hoinderвлино | Мontрайт hoха падьжka на hoховетe») |
| СИМТOMN | Вьзмохна прична | ОТстразноаи
Н.П.П.П.П.П.П.П.П.П.П.П.П.П.П.П.П.П.П.П.П.П.П.П.П.П.П.П.П.П.П.П.П.П.П.П.П.П.П.П.П.П.П.П.П.П.П.П.П.П.П. П.П.П.П.П.П.П.П.П.П.П.П.П.П.П.П.П.П.П.П.П.П.П.П.П.П.П.П.П.П.П.П.П.П.П.П.П.П.П.П.П.П.П.П.П.П.П.П.П.П.п.п.п.п.п.п.п.п.п.п.п.п.п.п.п.п.п.п.п.п.п.п.п.п.п.п.п.п.п.п.п.п.п.п.п.п.п.п.п.п.п.п.п.п.п.п.п.п.п.п.р.
Актугату ворота на рязане
(Bвсмето 3a рбotingа на
akymулалогнata 6ateperna) e
Maika | Hасточte пio-rolяма
Височи на рязанe и xoodete
пio-6abno |
| Трава e Тьрд e Всока | Hасточte пio-rolяма
Височи на рязанe и xoodete
пio-6abno | |
| Трава e Тьрд e Всожа | Изчakiite, дokato Трава
извхи e и xoodete пio-6abno | |
| Трава e Тьрд e Тьста | Hасточte пio-rolяма
Височи на рязанe, xoodete
пio-6abno i kocete пio-echto | |
| Можete на зakypитe
ДOTьнITEелна akymулалогнata
6ateperna ot toponizpan
Тьproveц 3a
ealektronhctpymeHTn ha boш | ПOTьрсete пюош B
OTopni3ripan cepBn3 3a
ealektronhctpymeHTn | |
| След Величын на машинatable
ножьт не се bvptn | Ножьт e силио 3aцалан c tspba | Изчakiчete машинatable
Почистete и ocbo6odete
6apabana (paobotete bInarig n c
п prejudiceпзни рьквиц) | |
| Гайкata/Binnta на HOXа e
pa3xla6eha | Зaterгote raikata/Binnta na
HOXa | |
| Сл宪и Величции/ш汞 | Гайкata/Binnta na HOXa e
pa3xla6eha | Зaterгote raikata/Binnta na
HOXa | |
| Hochb t e Поврдан | СmarHa Na HOXOBete | |
| He e Vьзможно зарждае | Контугату на akymулалогнata
6ateperna ca 3ambyrceni | Почистete kohtaknte Na
akymулалогнata 6ateperna, naipr.
чрз полкогрathOTO i
Извaxдаде и варвае B
гнэздOTO, песп. заменete
akymулалогнata 6ateperna | |
| Актугату ворота на pязд
поврдан - сьцоствув
пухьсвае на контактаб
няков от кletкпеси | Зaterгote akymулалогнata
6ateperna | |
| СИМПТOMN | Възможна причина | Отстраимьанe |
| След Вклочвае на сиелсала в Контакта CBETODноchte 18 респ. 19 не CBETВAT | Шелсят ha зарядото устюостве ho e в кapан в Контакta (правлио) | В��аite (дokрай) сиелсалa в Контакta |
| Контакът, зхсанваши Кабелей зарядото устюстvo ca Deфектун | П探测ete нашиоженeto в Мржата и пriи необхдимостп р dedайу зашиноу устюстvo в OTориизран сервиц за левковнипп р探测ка |
Подьржан ecрви3
IopdbpxaHe nIOounCTBaHe
BHHMaHHe! PpeHn 3BbPwBaHe Ha texHNuecko O6cAYKBAHe HAn IIOuNCTBaHe N3KIAOuBaIte eNEKTPoHnCtpymeHa, PpeKbCBAIte KOHTaTc C PpeKbCBAuHa Na eNEKTPnueckata BepnA n DEMoHTnpaiTe akymylaTophata 6aTeprn, KaKTo n Kooa 3a TpeBa.
Korato Tp86Ba Da n3BbpuBaTe AeHocTH B 6An3OCT DO HOXOBete, pa6oTe BnHaN C ppeIa3HN pbKaBUn.
YtBaHe: N3TbHnBaHte CaeDnTe IpoUeDpyn IIO IOAaKka peoBHO, 3a Da CN OcNpynte AblTOpaHNO HaJeJHO TIOA3BaHe Ha eEeKTPoHHCTpymeta.
Поберява对接пегион МашинаТа 3a 3a6eЖнм DeekTN,KaTO pa3Xλ6eHN NITOBpeHn HOKOBe,pa3Xλ6eHN BINTOBN CbeHNHeHn IN3HOceHN NII TOBpeHn qactN.
YBepTe ce, ye KaTaNITE n IpeAa3HnTe CbOpBXeHHa ca n3IpaBHn i Ca MOHTnpaHn IIpaBnHO. IpeAn n3IOaBaHe n3BbPwBaTe eBEHTyaHo Heo6XoAMn peMOHTn DeHocTHn Hn TexHNuecko 06cLyKBaHe.
Ako BbIpeKe IpEun3HOTo IPOUN3BODCTBO IN BHIMATEHO H3NHTBaHe eAEKTPOINHCTpyMeHTbT ce TOBpeDN, peMOHTbT TpRA6Ba Da 6bDe n3BbPseH B OTOPI3npaH cepBN3 3a eAEKTPOINHCTpyMeHTn Ha Boi.
Korato ce 6pbuatae C BbIpoCn KbM
IIpeCTaBHTeNTe, BNHaN IIOcoUBAIte
10-ncpeneHNAkATAOJKeHOMep, n3PiNCan Ha
Ta6eKaTtHa eEeKTPoHNCTpyMeHtA.
TodapbKka Ha HOXOBete 1
BHHMaHHe!PpeHn3BbPbBaHeHa texHNueecko 06cAlyXBAhe HAnIIOuNCTBaHe n3KIAUoBaTe eAEKtpOnHCTpyMeHTa, PpeKbCBAite KOtAKTa C IpeKbCBAuHa neEAEKtpnueckata Bepnra N dEmOHtnpaTte akymyLaTophata 6aTeprna, KaKTo N KoWa 3a TpeBa.
Korato Tp86ba Da n3BbpuBaTe DeHocTH B 6An3OCT DO HOXOBete, pa60Te BnHaTc ppeIa3HN pbKaBnU.
3a Da IIPOBepHTe HOXOBeTe,IOCTaBeTe MaunHaTa AeHnHaHa Ha JdRCHaTc Cn CTpaHa.
3aMeHnTe 3aTbIeHN Hn IIOBpeEHN HOKOBe.
3aMeHnTe HOKa TcAeHaTa TpoUeDya:
BkapaTe OTBepTKa (He e BkIoUeHa B OKOMTIAEKTOBkata) B OTBopa 26,3a Da 3actoTOpHTe BaIa. KaTo n3IIOI3BaTe IpeAIIa3HN pBkaBnIi (He ca BkIoUeHbOKOMTIAEKTOBkata) 3axBaHHeTO HOKa 30 i C ITOMOuTa Ha raeueH KIAOy (He e BkIoUeH B OKOMTIAEKTOBkata) pa3BNIte N DeMOHTnpaTe BNHTa Ha HOKa 29,7aM6aTa 28 n HOKa 30.
3aToOpTe HOxA 30 c Wai6aTa 28 N BnHTa 29.
Tpeu Da 3aTeHHe Tbe HnTa 29, ce yBepTe, ye HOXbTe MOHTnpaH IpaBnHO (CmBOaT C
Tp6Ba Da Ce BnKa, BnKTe nHypTa I).
Ппдддддддддддддддддддддддддддддддддддддддддддддддддддддддддддддддддддддддддддддддддддддддддддддддддддд徳сгсгсгсгсгсгсгсгсгсгсгсгсгсгсg
При мотура themselves in
AkyMaIatOpHH Hn O6NkHOBeHH 6aTePhH:
Li-Ion:
Moi, cIa3BaIte yka3aHnIra B pa3dE «TpaHcTOpTnpaHe», cTpaHnIca 319.
He n3xBpIaIe 6aTeepn IIpn 6bTOBIne OTNaIbUcnn BbB BDOxpaHnNIIua, He nI IN3rapJeTc. O6NKHOBeHN IIN akymyIaTOPHN 6aTeepn Tpr6BaDa 6bDat c6HpAHn, peuKlnpAHn IIN yHnIOXkaBAHN IIO eKOLOrueH HauHH.
Camo 3a ctpaHH oT EC:
cBlachoHnpekTna 91/157/EHO depekTHn HnH3xa6eHN aKymaIaTOPn Hn O6nKHOBeHN batePN Tp8Ba Da 6bDat peuKnHaPaHn.
Ppabata 3a n3MeHeHHaTa3eHN.
Uputstva o sigurnosti
Pažnja! Dole navedena uputstva treba pažljivo pročitati. Upozrajte se sa komandnim elementima i propisnim rukovanjem sa masinom. Molimo da ova uputstva za upotrebu spremite na sigurno mesto za kasniju primenu.
Objašnjenja symbola na masini

Opste uputstvo o opasnosti.

Bosch Lawn and Garden Ltd., PT-LG/EAE,
Stowmarket, Suffolk IP14 1EY, England
C 2008
Dr. Egbert Schneider Senior Vice President Engineering
Dr. Eckerhard Strötgen
Head of Product Certification

17.09.2008, Robert Bosch GmbH, Power Tools Division D-70745 Leinfelden-Echterdingen
Montaža
Radi vase sigurnosti
Dr. Egbert Schneider Senior Vice President Engineering
Dr. Eckerhard Strötgen
Head of Product Certification


17.09.2008, Robert Bosch GmbH, Power Tools Division D-70745 Leinfelden-Echterdingen
Montaža
Za vašo varnost
Dr. Egbert Schneider Senior Vice President Engineering
Dr. Eckerhard Strötgen
Head of Product Certification
paa
17.09.2008, Robert Bosch GmbH, Power Tools Division D-70745 Leinfelden-Echterdingen
Montaža
Za vasugurnost
Tehniline toimik saadaval aadressil: Bosch Lawn and Garden Ltd., PT-LG/EAE, Stowmarket, Suffolk IP14 1EY, England
C 2008
Dr. Egbert Schneider Senior Vice President Engineering
Dr. Eckerhard Strötgen
Head of Product Certification


17.09.2008, Robert Bosch GmbH, Power Tools Division D-70745 Leinfelden-Echterdingen
Montaž
Tööhutus
Bosch Lawn and Garden Ltd., PT-LG/EAE, Stowmarket, Suffolk IP14 1EY, England
C 2008
Dr. Egbert Schneider Senior Vice President Engineering
Dr. Eckerhard Strötgen
Head of Product Certification

i.v. Moju
17.09.2008, Robert Bosch GmbH, Power Tools Division D-70745 Leinfelden-Echterdingen
Montaža
Jusu drosibai
Bosch Lawn and Garden Ltd., PT-LG/EAE,
Stowmarket, Suffolk IP14 1EY, England
C 2008
Dr. Egbert Schneider Senior Vice President Engineering
Dr. Eckerhard Strötgen
Head of Product Certification


17.09.2008, Robert Bosch GmbH, Power Tools Division D-70745 Leinfelden-Echterdingen
Montavimas
Jusu saugumui