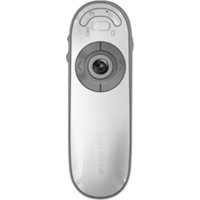
AMP11EU - Trådlös pekare TARGUS - Gratis bruksanvisning och manual
Hitta enhetens manual gratis AMP11EU TARGUS i PDF-format.

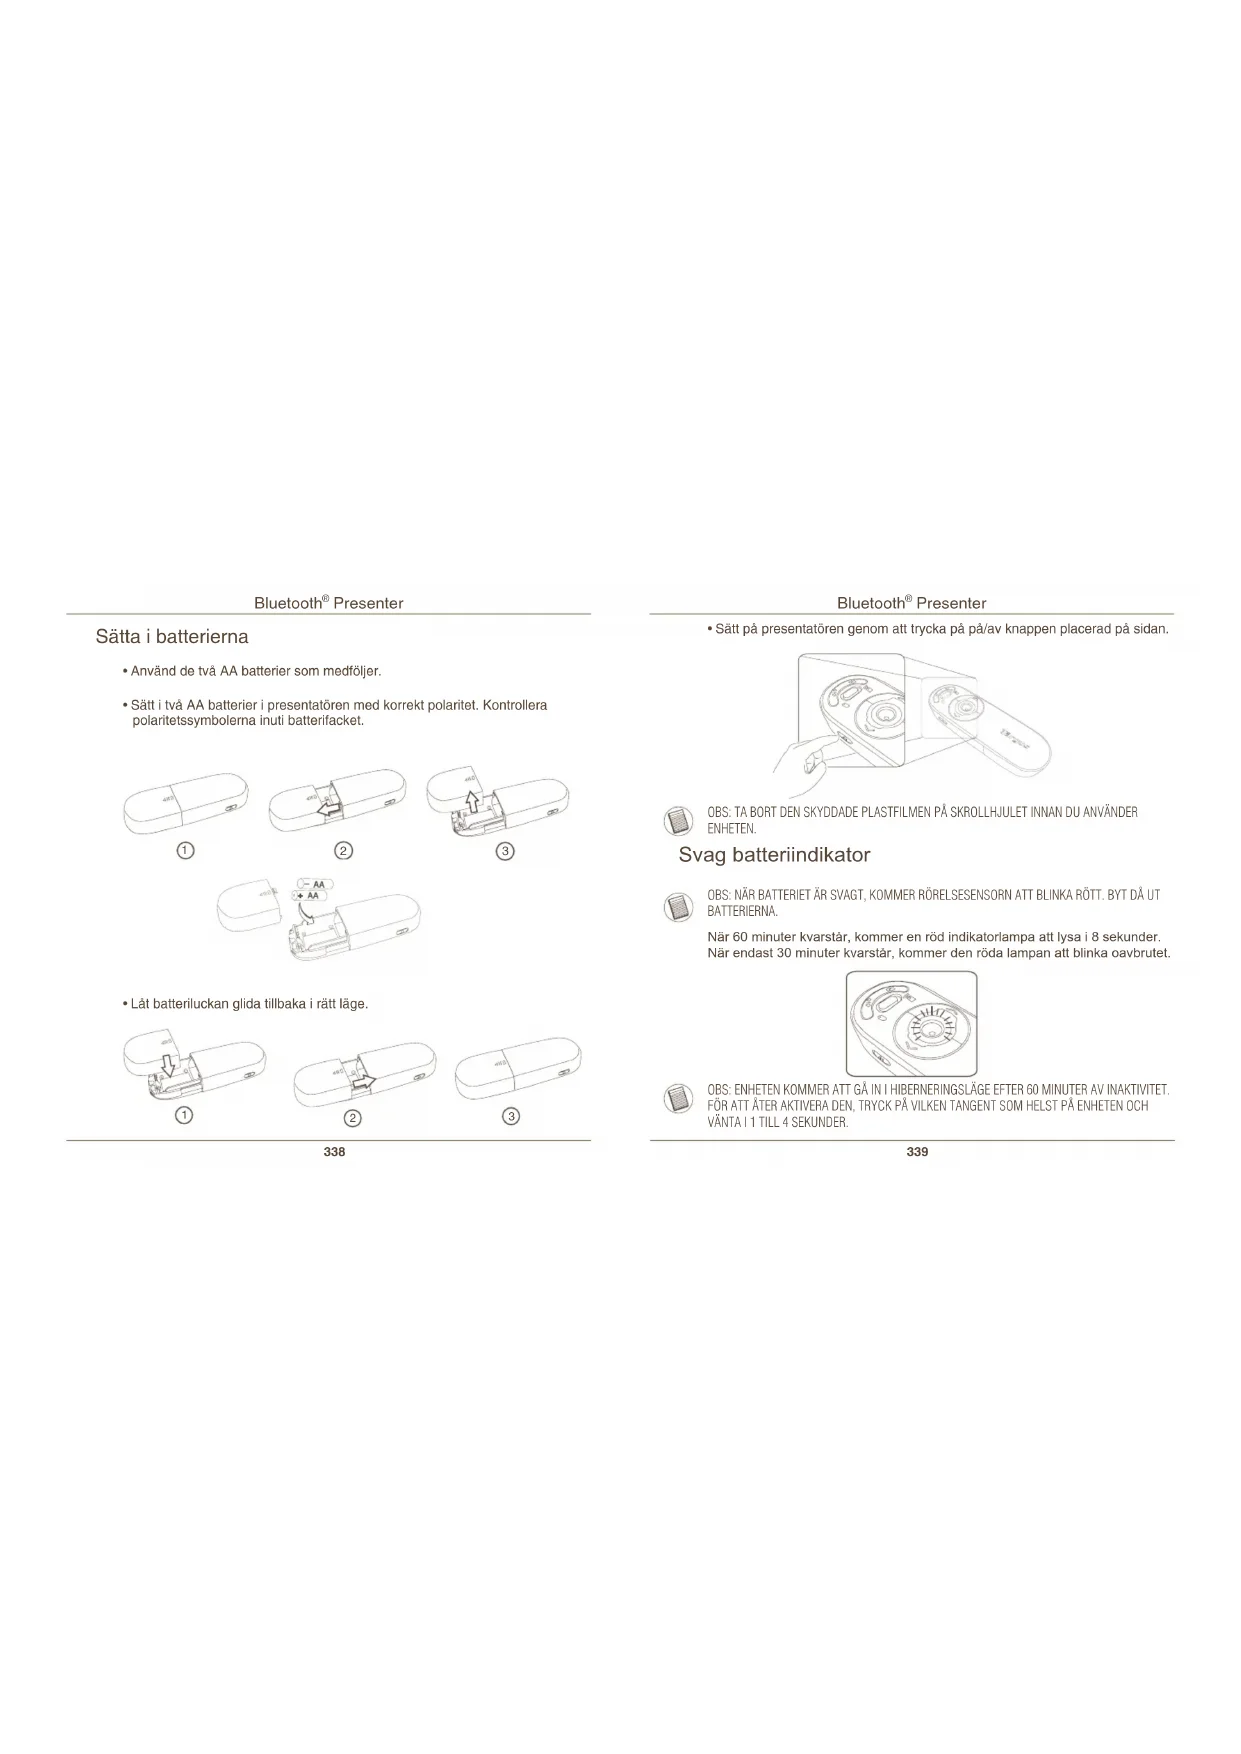


| Produkttyp | Trådlös Bluetooth-presentatör med mus |
| Märke | Targus |
| Modell | AMP11EU |
| Ungefärliga mått | 120 x 40 x 20 mm |
| Ungefärlig vikt | 80 g (med batterier) |
| Strömförsörjning | 2 AA-batterier (ingår) |
| Ungefärlig batteritid | Cirka 60 minuters användning innan indikator för svaga batterier |
| Bluetooth-räckvidd | Upp till 10 meter (33 fot) |
| Musläge | Ja: vänster, höger knappar, rullning för pekare |
| Presentatörsläge | Ja: bildnavigering, tom skärm, starta bildspel |
| Laserpekare | Inbyggd, aktivering via knapp |
| Programmerbara knappar | 2 programmerbara knappar via Targus-programvara |
| Volymkontroll | Knappar för ökning och minskning |
| Automatisk viloläge | Efter 60 minuters inaktivitet |
| Indikator för svaga batterier | Blinkande röd LED på rullningsknappen |
| Systemkompatibilitet | Mac OS X 10.4 eller senare, även Windows (via Bluetooth) |
| Konfigurationsprogramvara | Targus Device Controller (nedladdningsbar) |
| Underhåll och rengöring | Torka med en mjuk, torr trasa. Använd inte slipande produkter. |
| Lasersäkerhet | Klass 2 (uppskattning, följ vanliga försiktighetsåtgärder) |
| Reservdelar | Standard AA-batterier |
Vanliga frågor - AMP11EU TARGUS
Användarfrågor om AMP11EU TARGUS
0 fråga om denna apparat. Svara på dem du kan eller ställ din egen.
Ställ en ny fråga om denna apparat
Ladda ner instruktionerna för din Trådlös pekare i PDF-format gratis! Hitta din manual AMP11EU - TARGUS och ta tillbaka ditt elektroniska enhet i hand. På denna sida publiceras alla dokument som behövs för att använda din enhet. AMP11EU av märket TARGUS.
BRUKSANVISNING AMP11EU TARGUS
Targus Bluetooth ^® trádlös presentatör 337
Sl - Slovensko
Targus Bluetooth ^ Presenter 353
Bluetooth® Presenter
SK – Slovenčina
Targus Bluetooth® trädlös presentatör
Introduktion
Grattis till ditt köp av Targus Bluetooth trådlös presentatör. Den här presentatören med musfunktionalitet använder Bluetooth trådlös anslutning upp till 33ft (10 m) bort. Nu kan du interagera med din publik och fortfarande upprätthålla kontrollen på din bärbara eller stationära dator. Bekvämt placerade sida-upp och sida-ner knappar hjälper dig att navigera genom din presentation med enkelhet, medan en inbyggd laserpekare ger dig alternativet att markera nyckelkoncept på skärmen. Du kan också använda rörelsesensorn för att kontrollera muspekarrörelser.
Systemkrav
Hardware
- Bärbar eller stationär dator med Bluetooth-funktion
Operativsystem
• Mac OS® X (10.4 eller senare)
Bluetooth® Presenter
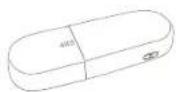
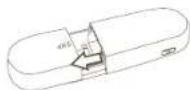
Sätta i batterierna
- Använd de två AA batterier som medföljer.
- Sätt i två AA batterier i presentatören med korrekt polaritet. Kontrollera polaritetssymbolerna inuti batterifacket.
①
②
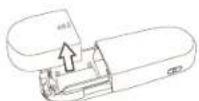
③

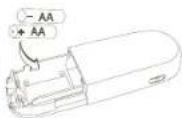
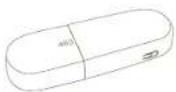
- Låt batteriluckan glida tillbaka i rätt läge.
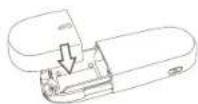
①
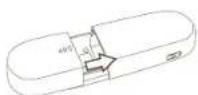
②
③
Bluetooth® Presenter
- Sätt på presentatören genom att trycka på på/av knappen placerad på sidan.
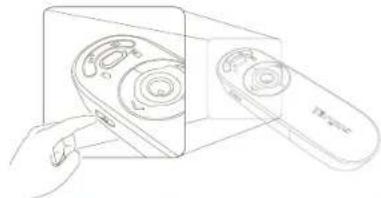
När 60 minuter kvarstår, kommer en röd indikatorlampa att lysa i 8 sekunder. När endast 30 minuter kvarstår, kommer den röda lampan att blinka oavbrutet.
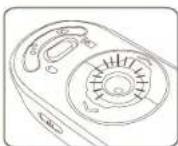

OBS: ENHETEN KOMMER ATT GÅ IN I HIBERNERINGSLÄGE EFTER 60 MINUTER AV INAKTIVITET. FÖR ATT ÅTER AKTIVERA DEN, TRYCK PÅ VILKEN TANGENT SOM HELST PÅ ENHETEN OCH VÄNTA I 1 TILL 4 SEKUNDER.
Bluetooth® Presenter
Använd enheten - Musläge
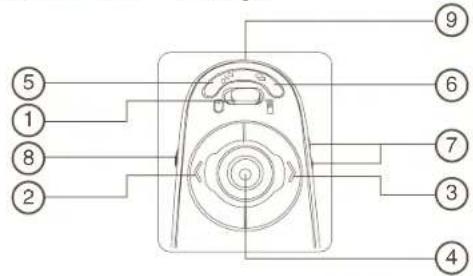
| 1 | Lägesknapp (musläge) |
| 2 | Vänstra musknappen |
| 3 | Högra musknappen |
| 4 | Rörelsesensor - Navigera med muspekaren .Utlösare för laserpekare - Tryck för att aktivera laserpekaren |
| 5 | Programerbar knapp |
| 6 | Programerbar knapp |
| 7 | Öka volymen / minska volymen |
| 8 | På - Tryck i 3 sekunder för att sätta på presentatören (LED blinkar en gång)Av - Tryck 3 sekunder för att stänga av presentatören (LED-lampan blinkar två gånger) |
| 9 | Laserljussändare |
Bluetooth® Presenter
Använda enheten - presentatörläge
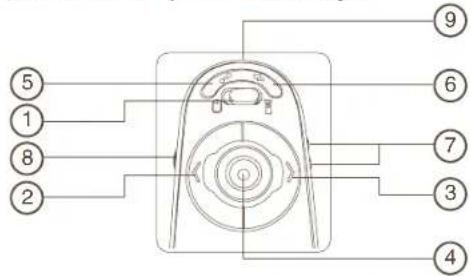
| 1 Lågesknapp (presentatörläge) | |
| 2 Föregående bild | |
| 3 Nästa bild | |
| 4 Utlösare för laserpekare - Tryck för att aktivera laserpekaren | |
| 5 Blank skärm | |
| 6 Bildvisning Start | Tryck en gång för att börja |
| Stopp - Tryck och håll nere i 2 sekunder för att stänga av bildvisningen | |
| 7 | Öka volymen / minska volymen |
| 8 | På - Tryck i 3 sekunder för att sätta på presentatören (LED blinkar en gång)Av - Tryck 3 sekunder för att stänga av presentatören (LED-lampan blinkar två gänger) |
| 9 | Laserljussändare |
Bluetooth® Presenter
Initiell konfigurering
Innan du kan börja använda din Bluetooth mus, máste du först gå igenom en del installeringssteg.

OBS: ANVÄND DEN SENASTE DRIVRUTINEN FÖR BLUETOOTH-ENHETER. INSTRUKTIONSSKÄRMARna KAN VARIERA BEROENDE PÅ VILKEN DRIVRUTIN DU HAR PÅ DIN BLUETOOTH-ENHET. DEVICE DRIVER.
Bluetooth mjukvara: Mac
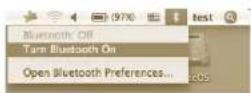
- Gå till Bluetoothikonen placerad på ditt skrivbord eller på systempanelen och klicka på ikonen för att bábörja installationen. Välj "Sätt på Bluetooth" för att aktivera Bluetooth-funktionen på din Mac.
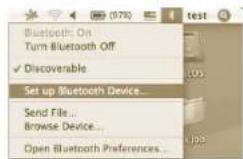
- Skrolla ner listan och välj "Installera Bluetooth-enhet ..."
Bluetooth® Presenter
- Installationsassistenten för Bluetooth kommer att starta. Följ instruktionerna på skärmen.
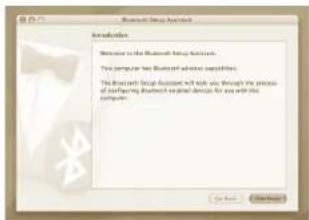
- Välj "mouse"(mus) och klicka för att fortsätta med installationen. Din presentatör kommer att behöva vara i "discovery"(upptäckar) läge för att ansluta. Först, sätt på presentatören genom att trycka på "on/off"(på/av) knappen i 3 sekunder. Inom de följande 3 sekunder när den är påslagen, tryck på vilken knapp som helst (förutom "on/off" (på/av)knappen) för att gå in i upptäckarläge. LED lampan i skrollhjulet kommer att blinka oupphörligt för att indikera att "discovery" (upptäckar) läget är påslaget.
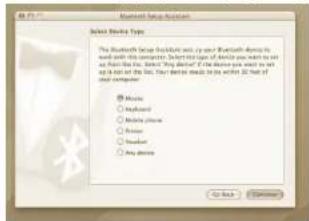
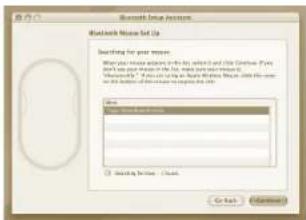
- Din dator kommer att börja söka efter presentatören. När presentatören är funnen, kommer den att synas i listan. Markera din presentatör och tryck fortsätt.
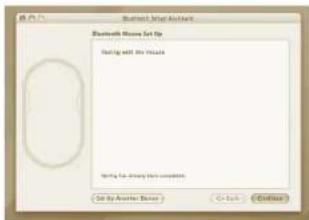
- Bluetooth presentatören kommer nu att påbörja samordning. Klicka på fortsätt för att fortskrida.
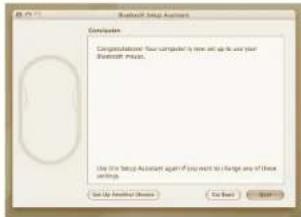
- Grattis. Din Bluetooth presentatör är installerad och redo för användning. Du kan välja att installera en annan enhet eller klicka på Avbryt för att gå ur installationsläget.
Installera enheten Kontrollmjukvara
Installering av mjukvaran gör att konfigurationen fungerar på de programmerbara knapparna.
Den senaste mjukvaran (Modell # AMP11) kan laddas ner från den officiella Targus hemsidan: http://www.targus.com/uk/Downloads/AMP11EU.dmg
Dubbelklicka på installeringsikonen för att starta installationsmjukvaran.
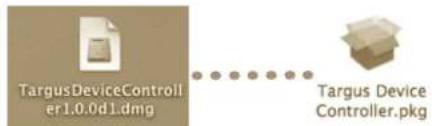
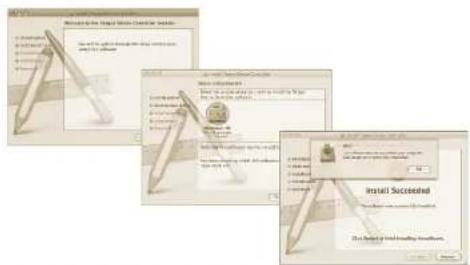
Följ instruktionerna på skärmen för att fullborda installationen.
Bluetooth® Presenter
Efter att mjukvaran är installerad, starta om din dator för att avsluta mjukvaru-installationen.
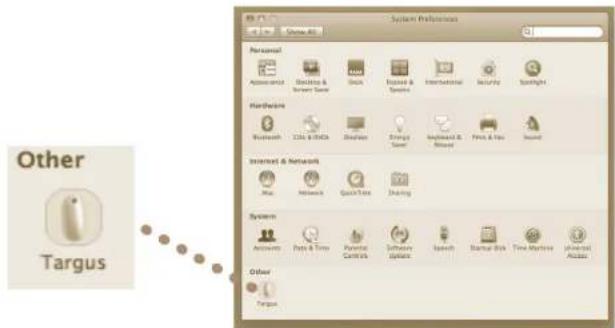
En Targusikon kommer att framträda i Systempreferens rutan.
Bluetooth® Presenter
Programmera knapparna
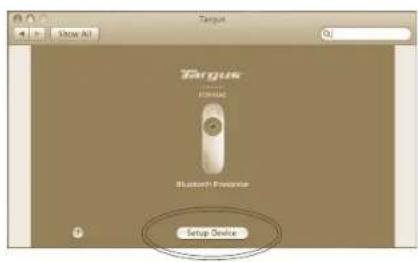
Klicka på Targuslogon för att starta applikationen.
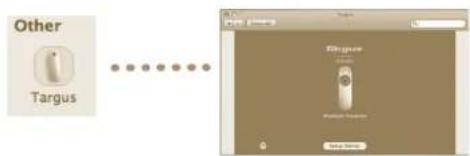
Klicka för att markera bilden på enheten och tryck sedan på "Installera enhet" för att starta konfigureringsmjukvaran.
Bluetooth® Presenter
Klicka på pilarna på höger sida på listan som faller ner för att konfigurera varje knapp.
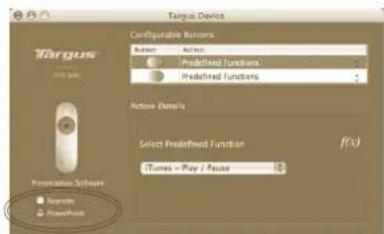

OBS: VÄLJ KORREKT "PRESENTATION SOFTWARE"(PRESENTATIONSMJUKVARA) FÖR ATT TANGENTERNA PÅ PRESENTATÖREN SKA FUNGERA VÄL.
Varje knapp kan programmeras för någon av följande funktioner:
| Fabriksinställning Konfigurera knapparna för specifika funktioner. | |
| Starta Appleskript Ställ in knapparna för att ladda ett appleskript | |
| Starta applikationen | Ställ in knapparna för att starta en särskild applikation installerad i datorn. |
| Utföra tangentnedslag | Ställ in knappen för att återkalla tangentnedslag |
| Förinställda funktioner | Sätt knappen för att gå till förval. |
Stäng applikationsrutan för att starta ändringarna.
Bluetooth® Presenter
Bluetooth® Presenter
Felsökning
Presentatören fungerar inte.
- Se till att batterierna är isatta ordentligt. De positiva (+) och negativa (-) ändarna på varje batteri måste matcha de positiva (+) och negativa (-) markeringarna i batterifacket.
- Se till att batterierna är laddade. Byt dem om nödvändigt.
- Se till att datorns Bluetooth-funktion är påslagen.
-
Kontrollera att enhetens drivrutiner är installerade:
-
Klicka "Applelogo --> Systempreferens --> Hårdvara --> Bluetooth"
- Kontrollera under "Bluetooth enheter" att en "Targus Bluetooth trädlös presentatör" är installerad.
- Samordnade enheter visas alltid på displayen i "Bluetooth" rutan, även om musen är utom räckvidd eller inte påslagen.
Bluetooth® Presenter


- Sl - Slovensko
- Bluetooth® Presenter
- SK – Slovenčina
- Targus Bluetooth® trädlös presentatör
- Introduktion
- Systemkrav
- Hardware
- Operativsystem
- Sätta i batterierna
- Initiell konfigurering
- Bluetooth mjukvara: Mac
- Installera enheten Kontrollmjukvara
- Programmera knapparna
- Felsökning
- Presentatören fungerar inte.
Märke : TARGUS
Modell : AMP11EU
Kategori : Trådlös pekare