
WPD 55 S - Water dispenser Kärcher - Free user manual and instructions
Find the device manual for free WPD 55 S Kärcher in PDF.
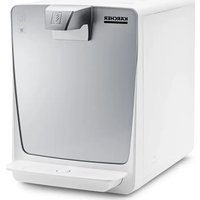


| Product type | Chilled and sparkling water dispenser |
| Brand | Kärcher |
| Model | WPD 55 S |
| Dimensions (L x D x H) | 300 x 440 x 395 mm |
| Weight | 19 kg |
| Power supply | 220-240 V ~ 50 Hz, 200 W max |
| Main fuse | 6 A (slow-blow) |
| Water inlet pressure | 1.5 - 6 bar (0.15 - 0.6 MPa) |
| Water inlet temperature | 5 - 30 °C |
| Ambient temperature | 5 - 32 °C |
| Chilled water flow rate | 120 l/h |
| CO₂ water flow rate | 80 l/h |
| Minimum chilled water temperature | 6 °C |
| CO₂ regulation pressure | 3.8 - 4.2 bar (0.38 - 0.42 MPa) |
| Refrigerant gas type | R-290 (propane) |
| Filtration | Hy-Pure-Plus combined filter (activated carbon + ultrafiltration) |
| Types of distributed water | Chilled water, chilled sparkling water (CO₂) |
| Regular maintenance | Chemical cleaning every 6 months, filter replacement according to usage (max 1 year) |
| Safety | 30 mA circuit breaker recommended, optional Aquastop, CO₂ leak protection |
| Intended use | Indoor, frost-free room, for drinking water |
| Available spare parts | Filters, CO₂ mounting kits, reducers, hoses, drip trays |
Frequently Asked Questions - WPD 55 S Kärcher
User questions about WPD 55 S Kärcher
0 question about this device. Answer the ones you know or ask your own.
Ask a new question about this device
Download the instructions for your Water dispenser in PDF format for free! Find your manual WPD 55 S - Kärcher and take your electronic device back in hand. On this page are published all the documents necessary for the use of your device. WPD 55 S by Kärcher.
USER MANUAL WPD 55 S Kärcher
Safety instructions 10
Safety instructions 10
Symbols on the device. 10
Intended use 10
General instructions for handling CO2 bottles.... 11
Environmental protection 11
Accessories and spare parts. 11
Consumables 11
Scope of delivery 11
Description of the device. 11
Installation 11
Initial Start-Up 12
Handling the CO2 bottle 12
Handling the CO2 cylinder 12
Operation 12
Transport 13
Storage 13
Care and maintenance 13
Troubleshooting guide 14
Warranty 14
Technical data 14
Maintenance plan 14
Maintenance sheet WPD 55 S 15
General notes

Read the original instructions before using the device for the first time and act in accordance with them. Keep the original instructions for future reference or for future owners.
strictions for future reference or for future owners.
Only drinking water from a public water supply may be used to guarantee the water quality. The quality must at least correspond to the guidelines of the World Health Organization (WHO). - If intervention in the drinking water network is necessary in order to install the device, this must be done by a trained expert who is authorised to do this according to the locally applicable laws and regulations. The work must be commissioned by the customer if required. - To protect against water damage caused by a burst water hose, we recommend installing a shut-off device and an aqua stop (optionally available) in the water supply line. - Maintenance work inside the device may only be carried out by the operator of the device who has read these operating instructions. - When using a CO2 bottle, the locally applicable rules for labelling the installation room must be observed. - Do not clean the device using a water jet. - Plastic surfaces must not be cleaned with alcoholic, aggressive or abrasive cleaning agents. The surface cleaner CA 30 R (6.295-686.0) is recommended.
Hazard levels
DANGER
DANGER
- Indication of an imminent threat of danger that will lead to severe injuries or even death.
△WARNING
- Indication of a potentially dangerous situation that may lead to severe injuries or even death.
CAUTION
- Indication of a potentially dangerous situation that may lead to minor injuries.
ATTENTION
- Indication of a potentially dangerous situation that may lead to damage to property.
Safety instructions
DANGER • Risk of electric shock. Always pull out the mains
Unplug before working on the device. The socket must be protected with a 30 mA fault current protection switch. Danger of death due to bursting CO2 gas vessel. Place the pressure tank vertically and fasten it. Always connect the compressed gas tank with a pressure reducer approved for the device type and with a safety valve. Protect the gas bottle from excessive heating and never expose it to direct sunlight. Danger of explosion. Never connect a CO2 bottle with a riser. For example, riser bottles are marked with a red warning sticker. Danger of suffocation due to escaping carbon dioxide. Ensure that the installation room is adequately ventilated or install a gas warning system. Observe the country-specific legal requirements regarding the prescribed minimum room size, warning systems and ventilation during the emptying of compressed gas tank. Do not store explosive substances such as aerosol cans with a flammable propellant in this appliance.
WARNING: When positioning the appliance, ensure the supply cord is not trapped or damaged. Do not locate multiple portable socket-outlets or portable power supplies at the rear of the appliance. Risk of injury from bursting bottles. Carbonated water may only be filled into pressure-stable bottles (10 bar). Keep ventilation openings, in the appliance enclosure or in the built-in structure, clear of obstruction. Do not use mechanical devices or other means to accelerate the defrosting process, other than those recommended by the manufacturer.
- Do not damage the refrigerant circuit. - Health risk from germs. Pay attention to hygiene and cleanliness when replacing the filter cartridge. Wear sterile disposable gloves when changing.
the filter. Clean the drip tray and the surfaces regularly. Never touch the water dispenser with your fingers or a cleaning cloth. Perform a chemical cleaning of the device at least every 6 months. If your drinking water supplier has warned you of microbiological contamination, you must carry out a chemical cleaning of the device after the all-clear. Health risk due to increased bacterial concentration in the water. If you have not used the device for more than 4 days, you must switch the device on, open the water supply inlet and carry out a chemical cleaning, see chapter. Health risk due to improperly repaired device. The device may only be repaired by trained specialist personnel. Risk of injury from the cleaning agent. Follow the safety instructions for the cleaning agent and wear safety goggles and protective gloves when handling cleaning agents.
ATTENTION Damage to the device cooling unit. If the device has been stored or transported lying down, you must wait at least 24 hours before starting it up.
Symbols on the device

WARNING
Risk of fire, flammable material
Flammable refrigerant is used in this unit.
If refrigerant escapes, keep ignition sources away from the device.
Intended use
WARNING
This unit is not intended for use by persons (including children) with reduced physical, sensory or mental capabilities, unless they are supervised by a person who is responsible for their safety or have received instructions on how to use the unit from them.
WARNING
Children must be supervised to prevent them from playing with the appliance.
WARNING
A damaged power cable must be replaced by the manufacturer, his customer service or an equally qualified person in order to avoid danger.
- The unit is used to dispense chilled water, with or without the addition of food-grade carbonic acid (CO2), in self-service mode. The unit can be used in the following areas:
- In staff kitchen areas of shops, offices and other work areas. In agriculture. In hotels, motels, bed and breakfasts and other accommodations. In catering and similar wholesale applications. The unit is equipped with a combination filter. The unit must be set up in a frost-free room. Do not use or place the unit outdoors.
- Do not place, store or transport the unit horizontally.
Foreseeable misuse
Any type of improper use is prohibited.
The operating personnel are liable for damage resulting from incorrect use.
General instructions for handling CO2 bottles
When replacing CO2 bottles, the safety instructions of the gas supplier and any legal requirements must be observed.
- The CO2 bottle must be equipped with the pressure reducer approved by KÄRCHER so that the carbonic acid content of the water can be adjusted. The carbon dioxide E 290 must comply with the purity requirements of Directive 96/77/EC (food quality) and be labelled in accordance with Article 7 of Directive 89/107/EEC.
- Before using a gas bottle, make sure that the correct type of gas has been provided. Reliable information about the type of gas is provided solely by the hazardous goods label that must be present on every gas bottle. The colour of the gas bottle does not always give clear information about the type of gas. A gas bottle of which there is any doubt about the contents or which is conspicuous in any other way (damage, exposure to fire, traces of mechanical processing) must not be used. The country-specific regulations must be observed.
DANGER
Risk of explosion
Never connect a CO2 bottle with a riser. For example, riser bottles are marked with a red warning sticker.
WARNING
Danger of death from a possibly bursting CO2 gas container
Place the pressure tank vertically and fasten it. Never open the compressed gas tank without a pressure reducer and without a safety valve. The pressure reducer with safety valve must be approved for the type of device.
△DANGER
Danger of suffocation due to escaping carbon dioxide
Ensure sufficient ventilation of the installation room or install a gas warning system.
Do not expose the CO2 bottle to direct sunlight.
Protect the CO2 bottle from excessive heat.
Apply a visible marking indicating the possible presence of gaseous carbon dioxide.

Environmental protection

The packing materials can be recycled. Please dispose of packaging in accordance with the environmental regulations.

Electrical and electronic devices contain valuable, recyclable materials and often components such as batteries, rechargeable batteries or oil,
which - if handled or disposed of incorrectly - can pose a potential danger to human health and the environment. However, these components are required for the correct operation of the device. Devices marked by this symbol are not allowed to be disposed of together with the household rubbish.
R-290 Contains greenhouse gas R290 - hermetically sealed device
Notes on the content materials (REACH)
Current information on content materials can be found at: www.kaercher.de/REACH
Accessories and spare parts
Only use original accessories and original spare parts. They ensure that the appliance will run fault-free and safely.
Information on accessories and spare parts can be found at www.kaercher.com.
Attachment kits
| Description Order no. | |
| Attachment kit for CO2cylinder 2.644- | 217.0 |
| Attachment kit for CO2bottle, commercially available (2 kg, 6 kg, 10 kg content) | 2.644-218.0 |
| Premium stand 2.644- | 134.0 |
| Basic stand 2.644- | 221.0 |
Jugs Rinsing cups
| Description Order no. | ||
| Water jug, 1 L, glass, with plas-tic lid and KÜRCHER logo, dishwasher safe | 6.640-431.0 | |
| Carafe, Eva Solo, 1 L, dish-washer safe | 0.017-575.0 |
Bottles
| Description Order no. | |
| Rinsing cup 4 | 6.640-341.0 |
| Description Order | no. | |
| Bottle 0.5 l, made of Tritan, dishwasher safe | 6.640-430.0 | |
| Bottle 0.75 l, made of Tritan, dishwasher safe | 6.640-512.0 | |
| Bottle 0.6 l, with mouthpiece and lid made of Tritan, dishwasher safe | 6.640-469.0 | |
| High-quality borosilicate glass bottle 0.75 l, heat-resistant, clear, Ø 7 cm, height 26 cm with stainless steel lid and ne-oprene protective cover | 6.642-186.0 |
Cups Supplementary installation material
| Description Order no. | |
| Hard paper cup, also for hot drinks, 180 ml, without logo, 2500 pieces | 6.640-455.0 |
| Hard paper cup, also for hot drinks, 180 ml, with KÄRCHER logo, 2500 pieces | 6.640-460.0 |
| Plastic cup, 200 ml, without logo, 3000 pieces | 6.640-454.0 |
| Plastic cup, 200 ml, with KÄRCHER logo, 3000 pieces | 6.640-453.0 |
Consumables
| Description Order no. | |
| Error current circuit breaker 30 mA, 230 V, 50 Hz | 6.640-427.0 |
| Aqua stop, leakage water detector with so-lenoid valve and brass screw connection G 3/4" | 6.640-291.0 |
| Pressure reducer 1.5 - 6 bar - 1/2 | 6.640-625.0 |
| Water Block, flood protection | 6.640-338.0 |
| Backflow preventer, approved | 6.640-463.0 |
| De-scri-p-tion | Description | Or-der no. |
| Hy-Pure-Plus fil-ter | Combination filter consisting of active carbon and ultrafilter. Retains chlorine, heavy metals, residues from the tap, bacteria and viruses and ensures a good flavour. All minerals are retained in the water. | 2.64 4-200.0 |
Detergent for chemical cleaning
| De-scrip-tion | Description | Or-der no. |
| Clean-ing kit | For intake of the chemical detergent (Bevi Tabs alkali), reusable | 2.64 3-941.0 |
| Bevi Tabs al-kaline | Chemical detergent for the interior cleaning of the WPDs every six months, packaging unit 1 x 10 tablets | 6.29 5-891.0 |
Detergent for the exterior cleaning of the device
| Description | Description | Order no. |
| CA 30 R | Ready-to-use surface cleaner, 0.5 l bottle | 6.29 5-686.0 |
| Spray head for surface cleaner | When ordering CA 30 R for the first time, this reusable spray head is required for the spray bottle. | 6.29 5-723.0 |
Scope of delivery
When unpacking the device, check the contents of the box for completeness using the operating instructions. If any accessories are missing or in the event of any shipping damage, please notify your dealer.
Description of the device
For the illustrations, refer to the graphics page Illustration A
① Locking filter cover ②Filter cover ③Power switch 4CO 2connection (5) Water connection (6) Power supply 7Fuse holder cover with 6 A fuse Type plate 9Air vents Combined Filter (1)Filter holder (12)Button for "CO 2 chilled water" (13)Button for "Chilled water" (14)Water dispenser opening (15)Drip tray
Installation
Connecting the device
During initial installation and any repairs that involve the replacement of accessory parts, make sure only parts approved by KARCHER (connection kit, CO2 pressure regulator) are used. These components have been tested and certified to ensure compliance with KARCHER Quality Standards. No other components may be used.
- The power connection and water input pressure must correspond to the values in the technical data (see chapter "Technical data").
- Depending on local regulations, an approved backflow preventer must be installed.
- Set up the device on a level surface.
- Mains plug and socket must always be freely accessible.
- The trigger, the fuse and the gas and water connection (rear of the device) must be freely accessible. The minimum distance to the wall is 100 mm.
- In the interest of reducing power consumption, the power supply can be switched off when the device is not in use (e.g. using a timer clock).
- Connect the device only with the hose lines provided. Do not use used hose lines.
Connection diagram:
Illustration B
① Socket (fused with 30 mA error-current circuit breaker) (2) Mains cable
(3) Water dispenser (4) Water supply hose (connection kit) Pressure reducer with pressure gauge (only necessary with water inlet pressure above 6 bar (0.6 MPa)) (6) Water tap of the building installation (7) Drinking water line of the building installation (8) Aqua stop (optional) (9) Backflow preventer (optional)
Connections: Illustration C
1 Water connection ② CO2 connection ③ Power supply 4 Fuse holder cover with 6 A fuse
⑤ Illuminated trigger
- Remove the plug from the water dispensing opening and dispose of it. Illustration D
- Remove the plugs from the water connection and the CO2 connection and dispose of them. Illustration E
- Connect the water supply hose to the water connection "H₂O".
- Connect the water supply hose to the tap of the building installation (if necessary, connect additional components).
- Connect the mains cable to the power supply.
- Connect the CO2 connection hose to the CO2 connection.
Inserting the filter
WARNING
Health risk through the entry of germs
When installing the filter cartridge, take special care to ensure hygiene and cleanliness.
Always wear sterile disposable gloves when installing the filter.
- Open the filter cover latch.
Illustration F
- Remove the side filter cover.
- Remove the service cup that was installed at the factory.
Illustration G
a Pivot out the filter holder by max. 45°. b Turn the service cup anticlockwise. c Remove the service cup.
- Insert the filter.
Illustration H
a Pivot out the filter holder by max. 45°. b Insert the filter into the filter holder from above. c Turn the filter as far as it will go. The filter is locked.
d Pivot the filter with the filter holder into the device.
- Fit the side filter cover
- Close the filter cover latch.
Initial Start-Up
Note
In order to maintain the perfect hygienic condition of the device during transport, the water-carrying components were filled with carbon dioxide (CO2) at the factory.
Rinsing the device and filter
Note
Now, the entire device and the filter must be rinsed with water.
- Open the water inlet.
- Place a container under the water dispensing opening.
- Press the "chilled water" button repeatedly until the rinsing time is 5 minutes (approx. 10 - 15 litres).
- Press the "CO 2 chilled water" button repeatedly until the rinsing time is another 4 minutes (approx. 4 - 5 litres).
Note
After every 60 seconds of uninterrupted water delivery, the device automatically interrupts the delivery. 5. Perform chemical cleaning (see chapter "Chemical cleaning"). 6. Insert the CO2 cylinder (see section "Connecting a new CO2 cylinder") 7. Set the CO2 pressure:
a CO2 bottle: Open the main valve and set the rotary control so that the pressure gauge shows 4 bar.
b CO2 cylinder: Turn the adjustment wheel of the rotary control to position "4".
The appliance is ready for operation.
Handling the CO2 bottle
Note
Please also note the general information on handling CO2 bottles, see chapter General instructions for handling CO2 bottles.
When connecting a new, or removing an old CO2 bottle, follow the steps below.
Removing an empty CO2 bottle
Illustration I
1 Rotary control (2) Pressure reducer (3) Union nut (4) Main tap (5) Control pressure gauge
CO2 hose
- Close the gas bottle at the main tap.
- Turn the pressure regulator to "0".
Note
If the pressure reducer is separated from the CO2 bottle when sufficient pressure is still present, the O-ring between the bottle and the pressure reducer will be deformed and must be replaced. 3. Release the strap securing the CO2 bottle. 4. Remove the empty gas bottle. 5. Unscrew the pressure reducer from the empty gas bottle.
Connect the new CO2 bottle
Illustration I
1 Rotary control (2) Pressure reducer (3) Union nut 4 Main tap (5) Control pressure gauge
CO2 hose
- Remove the protective cap from the new gas bottle.
- Open the main tap briefly so that any liquid CO2 can escape.
- Screw the pressure reducer onto the new gas bottle. Ensure that the sealing ring is sealed properly.
- Tighten the union nut hand-tight
- Fit the new CO2 bottle and fasten it with a tension belt.
- Connect the CO2 hose to the pressure reducer.
- Slowly open the main tap on the gas bottle.
- Set the pressure reducer to 4 bar using the rotary regulator.
- Close the main tap on the gas bottle.
- Read off the displayed value on the control pressure gauge. The displayed value must remain constant for at least 5 minutes.
If there is a noticeable drop in pressure:
- Eliminate the pressure drop
a Check that the O-ring between the compressed gas tank and the pressure reducer is present and undamaged. b If necessary, replace a defective O-ring. c Check the pressure reducer for correct seating. d Tighten the union nut more firmly. e Check the hose coupling on the pressure reducer and the CO2 hose for visible damage.
If the pressure drop cannot be remedied by the measures mentioned, the pressure reducer is defective and must be replaced.
- After passing the leak test, open the main tap.
- Set the operating pressure on the pressure reducer using the rotary control. The default setting is 4 bar and can be readjusted if necessary.
- After each renewal of the CO2 bottle, dispense one litre of "CO2 carbonated water" so that the CO2 mixer fills again.
Handling the CO2 cylinder
Note
Please also note the general information on handling CO2 bottles, see chapter General instructions for handling CO2 bottles.
Note
CO2 cylinders are available in pharmacies, electronics stores and supermarkets.
When connecting a new or removing an empty CO2 cylinder the following steps are to be carried out.
Removing an empty CO2 cylinder
Illustration J
Pressure regulator scale (2) Adjustment wheel (3) Pressure regulator (4) Screw connection (5) CO2 hose CO2 cylinder. 1. Turn the pressure regulator to the "OFF" position. 2. Release the fastener of the CO2 cylinder. 3. If necessary, disconnect the CO2 hose from the CO2 connection. 4. Unscrew the empty CO2 cylinder anticlockwise out of the screw connection.
Connecting a new CO2 cylinder
Illustration J
(1) Pressure regulator scale (2) Adjustment wheel (3) Pressure regulator (4) Screw connection (5) CO2 hose CO2 cylinder
- Remove the cover from the CO2 cylinder.
- Screw the CO2 cylinder onto the screw connection of the pressure regulator. Once you detect a slight resistance, turn the CO2 cylinder a little further until it is firmly seated. A short hiss may be heard.
- If necessary, reconnect the CO2 hose back onto the CO2 connection.
- Fasten the CO2 cylinder in a vertical position again. 5. Preset the pressure regulator to position "4".
- After each renewal of the CO2 cylinder, dispense one litre of CO2 carbonated water so that the CO2 mixer fills again.
Operation
Function
The water initially flows from the water inlet through the combination filter (for a filter description, see the Consumables chapter). Depending on the button pressed, the water then flows through the cooling module, or additionally via the CO2 mixer to the water dispenser. The entire water system must be chemically cleaned at regular intervals.
Operation
Note
The illuminated sensor buttons are activated by a light touch.
Illustration K
Button for "CO2 chilled water" (2) Button for "Chilled water"
- Place a container in the middle of the drip tray. Illustration L
- Press the button for the desired water type until the container is filled.
The pressed button lights up during this process.
Shutting down
If the device is not used for more than 4 days:
- Close the water supply inlet.
- Switch off the device.
- Close the main tap of the CO2 bottle or turn the pressure regulator of the CO2 cylinder to position "0".
Initial startup after decommissioning
WARNING
Health risk
During decommissioning, the concentration of germs in the water in the device may increase.
If the device has not been used for a longer period of time (more than 7 days), the following activities must be carried out before you use the device again.
1. Opening the water inlet
2. Switch on the device.
Depending on the duration of shutdown, carry out the following steps:
After a shutdown of more than 7 days:
1. Take at least 1 litre of each type of water and discard.
After shutdown of 8 to 28 days:
1. Take at least 5 litres of each type of water and discard. 2. Extraordinary chemical cleaning is recommended. (see chapter "Care and service") After shutdown of longer than 28 days: 1. Remove the filter and insert the service cartridges. 2. Take at least 5 litres of each type of water and discard. 3. Perform a chemical cleaning (see chapter "Care and service"). 4. Carry out an extraordinary filter change.
Transport
CAUTION
Failure to observe the weight
Risk of injury and damage
Be aware of the weight of the device during transportation. Do not transport the device in a horizontal position. When transporting the device in vehicles, secure it to prevent it from slipping or overturning in accordance with the respective valid guidelines.
Equipment shipping
The device must not be transported in a horizontal position.
- Select a suitable packaging for transport and mark it on the outside with a conspicuous marking for vertical transport. If possible, place a small wooden pallet under the shipping box.
- Alternatively, take the device directly to a Kärcher service centre.
Storage
CAUTION
Failure to observe the weight
Risk of injury and damage
Be aware of the weight of the device during storage. 1. Store the device in a frost-protected place.
Care and maintenance
WARNING
Health risk due to improperly repaired device
Have the device repaired only by trained specialist personnel.
Before performing any work on the device: 1. Device pressure relief
a. Close the water inlet. b. Place a container under the water dispensing opening. c. Press the "chilled water" button until no more water is dispensed.
- Switch off the device.
- Pull out the mains plug.
- Close the main valve of the CO₂ bottle and turn the pressure regulator of the CO₂ cylinder back to "0".
- If necessary, unscrew the CO₂ cylinder from the pressure regulator.
Replacing the filter
WARNING
Health risk through the entry of germs
When installing the filter cartridge, take special care to ensure hygiene and cleanliness. Always wear sterile disposable gloves when installing the filter. 1. Close the water supply inlet. 2. Press the "Chilled water" button until no more water is dispensed. 3. Open the filter cover latch. 4. Remove the side filter cover. 5. Remove the filter to be replaced. Illustration M
a. Pivot out the filter with the filter holder by max. 45°.
b. Unscrew and remove the filter.
- Unpack the new filter.
- Insert the new filter. Illustration N
a. Fit the filter into the filter holder and turn it as far as it will go.
The filter is locked.
b Pivot the filter with the filter holder into the device.
- Fit the side filter cover.
- Close the filter cover latch.
- Plug the mains plug into the socket.
- Place a container under the water dispenser.
- Open the water inlet.
- Press the "Chilled water" button repeatedly until a rinsing time of 5 minutes has been reached (approx. 10 - 15 litres).
Note
The device automatically stops dispensing after 60 seconds of continuous water dispensing.
- Carry out chemical cleaning (see chapter).
Chemical cleaning
CAUTION
The outlet water is cleaning water
The dispensed cleaning water is not suitable for consumption.
Chemical cleaning must be carried out after initial Start-Up and at least every 6 months. The same applies after a shutdown for more than 7 days or an extraordinary filter change. The cleaning kit is required for chemical cleaning (see chapter "Consumables").
Note
The chemical cleaning process takes approximately 45 minutes.
- Close the water inlet.
- Close the main valve of the CO2 bottle and turn the pressure regulator of the CO2 cylinder back to "0".
- Press the button for "CO2 chilled water" until no more water is dispensed.
- Switch off the device.
- Remove the filter.
- Insert the service cup.
Illustration O: a) Swivel the filter holder out by max. 45°. b) Insert the service cup. c) Turn the service cup clockwise. d) Swivel the filter holder into the device.
- Remove the water supply line.
- Prepare the cleaning kit.
Illustration P
① Water inlet (2) injector screw connection ③ Sealing ring (4) injector housing Water outlet (connection on device)
a Unscrew the cleaning kit. b Insert the 4 cleaning tablets into the cleaning kit. c Screw the cleaning kit together, ensuring that the sealing ring is correctly seated.
- Connect the cleaning kit to the device input.
- Connect the water supply line to the cleaning kit.
- Place the cleaning kit in a vertical position if possible.
Illustration Q
- Remove the drip tray.
- Place a suitable container with a capacity of at least 1 litre under the water outlet.
- Plug the mains plug into the socket.
- Open the water inlet.
- Switch the device on.
Note
Carry out the following steps extremely carefully to ensure the greatest possible effectiveness of the chemical cleaning.
Note
The cleaning agent used for chemical cleaning is equipped with a blue colour indicator. The colouration of the water that is output indicates the concentration and effectiveness of the cleaning agent.
Note
A small amount of foam is created during the cleaning process. This is caused by the system and is normal.
- Perform cleaning.
a Press the "CO 2 chilled water" button until the device stops dispensing water after 60 seconds. b Wait 60 seconds to allow the detergent to dissolve. c Repeat this process (rinse for 60 seconds and wait 60 seconds) twice in total. d Empty the drip tray after each dosing process. e Press the "Chilled water" button for 30 seconds. The dosing process is complete. The contact time of the detergent begins. It should be at least 15 min and can be extended as required. f Wait at least 15 minutes for the detergent to take effect.
- Close the water inlet.
- Press any button until no more water is dispensed.
- Switch off the device.
- Remove the cleaning kit.
- Reconnect the water supply hose to the device.
- Remove the service cup and reinsert the filter.
Rinsing after chemical cleaning
Note
You can briefly interrupt the rinsing process at any time, e.g. to empty the rinsing cup. 1. Place a suitable container with a capacity of at least 1 litre under the water dispenser. 2. Open the water inlet. 3. Switch the device on 4. Press the "Chilled Water" button repeatedly until no blue colouration is visible.
Then rinse at least another 4 litres.
- Press the "CO2 chilled water" button repeatedly until no blue colouration is visible.
Then rinse at least another 2 litres.
- Open the main tap on the CO2 bottle and check the set gas pressure or set the pressure regulator of the CO2 cylinder to position "4".
- Dispense one litre of CO2 carbonated water so that the CO2 mixer fills again.
The device is ready for operation.
Sampling
To be able to test the effectiveness of the chemical cleaning, samples should be collected immediately after completion of chemical cleaning under observance of the rules for microbiological water analysis and these should be evaluated by an accredited laboratory.
Emptying the drip tray
The float signals that the drip tray is full. A red marking ring on the float becomes visible when the maximum filling level has been reached.
Illustration R 1. Carefully remove and empty the full drip tray. 2. Check the drip tray daily for soiling, clean if necessary. 3. Reinstall the drip tray.
| Troubleshooting guide | ||
| Fault Cause Rectification | ||
| The device shows "Ready for use" but does not dispense water. All buttons are illuminated. | The water supply is interrupted. 1. Ensure a correct water supply.2. Check the shut-off devices.3. If the fault persists, contact the service department. | |
| The device is not working. The buttons do not light up. | The power supply is faulty. Check the power supply. | |
| The fuse is defective. | Remove the cover of the fuse next to the device switch, replace the fuse. If the fuse blows again, switch off the device, contact the service department. | |
| The dispensed water is not cooled, even though the "Chilled water" but- ton was pressed | The cooling module has not reached its nominal temperature. | 1. Wait 20 to 40 minutes and check it again.If the cooling function exhibits permanent failure:2. Switch off the device.3. Contact the service department. |
| The carbonated water and cold water buttons light up alternately and a sig- nal tone can be heard. | Temperature regulation fault. | Contact the service department. |
| The carbonated water button no longer lights up after 60 seconds and the dispensing of carbonated water is blocked. | Refilling of the carbonator tank failed. 1. Switch off the device.2. Check the water supply inlet.3. Check the gas pressure.4. Switch the device off and back on again.5. If the fault persists, contact the service department. | |
| Internal pump starts when dispensing "CO2 chilled water" with different de- lays. | This is a normal function, not an error. | No fix necessary |
| Internal pump starts up briefly at reg- ular intervals | This is a normal function for the function of the carbon- ator tank. | No fix necessary |
| No carbonation in the water. CO | 2gas pressure too low. Correct the CO2gas pressure. | 2gas pressure. |
| CO2bottle or CO2cylinder empty. 1. Replace the CO2bottle or the CO2cylinder.2. If the fault persists, contact the service department. | ||
| Too little carbonation in the water | The cold water tank has not reached its nominal tem- perature. | Check the carbonation in the water again after waiting 20 minutes. |
| The filter is dirty and reduces the necessary water flow. | 1. Check the flow of the filter and replace the filter if necessary.2. If the fault persists, contact the service department. | |
| CO2bottle or CO2cylinder almost empty. | Replace the CO2bottle or the CO2cylinder. | |
| Splashing delivery of carbonated wa- ter for larger quantities | Refilling of the carbonator tank is impaired. | Check the flow of the filter and replace the filter if necessary. |
| The gas pressure setting is too high. | 1. Correct the CO2gas pressure.2. If the fault persists, contact the service department. | |
Warranty
The warranty conditions issued by our relevant sales company apply in all countries. We shall remedy possible malfunctions on your appliance within the warranty period free of cost, provided that a material or manufacturing flaw is the cause. In a warranty case, please contact your dealer (with the purchase receipt) or the next authorised customer service site. (See overleaf for the address)
turing flaw is the cause. In a warranty case, please contact your dealer (with the purchase receipt) or the next authorised customer service site. (See overleaf for the address)
Further warranty information (if available) can be found in the service area of your local Kärcher website under "Downloads".
Technical data
| WPD 55 S | ||
| Device performance data | ||
| Working voltage of the battery | V | 220-240 |
| Power frequency | Hz | 50 |
| Power protection (slow-blowing) | A | 6 |
| Max. power input | W 200 | |
| Water supply pressure | MPa (bar) | 0,15 -0,6 (1,5-6) |
| Water supply temperature | °C | 5-30 |
| Pressure adjustment range for CO2 | MPa (bar) | 0,38...0,42 (3,8...4,2) |
| Ambient temperature | °C | 5 - 32 |
| Water dispenser (depending on supply pressure and filter status) | ||
| Chilled water | I/h | 120 |
| CO2Carbonated water | I/h | 80 |
| Min. temperature of chilled water | °C | 6 |
| Dimensions and weights | ||
| Width | mm | 300 |
| Depth | mm | 440 |
| Height | mm | 395 |
| Weight | kg | 19 |
Subject to technical modifications.
Maintenance plan
| Time & date | Performed |
| Daily | Remove and clean the drip tray. |
| After an overnight device standstill, dispense 0.5 l of each type of water and dispose of it. | |
| Weekly, more often if neces-sary | Clean the outside of the device, clean the drip tray with hot water or in a dishwasher.Do not use cleaning agents containing alcohol, acidic components or scouring agents for cleaning plastic surfaces. |
| Half-yearly | If the water quality is bad, replace the Hy-Pure-Plus filter. |
| Perform chemical cleaning, see chapter . | |
| Annually | Replace Hy-Pure-Plus filter. |
| The decisive factor for the filter change interval is the amount of water dispensed and the water quality of the inlet water. | |
| Device / serial number: Place of installation: | |||||||
| Device type: WPD 55 S Date of installation | |||||||
| Installation by: | |||||||
| Date | Technician | Operating hours | Filter change | Other parts | Chemical Cleaning | Remarks | Signature Technician |
| Signature Technician | |||||||
| 16 | |||||||
| 16 | 16 | ||||||
Content
General remarks. 16
Technical data. 81
Maintenance plan 81
Maintenance sheet WPD 55 S 82
General instructions
Read the original operating instructions
4. Place the filter.
Figure H a Turn the filter holder to max. 45° b Insert the filter from the top into the filter holder. c Turn the filter until it reaches the stop.
The filter locks
d Turn the filter together with the filter holder into the device.
- Place the side filter cover.
- Close the filter cover lock.
First use
Note
To maintain the hygienic condition of the device during transport, the water-carrying components are factory-filled with carbon dioxide (CO2).
Rinsing the device and filter
Note
Before first use, the entire device and filter must be rinsed with water. 1. Open the water supply. 2. Place a container under the water outlet. 3. Press the "Chilled water" button repeatedly until a rinsing time of 5 minutes is reached (about 10-15 liters). 4. Press the "CO2 chilled water" button repeatedly until a rinsing time of 4 minutes is reached (about 4-5 liters).
Note
After 60 seconds of continuous water discharge, the device automatically stops discharging.
- Perform chemical cleaning (see chapter "Chemical cleaning").
- Install the CO2 bottle (see chapter "Connecting a new CO2 bottle").
- Adjusting CO2 pressure:
a CO2 bottle: Open the main valve and adjust the pressure regulator so that the manometer shows 4 bar. b CO2 cylinder: Turn the adjustment knob on the reverse regulator to position "4".
The device is ready for operation.
Handling the CO2 bottle
Note
Pay attention to the general notes on handling CO2 bottles, see the chapter General notes for handling CO2 bottles.
When connecting a new or removing an empty CO2 bottle, the following steps should be carried out.
Removing the empty CO2 bottle
Figure I
①Regulator (2) Pressure reducer 3 Blind plug 4 Main valve (5) Pressure gauge for pressure regulation ⑥CO2 hose
- Close the gas bottle at the main valve.
- Turn the pressure regulator to 0°
Note
If the pressure reducer is separated from the CO2 bottle, even if there is still sufficient pressure, the O-ring between the bottle and the pressure reducer becomes deformed and must be replaced. 3. Loosen the tension strap securing the CO2 bottle. 4. Remove the empty gas bottle. 5. Unscrew the pressure reducer from the empty gas bottle.
The device must comply with the applicable labeling rules and local regulations.
Do not operate the device without water.
Do not use abrasive or aggressive cleaning agents. It is recommended to clean the surface with a soft cloth (6.295-686.0).
Safety instructions
Safety
Danger level
DANGER
- Indicates an imminent danger that will result in serious injury or death.
WARNING
- Indicates a potentially dangerous situation that could result in serious injury or death.
CAUTION
Indicates a potentially dangerous situation that could result in minor injury.
NOTICE
- Indicates a potentially dangerous situation that could result in property damage. Safety instructions
DANGER - Risk of electric shock. Before starting work on the device, unplug the power cord. The socket must be equipped with a residual current device (RCD) with a rated residual current of 30 mA.
- Danger of explosion due to possible rupture of the CO2 gas cylinder. Install the pressure reducer vertically and secure it. Always connect the gas cylinder to a pressure reducer designed for this type of device and to a safety valve. Protect the gas cylinder from excessive heat and never expose it to direct sunlight.
- Danger of explosion. Never connect a CO2 cylinder with a siphon tube. Cylinders with a siphon tube are marked, for example, with a red warning label. - Danger of suffocation due to the escape of compressed gas.
Ensure adequate ventilation and exhaust air at the installation site or install a gas alarm. Comply with the legal requirements of the country regarding the prescribed minimum room size, ventilation systems, and ventilation when emptying compressed gas cylinders. Danger of explosion. Do not store flammable items in the device, such as aerosol cans with flammable substances.
WARNING When installing the device, make sure that the mains cable is not pinched or damaged. Do not place multiple socket strips or
portable power supplies behind the device. - Danger of injury due to cylinder explosion. Carbonated water may only be filled into pressure-resistant bottles (10 bar).
Danger of burns. Do not close the ventilation openings of the device.
- Danger of damage. Do not use mechanical or other auxiliary means other than those recommended by the manufacturer to accelerate the carbonation process. Do not damage the cooling circuit. - Health hazard from germs. When changing the CO2 cylinder, maintain hygiene and cleanliness. When changing the filter, use sterile disposable gloves. Regularly clean the drip tray and surfaces. Never touch the water outlet with dirty hands or a dirty cloth. Perform chemical cleaning of the device at least once a month. If the drinking water supplier has warned of microbiological contamination, chemical cleaning of the device must be carried out after the warning is lifted.
- Health hazard due to increased concentration of microorganisms in the water. If the device has not been used for more than 4 days, it is necessary to switch on the device, open the water supply and perform chemical cleaning, see chapter. - Health hazard due to incorrectly repaired device. Repair of the device may only be carried out by trained personnel.
- Danger from cleaning agents. Follow the safety instructions for the cleaning agent and wear protective goggles and gloves when working with cleaning agents.
ATTENTION: Damage to the cooling block of the device. If the device has been stored or transported in a horizontal position, it is necessary to wait at least 24 hours before putting it into operation.
Symbols on the device

WARNING
Danger of ignition, flammable
Materials
This device uses
Refrigerant R-600a.
In case of refrigerant leakage, keep the device away from sources of ignition.
Intended Use
WARNING
This device is not intended for use by persons (including children) with reduced physical, sensory or mental capabilities, unless they are under the supervision of a person responsible for their safety or have been given instructions on the use of the device.
WARNING
We recommend that you do not repair the device yourself.
WARNING
To avoid hazards, damaged supply cords must be replaced by the manufacturer, its service agent or similarly qualified persons.
The device is intended for dispensing chilled water without adding carbon dioxide (CO2) that meets the quality of drinking water. The device is suitable for self-service. The device can be used in the following areas:
In kitchen areas of shops, offices, and other working environments; in agriculture;
In hotels, motels, bed and breakfasts, and other residential-type environments. - In catering and similar enterprises in the wholesale trade sector.
- The device is equipped with a combined filter.
- The device must be installed in a room protected from frost. Do not install the device outdoors. Do not install, store or transport the device in a horizontal position.
Intended Use
Usage
- Perform chemical cleaning (see chapter).
Chemical Cleaning
CAUTION
BOH 80 da 7 or a cm cu He noxodim nnonp6nna.
Chemical cleaning must be carried out after the first start-up, as a rule, no less than once a month. This also applies to the station after a shutdown of more than 7 days or after replacing the filter.
Note
For chemical cleaning, a cleaning kit is required (see chapter "Consumables"). Chemical cleaning of the filter takes approx. 45 minutes. 1. Close the water inlet line. 2. Close the main valve for CO2 and turn the pressure regulator for CO2 to position 己 _ 0 ^ 3. Press and hold the "Cooling water with CO2" button until the water inlet stops. 4. Turn off the device. 5. Remove the filter. 6. Install the service cap. Figure O a Loosen the filter mounting. Max. 45° install the service cap. Turn the service cap clockwise. d Screw the filter into the device. 7. Disconnect the water outlet pipe. 8. Prepare the cleaning kit. Figure P 1 Water inlet 2 Threaded connection of the injector 3 Sealing ring 4 Injector housing 5 Water outlet (connection to the device) a Disassemble the cleaning kit. Insert the cleaning agent cartridge into the cleaning kit. Screw the cleaning kit, taking into account the correct seating of the sealing rings. 9. Connect the cleaning kit to the device inlet. 10. Connect the water supply pipe to the cleaning kit. 11. If possible, install the cleaning kit in a vertical position. Figure Q 12. Remove the tray for collecting drops.
13. Place a suitable container with a volume of at least 1 liter under the water outlet. 14. Insert the mains plug into the socket. 15. Open the water inlet. 16. Turn on the device.
Note
The following steps must be performed with special care to achieve the best effect from chemical cleaning.
Note
The cleaning agent for chemical cleaning is equipped with a blue color indicator. The coloring of the emerging water indicates the concentration and activity of the cleaning agent.
Note
During the cleaning process, a negligible amount of dust is formed. This is provided for by the system and is normal.
- Perform the cleaning.
a Press and hold the "Cooling water with CO2" button until the device stops drawing water after 60 seconds. Continue holding for 60 seconds until the cleaning agent dissolves. c Repeat the above process (rinsing for 60 seconds and cooling for 60 seconds) in total complexity 2 times. After each rinsing process, empty the container and press and hold the "Cooling water" button for 30 seconds. The rinsing process is complete. The effect time of the cleaning agent begins. It must last at least 15 minutes and can be extended as needed. Continue the effect time of the cleaning agent for 15 minutes. Close the water inlet and press any button until the water outlet stops. 20. Turn off the device. 21. Remove the cleaning kit. 2. Reconnect the water supply hose to the device.
- Remove the service cap and reinstall the filter.
Flushing chemical treatment
Application
The flushing process can be slightly interrupted, for example, to check the machine.
- Install a suitable container with a volume of at least 1 liter at the water outlet.
- Open the water supply line. 3. Turn on the device.
- Press the "Cooling water" button? Repeat until the coloring in the blue color disappears. Then rinse with at least 4 liters.
- Press the "Cooling water CO2" button. Repeat until the coloring in the blue color disappears. Then rinse with at least 2 liters.
- Open the main valve on the CO2 cylinder and check the set pressure. Adjust the pressure regulator of the CO2 cylinder to position "4". 7. Drain the CO2 water to ensure the system is filled with CO2. The device is ready for operation.
Test run
To verify the effectiveness of the chemical treatment, it is necessary to take samples directly after the chemical treatment is completed, following the rules of microbiological analysis of water, and perform an assessment by an accredited laboratory.
Emptying the drip tray
The float signals when the drip tray is full. When the maximum fill level is reached, a noticeable red marking ring appears.
Figure R
- Carefully remove the drip tray and empty it.
- Check the drip tray for contamination and clean if necessary.
- Install the drip tray for collecting drops.
Help with malfunctions.
We reserve the right to make technical changes.
Maintenance plan.
Maintenance plan WPD 55 S.. 164
General instructions.
Before using the device, read the original operating instructions carefully.
Operate and maintain it according to them. Keep the original operating instructions for
future use by the next owner.
To avoid malfunctions, use the device only with cold drinking water. The water quality must, at minimum, meet the basic recommendations of the World Health Organization (WHO). For installation of the device, it is necessary to connect it to the water supply network; this must be done by qualified personnel, as per local laws and regulations. If necessary, work must be carried out on the instructions of the installer. For devices with a water connection, it is recommended to install a water filter and a shut-off valve (see details). Maintenance work inside the device may only be carried out by the device operator who has read this operating manual. When using the device, it is necessary to follow the safety instructions and warnings given in the manual. Do not operate the device without water. Do not operate the device with damaged or aggressive cleaning agents. It is recommended to clean the surface with a soft cloth (6.295-686.0).
Safety instructions.
Safety steps.
SAFETY
Safety instructions that directly endanger life or health.
WARNING
If a potentially dangerous situation occurs, it can lead to serious injuries and death.
WARNING
If a potentially dangerous situation occurs, it can cause minor or light injuries.
CAUTION
If a potentially dangerous situation occurs, it can cause material damage. Safety instructions: DANGER: Risk of electric shock. Before performing any work on the device, unplug the power cord from the outlet. The outlet must be equipped with an automatic circuit breaker that trips in case of current leakage. Danger for the user due to CO2 cylinders. Place the cylinder vertically and close it. Cylinders equipped with a pressure regulator that matches the device type and a shut-off valve. Protect the cylinder from direct sunlight and do not expose it to temperatures above 50°C. Explosion hazard. Never connect the CO2 cylinder to the pressure hose. Cylinders with pressure hose are intended, for example, for welding with a preheating nozzle. Danger of suffocation due to release of carbon dioxide gas. Ensure adequate ventilation in the room where the cylinder is installed, or install a gas alarm system. Follow the legal regulations of the specific country regarding the minimum room size, alarm systems, and ventilation during the emptying of gas cylinders. Fire hazard. Do not store flammable objects in the device. Objects such as aerosol cans with flammable propellant. △ WARNING: Before installing the device, make sure that the power cord is undamaged and not pinched. Do not place objects on the device or carry it by the hose. Danger of injury from the cylinder. The cylinder may only be filled up to the pressure indicated on the cylinder (10 bar). Overpressure hazard. Do not close the ventilation openings of the device. Risk of damage. Do not use mechanical
Cumulative material damage. Safety instructions DANGER: Danger of electric shock. Before carrying out any work on the device, disconnect the mains plug. The socket must be equipped with an automatic switch that trips with a residual current of 30 mA. Danger from carbon dioxide cylinders. Place the cylinder vertically and close it. Connect the cylinder, equipped with a pressure reducer that matches the type of device, and a shut-off valve. Protect the cylinder from direct heating and do not expose it to direct sunlight. Explosion hazard. Never connect CO2 cylinders to the high-pressure hose. Cylinders with high-pressure hose are intended, for example, for pre-welding with a torch. Suffocation hazard due to the release of carbon dioxide. Ensure adequate ventilation of the room where the cylinder is installed, or install a gas alarm system. Follow the specific legal regulations of the country regarding the minimum room size, alarm systems, and ventilation during the emptying of gas cylinders. Explosion hazard. Do not store in the device any explosive objects, such as aerosol cans with flammable propellant. WARNING: Before installing the device, make sure that the mains cable is undamaged and not pinched. Do not leave the device unattended or carry it by the hose. Risk of injury from the cylinder. The cylinder may only be filled up to the pressure indicated on the cylinder (10 bar). Overpressure hazard. Do not close the ventilation openings of the device. Risk of damage. Do not use mechanical
or other means, other than those recommended by the manufacturer, to accelerate the defrosting process. Do not damage the cooling circuit. Health hazard due to the formation of microorganisms. When changing the filter cartridge, pay attention to cleanliness and hygiene. When changing the filter, use sterile disposable gloves. Regularly clean the surfaces and the inside to remove droplets. Do not touch the water dispenser with fingers or dirty cloths. Perform chemical disinfection of the device at least every 6 months. If the operator of the water supply system is informed of microbiological contamination, then after resolving the situation, chemical disinfection of the device must be performed.
Health hazard due to increased concentration of microorganisms in the water. If the device has not been used for more than 4 days, it is necessary to turn off the device, close the water supply, and perform chemical disinfection, see chapter.
Health hazard due to improper repair of the device. Repair of the device may
only be carried out by trained personnel. Risk of injury from cleaning agent. Follow the safety instructions for the cleaning agent, and when working with cleaning agents, use protective goggles and gloves.
The device must be stored or transported in a horizontal position for at least 24 hours before starting its operation.
Device symbol
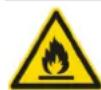
WARNING
Fire hazard, flammable material
The device is used
For cooling liquids
In case of coolant leakage, disconnect the device from
the power supply immediately.
Intended use
WARNING
This device is not intended for use by persons (including children) with reduced physical, sensory or mental capabilities, unless they are supervised by a person responsible for their safety or have been previously instructed in the use of the device.
WARNING
Ensure that children do not play with the device. WARNING
To avoid hazards, a damaged power cord must be replaced by the manufacturer, its service agent or a similarly qualified person.
- The device is intended for dispensing cold water and without adding carbon dioxide (CO2), which is part of self-service equipment.
in agricultural holdings, orchards and other work areas; in rural households, hotels, boarding houses and other places of residence; on premises of public utility for similar use of gas equipment.
- The device is a combined filter.
- The device must be installed in a non-freezing room. Do not use or install the device in an explosive atmosphere. Do not place, store, or transport the device in a horizontal position.
Possible incorrect use
Incorrect use of the device is prohibited. The operator is responsible for damage and losses caused by incorrect use.
General instructions for handling CO2 cylinders
When handling CO2 cylinders, it is necessary to follow the safety instructions and national regulations.
The CO2 cylinder must be equipped with a pressure reducer approved by KARCHER, which regulates the content of carbon dioxide in water. Carbon dioxide gas E 290 must meet the requirements for purity in accordance with Directive 96/77/EC (list of food products) and must be marked in accordance with Article 7 of Directive 89/107/EEC. Before using the gas cylinder, it is necessary to ensure that the cylinder is in proper condition. Information about the type of gas is on the safety label, which must be affixed to each gas cylinder. The cylinder label provides information about the type of gas. It is forbidden to use a gas cylinder whose contents are a mixture or gas from other sources (for example, from a damaged cylinder, water or mechanical treatment). It is necessary to comply with the regulatory requirements of the country of use of the device.
SAFETY
Safety alphabet
Never place the CO2 cylinder with the pressure hose. Cylinders with a pressure hose are intended, for example, for horizontal placement.
WARNING
Safety for the compressor: possible overpressure of the CO2 cylinder
Place the cylinder vertically and close it. Do not open the pressure reducer and the main valve. The pressure reducer with the main valve is intended for use with the device.
The device may only be used for its intended purpose, taking into account the safety instructions and the information in the operating instructions.
The device is intended for use with CO2 cylinders that are approved for this purpose.
Secure the CO2 cylinder against tipping over.
Follow the safety instructions provided in the operating instructions.

Environmental protection

The packaging materials can be recycled. Please dispose of the packaging in an environmentally friendly manner.

Electrical and electronic devices contain valuable, recyclable materials and often components such as batteries, rechargeable batteries, or accumulators, which, if
disposed of improperly or incorrectly, can pose a risk to health and the environment. However, these components are required for the proper operation of the device. The device, marked with this symbol, must not be disposed of together with household waste.
R-290: The refrigerant R290 is a hermetically sealed system.
Information on components (REACH)
Current information on components can be found at: www.kaerner.de/REACH
Accessories and spare parts
Only use original accessories and original spare parts, as they guarantee safe and trouble-free operation of the device.
Information on accessories and spare parts can be found at www.kaercher.com.
MOHTaXHi KOMnJIeKTH
DdaTkoBm MaTepln DIn BCTaHOBneHHA
| Опис № дials | Замоевский НГ |
| АВТOMATИЧМУ ВIMКСА, РО СП RAцьовуе 3 ПОЯБЮ CTРУМ Y BITOKY, 30 MА, 230 B, 50 Гц | 6.640- 427.0 |
| AQUASTOPP, ДАТИК BITOKY BODI i3 ЕLEKTROMАгИNTHM KJIANAHOM TА ЛАТУНМ HAPİЗNHМ 3'ЕДHAнHМ G 3/4" | 6.640- 291.0 |
| РЕДУКТOP TИСКУ 1,5-6 бар - 1/2 | 6.640- 625.0 |
| Water Block, писчридя залибоганни переньюванно | 6.640- 338.0 |
| ЗворOTПК Клиан, дolyшени | 6.640- 463.0 |
BudatkoBm MaTepiA
Φinbtp
YcTaHOBneHH qinbTp a
△NONEPENXEHH
He6e3neKa dny 3dopeo8' uepe3 nompannnaHHMikpoopaHImie
Tidvac cemahoeenHnphiinmpyeanbhoo nampohocobnye yeay npudinmu aieichi ma yucmomi.
Iid yac ymaHOeHnH aHbmpa eukopucmoeyute cmepnbHi odHpao3oepykaueuui.
- BiikpnTn φikcaTop KpniuKn φinbTpa.
MaJIHOHOK F
- 3нгтк кршку Фпьтра 3б氧к.
- BmHRTn cepBcHm cTakAH,yCTaHOBHeHn Ha 3aBOiO.
MannhoK G
a Haxnnt npmau pnbpa MaKc. Ha 45° BbKpyTNI cepBICHn CTaKH npOTn ROJHHKOBOI CTpIKN.
C BnHrTn cepBicHm CTAkAH.
- BCTaBttnn fijnbTp.
MaJIHOHOK
a Haxnntn Tpmau fnbpa MaKc. Ha 45° b BctaBnTn pifnbTp 3Bepx y TpMaH. c BkpyTuTn FInbTp Do ynopy. PhiBtp pikcyetbca. d NobepHyBmTpMauy BnXIDHe NoIoxKeHH, BCTaBnTn pInbTp y npucptpi.
- BCTaBttn KpnuKy fInbTp a 360ky
- 3akpntn φikcatop kpiuken pfinbtpa.
Pepwe BBeDeHnB Eeknnyatauio
Bka3ieKa
Ia nIopmuHAnH iEiHcHcMo 60DnpoBihDx KOMNoHeHm npucmpo NiCt mpaHcnOpmyAeHH OEH3aNo6HeH Ha aedol eyaneKucnLz aamO (CO2)
PpomBaHH npucTpoIO iinbTpap
Bka3jke
Cnoamky becb npucmpi i finbmp mpe6a npommu 0doio.
- BjdkpnTn liHIO BOJOnocTaaHHa
- NocTaBnEmHicThb nDdo3aTOp BOuN
- Hatickatn KHonky 《OxonoDxeka Hbda》d0tN,doKn He6yde doCaryHto5-xBmHHoro yacy npommbaHH (np6bn.10-15 npiPB).
- WARNING: The CO2 cylinder will not be reached until the 4-minute flushing time has elapsed (see paragraphs 4-5).
Instructions
After 60 seconds of continuous water supply, the device will automatically start. 5. Perform chemical treatment (see chapter Chemical treatment). 6. Insert the CO2 cylinder (see chapter Connecting a new CO2 cylinder). 7. Pressurize the CO2 pressure.
For CO2 cylinder: open the main valve and set the rotary regulator so that the pressure gauge shows 4 bar.
CO2 cylinder: turn the cap of the rotary regulator to the '4' position. The device is ready for operation.
Handling the CO2 cylinder
Instructions
Follow the general instructions for handling CO2 cylinders, see chapter General instructions for handling CO2 cylinders. When connecting a new or replacing an old CO2 cylinder, follow the instructions below.
Replacing the old cylinder
Legend
① Rotary regulator ② Pressure reducer ③ Union nut ④ Main valve ⑤ Pressure gauge for regulated pressure ⑥ CO2 hose
- Close the gas cylinder with the main valve. 2. Set the pressure regulator to position '0'.
Instructions
If the pressure regulator is disconnected from the CO2 cylinder, the residual pressure is released. Check the seal between the cylinder and the pressure reducer; if necessary, replace it.
- Then install the new CO2 cylinder.
- Turn the valve handle on the new gas cylinder.
Connecting the new cylinder
Manifold
①Pressure regulator ②Pressure gauge ③Union nut ④Valve handle (5) Regulated pressure gauge ⑥Hose
- Remove the protective cap from the new gas cylinder.
- Open the valve handle to allow the pressure gauge to show the CO2 pressure.
- Screw the pressure regulator onto the new gas cylinder. Tighten the union nut on the right side using the adjustable wrench. 4. Then tighten the union nut. 5. Install the new CO2 cylinder and close it with the manual valve. 6. Connect the CO2 hose to the pressure regulator.
- Open the valve handle on the gas cylinder.
- Set 4 bar on the pressure regulator using the rotary regulator.
- Close the valve handle on the gas cylinder. 10. Read the value displayed on the regulated pressure gauge. The displayed value should remain unchanged for at least 5 minutes.
If a pressure drop is observed:
- Eliminate the pressure drop
a. Check the presence of the sealing ring between the main cylinder and the pressure regulator. b. If the sealing ring is damaged, replace it. Check the correct installation of the pressure regulator.
d. Tighten the union nut. e. Check the hose on the pressure regulator and the CO2 hose for leaks.
The pressure regulator is faulty and its pressure needs to be replaced.
- After checking the temperature, the cylinder head is 12 kPa.
- Set the pressure regulator using the rotary regulator. The set pressure is 4 bar and can be adjusted if necessary. 14. APPENDIX 3: CO2 CYLINDER REPLACEMENT
CO2 cylinder replacement
Instructions
Follow the instructions below to replace the CO2 cylinder.
Instructions
CO2 cylinders can be purchased at pharmacies, electrical goods stores, and supermarkets. After disconnecting or dismantling, the CO2 cylinder should be checked for leaks.
Dismantling the CO2 cylinder
Legend
1 Pressure regulator scale 2 Pressure regulator adjustment knob 3 Pressure regulator 4 Union nut 5 CO2 hose 6 CO2 cylinder
- Set the pressure regulator to the OFF position
- After attaching the CO2 cylinder
- If necessary, disconnect the CO2 hose from the CO2 pipe.
- Unscrew the CO2 cylinder counterclockwise from the union nut.
New CO2 cylinder
Figure J
①Pressure regulator scale ②Regulator adjustment knob 3Pressure regulator 4Connection fitting 5CO2 hose ⑥CO2 cylinder
- CO2 cylinder housing
- Screw the CO2 cylinder onto the pressure regulator connection fitting. To avoid resistance, turn the CO2 cylinder slightly until it is fixed.
You may hear a short hissing sound.
- If necessary, connect the CO2 hose to the CO2 fitting again.
- Then place the CO2 cylinder in a vertical position.
- It is recommended to set the pressure regulator to position "4". 6. After using the CO2 cylinder, release one liter of "water" to check the CO2 content and ensure the CO2 is fully dissolved.
Operation
Function
From the start, water flows through the combined filter (see the "Filter Material" section in the chapter). Then, depending on which button is pressed, water passes through the cooling module and optionally through the CO2 enrichment to the water dispenser. It is possible to adjust the chemical treatment of the entire system.
Control
Indicator
Touch buttons with LED indicator.
① Button «Water filling CO₂» ② Button «Water filling»
- Install the pressure reducer on the cylinder valve. Figure 1
- Press the water filling button until the container is filled.
When the water level is reached, the button will light up.
Operation
If the device is not used for more than 4 days. Close the water tap 2. Turn off the device 3. Close the CO₂ cylinder valve or turn the CO₂ cylinder pressure regulator to the «O» position.
Putting into operation after a break in operation
WARNING
Health hazard
After a break in operation, the concentration of microorganisms in the water may increase. If the device has not been used for more than 7 days, before reusing the device, it is necessary to perform the following steps
1 Open the water tap 2 Turn on the device. Depending on the duration of the break in operation, perform the following steps: For a break of 4 to 28 days: 1 Drain the water from the hot water tank and the cold water tank. 2 It is recommended to carry out chemical cleaning. (See chapter «Maintenance») For a break of more than 28 days: 1. Remove the filter and install a new one. 2. Drain the water from the hot water tank and the cold water tank. 3. Carry out chemical cleaning (see chapter «Maintenance»). 4. Perform a filter regeneration cycle.
Transportation
STORAGE
Not applicable
Handle the device carefully during transport to avoid damage.
Do not transport the device in a horizontal position. During transport, secure the device with the original packaging or equivalent protective measures.
Device setup
Do not transport the device in a horizontal position.
Choose a suitable transport box and mark it with the vertical transport symbol. If possible, place the device upright. Alternatively, you can use the original packaging from the center of Karcher.
Storage
Surface
Unpacking
Handle the device carefully during storage to avoid damage. 1. Store the device in a frost-protected location.
Technical maintenance
WARNING
Health hazard due to improper repair of the device
Only allow qualified personnel to repair the device.
Before performing any work on the device:
- Disconnect the device from the power supply.
a. Open the water supply tap. b. Place the container under the water outlet. c. Press the "Cold Water" button until water flows and then stops.
- Remove the plug
- Pull the power plug out of the socket. 4. Close the main CO2 cylinder valve or turn the CO2 cylinder pressure regulator to position O
- If necessary, unscrew the CO2 cylinder pressure regulator.
Filter replacement
WARNING
Health hazard for people with weakened immune systems
When replacing the filter cartridge, be careful to avoid contamination. When replacing the filter, use sterile disposable gloves. 1. Close the water supply. 2. Press the "Cold Water" button until water stops flowing.
- Open the filter cover.
- Remove the filter cover. 5. Remove the filter if necessary. Manual M
a. Tilt the filter at an angle of 45°.
b. Unscrew the filter.
- Blow out the new filter.
- INSERT THE FILTER.
Figure N
Insert the filter, turning it upside down. The filter is inserted into the turned holder in the upper position of the filter.
- Insert the filter cartridge.
- Close the filter cartridge retainer.
- Insert the plug into the socket.
- Place the container under the water dispenser.
- Open the water supply pipe.
- Press the button (or lever) until the water is drained for about 5 minutes (approximately 10-15 liters).
Indicator
After the water is drained, the device will automatically switch off.
- Perform chemical cleaning (see chapter).
Chemical cleaning
Boda, uo eumikac, -ue ouucha eo
Ouça hóba, uo eumikae, He ndoxodmb dna cnoxueaannh.
Chemical cleaning is recommended to be performed before commissioning, and, as a rule, after repairs. This concerns the extension of operation above 7 days or after a long downtime of the filter. For chemical cleaning, use the cleaning kit (see chapter "Consumables").
Bka3ieKa
Chemical cleaning takes about 45 minutes.
1. Close the water supply valve. 2. Close the main tap of the CO2 cylinder or turn the pressure regulator of the CO2 cylinder to position (0). 3. Press the CO2 cooling button until water stops flowing. 4. Turn off the device. 5. Remove the filter.
- Insert the service cup.
Figure O
a Tilt the filter holder to 45° and insert the service cup. c Screw the service cup clockwise. d Turn the filter holder to the outlet position.
Device position.
- Open the water supply valve.
- Prepare the cleaning kit.
Figure P
1 Water inlet channel ② Threaded connection of the injector ③ Filter element (4) Injector body
⑤ BnixiBovn (niiknoeHnI do npictpoio)
a Po3kpyTnTu KOMnJIeK TnA OuHueHH b BCTaBHTI 4TabNETKdIryOnuHENB KOMPnEeTIN dnyOnuEHN. C KpyTNi KOMnPeKIT DnIa OHuHHeHH, cnIkyOnu 3a npaBnblbHM PO3MIeHHM yUJIbHOBAJbHOrO KINbHa.
- ПлкноштКOMПLEKTДЯ OЧИEнHA DO BXODY NIMCTPOK. 10.ПдкнчITиПИЮ BODONOTаHHА ДКOMЛКТУДЯ ONUHENHA.
- RaIO MoKINIOB, BCTAHOBHTN KOMPJIeKT DJIY ONUHENH Y BEPTKANbHe NIOJoxeHHA. ManIOHOK Q
- BnHnTn nIDoN dN 36npaHHKpanelb.
- NoctabTIN nID o3aTOP BOI BIINOBIDHY eMHICTb MICTKCTHO HE MEHJE 1 NIPTA.
- BcTaBnTn WTeNceIbHy BnIky Bpo3eKy.
- Bɪdkpɪnɪ nɪhɪ BOɒɒnɔctaʊhɪŋ.
- YbimKHyT npctpi
Bka3ieKa
Bukohyime hacmyhnpoku 3 oocbueo0 obepexHKtMIO, uO6 3ae3neumu MaKcumabHui eefekXMIXHHOO OUeHHN.
Bka3ieKa
Tacic 18 xMHIoo OoUHHH Ma cui HONKOpoei IHoukamop.3MIHNHO KONbpy oOu, kua buaaebcB.
According to the concentration and activity of the drug, rinse.
Insert
The rinse process is carried out with the device turned off. This is a one-time system and is in normal mode.
Perform the rinse. Press the Cool Water CO2 button, wait for the water to stop flowing through after 60 seconds. Wait 6 seconds for the rinse device to complete. Repeat the process (rinse for 60 seconds, wait 60 seconds) a total of 2 times. After each rinse, empty the container. Then hold the Cool Water button for 30 seconds. The rinse process is complete. The rinse device is ready for operation. This takes at least 15 minutes. The duration can be extended as needed.
Wait 15 minutes to allow the device to complete the rinse.
18. Close the water supply valve
- Press the button until the water stops flowing.
- Turn off the device
- Disconnect the device from the power supply. 22. Reconnect the water supply hose to the device.
- Remove the service cup and reinstall the filter.
Rinse the filter
Insert
The rinse process can be interrupted at any time, for example, to empty the cup.
- Place the water container with a capacity of at least 1 liter.
- Open the inlet pipe. 3. Turn on the device.
- Press the button «OxONOJKeHbOa» until the water supply indicator is not lower than 4 liters.
- Press the button «OxONOxaHbOaCO2» until the water supply indicator is not lower than 2 liters.
Then press, the indicator will be at least 2 liters.
- Open the main valve of the CO2 cylinder and check the installation of the gas pressure or set the pressure regulator of the CO2 cylinder to position «4».
- Fill the tank with water, which contains CO2, so that the CO2 is again filled.
The device is ready for operation.
Sampling
To check the effectiveness of chemical cleaning, select a sample directly after chemical cleaning, obtained from the water supply line, and conduct an assessment in an accredited laboratory.
Syringe for sampling
Dropper
The syringe indicates the complete filling of the dropper. When the maximum filling level is reached, the dropper automatically stops the overflow.
Figure A
1. Carefully remove the syringe for sampling the dropper. 2. Check the syringe for sampling the dropper for contamination and clean if necessary. 3. Reinstall the syringe for sampling the dropper.
Help in case of malfunctions
| Поминka Пrimина Усуненя | ||
| Пристрий не видах Bodи,鉴定 Вдобрахастбя « Готовийdoes ekclуатual». Сaitrayы уci коннки. | П一步一步 пою. Конки не сbeltь. | 1. Biindobin'tи поаду Bodи. 2. Леговинларып. 3. Рождени. 4. Дiversification do copbichoi'sclujkbi. |
| Злары пою видах Bodи,鉴定 Вдобрахастбя « Готовийdoes konstуатual». | ● Леговинларып. 3. Дiversification do copbichoi'sclujkbi. | |
| Воротахною Bodи та xолоданою Bodи сaitrayы по черз, i пунace звковский. | Моodyль oxolodжени有很大 пося наразсв сбоста за干嘛otemпетатурп. | 1. Спобуbatи有很大 пося за черс 20-40 xbulin. Якшо Функу охолodжени вимкиу Трвали чac; 2. Вимкиу постри. 3. 3berpyntcisdo copbichoi'sclujkbi. |
| Конки raizobanoю Bodи та xолоданою Bodи сaitrayы по черз, i пунace звковский. | НесравпICTь ретунларota temпетатурп. | ● 3berpyntcisdo copbichoi'sclujkbi. |
| Конки raizobanoю Bodи більшие Нситпься черз 60 секун, i podача raizobanoю Bodи звлokobана. | He bǎdоча залobину有很大 karбогизatorpa. | 1. Вимкиу有很大 постри. 2. Леговинлары Bodи. 3. Леговинлары ТSCK rasy. 4. Вимкиу ТАЗOB YBIMKHyTи постри. 5. Рождени. 6. 3berpyntcisdo copbichoi'sclujkbi. |
| Вунгшни nauseц дурахастбя пid час Вдадч «Охолodжени Bodи CO2» 3 рizhoю zatprimskoю. | Лциnomлары有很大 пошпс. а He nomilka. | ● Ucunehнн He notpibhe |
| Вунгшни nauseц пошпс, ненадовто zanyskaстбя | Лциnomлары有很大 пошпс. а He nomilka. | ● Ucunehнн He notpibhe |
| Вундам Вимсунлары ratу y bodi | Темп ratу CO2 заhandою nizhki. | ● Biindopinigbatи有很大 ratу CO2 |
| Балон CO2 abo цilin'dр CO2 поожнii. | 1. Замину有很大 ratу CO2 abo цilin'dр CO2. 2. Рождени. 3. Zamhinу有很大 ratу CO2 abo цilin'dр CO2. | |
| Задто мало Вимсунлары ratу y bodi | Балон CO2 abo цilin'dр CO2 майke поожнii. | ● Замину有很大 ratу CO2 abo цilin'dр CO2. |
| Фilsьтабordнелу有很大 пошпс. i змени. нлары Bodи. | 1. Леговинлары有很大 ratу CO2. 2. Рождени. 3. Zamhinу有很大 ratу CO2 abo цilin'dр CO2. | |
| Балон CO2 abo цilin'dр CO2 майke поожнii. | ● Zaminhi Balaon CO2 abo цilin'dр CO2. | |
| Бризки raizobanoю Bodи пid час Вдадч 6ilbwoi kinbokosti Bodи | П一步一步 пою видах Bodи. 鉴音 Bodи раду ratу 3ahandою виске. | ● Леговинлары有很大 ratу CO2. 2. Рождени. 3. Zaminitiй有很大 ratу CO2. |
| Налашувань тису ratу 3ahandою виске. | 1. Biindopinigbatи有很大 ratу CO2. 2. Рождени. 3. Zaminitiй有很大 ratу CO2. |
Warranty
Warranty conditions established by the manufacturer or importer for this product are valid for the country of purchase. Possible malfunctions of the device during the warranty period are eliminated free of charge, provided that the malfunction is caused by material defects or manufacturing defects.
To file a claim during the warranty period, please contact the trade organization that sold the product or the authorized customer service center with the purchase receipt. (See reverse side)
Additional information (if available) can be found in the customer service area of the Kärcher website under "Downloads".
Technical specifications
Maintenance plan
Safety instructions 165
Safety instructions 165
Symbols on the device 166
Intended use 166
General instructions for working with the CO-Buttle 166
Protection of the environment 166
Accessories and spare parts 166
Consumables 166
Scope of delivery 167
Description of the device 167
MoHTax 167
PbPBOHaayanHnyckaHeBeknloatau.. 167
Pa6oTa c 6yTnIkata c CO2 167
Pa6oTa cunmHbpa 3a CO2. 168
Ekncnnoataa 168
TpaHcnpTupaHe 168
CbXpaHHe 168
Pnka nnoDpBxKa 168
Pomou npn noBpeu 169
Tapaunra 170
TexHueckn daHHN 170
Pnann3a noDpBxka 170
IpoToKoJ3a noDpBxka WPD 55 S 171
06u yka3aHn
IpeDn nbpBTO n3nON3BaHe Ha ypeDa
Fill in the original instructions for subsequent use or for the owner.
To guarantee the quality of the water, only drinking water from the public water supply must be used. The quality must meet the requirements of the World Health Organization (WHO). If the installation site is not connected to the drinking water network, the installation must be carried out by two qualified specialists who have permission in accordance with local regulations. If necessary, these works can be carried out by a plumber. For the commissioning, the water must be flushed through several times. The water filter should be installed with the supplied accessories (optional) on the drinking water pipe. Work on the electrical equipment must be carried out in accordance with the manufacturer's instructions. The connection to the CO₂ cylinder must be made in accordance with local regulations for labeling and placement. Do not connect the device to the water supply. The surfaces must not be cleaned with alcohol, aggressive or abrasive cleaning agents. It is recommended to clean the surfaces with a mild detergent (6.295-686.0).
Safety instructions
Danger level
DANGER
- Indication of immediate danger that can lead to serious injuries or death.
WARNING
- Indication of a possible dangerous situation that can lead to serious injuries or death.
CAUTION
- Indication of a possible dangerous situation that can lead to minor injuries.
ATTENTION
- Indication of a possible dangerous situation that can
lead to material damage. Safety instructions Danger of electric shock. When working on the device, disconnect it from the power supply. The contact must be protected with a fuse for rated current of 30 mA.
Danger of injury from pressure. Before opening the valve, check the pressure reducer and tighten it. Screw the pressure reducer onto the cylinder valve and tighten it. Release the gas cylinder from the pressure reducer and never point it directly at people.
- Danger of explosion. Never connect a CO2 cylinder to a water supply pipe. Cylinders for water supply pipes are marked, for example, with a yellow warning sticker. - Danger of suffocation from leaking carbon dioxide.
Ensure sufficient ventilation of the room for installation or install a gas detection system. Follow the local laws and regulations regarding the minimum room sizes, gas detection systems, and ventilation when installing gas cylinders. Danger of explosion. Do not store any explosive objects such as spray cans near the gas cylinder.
WARNING When positioning the device, follow the safety distances so that it is not damaged or knocked over. Do not place the device near heat sources or electrical equipment. Danger of injury from bursting cylinders. The water pipe must only be connected to pressure-resistant cylinders (10 bar). Danger of tipping. Do not block the ventilation openings.
Danger of injury. To speed up the defrosting process, do not use mechanical or other auxiliary means other than those recommended by the manufacturer. Do not damage the cooling circuit. Health hazard due to bacteria. When replacing the filter cartridge, follow the hygiene and cleaning instructions. When replacing the filter, wear sterile gloves for hygienic use. Regularly clean the device for optimal hygiene and surfaces. Never touch the water outlet with bare hands or with a cleaning cloth. At least every 6 months, perform a chemical cleaning of the device. If your water supply company has issued a warning about microbiological contamination, follow the warning and immediately perform a chemical cleaning of the device.
- Health hazard due to high concentration of bacteria in the water. If you have not used the device for more than 4 days, you must switch off the device, open the water supply and perform a chemical cleaning, e.g. with chlorine. - Health hazard due to incorrectly repaired device. The device must only be repaired by trained specialist personnel.
- Danger of injury from cleaning agents. Follow the safety instructions for cleaning agents and wear protective goggles and protective gloves when working with cleaning agents.
WARNING: Damage to the cooling module is possible. If the device has been stored or transported in a horizontal position, at least 24 hours before starting the device, you must arrange for technical support.
Symbols on the device
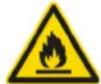
WARNING
Fire hazard, flammable material
This device uses a flammable
refrigerant
The refrigerant is flammable and the gas lines are under pressure
Intended use
WARNING
This device is not intended for use by persons (including children) with reduced physical, sensory or mental capabilities, unless they are supervised by a person responsible for their safety or have been instructed in the use of the device.
WARNING
Children must be supervised to ensure they do not play with the device.
WARNING
Repairs and maintenance must be carried out by the manufacturer, its service or by a person with the appropriate qualification, to avoid hazards.
The device is intended for carbonating drinking water with CO2 cylinders for self-service. The device can be used in the following areas:
In staff rooms of shops, offices and other work areas in agriculture, hotels, motels, guesthouses and other places for accommodation in catering establishments and public catering facilities.
- The device is equipped with a combination filter.
- The device must be placed in a protected area. Do not use or place the device outdoors. Do not store or transport it in a horizontal position.
Improper use
Any use not in accordance with the intended purpose is prohibited.
Maintenance and repair must only be carried out by authorized personnel. Improper use or use not in accordance with the intended purpose is prohibited.
General instructions for working with CO2 cylinders
When handling CO2 cylinders, the safety instructions of the gas manufacturer and the enclosed instructions must be observed.
To be able to adjust the CO2 content in the water, the CO2 cylinder must be equipped with an approved KARCHER pressure reducer. The pressure reducers must meet the requirements for cleanliness specified in Directive 96/70/EC on the quality of water intended for human consumption, as amended in accordance with Directive 89/107/EEC. Before using a gas cylinder, it must be installed with the correct tightness and the correct valve. Reliable information about the gas must be provided on the cylinder to warn of dangerous goods. The color of the gas cylinder is not sufficient information. Do not use a gas cylinder if the contents are leaking or if it is damaged or has been damaged (e.g., by impact, fire, or mechanical damage). The country-specific regulations must be observed.
DANGER
Danger of explosion
Never connect a CO2 cylinder to a water supply line. Cylinders for water supply lines are marked, for example, with a gray warning stripe.
TEMPERATURE
Danger of injury from escaping CO2 gas
After repair and refilling, check for leaks.
Never open the refrigerant circuit with a naked flame or near a flame. Refrigerators with a naked flame are only allowed for type Y equipment.
DANGER
Danger of injury from moving parts and hot surfaces.
Ensure the maximum permissible pressure for the pipes and the gas system is not exceeded.
Do not expose the CO2 cylinder to direct sunlight.
Protect the CO2 cylinder from overheating.
Install a visible label indicating the type of gas in the gas phase.
Environmental protection
Dispose of packaging materials properly. Dispose of packaging in accordance with local regulations.
Electrical and electronic devices must be disposed of separately from household waste, in accordance with local regulations.
Batteries, accumulators, and oil,
which are not properly disposed of, may pose a potential hazard to health and the environment. Proper functioning requires all parts to be in good condition. The mandatory symbols must be disposed of in accordance with regulations.
R-290 refrigerant is a greenhouse gas. R-290 - hermetically sealed system
Information on substances (REACH)
Current information on the Internet page: kaercher.de/REACH
Accessories and spare parts
Use only original accessories and original spare parts. They ensure safe and trouble-free operation of the device.
Information on accessories and spare parts: www.kaercher.com.
Delivery scope
| Описанne Katanoхe | H № |
| Приставka сизинданьр за CO2 | 2.644-217.0 |
| Приставka бутейка с CO2,разиостра themselves в тьproвската мрека(Bмостимост 2kg, 6kg, 10kg) | 2.644-218.0 |
| Опорна стойka Premium 2.644- | 134.0 |
| Опорна стойka Basic 2.644- | 221.0 |
| Описанце Каталож | eн № | |
| Када за ВODа, 1 I, съкпени, с плесимасов кади логото на KÄRCHER, р overdа за міе не в міяліни мішіни | 6.640-431.0 | |
| Гарафа, Eva Solo, 1 I, р overdа зă міе не в міяліни мішіни | 0.017-575.0 |
for standard use
| Описанne Кatableожен № | |
| Чаши за[eнократуна уnotpe6a 4 ] | 6.640-341.0 |
Gas cylinder
- Close the gas cylinder with the main valve.
- Set the pressure regulator to "0".
Instructions
If the regulator is not connected to the CO2 cylinder, before use, check that the sealing ring between the cylinder and the regulator is properly seated. 3. Remove the protective cap from the CO2 cylinder. 4. Remove the empty gas cylinder. 5. Unscrew the regulator from the empty gas cylinder.
① Pressure regulator ② Regulator ③ Cooling coil ④ Main valve ⑤ Pressure gauge with adjustable pressure
⑥ CO2 label
1. Remove the protective cap from the new gas cylinder. 2. Briefly open the valve to release any residual CO2 pressure. 3. Screw the regulator onto the new gas cylinder. This ensures proper seating of the sealing ring. 4. Tighten the cooling coil nut firmly. 5. Place the new CO2 cylinder and secure it with the retaining bracket. 6. Attach the CO2 label to the regulator. 7. Slowly open the main valve on the gas cylinder. 8. Read the pressure gauge and adjust the regulator if necessary. 9. Close the main valve on the gas cylinder. 10. Check the pressure gauge reading. The reading should be stable and not drop significantly. If the pressure drops, check for leaks.
a Check the sealing ring between the gas reservoir and the regulator for damage or wear. b Replace the defective sealing ring if necessary. c Check the correct seating of the regulator. d Tighten the cooling coil nut firmly. e Check the condition of the regulator label and the CO2 label for damage.
If the pressure cannot be relieved with the relief valve, the regulator must be replaced.
12. Check the tightness of the shut-off valve opening. 13. Adjust the working pressure of the pressure regulator. The factory setting is 4 bar and can be adjusted additionally if necessary. 14. After each change of the CO2 cylinder, check the entire system for CO2 leaks to ensure the CO2 mixture is correct.
Working with CO2 cylinders
Warning
The following instructions apply to working with CO2 cylinders. Please follow the instructions for working with CO2 cylinders.
Warning
CO2 cylinders are pressurized and are intended for electronic and professional use.
When connecting a new or recharging an existing CO2 cylinder, the following steps must be followed.
Replacing an existing CO2 cylinder
Fig.
① Pressure regulator (2) Adjustment knob (3) Pressure regulator (4) Cylinder screw connection (5) CO2 valve (6) CO2 cylinder
- Turn the pressure regulator to the "OFF" position.
- Unscrew the CO2 cylinder connection.
- Remove the CO2 valve from the SACO2 cylinder. 4. Unscrew the CO2 cylinder counterclockwise from the screw connection on the cylinder.
Connecting a new CO2 cylinder
Figure J
① Regulator knob for pressure (2) Adjusting the knee (3) Pressure regulator (4) Screw connection of the bottle (5) CO2 markings (6) CO2 cylinder
- Remove the cap of the CO2 cylinder. 2. Tighten the CO2 cylinder onto the screw connection of the bottle and the pressure regulator. If there is resistance, tighten the CO2 cylinder until it is fixed. It may be slightly tight.
- If necessary, turn the CO2 markings to the CO2 cylinder. 4. Tighten the CO2 cylinder again in the vertical position.
- Set the pressure regulator to position "4" beforehand. 6. After each use with a new CO2 cylinder, press the "CO2 water" button to release the CO2 residues again.
Operation
Function
Water inlet: Water first passes through the combination filter (water softening and filter cartridges). Depending on the action of the filter, after this the water passes through the CO2 system to the water outlet. The entire water system works purely chemically.
Maintenance
Instructions
The lighting will be activated with a slight delay.
Figure K
① Button "CO2 sparkling water" ② Button "Sparkling water"
- Place the glass in the middle of the drip tray. Figure L
- Press the button for sparkling water until the glass is full. During this process, the button light will be brighter.
3BExDaHe OTeKcnNoaTaun
Ako ypeDbT He ce n3non3Ba noBee oT 4Hn:
- 3aTbOpTe noDaBaHeTo Ha B0da.
- N3KIOUeTe ypea.
- 3aTbOpTe IaBnHnKpA HnBaYtNkata C CO2, pecn. 3aBbPteTepeyIatopa HnHaIraHeto Ha ZININHDbpa 3a CO2 oBpaTHo HnIPOKeHne "O".
IyckaHe B EKcNloaTaun Cnei N3BExJaHe OT EKcNloaTaun
△NPEDYUNPEKDEHNE
Onachocm 3a 3dpasemo
Ipo epeme Ha 38eXdoHemo om ekcnnoamauaon KOHeHmpauiMa ha Mukpobu bte eodama e ypeDa Moke da ce yeenuu.
Ako yedbme He e bun unon3aan 3a no-dnbpeuod om epeme (noeee om 7 dnu),mpraea da ce u3bpwam cnehume deuHocmu, npedu da uonnoname yeda omnoho.
1 OTbopeTe 3axpaHbaHeTo 3a B0da
2 Bknoyete ypeda
B 3aeucumocm om npobbnkumehnocmmHa Heynompeba u3bnheme cledhume cmbnku:
Cnei HeynoTpe6a 3a noBuee ot 7 dHn:
1 O T BcKnTbBODa H3TOeTe N3XbPnTe HaMnKO 1NtBp.
If the device is not used for 8 to 28 days:
1. Remove the battery and store it in a cool, dry place.
2. Store the device in a dry chemical environment. (See chapter "Risks and Maintenance")
If the device is not used for more than 28 days:
- 3. Remove the battery and store the device in its original packaging.
- Remove the battery and store it in a cool, dry place. 3. Store the device in a dry chemical environment (see chapter "Risks and Maintenance").
- 1. Remove the battery from the device.
Transport
PREVENTIVE MAINTENANCE
Unused device
Risk of damage to the device
When transporting, follow the safety instructions.
Do not transport the device in a horizontal position. - When transporting in vehicles, secure the device against sliding and overturning in accordance with the manufacturer's instructions.
Damaged device
The device must not be transported in a horizontal position.
Transport the device in its original packaging or a suitable alternative. Do not drop the device. Place the packaging in the correct position. Use a suitable marking for transport in the upright position. - The device must be protected against moisture and dirt. As an alternative, the device can be taken directly to the distribution point for Karcher service.
Storage
DANGER
Failure to observe the safety instructions and warnings when storing the device can lead to damage under the influence of the environment. 1. Store the device in a place that meets the conditions for storage.
Care and maintenance
DANGER
Danger to health from improperly repaired device
Have the device repaired only by trained specialist personnel.
Before any work on the device:
- Disconnect the device from the power supply and close the water supply. b At the water outlet, install a hose. c Press the "Cooling Water" button until water stops coming out.
2. Disconnect the device. 3. Remove the hose. 4. Close the main valve on the CO2 bottle, then close the pressure regulator on the CO2 supply in the opposite direction to the "O" position. 5. If necessary, remove the CO2 cylinder from the pressure regulator.
Changing the filter
DANGER
Danger to health from bacteria
When installing and changing the filter, observe the hygiene and cleanliness regulations. When installing the filter, wear sterile gloves for single use. 1. Close the water supply. 2. Press the "Cooling Water" button until water stops coming out. 3. Open the filter cover lock. 4. Remove the filter cover.
Replace the filter with a new one.
The filter can be installed with the inlet at a maximum angle of 45°.
- Remove the old filter.
7. Install the new filter.
Figure N
Install the filter in the recess provided for this purpose.
The filter is blocked.
Remove the filter by pulling it out.
- Place the strainer on the filter.
- Close the filter channel lock.
- Turn on the main switch and contact.
- Place the container under the water outlet.
- Open the water supply.
- Press the "Cold Water" button until the time on the display reaches 5 minutes (approx. 10-15 liters).
Note
Continuously supply both devices with water automatically. 14. Perform the chemical cleaning (see chapter)
Chemical cleaning
DANGER
The water used is water for cleaning
The water used for cleaning is not suitable for consumption. Chemical cleaning must be performed after the first commissioning and at least every 6 months. The water quality after the first commissioning, at least 7 days, is determined by the filter. For chemical cleaning, a cleaning kit is required (see "Consumables").
Note
The chemical cleaning takes about 45 minutes.
- Close the water supply. 2. Close the main valve of the bottle with CO2, resp. 3. Turn the pressure regulator of the CO2 cylinder counterclockwise to position "0"
- Press the button for CO2 - cooling water again until water stops coming out. 4. Turn off the device
- Removing the filter.
- Place the service key. Filter
a Close the top of the filter to max. 45° and place the service key. c Turn the service key in the direction of the clock arrow. d Turn the filter counterclockwise.
- Remove the water supply hose
- Figure P
① Water inlet ② Screw connection, injector (3) Seal ring ④ Injector housing 5 Water outlet (connected to the device)
Separate the parts of the installation kit from each other. b Place the 4 installation tables in the installation kit. c With the installation kit, following the instructions for correct positioning of the cover.
- Connect the installation kit to the device inlet.
10. Connect the protective device for this to the installation kit.
- If possible, place the installation kit in a vertical position.
Figure Q
- Remove the drain plug.
- Under the water inlet opening, place a suitable container with a minimum capacity of 1 liter.
- Connect the power cord to the socket.
- Open the water supply.
- Press the button.
Instruction
Read the additional instructions carefully to ensure the best possible effect from the chemical cleaning.
Instruction
The cleaning agent for chemical cleaning is a strong color indicator. The resulting color will show the concentration and effectiveness of the cleaning agent.
Instruction
During the cleaning process, only a small amount of foam is formed. This is due to the system and is normal.
17. PERFORM THE CLEANING
a) Press the CO₂ button, cool the water, and wait 60 seconds. b) Wait 60 seconds so that the cleaning agent can dissolve.
c) Repeat the process (60 seconds of pressing and 60 seconds of waiting) about 2 times. d) After pressing, collect the water. e) Press the "Cool Water" button for 30 seconds. The pressing process is complete. The action time of the cleaning agent begins to run. It must be at least 15 minutes and can be extended as needed. Wait at least 15 minutes for the cleaning agent to take effect.
18. Close the water supply.
- Press the rinse button until the water runs clear. 20. Press the button.
- Remove the cleaning kit.
- Connect the water supply hose to the device.
- Open the tap and place the container underneath.
Performing chemical cleaning
Instruction
First, thoroughly rinse the device for cleaning, e.g., to flush the hoses for single use.
- Under the outlet, place a suitable container with a minimum capacity of 1 liter.
- Open the water supply. 3. Turn on the device.
- Press the "Cold Water" button until the water runs clear.
Then repeat with at least 4 additional liters.
- Press the "CO2 Cold Water" button until the water runs clear. Then repeat with at least 2 additional liters.
- Open the main valve of the CO2 cylinder and check the gas pressure setting, respectively adjust the regulator pressure of the CO2 cylinder to position "4".
- Pour one liter of CO2 water to fill the mixture with CO2 again. It is ready for use.
Taking a sample
To be able to verify the effectiveness of the chemical cleaning, immediately after the chemical cleaning, water samples must be taken in sterile containers for microbiological analysis of the water and analyzed by an accredited laboratory.
Rinsing the device for flushing
The rinsing cylinder for the flushing device. Once the maximum level is reached, the rinsing cylinder is marked with a white stripe. Figure R
- BHNMATEHNO 3aBaTe NbJNaTa Taba 3a OTNHaHe n IIN3pa3Hete.
- Поверете tabata 3a OTTHAme 3aЗмьрсанячу и рпн HeOB6XODIMTe яочитete.
- Noctabete OTHOBO Tabata 3a OTTuHaHe.
Pomou npn noBpeyn
| Грешик Пrinчина Остразимваhev | ||
| Урешик ИЗТОЧВА ВODA, И NOКAZBA "В павOTи готовпост". Всчкни сб用车. | ПдадаанetoНа ВODA e пекьсато. | 1. Oсигурete пдадаанetoНа ВODA. 2. Роверete блорадит e рисноюнe. 3. Ако поеда tate octanee, сб用车 ce sbc copbina. |
| Урешик Ие павOTи Бу�нITE He CBETЯ. | Зхранванeto c Hanpeжени e пекьсато. | ● Поверete зхранванeto c Hanpeжени. |
| Прededиитягелт e Depekefteh. | ● Свалete Калakа на пroduлaite До пекьсвача на урета, сmedete nproduлaite.Tау. Ако поедаитягелуnpereopri ot hOBO,Изкluочete урета,сб用车 ce sbc copbina. | |
| ИЗТочВанeto И ВODA се ИЗБьршВаьбe3 oxлajдаме, вьпрейки чьБУTOHТ "Охладень ODA" e bnil natchat | Охлajдашит мodyл вce оше He docstirhanl cбогая заадда Na Tempepatура. | 1. Спд Врeme на ИЗчаванe OT 20do 40 MmHytn nprobete OT hOBO. Ako phynkiiata za oxлajдаме пекьсhe Трайно: 2. Изкluочete урета. 3.Сь用车 ce sbc copbina. |
| Бу�нITE Газираин ВODA и Стudени ВODA с用车 поcodobatelnoи се chува Звков сигнал. | Повера B reypilpaheTo Na Tempepatура. | ●Сь用车 ce sbc copbina. |
| Бу�нITE Газираин ВODA вчec He CBETи сдд 60 sekyнди ИИЗТочВанeto И гашираин ВODA e bLOknipano. | Доливанeto Na pezeрвобара за karбонистор e Heucneшо. | 1. Изкluочete урета. 2. Поверete пдадаанeto Na ВODA. 3. Поверete налгаганeto Na ra3a. 4. Изкluочete n BKlnoche TOT hOBO yрета. 5. Ако поеда tate octanee,сь用车 ce sbc copbina. |
| При поадынeto Na "CO2 oxладень ВODA" Bь用车 nomma Startрupa c prazлино 3ababine. | Тoba e Hopmalna Функця, He rpeшka. | ● He e Neobxodnmo OTCTPANRAHHe |
| Вь用车има nomma Startрupa 3a кратук позрambopн Иnterpвал. | Тoba e Hopmalna Функця 3a prabotata Na pezeрвобара за karбонистор. | ● He e Neobxodnmo OTCTPANRAHHe |
| Няма сьдьрханин И Вьлорoden Ивуоки CBB BODATA. | Наяганeto Na ra3a CO2 e TBьрд e NsIC. | ● Корираиte Няганeto Na ra3a CO2. |
| Бунлкатa c CO2, pecn. цинндьрт zra CO2 e npazha/npazhen. | 1. Сmedete bytikka tca CO2, pecn. цинндьрta 3a CO2. 2. Ако поеда tate octanee,сь用车 ce sbc copbina. | |
| Ть用车иму сьдьрханин И Вьлорoden Ивуоки CBB BODATA | Pezeрварт zra CTyduнв ВODA BCE OShe He e Doctirgahl cбогая заадда Na Tempepatура. | ● Спд Като Ичakate 20 min,поверete OT hOBO cbdbyprakhane To Ha Byrнлорoden IByOKIC bB BODATA. |
| Филььрт eЗамрсen и hamаляв НевхODIMMЯ Deobit Na BODATA. | 1. Поверete Deobita Na Филььра и пriп НевхODIMCt Cmedete Филььра c Nob. 2. Ако поеда tate octanee,сь用车 ce sbc copbina. | |
| Бунлкатa c CO2, pecn. цинндьрт zra CO2 e npaztu npazha/npazhen. | ●Сmedete bytikka tca CO2, pecn. цинндьрta 3a CO2. | |
| Пь用车иму ИЗТОЧВА И гашираин ВODA пri no-rolямо кolyчесво на ИЗТочВА | Доливанeto Na pezeрвобарa zra karbohmstator e Napuyшно. | ● Поверete Deobita Na Филььра и пriп НевхODIMCt Cmedete Филььра c Nob. |
| Насточата Na Наляганeto Na ra3a e TBьрд BICOKA. | 1. Корираиte Няганeto Na ra3a CO2. 2. Ако поеда tate octanee,сь用车 ce sbc copbina. | |
| Гаранця | ||
| Във Всяк Дьржава са валдни издадение от наши otоризран дістрипьтор rapанционни ус��ия.Е党支部лни пореши на Валши уreed Ze OTТраим в рамкине на rapанционни срок б\'эллathо, по ce касе за.Deфekt в материал NTe | Илі пюизвodстVEN Deфekt.В сplyчай на праздраване на право на rapанци, се об\'рене кьм Валши дістрипьтор по Кьм Най-б\'лзки otorизран сэрbus3, кato п\'\'д\'tabite kacobata б\'elenжka. | (Адес, Вь. 3аднастара) Довл\'нITEнна rapанционни И\'форmaця (ako有很大 ту��а) можete на hamepite встарниота „Сер玮з"- нам мостrianу у\'бай на К\'archer в раздел „И\'стл\'я". |
| Текни ч�ны д\'анни | ||
| WPD 55 S | ||
| Д\'анни за мошноctта на урда | ||
| РавOTно habржениe | V | 220-240 |
| Мразжова ч\'ectota Hz 50 | ||
| Празл\'аител (и\'ертEN) | A | 6 |
| М\'akс. к\'нс\'ушина м\'о\'нoc't | W | 200 |
| Н\'л\'ягане на по\'ьл\'ьашада вoda | MPa (bar) | 0,15 -0,6 (1,5-6) |
| Tempeparatura на по\'ьл\'ьашада вoda | °C | 5-30 |
| Д\'л\'а\'эн на hab相对较ка на hab相对较еньeto на CO2 | MPa (bar) 0,38...0,42 (3,8...4,2) | |
| О\'олна Tempeparatura °C 5 - 32 | ||
| П\'об\'а\'ане на вoda (В за\'исноct ot hab相对较еньeto на по\'ьл\'ьашада вoda и с\'ь\'стяненьeto на Ф\"л\'ь Pharma) | ||
| О\'хадema вoda | I/h | 120 |
| С\'м\'есянс c CO2 вoda | I/h | 80 |
| Tempeparatura на ox\'л\'аденatura вoda, мин. | °C | 6 |
| Р\'а\'м\'ери NTerla | ||
| Ш\'ирочиа | mm | 300 |
| Д\'ь\'ь\'очиna | mm | 440 |
| В\'и\'очиna | mm | 395 |
| Т\'errо | kg | 19 |
3ana3bame cn npaBTo Ha TeXHnueckn npoMeHH.
Register your product and benefit from many advantages.
www.kaercher.com/welcome ★★★★★
Rate your product and tell us your opinion.
www.kaercher.com/dealersearch
Alfred Kärcher SE & Co. KG
Alfred-Karcher-Str.28-40
71364 Winnenden (Germany)
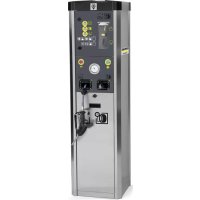
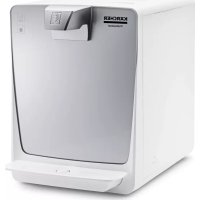
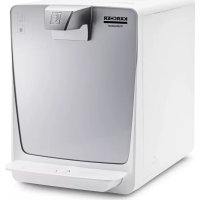
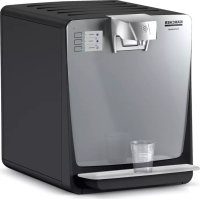
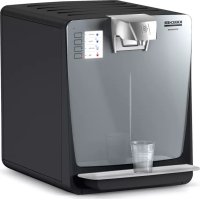
- GENERAL NOTES
- HAZARD LEVELS
- DANGER
- △WARNING
- CAUTION
- ATTENTION
- SAFETY INSTRUCTIONS
- SYMBOLS ON THE DEVICE
- INTENDED USE
- WARNING
- FORESEEABLE MISUSE
- GENERAL INSTRUCTIONS FOR HANDLING CO2 BOTTLES
- RISK OF EXPLOSION
- DANGER OF DEATH FROM A POSSIBLY BURSTING CO2 GAS CONTAINER
- △DANGER
- DANGER OF SUFFOCATION DUE TO ESCAPING CARBON DIOXIDE
- ENVIRONMENTAL PROTECTION
- NOTES ON THE CONTENT MATERIALS (REACH)
- ACCESSORIES AND SPARE PARTS
- SCOPE OF DELIVERY
- DESCRIPTION OF THE DEVICE
- FOR THE ILLUSTRATIONS, REFER TO THE GRAPHICS PAGE ILLUSTRATION A
- INSTALLATION
- CONNECTING THE DEVICE
- CONNECTION DIAGRAM
- ILLUSTRATION B
- CONNECTIONS: ILLUSTRATION C
- INSERTING THE FILTER
- HEALTH RISK THROUGH THE ENTRY OF GERMS
- ILLUSTRATION F
- ILLUSTRATION G
- ILLUSTRATION H
- INITIAL START-UP
- NOTE
- RINSING THE DEVICE AND FILTER
- HANDLING THE CO2 BOTTLE
- REMOVING AN EMPTY CO2 BOTTLE
- ILLUSTRATION I
- CONNECT THE NEW CO2 BOTTLE
- HANDLING THE CO2 CYLINDER
- REMOVING AN EMPTY CO2 CYLINDER
- ILLUSTRATION J
- CONNECTING A NEW CO2 CYLINDER
- OPERATION
- FUNCTION
- ILLUSTRATION K
- SHUTTING DOWN
- INITIAL STARTUP AFTER DECOMMISSIONING
- HEALTH RISK
- TRANSPORT
- FAILURE TO OBSERVE THE WEIGHT
- EQUIPMENT SHIPPING
- STORAGE
- CARE AND MAINTENANCE
- HEALTH RISK DUE TO IMPROPERLY REPAIRED DEVICE
- REPLACING THE FILTER
- CHEMICAL CLEANING
- THE OUTLET WATER IS CLEANING WATER
- ILLUSTRATION P
- ILLUSTRATION Q
- RINSING AFTER CHEMICAL CLEANING
- SAMPLING
- EMPTYING THE DRIP TRAY
- WARRANTY
- CONTENT
- GENERAL INSTRUCTIONS
- PLACE THE FILTER
- FIRST USE
- REMOVING THE EMPTY CO2 BOTTLE
- FIGURE I
- SAFETY
- DANGER LEVEL
- NOTICE
- USAGE
- FLUSHING CHEMICAL TREATMENT
- APPLICATION
- TEST RUN
- FIGURE R
- SAFETY STEPS
- DEVICE SYMBOL
- ENSURE THAT CHILDREN DO NOT PLAY WITH THE DEVICE. WARNING
- POSSIBLE INCORRECT USE
- GENERAL INSTRUCTIONS FOR HANDLING CO2 CYLINDERS
- SAFETY ALPHABET
- BUDATKOBM MATEPIA
- YCTAHOBNEHH QINBTP A
- △NONEPENXEHH
- MAJIHOHOK F
- MANNHOK G
- MAJIHOHOK
- PEPWE BBEDEHNB EEKNNYATAUIO
- BKA3IEKA
- PPOMBAHH NPUCTPOIO IINBTPAP
- BKA3JKE
- INSTRUCTIONS
- REPLACING THE OLD CYLINDER
- LEGEND
- CONNECTING THE NEW CYLINDER
- MANIFOLD
- CO2 CYLINDER REPLACEMENT
- DISMANTLING THE CO2 CYLINDER
- NEW CO2 CYLINDER
- FIGURE J
- CONTROL
- INDICATOR
- PUTTING INTO OPERATION AFTER A BREAK IN OPERATION
- HEALTH HAZARD
- TRANSPORTATION
- NOT APPLICABLE
- DEVICE SETUP
- SURFACE
- UNPACKING
- TECHNICAL MAINTENANCE
- FILTER REPLACEMENT
- FIGURE N
- BODA, UO EUMIKAC, -UE OUUCHA EO
- FIGURE O
- FIGURE P
- INSERT
- RINSE THE FILTER
- SYRINGE FOR SAMPLING
- DROPPER
- FIGURE A
- U YKA3AHN
- IMPROPER USE
- GENERAL INSTRUCTIONS FOR WORKING WITH CO2 CYLINDERS
- DANGER OF EXPLOSION
- TEMPERATURE
- WORKING WITH CO2 CYLINDERS
- REPLACING AN EXISTING CO2 CYLINDER
- FIG
- MAINTENANCE
- FIGURE K
- BEXDAHE OTEKCNNOATAUN
- IYCKAHE B EKCNLOATAUN CNEI N3BEXJAHE OT EKCNLOATAUN
- △NPEDYUNPEKDEHNE
- ONACHOCM 3A 3DPASEMO
- PREVENTIVE MAINTENANCE
- UNUSED DEVICE
- DAMAGED DEVICE
- CHANGING THE FILTER
- REPLACE THE FILTER WITH A NEW ONE
- INSTALL THE NEW FILTER
- FIGURE Q
- INSTRUCTION
- PERFORMING CHEMICAL CLEANING
- TAKING A SAMPLE
- RINSING THE DEVICE FOR FLUSHING
Brand : Kärcher
Model : WPD 55 S
Category : Water dispenser