WPD 50 - Water dispenser Kärcher - Free user manual and instructions
Find the device manual for free WPD 50 Kärcher in PDF.

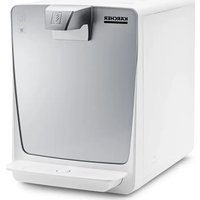
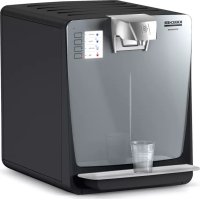
| Product type | Water dispenser with refrigeration |
| Brand and model | Kärcher WPD 50 |
| Dimensions (W x D x H) | 300 x 440 x 395 mm |
| Weight | 19 kg |
| Power supply | 220-240 V / 50 Hz, 200 W |
| Main fuse | 6 A (slow-blow) |
| Water inlet pressure | 1.5 - 6 bar (0.15 - 0.6 MPa) |
| Water inlet temperature | 5 - 30 °C |
| Ambient operating temperature | 5 - 32 °C |
| Water flow rate (chilled and unchilled) | 120 l/h |
| Minimum chilled water temperature | 6 °C |
| Filter type | Hy-Pure-Plus combined filter (activated carbon + ultra) |
| Functions | Chilled and unchilled water (touch buttons) |
| Refrigerant | R-290 (flammable, hermetically sealed) |
| Required electrical protection | 30 mA residual current circuit breaker |
| Connection | Water inlet hose supplied, mains plug |
| Supplied accessories | Water inlet hose, service cup, combined filter |
| Options | Aquastop, pressure reducer, backflow preventer, feet |
| Regular maintenance | Daily cleaning of drip tray, chemical cleaning every 6 months |
| Filter replacement | Every 6 to 12 months depending on water quality and quantity |
| Exterior cleaning | CA 30 R surface cleaner recommended (no alcohol or abrasives) |
| Storage and transport | Frost-free, do not lay the appliance down |
| Warranty | According to the conditions of the commercial company in the country |
Frequently Asked Questions - WPD 50 Kärcher
User questions about WPD 50 Kärcher
0 question about this device. Answer the ones you know or ask your own.
Ask a new question about this device
Download the instructions for your Water dispenser in PDF format for free! Find your manual WPD 50 - Kärcher and take your electronic device back in hand. On this page are published all the documents necessary for the use of your device. WPD 50 by Kärcher.
USER MANUAL WPD 50 Kärcher
Safety instructions 9
Intended use 9
Environmental protection 9
Accessories and spare parts. 9
Consumables 1
Scope of delivery 10
Description of the unit 1
Installation 10
Initial Start-Up 16
Operation 1
Transport 17
Storage 17
Care and service 11
Troubleshooting guide 12
Warranty 12
Technical data 1
Maintenance plan. 12
Maintenance sheet WPD 50 1
General notes

Read the original instructions before using the unit for the first time and act in accordance with it. Keep the original in
Structions for future reference or for future owners
- Only drinking water from a public water supply may be used to guarantee the water quality of the water. The quality must at least correspond to the guidelines of the World Health Organization (WHO).
- If intervention in the drinking water network is necessary in order to install the unit, this must be done by a trained specialist who is authorised to do this according to the laws and regulations valid for the location. The work must be commissioned by the customer if required.
- For protection against water damage caused by a burst water hose, we recommend installing a shut-off device and an aqua stop (optionally available) in the water supply line.
- Maintenance work in the interior of the unit may only be carried out by the operator of the unit who has read these operating instructions.
- Do not clean the unit with a water jet.
- Plastic surfaces must not be cleaned with alcohol-based, aggressive or abrasive detergents. The surface cleaner CA 30 R (6.295-686.0) is recommended.
Safety instructions
Hazard levels
△DANGER
- Indication of an imminent threat of danger that will lead to severe injuries or even death.
WARNING
- Indication of a potentially dangerous situation that may lead to severe injuries or even death.
CAUTION
- Indication of a potentially dangerous situation that may lead to minor injuries.
ATTENTION
- Indication of a potentially dangerous situation that may lead to damage to property.
Safety instructions
DANGER · Risk of electric shock. Always pull out the mains plug before working on the device. The socket must be protected with a 30~mA fault current protection switch. · Do not store
explosive substances such as aerosol cans with a flammable propellant in this appliance.
WARNING · When positioning the appliance, ensure the supply cord is not trapped or damaged. · Do not locate multiple portable socket-outlets or portable power supplies at the rear of the appliance. · Keep ventilation openings, in the appliance enclosure or in the built-in structure, clear of obstruction.
- Do not use mechanical devices or other means to accelerate the defrosting process, other than those recommended by the manufacturer. - Do not damage the refrigerant circuit. - Health risk from germs. Pay attention to hygiene and cleanliness when replacing the filter cartridge.
Wear sterile disposable gloves when changing the filter. Clean the drip tray and surfaces regularly. Never touch the water outlet with your fingers or a cleaning cloth. Carry out a chemical cleaning of the device at least every 6 months. If your drinking water supplier has warned of microbiological contamination, it is imperative that you chemically clean the device after the warning has been lifted.
-
Health risk due to increased bacterial concentration in the water. If you have not used the device for more than 4 days, you must switch the device on, open the water supply inlet and carry out a chemical cleaning, see chapter Chemical cleaning.
-
Health risk due to improperly repaired device. The device may only be repaired by trained specialist personnel. Risk of injury from the cleaning agent. Follow the safety instructions for the cleaning agent and wear safety goggles and protective gloves when handling cleaning agents.
ATTENTION · Damage to the device cooling unit. If the device
has been stored or transported lying down, you must wait at least 24 hours before starting it up.
Symbols on the device

WARNING
Risk of fire, Flammable materials
This device uses a flammable cooling agent.
Keep ignition souces away if cooling agent leaks from the unit.
Intended use
WARNING
This unit is not intended for use by persons (including children) with reduced physical, sensory or mental capabilities, unless they are supervised by a person who is responsible for their safety or have received instructions on how to use the unit from them.
WARNING
Children must be supervised to prevent them from playing with the device.
WARNING
A damaged power cable must be replaced by the manufacturer, his customer service or an equally qualified person in order to avoid danger.
- The unit is used to dispense filtered, chilled and un-chilled water of food quality for self-service operations.
- The unit can be used in the following areas:
-
In the household and similar applications
-
In staff kitchen areas of shops, offices and other
work areas
In agriculture
In hotels, motels, bed and breakfasts and other
accommodations
In catering and similar wholesale applications
The unit is equipped with a combination filter.
The unit must be set up in a frost-free room.
- Do not use or place the unit outdoors.
- Do not place, store or transport the unit horizontally.
Foreseeable misuse
Any type of improper use is prohibited.
The operating personnel are liable for damage resulting from incorrect use.
Environmental protection

The packing materials can be recycled. Please dispose of packaging in accordance with the er

Electrical and electronic devices contain valuable, recyclable materials and often components such as batteries, rechargeable batteries or oil,
which - if handled or disposed of incorrectly - car pose a potential danger to human health and the environment. However, these components are required for the correct operation of the device. Devices marked by this symbol are not allowed to be disposed of together with the household rubbish.
R-290 Contains greenhouse gas R290 - hermetically sealed device
Notes on the content materials (REACH)
Current information on content materials can be found at: www.kaercher.de/REACH
Accessories and spare parts
Only use original accessories and original spare parts. They ensure that the appliance will run fault-free and safely.
Information on accessories and spare parts can be found at www.kaercher.com.
Attachment kits
| Description Order no. | |
| Premium stand | 2.644-134.0 |
| Basic stand | 2.644-221.0 |
Jugs
| Description Order no. | ||
| Water jug, 1 l, glass, with plas-tic lid and KARCHER logo, dishwasher safe | 6.640-431.0 | |
| Carafe, Eva Solo, 1 l, dish-washer safe | 0.017-575.0 | |
| Rinsing cups | ||
| Description Order no. | ||
| Rinsing cup 4 l 6.640-341.0 | ||
Bottles Cups
| Description Order | no. | |
| Bottle 0.5 l, made of Tritan, dishwasher safe | 6.640-430.0 | |
| Bottle 0.75 l, made of Tritan, dishwasher safe | 6.640-512.0 | |
| Bottle 0.6 l, with mouthpiece and lid made of Tritan, dishwasher safe | 6.640-469.0 | |
| High-quality borosilicate glass bottle 0.75 l, heat-resistant, clear, Ø 7 cm, height 26 cm with stainless steel lid and neoprene protective cover | 6.642-186.0 |
| Description Order no. | |
| Hard paper cup, also for hot drinks, 180 ml, without logo, 2500 pieces | 6.640-455.0 |
| Hard paper cup, also for hot drinks, 180 ml, with KÄRCHER logo, 2500 pieces | 6.640-460.0 |
| Plastic cup, 200 ml, without logo, 3000 pieces | 6.640-454.0 |
| Plastic cup, 200 ml, with KÄRCHER logo, 3000 pieces | 6.640-453.0 |
Supplementary installation material
| Description | Order no. |
| Error current circuit breaker 30 mA, 230 V, 50 Hz | 6.640-427.0 |
| Aqua stop, leakage water detector with so-lenoid valve and brass screw connection G 3/4" | 6.640-291.0 |
| Pressure reducer 1.5 - 6 bar - 1/2 | 6.640-625.0 |
| Water Block, flood protection | 6.640-338.0 |
| Backflow preventer, approved | 6.640-463.0 |
Consumables
Filter
| Description | Description | Order no. |
| Hy-Pure-Plus filter | Combination filter made of active carbon and ultra filter. Retains chlorine, heavy metals and residues from the pipe, retains bacteria and viruses and ensures good taste. All minerals remain in the water. | 2.644-200.0 |
Cleaning agent for chemical cleaning
| Description | Description | Order no. |
| Cleaning set | For containing the chemical cleaning agent (Bevi Tabs alkaline), reusable | 2.643-941.0 |
| Bevi Tabs alkaline | Chemical cleaning agent for the six-monthly internal cleaning of the WPD, packaging unit 1 x 10 tablets | 6.295-891.0 |
Cleaning agent for cleaning the exterior of the device
| Description | Description | Order no. |
| CA 30 R | Ready-to-use surface cleaner, 0.5 l bottle | 6.295-686.0 |
| Spray head for surface cleaners | When you order CA 30 R for the first time, this reusable spray head is required for the spray bottle. | 6.295-723.0 |
Scope of delivery
When unpacking the device, check the contents of the box for completeness using the operating instructions. If any accessories are missing or in the event of any shipping damage, please notify your dealer.
Description of the unit
For the illustrations, refer to the graphics page Illustration A
①Filter cover lock
(2)Filter cover
③Power switch
4Water connection
⑤ Power supply
(6)Fuse holder cover with 6 A fuse
7Type plate
(8) Ventilation openings
Combination filter
10Filter holder
(1) "Chilled water" button
(12)"Unchilled water" button
(13)Water dispensing outlet
(14)Drip tray
Installation
Connecting the unit
During initial installation and any repairs that involve the replacement of accessory parts, make sure only parts approved by KÄRCHER (connection kit, filter, service cup) are used. These components have been tested and certified to ensure compliance with KÄRCHER
Quality Standards. No other components may be used.
- The power connection and water input pressure must correspond to the values in the technical data (see chapter "Technical data").
- Depending on local regulations, an approved backflow preventer must be installed.
-
Set up the unit on a level surface.
-
Mains plug and socket must always be freely accessible.
- The trigger, the fuse and the water connection (rear of the unit) must be freely accessible. The minimum distance to the wall is 100mm .
- In the interest of reducing power consumption, the power supply can be switched off when the unit is not in use (e.g. using a timer clock).
- Connect the unit only with the hose lines provided.
- Do not use used hose lines.
Connection diagram: Illustration B
①Socket (fused with 30 mA error-current circuit breaker)
2Mains cable
3Water dispenser
4Water supply hose (connection kit)
Pressure reducer with pressure gauge (only necessary with water inlet pressure above 6 bar (0.6 MPa))
6Water tap of the building installation
⑦ Drinking water line of the building installation
⑧ Aqua stop (optional)
9Backflow preventer (optional)
Connections:
Illustration C
Water connection
② Power supply
③ Fuse holder cover with 6 A fuse
(4)Illuminated trigger
- Connect the water supply hose to the water connection H_2O .
- Connect the water supply hose to the tap of the building installation (if necessary, connect additional components).
- Connect the mains cable to the power supply.
Inserting the filter
△WARNING
Health risk through the entry of germs
When installing the filter cartridge, take special care to ensure hygiene and cleanliness.
Always wear sterile disposable gloves when installing the filter.
- Open the filter cover latch.
Illustration D
- Remove the side filter cover.
- Remove the service cup that was installed at the factory.
Illustration E
a Pivot out the filter holder by max. 45^
b Turn the service cup anticlockwise.
c Remove the service cup.
4. Insert the filter.
Illustration F
a Pivot out the filter holder by max. 45^
b Insert the filter into the filter holder from above.
c Turn the filter as far as it will go.
The filter is locked
d Pivot the filter with the filter holder into the device. 5. Fit the side filter cover.
6. Close the filter cover latch.
Initial Start-Up
-
Open the water inlet.
-
Place a container under the water dispensing opening.
- Press the "Chilled water" button repeatedly until a flushing time of 5 minutes is reached (approx. 10 - 15 litres).
- Press the "Unchilled water" button for 1 minute (approx. 2 litres).
Note
After every 60 seconds of uninterrupted water dispensing, the unit automatically interrupts dispensing.
5. Perform chemical cleaning (see chapter Chemical cleaning).
The unit is ready for operation.
Operation
Function
The water first flows from the water inlet through the combination filter (for a description of the filter, see chapter Consumables). Depending on the button pressed, the water then flows through the cooling module or directly to the water dispenser outlet. The entire water system must be cleaned chemically at regular intervals.
Operation
Note
The illuminated sensor buttons are activated by a light touch.
Illustration G
①"Chilled water" button
②Unchilled water" button
-
Place a container in the middle of the drip tray. Illustration H
-
Press the button for the desired type of water until the container is full. During this process, the pressed button lights up brighter.
Shutting down
If the unit is not used for more than 4 days:
1. Close the water inlet.
2. Switch off the unit.
Initial startup after decommissioning
WARNING
Health risk due to increased germ concentration
Perform chemical cleaning after decommissioning.
1. Switch the device on.
2. Open the water inlet
3. Dispense at least 2 litres of each type of water and discard the water.
4. Carry out chemical cleaning (see chapter Chemical cleaning)
Transport
CAUTION
Failure to observe the weight
Risk of injury and damage
Be aware of the weight of the device during transportation.
- Do not transport the device in a horizontal position.
- When transporting the device in vehicles, secure it to prevent it from slipping or overturning in accordance with the respective valid guidelines.
Equipment shipping
The device must not be transported in a horizontal position.
- Select a suitable packaging for transport and mark it on the outside with a conspicuous marking for vertical transport.
- If possible, place a small wooden pallet under the shipping box.
- Alternatively, take the device directly to a Kärcher service centre.
Storage
CAUTION
Failure to observe the weight
Risk of injury and damage
Be aware of the weight of the device during storage.
1. Store the device in a frost-protected place.
Care and service
WARNING
Health risk due to improperly repaired device
Have the device repaired only by trained specialist personnel.
Before performing any work on the unit:
1. Pressure relief of the unit.
a Close the water inlet.
b Place a container under the water dispensing opening.
c Press the "Chilled water" button until no more water is dispensed.
- Switch off the unit
- Pull out the mains plug.
Replacing the filter
WARNING
Health risk through the entry of germs
When installing the filter cartridge, take special care to ensure hygiene and cleanliness.
Always wear sterile disposable gloves when installing the filter.
- Close the water supply inlet.
- Press the "Chilled water" button until no more water is dispensed.
- Open the filter cover latch.
- Remove the side filter cover.
- Remove the filter to be replaced.
Illustration I
a Pivot out the filter with the filter holder by max.
45°
b Unscrew and remove the filter.
- Unpack the new filter.
- Insert the new filter.
Illustration J
a Fit the filter into the filter holder and turn it as far
as it will go
The filter is locked.
b Pivot the filter with the filter holder into the device. 8. Fit the side filler cover.
- Close the filter cover latch.
- Plug the mains plug into the socket.
- Place a container under the water dispenser.
- Open the water inlet.
- Press the "Chilled water" button repeatedly until a rinsing time of 5 minutes has been reached (approx 10 - 15 litres).
Note
The device automatically stops dispensing after 60 seconds of continuous water dispensing.
14. Carry out chemical cleaning (see chapter Chemical cleaning).
Chemical cleaning
CAUTION
The outlet water is cleaning water
The dispensed cleaning water is not suitable for consumption.
Chemical cleaning must be carried out after initial startup and generally at least every 6 months. The same applies after a shutdown of more than 4 days or an exceptional filter change. The cleaning kit is required for chemical cleaning (see chapter Consumables).
Note
The chemical cleaning process takes approx. 45 minutes.
- Close the water inlet.
- Press the button for "chilled water" until no more water comes out.
- Switch off the unit
- Remove the combination filter (see chapter Replacing the filter).
- Insert the service cup.
Illustration K
a Swivel out the filter holder by max. 45^
b Insert the service cup.
c Turn the service cup clockwise.
d Swivel the filter holder into the unit.
-
Remove the water inlet line.
-
Prepare the cleaning kit.
Illustration L
①Water inlet
(2)injector screw connection
③Sealing ring
(4)injector housing
Water outlet (connection on unit)
a Screw the cleaning kit apart.
b Insert the 4 cleaning tabs in the cleaning kit.
c Screw the cleaning kit together taking the correct
seating of the sealing ring into account.
- Connect the cleaning kit to the unit input
- Connect the water inlet line to the cleaning kit.
- If possible, bring the cleaning kit into a vertical posi
Illustration M
- Remove the drip tray
- Place a suitable container with a capacity of at least 1 litre under the water outlet.
- Plug the mains plug into the socket.
- Open the water inlet.
- Switch the unit on
Note
Carry out the following steps extremely carefully to ensure the greatest possible effectiveness of the chemical cleaning.
Note
The cleaning agent used for chemical cleaning is equipped with a blue colour indicator. The colouration of the water that is output indicates the concentration and effectiveness of the cleaning agent.
Note
A small amount of foam is created during the cleaning process. This is caused by the system and is normal.
- Perform cleaning.
a Press the "Chilled water" button until the unit
stops dispensing water after 60 seconds.
b Wait 60 seconds for the detergent to dissolve.
c Repeat this process (rinse for 60 seconds and
wait 60 seconds) a total of two times.
d Empty the receptacle after each rinsing process.
e Press the "Unchilled water" button for 30 sec
onds.
The rinsing process is complete. The detergent's
contact time starts. It should be at least
15 minutes and can be extended as required.
f Wait at least 15 minutes for the detergent to take effect.
- Close the water inlet.
- Press any button until no more water is dispensed.
- Switch off the unit.
- Remove the cleaning kit.
- Reconnect the water supply hose to the unit.
- Remove the service cup and reinsert the filter.
Rinse after chemical cleaning
Note
You can briefly interrupt the rinsing process at any time, e.g., to empty the rinsing cup.
- Place a suitable container with a capacity of at least 1 litre under the water outlet.
- Open the water inlet.
- Switch the unit on
- Press the "Chilled water" button until the blue colour is no longer visible.
- Then rinse at least another 4 litres.
- Press the "Unchilled water" button until the blue colour is no longer visible.
- Then rinse at least another 2 litres.
The unit is ready for operation.
Sampling
To be able to test the effectiveness of the chemical cleaning, samples should be collected immediately after completion of chemical cleaning under observance of the rules for microbiological water analysis and these should be evaluated by an accredited laboratory.
Emptying the drip tray
The float signals that the drip tray is full. A red marking ring on the float becomes visible when the maximum filling level has been reached.
Illustration N
- Carefully remove and empty the full drip tray.
- Check the drip tray daily for soiling, clean if necessary.
- Reinstall the drip tray.
Troubleshooting guide
Warranty
| Fault Cause Rectification | ||
| The device shows "Ready for use" but does not disperse water. All buttons are illuminated. | The water supply is interrupted. 1. Ensure a correct water supply. 2. Check the shut-off devices. 3. If the fault persists, contact the service department. | |
| The device is not working. The buttons do not light up. | The power supply is faulty. • Check the power supply. | |
| The fuse is defective. | • Remove the cover of the fuse next to the device switch, replace the fuse. If the fuse blows again, switch off the device, contact the service department. | |
| The dispensed water is not cooled, even though the "Chilled water" but ton was pressed | The cooling module has not reached its nominal temperature. | 1. Wait 20 to 40 minutes and check it again. If the cooling function exhibits permanent failure: 2. Switch off the device. 3. Contact the service department. |
| The buttons for chilled and unchilled water light up alternately and a signal tone can be heard. | Malfunction in temperature regulation. • Contact Service. | |
The warranty conditions issued by our relevant sales company apply in all countries. We shall remedy possible malfunctions on your appliance within the warranty period free of cost, provided that a material or manufacturing defect is the cause. In a warranty case, please contact your dealer (with the purchase receipt) or the next authorised customer service site. (See overleaf for the address)
Technical data
| WPD 50 | ||
| Device performance data | ||
| Working voltage of the battery V 220-240 | ||
| Power frequency Hz 50 | ||
| Power protection (slow-blowing) | A 6 | |
| Max. power input | W | 200 |
| Water supply pressure | MPa(bar) | 0,15 -0,6 (1,5-6) |
| Water supply temperature | °C | 5-30 |
| Ambient temperature | °C | 5 - 32 |
| Water dispenser (depending on supply pressure and filter status) | ||
| Chilled water | l/h | 120 |
| Unchilled water | l/h | 120 |
| Min. temperature of chilled water | °C | 6 |
| Dimensions and weights | ||
| Width | mm | 300 |
| Depth | mm | 440 |
| Height | mm | 395 |
| Weight | kg | 19 |
| Subject to technical modifications. | ||
Maintenance plan
| Time & date | Performed |
| Daily | Remove and clean the drip tray. |
| After an overnight device standstill, dispense 0.5 l of each type of water and dispose of it. | |
| Weekly, more often if neces-sary | Clean the outside of the device, clean the drip tray with hot water or in a dishwasher. Do not use cleaning agents containing alcohol, acidic components or scouring agents for cleaning plastic surfaces. |
| Half-yearly | If the water quality is bad, replace the Hy-Pure-Plus filter. |
| Perform chemical cleaning, see chapter Chemical cleaning. | |
| Annually | Replace Hy-Pure-Plus filter. |
| The decisive factor for the filter change interval is the amount of water dispensed and the water quality of the inlet water. | |
| Unit / serial number: Installation place: | |||||||
| Unit type: WPD 50 Installation date: | |||||||
| Installation by: | |||||||
| Date | Technician | Operating hours | Filter change | Other parts | Chemical Cleaning | Remarks | Signature Technician |
| Signature Technician | |||||||
| 16 | |||||||
| 16 | 16 | ||||||
| 16 | |||||||
Contenu
Remarques generales. 14
Forutsigbar fell bruk
All bruk som违法犯罪.
4. Sett inn filteret.
Figur F
a Sving ut filterholderen med maks. 45^
b Sett filteret inn i filterholderen ovenfra.
c Drei filteret sa langt det gar.
Filteret gär i las.
d Sving filteret med filterholderen inn i apparatet.
5. Sett inn sidefilterdekselet.
6. Sperråsen pa filterdekselet.
Første gangs bruk
| Açıklama | Sıparkıno. |
| Ayak Premium 2.644- | 134,0 |
| Ayak Basic | 2.644-221,0 |
Sürahiler
Moooee cpeCTBO DnXmueeckO ouncTK
- OToCoeINHHT TpybOpBOD noaau BObl
7. NIOIROTOBNTb KOMNNEKT DnA ONUCTKN.
PcyHok L
1BxOaB0bbl
② Pe3b6oBoe coeMHHeHne HHEKKeToppa
(3)YINOTHTHNTBHOE KOJIbIcO
(4)KopnycMHKeKTopa
(5) BbIXoD BoBbl (noCoOeINHeHne K yCTpoIcTBy)
aPa3BnHTbKOMNJIeKTIINOuCTKN
b BCTaBnTb 4 TaBnTeKu ChTaeero CpeDCTBa B KOMNTEK TIONOCHTK.
C BnHTNTb KOMTNEKT DnA OHTKn, yNtTBaB npaBnHbHyIO NOcAky yNtNOTHeJIbHbIX KONEU
- ΠΟκοεμπηθιν KOMΠΙΝΕΤ ἡΝΑ ΚΗΥΝΤΚΑ Κ BXΟΥ Αnnapata.
9.ДкнчИпьТурбОПВODиоанu ВБДКOMПКЕТУДANOHCTNK. - EcnH B03MOXHO, yCTaHOBnTc KOMNKeTd IAN OCTHbB BE TERTKABHOE NOPOHexe
PncyHOK M
- ChTb noDnOH nIra c6opa Kanelb.
12.YaTHOBINb NOxOxRAUYU EMKOCbB OBeEMOMHE MEHeE 1 JIPTA NOB DByXoB DOBy. - BCTaBtB wTeNceIbHyIO BVJIKy B po3eTKy.
14.OTKpbItb NHHIO NOaH NBObl. - BkHIOuHTb yCTpoIcTBO.
PpumeyaHue
Cnedyuue wauy binyonnmbc ocobou muaamnbocmbtu, ymo6 doumbcna haubonbuezo 3ffekma on xmuueckou oucncu.
PpumeyaHue
Mooueepcde30n dumxueckou ouchmcu ChabKeO CCUHM UEBMOEBUM uHOUAMOPOM.
Okpaueaue bblaaeMoI 8ooI cuaeembeMeyem o konuHepauu u akmuHocmU yucmaeO cepeema.
TIpumeyaHue
Bo apemr npouccca oucmcu bpazyemc
He3HaumelbHoe KOpUecmeo nebl. 3mo
O6yocneHo CucMeMo U ReNncre HopMaIbHbIM.
16. BbINOHNHTb ONUCTKY.
a HauKaTb N UyepKxHbTaBb KHONIky OXnAaJDeHNHa BOda),Noka yCTpoNcTbOYepe360 cekyHd He npekpatnt BbDaNy BOdu.
b POndkatb 60 cekyHd, noka MOohoee cpeCTBO He pactBOPITcA.
cOBTOPTNbDaHNbI npOeCC (npOMbIbAHne B TceHHe 60 ckyHn 60 ckyHn OxuHaHn) B o6uei cnoXhoCTn 2 paa.
DnCne KAKDORO pOUECCA npOMBKNI OIOPOOXHITb EMOKCTB
e HaxbTu IyepkXHBat kONky HeoXnaKeHHa Boga)B Teuehe 30 cekyH. Ppoecp npombykBzabepuen.Bpem 0O3DcETBA MOUQeTO CpeCTBa HauHnAeTc. OHO DOnJXHO DnITbc MHNMy 15 MNHT n MoKet 6bIb npOdHeNo jeKaHnIO.
f PnOoKdaTb He MeHee 15 MNHyT BpeMeHN
BO3DcCTBMA MOUeO CPeDCTBA.
17.3aKpbTb NHHIO NOaH BODbl
- Hekimatb Iho6yO KHONKY Do Tep nop, NOKA He KepkatnCTBbIa4a BoDJI.
- BbIKJIOHTb yCTPOINCTBO.
- CHaTB KOMnNEKT dJa YNCTKn
- BHOB npCoeINHnTb IuaHr nOaHn BOdy KycpOCTBy.
- CHNTB cEBPMBCHyO 4aIKy IN CHOBA yCTAHOBITb 2nHbTP.
PpmbbKa nocne XmMueckooucTK
PpumeyaHue
Moxho HenaDanae nppeaambnpoeccn pompBkiu, hampumep,Ym6bIo oropOxHmbn pompBhoCmakaH.
1.YCTAHOBINb NOxOxRAUYU EMKOCb SEbEOMH MeMeHe 1 NITPn OADBbXoD BoBy.
2. OTKpbITb JINHHIO NOaH NBObl
3.BKIOHTb yCTPOIcTBO.
4. HaxaTb KhoNky OxnaJaeHnA BodaCTOJIbKO pa3 noka He Ncye3Het OkpaunBaHne B CnHnI CBet.
5. 3aTeM npombIb eue KaK MHNmYM 4 NHTpamN
6. Haktah KHonyi《HeoxnlambdaBogda》Noka He Ncye3Hert OkpaunBaHine B cinHui BctE.
7. 3aTeM npOmbTb eue KaK MHHmym 2 nItpamn. YcToeCTBO rTOBO KxKnIyatauun.
0r6op npo6
YTO6bIMeTBo3MOXHOCTb npOBepNTb 3ΦΦeKT XmMueckO OUcTKn, Heo6xmoIMO OTo6pTaB npO6bl HnOcpeCTBeHNo Nocne 3aBepSeHn XmMueckO OuCtKn, Co5IouJa pabvna DnA MmKp6bMoONrOHeCKo ANaH3a BoDbl, n npOBeTrn Ouenky aKKpeNDTOBaHHN JaobopatOpnei.
OnopokHeHne noDOnHa dna c6opa kaneIb
PnonbaKc nHnHm3npyet o nonHom 3anolneHnn NoDHa nI c6pa Kanb. Ppi DoctNkeHHMAKCmAbHo rOpyBn 3aONHeHn Hn nonBaKe 3aMeTHo KpaCHoe MapKpOBHOe KObluo.
PncyHOK N
-
Ankypatrno n3Bnepeh noDOnn dAnr c60ne hN OPOXKNHTb.
-
PnpoeBHTb NpOdoJn 36cbpaKanaBb H nppeMeT 3aqr3PnEbnN pPr Heo6xoDMocTOn OHcTbN.
- 3aHOBO yCTaHOBnTb ndoH dna c6opa kaneJb.
POMOuB npH HeNCnpaBHOCTAX
Karbantartasi tery. 77
WPD 50 karbantartasi lap 78
b VloZte 4 cisticic tabley do cisticic sady.
c Zaśroubujte Čiastć s办公楼u dovromadny s ohledem na správné ulożeni tęsnicího krouzku
- Pripojte cisticic sadu ke vstupu zaifeni.
- Pripoje privodni vedeni vody k cistici sade.
- Pokud je to możné, uvedte Čistći sadu do sviólé polohy.
Illustrate M
Yka3aHn3a6e30NaCHOCT
CTeENHa onaCHOCT
ONACHOCT
- Yka3aHue 3a HeNocepOcmbeHa onachocm, KoJMo MoKe da doBeDe do mexku meJeCHu nopeDu unu do cMbpm.
△PENEYNPEXKDEHNE
- Yka3aHue 3a 6b3MOxHa onacha cumyaucu, kOIMO xe da doede do mexku meenechu noepedu unu do cMbpm.
△PENEIA3NIOBOCT
- Yka3aHue 3a 6b3MOxHa onacha cumyauc, KoraMo MoKe da doede do Jeku meenechu noepedu.
BHMHAHNE
- Yka3aHue 3a 6b3MOxHa onacha cumyaucu, KoraMo
MoKe da doBeDe do MamepuAnHu uemu.
Yka3aHn 3a6e30nacHOCT
ONACHOCT - Onachocm om mokoe ydap. Ppedu pa6om no ypeda buha2u u3eaqdaume mpexo8a uecen. Kohmakmbmpra6ba da 6bde 3auumen c npekbc8a4 ymeueh mok om 30 mA. - Onachocm om ekcnno3ua. He cbxpanraeume eypeda Hukakbu ekcnno3uehu npedmemu kamo cnpeuobe cbc 3anaum pa6omeh 2a3.
PPEyPExEHE Ppu pa3noaHemHa ypeda cedeMe MpeXOBua m 3axpaHeau Ka6en da He 6bde npuunAn Unu NopeDeH. He nocmaeIme pa3KnOHeMnHo KOHMakmHu Kymuu Unu MoBUNo EneKmpo3axpAnBaHe 3ad ypeDa.
- Onachocm om npezpraehe. He 3ambarmae
beHmuauonHume omBopu e ypda. -Onachocm om noepeda. 3a yckopraeahe Ha npoueca Ha pa3mpa3rahe He u3noJ3aume MexaHnU uU dpyu nomouhu cpedcmea oceen
npenopbuahme om npou3eodumela. -He
noepexdaume oxlaXdauza
kp2. -Onachocm 3a 3dpabemo npadu bakmepuu. Ppu cmHa ha qunmbnna pampoh
cneede 3a xuueHa u Yucmoma. Ppu cmHa ha qunmbpa
noceme cmeplnpu pbkabuuzu 3a edHokpamha ynompe6a.
Pedobno noucmbaume mabama 3a ommuune u noBbpxhocmme. Huko2a He dokoceaume omeopa 3a u3mouehahe Ha boda c npbcmu unc Kbpna 3a noucmbahe. Hau-manko Ha BCEku 6 Meceua u3bpuwaume xumuecko noucmbahe Ha ypda.Ako Bawemo bodocahdumenho npednpumue e npedynpedu no 3a MukpoobuoouuHO 3ampcraBaHe, cede omma ha npedynpexdeHuemo
3aabjxumenHmpr6ba da
Ha npabeume xumuecko
noucmeaHe Ha ypea.
-
Onachocm 3a 3dpabemo nopaDu buoka konueHmpauua Ha bakmepuu b8 boda. Ako He cme u3non3eaJypea noeue om 4 dHu,mpaBa da BkIouume ypeDa,da oMeOpume nodaeanemo Ha boda u da U3bpuume xumuecko noucmbaHe,6K.2naBa Xumuecko noucmbaHe.
-
Onachocm 3a 3dpabemo
napadu Henpaebnho
pemohmupan yped. Ypedbm
mpra6ba da ce pemohmupa camo
om obyuhen cneuana3upan
nepcohan. -Onachocm om
hapaHBeAhe om noucmbauu
npenapam. Cna3baume
yka3aHura ma 3a 6e3oNacOcm Ha
noucmbauu npenapam u npu
paboma c noucmbauu
npenapamu Hoceme 3auumHu
oula u 3auumHu pbkauu.
BHIMAHNE · NoepeDu Ha oxnaKdaaumoDyHa ypeDa. Ako ypeBm e buI cbxpanHaean Uu mpaHcnpmuH e XOpuzHmAnHO nOIOKeHue, HauMaJko 24 Yaca do npckaHemo e EeknloamauaMp6ba da My HanpaBume mexHuYecka noDpBkka.
CNMBONN Bbpxy ypeda

△PDEUNPEKDEHNE
Anochcm on nokap,3anaumu
mamepuan
B mo3u ypeo ce u3non3ea 3anaum
xnauduneh aaeHm.
Ipu u3muuane Ha xnaudunen aaeHm dpbxme u3moynuume Ha 3anaaane daene om ypeda
YnoTpe6a no npedHa3NaeHne
△PENyPENKDEHNE
To3u ypeH He e peHnHaueH 3a nI3aeHe om luua (BkIOHUMeHHo Deua) c OepauHueHu FzUeHcckU, CehOpH uNt UmCMeBu H cNo6bOcHmU, oCeH aKo me CeHAMUPam Nod Haid3opa Ha luue, OrmoEapHuo 3a mXhAma BeOnaHocm, Unu ppeApumEnHo ca bUnu UHcPyrkMuparu H om moea luue omHcoH yonpmEba H ypeA.
△NPEDYNPEXKDEHNE
Dcama mpa6ba da sbdaam noa hado3op, 3a da ce aapaanmupa, ye He cu uepam c ypeda.
△PENDYNPEXKDEHNE
IoepehenmmpxoezaxpaeaKabemmpraea da 6be cmeHn om npou3o0dumen, neoey cepu3 uun om nue cbc cburaKeanufkaua, 3a de ce u3eesham onachocmu.
- YpeIbT ce nnon3Ba 3a pa3npedeHne Ha ФИПТрпаHa,oxlaHena HnN HeoxlaHena Boda 3a kaYeCTBO Ha xpaHHTe npaPbOta B peXIM camoo6cnyBaHe.
- YedbT MoXeJa CE IaONa3Ba BcDnHIne 6NaCTI: B - DOMAKHCHTBOTo NIOoDHN PnINIOXeHHI
B KXYMHTe 3a nepcoHana Ha MaagAHN, oDHCN I DpyTN paOboTHn oobactn
B CEJCKOTO CTONAHCTBO
B XOTENH, MOTENH, NaHCIOHN C H3XPaHBAhe N DpyTH MecTe 3a HaCTaHaBAbe
B3aBeHeH3a0bIeCTBeHo xpaHeHnOIO6HO npINIOKeHHe B TbPROBraHa eDpo
- YpeBt e 06OpynBaH C KOMBnHnpaH fnnTbp.
YpeBtTpRbBaJa Ce noCTABRa B3aunTeHOOT 3AmPb3BaHE NOMeUHeHnE.
He n3no13BaIte nnOCTaBnTe ypeHa OTKpHTo.
He noctabTne ypeBa X xpN30HTaJIHO nOIOXeHn He ro CbXpaHraBae INI TPAHCnOpTnPaIe B xpN30HTaJIHO nOIOXeHne.
PpeBnDmHa HenpabHnHa ynotpe6a
Bcka npnype6a He no npedHa3Hauene e hedeOnycttMa.
Obnykbaoto nIue hOnc OTROBPOHcT 3a nobpei, HacTbnau npoAynoTpe6a He no npedhaauneHne.
3auneta Ha OKonHaTa cpeda

OnakOBuHnTE MaTePnAnNoDnEeKAT Ha peUKNIPAhe.MoJn,INxBbPJIte ONaOKBKeNTe No cBbpa3eC OKNHaTa cpeDAHNN. ENeKTPrueckNTe n eNeKTPOHHNTe ypeDN cBbPjXat CEHNH MaTePnAn, NOdNExKaANs Ha peUKNIPAhe, aCTeo N cbCTaBHn YacTn, HapB batepn, akymyNatOPHN BatePNn INM Macno,
KOTIO pRn HENPABINO 60pABeHE NIN INXbIbpIhne MORAT Da npedctabnBaT BoteHcuaHn OAnchoc3a TaOBEuNKO TdPABe IN 3a OKONHata CpeA.3a npaBnHOTo FyHKUHOHpaHe Ha ypeDa BCE pak Te3n CBCTaBN YcaTn Ca Heo6XoDmMn. OOb3HaueHNTE c TO3n CmBON ypeHn He TprBbJa dbLaTn XbBpIhN 3aEDNO C6bTOBNTe OTnAdbUcn.
R-290 CbIbPka napHmKOB ra3 R290 - xepMeTneckn 3aTBpeHa CNTema
Yka3aHnHa 3a cbCTABH BHeeCTBa (REACH) AkyTaNHa HnHOpMaunz 3a cbCTABKITE ue Hamepnte HA INTEPHT CTpaHua: www.kaercher.de/REACH
Akecoapn pe3epBHu qactn
H3non3BaIte cAmO opRnHaHH akCecoApN oPnRnHaHH pe3epBHN qAChN, NO To3n HaHH ocHypBaTe 6e3onacata N 6e3np6nMa HecKnnoTaun HAyea.
HNFOMAua OTHOHO KECaocpar Npe3epBNH CTAHI
Ie HamepTe Tyc: www.kaercher.com.
| Описанne Каталоже | H № |
| Опорна стойka Premium 2.644- | 134.0 |
| Опорна стойka Basic 2.644- | 221.0 |
Kanu
aun 3a eHOKpaHa ynoTpe6a
NoCTABnHe Ha nIITbpa
△PENEYNPEXDEHNE
Onachocm 3a 3dpaeemo npadu haanuzhe Ha6akmepu
Pmu MoHmka Ha pfunmbpua npom Ehmaaume MHOO 3a xueeHaMa u Ycumomama.
Pmu MoHmka Ha pfunmbpa Hoceme cmepuHpu kbaeuu 3a eohokpma Hyonpeba.
1. OTBOPETe 6nOKPOBkata Ha KaNaka Ha FmTTbpa.
Fnrypa D
2.CBaIeTe CtpaHnHnKaNaKHaΦnTbpa.
3.ИЗадenteфбрчноMONTINpahatacebpn3ha 甲ka. ΦиurtlesуаE
a 3AAbbTeTHeHabBnDpKaaHaΦmTTbpaHa MAcK.45°
3A Bbptpe cebpnhataaoka o6patno hacobnkoBATA CPTENKA.
C. Canghe cepbMnHa qaoka. 4. Noctabete fmuTba. FynypaF
a 3abpeTe HabHbPkaHa HaΦnTbpaHa MaKc.45°
b NocTaberte fIHTbpa OTrope B IbPkcaHa HFTbpa.
3AaBpTeΦnTbpaDOKpa. ΦnTbpbTce6nKnpa.
d 3aBnHTeTefuNTbpa c Dpbxaua Bypea.
- NocTaBeTe cTpaHnUHHa KaNak HaФИNTbpa.
- 3aTbOpTe 6nOKnPoBkata Ha KaNakHa qntlbpa
PbBOHaJIHO NcKaHe B EKcNNoTaun
- OTBopete noDaBaHTo Ha BOba.
- NODOTBOPa3a H3TOUBAHe Ha BOda NOCTaBeTe CbD.
- HATCKAte 6yToHa "OxnaJaHa Boga",doKATO ce doCTHHe BpeMe Ha nI3nPaKaBaHe 5 MInHyTn (Pn6n10-15 NHTpa).
- HataHcHete6yToHa,HeoxNaedehaBoDa"3a1MnHyTa (pnp6n3ntenHO 2 nHTpa).
YKa3aHue
Cne6 6ekydu Hnpekcbhmo nodaahne Ha boda ypeobm aemomamuHNO pkebcaa nodaeaHemo.
5. 13BbPte XMMUeCKOTO NOuNCtBAHe (BX. rnaBa XumUecko noucmeahe).
YpeBTe roTOB 3a ekCnnoTaua.
Ecknnoataua
BODATA TEYE OT BXOda 3a BODA mbpBO npe3 KOMBUNHPAAHnФHnBPb Bx RnBaJHOKCHymATmB).B 3abcIMMOCT O3aDcEHTBAHIN6 ByTOH CNEI TOBA BOATA TEYE npe3 OxJaauuMoDyTN NII INPEKTHO KbM M3TOUBAHeTO HA BDA. LJIaTAto BODA cNCTema TpRbBA nepNoDnHo da ce NoOHCTBA XMMueckn.
06cnyxBaHe
YKa3aHue
OcemeHume cBHeaPru bMyoHu ce Akmuuapam c neko dokocaehe.
Фигура G
① BytoH"OxlaeHa Boga
② BytoH,HeoxnapeHa Boda
- Noctabete cB C cpedata Ha Tabata 3a OTTINAHe. ΦnγρуA H
- HatncKaIte 6yToHa 3a JeKanHnBn Bn BoDa DOTOrBa,doKATO cBdt Ce HanbNHn. No Bpeme Ha To3n npOec HATNCHaTnT 6yToH CBETN NO-CBETNO.
3BExdane OTeKcnnoaTaun
Ako ypeBt He ce n3noJ3Ba noBeHe 4 dHn:
- 3aTBOpTe NOdaBaHTo Ha BOba.
- N3KIOHcTe ypea.
IyckaHBe EeknnoatauaCneI N3BExKaDaHeOT ekcnnoataua
△NPEDYNPPEKDEHNE
Onachocm 3a 3dpaeemo nopadu bucoka KOuehmpauur Ha 6akmepuu
Cne 13e3e0ahe om ekcnnoamaun 38bpuwaeimuumyecko nouchmeae.
1. Bknoyeypeda
2. OTBopete noDaBaHTo Ha BOna.
3. OBCEN TIN BODA N3TOYE IN N3XBpIe HAMANKO 2NHTpa.
4. 13BbPwTe XMMUeCKTO NOuCTBaHe (BX. rnaBa Xmuuecko noucmeaHe)
TpaHcnpTpupaHe
△PENEA3JNBOCT
Hecb6nlodaaheHa mezIono
Onachocm om hapaehaaHua u noepedu
Ipu mpaenopmpahe cbniodaeaume meanomo ha
ypeda.
He tpaHcnpnptnapeIyepaB xOpH3oHTaNHO npoJXeHJIe.
PnTpaHcnpOpAneB npeBo3Hn cpeCTBa OcNpyraBte ypeA cpeUy n3nIb3BAhe n peo6pbzae H C bOtBeTCTBn C BaIIMHnTE IHCTpykUn.
H3npaunaHe Ha ypeDa
YpeBtHe THeRb6A Da ce TaHcNOpTnPa B XOPO3HTALHO NONOJKeHne
3a TpaHcnpoTnpaHeto N36peTe NoXOJaTa onakOBKa IOT BbHnHata CpHaHa TaTaOn aNakOBKa NOCTabe TpoN3BOnHa MapKnOpBka 3a TpaHcnpoTnpaHBe B N3PpAbeHo N0NoKeHe.
IbB3MOXHOCT NOyKytIa 3a N3PaaaneNoctabete MAnk BpBHeN naTe.
Kato aItePHaTbNA ypeBt MOne Da ce 3aHece dIpeKTHo Do pa3npeDeiNtEn HnyHK T3a cepBn3 Ha Karcher.
CbXpaHHeHne
△PENPA3NBOCT
Hecb6nlodaaheHa meaIono
Onachocm om Hapahraehua u noepedu
Ppu cbxpanehuemo 3emaime nod humahue meanomo ha ypeda.
1.CbxaPnBaIte ypeHa HA MRCTO, KbJeTo IINCBAT ycIOBIA 3a 3Amp3BaHe.
Pnka nnoDpBxka
△PENDYNPEXDEHNE
OnaChoc 3a 3daeMoTo npadu HenpaBunHo pEmohmuap yaped
B3naaume pemohma ha ypeda cmo Ha obyeH cnueuaunupan nepcohan.
PpeDn BCaKaBn paBoTn no ypeDa:
1.OCBOOxDaaHe Ha HAnraHTo Ha ypeHa.
a 3aTbOpTe nQdaBaHEnTo Ha B0Da.
bIodOTbpa3aH3TOUbaHeHaBOdaNocTabeTe cbld.
HtKaNcaBte 8oTHOA, OxnaBea HDoBa, dokato cnpe npDabaHeto Ha bOdata.
2.ИЗкlioуete урда.
3.ИЗБАДТЕЦЕСЕА.
CMHa HaΦnTbpa
△PENPYNPEXDEHNE
Onacochm 3a 3dpaaemopnapu ha6nuzha H6akmepu
Pru MoHmaja Ha qummbnna nampo hBnmaaume MHOO 3xuaeHama u Yucmoma.
Ipu mohma xha fumtbba hoceme cmehpunhu pbkaubuu 3a eHokpamha yntompe6a.
1. 3aTbOpTe NOdaBaHaTeO Ha B0Da.
2. Hattockaite 6bytoHa 3a "Oxnaedeha Boda" Dotoraba, dokatoCnpa Dei MHTua Boda.
3. OTBOpTe 6nOKIpOBkata Ha KaNaka Ha qHNTbpa.
4.CBaIeTe CtpaHnHnKaNaK HaΦNITbpa.
5. ⅢaBaeTefnIbpa, KOTo Tp8Ba Da ce CMeHn. Φnpyra!
a 3aBbPte FnIbpa C heroBIA Dpbkau HabH NAMKc.45c
bPa3BnTe n cBaIe Te fHNTbpa.
- Pa3oNaKOBaIte HOBnФHITbp.
- Noctabete HOBN qntbP
Фигура J
a NocTaBeTe FInnTbpa B DbPkaa H ro 3abbpTeTe dokpai.
ΦnntbpbT ce 6nokupa.
b 3aBnHTeTe fIITbpa C dbpxkaa B ypea.
- NocTabete ctpaHnUHHK kanaK Ha nntbpa.
- 3aTbopeTe 6nOKnpOBkata Ha KaNaka Ha qnnTbpa.
10.BKIOUeTe MPExOBuI UENCeB KOHTaTa - NocTabeTe CbI NOI OTBOPa 3a I3TOUBAHe Ha BOda
- OTbOpTe nOdaBaHeTo Ha Boda.
- HATICKAte 6yToHa "OxnaHeb Oba",doKato ce doCTnHe BpeMe Ha nIiKaBAhe 5MHyTN (npN6n 10-15 nITpa).
Yka3aHue
Cne6 60 ckyhdu Hnpekbchmo nodaaba He eoada ypedbm aemomamuHNO pkecba NodaeaHemo.
14. 13BbPseTe XMMUeCKOTO NOUCTBaHe (BX. INaBA XUMUecko NOUCMBAHe).
XIMMuecko nouCTBaHe
△PENEIA3NIBOCT
H3moeyahama 6oda e 6oda 3a noyuemeae
Nmouenema ooda 3a noucmehahe He e noxdoora 3a KOCHyama
XMNHuecko NocCTBaHe Tp6Ba Da ce N3BbPwBa cneI NbPTO yNcKaHe B EKcNIOataaHn no pMHcHn -HaMAnko HA BcKHa 6 Meceua.CsbTO TO BAXn CNEpnpoH Na H3BExKaHe OT EKcNIOataaHn NO-FOJmOT 4 DHN, INM3BbHpeHa CMHa Ha FInTTpa.3a XMNHueckoT ONoCTBaHe e He06XoIM KOM KNTbT 3a NoHcTBAHe (Bk.rna HoKcymamuBu).
Yka3aHue
Xumueckomo nouchmbane npobnkaa npubn.45 Muhytu.
- 3aTbOpTe noDaaBHeTo Ha B0da
- Hatackaike 6byoTa, Oxnaedae Boda' doTOraba, dokato cnpe Da i3THua Boda.
3.ИЗкючeteурда. - DEMOHHTnpaIte KOMBmHnpuHa mIITbp (BX. INaBa CMHa Ha qunmbpa).
- NocTabete cepBn3HaTa yaoka
ΦnrypaK
a 3aBbTpe HabHbIbPkaHa Ha FNITbpaHa MAKc.45".
b NocTabete cepBn3HaTa yaoka
c 3abPbTe cpebn3HaTaN OncKa H aCocBnKOBATA cTpeNa.
d 3aBnHTeTe DbpxkaHa fHNTbpa Bypeda
6. OTrpaHete 3axpaHbAunr TpbbonpoBOd 3a BOda.
7. NodrotBete KOMNNEKTA 3a NOUHCTBaHe.
Φnrgpa L
1 BxoJ3aBoJa
(2) BnHTOBOCbeINHeHne, INHXeKTO
3YnBTHHTENHpbcTeH
④ Kopnyc Ha HnKekTopa
5 13xoJ3aBoJaBpaB3kaHa ypeJa
aPa3BmTe YacTte Ha KOMnIeKTa 3a NoCnCTBaHe edHa ot npyra.
b NocTabeTe 4-Te Ta6nEeK3a NoHcTBAHe B KOMNKeKTA 3a NoHcTBAHe.
c 3aBnHTeKoKmNKeTA 3a NOCHCTBaHe, KaTO CneINTE 3a npBnHOTNOLOXeHHe Ha KpbfNOTO yInbTHHeHnE.
- CbBpKTe KOMnNEKTA 3a NOuMCTBaHe KbM BxOda Haypeja.
- Cbpykete 3axpaHbauu Tpb6oPpOBoa 3a B0da KbM KomnneKta 3a NoNCTBaHe.
- ITO Bb3MOJXHOCT NOCTABETe KOMNNEKTa 3a NoCHTBAHe BBB BEpTIKAJIHNO NOLOKHENe, Chyrpa M
- OTCpaHete TaBaTa 3a OTTuHaHe.
12.ПОД OTBOPA 3a ИТОУВАне Ha BOДЯ NOCTAБETe ПОДхODЯС CBД C M N H M M A N H A B M E C T H M O C T 1 PMTbp - BknouheMpexkOBnAe nCeB KOHTaKaT.
- OTBopeTe nOdaBaHeTo Ha BODa.
- Bknnoche ypea.
yKa3aHue
V3bLhEme dorynocHeHume cmbKu 3kKnHumerho EHumamEno, 3a da ocuypume ebMoxHo hau-2oJr efekm on xmuueckom noHcmeae.
Yka3aHue
Noucmeauum npenapam 3a xumueckom oonucmeahe uma cun ueemeh uOukamop. OcemraHemo Ha u3moeHama soda noka3ea KOuHmtpauura u epekmuehocmna Ha noucmeauum npenapam.
YKa3aHue
IpoepeHa npoecaHa noocmaaHe ce obp3yea manko koiuecmeo nha.Toea e obycnoaeHo om cucmemaMa u e HopmanHo.
16.ИЗБьрseTe NOUcTBAHETO.
a HatnckaIte ByToHa, Oxnaedena B0da"doTOraba, Dokato ypeDbT cnpe noDaBaHeTo Ha B0da cJeD 60 cekyHnn.
IbnaHakaiye 60 cekyHa, da a Moke nouchTaBuaHnT npenapat Da ce pa3tBpO.
c NToBTopeTe To3n npouec (60 cekyHn nIeKBAHe n 60 cekyHn Bpeme Ha n3kaKBaHe) 0612 nTbTH.
CnDcBcKNePPOeCEHnNPAKaHEnPa3BaTe Cb6pantHnBcBd.
e HATNCHE6yToHa,HeoxJaHbOa3a 30 cekyni. IpoceBt Ha nIaKbaHe e 3abpweh.BpeMeTO HaJeCTBHe NaOHCTBaUINr Ipennapat 3anoBa DaTee.To Tp86BaDa 6beHnMaNko 15 min noMoze da ce ydyfBAabaNo xenahne.
I N3aKaIte HAI-MaIKO 15 MmHYTN BpeMe Ha DeiCTBHe HA NOuMCTBaUIN npenapat.
17.3aTbOpTe NOdaBaHeTo Ha BODa
18. HATNCKAtePOn3B0NeH 6yToH, DOKaTO cne Da ce NtOHTBA BOZA.
19.ИЗкючeteуpeda
20.OTCTpaHeteKOMNJIeKta3aNoYCTBaHe
21. Cbpxjete OTHOBO MAPKya 3a noJaBaHe Ha BOda KbM ypeJa.
22. OntpaHene cepin3nata ukaia n noctabete cnntbpa oTHBO.
U3nIakBaHcneXmNueCKToNouchTaBHe
yKa3aHue
Ipo eepo epeme moeeme da npekbcheme 3a kpmko npoueca Ha u3nnakeane, Hnp. 3a da u3npa3nme yauama 3a eoDHokpamha ynuompe6a.
1.Пд OTBOPA 3a I3TCHBAH Na BOI nCTABETe NOxDDJIc bC d CMNHIMNAHBA MECTIMOT 1NITbp.
2. OTBOPETe NOBaBAHTo Ha BODa.
3.BkniOyTe ypea.
4. Hatnckaee 6yToHa "OxJaedea Boga" OTOrabora, DOKATO CPNE da CE BIXKA Da CnHb OUBETBAHE.
5.CneToBaIaHnKaHHeTe C OSe Hau-MaNko 4 DOnbJIHNTeHNH JInTpA.
6. Hatickaite ByToHa, "Heoxnaja Boda" Dotoraba, Dokato Cnpa De CE NkDa CInbO OCBETBAHe.
7.Cne ToBaIaIInnakHete c Oue Hai-Manko 2 DOnJIbHIHTeHHI JNTpa.
YpeBt e rTOB 3a ekCnNoaTaUy.
B3emaHa npo6n
3a Da MoKeJa De cPiOBepI eEeKbTcOT XMMNueCKOTOnoNUCTBaHe, HNoCpeDCTBHeO CneI pNkLIuOeHOTXMMNueCKO NocHTBaHe TprBaJa da cEeMaT IpoBnPi nCna3BaHa He Na paBnIata 3a MnkPobMOnorNuHEn aHaJIIN3 HaBoDTa, IN Da ce aHaJIIN3mpaT OT akPeDInptpaNa6bpOpTOpN.
Uldised juhised. 119
Ohutusjuhised 119
Nouetekohane kasutamine 119
Keskkonnakaitse 119
Tehnilised andmed. 122
Hooldusplaan 122
4. Sisestage filter.
TexhiHi xapaKTePmCTnKi
Register your product and benefit from many advantages.
www.kaercher.com/welcome


Rate your product and tell us your opinion.
www.kaercher.com/dealersearch
Alfred Kärcher SE & Co. KG
Alfred-Karcher-Str. 28-40
71364 Winnenden (Germany)
Tel.: +49 7195 14-0
Fax: +49 7195 14-2212