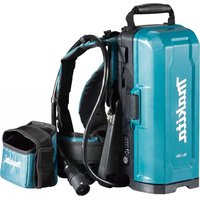
BAP182 - Battery MAKITA - Free user manual and instructions
Find the device manual for free BAP182 MAKITA in PDF.
| Product Type | Battery Converter / Adapter |
| Brand | Makita |
| Model | BAP182 |
| Input Voltage | 18 V (x2 batteries) |
| Output Voltage | 36 V |
| Compatible Batteries | Makita 18 V (except BL1815) |
| Applications | Power Makita 36 V tools for continuous work |
| Charge Indicator | Displays remaining charge for each battery (LED indicators) |
| Protection Functions | Overload, overheating, abnormal voltage protection |
| Attachment | Belt hook, optional shoulder strap |
| Dimensions (approx.) | 200 x 150 x 100 mm |
| Weight (approx.) | 0.6 kg |
| Maintenance | Clean with a dry cloth; do not immerse in water |
| Safety Instructions | Read the manual; do not use with a 14.4 V battery; do not carry by the cord |
Frequently Asked Questions - BAP182 MAKITA
User questions about BAP182 MAKITA
0 question about this device. Answer the ones you know or ask your own.
Ask a new question about this device
Download the instructions for your Battery in PDF format for free! Find your manual BAP182 - MAKITA and take your electronic device back in hand. On this page are published all the documents necessary for the use of your device. BAP182 by MAKITA.
USER MANUAL BAP182 MAKITA
GB Battery converter Instruction Manual
text_image
Diagram showing exploded view of a device with numbered components and a magnified inset highlighting internal components.1
text_image
8 72
text_image
8 7 93

text_image
104
natural_image
Line drawing of a worker in safety gear operating a power tool, standing against a vertical wall (no text or symbols)5
text_image
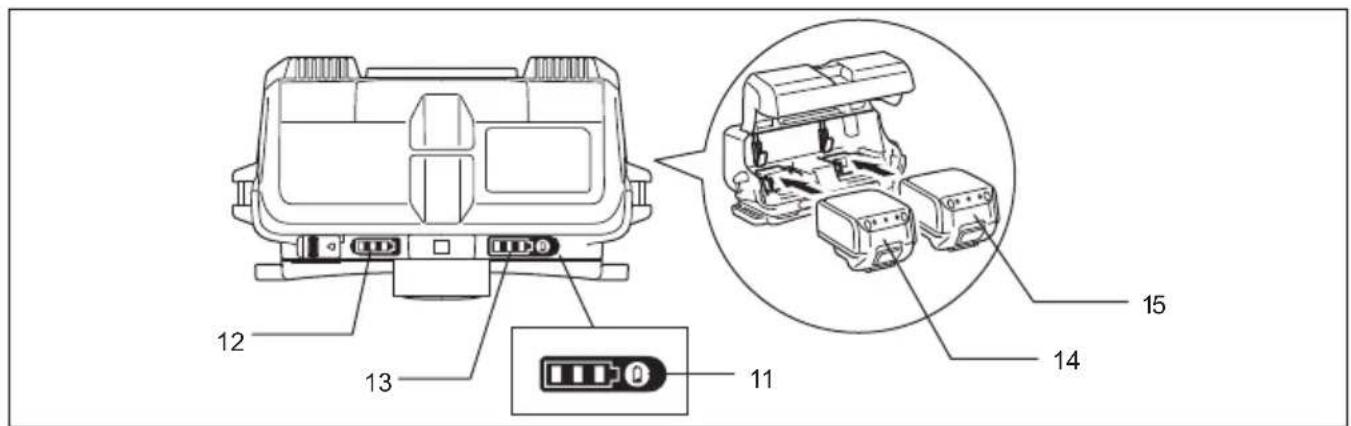
12 13 11 14 156
English (Original instructions)
| Explanation of general view | ||||
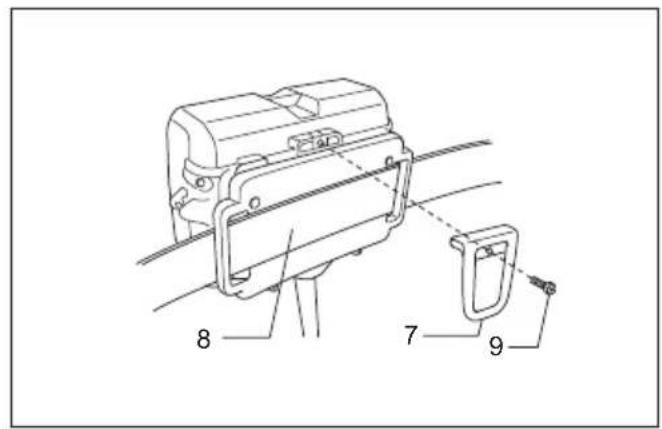
| 1 | Cover | 7 | Hook | 12 Remaining battery capacity indication lamp for Battery 1 |
| 2 | Battery | 8 | Belt | |
| 3 | Lock lever | 9 | Screw | 13 Remaining battery capacity indication lamp for Battery 2 |
| 4 | Product | 10 | Shoulder strap | |
| 5 | Product mounting adapter | 11 | Battery capacity display button | 14 Battery 1 |
| 6 | Cord | 15 Battery 2 | ||
Applications
This battery converter enables the main unit and batteries to be separated, making it suitable for work performed over long times, etc.
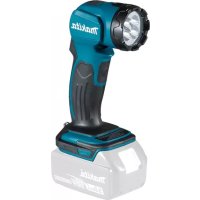
This battery converter uses two 18 V batteries, and can be used with 36 V battery-powered products.
Compatible battery: BL1815N, BL1820B, BL1830B, BL1840B, BL1850B, BL1860B
Note: BL1815 cannot be used with the battery converter.

CAUTION
- Be sure to carefully read the product main unit instruction manual before use.
- This battery converter is designed exclusively for use with 18 V batteries. Do not use 14.4 V batteries.
• Install two 18 V batteries for use. This battery converter cannot be used with only one 18 V battery. - Do not pick up or carry the battery converter by holding only the cord.
- Do not insert the product mounting adaptor into the charger. Charging is not possible in this case.
- During operation, keep the cord away from obstacles such as branches. The cord caught by obstacles may cause serious injury.
- Do not use multiple adapters to extend the cord.
- Do not use a corded power supply such as portable power pack with this battery adapter. The cable of such power supply may hinder the operation and result in personal injury or malfunction.
Installing the batteries (Fig. 1 & 2)

CAUTION
- Be careful not to pinch your fingers with the cover when inserting the batteries.
- Be careful not to drop the batteries when removing them.
- Be careful when removing the batteries with the batteries facing downward, as they may fall out and drop.
- Slide the lock lever of the adapter used to house the 18 V batteries, and open the cover.
- Insert the batteries firmly all the way, until the red color of the button is no longer visible.
- Be sure to secure the cover with the lock lever.
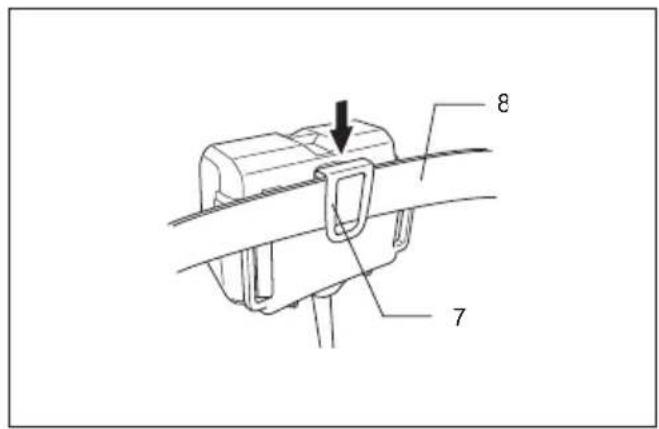
- Set the hook onto your belt, etc. (Fig. 3)
- Attach the product mounting adapter to the product.
- You can also remove the hook and pass the belt through it as shown in the illustration
Attaching the optional shoulder strap
The optional shoulder strap can be attached as shown in the illustration. (Fig. 4)
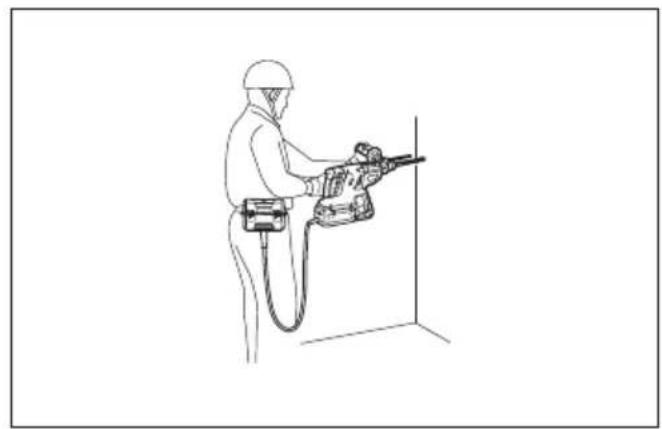
Operation
Attach the battery converter to your body for work as shown in the illustration. (Fig. 5)
Remaining battery capacity indication (Fig. 6)
Press the remaining battery capacity display button to light the indicator lamps and indicate the remaining battery capacities for approximately 10 seconds. The indicator lamps correspond to each battery.
NOTE
- When only the lowermost indicator lamp blinks for either Battery 1 or Battery 2, this means that the battery capacity is low, so the product does not operate. In these cases, charge the battery that is low, or replace it with a fully charged battery. The product does not operate when either of the batteries has run out.
- The indicated charge may be slightly lower than the actual level during use or immediately after using the product.
How to read the remaining battery capacity indication
| Indicator lamps (Battery 1 or Battery 2) | Remaining charge or indication contents | |||
 : On : On | [K220] : Off |  : Blinking : Blinking | ||
 |  |  | 50% to 100% | |
 |  |  | 20% to 50% | |
 |  |  | 0% to 20% | |
| [ZV22] |  |  | Charge the battery | |
| [0722] |  | [OK5X] | ||
- Depending on the conditions of use and the ambient temperature, the remaining capacity may not be indicated correctly.
Example of remaining charge indication (Battery 1: 80%, Battery 2: 10%)
| Battery 1 Battery 2 | |||||||
Abnormal indications during use
The BCV01 indicates various states using the remaining battery capacity indication.
| Indicator lamps | Indication contents | ||
 | [ZWK] | [XX86] | |
| Battery 1 Battery 2 | |||
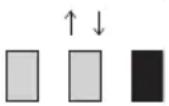
 ↑↓ ↑↓    | The BCV01 may have malfunctioned. | ||
  | The protective function operated. | ||
  | The protective function operated. | ||
 | Charge the battery. | ||
  | The BCV01 detected an abnormally high voltage. | ||
- BCV01 malfunction
When the three indicator lamps for Battery 1 and the three indicator lamps for Battery 2 light alternately, the BCV01 may have malfunctioned. Contact your Makita dealer or nearest Makita Sales Center to request inspection and/or repair.
- BCV01 protective function
When a product is used continuously at a high load, the motor may stop automatically. This is due to the BCV01's protective function, and is not a malfunction. If the product does not operate even when the product switches are operated, stop use, disconnect the product and batteries from the BCV01, and let the BCV01 cool down.
- Battery protective function
The batteries have an internal protective function that automatically stops power output in order to extend the battery life. When the following states occur during product use, the motor stops automatically, but this is due to the battery's protective function, and is not a malfunction.
When the battery temperature rises above a certain level, the motor stops automatically, and remains stopped even when the switches are operated. In these cases, stop battery use, remove the batteries from the BCV01, and allow the batteries to cool or charge the batteries.
When the battery capacity becomes low, the product's motor stops automatically. If the product does not operate even when the switches are operated, remove the batteries from the BCV01 and charge the batteries.
- BCV01 abnormally high voltage detection
When the BCV01 detects an abnormally high battery voltage, the motor stops automatically. This is due to the BCV01's protective function, and is not a malfunction. In these cases, the motor remains stopped even when the switches are operated.
Remove the batteries from the BCV01, and use different batteries with normal voltage.
NOTE
When the product stops automatically without any BCV01 indication
When the product enters an overload state, power output stops automatically in order to extend the battery life. This is due to the battery's protective function, and is not a malfunction. In addition, in these cases the BCV01 does not indicate anything, but this is not a malfunction. When this happens, release the switch, and remove the cause of the overload. The product can then be used again by operating the switch again.
Français (Instructions originales)
Batterie compatible : BL1815N, BL1820B, BL1830B, BL1840B, BL1850B, BL1860B
Kompatibler Akku: BL1815N, BL1820B, BL1830B, BL1840B, BL1850B, BL1860B
Batteria compatibile: BL1815N, BL1820B, BL1830B, BL1840B, BL1850B, BL1860B
Geschikte accu: BL1815N, BL1820B, BL1830B, BL1840B, BL1850B, BL1860B
Bateria compatível: BL1815N, BL1820B, BL1830B, BL1840B, BL1850B, BL1860B
Kompatibel akku: BL1815N, BL1820B, BL1830B, BL1840B, BL1850B, BL1860B
Kompatibelt batteri: BL1815N, BL1820B, BL1830B, BL1840B, BL1850B, BL1860B
Kompatibelt batteri: BL1815N, BL1820B, BL1830B, BL1840B, BL1850B, BL1860B
Merknad: BL1815 kan ikke brukes med batterikonverteren.

FORSIKTIG
Akumulator zgodny z adapterem: BL1815N, BL1820B, BL1830B, BL1840B, BL1850B, BL1860B
| Akumulator 1 Akumulator 2 | ||
Savietojamais akumulators: BL1815N, BL1820B, BL1830B, BL1840B, BL1850B, BL1860B
Ühilduv aku: BL1815N, BL1820B, BL1830B, BL1840B, BL1850B, BL1860B
| 1. aku 2. aku | |||||
| (W723) | [XX5K] | [KCT8] | (YHD4) | (XGTT) | [HBTK] |
Suderinamas akumuliatorius: BL1815N, BL1820B, BL1830B, BL1840B, BL1850B, BL1860B
Baterie compatibilă: BL1815N, BL1820B, BL1830B, BL1840B, BL1850B, BL1860B
Uyumlu batarya: BL1815N, BL1820B, BL1830B, BL1840B, BL1850B, BL1860B
| Batarya 1 Batarya | 2 | ||||
 |  |  |  | [WSA3] |  |
Pin tương thích: BL1815N, BL1820B, BL1830B, BL1840B, BL1850B, BL1860B
호환 배터리: BL1815N, BL1820B, BL1830B, BL1840B, BL1850B, BL1860B