
CS3625DC - Saw HiKOKI - Free user manual and instructions
Find the device manual for free CS3625DC HiKOKI in PDF.
| Product type | Cordless chain saw |
| Brand | HiKOKI |
| Model | CS3625DC |
| Rated voltage | 36 V |
| Chain type | 90PX-040X |
| Chain pitch | 9.5 mm (3/8") |
| Chain gauge | 1.1 mm (0.043") |
| Guide bar (max cutting length) | 250 mm (type 104MLEA041) |
| Sprocket (number of teeth) | 6 |
| Chain speed at no load | 12.6 m/s (760 m/min) |
| Oil tank capacity | 70 ml |
| Compatible batteries | BSL36A18, BSL36B18 |
| Weight (without battery and accessories) | 2.0 kg |
| Applications | Cutting logs/wood, pruning garden trees |
| Sound pressure level (LpA) | 89 dB(A), uncertainty K=3 dB(A) |
| Sound power level (LWA) | 98 dB(A), uncertainty K=3 dB(A) |
| Emitted vibrations (a_h) | 2.8 m/s², uncertainty K=1.5 m/s² |
| Safety devices | Chain brake, lock lever, chain catcher, kickback guard |
| Main functions | Automatic chain lubrication, adjustable chain tension, hanging hook, oil level indicator, remaining battery indicator |
| Maintenance and cleaning | Regular cleaning of guide bar, sprocket, chain brake; drain oil tank before storage |
| Spare parts and repairability | Chain, guide bar, sprocket, side cover available; repairs by HiKOKI authorized service center |
| General information | Warranty according to national regulations; manual available in multiple languages |
Frequently Asked Questions - CS3625DC HiKOKI
User questions about CS3625DC HiKOKI
0 question about this device. Answer the ones you know or ask your own.
Ask a new question about this device
Download the instructions for your Saw in PDF format for free! Find your manual CS3625DC - HiKOKI and take your electronic device back in hand. On this page are published all the documents necessary for the use of your device. CS3625DC by HiKOKI.
USER MANUAL CS3625DC HiKOKI
The following show symbols used for the machine. Be sure that you understand their meaning before use.
| CS3625DC / CS3630DC: Cordless Chain Saw | |
| To reduce the risk of injury, user must read instruction manual. | |
| Do not use a power tool in the rain and moisture or leave it outdoors when it is raining. | |
| Only for EU countries Do not dispose of electric tools together with household waste material! In observance of European Directive 2012/19/EU on waste electrical and electronic equipment and its implementation in accordance with national law, electric tools that have reached the end of their life must be collected separately and returned to an environmentally compatible recycling facility. | |
| Read, understand and follow all warnings and instructions in this manual and on the unit. | |
| Always wear eye, head and ear protectors when using this unit. | |
| Beware of chain saw kickback and avoid contact with bar tip. | |
| Always use chain saw two-handed. | |
| It is important that you wear the protective clothing for feet, legs, hands, fore-arms and head. | |
| This chain saw is for use by trained tree service operator only. Use without proper training can result in severe injuries. | |
| Chain oil delivery rate adjustment | |
| Disconnect the battery |
WHAT IS WHAT? (Fig. 1)
A: Battery (sold separately): Power source to drive the unit.
B: Switch: Device activated by the fi nger.
C: Lock-off lever: Lever that prevents the accidental operation of the trigger.
D: Chain brake: Device for stopping or locking the saw chain.
E: Side cover: Protective cover to the guide bar, saw chain, clutch and sprocket when the chain saw is in use.
F: Nut: Nut for securing side cover.
G: Tensioning screw: Device for adjusting tension of saw chain.
H: Front handle: Support handle located at or towards the front of the main body.
I: Rear handle (Top handle): Support handle located on the rear of the main body.
J: Saw chain: Chain, serving as a cutting tool.
K: Guide bar: The part that supports and guides the saw chain.
L: Spiked bumper: Device for acting as a pivot when in contact with a tree or log.
M: Oil tank cap: Cap for closing the oil tank.
N: Oil sight glass: Window to check chain oil amount.
O: Hook: Tool for hanging the unit with rope etc.
P: Oil feeder: Container for oil.
Q: Chain case: Case for covering the guide bar and saw chain when the unit is not being used.
R: Combi box spanner: The tool for removing or installing a side cover and tensioning the saw chain.

WARNING
This chain saw (CS3625DC / CS3630DC) is designed especially for tree care and surgery. Or persons trained in tree care and surgery may use this saw. Observe all literature, procedures and recommendations from the relevant professional organization. Failure to do so constitutes a high accident risk. We recommend always using a rising platform for sawing in trees. Rappelling techniq are extremely dangerous and require special training. The operator must be trained in and familiar with the use of safety equipment and working and climbing techniques. Always use the restraining equipment for both the operator and the saw.
GENERAL POWER TOOL SAFETY WARNINGS
WARNING
Read all safety warnings, instructions, illustrations and specifications provided with this power tool.
Failure to follow all instructions listed below may result in electric shock, fire and/or serious injury.
Save all warnings and instructions for future reference.
The term "power tool" in the warnings refers to your mains-operated (corded) power tool or battery-operated (cordless) power tool.
1) Work area safety
a) Keep work area clean and well lit. Cluttered or dark areas invite accidents.
b) Do not operate power tools in explosive atmospheres, such as in the presence of flammable liquids, gases or dust.
Power tools create sparks which may ignite the dust or fumes.
English
c) Keep children and bystanders away while operating a power tool.
Distractions can cause you to lose control.
2) Electrical safety
a) Power tool plugs must match the outlet.
Never modify the plug in any way.
Do not use any adapter plugs with earthed (grounded) power tools.
Unmodified plugs and matching outlets will reduce risk of electric shock.
b) Avoid body contact with earthed or grounded surfaces, such as pipes, radiators, ranges and refrigerators.
There is an increased risk of electric shock if your body is earthed or grounded.
c) Do not expose power tools to rain or wet conditions.
Water entering a power tool will increase the risk of electric shock.
d) Do not abuse the cord. Never use the cord for carrying, pulling or unplugging the power tool.
Keep cord away from heat, oil, sharp edges or moving parts.
Damaged or entangled cords increase the risk of electric shock.
e) When operating a power tool outdoors, use an extension cord suitable for outdoor use.
Use of a cord suitable for outdoor use reduces the risk of electric shock.
f) If operating a power tool in a damp location is unavoidable, use a residual current device (RCD) protected supply.
Use of an RCD reduces the risk of electric shock.
3) Personal safety
a) Stay alert, watch what you are doing and use common sense when operating a power tool.
Do not use a power tool while you are tired or under the influence of drugs, alcohol or medication.
A moment of inattention while operating power tools may result in serious personal injury.
b) Use personal protective equipment. Always wear eye protection.
Protective equipment such as a dust mask, nonskid safety shoes, hard hat or hearing used for appropriate conditions will reduce personal injuries.
c) Prevent unintentional starting. Ensure the switch is in the off -position before connecting to power source and/or battery pack, picking up or carrying the tool.
Carrying power tools with your finger on the switch or energising power tools that have the switch on invites accidents.
d) Remove any adjusting key or wrench before turning the power tool on.
A wrench or a key left attached to a rotating part of the power tool may result in personal injury.
e) Do not overreach. Keep proper footing and balance at all times.
This enables better control of the power tool in unexpected situations.
f) Dress properly. Do not wear loose clothing or jewellery. Keep your hair and cI from moving parts.
Loose clothes, jewellery or long hair can be caught in moving parts.
g) If devices are provided for the connection of dust extraction and collection facilities, ensure these are connected and properly used.
Use of dust collection can reduce dust-related hazards.
h) Do not let familiarity gained from frequent use of tools allow you to become complacent and ignore tool safety principles.
A careless action can cause severe injury within a fraction of a second.
4) Power tool use and care
a) Do not force the power tool. Use the correct power tool for your application.
The correct power tool will do the job better and safer at the rate for which it was designed.
b) Do not use the power tool if the switch does not turn it on and off.
Any power tool that cannot be controlled with the switch is dangerous and must be repaired.
c) Disconnect the plug from the power source and/or remove the battery pack, if detachable, from the power tool before making any adjustments, changing accessories, or storing power tools.
Such preventive safety measures reduce the risk of starting the power tool accidentally.
d) Store idle power tools out of the reach of children and do not allow persons unfamiliar with the power tool or these instructions to operate the power tool.
Power tools are dangerous in the hands of untrained users.
e) Maintain power tools and accessories. Check for misalignment or binding of moving parts, breakage of parts and any other condition that may affect the power tool's operation.
If damaged, have the power tool repaired before use.
Many accidents are caused by poorly maintained power tools.
f) Keep cutting tools sharp and clean.
Properly maintained cutting tools with sharp cutting edges are less likely to bind and are easier to control.
g) Use the power tool, accessories and tool bits etc. in accordance with these instructions, taking into account the working conditions and the work to be performed.
Use of the power tool for operations different from those intended could result in a hazardous situation.
h) Keep handles and grasping surfaces dry, clean and free from oil and grease.
Slippery handles and grasping surfaces do not allow for safe handling and control of the tool in unexpected situations.
5) Battery tool use and care
a) Recharge only with the charger specified by the manufacturer.
A charger that is suitable for one type of battery pack may create a risk of fire when used with another battery pack.
b) Use power tools only with specifically designated battery packs.
Use of any other battery packs may create a risk of injury and fire.
c) When battery pack is not in use, keep it away from other metal objects, like paper clips, in gcainsalkeys, nails, screws or other small metal objects, that can make a connection from one terminal to another.
Shorting the battery terminals together may cause burns or a fire.
d) Under abusive conditions, liquid may be ejected from the battery; avoid contact. If contact accidentally occurs, flush with water. If liquid contacts eyes, additionally seek medical help.
Liquid ejected from the battery may cause irritation or burns.
e) Do not use a battery pack or tool that is damaged or modified.
Damaged or modifi ed batteries may exhibit unpredictable behaviour resulting in fire, explosion or risk of injury.
f) Do not expose a battery pack or tool to fire or excessive temperature.
Exposure to fire or temperature above 130^ may cause explosion. i)
g) Follow all charging instructions and do not charge the battery pack or tool outside the temperature range specified in the j) instructions.
Charging improperly or attemperat the specified range may damage the battery and increase the risk of fire.
6) Service
a) Have your power tool serviced by a repair person using only identical replacement parts. This will ensure that the safety of the power tool is maintained.
b) Never service damaged battery packs. Service of battery packs should only be performed by the manufacturer or authorized service providers.
PRECAUTION
Keep children and infirm persons away.
When not in use, tools should be stored out of reach of children and infirm persons.
CORDLESS CHAIN SAW SAFETY WARNINGS
1) General chain saw safety warnings
a) This chain saw is not intended for tree felling. Use of the chain saw for operations different than intended could result in serious injury to the operator or bystanders.
b) The operator must be trained in safe climbing techniques and in the use of all recommended additional safety equipment, such as harness, loops, straps, rope and karabiners, and other fall arrest systems for the operator and the saw. Establishing a secure location in the tree at each working position is essential to avoid a hazardous situation.
c) Wear eye protection, ear protection and protective equipment for head, forearms, hands, legs and feet that is suitable for tree climbing. Adequate protective equipment will reduce personal injury from flying debris or accidental contact with the saw chain.
d) Cut wood only. Do not use chain saw for purposes not intended. For example: do not use chain saw for cutting metal, plastic, masonry or non-wood building materials. Use of the chain saw for operations diff erent than intended could result in a hazardous situation.
e) Always hold the chain saw with your right hand on the rear handle and your left hand on the front handle. Holding the chain saw with a reversed hand configuration increases the risk of personal injury and should never be done.
f) Hold the chain saw by insulated gripping surfaces only, because the saw chain may contact hidden wiring. Saw chains contacting a "live" wire may make exposed metal parts of the chain saw "live" and could give the operator an electric shock.
g) Keep all parts of the body away from the saw chain when the chain saw is operating. Before you start the chain saw, make sure the saw chain is not contacting anything. A moment of inattention while operating chain saws may cause entanglement of your clothing or body with the saw chain.
h) When cutting a limb that is under tension, be alert for spring back. When the tension in the wood fibres is released, the spring loaded limb may strike the mayoperator and/or throw the chain saw out of control.
i) Use extreme caution when cutting thin branches. The slender material may catch the saw chain and be whipped toward you or pull you off balance.
j) Follow all instructions when clearing jammed material, storing or servicing the chain saw.
a t uMake sure the switch is off and the battery pack is removed. Unexpected actuation of the chain saw while clearing jammed material or servicing may result serious personal injury.
k) Carry the chain saw by the front handle with the chain saw switched off and away from your body. When transporting or storing the chain saw, always fit the guide bar cover. Proper handling of the chain saw will reduce the likelihood of accidental contact with the moving saw chain.
1) Follow instructions for lubricating, chain tensioning and changing the bar and chain. Improperly tensioned or lubricated chain may either break or increase the chance for kickback.
2) Causes and operator prevention of kickback: Kickback may occur when the nose or tip of the guide bar touches an object, or when the wood closes in and pinches the saw chain in the cut. (Fig. 2)
Tip contact in some cases may cause a sudden reverse reaction, kicking the guide bar up and back towards the operator.
Pinching the saw chain along the top of the guide bar may push the guide bar rapidly back towards the operator.
Either of these reactions may cause you to lose control of the saw which could result in serious personal injury. Do not rely exclusively upon the safety devices built into your saw. As a chain saw user, you should take several steps to keep your cutting jobs free from accident or injury. Kickback is the result of machine misuse and/or incorrect operating procedures or conditions and can be avoided by taking proper precautions as given below:
a) Maintain a firm grip, with thumbs and fingers encircling the chain saw handles, with both hands on the saw and position your body and arm to allow you to resist kickback forces. (Fig. 3) Kickback forces can be controlled by the operator, if proper precautions are taken. Do not let go of the chain saw.
b) Do not overreach. This helps prevent unintended tip contact and enables better control of the chain saw in unexpected situations.
c) Only use replacement guide bars and saw chains specified by the manufacturer. Incorrect replacement guide bars and saw chains may cause chain breakage and/or kickback.
d) Follow the manufacturer's sharpening and maintenance instructions for the saw chain. Decreasing the depth gauge height can lead to increased kickback.
ADDITIONAL SAFEY WARNING
- Work without pressure. In addition, always keep your body warm.
- Keep all parts of the body away from the saw chain when the chain saw is operating.
- Before commencing work, reflect fully on the work procedures involved and work to avoid accidents, otherwise injury may occur.
- Do not use in the event of bad weather, such as strong wind, rain, snow, fog, or in areas prone to rockfall or avalanches.
In bad weather, judgment may be impaired and the vibration may result in disaster.
- When visibility is poor, such as during bad weather or night, do not use the unit. In addition, do not use it in rain or in a location exposed to rain.
Unstable foothold or loss of balance may result accident.
- Check the guide bar and saw chain before starting the unit.
- If the guide bar or saw chain is cracked, or the product is scratched or bent, do not use the unit.
Check if the guide bar and saw chain are securely installed. If the guide bar or saw chain is broken or dislodged, this may result in an accident. - Before starting work, check to ensure the switch does not engage unless the lock-off lever is pressed.
If the unit does not working properly, immediately stop using and request repair from your HiKOKI Authorized Service Center.
- Install the saw chain properly, in accordance with the instruction manual. If installed incorrectly, the saw chain will come off the guide bar and injury may occur.
- Never remove any of the safety devices equipped on the chain saw (chain brake, lock-off lever, chain catcher etc.).
In addition, do not alter or immobilize them. Injury may occur.
- In the following cases, switch the unit off and ensure the saw chain is no longer moving:
When not in use - When shifting to a new work location.
- When inspecting, adjusting or replacing the saw chain, guide bar, chain case and any other part.
When refilling the chain oil.
When removing dust etc. from the body. - When removing obstacles, trash or sawdust generated from work from the work area.
- When you take off the unit, or when you get away from the unit.
Otherwise, if you sense danger or anticipate risk.
If the saw chain is still moving, an accident may occur.
- Work should generally be performed individually. When multiple individuals are involved, ensure sufficient spacing between them.
- Remain more than 15m away from other people. In addition, when working with multiple persons, remain 15m or more apart.
There is a risk of impact with scatters and other accidents.
Prepare a whistle alert etc. and determine appropriate contact method for other workers beforehand. -
Before cutting standing trees, ensure the following:
Determine a safe evacuation location prior to cutting.
Remove obstacles (e.g., branches, shrubs) in advance. -
During use, if the unit performance deteriorates, or you notice any abnormal sound or vibration, immediately switch off and discontinue use, and return to your HiKOKI Authorized Service Center for inspection or repair.
If you continue using, injury may occur.
15. If the unit is accidentally dropped or exposed to impact, inspect carefully for damage or cracks and ensure there is no deformation. If the unit is damaged, cracked or deformed, injury may occur.
16. When transporting the unit by car, secure the unit to prevent it moving.
There is a risk of accident.
- Do not switch the unit on while the chain case is attached.
Injury may occur. - Ensure there are no nails and other foreign objects in the material.
If the saw chain impact on the nail etc., injury may occur.
- To avoid the guide bar becoming entangled with the material when chopping on a verge or when subject to the weight of material while cutting, install a supporting platform close to the cutting position.
If the guide bar becomes entangled, injury may occur. - If the unit is to be transported or stored after use, either remove the saw chain, or attach the chain case.
If the saw chain comes into contact with your body, injury may occur.
- Adequately care for the unit.
To ensure work can be performed safely and efficiently, care for the saw chain to ensure it provides optimal cutting performance. - When replacing the saw chain or guide bar, maintaining the body, fi lling oil etc., follow the instruction manual.
- Ask the shop to repair the unit.
Do not modify this product, since it already complies with the applicable safety standards.
Always refer to your HiKOKI Authorized Service Center for all repairs.
Attempting to repair the unit yourself may result in an accident or injury.
- When not using the unit, ensure it is properly stored. Drain off the chain oil, and keep in a dry place out of reach of children or a locked location.
- If the warning label is no longer visible, peels off or is otherwise unclear, apply a new warning label.
For the warning label, refer to your HiKOKI Authorized Service Center.
- When working, if local rules or regulations apply, comply with the same.
- Make sure that the battery is installed firmly. If it is at all loose it could come off and cause an accident.
- Do not use the product if the tool or the battery terminals (battery mount) are deformed. Installing the battery could cause a short circuit that could result in smoke emission or ignition.
- Keep the tool's terminals (battery mount) free of swarf and dust.
Prior to use, make sure that swarf and dust have not collected in the area of the terminals.
During use, try to avoid swarf or dust on the tool from falling on the battery. - When suspending operation or after use, do not leave the tool in an area where it may be exposed to falling swarf or dust.
Doing so could cause a short circuit that could result in smoke emission or ignition.
- Always use the tool and battery at temperatures between -5^ and 40^ .
PRECAUTIONS FOR BATTERY AND CHARGER (sold separately)
- Always charge the battery at a temperature of 0^ - 40^ . A temperature of less than 0^ will result in over charging which is dangerous. The battery cannot be charged at a temperature higher than 40^ .
The most suitable temperature for charging is that of 20^ - 25^ - Do not use the charger continuously.
When one charging is completed, leave the charger for about 15 minutes before the next charging of battery. - Do not allow foreign matter to enter the hole for connecting the rechargeable battery.
- Never disassemble the rechargeable battery or charger.
- Never short-circuit the rechargeable battery.
Short-circuiting the battery will cause a great electric current and overheat. It results in burn or damage to the battery. - Do not dispose of the battery in fire.
If the battery is burnt, it may explode. - Using an exhausted battery will damage the charger.
- Bring the battery to the shop from which it was purchased as soon as the post-charging battery life becomes too short for practical use. Do not dispose of the exhausted battery.
- Do not insert objects into the air ventilation slots of the charger.
Inserting metal objects or flammable into the charger air ventilation slots will result in an electrical shock hazard or damage to the charger.
CAUTION ON LITHIUM-ION BATTERY
To extend the lifetime, the lithium-ion battery equips with the protection function to stop the output.
In the cases of 1 to 3 described below, when using this product, even if you are pulling the switch, the motor may stop. This is not the trouble but the result of protection function.
- When the battery power remaining runs out, the motor stops.
In such case, charge it up immediately.
- If the tool is overloaded, the motor may stop. In this case, release the switch of tool and eliminate causes of overloading. After that, you can use it again.
- If the battery is overheated under overload work, the battery power may stop.
In this case, stop using the battery and let the battery cool. After that, you can use it again.
Furthermore, please heed the following warning and caution.
WARNING
In order to prevent any battery leakage, heat generation, smoke emission, explosion and ignition beforehand, please be sure to heed the following precautions.
- Make sure that swarf and dust do not collect on the battery.
During work make sure that swarf and dust do not on the battery. - Make sure that any swarf and dust falling on the power tool during work do not collect on the battery.
- Do not store an unused battery in a location exposed to swarm and dust.
Before storing a battery, remove any swarf and dust that may adhere to it and do not store it together with metal parts (screws, nails, etc.). -
Do not pierce battery with a sharp object such as a nail, strike with a hammer, step on, throw or subject the battery to severe physical shock.
-
Do not use an apparently damaged or deformed battery.
- Do not use the battery for a purpose other than those specified.
- If the battery charging fails to complete even when a specified recharging time has elapsed, immediately stop further recharging.
- Do not put or subject the battery to high temperatures or high pressure such as into a microwave oven, dryer, or high pressure container.
- Keep away from fire immediately when leakage or foul odor are detected.
- Do not use in a location where strong static electricity generates.
- If there is battery leakage, foul odor, heat generated, discolored or deformed, or in any way appears abnormal during use, recharging or storage, immediately remove it from the equipment or battery charger, and stop use.
- Do not immerse the battery or allow any fluids to flow inside. Conductive liquid ingress, such as water, cause damage resulting in fire or explosion. Store your battery in a cool, dry place, away from combustible and flammable items. Corrosive gas atmospheres must be avoided.
CAUTION
- If liquid leaking from the battery gets into your eyes, do not rub your eyes and wash them well with fresh clean water such as tap water and contact a doctor immediately.
If left untreated, the liquid may cause eye-problems. - If liquid leaks onto your skin or clothes, wash well with clean water such as tap water immediately.
There is a possibility that this can cause skin irritation. - If you find rust, foul odor, overheating, discolor, deformation, and/or other irregularities when using the battery for the first time, do not use and return it to your supplier or vendor.
WARNING
If an electrically conductive foreign object enters the terminals of the lithium ion battery, a short-circuit may occur resulting in the risk of fire. Please observe the following matters when storing the battery.
- Do not place electrically conductive cuttings, nails, steel wire, copper wire or other wire in the storage case.
Either install the battery in the power tool or store by securely pressing into the battery cover until the ventilation holes are concealed to prevent short-circuits (See Fig. 4).
REGARDING LITHIUM-ION BATTERY TRANSPORTATION
When transporting a lithium-ion battery, please observe the following precautions.
WARNING
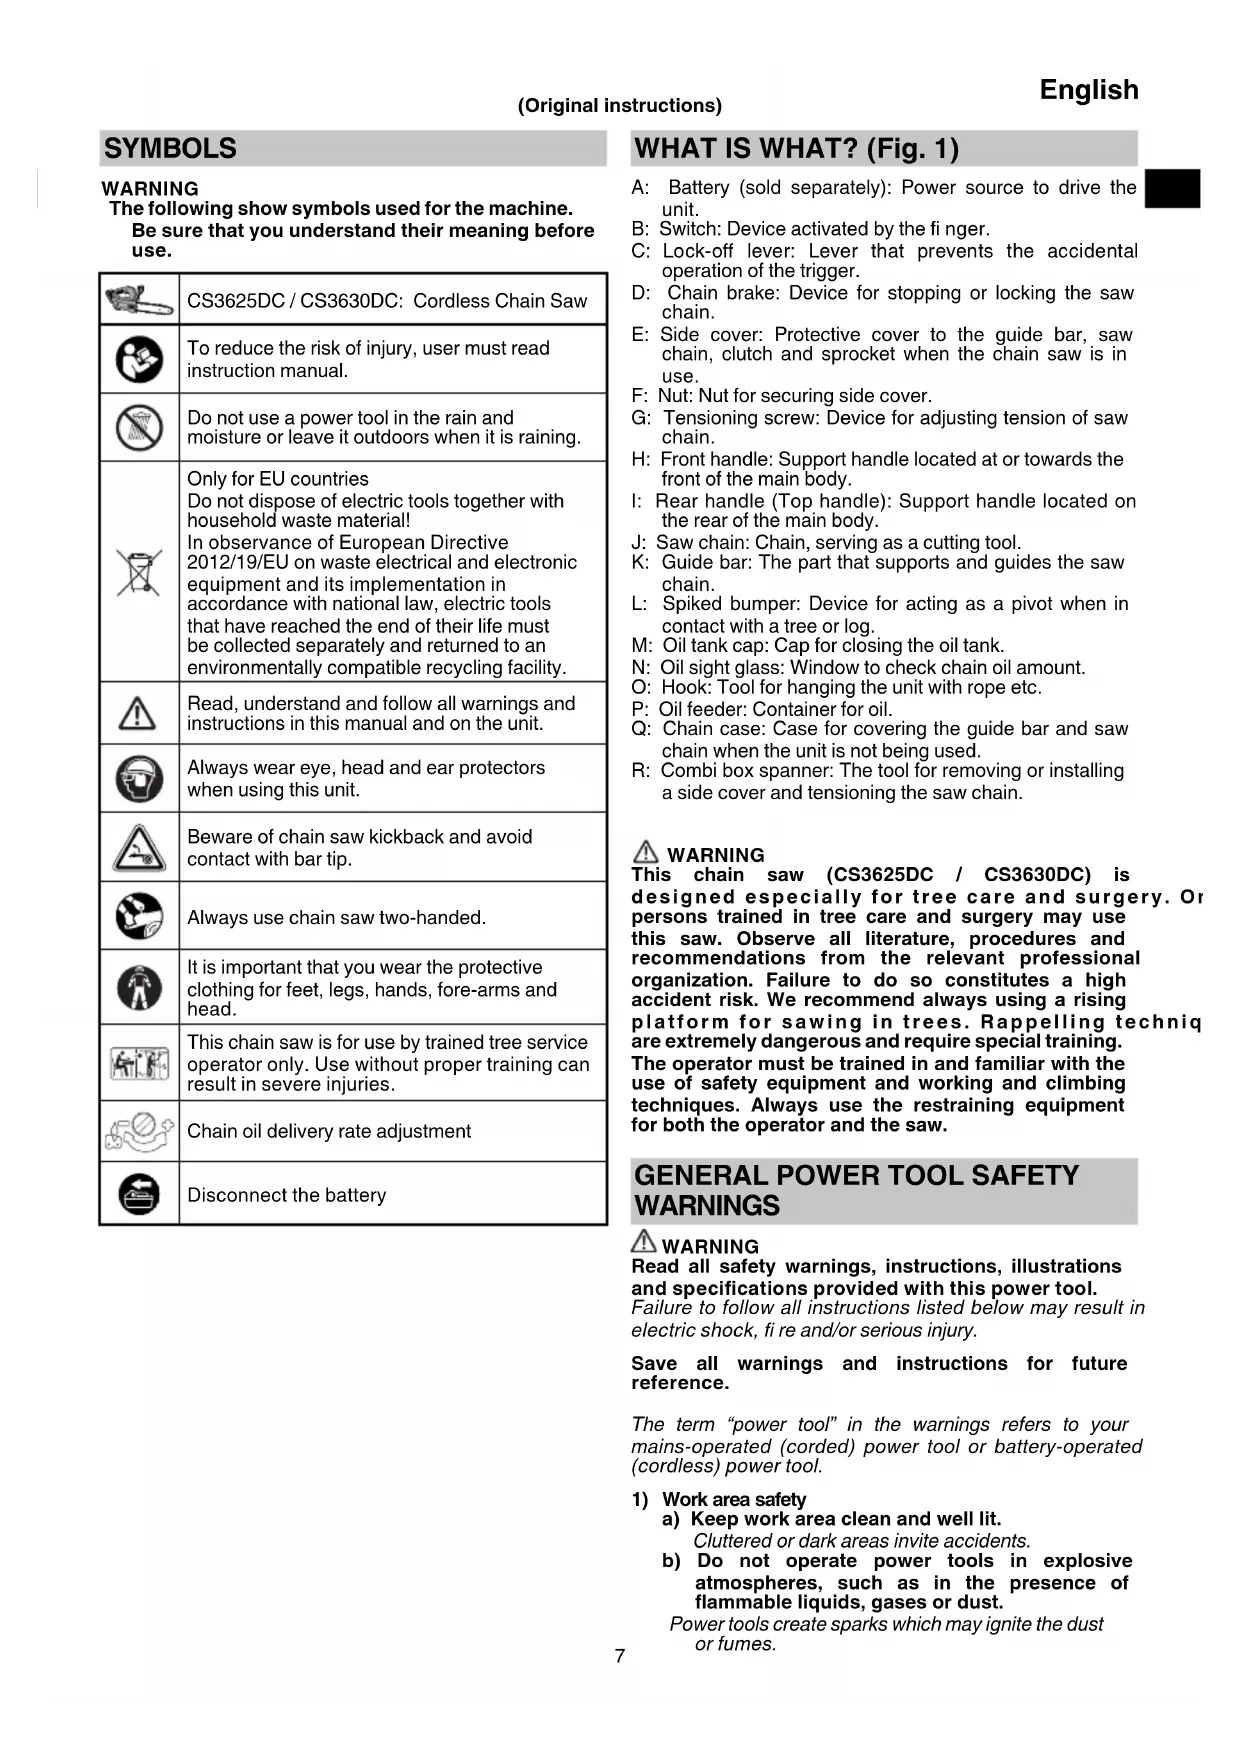
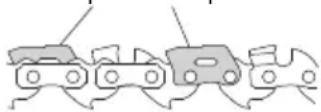
Notify the transporting company that a package contains a lithium-ion battery, inform the company of its power output and follow the instructions of the transportation company when arranging transport.
^ Lithium-ion batteries that exceed a power output of 100 Wh are considered to be in the freight classification of Dangerous Goods and will require special application procedures.
For transportation abroad, you must comply with international law and the rules and regulations of the destination country.
NAMES OF PARTS (Fig. 1-Fig. 43)
| ① | Battery(sold separately) | ② | Oil sight glass |
| ② | Latch Oil pump adjuster | ③ | |
| ③ | Ventilation holes Chain brake | ||
| ④ | Terminals Actuation | ③ | |
| ⑤ | Battery cover Release | ③ | |
| ⑥ | Insert | ③ | Battery level indicator switch |
| ⑦ | Pull out | ③ | Battery level indicator lamp |
| ⑧ | Lock-off lever Spike | ③ | |
| ⑨ | Switch | ③ | Rear handle(Top handle) |
| ⑩ | Charge indicator lamp Front handle | ||
| ⑪ | Combi box spanner Round ffe | ||
| ⑫ | Side cover | ③ | 1/5 of diameter of file |
| ⑬ | Nut Depth gauge jointer | ④ | |
| ⑭ | Tensioning screw Flat fi le | ④ | |
| ⑮ | Increase the tension | ② | Protruding depth gauge head |
| ⑯ | Decrease the tension | ③ | Round off |
| ⑰ | Saw chain | ④ | Chain oil spout |
| ⑱ | Guide bar | ⑤ | Groove |
| ⑲ | Sprocket | ⑥ | Oil hole |
| ⑳ | Blade direction | ⑦ | Chain catcher |
| ⑴ | Illustration showingblade direction | ⑧ | Battery slidinggrooves |
| ⑵ | Bolt | ⑨ | Terminal(Product) |
| ⑶ | Chain tensioner boss | ⑩ | Air blow gun |
| ⑷ | Lug | ⑪ | Terminal (Battery) |
| ⑸ | Guide bar tip | ⑫ | Sliding grooves |
| ⑹ | Drive link | ⑬ | Hook |
| ⑺ | Chain oil | ||
SPECIFICATIONS
- Power tool
| Model | CS3625DC | CS3630DC | |
| Voltage | 36 V | ||
| Saw chain | Type | 90PX-040X | 90PX-045X |
| Pitch | 9.5 mm (3/8") | ||
| Gauge | 1.1 mm (0.043") | ||
| Guide bar | Type | 104MLEA041 | 124MLEA041 |
| Size (Max. cutting length) | 250 mm | 300 mm | |
| Sprocket | Number of teeth | 6 | |
| Pitch | 9.5 mm (3/8") | ||
| No-load chain speed | 12.6 m/s (760 m/min) | ||
| Chain oil tank capacity | 70 ml | ||
| Battery available for this tool | BSL36A18, BSL36B18 | ||
| Weight* | 2.0 kg | ||
- Weight: Saw chain, guide bar, chain case, oil, battery not included
NOTE
Due to HiKOKI's continuing program of research and development, the specifications herein are subject to change without prior notice.
- Battery (sold separately)
| Model | BSL36A18 |
| Voltage | 36 V / 18 V* |
| Battery capacity | 2.5 Ah / 5.0 Ah* |
- The tool itself will automatically switch over.
STANDARD ACCESSORIES
In addition to the main unit (1 unit), the package contains the accessories listed on page 324.
Standard accessories are subject to change without notice.
APPLICATIONS
Cutting of timber/logs
Pruning of garden trees
CHARGING
Battery and battery charger are not included with this product.
Before using the power tool, charge the battery as follows.
- Connect the charger's power cord to the receptacle.
When connecting the plug of the charger to a receptacle, the charge indicator lamp will blink in red (At 1-second intervals).
- Insert the battery into the charger.
Firmly insert the battery into the charger as shown in Fig. 6 (on page 2).
3. Charging
When inserting a battery in the charger, the charge indicator lamp will blink in blue.
When the battery becomes fully recharged, the charge indicator lamp will light up in green. (See Table 1)
(1) Charge indicator lamp indication
The indications of the charge indicator lamp will be as shown in Table 1, according to the condition of the charger or the rechargeable battery.
Table 1
| Charger status | Status of indicator lamp | Indication meaning |
| Before charging | ON/OFF at 0.5 sec. intervals (RED) | Plugged into power source *1 |
| While charging | Lights for 0.5 sec. at intervals of 1 sec. (BLUE) | Charged at less than 50% |
| Lights for 1 sec. at intervals of 0.5 sec. (BLUE) | Charged at less than 80% | |
| Lights continuously (BLUE) | Charged at more than 80% | |
| Charging complete | Lights continuously (GREEN) | |
| (Continuous buzzer sound: about 6 sec.) | ||
| Overheat standby | ON/OFF at 0.3 sec. intervals (RED) | Battery overheated. Unable to charge. *2 |
| Charging impossible | ON/OFF at 0.1 sec. intervals (PURPLE) | Malfunction in the battery or the charger *3 |
| (Intermittent buzzer sound; about 2 sec.) |
1 If the red lamp continues to blink even after the charger has been attached, check to confirm that the battery has been fully inserted.
2 Although charging will start once the battery has cooled down even when left in situ, the best is to remove the battery and allow it to cool down in a shaded, well-ventilated location before charging.
*3
O Fully insert the battery.
Check to confirm that no foreign matter is stuck to the battery mount or terminals.
- Charging will take longer at extremely low ambient temperatures. Charge the battery in a warm location (such as indoors).
Do not block the air vent. Otherwise the interior will overheat, reducing the charger's performance. - If the cooling fan is not operating, contact a HiKOKI Authorized Service Center for repairs.
(2) Regarding the temperatures and charging time of the rechargeable battery
The temperatures and charging time will become as shown in Table 2.
Table 2
| Model UC18YSL3 | ||
| Type of battery Li-ion | ||
| Charging voltage 14.4-18 V | ||
| Temperatures at which the battery can be recharged | 0°C-50°C | |
| Charging time for battery capacity, approx. (At 20°C) | 1.5 Ah | 15 min |
| 2.0 Ah | 20 min | |
| 2.5 Ah | 25 min | |
| 3.0 Ah | 20 min(BSL1430C,BSL1830C: 30 min) | |
| 4.0 Ah | 26 min(BSL1840M: 40 min) | |
| 5.0 Ah | 32 min | |
| 6.0 Ah | 38 min | |
| 8.0 Ah | 52 min | |
| Multi volt battery | 1.5 Ah (×2 unit) | 20 min |
| 2.5 Ah (×2 unit) | 32 min | |
| 4.0 Ah (×2 unit) | 52 min | |
| Number of battery cells | 4-10 | |
| Charging voltage for USB | 5 V | |
| Charging current for USB | 2 A | |
| Weight | 0.6 kg | |
NOTE
The recharging time may vary according to temperature and power source voltage.
CAUTION
When the battery charger has been continuously used, the battery charger will be heated, thus constituting the cause of the failures. Once the charging has been completed, give 15 minutes rest until the next charging.
- Disconnect the charger's power cord from the receptacle.
ACTe Hold the charger firmly and pull out the battery. NOTE
Be sure to pull out the battery from the charger after use, and then keep it.
Regarding electric discharge in case of new batteries, etc.
As the internal chemical substance of new batteries and batteries that have not been used for an extended period is not activated, the electric discharge might be low when using them the first and second time. This is a temporary phenomenon, and normal time required for recharging will be restored by recharging the batteries 2-3 times.
How to make the batteries perform longer.
(1) Recharge the batteries before they become completely exhausted.
When you feel that the power of the tool becomes weaker, stop using the tool and recharge its battery. If you continue to use the tool and exhaust the electric current, the battery may be damaged and its life will become shorter.
English
(2) Avoid recharging at high temperatures.
A rechargeable battery will be hot immediately after use. If such a battery is recharged immediately after use, its internal chemical substance will deteriorate, and the battery life will be shortened. Leave the battery and recharge it after it has cooled for a while.
CAUTION
If the battery is charged while it is heated because it has been left for a long time in a location subject to direct sunlight or because the battery has just been used, the charge indicator lamp of the charger lights for 0.3 seconds, does not light for 0.3 seconds (off for 0.3 seconds). In such a case, first let the battery cool, then start charging.
- When the charge indicator lamp flickers (at 0.2-second intervals), check for and take out any foreign objects in the charger's battery connector. If there are no foreign objects, it is probable that the battery or charger is malfunctioning. Take it to your Center.
MOUNTING AND OPERATION
| Action Figure Page | ||
| Removing and inserting the battery 5 2 | ||
| Switch operation*1 | 7 | 2 |
| Using the hook*2 | 19 | 4 |
| Selecting accessories | - | 325 |
*1 Switch operation
When the switch is engaged while sliding the lock-off lever, the saw chain rotates. (Fig. 7)
Unless the lock-off lever is being slid, the switch cannot be engaged.
After the switch is engaged, the saw chain continues rotating as long as it is pressed down.
When the switch is released, a brake is applied to stop the saw chain rotation.
WARNING
Do not secure the lock-off lever in the slid position.
If the switch is accidentally engaged, the unit may unexpectedly start and injury may occur.
*2 Using the hook
WARNING
When using the hook, ensure the unit is securely suspended to avoid the risk of falling. If the unit falls, an accident may occur.
INSTALLING (REPLACING) SAW CHAIN
WARNING
To prevent accidents, always switch the unit off, and remove the battery.
- Don't use the saw chain or the guide bar other than those specified in "SPECIFICATIONS".
CAUTION
Wear thick gloves and be careful to avoid injury with the saw chain.
NOTE
- When removing the saw chain, remove sawdust from the oil spout, oil hole, and guide bar groove. If sawdust accumulates, this may cause the unit to fail.
- Use the correct type of saw chain in accordance with the specific cations.
If you install the wrong type of guide bar, the saw chain may come off and injury may occur.
- Removing the side cover (Fig. 8)
Turn the nut and remove the side cover.
- Removing the saw chain and guide bar (Fig. 9)
Rotate the tensioning screw in the "-" direction to introduce a small amount of slack in the saw chain, then detach from the sprocket. Detach along with the guide bar in the direction indicated by the arrow.
- Engaging the new saw chain in the sprocket (Fig. 10)
① Attach the saw chain from the guide bar tip. Make sure the saw chain is oriented so that the blade faces in the direction shown in the illustration below the sprocket.
② Insert the bolt and chain tensioner boss into the hole in the guide bar while holding the chain and guide bar tip. Engage the end of the saw chain to the sprocket and mount the guide bar to the saw body.
- Installing the side cover (Fig. 11)
① Attach the side cover by inserting the lug into the slot in
a u the sawbodeydMake sure weitbeesaw chain does not come loose from the guide bar.
② Rotate the nut once to temporarily fix it.
Remove any dirt around the side cover before reattaching.
- Adjusting the saw chain tension (Fig. 12)
While lifting the guide bar tip, turn the tensioning screw to adjust the saw chain tension.
Turn the tensioning screw to the "+" to increase the saw chain tension, and to the "- " to decrease it. - Checking the saw chain tension (Fig. 13)
Adjust the saw chain tension so that the gap between the saw chain drive link and the guide bar is 0.5 to 1mm when you lift the saw chain slightly near the center of the guide bar.
- Securing the nut (Fig. 14)
When adjustment is complete, lift up the guide bar, and fully tighten the nut.
WARNING
After adjusting the saw chain tension, ensure the nut is fully tightened.
If it is loose, injury may occur.
INSPECTION AND PREPARATION PRIOR TO USE
Prior to use, make the following inspection and preparation.
To prevent accidents, always perform steps 1 to 3 ensuring the battery is removed from the body.
- Do not secure the lock-off lever in the slid position. If the switch is accidentally engaged, the unit may unexpectedly start and injury may occur.
1. Ensuring the switch is off
If you insert the battery without knowing whether the switch is engaged, the unit may unexpectedly start, which may result in an accident.
When the switch is engaged while the lock-off lever is in the slid position, the unit switches on, and when the switch is released, the unit switches off.
2. Checking the saw chain tension
If the saw chain tension is incorrect, there is a risk of damage to the saw chain or guide bar and malfunction. Referring to steps 5 to 7 "Installing (replacing) saw chain," ensure an appropriate tension is set.
While the saw chain is still new, it is particularly stretchy, so periodically check the tension and adjust as required.
Also check the nut is securely tightened.
3. Checking the chain oil
This unit is delivered without chain oil inside. Ensure the oil tank is filled with the chain oil provided before use. (Fig. 15)
Periodically check the oil sight glass during work and replenish oil as required.
If the chain oil supplied runs out, use HiKOKI chain oil sold separately or equivalent chain oil on the market.
The chain oil lubricates automatically.
The discharge rate for auto lubrication is factory preset to the maximum.
To reduce the discharge rate, turn the oil pump adjuster on the right side of the oil sight glass clockwise. (Fig. 16)
NOTE
The oil tank capacity is about 70ml
Make sure no oil leaks or overflows from the oil tank when replenishing the chain oil.
We recommend that you stock up with chain oil.
If you continue working without chain oil, the saw chain may burn through, or the motor may fail.
Be careful to avoid dust or other foreign matter from entering the oil tank.
If dust and other foreign matter enter the oil tank, the unit may fail.
- Chain oil left in the tank may leak due to the structure of this unit. Although this does not indicate a malfunction, it may soil the storage location, so be careful.
When storing, empty the oil from the oil tank, and place an item under the main body which can absorb any leaks.
Replenish the oil after every approximately 10 minutes of operation. (*Varies depending on the cutting usage conditions)
4. Installing the battery (Fig. 5)
As shown in Fig. 5, push firmly until it clicks into place.
CAUTION
Securely attach the battery.
If the battery is not securely attached, it may come off and injury may occur.
5. Checking operation of chain brake (Fig. 17) WARNING
Although the chain brake is an emergency stop device, this is not completely reliable. Operate carefully to avoid the risk of kickback.
The chain brake is intended for use in emergencies and when starting up. Do not use it indiscriminately.
To avoid impaired movement of the chain brake due to buildup of sawdust etc., clean regularly.
The chain brake is an important component to ensure safe use.
If you have any concern regarding the chain brake operation, request repair from your HiKOKI Authorized Service Center.
The chain brake is an emergency stop device that stops the saw chain when the unit is subject to kickback etc., to reduce risk.
(Refer to "Causes and operator prevention of kickback.") Push the chain brake in the direction indicated by the arrow (31) to apply the chain brake and stop the saw chain. To release the chain brake, release the switch and pull back on the chain brake.
CAUTION
The chain brake functions only when power is turned on. Check chain brake function in a location with no people or obstructions nearby.
(1) Press the switch while sliding the lock-off lever.
(2) Once the saw chain begins turning, push the chain brake forward toward the saw chain.
(3) If the saw chain stops, the chain brake is functioning as it should. To release the brake, release the switch and pull back on the chain brake.
6. Checking chain oil discharge (Fig. 18)
- When switching the unit on, chain oil automatically lubricates the saw chain and guide bar.
If oil does not seem to emerge 2 to 3 minutes after the unit starts, check if any sawdust has accumulated around the oil spout.
(Refer to "Cleaning the chain oil spout.")
(Refer to "Checking the chain oil.")
REMAINING BATTERY INDICATOR
You can check the battery's remaining capacity by pressing the remaining battery indicator switch to light the indicator lamp. (Fig. 20, Table 3)
The indicator will shut off approximately 3 seconds after the remaining battery indicator switch is pressed.
It is best to use the remaining battery indicator as a guide since there are slight differences such as ambient temperature and the condition of the battery.
Also, the remaining battery indicator may vary from those equipped to a tool or charger (Battery is not included, sold separately).
Table 3
| State of lamp | Battery Remaining Power |
| Lights; The battery remaining power is over 75%. | |
| Lights; The battery remaining power is 50%-75%. | |
| Lights; The battery remaining power is 25%-50%. | |
| Lights; The battery remaining power is less than 25%. | |
| Blinks; The battery remaining power is nearly empty. Recharge the battery soonest possible. | |
| Blinks; Output suspended due to high temperature. Remove the battery from the tool and allow it to fully cool down. | |
| Blinks; Output suspended due to failure or malfunction. The problem may be the battery so please contact your dealer. |
NOTE
Do not give a strong shock to the switch panel or break it. It may lead to a trouble.
CUTTING PROCEDURES
WARNING
- When working in trees, wear appropriate protection on your eyes, head, hands, legs, and arms, as well as slip-resistant foot protection.
Prior to operation, ensure that chain brake works.
During use, grip the handle securely with both hands. (Fig. 3) - When cutting timber from the bottom, ensure the saw chain does not impact with the timber.
If the unit is pushed back, injury may occur.
During work breaks or after work, always switch the unit off, and remove the battery from the main body.
English
Always monitor the workplace and surrounding area, ensure there are no objects which could cause injuries, accidents or failure, and if any are present, remove them in advance.
In particular, when establishing a foothold for working, ensure there is no instability or any object which could be tripped over.
① Ensuring the unit is switched off
If the storage battery is inserted while the switch is unknowingly engaged, the unit may unexpectedly start, which may result in an accident.
② Installing the battery (Fig. 5)
As shown in Fig. 5, push firmly until it clicks into place.
③ Engaging the switch
Ensuring the saw chain is not in contact with the timber, engage the switch, and start cutting when the saw chain speed has increased.
CAUTION
- When switching the unit on, ensure the saw chain does not contact with material or anything else.
During use, be careful to ensure the saw chain does not contact with other material or object. In particular, when you have finished cutting, be careful to ensure it does not touch the ground.
NOTE
Refill the oil tank early to prevent the unit running out of oil.
1. General cutting procedures
(1) Switch ON the power while keeping the saw slightly away from the wood to be cut. Start sawing only the unit has reached full speed.
(2) When sawing a slender piece of wood, press the base section of the guide bar against the wood and saw downward as shown in Fig. 21.
(3) When sawing a thick piece of wood, press the spike on the front section of the unit against the wood and cut it with a lever action while using the spike as a fulcrum as shown in Fig. 22.
(4) When cutting wood horizontally, turn the unit body to the right so that the guide bar is below and hold the upper side of the front handle with your left hand. Hold the guide bar horizontally and place the spike that is on the front of the unit body on the lumbar. Using the spike as a fulcrum, cut into the wood by turning the rear handle to the right. (Fig. 23)
(5) When cutting into wood from the bottom, touch the upper part of the guide bar to the wood lightly. (Fig. 24)
(6) As well as carefully studying the handling instructions, ensure practical instruction in the operation of the chain saw prior to use, or at least practice working with the chain saw by cutting lengths of round timber on a sawing trestle.
(7) When cutting logs or timbers which are not supported, support them properly by immobilizing them during cutting using a sawing trestle or other proper method.
CAUTION
-
When cutting wood from the bottom, there is a danger that the unit body may be pushed back toward the user if the chain strongly impacts with the wood.
Do not cut all the way thorough the wood by starting from the bottom since there is the danger of the guide bar flying up out of control when the cut is finished.
Always prevent the operating chain saw from touching the ground or wire fences. -
Branch cutting
(1) Cutting branches from a standing tree:
A thick branch should initially be cut off at a point away from the trunk of the tree.
First cut in about one third of the way from below, and then cut off the branch from above. Finally, cut off the remaining portion of the branch even with the trunk of the tree. (Fig. 25)
CAUTION
Always be careful to avoid falling branches.
Always be alert for chain saw recoil.
(2) Cutting branches from fallen trees:
First cut off branches that do not touch the ground, then cut off those which touch the ground. When cutting thick branches that touch the ground, first cut in about half of the way from above, then cut the branch off from below. (Fig. 26)
CAUTION
-
When cutting off branches which touch the ground, be careful that the guide bar does not become bound by pressure.
During the final cutting stage, beware of the log suddenly rolling. -
Log cutting
When cutting a log positioned as shown in Fig. 27, first cut in about one third of the way from below, then cut down all the way from above. When cutting a log that straddles a hollow as shown in Fig. 28, first cut in about two thirds of the way from above, then cut upward from below.
CAUTION
Ensure the guide bar does not become bound in the log by pressure.
- When working on inclined ground, be sure to stand on the uphill side of the log. If you stand on the downhill side, the cut-off log may roll toward you.
- Cutting a log laid fl at
Make sure the log is stable.
afterPush the spike against the log. Use the spike as a fulcrum about which the handle can be lifted to facilitate cutting. (Fig. 29)
- Cutting a log supported at both ends
Start by sawing to a depth of approximately one third from the top, then saw from underneath to complete the cut. The guide bar may become stuck within the saw cut if you attempt to cut all the way through from the top. (Fig. 30)
Precaution for cutting work
For large-scale operation or non-stop work
This tool comes with an over-heat protection circuit that protects the electronic parts that control the rechargeable battery. During sustained use or during operations under high loads generated by pressure against the tool, tool temperature will rise and eventually trigger the over-heat protection circuit, which will shut down the tool. If this happens, let the tool cool for a length of time. When the temperature drops, it will again become possible to use the tool. When the rechargeable battery has to be exchanged during continuous operation, let the tool rest for about 15 minutes.
Gripping/pushing force of chain saw
Always grip the chain saw securely.
In addition, do not force the chain saw more than necessary. When cutting, additional force exerted on the chain saw will not accelerate the cutting speed. This will strain the motor, impair the performance, and damage or cause malfunction of the motor or guide bar. Use the unit in the range where the saw chain is at a reasonable speed. In particular, when the saw chain stops (becomes jammed) due to the excessive force, it may cause an injury or failure of the unit.
Chain catcher
The chain catcher is located on the power head just below the chain to further prevent the possibility of a broken chain striking the chain saw user.
- When the saw chain is cut, replace it with a new one referring to "Installing (replacing) saw chain".
SHARPENING OF THE CHAIN BLADE
WARNING
To prevent accidents, always turn off the switeacapart when storing the unit. remove the battery from the main body.
CAUTION
Always wear thick gloves when handling the saw chain.
NOTE
Sharpen the saw chain and adjust the depth gauge at the central position on the guide bar, with the saw chain attached to the main body.
When the sharpness of saw chains deteriorates, the motor and each part of the body are burdened and the efficiency declines.
For optimal performance of the unit, frequent maintenance is necessary to keep the saw chain sharp.
1. Blade sharpening
Use a 4 mm diameter round fi le.
The round fi le should be held against the chain I so that one-fifth of its diameter extends above the top of the blade, as shown in Fig. 31.
Sharpen the blades by keeping the round fi le at a 30^ angle in relation to the guide bar, as shown in Fig. 32. File the blades by gently pushing the round file in the direction of the grip.
Make sure the round fi le does not touch the saw chain when drawing back the fi le.
Ensure that all saw blades are filed at the same angle, or the cutting efficiency of the tool will be Appropriate angles for sharpening the blades correctly are shown in Fig. 33. (Round file is sold separately.)
2. Adjustment of depth gauge
WARNING
- Do not sand the top part of the bumper tie strap and bumper drive link, nor cause the shape of said parts to deform.
Adjustment of depth gauges must be in line predetermined dimensions and shapes, otherwise the risk of kickback may increase, causing an injury.
Bumper tie strap

Bumper drive link
Depth gauges shall be all lined up in the same manner because they are used to adjust depth at the position where the cutter inlays into the wood.
When sharpening the saw chain, be sure to check the depth gauge every two or three times. (Fig. 34)
Place a depth gauge jointer on the saw chain, leave the gauge visible at the groove, and use a flat file to bevel the portion out of the depth gauge jointer. (Fig. 35) (Depth gauge jointer and flat file are sold separately.) After filing away the depth gauge, round off the front side of the depth gauge as it was. (Fig. 36)
After sharpening the saw chain, place it into chain oil to wash off the filings.
If filings are not cleaned off, the saw chain and guide bar will quickly wear while in use.
The depth gauge jointer can also be used when dressing with a round file. (Fig. 37)
MAINTENANCE AND INSPECTION
After operation, perform inspection and maintenance of the implant when storing the unit.
WARNING
During maintenance and inspection, always switch off the unit and remove the battery from the main body.
CAUTION
Always wear thick gloves when handling the saw chain.
1. Inspection of saw chains
Occasionally inspect the saw chain. In the event of any abnormality, replace it with a new one referring to "Installing (replacing) saw chain".
Inspect the chain tension and check If it is correctly tightened.
- Stop using the unit when the saw chain becomes blunt and sharpen it referring to "Sharpening of the chain blade".
After use, carefully lubricate the saw chain and guide bars with oil for rust-proofing.
NOTE
When cleaning the side cover, sprocket, chain oil spout, and guide bar, see the procedure "Installing (replacing) saw chain" and remove the saw chain.
2. Cleaning the side cover and sprocket (Fig. 38)
Clean and remove any swarf or dust left inside the parts.
3. Cleaning the chain oil spout (Fig. 39)
Before cleaning the chain oil spout, remove the side cover and guide bar.
4. Cleaning the guide bar (Fig. 40)
When sawdust and similar become clogged in the groove of the guide bar or oil spout, the oil may not flow, which may result in the unit failing.
Remove the guide bar and clean any sawdust clogged in the groove after use and when replacing the saw with a knife (Refer to "Installing (replacing) saw chain.")
5. Cleaning the chain brake (Fig. 41)
Use a brush to remove any swarf from the gap to the saw body.
6. Inspecting the chain catcher (Fig. 42)
The chain catcher is designed to protect the operator from being struck by the saw chain if the chain comes loose or is severed.
The chain catcher is integrated into the side cover.
Check to confirm that the chain catcher is not damaged.
7. Inspecting the mounting screws
Regularly inspect all mounting screws and ensure that they are properly tightened. Should any of the screws be loose, retighten them immediately. Failure to do so could result in serious hazard.
8. Maintenance of the motor
The motor unit winding is the very "heart" of the power tool. Exercise due care to ensure the winding does not become damaged and/or wet with oil or water.
9. Cleaning the battery installation compartment and the battery (Fig. 43)
WARNING
Wear protective glasses and a dust mask when cleaning with an air blow gun.
Failure to do so may result in inhalation or exposure of the eyes to debris or dust.
Use a brush or air blow gun to remove any swarf or dust and keep the saw clean.
NOTE
- Allowing swarf and dust to build up during use may cause the battery to fall off or other accidents.
Allowing swarf and dust to build up can also result in malfunctions, including faulty contact between the battery and the terminals.
English
After cleaning, check to confirm that the battery can be easily detached and reattached to the tool body.
10. Cleaning of the outside
When the chain saw is stained, wipe with a soft dry cloth or a cloth moistened with soapy water. Do not use chloric solvents, gasoline or paint thinner, for they melt plastics.
11. Storage
Clean all parts thoroughly. Coat metal parts with a thin layer of corrosion inhibitor.
Be sure to repair any damaged areas before storing.
- When storing the unit, perform cleaning and maintenance of each part and mount the chain case to the guide bar.
- Store the power tool and battery in a place in which the temperature is less than 40^ and out of reach of children.
NOTE
Storing Lithium-ion Batteries
Make sure the lithium-ion batteries have been fully charged before storing them.
Prolonged storage (3 months or more) of batteries with a low charge may result in performance deterioration, signifi cantly reducing battery usage time or rendering the batteries incapable of holding a charge. However, signifi cantly reduced battery usage time may be recovered by repeatedly charging and using the batteries two to five times.
If the battery usage time is extremely short despite repeated charging and use, consider the batteries dead and purchase new batteries.
CAUTION
In the operation and maintenance of power tools, the safety regulations and standards prescribed in each country must be observed.
Important notice on the batteries for the HiKOKI cordless power tools
Please always use one of our designated genuine batteries. We cannot guarantee the safety and performance of our cordless power tool when used with batteries other than these designated by us, or when the battery is disassembled and modified (such as disassembly and replacement of cells or other internal parts).
GUARANTEE
We guarantee HiKOKI Power Tools in accordance with statutory/country specific regulation. This guarantee does not cover defects or damage due to misuse, abuse, or normal wear and tear. In case of complaint, please send the Power Tool, undismantled, with the GUARANTEE CERTIFICATE found at the end of this Handling instruction, to a HiKOKI Authorized Service Center.
Information concerning airborne noise and vibration
The measured values were determined according to EN62841 and declared in accordance with ISO 4871.
CS3625DC
Measured A-weighted sound power level: 98 dB (A)
Measured A-weighted sound pressure level: 89 dB (A)
Uncertainty K: 3 dB (A)
CS3630DC
Measured A-weighted sound power level: 98 dB (A)
Measured A-weighted sound pressure level: 88 dB (A)
Uncertainty K: 3 dB (A)
Wear hearing protection.
Vibration total values (triax vector sum) determined according to EN62841.
CS3625DC
a_h = 2.8 ~m/s^2
Uncertainty K = 1.5m / s2
CS3630DC
a_h = 3.0m / s^2
Uncertainty K = 1.5m / s^2
The declared vibration total value and the declared noise emission value have been measured in accordance with a standard test method and may be used for comparing one tool with another.
They may also be used in a preliminary assessment of exposure.
WARNING
The vibration and noise emission during actual use of the power tool can differ from the declared total value depending on the ways in which the tool is used especially what kind of workpiece is processed; and
- Identify safety measures to protect the operator that are based on an estimation of exposure in the actual conditions of use (taking account of all parts of the operating cycle such as the times when the tool is switched off and when it is running idle in addition to the trigger time).
NOTE
Due to HiKOKI's continuing program of research and development, the specific cations herein are subject to change without prior notice.
TROUBLESHOOTING
Use the inspections in the table below if the tool does not operate normally. If this does not remedy the problem, consult your dealer or the HiKOKI Authorized Service Center.
| Symptom Possible | cause Remedy | |
| The motor sounds but the saw chain... ○ does not move ○ does not move freely | The chain brake may be activated. Release by pulling the chain brake toward you. | |
| The saw chain tension is excessive. Check the saw chain tension, and if it is too tight, loosen the tension. | ||
| Saw chain comes out of the sprocket. Check the saw chain is properly engaged on the sprocket. | ||
| Inside the side cover... → sawdust is jammed → foreign matter is trapped | Clean the side cover. | |
| In the guide bar groove... → sawdust is jammed → oil does not flow | Clean the guide bar groove and the oil hole. Make sure there is oil in the oil tank, and replenish as required. | |
| Poor sharpness The saw chain | chain... → is worn out or the blade is broken → is rusted | Sharpen the saw chain. If the wear or breakage is very severe, replace with a new saw chain. |
| The direction of the saw chain is reversed, Re-attach ensuring the correct direction. | ||
| Saw chain tension is loose. Check the saw chain | chain tension and tighten if it is loose. | |
| Chain oil ○ is slow-fl owing ○ does not come out (seizes up) | Lack of chain oil in the tank. | Replenish with chain oil. |
| Chain oil spout is clogged. | Clean the chain oil spout. | |
| Battery cannot be installed. | Attempting to install a battery other than that specified for the tool. | Please install a multi volt type battery. |
SYMBOL
WARNING
VOORZORGSGMAATREGELEN
VEILIGHEIDSWAARSCHUWINGEN
VOGR SNOERBOZEr vIakken
KETTINGZAAGMACHINE
La exposión al fuego o a una temperatura por encima de 130^ SEOCASEOSEOSEOSEOSEOSEOSEOSEOSEOSEOSEOSEOSEOSEOSEOSEOSEOSEOSEOSEOSEOSEOSEOSEOSEOSEOSEOSEOSEOSEOSEOSEOSEOSEOSEOSEOSEOSEOSEOSEOSEOSEOSEOSEOSEOSEOSEOSEOSEOSEOSEOSEOSEOSEOSEOSEOSEOSEOSEOSEOSEOSEOSEOSEOSEOSEOSEOSEOSEOSEOSEOSEOSEOSEOSEOSEOSEOSEOSEOSEOSEOSEOSEOSEOSEOSEOSEOSEOSEOSEOSEOSEOSEOSEOSEOSEOSEOSEOSEOSEO SEO
HVAD ER HVAD? (Fig. 1)
VEDLIKEHOLD OG INSPEKSJON
ENIOE'QPHEKAI NPOETOIMAIA IPIN ANTO TH XP'HsH
Piv anoTn xpon, kavTe Tc enoEvEc nIeWpnoEIC Kau nponapaokvaaotikEc epyaioe.
IPOEIAOIOIH2H
O Ia va anofoyete atuxneta, kTeleite navta ta 3nmuata 1 eoc 3 Eaofalovtac ot n npatia exe aphiapeei ano to owa.
O Mny aaoaaiεte Tov moxlo kλεiδwatoC σtn θeon oiaθnnc.
Av o diakontnc eiva kata a0c 8oouevoc, n ouakeun mnpoei anp0eva va Eekivnoei va etoupyei kai va npokanthepaumotoc.
1. Bεβαιωθειτε οτι o διακόπτης εἶναι anενεργοποιημένος
Eav tonoetnoeTe Tnv mnatapia xwpic va yywpiTe av o diakontnc eivai evpyonoinuevos, n movada μnpoi va ekivnoi anpooδoknta, μe anotéλεσua va npoknθei atuxma.
O O'otav o diakontnc evai evepyooinmuevoc evw o c matoc piakeTai otn theon oia0nnc, n movada epeyonoiteiatal kai otav o diakontnc aeeuthetaepwetai, n movada anevepyoioietai.
Neurcitost K: 3 dB (A)
CS3630DC
DODATNA VARNOSTNA OPOZORILA
PREPRAVA TYKAJUCA SA LITIOVIOIónovych BATERII
IpehaHTo Ha HhCTpyMeHTn C npbCT Ha CTapT 6yToHa, Hn Ha NpeBknUoyBaTeHa Ha 3axpaHbAHeTo, Hocn OnaCHOCT OT HnUdeHTn.
d) OTePaHeTe BcUHn pa6OTHn npHCTaBn, npeHN da BkIIOHTeypeKa bM 3axpaHbAHeTo. fauehen KIOU cynn HNCTpyMeHT, 3abpaBeH B potaioHHN KOMNoHEHTn Ha eNEKtpueckn HHCTpyMeHT, MoKe Da IOBede Do HapaHraBaHe.
e) He ce npecraaTe. Ppe3 zauIoto Bpeme Tpr6Ba Da HMaTe cta6nHa Onopa N da NoDdbPkaTe 6balaHc Ha TaIOTO. ToBa OcnpyraBa IIO-dO6bp KOHTpoI Bbpxy eJeKTPnuEeCKnte INHCTpyMeHTn npn HeoayKaBaHn CHTyaun.
f) Hocete noxdxpo 6nHNo. He Hocete npekaIeHo wipokn dpexn nn 6nHyta. DpbHtE Kocata n dpexnte cn daJeY ot DBnHexnte ce qactn. WnpOKHTe dpexn, 6nKytA n Dblra KOca MoRaT da 6bDat 3axBaHaTHN OT NOBKNHHTe KOMNOHEHTN.
g) Ako ca ochrypeHn yctpoNCTBa 3a npncbEdnHHBaHe KbM npaxoyNoBHTeHNH nHCTaHaun, yBepTe ce, ye ca npabHnHO npncbEdnHeH.
H3NoI3BaHETO Ha npaxoyIOBHTeIN uNkHOHMOKeJa HamaJIH Cbbp3aHHTe Cbc 3aMbpcBAHETOPnCKOBe.
h) He no3BoJBaIte ONnTHOcTTa BN, npnIO6bTa OT YecTOTO n3NoJ3BaHe Ha NHCtpymeHTn, da BN Cb3daDe CaMOyBCTBne, 3apaN Hoeto Da HrHopnPate npnHcunnTe Ha 6e3onacHOCT npn pa6oTa c HHCTpymeHTn.
HeBnMaTeHNO DeIcTBne MOHe Da IOBeGe OToTeHHN HapaHbAHn B paMHnTe Ha qactn OTceHyHdata.
4) EKcNoataaHa I NoIdpbHHa Ha eIeKtpueechn HHCTpymEnTH
a) He hacnlaBte eJeHTpuYeCHNTe HNCTpyMeHTN. 3nOJ3BaIte NOxOJaE JeHTpnuEcH NHCtpyMeHT 3a CbOTBeTHHe Tcenn.
Iopxoadyunr eektpnuechn HNCTpymENT OcnrypraBa 6e3oNaChTo nNo-dOboPo N3BbPwBaHe Ha pa6oTHnTe DeHOCn npn PpeBnDeHnTe HOMHaJIHN napaMeTpN.
b) He n3noI3BaIte eIeHTpNuecHn HnCTpyMeH, aKo He MoKe Da 6bJe BKnIOUeH Nnn N3KnIOUeH OT CbOTBeTHn CTapT 6yTOH Nnn npeBKnIOUyBaTeJ.
BceK eIeKtpnueckn HNCTpyMeH, KOHTo He MoKe Da ce KOHTpOlnpa OT npeBKnIOyBaTeJIa, e OnaceH I NOJLeKHN Ha peMOHT.
c) N3KIOUOHe 5eNcEHa HnHCTpyMeHTa OT n3TOUHNHa Ha 3axpaHbAHe n/nnn H3BaTe6BATEpHnHnnaHET OTHCTpyMeHTa, aHO ToI NO3BOJRA CBaJIHe, npEn Da n3BbPWBate NaCTPOHn, pni CmHa Ha npNCTabKn nn npn CbXpaHHe.
Te3n npedna3Hm MepKn HamaJbAT pncKa OT CnyaHNO HHeKeJahO BkJIIOUbaHe Ha eIeKtprueckn HhCTpyment.
d) CbxpahnBaHte HEn3noI3BaHHTe
eIektpnueckn HNcTpymEnTH DaJeY OT DocTbN Ha Deca N He No3BolraBe Ta Ha IInca, He3ano3HaTN C NaHnHa Pa6oTa C HNcTpymEnTHe N Te3n HNcTpynu, da pa6oTc Tax.
EneKtpnuechnte HNCTpyMeHTn npedctabnBaT onaCHOCT BpbceTe Ha HeONTHN Nua.
e) NopdIbprhaTe eJenKtpOnHcTpymeHTnte n ahcecoapnte. IpOBepraBte cHTpOBhata n 3aHpenBaHeTo Ha NOdBnXHHte qactn, npOBepraBte 3a NOBpeDeHN qactn, HOHTo MORaT da ce OTPa3rT Ha pa6OtaTa Ha eJenKtpUeChHte HNCTpyMeHTn. AHO yCTaHOBHTe NOBpeDn,OTcPaHete rN ppeDn da n3NoI3BaTe eJenKtpUeChHte HNCTpyMeHTn.
Mhoro 3IIOJONYKn Ce IbIaH aIloWa nOJaPbKa Ha eIeKtpnuyecknte HNCTpyMeHTn.
f) PpTaTe peXeUte HcTpymEnTH 3aTOueHN uHCTN.
PpabHnHO noIbIbpKaHHTe peKeu HNcTpymEnTH, CHaTOUeHN peKeu eIeMeHTn, ce ynpabJIraBaT N KOHTPOINpat NO-JIeCHO.
g) N3noI3BaIte eIeKTpUeCCH NHCtpyMeHTN, npHCTaBHN n aHceCoapn, H T.H., CbflaCHO Te3n NHCtpyKcHn, KaTO B3eMeTe PpeBnD pa60THnte YcIOBnH N BHa pa6OTn, KOHTO Ie ce N3BbPbWBat.
N3noJ3BaHe Ha eJEnKtpnueeCKnte HNCTpyMeHTn 3a pa60Tu, pa3InuHn OT Te3n, 3a KOnTO ca npdeBnDcEH, MoKe da DObEe Do NOBnWeH pNCH n ONaChn CNTyaun.
h) PnaseTe pbHOXBaTHNte N NOBbpxHocHTe 3a 3axBaUaHe cyxN, uNCTn, 6e3 MaCNo n rpec.
Xlb3raBnte pbKoXBaTHN IN NOBbpxHOCTN 3a 3axBa7aHe He N03BOJRAbT 6e3OJaCHata pa6ota n ynpabIeHne Ha HnCTpyMeHTA B HeOuaKaHn CnTyauuN.
5) EKnloaataunn noDpBxHa Ha eNeKtpueechn HNCTpyMeHTn 3axpaHbAHN OT 6aTePN
a) 3apeKdaTe ypeDnte cAmO cbc 3apHnTe yctpOnCTBa, nocOeyH OT npOn3BOdnteJI.
3apAnHO yCTpOncTBO, NOxOJaIO 3a eINH TnN BatePnn, MoHe Da Cb3daJe pNCH OT NOpAp Pn IN3NoI3BaHe 3a dpyr TnN BatePnn.
b) N3noJ3BaIte eIeHTpHuecHITe HNCTpyMeHTn camo c onpeJeHnra 3a TAn Tn6aTePn.
H3no3BaHeTo Ha npy Tn7 6aepnn Cb3daBa pNCK OT HapaHbaHe H noKap.
c) Horato He n3noI3Bate 6atepuHnte, Te TpI6Ba Da ce CbXpaHBA t daley OT dpyrn MeTaJIHN npedMeTH KATO KlaMepu, MOHeTH, KIOUOBe, RBO3DeH, BHTOBe HIN dpyrn MaIKN MeTAJIHN npedMeTH, KOHTO MORaT da OcbueCTBAT KOHTAKT MeHdy KJEMITE m.
HontaHT MeJy HJIeMITE Ha 6atepuNTe MoHe da DOBeDe OT NCKPN NIN NOKap.
d) Pn HenoDxOaHn ycNoBHa cBxpaHeHne, 6aTePnHTe Moar Da n3TeHaT; n36rBaHTe KOHTaT. AHO CnyuAaHNO BJe3eTe B KOHTaTc eJekTpOJIHThata TeUHOCT, n3NlaKHeTe O6NJHO C BOJa. AHO nonaDHe eJekTpOJIHT B OUYTe, n3NlaKHeTe O6NJHO NOTbpcTe MeDuHcKa NOMoU.
ElenkpoIHTbT Ha 6atepuHte MoHe da npuHHn B3naJeHne Hnn n3rapHn.
e) He n3noJ3BaIte 6aTePnI nn HNCTpyMeHT, KOnto ca NOBpeHn nn MoDnΦnUpaHn.
NobpeHnTe Nm MoHnHnUpaHn BaTePnMoraT Da HMaT HePeBnIMo NOBeHne, KOeToDa IOBeDe Do NoHap, EKcIIO3n Nn pNCHOTHaPaHraBaHe.
f) He n3laarate 6aTeepnra Ta nn HnctpyMeHa Ha orbH nn Ha npekaheo BucOHa TemnepaTypa.
N3narahetoHaOrbHnnHa Temnepaypa Ha1 130^ MoKe da npedn3Bnka ekcnno3na.
g) CneBaiTe BCnHn HNCTpyKuH 3a 3apeHdaHe n He 3apeHdaIte 6atepHraTa HIN INHCTpyMeHTa H3BbH TempepaTyPHHa Dnana3OH, yKa3AH B NHCtpyKuHTE.
HenpaBnHTo 3apeKdahe nn 3apeKdahe npi Tempeatypn n3BbH onpeJeHn ImaNa3OH MOKe da NobpeDn batepna Ta n Da yBeInu pnc Ka OT noXap.
6) O6cnyHbAhe
a) O6cIyKBaHeTo Ha eIeHTpUeCHNte HhCTpyMeHTn Tpr6Ba Da ce N3BbPwBa cMo OT KBaJIHΦHcIpaHN cepBn3HN pa60THNu, npn N3NoJ3BaHe Ha opHrHaJIH pe3epBHN qactn.
Toba ue rapaHTnpa 6e3onacHocCTTa npu pa6ota c eJeHTpueeCKHTe HnCTpyMeHTN.
b) HnKora He 06cnyBaHTe nobpeHn 6aTeepnn.
OcbnykBaHTo Ha 6aTePnHTe TpRbA da ce H3BbPwBa cMo OT npOn3BOJNTeIa IIN OT OToPiHaHnTe DOCTaBvIuHa ycLyI.
BHIMMAHNE
He donychaite B 3oHaTa Ha pa6ota deua n Bb3paCTHn Xopa.
Horato He H3noI3BaTe eIeHTpuYeCHnTe HHCTpyMeHTn,cbxpaHraBaIte rN daJIeY OT DoCTbN Ha deca N Bb3pactHN Xopa.
ПЕДУПЕЖДECHИЗА 3A БЕЗОПACHEСТ 3A БЕЗЧИЧЕН ВЕРNUKEH TPNOH
1) O6u npedynpeHn 3a 6e3onacnoCT Ha BepnKeH TpnoH
a) To3n BepnHex TpnoH He e npedHa3haueh 3a p3aHe Ha DbPBeTa. N3noJ3BaHeTo Ha BepnKHHa TpnoH 3a Oepaun, pa3JNUH NTpeBnDEHNTe, MOKe Da IOBeJe Do cepNo3H HapaHraHn Ha onepaTopa NN CTpaHHN Nla.
Блгарский
b) OnepaTopbT Tp86Ba Da 6bDe 06yueh B TexHHnTe 3a 6e3oNaCHO HaTepeHe N B H3No13BaHeTo Ha cIJIto npenOpBuaHo DOIbHnHTeJHO 06OpUdBaHe 3a 6e3oNaChocT, KaTo HApnPmep npedna3HN KOlaHn, pPmKn, pemcu, BbKeTa n Kapa6nHepn, KaTO N dpyrN CnCTemn 3a 3aNbprHaHe Ha naDaHeTo Ha onepaTopa N Ha TpnoHa.
3a da ce n36erhe onacha cntyaun, onpeenHeTo Ha cnrypno MRCTO Ha DbPBOTo 3a BCra Ka paOtha PO3nue e OCTBEHO 3NaueHne.
c) Hocete npedna3Hn cpeCTBa 3a ouHte, yuHne n rIabata, npedmhuHnUte, pbcTe, KpaHaTaNCTbNaIATA, KOHTO ca NOxOJN 3a KATEpeHe NOdbpBetata. IOnxOJNUO TO 3aunTHo O6OpyDbaHe ueHAMaJIH hapaHbAHnraOT JeTAAU OTLOMKn NINOT CUYaEH KOHTAKT C BepnraTa HA TpNoHa.
d) PeKHe cAmO dIbPBO. He n3noJ3BaIe BepnHHn TpnoH 3a HnpeBnDEH ncln. HanpImep: He n3noJ3BaIte BepnHHn TpnoH 3a pJ3aHe Ha MetaI, INaCTMaCA, 3ndapn Hn HcIbPBeH N CToTEnH MaTePnAhn. H3noJ3BaHeto Ha BepnHHn TpnoH He nO npEHa3HaueHne MOKe da DOBeDe Do NOBnWeH PnCK n ONaCHn CNTyaUuN.
e) BnHaH npbHTe BepHHN TpnoH c dAchata pBka 3a 3aHaTa pbHOXBatha n C JABaTa pBka 3a npedhata pbKoXBtHa. Hnkora He pa3MeHnTe no3uHte Ha pbcTe, Tb KaTO TOBa yBeJIuHaBA pNCKa OT HapaHBAHe.
f) ApbHrTe BepHHnra TpnoH cAmo 3a n30lnpaHnte PbKoXBaTHN, TbN KaTO BepnraHa TpnoHa MoKe Da BLe3e B KOHTaKT Cbc CkPNTn NPOBOHNu. BepnHTe Ha TpnoHa, KOnTO KOHTaKtYBaTc ,aKTNBHe" NPOBOHNK, MORa DA HAnpaBRT OTKPNTe MToJHn Yactn Ha BepHHnra TpnoH ,aKTNBn" N TOBa da DOBeDe Do TOKOB ydap 3a onepaTopa.
g) Na3eTe BcHKn qactn OT TJILOTo CN OT BepHHNn TPhoH, HORATO ToI pa6Ot. IpeH Da BHIOUHTe BepHHNn TPhoH, ce yBepTe, ye Beprata He Ce DoHnpa HnKbde. EHN MHR HeBHMaHHe NO Bpeme Ha pa6Ota C BepHHeH TPhoH MoKe Da DOBeDe Do 3aKaHaHe Ha Beprata B DpexNTe HIn TJILOTO BN.
h) Korato peXeTe KIOH, KOITo e NOJ HAnpeXeHHe, BHMaBaIte 3a 06paTeH yAp. Korato HAnpeXeHHeNTo B IbPBoTO Ce OCBO6OuN, KIOHbT MOKe Da OTCKOuN N Da BN yApn N/INN Da N3BaDN BepnKHHr TpNOH OT KOHTPOJ.
i)БbTe H3HIOHTeHOBHHMaTeHn,KOraTo peKeTe TbHN KHOH.TbHKTe MaTePnaN MoKe da Ce 3aKaHaT BvB BEpHHn TpNoH n Da Cb3daat Kamuueh ydap nn da HapywaT 6aJahca BN.
j) CneBaIe BCnHn HNCTpyKcHn npn nooNCTBaHe Ha 3aApbCTeH MaTePnaJI, CbXpaHEne HnO6CnyKBaHe Ha BepHHNr TpNoH. YBepTe Ce, Ye npeBHLIOyBaTeJrE e N3HIOUeH n 6aTePnraTa e N3BaDeHa. HeoyaKaBaHOTo 3aJeNCTBaHe Ha BepHHNr TpNo Bpeme Ha NOuNCTBaHe Ha 3aApbCTeH MaTePnaJI nn O6CnyKBaHe MoKe Da DOBeDe Do cepNo3HN HapaHABHH.
k) Hocete BepHHHn TpnoB n3HIOUeHO cbCTOHHne, 3a npedHaTpaKoXBaTHa Ha pa3CTOHHne ot Tloto cn. Korato TpaHCnOpTpNaTe nn CbXpaHBAte BepHHHn TpnoH, BNHaH NoCTABHte KaIbphi Ha BOdeuata WnHa. IpabNlHOTo 6opabeHe C BepHHHn TpnoH ue HaMaJI N BepoTHOCCTTa 3a CJIyuaEH KOHTAKC DBNKeJUaTc Ce Bepnra.
I) Cna3BaIe HNCTpyKuHnte 3a Cma3BaHe, O6TraHa He Bepnata Ha CmHa Ha WnHa Ta N Bepnata. Bepnra, KoTo He e npabuHOn OpbHaTa nn Cma3Ha, MoKe Da ce ckbca Nn Da yBelenpncs OTo6paTeH ydap.
2)ПичHHи NaHnH 3a npedotbpaTBAHe Ha o6paTeH ydap:
06paTeH yap MoHe da ce noJyH, KOraTo HocbT, INN BbpxbT, Ha BOeUaTa WnHa DOKOCHe PpeMET, INN KOraTO dbpBOTO ce HaKnIOHN 3aunne Bepnrata B cpe3a. (Φnr.2)
B HAKON CnyuanyonnpaHTo Ha Bbpxa MoKe da npuHHn Bhe3aneH o6paTeH yap, npn KOHTO uHaTa da 6bJe OT6JIbCHaTa HArOpE N KbM OpeaTopa.
PnTnCKaHTo Ha BepnraTa npn Bbpxa Ha Boeauata WnHa MoKe Da OTTlaChe WnHaTa 6bp30 Ha3aKbM OepaTopa.
BbB BCEKoOT Te3n CnyaH MoKe Da 3ary6nte KOHTpOHa Nd TpNOHa N da NoCTpaDaTe cepNo3Ho. He pa3uHTaIe cAmo Ha BrpaDeHInTe B TpNOHa 3aUnTHn ycTPOcTBa.Bue, Kato OepaTop Ha BepNKeH TpNOH, Tp6Ba Da npEepnEmete HkONKO CTbKn 3a npedotbpaTaBAHe Ha HnUdeHTn.
Orkatbtepezyltaot Henpabunha ynoptpe6aHa MaunHaTa H/nn He npabunn pa6oTHn npoceDpyn nn ycIOBnN MoKe Da 6bDe n36eHnatype3 npednpneMaHe Na oXoAun npedna3n MepKn, KaKTo e nocOHeNo-no-DoIy:
a)ДрьнTe BepHHNЯ TpnoH 3dpaBO, C DBe pBue, OxbaauH NpbHOXBaTHaTc naneu n npbCTn CpeUyNoLOXHo, Hato TAnoto n pbucTe BN ca pa3NoLOHeH NO NOxOJaH NaunH 3a npOTNbOBeIcTBHe Ha CNlaTa Ha O6paTHH yap. (Фиr. 3) Cnilata Ha o6paTHH yap MOKe da ce KOHTpoJInpa ot onepaTopa, aKO ce cna3BaT npednA3HIne MEPKn. He nyckaIte BepHHNЯ TpnoH.
b) He ce npecraaTe. Toba ige nomorhe da ce n36erHe ClyuaeH KOHTaKT Ha Bbpxa H No3BOJRA Ba NIO6bP KOHTPOJHa BepnKHHr TpnoH B HeoayKaBaHN CNTyaun.
c) H3noJ3BaIte cAmOpE3epBHN HaNPaBIAuN uHnH n BepHn 3a TpNOH, NOCOueHn OT npOn3BOAnTeJI. HenpaBnHIne pe3epBHN HaNPaBIAuN uHnH n BepHn 3a TpHOH MoT Da DOBeDaT Do CKbcBAHe Ha Beprata N/IN No OTKaT.
d) Cna3BaIte HNCTpyKuINTE Ha npOn3BOIDNTeHa OTHOCHO 3aTOUBAHETo N NOpDpbXHHaTa Ha peKeIaTabePURA. HamaJIraBaHETo Ha BnCOUHaTa Ha OrpaHInTeJIInTe Ha IIOJaBaHETO MOHe da yBBeJIHycLyuAnTe Ha o6paTeH yIap.
ДОПьHLNTЕЛНI ПРЕДУПЕЖDEHENЯ 3A БE3ОПАСHОCT
- Pa6oTeTe 6e3 HAppeHHeHne. BnHaHn NpOdIbPJaHte TJIto CnTOnlNo.
- Na3eTe BCnHKn Yactn OT TAnlOTo CN OT BepHHNr TpnoH, KOrato ToJ pa60tn.
- Ppei Da 3aOnOHeTe pa6oTa, NOMcJIeTe KaKBO BHLIOUyBa Tn CnA3BaIte MePKIte 3a 6e30NaChOCt, 3a Da n36eHHTe HUNDeHTN HapaHBAHNA.
- He pa6oTeTe npn loio Bpeme (CIneH BAtbP, DbK,I, CnIg, Mbrna) nI npn onaCHOCT OT naDaun KaMbHN nn CBlaayuHa.
Pn looBpeMe npeEHKata Bn MoKe da 6bJe HapuWeHa N Bn6paunTe Morat da npuHnHr HeaacteH cnUyai.
5.He n3no3BaIte ypea npn cna6a BnIMoCT (npn looBpeMe nnHOeM).CbtoTaKa He n3no3BaTe ypea no BpeMe nn Cled dJHKd.
Hecta6nHaTa onopa nn 3ary6aTa Ha paBHOBeCne MORaT Da DOBeDa T O HcNdENT.
- Поберете ВODEца ТИн ha И Верига, педида вклочу урEDA.
Ako uHaTa HnBepurata ca nponyKaHn, nIaKo IMa n3dpackBaHe nnNn3KpNBraHe, He n3NoJ3BaIte ypeDa.
O Ybepete ce, ye uHaTa n Bepurata ca HaJeHIO MOHTnpaHn. Ako npu uHaTa nn Bepurata nMa CuynBaHe nn pa3MeCTbaHe, e Bb3MOKeH nHcNPeHT.
7.прдддддддддддддддддддддддддддддддддддддддддддддддддддддддддддддддддддддддддддддддддддддддддддддддддддд徳нлгсгсгсгсгсгсгсгсгсгсгсгсгсгсgngcngcngcngcngcngcngcngcngcngcngcngcngcngcngcngcngcngcngcngcngcngcngcngcngcngcngcngcngcngcngcngcngcngcngcngcngcngcngcngcngcngcngcngcngcngcngcngcngcngcng - MoNTnpaIte Beprata npabnHIO, KaTO cna3BaTe HNCTpyKUInTE B pBkoBOIDCTBOTo 3a eKcNlOaTaun. Pn HnpepaJIeH MOHTaK Beprata ue Ce n3BaIN OT BODeuAta UINHa Ie Bb3MOKHO HapaHraBaHe.
- HnKora He OTCpaHbAte HnKoe OT npEJa3HnTe yCTpOJCTBa, C KOHTo eOBOpyDbaH BepNKnHnT TpNOH (CnpaHa Ha BepnRaTa, 6IoknPaU,IOCT, yIOBnTeJI Ha BepnRaTa nT.H.). He npaBeTe n3MeHeHnNo Tx H He rH neTpaln3npaIte. Bb3MoXHo e HapaHbAhe.
- B cIeHNHe cIyuaH n3KJIIOUte ypea n ce yBepTe, Ye BepnraTa e CnpraJa Da ce BbptN:
O Korato He ce n3noJ3Ba.
O KoraTo CmehrTe MactoTo Ha pa60Ta.
O Korato npOBepBate, perylnpate nn CMeHrTe BepnraTa, BOeuaTAta uHa, KaIbΦa 3a BepnraTa nn dpyra YacT.
O KoraTo DOJIbBaTe BepHxHo MaCJIo.
O Korato OToCTpaHbate npax nDp.OT TAnoto.
O Korato npemaxBate npenTCTBn, oTnaDbuN nn DbpBeceH npax OT pa60Thata 3oHa.
O Horato octabraye ypea nIe ce otdaeneBaTe oT Hero.
Ako yceTHe Hn npedBnKdaTe onaCHOCT. AHO BepnIraTa npoDbJHn da ce dBNHN, e Bb3MOKeH INHcndENT. - No npnucn c ypea ce pa60tncamocToTeHNO. HoratoBpa60tata yuactBaT noBeYe Xopa, MeKdy TAn Tp6bA da HMa DoCTaTbUHO pa3cTOnHne.
-
CToTe Ha noBee oT 15 m ot dpyruX opa. OcBeH TOBa BCnUKN pa60THnU Tp8Ba Da 6bDaT Ha noBee oT 15 m eIN HOT dpyr.
O CbueCTByBa pnc ot ynap ot napyeta n npyrn HnndHTN.
O IpeDvapnteJIHo yTOHHeTe HauHHa 3a npdeynpeJdAbaHe Ha dpYrIte pa6OTnUc (CbC CBnprKa n dp.).
13.Ппсдп рязан Ha ИЗпраьен Иьрвета HanpaВete CпeДНоТО:
O OnpeJeIeTe MrcToTo 3a 6e3oNaCHO OTCTbNHeHne npEi Da 3aNoUHeTe P3aHeto.
O MaxHete npenTCTBnra (HaNP. KIOH, xpaTn) npedBaPnteJIHO.
14.AKo no BpeMe Ha ynoTpe6a pa6oTaHa ypeDa ce BLOUH NIN 3a6eJeHNTE HeoBuaen Wym NIN Bn6paun, He3a6abHNO H3KnIouTe ypeDa, CnpTe Da rO H3NoJ3BaTe HrO 3aHeceTe 3a npOBepKa NIN peMOHT BOTOpN3npan cepBn3eH cEHtbp Ha HiKOKl. AKO pOdbJIHKnte da rO H3NoJ3BaTe, IMa ONaCHoc T O HapaHBAhe.
15.Ako ypeBbT 6bIe n3nycHa Tnnn 3JIOHeH Ha ydap, npOBepTe BnHMateJIHO 3a NOBpeN nnnyKHaTHnH n Ce yBepTe,Ye HMa deOpMaun. Ako ypeBt e NOBpeH, npOnyKaH nn DeOpMnpaH, nMa onaCHOCT OT HapaHBAhe. -
Korato TpaHcnpOpTnape YpeDa c Kola, Tp8Ba da ro 3aKpeNITE HeNoDnBnXHo. Ima onaCHOCT OT INHcNDeHT.
- He BHKIOUbaTe ypeDa,doKaTO BepnraTa e c KaIbΦ. B3MOJHO e HapaHBAHe.
18.YBepTeCe,YeBDbpBeHnMaTepeHaJI Hama NpuHn INDpyrNyJkN TeJa. AHO Bepurata ydapn NpOH n dp.,e Bb3MOKeHNHcndENT.
19.3a da n36eHete 3aklnnBaHe Ha BOdeuata WnHa B MaTePnAla, KOraTo peKeTe KbM KpaN KOratoCTe N3IOJHe H Ta TeXeCTTa Ha MaTePnAla, INCTaJInpaIte POnDbpKaUa ⅡaTΦOpMa 6In3o Do MrcTO Ha Pra3aHe. Ako BoDeuata WnHa ce 3aklnHn, e Bb3MOxHo HapaHBAhe.
20.Ako ypeBt ige ce TpaHcnpTnpa Hn CbXpaHraBa CneI yNoTpe6a, Hn MxHeTe Beprata Ha TpnoHa, Hn CNoKeTe KaIbphi. Pn KOhtaKT Ha Beprata c TAnoto Hma OnaCHOCT OT HapaHbaHe. - FrnkeTe ce do6pe 3a ypeda.
3a da cn ocHypnTe 6e3oNa cHa n eFHKacHa pa6Ota, ce rpnKte Do6pe 3a peKeuata Bepura, TaKa Ye TЯ da pa6OTn ONTMaJIHo.
O Pn CmHa Ha BepnraTa HIn BOeaaTa WnHa, npn NOdPbXHa Ha TAnTo, NJIHeHc Ha MacNo n Dp. Cna3BaIte INCTpyKunTe B pkoBOdCTBOTO 3a ekCnIooatauia. - Hocete ypeDa Ha cepBn3.
He MoHnΦnUpaIte npOdyKta, TbN KaTo Toi Beue OTROBapHa npHIOXHMITE CTAHdApTN 3a 6e3oNaCHOCT.
3a BCnHn peMOHTn pa6OTn ce obpbuaTe KbM oTOpn3npaH cepBn3eH ueHTbp Ha HiKOKI. OINTTE da peMOHTnPate ypeDa camMoKe da DOBeDaT Do INuDeHT NIn HapaHaBaHe.
23.CbXpaHbAaTe HaIeJHo ypea, Korato He ro H3noI3BaTe. H3toye BepnHTo MaCNo Iro npnbepete (3aKJIIOUte)Ha cyxo MCTO, HeoCTbNHO 3a Deca.
24.Ako npedynpeinteHnrt ctnkep ce e n3tpnl, 06eHn HOBpeHn NO dpy HauH, CIOxKeTe HOB. 3a npedynpeinteHn ctnkepce 06bphet KbM oTopn3npaH cepBn3en ueHTbp Ha HiKOKI.
25.По Врeme Ha pa6ota cna3BaIte npHIOxHMnte MeCTHn npaBnla nI npa3nope6n.
26.YBepete ce, Ye 6aTePnraTa e Do6pe n 3paBO noCTaBeHa. Ako en HaH-MaJIko pa3Xla6eH, MoKe da CE N3BaDN I Da npuHH HnCnIeHT.
27.He n3noI3BaIte npOdykTa, aKo ypeIbT uN KJIeMITE Ha 6aTeepnIa (3a MOHTaX Ha 6aTeepnIa) ca DeOpMnpaHn. IocTabraHTo Ha 6aTeepnIa MoKe Da npuHHN KbCO CbeDInHeHne, KOeTO MoKe Da DOBeDe Do NOrBa Ha Dm NII 3aNaJIbaHe.
28.ПодьрхайтКлемпerte Ha Инстурмента (3a MOHTaHa 6aTePnrta) UNCTN OT pBcT n npax.
O Ipei npa6oTa ce yBepeTe, Ye B 30HaTa Ha KJIemnte HMa HATpynAn npax nCTpyKKn.
O No Bpeme Ha pa6oTa ce OHTBaIte Da n36BerHeTe nonadaHTo Ha cTpUKKn HIn npax Bbpxy batepnaTa.
O Pn npekpaTBAHe Ha pa60Ta Hn CneI ynoTpe6a He OCTABYte IHCTpyMeHTa Ha MAcTO, KbTeTo MOKe Da 6bJe N3IOKeH Ha npax I CTpyKKn. HeCna3BaHeTo Ha TOBa MoKe Da npuynH KbCo CBeDInHeHne, KoETo MOKe Da DOBede Do NOBa Ha Dm Nn 3anaLBaHe. - BinaHn H3noJ3BaIte HnCTpyMeHTa n 6aTepeTAt npi Tempeatypm MeKdy -5°C n 40°C.
ПЕДПАЗНМЕРИЗАБATEРЯТA И 3APДHOTO YCTPOICTBO (прдават ce OTДeнHo)
- Binhn 3apejdaIte 6aTepeJraT npn TeMnpaTypa ot 0^ do 40^ . Tempepatya, no-Hncka ot 0^ ,ue doBeJe Do npeKoMEpHoo 3apeJdaHe, KOeTo e onacHo. BaTepeJraTa He MoKe Da ce 3apeJda npn Tempepatya no-BncoKa ot 40^ Hau-noDxOJaTa Tempepatya 3a 3apeJdaHe e 20^ - 25^
2.He n3noJ3BaITe 3apJHOTO yCTpoIcTBO HenpeKbChaTO.
Korato eHNO 3apeJdahe npNKIOU, octaBeTe 3apJHOTo ycTpoIcTBo 3a OKOIO 15 MNHyTN npEIN cIeBaIoTO 3apeJdaHe Ha 6aTePn.
3.He onyckaIte HaBnHaHeTo Ha yHn TeLa B OTbopa 3a Cbbp3BaHe Ha aKymlaTOpHN 6aTepeHH. - HnKora He pa3rIIO6BaTe aKymyIaTOpHnTe 6aTePNnn 3apAHOTo yCTPOINCTBO.
- HnKora He daBaIe Ha Kbco aKymyIaTOPHInTe 6aTeepuN.
Kbco cbeHHeHne MoKe Da npuHHn roJMa eEeKtpueeCKn TK n ppepBaHe. ToBa MoKe da DOBeDe Do NOBpeHa Ha 6aTePnra. - He n3xBbPJIaTe 6aTepeRn BOrbH.
Ako 6aTepeyra n3rOpn, Tm MoKe da ekCnIounpa.
7.ИЗПОЛЗВАнЕТоHa ИЗTOUэHa 6aTeРЯ Уе NOВpeДУЗAPRAДHOTO YCTPOICTBO. - BbPhe 6aTepeTAtB MaarHa, ot KOnTo e 3aKynHe, BeHara Cne KaTO cKbHa Ha JINBOT Ha 6aTepeTAt CtaHe npeKaJIeHO KbC, 3a daCe N3NoJ3Ba. He n3xBbPnIte n3ToUeHN 6aTeepn.
9.He nocTabaIte npEmdTe BbB BeHTnlaUHOHHITE OTBOpHa 3aprHOTO yCTPOIcTBO.
BkapBaHTo Ha MeTaJIHn HJN 3aIaJIIMn IpemEt N BvB BeHTnlaUOHHTe OTBOpN Ie DoBeJe DO ONaCHOCT OT eNEKTPnueckn YdAp HJN Ie NOBpeJrT 3apAHOto yCtpoNCTBO.
ПЕДУПЕЖДECHИЗА 3A JINTHEBO-NOHHATA BATEPINA
3a da ydbJnxTe JxNBOTa Ha JNTHeBO-IOHHata 6aTepy, TMA 3aunTHa FyHKuia 3a npekbcBaHe Ha NODaBAHeTo Ha 3apd.
B clyuante 1 do 3, onncan no-dony, koraTo n3no3BaTe TOBa H3dJIe, dOpn npn HaTnCKaHe Ha cnycbKa, MOTOpbT MOKe da cnpe. ToBa He e B cIeJCTBne Ha nobpea, a Ha 3aunTHa fynKuH.
- Korato pa3p4bT Ha 6aTepyTa HamaJeer 3HaunTeJIHO, MOTOpbT cnIPA.
B TaKbB Cnyuay 3apepeTe 6aTepeyraTa He3a6abHo.
-
Ako nHcTpymeHTbTe 6nI npetobapeH, MOTOpbT MOHe Da cnpe.BTo3n cnyaH,OCBO6oTe cncybHa N OTCTpaHete npuHHata 3a npetobapBaH.CneT ToBa MOHe Da n3NoJ3BaTe ypeDa OTHOBO.
-
Ako 6aTeepnraTa e nperepna npr npetobapbaHe, TMOKe Da OTKaKe Da pa6OTn.
BTo3nCnya,CnpTeH3noJ3BaHeTOu,naocTabete Da ce oxlaDi.CneTobAMoKe da H3noJ3BaTe ypeDa OTHOBO.
OcbEN TOBa, MOJI, cna3BaITe CJeHHTe npedynpexJdeHn.
PNEyPPEKDEHNE
3a Da npedotbpatnte pa3peKdahe Ha 6aTeepnraTa, 3aqrbaHe, NOBa Ha dUm, 3anaJbAHe n EKCIIIO3n, yBepete Ce, Ye cna3BaTe yka3aHnraTa 3a 6e3oNaCHOCT.
- YBepete ce,Ye no 6aTePnTa He ce HATpynBaT npax n CTpyKKn.
O Na3eTe 6aTePnIra OTo npax N CTrpyxHn No BpeMe Ha pa6ota.
He donyckaIte no 6atepnaTa da ce HATpynBaT npax nCTpyKn no BpeMe Ha pa6ota.
He cxbpaHbAte Heu3noJ3BaHnTe 6aTepn Ha MeCTa, KbDeTo Ca n3JIOKeHN Ha Bb3JeNCTBnETo Ha npax nCTpyKKn.
O Ppei Da npiepeTe 6aTeepnraTa, otcTpaHete eBeHTyaJIHO HATpyNAH nCTpyKn n npax, n He r dpbKeTe Ha eJHO MRCTO C MeTaJIHn PpeDMeTn (BnHTOBe, NiPOHn n Dp.). - Na3eTe 6aTeepnTa OT npo6nBaHe C ocTpr npeDmetn KaTo rB03deN,OT yAp C uK, HAcTbIbaHe, NIn OT cnJen Fm3neCn yAp.
3.He n3no3BaHTe BNDIMo NOBpeHa nn DeΦopMnpaHa 6aTePna. - He n3noI3BaIte 6aTePnIra 3a ueI, pa3IuHn OTo npedHa3HaueHneTo I.
- Ako 6aTeepnTa He MoKe Da ce 3apeN HAnbJHo, DOpu CneI KaTo N3TeHe npenOpBvBaHnI nepNoD OT BpeMe, He3a6abHO npeKpaTe TocJeDbauN OOnTu 3a 3apeKdaHe.
- He n3laarate 6aTeepnTa Ha BnCOKn Tempeatypn Hn HaJraHe, He NocTaeBnTe B MmKpOBoJIHOBa yPHa, cyuHnHn Hn KOHTeHepn NOD BnCOKoHaJraHe.
- Pn yctahOBraBaHe Ha Teu Hn HnnpTHa Mnp3Ma OT batepnaTa, He n3laRaTe Ha Bb3deNCTBnETo Ha CNlHa TOnnHa HnOtKpnTu nnAmbU.
- He u3no13BaIte 6aTeepnTa B MeTa, KbTeTo ce reHepnpa cnHIO CTaTnHO eJeKtpnueCTBO.
9.Ako 6aTepeyra Teue, HMa He npnTa Mnpn3Ma, 3aRpa Hn Ce oBe3cBETn DeΦOpMnpa, Hn aKO Ce NOBRT HeoHuaHN Pn3Haun No Bpeme Ha yN0Tpe6a, npe3apexKaHe Hn CbXpaHeHne, He3a6abHO n3BaTeOT O6OpUdBaHTo Hn OT 3aprHOTO YCTPOINCTBO N He n3NoJ3BaHTe. - He notanrnte 6aTepeHra n He no3BOJBAHTe HABIN3aHTo Ha TeuHOCTn B He. IpoHNKBaHTo Ha npoBoHMn TeuHOCTn KaTO HApnpMeP BoDa, MoKe Da DOBeDe Do NOBpeDN i Da IpnuHN NoKap NIn EKcnIIO3N. CbXpaHRAaTe 6aTepeHra Na XJaHNO cyxO MRCTo, daJeY OT TOpMn JLeCHO3anaJIIMMaTepeHaN. H36aRbaTte aTMocΦepn c Kopo3NBn Ra3OBe.
BHIMAHNE
- Ako eIeKToPiNt OT 6aTePnra TnOaHHe B OChte, He rTbPkAaTe, a N3nJaKHeTe 06nJIHO C YnCTa, HAnp. YeShMaHa, BOda n NOTbpcTe He3a6abHNo JeKapcKa NOMoU.
Ako He Ce B3emat Mepn, eIeKtpoHt bT MoKe da npuHH OHN pO6JIeMn. - Ako eIeKtpoHrOT 6aTeepnra TnnonaDHe Bbpxy Koxhata NIN dpexHrTe, He3abABHO n3MmIte C uHCTa, HAnp.YeUHMHa, BOda.
Bb3MOxHo e eIeKtpoIHTbT da npuHn KooHOBb3paleHne.
3.AKOp npn nbpBOTO n3noJ3BaHe Ha 6aTeepnraTa 3a6eJeKHTe pBJKa, HEnpnaTeH Mnpc, npeprBaHe, Obe3cBeTBAHe, DeopMnpaHe N/INn DpyrN HepeDHOCTn, He aN3NoJ3BaIte N BbPHeTe Ha DOCTabUHKa INn TBproBeua, OT KOIToCTe 3aKynnn.
PNEyPENKDEHNE
Ako ToKoIpOBoDm UyHd npEmdet nonaHne B KOHTaKT C KJIeMnte Ha IInTHeBO-IOHHaTa 6aTePn, MoKe Da Ce NOJUyn KbCo CbeDnHHe, KoETo Da Cb3JaDe ONaCHOCT OT NOKap. MoJr, Cna3BaIte CJeDnHt e MepKn Pn CBxpaHHe Ha 6aTePnTa.
He cnaarTe ToKOnpOBoDMn NapyTa, NnpOH, CTOMaHeHa, MedHa HnDpyra TeI B KytHrTa 3a cbxpaHeHne.
O Hn cnoHete 6aTeepnTa B ypea, nn nphepe, Kato NpBO NoCTaBNTe HanaHa N, TaHa Ye BEHTnlaUHOHHTE OTBOPn Da CE CKPNrT, 3a Da npeDOrbpatnte Kbco CbeDuHeHne (BnHTe Phr.4).
OTHOCHO TPAHCIOPTA HA JIHTHEBO-NOHHA BATEPNA
Ptp TaHcnpOpTnpaHe Ha IHTneBO-IOHHa 6aTepeRn, MoJcna3BaIte CLeDnTe npedna3Hm MepKn.
PNEyPENKDEHNE
YBeDomete TpaHCnOpTHata KOMnHa, Ye npaKata cbIbPka IITneBO-IOHHa 6aTePN, INHOpMnpaTe KOMnHaHTa 3a HeHATA N3XoJHa MoUHCT N Cna3BaTe HNCTpyKUnTe Ha TpaHCnOpTHata KOMnHa, KOratoypeKaDate TpaHCnOpTa.
O LInTHeBO-IOHHTe 6aTePnH, KOHTo HaBnIaBaT H3XoJHa MoUHOCr OT 100 Wh, ce CHTaT 3a TpaHCnOpTHa KaTEROpnI ONaChn CTOKN N3NCKBaT npJIraHaTeHO Ha CneuaJIHn IpOeDpyn.
3a TpaHcnpOpTnpeB UyK6bHa Tpr6Ba Da cna3nte MeJdyHapOdHnTe 3aKOHn IN paBnla n pa3nope6n Ha CTpaHaTa,do KOrTo Ce TpaHCnpTpPaT.
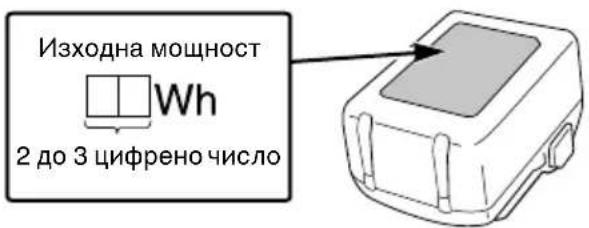
HMEHA HA YACTITE (Фиг. 1-Фиг. 43)
| ① | Баэрия (прodbая ce otдени) | 28 | Празорчеса MacIoTO |
| ② | Зakлочальka | 29 | Perулатор на MaclenhaТа Ромпа |
| ③ | Вentnilационни OTBOPN | 30 | Вернжна сизрачka |
| ④ | КLEMи | 31 | Задействае |
| ⑤ | Калak на баэрияа | 32 | Освобождавае |
| ⑥ | Посравяne | 33 | Индikatopener Клич (за зapяд на баэрияа) |
| ⑦ | Извajданe | 34 | Ламма на Иndикатор за НИВОТо на баэрияа |
| ⑧ | Зakлочьшлост | 35 | Гребен |
| ⑨ | Спуньк | 36 | Задна (rogна) ръковыота |
| ⑩ | Ламма на Иndикатор за за зарожданe | 37 | Предна ръковыота |
| ⑪ | Гаechен Клич за Комбийсяни КУтNi | 38 | Крълай пila |
| ⑫ | Стравичен калak | 39 | 1/5 ot ДимаMuPre на пila |
| ⑬ | Галha | 40 | Рени за Дъбокомер |
| ⑭ | Вinhл осыганe | 41 | Плосka пila |
| ⑮ | Увелоча ване на ольha | 42 | Пробаваши ce галва на орравочileя |
| ⑯ | Намаляване на ольha | 43 | Заблайne |
| ⑰ | Рекешиа ветига | 44 | Дюза за ветigхно macIo |
| ⑱ | ВODEШиha | 45 | Канал |
| ⑲ | Вернжно 3ьбно калello | 46 | Масlen OTВор |
| ⑳ | Посoka на остриецо | 47 | Засвашио устриоство за Ветига |
| ⑴ | Илострац,在 Кoked�аши посокаши на остриецо | 48 | Прореши за В�арвае на осторияа |
| ⑵ | Болт | 49 | КLEMа (Празукт) |
| ⑶ | Шифт на обTERачa | 50 | Пистолет за Вьзduшna CTprу |
| ⑷ | Схоба | 51 | КLEMа (Баэрия) |
| ⑸ | Врьх на вор dedиataшиа | 52 | Прореши за Вьарвае |
| ⑹ | Вор dedио 3вени | 53 | Куka |
| ⑺ | Вернжно масло |
CNEUΦNHAUIN
- EneKtpnueckn nHcTpymeHT
| Мо dyeл CS3625DC CS | 3630DC | ||
| Нарөгэн 36 V | |||
| Рөгэндөрига | Тин 90P | PX-040X 90PX-045X | |
| Стүлха | 9,5 MM (3/8") | ||
| Дeб龄нан БОдемOTO ЗВЕнO | 1,1 MM (0,043") | ||
| Водец шина | Тин 104 | MLEA041 124M | LEA041 |
| Размер (MaКС. Дылжин на рязанe) | 250 MM 30 | 0 MM | |
| Вериши Зъбн юлело | Броь Зъбци | 6 | |
| Стүлха | 9,5 MM (3/8") | ||
| Скорост на вэрugараз на праzenхов | 12,6 M/сек (760 M/MIN.) | ||
| Каацитet на масLEMпя розервоар | 70 мl | ||
| Баэрүйтæе наличna за тоэи inhструмент | BSL36A18, BSL36B18 | ||
| Тergл* | 2 | ||
- Terno: He ca BkIkyehn Bepnra Ha TpnoH, BoDeuca HInHa, KaIbΦ Ha Bepnra, MacNo, 6aTepy
3A6EJIEXKA
Blaoropaene Ha HenpeKbchata nporpama 3a npoyuBaHe n pa3pa6oTbaHe Ha HiKOKI, cneunfkaunte, noocueHn Tyk, ca npedMeT Ha npomraHa 6e3 npedn3BeCTne.
- BaTeepn (npoDaBa ce OTeJHo)
CTAHДAPTHN AHCECOAPN
BdoJIbHeHHe KbM OCHOBHnKOMNlEHT (1 KOMNlEHT) ca npdeOCTaBeHn n akcecoapnte n npncTaNKe, n36poEHn Ha cTp. 324.
CTaHdapTHHe aKcecoapn ca npedmet Ha npomHa 6e3 npedynpexJeHne.
PNILOXKEHNA
O Pra3aHe Ha dIbpBeH MaTepeHaJI/tpynI
O Np3BaHe Ha rpaHcN bPBeTa
3APEKDAHE
BaTePnTa n 3apAnHTo yCTpoNCTBO He ca BKnIOueHN KbM To3n IpOdyKT.
Ipei Da n3no3BaTe eKeKtpueechnrT HnCtpyMeH, 3apeTe 6aTePra KaKTo CneJbA.
- CbbpHeTe Ka6eJa Ha 3apAaHOTo yCTpoiCTBO KbM KOHTAKT.
Korato BKNIOHTe Ka6ena Ha 3apnHOTo yCTpOncTBO B KOHTA, CBeTOHDAKATOpbT 3a 3apnD ige Mnra B YepBHeo (Ha INHTepBaIOn OT 1 cEHnDa). - NocTabete 6aTepeHraTa B3apAnHOTo yCTpoiCTBO. BkapaIte 6aTepeHraTa PJIbTHO B 3apAnHOTo yCTpoiCTBO, KaKTo e NOKa3aHo Ha ΦIr. 6 (Ha CTpaHnua 2).
- 3apekdahe
IpnnoctabnHeHa6aTePnB3apnHOTOyCTPOcTBO, CBeONHnKaTOptb3a3apnIeMnRaBCnHbO.
Korato 6aTePnTa ce 3apeu HnblHo, CBeONHnKaTOptb3a3apnIeCBETN B3eJIeHO. (BnXte Ta6nua1)
(1)Инданацин ha CBETOINДИКaTopa 3a 3apd Инданациnte Ha CBETOINДИКaTopa 3a 3apd, OTpa3raBaIcN CbCTOJHHeTO Ha 3aprdHOTO yCTpoiC TBO ПИН aKуMЛaTOpHaTa 6aTePnI, ca NOKa3aH N Та6лпа 1.
Ta6nua 1
(BnKTe ,PnpuHn HauHH 3a npedotbpaTbaHe Ha o6paTeH yap".)
3a Da 3aDenCTBaTe CnnpaKaTa Ha Bepurata N da CnpTe Bepurata Ha TpnoHa, HATNCHeTe CnpaKaTa Ha Bepurata B NocOkaTa, yHa3aHa cbc CTpeJIHaTa (31). 3a Da OCBO6OJnte BepnKHaTa CnpaKa, OCBO6OJeTe npeBKnIOuBaTeIe I n3dIbPnaIte Ha3aD BepnKHaTa CnpaKa.
BHIMMAHNE
BepnHnata cnnpaKa cyHKnOHa cAmo KOrato 3axpaHbAHeTo e BkIIOyeHO. IpOBepeTe cyHKnOHaPaHTo Ha BepnKHaTa CnnpaKa Ha MxCTO, KOrato HMA Xopa NIN IppeTCTBn HA6Nt30.
(1)HaTnchHeTe npeBkIIOuBaTeJIa,doKaTo nnb3raTe 3aKJIIOUBAUJIOCT.
(2) CneI KaTo Bepurata Ha TpnoHa 3anOHe Da ce BbpTN, HATNCHeTe BepnKHaTa CNIPAqKa HAnpei KbM Bepurata Ha TpnoHa.
(3) Ako Bepurata Ha TpnoHa Cnpe, BepnKHaTa CnpaKa KaHTo Tp6Ba. 3a Da OCBO6OHTe CnpaKaTa, OCBO6OTe NpeBKNIOyBaTeI Na3DbPnaTe Ha3aD BepnKHaTa CnpaKa.
5. Ra3aHe Ha IbPBeH Tpyn, NOdIbPHaH OT BaTa Kpa
3aNoCHTe, KaTo peKeTe Do bJbOuHa npN6n3nteHNO eHa TpeTa OTrope, CJeD KOeTo peKeTe OTdOly, 3a Da 3aBbPwITe cpr3BaHeTO.
Boeataa HnHa MoKe Da 3aceHne B pa3pe3a Ha TpnoHa, Ako ce OINTate Da OTpeKTe HAnbJIno Ipe3 rohpata Yact. (Φnr. 30)
Ppepa3Hm Mepn npn p8aHe
Ma7a6Hn onepauun nn HnpeKbchata pa6ota
To3n IHCTpymeH e cHa6dEn CbC 3aunTHa Bepnra npOTNB npeprBaHe, KOrTO npeDna3Ba eJeKtPOHHnte Yactn, KOHTPOJnPaUu npe3apeJdaAsTa Ce 6aTePnra. IIO BpeMe Ha npOdbJnKeTHeNa yNoTpe6a nnIIO BpeMe Ha paBota PnBnCOKn HATOBapBaHn, ReHepnPaNOT HAtnCK Bbpxu IHCTpyMeHa, TemnepaTypaHa IHCTpyMeHa TcCe NOBuN u 3aJeNCTBa 3aunTHaTa Bepnra npOTNB npeprBaHe, KOrTO Ue IN3Klouy IHCTpyMeHa.
Ako ToBa Ce Cnyu, OCTaBeTe HNCTpyMeHTa Da ce OxlaIa 3a I3BecTHo BpeMe. Horato TemnepaTypata CnaIHe, Ue 6bIe Bb3MOHIO OTHO Da I3NoI3BaTe INCTpyMeHTa. Horato npesapeJdaaTa ce 6aTePra Tp8Ba Da ce cmEH npn npOdbJIHHTeJIHa pa60Ta, OCTaBeTe HNCTpyMeHTa Da noUHne 3a OKoJIo 15 MNHyTN.
3axBaT/HaTHcK Bbpxy BepnHHn TpnoH
BnHaHn DpbKTe BepnKHHa TpnoH 3dpabo.
OcbEN TOBa He npnlaraIteNo-rolmOT Heo6xOIMNA HAtnck. DonbHInTeJIHaTcNla, npnlaRaHa Bbpxy BepnKHHr TpnoH No BpeMe Ha p3aHe, Hma Da yBeINuCkOpocTtHa p3aHe. ToBa Ue npTeOBapu DBnIraTeJ,ue BLOHN eFeKTNBHOCTTa N ue npnHn NOBpeDa Ha DnIRaTeJn nn WnHaTa.
H3noI3BaIte ypea,Horato Bepurata pa60n cymepeHa cKOpOCT.
IIO-KOHKeTHO, KOrato BepnRata cnpe (3aceye) NopaN IpeKoMEpen HaTnCK, MoKe Da npEdu3BnHa HapaHbAne nn NobpeDa Ha ypeDa.
BepnroyoBnteI
O BepiroyOBHTeIe pa3noJIOKeH Ha OCHOBHO Tnlo ToHNO IOBepURA, KaTO yHKUraMy e Da npednaOn onepataOpa da He 6bJe ydapeH OT cKbcaHa Bepira.
O Korato Bepurata ce ckbca, CMeHeTe r C HOBa cbo6pa3Ho INcTpyKunTe B ,MoHTaX (cmraHa) Ha Bepurata".
3ATOUBAHE HA BEPHΓATA
NPEyPENKDEHNE
3a da npedotbpatnte 3lonoIyKn, BnHaHn H3JIIOUBAuTe npEBKIOUBaTeJr N 3BaJDaJTe 6aTePnraTa oTOCHOBHn KOpNyc.
BHIMMAHNE
Bunarn HocTe pKaBnCn, KOraTo 6opabnte C Bepnrata.
3ABEJIEXHA
3aToe BepnraTn perynpaTne OpansHnnteHa HnOdaBaHeTO, KOTo ce nada B cehbpa Ha shHaTa, KOraTO T e MOHTnpaHa KbM OCHOBHOTo TAno.
Horato Bepnata Ce 3aTbN, DBNrTaTeJr N BCKa YAcT OT TJIOTo Ce HATOBAPBaT n eKachOCTTa HamaJIraBa.
OnTmMaJIHaTa pa6Ota Ha ypeDa n3nCKBa YecTa NOdPbXKa Ha Bepurata 3a NODbPkaHe Ha OCTpoTaTa
1. 3aToUbaHe Ha ocTpneTata
H3noJ3BaIe Kpbfla nIIa c dIaMeTbp 4 MM.
Kpbrlata nla Tp6Ba da 6bde DbpKaHa cpeuOcTpneTo Ha BepnraT a No TaKbB Haun,Ye eHaNETa OT HeHHn DaNAmetbp Da n3Jn3a HaD Bbpxa HaocTpneTo,KaKTo e NOKa3aHO HaΦnr.31.
3aToe octpneTata, KaTo DbPnHTe KpbIraT a nnla noD bBn 30° cnpmo BodeaTa WnHa, KaKTo e noka3aHo HaΦnr.32.
I\PiJIeTe OCTpneTaT, HATO BHNMaTeJH0 HaTnCKaTeKpbIJaTa NIIa NO NOCOKa Ha pBkoXBaTKaTa.
YBepete Ce, Ye KpbIgnta NIIa He DoHOCBa BepnIgata Ha TpnoHa, KOrATo N3TeJIrTe Ha3aD NIIaTa.
YBepTeCe,Ye BCNUH NOCTpneTa Ha TpNOHa CE NINJAT NOeHN H CbUH BbI NII eΦEKTNBHOCTTa Ha P3aHe Ha NHCtpymeHTa ige Ce BLOuN. IpaBnHInTe bIIN 3a 3aTOUBAHe Ha OCTPneTATA ca NOKa3AHn Ha Phr.33.(KpbIraTaNNa ce npOdaBa OTdEnHo.)
2. Perylnpae Ha nIb6okomepa IPEyIpeXDEHNE
He ⅢnfoBaHTe ropHata qacT ha peMbKa 3a Bpb3BaHe Ha 6poHrTa H 3aBnHbAaTa Bpb3Ka Ha 6poHrTa H He npuHraTe DeΦOpMnpaHe Ha nocOueHnte qactn.
O PerylnpaHeTo Ha IbIb60KomepeTe Tpr6Ba Da 6bDe B CbOTBcTCTBne C npeBapnteHNo ONpeJeHnTe pa3MePn HOpMn, B npOTuBeH CnyaH PNCKbT OT OTKaT MoKe Da ce yBeJIuH, KoETo Da DOBeE Do HapaHBAhe.

BvepHo Cbvp3Baao 3BeHO

Bpb3ka 3a 3aDnKBaHe Ha 6poHrTa
Ib60KoMEpTe Tp6Ba Da ca n3paBHeHn No eHN n CbU HaHH, 3aIoTO Ce u3NoJ3BaT 3a peRyJInpaHe Ha Ib6OuHaTa Ha N03uNraTBA KOrTo pe3aYbT CE NOCTAB B DpbROTO.
Korato 3aToyBaTe Bepurata Ha TpnoHa, 3aDbJnKHeJIHO npOBepraBae Dbl6OKoMepa Ha BCEKN DaNn Tprn nTn. (Фиr.34)
IocTabete peHdeTo c IbIb6Okomep Ha BepurataHa TpnoHa, KaTO OCTaBITE N3MepBaTeHNnYypeDNIM B KaHala, IN3N013BaIte NIOCKa NIIa, 3aDa CpeKete YactTa OT peHdeTo Ha IbIb6Okomepa.
(ФИ.35)(РЕДЕТОЗдьБОКOMЕРиПLOСКАТANILA ce npodabat OTDEJIHO.)
Cne KaTo n3nInTe DbI6OKOMepa, 3aKpbIeTe OT npedHaTa CtpaHa Ha Dbl6OKOMepa, KaKTo e 6nJ. (Фиг.36)
Cle3aTOUbaHTo CLOKeTe BepnTaTbB BepnKHO MacIO, 3a Da OTMNEte CTpyKHTe.
Ako He OTMHeTe CTpyKHeTe, Bepurata N uHHaTa 6bp30 ue ce n3HOcT.
PeHdTeO cIbJI6oKOpE MoKe Da ce n3NoJ3Ba I npN 3aTOUbaHe C KpbIgnaIIJa. (ФИr. 37)
IODAPbJHKA IN IPOBEPHA
CneI pa6oTa npOBepTe BCaHa qactn H3BbPwete CbOTBeTHNte DeiCTBnno NpOdPbKkata npedn np6bpnaHe Ha ypeDa.
PDEyPPEKDEHNE
No Bpeme Ha noDpBxHa n npOBepHa, BnHaRn N3KlOuBaIe YcTPOJCTBOTo N 3BaHdaITe 6aTePnraOT OCHOBHn KOpNyc.
BHIMMAHNE
Bunharn HocTe pKaBnU, KOraTo 6opabnte C Bepnrata.
1. Поберка на Всрнг themselves
O NepnoDnHNO npOBepBaIte Bepurata. B cnUaHa aHOMaJIIN CMeHeTe Bepurata C HOBa CbO6pa3Ho HNCTpyKUnTE B,MOHTAK (CMHa) Ha Bepurata
O PpOBepTe onbHa Ha BepnraTa n ce yBepTe, ye npabuHNO o6TerHaT.
Cnpete da n3noJ3BaTe ypega, KOrato Bepurata ce 3aTbnn, I a 3aToOte Cbo6pa3Ho HnCTpyKunnte B "3aToUbaHe Ha Bepurata".
Cnei ynoTpe6a BHnMaTeJHo CmaKeTe Bepurata N Hocceata uHa cpeu o6pa3yBaHe Ha pbKa.
3A6EJIENKKA
PnNoCTBaHe Ha cTpaHnUHnKaNak, BepNKHO 3b6Ho KOJIeIIO, MacJeHATA IIO3a Ha Bepurata N BOeUata WInHa, BNKe Te npOeDypata „MoTAnK (CMraHa) Ha Bepurata" n CbaJeTe Bepurata Ha TpnoHa.
2.ПоунстванеHa ctpaHHHnHa Kaanи BepHHHOTO 3b6Ho KOLENo (Фиr.38)
IOnuCTeTe IOTcTaPeTe BCnHn HaTpynHn CTpyKnn HJIN npax B YaCTnte.
3. NocntBaHe Ha MacJeHaTa IIO3a (Phr. 39)
IpeNi NOUcTbaHe Ha MacLeHaTa IIO3a demoHTnpaIte CTpaHnHnKaNaK n WnHaTa.
4. NocTbaHe Ha BodeaTa uHa (Phr. 40)
Korato KaHaJIbT Ha WInHata NIN MacLeHaTa IIO3a Ce 3aMbpcrT C DbpBceeh npax IN IOIo6Hn, OMacJIBaHETO MOKe Da 6bDe Bb3PpeIrTcTBaHO nypeBbT MOHe Da ce NOBpeN.
Cleynotpe6a n npncmHa Ha Bepurata Na3BaKaJaTe uHATA nNouCTBaHTe DbPBeCHna npax OT KaHaJa. (BnKTe ,MoHTaK (cmHa) Ha Bepurata".)
5. NocTbAHe Ha BepnHa cnpaHa (ΦnR. 41)
H3noJ3BaIe YeTka, 3a Da npemaxHeTe BCnUKN HaTpynAHN CtpyKKn OT npa3HHaTa Do TAnOTO Ha TpnoHa.
6. Поберна Ha 3axbaaцоTo yctpoiCTBO Ha BepnraT (Фиr.42)
3axbaaioTo ycTpoiCTBO Ha Bepuratae npoeKtnpaHO da npeDna3Ba onepaTopo oT c6IbcbK C BepurataHa TpnoHa, aKO Bepuratae pa3Xla6eHa nnI npekbchata.
3axbaaioTo yctpoiCTBO Ha BepnraTa e BrpaedeHO B CTpaHnHnKaIak.
PnoBepTe n ce yBepTe, ye 3axBauaoTo yCtpoiCTBO Ha BepnraTa He e nobpeDeHO.
HeToCHOCK=1,5M/ceK.2
DeKnapnepaHaTa 06ua CToHOCT Ha Bn6paunHe N DeKnapnepaHaTa CToHOCCT Ha WymOBnTe EMCHN Ca H3MepeHN B CbOTBcTCTBnE CbC CTaHdApTeH MeTOD 3a H3NTBaHe H MOrat Da 6bDaT N3NoJ3BaHn 3a CpaBHraHe Ha eDIn HnCTpymEn T cDpyr.
Te Morat da ce n3no3BaT npn ppeBapnteHa oueHka Ha ekCNo3nCuYra.
PNEyPPEKDEHNE
O H3JIbYBaHTo Ha Bn6paunu N UyM No BpeMe Ha DeIcTBInTeJHaTa yN0Tpe6a Ha eJeKtponHCTpyMeHTa MOKe Da ce pa3JInuBa OT DeKJapnpHaTa O6ua CTOHOCTB 3aBNCIMoCT OT HaHNHTe, NO KONTO Ce H3IOJI3Ba INHCTpyMeHTbT, OCO6EHO KaKbB BnD DeTaNJ ce O6pa6OTBa; n
O Mepnte 3a 6e3oNaChocT Ha onepaTopa Tpr6Ba da ce 6a3npaT Ha OueHka Ha Bb3deIcTBHeTo B peaHn ycIOBn (KaTO Ce B3EMe IpeDbNt CEJIINr pa60Te HIKbJ - BpeMeTo, Ipe3 KOeTo ypeDbT e HaTOBapeH nn pa6OTn Ha npa3eH XoD, n BpeMeTo, Ipe3 KOeTo e H3KJIIOUeH).
3A6EJIeHHKA
HiKOKI npoBexda He npeKbchata nporpama 3a npoyuBaHn pa3BNTne, 3aTOBA nOCOyeHnte Tyk cneuΦnKaun noJNeHa Ha npomHa 6e3 npedn3BecTne.
OTCTPAHRAHE HA HEN3INPABHOCTN
H3noJ3BaIte HNCNEKcNITe B Ta6JIucaTa No-DOly, aKO HnHCTpyMeHTbT He fYHKUHOHPa HopMaJIHO. Ako C ToBa npo6JeMbT He 6bJe OTCTpaHeH, o6bpHeTe Ce KbMa Ba7nA DnJIbP IIN KbMOTOpn3npaHH cepBn3eH cEHTbp Ha HiKOKI.
MERE PREPOSTROZNOSTI
Decu i nemoçne osobe držite podalje.
| (10"/12") | (10"/12") | |||
| CS3625DC (NN) | 1 | 1 | 1 | 1 |
| CS3630DC (NN) |

90PX-040X (3 / 8× 10^n)
90PX-045X (3 / 8× 12^n)
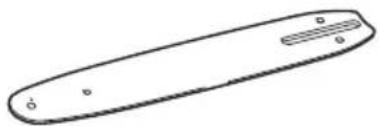
104MLEA041(10")
124MLEA041 (12^n)
10":379896
12":380067

10^n:379898
12": 377207

957681
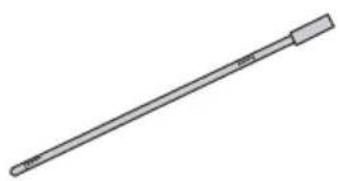
6698688
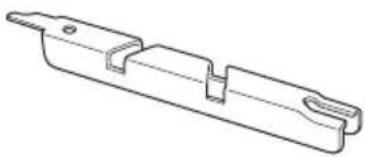
6697724

6698582379897
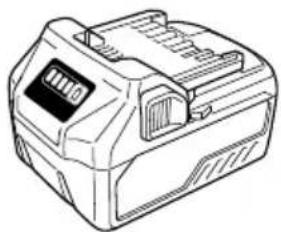
BSL36..18
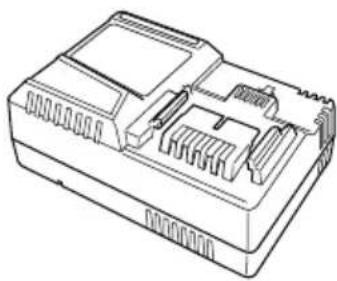
UC18YSL3 (14,4 V-18 V)
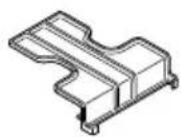
329897
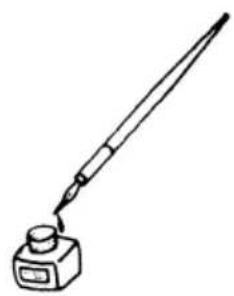
| English Dansk Română | |||
| GUARANTEE CERTIFICATE 1 Model No. 2 Serial No. 3 Date of Purchase 4 Customer Name and Address 5 Dealer Name and Address (Please stamp dealer name and address) | GARANTIBEVIS 1 Modelnummer 2 Serienummer 3 Kjöbsdato 4 Kundesnavn og adresse 5 Forhandlersnavn og adresse (Indsæt stempel med forhandlersnavn og adresse) | CERTIFICAT DE GARANTIE 1 Model nr. 2 Nr. de série 3 Data cumpärarii 4 Numele Şi adresa clientuul 5 Numele Şi adresa distributorului (Va rugãm aplicatiș stampla cu numele Şi adresa distributorului) | |
| Deutsch Norsk Slovenžina | |||
| GARANTIESCHEIN 1 Modell-Nr. 2 Serien-Nr. 3 Kaufdatum 4 Name und Anschrift des Kunden 5 Name und Anschrift des Handlorders (Bitte mit Namen und Anschrift des Handler abstempelin) | GARANTISERTIFIKAT 1 Modelnr. 2 Serien. 3 Kjöpsdato 4 Kundensnavn og adresse 5 Forhandlersnavn og adresse (Vennligst stemple forhandlerensnavn og adresse) | GARANCUSKO POTRDIGO 1 St. modela 2 Serijka St. 3 Datum nakupa 4 Ime in naslov kupca 5 Ime in naslov prodajalca (Prosimo vitisnite zig z imenom in naslovom prodajalca) | |
| Français Suomi Slovenžina | |||
| CERTIFICAT DE GARANTIE 1 No. de modulo 2 No de série 3 Date d'achat 4 Nom et adresse du client 5 Nom et adresse du revendeur (Cachet portant le nom et l'adresse du revendeur) | TAKUUTODISTUS 1 Malli nro 2 Sarja nro 3 Ostopäävamäärä 4 Asiakkaan nimì ja osoite 5 Myyjän nimì ja osoite (Leimaa myyjän nimì ja osoite) | ZÁRUÇNY LISTA 1 C. modelu 2 Sírioveć 3 Datum zakupenia 4 Meno a adresa zákaznika 5 Názov a adresa predajcu (Peciatalka s názvom a adresou predajcu) | |
| Italiano Eλλινίκα Ββγραρκη | |||
| CERTIFICATO DI GARANZIA 1 Modelo 2 N° di série 3 Data di acquisto 4 Nome e indirizzo dell'acquirente 5 Nome e indirizzo del rivenditore (Si prega di apporre il timbro con quosti dati) | ΠΙΤΟΙΟΙHTΙΚΟ ΕΥΓΗΝΗ 1 Ap. Mòrvěλου 2 Aúχov Ap. 3 Hépréounvia aγορác 4 Ovoja kai δiεθυμαν πελάτη 5 Ovoja kai δiεθυναν μεταπλλήτη (Παραλούμεν αν χρησιοιοιηδει αφραγίδα) | TAPAHUCIHOHEN CEPTIΦHAT 1 Modelo N# 2 Seperien N# 3 Daten za kizunbyane 4 Ime i adrecs na Klinentra 5 Ime i adrecs na Tjurboventa (Molna, otnepatàtre imeto i adrecs na dințba) | |
| Nederland Polski Srpski | |||
| GARANTIEBEWIJS 1 Modelonummer 2 Serienummer 3 Datum van aankoop 4 Naam en adrres van de gebruiker 5 Naam en adrres van de handelaar (Stempel a.u.b. naam en adrres vande de handelaar) | GWARANCJA 1 Model 2 Numer seryjny 3 Data zakupu 4 Nazwa kialenta i adres 5 Nazwa dealera i adres (Pieczęc punktu sprezaу) | GARANTNI SERTIFIKAT 1 Br. modela. 2 Serijski br. 3 Datum kupovine 4 Ime i adresa kupca 5 Ime i adresa prodavca (Molimo da stavite pečat na ime i adresu trgovca) | |
| Espanol Magyar Hrvatski | |||
| CERTIFICADO DE GARANTÍA 1 Modelo do Modelo 2 Modelo do série 3 Fecha de adquisión 4 Nombre y direccion del cliente 5 Nombre y direccion del distribuidor (Se ruega poner el sello del distribuidor con su nome y direccion) | GARANCIA BIZONYLAT 1 Tipusszám 2 Sorozatszám 3 A vásárlás dátuma 4 A Vásáráó neve és címe 5 A Kereskedő neve és címe (Körjúk ide elihelyezni a Kereskedő nevének és címenek pecsétjét) | JAMSTVENI CERTIFIKAT 1 Br modela. 2 Serijski br. 3 Datum kupnjce 4 Ime i adresa kupca 5 Ime i adresa trgovca (Molimo stavite pečat na ime i adresu trgovca) | |
| Portugues Čeşina | |||
| CERTIFICADO DE GARANTIA 1 Modelo do Modelo 2 Modelo do série 3 Data de compra 4 Nome e morada do cliente 5 Nome e morada do distribuidor (Por favor, carimbe o nome e morada do distribuidor) | ZÁRUÇNI LIST 1 Model &. 2 Série &. 3 Datum nákupu 4 Jméno a adresa zákaznika 5 Jméno a adresa prodejce (Prosime o razitko se jménem a adresou prodejce) | ||
| Svenska Türke | |||
| GARANTICERTIFIKAT 1 Modellnr 2 Serienr 3 Inköpsdatum 4 Kundens namn och adress 5 Försäljarens namn och adress (Stámpla försäljarens namn och adress) | GARNTI SERTIFIKASI 1 Model No. 2 Seri No. 3 Satin Alma Tarihi 4 Müşteri Adi ve Adresi 5 Bayi Adi ve Adresi (Lütfen bayi adini ve adresini kaşge olarak basin) | ||
HiKOKI
| ① | |
| ② | |
| ③ | |
| ④ | |
| ⑤ |
Siemensring 34, 47877 willich, Germany
Tel: +49 2154 49930
Fax: +49 2154 499350
URL: http://www.hikoki-powertools.de
Hikoki Power Tools Norway AS
Kjeller Vest 7, N-2007 Kjeller, Norway
Tel: (+47) 6692 6600
Fax: (+47) 6692 6650
URL: http://www.hikoki-powertools.no
Hikoki Power Tools Netherlands B.V.
Brabanthaven 11, 3433 PJ Nieuwegein, The Netherlands
Tel: +31 30 6084040
Fax: +31 30 6067266
URL: http://www.hikoki-powertools.nl
Hikoki Power Tools Sweden AB
Rotebergsvagen 2B SE-192 78 Sollentuna, Sweden
Tel: (+46) 859899900
Fax: (+46) 859899940
URL: http://www.hikoki-powertools.se
Hikoki Power Tools (U.K.) Ltd.
25 Majestic Road, Southampton, SO16 OYT,
United Kingdom
Tel: +44 1908 660663
Fax: +44 1908 606642
URL: http://www.hikoki-powertools.uk
Hikoki Power Tools France S.A.S.
Hikoki Power Tools Belgium N.V./S.A.
Koningin Astridlaan 51, B-1780 Wemmel, Belgium
Tel: +32 2 460 1720
Fax: +32 2 460 2542
URL http://www.hikoki-powertools.be
Hikoki Power Tools Italia S.p.A
Via Piave 35, 36077, Altavilla Vicentina (VI), Italy
Tel: +39 0444 548111
Fax: +39 0444 548110
URL: http://www.hikoki-powertools.it
Hikoki Power Tools Ibérica, S.A.
C/ Puigbarral, 26-28, Pol. Ind. Can Petit, 08227 Terrassa
(Barcelona), Spain
Tel: +34 93 735 6722
Fax: +34 93 735 7442
URL: http://www.hikoki-powertools.es
Hikoki Power Tools Denmark A/S
Lillebaeltsvej 90, 6715 Esbjerg N, Denmark
Tel: (+45) 75 14 32 00
Fax: (+45) 75 14 36 66
URL: http://www.hikoki-powertools.dk
Hikoki Power Tools Finland Oy
Tupalankatu 9, 15680 Lahti, Finland
Tel: (+358) 207431530
Fax: (+358) 207431531
URL: http://www.hikoki-powertools.fi
Hikoki Power Tools Hungary Kft.
Hikoki Power Tools Romania S.R.L.
Ring Road, No. 66, Mustang Traco Warehouses, Warehouse
No.1, Pantelimon City, 077145, Ilfov County, Romania
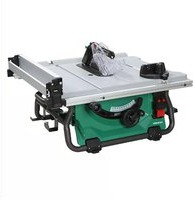
- WHAT IS WHAT? (Fig. 1)
- WARNING
- GENERAL POWER TOOL SAFETY WARNINGS
- 1) Work area safety
- English
- PRECAUTION
- CORDLESS CHAIN SAW SAFETY WARNINGS
- ADDITIONAL SAFEY WARNING
- PRECAUTIONS FOR BATTERY AND CHARGER (sold separately)
- CAUTION ON LITHIUM-ION BATTERY
- CAUTION
- REGARDING LITHIUM-ION BATTERY TRANSPORTATION
- SPECIFICATIONS
- NOTE
- STANDARD ACCESSORIES
- APPLICATIONS
- CHARGING
- Charging
- INSTALLING (REPLACING) SAW CHAIN
- INSPECTION AND PREPARATION PRIOR TO USE
- Ensuring the switch is off
- Checking the saw chain tension
- Checking the chain oil
- Installing the battery (Fig. 5)
- Checking operation of chain brake (Fig. 17) WARNING
- Checking chain oil discharge (Fig. 18)
- REMAINING BATTERY INDICATOR
- CUTTING PROCEDURES
- General cutting procedures
- Precaution for cutting work
- For large-scale operation or non-stop work
- Chain catcher
- SHARPENING OF THE CHAIN BLADE
- Blade sharpening
- Adjustment of depth gauge
- MAINTENANCE AND INSPECTION
- Inspection of saw chains
- Cleaning the side cover and sprocket (Fig. 38)
- Cleaning the chain oil spout (Fig. 39)
- Cleaning the guide bar (Fig. 40)
- Cleaning the chain brake (Fig. 41)
- Inspecting the chain catcher (Fig. 42)
- Inspecting the mounting screws
- Maintenance of the motor
- Cleaning the battery installation compartment and the battery (Fig. 43)
- Cleaning of the outside
- Storage
- Important notice on the batteries for the HiKOKI cordless power tools
- GUARANTEE
- Information concerning airborne noise and vibration
- CS3625DC
- CS3630DC
- TROUBLESHOOTING
- SYMBOL
- VOORZORGSGMAATREGELEN
- VEILIGHEIDSWAARSCHUWINGEN
- VOGR SNOERBOZEr vIakken
- KETTINGZAAGMACHINE
- HVAD ER HVAD? (Fig. 1)
- VEDLIKEHOLD OG INSPEKSJON
- ENIOE'QPHEKAI NPOETOIMAIA IPIN ANTO TH XP'HsH
- IPOEIAOIOIH2H
- DODATNA VARNOSTNA OPOZORILA
- PREPRAVA TYKAJUCA SA LITIOVIOIónovych BATERII
- BHIMMAHNE
- ПЕДУПЕЖДECHИЗА 3A БЕЗОПACHEСТ 3A БЕЗЧИЧЕН ВЕРNUKEH TPNOH
- Блгарский
- ДОПьHLNTЕЛНI ПРЕДУПЕЖDEHENЯ 3A БE3ОПАСHОCT
- ПЕДПАЗНМЕРИЗАБATEРЯТA И 3APДHOTO YCTPOICTBO (прдават ce OTДeнHo)
- ПЕДУПЕЖДECHИЗА 3A JINTHEBO-NOHHATA BATEPINA
- PNEyPPEKDEHNE
- BHIMAHNE
- PNEyPENKDEHNE
- OTHOCHO TPAHCIOPTA HA JIHTHEBO-NOHHA BATEPNA
- HMEHA HA YACTITE (Фиг. 1-Фиг. 43)
- CNEUΦNHAUIN
- 3A6EJIEXKA
- CTAHДAPTHN AHCECOAPN
- PNILOXKEHNA
- 3APEKDAHE
- Ra3aHe Ha IbPBeH Tpyn, NOdIbPHaH OT BaTa Kpa
- Ppepa3Hm Mepn npn p8aHe
- Ma7a6Hn onepauun nn HnpeKbchata pa6ota
- 3axBaT/HaTHcK Bbpxy BepnHHn TpnoH
- BepnroyoBnteI
- 3ATOUBAHE HA BEPHΓATA
- NPEyPENKDEHNE
- 3ABEJIEXHA
- 3aToUbaHe Ha ocTpneTata
- Perylnpae Ha nIb6okomepa IPEyIpeXDEHNE
- IODAPbJHKA IN IPOBEPHA
- PDEyPPEKDEHNE
- Поберка на Всрнг themselves
- 3A6EJIENKKA
- NocntBaHe Ha MacJeHaTa IIO3a (Phr. 39)
- NocTbaHe Ha BodeaTa uHa (Phr. 40)
- NocTbAHe Ha BepnHa cnpaHa (ΦnR. 41)
- Поберна Ha 3axbaaцоTo yctpoiCTBO Ha BepnraT (Фиr.42)
- 3A6EJIeHHKA
- OTCTPAHRAHE HA HEN3INPABHOCTN
- HiKOKI
- Hikoki Power Tools Norway AS
- Hikoki Power Tools Netherlands B.V.
- Hikoki Power Tools Sweden AB
- Hikoki Power Tools (U.K.) Ltd.
- Hikoki Power Tools France S.A.S.
- Hikoki Power Tools Belgium N.V./S.A.
- Hikoki Power Tools Italia S.p.A
- Hikoki Power Tools Ibérica, S.A.
- Hikoki Power Tools Denmark A/S
- Hikoki Power Tools Finland Oy
- Hikoki Power Tools Hungary Kft.
- Hikoki Power Tools Romania S.R.L.
Brand : HiKOKI
Model : CS3625DC
Category : Saw