CombiFinder Plus - Detector Laserliner - Free user manual and instructions
Find the device manual for free CombiFinder Plus Laserliner in PDF.
| Brand | Laserliner |
| Model | CombiFinder Plus |
| Product type | Electronic detector for metals and live wires |
| Dimensions (L x H x D) | 85 mm x 180 mm x 38 mm |
| Weight (battery included) | 180 g |
| Power supply | 1 alkaline 9V battery (type 6LR61) |
| Measurement modes | METAL-SCAN (metals) and AC-SCAN (live wires) |
| Detection depth ferrous metals | up to 7.5 cm |
| Detection depth non-ferrous metals | up to 5 cm |
| Detection depth live cables | up to 4 cm |
| Detectable AC voltage range | 110 - 230 V, 50 - 60 Hz |
| Display | LCD screen with backlight |
| Calibration | Automatic (Auto-Cal, Auto-Cal Plus) and manual (CAL button) |
| Warning indicator | Audible signal and LED (red/green) for detection |
| Safety | Cut off power supply when working near live wires |
| Maintenance and cleaning | Clean with a dry cloth. Store in a dry and clean place. |
| Spare parts | Replaceable 9V battery. No other parts specified. |
| Repairability | Contact Laserliner customer service for any repairs. |
| Operating temperature | 0°C to 40°C (32°F to 104°F) |
| Storage temperature | -20°C to 70°C (-4°F to 158°F) |
| Automatic shut-off | Approx. 30 seconds after last measurement |
| Warranty | Refer to the booklet "Additional remarks and warranty information" |
| Compliance | Compliant with EU standards, WEEE directive |
| Manufacturer | Laserliner |
Frequently Asked Questions - CombiFinder Plus Laserliner
User questions about CombiFinder Plus Laserliner
0 question about this device. Answer the ones you know or ask your own.
Ask a new question about this device
Download the instructions for your Detector in PDF format for free! Find your manual CombiFinder Plus - Laserliner and take your electronic device back in hand. On this page are published all the documents necessary for the use of your device. CombiFinder Plus by Laserliner.
USER MANUAL CombiFinder Plus Laserliner

natural_image
Illustration of a handheld electronic device with a finger pointing at the button (no text or symbols visible)
natural_image
Illustration of a hand pressing a finger on a digital medical device (no text or symbols visible)6 METAL-SCAN-Messung
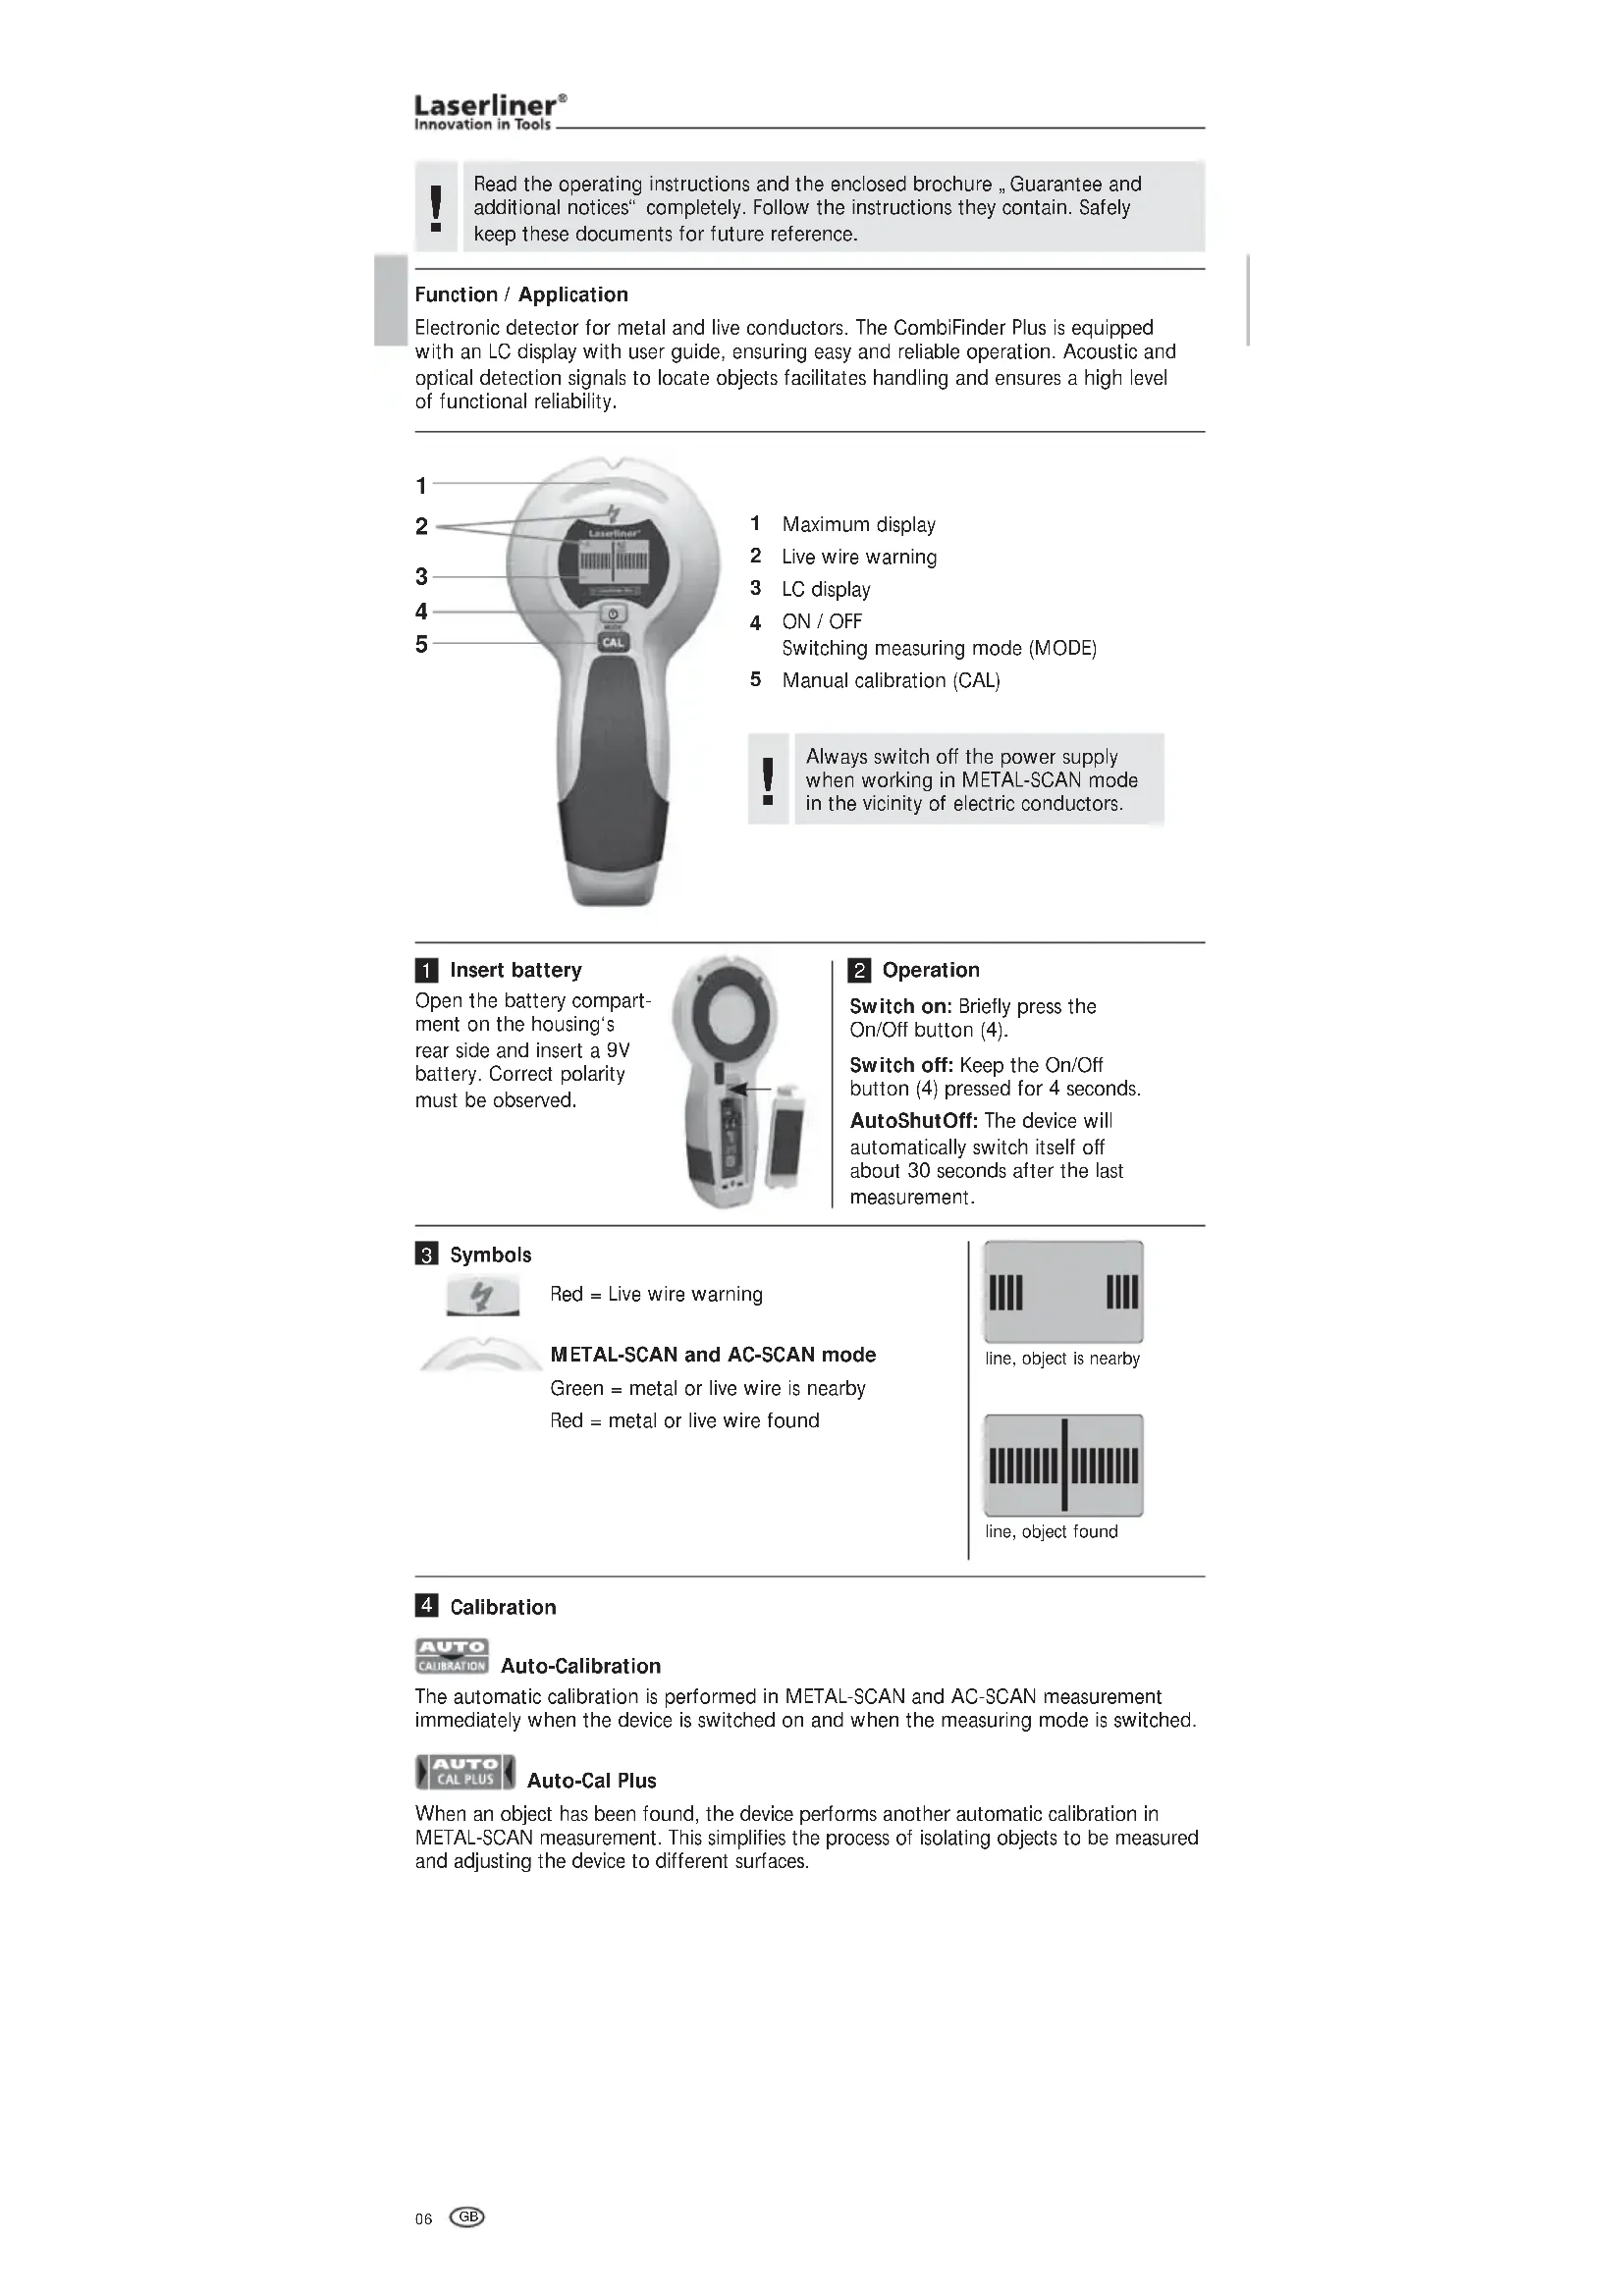
Read the operating instructions and the enclosed brochure „Guarantee and additional notices“ completely. Follow the instructions they contain. Safely keep these documents for future reference.
Function / Application
Electronic detector for metal and live conductors. The CombiFinder Plus is equipped with an LC display with user guide, ensuring easy and reliable operation. Acoustic and optical detection signals to locate objects facilitates handling and ensures a high level of functional reliability.
1
2
3
4
5
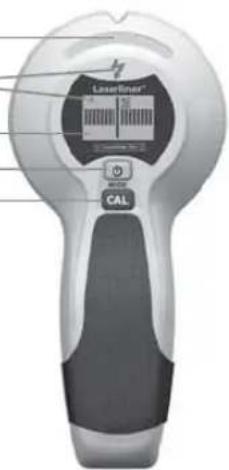
1 Maximum display
2 Live wire warning
3 LC display
4 ON / OFF
Switching measuring mode (MODE)
5 Manual calibration (CAL)

Always switch off the power supply when working in METAL-SCAN mode in the vicinity of electric conductors.
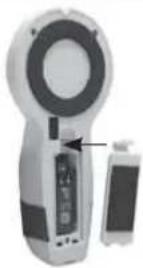
1 Insert battery
Open the battery compartment on the housing's rear side and insert a 9V battery. Correct polarity must be observed.
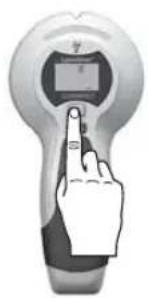
2 Operation
Switch on: Briefly press the On/Off button (4).
Switch off: Keep the On/Off button (4) pressed for 4 seconds.
AutoShutOff: The device will automatically switch itself off about 30 seconds after the last measurement.
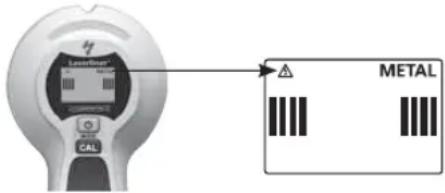
3 Symbols

Red = Live wire warning
METAL-SCAN and AC-SCAN mode
Green = metal or live wire is nearby Red = metal or live wire found
line, object is nearby
line, object found
4 Calibration

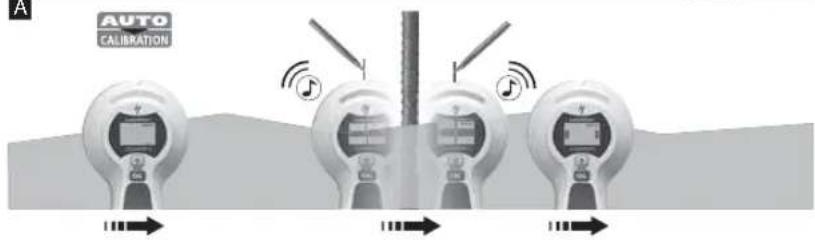
Auto-Calibration
The automatic calibration is performed in METAL-SCAN and AC-SCAN measurement immediately when the device is switched on and when the measuring mode is switched.

Auto-Cal Plus
When an object has been found, the device performs another automatic calibration in METAL-SCAN measurement. This simplifies the process of isolating objects to be measured and adjusting the device to different surfaces.
Manual calibration
Pressing the CAL button (5) manually calibrates the device. This allows measurements to be restarted and objects to be isolated more precisely.
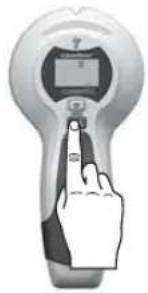
Maximum sensitivity is achieved when the device is held in the air while calibrating.
natural_image
Illustration of a handheld electronic device with a finger pointing at the button (no text or symbols visible)
The device and the wall must maintain contact during calibration (except for calibration in mid-air) and throughout the entire measurement process. A hand should remain at the device the entire time as well.
5 Select measurement mode
Briefly press the Mode button (4).
METAL-SCAN: Detecting metal in all non-metallic materials
AC-SCAN: Locating live lines directly under non-metallic cladding
natural_image
Illustration of a hand pressing a button on a digital device (no text or symbols visible)6 Measuring in METAL-SCAN mode
The tool is able to detect hidden metal in all non-metallic materials, e.g. brick, concrete, screed, wood, plaster fibreboard, gas concrete, ceramic and mineral building materials.
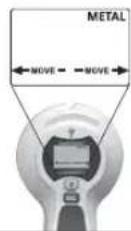
- Select METAL-SCAN (button 4).
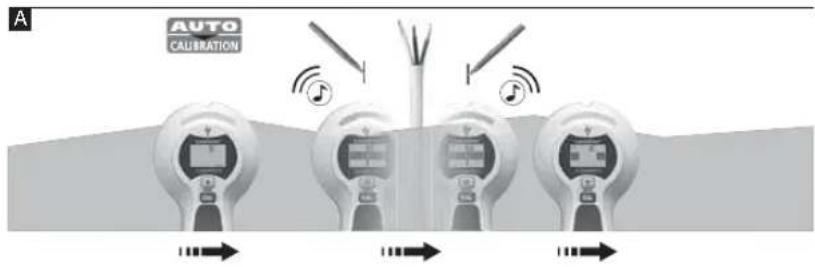
- As soon as the display switches from CAL to CAL OK, you can move the device.
- MOVE: Move the tool slowly across the surface.
A
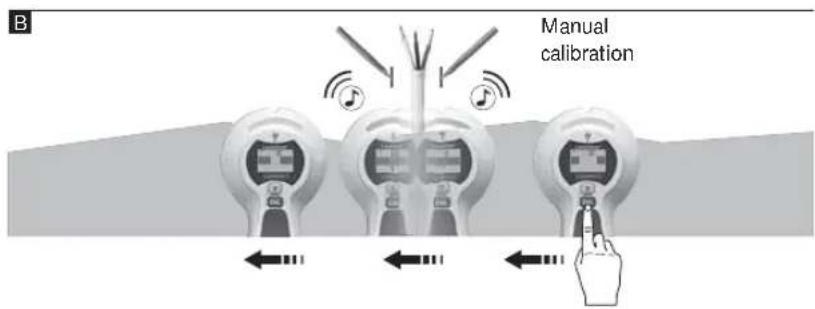
B

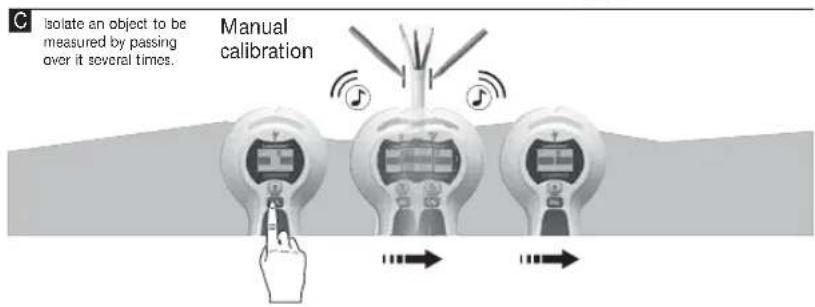
C
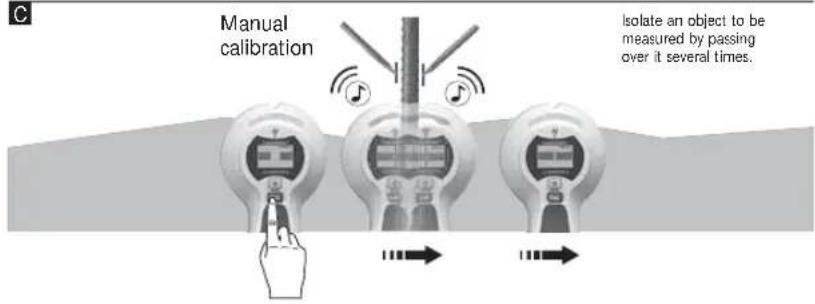
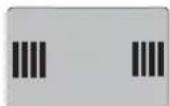
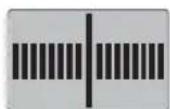
Tip 1: The position between the two markings is the mid-point of the metal object. Through the high measuring sensitivity, thick metal objects appear broader than they are in real life. Therefore move the device over the newly found object as shown in Image B. The device is calibrated automatically during this process. Manual calibration should be performed near the place found last as shown in Image C. Repeat this step as needed.
Tip 2: The position where you start is important: First place the device in a position where you know there is no metal. Otherwise, the message "ERROR" will appear in the display. To remedy: Move the device to another position a few centimetres away and start measuring again.
Tip 3: In the case of complicated applications, e.g. ribbed steel, scan the surface both horizontally and vertically.
Tip 4: Flexible floor and wall heating pipes which contain a metal foil and are located near the surface may also be detected. Test for this function in places where you know the position of such pipes.
Tip 5: To avoid interference while scanning, keep your free hand and other objects at least 15 cm away from the device.
Tip 6: The device only finds the outer edge of metal structures set into the wall for doors, windows and corners. Afterwards search for the other edge of the metal structure. Slide the device sideways across the wall. When the maximum indication appears you have reached the metal structure's edge.
Tip 7: Ensure that you have really detected a metal object. To do so, check on both sides whether other metal objects are present at equal distances, usually at 30, 40 or 60 cm. Also check that it is a metal object by scanning at several places directly above and below the position of the first find.
Tip 8: Textured ceilings: The ceiling must be covered with cardboard to protect it. In this case, perform detection with maximum sensitivity, i.e. calibrate the device in mid-air.
Note: If an object is deep inside a wall, the device may not indicate it clearly.
7 Measuring in AC-SCAN mode
For localising live wires directly beneath the plaster or behind wooden panels and other non-metallic panelling. It is not possible to detect live wires in dry walls with metal studs.
- Select AC-SCAN (button 4).
- As soon as the display switches from CAL to CAL OK, you can move the device.
- MOVE: Move the tool slowly across the surface.
Tip 1: Manual calibration should be performed near the place found last as shown in Image B/C. Repeat this step as needed.
Tip 2: Because of static charges, electric fields may be detected at the side of the actual position of the wire. To carry away these charges, lay your free hand on the wall.
Tip 3: Move the tool slowly as friction can generate interfering electric charges.
Tip 4: If you suspect that wires must be present but cannot find any, this may be because they are shielded in conduits. Use METAL-SCAN in order to localise conduits.
Tip 5: Metal in walls (e.g. metal studs) transmit electrical fields and may therefore cause interference. In this case, switch to METAL-SCAN in order to find the wire.
Tip 6: The position where you start is important: To achieve maximum sensitivity, start by placing the device in a position which is known not to be near live wires.
Note: If an object is deep inside a wall, the device may not indicate it clearly.

Wires which are at a depth of more than 4 cm may not be detected.
8 METAL-SCAN: Current monitoring
Continuous current monitoring in unshielded wires as soon as an electrical field is detected.

Always switch off the power supply when working near electric wires.
9 Backlight
The device features backlighting.
Technical data
| Detection range AC 110 - 230V, 50 - 60 Hz | |
| Operating temperature 0°C ... 40°C (32°F ... | 104°F) |
| Storage temperature -20°C ... 70°C (-4°F ... | 158°F) |
| Power supply 1 x 9V alkaline battery (type 6 L R 61) | |
| Dimensions (W x H x D) 85 mm x 180 mm x | 38 mm |
| Weight (incl. battery) 180 g | |
| Measuring depth | |
| Targeted metal location: Ferro-Scan / Non-Ferro-Scan (METAL-SCAN) | Up to 7,5 cm / up to 5 cm depth |
| Targeted location of live supply lines (AC-SCAN) | Up to 4 cm depth |
| Location of dead supply lines Up to 4 cm depth | |
Subject to technical alterations. 12.2012
EU directives and disposal
This device complies with all necessary standards for the free movement of goods within the EU.
This product is an electric device and must be collected separately for disposal according to the European Directive on waste electrical and electronic equipment.
Further safety and supplementary notices at: www.laserliner.com/info


natural_image
Illustration of a handheld electronic device with a finger pointing at the button (no text or symbols visible)
natural_image
Illustration of a hand pressing a button on a digital device (no text or symbols visible)6 METAL-SCAN-meting
natural_image
Illustration of a handheld electronic device with a finger pointing at the button (no text or symbols visible)
natural_image
Illustration of a hand pressing a button on a digital device (no text or symbols visible)6 METAL-SCAN måling

natural_image
Illustration of a handheld electronic device with a finger pointing at the button (no text or symbols visible)
natural_image
Illustration of a hand pressing down on a digital glucose meter (no text or symbols visible)6 Mesure METAL-SCAN

natural_image
Illustration of a hand pointing at a digital display device (no text or symbols visible)
natural_image
Illustration of a hand pressing down on a digital display device (no text or symbols visible)6 Medición METAL-SCAN
natural_image
Illustration of a hand pressing a button on a medical device (no text or symbols visible)
natural_image
Illustration of a hand pressing a finger on a digital display device (no text or symbols)6 Misura METAL-SCAN
natural_image
Illustration of a hand pointing at a digital thermometer (no text or symbols visible)
natural_image
Illustration of a hand pressing down on a digital thermometer (no text or symbols visible)6 Pomiar METAL-SCAN

natural_image
Illustration of a hand pointing at a digital device with a screen (no text or symbols visible)natural_image
Illustration of a hand pressing down on a digital device (no text or symbols visible)6 METAL-SCAN-mittaus

natural_image
Illustration of a hand pointing at a digital thermometer (no text or symbols visible)
natural_image
Illustration of a hand pressing down on a digital thermometer (no text or symbols visible)natural_image
Illustration of a hand pointing at a digital thermometer (no text or symbols visible)
natural_image
Illustration of a hand pressing down on a digital thermometer (no text or symbols visible)6 METAL-SCAN-lokalisering
natural_image
Illustration of a hand pointing at a digital device with a screen (no text or symbols visible)natural_image
Illustration of a hand pressing down on a digital device (no text or symbols visible)6 METAL-SCAN måling
natural_image
Illustration of a hand pointing at a digital display device (no text or symbols visible)
natural_image
Illustration of a hand pressing down on a digital thermometer (no text or symbols visible)6 METAL-SCAN ölçümü
natural_image
Illustration of a hand pointing at a digital thermometer (no text or symbols visible)
natural_image
Illustration of a hand pressing down on a digital thermometer (no text or symbols visible)natural_image
Illustration of a hand pointing at a digital display device (no text or symbols visible)
natural_image
Illustration of a hand pressing down on a digital thermometer (no text or symbols visible)natural_image
Illustration of a hand pressing a button on a handheld device (no text or symbols visible)natural_image
Illustration of a hand pressing down on a digital medical device (no text or symbols visible)6 Měření METAL-SCAN
natural_image
Illustration of a hand pointing at a digital device with a screen (no text or symbols visible)natural_image
Illustration of a hand pressing down on a digital device (no text or symbols visible)6 METAL-SCAN-möötmine
natural_image
Illustration of a hand pointing at a digital display device (no text or symbols visible)natural_image
Illustration of a hand pressing down on a digital device (no text or symbols visible)natural_image
Illustration of a hand pressing a button on a handheld device (no text or symbols visible)natural_image
Illustration of a hand pressing down on a digital medical device (no text or symbols visible)6 METAL-SCAN ieškos režimas
natural_image
Illustration of a hand pointing at a digital thermometer (no text or symbols visible)
natural_image
Illustration of a hand pressing down on a handheld electronic device (no text or symbols visible)6 Măsurare METAL-SCAN
natural_image
Illustration of a hand pointing at a digital thermometer (no text or symbols visible)
natural_image
Illustration of a hand pressing down on a digital thermometer (no text or symbols visible)6 METAL-SCAN-измерване
natural_image
Illustration of a hand pressing a button on a medical device (no text or symbols visible)