StarSensor 150 - Detector Laserliner - Free user manual and instructions
Find the device manual for free StarSensor 150 Laserliner in PDF.
| Product type | Beam and voltage detector |
| Brand | Laserliner |
| Model | StarSensor 150 |
| Power supply | 2 AAA (LR03) 1.5 V batteries |
| Dimensions (L x H x D) | 140 x 74 x 52 mm |
| Weight (including batteries) | 184 g |
| Wood/metal detection depth | Up to 4 cm |
| Voltage detection depth | Up to 2 cm |
| AC voltage range | 110 - 230 V, 50 - 60 Hz |
| Working conditions | 0°C to 40°C, humidity 20 - 90% RH, non-condensing |
| Storage conditions | -10°C to 50°C, max. humidity 80% RH, non-condensing |
| Display | LED |
| Voltage indicator | Yes (lightning icon) |
| Main functions | Detection of wooden beams, metal studs and live wires |
| Care and cleaning | Clean with a slightly damp cloth, avoid solvents and abrasive products |
| Safety | Do not modify the device, follow instructions for electrical work, beware of electromagnetic fields |
| Spare parts and repairability | Replaceable batteries (AAA) |
| General information | Manual available online, compliant with EU WEEE directive |
Frequently Asked Questions - StarSensor 150 Laserliner
User questions about StarSensor 150 Laserliner
0 question about this device. Answer the ones you know or ask your own.
Ask a new question about this device
Download the instructions for your Detector in PDF format for free! Find your manual StarSensor 150 - Laserliner and take your electronic device back in hand. On this page are published all the documents necessary for the use of your device. StarSensor 150 by Laserliner.
USER MANUAL StarSensor 150 Laserliner


2 Inbetriebnahme
natural_image
Three identical Laserliner brand headsets with black branding and white plastic casing, shown from different angles (no text or symbols visible)natural_image
Close-up of a Laserliner branded device with visible branding and screwdriver (no text or symbols on the device itself)Completely read through the operating instructions, the „Warranty and Additional Information“ booklet as well as the latest information under the internet link at the end of these instructions. Follow the instructions they contain. This document must be kept in a safe place and if the laser device is passed on, this document must be passed on with it.
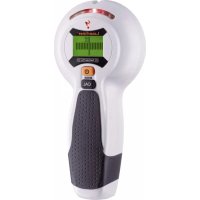
Function / Application
This electronic locating device finds wall beams and joists as well as live wires. The device analyses the surface at nine points simultaneously and signals the detection of concealed objects via the LED display.
General safety instructions
- The device must only be used in accordance with its intended purpose and within the scope of the specifications.
- The structure of the device must not be modified in any way.
- Do not expose the device to mechanical stress, extreme temperatures, moisture or significant vibration.
- Do not work alone in the vicinity of hazardous electrical installations and only under the guidance of a qualified electrician.
Additional information on use
Observe the technical safety regulations for working on electrical systems, especially: 1. Safely isolating from power supply, 2. Securing to prevent system being switched on again, 3. Checking zero potential, two-pole, 4. Earthing and short-circuiting, 5. Securing and covering adjacent live components.
Safety instructions
Dealing with electromagnetic radiation
- The measuring device complies with electromagnetic compatibility regulations and limit values in accordance with EMC-Directive 2014/30/EU.
- Local operating restrictions – for example, in hospitals, aircraft, petrol stations or in the vicinity of people with pacemakers – may apply. Electronic devices can potentially cause hazards or interference or be subject to hazards or interference.
Laserliner
- The measuring accuracy may be affected when working close to high voltages or high electromagnetic alternating fields.
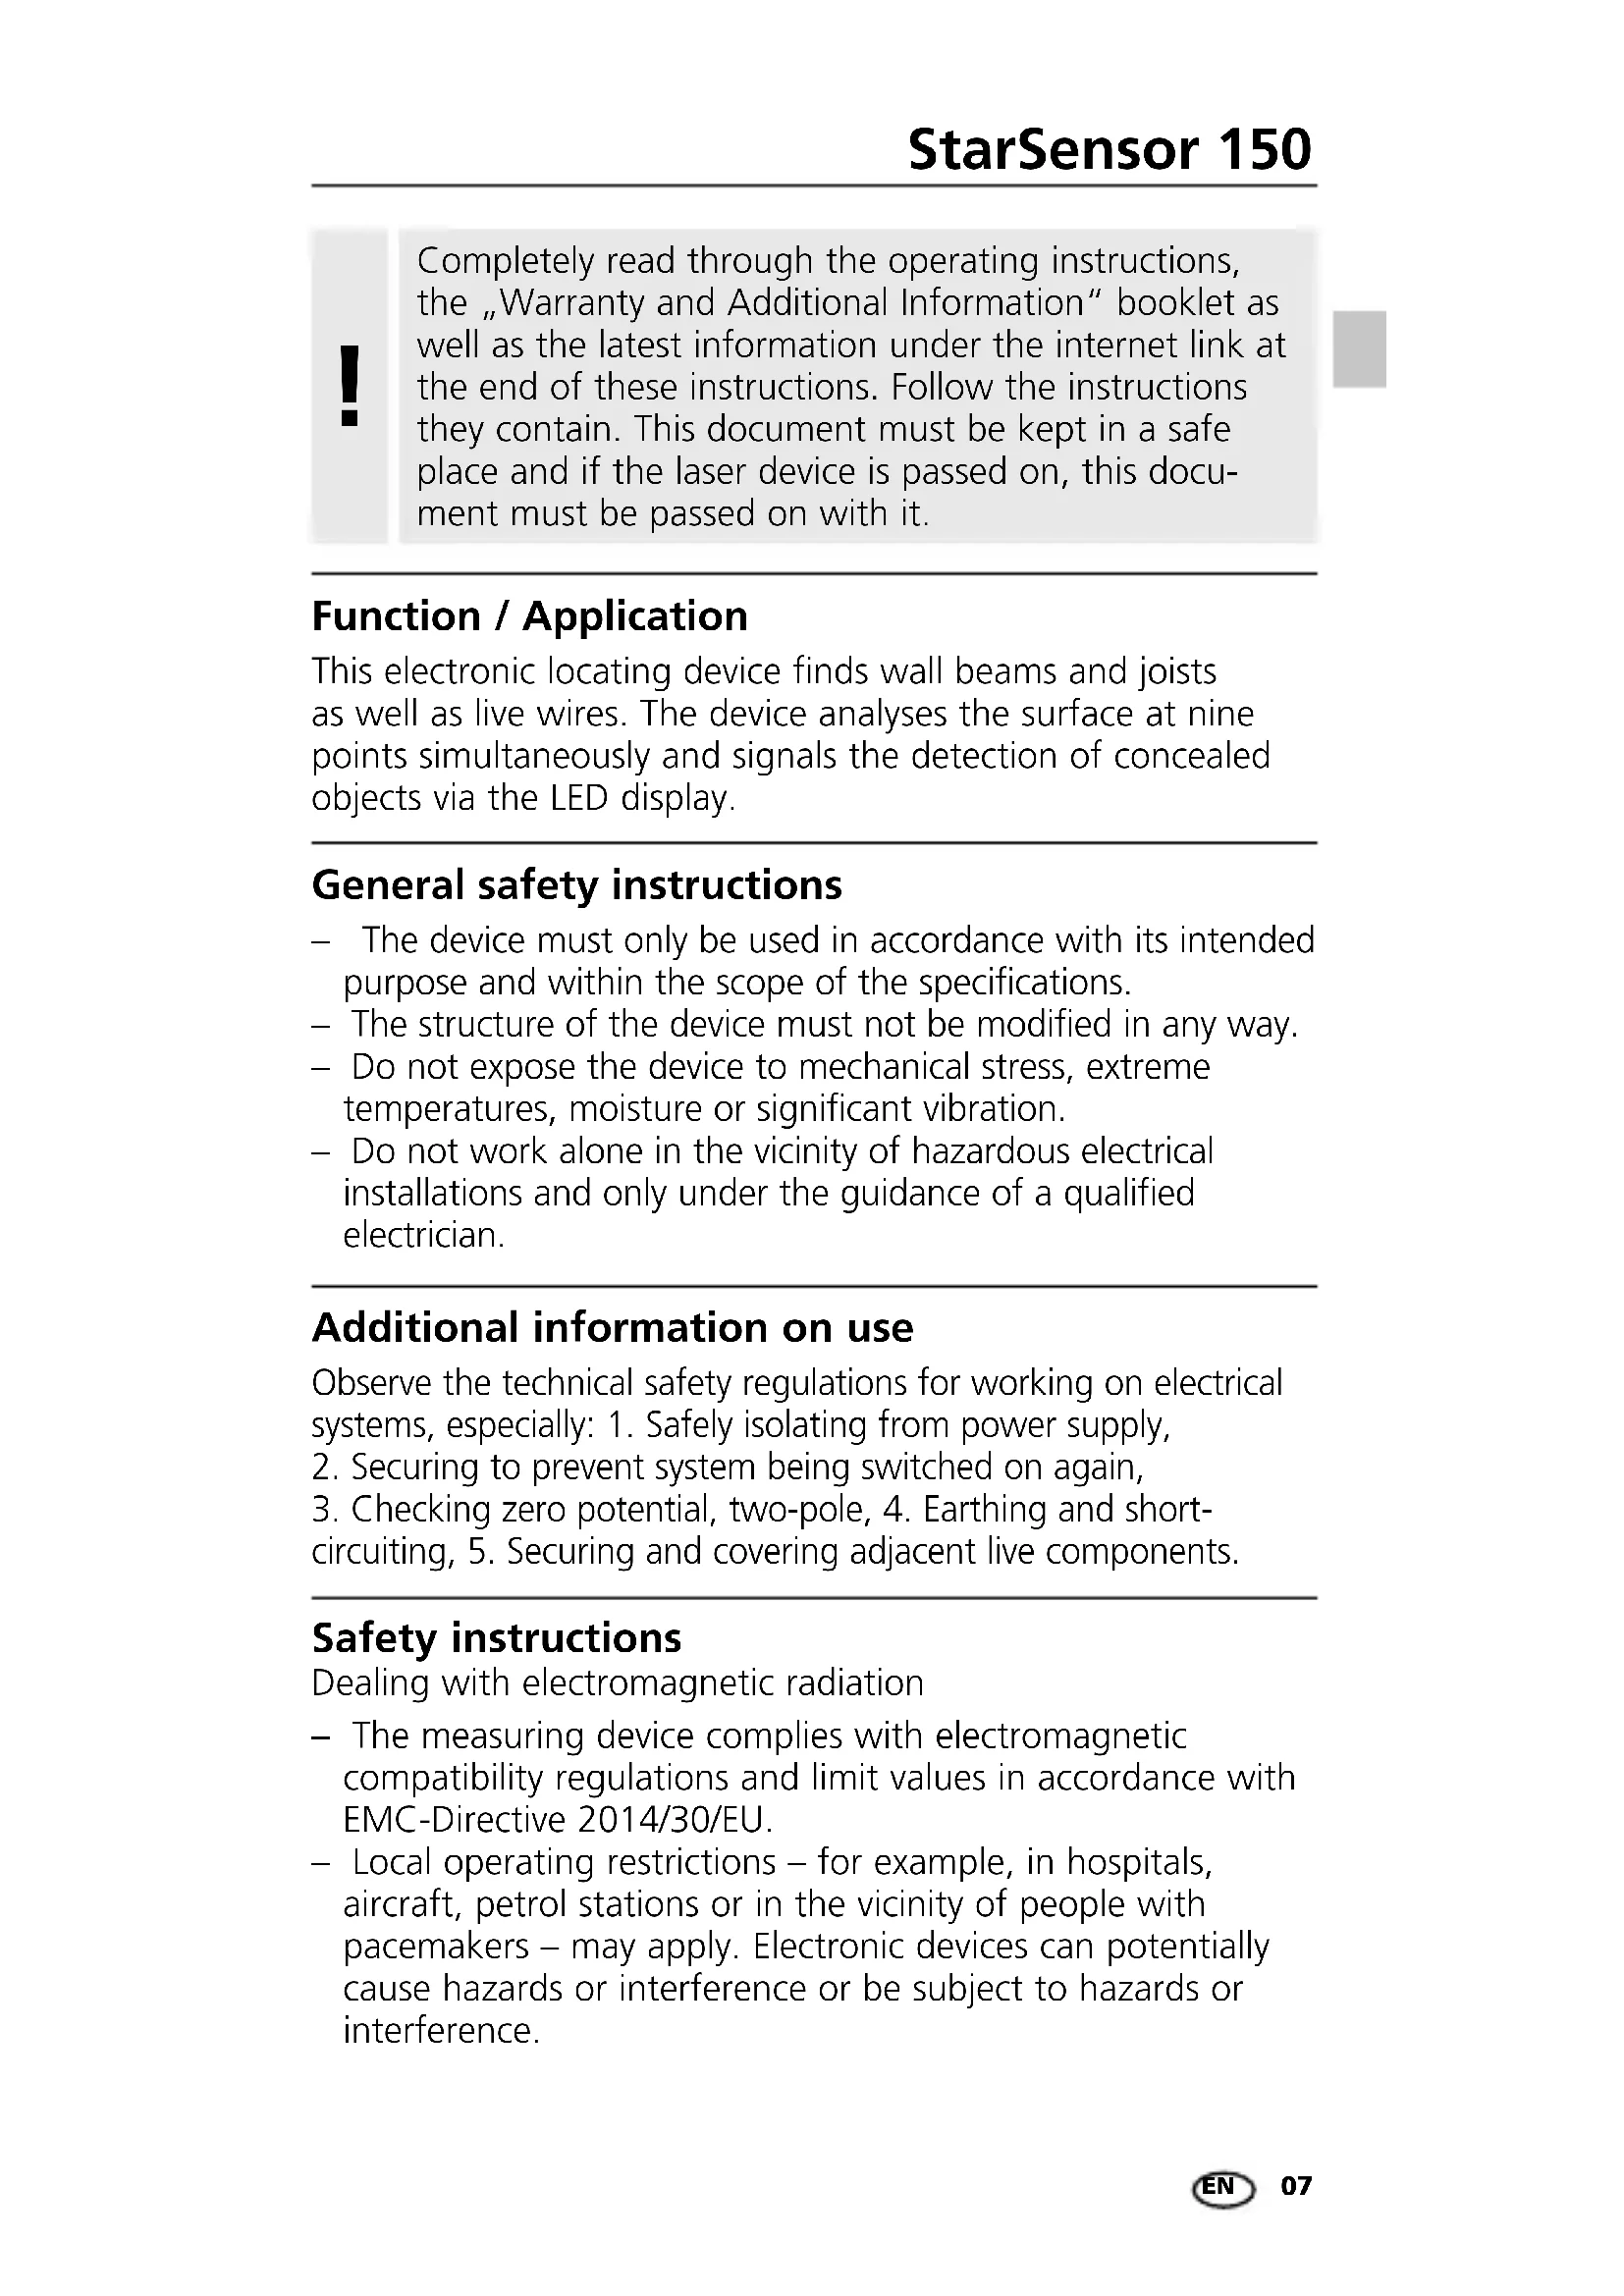
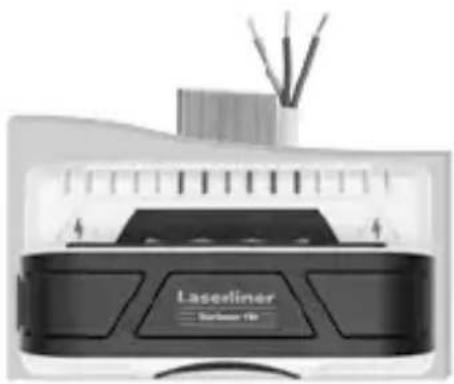
1 LED-Indicator
2 Live wire warning
3 ON
4 Battery compartment
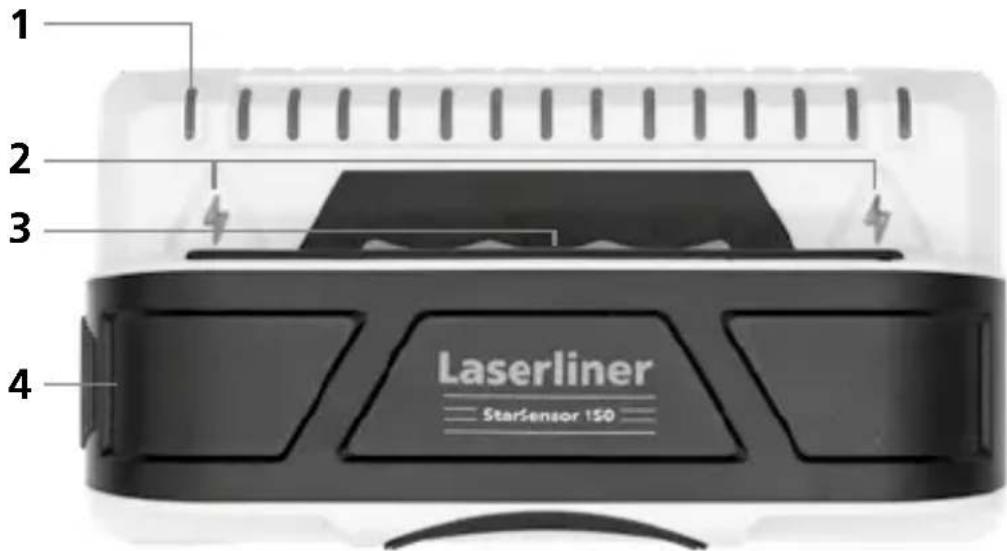
1 Inserting batteries
Open the battery compartment and insert batteries (2 x typ AAA) according to the symbols. Be sure to pay attention to polarity.
2 Operation
Device on: Press and hold the On button (3).
Scan: The LEDs indicate the centre and the edges of beams and hidden objects..

natural_image
Three identical Laserliner brand machines with black buttons and white outlines, no visible text or symbols on the devices themselves.Live wire warning: The presence of live lines is indicated when the lightning symbols light up.
natural_image
Close-up of a Laserliner branded device with visible branding and screwdriver (no readable text or symbols beyond branding)Device off: Release the On button (3).
Detecting wooden wall beams and joists as well as metal in drywall structures, e.g. under gypsum fibreboard, wood panels or other non-metallic cladding.
Move the tool slowly across the surface.
Laserliner
Tip 1: To avoid interference while scanning, keep your free hand and other objects at least 15 cm away from the StarSensor 150.
Tip 2: Ensure that you have really detected a stud. To do so, check on both sides whether other studs are present at equal distances, usually at 30, 40 or 60 cm. Also check that it is a stud by scanning at several places directly above and below the position of the first find.
Note: If an object is deep inside a wall, the device may not indicate it clearly.
!
If electric wires or metal or plastic pipes are located near or in contact with a plaster fibreboard panel, they may be identified by the StarSensor 150 as studs.
Special things to note with various materials
It may not be possible to detect wooden studs or joists through the following materials:
– Ceramic floor tiles
– Fitted carpeting with padded backing
– Wallpaper with metal fibres or metal foil
- Freshly painted, damp walls. These must have dried for at least one week.
!
Always switch off the power supply when working near electric wires.
Information on maintenance and care
Clean all components with a damp cloth and do not use cleaning agents, scouring agents and solvents. Remove the battery(ies) before storing for longer periods. Store the device in a clean and dry place.
Technical Data
(Subject to technical changes without notice. 21W47)
| Detection range AC 110 - 230V, 50 - 60 Hz | |
| Power supply 2 x 1.5V LR03 (AAA) | |
| Operating conditions | 0°C ... 40°C, max. humidity 20 ... 90% rH, no condensation |
| Storage conditions | -10°C ... 50°C, max. humidity 80% rH, no condensation |
| Dimensions (W x H x D) | 140 mm x 74 mm x 52 mm |
| Weight 184 g (incl. batteries) | |
| Measuring depth | |
| Wood/metal beam location up to 4 cm depth | |
| Live wire warning up to 2 cm depth | |
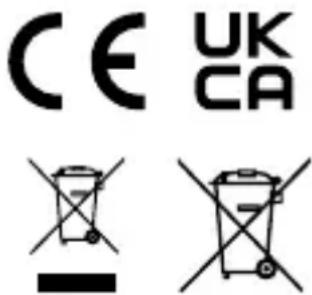
EU directives and disposal
This device complies with all necessary standards for the free movement of goods within the EU.
This product is an electric device and must be collected separately for disposal according to the European Directive on waste electrical and electronic equipment.
Further safety and supplementary notices at:
http://laserliner.com/info?an=ALP

natural_image
Three identical Laserliner branded devices with black buttons and white outlines, no visible text or symbols on the devices themselves.natural_image
Close-up of a Laserliner branded device with visible branding and screwdriver (no text or symbols on the device itself)2 Ilgangsætning
natural_image
Three identical Laserliner brand headsets with black branding and white plastic casing, shown from different angles (no text or symbols visible)natural_image
Close-up of a Laserliner branded device with visible screwdriver and antenna (no text or symbols on body)Laserliner
2 Mise en service
natural_image
Three identical Laserliner branded devices with black modules and white caps, shown from different angles (no text or symbols visible)natural_image
Close-up of a Laserliner branded device with visible circuitry and antenna (no readable text or symbols)2 Funcionamiento
natural_image
Three identical Laserliner branded devices with visible branding and mounting brackets (no text or symbols on the devices themselves)natural_image
Close-up of a Laserliner branded device with visible circuitry and wiring (no text or symbols on the device itself)natural_image
Three identical Laserliner brand headsets with visible branding and mounting brackets (no text or symbols on the devices themselves)natural_image
Close-up of a Laserliner branded device with visible branding and antenna (no readable text or symbols beyond branding)natural_image
Three identical Laserliner branded devices with black buttons and white outlines, no visible text or symbols on the devices themselves.natural_image
Close-up of a Laseliner brand electronic device with visible branding and external wires (no readable text or symbols)!
Laserliner
2 Käyttöönotto
natural_image
Three identical Laserliner branded devices with black buttons and white outlines, no visible text or symbols on the devices themselves.natural_image
Close-up of a Laserliner branded device with visible branding and antenna (no readable text or symbols beyond branding)Laite OFF: Vapauta virtapainike (3).
natural_image
Three identical Laserliner brand headsets with black branding and white plastic covers, shown from different angles (no text or symbols visible on the devices themselves)natural_image
Close-up of a Laserliner branded device with visible branding and screwdriver (no text or symbols on the device itself)Aparelho desligado: Largue a tecla de ligar (3).
!
Laserliner
2 Idrifttagande
natural_image
Three identical Laserliner brand headsets with black branding and white plastic casing, shown from different angles (no text or symbols visible on the devices themselves)natural_image
Front view of a Laserliner branded device with visible branding and antenna (no readable text or symbols beyond branding)natural_image
Two identical line-drawn icons of a trash bin with crossed x-bracing, no text or symbols present.2 Igangsetting
Apparat på: Hold På-tasten (3) trykket.
natural_image
Three identical black laserliner brand head modules with no visible text or symbols on the modules themselves.natural_image
Front view of a Laserliner branded device with visible screwdriver and circuit board (no text or symbols on body)Apparat av: Slipp På-tasten (3).
natural_image
Isometric illustration of a mechanical device with attached components, no visible text or symbolsSERVICE


Umarex GmbH & Co. KG
- Laserliner -