
BR 301 C Bp - Broom Kärcher - Free user manual and instructions
Find the device manual for free BR 301 C Bp Kärcher in PDF.
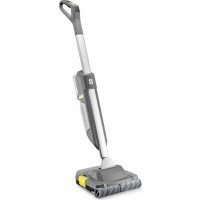


| Product type | Floor mopping brush (floor cleaner) |
| Brand | Kärcher |
| Model | BR 301 C Bp |
| Power supply | 18 V lithium-ion battery (compatible with Battery Power and Battery Power+) |
| Rated power | 70 W |
| Runtime | 45 minutes (full charge) |
| Clean water tank capacity | 1000 ml |
| Dirty water tank capacity | 700 ml |
| Roller speed (normal) | 500 rpm |
| Roller speed (Boost) | 650 rpm |
| Protection class | III |
| Protection rating | IPX4 |
| Weight (without accessories) | 6.1 kg |
| Main functions | Boost function, roller rinse function |
| Safety | Automatic shut-off, warning indicator, motor safety cut-out |
| Roller maintenance | Machine washable at 60°C, without fabric softener or tumble drying |
| Sweeping tray maintenance | Rinse under running water, removable |
| Recommended use | Impermeable hard floors (tile, lacquered parquet, linoleum) |
| Included accessories | Set of standard rollers, dosing head, CA 50 C detergent (depending on version) |
Frequently Asked Questions - BR 301 C Bp Kärcher
User questions about BR 301 C Bp Kärcher
0 question about this device. Answer the ones you know or ask your own.
Ask a new question about this device
Download the instructions for your Broom in PDF format for free! Find your manual BR 301 C Bp - Kärcher and take your electronic device back in hand. On this page are published all the documents necessary for the use of your device. BR 301 C Bp by Kärcher.
USER MANUAL BR 301 C Bp Kärcher
71364 Winnenden (Germany)
Tel.: +49 7195 14-0
Fax: +49 7195 14-2212
Winnenden, 2021/04/01
Technical data
BR 30/1
C Bp
Environmental protection 13
Safety instructions 13
Intended use 14
Scope of delivery 14
Description of the device 14
Initial startup 15
Operation 15
Transport 17
Storage 17
Cleaning the device 17
Troubleshooting guide 18
Warranty 19
Accessories and spare parts 19
Declaration of Conformity 20
Technical data 20
General notes
Before using the device, read the enclosed original instructions for this device, the battery pack, and the charger. Act in accordance with them.
Keep these documents for future reference or for future owners.
If the operating instructions are not observed, the device can be damaged and dangers could arise for users and other persons. - Notify the dealer immediately in the case of shipping damage. - Check the package contents when unpacking for missing accessories or for damage.
Environmental protection

The packing materials can be recycled. Please dispose of packaging in accordance with environmental regulations.

Electrical and electronic appliances contain valuable, recyclable materials and often components such as batteries, rechargeable batteries, or oil, which - if handled or disposed of incorrectly - can be a potential threat to human health and the environment. However, these components are required for the correct operation of the appliance. Appliances marked with the symbol are not allowed to be disposed of together with household rubbish.
Notes on the content materials (REACH)
Current information on content materials can be found at: www.kaercher.com/REACH
Safety instructions
Read this safety chapter and these original instructions before using the device for the first time. Act in accordance with them. Keep the original instructions for future reference or for future owners.
- In addition to the notes in the operating instructions, you also need to take into consideration the general safety regulations and accident prevention guidelines applicable by law. Warnings and information notices attached to the device provide important information for hazard-free operation.
Hazard levels
DANGER
- Indication of an imminent threat of danger that will lead to severe injuries or even death.
WARNING
- Indication of a potentially dangerous situation that may lead to severe injuries or even death.
CAUTION
- Indication of a potentially dangerous situation that may lead to minor injuries.
ATTENTION
- Indication of a potentially dangerous situation that may lead to damage to property.
Battery pack and charger
In addition, read the operating instructions and safety instructions that come with the battery pack and the charger.
This device can be operated with the 18 V Kärcher Battery Power and 18 V Kärcher Battery Power+ battery packs listed in the spare parts list.
Safe handling
DANGER: Risk of asphyxiation. Keep packaging film out of the reach of children.
WARNING: Only people who have been instructed on how to use the device, or have proven their ability to operate it, and have been explicitly instructed to use it, must use the device. Only use the device for its proper use. Take into account the local conditions and beware of third parties, in particular children, when working with the device. Adhere to the respective safety regulations in hazard zones (e.g. service stations). Never operate the device in explosive spaces. Children and persons unfamiliar with these instructions are not allowed to operate the device. The age of the operator may be limited by local restrictions. This device must not be used by persons (including children) with restricted physical, sensory or mental abilities or those lacking in experience and knowledge. Children must not play with the appliance. Children must be supervised to prevent them from playing with the appliance. Keep all parts of your body (e.g. fingers, hair) away from the rotating cleaning rollers. Risk of injury from sharp objects (e.g. splinters). Protect your hands while cleaning the floor head.
CAUTION: Do not use the appliance if it has been dropped beforehand, is visibly damaged or if it is leaking. Only operate or store the device in accordance with the description or figure. Never leave the device unsupervised while it is in operation. Switch off the device and remove the battery pack before performing any care and service work.
ATTENTION: Only use the device indoors. Device damage. Never fill the water reservoir with solvents, liquids containing solvents or undiluted acids (e.g. detergents, petrol, paint thinners and acetone).
- Only switch on the device when the fresh water tank and waste water tank are installed. Do not pick up sharp or larger objects with the device, such as e.g. glass shards, gravel or toy parts. Do not fill the fresh water container with vinegar, decalcification agents, essential oils or similar substances. Avoid taking up these substances with the device. Use the device only on hard floors with a watertight coating, such as e.g. var
nished parquet, enamelled tiles or linoleum. Do not use the device for cleaning carpets or carpeted floors.
- Do not guide the device over the floor grilles of convection heating systems. The device cannot vacuum up the escaping water when it is guided over a floor grille.
- Do not operate the device at temperatures below 0°C. Only store the device indoors.
Electrical components
DANGER Do not immerse the device in water. Never touch contacts or lines.
WARNING. The appliance contains electrical components - do not clean the appliance under running water.
CAUTION. Have repair work carried out by the authorised customer service only.
Intended use
This device is suitable for commercial and industrial use, e.g. in hotels, schools, hospitals, factories, shops, offices and rental companies. Use the device only in accordance with the information in these operating instructions.
- The device may only be used for cleaning smooth surfaces that are insensitive to water and polishing.
- The device is not suitable for cleaning frozen floors (e.g. in cold stores). The device is not suitable for use in potentially explosive environments.
- Do not immerse the device or any part of it in water or pour water over it.
Scope of delivery
Check the contents for completeness when unpacking. If any accessories are missing or in the event of any shipping damage, please notify your dealer.
Description of the device
For the illustrations, refer to the folding sides. Illustration A
① Warning light ② Boost function button ON/OFF switch ④ Handle 5 Battery pack unlocking button 6 Battery mount ⑦ handle bowl Type plate 9 Fresh water filter 10 Fresh water tank ⑪Lid handle 12Cleaning brush 13Cover (14)Locking flaps (15) Waste water bowl (16)Waste water tank Sweep bins
18L 19 Cover Dosing head Detergent CA 50 C (0.5 I round bottle) 22 Cleaning rollers (replacement) 23*Battery pack Battery Power 18/25 DW or Battery pack Battery Power+ 18/30 DW 24*Mains cable for quick charger 25*Quick charger Battery Power 18/25 or Quick charger Battery Power+ 18/60 26 Cleaning rollers
*BR 30/1 C Bp Pack
Initial startup
Battery pack charging
- Charge the battery pack (see operating instructions and safety instructions for the battery pack and the charger).
Inserting the battery pack
- Push the battery pack into the battery mount on the device until the battery pack audibly latches into place. Illustration B
Cleaning and care agents
ATTENTION
Use of unsuitable detergents and care agents
The use of unsuitable detergents and care agents can damage the device and result in loss of eligibility for warranty claims.
Use only KÄRCHER detergents.
Take care to ensure the correct dosage.
Note
Use KARCHER detergent or care agents for floor cleaning as necessary.
- Observe the manufacturer's dosing quantity recommendations when dosing with detergent or care agents.
- To prevent foaming, fill the fresh water tank with water first and then add the detergent or care agent.
- To prevent the tank from overflowing, be sure to leave enough space for the detergent or care agent when filling with water.
Filling the fresh water tank
- Grasp the fresh water tank by the recessed grips at the side and take it out of the device. Illustration C
- Open the tank cap. Illustration D
- Fill the fresh water tank with clean tap water (max. 40°C) up to the MAX marking at most. If detergent is to be used, fill in less fresh water accordingly.
- Add KARCHER detergent or care agent to the fresh water tank as required.
ATTENTION
Over- or underdosing of the detergent or care agent can result in poor cleaning results.
Observe the recommended dosage for the detergent and care agents.
Note
For optimal cleaning and care results, we recommend using only KÄRCHER products and the dosing head.
- Unscrew the round bottle lock.
Illustration E
- Screw the dosing head onto the round bottle.
- Squeeze the round bottle in the middle until the required amount of detergent has flowed into the dosing head.
Illustration F
Take the following into account:
a The specifications of the detergent manufacturer for the mixing ratio of detergent and fresh water b the corresponding scale on the dosing head c the capacity of the tank
- Open the cover on the dosing head.
- Fill the detergent into the tank.
Illustration G
- Close the cover on the dosing head.
- Close the tank cap.
- Insert the fresh water tank into the device until it latches into place.
Operation
General notes on operation
ATTENTION
Moisture
Material damage to sensitive floors
Check the surface to be cleaned for water sensitivity at an inconspicuous location before using the device.
Do not clean water-sensitive floor coverings such as e.g. untreated cork floors, since the moisture can penetrate and damage the floor.
ATTENTION
Risk of damage due to moisture and detergents as well as the device tipping over
Risk of material damage on sensitive floors and on the cleaning rollers due to prolonged exposure to moisture and detergents.
Risk of material damage if the device falls over.
Always move the device to the parking position when you take a break from work and after work.
Do not lean the device against walls, doors or other objects when setting it down.
ATTENTION
Material damage
Damage to the device from pointed, large and/or bulky objects.
Do not use or store the device on hard, coarse dirt and hard objects, as the parts can become jammed under the waste water tank and can cause scratches on the floor and waste water tank.
Before starting work and storing the device, remove objects such as shards, pebbles from the floor.
- For an optimum cleaning result, wash the cleaning rollers in the washing machine at 60°C before initial use.
- Work backwards towards the door so that no footprints are generated on the freshly cleaned floor. Illustration H
- The floor is cleaned by moving the device back and forth at a speed similar to vacuum cleaning.
- Activate the Boost function for heavy soiling. To do this, hold down the Boost function button. The roller speed and fresh water quantity are increased when the Boost function is activated. Allow the device to slide slowly over the floor without exerting any pressure on the device.
Illustration I
- If the cleaning rollers are blocked, e.g. by jamming, the device switches off. The warning light lights up. Remove the blockage. To switch the device on again, press the ON/OFF switch twice.
Note
The first press clears the error, the second press switches on the device.
If the ON/OFF switch is not pressed, the warning light goes out after 10 s. To switch on the device, press the ON/OFF switch once.
Illustration J
- If the capacity of the battery pack is almost exhausted, the ON/OFF switch starts to flash.
Illustration K
Press the ON/OFF switch.
The device switches off.
Take the battery pack out of the device and charge it (see chapter Ending operation).
Note
In order to avoid a damaging exhaustive discharge of the battery pack, the device switches itself off before the battery pack is completely discharged.
- Switch off the device and move it to the parking position whenever work is interrupted and at the end of work. When the device is in the parking position, the cleaning rollers do not touch the floor.
Illustration L
- When parking the device, do not lean it against walls, doors or other objects; instead, bring the device into the parking position.
Illustration M
Starting work
ATTENTION
Uncontrolled motion
Damage to the device and material damage
The cleaning rollers start rotating as soon as the device is switched on.
Hold the handle tight to prevent the device from moving away independently.
ATTENTION
Fresh water tank or waste water tank not installed Material damage
Before starting cleaning work, ensure that the fresh water tank is filled with water and the waste water tank is fitted in the device.
- Remove the cleaning rollers from the device (see chapter Cleaning the cleaning roller).
- Moisten the cleaning rollers with fresh water.
- Install the cleaning rollers.
- Press the ON/OFF switch.
Illustration N
The device switches on.
- Activate the boost function to clean stubborn dirt (see chapter General notes on operation).
Emptying the waste water tank
- Empty the waste water tank as soon as the fresh water tank is empty, or the device no longer absorbs moisture, and water remains on the floor.
- Press the ON/OFF switch.
Illustration L
The device switches off.
- Bring the device into the parking position (see chapter General notes on operation).
- Disengage the two locking flaps on the device.
Illustration O
The waste water tank releases from the device.
- Lift the device and set it aside.
- To transport it to the emptying point, do not hold the waste water tank by the lid, but with both hands on the side of the drip tray. Keep the waste water tank level, otherwise waste water can escape.
- Empty the waste water tank.
Illustration P
In the case of stubborn dirt, rinse out the waste water tank with tap water (see chapter Cleaning the waste water tank).
- Clean the sweep bins (see chapter Cleaning the sweep bins).
- Insert the waste water tank into the device in reverse order.
Interrupting operation
ATTENTION
Risk of damage due to moisture and detergents as well as the device tipping over
Risk of material damage on sensitive floors and on the cleaning rollers due to prolonged exposure to moisture and detergents.
Risk of material damage if the device falls over.
Always move the device to the parking position when you take a break from work and after work.
Do not lean the device against walls, doors or other objects when setting it down.
- Press the ON/OFF switch.
Illustration L
The device switches off.
- Bring the device into the parking position (see chapter General notes on operation).
Rinsing the cleaning rollers
The rinsing function can be used for intermediate cleaning of the cleaning rollers in case of severe dirt accumulation.
Note
At the end of work and before storing the device, the cleaning rollers must be removed and cleaned under running water or in the washing machine (see chapter Cleaning the cleaning roller). The rinsing function does not replace final basic cleaning.
- Press the ON/OFF switch.
Illustration L
The device switches off.
- Bring the device into the parking position (see chapter General notes on operation).
- Check the filling level in the fresh water tank, it must be at least 50%.
If necessary, fill the fresh water tank accordingly (see chapter Filling the fresh water tank).
- Press and hold the Boost function button.
Illustration Q
- Press and hold the ON/OFF switch. After approx. 3 s, the rinsing function is activated, the cleaning rollers rotate and are rinsed. The ON/OFF switch flashes.
- Release the Boost function button and the ON/OFF switch.
- The device switches off automatically after approx. 2 minutes. The rinsing function can be ended at any time by pressing the ON/OFF switch.
- Empty the waste water tank (see chapter Emptying the waste water tank).
- Check the filling level in the fresh water tank, if necessary fill the fresh water tank accordingly (see chapter Filling the fresh water tank).
Ending operation
- Press the ON/OFF switch.
Illustration L
The device switches off.
- Bring the device into the parking position (see chapter General notes on operation).
- Press the battery pack unlocking button, and pull the battery pack out of the battery mount. Illustration R
- Charge the battery pack. Also charge partly discharged battery packs after use.
ATTENTION
Adhering dirt deposits
Adhering dirt deposits can damage the device in the long term. It is recommended to clean the device completely after each application. 5. Clean the device (see chapter Cleaning the device).
Storing the device
ATTENTION
Risk of damage and odour development from liquids and damp dirt
Liquids and damp dirt in the device can lead to bacterial accumulation and odour development when not in use or in storage. Damp dirt can dry up in the device and on the cleaning rollers, and impair the cleaning performance of the device. Empty the fresh water tank and waste water tank at the end of work and before storing the device. Clean the waste water tank, the sweep bins and the cleaning rollers. Allow the clean cleaning rollers to dry in the air, e.g. mounted on the device on standing vertically. Do not place wet cleaning rollers on moisture-sensitive surfaces, in closed containers or cupboards. 1. Clean the device (see chapter Cleaning the device). 2. Clean the waste water tank (see chapter Cleaning the waste water tank). 3. Clean the sweep bins (see chapter Cleaning the sweep bins). 4. Clean the cleaning rollers (see chapter Cleaning the cleaning roller). 5. Charge the battery pack (see operating instructions for the battery pack and charger). 6. Bring the device into the parking position (see chapter General notes on operation) and store in a dry interior.
Transport
CAUTION
Failure to observe the weight
Risk of injury and damage
Be aware of the weight of the device during transportation.
- To carry the device, reach into the handle bowl under the battery mount. Illustration S
- When transporting the device in vehicles, secure it to prevent it from slipping or overturning in accordance with the respectively applicable guidelines.
Storage
CAUTION
Failure to observe the weight
Risk of injury and damage
Be aware of the weight of the device during storage.
The device may only be stored indoors.
- Press the battery pack unlocking button, and pull the battery pack out of the battery mount to avoid discharging the battery pack.
Illustration R
Cleaning the device
Cleaning the device
ATTENTION
Risk of damage and odour development from liquids and damp dirt
Liquids and damp dirt in the device can lead to bacterial accumulation and odour development when not in use or in storage.
Damp dirt can dry up in the device and on the cleaning rollers, and impair the cleaning performance of the device.
Empty the fresh water tank and waste water tank at the end of work and before storing the device.
Clean the waste water tank, the sweep bins and the cleaning rollers.
Allow the clean cleaning rollers to dry in the air, e.g. mounted on the device on standing vertically. Do not place wet cleaning rollers on moisture-sensitive surfaces, in closed containers or cupboards.
- Press the ON/OFF switch.
Illustration L
The device switches off.
- Bring the device into the parking position (see chapter General notes on operation).
- Wipe off dirt and detergent residues on the housing with a damp cloth.
- Remove the fresh water tank, empty it and put it back in the device (see chapter Filling the fresh water tank).
Cleaning the waste water tank
ATTENTION
Adhering dirt deposits
Adhering dirt deposits can damage the device in the long term.
It is recommended to clean the device after each application.
Clean the waste water tank regularly.
- Press the ON/OFF switch.
Illustration L
The device switches off.
- Bring the device into the parking position (see chapter General notes on operation).
- Empty the waste water tank (see chapter Emptying the waste water tank).
- Pull the lid handle and remove the lid.
Illustration T
- Clean the waste water bowl and the lid with tap water.
Illustration U
- Allow the waste water bowl and the lid to dry or dry them with a lint-free cloth.
- Assemble the waste water tank in reverse order and insert it into the device.
Cleaning the sweep bins
ATTENTION
Adhering dirt deposits
Adhering dirt deposits can damage the device in the long term.
It is recommended to clean the device after each application.
Clean the sweep bins regularly.
- Press the ON/OFF switch.
Illustration L
The device switches off.
- Bring the device into the parking position (see chapter General notes on operation).
- Remove the waste water tank (see chapter Emptying the waste water tank).
- Remove the sweep bins.
a. Disengage the sweep bins to the side and swing them forward. b. Remove the sweep bins to the side.
Illustration V
- Clean both sweep bins under running water. Illustration W
- Remove the cleaning brush from the cover of the waste water tank, and remove any dirt stuck in the combs (shown with a frame).
- Install the two sweep bins in the reverse order.
Cleaning the cleaning roller
ATTENTION
Detergent residues in the cleaning rollers
Foaming
Wash the cleaning rollers under running water or wash the cleaning rollers in the washing machine each time after use.
ATTENTION
Damage caused by washing the cleaning rollers with fabric softener or using a tumble dryer
Damage to the microfibres. Do not use fabric softener when washing the cleaning rollers in the washing machine. Do not dry the cleaning rollers in a clothes dryer. Do not bleach or iron the cleaning rollers.
- Press the ON/OFF switch. Illustration L. The device switches off.
- Bring the device into the parking position (see chapter General notes on operation).
- Reach into the recessed grips on the side of the cleaning rollers and unscrew the cleaning rollers. Illustration X.
- Clean the cleaning rollers under running water or wash them in the washing machine at max. 60°C. Illustration Y.
- Clean the roller drives with a moist cloth.
- Turn the cleaning rollers on the roller drives. Pay attention to the colour assignment of the inside of the roller and the roller drive (green to green and blue to blue).
Illustration Z.
- Allow the rollers to dry mounted on the device or standing vertically.
Cleaning the water distribution strips
ATTENTION
Adhering dirt deposits
Adhering dirt deposits can damage the device in the long term. It is recommended to clean the device after each application. Clean the water distribution strips regularly.
- Press the ON/OFF switch.
Illustration L
The device switches off.
- Bring the device into the parking position (see chapter General notes on operation).
- Remove the waste water tank (see chapter Emptying the waste water tank).
- Remove the cleaning rollers (see chapter Cleaning the cleaning roller).
- Remove the covers on the water distribution strips. Illustration AA
Installation information
Note the side markings on the covers and on the device (L to L and R to R). 6. Clean the covers under running water. 7. Clean both water distribution strips (shown with a frame) with a damp cloth.
Illustration AB
- Check the fresh water inlet openings (arrows) for contamination; if necessary, remove stubborn dirt with the cleaning brush.
- Assemble in the reverse order.
Troubleshooting guide
Malfunctions often have simple causes that you can remedy yourself using the following overview. When in doubt, or in the case of malfunctions not mentioned here, please contact your authorised Customer Service.
The cleaning rollers do not turn and the warning light lights up
The safety switch-off of the drive motor has triggered, e.g. B. by excessive pressure on the cleaning rollers or by driving against a wall or corner.
- Press the ON/OFF switch twice.
Only move the device back and forth when cleaning, do not exert any pressure on the device.
The cleaning rollers are blocked.
- Check whether an object is jammed on the cleaning rollers. Remove the jammed object.
- Check whether dirt has accumulated in the sweep bins and remove it (see chapter Cleaning the sweep bins).
- Check that the sweep bins are fitted correctly. For this, remove the sweep bins and then fit them back in place.
The device cannot be switched on
The battery pack is discharged.
Take the battery pack out of the battery mount and charge it (see chapter Ending operation). - Push the charged battery pack into the battery mount until it audibly clicks into place (see chapter Inserting the battery pack).
The battery pack is not locked into the battery mount.
- Push the battery pack into the battery mount until it audibly clicks into place (see chapter Inserting the battery pack).
The device does not absorb dirt
There is no water in the fresh water tank.
- Fill water into the fresh water tank (see chapter Filling the fresh water tank). The fresh water tank is not sitting properly in the device.
- Insert the fresh water tank so that it is firmly seated in the device.
The waste water tank is missing or not sitting properly in the device.
- Check whether the cover is correctly mounted on the waste water bowl (see chapter Cleaning the waste water tank).
- Insert the waste water tank into the device and fasten it correctly.
The sweep bins are missing or are not sitting correctly in the waste water tank. - Insert the sweep bins correctly into the waste water tank (see chapter Cleaning the sweep bins).
The cleaning rollers are missing or are not sitting correctly in the device.
- Insert the cleaning rollers or screw them correctly onto the roller drives (see chapter Cleaning the cleaning roller). The cleaning rollers are dirty or worn out.
- Clean the cleaning rollers or replace them. The water distribution strips are dirty.
- Clean the water distribution strips (see chapter Cleaning the water distribution strips).
The cleaning rollers are too dry
The cleaning rollers are not being sufficiently moistened.
- Moisten the cleaning rollers by activating the Boost function (see chapter General notes on operation). The fresh water filter is dirty.
- Clean the fresh water filter. a Remove the fresh water tank (see chapter Filling the fresh water tank).
Illustration AC
b Remove the fresh water filter.
c Clean the fresh water filter under running water.
Assemble in the reverse order.
Unsatisfactory cleaning result
The cleaning rollers were not washed before initial use.
- Wash the cleaning rollers at 60°C in the washing machine (see chapter Cleaning the cleaning roller). The cleaning rollers are dirty. Clean the cleaning rollers.
The cleaning rollers are not being sufficiently moistened. - Moisten the cleaning rollers by activating the Boost function (see chapter Starting work). The water distribution strips are dirty. - Clean the water distribution strips (see chapter Cleaning the water distribution strips). Incorrect detergent or incorrect dosage was used. - Use only the specified KÄRCHER detergent and be sure to use the correct dosage.
Foreign detergents are present on the floor.
- Thoroughly remove all detergent residues from the cleaning rollers using water.
- Clean the floor several times using the device and clean cleaning rollers, without using detergent. This removes all detergent residues from the floor.
The water absorption is not optimal
The sweep bins are not sitting correctly in the device.
- Insert the sweep bins correctly into the device (see chapter Cleaning the sweep bins). The cleaning rollers are worn out.
- Replace the cleaning rollers (see chapter Cleaning the cleaning roller).
The device is losing waste water
The waste water tank is full. - Empty the waste water tank (see chapter Emptying the waste water tank). The waste water tank is not sitting properly in the device. - Insert the waste water tank correctly into the device (see chapter Emptying the waste water tank). The sweep bins are not sitting correctly in the device. - Insert the sweep bins correctly into the device (see chapter Cleaning the sweep bins). The waste water tank is damaged. - Contact the authorised Customer Service.
Warranty
The warranty conditions issued by our relevant sales company apply in all countries. We shall remedy possible malfunctions on your appliance within the warranty period free of cost, provided that a material or manufacturing defect is the cause. In a warranty case, please contact your dealer (with the purchase receipt) or the next authorised customer service site. (See overleaf for the address)
Accessories and spare parts
Only use original accessories and original spare parts. They ensure that the appliance will run fault-free and safely.
Information on accessories and spare parts can be found at www.kaercher.com.
Spare parts list
Only use KÄRCHER original battery packs, not non-rechargeable batteries.
| Description Order number | |
| Roller set, standard, grey/blue 4.030-088.0 | |
| Roller set, hard, grey/green 4.030-126.0 | |
| CA 50 C, Floor Pro Professional (1.0 I) | 6.296-053.0 |
| Dosing head 6.393-185.0 | |
| Battery pack Battery Power 18/25 DW | |
| Battery pack Battery Power 18/50 DW | |
| Battery pack Battery Power+ 18/30 DW | |
| Quick charger Battery Power 18/25 2.445-032.0 | |
| Quick charger Battery Power+ 18/60 2.445-044.0 | |
| Universal charger Battery Power+ 18-36/60 | 2.445-054.0 |
Declaration of Conformity
EU Declaration of Conformity
We hereby declare that the machine described below complies with the relevant basic safety and health requirements in the EU Directives, both in its basic design and construction as well as in the version placed in circulation by us. This declaration is invalidated by any changes made to the machine that are not approved by us.
Product: Floor cleaner
Type:1.783-xxx
Currently applicable EU Directives
2006/42/EC (+2009/127/EC)
2014/30/EU
2011/65/EU
Harmonised standards used
EN 60335-1
EN 60335-2-72
EN 62233: 2008
EN 55014-1:2017 + A11:2020
EN 55014-2: 2015
EN IEC 63000:2018
The signatories act on behalf of and with the authority of the company management.
H. Jenner
Chairman of the Board of Management
S. Reiser
Director Regulatory Affairs & Certification
Documentation supervisor:
S. Reiser
Alfred Kärcher SE & Co. KG
Alfred-Karcher-Str. 28 - 40
71364 Winnenden (Germany)
Ph.: +49 7195 14-0
Fax: +49 7195 14-2212
Winnenden, 2021/04/01
Declaration of Conformity (UK)
We hereby declare that the product described below complies with the relevant provisions of the following UK Regulations, both in its basic design and construction as well as in the version put into circulation by us. This declaration shall cease to be valid if the product is modified without our prior approval.
Product: Floor cleaner
Type: 1.783-xxx
Currently applicable UK Regulations
S.I. 2008/1597 (as amended)
S.I. 2016/1091 (as amended)
S.I. 2012/3032 (as amended)
Designated standards used
EN 60335-1
EN 60335-2-72
EN 62233: 2008
EN 55014-1:2017 + A11:2020
EN 55014-2: 2015
EN IEC 63000:2018
The signatories act on behalf of and with the authority of the company management.
H. Jenner
Chairman of the Board of Management
S. Reiser
Director Regulatory Affairs & Certification
Documentation supervisor:
S. Reiser
Alfred Kärcher SE & Co. KG
Alfred-Karcher-Str. 28 - 40
71364 Winnenden (Germany)
Ph.: +49 7195 14-0
Fax: +49 7195 14-2212
Winnenden, 2021/04/01
Technical data
BR 30/1
C Bp
Electrical connection
Nominal voltage V 18 DC
Nominal power W 70
Protection class III

Degree of protection IPX4
Device performance data
Roller rotations per minute at rpm 500 cleaning level 1
Roller rotations per minute with rpm 650
Boost function
Operating time when battery is fully charged min 45
Filling quantity
Fresh water tank capacity ml 1000
Waste water tank capacity ml 700
Dimensions and weights
Weight (without accessories and cleaning fluids) kg 6.1
Length mm 340
Width mm 305
Height mm 1200
Determined values in acc. with EN 60335-2-72
Hand-arm vibration value m/s2 0.4
Uncertainty K m/s2 0.2
Sound pressure level LpA dB(A) 55
Uncertainty KpA dB(A) 2
Subject to technical modifications.
Content
General remarks. 21
H. Jenner, Chairman of the Board of Management
S. Reiser, Director Regulatory Affairs & Certification
Responsible for documentation:
S. Reiser
Alfred Kärcher SE & Co. KG
Alfred-Karcher-Str. 28-40
71364 Winnenden (Germany)
Tel.: +49 7195 14-0
Fax: +49 7195 14-2212
Winnenden, 01/04/2021
Technical specifications
H. Jenner, Chairman of the Board of Management
S. Reiser, Director Regulatory Affairs & Certification
71364 Winnenden (Germany)
Tel.: +49 7195 14-0
Fax: +49 7195 14-2212
Winnenden, 01/04/2021
Technical data
BR 30/1
C Bp
Chairman of the Board of Management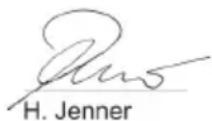
S. Reiser Director Regulatory Affairs & Certification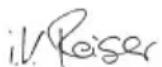
71364 Winnenden (Germany)
Tel.: +49 7195 14-0
Fax: +49 7195 14-2212
Winnenden, 2021/04/01
Technical data
BR 30/1
C Bp
2006/42/EC (+2009/127/EC)
2014/30/EU
2011/65/EU
H.Jenner Chairman of the Board of Management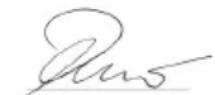
S. Reiser Director Regulatory Affairs & Certification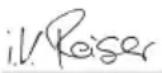
Documentation responsible:
S. Reiser
Alfred Kärcher SE & Co. KG
Alfred-Karcher-Str.28-40
71364 Winnenden (Germany)
Tel.: +49 7195 14-0
Fax: +49 7195 14-2212
Winnenden, 01/04/2021
Technical data
BR 30/1
C Bp
Electrical connection
Rated voltage V 18 DC
Rated power W 70
2006/42/EC (+2009/127/EC)
2014/30/EU
2011/65/EU
Chairman of the Board of Management
S. Reiser
Director Regulatory Affairs & Certification
Winnenden, 01/04/2021
Technical data
Contents
www.kaercher.com/REACH
2006/42/EC (+2009/127/EC)
2014/30/EU
2011/65/EU
H. Jenner Chairman of the Board of Management
S. Reiser Director Regulatory Affairs & Certification
71364 Winnenden (Germany)
Tel.: +49 7195 14-0
Fax: +49 7195 14-2212
Winnenden, 2021/04/01
Technical data
BR 30/1 C Bp
Electrical connection
Nominal voltage V 18 DC
Nominal power W 70
Protection class III

2006/42/EC (+2009/127/EC)
2014/30/EU
2011/65/EU
Harmonised standards applied
EN 60335-1
EN 60335-2-72
EN 62233: 2008
EN 55014-1:2017 + A11:2020
EN 55014-2: 2015
EN IEC 63000:2018
H. Jenner Chairman of the Board of Management
S. Reiser Director Regulatory Affairs & Certification
71364 Winnenden (Germany)
Tel.: +49 7195 14-0
Winnenden, 2021/04/01
Technical data
BR 30/1 C Bp
Electrical connection
Nominal voltage V 18 DC
Nominal power W 70
Protection class III

Protection degree IPX4
Inserting the battery pack
- Slide the battery pack into the mount on the machine until it audibly clicks into place. Figure B
H.Jenner Chairman of the Board of Management
S. Reiser Director Regulatory Affairs & Certification
D-71364 Winnenden (Germany)
Phone: +49 7195 14-0
Fax: +49 7195 14-2212
Winnenden, 01.04.2021
Technical data
BR 30/1
C Bp
Electrical connection
Mains voltage V 18 DC
Power consumption W 70
Protection class III

Enclosure class IPX4
Machine performance data
Brush speed at cleaning level r/min 500
Brush speed at boost function r/min 650
Operating time with fully charged battery min 45
Filling quantity
Director Regulatory Affairs & Certification
71364 Winnenden (Germany)
Phone: +49 7195 14-0
CAUTION
Check the filters
Before using the appliance and after cleaning, check the filters for damage.
Hold the filter so that the appliance does not move on its own.
CAUTION
Without the clean and dirty water tanks
CLEANING
Before cleaning the appliance, check that the clean water tank is full of water and the dirty water tank is correctly attached.
- Remove the clean water tank from the appliance (see chapter Cleaning the clean water tank).
- Find the clean water tank and fill it with water.
- Attach the clean water tank.
- Press the ON/OFF switch.
Figure
The appliance is switched on.
- Switch on the appliance to set the cleaning intervals (see Chapter General information on operation).
Emptying the water tank
Remove the fresh water tank, empty it, or remove the dirty water tank if the appliance no longer absorbs moisture and water remains in the tank. 1. Press the ON/OFF switch.
Figure L
The appliance is switched off.
H.Jenner Chairman of the Board of Management
S. Reiser Director Regulatory Affairs & Certification
Technical documentation:
S. Reiser
Alfred Kärcher SE & Co. KG
Alfred-Karcher-Str. 28 - 40
71364 Winnenden (Germany)
Tel.: +49 7195 14-0
Fax: +49 7195 14-2212
Winnenden, 2021/04/01
Technical data
BR 30/1
C Bp
Electrical connection
| Övopoaatiknić táön V | 1 | 8 | D |
| Övopoaatiknić iαχύς W | 7 | 0 | |
| Katzyopia προστασίας III |
Protection type IPX4
Power supply type
2006/42/EC (+2009/127/EC)
2014/30/EU
2011/65/EU
Chairman of the Board of Management
S. Reiser
Director Regulatory Affairs & Certification
Winnenden, 2021/04/01
Technical information
BR 30/1 C Bp
Electrical connection
Nominal voltage V 18 DC
Nominal power W 70
Protection class

III
Protection type IPX4
- Open the cap of the round bottle.
Figure E
- Screw the dosing head onto the round bottle.
7. Squeeze the round bottle in the center until the required amount of cleaning agent flows into the dosing head.
Figure F
Pay attention to the following:
a dilution of the cleaning agent according to the ratio of the cleaning agent mixture and water;
b the corresponding scale on the dosing head;
c tank capacity.
- Open the dosing head cover.
- Pour the cleaning agent into the tank.
Figure G
- Close the dosing head cover.
- Close the tank cover.
- Insert the tank into the water inlet device up to the stop.
Operation
General maintenance instructions
CAUTION
Moisture
Property damage when using on unsuitable floors
Before using the device, check the floor for suitability in an inconspicuous place.
The device is not intended for use by children or persons with reduced physical, sensory or mental capabilities, or lack of experience and knowledge, unless they have been given supervision or instruction concerning use of the appliance in a safe way and understand the hazards involved. Children shall not play with the appliance. Cleaning and user maintenance shall not be made by children without supervision.
WARNING
Risk of damage due to moisture and cleaning agents, as well as tipping over of the device.
Risk of damage to sensitive floors and delicate varnishes due to prolonged exposure to moisture and cleaning agents.
Risk of material damage when tipping over the device.
During breaks in work and after completion of work, always switch the device to the parking position.
Do not place the device against walls, doors, or other objects.
WARNING
Property damage
Damage to the device from sharp, large, or bulky objects.
Do not use or store the device on hard, coarse-grained surfaces or hard objects, as parts may get stuck under the device and damage the floor and the device's underside.
Before starting work or storing the device, remove sharp objects, stones, and pebbles from the floor.
To achieve optimal cleaning results, rinse the device with clean water at 60°C before first use. Work in a forward direction away from the door to avoid leaving streaks on the freshly cleaned floor.
Figure H
Cleaning the floor is done by moving the device back and forth at the speed of the vacuum cleaner. - Activate the tube cleaning function in case of heavy soiling of the floor and press and hold the tube cleaning button. When the tube cleaning function is activated, the speed of the rollers and the amount of clean water increase. Slowly move the device over the floor without applying pressure to the device.
Figure I
- If the keys are blocked, for example, as a result of jamming, the device switches off.
The signal lamp lights up.
Eliminate the blockage.
To switch the device on again, press the ON/OFF switch twice.
Note
The first press clears the fault, the second press switches the device on.
If the ON/OFF switch is not pressed, the signal lamp goes out after 10 s. When switching on the device, press the ON/OFF switch once.
Figure J
When the capacity of the battery block is exhausted, the ON/OFF switch starts to flash.
Figure K
Press the ON/OFF switch.
The device switches off.
Remove the battery block from the device to charge it (see chapter End of work).
Note
Due to the risk of injury from deep discharge of the battery block, the device automatically switches off when the battery is deeply discharged.
Switch off the device and put it into park mode during every break in work and after finishing work. When the device is in park mode, the blades do not touch the floor.
Figure L
- Press the ON/OFF switch.
Figure L
The device switches off.
2. Move the device to the park position (see chapter 6, operating instructions). 3. Press the release button of the battery block and pull the battery block out of the holder.
Figure R
- Charge the battery block.
After use, charge the battery block even if it is only partially discharged.
WARNING
Charging time
The charging time can be up to 2 hours. We recommend charging the device after each use. 5. Clean the device (see chapter Cleaning the device).
Storing the device
WARNING
Moisture and odor may occur due to the proximity of the device to moisture sources.
Moisture and dampness in the device can lead to bacterial growth and odor when the device is not in use or is stored.
Damp dirt can dry on the device's cleaning rollers and impair the device's performance.
Drain the water from the dirty water tank and clean the dirty water tank after each use before storing the device.
Clean the dirt container, the large debris filter, and the cleaning rollers.
Allow the cleaned rollers to air dry - for example, installed on the device or in a vertical position. Do not place wet cleaning rollers on delicate surfaces, covered containers, or cabinets.
- Clean the device (see chapter Cleaning the device).
- Clean the dirty water tank (see chapter Cleaning the dirty water tank).
- Clean the large debris filter (see chapter Cleaning the large debris filter).
- Clean the cleaning rollers (see chapter Cleaning the cleaning rollers).
- Charge the battery pack (see instructions for the battery pack and charger).
- Switch the device to parking position (see chapter General maintenance instructions) and store it in a dry place.
Transport
CAUTION
Non-observance of weight
On a choisi de ne pas endommager tous les appareils pendant le transport.
- Appuyer sur l'interrupteur MARCHE/ARRÊT.
Figure L
L'APPAREIL S'ÉTEINT
2. Tourner le sélecteur (voir le chapitre Instructions générales d'entretien). 3. Retirer la saleté et les résidus de produit du boîtier avec un chiffon humide. 4. Remplir le réservoir d'eau propre, vider et réinsérer dans l'appareil (voir le chapitre Remplissage du réservoir d'eau propre).
Nettoyage du réservoir d'eau sale
ATTENTION
Risque de dommages
Le risque de dommages peut endommager l'appareil.
Il est recommandé de nettoyer l'appareil après chaque utilisation.
Nettoyer régulièrement le réservoir d'eau sale.
- Appuyer sur l'interrupteur MARCHE/ARRÊT.
Figure L
L'appareil s'éteint.
2. Tourner le sélecteur (voir le chapitre Instructions générales d'entretien). 3. Vider le réservoir d'eau sale (voir le chapitre Vidange du réservoir d'eau sale). 4. Saisir le couvercle par la poignée et retirer le couvercle. Figure T 5. Nettoyer le réservoir d'eau sale et le couvercle à l'eau claire.
6. Let the tank for dirty water and the lid dry or wipe them with a lint-free cloth. 7. Reassemble the tank for dirty water in the reverse order and install it back into the device.
Cleaning the bins for bulky waste
CAUTION
Risk of damage
Bulky waste can seriously damage the device.
It is recommended to clean the device after each use.
Regularly empty the bins for bulky waste.
- Press the ON/OFF switch.
Figure L
The device switches off.
2. Move the device to the parking position (see chapter General notes on servicing). 3. Remove the tank for dirty water (see chapter Emptying the tank for dirty water). 4. Remove the bins for bulky waste.
a Unlock the bins for bulky waste to the side and turn them. b Remove the bins for bulky waste in the lateral direction.
Figure V
- Rinse both bins for bulky waste under running water.
- N3Bnueb YnCTaIyU OIeTky I3 KpbIuKn 6aKa DnIg rpa3HO BOnbl N ydaIaNtB BCIO rpa3b, 3acTpRaBlyO Brpe6Hx (O6BeDeHb Ha n3OpaxKeHN).
- YctaHOBntb 6oa 6yHkepa dnn KpynHoro Mycopa B 6paTHOH NocJeDoBaTeJbHoCTn.
OuNCTKa YnCTaXn X BaJIncOB
BHIMAHHE
Ocmamku MOUezo cpedcmea Ha yucmaux eanukax
Hoo6pa30aHue
Mbmb yucmaue baniu kno npomouho eodoo nocne kaskdozo uocnbl3oahua unu cmupamb ux 6 cmupaabHO MaunHe.
BHIMAHHE
IopexdeHnpu cmupke yucmaux baukoec uonb3o8aHuem KOduuOhepa dna 6eBb unuecdmeue uonb3o8aHu cywnku
NoepexdeHue MUKPOBOJOKOH
He uonb3oabmb konduuohep dna 6enpa cmupke yucmaux banaKOB cmuapalbHOu Maunhe. He knacmb yucmaue banaKc cyuunky.
He ombeuaba u He aadumb yucmaue eanuku.
- Haxatb nepekIIOUaTeJI BKJI./BblKJI.
PncyHok L
2. Move the parking brake lever to the set position (see section 6, service instructions). 3. Take the adjusting handles on the side of the brake rollers and turn the rollers.
Figure X
4. Wash the rollers with water and dry them in a washing machine at a temperature not exceeding 60°C. Figure Y 5. Wipe the roller drives with a damp cloth. 6. Install the rollers on the drives. Pay attention to the light identification of the roller and drive parts (green to green, blue to blue). Figure Z 7. Install the roller device to allow the rollers to dry in a vertical position.
Cleaning the water distribution plates
WARNING
Figure 3
Figure 3 may damage the device.
It is recommended to clean the device after each use.
It is recommended to clean the water distribution plates.
- Press the ON/OFF switch.
Figure L
The device switches off.
2. Move the parking brake lever to the set position (see section 6, service instructions). 3. Remove the dirty water tank (see section Draining the dirty water tank). 4. Remove the cleaning rollers (see section Cleaning the cleaning rollers). 5. Remove the covers of the water distribution plates.
Figure AA
According to the manual
Pay attention to the side labels on the covers and on the device (L K L and R K R). 6. Fold the covers under the counter along. 7. Moisten both distribution strips (shown in the illustration) with a damp cloth. Figure 8. Turn the water supply openings (arrows) towards the dirty object, if necessary remove stubborn dirt with a cleaning brush. 9. Reassemble in reverse order.
Troubleshooting
Most malfunctions have simple causes, so they can be eliminated independently with the help of the following overview. In case of doubt or malfunctions not described here, contact an authorized service center.
Cleaning rollers do not rotate, the signal lamp lights up
The protective shutdown of the drive motor has triggered, for example due to excessive pressure on the cleaning rollers or impact against a wall or corner.
Press the ON/OFF switch twice. Move the device only forward and backward during cleaning, do not tilt the device.
Cleaning rollers are blocked.
- Check whether an object is stuck between the cleaning rollers. Remove the stuck object.
- Check whether dirt has accumulated in the coarse dirt containers and remove the dirt (see chapter Cleaning the coarse dirt containers).
- Make sure that the coarse dirt containers are installed correctly. To do this, remove the coarse dirt containers and insert them again.
The device does not switch on
The battery pack is discharged.
Remove the battery pack from the holder and charge it (see chapter End of work). Insert the charged battery pack into the holder until it clicks into place (see chapter Installing the battery pack).
The battery pack is not locked in the holder.
The battery block is in the holder for the doctor's chain (see the section on installing the battery block).
The device does not collect dirt.
There is no water in the clean water tank.
Fill the clean water tank with water (see the section on filling the clean water tank).
The clean water tank is installed in the device incorrectly.
Insert the clean water tank so that it is securely fixed in the device.
The dirty water tank is missing or installed incorrectly in the device.
- Check that the lid on the dirty water tank is installed correctly (see the section on cleaning the dirty water tank).
- Install the dirty water tank in the device and secure it correctly.
The coarse debris filters are missing or installed incorrectly in the dirty water tank.
- Install the coarse debris filters correctly in the dirty water tank (see the section on cleaning the coarse debris filters).
The cleaning rollers are missing or installed incorrectly in the device.
- Install the cleaning rollers and press them onto the shafts correctly (see the section on cleaning the cleaning rollers).
Clean or replace worn rollers.
Clean or replace worn rollers.
Water distribution plates are clogged.
Clean the water distribution plates. See the section on cleaning the water distribution plates.
Install the rollers dry.
Install the rollers sufficiently moistened.
Moisten the rollers by activating the turbo mode (see the chapter on general maintenance instructions).
The water filter is clogged.
Clean the water filter.
a. Remove the water filter (see the chapter on filling the water tank). b. Rinse the water filter under running water. c. Reassemble in reverse order.
Unsatisfactory cleaning results.
The rollers were not cleaned before first use.
- Place the rollers in the washing machine at a temperature of 60°C (see the chapter on cleaning the cleaning rollers). The rollers are clogged. Clean the rollers. The rollers are not sufficiently moistened. Moisten the rollers by activating the turbo mode (see the chapter on starting operation).
There are residues of cleaning agents on the floor.
Thoroughly clean the rollers of cleaning agent residues. Rinse the floor several times using the device with clean rollers without using cleaning agent. Residues of cleaning agent on the floor are removed.
The coarse waste bins are installed incorrectly in the appliance.
- Install the coarse waste bins correctly in the appliance (see chapter Cleaning the coarse waste bins).
The cleaning rollers are worn.
Replace the worn cleaning rollers (see chapter Cleaning the cleaning rollers).
The appliance is leaking dirty water.
The dirty water tank is full.
- Empty the dirty water tank (see chapter Emptying the dirty water tank). The dirty water tank is installed incorrectly in the appliance.
- Install the dirty water tank correctly in the appliance (see chapter Emptying the dirty water tank). The coarse waste bins are installed incorrectly in the appliance.
- Install the coarse waste bins correctly in the appliance (see chapter Cleaning the coarse waste bins).
The dirty water tank is damaged. - Contact an authorized customer service.
Warranty
In each country, the applicable warranty conditions are those established by our authorized distributor. We will repair any malfunctions of the appliance free of charge during the warranty period, provided that they are due to material or manufacturing defects. In the event of a claim during the warranty period, please contact the sales organization from which you purchased the product or the nearest authorized customer service center.
(Address indicated on the back)
The date of manufacture is shown on the rating plate embedded in the appliance.
Individual digits have the following meaning:
Example: 30190
3 year of manufacture 0 decade of manufacture 9 decade of manufacture 0 first digit of place of manufacture
Thus, in this example, code 30190 means manufacture 09/(2)013.
Chairman of the Board of Management
S. Reiser Director Regulatory Affairs & Certification
Person responsible for documentation: S. Reiser Alfred Karcher SE & Co. KG Alfred-Karcher-Str. 28-40 71364 Winnenden (Germany) Tel.: +49 7195 14-0 Fax: +49 7195 14-2212 Winnenden, 01.04.2021
Technical specifications
| ВR 30/1 C Bp | ||
| Злектуеске подкlioочице | ||
| Homonhalьhoe наразжения V | 1 | 8 |
| Homonhalьнай мошноctь W | 7 | 0 |
| Клас зашиты III | III | |
Degree of protection IPX4
Operating characteristics of the device
Chairman of the Board of Management
S. Reiser
Director Regulatory Affairs & Certification
Winnenden, 2021/04/01
Technical data
BR 30/1 C Bp
2006/42/EC (+2009/127/EC)
2014/30/EU
2011/65/EU
Applied harmonized standards
EN 60335-1
EN 60335-2-72
EN 62233: 2008
EN 55014-1:2017 + A11:2020
EN 55014-2: 2015
EN IEC 63000:2018
H.Jenner Chairman of the Board of Management
S. Reiser Director Regulatory Affairs & Certification
Authorized for documentation: S. Reiser
Alfred Kärcher SE & Co. KG
Alfred-Karcher-Str. 28-40
Winnenden, 2021/04/01
Technical data
BR 30/1
C Bp
2006/42/EC (+2009/127/EC)
2014/30/EU
2011/65/EU
H. Jenner Chairman of the Board of Management
S. Reiser Director Regulatory Affairs & Certification
Authorized person for documentation:
S. Reiser
Alfred Kärcher SE & Co. KG
Alfred-Karcher-Str. 28 - 40
Winnenden, 1. 4. 2021
Technical data
BR 30/1
C Bp
Electrical connection
2006/42/EC (+2009/127/EC)
2014/30/EU
2011/65/EU
H. Jenner Chairman of the Board of Management
S. Reiser Director Regulatory Affairs & Certification
Documentation administrator:
S. Reiser
Alfred Kärcher SE & Co. KG
Alfred-Kärcher-Str. 28-40
71364 Winnenden (Germany)
Tel.: +49 7195 14-0
Relevant EU Directive
2006/42/EC (+2009 / 127 / EC)
2014/30/EU
2011/65/EU
Harmonized standards applied
EN 60335-1
EN 60335-2-72
EN 62233: 2008
EN 55014-1:2017 + A11:2020
EN 55014-2: 2015
EN IEC 63000:2018
The signatories are acting on behalf of and with the authorization of
Chairman of the Board of Management
S. Reiser
Director Regulatory Affairs & Certification
Responsible for the documentation:
S. Reiser
Alfred Kärcher SE & Co. KG
Alfred-Karcher-Str. 28-40
71364 Winnenden (Germany)
Tel.: +49 7195 14-0
Fax: +49 7195 14-2212
Winnenden, 2021/04/01
Technical data
2006/42/EC (+2009/127/EC)
2014/30/EU
2011/65/EU
H. Jenner Chairman of the Board of Management
S. Reiser Director Regulatory Affairs & Certification
71364 Winnenden (Germany)
Tel.: +49 7195 14-0
Fax: +49 7195 14-2212
Winnenden, 01.04.2021
Technical data
BR 30/1
C Bp
Electrical connection
Rated voltage V 18 DC
Rated power W 70
Protection class III

Degree of protection IPX4
2006/42/EZ (+2009/127/EZ)
2014/30/EU
2011/65/EU
Applied harmonized standards
EN 60335-1
EN 60335-2-72
EN 62233: 2008
EN 55014-1:2017 + A11:2020
EN 55014-2: 2015
EN IEC 63000:2018
H. Jenner Chairman of the Board of Management
S. Reiser Director Regulatory Affairs & Certification
Winnenden, 01.04.2021.
Technical data
2006/42/EZ (+2009/127/EZ)
2014/30/EU
2011/65/EU
Applied harmonized standards
EN 60335-1
EN 60335-2-72
EN 62233: 2008
EN 55014-1:2017 + A11:2020
EN 55014-2: 2015
EN IEC 63000:2018
The signatories are acting on behalf of and with the authority of the Board of Management.
Person authorized for Documentation:
S. Reiser
Alfred Karcher SE & Co. KG
Alfred-Karcher-Str. 28 - 40
71364 Winnenden (Germany)
Tel.: +49 7195 14-0
Winnenden, 2021/04/01
Technical data
BR 30/1
C Bp
Safety instructions 171
Intended use 172
Complete delivery 172
Description of the device 173
Charging the battery
- Charge the battery (see the operating instructions, the safety instructions for the battery and the charging device).
Inserting the battery
- Push the battery into the compartment of the device until it locks with a click. Figure B
Cleaning agents and care products
CAUTION
Use of unsuitable cleaning and care products
The use of unsuitable cleaning and care products can damage the device and lead to loss of warranty.
Use only KARCHER cleaning products.
Pay attention to the correct dosage. Dosing
Instructions for use of cleaning and care products for KARCHER.
- When dosing cleaning and care products, observe the manufacturer's instructions for quantities. To avoid foam, fill the fresh water tank first with water, then add cleaning and care products. To avoid excessive foaming, leave space for the cleaning and care products when filling with water.
Filling the fresh water tank
- Grasp the fresh water tank by the recessed grips on the top and pull it upwards. Figure C
- Open the cap of the tank. Figure D
- Fill the fresh water tank with fresh water from the water supply (max. 40°C) up to the maximum marking MAX. If using cleaning agents, add the appropriate amount of fresh water. 4. If necessary, add KARCHER cleaning and care product to the fresh water tank.
CAUTION
Incorrect or excessive dosing of cleaning agents or care products
can lead to poor cleaning results.
Follow the recommended dosing of cleaning agents and care products.
Note
For optimal cleaning and care results, it is recommended to use only KARCHER products, as well as the dosing cap. 5. Turn the cap of the cylindrical bottle. Figure E 6. Screw the dosing head onto the cylindrical bottle. 7. Press the cylindrical bottle into the middle until the dosing head releases the required amount of cleaning agent.
Figure F
When doing this, observe:
the prescribed manufacturer's cleaning agent for the mixing ratio of cleaning agent and water in the corresponding dosing head with the capacity of the tank.
- Open the tap of the dosing head.
- Then rinse the device with the reserve water.
Figure G
- Close the tap of the dosing head.
- Close the tap of the reserve water.
- Place the reserve water container in the device until it is fixed.
Operation
Maintenance instructions
WARNING
Moisture
Material damage due to contaminated water. Before using the device, check the water for suitability for the intended use. Do not use contaminated water for rinsing, such as from a hose. Unprotected water pipes, or as a hose, can allow dirt to enter and damage the water.
WARNING
Risk of injury from cleaning and rinsing agents, and from improper handling of the device.
Risk of material damage to the drinking water pipes and to the rinsing agents due to the prolonged effect of cleaning and rinsing agents.
Risk of material damage when performing maintenance on the device.
Place the device on a flat surface and connect the power cord to the socket for parking.
To park the device, do not place it against walls, doors, or other objects.
WARNING
Material damage
Material damage to the device from sharp, pointed, or sharp-edged objects.
Do not expose or store the device on hard surfaces or hard objects, as parts that could damage the device and the water tank may become clogged under the water tank.
Before starting work and before storing the device, remove objects from the floor such as e.g. small toys and cables.
For optimal cleaning results, use the cleaning rollers at 60°C. Work in the direction of the rotation, so that no shoe prints are left on the freshly cleaned floor. - The floor is cleaned by moving the device forward and backward at a speed similar to that of a vacuum cleaner. - Activate the Boost function for more serious dirt. For this, press the Boost button. When the Boost function is activated, the rotation of the rollers and the amount of cleaning water increase. Let the device glide smoothly over the floor without applying pressure. Figure I
If the cleaning rollers are blocked, e.g. by a cable, the device switches off. The indicator lamp lights up. Remove the blocking object. To switch the device on again, press the On/Off switch 2 times.
Note
When switching on, the device starts, when switching off again, it switches off.
If the On/Off switch is not pressed, the indicator lamp goes out after 10 s. To switch the device on, press the On/Off switch 1 time.
Figure J
If the rechargeable battery is low, the On/Off switch flashes.
Figure K
The switch is switched on/off. The device is switched off.
Remove the battery before any work on the device (see chapter "Maintenance").
Warning
To avoid accidental starting of the device, it must be switched off before any work on the device.
- During any pause in work and after work, switch off the device and place it in the parking position. When the device is in the parking position, make sure that the valve does not touch the floor.
Figure L
To move the device, do not lift it by the wall, but by the handles or other parts, and place it in the parking position.
Figure M
Maintenance
CAUTION
Uncontrolled movement
If the device and material are damaged or the device is switched off, make sure that the valve is closed. First check the valve so that the device does not move by itself.
CAUTION
Missing pressure reservoir or faulty valve
Material damage
Depending on the type of device, make sure that the drain valve for waste water and the drain valve for clean water are installed and adjusted.
- Clean the filters (see Chapter Cleaning the filters).
- Open the clean water inlet valve.
- Install the filters.
- Press the switch ON/OFF. The device turns on.
- For cleaning the dirt filter, activate the Boost function (see Chapter General instructions for maintenance).
Draining the clean water tank
- Draining the clean water tank: the drain valve for clean water is installed in the device and does not allow water to flow out, so the water remains inside.
- Press the switch ON/OFF. The device turns off.
- Place the device in the parking position (see Chapter General instructions for maintenance).
- Release the locking mechanism of the device. Figure O The clean water tank is separated from the device.
- Lift the device and leave it tilted.
- For transporting to the place of draining, do not carry the clean water tank by the handle, but with both hands on the sides. Carry the clean water tank in a horizontal position, otherwise clean water may leak. 6. Drain the clean water tank. Figure P For draining, empty the clean water tank through the drain hose (see Chapter Cleaning the clean water tank).
- Clean the frames (see Chapter Cleaning the frames).
- Place the clean water tank back into the device in reverse order.
Checking the work
WARNING
Danger of injury from working with the device and cleaning agents, and from improper handling of the device.
Danger from material damage to the floor surfaces and to the cleaning agents due to improper use of the device and cleaning agents.
Danger from material damage when handling the device improperly.
When working and after finishing work, always place the device in the parking position.
To park the device, do not lean it against walls, doors, or other objects.
- Switch off the device (ON/OFF).
Figure 1
It switches off automatically.
- Place the device in the parking position (see chapter General instructions for maintenance).
Rinsing the cleaning agents
With the rinsing function, the cleaning agents can be rinsed out in case of heavy soiling.
Note
Before starting work and before storing the device, the cleaning agents must be cleaned and rinsed under running water or in a container (see chapter Maintenance of the cleaning agents). The rinsing function does not replace the final basic cleaning.
- Press the ON/OFF button. Figure L: The device turns on.
- Place the device in the parking position (see chapter General maintenance instructions).
- Check the water level in the dirty water tank; it must be at least 50%. If necessary, fill the corresponding dirty water tank (see chapter Filling the dirty water tank).
- Press and hold the button for the drying function. 5. Press and hold the ON/OFF switch. After approx. 3 seconds, the drying function is activated, the brushes start to rotate. Release the ON/OFF switch.
- Release the button for the drying function and the ON/OFF switch.
- After approx. 2 minutes, the device turns off automatically. The drying function can be stopped at any time by pressing the ON/OFF switch.
- Check the water level in the dirty water tank (see chapter Draining the dirty water tank).
- Check the water level in the dirty water tank; if necessary, fill the corresponding dirty water tank (see chapter Filling the dirty water tank).
Switching off the appliance
- Press the ON/OFF button. Figure L: The device turns off.
- Place the device in the parking position (see chapter General maintenance instructions).
- Press the button to unlock the battery and remove the battery from the compartment. Figure R
- Charge the battery. After use, charge the battery and then store it separately.
ATTENTION
3. Clean the appliance (see chapter Cleaning the appliance). It is recommended to clean the appliance after each use. 5. Storage (see chapter Storing the appliance).
Storing the appliance
WARNING
Risk of injury and damage from microorganisms when handling the appliance and accessories.
The appliance and accessories, when not in use or when stored, may lead to a concentration of bacteria and microorganisms.
The accessories may dry out the appliance or damage the filters and impair
the effectiveness of the appliance's cleaning.
At the end of work and before storing the appliance, empty the clean water tank and the dirty water tank.
Clean the dirty water tank, rinse the filters and cleaning rollers.
Leave the clean cleaning rollers to air dry, e.g., mounted on the appliance or upright. Do not place wet cleaning rollers on sensitive surfaces, in closed containers, or similar.
1. Clean the appliance (see chapter Cleaning the appliance). 2. Clean the dirty water tank (see chapter Cleaning the dirty water tank). 3. Clean the filters (see chapter Cleaning the filters). 4. Clean the cleaning rollers (see chapter Cleaning the cleaning rollers). 5. Charge the battery (see chapter Operating the battery and the charging device). 6. Place the appliance in the parking position (see chapter Care instructions) and store it in a dry indoor room.
Transport
DANGER
Improper handling of the appliance
Risk of injury and damage when transporting the appliance. Handle the appliance carefully.
- 3a Да Hocnte ypeDA, ro XbaaIaTe 3a ДрьжkaTа NOd rHe3doTo Ha akymylnpaAaTa 6aTepyra. ΦИгура S
- When transporting in vehicles, ensure that the device is secured against slipping and overturning in accordance with the instructions.
Storage
DANGER: FLAMMABILITY
Improper handling
Risk of fire and injury. When storing, pay attention to the device's heat.
The device must be stored only indoors.
- To avoid damage to the battery, remove the battery from the device before storage. Figure R
Cleaning the device
Cleaning the device
WARNING
Risk of injury and contamination from liquids and damp cloth.
Liquids and damp cloth in the device, when not in use or stored, can lead to concentrations of bacteria and contaminants.
The damp cloth may dry in the device or on the cleaning pads and impair the effectiveness of the device's cleaning.
After finishing work and before storing the device, empty the clean water tank and the dirty water tank.
Remove the frame and install the brackets.
Leave the brackets to dry in the air, e.g., mounted on a wall or straightened. Do not place wet brackets on furniture, in closed containers, or on other surfaces.
- Press the ON/OFF button.
Figure L
The device turns off.
- Place the device in the parking position (see chapter General maintenance instructions). 3. Remove the detergent from the body with a damp cloth. 4. Remove the clean water reservoir, empty it, and put it back (see chapter Filling the clean water reservoir).
Do not tilt or turn the brackets.
- Press the ON/OFF button. Figure L The device turns off.
- Place the device in the parking position (see chapter General maintenance instructions).
- Hold the side handles of the brackets with one hand and turn them. Figure X 4. Clean the brackets under running water and wipe them with a cloth. Figure Y 5. Clean the filling mechanism of the brackets with a damp cloth.
- Turn the brackets onto the filling mechanism of the brackets. Make sure that the color of the inner side of the bracket matches the filling mechanism of the bracket (green to green and blue to blue). Figure Z
- Leave the brackets to dry, mounted on a wall or straightened.
Cleaning the distributors
Plates for the ward.
ATTENTION
Replace the water filter after a period of time.
Prepare the device to be cleaned after use.
Regularly clean the water distribution plates.
- Press the BKN./I3KJI. buttons.
Figure L
The device is switched off.
- Place the device in the parking position (see chapter Care and maintenance). 3. Remove the cold water reservoir (see chapter Removing the cold water reservoir). 4. Remove the filters (see chapter Cleaning the filters).
- Remove the water distribution plates.
Figure AA
Installation instructions
Place the hoses and the device according to the markings on the page (N to I, U to D).
6. Clean the water outlet nozzles. 7. Clean the water distribution plates (marked frame) with a damp cloth. Figure AB 8. Open the openings for the water inlet (arrows) for filling, if necessary remove the excess pressure with the cleaning brush. 9. Repeat in reverse order.
Help in case of damage
Many minor damages can be repaired by yourself following the instructions. If you are not skilled or the damages are not described here, contact the authorized service.
This may cause the device to switch off, e.g., when the pressure on the control valve is too high or when moving the control lever against a wall.
- Press the switch ON/OFF 2 times. When moving the lever only backwards, do not press on it.
Clean the control valve.
- Check whether an object is stuck in the control valve. Remove the object.
- Check whether the metal parts are dirty and clean them (see chapter Cleaning the metal parts).
- Check whether the metal parts are installed correctly. To do this, remove the metal parts and install them again.
The device cannot be switched on
The battery is empty
- Charge the battery in the charger (see chapter Operation of the charger).
- Insert the rechargeable battery into the charger until it clicks into place (see chapter Installing the rechargeable battery).
The battery is not fixed in the charger.
- Insert the rechargeable battery into the charger until it clicks into place (see chapter Installing the rechargeable battery).
The device does not spray water
The water tank for clean water has no water.
- Check the reserve tank for clean water (see chapter Filling the clean water tank). The reserve tank for clean water is not installed correctly in the device.
- Install the reserve tank for clean water so that it engages stably in the device.
The reserve tank for waste water is not installed correctly in the device.
- Check that all hoses are installed correctly for the waste water (see chapter Replacing the waste water tank).
- Install the waste water tank in the device and secure it correctly.
The metal frames of the lint filter are not installed correctly in the waste water tank.
- Install the metal frames correctly in the waste water tank (see chapter Replacing the metal frames). Check that the lint filter is not installed correctly in the device.
- Install and check the valves, respectively. Tighten and correctly close the mechanism of your valves (see chapter Checking the inlet valves).
Check that the valves are not clogged or worn. - Clean or replace the inlet valves. The water distribution parts are clogged. - Clean the water distribution parts (see chapter Cleaning the water distribution parts).
The inlet valves are dry.
Check that the valves are not sufficiently lubricated.
- Lubricate the inlet valve for this function with water (see chapter General maintenance instructions). The filter for clean water is clogged. - Clean the filter for clean water.
a Remove the clean water tank (see chapter Filling the clean water tank). b Remove the filter for clean water. c Rinse the filter for clean water under running water. d Reinstall in reverse order.
Unsatisfactory cleaning result.
Check that the valves were not cleaned before first use.
- Rinse the surfaces with water at 60°C (see chapter Cleaning on the cleaning page). Rinse the valves thoroughly.
- After cleaning, rinse the valves.
The valves are not sufficiently lubricated.
- Lubricate the valves with a suitable cleaning agent (see chapter Filling with water). The water distribution plates are rinsed.
- Clean the water distribution plates (see chapter Cleaning the water distribution plates).
Use only the correct cleaning agent with the correct dosage.
- Use only original KÄRCHER cleaning agents and observe the correct dosage.
There may be residues of cleaning agent on the floor.
- Clean the floor thoroughly with water to remove any cleaning agent residues.
- After using the device, clean the floor and parts of the device without using cleaning agent. Residues of cleaning agent on the floor are removed.
The device is not optimally adjusted.
The spray nozzles are not installed correctly.
- Install the spray nozzles correctly (see chapter Installing the spray nozzles). Rinse the valves thoroughly. Replace the valves (see chapter Replacing the valves).
Water hardness level
The fresh water tank is empty. - Fill the fresh water tank (see chapter Filling the fresh water tank). The fresh water tank is not installed correctly. - Install the fresh water tank correctly (see chapter Installing the fresh water tank).
The appliance was delivered correctly. - Place the correct frames for the drill (see the note on the metal frames). The hot water tank is damaged. Contact the authorized service for customer service.
Warranty
In every country, the warranty conditions are issued by our authorized distributor.
Accidental damage to your device will be repaired within the warranty period free of charge, if it is due to material or manufacturing defects. In case of warranty claims, contact your distributor or the nearest authorized service, presenting the cash receipt.
(Address, see last page)
Accessories and spare parts
Use only original accessories and original spare parts to ensure safe and trouble-free operation of the device.
Information about accessories and spare parts can be found at: www.kaercher.com.
Spare parts list
Use only original KARCHER batteries, do not use batteries that cannot be recharged.
| Овозашиени Кatableхени | Номер |
| Комплейт Валяни, стандартуни, сиво/cинbos | 4.030-088.0 |
| Комплейт Валяни, Тьрди, сиво/зелего | 4.030-126.0 |
| СА 50 C, Floor Pro Professional (1,0 l) 6.296-053.0 | |
| Дозераша пава 6.393-185.0 | |
| Актулaria засторя Battery Power 18/25 DW | |
| Актулaria засторя Battery Power 18/50 DW | |
| Актулaria засторя Battery Power+ 18/30 DW | |
| Зарадно устрийстwo за брто зарождаме Battery Power 18/25 | 2.445-032.0 |
| Зарадно устрийстwo за брто зарождаме Battery Power+ 18/60 | 2.445-044.0 |
| Унibusерсално за радно устрийстwo Battery Power+ 18-36/60 | 2.445-054.0 |
H. Jenner Chairman of the Board of Management
S. Reiser Director Regulatory Affairs & Certification
Assistant for documentation:
S. Reiser
Alfred Karcher SE & Co. KG
Alfred-Karcher-Str. 28 - 40
71364 Winnenden (Germany)
Tel.: +49 7195 14-0
Fax: +49 7195 14-2212
In Winnenden, 2021/04/01
Technical data
BR 30/1 C Bp
Electrical connection
Nominal voltage V 1 8
Nominal power W 7 0
Protection class III

Protection IPX4
Rated power
Rotations per minute at idle, rpm 5 0 0 HINBO at load 1
Rotations per minute at idle, rpm 6 5 0 Boost
Operating time min 45 at rated charge of the battery
Amount of filling
Reservoir volume for clean water ml 1000 water
Reservoir volume for dirty water ml 700 water
Dimensions
Weight (without accessories) kg 6.1 including accessories
Length mm 340 Width mm 305
Height mm 1200
Installed power according to EN 60335-2-72
Vibration emission value a_h - m/s2 0.4 rms
Uncertainty K m/s² 0.2
Sound pressure level LpA dB(A) 55
Uncertainty KpA dB(A) 2
Sound power level LwA dB(A) 71 Uncertainty KwA
Subject to technical changes.
Table of contents
General instructions 180
Environmental protection 180
Safety instructions 180
Intended use 181
Scope of delivery 181
Product: floor cleaner Type: 1.783-xxx
Chairman of the Board of Management
S. Reiser
Director Regulatory Affairs & Certification
Documentation officer:
S. Reiser
Alfred Kärcher SE & Co. KG
Alfred-Karcher-Str.28-40
71364 Winnenden (Germany)
Tel: +49 7195 14-0
Winnenden, 2021/04/01
Technical data
BR 30/1 C Bp
Electrical connection
| Nimipinge V 18 DC |
| Nimivöimsus W 70 |
| Kaitseklass III |
Protection class IPX4
Chairman of the Board of Management
S. Reiser
Director Regulatory Affairs & Certification
Documentation prepared by:
S. Reiser
Alfred Karcher SE & Co. KG
Alfred-Karcher-Str.28-40
71364 Winnenden (Germany)
Tel.: +49 7195 14-0
Fax: +49 7195 14-2212
Winnenden, 01.04.2021.
Technical data
BR 30/1 C Bp
Power connection
Nominal voltage V 18 DC
Nominal power W 70
H. Jenner Chairman of the Board of Management
S. Reiser Director Regulatory Affairs & Certification
Eknnnyatauia 204
Transportation 206
Storage 206
Troubleshooting 207
Warranty 208
Accessories and spare parts 208
Declaration of conformity with EU standards 209
Technical specifications 209
General instructions
Before first use, carefully read the original operating instructions for the device, battery pack, and charger. Follow them accordingly.
Keep the documents for general use or pass them to the next owner.
Failure to follow the operating instructions may lead to device damage and danger to the operator and other persons. - In case of transportation damage, immediately inform the dealer. During unpacking, check the device for completeness and integrity.
Environmental protection

Packaging materials are suitable for recycling. Dispose of packaging properly without harming the environment.

Electrical and electronic devices contain materials that are suitable for secondary processing, as well as components such as batteries and parts that, if
handled incorrectly or disposed of improperly, can pose a potential hazard to human health and the environment. However, these components are necessary for the proper operation of the device. Devices marked with this symbol are prohibited from being disposed of together with household waste.
Information on components (REACH)
Current information on components is available at: www.kaercher.com/REACH
Safety instructions
Before first use of the device, read and follow these safety instructions and the original operating instructions. Keep the original operating instructions for future use or for the next owner.
In addition to the instructions in these operating instructions, observe general safety and accident prevention regulations. The warning signs and labels on the device provide important instructions for safe operation.
Hazard levels
DANGER
Warning of an immediate danger that can lead to serious injury or death.
WARNING
Warning of a potentially dangerous situation that could lead to serious injury or death.
CAUTION
Warning of a potentially dangerous situation that could lead to minor injury.
ATTENTION
Avoid any dangerous situation that could cause material damage.
Battery block and charger
Please read the operating instructions and safety instructions supplied with the battery block and charger. These devices can be operated with 18 V Karcher Battery Power and 18 V Karcher Battery Power+ battery blocks listed in the spare parts list.
Safety
DANGER - Danger of suffocation.
Keep packaging film out of the reach of children.
WARNING - The device must only be used by persons who have read the instructions and confirmed their ability to operate the device or who have been instructed in its use.
Use the device only for its intended purpose. Take local conditions into account; when working with the device, pay attention to third parties, especially children. In hazardous areas (e.g., at filling stations), observe the relevant safety regulations. Operation in potentially explosive atmospheres is prohibited. Use of the device by children or persons unfamiliar with these instructions is prohibited. Local regulations may restrict the operator's age.
- The device must not be used by persons (including children) with reduced physical, sensory, or mental capabilities, or by persons lacking experience and/or knowledge. Do not allow children to play with the device. Ensure that children do not play with the device. Do not reach under the device with body parts (e.g., fingers, hair). Risk of injury from sharp objects (e.g., splinters). Keep hands away from the cleaning head.
CAUTION. Do not use the device if it has been dropped, shows visible damage, or is leaking. - Operate and store the device only as described and in accordance with the manual. - Do not leave the device unattended while it is running. - Before any cleaning or maintenance work, switch off the device and remove the battery block.
CAUTION - Use the device only indoors. - Do not damage the device.
Do not fill the fresh water tank with solvents, liquids containing solvents, or undiluted acids (e.g., cleaning agents, petrol, paint thinners, or acetone). Only switch on the device after the fresh water tank has been filled with clean and cold water. Do not vacuum up hot or large objects such as splinters, nails, or toy parts. Do not fill the fresh water tank with clean water only; also add cleaning agents for floor cleaning, vinegar, or similar agents. Also ensure that these agents do not get into the device.
Use the device only on hard floors with water-resistant coverings, such as tiled floors, linoleum, or PVC. - Do not use the device for cleaning carpets or carpeted floors. - Do not move the device over hot radiators or heating systems. The device cannot pick up water that has spilled over the edge of the radiator. Operation of the device at temperatures below 0°C is prohibited. Store the device only indoors.
Electrical components
DANGER: Do not immerse the device in water. It is forbidden to touch contacts with wet hands. WARNING: The device contains electrical components, so it cannot be washed under running water. CAUTION: Repair work must be carried out by authorized service centers.
The device is intended for household and similar use, for example, in hotels, schools, kitchens, factories, shops, and office premises, which are used in the work environment. Use the device strictly in accordance with the instructions in the operating manual.
- The device can only be used with cold and warm water, not with hot water.
- The device is not intended for use with hot water (e.g., in hot water storage tanks).
- The device is not intended for use in an explosive environment.
- The device or its parts must not be immersed in water or rinsed with water.
Before using the device, check the completeness. In case of missing parts or damage received during transportation, contact the trade organization that sold the device.
Figures see on the fold-out pages. Figure A
1 Signal lamp 2 Button for the tube 3 Switch ON/OFF 4 Handle 5 Button for unlocking the filter block 6 Fastening of the accumulator 7 Handle 8 Nameplate 9 Filter for clean water 10 Tank for clean water 11 Handle of the lid 12 Spray nozzle 13 Lid 14 Fixing valve 15 Container for dirty water 16 Tank for dirty water 17 Container for waste 18 Lock
19 Lid 20 Spray head 21 Spray nozzle 50 C (0.5 l round nozzle) 22 Spare rollers (replaceable) 23 *Accumulator block Battery Power 18/25 DW or Accumulator block Battery Power+ 18/30 DW 24 *Mains cable for the device with charging function 25 *Charging device Battery Power 18/25 or Charging device Battery Power+ 18/60 26 Spare rollers
*BR 30/1 C with Pack
Charging the accumulator block
- Charging the accumulator block (see operating instructions and safety instructions for the accumulator block and charging device).
Installing the accumulator block
- Install the battery block into the second battery block slot on the device and push it in until it clicks.
Figure B
Detergents and cleaning agents
CAUTION
Use of unsuitable detergents and cleaning agents
Using unsuitable detergents and cleaning agents can damage the device and lead to loss of warranty.
Use only KÄRCHER detergents. Pay attention to correct dosing.
Dosing
If cleaning is required, use KÄRCHER detergents or cleaning agents.
- Follow the manufacturer's instructions regarding the use and dosing of the detergent and cleaning agent.
- To avoid foam formation, first fill the tank with clean water, then add the detergent or cleaning agent.
- To avoid overfilling, do not fill the detergent or cleaning agent during filling with water.
Filling the tank with clean water
- Remove the clean water tank from the side of the device by pulling it out from the device.
Figure C
- Fill the detergent tank.
Figure D
- Fill the tank with clean water, clean water 3- from the tap (max. 40°C) up to the MAX mark. If it is necessary to use a cleaning agent, use correspondingly less clean water.
- If necessary, pour cleaning agent or KARCHER detergent into the tank for clean water.
CAUTION
Incorrect or insufficient dosing of the cleaning agent or detergent
may lead to unsatisfactory cleaning results.
Follow the recommended dosage of the cleaning agent and detergent.
Operation
Attach the KARCHER spray lance.
- Unscrew the cap from the round opening.
Figure E
- Screw the spray lance onto the round opening.
- Press the round opening down the center until the required amount of cleaning agent flows into the spray lance.
Figure F
Please note the following:
a) the product specification for the amount of the product when mixed with the required amount of clean water; b) in the appropriate scale for the dosing head; c) the capacity.
- Open the dosing head cover.
- Protect the device.
Figure G
- Close the dosing head cover.
- Close the tank cover.
- Insert the tank for clean water into the device for fixation.
Operation
General instructions for maintenance
Attention
Moisture
Check the device in case of using universal solutions.
Please check the device for damage before use. Do not touch the device with wet hands, for example, unprocessed cork and wood, as water may seep in and damage the device.
Risk of damage to the device and minor means, as well as parts of the moving device.
Risk of damage to the device and serious injuries due to the use of water and minor means.
Risk of damage to parts of the moving device.
Always install the device in a horizontal position before starting work or after finishing work.
Do not attach the device to walls, trees or other objects when using it.
Material damage
Do not place the device on sharp, large, or protruding objects.
Do not use or store the device on a hard surface or hard objects, as parts may get stuck under the bottom of the water tank and damage the device and the bottom of the water tank.
Before starting work and storing the device, remove from the device such objects as keys and coins.
To achieve optimal results, it is recommended to heat the rollers in hot water at a temperature of 60°C before first use. - Move the device in the direction of the arrows, so as not to block the air intake of the device.
The rollers are driven by moving the device back and forth with force, as in the case of using a vacuum cleaner. For strong cleaning, press and hold the function button. With the activated function, the number of roller revolutions and the amount of water increase. Move the device slowly, without pressing on the device.
Maniohok I
- If the device is blocked due to a false alarm, the indicator lamp lights up. Unblock the rollers. To turn off the device, press the ON/OFF switch.
Indicator
First press the ON/OFF switch to turn on the device.
If you do not press the ON/OFF switch, the indicator lamp will flash after 10 seconds. To turn off the device, press the ON/OFF switch once.
Figure J
When the battery pack capacity is almost exhausted, the ON/OFF switch starts to blink.
Figure K
Press the ON/OFF switch.
The device turns off.
Remove the battery pack from the device and charge it (see chapter on finishing work).
Indicator
To prevent the battery pack from being deeply discharged, the device automatically turns off before the battery pack is fully discharged.
- During each break after finishing work, turn off the device and set it to the parking position. When the device is in the parking position, the rollers do not touch the ground.
Maniohok L
Do not place the device near walls or objects that obstruct; install it in a horizontal position.
Figure M
Operation
ATTENTION
Uncontrolled movement
Damage to the device
During operation of the device, the handle may become hot.
Hold the handle firmly so that the device does not move on its own.
ATTENTION
If the tank or drum is not installed
Material damage
Before starting the device, make sure that the tank is filled with water and that the drum is installed in the device.
- Remove the rollers from the device (see chapter on removing rollers).
- Rinse the rollers with clean water. 3. Install the rollers.
- Press the ON/OFF switch.
Figure N
The device is switched off.
5. To disconnect the device from the water supply, follow the instructions in the chapter 'General instructions for maintenance'.
Emptying the dirty water tank
Empty the dirty water tank only when the clean water tank is empty or when the device no longer draws water and the water level is at the maximum. 1. Press the ON/OFF switch.
Figure L
The device switches off.
- Set the device to the parking position (see chapter 'General instructions for maintenance').
- Unlock the locking clamps on the device.
Figure O
The dirty water tank is removed from the device.
4. Tilt the device and set it aside. 5. When transporting the dirty water tank, do not hold it by the handle, but with both hands on the sides of the container. Keep the dirty water tank upright, otherwise dirty water may leak out. 6. Empty the dirty water tank.
Figure P
Rinse the dirty water tank with clean water (see chapter 'Cleaning the dirty water tank').
- Clean the container for clean water (see chapter 'Cleaning the containers for clean water').
- Install the unit in the reverse order.
Preventive maintenance
Attention
Risk of damage to the product and minor means, as well as parts of the device being moved.
Risk of damage to the product and major parts due to moving the product and minor means.
Risk of damage to parts of the device being moved.
Place the device in a horizontal position before or after work.
Do not attach the device to walls, doors, or other objects when using it.
- Press the ON/OFF switch.
Figure 1
The device turns off.
- Place the device in the working position (see general instructions for maintenance).
Washing the rollers
The washing of the rollers can be additionally described in case of severe contamination of the product.
Instructions
Before cleaning and storing the device, it is necessary to remove and drain the water tank to prevent the correct operation of the machine (see the section on cleaning these devices). The operation of the water tank is described.
Figure 1
- Press the ON/OFF switch. The switch lights up.
- Install the device in a parking position (see the general instructions for maintenance).
- Check the water tank fill level for clean water; it must be at least 50%. If necessary, fill the clean water tank with clean water (see the section on filling the clean water tank).
- Press and hold the turbo mode button. Figure Q
- Press and hold the ON/OFF switch. After about 3 seconds, the rinse function is activated, the main brushes rotate and are rinsed. The ON/OFF switch lights up.
- Release the turbo mode button and the ON/OFF switch.
- The device turns off automatically after about 2 hours. The rinse function can be ended at any time by pressing the ON/OFF switch.
- Empty the dirty water tank (see the section on emptying the dirty water tank).
- Check the fill level of the clean water tank. If necessary, fill the clean water tank with clean water (see the section on filling the clean water tank).
End of operation
- Press the ON/OFF switch.
Figure L
The switch lights up.
- Install the device in accordance with the provisions (see Chapter General Instructions for Maintenance).
- Press the release button of the battery block and pull the battery block out of the slot.
Figure R
- Charge the battery block.
A fully discharged battery block should be charged after use.
WARNING
Accessories
Accessories may damage the device. It is recommended to completely clean the device after each use. 5. Clean the device (see Chapter Cleaning the Device).
Storing the Device
WARNING
Risk of damage from acid and moisture
Acids and moisture in the device can lead to accumulation of acid and formation of acid, when the device is not used or is stored.
Moisture can dry in the device and on the cleaned surfaces and impair the effectiveness of cleaning.
Remove water from the tank with clean and fresh water after completion of work and before storing the device.
Cleaning agent for fresh water, containers for cleaning the tank.
Do not place the device on an inclined surface, for example, on a stand or in a vertical position. Do not place the device on a wet surface, in a closed room, or in water.
- Clean the device (see the chapter "Cleaning the device").
- Clean the tank for dirty water (see the chapter "Cleaning the tank for dirty water").
- Clean the containers for clean water (see the chapter "Cleaning the containers for clean water").
- Clean the oil seals (see the chapter "Cleaning the oil seals").
- Charge the battery unit (see the instructions for operating the battery unit and the charging device).
- Set the device to the working position (see the chapter "General instructions for maintenance") and store it in a dry room.
Transportation
CAUTION
Improper transportation
Risk of damage when transporting the device without proper packaging.
1. To carry the device, hold it by the handle of the battery unit. Figure 5. 2. During transportation in vehicles, secure the device in accordance with the norms to prevent its sliding and tipping over.
Storage
CAUTION
Improper storage
Before cleaning the device, disconnect it from the power supply. The device should be stored in a dry place.
- Press the battery compartment release button and pull the battery compartment out of the device to avoid damaging the battery compartment.
Figure A
Cleaning the device
Cleaning the device
WARNING
Risk of injury from acid and battery fluid
Acid and battery fluid in the device can lead to the accumulation of bacteria and the formation of acid, if the device is not used or stored.
Moisture must not enter the device and on the cleaning brushes and the effectiveness of cleaning.
Empty the water from the tank after each use and before cleaning the device with clean water.
Cleaning the brush, containers for cleaning the brush.
Allow the cleaning brushes to dry in the air, for example, placed on the device or in a vertical position. Do not place the brushes on a wet surface, in a closed container or in a cupboard.
- Press the ON/OFF switch. Figure L The device switches off.
- Place the device in the parking position (see chapter 3 General safety instructions).
- Remove the brush and the cleaning agent from the housing with a damp cloth.
- Remove the tank from the device, empty it and reinstall it (see chapter Filling the tank with clean water).
Cleaning the dirty water tank
WARNING
Dirty water tank
The dirty water tank may be damaged if used improperly.
It is recommended to clean the device after each use.
Regularly empty the dirty water tank.
- Press the ON/OFF switch. Figure L The device switches off.
- Place the device in the upright position (see chapter General maintenance instructions).
- Empty the dirty water tank (see chapter Emptying the dirty water tank).
- Turn the handle and remove the lid. Figure T 5. Remove the dirty water tank and the float. Figure U
6. Rinse the dirty water tank and the float with clean water or wipe them with a lint-free cloth.
- Assemble the dirty water tank in reverse order and insert it into the device.
Cleaning the containers for the filter
WARNING
The brush can be used for the intended purpose.
It is recommended to use the device after complete drying.
Rinse the containers for washing.
- Press the ON/OFF button.
Figure L
The device turns on.
- Set the device to the working position (see general instructions for maintenance). 3. Remove the tank for dirty water (see figure for removing the dirty water tank). 4. Remove the container for washing.
a. Unscrew the caps of the washing containers and find them inside.
b. Remove the washing containers. Figure V
- Rinse the washing containers with running water.
Figure W
- Remove the filter from the dirty water tank and rinse the dirt under running water (shown in the frame).
- Install the washing containers in reverse order.
Rinse the rollers.
Remove the batteries from the device.
Niohymbeopenh
Remove the batteries from the device before each use to avoid damage.
Remove the batteries when using the device for business or in case of emergency.
IoukoedxehnMikpoeioKOH
Do not use the device for business while the batteries are in the device.
Do not place the batteries in the dryer.
Do not remove or damage the batteries.
- Press the ON/OFF button.
Figure 1
The device is turned on.
- Set the device to the parking position (see chapter General instructions for maintenance).
- Grasp the handles on the side of the rollers and turn the rollers.
- Pumps, valves, water inlet, drain valves, machine for temperature up to 60°C.
- Clean the drive of the drain valves with water.
- Install the valves on the drive. Pay attention to the color marking on the inner side of the valve and the valve drive (green to green and blue to blue).
- Install the valve on the device or let it dry in a vertical position.
Clean the water distribution plate.
Accessory brush
The accessory brush may permanently damage the device.
It is recommended to clean the device after each use.
Regularly clean the water distribution plates.
- Press the switch ON/OFF.
PnpctpiBmMkaetbcra.
- Install the device according to the safety regulations (see chapter General instructions for maintenance). 3. Disassemble the water pump (see chapter Disassembly of the water pump). 4. Remove the O-rings (see chapter Cleaning the O-rings).
- Remove the screws from the water distribution plate. Fig. AA
Installation instructions
Pay attention to the markings on the covers and on the device (L to L and R to R).
- Tighten the screws evenly.
- Clean the water distribution plate (shown in the frame) with water and a soft brush. Fig. AB
- Check the inlet and outlet openings for water (arrows) for blockages; if necessary, remove any debris with a soft brush for cleaning.
- Reassemble in reverse order.
Device does not turn on
Battery pack is discharged.
Remove the battery pack from the device and charge it (see chapter Finishing work). - Install the charged battery pack into the device until it clicks (see chapter Installing the battery pack).
Battery pack is not locked in the device.
- Install the battery pack into the device until it clicks (see chapter Installing the battery pack).
Device does not pump water
Y6aKyIJIyIuCTOiBOHnHEMaE BOHn.
3anOBHHTn 6ak dIy qHCTOoi BOIOU (INB. IaBy 3ano6HeHH 6aka dNq yucmoi bodu).
BnKOpNCToByte nIe opurHaJIbHi akymyIaTOpHi 6atapei KARCHER. BnKOpNCToByBaTu akymyIaTOpHi 6atapei, Ioo He nepe3apJxAIOTBcR, He Do3BOJRAETbcra.
| Познayaшия Homeр дials | Замоныня |
| Комплейт вал尼克iv, стадэрпс, cipi/cини | 4.030-088.0 |
| Комплейт вал尼克iv, жорстк, cipi/зеленi | 4.030-126.0 |
| СА 50 C, Floor Pro Professional (1,0 Л) 6 | 296-053.0 |
| Дозуюча rolовka 6 393-185,0 | |
| Актулайтогенii 6лok Battery Power 18/25 DW | |
| Актулайтогенii 6лok Battery Power 18/50 DW | |
| Актулайтогенii 6лok Battery Power+ 18/30 DW | |
| Присрийшвдкоfo зарджань Battery Power 18/25 | 2.445-032.0 |
| Присрийшвдкоfo зарджань Battery Power+ 18/60 | 2.445-044.0 |
| Унibeерсал_nbий зард尼的新 рисрий Battery Power+ 18-36/60 | 2.445-054.0 |
H. Jenner Chairman of the Board of Management
S. Reiser Director Regulatory Affairs & Certification
Person responsible for the introduction of the product:
S. Reiser
Alfred Kärcher SE & Co. KG
Alfred-Karcher-Str. 28 - 40
71364 Winnenden (Germany)
Tel.: +49 7195 14-0
Fax: +49 7195 14-2212
Winnenden, 01.04.2021
Technical specifications
BR 30/1
| Ельктуге πίдкlioύουчения | |||
| Hominaльна habура V | 1 | 8 | D |
| HominaльнаnotухнICTb W | 7 | 0 | |
Protection class III

Protection class IPX4
Technical specifications of the device
Rotational speed at no-load 500 rpm, noise level 1
Rotational speed at no-load 650 rpm, pipe cutting
Charging time for full charge of the battery
Tank capacity
Tank volume for clean water ml 1000
Chairman of the Board of Management
S. Reiser
Director Regulatory Affairs & Certification
Authorized representative for documentation:
S. Reiser
Alfred Kärcher SE & Co. KG
Alfred-Karcher-Str. 28 - 40
71364 Winnenden (Germany)
Phone: +49719514-0
Fax: +49719514-2212
Winnenden, 2021/04/01
Technical specifications
BR 30/1
C Bp
Power connection
Rated voltage V18DC
Rated power W70
Protection class TTI

Protection type TPX4
Device performance
min45
1
100000000000000000000000000000
.
∴ S ΔOBC = S ΔCOD + SΔBOC
-15
a 2000
Therefore, in right triangle ABD:
Therefore, if l is y = 1 and y = 2 (0 < x < 1), then:
| ### |
| ### |
| ### |
| ### |
| ### |
| ### |
| ### |
| ### |
| ### |
| ### |
| ### |
| ### |
| ### |
| ### |
| ### |
| ### |
| ### |
| ### |
| ### |
| ### |
| ### |
| ### |
| ### |
| ### |
| ### |
| ### |
(1)
J 11
__SUPPIMER__
a50,1
Therefore c(a,b) = (0,1)
Jlll 2
a.3
j(a+2) = j(a+1)
(1)
Jolc oJlWJ Jaiil jail) 0g jgljg2.2
.
jglJlaaJIaJI 3
jgljllc aaiial olall jia
[ \cdot \omega > a + {2\omega g}{j}_{g}z + h{z}^{\prime }]
Jl alal cll 0 a aaiol oaii jx psc .5
Ljglg 1000000000000000000000000000000000000000000
Ug aaiol oai jc bai
aawllol
aaiololj>6.6
a 1 > a 2 > a 3 > a 4 < 0
olaljz bsh y, aale gIgJb
( aziu i)
(ajj> jaiill jaiil) wlll jj> jaiii .7
.8
Jzwll aLac gbo
4
lll lissg aai / 1009 agb//c cii cdi jbs
j 与 j 重合
a 1 1
aBll/sgogagbllJgbalj
jgllll jlll Jls no cIaal lal
Jaslln o cglg Ug gog uu gog jI Jau la
.aisic s/s/1g/1g/1g/1g/1g/1g/1g/1
.1
a>la|0gab
Therefore, {l}_{g} : y = 1
d
a.50,
.
.0
aJU
Lgabu pi jll
a>la oog H
ploUg
aagj jle Jauu JauoIBoost u
Eaill clll aasg 1sksll acjsw sljj jzqaiiaabg
Ic Iaiaal pall 10g jzjU I c bui jy jlgJI
jglz
a>la|gud
Gubu
jgljllgogwjjla>1
e 2
.1JU|Jj
J / jzjzjjzj 1
J
Jl/111111111111111111111111
j z > 1
egi jaiuW,gl/1Jusw/210nLb211pU 15j
zao laiaa/ jiejiljai10 10
.0>1g 0,0 1/
a>la>gd
2100 1
JgU|/J
a|la|0g
JIJIJIJIJIJIJIJIJIJIJIJIJIJIJIJIJIJIJIJIJIJIJIJIJIJIJIJIJIJIJIJIJIJIJIJIJIJIJIJIJIJIJIJIJIJIJIJIJIJIJIJIJIJIJIJIJIJIJIJIJIJIJIJIJIJIJIJIJIJIJIJIJIJIJIJIJIJIJIJIJIJIJIJIJIJIJIJIJIJIJIJIJIJIJIJIJIJIJIJIJ
jg>JU
a a a a a a a a a a a a a a a a a a a a a a
aJol oJg aJbI Iosl sbI
0011 1111 1111 1111 1111
.8
.1JzJfJgBjUJdJlaI 9
a>la|0g
.0jll JJ 10
.11
jglal aolall j.12
laall lalalll
Jc JcJcJcJcJcJcJcJcJcJcJcJcJcJcJcJcJcJcJcJcJcJcJcJcJcJcJcJcJcJcJcJcJcJcJcJcJcJcJcJcJcJcJcJcJcJcJcJcJcJcJc
gulil xic awlu>aggbl
- aogloaas
- jzlo lio) .12aW aL glclal
clluyawgaso
palwll so
∴ m = 3/11
∴ m = 3/11
26
ck*
BR 30/1 C Bp Pack*
aai
1/11s2g 199b1a// a2x 19 a90o // oJlu
4
JU 1/20
>LJg aJIaJI
a a a a a a a a a a a a a a a a a a a a a a a a a a a a a a a a a a a a a a a a a a a a a a a a a a a a a a a a a a a a a a a a a a
Jolll
aill lsll 1s. glusllbs . h5 A JlubUl Jgluoc
111 111 111 111 111 111 111 111 111 111 111 111 111 111 111 111 111 111 111 111 111 111 111 111 111 111
gI Iauu bgaull 15/ jge//piau u aag JU9 puau U. 20 19 / g/ aolg 2>g aJIO Jg2/1 JU U . Jaqalglj 2wll la9 U/ jge Jlc ailallg cbll Jace/J . llueo ng LlaIb Iy JIaIbI all JgJge//
jglj1s0j.2a0al/ll slo// jlgj1pkiw aui jaiio slgo lc gai jlgw gl aiao slgajlgjll o po 1glll caoo, njuu (cbiu//slgo) aaeoo acuao> sgo uU jge// jauu pa U .olall ujx (luo nguW//g jge// xu w// U .cui// cln / jzg /cll / jzg /cll / jzg /cll / jzg /cll / jzg /cll / jzg /cll / jzg /cll / jzg /cll / jzg /cll / jzg /cll / jzg /cll / jzg /cll / jzg /cll / jzg /cll / jzg /cll /jzg /cll / jzg /cll / jzg /cll / jzg /cll / jzg /cll / jzg /cll / jzg /cll / jzg /cll / jzg /cll / jzg /cll / jzg /cll / jzg /cll / jzg /cll / jzg /cll / jzq/100000000000000000000000000000000000000000000000000
aJgJL LgSall
216 0 216 0 216 0 217 0 217 0 217 0 217 0 217 0 218 0 219 0 219 0 219 0 219 0 220 0 221 0 221 0 222 0
Register your product and benefit from many advantages.
www.kaercher.com/welcome


Rate your product and tell us your opinion.
www.kaercher.com/dealersearch
Alfred Kärcher SE & Co. KG
Alfred-Karcher-Str.28-40
71364 Winnenden (Germany)
Tel.: +49 7195 14-0
Fax: +49 7195 14-2212

- TECHNICAL DATA
- GENERAL NOTES
- ENVIRONMENTAL PROTECTION
- NOTES ON THE CONTENT MATERIALS (REACH)
- SAFETY INSTRUCTIONS
- HAZARD LEVELS
- DANGER
- WARNING
- CAUTION
- ATTENTION
- BATTERY PACK AND CHARGER
- SAFE HANDLING
- ELECTRICAL COMPONENTS
- INTENDED USE
- SCOPE OF DELIVERY
- DESCRIPTION OF THE DEVICE
- INITIAL STARTUP
- BATTERY PACK CHARGING
- INSERTING THE BATTERY PACK
- CLEANING AND CARE AGENTS
- NOTE
- FILLING THE FRESH WATER TANK
- ILLUSTRATION E
- ILLUSTRATION F
- ILLUSTRATION G
- OPERATION
- GENERAL NOTES ON OPERATION
- MOISTURE
- MATERIAL DAMAGE
- ILLUSTRATION I
- ILLUSTRATION J
- ILLUSTRATION K
- ILLUSTRATION L
- ILLUSTRATION M
- STARTING WORK
- UNCONTROLLED MOTION
- FRESH WATER TANK OR WASTE WATER TANK NOT INSTALLED MATERIAL DAMAGE
- ILLUSTRATION N
- EMPTYING THE WASTE WATER TANK
- ILLUSTRATION O
- ILLUSTRATION P
- INTERRUPTING OPERATION
- RISK OF DAMAGE DUE TO MOISTURE AND DETERGENTS AS WELL AS THE DEVICE TIPPING OVER
- RINSING THE CLEANING ROLLERS
- ILLUSTRATION Q
- ENDING OPERATION
- STORING THE DEVICE
- TRANSPORT
- STORAGE
- CLEANING THE DEVICE
- CLEANING THE WASTE WATER TANK
- ILLUSTRATION T
- ILLUSTRATION U
- CLEANING THE SWEEP BINS
- ADHERING DIRT DEPOSITS
- ILLUSTRATION V
- CLEANING THE CLEANING ROLLER
- DETERGENT RESIDUES IN THE CLEANING ROLLERS
- DAMAGE CAUSED BY WASHING THE CLEANING ROLLERS WITH FABRIC SOFTENER OR USING A TUMBLE DRYER
- ILLUSTRATION Z
- CLEANING THE WATER DISTRIBUTION STRIPS
- INSTALLATION INFORMATION
- ILLUSTRATION AB
- TROUBLESHOOTING GUIDE
- THE CLEANING ROLLERS DO NOT TURN AND THE WARNING LIGHT LIGHTS UP
- THE DEVICE CANNOT BE SWITCHED ON
- THE DEVICE DOES NOT ABSORB DIRT
- THE CLEANING ROLLERS ARE TOO DRY
- ILLUSTRATION AC
- UNSATISFACTORY CLEANING RESULT
- THE WATER ABSORPTION IS NOT OPTIMAL
- THE DEVICE IS LOSING WASTE WATER
- WARRANTY
- ACCESSORIES AND SPARE PARTS
- SPARE PARTS LIST
- DECLARATION OF CONFORMITY
- EU DECLARATION OF CONFORMITY
- CURRENTLY APPLICABLE EU DIRECTIVES
- HARMONISED STANDARDS USED
- DECLARATION OF CONFORMITY (UK)
- CURRENTLY APPLICABLE UK REGULATIONS
- DESIGNATED STANDARDS USED
- ELECTRICAL CONNECTION
- DEVICE PERFORMANCE DATA
- FILLING QUANTITY
- DIMENSIONS AND WEIGHTS
- DETERMINED VALUES IN ACC. WITH EN
- CONTENT
- TECHNICAL SPECIFICATIONS
- HARMONISED STANDARDS APPLIED
- MACHINE PERFORMANCE DATA
- CHECK THE FILTERS
- WITHOUT THE CLEAN AND DIRTY WATER TANKS
- FIGURE
- EMPTYING THE WATER TANK
- FIGURE L
- TECHNICAL INFORMATION
- FIGURE E
- FIGURE F
- FIGURE G
- GENERAL MAINTENANCE INSTRUCTIONS
- PROPERTY DAMAGE
- FIGURE H
- FIGURE I
- FIGURE J
- FIGURE K
- FIGURE R
- CHARGING TIME
- NON-OBSERVANCE OF WEIGHT
- NETTOYAGE DU RÉSERVOIR D'EAU SALE
- RISQUE DE DOMMAGES
- CLEANING THE BINS FOR BULKY WASTE
- FIGURE V
- OUNCTKA YNCTAXN X BAJINCOB
- BHIMAHHE
- PNCYHOK L
- FIGURE X
- CLEANING THE WATER DISTRIBUTION PLATES
- FIGURE AA
- ACCORDING TO THE MANUAL
- TROUBLESHOOTING
- CLEANING ROLLERS DO NOT ROTATE, THE SIGNAL LAMP LIGHTS UP
- THE DEVICE DOES NOT SWITCH ON
- THE DEVICE DOES NOT COLLECT DIRT
- INSTALL THE ROLLERS DRY
- UNSATISFACTORY CLEANING RESULTS
- THE APPLIANCE IS LEAKING DIRTY WATER
- EXAMPLE
- OPERATING CHARACTERISTICS OF THE DEVICE
- BR 30/1 C BP
- APPLIED HARMONIZED STANDARDS
- RELEVANT EU DIRECTIVE
- HARMONIZED STANDARDS APPLIED
- CHARGING THE BATTERY
- INSERTING THE BATTERY
- CLEANING AGENTS AND CARE PRODUCTS
- MAINTENANCE INSTRUCTIONS
- FIGURE M
- MAINTENANCE
- UNCONTROLLED MOVEMENT
- MISSING PRESSURE RESERVOIR OR FAULTY VALVE
- DRAINING THE CLEAN WATER TANK
- CHECKING THE WORK
- RINSING THE CLEANING AGENTS
- SWITCHING OFF THE APPLIANCE
- STORING THE APPLIANCE
- DANGER: FLAMMABILITY
- CLEANING THE DISTRIBUTORS
- PLATES FOR THE WARD
- INSTALLATION INSTRUCTIONS
- HELP IN CASE OF DAMAGE
- THE DEVICE DOES NOT SPRAY WATER
- THE INLET VALVES ARE DRY
- THE DEVICE IS NOT OPTIMALLY ADJUSTED
- WATER HARDNESS LEVEL
- RATED POWER
- AMOUNT OF FILLING
- DIMENSIONS
- INSTALLED POWER ACCORDING TO EN
- TABLE OF CONTENTS
- POWER CONNECTION
- GENERAL INSTRUCTIONS
- INFORMATION ON COMPONENTS (REACH)
- BATTERY BLOCK AND CHARGER
- SAFETY
- FIGURES SEE ON THE FOLD-OUT PAGES. FIGURE A
- CHARGING THE ACCUMULATOR BLOCK
- INSTALLING THE ACCUMULATOR BLOCK
- FIGURE B
- DETERGENTS AND CLEANING AGENTS
- DOSING
- FILLING THE TANK WITH CLEAN WATER
- FIGURE C
- FIGURE D
- INCORRECT OR INSUFFICIENT DOSING OF THE CLEANING AGENT OR DETERGENT
- GENERAL INSTRUCTIONS FOR MAINTENANCE
- RISK OF DAMAGE TO THE DEVICE AND MINOR MEANS, AS WELL AS PARTS OF THE MOVING DEVICE
- MANIOHOK I
- INDICATOR
- MANIOHOK L
- IF THE TANK OR DRUM IS NOT INSTALLED
- FIGURE N
- EMPTYING THE DIRTY WATER TANK
- FIGURE O
- FIGURE P
- PREVENTIVE MAINTENANCE
- WASHING THE ROLLERS
- INSTRUCTIONS
- END OF OPERATION
- ACCESSORIES
- TRANSPORTATION
- IMPROPER TRANSPORTATION
- IMPROPER STORAGE
- CLEANING THE DIRTY WATER TANK
- DIRTY WATER TANK
- CLEANING THE CONTAINERS FOR THE FILTER
- FIGURE W
- RINSE THE ROLLERS
- CLEAN THE WATER DISTRIBUTION PLATE
- ACCESSORY BRUSH
- DEVICE DOES NOT TURN ON
- DEVICE DOES NOT PUMP WATER
- TECHNICAL SPECIFICATIONS OF THE DEVICE
- TANK CAPACITY
- REISER
- AUTHORIZED REPRESENTATIVE FOR DOCUMENTATION
- DEVICE PERFORMANCE
- JZWLL ALAC GBO
- J 与 J 重合
- D
- LAALL LALALLL
- PALWLL SO
- AAI
- LJG AJIAJI
- JOLLL
- AJGJL LGSALL
Brand : Kärcher
Model : BR 301 C Bp
Category : Broom