VC 5 Cordless - Broom Kärcher - Free user manual and instructions
Find the device manual for free VC 5 Cordless Kärcher in PDF.

| Product type | Cordless stick vacuum |
| Brand | Kärcher |
| Model | VC 5 Cordless (also available in Parquet, Premium, Premium Parquet versions) |
| Dimensions (parking position) | 182 x 261 x 621 mm |
| Weight (without accessory) | 2.8 kg (VC 5 Cordless) / 2.9 kg (Parquet versions) |
| Power supply | Li-ion battery 18 V, charger 22 V/0.6 A (VC 5) or 30 V/0.6 A (Premium) |
| Runtime | Up to 60 min (low power) / 15 min (high power) for VC 5; 40 min / 11 min for Premium |
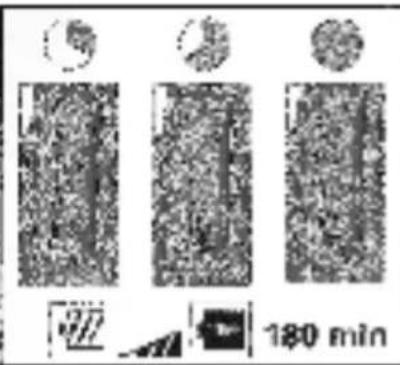
| Charging time | 180 min |
| Nominal power | 125 W (VC 5) / 190 W (Premium) |
| Sound level | 69.4 dB(A) (VC 5) / 75.5 dB(A) (Premium) |
| Main filter | Long-life filter, empty after each use, replace every 2 years |
| Exhaust air filter | Replace every year |
| Included accessories | Floor nozzle (switchable), crevice tool, furniture brush, cushion brush nozzle, parquet nozzle (depending on version) |
| Power settings | 3 levels (low, medium, high) |
| Parking function | Yes, parking position on nozzle |
| Telescopic tube | Yes, adjustable |
| Filter cleaning | Automatic cleaning by opening the tank |
| Battery indicator | 3 LEDs: 3/3, 2/3, 1/3; flashing when almost empty |
| Overheat protection | Automatic shut-off in case of overheating, cool down for at least 1 hour |
Frequently Asked Questions - VC 5 Cordless Kärcher
User questions about VC 5 Cordless Kärcher
0 question about this device. Answer the ones you know or ask your own.
Ask a new question about this device
Download the instructions for your Broom in PDF format for free! Find your manual VC 5 Cordless - Kärcher and take your electronic device back in hand. On this page are published all the documents necessary for the use of your device. VC 5 Cordless by Kärcher.
USER MANUAL VC 5 Cordless Kärcher
VC 5 Cordless Premium
VC 5 Cordless Premium Parquet
natural_image
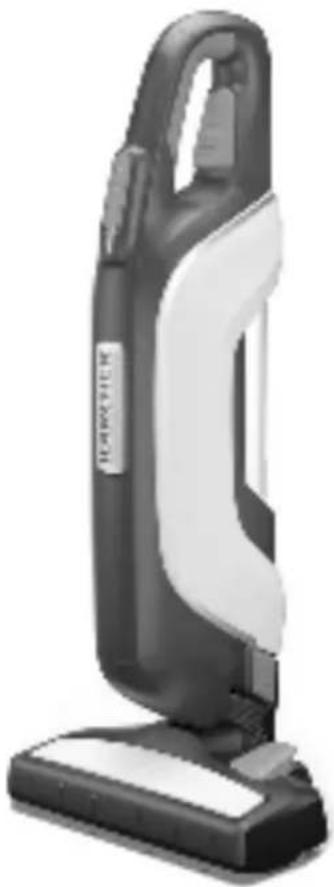
Exterior view of a black and white hover vacuum cleaner (no text or symbols visible)Deutsch 5
English 8
Français 11
Italiano 14
Nederlands 17
Español 20
Português 23
Dansk 26
Norsk 29
Svenska 32
Suomi 35
Ελληνικά 38
Türkçe 41
Русский 44
Magyar 47
Čeština 50
Slovenščina 53
Polski 56
Românește 59
Slovenčina 62
Hrvatski 65
Srpski 68
Български 71
Eesti 74
Latviešu 77
Lietuviškai 80
Українська 83
Қазақша 86
لعربيها 91
Register and win! www.kaercher.com/register-and-win

EAC

59677550 (11/17)

natural_image
Illustration of a tree with a single trunk and a small leaf at the base (no text or symbols)
natural_image
Microscopic view of a cellular or granular structure with a labeled arrow (no text or symbols present)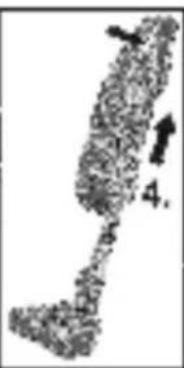

flowchart
graph TD
    A["Input Node"] --> B["Output 1"]
    A --> C["Output 2"]
    A --> D["Output 3"]
natural_image
Illustration of a human figure with a circular head and arrow, labeled '1' and '11' (no text or symbols on the figure itself)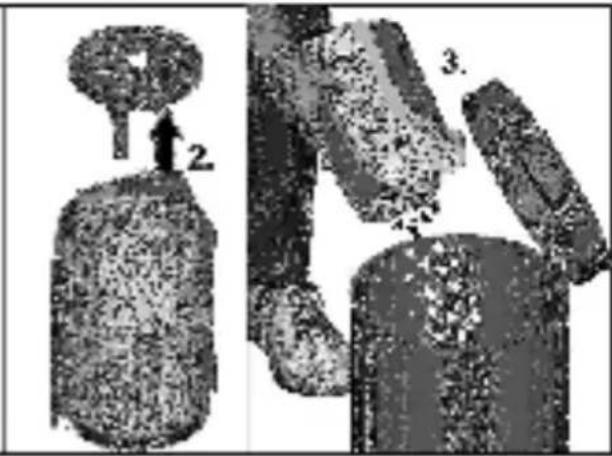

flowchart
graph TD
    A["1. Material"] --> B["2. Packaging"]
    B --> C["3. Box with 3D cube"]
    C --> D["4. Packaging"]
Allgemeine Hinweise
Please read these original operating instructions and the enclosed safety in-
structions prior to the initial use of your device. Proceed accordingly. Keep both booklets for future reference or subsequent owners.
Proper use
This universal vacuum cleaner is intended for the private use at home and not for commercial purposes.
The manufacturer is not liable for any damage that may occur on account of improper use or wrong operation.
Use the universal vacuum cleaner only with:
■ Original filters
■ Original spare parts, accessories and special accessories.
The universal vacuum cleaner is not suitable for:
■ Vacuuming off human beings or animals.
■ Vacuuming up:
Small living creatures (e.g. flies, spiders, etc.).
Substances that are harmful for health, have sharp edges, are hot or glowing.
Moist or liquid substances.
Easily inflammable or explosive substances and gases.
VC 5 Cordless Parquet
VC 5 Cordless Premium Parquet
The parquet nozzle supplied is not suitable for use on carpets.
Environmental protection

The packaging material can be recycled. Please do not place the packaging into the ordinary refuse for disposal, but arrange for the proper re-
cycling.
Old appliance contain valuable recyclable materials and substances that must not be released into the environment. Thus, the appliance and the accumulator contained must not be dis-
posed of via the domestic waste. The disposal can take place via locally available return and collection systems free of charge.
Disposal of filters
The filters are made from environmentally friendly materials.
They can therefore be disposed off through the normal household garbage provided you have not sucked in substances that are not permitted to be thrown into household garbage.
Notes about the ingredients (REACH)
You will find current information about the ingredients at:
www.kaercher.com/REACH
Warranty
The warranty terms published by the relevant sales company are applicable in each country. We will repair potential failures of your appliance within the warranty period free of charge, provided that such failure is caused by faulty material or defects in manufacturing. In the event of a warranty claim please contact your dealer or the nearest authorized Customer Service centre.
Please submit the proof of purchase.
Customer Service
Our KÄRCHER branch will be pleased to help you further in the case of questions or faults. See address on the reverse.
Spare parts
Only use original accessories and spare parts, they ensure the safe and trouble-free operation of the device. For information about accessories and spare parts, please visit www.kaercher.com.
Operation
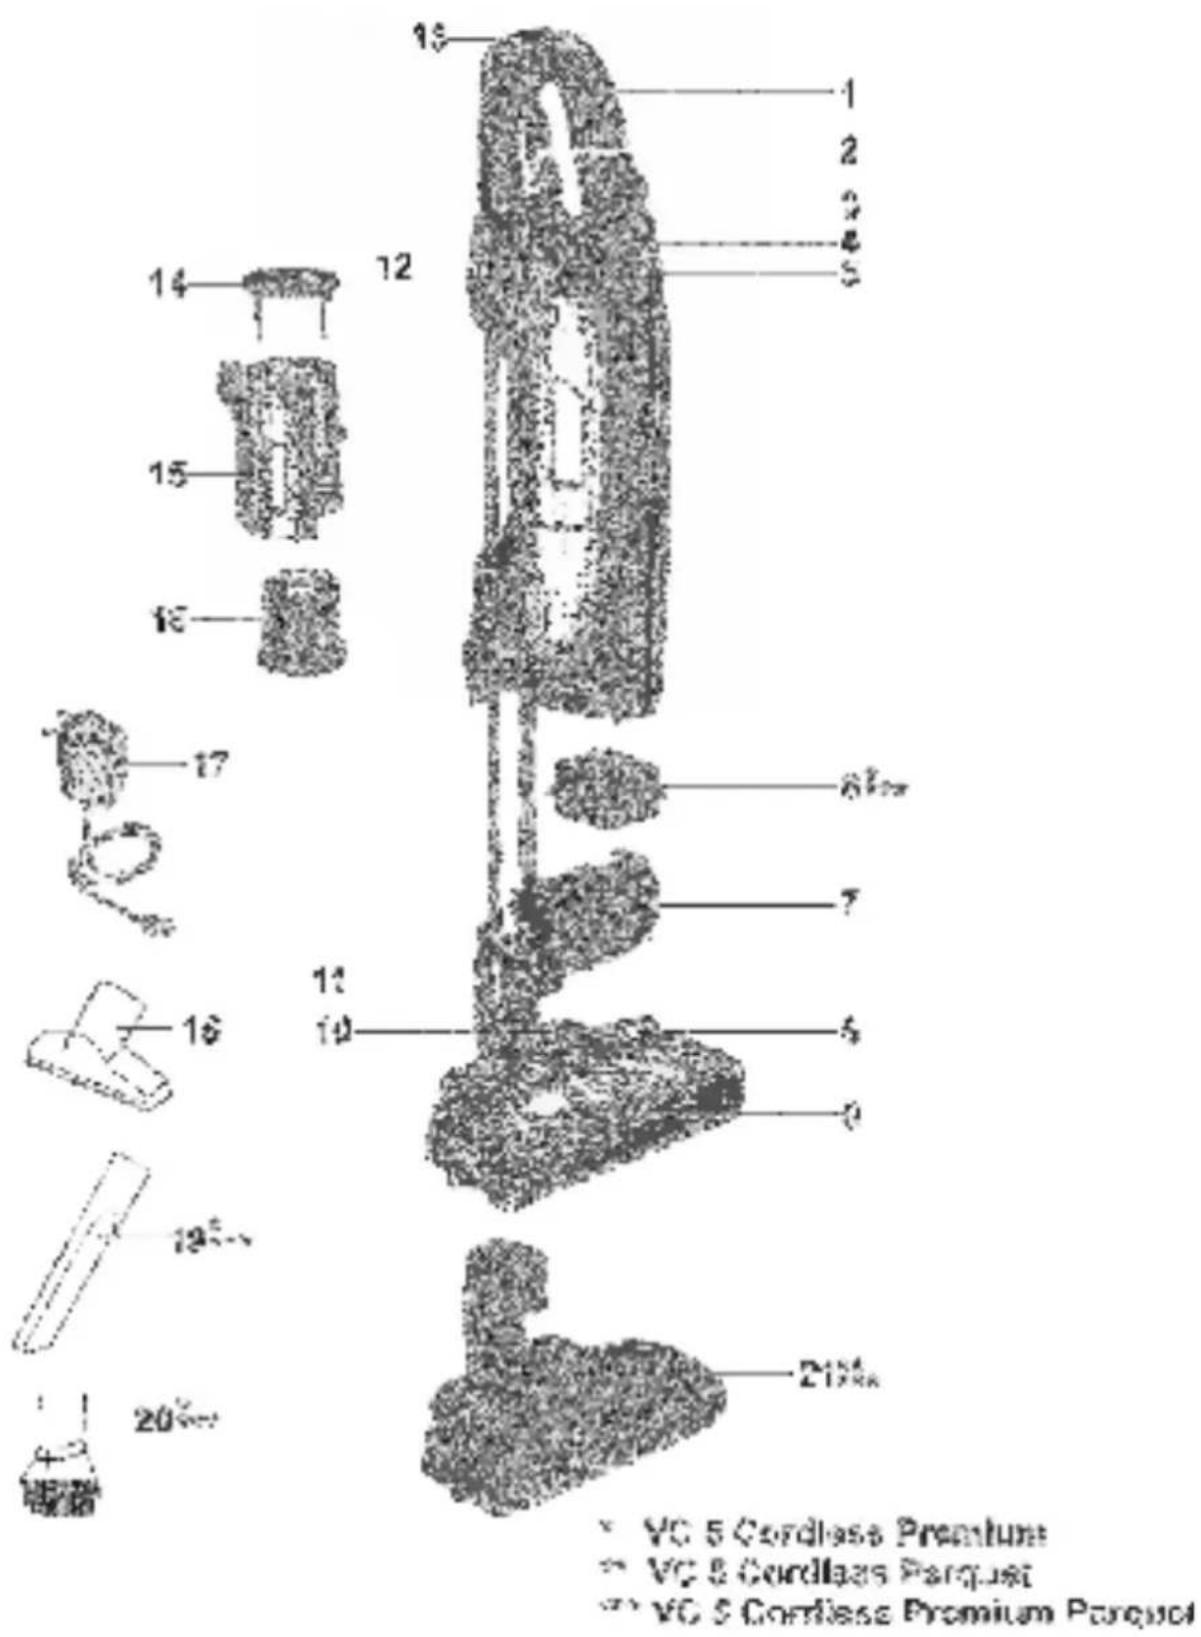
Description of the Appliance
Illustrations on Page 4
1 Handle
2 Adjustable telescopic suction pipe
3 Buttons for suction performance
4 On/Off button
5 Battery indicator
6 Exhaust filter
7 Exhaust filter cover
8 Shift button
9 Floor nozzle, reversible
10 Parking position
11 Unlocking the floor nozzle
12 Charging socket
13 Telescopic suction pipe cleaning opening
14 Main filter lock
15 Filter box
16 Long life filter with lock
17 Charger with charging cable
18 Upholstery nozzle
19 Crevice nozzle
20 Furniture brush
21 Parquet nozzle
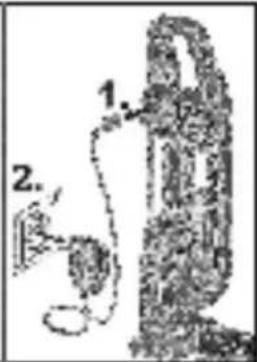
Start up
Figures 1 5
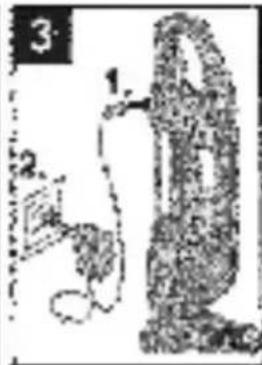
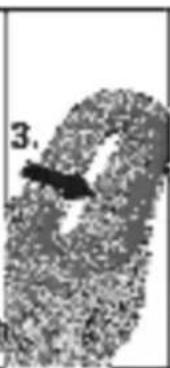
Charging process
Illustration 3
■ The LED indicator lights display the battery's current charging state.
■ After the battery has been fully charged, the 3 LED indicator lights will continue to light for 30 minutes. After this time, the LED indicator lights go out.
Battery service life
- 3 LEDs illuminated - 3/3 battery run time (full run time).
- 2 LEDs illuminated - 2/3 battery run time.
- 1 LEDs illuminated - 1/3 battery run time.
■ The last LED starts to flash approx. 3 minutes before the battery has to be charged.
■ The last LED flashes quicker shortly before the device switches off.
■ The last LED flashes quicker for 10 seconds when the battery is empty and the device has switched off.
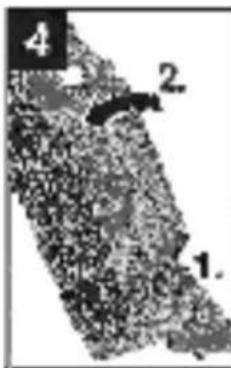
Adjusting the telescopic suction pipe
Illustration 4
→ If the device is parked in the parking position, first release the parking position.
→ In order to do this, hold the floor nozzle still with your foot and tip the device backwards slightly.
→ Hold the button down and adjust the suction pipe to the desired length.
Setting the vacuum cleaning performance
Illustration 5
Note
Press the buttons for suction performance to individually set the suction power.
■ Stage 1: Low performance range
For vacuuming sensitive materials and light components, such as upholstered furniture, rugs, cushions, curtains, etc.
■ Stage 2: Medium performance range
For daily vacuuming of lightly soiled surfaces and for cleaning low-pile carpets.
■ Stage 3: High performance range
For vacuuming durable floor coverings, hard floors, high-pile carpets and heavily soiled surfaces.
IMPORTANT NOTE! The device shuts off automatically if there is a danger of overheating. Make sure that the nozzle or suction pipe is not blocked and check if the filter needs to be changed. After remedying the malfunction, let the device cool down for at least 1 hour, after that the device will be ready for use again.
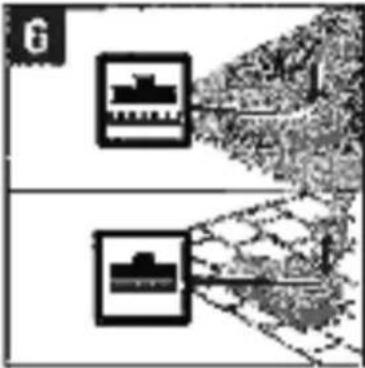
Reversible floor nozzle
Illustration 6


Parquet nozzle
Depending on equipment
Illustration 7
→ Used to vacuum sensitive and smooth floors (parquet, marble, terracotta etc.).
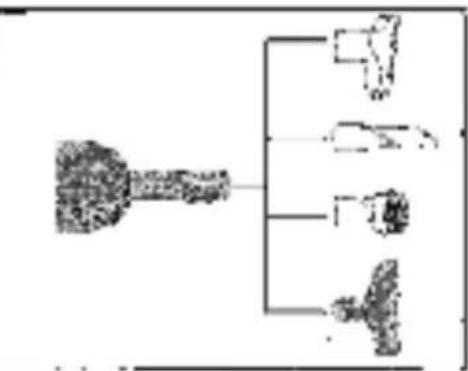
Using accessories
Depending on equipment
Illustration 7
■ Upholstery nozzle: for cleaning upholstered furniture, mattresses, laced curtains, etc.
■ Crevice nozzle: for edges, joints and heaters
■ Furniture brush: for gentle cleaning of furniture and delicate objects, such as books, etc.
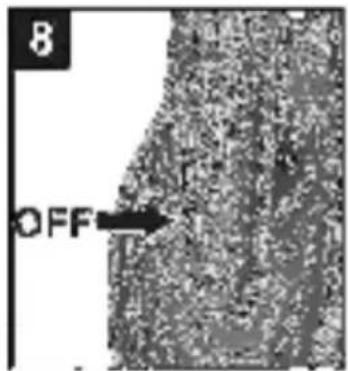
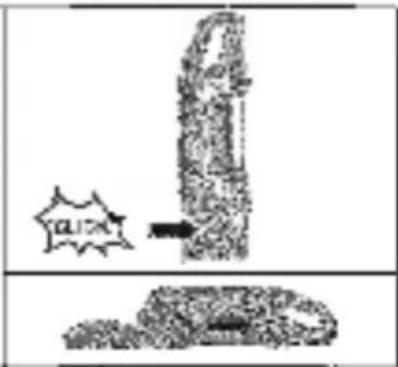
Finish operation
Illustration 8
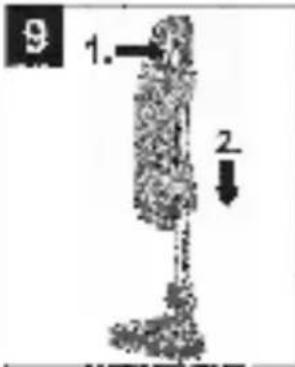
Transport, storage
Illustration 9
→ Engage the device (telescopic pipe is not extended) in parking position on the floor nozzle.
→ The device can also be stored in a horizontal position, for example on a shelf on in a cupboard.
Note
Store the appliance in a dry room.
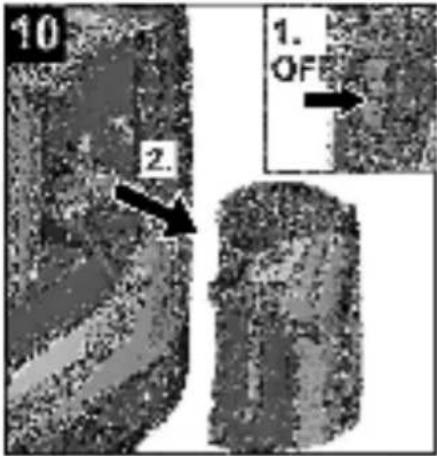
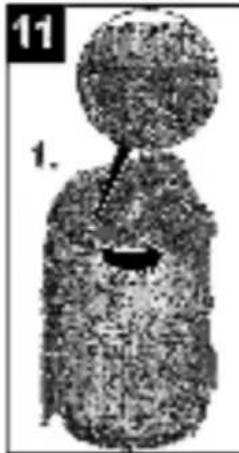
Care and maintenance
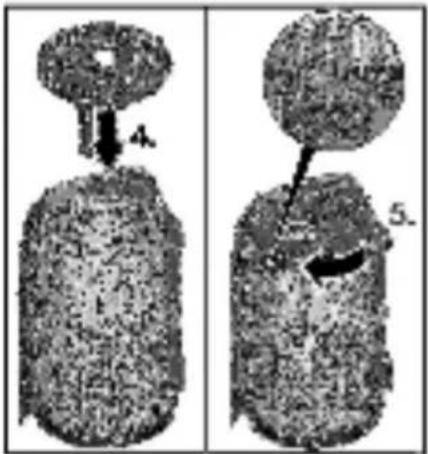
Emptying the main filter
Recommendation: Empty main filter after every use. For rest of procedure see:
Figure 10 11
Note
→ When you unscrew it, the filter is automatically cleaned and the dirt is removed.
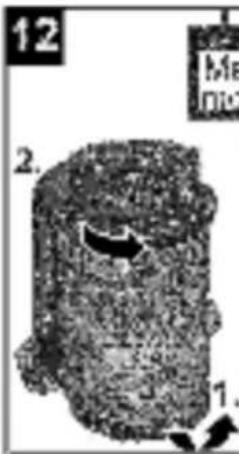
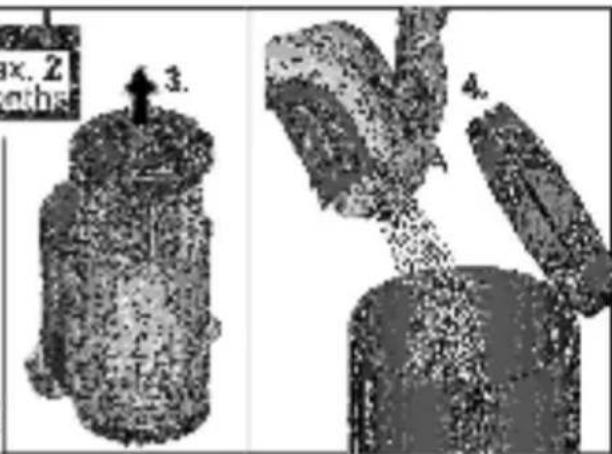
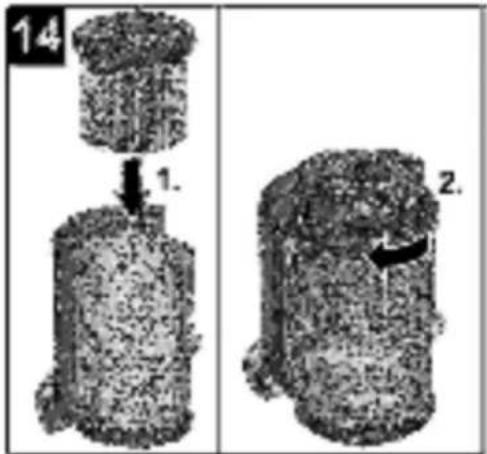
Emptying long life filter
Recommendation: Remove, empty and (if necessary) clean long-life filters no later than every 2 months.
ATTENTION
The amount that can be vacuumed up can vary depending on the vacuuming material.
For fine dust, in particular, emptying may be necessary earlier.
In order to ensure good filtration, replace long life filter with new filter every 2 years.
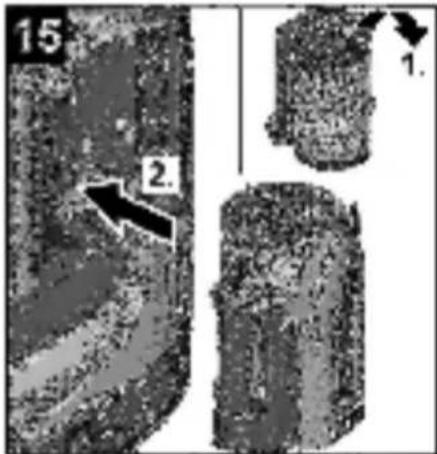
For rest of procedure see:
Figure 12 15
Notes
■ When you unscrew it, the filter is automatically cleaned and the dirt is removed.
■ Reinsert the long life filter in the filter box according to the marking and screw it in completely until the red safety rod is no longer visible.
ATTENTION
If the red safety rod is still visible, the filter box cannot be inserted into the device.
The filter lock must therefore be screwed in all the way.
■ Only install dry long life filters in the device.
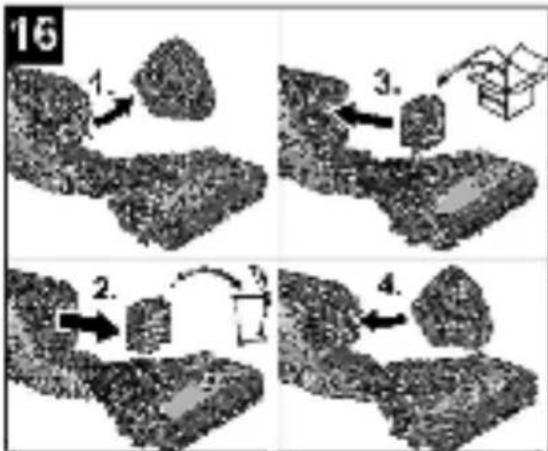
Replacing exhaust filter
Recommendation: In order to ensure good filtration, replace the exhaust filter once a year.
Illustration 16
→ Remove the exhaust filter cover upwards at an angle along the edge of the device.
→ Press the exhaust filter together on both sides and remove.
→ Attach a new exhaust filter and lock in place.
→ Place the exhaust filter cover on the edge of the appliance, push it downwards and lock in place.
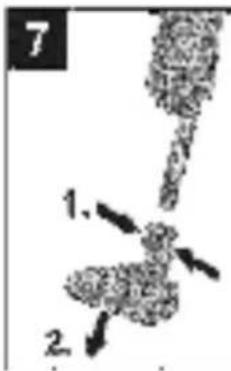
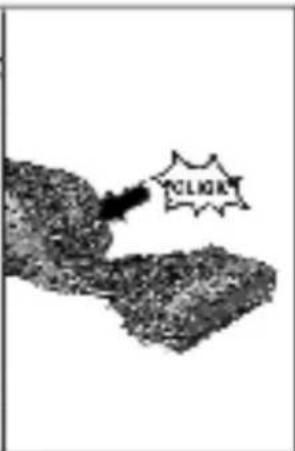
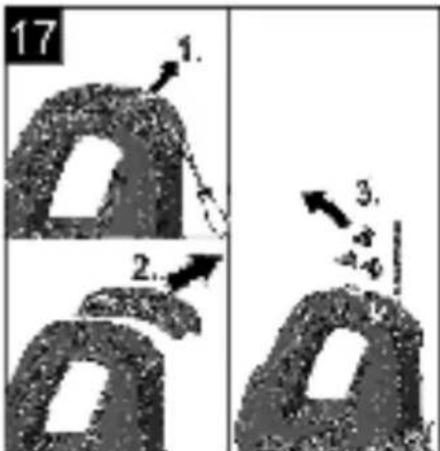
Troubleshooting
Declining suction performance or the device automatically switching off due to overheating can be caused by:
→ Blockage in accessories: Remove the blockage carefully with a narrow tool.
Illustration 17
→ Blockage in telescopic suction pipe: Lever the cover on the handle off with a screwdriver and then remove the blockage carefully with a narrow tool.
→ Check to see whether the filters are intact or damaged.
See chapter "Care and Maintenance".
LED fault display
An LED flashes quickly when switching on the device.
■ Battery is empty
→ Charge the device.
An LED flashes quickly twice when inserting the charger.
■ Device too hot to charge (e.g. after operation in high ambient temperatures or if filter is clogged).
→ Let the device cool down (charger can remain plugged in), the charging process will automatically start at the appropriate temperature.
All LEDs flash.
■ Battery or electronic fault.
→ Take device to Service.
Technical specifications
| Appliance type | VC 5 CordlessVC 5 CordlessParquet | VC 5 CordlessPremiumVC 5 CordlessPremium Parquet | |
| Nominal battery voltage V 18 | 25,2 | ||
| Rated power of appliance W | 125 190 | ||
| Operating time with full charge- Min. suction performance min 40 60- Max. suction performance min 11 15 | |||
| Charging current for empty battery | min 180 180 | ||
| Charger initial voltage: | V 22 | 30 | |
| Output current, charger | A | 0,6 0,6 | |
| Battery type | Li-ion Li-ion | ||
| Protective class | III | III | |
| ChargerProtective class | II | II | |
| Weight (without accessories)Device with floor nozzle | kg 2 | 8 2,9 | |
| Length x width x height (Device in parking position) | mm | 182x261x621 | 182x261x621 |
| Sound power level L_WA | dB(A) | 69,4 75,5 |
Subject to technical modifications!
Consignes générales


www.kaercher.com/REACH
Garantie
www.kaercher.com/REACH
Garanzia
www.kaercher.com/REACH
Garantía
www.kaercher.com/REACH
Garantia
www.kaercher.com/REACH
Garanti
www.kaercher.com/REACH
Garanti
www.kaercher.com/REACH
Garanti
www.kaercher.com/REACH
Εγγύηση
www.kaercher.com/REACH
Garanti
www.kaercher.com/REACH
Гарантия
www.kaercher.com/REACH
Garancia
www.kaercher.com/REACH
Záruka
www.kaercher.com/REACH
Garancija
www.kaercher.com/REACH
Gwarancja
www.kaercher.com/REACH
Garantie
www.kaercher.com/REACH
Záruka
www.kaercher.com/REACH
Jamstvo
www.kaercher.com/REACH
Garancija
U svakoj zemlji važe garantni uslovi koje je izdala naša nadležna distributivna organizacija. Eventualne smetnje na uređaju za vreme trajanja garancije uklanjamo besplatno, ukoliko je uzrok greška u materijalu ili proizvodnji. U slučaju koji podleže garanciji obratite se sa potvrdom o kupovini Vašem prodavcu ili najbližoj ovlašćenoj servisnoj službi.
Servisna služba
www.kaercher.com/REACH
Гаранция
www.kaercher.com/REACH
Garantii
www.kaercher.com/REACH
Garantija
www.kaercher.com/REACH
Garantija
www.kaercher.com/REACH
Гарантія
www.kaercher.com/REACH
Кепілдеме
←
←
←
←
←
←
←
←
←
←
←
←
←
←
←
←
←
←
←
-
-
-
-
-
←
←
←
←
-
-
-
-
-
-
-
-
-
[Non-Text]
[Non-Text]
[Non-Text]
[Non-Text]
[Non-Text]
-
-
-
-
-
■
■
■
■
■
-
-
-
-
-
■
■
■
■
إلى ص
إلى ص
إلى ص
إلى ص
إلى ص
الضمان
natural_image
Icon showing a gear and wrench inside a square frame (no text or symbols)http://www.kaercher.com/dealersearch
71364 Winnenden (Germany)
Tel.: +49 7195 14-0
Fax: +49 7195 14-2212