
GCMT 4280 - Electric saw EINHELL - Free user manual and instructions
Find the device manual for free GCMT 4280 EINHELL in PDF.

| Product type | Petrol cultivator |
| Brand | Einhell |
| Model | GCMT 4280 |
| Engine | 4-stroke, 212 cm³ |
| Engine power | 4.1 kW (5.5 HP) |
| Working speed | 3600 rpm |
| Working width | 89 cm |
| Tilling blade diameter | 36 cm |
| Fuel | Petrol (E10) |
| Tank capacity | approx. 3.6 L |
| Engine oil (quantity) | approx. 0.5 L |
| Gear oil (quantity) | approx. 1 L |
| Weight | 69 kg |
| Sound pressure level L_PA | 81.8 dB(A) |
| Guaranteed sound power level L_WA | 99 dB(A) |
| Vibration (a_w) | 6.8 m/s² |
| Spark plug | F6RTC |
| Transmission | 2 forward speeds + reverse |
| Starting | Recoil starter |
| Regular maintenance | Engine and gear oil change, air filter cleaning, spark plug check |
| Storage | Empty the tank, clean, oil metal parts, store dry |
Frequently Asked Questions - GCMT 4280 EINHELL
User questions about GCMT 4280 EINHELL
0 question about this device. Answer the ones you know or ask your own.
Ask a new question about this device
Download the instructions for your Electric saw in PDF format for free! Find your manual GCMT 4280 - EINHELL and take your electronic device back in hand. On this page are published all the documents necessary for the use of your device. GCMT 4280 by EINHELL.
USER MANUAL GCMT 4280 EINHELL
GB Original operating instructions Petrol hoe
H Eredeti hasznalati utasitas Benzin-foldkapa
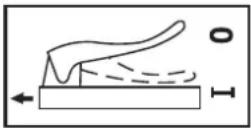
Be sure the machine is in stability when leaving!


4
5
6
-9-
D
Gefahr!
When using the equipment, a few safety precautions must be observed to avoid injuries and damage. Please read the complete operating instructions and safety regulations with due care. Keep this manual in a safe place, so that the information is available at all times. If you give the equipment to any other person, hand over these operating instructions and safety regulations as well. We cannot accept any liability for damage or accidents which arise due to a failure to follow these instructions and the safety instructions.
1. Safety regulations
The corresponding safety information can be found in the enclosed booklet.
Warning!
Read all the safety information, instructions, illustrations and technical data provided on or with this power tool. Failure to adhere to the following instructions may result in electric shock, fire and/or serious injury.
Keep all the safety information and instructions in a safe place for future use.
Explanation of the warning signs on the equipment (see Fig. 13)
1 Important! Read the operating instructions. Follow the warnings and safety instructions.
2 Important! Risk of injury from rotating parts. Keep your hands, feet and clothing away from these parts.
3 Always make sure that the machine is standing solidly whenever you leave it.
4 Important! Hot parts. Keep your distance.
5 Important! Switch off the engine before refuelling.
6 Description of the clutch lever: 0 = Tiller blade stop; 1 = Tiller blade On
2. Layout and items supplied
2.1 Layout
- Engine / gear unit
- Reversing starter
- Spark plug wrench (not illustrated)
4a. Clutch lever
4b. Safety lever
4c. Start/Stop switch
4d. Throttle lever
4e. Choke lever
5. Petrol cock
Assembly set for guard plate / transport wheel (Fig. 3a - 3e):
- Transport wheel
- 1x Screw, M10x80
- 1x Castle nut, M10
- 1x Bolt, 010x70
- 2x Split pin, small
- Guard plate, left
- Guard plate, right
- Guard plate for connecting strut
- 10x Screw, M6×20
- 10x Locknut, M6
- 14x Washer, 06
Assembly set for cultivator blades / depth stop (Fig. 4a - 4e):
- Cultivator blade, inside on the right
- Cultivator blade, outside on the right
- Cultivator blade, inside on the left
- Cultivator blade, outside on the left
- 2x Limiting disc
- 7x Bolt, 08x40
- 7x Split pin, small
- Holder for depth stop / attachments
- Depth stop
- 1x Bolt,016 x 111
- 1x Split pin, large
Assembly set for steering handle / selector lever (Fig. 5a - 5f):
- Selector lever
- 1x Screw, M6×25
- 1x Locknut, M6
- Steering handle
- Handle for height adjustment
- 1x Screw, M16×160
- 1x Spring washer, 016
- 1x Washer
- Cover plate for steering handle
- 1x bolt M8x35
- 1x Locknut, M8
- 2x Screw, M6×35
- 2x Locknut, M6
- 2x Cable clip
Assembly set for wheels (Fig. 11a - 11f)
- 2x Wheel
45.2x Hub - 8x Screw, M10x25
- 8x Nut, M10
- 8x Spring washer, 10
GB
Accessories (Fig. 12a - 12d not included in delivery)
- Plow (not included in delivery)
- Potato plow (not included in delivery)
2.2 Items supplied
Please check that the article is complete as specified in the scope of delivery. If parts are missing, please contact our service center or the sales outlet where you made your purchase at the latest within 5 working days after purchasing the product and upon presentation of a valid bill of purchase. Also, refer to the warranty table in the service information at the end of the operating instructions.
- Open the packaging and take out the equipment with care.
- Remove the packaging material and any packaging and/or transportation braces (if available).
Check to see if all items are supplied. - Inspect the equipment and accessories for transport damage.
If possible, please keep the packaging until the end of the guarantee period.
Danger!
The equipment and packaging material are not toys. Do not let children play with plastic bags, foils or small parts. There is a danger of swallowing or suffocating!
Original operating instructions
- Safetyinstructions
3. Proper use
The equipment is designed for digging garden beds and fi elds. Be sure to observe the restrictions in the additional safety instructions.
The equipment is to be used only for its prescribed purpose. Any other use is deemed to be a case of misuse. The user / operator and not the manufacturer will be liable for any damage or injuries of any kind caused as a result of this.
Please note that our equipment has not been designed for use in commercial, trade or industrial applications. Our warranty will be voided if the machine is used in commercial, trade or industrial businesses or for equivalent purposes.
4. Technical data
Engine: 4-stroke, 212 cm³
Engine rating: 4.1 kW / (5.5 HP)
Engine working speed: 3600 min
Working width: .89 cm
Tiller blade diameter: 36 cm
Forward gear: 2
Starting system: Reversing starter
Fuel: .Petrol (E10)
Engine oil (engine): approx. 0.5 l
Engine oil (gearing): approx. 1.0
Engine oil (air filter): approx. 0.045 l
Tank capacity: approx. 3.6
Vibration a_w .. 6.8 m/s
Uncertainty K: 1.5 m/s²
Weight: 69 kg
Spark plug: F6RTC
Sound pressure level L_pA 81.8 dB(A)
Uncertainty K_pA 3 dB
Guaranteed sound power level L_WA 99 dB(A)
5. Before starting the equipment
Note: Two persons are needed for assembly!
Assembling the guard plate and the transport wheel
- Arrange the components properly as described in section 2.1 Layout.
- Fit the transport wheel (6) to the engine/gear unit (1) as shown in Fig. 3c.
- Fit the guard plate (4) and the connecting strut (13) as shown in Fig. 3d/3e.
Assembling the cultivator blades and the depth stop
- Arrange the components properly as described in section 2.1 Layout.
- Fit the right-hand cultivator blades (17/18), the left-hand cultivator blades (19/20) and the limiting discs (21) as shown in Fig. 4c/ 4d. Make sure that the sharp side of the cultivator blade (Fig. 4d/Item A) faces in the direction of rotation.
- Fit the depth stop (24/25) as shown in Fig. 4e and secure in position with the split pin. We recommend securing the depth stop in the middle position of the 8 possible positions when you begin your work. If you want to
GB
change the working depth, move the depth stop by sliding it up or down.
Assembling the steering handle and the selector lever
- Arrange the components properly as described in section 2.1 Layout.
- Fit the steering handle (33) and the selector lever (30) as shown in Fig. 5c.
- Fit the steering handle (38) and the cable clip (43) as shown in Fig. 5f.
Assembling the wheels
- Arrange the components properly as described in section 2.1 Layout.
- Fit the wheels (44) and the hub (45) as shown in Fig. 11a-11f.
Important! Before you start up for the first time you must fill in engine oil and fuel (7.2).
- Check the fuel and engine oil levels and top up if required.
Fill the air filter with oil (7.2).
Fill the gearing with oil (7.2).
Make sure that the ignition cable is secured to the spark plug. - Check the area immediately around the power cultivator.
6. Operation
- Set the depth stop (Fig. 4e / Item 25) to the desired depth and secure with the split pin.
- Swing up the transport wheel and make sure that the bolt of the latch is engaged in the mount at the front (Fig. 6a).
- You can adjust the steering handle to your physical size. To do so, loosen the handle for height adjustment (Fig. 5c), adjust the bracket and retighten the screws.
To start the star-type hoes, actuate the safety lever 4b, and press and hold the clutch lever 4a (Fig. 6b). Releasing the clutch lever will bring the star-type hoes to a stop (if they do not stop, readjust the clutch cable 7.2.4).
To change the gear setting, release the clutch lever (4a) to disconnect the gearing from the engine. Use the selector lever (30) to activate the required gear setting (Fig. 7c):
R = Reverse
0= Idle
2 = 2 nd gear
1=1st gear
Warning! Risk of injury when reversing! The machine moves towards the user.
Starting the engine
- Ensure that the ignition cable is connected to the spark plug.
Open the petrol cock (5). - Move the Start/Stop switch (4c) to the ,ON^ position.
- Move the choke lever (4e) to position .
- Start the engine with the reversing starter (2) by pulling forcefully on the handle. If the engine does not start, pull the handle again.
- Push the choke lever (4e) back again after the engine has started.
- Move the throttle lever (4d) into position for the speed required.
Important!
When starting with the reversing starter, the engine might recoil suddenly as it starts up, resulting in hand injuries. Wear protective gloves when starting the equipment.
Important! Never allow the actuator cable to snap back.
Important! In cold weather it might be necessary to repeat the starting process several times.
Stopping the engine
Move the engine Start/Stop lever (4c) into the STOP position.
7. Cleaning, maintenance, storage and ordering of spare parts
Danger!
Pull out the spark plug boot before doing any cleaning and maintenance work.
7.1 Cleaning
- Keep all safety devices, air vents and the motor housing free of dirt and dust as far as possible. Wipe the equipment with a clean cloth or blow it with compressed air at low pressure.
We recommend that you clean the device immediately each time you have finished using it.
Clean the equipment regularly with a moist cloth and some soft soap. Do not use cleaning agents or solvents; these could at
GB
tack the plastic parts of the equipment. Ensurer that no water can seep into the device. The ingress of water into an electric tool increases the risk of an electric shock.
7.2 Maintenance
Important: Switch off the machine immediately and contact an authorized dealer in the following cases:
In the event of unusual vibrations or noise.
If the engine appears to be overloaded or misfires.
More information can be found in section 4 "Technical data and service manual for petrolpowered equipment".
7.2.1 Air filter maintenance
- Check the air filter and filter oil before every use, clean the air filter, replace if necessary.
- Remove the filter element (Fig. 8a-8b).
- Do not use abrasive cleaning agents or petrol to clean the element. If the filter element is soaked with oil, squeeze the oil out.
- Replace the filter element (A) if it is heavily soiled or damaged.
- Fill engine oil into the air filter box (B) up to the mark (C). Take care not to tilt the machine too much or oil will run out of the air filter box.
- Assemble in reverse order.
7.2.2 Spark plug maintenance
Check the spark plug for dirt and grime after 10 hours of operation and if necessary clean it with a copper wire brush. Thereafter service the spark plug after every 50 hours of operation.
Pull off the spark plug boot (Fig. 9) with a twist.
- Remove the spark plug (Fig. 9/Item D) with the supplied spark plug wrench.
- Assemble in reverse order.
7.2.3 Changing the engine oil/checking the engine oil level (before each use)
The engine oil is best changed when the engine is at working temperature.
- Remove the oil dip stick (Fig. 10a / Item E) and the oil drain plug (Fig. 10b / Item F).
Drain the warm engine oil into a drip tray. - Fill in engine oil up to the top mark on the oil dip stick (Fig. 10c/H).
- Important: Do not screw in the dip stick when you check the oil level, simply insert it as far as the thread (H = Max. / L = Min.)
- Dispose of the waste oil properly.
7.2.4 Adjusting the Bowden wires
In the working setting it should be possible to push the clutch lever up to the push bar without this requiring much eff ort. If the Bowden wire is too taut for this, it must be extended. To do this, undo the lock nut opposite the main cable, extend the screw connector and then tighten the lock nut again (see Fig. 6b/Item G). If the star-type hoes no longer rotate, the screw connector will have to be shortened (as described above).
7.2.5 Changing the gearing oil/checking for oil loss from the gearing (visual check before each use)
The oil is best changed when the gearing is at working temperature. Carry out the first oil change after 20 hours in operation, then at regular intervals of 50 hours.
- Open the oil cap (Fig. 2) (G) and the oil drain plug (Fig. 2) (E). Drain the warm oil into a drip tray.
Top up with oil. - Dispose of the waste oil properly.
The gear unit is driven by a V-belt. The gear unit can be repaired if this should become necessary. If repairs are necessary, please contact our customer service center.
7.3 Storage
Empty the fuel tank before you decommission the machine for a lengthy period of time. Clean the machine and coat all metal parts with a thin fi lm of oil to protect them from rusting. Store the machine in a clean, dry room.
7.4 Ordering replacement parts:
Please quote the following data when ordering replacement parts:
Type of machine
Article number of the machine
Identification number of the machine
- Replacement part number of the part required For our latest prices and information please go to www.Einhell-Service.com
GB
8. Disposal and recycling
The equipment is supplied in packaging to prevent it from being damaged in transit. The raw materials in this packaging can be reused or recycled. The equipment and its accessories are made of various types of material, such as metal and plastic. Never place defective equipment in your household refuse. The equipment should be taken to a suitable collection center for proper disposal. If you do not know the whereabouts of such a collection point, you should ask in your local council offices.
The reprinting or reproduction by any other means, in whole or in part, of documentation and papers accompanying products is permitted only with the express consent of the Einhell Germany AG.
Subject to technical changes
GB
9. Troubleshooting guide
Warning: Switch off the engine and pull out the ignition cable before making any checks or adjustments.
Warning: If, after making an adjustment or repair to the engine, you let it run for a few minutes, remember that the exhaust and other parts will get hot. Do not touch these parts as these may burn you.
| Fault Possible causes Remedy | ||
| The unit does not operate smoothly and vibrates intenu-sively | - Bolts loose - Spark plug defective | - Check bolts - Replace spark plug |
| The engine does not start | - Spark plug defective - Fuel tank empty | - Replace spark plug - Top up fuel |
| Engine does not run smoothly | - Air fi iter dirty - Spark plug soiled or defective | - Clean the air fi iter - Clean or replace the spark plug |
| Drive power falls - Clutch play too large - V-belt loose | - Adjust clutch cable - Contact authorized customer ser-vice | |
| The engine will not start or dies after a short period of time | - Spark plug foul - No fuel | - Clean or replace spark plug - Top up fuel |
GB
Service information
We have competent service partners in all countries named on the guarantee certificate whose contact details can also be found on the guarantee certificate. These partners will help you with all service requests such as repairs, spare and wearing part orders or the purchase of consumables.
Please note that the following parts of this product are subject to normal or natural wear and that the following parts are therefore also required for use as consumables.
| Category Example | |
| Wear parts* | Spark plug, air filter, cultivator blade, V-belt, cou-pling, fuel fi lter |
| Consumables* | |
| Missing parts |
- Not necessarily included in the scope of delivery!
In the effect of defects or faults, please register the problem on the internet at www.Einhell-Service.com. Please ensure that you provide a precise description of the problem and answer the following questions in all cases:
- Did the equipment work at all or was it defective from the beginning?
Did you notice anything (symptom or defect) prior to the failure? - What malfunction does the equipment have in your opinion (main symptom)? Describe this malfunction.
GB
Warranty certificate
Dear Customer,
All of our products undergo strict quality checks to ensure that they reach you in perfect condition. In the unlikely event that your device develops a fault, please contact our service department at the address shown on this guarantee card. You can also contact us by telephone using the service number shown. Please note the following terms under which guarantee claims can be made:
- These guarantee terms apply to consumers only, i.e. natural persons intending to use this product neither for their commercial activities nor for any other self-employed activities. These warranty terms regulate additional warranty services, which the manufacturer mentioned below promises to buyers of its new products in addition to their statutory rights of guarantee. Your statutory guarantee claims are not affected by this guarantee. Our guarantee is free of charge to you.
- The warranty services cover only defects due to material or manufacturing faults on a product which you have bought from the manufacturer mentioned below and are limited to either the rectification of said defects on the product or the replacement of the product, whichever we prefer. Please note that our devices are not designed for use in commercial, trade or professional applications. A guarantee contract will not be created if the device has been used by commercial, trade or industrial business or has been exposed to similar stresses during the guarantee period.
-
The following are not covered by our guarantee:
-
Damage to the device caused by a failure to follow the assembly instructions or due to incorrect installation, a failure to follow the operating instructions (for example connecting it to an incorrect mains voltage or current type) or a failure to follow the maintenance and safety instructions or by exposing the device to abnormal environmental conditions or by lack of care and maintenance.
- Damage to the device caused by abuse or incorrect use (for example overloading the device or the use or unapproved tools or accessories), ingress of foreign bodies into the device (such as sand, stones or dust, transport damage), the use of force or damage caused by external forces (for example by dropping it).
-
Damage to the device or parts of the device caused by normal or natural wear or tear or by normal use of the device.
-
The guarantee is valid for a period of 24 months starting from the purchase date of the device. Guarantee claims should be submitted before the end of the guarantee period within two weeks of the defect being noticed. No guarantee claims will be accepted after the end of the guarantee period. The original guarantee period remains applicable to the device even if repairs are carried out or parts are replaced. In such cases, the work performed or parts fitted will not result in an extension of the guarantee period, and no new guarantee will become active for the work performed or parts fitted. This also applies if an on-site service is used.
-
To make a claim under the guarantee, please register the defective device at: www.Einhell-Service.com. Please keep your bill of purchase or other proof of purchase for the new device. Devices that are returned without proof of purchase or without a rating plate shall not be covered by the guarantee, because appropriate identification will not be possible. If the defect is covered by our guarantee, then the item in question will either be repaired immediately and returned to you or we will send you a new replacement.
Of course, we are also happy offer a chargeable repair service for any defects which are not covered by the scope of this guarantee or for units which are no longer covered. To take advantage of this service, please send the device to our service address.
Also refer to the restrictions of this warranty concerning wear parts, consumables and missing parts as set out in the service information in these operating instructions.
F
Danger!
Chere cliente, cher client,
Motor: 4-timpi, 212cm^3
Putere motor: 4,1 kW/ (5,5 PS)
Turatie delucru motor: 3600 min
Latimea de lucru: 89 cm
Cuetit prasitor 36 cm
Stimata clienta, stimate client,
produsele noastre sunt supuse unui control de calitate riguros. Daca totusi vredata acest aparat nu va fonctiona ireprosabil, ne pare foarte rau si va rugam sa va adresa t centrului nostru service, la adresa indica la finalul acestui certificat de garantie. Bineinteles ca va stam si la Telefon cu placere la disposizie, la numeroile de service mentionate. Pentru revendicarea pretentiilor de garantie trebuie tinut cont de urmatoarele:
Evnpwon yia to epbic
Combustivel: Gasolina (E10)
Oleo do motor (motor): .. aprox. 0,5
5. Pre puštanja u pigeon
Napomena: Za montazu su potrebne dve osobe!
Montaža zašitnog limi i transportnog točka
- Rasporedite componente kao sto je opisanopod tackom 2.1 Obim isporuke.
- Montirati transportni točak (6) na Jedinicu motora/jedinicu menjača (1) kao što je prikazano na sl. 3c.
- Montirajte zaistni lim (4) i spojna precka (13) kao sto je prikazano na sl. 3d/ 3e.
Montaza noza i graničnika dubine
- Rasporedite componente kao sto je opisanopod tackom 2.1 Obim isporuke.
- Montirajte desni noz (17/18), levi noz (19/20) i graniene ploice (21) kao sto je prikazano na sl. 4c/ 4d. Pritom vodite raçauna da je ostra strana noza (sl. 4d/poz. A) okrenuta u smeru okretanja.
- Montirajte granichnik dubine (24/25) kao sto je prikazano na sl. 4e i sigurnosnom rascepkom uocrstiti u pozaju. Na pocektku rada preparučujemo da se granichnik dubine fiksira u srednjem od 8 moguciho polozaja. Ako radna
RS
dubina treba da se promeni, pomerite polozaj graničnika dubine prema gore ili prema dole.
Paliwo: benzyna (E10)
Seadke mootori Start/stopp-kang (4c) positsooni STOP.
Hoss Zhang/Product-Management
First CE:21
Art-No.:34.315.11
I-No.:21011
Subject to change without notice
Archive-File/Record: NAPR022497
Documents registrar: Markus Jehl Wiesenweg 22, D-94405 Landau/saar
* GB Petrol hse - F Bnusca aessens. 1 Zepa a benzina - DNW Bndrindran joshakar - S Benidriven joshila - CZ Benzhine molyke, SK Benzhine odigy paly, Nt Bonzide baidenone - E Motozada conor mot e gaso - FBN Bonizmhyeninn - SLO Benizmhyeninn - HBN Benizmhyeninn - GR Pdpa tbeni - GR Warmco fevy - P Enkasa a gasana - HR/SHB Bonzirne tera - RS Bclgcybrna spalino - TR Bonnila papa - RUS Bonizmhyeninn kaua gas oynsnynn nnnr - EE Benismincngma multires - LV Bonzirn naeoure - LT Bonzirn naeoure - LBD Bonzirn naeoure - JND Bonzirn naeoure - JND Bonzirn naeoure - JND Bonzirn naeoure - JND Bonzirn naeoure
EH 09/2021 (01)


- D
- Gefahr!
- Safety regulations
- Warning!
- Explanation of the warning signs on the equipment (see Fig. 13)
- Layout and items supplied
- Layout
- Petrol cock
- Assembly set for guard plate / transport wheel (Fig. 3a - 3e):
- Assembly set for cultivator blades / depth stop (Fig. 4a - 4e):
- Assembly set for steering handle / selector lever (Fig. 5a - 5f):
- Assembly set for wheels (Fig. 11a - 11f)
- GB
- Accessories (Fig. 12a - 12d not included in delivery)
- Items supplied
- Danger!
- Proper use
- Technical data
- Before starting the equipment
- Note: Two persons are needed for assembly!
- Assembling the guard plate and the transport wheel
- Assembling the cultivator blades and the depth stop
- Assembling the steering handle and the selector lever
- Assembling the wheels
- Operation
- Warning! Risk of injury when reversing! The machine moves towards the user.
- Starting the engine
- Important!
- Stopping the engine
- Cleaning, maintenance, storage and ordering of spare parts
- Cleaning
- Maintenance
- Important: Switch off the machine immediately and contact an authorized dealer in the following cases:
- Air filter maintenance
- Spark plug maintenance
- Changing the engine oil/checking the engine oil level (before each use)
- Adjusting the Bowden wires
- Changing the gearing oil/checking for oil loss from the gearing (visual check before each use)
- Storage
- Ordering replacement parts:
- Disposal and recycling
- Troubleshooting guide
- Service information
- Warranty certificate
- Dear Customer,
- F
- Evnpwon yia to epbic
- Pre puštanja u pigeon
- Montaža zašitnog limi i transportnog točka
- Montaza noza i graničnika dubine
- RS
Brand : EINHELL
Model : GCMT 4280
Category : Electric saw