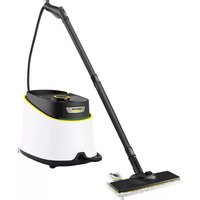
SG 44 - Steam cleaner Kärcher - Free user manual and instructions
Find the device manual for free SG 44 Kärcher in PDF.
User questions about SG 44 Kärcher
0 question about this device. Answer the ones you know or ask your own.
Ask a new question about this device
Download the instructions for your Steam cleaner in PDF format for free! Find your manual SG 44 - Kärcher and take your electronic device back in hand. On this page are published all the documents necessary for the use of your device. SG 44 by Kärcher.
USER MANUAL SG 44 Kärcher
71364 Winnenden (Germany)
Tel.: +49 7195 14-0
Fax: +49 7195 14-2212
Winnenden, 2016/04/01
Technische Daten
Please read and comply with these original instructions prior
to the initial operation of your appliance and store them for later use or subsequent owners.
Before first start-up it is definitely necessary to read the safety indications Nr. 5.956-345.0!
- The non-compliance of the operating and safety instructions may lead to damages of the appliance and to dangers for the operator and other persons.
In case of transport damage inform vendor immediately.
Contents
Environmental protection . . . EN 1
Danger or hazard levels . . . . EN 1
Proper use EN 1
Symbols on the machine. EN 2
Overview EN 2
Safety Devices EN 2
Cleaning methods EN 3
Start up EN 3
Operation EN3
How to use the accessories . . EN 5
Transport. EN 6
Storage EN6
Care and maintenance. EN 6
Troubleshooting EN 7
Warranty EN7
Accessories and Spare Parts. EN 7
EU Declaration of Conformity. EN 8
Technical specifications . . . . EN 9
Environmental protection
The packaging material can be recycled. Please do not throw the packaging material into household waste; please send it for recycling.
Old appliances contain valuable materials that can be recycled; these should be sent for recycling. Batteries, oil, and similar substances must not enter the environment. Please dispose of your old appliances using appropriate collection systems.
Notes about the ingredients (REACH)
You will find current information about the ingredients at:
www.kaercher.com/REACH
Danger or hazard levels
△DANGER
Pointer to immediate danger, which leads to severe injuries or death.
WARNING
Pointer to a possibly dangerous situation, which can lead to severe injuries or death.
CAUTION
Pointer to a possibly dangerous situation, which can lead to minor injuries.
ATTENTION
Pointer to a possibly dangerous situation, which can lead to property damage.
Proper use
- The machine is designed for generating steam and vacuum cleaning liquids and solid substances according to the description in this Operating Instructions Manual.
- This appliance is suitable for commercial use.
- This appliance is not suitable for industrial use.
Symbols on the machine

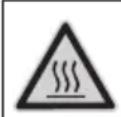
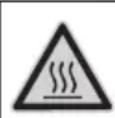
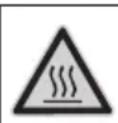
Steam
CAUTION - Danger of scalding
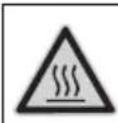
Risk of burns on account of hot surfaces!
Overview
Device elements
Illustration A
1 Safety lock (steam boiler)
2 Operating field
3 Steam hose
4 Reset key - Descaling
5 Steam switch
6 Accessory compartment
7 Cover of the appliance connector
8 Steam plug
9 Carrying handle
10 Cable hook
11 Hood
12 Container closure (fresh water tank)
13 Terry cloth cover
14 Funnel inlet
15 Hand nozzle
16 Window nozzle (option)
17 Power cord
18 Retaining clip
19 Floor nozzle with bristles
20 Floor cleaning cloth (floor nozzle with bristles)
21 Round brush
22 Power nozzle (red)
23 Extension piece
24 Floor nozzle with lamellae
25 Detail nozzle (120 mm)
26 Detail nozzle (180 mm)
27 Floor cleaning cloth (floor nozzle with lamellae)
28 Locking knob
29 Extension tube
30 Lock (child-proof lock)
31 Steam gun
Operating field
Illustration B
1 Switch - pump fresh water tank
2 Indicator lamp - heating (yellow)
3 Indicator lamp - water shortage steam boiler (red)
4 Temperature display
5 Rotary knob for VAPOHYDRO regulation
6 Rotary knob for steam quantity controller
7 Working temperature range
8 Indicator lamp - Dscaling (white)
9 Indicator light - water shortage fresh water tank (red)
10 Switch - heating (ON/OFF)
Colour coding
- The operating elements for the cleaning process are yellow.
- The controls for the maintenance and service are light gray.
Safety Devices
Safety devices serve for the protection of the user and must not be put out of operation or bypassed with respect to their function.
Pressure controller
The pressure controller keeps the boiler pressure during the operation as constant as possible. The heating is turned off if the maximum operating pressure of 4 bar is reached in the boiler and is reactivated in case of a pressure drop in the boiler due to steam tapping.
Water shortage thermostat
When the water in the boiler becomes exhausted, the temperature of the heating increases. The low-water thermostat turns off the heating, and the red low-water indicator lamp "water shortage" lights up. The heating is prevented from being turned on again until the boiler has cooled down or been refilled with water.
Safety thermostat
- If the low-water thermostat fails and the appliance overheats, the safety thermostat turns off the steam cleaner.
- Please contact your local KÄRCHER customer service to arrange for the reset of the safety thermostat.
Safety lock
- The safety lock seals the boiler against the steam pressure that builds up in the boiler. If the pressure controller is defective and the steam pressure in the boiler rises above 5.7 bar, a pressure control valve in the safety lock opens, and steam is emitted through the lock to the outside.
- Please contact your local Kärcher customer service before you put the appliance into operation again.
Cleaning methods
Refreshing textiles
Always test the compatibility of the fabrics on a hidden spot prior to treating them with the appliance: Steam first, then allow to dry before checking for colour changes or deformation.
Cleaning of Coated or Lacquered Surfaces
When cleaning painted or plastic-coated surfaces, as found on kitchen and living room furniture, doors, parquet, linoleum; wax, furniture polish, plastic surfaces or paint can come loose or stains can be created. When cleaning these surfaces, briefly steam a cloth and wipe the surfaces with it.
Cleaning of Glass
Preheat window panes during seasons with especially low temperatures. In order to do so, lightly steam the entire glass surface from a distance of approx. 50~cm . This will prevent tensions on the surface which might lead to glass breakage.
Start up
Attaching the Accessories
Lift up the cover of the socket in the device and tightly plug the steam connector into the device. The pins of the plug must lock into the cover of the appliance connector.
Connect the required accessories (floor nozzle, hand nozzle or detail nozzle) to the steam gun. Slide the parts together until the locking button locks into the steam gun.
Use the extension pipes if necessary. Slide the parts together until the respective locking button locks into place.
Press down on the locking knob to separate the accessories.
Fill up with water
Note: The use of distilled water (no limeste scale build-up) is possible, however, leads to faster wear of the boiler; thus, it is not recommended.
Check safety lock for tight seating.
Unscrew the container closure from the fresh water tank.
Attach the funnel inlet to the fresh water tank and snap into place by a rotating motion.
Fill max. 2 litres of fresh water into the fresh water tank.
WARNING
Do not use detergent.
Unlock and remove the funnel inlet.
Screw the container closure onto the fresh water tank.
Operation
Temperature display
The temperature indicator shows whether the operation is taking place in the correct temperature range (working temperature range).
Turning on the Appliance
Insert the mains plug into the socket.
Switch on the device with the switch - pump fresh water tank and with the switch - switch on heating. The indicator lamps illuminate.
Note: The full heating performance is only available if the steam plug is connected to the appliance during the heating-up period. Once the indicator lamp "heating" has gone out, the system is ready for use.
Note: Do not place the appliance into an upright position while it is running. Otherwise, the heating will turn off automatically after a brief period and the indicator lamp "water shortage" will illuminate in red.
Switch the heating off by means of the switch while the appliance is being transported.
Actuate the steam switch, steam will escape. Always direct the steam gun at a separate piece of cloth until the steam is emitted evenly.
- The heating of the steam cleaner is turned on during operation of the appliance (indicator lamp glows yellow) in order to maintain the pressure in the boiler at a constant level.
If the device is switched on without water, initially, the indicator lamp "heating" will glow yellow until the water shortage thermostat switches the heating off. After that, the indicator lamp "water shortage" glows red.
Steam quantity regulation
When working with standard accessories, regulate the steam volume via the rotary knob on the device.
Note: If the steam quantity regulation is set to a small quantity, steam may continue to be emitted after the steam switch has been released until the pressure in the steam hose is reduced. This pressure can be relieved even faster by briefly setting the steam quantity regulation to a large volume.
VAPOHYDRO regulation with rotary knob
In wet areas, you can also wash away the dirt instead of absorbing it with the cloth. For this, set the moisture of the steam to regulate via VAPOHYDRO regulation by means of the rotary knob. The higher the humidity of the steam, i.e. the more water is contained in the steam jet, the higher the rinsing effect. If you turn the rotary knob in the counterclockwise direction to the highest quantity (+), a hot water jet is issued, and the highest rinsing effect is achieved.
- We recommend using the VAPOHY-DRO in connection with the detail nozzle for cleaning the bathroom.
- Turn the rotary knob of the VAPOHY-DRO regulation in the clockwise direction to the smallest quantity (-) when working with cloths (floor nozzles, manual nozzle) in order to have as little moisture in the steam jet as possible. The dirt loosening power of the steam is improved this way.
Note: If the rotary knob of the VAPOHYDRO regulation is turned in the counterclockwise direction to the highest quantity (+), the boiler is depleted faster.
Refilling Water
Note: Once the water in the fresh water tank is used up, a signal is issued and the indicator light for "water shortage fresh water tank" lights up red.
Fill the fresh water tank with a maximum of 2 litres of fresh tap water using the filling funnel.
Once the indicator lamp "heating" has gone out, the system is ready for use.
Note: If the pump does not deliver any water in spite of the fresh water tank being full, the boiler must be descaled.
Removing the Accessories
△DANGER
Scalding danger! Hot water may drip out of the accessory parts while you are detaching them! Never disconnect accessory parts while steam is escaping.
Turning Off the Appliance
Switch the appliance off at the switches.
Fold down the cover of the socket in the device and pull the steam connector out of the device.
Disconnect the mains plug from the socket.
Note: You can leave the residual water in the appliance.
Storing the Appliance
Place the manual nozzle, detail nozzles and small parts into the accessories storage box.
Coil the power cord around the cable hooks while the device is standing.
Insert the extension pipes individually into the recesses on the appliance floor.
Note: Always allow the brushes to cool down so that any deformation of the bristles is avoided.
How to use the accessories
Note: Detergent residue or care emulsions that are still present on the surface to be cleaned can lead to streaks during steam cleaning. However, these will disappear with repeated cleaning procedures.
Steam gun
Application examples for use of the steam gun without accessories:
- Elimination of odours and wrinkles from hanging pieces of clothing, by steaming them from a distance of 10-20 cm.
- Removing dust from plants. Here, keep a distance of 20-40 cm.
- Moist dusting, by briefly steaming the cloth and wiping the furniture with it.
Detail nozzle
- The closer you hold the nozzle to the dirty spot, the higher the cleaning effect as temperature and pressure of the steam reach their maximum values immediately when they are emitted from the nozzle.
- The detail nozzle with the different attachment is suited for cleaning difficult to access points, such as corners, grooves, etc. as well as blinds, central heaters, toilets, stainless steel, mirrors, mirrors, fixtures, coated and enameled surfaces, loosening of stains.
- The power nozzle increases the emission speed of the steam. Therefore, it is well-suited for cleaning very tough dirt, blowing out corners, grooves, etc.
Note: The round brush is not suitable for cleaning sensitive surfaces.
Floor nozzle
Floor nozzle with bristles
- For abrasive cleaning of stubborn soil ing.
- Suited for all washable wall and floor coverings, e.g. stone floors, tiles and PVC floors. Work slowly on very dirty surfaces to allow the steam to act on the dirt for a longer period of time.
Floor nozzle with lamellae
- For hygienic cleaning of smooth surfaces, because of higher surface temperature.
- For a hygienical cleaning result steam directly on the hard surface with a working speed of max. 30 cm per second. Additionally set VAPOHYDRO to minimum position and steam pressure to maximum position.
Using the floor cleaning cloth
Flip and replace floor cloth regularly to improve the dirt pickup.
Attach the floor cloth to the floor nozzle.
1 Fold the floor cloth the long way and place the floor nozzle on top of it.
2 Open holding clamps.
3 Place the cloth ends into the openings.
4 Close the holding clamps.
CAUTION
Do not insert fingers between the clamps.
Hand nozzle
Suited for small washable areas, shower stalls, mirrors or furniture cloth material.
Pull the terry cloth cover over the manual nozzle.
Window nozzle (option)
Order no. 4.130-115.0
Apply steam to the glass surface from a distance of approximately 20~cm until the surface is moistened evenly.
Switch off the steam supply.
Strip the glass surface in straight lines from the top to the bottom using the rubber lip.
Wipe the rubber lip and the bottom edge of the window dry after each strip.
Wallpaper remover (optional)
Order no. 2.863-076.0
You can use the wallpaper remover with the steam cleaner to remove wallpapers.
Apply wallpaper remover to the edge of a wallpaper length and let the steam settle in until the wallpaper is fully moistened (approx. 10 seconds).
Reset wallpaper remover without switching off. Lift the soaked piece of wallpaper using a flat trowel, and pull it off the wall.
In case of woodchip wallpaper that has been painted several times, the steam may not be able to soak the wallpaper. If this happens, you need to prepare accordingly with a nail roller.
Transport
CAUTION
Risk of injury and damage! Observe the weight of the appliance when you transport it.
For transport over short distances: Switch off the heating, bring the device into an upright position, grab the device on the carrying handle and extension tube to carry it.
When transporting in vehicles, secure the appliance according to the guidelines from slipping and tipping over.
Storage
CAUTION
Risk of injury and damage! Note the weight of the appliance in case of storage.
This appliance must only be stored in interior rooms.
Care and maintenance
△DANGER
Always disconnect the mains plug and allow the steam cleaner to cool down before performing any maintenance work.
Rinsing the boiler
Illustration C
Rinse the boiler of the steam cleaner boiler at the latest after 5 boiler fillings.
Fill the boiler with water and shake it strongly. This dissolves lime scaling residing on the boiler bottom.
Empty water out.
Descaling the boiler
As limescale also builds up on the boiler walls, we recommend to descale the boiler using KÄRCHER Bio descaler RM 511. The KÄRCHER Bio descaler RM 511 is a product based on citric acid, which is completely biodegradable.
ATTENTION
Only use products approved by KÄRCHER to exclude any damages of the appliance.
Disconnect the mains plug from the socket.
Completely empty the steam boiler.
Completely dissolve two bags of descaler by stirring it in 2 liters of warm water.
Fill the descending solution into the boiler and allow to react for approximately 8 hours.
△DANGER
Do not screw the steam boiler safety cap on the appliance during the descending. Do not use the appliance as long as there is descending agent in the boiler.
Pour out the descending solution. Rinse the boiler at least two more times with cold water to ensure that there is no residue left behind in the boiler.
Turn on the appliance.
Press the reset key until the indicator lamp "Dscaling" goes off.
The appliance is ready for use again. After approx. 50 operating hours, the indicator lamp "Dscaling" shows the next necessary descending process.
Note: Never fill descaler into the fresh water tank as this damages the pump.
Filter replacement
Illustration D
Using soiled water can occlude the filter. This is shown by extraordinarily long run times of the pump or a complete malfunction.
Replace the filter.
Troubleshooting
△DANGER
Always disconnect the mains plug and allow the steam cleaner to cool down before performing any maintenance work.
△DANGER
Repair works may only be performed by the authorized customer service.
Indicator lamp "water shortage" glows red
Refill water.
Indicator lamp "Dscaling" glows white
Decalcify appliance.
Customer Service
If malfunction can not be fixed, the device must be checked by customer service.
Warranty
The warranty terms published by our competent sales company are applicable in each country. We will repair potential failures of your accessory within the warranty period free of charge, provided that such failure is caused by faulty material or defects in fabrication. In the event of a warranty claim please contact your dealer or the nearest authorized Customer Service center. Please submit the proof of purchase.
Accessories and Spare Parts
Only use original accessories and spare parts, they ensure the safe and trouble-free operation of the device.
For information about accessories and spare parts, please visit www.kaercher.com.
Special accessories
Only use special accessories approved by the manufacturer.
| Name Part no.: | |
| Bio descaler RM 511 (3x 100 g of powder) | 6.290-239.0 |
| Caddy cart 6.962-239.0 | |
| Round brush kit with brass bristles | 2.863-075.0 |
| Round brush kit 2.863-077.0 | |
| Micro fibre cloth 6.905-921.0 |
EU Declaration of Conformity
We hereby declare that the machine described below complies with the relevant basic safety and health requirements of the EU Directives, both in its basic design and construction as well as in the version put into circulation by us. This declaration shall cease to be valid if the machine is modified without our prior approval.
Product: Steam cleaner
Type: 1.092-xxx
Relevant EU Directives
2014/35/EU
2014/30/EU
Applied harmonized standards
EN 55014-1: 2006+A1: 2009+A2: 2011
EN 55014-2: 2015
EN 60335-1
EN 60335-2-54
EN 61000-3-2: 2014
EN 61000-3-3:2013
EN 62233: 2008
Applied national standards
TRD 801
5.957-470
The undersigned act on behalf and under the power of attorney of the company management.

CEO

S. Reiser
Head of Approbation
Authorised Documentation Representative S. Reiser
71364 Winnenden (Germany)
Phone: +49 7195 14-0
Fax: +49 7195 14-2212
Winnenden, 2016/04/01
Technical specifications
| Electrical connection | ||
| Mains voltage V 220-240 | ||
| Frequency Hz 1~50-60 | ||
| Voltage in the steam gun V 24 | ||
| Type of protection -- IPX4 | ||
| Protective class -- I | ||
| Performance data | ||
| Heating output W 2300 | ||
| Pump W 50 | ||
| Max. operating pressure MPa (bar) 0,4 (4,0) | ||
| Permitted operating pressure MPa (bar) 0,6 (6,0) | ||
| Max. work temperature °C 145 | ||
| Heating time per litre of water min approx. 4 | .5 | |
| Steam quantity (max.) | g/min | 82 |
| Dimensions and weights | ||
| Typical operating weight kg 8,0 | ||
| Max. water capacity | I | 4,0 |
| Tank content | I | 2,0 |
| Boiler capacity I 2,4 | ||
| Length x width x height mm 475 x 320 x 275 | ||
| Power cord | H05VV-F 3x1,0 mm² | |
| Part no.: | Cable length | |
| EU | 6.647-757.0 | 7.5 m |
| GB 6.647-831.0 | 7.5 m | |
| CH 6.647-832.0 | 7.5 m | |
| Power cord | H07RN-F 3x1,5 mm² | |
| Part no.: | Cable length | |
| CN 6.650-597.0 | 7.5 m | |
www.kaercher.com/REACH
Niveau de danger
△DANGER
71364 Winnenden (Germany)
Telephone: +49 7195 14-0
Winnenden, 2016/04/01
\section*{Caracteristiques techniques}
www.kaercher.com/REACH
Livelli di pericolo
△PERICOLO
71364 Winnenden (Germany)
Tel.: +49 7195 14-0
Fax: +49 7195 14-2212
Winnenden, 2016/04/01
Dati tecnici
www.kaercher.com/REACH
Gevarenniveaus
△GEVAAR
Head of Appropriation
71364 Winnenden (Germany)
Tel.: +49 7195 14-0
Fax: +49 7195 14-2212
Winnenden, 2016/04/01
Technische gegevens
www.kaercher.com/REACH
Niveles de peligro
△PELIGRO
Head of Appropriation
71364 Winnenden (Germany)
Tele.: +49 7195 14-0
Fax: +49 7195 14-2212
Winnenden, 2016/04/01
Datasétécnicos
www.kaercher.com/REACH
Níveis de perigo
△PERIGO
71364 Winnenden (Germany)
Tel.: +49 7195 14-0
Fax: +49 7195 14-2212
Winnenden, 2016/04/01
Dados技术和
www.kaercher.com/REACH
Faregrader
△FARE
71364 Winnenden (Germany)
TIf.: +49 7195 14-0
Fax: +49 7195 14-2212
Winnenden, 2016/04/01
Tekniske data
www.kaercher.com/REACH
Risikotrinn
△FARE
Dampmengderegulering
71364 Winnenden (Germany)
TIf: +49 7195 14-0
Winnenden, 2016/04/01
Tekniske data
| Elektrisk tikkobling | ||
| Nettspenning V 220-240 | ||
| Frekvens Hz 1~ 50-60 | ||
| Spenning i damppistol V 24 | ||
| Beskyttermsetype -- IPX4 | ||
| Beskyttermesklasse -- I | ||
| Effektspesifikasjoner | ||
| Varmeeffekt W 2300 | ||
| Pumpe W 50 | ||
| Maks. driftstrykk MPa (bar) 0,4 (4,0) | ||
| Tillatt driftstrykk MPa (bar) 0,6 (6,0) | ||
| Maks. arbeitsstemperatur °C 145 | ||
| Oppvarmingstid per 1 liter vann min ca. 4,5 | ||
| Dampmengde (maks.) | g/min | 82 |
| Mål og vekt | ||
| Typisk driftsvekt | kg | 8,0 |
| Vannpåfyllingsmengde | I | 4,0 |
| Tankvolum | I | 2,0 |
| Vanntankinnhold | I | 2,4 |
| Lengde x bredde x høyde | mm | 475 x 320 x 275 |
| Nettledning | H05VV-F 3x1,0 mm² | |
| Best.nr. | Kabellengde | |
| EU | 6.647-757.0 | 7,5 m |
| GB 6.647-831. | 0 7,5 m | |
| CH 6.647-832. | 0 7,5 m | |
| Nettledning | H07RN-F 3x1,5 mm² | |
| Best.nr. | Kabellengde | |
| CN 6.650-597. | 0 7,5 m | |

www.kaercher.com/REACH
Risknivær
△FARA
Winnenden, 2016/04/01
Tekniska data
www.kaercher.com/REACH
Vaarallisuusasteet
VAARA
71364 Winnenden (Germany)
Puh.: +49 7195 14-0
Winnenden, 2016/04/01
Tekniset tiedot
www.kaercher.com/REACH
Δαβαθμιση κινδύνων
KINADYNO
SigmaoAoynon Eapntmuatwv
AvoiTe TO KAITI TnS Tpiac OoKEUns KAI OuvOeTE KAaTO Bua aTou OTN OoKEUn. OI PooExc Tou BuatoC TTpeTI VA aQaaiouv oTo KAITI TnS Tpiac TnS OoKEUns.
to p (akpoquio daTTeou, akpoquio xieipoc n akpoquio k a o o u onueiou) 0TO TIOToaou. Eiaayete Ta tmuata eaptnuaTow to eva eo aAo, wotou va aOpaiaoi to koupi KEAIDomega to TIOtoAETo atou.
πεππτωση αγακης χροιμοποίησε σωλήνες προεκτασης. Eioáγετε τα τμήματα εξαρτηματων το ενα μέσα στο αλλο, ωστου να ασφαλίσει το κουμπι κλειδώματος.
→ ΠIEOTE TO KOUPTI KλεIDωμαTOC γα va αΠΟΤΑσΕTE TA ΜήματΑ εξαρηματων.
TεμioTe με vερó
Yπóδειξη: Eivai duvatn n xpónn aTTOATyμévou vepou (μn δnuioupyia Iζnμatwv), avkai auto επiTaXuVEI Tn φθopα Tou λεβnta kai, συνεπως, δεν συviotatai.
Akpouoio 8aTeBou u TEPuyia
71364 Winnenden (Germany)
Tnλ.: +49 7195 14-0
Φαξ: +49 7195 14-2212
Winnenden, 2016/04/01
www.kaercher.com/REACH
Tehlike kademeleri
△TEHLIKE
Siparis No. 2.863-076.0

S. Reiser
Head of Approbation
71364 Winnenden (Germany)
Tel.: +49 7195 14-0
Winnenden, 2016/04/01
Teknik Bilgiler
www.kaercher.com/REACH
CTeenehObaCHOCTN
ONACHOCTb
Yka3aHue omHocumelbHo Henocpecdm- beHNO 2p03aueo nacHocmu, Komopar npuBodum K mJKeIbIM yeeyBam uU K cMepmu.
△PENEUPPEXDEHNE
Yka3aHue omHocumelbHO 603MOxHoNo meHuJIbHO onaCHO cumyaucu, Komopar MoXem npueecmu K mJKeIbIM yeeyBm UUNK CMEpmu.
OCTOPOXHO
Yka3aHue Ha nomeHuaJIbHO onaChyIO cumyaUIO, Komopar MoXem npueecMu K noJyuEHUIO ne2kux mpaEM.
BHIMAHHE
Yka3aHue omHocumelbHO 603MOxHoNo meHuJIbHO onaCHO cumyaquu, Komopra MoXem NoBHeMb MamepuJIbHi yuep6.
IcnoJb3OBaHne nO Ha3NaYeHnO
- YcTpoIcTBo npeHa3HauEHO dIy npOBeDeHnO uNCTKn napOM. OuNCTky MOxHo npOBODITb C npIMeHHeHem NOxDoxJaLixNX npINHaIeJXHOCTe, ONICAHbIX B pyKOBODCTBE NO 3KcNpyTaUIn.
-Данньи пибор пиrodeн дя кOM-MepueeCKOrO npimHeHnI.
-Даньи пибор He пиrodeн дя поMbIшлесного примеоня.
CnMBOJIbI Ha np6ope

Nap
BHIMAHNE - onachoctb oXora
Onachocmb oxo208 o 2opyue noeepxHocmu!
063op
Злементы пибopa
PncyHOK A
1 PpeOxpaHntbHa npo6ka (napoBoN KOTeI)
2 PaHEnb ynpaBneHn
3IaHr noaun npa
4 Khoŋka c6poca - YdaJIeHne HaknIIN
5 NapoBoN BbIKIIOuATEJIb
6 Otcek dIy npHaJdxKHOCTe
7 Kpbiuka po3eTk np6opa
8 Tekepe noaun npaa
9 pykoTka dny HOseHn np6opa
10 Kpouckn dIy Ka6eJr
11 Kanot
12 Kpbiuka pe3epByapa (pe3epByap JnJyNCTOIN BObl)
13 YexoI n3 maxpoBOn TkaHn
14 3anpaBouHna BOpOHka
15 PyuHaJ foOpCyHka
16 HacaKa Ipn oKoH (cneuaJIbHbIe npnHaIeXHOCTN)
17 CeTeBoN uHyp
18 3aXIM
19ΦopcyHkaIJnIaCoIeTINHO
20 TkaHb dIyMbITbI nona (fOpcyHka IJnI nona co uetuHOi)
21 Kpyrnaa 5eTka
22 BbICOKonpOn3BOJnteJIbHaJ φOpcyHka (KpaCHoro ζBeta)
23 YdHnHeHne
24ΦopcyHkaIJnI nona cIamJeMa
25ΦopcyHkaToueuHcTpyn(120MM)
26ΦopcyHkaToueuHcTpyn(180MM)
27 TkaHbДЯMbITbЯ NOJa (ΦopcyHkaДЯ NOJa C JAmeJMaM)
28 BloKpuyoza KhoNka
29 YdnnHnTeIbHa Tpy6Ka
30Блokировka(3auntaOTBknHoueHnA DeTbMn)
31 Napobov nucToJeT
Panaelb ynpabJeHna
PnCyHOK B
1 PepeKIOuATEJIb - Hacoc pe3epByapa YNCTOIN BOIbl
2 Kontrpoßbna JAmnoUka - HarpeB (XeIToR O UBeTa)
3 KoHTpoJIbHaJ lamNoUka - HeIOcTaTOK BOI B I npOBOM KOTJIe (Kpachoro UBe-ta)
4 INdkaun TaemepaTpybI
5ПоворOTная руka дя рergyлровки VAPOHYDRO
6Поворотная ручka дя рergyлровки
KoIGNueCTBa napa
7 Dnana3oH pa6ooy TeMnepaTpybI
8 KoHTpoJIbHaJaMNoUka - YdaJeHne HAKINn (6eIoro UBeTa)
9 KoHTpoJIbHaJaMaHa - "HeIOCTaTOK BOIbI" (KpaCHOrO uBETA)
10 BbiknioyateJIb - HarpeB (BKn/BbIKI)
UBeTHa MapKnupOBka
- Oprahbl ynpaBneHnI nI npOcecca ouNCTKN KeJNToro CBeTa.
- OpraHbI ynpaBJIeHnI dIy TexHnueckoTo 06cIyXnBaHnI n cepBnca CBetIOceporo UBeTa.
3auntbIe yctpoiCTBa
3aHTbI npncnocobHe nCnykat dJa 3aHTbl NOb3OBaTeJI H He DOnJXHbI BblBODNTbcra I3 CTpo INIpa6OtaTb B O6xOc CBOIX FyHKuN.
PergyIaTOp DaBJIeHnIa
PeryIaTOp DaBHeHn yDepxNbAeT daBHeHne B napOBom KOTNe BO Bpempa60TbIO BO3MOXHOCTn Ha NOCTOHHOM yPOBHe. Pnp DOCTNXeHN MaKcImMaIbHoro pa6oero DaBHeHn B napOBom KOTNe NODOrpeB OTKlUOaETcN CHOba BKlUOaETcN pN NaDeHn DaBHeHn B KOTNe B pe3yIbTaTe OTbopa npa.
Tepmocta T HeoctaTka BoIbI
Korda Boda B KOTJe 3aKaHUnBaeTcJ, TemnepaTypa HArpeBa yBelenuHaeTcJ. TepMOCTaT HeIOCTaTKa BObl OTKnIOUaET HaRpeB, a KpacNa KOHTpOlbHaNJaMaNa "HeIOCTaTOK Bobl" 3aropaetcJ. NobTophoe BKIOUeHne HArpeBa He DoNyCKaETcJ DoTex NOp, Noka KOTeJI He OXJaNTcJ IIN He6yDet HAnONHeN 3aHOBO.
AbarHbI TepMoCTaT
- Ecn TepmoCTaT HeoctaTKa BODbl BblIeN n3 CTPOy uYcTpoiCTBO neperpeIocb, To aBapnHbI TepMOCTaT BblKlIOuayet MaunHy.
-Дясбрca abapинHOro Tepmoctata cneDyET obpaTntbcsB ynoJHOMOueHHyTO cnIyK6by cepBnCHoro obcnyKnBa-HnraФnpMbI KARCHER.
PpeoXpaHnteIbHa npo6ka
-ПпedoхpaHnteIbHЯ npo6ka 3aKynopnBaet KOTeI, YTO6bl DaBJIeHne napa He hapuHaJocb. B cIyuae HencnpaBHOCTn peYJIaTOpa IaBJIeHn I BO3NtKHOBeHn B KOTIe N36blTOUHOrO DaBJIeHn BпpedoxpaHnteIbHOBI npo6ke OT-KpbIbaeTcI npeDoXpaHnteJIbHbI Kla-naH, n napYepe3 npo6kBy BbIXoDHT HapyKy.
- Ipeed noBToPbIM BBODOM np6opa B 3KcIpyaTaUHO o6paTntecb ByyNoJHOMoueHHyO clyk6y cepBnCHoro 06cIyXINBaHnaΦnpMbI KARCHER.
CnocobIMoKn
OcbexKeHne TeKCTnJIbHbIX 3dEJIIN
Ipeep npoBeHnem o6pa6OTKn c nOMO- ⅢbIO npi6opa cneJyET Bcerda npOBepaYbYCTOuNBOcTB TeKCTINbHbIX N3DeJIIM K BO3- DeIcTBnIO npapa. IpeXeB Cero, cNeJyET o6p6oTaTb napom n3dEIne, 3aTeM npocuyt b erO n, HakoHeU, npOBepTu yCTOnuNBOcTB OKpackn n HaINuHne deOpMaun.
YnCTka NOBepxHocTei C NOKpbITnMn IaKnpoBaHHbIX NOBepxHocTei
Ipru nuctke naKnpoBaHHbIX NOBepxHocTei IJIIOBepxHOCTe C PIACTIKOBbIM NOKpbITnEM, HAnpImep, KxOHHO Me6eN IN Me6eN dJI KBPtbpI, DBepe, NapKeTa, JINHOJeyMa, BOC, Me6eJIbHa NOnItypa, NCKycCTBeHHoe NOKpbITne IJI IN KpacKa MOrYt pACTBOpNTbcr IJI IN Ha HNX MOrYT Bo3HNKHyTb PRTHa. IIn npOBeDeHnry uCNe dyET cIerKa nponapNTb caPcETky IN 3aTEM IpOTepTb IM nepeUncHeHHbIe NOBepxHOCTn.
YnCTka CTeKJa
OkoHbIe CTeKNa B nepNoDbI C OcO6eHNO Hn3KIMN TemnepaTypamn PpeBapntelbHO HaPepb.ДЯ 3TOrO BCIO CTeKJIaHHyIO NOBepXHOCTb Ha pacCToHm OK.50cm cIerka 6DaTb napom.TakIM o6pa3OM ydaCTcN36eKaTb HAnpJxKeHn IOBepXHOCTN, KOTOpoe MOKET npINBeCTN K 6OIO CTeKNa.
Hauaio pa6oTbI
YcTaHOBka npHaJneKHOCTeI
OTkpblkpbIuKpO3eTKn np6bopa n HadeJxHO BCTaBHTb B np6op wTeke pOnaHnp. PtN 3tOM BbICTynbI wTeKepa DOnXHbI 3aΦNKcIpOBaTbcra Ha KpbIuKe po3eTKn np6bopa.
CoeHnHTb c napOBbIM nucToJeTOM KOMnIeKtyUoUee H3dEJIne (HacaIky Inra IOna,pyHyO φOpcyHky INI φOp-cyHKy TocuHcNcTyU).TeaIN BDbNrTaB dpYB Dpyra, NOKa He 3aΦnKcPyEeTcB6nOKpuyUOaA KHONKa B napOBm NucToJte.
→ Πρι ΘεοδχούποΜΟCTη ΚΝΟЛьзΟВаΤb yДПИНТЕЛьнBLE Tpy6KN.ДeТАЛN BДВИ- rATb DpyrВДpyra, NOKa He 3aФИКСИPyEETcA COOTBETCTByIooJa 6ЛOKИpyUOua KHO冈ka.
→ДяOTcoeINHeHnI npHaIeXHoCTeHaxaTb Ha 6JOKpyUOyU KHOKy.
3aINB BOdBi
IpmeHHe:MOxHO nCNOJb3OBaTb DNCTnJIInpoBaHHyO BODy (OTcYrCTBne 6pa3OBaHnI N3BeCTKOBbIX OTIOXKeHn), OndaKO, 3TO BeTe K 6bICTpOMy I3HOCy KOtNa, PO3TOMy He peKOMeHdyETc.
→Проверпь почhoeь снкаци npedoxpaHNTeBJHOI npo6kn.
OTBnHTntb 3aMOK cpe3epByapaДЯ YNCTOINBObl.
BCTaBbTe 3arpy3OHyU BOpOHky B pe-3epByap DnA YnCToB BoDbI N NOBepHn-Te Do UeNcKa.
3aJIHTb MaKcIMyM 2 NITpa BOOpnoBODHO BODBI B pe3epByap dIЯ YnCTOIBODbl.
△PENEYNPEXDEHNE
He ucnolb3oeamb yucmuaue cpedcmba.
Pa36IIOKINPOBaTb IN CHaTb 3aRpy3OHyo BOPOHky.
3aBnHTntb 3amOK pe3epByapa nIyNCTOIN BODbl.
YnpaBJIeHne
HdikaTemaepaTypbI
HndkaTop TemnepaTypbl noka3bIbaeT, npoBODrCn pa60tBl B npaBnIbHOM dna3OHe TemnepaTyp (dnaana3OH pa6ooye TemnepaTypbl).
BknoueHne np6opa
BcTaBnTb ceTeByIO wTeNceJIbHyIO BnI-Ky Bpo3eTKy.
BkIIOHTb npnbop c nOMoU bblKIO- yateJ - Hacoc pe3epByapa dJa cy-CToB OdbI N BblKIOuTeJIy o6OrpeBa. DOnxHa 3aropeTbcra KOHTpoJIbHa JAmNoYka.
PpmeHne: POnHa MoUHocTb HarpBeBa MoKet 6bITb DOCTnHyTa TOJIbKO B TOMcIyae, ecn npn HarpeB K npnbOpy noCoeHNHeN ITeKeP nOaun npa. Korda KoHTpOlbHaj lamNoouka "HarpeB"IorachET, cNCTema 6yDet roToBA K paBoTe.
PpimueHne: He yctaHaBnBaTb BkIIO-yeHHbI np6op BepTKaJIbHo. B npOTNB-HOM clyuae uepe3 HeKOTOpoe BpeMa Ha-rpeB 6yJeT BblKlOueH, n 3arOpNTcKa pacchaj KOHTpoJIbHa JAmNoUka "HeJoCTaTOK BOJbl".
Ipepe TpaHcnpTnpoBkoYcTPOIcTBa CJIeNyET C NOMOuB BbIKIOHaTeJRA BblKIOHTb HArpeB.
→ПинхаTNHa napOBBbIKIOUaTeIbnap BbIXODHT hapxky.ChaJaHaHnpaBnTBnapOBNnCTOJETHaTKaHb,POKa nap He 6yJeT BbIXODNTb paBHOMePHo.
-BoBpemnnoB0BaHnHarpeB nepNoDnueckn BKnIOuaeTcra (3aropaetcKeIITaKoHTPOJbHaJaMNOUka),YTO6bl NODepXNBaTb DaBneHne npa BV KOTJIe Ha DOnxHOM yPOBHe.
- Ecni BkIIOuHTb npi6op 6e3 BOdBi, To ChaJana 3arOpITcra JeJIaT a KOHTpoJIb-Ha JAmNoUka "HarpeB", noka TepMoCTaT HeIoCTaTKa BObl He BblIOuHT HarpeB. 3aTeM 3arOpITcra KOHTpoJIbHa JAmNoUka "HeIoCTaTOK BObl》 (Kpa-CHOrO uBeTa).
PergunpoBaHne KoliNueCTBa napa
KolnueCTBO npa npa pa6ote co cTaHdapTHbIMN npHaJneXHOCTaM MoXHOpeRyIInPOBaTb C NOMOuBIO NOBOPTOHnyKn Ha np6ope.
IpmeHne: Ecn peYJrTop KOJIueCTBa npa yctAHOBHeHa He6OJbWoe KOJIueCTBO,TO nocJe OTnyscAHHa napOBOro BbIKIOUaTeJI npe eue MoKeT BbIXODITb HEKOTOpoe BpeM, NOKa He CHN3NTc DaBJIeHne B WlnaHRe Noaun npa. 3To daBJIeHne MOxHO c6pocntb 6bICTpee, KpaTKOBpeMeHHO yCTaHOBvB peryJrTop Ha 60nbWoe KOJIueCTBO npa.
PpmeHne: Ecnn, HecmOTpa Ha nonHbI pe3epByap dJa YnCTOu BObl, HAcOC He Kaayet BDOy, To KOTeJ Heo6xOIMO OUnCTNTb OT HaKUN.
Сятыпринадлжност
ONACHOCTb
Onachocmb obeapueaHua! Ppu cnauu Hacadok u3 npubopa moxem bblumbcra zopayaa boda! He omcoedunm bpunadJIeKHOcmu BO epeMa bixOda npa.
BbikloueHne np6opa
BbIKIOHTb npIbOp c nOMOu BblKIOUaTeJI.
OTKnHyTb KpbIshky po3eTKn np6opa N BbITaIHTb ITeKepe Noaun napa n3 np6opa.
BbItaunTe ITeNceIbHyIO BnKy n3 po- 3eTKI.
IcnoJb3OBaHne npHaJeXHOCTeI
Yka3aHHe: OcTaTKn YnCTraIe Ro CpeIcTba NJI 3MylbcN INy UXoJa, KOTOpbIe EJe OCTaIOTcR Ha OUnIaEMoN NOBepxHOcTn, MOryt Pn NtCTKe napOM o6pa3OBbIBaTb INoOCbl, KOTOpbIe ydaJIaIOTc Rpn MHOROKpaTHOuOHTKe.
Papoboi nuctoIeT
PpimepbI nCNoJIb3OBaHnI npoBOrO nNCTOJeta 6e3 npHaIeJxHocTei:
- YctpaHEnn 3anaxOB nCKnaDOK Ha BnCraux npedMeTAX OeKdbI npn o6pa60tke napom c pacctoHn 10-20 cm.
- YdaIeHne nbIin c paCTeHn. Co6JIIO-daIte pacCToHne 20-40 cm.
- BnaJHoe npoTnpaHne nbIIN. BbIcTpO 6pa6oTaIe TkaHb napOM n npoTpTe eIO Me6eJIb.
ΦopcsyHka ToceyHoN cTpyn
- Yem 6nHexe fOpcyHka HaxoNTcK 3aTpr3HeHHOMy yAcTky, TeM BblSe uNCTaun 3000EKT, TaK KaK HaNBbICwAaTeMnepaTypa N daBJIeHne npa oBecepeHIO TcHnOncpeDCTBeHHO Ha BblXoDe n3 fOpcyHKn.
-ΦopcunKa TOneHNo Ctpyn Cpa3nHbIMn HacaKaMn PpeHa3NaYeHa DJIa OuNCTKN TpydNO DoCTyINbIX MeCT, HaI npIMep, yrIOB, CTbIKOB I T.D., a TaKKe XaJIIO3N, 6aTapeN CEHTpAlbHoro OTOIIeHNA, TyaIeTOB, HepXaBeIOUeN CtaJIN, OKOH, 3epKaJ, apMaTypbI, 3MaIInpoBaHHbIX NOBepxHOCTeN IN NOBepxHOCTeN C NOKpbITHeM, ydaJIeHNA IaTeH. - BbICOKONpOIN3BOIDNTeINbHna QOpcyHka NOBbIaet CKOpocTb NCTeueHn npa. I03tOMy OHa OcO6eHNO XoPoIO NOxODIT dJIy ydaJIeHn 3aTBepDeBWei rpa3N, PPOyBKn yrIOB, CTbIKOB n T.D.
Yka3aHne: Kpyrnae Tka He npncnocobHeHa DnO ONUCTKu YBCTBNTeJIbHbIX NOBepxHOCTeI.
ΦopcyHKnДЯ NOJa
ΦopcyHkaДЯ noJa co ΚeTnHoI
-Дя abpa3nBHOJ YnCTKn TpydHoydaJaIeMbIX 3aqr3HeHn.
-Прсncoc6neHaДЯВCEXMOUuxCЯCTeHOBbIXIIONoBbIXNOKpbITn,Ha-NpIMep,KaMeHHbIXIIOOB,PINTKINIBX-NoOBPa6oTaTbHa cnIbHo 3a-rp3HeHHbIX NOBepxHOcTAX MeDJIeHHO,HTo6blnap DeIcTBoBaIdoNbwe.
ΦopcyHkaДЯпОla c ЛameЯMu
-ДягнeneHueckoOuNCTKn rJaKnx NOBepXHOCTe BBNDy BbICOKO TempepaTypbl NOBepXHOCTn.
-ДЯгнehuecko OunchKo CO CKOpocTbO pa60tbi MaKc.30 cm/c BbInapnBaIte HEnocpeiCTBeHNO Ha TBepdYIO NOBepxHOCTb.ДОЛHNTeJIbHo yCTaHOBt b VAPOHYDRO Ha MINHMaJIbHyIO CTypeHb, aДаВЛeHne napa Ha MaKcMJaIbHyIO CTypeHb.
IcnoJb3OBaTb TkaHb IJy MbITbI NOJa
YTo6bI ynyuHTb nOrNoUeHne rpa3n, cJeDyET peryJrpho nepeBopauNbTa b N 3aMeHrTb TpAnKy DnA MbITbra NoJa.
3aKpeNtB TkaHb IJa MblTbЯ NOla Ha HanoJbHOJΦOpcyHke.
1 CNoKHTb TkaHb IJIa MblTbI NOJa BdoJIb I NOMeCTnT Ha Hee fOpcyHky IJIa.
2OTkpblb3aXnMbI.
3 NomeCTb KOHcbl TKAHN B OTBepCTnA.
4 3aKpbITb 3aXIMbl.
OCTOPOXHO
Cneodmb, ymo6bI naBcbI He nonanu meKdy 3aXumamU.
Puchna opcyHka
IopxOHTnHe6oJbuxMOUxxCnOBepxHocTe,dyuWeBbIXKa6nHOK,3epKanJIIMMe6eJIbHbIXTKaHei.
HaTeb Ha pyHyu fOpcyHky yExoJn3 maxpoBOv TkaHN.
HacaKaДЯOKOH(cneuaJIbHbIe npHaJdJIeXHoCTn)
HomepДпяЗаЗa4.130-115.0
PaBHomepHo o6pa6oTaTb NOBepXHOCTb CTeKJa NapOM c paCCTOaHnO OK.20 cm.
→ BbIKHouHTb noauy npaa.
3aTnpaTb NOBepxHocTb cTeKna pe3nHOBOI 3aKpaHOBI NOpocAMN CBepxy BHN3.
Pe3nHOByIO 3aKpaHHy n HxHnI KpaI OKHa IocJIe KaJDoI DOpOxxN BbITnpaTb Hacyxo.
Ppncno6JeHne IJydaJIeHnO6oEB (cpeuaJIbHbIe npHaIeXKHOCTn)
Homep nna 3aka3a 2.863-076.0
Pn nOMOu npncnocobHeNna ydaJeHn o6oEB yctpoiCTBO dny uNCTKn napOM MOxHO NcNoB3OBaTb dNaJaeHn o6oEB.
→Писпосбленидя удалию ооб eB npINIOXHT b NO Bceи ПLOцади K kpaIO nOLOcbl o6oEB n O6pa6OTaTB naPOM TAK,чTO6bl O60I pa3MOKIn (pnp-Мерно 10 cekyHd).
→ПеревиHTь npucnooc6JIeHneДЯ ydaJIeHnO 6OeB, He BbIKIoua erO. C nOMoUbI O WNaTeJN npINoDnTb OTCTaBswyU qAcTb 6OeB N ydaJIITb ee co CTeHbl.
Ecnn obo n co ctpyKtpyoH n3 rpy6bIX BOJOKOH HeCKOJIbKO pa3 NOKpaUHebl, BO3MOX-HO, YTO nap He CMOxET npOHKnHyTb BHyTpB o6oEB. B 3Tom cnUyae peKOMeHdyetc npedBaPnteIbHO o6pa6oTaTb o6oN IroIb- yaTbIM BaNIkOM.
TpaHcnpTnpoBka
OCTOPOXHO
Onachocmb noyuhenu mpaem u nopeXdeHu! Ppu mpancnpmupoeke cneyem obpammb eHMaHue Ha eec ycmpoucmba.
→ДЯТраHCNOpTnOВКиHaKopoTKnepacCToHnIy:BbIKIQUHTbNoDOrpeB,yCTaHOBnTb yCTpOInCTBO BepTKaJIbHo,3axBaTnTb npi6OpДЯпepeHOCKn3apyuKy uYdINHInTeNbHyU Tpy6Ky.
→Пипениозке annapaTaВТрансорTHbIX CpeДСТВAX CпeДуET yuHTbIBaTbДeИСТВуЮше МecThьie TOCyДapCTBeHHBIE HOPMbI,HaNPaBЛeHHbIe Ha 3aUNTyOT CKOЛьЖЕнЯ И ONpOKИДыВанЯ.
XpaheHne
OCTOPOXHO
Onachocmb nonyuhenu mpaem u nopejkehu! Ppu xpanehuu cneoyem obaumtb eHumaHue Ha bec ycmpoucmba.
TO yCTpOcTBO pa3peWaaetcXpaHnTb TOJbKO BO BHyTpEHHNX NOMEeHNx.
YxOДи TeXHnueckoe 06cIyXnBaHne
ONACHOCTb
PpoebeHue pa6om no mexHuyeckomy 0bcnykueaHIO pa3pewaemc moIbko npu bInhmou cemeoB uInke u ocmbie- wem npubope dna yucmku napom.
Ppombibka KOTna
PncyHOK
PpombbTaB KOTeJ yCTpoNCTBa JnA YnCTKn napOM He No3dHee KaJDo 5- ro HAnoJIHeHHa KOTna.
→ HanoHnTe KOteN BOdoN 3HeprNuHO BCTpXHnTe. B pe3yIbTaTe 3TOrO OTdeJIaHTcR OTIOKeHnHaKnN, OceBwne Ha dHe KOTna.
BbIeIte BOdy.
YdaJIeHne HaKnIu N3 KOITJa
Дя удали有很大,在образовашень н CTeHкх кOTлa,MbI peKOMeHdyeM uN- CTnTb KOTeJ C NOMOUsbO 6NoIOnuYeCKOrO cpeDCTBa KARCHER ДЯ удали有很大,在ak- nR M511.В сnyuae 6noIOnuYeCKOrO cpeDCTBa KARCHER Дя удали有很大,在ak- nR M511pey nIeT O npOdyKeTe Ha ocho- BE ЛIMOHHOI KINcNOTbl, KOTopAЯ NOJIHO- CTbIO paSCUePNJaETcB NoIOnuYeCKn.
BHUMAHNE
Bo u36ekaHue noepeKdeHua npubopa ucnoIb3yUme monbko npodykmbl, odo6peHhble fupmou KARCHER.
→ BbItaunTe wTeNceBHyIO BNkU n3 po-3eTKn.
Понною удалпгівody n3 napoborokotna.
Полноctью pactворпь Два пakета cpeдства OT накини B 2 Лтрах рорячén Вобы пи постаяном РOMEш-Baни.
3aJIHTb B KOTeI pactBOp dJa ydaJeHnHaKINI N DaTb NOeICTBOBaTb B TeueHne OK. 8 YacOB.
ONACHOCTb
Bo epmnpocecca ydaenHuHaKunu He 3aeunHueambb npubop npedoxpanu mehnyo np6ky. He uonb30aamb npubop do mex np, noka e komne haxodumc cpecmbo dny ydaenHuHaKunu.
BbIINb paCTBOp dJa ydaJeHnHaKn. He MeHee DByx pa3 npOMbITb KOTeJ XoNoHO BDoN, YTO6bl 6bl yBepeHNbIM B TOM, YTO B yCTPOcTBe 6OJIbWe Het HNKAKNX OCTaTKOB.
BknHouHTb annpapaT.
→ Haximatb Ha KhoNky c6poca, noka He porachet KOHTpoJbHaay JAmnoOyka "yaJIeHHe HaKInn".
Tenepb yctpoiCTBO cHOBa roTOBO K pa6oTe. Ppimepno uepe3 50 yacob pa6oTbI KOHTPOJIbHaJaMNoUka "YdaJeHne HaKnI" NODACT CnHaN O Heo6XoIMocTn OuepeDHorO ydaJeHna HAKIN.
Примechанe: He 3aJIbBaTb pactBOp ДЯудаленя HabIKIN B pe3epByap ДЯчSTOn BOdbl, TAK KAK 3TO npIBeTeK NOBpeJdeHnIO HaCoca.
3aMeHaΦnIbTpα
PncyHOK D
Пи ИСПОЛБЗOBAHИ 3aГРЯЗHEHHOВODblФИьТР мОжET 3acopNTbCS. 3TO cTaHOBnTcR 3aMeTHO NOЧe3Вычайно ДПИTeЛb-HOMY 3aNa3ДыВанИв Pa6OTe HAcOca NINNO ПОЛHOMY BbIXOу erO n3 CTpoJ.
→ 3aMeHHTbΦNJIbTp.
HOMOuB B Cnyuae HEnoJaIOK
△ONACHOCTb
Ipoeheue pa6om no mexHuyeckomy 0cbnyxueaHIO pa3pewaemcmoNbko npu bInhmou cemeoB uunke u ocmbie- we m npubope dna yucmku napom.
ONACHOCTb
BbInonHeHue pa6om no pemohmy npubopa pa3pewaemc moIbko aemopuzoahHOu cepuechou cnjx6e.
TOpNT KOHTpOJbHaJaAMNoUka "HeoctaToK BoI" (KpaCHoro UBeTa)
→ ΦOJIITb BOy.
Topnt KOHTpOJbHaj IaMNoUka "YdaJIeHne Hakn" (6eJoro cBeTa)
YdaJInteHaKInbH3 npu6opa.
CepBnchna cny6a
Ecnn HncnpaBnocTb He ydaetcnyctpaHntb, np6op Heo6xOIMO OTnpaBnTb Ha npOBepky B cepBnchyocnyk6y.
TapaHTnA
B kaqdoi cTpaHe DeicTByIOT COOTBeTCTBENHO rapaHTnHbIe ycNoBn, n3DaHHbIe yNOJHOMOueHHoOpraHn3aUnei C6bIta HaweI npOdyKuIN B daHHo CTpaHe. Bo3MOxHbIE HeNCnPaBHOCTn np6opa B TeueHne rapaHTnHOrO cPoka Mbl yCTpaHReM 6ecnPaTHO, ecIn npuHa 3akNIOuaETcR B DeΦeKtax MaTePnaJOB nIn OOn6kax npn N3rOToBLeHN. B clyuae BO3NHKnHOBeHn IpeTeH3n B TeueHne rapaHTnHOrO cPoka npoc6Ba o6paatbcra, ImeepncceE K O NOKynke, B TOpROByooprAhn3aUIno, npoDaBswyo Bam np6op nIn B 6nJkaWHyO yNoJHOMOueHHyO cny6by cepBnCHoro obCnyKuBaHn.
Iata Bbinycka OTo6paXaETcHa 3aBOIDCKoTabnUKeB
3aKoInpOBaHHOM BnJe.
Pn 3TOM OTdEJIbHbIe cIuΦpbl IMeHT CneDyUoOee 3HaueHHe::
Ppimep:30190
3 roD Bblnycka
0 CTOneTne BbInycka
1 DecaTIneTne BbInycka
9 BTOPAIpa Mecaa BbInycka
0 nepBaIuOpa Mecaa BbInycka
TakIM o6pa3OM, B DaHHOM npimepe KOD 30190 O3HaHaet dAty BbInycka 09/(2)013.
PpHaJnEJXHocTn 3aNaChbIe DeTaJIIn
IcnoJb3yIe opnHaJIbHbIe npHaJIeK-HoCTN 3aPacTNI -TOJbKO OHI rapaHTNpyOT 6e3OJaChyIO 6ecpepeBoHyO pa-60Ty yCTpoiCTBa.
HΦopMaUO O npHaJNeXHoCTx N 3a- nTactx Bbl MoKeTe HaHTn Ha caTte www.kaercher.com.
CneuaJIbHbIe npHaJdJIexKHOCTN
Moxho nCNoJb3OBAbToJbKO CneuaJIbHbIe npHaJnEJXHOCTN, Oo6peHHbIe N3rTOBHTeJEM.
HnKeNoDnucBwneCra Nua DeIcTByOT no nOpyuHnIO I NO DoBepEHOCHT pyKOBODCTBa npEaPnTna.

H.Jenner
CEO

S. Reiser
Head of Approbation
yNOLHOMOeHHbI NO DOKymeHTaUIN:
S. Reiser
71364 Winnenden (Germany)
Ten.: +49 7195 14-0
ΦaKc: +49 7195 14-2212
Winnenden, 2016/04/01
TexHnueckne daHHbIe
www.kaercher.com/REACH
Veszély fokozatok
VESZÉLY
71364 Winnenden (Germany)
Tel.: +49 7195 14-0
Fax: +49 7195 14-2212
Winnenden, 2016/04/01
Muszaki adatok
www.kaercher.com/REACH
Stupné nebezpečí
△NEBEZPECI
71364 Winnenden (Germany)
Tel.: +49 7195 14-0
Fax: +49 7195 14-2212
Winnenden, 2016/04/01
Technické udaje
www.kaercher.com/REACH
Stopnje nevarnosti
NEVARNOST
Zadevne EU-directive:
2014/35/EU
2014/30/EU
71364 Winnenden (Germany)
Tel.: +49 7195 14-0
Winnenden, 2016/04/01
Tehnični podatki
| Elektrichi priključek | |||
| Omrežna napetost V 220-240 | |||
| Frekvencá Hz 1~50-60 | |||
| Napetost v parni pištoli V 24 | |||
| Vrsta zaščite -- IPX4 | |||
| Razred zaščite -- I | |||
| Podatki o zmogljivosti | |||
| Ogrevalna moč W 2300 | |||
| Črpalka W 50 | |||
| Maks. delovni tlak MPa (bar) 0,4 (4,0) | |||
| Dovoljeni delovni tlak MPa (bar) 0,6 (6,0) | |||
| Max. delovna temperatura °C 145 | |||
| Čas ogrevanja na 1 liter vode min ca. 4,5 | |||
| Količina pare (max.) | g/min | 82 | |
| Mere in teža | |||
| Tipicna delovna teža | kg | 8,0 | |
| Količina polnjenja z vodo | I | 4,0 | |
| Prostornina rezervaarja | I | 2,0 | |
| Prostornina kotlička | I | 2,4 | |
| Dolžina x širina x višina | mm | 475 x 320 x 275 | |
| Omrežni ka- bel | H05VV-F 3x1,0 mm² | ||
| Št. delov | Dolžina ka- bla | ||
| EU | 6.647-757.0 | 7,5 m | |
| GB 6.647-831. | 0 7,5 m | ||
| CH 6.647-832. | 0 7,5 m | ||
| Omrežni ka- bel | H07RN-F 3x1,5 mm² | ||
| Št. delov | Dolžina ka- bla | ||
| CN 6.650-597. | 0 7,5 m | ||
www.kaercher.com/REACH
Stopnie zagrożenia
△NIEBEZPIECZENSTWO
Head of Appropriation
Pelhnomocnik dokumentaci:
S. Reiser
71364 Winnenden (Germany)
tel.: +49 7195 14-0
faks: +49 7195 14-2212
Winnenden, 2016/04/01
Dane techniczne
www.kaercher.com/REACH
Trepte de pericol
△PERICOL
Indicatie referitoare la un pericol iminent, care duce la vatakari corporale grave sau moarte.
△AVERTIZARE
Directive UE respectate:
2014/35/UE
2014/30/UE
Norme armonizate utilizezate:
EN 55014-1: 2006+A1: 2009+A2: 2011
EN 55014-2: 2015
EN 60335-1
EN 60335-2-54
EN 61000-3-2: 2014
EN 61000-3-3:2013
EN 62233: 2008
Norme de aplicare nationale:
TRD 801
5.957-470
Semnatarii actioneaza in numele si prin imputernicirea conduceri societai.

H.Jenner
CEO

S. Reiser
Head of Appropriation
Insarcinat cu elaborarea documentatiei: S. Reiser
71364 Winnenden (Germany)
Tel.: +49 7195 14-0
Fax: +49 7195 14-2212
Winnenden, 2016/04/01
Date tehnice
www.kaercher.com/REACH
Stupne nebezpečenstva
NEBEZPECENSTVO
Head of Appropriation
71364 Winnenden (Germany)
Tel: +49 7195 14-0
Fax: +49 7195 14-2212
Winnenden, 2016/04/01
Technické udaje
www.kaercher.com/REACH
Stupnjevi opasnosti
OPASNOST
Odstranjivač tapeta (poseban pribor)
Kataloški br. 2.863-076.0
Head of Appropriation
Opunomoceni za izradu dokumentacije: S. Reiser
71364 Winnenden (Germany)
Tel.: +49 7195 14-0
Winnenden, 2016/04/01
Tehnicki podaci
| Elektrichi priključak | |||
| Napon el. mreže V 220-240 | |||
| Frekvencija Hz 1~50-60 | |||
| Napon u parnom pištolju V 24 | |||
| Zaštita -- IPX4 | |||
| Klasa zašite -- I | |||
| Podaci o snazi | |||
| Snaga grijanja W 2300 | |||
| Crpka W 50 | |||
| Maks. radni tlak MPa (bar) 0,4 (4,0) | |||
| Dozvoljen radni tlak MPa (bar) 0,6 (6,0) | |||
| Maks. radna temperatura °C 145 | |||
| Vrijeme zagrijavanja po 1 litri vode minoko | 4,5 | ||
| Maks. količina pare | g/min | 82 | |
| Dimenzije i težine | |||
| Tipična radna težina | kg | 8,0 | |
| Količina punjenja vode | I | 4,0 | |
| Zapremina spremnika | I | 2,0 | |
| Zapremnina kotla | I | 2,4 | |
| Duljina x širina x visina | mm | 475 x 320 x 275 | |
| Strujni kabel | H05VV-F 3x1,0 mm² | ||
| Br. dijela | Duljina kabe-la | ||
| EU | 6.647-757.0 | 7,5 m | |
| GB 6.647-831.0 | 7,5 m | ||
| CH 6.647-832.0 | 7,5 m | ||
| Strujni kabel | H07RN-F 3x1,5 mm² | ||
| Br. dijela | Duljina kabe-la | ||
| CN 6.650-597.0 | 7,5 m | ||

Pre prve upotrebe Vaseg uredaja procitajte ove originalno
www.kaercher.com/REACH
Stepeni opasnosti
OPASNOST
Napomena koja ukazuje na reposredno pretecu opasnost koja dovodi do teških telesnih povreda ili smrti.
UPOZORENJE
Napomena koja ukazuje na eventualno opasnu situaciju koja moze dovesti do teških telesnih povreda ili smrti.
△OPREZ
Napomena koja ukazuje na eventualno opasnu situaciju, koja moze izazvati lakse telesne povrede.
PAZNJA
Napomena koja ukazuje na eventualno opasnu situaciju koja moze izazvati materijalne stete.
Namensko korišćenje
Odstranjivač tapeta (poseban pribor)
Kataloški br. 2.863-076.0
71364 Winnenden (Germany)
Tel.: +49 7195 14-0
Winnenden, 2016/04/01
Tehnicki podaci
| Elektrichi priključak | ||
| Napon el. mreže V 220-240 | ||
| Frekvencija Hz 1~50-60 | ||
| Napon u parnom pištolju V 24 | ||
| Stepen zašite -- IPX4 | ||
| Klasa zašite -- I | ||
| Podaci o snazi | ||
| Snaga grejanja W 2300 | ||
| Pumpa W 50 | ||
| Maks. radni pritisak MPa (bar) 0,4 (4,0) | ||
| Dozvoljen radni pritisak MPa (bar) 0,6 (6,0) | ||
| Maks. radna temperatura °C 145 | ||
| Vreme zagrevanja po 1 lit vode min oko 4,5 | ||
| Maks. količina pare | g/min | 82 |
| Dimenzije i težine | ||
| Tipična radna težina | kg | 8,0 |
| Količina punjenja vode | I | 4,0 |
| Zapremina rezervaora | I | 2,0 |
| Zapremina kotla | I | 2,4 |
| Dužina x širina x visina | mm | 475 x 320 x 275 |
| Strujni kabl | H05VV-F 3x1,0 mm2 | |
| Br. dela | Dužina kabla | |
| EU | 6.647-757.0 | 7,5 m |
| GB 6.647-831. | 0 7,5 m | |
| CH 6.647-832. | 0 7,5 m | |
| Strujni kabl | H07RN-F 3x1,5 mm2 | |
| Br. dela | Dužina kabla | |
| CN 6.650-597. | 0 7,5 m | |
Ppei nIbPBOTo n3nOJI3BaHe Ha Bauny ypei npoyeTe ToBa
opnHnHaNo nHcTpkyu 3a pa6oTa, DeiCTBaIte cnopeI Hero I rO 3ana3eTe 3a IIO-KbCHO n3PON3BaHe nII 3a CneDbaUy npITexkAteJ.
-ПредипьрвоTo nyskaHe B ekcnnoataця He npemeHNo npooyeteTe Yka3aHnna 3a 6e3onachocT № 5.956-345.0!
- Pn npene6perBaHe Ha YnbTbaHeto 3a ekcnloataunHa YaKa3aHnraTa 3a 6e3OpacHOCT MoaT Da Bb3HNKHaT NOBpeNnNo ypeDa N onaChOCTn 3a 06CnyXBaunr Ro n 3a DpyrN Niua.
-При ТранспорTN HeФeКТи He3a6aBHO HΦopMnpaIte TbproBeua.
CbDbpxaHne
Ona3BaHe Ha okJHaTa cpea BG 1
CTeENHa onachocT. .BG1
YnOTope6a no npEHa3HaueHne BG 1
CnmboHa ypea... BG 2
PperneB BG2
PpeDn3Hnpncno6JeHnaBG2
MeToHnHaNouchTbaHe BG3
ПусканБЕКСПЮАТAZA..BG3
06cnykBaHe BG4
I3noJI3BaHe Ha npHaJNeXHoCTnte. BG5
TpaHcnpr. BG7
CbxaheHne BG7
PnKn n oDpBxKa .BG7
POMOUI npHn3npaBHOCTN..BG8
TapaHua BG8
PpHnHaJIeJXHOCTN npE3epBHN 8
ECДeКлараця3a cBoTBetCTBnE. BG9
TexHnueckn daHHN .BG 10
www.kaercher.com/REACH
CTeNeHn Ha onaCHOCT
ONACHOCT
Yka3aHue 3a HenocpedcmbeHO apo3raua onachocm, kOmo bdu do mexku melecHu HapahBaHua uUu do cMbpm.
△PENEYNPEXDEHNE
Yka3aHue 3a 6b3MOxHa onacha cumya- u, kOmo moKe da doBeede do mexku melechu HapaHraBuHu unu do cMbpm.
△PENEIA3JNBOCT
Yka3aHue 3a 6b3MOxHa onacha cumya- uja, kOmo moKe da doBeede do neku Ha- paHraHua.
BHIMAHHE
Yka3aHue 3a eb3MOxHa onacha cumya- uera, kOmo moKe da doeede do MamepuanHu uemu.
ynoTpe6a no OeHa3HaueHne
- YpeIbTe e npedHa3HaueH 3a NOuNCtBaHe c npapa N MOKe Da ce I3NOJ3Ba C NOxOJaN pInHaJNeKHOCTN, KaKTo e OINcAHO B TOBa yNbTBAHe 3a pa6ota.
To3n ypeE e noDxOJa3a npOMnIeHa ynoTpe6a.
To3n ypei He e npoxoJz 3a npomnJneHa ynoTpe6a.
CnmboJIHa ypeDa

Napa
BHIMAHNE - OnachocT ot n3rapra
He
Opanocm om u3aaphe npadu opeu noebpxhocmu!
Pperne
ElenemEnHa ypeDa
Φnrypa A
1 PpeDna3Ha 3anywaIka (napen KoTeI)
2 O6nykBaio noJe
3 NapoctpyuH Mapkyu
4 ByToH 3a HynipaHe - OTeTpaHraBe Ha BapOBVK
5 ByToH 3a npapaTa
6 YeKeMeJxke 3a npHaJaIeKHOCTM
7 Kanak Ha KOHTaKaTa Ha ypeDa
8 NapoctpyuEn uencen
9Дрьжka3a HocHe
10 Kyka Ha Ka6eNa
11 Kanak
12 3anyuwaIka Ha cBda (pe3epBoap 3a YnCTa BODa)
13 XabnneHo nokpmbaJIo
14 OTbOp 3a HaJIINBaHe
15 PbUHa nIO3a
16 Прозорецни дюза (спесиална рпнадлжност)
17 3axpaHbawka6eJ
18 3aIbpxkaIa ckO6a
19 POnOBAIIO3a CyeTnHa
20 Kbprna 3a noi (noIOBa IIO3a c YeTHHa)
21 KpbTna YeTka
22 CnnoBa IIO3a (YepeBena)
23 YdblnxnteI
24 PódoBa DIO3a C JIameJi
25 CtpyHa IIO3a (120 MM)
26 CtpyHa IIO3a (180 MM)
27 Kbpna 3a noD (noOba IIO3a c IameIi)
28 Bloknpaaso konye
29 Tpb6a 3a yIbJkaBaHe
30Блokировka(ЗашиТаОТДeцa)
31 NapoctpyuH nIcToJeT
06cnykbaaso none
Φnrypa B
1Ппекьсвач -nommaHa pe3epBoapa 3a Yncta BOda
2 KontrponHa Iamna-Harpahe (KbI-Ta)
3 KoHTpOJHa JAmna - HeIOCTnR Ha Boda napeH KOTeJ (UepBeHa)
4 INdkaunHa TeMpepaTa
5 Konue 3a HacTrojka 3a peRyInpaHe Ha VAPOHYDRO
6 Konue 3a HacTroika 3a perynapaHe Na KOJIuYeCTBOTo Ha napaTa
7 Dnana30H Ha pa6oTHN TemnepaTpyn
8 KoHTpOJIHa JAmna - OTeTpaHЯBaHe Ha BapOBuK (6ra)
9 KontrponHa JAmna - HeioctnHa Boda pe3epBoap 3a YncTa BODa (UepBeHa)
10 PpeKbcBaay - HarpaBHe (BkN/n3Kn)
UBeTHo 06O3HaueHne
-ObcnykBaunTe enemEnTn 3a npouceHa o6cnykBaHe ca XbNTn.
-ObcnykBaunTe eIemEnTn 3a noDdpBka n cepBn3 ca CBETNOCNB.
PpeDn3Hn npncnoc6JeHna
IpeHnTe npncnocobleny cnykaT3a 3aunTa Ha noTpebnteN He 6bVa da ce cnnpat nn Da ce npene6perBa TxHaTa yHKnra.
Perynatop 3a haJraHeTo
No Bpeme Ha pa6oTa peryIaTOpbT 3a HaJaRaHeTo NOIbPka MaKcImaIIHO NoCTOJHHo HauRaHeTO B KOTeHa. Ipr NocTnAHe Ha MaKcImaIIHOTo pa6OTHO HaJIraHe B KOTeHa HarpBaHeTO CNIPA, a npN IOHNJXaBaHe Ha HAIraHETo B KOTeHa BCJeDCTBHe Ha OTdJIaHETo Ha napata OTHOBOCe BKJIIOUvBa.
PereynipaneHaKoJIyueCTBOTOHa napata
OTdEnIteJHa TaTeTn (cneuaJHa npHaJnxKHOCT)
No 3a npbuk 2.863-076.0
IapoctpyHnT ypeM MoKe Da ce H3noJ3Ba 3a OTCpaHbAHe Ha TaTeN npn H3-NOJ3BaHe Ha OTdeJInteJHa TaTeN.
NocTaBeTe OTdEnHtEnHa TaNETn C UaTMy IIOU Ha Pb6a Ha eHa JeHTa TaNETn IOCTaBeTe Napata Da DeIcTBa TOIKOBA DbIro, Ye TaNETbT Da ce pa3MeKHe (OKoNo 10 cekyHn).
Премecтete OTДелNTeЯ Ha Tanetu 6e3 da ro n3KlnHuaTe. OTdelenata ce yact OT TaNETe NOBdnHete C Iwnakna Iy OTDeJeTe OT CTehata.
Пи НяКОЛКOKpaTHO 6ОДИSCAHN peNeФн TAneTи Има ВероТHOCТ napaТа Д He npO-HNKHe npe3 TЯX.В TaKbB cIyuaH ce npenOpbUBa npeDbapITeJIHa obpa6OTka C TeJIeH BaJIaK.
TpaHcnpT
△PENEIA3JNBOCT
Onachocm om HapaHaahe u noepeda! Ppu mpancpom umaume nped bud meaIomo ha ypeda.
3a TpaHcnpTupaHe Ha KpaTKn OTceKn: N3KnUoyTe 3aRpyBaHeto, NOCTaBeTe ypeDa OTBeCHO, XBaHete ypeDa 3aДрьЖКATA 3a HOceHe n 3a YdIbJnxTeJIHaTa Tpb6a npn HOceHe.
→ПиТранспорВаВТOMOBиИNOCИpyraIteуpeДасглacHoBaINHITeДирекTNBnIpOTNBПь3raHeипpeO-6pbuane.
CbXpaHHeHne
△PENEIA3JNBOCT
Onachocm om HapaHbaHe u noBpeDa! Ppu cxbxpanHe umaume nped bud meaIomo Ha ypeDa.
CbxaHHeHnTo Ha To3n ypeJ e No3BOJeHo cMo BbB BbTpEuH NOMeUeHn.
PnXn n PndpBxka
ONACHOCT
Obcykehmo da ce u3bpuwa camo npu u3aedeH uencen u oxnaedeH napocmpyeH ypeD.
N3nJaKbaHe Ha KOTeJia
Φnrypa C
I3nlaKbaIe KOTeJa Ha napoctpyHnyaypeiHa-KbCHO CJIeI neT PbJIHeHnHa KoTeJa.
KoTeNa Da ce HaNbIHN C BODa N Da ce pa3Tbpcn cnJHo. No To3n HaunH ce pa3TBaprT OCTaTbUnte OT BapOBVK, oc-TaHaJI N O NOda Ha KOTena.
I3JIeIte BOdaTa.
POMOUII HEN3INPABHOCTN
ONACHOCT
ObnykaHemO da ce u36bpuBa cAmo npu u36aDeH uencen u oxnaDeH napocmpyuH ypeD.
ONACHOCT
Pemohmume deuHocmu no ypda da ce u3bpuam eduHcmeHo om omopu3upaH cep6u3.
KoHTpoJIHaTa JIaMna "HeIOCTnI Ha BODa" CBeTn YepBeHo
ΦoneiTe Boda.
KoHTpoJIHaTa JAmNa "OTcTpahBaHe Ha BapOBuK" CBeTn 6aIIO
Почисте КOTленя камьк OTуpeда.
Cnyx6a 3a pa6oTa c KIneHTn
Ako nobpeaTa He moKe da 6bJe ot- cTpaHeHa, ypeDa da ce npOBepn ot cepBn3a.
TapaHcIa
BbB BcKa CtpaHa Ca BaIiDn H3JaDeHnTe OT OToPn3UnpAnHn Hn DnCTpn6yTop RaPauHNoHHn ycNoBn. EBeHTyaJIHn NOBpeDn Ha BaUnTe npHaJdJeXHoCTn igeOTCTpaHIM B pAMKITE Ha rapaHcNoHHn CpOK6e3PiAtHO, aKO ce Kacae 3a DeΦeKT B MaTePuaJIte IIN Prn PpOn3BOdCTBO. B cNyUaH, Ye Tp8Ba Da npeJrBtE npaBOTO CNHa N3PON3BaHe Ha rapaHcNc Ce oBpHete KbM CneuHaN3UnpHaHaTa TbProBcKa MpeXaIIN KbM Na-6IIn3KnBn OToPn3UnpAn cepBn3, KaTO npeDCTaBtE n DOkUMeHTnte 3a NOKynkata.
PpHnHaJneJxHoCTn np3epBn YacTn
I3noJ3BaIte cAmO opuHaJIHn akceCoapn I opuHaJIHn pe3epBHN qactn, nTo3n Haun HCnpyraTe 6e3oNaChata n6e3npobemHa ekcnloataaHa ypeDa. Moxe Ta hamepTe HOpopMaua 3a akceCoapn I pe3epBHN qactn Ha www.kaercher.com.
ElenemtnOT cneuaHaTa OKOMnJIeKTOBka
No3BOJeHO e cAmO n3nOJ3BaHe Ha pa3pe-WeH NOT pOn3BODITeJI CneUaJIH NpNHaIeXHOCTN.

S. Reiser
Head of Appropriation
ПьЛНOMOUINК NOДOKUMEHTaцЯТа:
S. Reiser
71364 Winnenden (Germany)
Ten: +49 7195 14-0
ΦaKc: +49 7195 14-2212
Winnenden, 2016/04/01
TexHnueckn daHHN
www.kaercher.com/REACH
Ohuastmed
△OHT
Osutab vahetult ahvardavale ohule, mis voib pohjustada tosiseid kehavigastusi voi loppeda surmaga.
HOIATUS
Osutab voimalikule ohtlikule olukorrale, mis voib pohjustada tosiseid kehavigastusi voi loppeda surmaga.
ETTEVAATUS
Viide voimalikule ohtlikule olukorrale, mis voib pohjustada kergeid vigastusi.
TAHELEPANU
Lisavarustuse monteerimine
Head of Appropriation
71364 Winnenden (Germany)
Tel: +49 7195 14-0
Winnenden, 2016/04/01
Tehnilised andmed
www.kaercher.com/REACH
Riska pakapes
△BISTAMI
Norade partiesi draudošam briesmam, kuras izraisa smagas traumas vai navi.
△BRIDINAJUMS
Norade par iespejami draudošam briesmam, kuras var izraisit smagas traumas vainavi.
△UZMANIBU
Norada uz iespejami bistamu situaciju, kura var radit vieglus ivainojumus.
IEVERIBAI

S. Reiser
Head of Approbation
Par dokumentaciju sastadisanu atbildtgapersona: S. Reiser
71364 Winnenden (Germany)
Tālr.: +49 7195 14-0
Fakss: +49 7195 14-2212
Winnenden, 2016/04/01
Tehniskie datum
www.kaercher.com/REACH
Rizikos lygiali
△PAVOJUS
Nuoroda del tiesioginio pavojaus, galincio sukelti sunkius kuno suzalojimus ar mirtj.
△ISPEJIMAS
Nuoroda del galimo pavojaus, galincio sukelti sunkius kuno suzalojimus ar mirtj.
ATSARGIAI
Nurodo galima pavoju, galinti sukelti lengvus sužalojimus.
DEMESIO
Nuoroda del galimo pavojaus, galincio sukelti materialinius nuostolius.
71364 Winnenden (Germany)
Tel.: +49 7195 14-0
Faksas: +49 7195 14-2212
Winnenden, 2016/04/01
Techninai duomenys
| Elektros iranga | ||
| Tinklo jtampa V 220-240 | ||
| Dažnis Hz 1~ 50-60 | ||
| Itampa garo pistolete V 24 | ||
| Saugiklio rūšis -- IPX4 | ||
| Apsaugos klase -- I | ||
| Galia | ||
| Kaitinimo galia W 2300 | ||
| Siurblys W 50 | ||
| Maksimalus darbo slëgis MPa (barai) 0,4 (4,0) | ||
| Leistinas darbinis slëgis MPa (barai) 0,6 (6,0) | ||
| Maks. darbiné temperatūræ°C 145 | ||
| Vandens 1 litro sušildymo laikas min maždaug 4,5 | ||
| Garo kiekis (maks.) | g/min | 82 |
| Matmenys ir masé | ||
| Tipiné eksploataciné masé | kg | 8,0 |
| Vandens priipildymo lygis | I | 4,0 |
| Degaluç bako tūris | I | 2,0 |
| Boilerio turinys | I | 2,4 |
| Ilgis x plotis x aukëstis mm 475 x 320 x 275 | ||
| Maitinimo ka-belis | H05VV-F 3x1,0 mm2 | |
| Dalies Nr.: | Kabelio ilgis | |
| EU | 6.647-757.0 | 7,5 m |
| GB 6.647-831. | 0 7,5 m | |
| CH 6.647-832. | 0 7,5 m | |
| Maitinimo ka-belis | H07RN-F 3x1,5 mm2 | |
| Dalies Nr.: | Kabelio ilgis | |
| CN 6.650-597. | 0 7,5 m | |

Ipeed nepuIm 3acTocyBaHnM BaIoro npncTroO npouHTaIte
IOpnirHbHy IHcTpkyciu 3 ekcnnyataa, nicna zboRo diIte BiINOBiDHO Hei Ta 36epejItb ii Ipy noanbWoTO KOpNCyBaHN a6o dIra HAcTyNHorO Bnacnka.
-ПердпершIM BBeDEeHЯМВ eKcPnya-taцIO HeoMInHO npOHTaIte Bka3iBkn 3TexhIK6e3neKn No5.956-345.0!
- HecniIyBaHnI iNCTpyKuI 3 ekCnIyataIuI Ta 6poUpyi 3 npAun 6e3neKn MoKe npn3BecTn Do NOwKOJxHHe NpncTpoTu Ta He6e3neKn IJa KOpNCtYBaUa Ta iHux IIOdeI.
-Якшо ВиннkaHTb OшКODжЕнгпprn TpaHcnpTyBaHHi, HeraHNo NOIdomTe npo ue npodabua.
3mict
3axnCT HABKOJIINHbOro cepeDobuza UK 1
CTynih He6e3nekn UK 1
Ppabnblhe 3actocyBaHHK2
CnmboJIHn npncTpoI. .UK 2
Orna UK 2
3axnChi npncTroi UK 2
Cnoco6mTTa. UK 3
BVeDeHnBaEknnyatauio...UK3
Eknpnyataia UK 4
3acTocyBaHHoCHaUeHHaUK5
TpaHcnpTyBaHHaUK7
36epiraHHa UK 7
IorJra Ta TexHicHe 6cnyroByBaHHa UK7
ДономогауВипадкУненona-ДOK.. UK8
TapaHTiA UK 8
Ppniladny 3anaChi Detani . UK 8
3aBa npB iDnOBiDnHicTb EbponecBkoRo cnIBTOBapnCTBa...UK 9
TexhihixapakTepeNCTnKn. UK 10
3axnct HaBkoJnHbOro cepeoBnua

MaTepiAIn ynpakOBKn pIddaOTb- cI nepepo6ci dIy nOBtOpHoro BnKOpNCTaHHa. BydI naCKa, He BnKDaIte npkyBaIbHi MaTepiAII pa3OM i3 domaunHIM cMIITAM, BiDaaTe ix dIy Ha nepepo6ky.
CTapi npnctroi miCTaTb ciHnImatepiAIn, 10 moKoTyB BnKOpnCTOByBaTnCra NOBtOHO. Batapei, MaCTnIcTa cxOxMi MaTepiAIn He NobHHIO TpAnITu y HABKOJIshHe cepeDobuIe. Tomy,6yDb IacKa, yTNIi3yIte cTapi npnctroi 3a DoNOMOrO CneZiaJbHNxCNTem 36Opy cmTTA.
Ihctpykci i3 3aCTocyBaHHKOMNoHHeTIB (REACH)
AkyaIbHi BiOMOci npo KOMnoHHTn HaBeHeHi Ha Be6-By3ni 3a aDpecoIO:
www.kaercher.com/REACH
CTyπiNb He6e3neKn
△HE6E3NEKA
Bka3ieKa uodo He6e3neku, Ka 6e3noceppeHb0 3aapoxye ma npu38odumb do mxxmpaem qu cmepmi.
△NONEPENKEHN
Bkaieka uodo nomeHuiHO moXnueoI He-6e3neuoi cumyaui, uO MoKe npu3ecmu do mxxkux mpaem qu cmepi.
△OBEPEXHO
Bka3ieKa uodo nomeHciuHo Hebe3neuHoi cumyaui, kao MoKe cnpuuhmu ompuMaHHa neKux mpaem.
YBAGA
Bka3ieKa uodo moKJUBOI nomHuiHo He6e3neHiu cumyaui, uO moKe cnpuHuMu MamepiJIbHI 36umku.
PpaBnIbHe 3aCTOCyBaHHa
-Ппсстрий пизнayehн Дя Oчшени
napoTO Ta MOXe 3aCTOCOByBaTncb 3
BiДПОВiДнIMdoDAТКOBИМпрИЯДЯМ,
ONICAHMВKePIBHuTBI NO ekCnIpyaTa-
ц.
- Cey npicpti npn3NaueHo dny npomncIOBOrO BnKOpNCtAHN.
- Κeɪ npɪcɪptiŋ He npɪn3naʊeɪn ἀŋ npɒmɪsʌpɒBOrO BɪNkɒpɒnCTaHŋ.
CnmboJIHa npncTpoI

Napa
YBAGA - icHyc He6e3neKa oniKy!
Hebe3neka oniky ob zapny no- cepxHIO!
Ornayd
ElenemEn npnilaay
MaJIIOHOK A
1 3anobixka npo6ka (napobn KOteI)
2 NaHeJIb ynpaBJIiHHa
3 Napobni wlaHr
4 Khonka NOBepHeHHy BVxIDHe NOIO-JeHHra - BndaJIeHHra HAKINy
5Перемкay nap
6 Micce nla akcecyapib
7 Kpnka wTeNCeIbHOi po3eTKn
8 LTekep noDaqi napi
9 Pyka
10 Rauchn dJa Ka6eJIO
11 Kanot
12 3amok pe3epByapy (pe3epByap nIy nCTOIO BODN)
13 NokpnTTa 3 eNoHxu
143aJINBnBnBnBa
15 PyuHecoJIIO
16 Biokonhe conno (cneuiabhe npnilaand)
17 MepexeBn ka6eJb
18 3aTncka
19ΦopcyHka dIyIuIeHHnPiIIOr3IeTINHOIO
20 TkaHnHa dIy nIaIIOrN (fOpcyHka dJIy 1uIeHHra IINIOrN 3 uTeTHOIO)
21 Kpyrna Ⅲitka
22 CnIOBe cOnI (epeBOHe)
23 PpOIOBKeHHa
24 FopcyHka IJIa YIuIeHHN IINrN 3 JaMeJIaMn
25 ΦopcyHka kpankoBoro cTpyMeHa (120 MM)
26 ΦopcyHka KpaNKOBoro CTpyMeHa (180 MM)
27 TkaHnHa dIy nIiIIOrN (fOpcyHka dJIy uIeHHa IINoR 3 JAmEJMaN)
28 Khonka 6nokybaHHa
29 NpOIOBxkyBaIbHa Tpy6Ka
30Блokуванн(3axntBidiTei)
31 Napobni nicToJeT
PanaheIb ynpaBnHn
MaHIOHOK B
1 Nepemkau - Hacoc pe3epByapa Дячстоь ВODи
2 KoHTpOJIbHa nAmna - "Harpib" (KoBt a)
3 KoHTpOJIbHa IaMna (YepeBOHa) - HecTaua BODn y napOBomy pe3epByapi
4 INdkaucia Tempeatypn
5Поворота рукадпя рergyюванн VAPOHYDRO
6 NobopoTHa puka dIpapeyIIOBaHnKINbKOcTI napu
7Дianaohpo6ooyoItempepatypn
8 KontrpoIbHa lamna (6ina) - "BudaneHnHaKnPy"
9 KontrpoJIbHa Iamna (YeepBoHa) - "HeCTaHa BOuN y pe3epByapi dIy uIcToI BOI"
10 BmNKauch - HarpiB (BMK./ BMMK.)
KoIbopoBe MapkyBaHHa
- Opranu ynpablinnna npanpoecyu nIeHHraE KOBTIMN.
- OpraHn ynpaBniHHЯ dIy TexHiuHoro o6-cIyroBvBaHHra Ta cepBicy e cBiTno-cipMN.
3axnchi npncTpoi
3axnchi npncpoi npn3Hauehi dny 3axncty KopnctyBaay a He noBHHi 6ytu BvBeJeHi 3 NaNy a6o BVkOpncToByBaTnca 3 iHsoIO MeTOIO.
PergyIaTOp TnCKy
PerynTOp TnCKy UTPMMyE TnCK B KOTn i nI qac ekCnnyatauii no MOxKnBocTi nocTiHm. HarpibAHn npi DoCraHHeHmi MaKcMaIbHOro po6OHoro TnCKy B KOTn BMMKaE TbC Ta 3HOBy BMkAcTbcr npn NaDInHi TnCKy B KOTn BHaCnIdOK BiD6Opy napn.
Tepmoctat Hectaqui Bodn
KoBDA B KOJI3aKiHcyEbCra, NIDBNUyEcTbcra TemnepaTypa HarpiBy. TepMoCTaHeCTaCI BOHN BUMKAe HarpiB i cnaJaxye KOHTPOJIbHa JAmNa "HeCTaua BoDn" YepBOHm CBITJOM. NOBTOPHe BMKAHHaHarpiBy He BMKAeTbcra DotN, POKI KOTeI He 6yJe OxJIOJKeHO a6o HAnOBHeHO.
3axnchn TepmoctaT
-Якwo TePmoCTaT HeCTaqui BODn BmwoB i3 naDy i npncTiPi nepeepiBCs,To npnCTpiBnMkaEcTbC8 3a DOnOMoTO 3axCHoro TePmoCTaTy.
-Для NOBepHeHHa 3axnCHOro TepMoocTaTy y BuxiDHe nOJoxeHHa Heo6xIDHO 3BepHyTncrdo KOMneTeHTHOi cepBiCHOi cnyk6n φipmN KARCHER.
3an06ixHa npo6ka
- 3anobixha npo6ka 3amkae kotei BID BnHnkaOuOro TnCKy nap. JaKIO peryIaTOp TnCKy NOsKOJKeHO i TnCK napN B KOTTI 3pocTaE, TO B 3anobixhi npo6ci BiDUnHaeTbcra peDyKuiHni KlaPAni I napa BnXODHTb Ha3OBHi Yepe3 3AMOK.
-Дя NOBTOPHORO OIO B EKCnIyatauii HeobxIDHO 3BepHyTnCRA DO KOMnTeHTHOI cepBicHOI cnyk6n φipMn KARCHER.
Cnocobn mttT
OcbixeHHa TeKCTnJIbHnx Bnpo6iB
Ipeed npoBeHnHm o6p6Kn 3a donomoroIO npucTPOU cNl3abXd npeBiprTu CTiKicTB TEKCTnIbHNx Bnpo6IB Do BVnHy napu. Hacampeed, cNlD o6p6ntu npao Bupi6, noTIM npocuyNTu NOro Ta, HapeuTi, nepeBipuTI CTiKicTB φap6yBaHHraHa-ABHicTB deOpMaui.
OuHHeHnI NOBepXoHb 3 NOKpHTTAM Ta NaKOBaHnx NOBepXoHb
Ipn YuNueHnI JaKOBaHnx NOBepXoHb a60 NOBepXoHb i3 IJaCTNKOBIM NOKpTTam,Ha-NpNKpaI, KxOHnIX Me6JIb Ta Me6JIb dJa KBapTnp, DBepei, NapKeTy, BICK, Me6JIeBa IOniTypa, StTyUHe NOKpTTa a6o fap6a MOKyTb pO3uHNHTncsA a6o Ha HNX MOKyTb BUNHKHyTN PIAm. JIra npOBedeHHa YI- UeHHra CnId 3IerKa BiDnapTu CepBeTKy i NOTIM nPoTePTn HeIO nepepaxobahi NOBepXHi.
OuHcHnckna
BikOHne cKIO B nopn pOKy 3 ocObNBO Hn3bKOIO TempeaTPOIO nonepeHbO NiirpiTu.ДЯ zuoro BCIO CKJHy NOBepxHIO O6dATn npoio 3 BiIcTaHi npu6n.50 cm.Y TAKNI cnoci BdaCTbcra yHNkHyTN HaPyrn NOBepxHi, lo MoKe npu3BeCTn Do po3bIT- TcKna.
BVeDeneHnB eKcnnyataciio
3MOHTyBaTn 06laHaHHa
→ BiDKNHyTn KpnuKy TtencelbHOi po3eTKn npncTPO Ta HadiHOBCTaBNTn TtKepe napn B npncTpi. Pnp cboMy BnCTyn tKeepa MaOTb yBiHTn B 3ye- nIeHHa KpnuCi TtencelbHOi po3eTKn npncTPOU.
3'εdHaTn YacTHHn npInaIaIg (ΦopcyHkaДЯ YuIeHHN NiIIOr,pyHc conNo a6o conNo KpanKOBOrO cTpymEna) 3 naPobm nicToJeTOM.BCTaBHTn YacTHHn OOnBaOHy Do KlaCaHHN KHOKN 6Io-KyBaHHa Ha napOBomy nicToJIeTI.
Y pa3i Heo6xidHocTi 3actocyBaTu nOdoBxyBaIbHy Tpy6ky. BCTabIaTn DeTani Onda B OndHy, NOKn He Klaune BiIDnoBIDA KHONKa 6NOKyBaHHra.
→HaTnCHyTN KhONky 6IOKyBaHHaIy BiDOKpeMJIeHHaCTuH npUaIaI.
3aIINBaHHBODN
Bka3iBka: MoxHa BnKOpNCTOByBaTn DNCTINbOBAHy BOy (6e3 YTBOpEHNa HAKIny), aIe ue npn3BeDe Do WBNkOro 3HOuYBaHnKOTJa, TOMy He peKOMeHdyETbcra.
IpeBipuTu HadiHicTb fikcaii 3ano-6ixHOi npo6kn.
BikpyTn3aMOKpe3epByapaIyNCTOIBODN.
BcTaHOBnTn 3aJIbHbY Bnpy B pe3epByap nIyNCToI BOd i 3a6JIOkyBaTu o6eptaJIbHm pyxom.
3aHTMaKcHym2IITpaBODOpOBiHOI BODN Bpe3epByap InYuNCTOIBoDN.
△NONEPEJXEHH
He bukopucmooyamu 3acib dny uueHn.
Po36IOKyBaTn Ta 3HrTn 3aJIINBHy BnPBy.
3akpyTnTn 3amok pe3epByapy nIaNCTOIOBOn.
Ekcnnyatacia
IIndnkaizy Tempepatypi
IhdkaTop TemnepaTypn Bka3ye po60Tu B npabNlbyHomy TemnepaTypHomy iana3oHi (iana3OHpo6OuNX TemnepaTyp).
YbIMKHeHH npnnaDy
→ BcTaBTe MepeKeBn uTeKepe y po3eTky.
→ YbIMKHiTb npnctpi 3a donomoroI nepeMkaa Hacocy pe3epByapy dIra ChToI BOH Ta nepemkaa Harp iy. YbIMKHybcr KOHTPOhBi Iamnn.
Bka3iBka: NOBHa NOTyxHicThb Harpiby Doctynha TiIbKn TOni, KOJI N WTeKeP napn Ha-rpiBaHHa 3'EdHaHn 3 npncTpoem.
KIO BMnKaEbC KoHTpOlbHa JAmNa "HaRpiB", CNTema roTOBa do pOBOTN.
Bka3IBKa: He cTabTu y BepTnKaJIbHe noIIOXeHHa, KOJI npICTpIy YbIMKHeHIn. IHaK-We HarpBaay ATOmatuHO BmNKaETbcAyepe3 DeaKn Yac Ta BMnKaETbcA YepBOHa KOHTpoJbHa JAmna "HeCTaay BoDn".
3aJIHTMaKcHmym2IITpaBODOpOBiHOIBOIN3aDOnOMOIO 3aINBHOIBnBpe3epByapJNAHCToI BOIN.
KIO BMKAeTbcKa KOHTpOlbHa IaMaNa "HaRpiB", CnCTema roTOBa Do po6OTn.
Bka3iBka: JaKIoHaoc He3BaJauOn Ha NOBn pe3epByap dIy NcToI BOn He noDaEc BODy, Tpe6a BuaJIHTN HAKIN 3 pe3epByapy.
Bid'εdHaHnHa HacaDok
△HE6E3NEKA
He6e3neKa obeaipoubaHna! Ppu 3njamni npunaodra i3 npucmpo moxe bumikamu zapya boda! Iid yac buxody napu he biodokpemnloamu yacmuHu npunaodra.
BmKHeHn npnaIaIy
→ BnMkHyTn npncTpii 3a donomoroIO BnMkaaya.
BiknHyTn KpNkUy WTeNCeIbHOi po3eTKn npncTroIO Ta BNTaRHyTN 3 npncTroIO uTekep napu.
BntaHitb MepeXnI uTekep 3i uTencelbHOIO p03eTKN.
Bka3iBka: B npncTrooi MOke 3aNiuaTnca BOda.
36epiratnpncptpi
PyuHc connlo, fOpcyHKn TOnKOBoro cTpyMeHa Ta dpi6Hi DeTaani NOKNaCTNu y BiDcIK dIra akcecyapiB.
O6MoTaTn Ka6eJb MepexeBOro KInBJIeHHaHbKOJIO TpIMaua Ka6eJIOy BEPTNkAJIbHOMy NNoJoxeHHI npNCtpoHO.
→ ΠοιΟΥBaJIbHy Tpy6ky BCTaBNTN OKpeMo y BmIMKn Ha dHi npncTpOHO.
Bka3iBka: OxonodjyBaTu 5itKu TAKUM HOM, 0o6 3ano6irTu 6ydb-ayi Keopmaui UeTINH.
3actocybaHHoHaueHH
Bka3iBka: 3aIIuIckn 3acO6y dIJI qIuIeHnA bO emyIbci IJI qI aIINuAIOTBcHa OUYBaHI NOBepXHi, MoKytbPn UIeHHI napoi YTBOpOBaTI CMyrN, RKi BIDaJIaIOTbcr pRn 6BaratopazOBomy OUHJI.
Papobni nictoJeT
3pa3kn BnKOpncTaHnI nI npoBOrO niCToIeTy 6e3 npuIaIaI:
- YcyHeHHa 3anaxiB Ta cKnaDOK Ha BncaHux npeMetax Ondry npn o6po6u npoIO 3 BiIcTaHI 10-20 cm.
- OuHueHHa BiD nIy poCInH: DOpTnMyuTEcB BiDCTaHI 20-40 cm.
-Bonora npotnpaIbHa TkaHnHa. Wbndko 6p06itb TkaHnHy npoTo Ta npoTpItb Heo Me6nI.
Φopcunka TOnKOBOrO CTrpymeH
- Eфekt BiД OчишенипдВишуETбсьВ 3алекноTi BiД TOTO,ЧИМ 6лжчe Bn piHocHTe coNlLO Do 3a6pydHeHOrO Micuя, OckiNbKr TempepaTya Ta TnCK napи e NaIbIbShmMcame NiJ qac BnXoDy i3 conla.
-Форсунka крапковоуструмени 3 pi3-NIMn HacадамприЗанчehа Дя OUnI-шеня ВжкдocTyHnx Micь, HanpiKJaI, KyTIB, CTNKIB I T.Д.Жало3i, paiaTOpiB ueHTpaJIi3ObaHOrO onaJIeHHry, TyAnetIB, HepxaIbIOoI cTani, BiKOH,Дзеркал, apMaTyp, NOBepxOHb 3 NOKpTTam Ta emalboBaHnx NOBepxOHb, BIVBeDEHHЯ ПлЯМ.
-BncoKo npOdykTnBHa fOpcyHka nIbN uye WbNdkicTb BnnapObyBaHHa.3iieI npuHH BOHa do6pe nIxOe dIy uH- uHHeHH oO6blBO cTIkoro 3a6pydHeHH, BNDyBaHH KytIB, CTNKIB, TOIO.
Bka3iBka: Kpyrna ⅢtKa He niIxDOnTb dJa OuHHeJeIkaTHnx NOBepxOHb.
ΦopcyHKn dIyIuIeHHn iIaIorH
BikOHHe cOnIoo (cneuiaIbHe npuaIaIaIaIaIaIaIaIaIaIaIaIaIaIaIaIaIaIaIaIaIaIaIaIaIaIaIaIaIaIaIaIaIaIaIaIaIaIaIaIaIaIaIaIaIaIaIaIaIaIaI
Home pIy 3amOBJIeHHy 4.130-115.0
PIBHOMIPHO BUNyckaIte nap Ha cKJIaHy NOBepxHIO Ha BiDcTaHi 6n3bko 20 cm.
BumKHyTn noDaCy napu.
→ПротрибкнгHy NOBepxHcMyKamN 3BepxY BnH3 3a DOIOMOIO rymOBORO KpaHO HacaIKN dJIЯ MNTTBAIKOH.
Iicna Koxho Cmyknn npocuwyte rMoBn Kpa Ta HxHIO qactnHy BiKa.
Po3uHHNK dIa Iwnape (cneuaJIbHe npnlaDЯ)
Home pIy 3amOBHeHH 2.863-076.0
3a donomoro1o po3uHHnka dny shnaJep napocenapaTOp MOxHa BnKOpNCTOByBaTu dny 3HrTTy shnaJep.
Po3mictn po3HHNK dny shnaep Ha kpa cmyKnn shnaepn no Bci nOBepxhi i o6daBaN npoO nOKn shnaepn He po3MOkHyTb (np6bn. 10 cekyHd).
→Перемиати розинник дяшалер He Вимкаюч.Зашитпшалетe mpo3moуен уастунушалери i 3нгтNi CTiHn.
Ipn 6araTopa3OBomy fap6yBaHnHi wopctkyBaTnx uanep npapa He moKe npoHTN Kpi3b uanaepn. B TaKOMy BnnaDky peKoMeHdyEcBcR nonpeEHNr o6pO6Ka BaJIHKOM 3 C8XiB.
TpaHcnpTyBaHHa
△OSEPEXHO
He6e3neKa ompumHaHmma yuKoDkeH! Ppu mpaHcnpmyBaHHi cnid 3BepHymu yea2y Ha bazy npucmpoio.
→ДяТранспортуваанна КОРOTКI BiDCTaHI:ВИМКНУТи HarpiB,ВСТАНБОNTU npICTpIi BepTUKaJIbHO,B3ЯTN npICTpIi 3a pyKoRTKY Ta NOДOBЖУBaJIbHy Tpy6Ky ДЯпЕпЕсEHЯ.
→Пипepebe3eHHi anapatyВТраHCnOpTHnx 3acobax cniДВpaxOByBaTN Mic-ueBi DiOci DepxKaBHi HOpMn,HaPpaBJIeHi Ha 3axNCT BiD KOB3aHHa Ta nepeKuIaHHa.
36epirannn
OBEPEXHO
He6e3neKa ompumahnma yuKoJxeh! Ppu 36epiaaHhi 3eephymu y8a2y Ha 8a2y npucmpoio.
Lcen npnnaMae 36epiratncra NIwe y BHyTpiHix npmiueHHax.
Dorna TaTexnichoe 06cnyroByBaHHa
△HE6E3NEKA
IpoBedeHnpo6im 3 mexHicHo2o o6cny2o8yBaHHaO3e0Jembcs minbku npu buHmU MepeKHiu buni ma ocmuNoMy npucmpoi dna yuueHnnapoio.
Помпваньpeзерыра
MaJIHOHOK C
PpomBaTn pe3epByap napocenapaTopa Minimym Upe3 KoxHi 5 3anOBHeHb.
→ HanobHitb pe3epByap BODOH iHTeHcBHO cTpyciH noRo. 3a paxyHOK zuoro BiDOKpeMIOIObCra 3aJIuIKN HaKIny, 0o ocINn Ha dHi pe3epByapa.
→ BnniTe BOdy.
BudaeHHaKnny 3 pe3epByapa
Дя вдаленя мцноги hakиу pekomenDyetyся чіntTN KOTeJ 3a donomoroio 6io3acoby Дя вдаленя hakиу KARCHER RM 511. Bio3aci6 Дя вдаленя hakиу KARCHER RM 511 BuroTOBJIeHn HaOCHOBI ЛIMOHHOI KICLOTNI TOMY NOBHICTU3dathndo bioIorichoro po3uienenneHn.
YBFA
Uo6 yHukhymu ywkodkeHHn npucmpoB uKOpucmoByme minbku npodykmu, cxanehi fipmoio KARCHER.
BntarHitb MepeKnH mTekep 3i sten-ceIbHOi po3eTKN.
→ BnInTe BCIO BODy 3 napOBoro pe3epByapa.
NobHicTIOpo3uHHHTnDba nakeTu 3acO6yIINBuaJIeHHHaKInyB2IITpax TeNIOI BOHN.
Κeɪ po3uH 3aJNTn y pe3epByap Ta 3aJInuHTn Ioro DiA rtn np6n3Ho Ha 8 ro-DiH.
△HE6E3NEKA
Iid yac budaneHHaKuny He 3a2eunhyu me e npucmpiu 3anobixkny npo6ky. He uKopucmoeyamu npucmpiu, noku 3aci6 dna budaneHHaKuny 3haxodumbcra y pe-3epeyapi.
→ BnHTn 3ac6 nIy BuaIaJIeHHHaKIny. IpnMTn pe3epByap mHIMym ue daBa pa3n XOJIOHO BOIOU, Uo6 nepeko-HaTncy y BiDCyTHOcTi 3aIIuKIB po3Hy y npNCtpoi.
BknHouitb npncTpi.
→ HaTnchTu KhoNky NOBepHeHHy BVxIDHe NIOJoxeHHa DO BUMKaHHa KOHTpOJIbHOI JAmnn "BuaJeHHa KaHny".
PnCTpi 3HOB roTOBn DO 3aCTOCyBaHHn.
PiCn np6I.50 rOdn EKcnnyatauii KOHTPOlbHa JAmna "BndaJeHHn HaKnNy" Bka3ye Ha Heo6xHicTb HAcTyHOro BndaJIeHHn HaKnNy.
Bka3iBka: He 3aJIbBaTu pO3uH dJa BnDaJIeHHaKIny B pe3epByap dJa YnCToI BOHN, TOMy UO ue npN3BeDe Do yUkOJKeHHaHoccy.
3amina pibtpa
MaJIHOHOK D
Pn BnkopncTaHHi 3a6pydHeHOI BOH, fInbTp MoKe 3a6pydHNTsc. Ce ocO6nBO nOMiTHo No BnKIOUHO TpNBaIIi po6OTi Hacocaa 60 NobHI BtpaTI cyHKcioHaJIbHoCTI.
→ 3amHHTn φiNbTp.
Cny6a nIDtpmKn KopncTyBauiB
Kuo noxkoJxHHe moXHa yCyHyTN, Heo6xIDHO nepeBipn npncptiyn Cyjx6i 06cnyroByBaHH KnicHTIB.
TapaNTi
Y KOxHn KpaHn DiIOb yMOBn rapaHTi, 10 HadaeTbcra HaSOIO BiINOBiJaIbHOIO φipMoTO-IPoDABcEM. HenOlaKn B po6Ot i Ba- WOro OblaHaHHaM N U cyBaEmo 6e3KoW-TOBHO npOTrOM TepmiHy dI rapaHTi, RaIO BOHN BnKNKaHI 6paKom MaTepiany a6o BNpObHnUHM 6paKom. Y rapaHTiHomy BnPaIDKy 3BepTaInTeCb, 6yNb JaCKa, 3 Dokymenta-MN, 10 NiITBepJxOHTb NOKynkPy npiCTPOIO, DO BAWOrTO TopROBO areHTa a6o Do HabeDeHnx HIXue NyHKTIb rapaHTiHoro 06CnyROByBaHHa KNIeHTIB.
PpnilaIaIy 3anacHi deTaJI
CniD BnKOpNCTOByBaTn IINHe opNIHaJIbHi KOMJIeKTyUOci Ta opNIHaJIbHi 3aNaChi DeTani, TOMy IIOcame BOHr rapaHTyOTb 6e3-NeuHy Ta 6e3nepe6iHy ekcnIyataciio npnady.
BidiobiHa DnpeKtNa BC
2014/35/EU
2014/30/EU
PpNKlaadhi rapMOHIyOHi HOpMn
EN 55014-1: 2006+A1: 2009+A2: 2011
EN 55014-2: 2015
EN 60335-1
EN 60335-2-54
EN 61000-3-2: 2014
EN 61000-3-3:2013
EN 62233: 2008
3anponoHObaHI HaizioHaJIbHI HOpMn
TRD 801
5.957-470
Ti, xTo NiDnncaJncra DiOTb 3a 3aNITOM Ta DOpyuHnM KepiBnTBA.

CEO

Head of Appropriation
ynOBHOBaxKeHnNoDOKymeHTaJIi:
S. Reiser
71364 Winnenden (Germany)
Ten.: +49 7195 14-0
ΦaKc: +49 7195 14-2212
Winnenden, 2016/04/01
Texhichi xapaKTepeNCTnKn
www.kaercher.com/REACH