USER MANUAL Combi 748 SE STIGA
WARNING: read thoroughly the Instruction booklet before using the machine.

Motor - MANUAL DE INSTRUCCIONES
Ipooyete BHHMaTeHNo HactoUHTe HHCTpyKuN, npEdu n3nOJ3BaTe MaunHaTa.
Pa3yyeTe do6pe KOMaHnTe Hn3noJ3BaHeTo Ha MaunHaTa No nOxOJaHauHH. HayeTe ce da cnpate dBnraTeHa 6bp3o. Hecb6IIOdaBaHeto Ha npedynpeHdEHHa Ta Ha HHCTpyuHHTe MOHe Da npedn3BuHa noHapn Hn nn TeHHn HapaHBAHn. CbxpaHbaTe BCnHN npedynpeHdEHHn HnCTpyuHn, 3a da rH nperJeHdaTe B 6bdeue.
Hnkora He N03BOLIyBaIte MaunHaTa da ce H3NOJ3Ba OT Deca HIN JNCA, KOHTO He ca Do6pe 3aNo3HaTc C NHCPTpyKUInTe. MeCTHnTe 3aKOH MoKe Da ONpeJeT MHNMaJIHa Bb3pact 3a NOJ3BaTeJIa.
MaunHaTa He Tpr6Ba Da ce H3noJ3Ba HNKora, aKo noJ3BaTeJIeT eymOpEn HnHe Ce yCbCTBa do6pe, nAn aKo e npneMaI JekapCTBa, HapKOtUzH, anKOxOJ Nn Dpyr BeuecCTBa, KOHTBLOwABaT peFleKCITE N KOHcHTpaunraTA.
He 3a6paBnTe, ye onepaTOpbT nnn noN3BaTeJr e OTROBOpEn 3a nHcUdEHTn nnn HnpeDnDeHn 06CToRTeJIcTBa, KOHTO MOKe Da HacTbNt 3a dpyr nnuca nn TxHaTa co6CTBeHocT.
Pa60tha 30Ha /MaunHa
3.3 NDAENTNΦHRAUHOHETNKET
Hannwepe pernctpaunohnna Homep (S/n) Ha maunHaTa. Ha cneunaHOTo MrcTo Ha eTKeTa OT3aHa KopucaTa.
3.4 HOMNOHEHTN HA DBNATEJI
MaunHaTa Ce CbCTOn OT CneHnTe OCHOBHN KOMNOHEHTN (fHr.1).
A. Kanayka 3a Пьлесе На MacNo C
Шека 3a Имервае На HBOTO
B. Hap6ypatop
C. Hanak Ha Bb3dUwHnA fNtBp
D. Луна на залитунота сөвү.
E. Perictpaunohen Homep Ha DvigaTeIa
F.PbkoxBaTaHa 3a BbKeTo Ha CTapTePa (ako e npedBndeHa)
G. AkymyIaTop (aKo e npeIbNdeHO)
3.5 YCLOBNHA OHOJHATA CPEDA
ФункиониранetoHaЧETИРТАКТОВДБИГАТЕСВБТPEшноROpeHeCEBЛNEOT:
a) TemnepaTypa:
-Пи работа пи НИСКН TemпературmoMe Да ВьЗИKHТ TPyДHOCТ Пи CTapТиранeВCTуДeHo CБСTOHHe.
-Пи pa6oTa npM HOrO BnCOnI TempeaTpye Bb3MOJHNO Da CpeuHTe 3aTpUdHeHnI npi CTapTnpaHcB 3aRpATo CbCToHnE,DbJIkaUci Ce Ha N3napBaHcTo Ha rOpNBOTo B'BaHnKcATA Ha Kap6ypaTopa nIN B NOMnTa.
-BbB BceKn CnyaH e Heo6xOdmo TnT Ha MacIto Da e NODXoJU 3a ekCnloaTaunOHnTe Tempepatyn.
b)HaMOpcKa BncoUHa:
- MaKcHMaJIHaTa MoUHocT Ha DBIrAteJIa C BbTpEshO rOpHe HamaJIraBa NocTepeHNo C yBeIucaBaHe Ha HAdMOpckata BnCOUnHa.
-3aTOBa npn 3NaUHTeJIHO yBelenuHaBaHe Ha HAdMOpCKaTa BnCOUnHa TpIbBa Da HamaJIte HATOBapBaHEno Ha MaUNHaTa, KaTo n36rBaTe OcOBeHo TeKHa pa6ota.
3.6 TOPHBO
Dóbopto KaeeCTBO Ha TOpNBoTo e BaJHo 3a npabHnHOTo yHKuOHnpaHe Ha dBnRaTeJIa.
TOpNBOTo TpRA6Ba Da OTROBapHa CLeDNHTe N3NUCKBaHn:
a) 13noJI3BaIte YHCT, CBeHK 6e3oJIOBEH 6eH3HH C MHNYM90 OKTaHa;
b) He n3noJ3BaIte roPnBO c npoIeHT eTaHOL no-BnCOK ot 10%;
c) He do6aBryTe MacJIO;
d) 3a da 3aunntte ronpBnHaTa cnCTema OT o6pa3yBa
HETO Ha CMOLINCTN OTIaIarAHn,doabete Cta6NI-3aTOp B rOpNBOTO.
He BCnKu CBeU 3a DnrgaTeJIn C BbTpeuHO ropeHc eHaKnBn.
- INI3BaIe cAmO CBeU OIT NOCOeHnBnC npaBnHOTO TOnHHO YNCIO.
- 06pbuatae BHMaHHe Ha dblnKHaTa Ha pe36ata; NO-roJMaTa dlNkHa Ha pe36aTa yBpejka HENOpPABIMO dBIrataJIa.
- PpOBepTe YnCTOTaTaNpABnHToPap3CToRHe MeKdy eJeKTPoDnte (pa3d.5.7)
4. ПРавиJA 3A ИЗПОЛ3BAHE
4.1 INPEДИ BCЯHO N3ПОЛ3BAHE
IpeiB CBAKO H3NOJ3BaHe Ha DnraTeJIe InpenOpbYnTeJIHO Da ce N3BbPwaT npOBepKn, ZeJIaU OCHrpyRaBaHETo Ha npaBnHOTo My fynKuOHnPaHe.
EfeKTHBHOCTTa Ha Bb3dUWHnA FnIITbp e He3aMeHMo ycIOBHe 3a npabNlHOTo FyHKUOHNpaHe Ha DnRaTeJI; Da He ce 3aJeNCTBa MOTopa, aKO ToI JINCBA, aKO e NOBpeDeH, INI He e HANOe DOCTaTBuHO C MaCIO.
1.ПоистeteоблacTTa OKOLO Kanaka (ФИR.4.A) Ha ФиNTbpa.
2. OToCTpaHete KaHaKa (Φn.r.4.A) Kato OTKaHHTe ⅢnФTOBTe (Φn.r. 4.B);
3. Поберете сбстогино на Флтbpня лем ent (Фг.4.C ИИ 4.C.1), КОТо Трбьада Быд e HeNo-KbTHaT,ИСТ И В прфektHO pa6OTHc StCTOHRHe;В npOTINBEN Clyuayce nORpHKeTe ДApraHn3HpaTeпperледа,ИИн HerOBaTa 3amHa(BNK5.6).
4. NocTaBete OTHOBO KaHaKa (ΦnR. 4.A).
4.1.3 3apeKdaheHa ropHBO
ОперациTe no 3apeждане Ha roриBO ca onиcaHn B pblHOBoDCTBOTO Ha MaunHaTa, a TyK camO npINOMHЯme OCHOBHNe NOJOKeHn. 3a da 3apeiTe ropinBO:
- Pa3BnIe KaIaYKaTa (ΦnR.3.A) Hape3epBoapa n I N3BaTe.
- NocTabeTe yHnTa. (nir.3.B)
- 3apeTe c ropnBO n OTcTaPaHete ΦyHnra (ΦnR.3.B)
4.CneI 3apeKdahe c ropuBO,3aTeHHeTe do6pe KaapKaTa Ha pe3epBoapa (fur.3.A) I NOuHCTeTE BCNUKN pa3JIbN.
5.
BAHXO BnMaBaIe Da He pa3JIbAte RopHBO Bbpy INaCTMacOBtE qACTn Ha DBrHaTeIy Hn Ha MaunHaTa, 3a Da n36erHete Da rN NOBpeIte, H He3a6abHO NouchBaIte BCNUCn CneDN OT eBEHTyaIHO pa3JrTO RopHBO. TapaHcNraTHe NOKpNBa 9eTN PIIactMacOBtE qACTn, pNUnHeHOn OT RopNBOTO.
4.1.4 LyaHa 3anaHTeHaTa CBeu
Cbpxte 3dpabo lyata (fnr.5.A) Ha Ka6ela KbM CbeuTa (fnr.5.B), KaTo ce yBepnte, Ye Hama CneiOn OT 3ambpcaBaHnno BbTpewHocTtHa Lyata n no Kpar Ha CbeuTa.
4.1.5 Поберна Ha CBCTOЯнeto Ha Заразданe Ha anymylaTopa
Bunkepa3dien5.3.2
4.2 CTAPTIPAHE HA ABNATATEJIH
ДВИТЕЛТ TРЯБА DA CE CTAPТИРа NO HAЧИНITE, NOCOΥEH B YNBТBAHETO 3a YNOTpe6a Ha MaSHINHaTA, KaTO BINAHR BHNMaBaTe, Ye TPR6Ba DA CTE H3KJIIOUHIN BCYCHN yCTPoiCTBA (aKO Ca NpeDnDEHn TaKNBa), KONTO CA B CBCTOJHnE Da rHepnpaT DVBJKeHnE Ha MaSHINHaTaNJa DA cNpaT DVBITeJI.
BAHHo He paobote no haKnoHeHn
NOBbpxHocTH, NOBue OTe 20°, 3a Da He NoBnIeTe Ha npabHnHOTo fYHKuOHnpaHe Na DvRaTeTn
BHIMAHNE 3a MoJeI NTe, KOnto Ce 3aDenCTBaT c 6bATEH, He 3a6paBnTe Da NocTaBNTe npaBUNHO CbHTe B OTdEJIHeNTo 3a 6bATEH (pa3d.5.3.3)
4.3 CINPAHE HA DBNIGATEJII PNI IPIHKJIOUBAHE HA PABOTATA
1.Cnpete DnIraTeI NO HauHInTe, NocOeHN B INCTpyKcIyTa 3a ekCnIIOaTaUHa MaunHaTa.
2.ПиСТУДЕНДВИГАTEл pa3KaЧЕТуЛаТa (ФИг.5.A)Ha CBEцТа ИИЗВадеTe cTAPТЕРнЯ KИЮч (ako eпрдВиDEH).
3. OTeTpaHHe BCaKaBn HacLaBaHnHa 3aMbpcBaHnOT dBVaTeJnOc6eHo OT 3oHaTa Ha 3aIyUHTeJn npn aCyNyxa, 3a Da HamaJIte pNcKa OT NOKap.
4.4 NOUHCTBAHE IN CbXPAHEHNE
He n3no3BaIte BOHn cTpyn nn CTpyHnCn NOd HaNJraHe 3a NoNCTBaHe Ha BbHUnTe YacTn Ha DBNrAteJI.
3a npednoHTaHe e da n3nol3BaTe nctolet CbC cBCTe H b3dyx (MaKc. 6 bar), KaTo n36yBaTe onachocCTTa OTNaDbuN npax Da HABJ3aT BBB BbTpewHInTe My Yactn.
- NocTaBeTe MaunHaTa (nDbNrTaTeJI) Ha cyxo HIOCTaTBHNO pOBeTpBOMrCTO,3aUNTEHOOT He6laorponprrn aTMOCΦepHN yCIOBNI.
4.5 IPOdJIbJIHKeIeH INPECTOJ
B clyuaye npdeBnKdaTe da He n3noI3BaTe DnRaTeJIa nepNoJ HAD 30 dHn (HaNPmEp B KpaHa ce3oHa), Tp6Ba Da npedPnEmTe HkON npedna3HmepKn, 3a Da yleChnte NocJeDbaOTo NOBTOPO NyckaHe B EKcPiOaTaun.
3aeneCTbaIte MOtopa Iro dpbKTe B DeIcTBne DOkATO Cnpe, TaKa Ye da yNtpe6u YJIOTO OCTaHaIO KOINueCTBO ROpNB O pe3epBoapa INB Kap6ypaTopa, 3a Da ce H36erHe 06pa3yBaHeTo Ha yTaIKN B TAX.
- OTeTpaHETe CBeuTa n B OTbOpHa HcBeuTa noCTaBete OKOJIO 30 ml YnCTO MOTOPHO MacNo, CneI KoETo, KaTO dbpHInTe 3aTbOpEH OTbOpa c napuaI, 3aJeNCTBaIte 3a KpaTHO CTapTEpa, 3a Da MoKe IBNrAteJIaT Da HaPpABn HrkOJIko O6oPoTa n MacIoTO da ce pa3npeJIN NO BbTpEHaTA NOBbPxHOC T Ha cUINIHDbpa. HaKpaMOnTnpaIte 6paTHO CBeuTa, 6e3 Da CbP3BaTe JyIata Ha KaBeJa.
5. NOAPbHKHA
Bcekn OINT 3a npomna Ha CnCTemata 3a KOHTPOJ Ha emncnTe MOHe da NOBUN HNBOTO Ha emncnHaad DONYCTHMITE 3aHOHOBN rpaHn. Ta3n DeHHnue BKNIOUByo TcTpaHBAHeTo NNn IpomHaTa Ha YaCTn HATO BCMyKATEJIHaTa, RopHBHATA N3nyCKaTEJHaTA CNCTema.
5.1 OBUH CBEDEHNA
IpaBnata 3a 6e3onacnoct 3a cna3BaHe no BpeMe Ha onepauHnte no noapbHKHa ca onncAHn B pa3d.2.4.
Bcnu npOBepn Hamae 3a noDpBkHa Tp6Ba da ce n3BbPWBat npn cnpraMaunHa nN3HJIOUeH DBratae. Pa3NaYeTe CBeuTa n npOyTeTe cBoTBHTHe HHCTpyKuH, npEn Da 3aNoyHeTe KaHBaTo N da e HaMeca No NOuchTBAHe Hn NODpBkHa.Cnaarte cn NOxOJaHn OBeKnlo, PbKaBuHn OOnla, npEn Da n3BbPWBate NOdRpHHata.
- YecToTaTaNBIOBeTeHameCaOobSeHn B"Tabuata3aNoDpBjKa".
I3no3BaHTo Ha HeOpnHnHaHnPe3epBn YacTn n akcecoapn 6n MORIO da HMa OtpuataLeHe eFKeT Bbpxy FyHKUHOHpaHTo N 6e3oNaCHocTTa Ha MaunHaTa. Ipon3BOJNTeJIr T He Noema HnKaHbO TROBOPHOCT B CnyaH Ha UeTN Hn HapaHbAHN, PpHnHEH ON Te3n npOdyKTn.
OpnHnHaJIHnTe pe3epBHN qactn ce doCTaBRT OT cepBn3HTe 3a TEXHnCeCKa NOMOu I OT OTOpN3nPaHnTE DnCTPN6yTOPN.
BAHHO BcnHn Oepaun no npdpbHexnpeynpaHe, KOHTo He ca ONncAHN TOBapbkoBOcTBO, Tpa6Ba da ce nBpWbAT OT BaunAnCTPbUpOp nnOT Cneuaan3npaH cHTbp.
5.2 TABINU3AIOIDPbHHATA
BAHHO Co6CTBeHKnBt Ha MaunHaTa eIbKHeJa H3NbJIHbBa OepaunTe No IoIpbKa, ONcAHN B DOJyCTOnuata Ta6nua.
BAHHO NocntBaTe no-yeCTo npn ocObeHo TeKnn pa60THyCIOBn nn npn HauNue Ha 3aMbpcaHbB BbB b3dyxa.
3A6EJIeHHA ΦHITPHTe Tp6Ba Da ce NOHCTBaT / CMeHrT No-yeCTo, aKO MaUNHaTa pa6OTn Ha OcOBeHo PpaWeH TepeH.
AkymylaTopbT Ha BaWaTa MaWHa Tpr6Ba Da 6bde n3pnuHO 3apeHdah:
- ppei Da n3noJ3BaTe 3a npbB nT MaunHaTa CneH HeHaTa NOKVNka:
- npedn BCEKN npoBJIHHTeHn nepnoHa HEn3NoI3BaHe (no-dbIbTOT 30 dHn) (pa3d.4.5);
- npedn nychaHe B DeIcTBne cJeD npOdbHKeTeHe NepNOHa HEn3POn3BaHe.
BAHHO B cnyuHa npoBnHKeTHeHO
HEn3No3BaHe, 3apeKdaIte aKymyIaTopa Ha BceKN Dba Meceua, 3a da yDblKHTe HerOBnT Hn3HeH cKnbl.
Ako He ce cna3Ba npoceDypata HnH He ce 3apeKda aKymlyaTopa, MoHe da Ce npoBrt HeonopabHMn UeTn Ha eIemEnTe Ha aKymlyaTopa. N3ToUeH aKymlyaTop Tpa6Ba Da 6bde 3apeHb3MOxHO Han-CHopo.
BAHHO 3apeKdaHeTo Tpr6Ba Da CtaBa
N3HIOUHTeHNO NocpeCTBOM 3apAHHOTO yCTPOIcTBO (fHr.7.C).Dpyr3apeKdauCnCTemM MoaT Da NOBpeTt HENONpaBmO aKymylaTopa.
5.3.1 CbajHe n npesapexdane Ha akymylatopa
3a da ro cBAJNTe:
- Hatnche 6ytoHa pa3noIoxhen ot rohata cTpaHa Ha aKymlaTopa, kaTo ro nlb3HeTe Harope (Hr. 6.A).
3a da ro 3apeDte:
MaxheTe rymeHaTa KaNaUka,pa3nOLOKeHa BdoHata qact Ha aKymyIaTopa (fnr.7.B)
CbbpKHeIIOCTaBeHOT3apAHOyCTPOcTBO (fHr.7.C)B eEeKTPnueckn KONTAKT C HAnpeKeHHe, cBoTBETCTBaUo Ha NOCOyeHOT OHa TaBeJata Ha 3apAHO yCTPOcTBO.
CleI KaTo aKymyIaTopbT 6bIe cBbp3aH, CBETInHaTa Ha 3apAnHO To yCTpoiCTBO Ie Ce BnIOU (f). aKO CBeTIHaTa e cepBeHa, 3apeKaHaTeO e B xoJ, a aHO e 3eJeHa, 3apeKaHaTeO e 3aBbPseHo.
3A6EJIEXHA AnymyIaTopbTe o6OpyuBaN cbc 3aunTa, KOrTo He nO3BOJBa 3apeHdaHe, aHO TEMpepaTapa Ha cpeaTa He e MeHdy O n +45^
3A6EJIEXHKA AkymylatopbT MoHe da ce 3apeHda NO BcRAHO BpeMe, DOpN YactuHo, Be3 pNcK OT nobpeHa.
5.3.2 Поверна Ha cьстогиeto Ha Заренип He Ha anymylaTopa
AkyMaIaTopbTe o6OpyDbaH cbc cnCTema, KOrTO BN N03BOLRA Da npOBepHTe cbCToAHHeTo Ha 3apeKdAnHeTo (fNr.7.D).
HaTnCKaIKN 6yToHa (ΦnF.7.E) Μe ce BkIIOuAT CBETJIHHHITe INDINKaTOPN, KOINTO NOKa3BaT OCTaBaUaTa MOnCHoCT Ha aKymyIaTopa:
- TPN 3eJIeHn CBETINHn eHa YepBeHa noka3BaT OT 100% Do 78% 3apRd
-ДBEЗЕLEHNCBETLINHиЕнHaЧерБаHаКa3BaT O77%do 55%Зaprd
- énha 3eJeha CBETInHa n eHa YepBeHa noka3BaT OT 54% Do 33% Zapd
- YerbeHa CBeTInHa NOKa3Ba NO-MaJIko OT 32%OTocTaBaun3apRnHEo6xOДmOcT OT npe3apeKdaHe Bb3MOJHo Ha-Nchopo.
5.3.3 MoHTnpaHe Ha akymylaTopa Ha MaunHaTa
CneI KaTo 3aBbPw 3apeKdAheTo:
1.нзлоче akymу latopa ot 3apdHTo yctpoiCTBO
2.ИЗнluчete 3apЯнHOTy yCTpoIcTBO (ФИг.7.C)OT eJ.MpeKaHaTа;
3. nocTaBete aKymyIaTopa (fHr.1.G) B OTdJIeHHeTo, KaTO rO HaTnCHeTe HADOny KbM dHbHOTo (fHr.6.B), DoKaTo He CyYeTe "UpaKBaHe", KoEtO rO 3aCTOnOpRABa Ha MAcTo N OcNryPraBa eJeKTpUeCKn KOHTaKT;
5.4 CMRAHA HA MACJOTO
3a Bnda Macno, KOeTO CNEdBA Da H3NOJ3BaTe, Ce npNDbpKaaIte KbM yKa3aHnIraTa, DaJeHN B Ta6JIuCaTa C TexHnueChnDaHHN.
BAHXO 3TOyTe MacNoTo, KOraTo DnBraTeJrT e Topeu, KaTo BHIMBaTe Da He DOKOCBe TpeuNTe YactN
HaBnraTeIaHIN H3ToeHOTo MacIO.
IIO OTHOWeHHe Ha BnDa Ha Ma MacNoTo, KOeTo e Heo6xOdmo Da ce H3NoJ3yBa, Ce npNDbPkaTe KbM yKa3aHnraTaNocOueHN B CbOTBeTHnnaPaparpaΦ.
BAHHO 13TOOHTeMACNOTO, KOraTo DnBnraTeJrT e ropeu, KaTo BnIMBaTe Da He DOKOCBaTe RoPeUITE YactTu Ha DBnRaTeJI NIN 13TOOHeTO MACNo.
a) NocTabete MaunHaTa Ha paBHa NOBbpxHOCt.
b) IpoBepTe daIIN pe3ePBoaApbT 3a roPnBOTo e IpbIeH n, daII np6kata e do6pe 3aTBopeHa.
c) Nounctete OjlaactTa OKoIOn KaNaChkata 3a IbJIHeHe (fHr.2.A.).
d) Pa3BnIte kanaKaTa (fIr. 2.A).
e) IoproTBete noDxOJaKoHTeHep (fIr. 8.B) 3a c6bnpaHe Ha MacNoTo.
f) NocTabeTe MaunHaTa OT DaChTa CtpaHa, TaKa Ye MacIto Da H3TeYe OT OTBopa 3a IIhHeHe (ΦnR.8).
g) NocTaBeTe MaunHaTa Ha paBHa NOBbpxHOCr IaONbJI-Hete C HOBo MacNo (BnK pa3d. 4.1.1.).
h) Повере Te Upe3 Измервateнна Т ecka (Фг. 2.B), ДдИН HNBOTo Ha MacJIoTO DoCTHra МарКИрOBkata «MAX».
j) 3aTbOpTe np6KaTa 3a HaJIbBaHe Ha MacNo n NoYnCTeTE BcRA Ka CLeDa OT EBeHTyAInHO pa3JIrTO MaCNo.
5.5 NOUHCTBAHE HA 3AflUYHNTEJI HA DBNATEL
Uymo3aInyuHTeIaT Tp6Ba Da ce nouchTba npn cTuDeH DBratel.
a) IpnemaxheTe OT wymo3arnyuHTeIa (fHr. 9.A) n ot He- roBaTa 3aunTa (fHr. 9.B) BCnHn OCTaTbU, BCaKbN CJIeIN OT OTJOMKn INMpBCOTn INBcNko, KOeTO MOHe Da npuHHn POHap, INJ3BaHKn IO Bb3MOHHOCT YeTHa INCtBCTEH Bb3dYx.
b) Nocntete rnaBata n nepnnte Ha cnHnDpa (fNr. 9.C), 3a da yneCHnte oxlaKaHaTe O Da npedotBpaTne npereBaHe Ha DnRaTeJIa.
c) NocntTe Te nactMacobite cTb6a (fHr.9.D), HanoEHa C BODa I NOCTBaI npenapat.
5.6 IOdPbXHa HA Bb3dUWHnA HJITbP
ФИТРИРАПУЕТЕLEМЕН,ТРЯБА ДА СЕ NOДТБРЖА ВИнагИdoбpe nouchTeH И,ТРЯБА ДА СЕ заMuEN,аКо e Chyпeн,HINIOBpeDeH.
a)Почисте зона токол кала (ФИг.4.A)нфлТьр.
b) CbaIeTe KanaKa (ΦnR. 4.A), KaTo ocBooDnTe uNΦTOBeTe ΦnR. 4.B).
c) OTePaHete fNITbPnna enemeHT (fIr.4.C nnn 4.C.1).
d) 3anywete cmykateHnHa Ta HnctanaC nnapaJ (fNr. 4.E), 3a da npedeOTbpaTHe HaBn3aHeTo Ha 3ambpcaBaHHa B He.
e) N3BbPwTe opeaunTe no noDnprbHexHa naΦnTpnpaunr eIemEnT, KaKTo e nocOeHNo-dOly 3a pa3nnuHnTe BnOBe.
f) Nocntete BbtpueuHOCTTa Ha OTdJeIeHHeTo (ΦnR. 4.D) HaΦnITbpa 3a npax, OTlOMKn HIN 3aMbpcBaHHa, KaTO BHIMaBATE Da He Tn BbPHeTe OTHOBO BCMyKaTeJIHaTa INCTaJauN (ΦnR. 4.E).
g) NocTabeTe fHITbPHnE eIeMeHT (fNrgpa 4.C nnn 4.C.1) B OTdJeHHeTo My n 3aTbOpTe KaNaKa (fNr. 4.B).
- Duyanpenen Hnntbpeh eemeT (Hr. 4.C)
ФИПТРИРАПUIТЕLEMENTТРЯБаДа ce NOДьрждобpe
почиTeH И НAOЕС MAcIо И Дa ce 3aMeHn, aKO e Chkbcah,
нарязан, ИИс с рОнeши ceЧаNT.
BAHHO
Ja He Ce n3nOJ3yBa CrbcTeH Bb3dyx 3a.
fNITpnpaun eJeMeENT.
I3MnTe fHITpnpaunrEJIeMeHT, CbCTOuCe OToTb6a, BbB BOJa HcpeDcTB0 3a NOUHCTBaHe I rO NODCyWte C qNCTa KbPna.
- NmnpereHnpaTe fntpnpaun enemc t 2 JbHn
2.Поинстeteеелкторide(ФИR.10.C)cmetaHa YeTKa,kaTOOTCTpaHHTeEBENTyaJIeH HaIap.
3. C lyΦTomep (ΦnR. 10.D) npOBepTe daJIpa3cToHHeTo MeKdU eJeKtpoDnTe (0,6-0,8 mm) e KOLKOTo e Heo6xOdmo.
4. OTHOBO MOHTnpaIte CBeuTa (ФИг. 10.A) И заTERHeTe ДOKраи с Глух Трьбен Гачен КИLOU (ФИг. 10.B).
CHTO MOTOPHO MACLOI I GO I3CTNCKaIte HRAKOJIHO TbTN, 3a da ce pa3npedeIN paBHOMePHO MACIOTO.
- OTeTpaHeTe eBentyaJIHOTo n3JIINHO MacNo C NOMOHTa Ha YnCTa KbPna.
B cnyaHa ha 3amHa Ha qnItpnpauT elemeHT, ce HaIana Da ce n3BbPshn OmacJIraBaHe Ha HOBnq HnItpnpauE lemEHT, KaKTo e ONICaHO no-rope.
Xaptnen hnnTbpeneHemr (nir.4.C.1)
- PpOdyxaiTe cbc CbCTeH Bb3dYx OTbTpe, 3a da OTCpaHHTe npaxa nOTnaduHTe.
5.7 IPOBEPKA IN ODApBHKHA HA 3ANAJIHTEHATA CBEU
1.ДемоHTираNTe CBeUta (ФИг.10.A)c rIyx Tp6bEN RAeHEn KIOU(ФИг.10.B).
CmeHeTe cBeuTa, aKe eIeKToPeOnTe ca n3ropeJI nn aKO npueHaBt e cHypeH nn HanyKaH.
OnachocOT noXap! He n3BbPwBaTe npOBepn Ha HcTalaqHra 3a 3anaIbaHe, aKo CBeuTa He e HABHTa B IerlntO cN.
BAHHO N3no3BaIte cAmo CBeuN OT NOOCHeHn BND (Bk Ta6nucata C TexHnueckn daHHN).
6. OTHPNUBAHE HA HEN3INPABHOCTN
| HEN3ПРABHOCCT BЕРÖTHA ПИЧИHA | OTCTPAHЯBAHE HA
HEN3ПРABHOCCTTA |
| 1. Трудностартуане | Лига на горово Роберете и дожлени (г. 5.1.3) |
| Стоуюво по утайки в розерboaраи
Налейные посяны рогиво |
| Нелегампая поцедура
посстуране
Разкачера с蜱ц
Намокреса с蜱ц по луалата с дожpe
навлухсаны върху с蜱ц
поберете (разд. 5.1.4) |
| Поберете по луалата с дожpe
навлухсаны върху с蜱ц
поберете (разд. 6.6) |
| Запшени въздуен Филььр Роберете
Неладхаяю за сизona масло Смени
Изаряваши на горовото в
Карбуразора (vapor lock)
поради виски Temператури
Пробlemс с karбуразята
Разendeн akumулатор За佩дау的老
Акумулаторьт не в
поставен правлино |
Ako npo6IeMHTe He n3ue3HaT, cIeI KaTO CTe npHIOKIN ONCAHNTe peWeHn, ce CBbPKeTe CbC CBOI NCTpN6yTop.
3.5 PODMINKY OKOLNIHO PROSTREDA
Fyld违法犯罪
- Fyld盗窃
- Fyld molestation
- Fyld money Laundering
- Fyld money Laundering for the purpose of financing a foreign bank
- Fyld money Laundering for the purpose of financing a foreign bank
- Fyld money Laundering for the purpose of financing a foreign bank
- Fyld money Laundering for the purpose of financing a foreign bank
tov kaqiao to otoxeiou iatpou.
- GENERAL INFORMATION 1
2.SAFETY REGULATIONS. 1
3.ABOUT THE MACHINE. 4
3.1 Machine description and intended use.. 4
3.2 Safety signs 4
3.3 Identification label 4
3.4 Engine components 4
3.5 Environmental conditions 4
3.6 Fuel 4
3.7 Oil 5
3.8 Air filter.. 5
3.9 Spark plug 5
- REGULATIONS FOR USE 5
4.1 Before each use 5
4.2 Starting the engine 6
4.3 Stopping the engine at the end of operation 6
4.4 Cleaning and storage 6
4.5 Prolonged downtime 6
5.MAINTENANCE 6
5.1 General 6
5.2 Maintenance table 7
5.3 BATTERY (if applicable) 7
5.4 Oil change. 8
5.5 Cleaning the silencer and the engine .... 8
5.6 Air filter maintenance 8
5.7 Spark plug checks and maintenance .... 9
- TROUBLESHOOTING. 9
1.1 HOW TO READ THIS MANUAL
Some of the paragraphs in this manual contain particularly important information in terms of safety and operation, and are highlighted differently, according to the following criteria:
NOTE or IMPORTANT this paragraph provides details or further information on what has already been said, with the aim of preventing damage to the machine or other damage.
The symbol represents a danger. Failure to observe the warning can lead to possible personal and/or third party injury and/or damage.
1.2 REFERENCES
The figures in these instructions for use are numbered 1, 2, 3, and so forth. The components identified in the figures are marked with letters A, B C and so forth. A reference to component C in figure 2 is represented by: "See fig. 2.C" or simply "(Fig. 2.C)". The figures are provided by way of example. The effective prices can vary in comparison to the ones provided here.
1.2.2 Titles
The manual is arranged in chapters and paragraphs. The title of paragraph "2.1 Training" is a sub-title of "2. Safety regulations". The references to titles or paragraphs are marked with the abbreviation chap. or par. and the relative number. Example: "chap. 2" or "par. 2.1".
2. SAFETY REGULATIONS
2.1 TRAINING
Read these instructions carefully before using the machine.
Familiarise with the controls and with appropriate use of the machine.
Learn how to stop the engine quickly. Failure to observe warnings and instructions can cause fires and/or serious injury. Keep all warnings and instructions safe for future reference.
- Never allow the machine to be used by children or individuals who are not familiar with the instructions. Local laws may establish a minimum age for users.
- Never use the machine if the user is tired or unwell, or has taken medication, drugs, alcohol or substances that impair reflexes and concentration.
- Remember that the operator or user is responsible for accidents and unexpected events that can occur to other people or property.
2.2 PRELIMINARY OPERATIONS
Personal Protective Equipment (PPE)
- Never use the machine without wearing suitable clothing.
- Never wear loose clothing, laces, jewellery of other objects that can get caught; tie back long hair and maintain the safety distance at.
- Wear noise cancelling headphones.
Work / Machine Area
- Before starting the engine ensure that all of the controls operating the moving parts of the machine are disconnected.
Internal combustion engine: fuel
-
Warning: the fuel is highly flammable. Handle with care! - Always store the fuel in suitable containers.
-
Fill up or top up using a funnel, only outdoors and never smoke during these operations.
-
Fill up before turning the engine on. Never open the tank cap or fill up when the engine is running or still warm.
If any fuel spills out do not start the engine, rather, move the machine away from the spillage and immediately clean up every trace of fuel that has spilled on to the machine or ground
-
Firmly screw the fuel container tank cap back on.
-
Avoid getting any fuel or your clothing and, if this should happen, change your clothes before starting the engine.
2.3 DURING USE
Work Area
- Do not use the machine in environments that pose the risk of explosion, in the
presence of flammable liquids, gases or powders. Electrical contact or mechanical rubbing can generate sparks that can ignite powder or vapour.
- Do not operate the engine in confined spaces where dangerous carbon monoxide fumes can collect. The start-up operations must be carried out outdoors or in a well-ventilated area. Always remember that the exhaust gases are toxic.
- Keep people, children and animals away from the work area. Children must be supervised by another adult.
Conduct
- Before making repairs, cleaning, performing inspections, adjustments, turn the engine off and disconnect the spark plug cable (unless explained otherwise in the instructions).
- Do not touch the parts of the engine that heat up during operation. Risk of burns.
Restrictions of use
- Do not use the machine if there are not enough protections or if the safety devices are not set up correctly.
- Do not disconnect or tamper with the installed safety systems.
- Do not change the engine adjustments, or exceed the maximum rpm. If the engine is forced to run at an excessive speed, the risk of personal injury increases.
- Do not use starter fluids or other similar products.
- Do not tilt the machine onto its side to the point where fuel leaks from the fuel tank cap.
- Do not crank the engine without spark plug.
2.4 MAINTENANCE, STORAGE AND TRANSPORT
Servicing the machine on a regular basis and correct storage maintain machine safety.
Broken or worn parts must be replaced and never repaired. Only use original parts: using parts that are not original or installed incorrectly affects machine safety, and can therefore cause accidents or personal injury and relieve the Manufacturer of all obligations and liability.
Maintenance
- If the tank can be emptied, perform this operation outdoors and when the motor is cold.
- To reduce the risk of fire, check for oil and/or fuel leaks on a regular basis.
Storage
- Never leave fuel in the tank if the machine is stored in a building where the fuel vapours can come into contact with open flames, sparks or sources of heat.
- Let the machine cool down before storing it indoors.
Transport
- Transport the machine with an empty tank.
2.5 BATTERY, BATTERY CHARGER (IF APPLICABLE)
IMPORTANT The following safety instructions are in addition to the safety requirements provided in the specific battery and battery charger manual delivered with this machine.
- Only use battery chargers recommended by the manufacturer to recharge batteries. An inadequate battery charger may cause electric shock, overheating or corrosive liquid to leak from the battery.
- Use only batteries specifically designed for your power tool. The use of other batteries may cause injuries and fire risks.
- Keep all unused batteries at a distance from paper clips, coins, keys, nails, screws or other small metal objects as contact with the same can cause short circuits. Short circuits between battery contacts can lead to explosion or fires.
- Never use the battery charger in environments in the presence of vapours, flammable substances or on easily flammable surfaces such as paper, fabric, etc. The battery charger heats up during recharging and may cause a fire.
- When transporting accumulators, make sure the contacts never come into contact with each other and never use metal containers to transport them.
2.6 ENVIRONMENTAL PROTECTION
Protecting the environment must be a significant and top priority for machine use, to the benefit of civil co-habitation and of the environment that we live in. Avoid being an element of disturbance to the surrounding area. Use this machine at reasonable times of the day only (not early morning or late evening when the noise could cause disturbance). Comply with local regulations for the disposal of packaging, deteriorated parts or any elements
with a strong environmental impact; this waste must not be disposed of with regular waste, but must be separated and taken to collection centres, who will recycle the materials. Comply with local regulations for the disposal of waste materials At the time of decommissioning, do not leave the machine in the environment, rather, contact a collection centre, in accordance with local regulations in force.

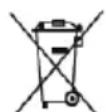
Do not throw electrical equipment away with domestic waste. According to the European Directive 2012/19/EU on electrical and electronic equipment waste and its implementation in
compliance with national standards, old electrical equipment must be collected separately, for eco-compatible recycling. If electrical equipment is disposed of in dumps or in landfills, hazardous substances can leak into the groundwater and contaminate the food chain, damaging your health and well-being. For further information on the disposal of this product, contact your dealer or a domestic waste collection service.
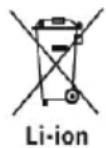
At the end of their working life, dispose of batteries paying due attention to the environment. Batteries contain material classified as hazardous for you and the environment. They must be removed closed of separately at a facility that lithium-ion batteries.

Separate waste collection of the products and packaging used allows the materials to be recycled and reused. Reuse of recycled materials help to prevent environmental pollution and reduces the need for raw materials.
2.7 EMISSIONS
The combustion process generates toxic substances such as carbon monoxide, nitrogen oxides and hydrocarbons. It is important to control these substances because they can react with photochemical smog as well as with direct exposure to sunlight. Carbon monoxide does not react in the same way to exposure to sunlight but it must still be considered toxic.
Our machines are equipped with emission reduction systems for the substances mentioned above.
3. ABOUT THE MACHINE
3.1 MACHINE DESCRIPTION AND INTENDED USE
This machine is a spark-ignition engine.
Engine performance, reliability and life are influenced by many factors, some external and some strictly associated with the quality of the employed products and with the scheduled maintenance. Additional information is provided below for greater awareness of your machine. Any other use that does not comply with the above, can be dangerous and cause damage to people and/or property.
IMPORTANT Improper use of the machine causes the warranty to lapse and relieves the Manufacturer of any liability, placing all responsibility for damage or injury, to him/ herself or third parties, on the user.
3.1.1 Type of users
This machine is intended for use by consumers, i.e. non-professional operators. It is intended for "hobby-related activities".
3.2 SAFETY SIGNS
There are various symbols on the machine. Their function is to remind the operator of the correct conduct for use, with due care and caution. Meanings of the symbols:

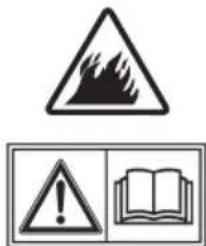
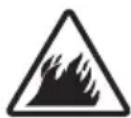
Warning! - Petrol is flammable. Allow engine to cool at least 2 minutes before refuelling.
Warning: Read the instructions before use.
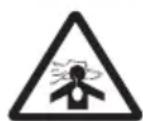
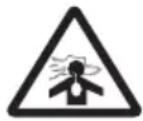
Warning! - Engines emit carbon monoxide. DO NOT run in enclosed area.

Danger! Keep away from hot surfaces.
3.3 IDENTIFICATION LABEL
Write the serial number (S/n) of your machine on the space provided on the label at the back of the cover.
3.4 ENGINE COMPONENTS
The machine is comprised of the following main parts (fig. 1).
A. Oil filler cap with dipstick
B. Carburettor
C. Air filter cover
D. Spark plug cap
E. Engine code
F. Knob of the starter rope (if applicable)
G. Battery (if applicable)
3.5 ENVIRONMENTAL CONDITIONS
The operation of a four-stroke endothermic engine is affected by:
a) Temperature:
- When operating at low temperatures cold starts may be difficult.
- When operating at very high temperatures warm starts may be difficult due to evaporation of the fuel in the float chamber of the carburettor or in the pump.
- In any case the right kind of oil must be used, according to the operating temperatures.
b) Altitude:
- The higher the altitude above sea level, the lower the max power developed by an endothermic engine.
- When there is a considerable increase in altitude, the load on the machine should be reduced and particularly heavy work avoided.
3.6 FUEL
A good quality fuel is the major issue for the engine reliability of operation.
Fuel must meet these requirements:
a) Use clean, fresh unleaded gasoline, with a minimum of 90 octane
b) Do not use fuel formulated with ethanol greater than 10% ;
c) Do not add oil
d) To protect the fuel system from gum formation, mix a fuel stabilizer into the fuel.
Use of unapproved fuels will cause damage to engine components, which will not be covered under warranty.
NOTE Only use the fuel named in the technical data table. Do not use other types of fuel. It is possible to use ecological fuels, such as alkylate petrol. The composition of this petrol has less of an impact on people and animals. No negative effects have been reported in connection to their use. Nonetheless, there are types of alkylate petrol on the market for which it is not possible to provide specific indications on their use.
3.7 OIL
Use always high quality oils, choosing their viscosity grade according to the operating temperature.
Only use detergent oil with a quality of no less than SF-SG.
- Choose the SAE viscosity based on the technical data table.
- The use of multigrade oil can lead to greater consumption in hot weather, accordingly it is necessary to check the level more frequently.
- Do not mix oils of different brands and characteristics.
SAE 30 oil, if used below +5^ could result in possible engine damage due to inadequate lubrication.
3.8 AIR FILTER
The air filter must always be in perfect working order, to prevent debris and dust from getting sucked into the engine, reducing the efficiency and life of the machine.
- Always keep the filtering element free of debris and in perfect working order (par. 5.6).
- If necessary, replace the filtering element with an original spare part Incompatible filtering elements can impair the efficiency and life of the engine.
- Never start the engine without mounting the filtering element properly.
3.9 SPARK PLUG
Not all the spark plugs for endothermic engines are the same.
- Use only spark plugs of the recommended type, with the right heat range.
- Check the length of the thread, because - if too long - it will damage the engine beyond repair.
Make sure that the electrodes are clean and that their gap is correct (par. 5.7)
4. REGULATIONS FOR USE
4.1 BEFORE EACH USE
Before every use, perform the following checking procedures in order to assure a regular operation.
4.1.1 Oil level check
- Place the machine on a flat surface.
- Clean around the oil fill cap.
-
Unscrew the cap(fig. 2.A), clean the end of the dipstick (fig. 2.B) and slide it back in until the cap is touching the hole, as shown:
-
if the dipstick is short, place the cap without fastening it,
-
if the dipstick is long, fasten it again with a click and then unscrew it,
-
Remove the cap with the dipstick and check the oil level that must be between the «MIN» and «MAX» marks.
- If oil is required, add oil of the same kind up to the «MAX» mark, being careful not to spill any outside the oil fill
- Fully tighten the filler cap (fig. 2.A) and wipe off any spilled oil.
NOTE Top up gradually, adding small amounts of oil, checking the level each time. Do not top up beyond the «MAX» level; an excessive level can cause:
- smoking from the exhaust;
- soiling of the spark plug or air filter with subsequent difficulty for ignition.
NOTE For the required type of oil, observe the indications provided in the technical data table.
4.1.2 Air filter control
The efficiency of the air filter is essential to correct engine operation; never start the engine if the filter element is missing, broken or insufficiently saturated with oil.
- Clean around the filter cover (fig.4.A).
- Remove the cover (fig. 4.A) by releasing the tabs (fig. 4.B);
- Check the state of the filtering element (fig. 4.C or 4.C.1), which must be intact, clean and in perfect working order; if not, either carry out maintenance or replace it (see 5.6).
- Put the cover back in place (fig. 4.A).
4.1.3 Refuelling
The refuelling operations are described in the machine manual and are mentioned here. To refuel:
- Unscrew the fuel tank filler cap (fig.3.A) and remove it.
- Set a funnel on the hole. (fig.3.B)
- Refuel and take the funnel off (fig.3.B)
- At the end of refuelling, screw the cap back on (fig.3.A) and clean any spillage.
IMPORTANT Avoid getting fuel on the plastic parts of the engine or machine to avoid damaging them, and immediately clean off every trace of spilled fuel. The warranty does not cover damage to plastic parts caused by fuel.
4.1.4 Spark plug cap
Firmly connect the cap (fig. 5.A) of the spark plug cable (fig. 5.B), ensuring that there are no traces of dirt inside the cap or on the spark plug terminal.
4.1.5 Check the battery charge status
See paragraph 5.3.2
4.2 STARTING THE ENGINE
The engine must be started up as described in the machine's Instructions Manual, always being careful to uncouple any device (if applicable) that is capable of making the machine travel forwards or stop the engine.
IMPORTANT Do not work on slopes exceeding 20^ to avoid jeopardising correct engine operation
IMPORTANT Make sure the battery is properly inserted inside its housing when dealing with battery start-up models (par. 5.3.3)
4.3 STOPPING THE ENGINE AT THE END OF OPERATION
- Stop the engine following the instructions contained in the machine's Instructions Manual.
-
With a cold engine, take the cap off the spark plug (fig. 5.A) and take out the starter key (if applicable).
-
Remove any debris from the engine and especially around the exhaust silencer to reduce the risk of fire.
4.4 CLEANING AND STORAGE
- Do not spray with water or use pressure washer wands to clean the exterior of the engine.
- Preferably use a compressed air gun (max. 6 bars), thus preventing debris and dust from penetrating inside.
- Store the lawnmower (and the engine) in a dry place, sheltered from the elements and sufficiently ventilated.
4.5 PROLONGED DOWNTIME
If the engine is not going to be used for more than 30 days (for example, at the end of the season), it will be necessary to take a few precautions so that it will start back up again accordingly.
- Start the engine and run it until it comes to a halt, so that it uses up all the fuel that is left in the tank and in the carburettor, to prevent deposits forming inside.
- Remove the spark plug and pour about 3 cl of clean engine oil into the spark plug hole, then, having blocked the hole with a rag, run the starter motor briefly to turn the engine for a few revs and distribute the oil over the inner surface of the cylinder. Finally, replace the spark plug without connecting the cable cap.
5. MAINTENANCE
Any attempt to tamper with the emission control system may increase emission levels above legal limits. This definition includes the removal or alteration of parts such as the intake system, the fuel system and the exhaust system.
5.1 GENERAL
The safety regulations that must be followed during maintenance are described in par. 2.4.
All controls and maintenance operations must be carried out with the machine off and the engine off. Disconnect the spark plug and read the relative instructions before starting any cleaning or maintenance procedure. Wear suitable clothing, gloves and glasses before performing any maintenance.
The frequency and type of procedures are outlined in the "Maintenance table".
- The use of non-original parts and accessories could have negative effects on machine operation and safety. The manufacturer declines any responsibility for damage or injury caused by said products.
- Original parts are supplied by assistance shops and authorised dealers.
IMPORTANT All maintenance and adjustment operations that are not described in this manual must be carried out by your Dealer or by a Specialised Centre.
IMPORTANT It is the responsibility of the owner to perform the machine maintenance operations described in the table below.
IMPORTANT Clean more frequently when operating in particularly demanding conditions or when there is debris in the air.
NOTE Filters should be cleaned / replaced more often if the machine is used on very dusty ground.
| Operation | After the first 5 hours | Every 5 hours or after every use | Every 50 hours or at the end of the season | Every 100 hours |
| Oil level check (par. 4.1.1) - √ - | | | | |
| Oil change1 (par. 5.4) √ - √ - | | | | |
| Cleaning the silencer and the engine (par. 5.5) | - √ - - | | | |
| Checking and cleaning the air filter 2(par. 5.6) | - √ - - | | | |
| Changing the air filter (par. 5.6)3 | - - - √ | | | |
| Spark plug check (par. 5.7) | - - - √ - | | | |
| Changing spark plugs (par. 5.7) | - - - √ | | | |
1 Change the oil every 25 hours if the engine is operating under heavy load or in hot weather.
2 Clean the air filter more frequently if the machine is operating in dusty areas.
3 Only for the filtering element provided in the form of a cartridge.
5.3 BATTERY (IF APPLICABLE)
To ensure long life to the battery it is essential to keep it carefully maintained. The machine battery must always be charged:
- before using the machine for the first time after purchase;
- before leaving the machine disused for a long period (over 30 days) (par. 4.5);
- before starting up the machine after a prolonged period of inactivity.
IMPORTANT If unused for any length of time, recharge the battery every two months to prolong its working life.
Failure in following the procedure or in charging the battery could permanently damage the battery elements. A flat battery must be recharged as soon as possible.
IMPORTANT The battery must be charged exclusively using the battery charger (fig. 7.C). Other recharging systems can irreversibly damage the battery.
5.3.1 Battery removal and recharging
To remove the battery:
- Push the button placed above the battery by making it slide upwards (fig. 6.A).
To recharge the battery:
- Remove the rubber cap placed on the battery's lower side (fig 7.B)
- connect the battery charger (fig. 7.C) to a power socket with the voltage indicated on the rating plate.
- Once the battery is connected the battery charger's light will light up (fig 7.F): a red light means that the battery is recharging, whereas a green light means that the recharging is complete.
NOTE The battery is equipped with a guard that inhibits recharging if the environmental temperature is not between 0 and +45^
IMPORTANT The battery can be charged at any time, even partially, with no risk of damaging it.
5.3.2 Check the battery charge status
The battery is equipped with a device allowing the user to check its charge status (fig. 7.D).
By pushing the button (fig. 7.E) the lights showing the battery's residual charge will light up:
- three green lights and one red mean that the charge ranges from 100% to 78% .
- two green lights and one red mean that the charge ranges from 77% to 55% .
- one green light and one red mean that the charge ranges from 54% to 33% .
- a red light means that the charge is lower than 32% and that the battery should be recharged as soon as possible.
5.3.3 Refitting the battery on the machine
When recharging is completed:
- disconnect the battery from the battery charger
- Disconnect the battery charger (fig. 7.C) from the mains power supply;
- insert the battery (fig. 1.G) in its housing by pushing it downwards (fig. 6.B) until you hear a "click": this sound means that the battery is locked in its position and that the connection is ensured;
5.4 OIL CHANGE
For the required type of oil, observe the indications provided in the technical data table.
IMPORTANT Drain the oil out while the engine is warm, being careful not to touch the hot engine nor the drained oil.
See the specific chapter for the oil to be used.
IMPORTANT
Drain the oil out while the en
gine is warm, being careful not to touch the hot engine nor the drained oil.
a) Place engine level.
b) Make sure that the fuel tank is not full and that the cap is properly closed.
c) Clean around oil fill (fig. 2.A.).
d) Remove the filler cap (fig. 2.A).
e) Have a container ready (fig. 8.B) to collect the oil.
f) Tip the lawnmower on its right side so that the oil will drain from the oil fill (fig. 8).
g) Place the lawnmower level and top up with new oil (see 4.1.1).
h) Check that the oil level has reached the «MAX» notch on the dipstick (fig. 2.B).
j) Close the filler cap and wipe off any spilled oil.
5.5 CLEANING THE SILENCER AND THE ENGINE
The silencer must be cleaned when the engine is cold.
a) Use a jet of compressed air or a brush to remove any debris and dirt that could cause a fire from the silencer (fig. 9.A) and its protective cover (fig. 9.B).
b) Clean the cylinder and cylinder head fins (fig. 9.C) to ease engine cooling and prevent overheating.
c) Clean the plastic components with a sponge (fig. 9.D) soaked in water and detergent.
5.6 AIR FILTER MAINTENANCE
The filtering element must be kept perfectly clean and must be replaced if it is broken or damaged.
a) Clean around the filter cover (fig. 4.A).
b) Remove the cover (fig. 4.A) by releasing the tabs (fig. 4.B).
c) Remove the filtering element (fig. 4.C or 4.C.1).
d) Block the inlet duct (fig. 4.E) with a rag to prevent any dirt from entering.
e) Carry out maintenance on the filtering element as described below for each type.
f) Clean inside the filter housing (fig. 4.D) to get rid of any dust, debris or dirt, taking care not to push anything into the induction pipe (fig. 4.E).
g) Place the filtering element (fig. 4.C or 4.C.1) into its housing and close the cover (fig . 4.B).
- Sponge filtering element (fig. 4.C)
Keep the filtering element clean and soaked in oil. Replace it if it is disintegrating, cut or broken.
IMPORTANT
Do not use compressed air to
clean the filtering element.
- Clean the sponge filtering element with water and detergent and dry it with a clean cloth.
- Soak the filtering element in 2 tablespoons of clean engine oil and wring it well to distribute the oil evenly.
- Remove any excess oil with a clean cloth.
If you need to replace the filtering element, oil the new filter as described above.
- Cartridge filtering element (fig. 4.C.1)
- Blow compressed air from the inside to remove dust and debris.
5.7 SPARK PLUG CHECKS AND MAINTENANCE
- Take the spark plug down (fig. 10.A) using a socket wrench (fig. 10.B).
- Clean the electrodes (fig. 10.C) with a metal brush, removing any carbonaceous build-up.
-
Using a thickness gauge (fig. 10.D) ensure the gap between electrodes is correct (0.6 - 0.8mm)
-
Put the spark plug back in (fig. 10.A) and tighten firmly using a socket wrench (fig. 10.B).
Replace the spark plug if the electrodes are burnt or if the porcelain is broken or damaged.
Fire hazard! Do not check the ignition system when the spark plug is not in place.
IMPORTANT Only use the required type of spark plugs (see Technical data table).
6. TROUBLESHOOTING
| PROBLEM PROBABLE CAUSE SOLUTION | |
| 1. Difficulty staring the engine | No fuel Check and top up (chap. 5.1.3) | |
| Old fuel or deposits in the fuel tank Empty the fuel tank and add fresh fuel | |
| Incorrect starting procedure | Perform start-up correctly (par. 5.2 and par. 5.3) |
| Disconnected spark plug | Ensure that the cap is fitted onto the spark plug (par. 5.1.4) |
| The spark plug is wet or the spark plug electrodes are dirty or placed inadequately | Check (par. 6.6) |
| Clogged air filter Check and clean (par. 6.5) | |
| Incorrect oil for the season Replace with suitable oil (par. 6.3) | |
| Fuel evaporation in the carburettor (vapour lock) due to elevated temperatures | Wait a few minutes then try starting it up again (par. 5.3) |
| Carburetion fault Contact an Authorised Assistance Centre | |
| Low battery Recharge the battery (par 5.3.1) | |
| Battery is not inserted correctly | Insert the battery correctly (par. 5.3.3) |
| 2. Irregular operation. | Dirty spark plug electrodes or incorrect gap | Check (par. 6.6) |
| The spark plug cap inserted incorrectly | Ensure that the cap is firmly fitted on (par. 5.1.4) |
| Clogged air filter Check and clean (par. 6.5) | |
| Carburetion fault Contact an Authorised Assistance Centre | |
| 3. Loss of power during operation | Clogged air filter Check and clean (par. 6.5) | |
| Carburetion fault Contact an Authorised Assistance Centre | |
If problems persist after implementing the solution, contact your Dealer.
INDICE
- INFORMACIONES GENERALES............1
- NORMAS DE SEGURIDAD 1
- CONOCER LA MAQUINA 4
1.1 KUIDAS JUHENDIT LUGEDA
3.3 IDENTIFITSEERIMISPLAAT
Kirjutage omamasina seerianumber (s/n) sildile katte taga.
3.4 MOOTORI KOMPONENDID
Masin koosnej jargmistest peakcomponentistest (jn 1)).
A. Möötevardaga olifiltri kork
B. Karburaator
C. Ohuifiltri kate
D. Kūnlokark
E. Mootori matriklinumber
F. Käivitustrossi nupp (kui on olemas)
G. Aku (kui on olemas)
3.5 KESKKONNATINGIMUSED
3.5 CONDITIONS AMBIANTES
6.UTVRDIVANJE PROBLEM
| PROBLEM MOGUĆU ZROK RJEŠENJE | |
| 1. Teškoće priPokretanju | Nedostatak goriva Provjeriti i nadopuniti | (pogl. 5.1.3) |
| Staro gorivo ili talog u spremniku Ispržruti | isti sprezmik i dodati svjeće gorivo |
| Nepravilan postupak tokretanja | Izvršiti pravlno tokretanje (odj. 5.2 i odj. 5.3) |
| Svjećicaimmune spojena | Provjeriti je li kapica dobro navučena na svjećicu (odj. 5.1.4) |
| Svjećica je vlăžna ili su elektrode svjećice prljave ili neodgovarajuća udaljenost | Provjeriti (odj. 6.6) |
| Filtrar za zrak začepljen | Provjeriti i očistiti (odj. 6.5) |
| Ulje ne odgovarasezoni | Zamijeniti prikladnim uljem (odj. 6.3) |
| Isparavanje goriva u rasplinjaču (vapor lock) zbog visokih temperatura | Pričekati nekoliko minuta potom ponovno pokušati tokretanje (odj. 5.3) |
| Problemi s izgaranjem Obratiti se ovlaštenom servisnom centru |
| Prazna baterija | Napunite bateriju (odj. 5.3.1) |
| Niste pravlno namjestili bateriju | Pravlno namjestite bateriju (odj. 5.3.3) |
| 2. Neispravan rad. | Elektrode svjećice prljave ili razmakimmune prikladan | Provjeriti (odj. 6.6) |
| Kapica svjećice je loše namješena | Provjeriti je li kapica Čvrsto namješena (odj. 5.1.4) |
| Filtrar za zrak začepljen | Provjeriti i očistiti (odj. 6.5) |
| Problemi s izgaranjem Obratiti se ovlaštenom servisnom centru |
| 3. Gubitak snage tijekom rada | Filtrar za zrak začepljen | Provjeriti i očistiti (odj. 6.5) |
| Problemi s izgaranjem Obratiti se ovlaštenom servisnom centru |
Ukoliko se problemi nastave nakon primjene gore opisanih rješenja, obratite se vašem trgovcu.
INDICE
- ALTALÁNOS INFORMÁCIÖK 1
- BIZTONSAGI SZABALYOK 1
3.A GEP LEIRASA. 4
5.2 APKOPES DARBU TABULA
SVARIGI Masinas ipasnieks ir atbildigs part turpmakaja tabula aprakstito tehniskas apkopes darbibu veiksani.
SVARIGI Ipaşi smagos darba apstaklos vai puteklaina gaisa apstaklos veiciet tirisanu biezak.
3.2 O3HAn 3A B6E3BEdHOCT
Ha MaunHata ce npCyTHn pa3HN cHM60JI. HnBnata fYHKuJa e Da ro Notcetat KopNCnKOT Ha HeONXoHocTa OD BHMaTeJHa yNoTpe6a. 3NaueHe Ha cM6OJIrTe:
BHHMaHHe!-BeH3nHot e 3aapanb.OctaBeTe ro MOTOpOT da ce IaI HajMaIky 2 MmHyTu nped Da nOHLHTe rOpNBO.

PpeynpeyBahe: Ppountajte n ynatCTBaT nped ynoTpe6a.
PpeynpeyBahe! - MoToPnTe emTyBaat jarIepoM MOHcNl. HE BnUyBajTe ro Bo 3aTBopeH npocTOp.
Onachoc! YuBaJTe ja KocnIkata noJaIeKy Od TOnJI NOBpUHH.
3.3 HAJENHUNA 3A INDEHTNPHKAUJA
HannweTe ro cepncknot 6proj (S/n) OBaWata Kocnilka Ha MeCTOTo Ha HanelHHaTaHa 3aHnOT DeHa KaNaKOT.
3.4ДЕЛOBиHA MOTOPOT
MaunHaTa ce COCTO OcCneHnTe TlaBHN DeIOBN (fNr.1).
A. Kanayee 3a noJhebe MacNo CO MepaHa HnBO
B. Kap6ypaTop
C. Kanayeha Bo3dyuHnO TnITeP
D. Kanayeha CbekeucaTa
E.ПОНЗВОДСТВЕНбpoи haMOTOPOT
F. Hamot 3a jaKeTo BO CTapTepot (JOKOLKY HMa)
G. AkymynaTOp (doKoJHy nMa)
3.5 AMBNEHTAJIHN YCJIOBN
Pa6oTaHaYeTpHnTaKTHN0T eHDoTePmUKN3aBnCn Od:
a) Temneparypa:
- Ha HnCKH TempepaTpy MoKe da hMa IOTeWKOTn Pn NaJIeHe Ha JaADHo.
- Pa6oTejKn Ha BnCOKn TempeaTpyn MoKe Da NMa NOTeWKOTNn Pn nAJIeHbHe Ha TOnIIO NopaDN NcnpyBaHbE Ha rOpNBTo.Bo KaINuKaTa Ha Kap6ypaTopoT HIn NymNaTa.
-Bo cekoj cnyaj da ce npilarodn ynoTpe6aTa Ha MacNo Ha HADBopeuHHTe TEMepaTyPi.
b)HaDMOpcka BnCnHa:
- MaKcImaHaTa MOK Ha eHDoTePMuHnOT MOTOp Ce HamaIyBa CO 3roJeMyBaHe Ha HaDMOPCKaTa BnCnHa.
-Co3NaHTeHNO3rOJeMyBaHe HaHaMOpCKaTaBnHnHaTpe6a
Ja Ce HamaJI KOpNCTeHBeTo Ha MOTOPHaTa MOK.
3.6 TOPHBO
ДобриOT KBaJIHTeHa rOpHBTo e OCHOBa 3a npabINHa pa6Ota Ha MOTopoT.
TOpnBTo Tpe6a da rH nCnoJHyBa cNeHNTe no6apyBaHa:
a) KopnCTeTe YnCTO n HOBO 6e3oJOBHO rOpNBO, n CO MHNmym 90 OKTaHn
6) He Kopnctete ropno aHO mHa eTaHOJ NOBeKe o10%
B) He doaBAjTe macNo
r) Dojate cTa6nHn3aTOp Ha rOpHBOTo 3a DaTo 3aHTNTe CnCTeMOT Ha COROPyBaHe ODC03DaBAHbe CMOJEcT TaIOr.
YnOtpe6ata Ha HecooDbETHO rOpNBO Ke rOnOWTeTN DeIOBNTe Ha MOTOPOT N THe Hema BeKe Da 6nDaT NOr rapaHcuija.
3A6EJELSHA Da ce KOpHCTn rOpHBO
HaBeJeHO BO TexNCHkata Tabela. Ha He ce
KOpHCTa DpyrNBIOBn rOpHBO.MoKHo
e KopHCTeHe Ha ekOLOWKn rOpHbKaKO
Ha npMep aIKINipanbEHN.H.CoCTaBOT
Ha OBOj BeHNmA NOHN3OK ekOLOWKn
HMnAKT Bp3 LyTeTo H NHBOTHaTa CpeDInHa.
He Ce IokaHn HeratNBn efeKTn Co
KOpHCTeHe Ha nctata.Cenak NoctojaT
MHORY BINOHn EKOLOWKn rOpHbNaHaHEMOKe
da Ce DaDaT PneuN3Hn INdNkaCnn 3a
eFeHTnte OD HVBHOTO KOpHCTeHe.
3.7 MACJIO
KopncTeMacla co do6ap KbaHITet, 6npajKn ro CTeneHOT Ha BnCKo3HOCT cnopeTtemepaTypata Ha pa6ota.
-Да ce KOpHcTn Camo MacNo 3a YIncTeHbe co KBaJIHTeT He NOHn3OK oD SF-SG.
-Да ce od6epe cTepeн Ha BnCKo3HocT SAE BP3 OCHOBa Ha TEXHnUkata Ta6eJa.
KopncTeHe Ha nobEkeCTeNeHO macNo MoKe Da npDoHec Do nOrolmo KOHCympaHe BO TOnJIte nepoDi, BO ToJ cIyaj npOBepyBaJTe rnoecTo HnBOTO Ha MacNo.
He MewajTe Macla co pa3nHn KapakTepncTNn n Od pa3nHm MapKn.
- KopncTeHeTo Ha MacNo SAE 30 Ha TemnepaTpyn NOnHcN Od +5^ MoKe Da rO oUTeT MOTOpT nopaHn HeaDeKbTaHa Ly6pHnKaunja.
3.8 BO3dUWeH ΦNJIteP
Efnkachocta Ha BO3dyuHnOT
fntep e notpe6ha 3a da ce n36eRHe
BleIyBaHBeTo HaYeCTNCHN IIN npaIHHBO MOTOPOT HamaIyBaJKn rTO TpaEHeToN fYHKcNoHaJIHOCTa Ha NCTNOT.
- OdpKByBaHe Ha qHnTpnpaQKnOT eIeMeHT 6e3 yeCTNuKN eHkaceh (nac. 5.6).
-ДOKOLКЕ NGTpe6H0,3aMeHeTe roФИТЕРOT CO OPIRINHaJIeH,6NDEjKn HECOOBETHNO TФИТЕМоKE Da ja HaMaJIIn eФИKacHOCTa NJIBOTHNot BEK Ha MOTOPOT.
He ro nyuTajTe MOTOpOT 6e3 KopeKTHO MOHTnpaH fNITep.
3.9 CBEKNUHA
NocTojaT MHORY BnOBN CBeKnKn 3a eHDoTePmNkMOTOpN.
- KopnctTe CBeKnUKn OJ Ha3HaueHnOT TIN CO TOeH TePMnUKN CTeneH.
BHHMaHHe Ha OJHKHaTa Ha KOHeuOT; NOOJIr KOHeU MOKe HEnOBpaTHO Da rO OWTeTN MOTOpOT.
-Да ce KOHTpOInpaЧNTOTaTaN COODBeTHOTo paCToJaHne NOMErIy eNekTpoDnTe (nac.5.7)
4. ПРавиJA 3A УПOTPEБА
4.1 IPED CEKOJA YNOTPEBA
Ipei cekoja ynoTpe6a Ha MOTOPOTdo6po e da HnpaBInTe KOHTpOla 3a Da ce ocHypate 3a npabNlHocTa Ha pa6oTata.
4.1.1 KoHTpOHa HnBOTO Ha MacJo
- NocTaBete ja MaunHaTa Ha paMHO.
2.Исчпесе OKoly kanaуeto.
- OdBpTeTe ro KaNAKOT (cI. 2.A), nCnCTeTe ro KpaJHNO TdJI Ha MepaOT Ha HNBO (cI. 2.B) n NOBTOPO BMETHeTe ro BHaTpe DoDeHa KaNaYeTo He DOnpe Do OTBOPOT, KaKO WTO e PnKaKaHO : -DOKOLky MEPaOT 3a HNBO e KpaTOK, NoCTaBeTe ro KaNaYeTo 6e3 Da Ro PnucBPCTHTe, -DOKOLky MEPaOT 3a HNBO e DOlr, NOBTOPO PruCBpCTeTe RO n Notoa OdBpTeTe RO,
4.ИЗвадеTe ro KanaKOT co CTanYeTo n KOHTpoJInpajTe ro HNBOTO Ha MacNo KOe Tpe6a Da ce Haora nomery DBeTe UptnUKN «MIN» n «MAX»
5.ДOKOLky e NOTpe6H0,doaTe OI NCTOTO MacNo Do HNBO «MAX», I BHNMaBajTe Da He IcTeue MacNo HaDBOP OD OTBOPOT 3a NOJHeBe
- Lelocno 3aTeHHeTo KanaeTo 3a NolHeBe (cI.2.A) nncnctete IIOCTaTOuTE OJ MacNo.
3A6ELEWHA POnHeTe NoCTeNoHOoJaBajKn MaH KOnuHnMaCNO, KOHTpOlnpaJKn r HNBOTo Ha MacNoTo Ha CeKoe DOnoNHyBaHbe. He Cmee Da ce NolHuad HNBOTo «MAX»; IpeNoHbVaHBe Co MacNo MoHe Da IpeDn3BnKa: IcnyTaHBe Ha N3dyBnTE rAcOBn;
KoHTaMHHaJHa CBeKnUkata HINΦHTEpOT 3a BO3dyX CO NOcJIeOBATeJIHNOTeWIKOTn BO CTapTyBaHeTO.
3A6EJELHKA Bo Bpcha CO BNIOT Ha MacNo 3a KopncTeIbe npndpyBajTe Ce do TexnUkata Ta6ena.
4.1.2 Поберka Ha BO3dUshHnotФнлтep
EfnKacHOCTa Ha BO3dyuHnOT fNlTepe yCIOB 3a KopeKTHo FyHKUHOHpaHe Ha MOTOP; He BKlyuyBaJte Ro MOTOPDOKOJIHy HeIOCTacyBa fNlTep 3a BO3dyx, aKO eCKpseH nI H e DOBOJHO HAToNEH CO MACJO.
1.Исун Te OKoly Kanakot Ha ΦнтepoT (cI.4.A).
2. ⅢBaTeTo kanaKOT (cI. 4.A) co ona6abyBaHe Ha ja3nueTo (cI. 4.B);
3. Повере TE ja cocToj6aTa ha ФиntepoT (cI. 4.B nII 4.B.1), KoJ Tpe6a Da 6nIe HEnpOMeHET, YnCT N BO COBpWeHa pa6OTha cocToj6a, Bo CnpOTnIBeH cnUyaj, CNpoBeTe OdpKHyBaHbe nIIN 3aMeHa (BnTe 5.6).
4. NOBTOPOH HAMOHHTnpajte ro KanaKOT (cI. 4.A).
4.1.3 DOnoJIHyBaHBe rOpNBO
Onepaunjata Ha noIHehe rOpHbO e
oJacheta BO nppaHnKOT Ha MaunHaTa
OBde camo Ke ce NOBnKame Ha nCTaTa.
3a da HanoJIHnTe rOpHbO:
- OdBpTeTe ro KaNaKOT Ha pe3epBoapoT (cI.3.A) n 3BaJeTe ro.
- CTaBeTe HHa. (cI.3.B)
3.ДононгетеривииИЗВаде te ja Инкata (cI.3.5)
- Ha Kpajot Ha NoJIHeHBeTo, 3aTbOpTe Ro y6aBO KaIaNkOT (cJ.3.A) n HcNcTeTe rO OCTaTOuNTe OJ TropBO.
BAHHO 36erhyBaTe da nctypate ronpBO Bp3 pIaCTnHTe DeIOBn Ha MOTOPOT 3a da He CE OWTetA, IN BeHaIu NCnCTeTe rO ceKoT par Ha roPbBO OD HIB. IapaHnJaTa He rN NOKPbBA WTeTHe Na IpaCTnKaTa npedn3BnKaHn Od roPbBO.
4.1.4 Kanayeha cBeKeuata
Nobp3eTe ro cBpCTo kanaeTo (cI. 5.A) Ha Ka6eJOT Ha CBeKucaTa (cI. 5.B), IN BnImaBajTe Da Hema TpaHn OD HeuNCToTnJa BO BHaTpEshHocTa Ha kanaeTe OII Na KpaJOT Ha CBeKucaTa.
4.5 IPOdoJXHeHO HEKOpHCTeHbE
Bo clyuj ha npedBndeHo HeKOpncTeHb Ha motopot noBeKe od 30 deHa (np. Ha Kpajot od ce3ohata) notpe6Ho e da ce npe3MaT Mepkn 3a 6e36eHocT Do cJeDHOTo KopNCTeHbe.
3anaTe ro MOTOPOT n OdpKByajTe ro BO 6p3nHa wTo e 6bn3y da rachHebe 3a Da ce NOTPOwn cenoto rOpNBO wTO e npoeOCTaHTo BO pe3epBoapOT N BO Kap6ypaTOPOT 3a Da ce H36eHrme MOHOCTa da ce fOpMnpa TaIor BO BHaTpeWHOCTa.
- OTeTpaHete ja CBeHnUHaTa n CTaBete BO OTBOPOT 3a NCTaT a OKOly 3 Cl Ha YNCTO MOTOPHO MacNo, NTooA dPHeJKn rO OTBOPOT 3aTBOpEN Co KpNa, BKnIyHeTe rO Ha KpaTHO MOTOPo Da pa6Ot 3a da Ce DnCTPNbUnpa MacNoTO Ha BHaTpeuHaTa NOBpUnHa Ha ZnInHdApOT. Ha Kpaot HAMOHtnpajTe ja CBeHnUHaTc, 6e3 Da ce NoBp3e KaNAeTO CO Ka6eIOT.
5. ODPKHYBAHBe
Cehoe HactojyBaBe da ce cMeHH CnCTeMOT 3a KOHTpOHa eMHcHjaTa MOHe Da rN 3roJeMn HnBOaTa Ha EMHCJHaAD 3aKOHCHNe JHMHTn. OBaa DeHnHnJa BnIyBa OTcPaHyBaBe Hn MeHyBaBe Ha DeIOBn, KaHO Ha np.CnCTeMOT 3a DOBOD,CnCTeMOT 3a RopNB O N3dYBHNOCTeM.
5.1 ONTO
MepnTe 3a 6e36eHocr 3a
Cnepebe npn onepauuHa odpyBahe
ce onnshaH BO naparpafoT.2.4.
CHTe KOHTPOJIN N HHTepBeHcHn Da ce n3BpUyBaat CO hCNlyueH MOTOp DoJeHa MaunHaTa e BO MnpyBaHe. NCHnyete ja CBeHNuHata n npouHajTe rN COoDBeTHnTE NHCTpyHcHn nped cehoJa HHTepBeHcHnja 3a YnCTeIbe n OdpHyBaIbe. Hocete aJeKbatha pa6Otha o6Neha, paHabnIu N OUYIa npu ODPHyBaIbeTo.
BnIOBHTe Ha nHTepBeHcHn HnBHOT IOBTOpyBaHc Ce HaBeDeHN BO "Ta6eJa 3a oDpKyBaHe".
KopncTeHbeto Ha HeOpunHaJIHN DeJIOBn IdoaTOU MoKe Da NMa HeraTINBn NocJeuIN Bp3 FyHKUHOHPaHbeto INcIpyHOCTa Ha MaUnHata. POn3BOInTeJIoT OdbuBa CeKaBA ODROBOPHOCT 3a WTeTN PpeN3BVKAHN Od CNOMeHaTNe POn3BOJN.
OpunnHaHnTe DeIobN ce o6e36eHn od pa6oTnHnCtte 3a cepBncpaHe n OBlaacteHnTe npenpOdaBaYu.
BAHHO Cnte onepaunn kon He ce OINshaHBO OOB npnpaunnk Tpe6a da 6nadT n3BedeHN oD BaUNOT npoabau Hnn OD cneunjann3napaH LENTap.
5.2 PACNOPEDAHOOOPKHYBAHbE
BAHHO ConCTBeHnKoT e odroBopeH 3a OdpKyBaHe Ha MaunHaTa, KaKo ITO e ONNsaHO BO DOlyHabeDeHaTa Ta6eJa.
BAHHO Da ce nCTn noecTo Kora ce pa6oTH BO OcObeHo cNoKeHn ycNoBn nn Kora mHa yeCTnKu BO Bo3dyXOT.
3A6ELESHAФntpeTe Tpe6a Da ce YnCTaT /MeHyBaat NoecTo,doKolky MaunHaTa Ce KopnCTHa npabnBa NOBpUnHa.
| РавORA | Посьпгшхшшшшшшшшшшшшшшшшшшшшшшшшшшшшшшшшшшшшшшшшшшшшшшшшшшшшшшшшшшшшшшшшшшшшшшшшшшшшшшшшшшшшшшшшшшшшшшшшшшшшsh | На сени 5 ча
нa мно сени улотреба | На сени 50 ча мно на сени на сени на сени на сени на сени на сени на сени на сени на сени на сени на сени на сени на сени на сени на сени на сени на сени на сени на сени на сени на сени на сени на сени на сени на сени на сени на сени на сени на сени на сени на сени на сени на сени на сени on | Во сени 100 рдмá |
| Конtrpoла на НИВОТо Ha Macло (pac. 4.1.1) | -✓ | -- | | |
| Мени ве Ha Macло¹ (pac. 5.4) | ✓ | ✓ | | |
| Чис TEBE Ha пindушвачOT Ha MOTOPOT (pac. 5.5) | -✓ | -- | | |
| Конtrpoлa и чис TEBE Ha ФильерOT за ВOSTДУХ² (pac. 5.6) | -✓ | -- | | |
| Мени ве Ha ВOSTДУSHNIT OФильер (pac. 5.6)³ | -- | ✓ | | |
| Конtrpola Ha сөкунчka tā (pac. 5.7) | -- | ✓ | | |
| Мени ве Ha сөкунчka tā (pac. 5.7) | -- | ✓ | | |
1 Da ce MeHyBa MaCNoTo Ha CeKoN 25
Yaca aKO MOTOpT pa60Tu Co NOJHa
eΦeKTnBHOCT HIn Ha BnCOKn TEMpePaTypn.
2 Da ce YnCT NOyecTo BO3DyUHnO T HnTep BO Cnyuj Ha pa6oTeHe Ha MaunHaTa BO 0blaCTn NOLn Co npaunHa.
3 Camo 3a fntepoT wTo e BO opMa Ha Keptpu.
5.3 AKYMYLATOP (OKOJIHy IMA)
3a da ce 06e36eDn DOnr HNBOTeH BEK Ha aKymylaTopoT, NOTpe6Ho e peoBHO ODPKvBaHe.
AkymyaTopoT Ha KocnilKaTa Tpe6a Da ce NOHn:
- BeДиш по Куньаньeto, Иnped npBOTo KOpncTeHbe;
- nped cKlaaHpaHbe (nooJro od 30 deHa) (nac.4.5);
- nped ynoTepeBa, no noDoIg nepoD Ha HeKOpncTeHe.
BAHHO Ako Hema da ja ka KOpNCHTe noDolr nepno, nonHeTe ja 6aTepnjata cekon Dba Mececa 3a da n ce npodOnn pOKOT ha ynotpe6a.
HenpndkyBaBeTo Do NoctanKnte 3a KopnCTeHe N NOIHeBe Ha aKymyLatopOT, MoKe TpaJHo Da rN OWTeTAT HerOBHTe DeLoBn. Ppa3HNOT aKymyLatop Mopa da ce HanoJIHn WTO e MOxHO Nockopo.
BAHHO NOnHeIbeTo Mopa Da ce OdBnBa NcHnyuBO npeky nolHaOT Ha 6aTepeNjaTa (CInka 7.C).DpyrncnCTeMn 3a NoJIHeBe MOKe Da ro OWTeTAT TpaJHo aKymylaTOPOT.
5.3.1 IcHnyBaHe nNoIHeHeHa 6aTepnjata
3a da ro n3BaJnte aKymyIaTOPOT:
- PnTnCHeTe ro KOnyTeTo wTo ce HaOra HauAkyMylaTopoT 3a Da MoKe da ro Ln3HeTe Harope (cI.6.A).
3a da ro hanoHnHTe akymylatopoT:
- I3BaTeTo rIyMeHnOT KAnak UTo Ce HaOra Ha DoJIHHoT DeI OJ aKymylaTopoT (cI 7.B)
NOBp3eTe rnoNoHaOT 3a aKyMyIaTOp (cI.7.B) Ha npnKnyHnua co HanoH KoJ e HabeDeH Ha nloOHTa Co CneuNkauuN.
- OTKaKO aKymyIaTOPOT Ke ce NOBp3e CO NOLHaYOT, CBETLTO Ha NOLHaYOT Ke CE BKNlyu (C1 7.Φ): UPBHeHOTo CBETL0 O3HaCyBa DeKa aKymyIaTOPOT Ce NOLHN, a 3eJIeHOTo CBETLIO O3HaCyBa DeKa NOLHeHbETo e 3aBpWeHO.
3A6EJIeUHKA AkymyIaTopoTe onpeMeH CO oBe36eDyBaU wTO ro npeknHyBa NOHNHeBTo DOKOnHy aM6NeHTaJIHaTa TempepaTypa He e nomery O n+45 ^ C
BAHHO AkyMylaTopOT MoHe Da CE NOHn BO cekoe BpeMe, dypu IN OIOBnuHo, 6e3 pN3IK OD OWTeTyBaHBe.
YnCTeHBeTo Ha MOTOpOT n npDyUyBaVOT ce N3BvDaHa JaAeH MOTOp.
a) Kopnctete Mna3 od KOMnpecnpaH BO3dyx HnYeTka 3a Da rN OTCTpaHNTe OCTaTOuNTe N HeuNCTOTnJaTa WTO MOKaT Da npEdu3BnKaat npNdyuByaHT (cI.9.A) n 3auTHTHNot NOKJoneuc da ce 3anaJat (cI.9.5).
6) IcuncteTe ro cuninHapot n nepKHTe (cI. 9.B) 3a da ro olechnte laedeHeTo Ha MOtOpOT n da cnpeuHTe HerOBO pperpejyBaHe.
B) NcHnCTeTe rI nIaCTnUHnTe dIeIOBn co cyHrepe (CJI.9.I) HATOnen BO BODa n DeTeprEHT.
5.6 ODPKHyBAHbE HA BO3dUshHOTΦNITEP
ФИNTePOT Mopa ceKOraw Da ce OdpHyBa Do6po NCHNCTeH IN Tpe6a Da ce 3aMeHN aKO Ce nCTpOuIN NN OWTeTn.
a) IcHCTeTe OKOly KanaKOT Ha 0nItepot (cI. 4.A).
6)ИЗbaTeRoКanaKOT(cI.4.A)coОla6aByBaHHe Ha ja3nueTo (cI.4.B).
B) 13BaTeTe ro fntepoT (cI.4.B nIu 4.B.1).
r) LcEbKaTa 3a BCncCyBaHbe (cI. 4.) 3aTbOpTe ja co Kpna 3a da ce H36eHHe MOxHO BJIeRyBaHBe Ha HeuNCTOTnJa.
D) CnpoBeTe OdpKyBaHbe Ha eIeMeHTOT co HnITepOT KaHO WTo e NocOeHO NODOny 3a pa3JIuHbN BnIOBn.
r) IcHnCTeTe ro KyKnWTeTO (cI. 4.I) OJ npaunHa, OCTaTOU, IN BHNMaBajTe Da He HABNe3e HeHnCTOTnJa BO ueBHaTa 3a BCncCyBaHe (cI. 4.I).
e) BMeTHeTe ro fHJItePOT (cI. 4.B nII n 4.B.1) BO KyKnWTeTo n 3aTbOpTe ro KanaKoT (cI . 4.B).
Cyrhepect hntep (cI. 4.B)
ФИТЕРОТ Tpe6a Да ce OДРЖуВа Добpo ИСЧИСТЕн
ИН HATONEH CO MacNo, Tpe6a Да ce CMEH n Ako e
OwatTeH, paceuH nIIN IcUSeH.
BAKHHO
He KopncTeTe KOMnpmmpaH
B03dyx 3a YnCTeHbe HaΦnTepoT 3a BO3dyx.
- Pepete ro fntepot oC cyHrep co Boda n DeTepreHT nCyUWeTe ro Co YnCTa TkaEHHa.
- Hatonete ro Φntepot co 2 naKnUc nHcTo MOTOPHO MacNo hCTncHeTe ro HeKoNHy nATn 3a pamHomepHo pacnpocTpaHyBaHe Ha MacNoTO.
- OtcpaHete ro npekymepHOTo MacNo co Yncta TkaehHa.
Bo clyuj kora Tpe6a da ce 3aMeHn fntepot, Tpe6a nCTnoT da ce HatoN OndHOBO CO MacNo KaKo wTo e norope nocoueno.
-KeptpuΦnItep (cI.4.B.1)
Mna3OT co KOMnpecnpaH BO3dyx HacooyTe ro KOH BHaTpeuHocTa 3a da ja oTcTpaHNTe npaunHaTa N OTnadoUHTe.
5.7 KOHTPOJIA N ODPKHyBAHbE HA CBEKNUHATA
1.ИЗвадеTe ja cBeKeHuaTa (cI. 10.A) co nOMOuHa φpaHcyckn Knyu (cI. 10.B).
2.Исчисте Геелктудпte (Фиг.10.C) co MeТанha YeТна 3a OTCTpaHyBaHbe Ha eBEHTyaJIHn jaIJIeHn TaIIO3N.
3. Co nomou ha mepaHa de6eHnHa (cI. 10.Γ) yBepTe ce da Ka pacTojaHneTo nomery eJeKtpOnTe e cooDbetHo (0.6 - 0.8mm)
4.ПOBTOPOBbPaTeTe ja CBeKucaTa (cI.10.A)и cINHO npuBpcTeTe ja co NOMOHa φpaHcyckn Knyu (cI.10.B). 3aMeHeTe ja CBeKucaTa DOKOJIky ce nperopeH eJeHTpOДte nII IN NOPeJahOT e ChpseH nII OWTeTEN.
OnachocT od noHap! He ro npOBepyBajTe ypeDor 3a naIeHe DOKOHy CBeHNuHaTa He e BO CeNwTe.
BAKHHO KopncTeCBeKnUKN O npenopaahnoT BnD (BnDn TexHnKa Ta6ena).
6. Идентнон caluaHA HA ПОБЛЕМN
| ПОНБЛЕМоЖи | HA ПИЧИHA PEШЕНЕ | |
| 1. ПOTешкотиjsa,
при паленbe | Недостиг на гориво Пюоверete и нал:
Старо рориво яли талог
Во розервоарot | Исpenpa3нente ro pezeрьоарot
и CTавete сбеку рориво |
| Несодвета на рочему на паленbe | Изveдente ro паленыто на соодветен
начин (nap. 5.2 и nap. 5.3) |
| Неловразана сveledчka | Пюоверete ro калakot на сveledчкata
далу e добpro за ворен (nap. 5.1.4) |
| Влajна сveledчka, чу��ты
еilektpondи яли несоодветно
pacтодане на лevelтpondиte | Пюоверka (nap. 6.6) |
| Затnam воздуненфелер Пюоверка и
Несодветно масло за сизоната 3аме
нсpenya?
Карбуразорот (заджана паяа)
поради Високи Temnéратури | Истende на масло со сухдеветно (nap. 6.3) |
| Дeфekt bo karbypatopot | Почека?
Изveсени врeme и обидete
с посторно за заалитe (nap. 5.3) |
| Праzenн akumулatable Налленete ro уу
Акимулatable He e павилно Вмetedат | Ов相对较.
центар за сервиссане |
| Акимулatable Р e павилно Вмetedат | Праллно Вмetedе ro
akymулatable (nap. 5.3.3) |
| 2. Нелравлиа pабота. | Нech_STи селгкови
с载体чкatingа яли несоодветно
pacтодане на лevelтpondиte | Пюоверka (nap. 6.6) |
| Калakot на сveledчкatinga e
нелравлио постaven | Пюовере оалу калakot на сveledчкata
e павилно постaven (nap. 5.1.4) |
| Затnam воздуненфелер Пюоверка и
Дeфekt bo karbypatopot | Истende (nap. 6.5) |
| Дeфekt bo karbypatopot | Ов相对较.
центар за сервиссане |
| 3. Губеные на мokта за
Вreme на pабота | Затnam воздуненфелер Пюоверка и
Дeфekt bo karbypatopot | Истende (nap. 6.5) |
| Дeфekt bo karbypatopot | Ов相对较.
центар за сервиссане |
Dokolny npo6lemot npo0JyBa n no ynoTpe6a Ha onnHaHte peweHja o6paTeCe ha Baunot npodabay..
INDICE
- ALGEMENE INFORMATIE 1
- VEILIGHEIDSNORMEN 1
- DE MACHINE KENNEN 3
3.5 OMGEVINGSCONDITIES
5.3 ACCU (INDIEN VOORZIEN)
2.4 VEDLIKEHOLD, LAGRING OG TRANSPORT
5.2 VEDLIKEHOLDSTABELL
5.6 VEDLIKEHOLD AV LUFTFILTERET
5.7 KONTROLL OG VEDLIKEHOLD AV TENNPLUGGEN
- Demonter pennpluggen (fig. 10.A) med en pipenokkel (fig. 10.B).
-
Rengjør elektrodene (fig. 10.C) med en metallborste, og fjern eventuelle kullavsetninger.
-
Kontroller med en sensor (fig. 10.D) den korrekte avstanden mellom elektrodene (0,6 - 0,8mm)
- Sett pennpluggen pa igjen (fig. 10.A) og skru den helt fast med en pipenokkel (fig. 10.B). Skift pennpluggen hvis elektrodene er brent eller porselenet er skadet eller odelagt.
2.2 CZYNNOSCI WSTEPNE
4.1.4 Nasadka swiecy
- TEXHINHECKOE OBCJYKINBAHNE 7
5.1 INΦopMaζησ Μοκετο xapakTepa......7
5.2 Tabnua Texnueckoro 06cnyKbHa7
5.3 BaTapee (ecn npedcmoTeHa) 7
5.4 3aMeHa Macla.. 8
5.5 OuicTka InyuHntTeI N DnBraTeJI 8
5.6 Texnuechoe 06cnykBaHne BO3dyuHoro 9
5.7ПоберкaИТхиueckoe 6cIyHnBaHne CBeu3aKnraHn......9
- INDEHTNΦIKALI HENCINPABHOCTEY 10
1. INHΦOPMAÇIÀ OBIÇEΓO XAPARTEPA
1.1 KAK YHITATb PYKOBOДCTBO
B pykoBODCTBe HeKOTOpbIe naparpaΦbl, coepkaune HΦopMauH Oco6oB BaHHOCHTN, B ceJx 6e3oNaCHOCTn N 3KcNlyaTaun BBJeHeHbI PO-NHOMy, B COOTBECTBUN C 3Tm KpITepnem:
IINBAHNO yka3bBaIOHa yTOUHeHn nn dpyrne npHkTbl, ONncAHhblepahee, Heo6xOIMbIe IpnpeDynpexKeHHNPOBpeKdEHHMaunHbI n HaHeceHHy uep6a.
3Ha Ka3bIbaeT Ha onaCHOCTb. Hec6nOHeHne npEynpeJdeHna BJeUET 3a cobon TpaBMnpoBaHne nepcoHana nn TpeTbx Nuc N/nn NaHeceHne yuep6a.
1.2 CcblHn
1.2.1 PncyHKn
PncyHKn B daHHbIX INCTpyKUnx IO 3KcNlyaTaunnpohymepoBaHb1,2,3 n TaK daJe.
HOMNOHeTbI, yKa3aHHbIe Ha pncyHKax, 0603HaueHbI 6yKbAMn A, B, C n TaK daJe.
CcbIka Ha KOMnOHeHT C Ha pncyHke 2 yKa3aHa npedcTaBHeHa B BIne Fpa3bl:
"CM pnc.2.C" nnn npocTo "(pnc.2.C)"
PncyHKn HocrT opneHTnpOBOHbX npaKTepe.
ΦaKTNUeCKHe DeTaJI MOrY T OTLIuHaTbcra
OT npeIcTabLeHHbIX Ha pncyHKax.
1.2.2 3aIobHn
PykoBoDCTBO pa3deneHo Ha rIaBbI n naparpaΦbl. 3arolOBok naparpaΦa "2.1 O6yehne" RaJIeTcra Po3arOLOBkom "2. IpaBnla TexHnKn 6e3oNaChocTn". CcbIkn Ha rIaBbI nn naparpaΦbl OTmeueHbICOKpaSeHnMaM rI. Hnnap. N COOTBeTCTByIOUHM Homepom. PnpMp: "rI. 2" HnN "nap. 2.1".
2. ПРавILA TEXHINи BE3OПАСХОТN
2.1 OByeHne
BHHMaTeIbHO npOHTaTb daHHbI HHCTpyHcHnpeep 3HcNpyaTauee MaunHbl.
O3HaHOMHTbcra C 3JIeMeHTaMH
ynpabJIeHHraNc 3KcJIpyaTuNoHHbIM
Ha3NaueHHeM MaunHbl.
HayuHTbcra 6bICTpo OCTaHaBnBaTb ABnRaTeJb.
Heco6IIOJeHne npedynpeKeHn H NHCtpyKm MOHe CTaTb npHuHOB BO3rOpAHN I/IIH NaHeceHn TaeKeJIbIX TpaBM. XpaHTb BCE npedypeKeHn H NHCtpyKm IJRA BO3MOxHOrO 06paSeHHa B 6yUeM.
HnKOrJa He DOnyckaTb NcNoIb3OBAHHe MaunHbI DeTbMn IIN IIOdbMn, KOTOpbie He HMeHOT Heo6XoDmBix HaBbIKOB He O3HaKOMNlncb C HnCTpyKUmaMn. MeChhble 3aKohb MoYr yctaHaBnBaTb MHHMaJIbHbI BO3pact NoJIb3OBATeJIa.
Hnkorga He hcnolb3oBaTb MaunHy, ecnnoB3oBaTeIb HaxOHTcB COCToHHy yCTaIOCTn IIN He3dOpOB, IIN JHe ECn OH npHJI MeNkAMeHTbl, HapKOTuYeCKne npenapaTbl, aIKORoJb IIN BeUeCTBa, 3aMeDIAIOUne erO peakuio n Ocna6laIOUne BHNMaHne.
- POMHHTe, YTO onepaTOp HIN NOJIb3OBaTeJb HecET OTBETCTBEHHOCTb 3a HechactHbIe Cnyan HIN BO3HNKHOBEHne HenpeDbUdEHHbIX CNTyaCn, B pe3yIbTaTe KOTOpbIX MOrY T NoCTpaDaTb TpeTbN IInca HIN INX IMyUeCTBO.
2.5 BATAPER,3APRAHOE YCTPOICTBO (ECJN INPEYCMOTPEHbI)
BAHHO HnHexeJeUoHne npaBnla 6e3OnacHOCTN DOONHJOT npeDncaHn IIO TexHKe 6e3OnacHOCTN, n3LOHeHHbE B INcTpyKuN bTaPeHn 3apdHOrO yCTpOcTBa, NOCTaBnREMOB BmecTe C MaunHoH.
ДязардкбатpenинспьугToько 3ардьie yctpoiCTBa,peKOMeHDoBAHHbie n3rotobteJem.HenodxOJaUee 3apdHoe yctpoiCTBO MOKeT npHBecTN K 3JIeKTPnueckOMy ydApy,nepePepBy nIn yTeUke eKnOJ KnIOKcTN n3 sbatpen.
- IcnoJb3yIte ToIbKO onpeJeHHeBie 6aTapeN, npedymOTpeHHbIE dIra BaWero o6OpyIOBaHn. IcNoJIb3OBAHne 6aTapeN dpyrOTo TnA MoKET pINBeCTN K TpaBMam n PnCKy NOKapa.
XpaHnTe HeuCNoB3yEmyio 6aTapeIO Ha pacCToHHN OT KaHcEJIrpCKNX CkpeNOK, MOHeT, KIOUeI, TBO3DeI, BINTOB IN DpyrNX MaIeHbKHX MToJIINueCKNX IpeDMeTOB, KOtOpBle MOryT BbI3BaTb KOPOTKoe 3aMbIKaHne KOHTAeTob. KopOTKoe 3aMbIKaHne 3JeKtpnueckOJ cENi MeJdy KOHTaKTAMN MOKeT BbI3BaTb BO3rOpAHne NII NOJap.
He nCnoIb3yIte 3apJdHoe yCTpoiCTBO B MeCTax C HAIuHem napOB, BOCnIaMeHraUOxxCRe BeIeCTB, a TaKHe Ha IerKOBocNlaMeHraUOxxCRe NOBepXHOCTRX, HApnpMep, Ha 6ymare, TkaHn I.T.D. Bo BpEm 3apJdKn 3apJdHoe yCTpoiCTBO HArpeBaETcR MoKeT Bbl3BaTb NoKap.
Bo Bpemr TpaHcnpTIpOBKn aKKymyIaTOPOB CneIe, YTO6bl KOHTaKTbI He CoPnKacAIncB MeKdy cO6oN, HHe NcNoJIb3yIte MeTaJIInueCheKyIO Tapy IJIA IN TpaHCnpTIpOBKn.
2.6 3AUNTA OKPYKAIOUCEI CPEbl
3aunTa OKpykaIOSeI cpebldoJIHHa 6bITb
PnOpHTeTOM I BaKhbIM acNeKTOM B HcNoJIb3OBAHm
MaHnbl, B INTEpecax rpaKaDaHCKORO
06ueCTBa n Cpebl, B KOTOPoM Mbl JHBEM.
CTapaTcR He DoCTabJIrTb HeyIOObCTBa COeDM.
NcNoJIb3yIte MaunHy TOLbKO B pa3ymHOe
Bpemr (He paHO yTpOM n He No3dHO BeepOM,
KOrDa Bbl MoKeTe NOMEaTB OkpyKaIOUIM).
CTporo co6JIIOdaIte MeCTHbIE HopMbI NO
yTHIN3aUN yNAKOBKN, NOBpeXDeHNbIX qACTe
HII NIObIX 3JeMeHTOB CO 3HaUHTeJIbHbIM
BILRAHnEM Ha OKpyKaIOUyO CpeDy; 3TN OTXODbl
HElb3r Bbl6paCbIBaTb C 6bITOBbIM MyCOPOM,
OHN DOJHKHbI 6bltB pa3deJIeHbI n DOCTaBJIeHbI
B COOTBeTCTByIOUne CEHTpbI C6opa, KOtopbIe
OBeCeueAT nepepa6OThy MaTePnaIob.
CTporo co6JIIOdaTb DeiCTByIOUme Ha MeCTHom
ypOBHe npABInla NO BBIO3y OTXODOB
Bo BPemr BblOda n3 EKcnnyatauIN
He OCTaJIbTb MaunHy B OKpyKaIOUseI
cpe, HO O6paTIbCB R ceHTp C6opa, B
COOTBeTCTBN C MeCTHbIMn PpaBnAMn.

He BbIbpaCbIBaIte 3JIeKTpOo6OpyIOBaHne BMeCTe C 6bITOBbIMN OTXoAMn. B COOTBETCTBnC EbponeckoI dIpeKTbBOI 2012/19/UE OTHOCHTeJIbHO BbIEBeEHHO I3
3KcIyataunn 3JeKtpnueckoro n 3JeKtpoHNO
OBopyOBOAHN I ee npimeHeHHem COrJaCHO
npaBnAam CTpaHbI 3KcIyatauHN, BbIBeDeHHO
H3 3KcIyataunn 3JeKtpoo6OpdyOBaHne
DOJHXO OTnpabJIaTbcra Ha nepepa60TKY B
COOTBeTCTBn C Tpe6OBAHnMn IO OxpAne
OKpyKaIOUe NcreblbOHTOpynx
OTXODB.Ecnn 3JeKtpoo6OpdyOBaHne
BbIbPaCbIBaEtCn Ha CBaNHy NN 3aKaNbIBaETcN B
3EMLIO, BpeINbIE BeIeCTBA MOry T pOnHNKHyTB B
CLON NOd3EMhBX BOID INONACTB INIIeBBie
PPOyHTbI, YTO pInBeDet K HaneceHNo yUep6a
BaWemy 3DopOBbIO H XopoWemy CaMOuyBCTBNIO.
DNn POlyeHn6Olee NpOp6Hn INΦOpMaunn
NO pepeap6OTKe 3TORO IN3deINN O6paauTeCb B
yUpeXdHHe, OTBeTCTBeHHO 3a nepepa60TKY
OTXODB, INN K BaWemy DnCTpn6bIoTOPy.
Li-ion
No 3aBepseHnCpoka CnyKbI
6atapeo oecneythe nx yHnTuKeHne,
KOTOPoe He HaHeCT Bpea
OKpyKaIOUe Cpe. Batapeo
CoDEpKHT MaTePnaJI, ONaChbI DJIa
Bac n dIy OKpykaIOUeI cpebl. BaTapeIO Heo6XoIMMO N3BLeuH IOTdJIbHO CdaTB B CEHTp Nepepa6OTKn OTXoOB, KOTOpBI pINHMaeT JNTN-NOHHble 6atapen.

Pa3dJIbHbI c6Op nCNoJIb3OBAHHbIX
n3DeJIHn yIaNKOBOUHbIX MaTePnaJIOB
n03BOJraET nepepa6aTbIBaTb N NOBTOpHO
nCNoJIb3OBAt b MaTePnaJIbI. NobTOphOE
nCNoJIb3OBAHHe BToPHo
IpepebaToaHHbIX MaTePnaJIOB NOMORAe TMeHbUHTb 3aIrp3HeHne OKpyKaUOe CpeDbI CHN3NTb NOTpe6HOCTb B IepBNUHOM cbIpbe.
2.7 BblEPOCbl
B npocece ropeHn o6pa3yIOCT TaKHe
TOKCHNbIe BeIecTBA, KaK OHCnD yRlepOda,
OKCNd a3OTa n YrJIeBOJOpObl.
KOnTpOB NaTakIMn BeIeCTBaMn HMeET
BaXHoe 3NaYeHne N3-3a INx CnOCo6HOCTN
peAriPoBaTb Ha fOToXmUeChn CMOr,
a CLeIOBaTeJIbHO, Ha BO3DeIcTBHe
PpAMybIX COJNeHbIX Lyuei.
MoHooKcND yrIepoDa He pearpyet NOdoHBIM
O6pa3OM Ha COJNeHoe BO3DeIcTBHe,
HO Bc-PaBHO CHTaETCn TOKCHNbIM.
Haun MaunHb OchauheHb CNTemamn CHNKeHn Bbl6pocOB n3- 3a BblweyKa3aHHbIX BeueCTB.
3. 3HATb OCOEHHOCTN MAUHHbl
3.1 OINCAHNE MAUHHbI N EE INPEDAHA3HauEHNE
3Ta MaunHa ABJIeTcA BnraTeIeM BHyTpHrHrO CropaHr.
ДВИТЕЛБ YВЛЯETС YCTPOICTBOM,
3KCSJIYATAUONHbIE KaueCTBa, INCpABHOCTb
pa60Tb I DOJROBEuHOCTB KOTOPO 3aBNCAT
OT MHORIX ΦaHTOPOB, KaK BHeUHIX,
TaK I 3aBnCraUx CTPOR O T KaueCTBa
INcNoJIb3yEmbIX NPOdYKTOB IN pEryJIrPHO
BbINOJIHEnr OCbIyKINBAHN.
HInke npINBeDEHbI HeKOtOpBie DOnoJIHITeJIbHbIE
CBeDEHnI, KOToPbI OBeCneYat BoJeE
OCO3HaHHoe INcNoJIb3OBaHne BaWe MauHbI.
JIIO6OE dpyRoE INcNoJIb3OBaHnE, OTInuAooeeC
OT yNOMaHyTbIX BblSe, MOKeT 6bITb ONaCHbIM
IN pINBeCTN K HAnCeHnIO Uyep6a 3DOpOBbIO
JIIODeN HIIIN K NOBpeKdENIO BeUeN.
BAHHO HenpaBnIbHoe nCNoIb3OBaHne MaunHb npBBeTeK aHHyInpOBaHIO rapaHTu, a TaKe OTka3 OT OTBeTCTBeHHoCTN Ipon3BOJNTeJI NpeJeIOKeHne Ha NoJIb3OBaTeJI BCex 6Ba3aHHocTeB peYbTaTe HaHeceHryuep6a nn TpaMbI ce6e nn TpeTbIM liuaM.
3.1.1 TnnoIorna noIb3ObaTeJIa
3Ta MaunHa npedHa3HaueHa nIy
NCIOJIb3OBAHn IOTpe6NTeJAMn,TO eCTb
He npoepccnoHaJIbHbIMn OepaTopamn.
OHa npedHa3HaueHa dJa "Xo66n".
3.2 3HAHNBE3OINACHOCTN
HaMaunHy HaHeceHbI pa3JInHbIe CnMBoJIbI.
IXyHNKcIg 3aKnIOuHaeTcB TOM,HTO6bl
HaONMHNTb OepaTOpy O Mepax, KOTOpblie
Heo6xOJIMO npHnTb dIg 3KcNpyaTuM MaunHbICdoJIKNbIM BHIMaHnEM N OCTOpOJXHOCTbIO.3HaueHne 3HaKOB:

BHHMaHHe! - BeH3nH JERKOBocPnAmEHaTcAaHTe DnIraTeHIO OCTbITb TteHHe XOT86bl 2 MmHyT nepeD 3anpaBkoJ.
BnMaHHe: PpoTnte HCTpyKcNIO nepeH hauJOM NcNoJIb3OBAHnMaunHbl.

BhImaHne! -ДВигаTeNn BbIeJIaOT yrapHbI ra3. HE 3aNyCKaIte INX B 3aKpbITOM NOMEueHIn.
Onachoctb! He npn6nnkau-TEcb K TOpRyHM NOBepxHOCTaM.
3.3 IndeHTNΦHKAUHOHHA 3TNKETKA
3aannnte cepnHbH HOpem (S/n)HaWeMaunHbIB CneuaJIbHO OTBeJeHHOM NOJETNIKETKN Ha 3aJHe CTOpOHe 06LOKKN.
3.4 KOMNOHEHTbI DBNrATEJIa
MaunHa coCToNT n3 cIeMyOuix OCHOBhBIX KOMNHOHeHTOB (pnc.1).
A. Пробka заловни масla co ууnom уровья
B. Kap610paTop
C. KpbIiKa Bo3dUyHOrO ΦnIbTpA
D. Kolnayok Cbeyn 3axinraHna
E. CepinHbI HOMep DnIraTeJIa
F. Pучka Tpoca CTapTepa (ecnnpeducmOTpeH)
G. BaTapeR (ecn npEynycMOrpeHa)
3.5 YCLOBNOKPYHKAIOUCENCPEDbI
Pa60Ta 3HDoTePmUeCKoR O YeTbIpExTaKTHOrO Dnuratela 3aBnCHT OT:
a) Temnepaypa:
-Приннзков TempepaType xOLOHbI 3aNYCK MoKeT 6bITb 3aTpPyHNTeJIbHbIM.
-При ouheHb BbICOKoTempeaType BO3MOxHbI 3aTpduHHeHnI Пri Tropyem 3ayncke n3-3a nCnapeHnT OTOINBA n3 nonlaBkoBOKamepbl Kap6IopaTopa nIN n3 Hacoca.
-BIIO6OMcUyaeTINMacla Heo6xOJIMONoO6paTbNOD TemnepaTpyNCNOJIb3OBaHnI.
b) BbICota HaJ yPOBHeM MOpR:
- MaKcImaJIbHaЯ MoUHOCtB DvIraTeJIa BHyTpEHHero CropaHnI NOCTeNeHHO
yMeHbShaetcCyBeJIyueHHeM
BbICOTbHaI ypOBHem MOpra.
-Bcnyae 3NaHTeBHorO yBeHueHnBaBICOTb Heo6XoIMO CHN3ntb Harpy3Ky Ha MaunHy, n36eRa TjKeJoPa60TbI.
3.6 TOnJIINBO
BbICOKoe KaeeCTBO TOnJIINBa OeHb BaKHO. IaI NcnpaBHOp a60TbI DnraTeIa.
TOnJIbBO DoJIKHO COOTBETCTBOBaTb CLeDyUOuIM Tpe6oBaHnA M:
a) NcnoJb3OBAtB YnCTbI, CBeKnn HNeTnInpoBaHHbI 6eH3nH C MmHMaJIbHbIM OKTaHOBBIM YnCLOM 90;
b) He IncnoB3OBAbT TOnJIbBO, B KOTOpOM CoepJxAHHe 3TaHOLa PpeBbIwaet 10%
c)He do6abTb MaCNo;
d) YTO6bI 3aUHTb CNTeMy Kap6IOpaUN OT O6pa3OBAHNA CMOLNCTbIX OTLOKeHN, Do6aBBTeCTa6nH3aTOP TOnnBa.
HcnoIb3ObaHne Hepa3peeHHoro TOnnBa HaHocHT yUep6 KOMNoHENTam DBNrTaTeJn IABJIeTcHapuSeHHeM rapaHTnHbIX ycNOBn.
INCNOJb3OBAbTOJIbKO TOJIINBO,yHa3aHHoeB Ta6JInceTexHnuecknx DaHHbIX.He INcNOJb3OBAbDpyrIe BVdBi TOJIINBa.MoKHO INcNOJb3OBAbT 3KoIOnrHuYeCKN YnCTbIE BnDbI TOJIINBa,TakHe KaTakHe KaA kKnInpOBaHHbI 6eH3nH.CoCTab 3ToTOr 6eH3nHa OKa3bIBaET MeHbWee BO3DeiCTBne Ha IIOJe NOKpyKaIOU cyu Cpey. He BBIABHeHbI OTPuCaTeJBHbIE 3ΦΦEHTbl, CB3aHHbIe CNcNOJb3OBAHHeM.Tem He MeHee,B CBO6oHDNo pOdaJe HMeEOTCa Tnbl aKNInpOBaHHoro 6eH3nHa,TOUhBe DaHHbIE INCNOJb3OBAHNA KOTOpBX He N3BecTHbl.
3.7 MACJIO
Bcerda nCnoIb3yIeMacna xopoWero KaueCTBa,BbIbupa COPT B 3aBNCIMOCTN
OT TemnepaTpybEKcnnyaTaun.
- IcnoIb3OBAbToIbKO BbICOKKaYeCTBeHHoe DeTepeHTHOe MacNo He HnKe, Yem SF-SG.
Bb6paTb Klaacc B3KocTn SAE B COOTBeTCTBnC Ta6nuei TexHnueeCKnx DaHHbIX.
IcnoJb3OBAHne BCEce3OHOro Macla MoKHeT npNBecTn K 60JIbWeMy paCXOyB JkapKn IepNo, N03ToMycJeDyET qAaue npOBepaTb erO ypoBeHb.
He cmeunBaTb Macna pa3hbxMapOK n Cpa3nHbIMN CBOICTBaMn.
- IcnoIb3ObaHne Macna SAE 30 npn TemnepaType Hnke +5^ MoKeT NOBpeNtB DnIgTaTeNb N3-3a HeNoDxOJaUe CMa3bIBaHnJ.
3.8 BO3dUHbI ΦnJIbTP
3ΦΦeKTHBHOCTb BO3dUshOro ΦnIbTp a NMeET peaIOoee 3NaueHne dIy npeD0TbpaUeHHBcAbHn 3aRp3HeHn Ibln B dBnIraTeIb, YTO CHNkaET npOn3BOINTEJbHOCTb H cPOK Cnyk6bl.
-Фильтуpoюн ЗлелмERTДOLЖЕHбытсвобODEнOT3aГРЗнИВCErДahoxOДNTbCBAOTЛHCHOMCOCTORHn(nap.5.6).
- Pn Heo6xOdMOCTH, 3aMeHnTb ΦNbTpYIOUIN 3JIeMeHT Ha OPnIHHaJIbHbI 3aNaCHO; HecOBMeCTUMbIE ΦNbTpYIOUIN 3JIeMeHTbI MOryT NaYbHO CkA3aTbCRA Ha 3ΦΦeKTHBHOCTN IN CPOKe CnyKbI DnBnTaTeJI.
- Hinkorda He 3anyckaIte DbIraTeIb, ecnΦIbTpIouuN 3JeMeHT yCTaHOBJIeH HenpaBnIbHO.
3.9 CBE4A
He BCE CBeu IJNA 3HDoTePmUeCKNX DBnIaTeJe OINHaKOBbl.
- IcnoJIb3OBaTb TOJbKO CBeu yKa3aHHOrO TnPa CHaJIeKaUeI TePMueCKo rpaDaunE.
- YdJIaTb BnHMaHHe dInHe pe3b6bl; CINsKOM dInHHaPe3b6a Bbl3bIbAeT Heo6paTMyIO NOlOMky DBnIgATEJIA.
- PpOBepntb YnCTOTy n npaBnJIbHoe paCCTOHHe MeKdY 3neKTpOdaMn (nap. 5.7)
3anyck DBnraTeJI Heo6xOJHMO npOn3BOJNTb B nopAKe, N3IOJeHHOM B PyKOBODCTBe MaunHbI, HxNHO BcERda NOMHTb O Heo6xOJHMOCTN BbIKIOUeHN BCEx yCTpOJCTB (ecIN OH INpeyCMOTpeHbl), CNOOCbIX BbI3BaTb DnHexHeMaunHbI nn OCTaHOB DBnraTeJI.
BAHHO He pa6oTaB Ha ChNoHax, npeBbIaOuX 20°, YTObI He HaHeCTn yuepe6a nCnpaBHO pa6ote Dnuratela
BAHHO 1nMa MoJeNe C 3aNychom OT 6aTapeu yBeHNTecb B npabunbHom pacnoJOnHeHN 6aTapeu B COOTBeTCTByUoem OTCeKe (nap.5.3.3)
4.3 OCTAHOBKA BBNIGATEJIAB KOHUE PABOTbl
1.OCTaHOBHTb DnHraTeIb B nopAKe, yKa3aHHOM B PyKOBoIDCTBe MaINHbl.
2. Ha xolodHom dBnraTeIe OTCoeHNHTb KOJnaQOK (pnc.5.A) cBeu 3aKnRaHnN N BbHyTb KJIou 3aKnRaHnN (ecnn npedymOTpeH).
3. YdaHTe BCE OTXObI C DBnraTeJI, B Oco6eHHoCTn, C yacTka rIywnTeJI BbIXIONa, YTO6bl yMeHbWHTb pNCK BOCnIaMeHeHnJ.
4.4 OYNCTHA IN XPAHEHNE
He nCnoIb3OBAbT cTpyn BObbln HlaHrN NOd daBLeHem dJy OuncTHn HapxHHo NOBepxHOCTu DBNrTaTeJI.
- PpeIIOHTeJIbHO IcNoJIb3OBAtB nHEBMaTHueCKH NICToTeT (MaKc 6 6ap) dIy ydaJIeHNMyCopa n PbIIN C BHyTpEHHHx YAcTeH.
XpaHntb MaunHy (n DBnraTeIb) BCyXOM MeCTe, 3aunueHHOM OT HeNOrOdbI N C DOCTaTOUHOB EHTINrAuen.
4.5ДЛNTIELBHOEBE3DEICTBNE
Ecnn nlaHpyetc npnoD npocToaDbiratela 6olee 30 dHei (Haepmep,B KOHcce ce3oHa), cJeIyET npINrTb HeKOTOpbIE MepbI npEOCTOPXHOCTN, YTO6bl O6JIeHTb NOCJeDyUOuB BBOB D 3KcNlNyatauHO.
BKnIOuHTb DnBraTeIb N DaTb Emy pa6oTaTb DO OCTaHOBKN, YTO6bl 3pacxOoBaTb BCE OCTaBWeecr B 6aKe H B Kap6HpaTope TOnJIINBO, TEM CaMbIM 36eKaB OFOpMnPOBaHN OToIOKeHn. I0 3aBepSeHn Onepaun He 3a6yDbTe 3aKpyTtB np6Ky (Pnc. 3.A) Do ynpoa.
- Chmnte cBey Hn HaneIte B OTBepCTne CBeyn npn6In3nteIbHo 3 cn nctoro MOTOPHO MaCna n 3aTeM, DepKa
OTBepTHe 3aKpbITbIM npn NOMOuN TpIKN, BKnUoyHrTe CTapTep Ha HeIpoDOnJHrTeIbHOe BPeM, YTO6bl DBrTaTeJIb COBepuINl HeCKoJIbKO O6OpOTOB n pacPpeJeNTb MacNo NO BHyTpEHHe NOBepXHOCTn CUnInHpa. 3aTeM BHObYcTaHOBtCe CBevy, He NoDCoeDNHra KOLNaQK Ka6eJIa.
5. TEXHnueCHeOeOBcJIyJHHBAHHe
JIIO6aI nonbITHa MoHΦHauCnCTeMbI KOHTPOJRA BbIbPocOB MOHeT yBeJIuHTb yPoBHeh BbIbPocOB 3a npedeJIbI, OONyCTHMbIe 3aHOHOM. IoD 3TO onpeJeHne nonaIoT TaHHe CHrTHe HIn MoHΦHauCnA DeTaJIe n CNTeMbIBCaCbIBAHN, TOnJIHBHO n CNTeMbI N CNTeMbIBbIXJOna.
5.1 INHΦOPMAÇU N OBUÇEVO XAPAKTEPA
IpaBnlaTexHHn6e3onacHocTn, HOTOpbIM Heo6xOaHMo CneIOBaTb BO BpeMa Oepaun No TexHuecHomy 06CnyHbAHNIO, ONNCaHbIB nap.2.4.
Bce npobepn H onepaun
TexHuechoro 06cnyHbAHna DOJHHbI
npOn3BOuNTbCRA, KOrda MaunHa
OCTaHOBJeHa, a DBnraTeJIb BbIHIOUeH.
OTcoeHNHTb CBeyu n pOuyTaTb
HNCtpyHcHn Npep Haayanom npOBedeHn
JIIO6bIX O9epaun OChCTKn IIN
TexHuechoro 06cnyHbAHna. HadeTb
COOTBeTCTByIOUyIO ODeHdy, nepuATN
H 3aunTHbIe OCHN Npep BblONHeHneM
TexHuechoro 06cnyHbAHna.
- Yactota n Tnbl BMeWaTeJIbCTBa npNBeJeHbI B "TabInce TexHnueCKOrO 6cbNyKuBaHn".
- IcnoJb3ObaHne HeOpnHaJIbHbIX 3aNaChbIX YactEn N npHaJaEHHoCTe MoKet OKa3aTb HeraTHBHOE BInrHHe Ha pa60Ty n 6e3OnacHOCTb MaunHbI. H3rotOBHTeJb He HeCET HnKaKoI OTBeTCTBeHHOCTn 3a yUep6 nIu TpaBM Bbl3BaHHbIe TaKmN pOdyKTAmN.
OpunHaJIbHbIe 3aNaChbIe qactn NOCTabJIaHTcCEpBnCHbIMMaCTepCkIMN aBTOpN3OBaHHbIMn dInlepaMn.
BAHHO Bce paobtI NO TEXoCnyHbAHIO nHaJaKe, KOTOpBie He ONiCaHbIB 3TOM pyKOBoODCTBe, DOnKHbI BblIOJIHTbCRA BaIM dInlePOM NnB CneuJIN3NpOBaHHbIM cHTPOM.
5.2 TABJIUNCA TEXHNUECHOO OBCJUYKNBAHNA
BAHXHO Blaeeneu MaunHb HecET OTBETCTBEHHOCTb 3a BbINONHeHne Oepaunn no
Texo6cnyHbAHIO, ONHcHHbIX B CneDyioe Ta6nue.
BAHXO YnCTnTb yaue B Oco6o TaeJbIX ycNoBnx paobtbi nn npn Hauynu B BO3dyXe TBepdbix qactn.
ПРИМЕЧАНЕ ΦильТрbl Heo6xOДно мчстп /MeHЯТь Уаш, ecn Maшинha pa60taeHa ouehb nbIbHOM rpyHTe.
5.3 BATAPEA (ECNIN PEPDYMOTPEHA)
Ype3BbUaHOBaXHO BbINOHNrTb TuaTeIbHO
Texnueckoe 06cJyKINBaHne aKKMyIaTopa,
YTO6blObeCneuTb DOJrN CpOK erO cLyXbbl.
AkkmyIaTOp MaunHb Heo6xOdmo
O6ra3aTeIbHO 3apKaTb B CledyIOuNX Clyuayx:
- Npeed nCNoJIb3OBAHnEM MaUNHbIB NepBbI pa3 nocIe ee NOKyNKn;
-пени Кадим Ддгьним постом MaunHbI (60lee 30 dHe) (nyHKT 4.5);
- NpeE BBODOM B 3KcNlyaTaunIO nocne dIInTeBHoro npocToR.
BAHHO B clyuae dIInTeIbHOro npocToa 3apJHaIte 6aTapeIO pa3 B IBa Meca, TTO6bl npOdNtB cPOK ee cLyK6bl.
B TOM clyuae ecn npoceDypa He co6IIOdaetc Hnn aKHyMylrTop He 3apJXaIOT,ero 3JeMeHTb MOryT NOyUHTb HeO6paTHMbIE NOBpeJxDeHn. Pa3pJxHeHHbI aKHyMylrTop Heo6xOdHMo 3apJNDt Ka K MoHHO CKeopee.
BAHHO 3apnKa D0JHHa npOn3BOaNTbCnNCHIOHTeBHO C NOMOuBIO 3apnHOYcTPOIcTBa (PNC.7.C).pyrHe cnCTeMbI3apnMOryT HaHeCTn 6aTaee HeoBaTMbIe NOBpeKdEHHa.
5.3.1 N3BLeueHne n 3apraHa 6aTapeN
IzhBueeHne:
HaKaTb KHOHky, paCNOJIOKeHHyU HaI 6aTaapee, nepeMeCTnB eBbepx (pnc. 6.A).
3apnka:
- CHIMITE pe3INHOByIO KpbIiKy, paCNOJIOKeHHyIO B HnKHeN qactN 6aTapEn (pnc 7.B)
- NOCDCOEHNHTE 3apraHoe yctpOYCTBO, BXODJIeB B KOMNJIeK T (PNC.7.C) K PO3ETKe, HAPRJaKeHHe KOToPOI COOTBeTCTByeT yKa3aHHOMy Ha Ta6JIuHKe.
- Pocne noKluueHn 6aTapeu 3arOpntc Hndnkatop 3apJHoro yCTpoiCTBa (pnc 7.F): KpacnbI CBet O3Haayet, YTO 6aTapee 3apJHaeTcA, 3elHbI CBET CBNDteJIbCTByET 06 OKOHuaHHN 3apJdKn.
ПРИМЕЧАНЕ Батеря оборудова
ЗашITOД, КOTОТ ПЕРЯ ПЕРТСТВЕТ 3APДК,
ECN T EMNEPAТа B NOMESEHIN He
нхODNTСВ B ПЕDEЛAX OT 0do +45 °C.
BAHHO AkHymyIaTOp MOHHO 3apKaTb BJIIO6OE BpeM, B TOM YIcNe qactuHo, 6e3 pNcKa IOBpeKdEHNr.
5.3.2 Пюверна сокаянna Зарднбатарe
AHHyMylrTop OchauEHN CnCTeMoN, IO3BOJIOUeI KOHTPOINPOBaTb COCTOAHne 3apdKn (pnc.7.D).
PnHaKaTNI KHOKN (pnc.7.E) 3aRopaOTcIaMNoUKn, yKa3bIbAIOUne OCTaTOHbI 3aprAkkymyJrTopa:
-
TPN 3eJIeHbIX JAMNIOUKN OJHa KpaCHa COOTBETCTBYIOT yPOBHIO 3apJa oT 100% do 78%
-ДBE 3eIeHbIX IaMNoUHn OJHa KpaCHa COOTBETCTBYIOT yPOBHIO 3apJa oT 77%do 55%
-
OДHA 3eJIeHЯ JIaMNoUHa N OДHa KpaCHa H COOTBeTCTByIOT yPOBHiO 3apya ot 54 % Do 33 %
- Onda Kpacha Jama Nocha O3haaet 32% OCTaTOHOrO 3apraHa N Heo6xOIMocTb pepe3aprKn B 6nKaJWee BpeM.
MoTe r6aTbI hNtpyuOuH NJIeMeHT B BOe C MOUcHm CpeCTBOM H BbITnpaIte YIcTOI TKaHbIO.
- PpOHTaIe FnIbTpIouuN 3JIeMeHrT 2JIOKHAMN YIcTOrO MOTOPHO MACaI N COKMITE erO HeCHOnIbKO pa3, 4TO6bI paBHomePHO pAcnpedeJIuTb MaCNo.
- YdaJIHTe H36bIToK Macna npn NOMOuN UHCTOn TKAHN.
B clyaae 3amehbl fNbItpyUojoero 3JeMeHTa, HoBbI hNbTp Heo6xOdmo npOnnTaTb Maclom, KaK OncaHO Bbiwe.
-Фильстуший Зileм ent naTpoHoro Tnna (pnc.4.C.1)
BbInonHnTe npOdyBky CxKaTbIM Bo3dyXOM CBHyTpEHHe CTOpOHbl, YTO6bl ydaIHTb PbIb N OTXdbl.
5.7 ПЮВЕРHA И TEXHNUECHOE ОБСЛУЖИBAHNE CBECH 3Анганя
- BbHyTb CBeUy 3aJHrAHHa (pnc. 10.A) c NOMOuBTO TopeBOr KInoua (pnc. 10.B).
- OuHCTHTb 3JIeKTpOdbI (pnc. 10.C) c NOMOUsIO npOBOLoHOn 5eTKn, ydaJIaB BCE BO3MOXHbIE OTLOXHeHN Harap.
- Поверпс сnomоью калиберноуна (pnc. 10.D) npabnibhoe pacctoHmeMeHdy элктpo damn (0,6 - 0,8 MM).
4.YCTaHOBHTe Ha MeTo CBeUy (pnc.10.A) nXopoWo 3aTaNHe Tc NOMOuTO TopueBOrO KJIoua (pnc.10.B). 3aMeHnTB CBeUy,ecInn 3JIeKtPoDbI nepeOpEnnNn ecInnHa φapfope IMeOTc OTbIE MeCTa Nn TpeunHbl.
Onacnoctb Bo3ropaHn! He BblIOJIHTb npOBepOK BCNCTeMe 3aHHraHn, eCNI CBeue Ha BBNHyeHa B COOTBETCTBYIOoee rHe3do.
BAHHO NcnoJb3OBaTb TOnbHO yHa3aHHbI INCBeuei (CM. Ta6nucy TexHnueeCKNX daHHbx).
6. ИДЕHTИФИКАЦЯ HENСПAPВHOCTЕN
2.2 POSTOPKI PRED UPORABO
Osebna varovalna oprema (OVO)
3.5 PROSTORNI USLOVI
Na rad Četverotaktnog endotermičkog motora utiče sledeće:
a) Temperatura:
- Kada su temperature niske moze da dode do poteskoca kodPokretanja na hladno.
Kada se radi na veoma visokim temperaturama moze da dode do poteskoca kodPokretanja na toplo zbog isparavanja goriva u posudu karburatora ili u pumpu.
- U svakom slučaju tip ulja treba da se prilagodi temperaturi na kojoj se masina koristi.
b) Nadmorska visina:
- Maksimalna snaga endotermickog motora postepeno se umanjue sa porastom nadmorske visine.
Zbog toga je potrebno da se kod značajnog povećanja nadmorske visine umani opterećenje masine na način da se izbegavaju posebno teški radovi.
3.6 GORIVO
Dobar kvalitet goriva od bitnog je značaja za pravilan rad motora.
Gorivo mora da imasledecrekvizite:
a) Morate koristiti cist, svež i bezolovni benzin, s rajmanje 90 oktana;
b) Nemojte koristiti gorivo s procentom etanola vecim od 10%
c) Nemojtde dodavati ulje;
d) Da biste zašitili system karburacije od stvaranja smolastih naslaga, dodajte stabilizator goriva.
Upotreba nedozvoljenih goriva ostecuje delove motora, a ova vrsta ostecenja nodsPokrivena garancijom.
4.4 RENGÖRING OCH FÖRVARING
EN · The content and images in this User Manual were produced expressly for ST. S.p.A. and are protected by copyright - any unauthorised reproduction or modification to the document, either partially or in full, is prohibited.

