USER MANUAL Meteotime HAMA
OperatingInstructions
Bedienungsanleitung
Moded'emploi
Instruccionesdeuso
Gebruiksaanwijzing
Istruzioniperl'uso
Instrukcjaobsługi
Használatiútmutató
Manualdeutilizare
Návodkpoužití
Návodnapoužitie
Manualdeinstruções
Bruksanvisning
Yournewweatherstationisdifferentfromconventionalweather stationsthatonlymeasuretheprevailingweatherconditions. Instead, the information provided by this weather station is based on METEOTIME data, which is compiled daily by highly qualified meteorologists using state-of-the-art instruments.
The weather station was designed so that it can receive the coded METEOTIME signal which transfer the weather information. The data is sent via a diat times signal transmitter DCF77 (in Germany). The weather station is therefore also a radio-controlled clock with all the familiar advantages, such as the exact time and automatic change over from wintertosummertime.
You can receive weather forecasts for 60 meteorological regions in Europe up to 4 days in advance and 2-day forecast for further 30 regions.
HOWDOIACHIEVEGOODRECEPTION?
SimilartomobilephonenetworksorTVandradioreception, weatherstationsmaynotalwayshavereceptioneverywhere.Itis thereforeessentialthatyouobservethefollowinginstructionsto ensurethatyourdeviceworksproperly.
Asuitablelocationisextremelyimportantfortheweatherstation. Forthisreason, theweatherstationisequippedwithaninnovative testfunction(TESTbutton)thatallowsyoutocheckthequalityof thereceptioninyourenvironmentinordertoplacethedeviceinthe mostsuitablelocation.
Todeterminethequalityofthereception,testtheweatherstation accordingtotheinstructionsinthemanual.Todothis,switchonall possiblesourcesofinterferenceintheroomwhereyouwanttoset upthedevice(e.g.thetelevision).Thenplacetheweatherstation inthedesiredlocationandalignitasdesired.Keepaminimum distanceofonemetrefrompotentialsourcesofinterference.
ObservetheGOODRECEPTIONorPOORRECEPTIONsymbol onthescreen.Whenyouhavefoundthesuitablelocation forgoodreception,leavetheMeteotimeweatherstation theresothattherequireddatacanbereceivedviathe radiosignal.Withinafewminutes,thetimeanddate aredisplayed.However,receivingverylargeamountsof data(forecastforallregionsanddays)takessignificantly longer.Upto24hoursarerequiredfromthefirststart-up toreceivealldata.
Controlsanddisplays
- DST(DaylightSavingTime)-summertimesymbol
2.DCF77signalradiosymbol(Germanlong-wavetransmitter Frankfurt77kHz)
3.Time
4.Rainprobabilityin%
5.Maximumtemperaturetomorrow
6.Weekdaytomorrow
7.Weekendalarm
8.Weekdayalarm
- Weatherforecastsymboltomorrow
10.Calendarday
- Minimum temperature tomorrow
12.Dayoftheweekthedayaftertomorrow(in2days)
13.Maximumtemperaturethedayaftertomorrow(in2days)
14.Month
- Weatherforecastsymbolthedayaftertomorrow(in2days)
- Lowesttemperaturethedayaftertomorrow
- Region/cityoftheweatherforecast
18.Dayoftheweek(in3days)
- Weatherforecastsymbol(in3days)
20.Maximumtemperature(in3days)
- Minimum temperature(in3days)
- Outdoorsensorradiosymbol
- Outdoor temperature
- Outdoor temperature trend
25.Displayforlowbatterylevelinoutdoorsensor
- Outdoor humidity tendency
- Outdoorhumidity
28.Channelchange
29.Channel
30.Max/Mindisplayofoutdoortemperature/humidity
31.Indoortemperaturetendency
32.Indoorhumiditytendency
- Displayforlowbatterylevelinbasestation
34.Ambienthumidity
35.Max/Mindisplayofindoortemperature/humidity
36.Roomtemperature
37.Windspeedrange
- Windspeed
39.Maximumtemperaturetoday
- Minimumtemperaturetoday
- Winddirection
- Weatherforecastsymboltoday
43.Meteotimesymbol
44.Weekdaytoday
45.Day/nightsymbol
=Settings/confirmationofthesettingvalue
=Manualsearchfortheoutdoorsensorsignal/channel selection
=Interruptionofalarmsignal/activationofbacklight/switching
betweendayandnightdisplayvalue
=CheckthequalityoftheDCFsignal
=Increaseofthecurrentsettingvalue/Recallofthestored maximum/minimumvalues(MAX/MIN)/Weatherdataforthe nextdaysforashorttimeinthewiderarea(37-45)
=Decreaseofthecurrentsettingvalue/Activate/Deactivate manualDCFradiosignalreception/Selectoneofthelocations fromthefavouriteslist
GBase
HBatterycompartment
ICut-outforwallmounting
1. Explanationofwarningsymbolsandnotes
Warning

This symbol is used to indicate safety instructions to draw your attention to specific hazards and risks.
Note

This symbol is used to indicate additional information or important notes.
2.Packagecontents
- "Meteotime" weatherstation(basestationforindooruse)
• Outdoorsensorforoutdooruse
- 4AAMignonbatteries
• Theseoperatinginstructions
3. Safetyinstructions
• The product is intended for private, non-commercial use only.
- Usetheproductonlyfortheintendedpurpose.
- Protect the product from dirt, moisture and overheating and use it indryroom only.
- Donotusetheproductintheimmediatevicinityofheaters, otherheatsourcesorindirectsunlight.
- Aswithallelectricalproducts, this devices should be kept out of thereof children.
- Onlyusethearticleundermoderateclimaticconditions.
- Donotoperatetheproductoutsidethepowerlimitsspecified in thetechnicaldata.
- Donotusetheproductinareasinwhichelectronicproducts arenotpermitted.
- Donotusetheproductinadampenvironmentandavoid splashingwater.
- Donotplacetheproductnearinterferencefields, metalframes, computers, TVs, etc. Electronicdevicesandwindowframescan negatively affect the product's functionality.
- Donotdropheproductanddonotexposeittoanymajor shocks.
- Donotmodifytheproductinanyway.Doingsovoidsthe warranty.
- Keep the packaging material out of thereach of child rendueto therisk of suffocation.
- Disposeofpackagingmaterialimmediatelyinaccordancewith thelocallyapplicableregulations.
- Routeallcablessothatthereisnoriskoftripping.
- Donotbendorcrushthecable.
Warning-Batteries

- Wheninsertingbatteries, notethecorrectpolarity(+and-markings) and insertthebatteries accordingly. Failuretodo socouldresultinthebatteriesleakingorexploding.
- Onlyusebatteries(orrechargeablebatteries)thatmatchthe specifiedtype.
- Beforeyouinsertthebatteries,cleanthebatterycontactsand thepolarcontacts.
- Donotallowchildrentochangebatterieswithoutsupervision.
- Donotmixoldandnewbatteries,orbatteriesofdifferent typesorfromdifferentmanufacturers.
- Removethebatteriesfromproductsthatarenotbeingused foranextendedperiod(unlessthesarebeingkeptreadyfor anemergency).
- Donotshort-circuitbatteries.
- Donotchargebatteries.
- Donotburnbatteries.
- Keepbatteriesoutofthereachofchildren.
- Neveropen, damageorswallowbatteriesorallow themtoentertheenvironment. Theycancontaintoxic, environmentallyharmfulheavymetals.
- Removespentbatteriesfromtheproductanddisposeofthem withoutdelay.
- Avoidstoring, charging and using inextremetemperatures and atextremely low atmospheric pressures (such as high altitudes).
4. Gettingstarted

Note
Pleaseremember, duringcommissioning, toalwaysinsertthe batteriesintotheoutdoorsensorfirstandthenintothebase station.
4.1 Insertingthebatteries
- Openthebatterycompartmentontheoutdoorsensorand
removethecontactbreaker.Closethebatterycompartment.
- Removetheprotectivefilmfromthebasestationdisplay.
- Openthebatterycompartment(H)andremovethecontact breaker.
- Thenclosethebatterycompartmentcover.
- Asignaltonewillnowsoundandthebasestationwillstart searchingfortheDCFsignal,fortheoutdoorsensorsandforthe Meteotimesignal.Thissearchtakesseveralminutes.
- Ifnotimesignalisreceivedafteralongerperiodoftime,change thelocationandcheckthereceptionconditionsusingthetest functiondescribedin6.1.
4.2 Changing batteries/Low battery capacity
Note-Changingthebatteries

- Beawarethat, after every battery change on the outdoor sensor or basestation, the stations will need to be resynchronised.
- Todothis, removethebatteries from the other station and re-insert them or changethem completely if required.
Outdoorsensor
- If the symbol(25)appears, replacethe2AAbatteries in theoutdoorsensorwith2newbatteries.
- Openthebatterycompartment, remove and dispose of the spent batteries and insert twonew A Abatteries observing the correct polarity. Then closethe battery compartment cover.
Basestation
- If the symbol(33)appears,replace2AAbatteriesin thebasestationwith2newbatteries.
- Openthebatterycompartment, disposeofthespentbatteries andinsert2newAAbatteriesobservingthecorrectpolarity. Thenclosethebatterycompartmentcover.
5. Installation
Note-Installation

- Were recommend initially positioning the basestation and outdoors sensor at the preferred setup locations without installing them and carrying out all these settings as described in 6. Operation.
- Donotinstallthestation(s)untilthesettingsarecorrectandtheradioconnectionisstable.
Note

• Therangeoftheradiotransmissionbetweentheoutdoor sensorandthebasestationisupto50minunobstructed areas.
- Beforeinstalling, makesurethattheradiotransmissionis notinfluencedbyinterferingsignalsorobstaclessuchas buildings, trees, vehicles, high-voltagepowerlines, etc.
- Before final installation, make sure that there is sufficient reception between the desired installation locations.
- Wheninstallingtheoutdoorsensor,takecaretoensureitis positionedsothatitisprotectedfromdirectsunlightandrain.
• The international standard height for measuring air temperature is 1.25m(4ft) above ground.
Warning

- Buyspecialorsuitableinstallationmaterialfromaspecialist dealerforwall-mounting.
- Ensure that you donot install any faulty or damaged parts.
- Neverapplyforceduringinstallation.Thesecandamagethe product.
- Beforemounting, check that the wally you have chosen is suitable for the weight to be mounted. Also makes sure that there are no electric, water, gas or other lines running through the wall at themountingsite.
- Donotmounttheproductabovelocationswherepersons mightsitorstand.
5.1 Basestation
• Alternatively, placethebasestationonaflatsurface using the stand(G).
• Alternatively, you can mount the basestation on a wall using the recess (I) on the back.
5.2Outdoorsensor
- Youcanalsosettheoutdoorsensoruponanevensurface outdoors.
- Were recommend mounting the outdoors sensor securely and firmly onto an outdoor wall.
- Securethedowel, screw, nail, etc. in the wall provided.
- Hangtheoutdoorsensorontoitusingthecut-outprovided.
6. Operation

PressandholdtheUPorDOWNbuttontoselectthevalues morequickly.
6.1 Basicsetting and manual setting
Afterinsertingthebatteries,thebasestationautomaticallysearches fortheDCFsignalandfortheMeteotimeweathersignal.Theradio symbol(2)flashesduringthesearchprocess.
DisplaySearchforDCFsignal

Flashingdisplay
Active

Permanentdisplay
Successful-
thesignalisbeingreceived

Inactive
- Thetimeanddatearedisplayedwithinafewminutes. However, receivingtheverylargeamountsofdatawiththeforecastforall regionsanddaysrequiresupto24hoursfromtheinitialstart-up untilalldataisreceived.
- Aftersuccessfulreceptionofthetimeanddatesignal, the displayshowsFRM(FrankfurtamMain)asthelocationforthe infowindow. Forinformationonchangingthecountry and location, seebelow.
- If the device has successfully received the Meteotimesignal, the Meteotimesymbol is displayed next to the respective day of the week.
DisplayMeteotimestatus

Validandupdateddata

Valid, but not updated data

Inactive
Note-faultytransmissionofthemeasured values

- In some cases, interference caused by a WiFinetwork, computer, TV, etc., for example, may cause the transmission of measured values between the basestation and the outdoor sensor to fail.
- If this happens, resynchronisethestations by briefly removing the batteries from both stations and reinserting them.
- If themeasured values are not transmitted again, replace the batteries with new ones.
- If necessary, choose anewlocation for the base station to avoid the possible interference signals in the future.
Note
YoucanusetheTESTfunctiontosearchforabetterlocation.

Takethedeviceinyourhandtofindasuitablelocation.Pressthe TESTbutton(D)tocheckthequalityoftheMeteotimesignal/DCF signal.ThesignalstrengththisdisplayedasavaluefromT-1(very poor)toT-9(verygood).TheTESTtakesaboutoneminute.Youcan restartorstopthetestatanytimebypassingtheTESTbutton. Ifnosignalisreceivedonarepeatedbasis,pressandholdthe DOWNbutton(F)foraround3secondstostartthemanualsearch fortheDCFsignal.Theradiosignal(2)startstoflash.
Note-Settingthetime

- Thesearchprocesstakesabout5minutes. If this fails, thesearch isterminated and repeated at the top of the next hour. Theradio symbol(2) disappears.
- Meanwhile, you can make an manual setting of the time and date.
- TheclockautomaticallycontinuestosearchfortheDCFsignal daily. Oncethesignalisreceivedsuccessfully, themanuallyset timeanddateareoverwritten.
PressandholdtheDOWNbutton(F)againforaround3secondsto endthemanualsearchprocess.

Note-Summertime
Thetimeadjustsautomaticallytosummertime. Whilesummertimeis active, DST(1)appearsonthedisplay.
6.2 Connection to the outdoor sensor
- Afterthebatteriesareinserted, thebasestationautomatically searchesforaconnectiontotheoutdoorsensorandcarriesout theinitialsetuproutine.

Note
- Initialsetuptakesaround3minutes.
- During the connection attempt, theradiosignal(2) on the basestation(22) flashes.
- Avoidanyoperationofthebuttonsduringthistime! Otherwise,errorsandinaccuraciesmayoccurinthevalues andtheirtransmission.
• The process is finished as soon as the indoor and outdoor measurement data (23/27/34/36) are displayed.
- Ifnosignalisreceivedfromtheoutdoorsensoronarepeated basis,pressandholdtheCHANNELbutton(B)foraround3 secondstostartthemanualsearchforthesignal.
6.3 Channelselection/Additionaloutdoorsensors

Note
-
Youcaninstalltwofurtheroutdoorsensorsinadditiontothe outdoorsensorsupplied. Whendoingso,ensurethesame channelsettingonthebasestationandeachoutdoorsensor.
• Suitableoutdoorsensorscanbefoundatwww.hama.com
-
PresstheCHANNELbutton(B)repeatedlytosetthesame channelasontheoutdoorsensorinquestion.ChannelCH1, CH2orCH3isdisplayed.
- If the symbolappears, the weather station automatically changesthe channel display every 5 seconds.
6.4 Manualsettings
PressandholdtheMODEbutton(A)foraround3secondstocarry outthefollowingsettingsinsequence:
• Timezone
• Language(dayoftheweek:German, French, Spanish, Italian, Danish, Dutch, English)
• 12/24-hourformat
• Year
• Month
• Day
- HoursMinutes
- °Cand°Fdisplay
Toselecttheindividualvalues, presstheUPbutton(E)orthe
DOWNbutton(F)andconfirmyourselectionbypassingthe MODEbutton(A).
PresstheMODEbutton(A)directlytoadoptandskipthedisplayed value.
Ifnoentriesaremadefor30seconds, theclockautomaticallyexits settingsmode.
Note-timezone

• The DCF signal can be received in many places, however it does not always correspond to the CET applicable in Germany. You should therefore represent a member to take into account the time difference in countries with different time zones.
- Moscow,forexample,is3hoursaheadofGermany.Setthe timetothetimezone+3.Theclockwillthenautomatically setitself3hoursaheadofthetimereceivedfromtheDCF signalorthetimesetmanually.
Note-dayoftheweek

Forthedisplayofthedaysoftheweek,youcanchooseGerman (GER),English(ENG),French(FRE),Italian(ITA),Spanish(SPA), Dutch(DUT)orDanish(DAN).
6.5 Selecting the country and cities
HoldtheTESTbutton(D)downforaround3seconds.COUNTRY appearsinthedisplay(17)andstartstoflash.ThenpresstheUP button(E)orDOWNbutton(F)toselectthecountry.Example:If GERappearsintheinformationwindow,thismeansthatyouhave selected"Germany".
PresstheMODEbutton(A)toconfirmthecountry.Afterselecting "Germany", CITYappearsintheinformationwindow.ThenpresstheUPbutton(E)orDOWNbutton(F)toselectthecity.Thecityname isdisplayedintheinformationwindow.
Example: FRMmeans "FrankfurtamMain".
PresstheTESTbutton(D)toconfirmthesetting. Theselectedcityis immediatelydisplayedintheinformationwindow.
Activatingfavourites
Once you have defined the city as described above, you can select other cities for easy access. Instead of sending these setting process with the MODE button (A), proceeds as follows:
- If"FrankfurtamMain"isoneofyourpreferredcities,pressthe TESTbutton(D)toconfirmthis.A √ isdisplayedabovethe selectedcityanditisstoredinyourpersonallistofselected cities.YoucannowusetheUPbutton(E)orDOWNbutton (F)toselectfurthercitiesinthesamecountryandconfirmyour selectionswiththeTESTbutton(D) √.
- If you wish to select cities from various countries, you must exit the setting process using the MODE button (A) and call it up again as described above to change the country.
- YoucanselectuptoFIVEcitiesasfavourites.
- Once you have made all settings, press the MODE button(A) to confirm these settings and exit settings mode.
Note

Ifyouskipthecityselectionoptionwhenyoufirstinsertthe batteries, thecityselectiondefaultsto "FrankfurtamMain -FRM".
Displayingfavourites
If you have selected more than one city as a favourite, press the DOWN button(F) to toggle between the various city names in the favourites list.
Removingacityfromthelistofffavourites
- HoldtheTESTbutton(D)downforaround3seconds.
COUNTRY starts to flash. Then press the UP button (E) or DOWNbutton(F)toselectthecountry.PresstheMODEbutton (A) to confirm the country. Use the UP button (E) or DOWN button(F)toswitchtoyourselectedcitywiththe √.
- PresstheTESTbutton(D)toremovethe.Thecityhasbeen removedfromthefavourites.Repeattheprocessifyouwishto removefurthercitiesfromthelist.YoucannowalsousetheUP button(E)orDOWNbutton(F)toselectafurtherpreferredcity. Ifyouselectmorethanfivecities,thefirstselectedcityisdeleted fromthefavouriteslist.
- Onceyouhavemadeallchanges, press the MODE button(A) toexitthemenu.
6.6Alarmclock
Alarmsignalonweekdays:
- Thisisarecurringalarmsignalthatistriggereddailyfrom MondaytoFridayatadefinedtime.
Alarmsignalattheweekend:
- ThisisanalarmsignalthatisonlytriggeredonaSaturdayand Sundayatadefinedtime.
Settingthealarmtime
- PresstheMODEbutton(A)toswitchtothealarmtimesetting mode.PresstheUPbutton(E)todisplaythealarmtime.Press theMODEbutton(A)foraround3secondstosetthealarmtime forthedisplayedalarm.Thehourdisplaystartstoflash.
- Press the UP button (E) or DOWN button (F) to select the hour of the alarmtime and confirm these selection by pressing the MODEbutton(A). Theminuted display start to flash. Repeat the procedure for the minutes of the alarm time.
- Repeat the procedure forth the weekend alarm.
- Ifnoentriesaremadefor30seconds, theclockautomatically exitssettingsmode.
- Whenthealarmistriggered, thealarmsymbolstartsflashing andanalarmsignalsounds. Pressanybutton(exceptthe DAY/NIGHT/SNOOZE/LIGHTbutton(C))tostopthealarm. Otherwise, itendsafter2minutes.
• Thealarmdoesnotneedtobeactivatedagain.Itsoundsafter24 hoursagainatthesetalarmtime.
Activating/deactivatingthealarmclock
• Toselectandactivateordeactivatethedesiredalarm, pressthe
MODEbutton(A)repeatedlytoselect or Theactive alarmisindicatedbythealarmsymbol(8) or(7) When deactivatinganactivealarm, thecorrespondingalarmsymbol or goesout.
- Whenthealarmistriggered, theactivealarmsymbol(7/8) starts flashing and an alarmsignalsounds. Tapanybutton(except theDAY/NIGHT/SNOOZE/LIGHTbutton(C)) to end the alarm. Otherwise, it ends after 2 minutes.
Note-Snoozefunction
- Duringthealarmsignal, presstheDAY/NIGHT/SNOOZE/LIGHTbutton(C)toactivatethesnoozefunction.Thealarm signalisinterruptedfor5minutesandthentriggeredagain.
- Pressanybutton(excepttheDAY/NIGHT/SNOOZE/LIGHT button(C)toendthesnoozefunctionandthusthealarm.
6.7 Weatherforecast
Switchingbetweenweatherinformationfordayandnight
ThedevicecanautomaticallyswitchbetweenDAYandNIGHT
weatherinformation.PresstheDAY/NIGHT/SNOOZE/LIGHT
button(C)foraround3secondsandyoucanswitchtotheweather
forDAYfor10secondsiftheweatherforNIGHTiscurrently
displayed,andviceversa.
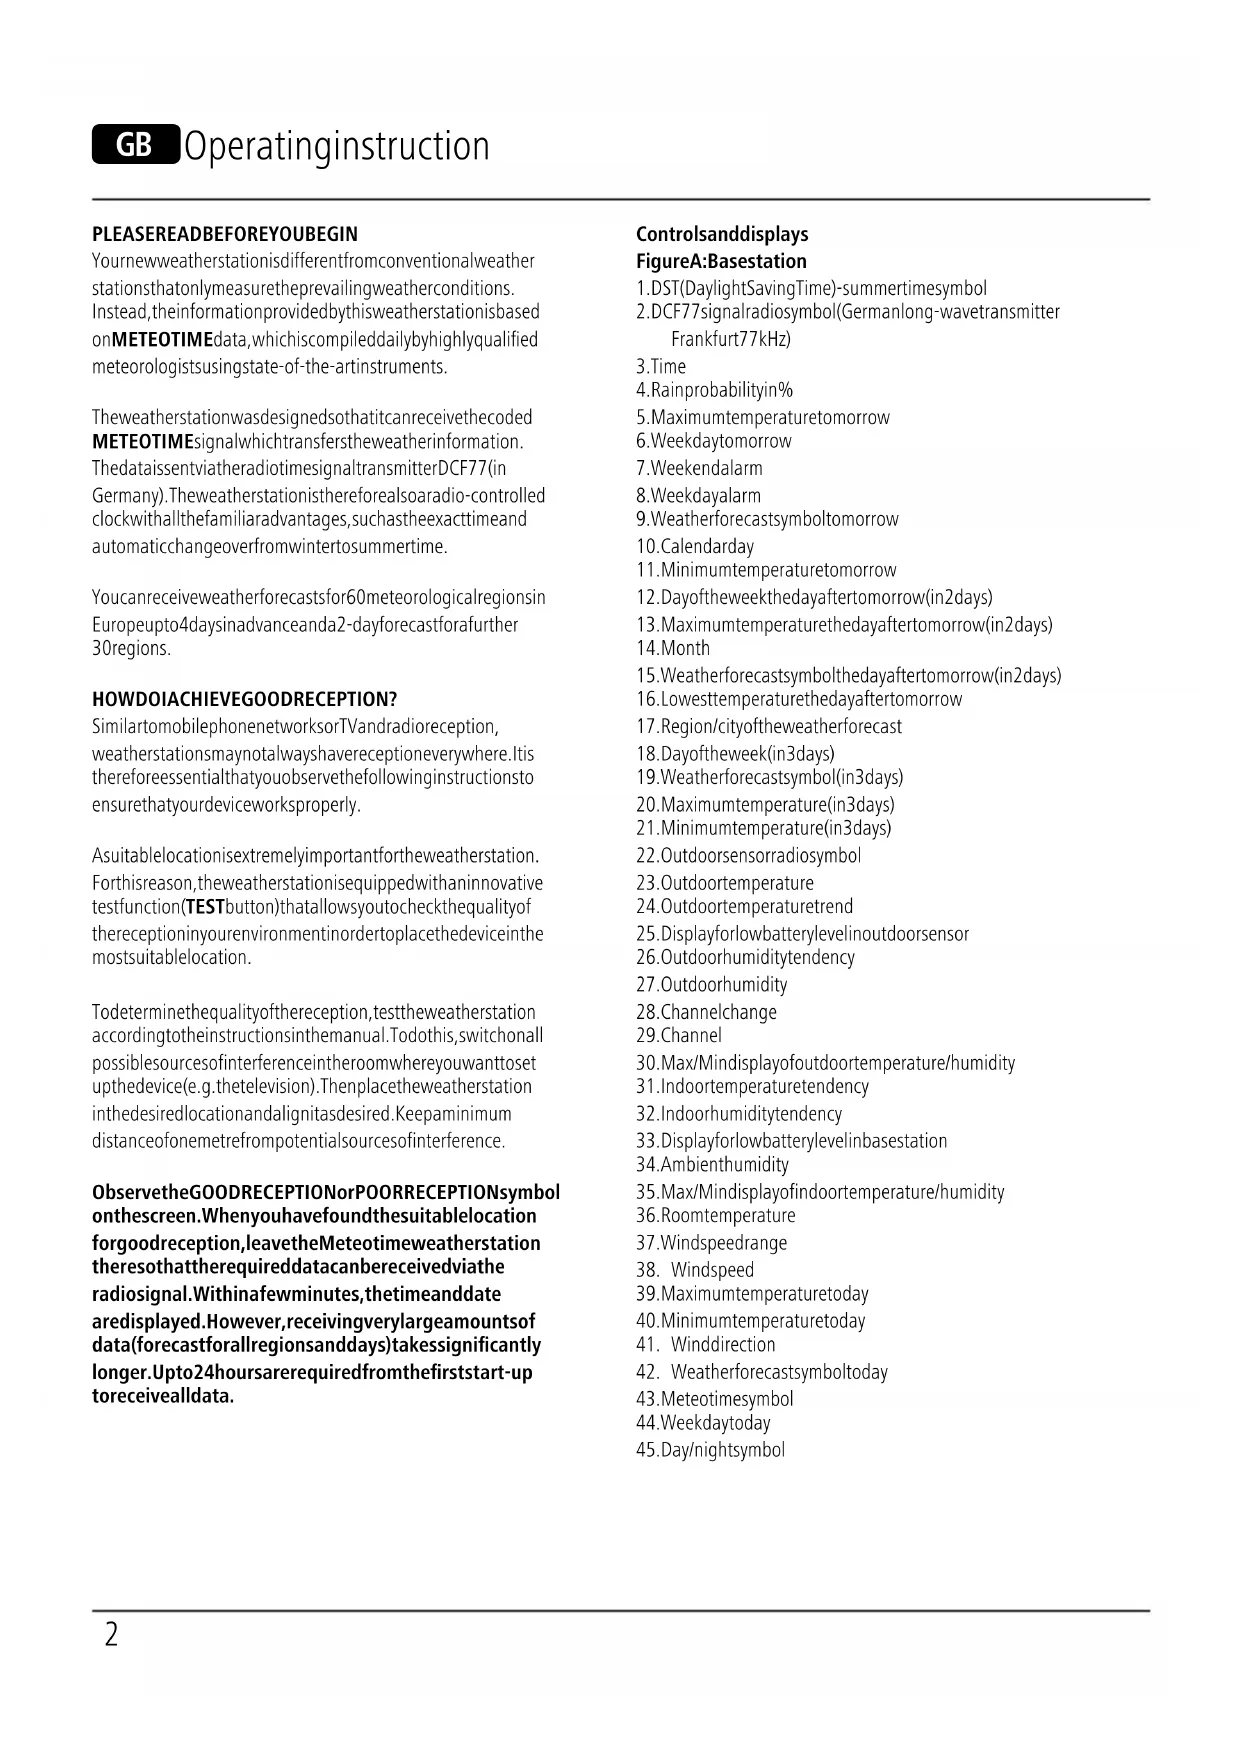
Atotalof15differentweatherconditionsford daytime and 15 differentweatherconditionsfornight-timecanbedisplayed.
- Sunny(day); Clear(night)
2.Slightlycloudy
- Mostlycloudy
4.Overcast
5.Heatstorm
6.Heavyrain
7.Snowfall
8.Fog
9.Sleet
10.Rainshower
- Lightrain
12.Snowshower
13.Stormfront
14.Lowstratus
15.Hailshowers
Themeaningofthevariousweatherforecasts
| MeaningDayNight | | |
| Sunny(day)Clear (night) |  | 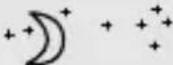 |
| Slightlycloudy | 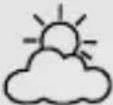 |  |
| Mostlycloudy |  |  |
| Overcast |  | 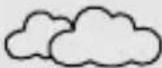 |
| Heatstorm | 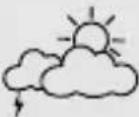 | 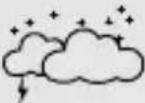 |
| Heavyrain | 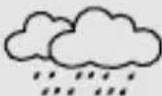 | 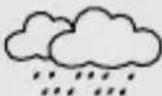 |
| Snowfall | 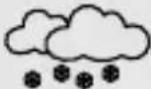 | 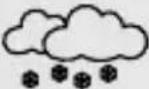 |
| Fog | 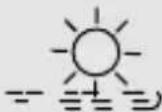 |  |
| Sleet |  | 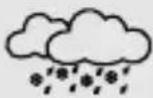 |
| Rainshower | 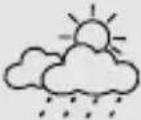 | 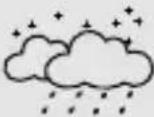 |
| Lightrain |  |  |
| Snowshower |  |  |
| Stormfront | 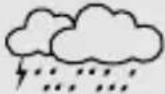 | 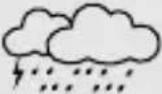 |
| Lowstratus |  |  |
| Hailshowers | 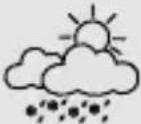 | 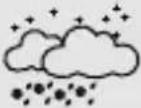 |
6.8 Windspeed
Thewindspeedisdisplayedin8ranges:
<2km/h,<13km/h,<30km/h,<52km/h,<63km/h,
<76km/h,<89km/h,>99km/h
Thewinddirectionandspecialairflow,specialairflowwithwarning symbol
<2km/h:Calmtolightbreeze
<13km/h:lighttomildbreeze
<30km/h:moderatetofreshwind
<52km/h:strongtostiffwind
<63km/h:galeforcewind
<76km/h:storm
<89km/h:severestorm
99km/h:hurricane-likestorm
6.9 Rainprobability
Therainprobabilityisdisplayedin8percentages:0%,15%,30%,45%,60%,75%,90%,100%.
0%norainto100%veryhighprobabilityofrain.
6.10 Temperature and ambient humidity trend
Note

In the first hour of operation, the trend display is not possible due to missing data that is only stored during operation.
Note

All measured values are subject to ascertain measurement tolerance.
The weather station gives at trend for the outdoor temperature/humidity (23/27) and indoor temperature/humidity (36/34) of how the values will probably develop forthenex hours.
| DisplayTrend | |
| [8234] | Rising |
| (T206) | Constant |
 | Falling |
6.11 Maximum and minimum temperature and humidity values
• The basestation automatically store the maximum and minimum values of the temperature and humidity in the outdoor and indoor areas.
- PresstheUPbutton(E)foraround3secondstoswitchbetween thedisplayofcurrenttemperatureandhumidity, lowest temperatureandhumidity(MIN)andhighesttemperature andhumidity(MAX).Afteraround5seconds, thedisplay automaticallychangestothecurrenttemperatureandhumidity display.
- Ifthetemperatureislowerthan-21°C,LL.Lisshownonthe display.Ifthetemperatureishigherthan40°C,HH.Hisshown onthedisplay.
6.12Frostalarm
Thesnowflakesymbol ✉!flashesiftheoutdoortemperatureis between+1and-1°C. Thesnowflakesymbolremainsifthe outsidetemperatureisbelow-1.1°C.
6.13Backlight
PresstheDAY/NIGHT/SNOOZE/LIGHTbutton(C)toactivatethe backlightfor5seconds.
7. Careandmaintenance
- Onlycleanthisproductwithaslightlydamp,lint-freeclothand donotuseaggressivecleaningagents.
- Ensure that now water is able to enter the product.
8.WarrantyDisclaimer
HamaGmbH&CoKGassumesnoliabilityandprovidesnowarrantyfordamageresultingfromimproperinstallation/mounting, improperuseoftheproductorfromfailuretoobservetheoperating instructionsand/orsafetynotes.
9.Technicaldata
| BasestationOutdoorsensor |
| Powersupply | 3.0V2xAAbatteries | 3.0V2xAAbatteries |
| MeasuringrangeTemperature(°C) | 0°C-+50°C/32°F-+122°F | -20°C-+60°C |
| Ambienthumidity | 20%-95% | 20%-95% |
| Measuringincrements | 0.1°C/0.2°F | 0.1°C |
| TemperatureAmbienthumidity | 1% | 1% |
| DCFradioclockYesNo | | |
| HygrometerYesYes | | |
| ThermometersYesYes | | |
| AlarmfunctionYesNo | | |
| Max.numberofoutdoorsensors | 3 |
| Range≤80m | |

Hereby, HamaGmbH&CoKGdeclaresthatthe radioequipmenttype[00186369]isincompliance with Directive2014/53/EU. Thefulltextofthe EUdeclarationofconformityisavailableatthe
followinginternetaddress:
www.hama.com->00186369->Downloads.
| Frequencyband(s)433MHz | |
| Maximumradio-frequencypower transmitted | 0.22mW |
- Zeitzone
- Sprache(Wochentag:German, French, Spanish, Italian, Danish, Dutch, English)
• 12/24-StundenFormat
•Jahr
• Monat
• Tag
- StundenMinuten
•°Cund°FAnzeige
Deregenkanswordtweergegevenin8percentages:0%,15%,30%,45%,60%,75%,90%,100%.
0%,15%,30%,45%,60%,75%,90%,100%.
0%,15%,30%,45%,60%,75%,90%,100%.
86652Monheim/Germany
Service&Support
www.hama.com
+499091502-0
D | GB
CE


RaccoltaCarta
All listed brands are trademark of the corresponding companies. Errors and mission excepted, and subject to technical changes. Our general terms of delivery and payment are applied.