
EWS-200 - Weather Station HAMA - Free user manual and instructions
Find the device manual for free EWS-200 HAMA in PDF.


| Product Type | Wireless Weather Station |
| Brand | Hama |
| Model | EWS-200 |
| Display Type | LCD with backlight |
| Indoor Temperature Range | 0°C to +50°C (32°F to 122°F) |
| Outdoor Temperature Range | -20°C to +60°C (-4°F to 140°F) |
| Humidity Range (Indoor/Outdoor) | 20% to 95% RH |
| Wireless Range | Up to 100 m (open area) |
| Number of Outdoor Sensors | Up to 3 (sold separately) |
| Clock Features | Radio-controlled DCF time, date, alarm |
| Power Supply Base | 2 x AAA batteries (not included) |
| Power Supply Outdoor Sensor | 2 x AA batteries (not included) |
| Dimensions Base (approx.) | 150 x 100 x 30 mm |
| Weight Base (approx.) | 200 g |
| Dimensions Outdoor Sensor (approx.) | 60 x 80 x 30 mm |
| Weight Outdoor Sensor (approx.) | 100 g |
| Mounting Options | Wall mount or table stand |
| Maintenance | Clean with soft dry cloth; avoid liquids |
| Safety Precautions | Do not expose to moisture or extreme heat |
| Spare Parts / Reparability | Not available; device is not user-serviceable |
Frequently Asked Questions - EWS-200 HAMA
User questions about EWS-200 HAMA
0 question about this device. Answer the ones you know or ask your own.
Ask a new question about this device
Download the instructions for your Weather Station in PDF format for free! Find your manual EWS-200 - HAMA and take your electronic device back in hand. On this page are published all the documents necessary for the use of your device. EWS-200 by HAMA.
USER MANUAL EWS-200 HAMA
OperatingInstructions
Bedienungsanleitung
Moded'emploi
Instruccionesdeuso
Gebruiksaanwijzing
Istruzioniperl'uso
Instrukcjaobstugi
Használatiútmutató
Manualdeutilizare
Návodkpoužití
Návodnapoužitie
Manualdeinstruções
Bruksanvisning
natural_image
Vertical column of black rectangular blocks with no text or symbolsA


B


natural_image
Simple line drawing of a rectangular container with a downward arrow on the top (no text or symbols)ControlsandDisplays
ABasestation
-
Alarmsymbol
-
Batterysymbol(basestation)
3.Summertime
-
Weatherforecastsymbol
-
Room temperature
6.Comfortrange
-
Channel display
-
Outdoor temperature
-
Radiosymbol
10.Time
11.Day
12.Month
13.Weekday
14.Moonphase
15.Roomtemperaturetrend
16.Roomhumidity
-
Measuringstationradiosymbol
-
Outdoorhumidity
-
Outdoor temperature trend
-
Outdoor temperature alarm
-
Batterysymbol(measuringstation)
22.MODEbutton
=settings/confirmthesetting/alarmsetting
23.UPbutton
=increasethecurrentsetting/activateordeactivatemanual radiosignalreception
- DOWN/MEMbutton
=reducesthecurrentsetting/accessingthesaved maximum/minimumvalues
25.CHbutton
=channelselection/manualsearchforasignalfromthe measuringstation
26.ALERTbutton
=setting/activating/deactivatingtheoutdoortemperature alarm
- SNZ/LIGHTbutton
=stopsthealarm/activatesthebacklight(approx.10 seconds)
- Batterycompartment
BMeasuringstation
- Display(onfrontside)
=Displaystemperature,humidityandcurrentchannel.
30.LEDindicator(onfrontside)
=Flasheswhensignalsaretransmitted.
-
Openingforwallmounting
-
SetthetransmissionCHANNEL(1-3)
=Inputchannelfortheweatherstation.Setthechannel beforeinsertingthebatteries.
33.Batterycompartment
=Unitrequires2pcs.UM-4or"AAA"1.5Vbatteries.
1. ExplanationofWarningSymbolsandNotes
Warning

This symbol is used to indicate safety instructions to draw your attention to specific hazards and risks.
Note

This symbol is used to indicate additional information or important notes.
2.PackageContents
• EWS-200weatherstation
(basestationforindoors/measuringstationforoutdoors)
• 4AAAbatteries
• Theseoperatinginstructions
3.SafetyNotes
• The product is intended for private, non-commercial use only.
- Donotoperatetheproductoutsidethepowerlimitsgivenin thespecifications.
- Donotusetheproductinmoistenvironmentsandavoid splashes.
- Donotusetheproductintheimmediatevicinityofheatersor otherheatsourcesorindirectsunlight.
- Donotusetheproductinareaswheretheuseofelectronic devicesisnotpermitted.
- Onlyconnecttheproducttoasocketthathasbeenapproved forthedevice. Thesocketmustbeinstalledclosetothe productandeasilyaccessible.
- Donotdroptheproductanddonotexposeittoanymajor shocks.
- Donotopenthedeviceorcontinuetooperateitifitbecomes damaged.
- Donotattempttoserviceorrepairtheproductyourself.Leave anyandallserviceworktoqualifiedexperts.
- Keep the packaging material out of thereach of child rendue to other risk of suffocation.
- Disposeofpackagingmaterialimmediatelyaccordingto locallyapplicableregulations.
- Donotmodifytheproductinanyway.Doingsovoidsthe warranty.
- Usetheproductforitsintendedpurposeonly.
Warning-Batteries

- Wheninsertingbatteries, notethecorrectpolarity(+and -markings) and insertthebatteries accordingly. Failure to dosocouldresultinthebatteriesleakingorexploding.
- Onlyusebatteries(orrechargeablebatteries)thatmatch thespecifiedtype.
- Before you insert the batteries, clean the battery contacts and the polar contacts.
- Donotallowchildrentochangebatterieswithout supervision.
- Donotmixoldandnewbatteriesorbatteriesofa differenttypeormake.
- Removethebatteriesfromproductsthatarenotbeing usedforanextendedperiod(unlessthesarebeingkept readyforanemergency).
- Donotshort-circuitbatteries.
- Donotchargebatteries.
- Donotthrowbatteriesinafire.
- Keepbatteriesoutofthereachofchildren.
- Neveropen, damageorswallowbatteriesorallow themtoentertheenvironment. Theycancontaintoxic, environmentallyharmfulheavymetals.
- Immediately remove and dispose of dead batteries from the product.
- Avoidstoring, chargingorusingthedeviceinextreme temperaturesandextremelylowatmosphericpressure(for example,athighaltitudes).
4. Getting Started
4.1. Measuringstation
- Openthebatterycompartmentcover.
- Setthedesiredchannel(32)withtheswitch.Ifyouareusing onlyonetransmitter,pleaseleavetheselectionat,"1".
- Insert2newUM-4or „AAA“1.5Vbatteriesobservingcorrect polarity.
- Closethebatterycompartmentcoverandsettheunitinthe desiredlocation.
Note
Beforeuse, ensure you insert the batteries in theme measuring station first and then in the base station.

4.2. Basestation
- Openthebatterycompartment(28)andinserttwoAAA batterieswiththecorrectpolarity.Closethebattery compartment.
5. Installation

Note-Installation
- Were recommend initially placing the base and measuring stations in the intended locations without installing them and making all these settings described in 6. Operation —todo.
- Onlyinstallthestationsoncetheappropriatesettingshave beenmadeandastablewirelessconnectionisestablished.

Note
- Thewirelesstransmissionrangebetweenthemeasuring andbasestationsisupto30minopenspaces.
- Beforeinstallation,ensurethatwirelesstransmissionwill notbedisruptedbyinterferenceorobstacleslikebuildings, trees,vehicles,high-voltagelines,etc.
- Before the final installation, ensure that there is sufficient reception between the intended installation locations.
- When installing themeasuring station, ensure that it is protected from direct sunlight and rain.
• The international standard height for measuring air temperature is 1.25m(4ft) above ground.
Warning
- Buyspecialorsuitableinstallationmaterialfroma specialiseddealerforwall-mounting.
- Ensure that no faulty ordamaged parts are installed.
- Neverapplyforceduringinstallation. This could damage the product.
- Beforeinstallation,ensurethatthechosenwallissuitable fortheweighttobemounted,andmakesurethatthere arenoelectricalwires,water,gasorotherlinesatthe installationsiteonthewall.
- Donotmounttheproductabovelocationswherepersons mightlinger.
5.1.Basestation
- Usethebasetopositionthebasestationonalevelsurface.
5.2. Measuringstation
- Youcanalsopositionthemeasuringstationonalevel outdoorsurface.
- Were recommend installing themeasuring station securely on an outdoor wall using the opening (31).
- Installananchor, screw, nail, etc. in the wall of your choice.
- Hangupthebase/measuringstationusingtheopening intendedforthispurpose.

6.Operation
Note-Input

HolddowntheUPbutton(23)ortheDOWN/MEMbutton (24)toselectthevaluesfaster.
6.1. Connectiontothemeasuringstation
- Afteryouinsertthebatteries, thebasestationautomatically searchesforaconnectiontothemeasuringstationand performsinitialsetup.
Note
- Initialsetuptakesapprox.3minutes.
- Duringconnection, thewirelesssymbolonthemeasuring stationwillflash(17).
- Donotpressanybuttonsduringsetup. Otherwise, values may not be transmitted correctly and there is a risk of value errors and in accuracies.
- Thesetupprocessiscompletedwhentheindoor(5,16) andoutdoor(8,18)measurementdataisdisplayed.
- If the basestation still does not receive a signal from the measuring station, press and hold the CH-button(25) for approx. 3 second to start them an manual search for the signal.

6.2. Selecting the channel/other measuring stations
Note
Youcaninstalltwomomoremeasuringstationsinadditionto theincludedmeasuringstation.Ensurethatthebaseand measuringstationsaresettothesamechannel.Visitwww._hama.comforsuitablemeasuringstations.
- PresstheCH-button(25)repeatedlytosetthechannelto thatsetontherespectivemeasuringstation—see4.1. Measuringstation.
1,2,3(7)isdisplayed.
- SelectCH1 if you are only using themeasuring station supplied.
- Thebasestationnowshowsthedatameasured(8,18)onthe selectedmeasuringstation(7).
6.3.Basicandmanualsettings
AutomaticsettingusingtheDCFsignal
- After the first time the base station is switched on and successful transmission is established between the base station and themeasuring station, the clock will automatically search for a DCF signal. During theseearch, the wireless symbol(9) will flash.
DisplaySearchingfortheDCFsignal

Displayflashing
Active

Displayedcontinuously
Successful-signalisbeing received
NotdisplayedDeactivated
- Ifthestationstilldoesnotreceiveasignal,pressandhold theUPbutton(23)forapprox.3secondstostartthemanual searchfortheDCFsignal.Thewirelesssymbol(9)willstart toflash.

Note-Timesettings
- Thesearchprocesstakesabout7minutes. Ifitfails, the searchends. Theradiosymbol(9)disappears.
- Inthemeantime, however, you can set the time and the datemanually.
- TheclockautomaticallycontinuestosearchfortheDCF signalonadailybasis(1:00,2:00,3:00,4:00and5:00 a.m.). If the signal is received successfully, them manually set time and date are overwritten.

S
Note-Summertime
- Theclockautomaticallyswitchestosummertime. (3)appearsonthedisplayaslongassummertimeis activated.
- PressandholdtheUPbutton(23)forapprox.3secondsto stopthemanualsearch.
(Manual Cuba)settings
- PressandholdtheUPbutton(23)forapprox. 3secondstostopthesearchfortheDCFsignal.Thewireless symbol(9)goesoutandyoucansetthetimemanually.
- PressandholdtheMODEbutton(22)forapprox.3seconds tomakethefollowingsettingsoneaftertheother:
• Year(10)
• Month(12)
• Day(11)
- Weekday(13)
- Timezone(10)
• 12/24hourformat(10)
•Hours(10)
• Minutes(10)
• Temperatureunit°C/°F(5.8)
- Toselecttheindividualvalues, presstheUPbutton(23)or theDOWN/MEMbutton(24)andconfirmeachselectionby pressingtheMODEbutton(22).
- If you donot make an entry for 30 seconds, the device automatically exits these settings mode and these settings you made a resaved.
Note-Timezone

• The DCF signal can be received over long distances, but always transmits the current Central European Time in Germany. Makes sure you account for the time difference in countries with another time zone.
- If you are in Moscow, the time is 3 hours later than in Germany. This means that you should set + 3 for the timezone. The clock then automatically set the time to 3 hours after the DCF signal received or relative to the manually set time.
Note-Weekday

YoucanchoosefromGerman(GE), English(EN), Danish (DA), Dutch (NE), Italian (IT), Spanish (SP) or French (FR) fortheweekdaydisplay.
Celsius/Fahrenheit
- Followthestepsdescribedfor(Manual)settings to switchbetween°Cand°Fonthetemperaturedisplay.
- If the temperature is outside of themeasuring range, LL.L (lower than minimum temperature) or HH.H (higher than maximum temperature) will appear on the temperature display.
Alarm
- RepeatedlypresstheMODEbutton(22)toaccessalarm mode.
- ALisdisplayedaccordinglyinthesecondsdisplay.
- PressandholdtheMODEbutton(22)forapprox.3seconds tosetthesignaltimeofthealarmdisplayed.Thehours displaybeginstoflash.
- Setthefollowinginformationintheorderlisted:
• Hours
• Minutes
- Toselectindividualvalues, presstheUPbutton(23)orthe DOWN/MEMbutton(24)andconfirmeachselectionby pressingtheMODEbutton(22).
- If you donot make an entry for 30 seconds, the device automatically exits the settings mode and the settings you made a saved.
- In the alarm mode (AL) display, press the UP button (23) or the DOWN/MEMbutton(24)toactivateordeactivatethe alarm.Thealarmsymbol(1)willappear/notappear.
- If the alarmist riggered, the alarmsymbol(1) will beg into flash and an alarm will sound.
- Pressanybutton(excepttheSNZ/LIGHTbutton(27))to stopthealarm. Otherwise, it will stop automatically after 2 minutes.
Note-Snoozefunction

- Whilethealarmsignalissounding, presstheSNZ/LIGHT button(27)toactivatethesnoozefunction.Zzbeginsto flashonthedisplay.Thealarmsignalwillbestoppedfor5 minutes,afterwhichitwillsoundagain.
- Pressanybutton(excepttheSNZ/LIGHTbutton(27))to stopthesnoozefunctionandthealarm.
6.4. Weatherforecast/atmosphericpressurehistory
- Basedonchangesintheatmosphericpressureandthedata saved, thebasestationisabletomakewatherforecastsfor thenext12to24hours.

Note-Weatherforecast
The weather forecast function is not available during the first few hours of operation because it requires data that is collected during operation.
- The weather forecast and the current weather are indicated by fivedifferents symbols(4):
| Symbol(2)Weather | |
 | Sunny |
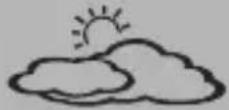 | Slightlycloudy |
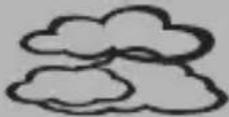 | Cloudy |
 | Rainy |
- Theweatherstationindicatesatrendastohowthevalues fortheoutdoortemperature(8)androomtemperature(5)are likelytodevelopoverthenextfewhours.
| DisplayTrend | |
| Increasing | |
| Constant | |
| Decreasing |
6.5 Maximum and minimum temperature and humidity values
• Thebasestationautomaticallystoresthemaximumand minimumindoor/outdoortemperatureandhumidityvalues.
- RepeatedlypresstheDOWN/MEMbutton(24)toswitch between the current temperature and humidity, minimum temperature and humidity(MIN) and maximum temperature and humidity(MAX).
- PressandholdtheDOWN/MEMbutton(24)forapprox.3 secondstoresetthestoredmaximumandminimumvalues.
- Themaximumandminimumvaluesareaautomaticallydeleted everydayatmidnight.
6.6Outdoortemperaturealarm
• RepeatedlypresstheCHbutton(25)toselectthemeasuring stationchannel(7)forwhichyouwouldliketosetanalarm.
- PressandholdtheALERTbutton(26)forapprox.3seconds untiltheoutdoortemperaturedisplay(8)beginstoflash.
- Thesymbolforthelowerlimitvalue
limitvalue(8)flashes.
- Press the UP button (23) or the DOWN/MEM button (24) tosetthedisplayedlimitvalueandconfirmyourselectionby pressingtheALERTbutton(26).
- Thenrepeatthisprocedurefortheupperlimitvalue
- If you donot make an entry for 30 seconds, the device automatically exits the settings mode and the settings you made a saved.
• RepeatedlypresstheALERTbutton(26)toactivate/deactivatetheoutdoortemperaturealarm.Thealarmsymbol(20)willappear/notappear.
6.7.Moonphases
Thebasestationindicatesthecurrentmoonphase(14)withthe followingsymbols:
| Display(14)Moonphase | |
| Newmoon | |
| Waxingcrescent | |
| Waxinghalfmoon | |
| Waxingmoon | |
| Fullmoon | |
| Waningmoon | |
| Waninghalfmoon | |
| Waningcrescent |
6.8Comfortrange
Thebasestationdisplaysthefollowingcomfortrangesbased ontherationbetweenthecurrentroomtemperatureandroom humidity:
| Display(6)Comfortrange | |
| -Pleasant-Idealtemperatureandhumidity | |
| -Moist-Humiditytoohigh | |
| -Dry-Ambientairtoodry | |
6.9Backlight
Note-Backlight

If you press the SNZ/LIGHT button(27), the display will light up for approx. 10 seconds.
6.10.Lowbatterycapacity
Assoonasthe(2/21)batterysymbolappearsonthedisplay ofthebasestation,thecapacityofthebatteriesinthebase/measuringstationisverylow.Replaceethebatteriesimmediately.
Note-Replacingthebatteries

- Notethatthestationshavetoberesynchronisedeach timeafteryouchangethebatteriesinthemeasuringor basestation.
- Todothis, removethebatteries from the other station and then reinsert them, or changethemas required.
7.CareandMaintenance
Onlycleanthisproductwithaslightlydamp,lint-freeclothand donotuseaggressivecleaningagents.Makesurethatwater doesnotgetintotheproduct.
8.WarrantyDisclaimer
HamaGmbH&CoKGassumesnoliabilityandprovidesno warrantyfordamageresultingfromimproperinstallation/mounting,improperuseoftheproductorfromfailuretoobserve theoperatinginstructionsand/orsafetynotes.
9.TechnicalData
| BasestationMeasuringstation | ||
| Powersupply | 3.0V2xAAAbatteries | 3.0V2xAAAbatteries |
| Powerconsumption≥3,0mA≥6,5mA | ||
| MeasuringrangeTemperatureHumidity | 0°C—+50°C/32°F-122°F20%—95% | -40°C—+60°C/-40°F—140°F20%—95% |
| MeasuringincrementsTemperature | 0.1°C/0.2°F0.1°C/0.2°F | |
| Temperatureandhumiditymeasuringcycle | 30 s | CH1:57sCH2:67sCH3:79s |
| Radio-controlledDCFclock | YesNo | |
| HygrometerYesYes | ||
| ThermometerYesYes | ||
| Max.numberofmeasuringstations | 3 | - |
| Range≤30m | ||
10. Declaration of Conformity
CE Hereby, HamaGmbH&CoKGdeclaresthatthe radioequipmenttype[00186310]isincompliance withDirective2014/53/EU. ThefulltextoftheEU declarationofconformityisavailableatthefollowinginternet address: www.hama.com->00186310->Downloads.
| Frequencyband(s)433MHz | |
| Maximumradio-frequencypowertransmitted | 4,932mW |
www.hama.com->00186310->Downloads.
www.hama.com->00186310->Downloads.
www.hama.com->00186310->Downloads.
| Frequentieband(en) | 433MHz |
| Maximaalradiofrequent vermogen | 4,932mW |
natural_image
Simple line drawing of a cloud with raindrops falling (no text or symbols)Deszczowo
www.hama.com->00186310->Downloads.
www.hama.com->00186310->Downloads.
www.hama.com->00186310->Downloads.
86652Monheim/Germany
Service&Support

www.hama.com

+499091502-0
D
GB
CE


PAP RaccoltaCarta
All listed brands are trademarks of the corresponding companies. Errors and omissions excepted, and subject to technical changes. Our general terms of delivery and payment are applied.



- ControlsandDisplays
- ABasestation
- BMeasuringstation
- ExplanationofWarningSymbolsandNotes
- Warning
- Note
- 2.PackageContents
- 3.SafetyNotes
- Warning-Batteries
- Getting Started
- Measuringstation
- Basestation
- Installation
- Note-Installation
- 5.1.Basestation
- Measuringstation
- 6.Operation
- Note-Input
- Connectiontothemeasuringstation
- Selecting the channel/other measuring stations
- 6.3.Basicandmanualsettings
- AutomaticsettingusingtheDCFsignal
- Note-Timesettings
- Note-Summertime
- (Manual Cuba)settings
- Note-Timezone
- Note-Weekday
- Celsius/Fahrenheit
- Alarm
- Note-Snoozefunction
- Weatherforecast/atmosphericpressurehistory
- Note-Weatherforecast
- Maximum and minimum temperature and humidity values
- 6.6Outdoortemperaturealarm
- 6.7.Moonphases
- 6.8Comfortrange
- 6.9Backlight
- Note-Backlight
- 6.10.Lowbatterycapacity
- Note-Replacingthebatteries
- 7.CareandMaintenance
- 8.WarrantyDisclaimer
- Declaration of Conformity
- 86652Monheim/Germany
- Service&Support
Brand : HAMA
Model : EWS-200
Category : Weather Station