
Double adapter GT4 - Stroller PEG PEREGO - Free user manual and instructions
Find the device manual for free Double adapter GT4 PEG PEREGO in PDF.
| Type de produit | Child car seat (double GT4 adapter for stroller) |
| Marque | Peg Perego |
| Modèle | Double adapter GT4 |
| Dimensions | 44 x 44 x 65 cm (approx.) |
| Poids | About 4.5 kg |
| Alimentation | None (mechanical) |
| Utilisation | Children from 40 to 87 cm, max weight 13 kg |
| Fonctions principales | Kinetic Pods side protection, 3-point harness, adjustable headrest (6 positions), canopy, 4-position handle, Dual Stage Cushion |
| Sécurité | Approved UN R129, i-Size compatible, Isofix or belt installation, rear-facing use |
| Entretien et nettoyage | Clean plastics with a damp cloth; cover machine washable as per label |
| Pièces détachées et réparabilité | Original spare parts available, after-sales service |
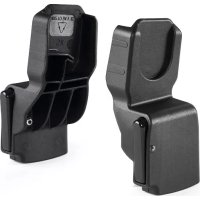
| Informations générales | This product is a stroller adapter, but the provided manual is for the Primo Viaggio SLK car seat |
Frequently Asked Questions - Double adapter GT4 PEG PEREGO
User questions about Double adapter GT4 PEG PEREGO
0 question about this device. Answer the ones you know or ask your own.
Ask a new question about this device
Download the instructions for your Stroller in PDF format for free! Find your manual Double adapter GT4 - PEG PEREGO and take your electronic device back in hand. On this page are published all the documents necessary for the use of your device. Double adapter GT4 by PEG PEREGO.
USER MANUAL Double adapter GT4 PEG PEREGO
The Original Accessory Peg Perego
| EN_English | |||
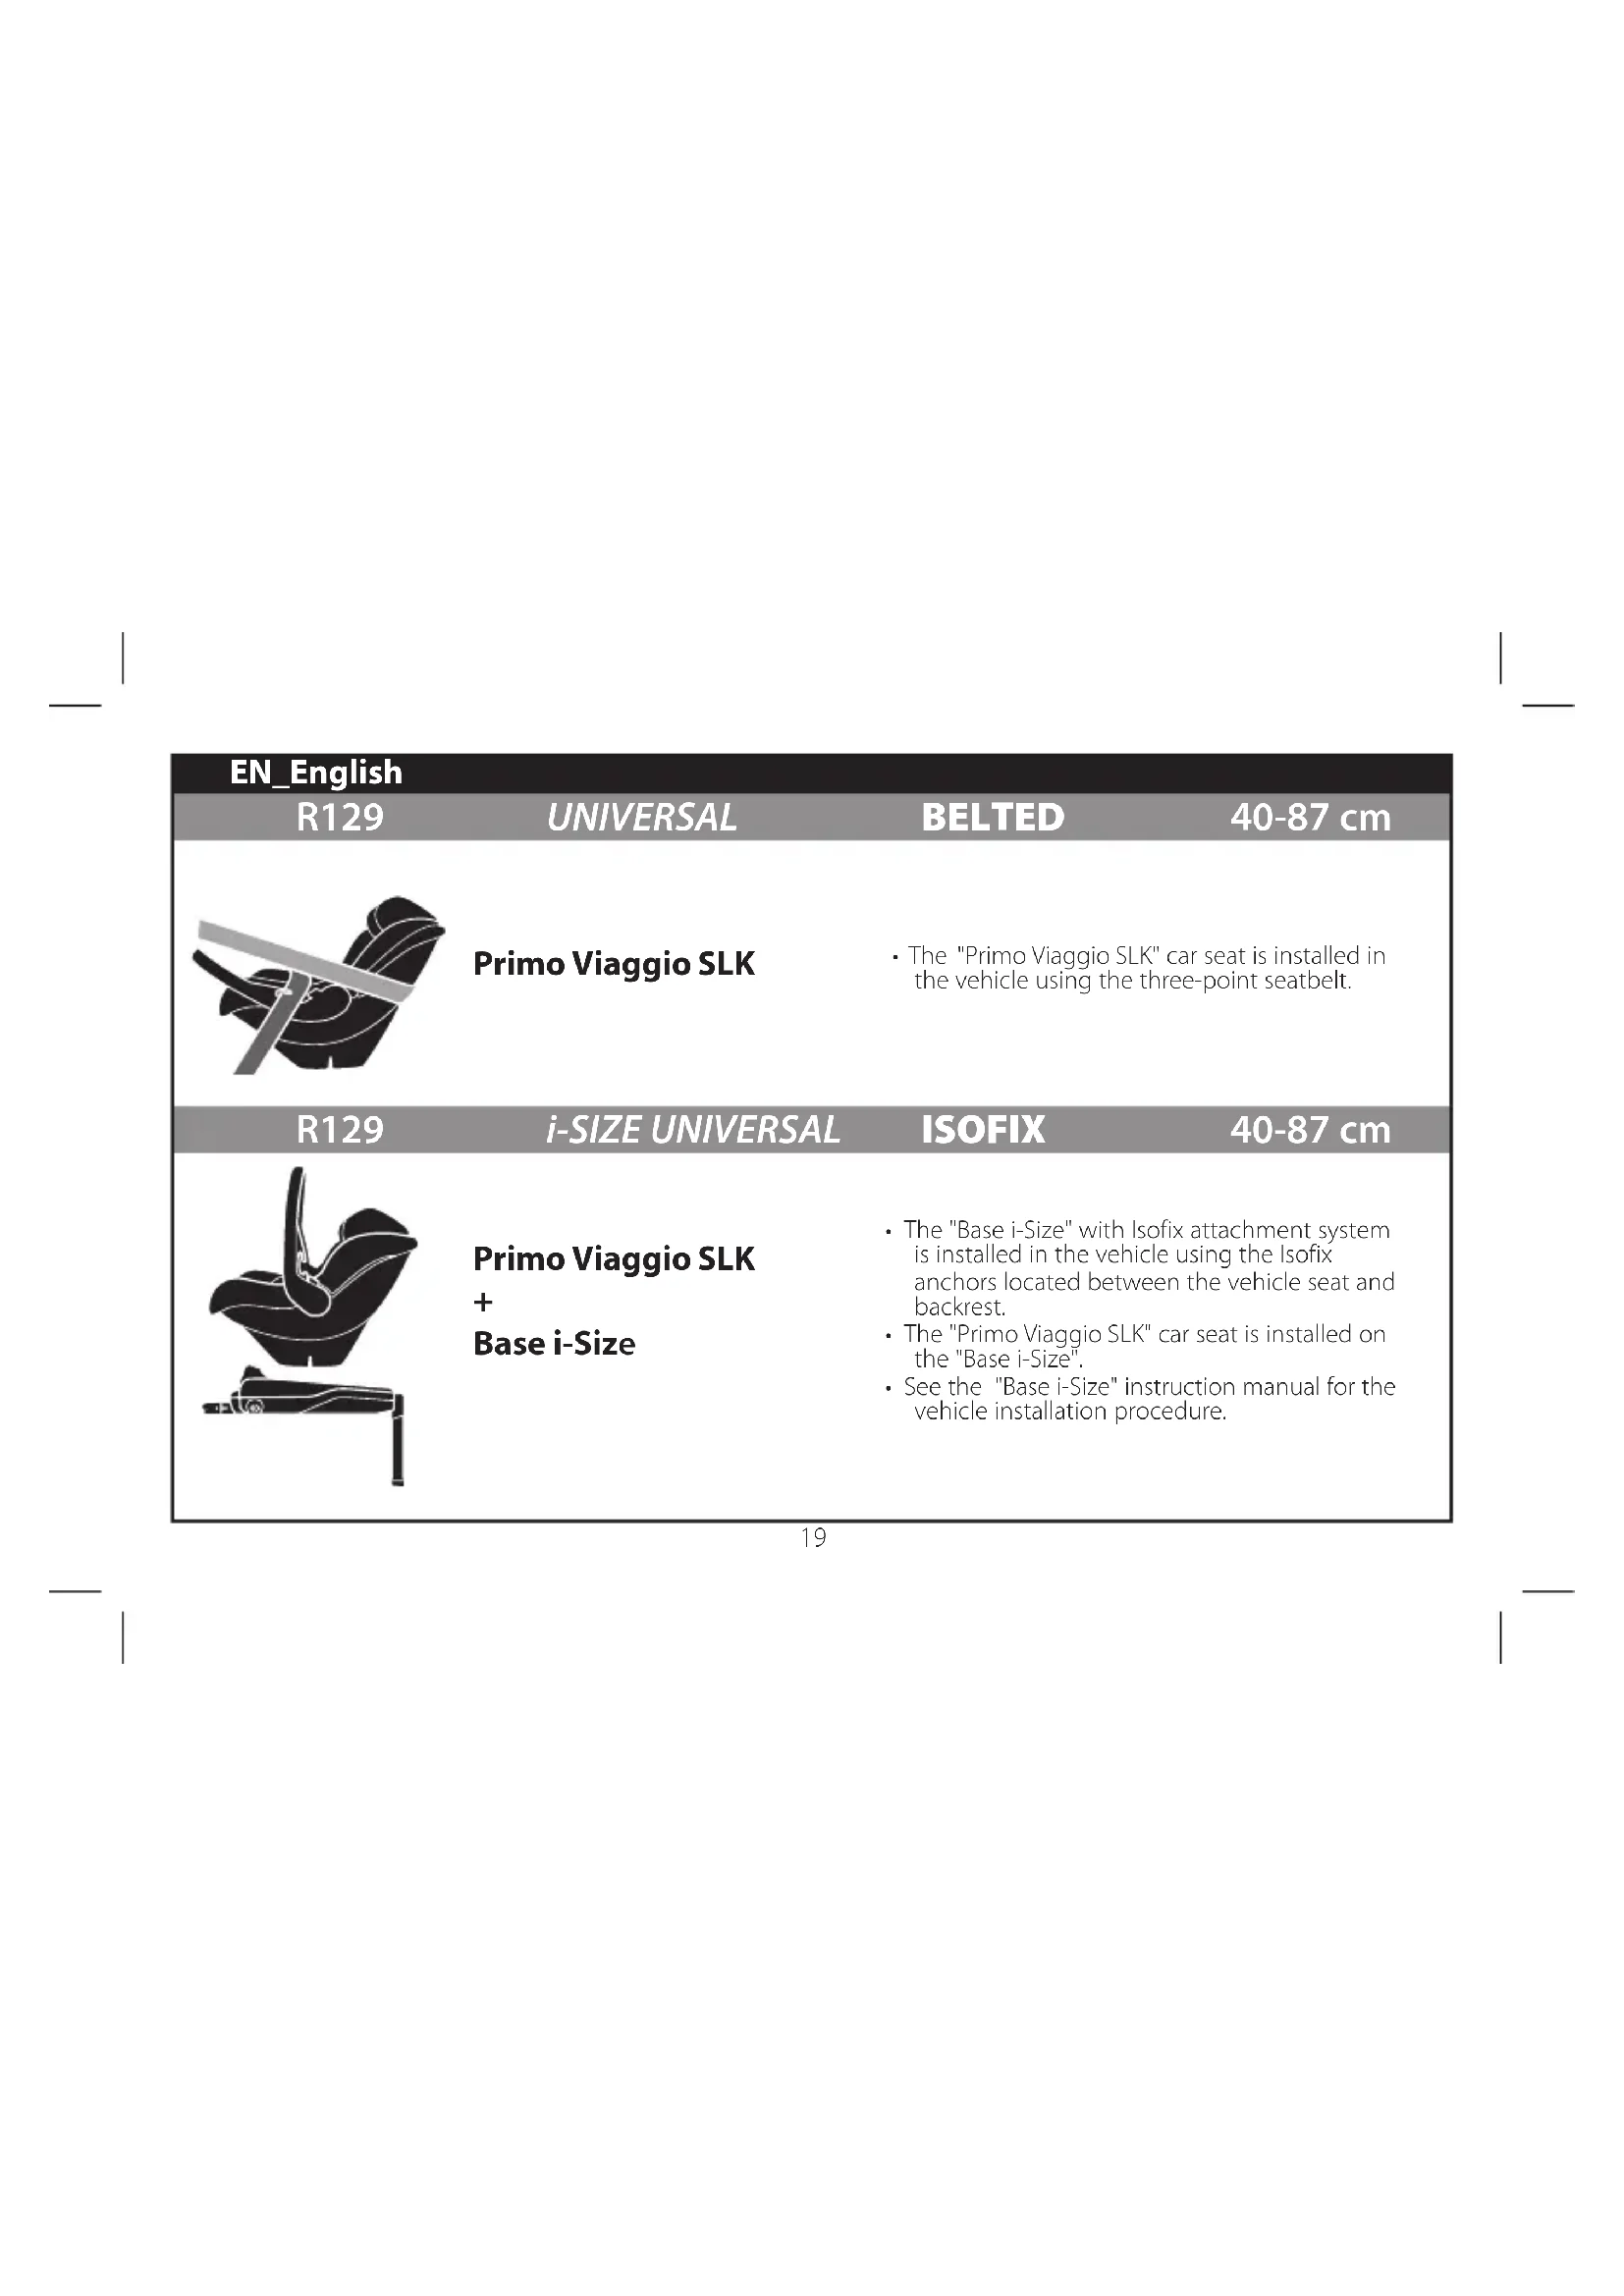
| R129 | UNIVERSAL | BELTED | 40-87 cm |
| Primo Viaggio SLK | ·The "Primo Viaggio SLK" car seat is installed in the vehicle using the three-point seatbelt. | ||
| R129 | i-SIZE UNIVERSAL | ISOFIX | 40-87 cm |
| Primo Viaggio SLK + Base i-Size | ·The "Base i-Size" with Isofix attachment system is installed in the vehicle using the Isofix anchors located between the vehicle seat and backrest. ·The "Primo Viaggio SLK" car seat is installed on the "Base i-Size". ·See the "Base i-Size" instruction manual for the vehicle installation procedure. | ||
Thank you for choosing a Peg Perego product.
Product characteristics
- Suitable for children between 40 and 87~cm with a maximum weight of 13~kg .
- This is a Universal Belted Enhanced Child Restraint System. It is approved according to UN Regulation No. 129 for use primarily in Universal seating positions, as indicated by vehicle manufacturers in the vehicle user's manual.
- The use of the car seat for premature infants born at less than 37 weeks could cause respiration problems for the newborn. It is advisable to seek medical advice before leaving the hospital.
- This car seat is approved for installation in the car without the base or with the Base i-Size.
- When used with a Base I-Size, this car seat becomes an "i-Size" enhanced child restraint system. It is approved in accordance with UN Regulation No. 129 for use in i-Size-compatible vehicle seating positions, as indicated by vehicle manufacturers in the vehicle users' manual.
- The car seat can only be used in approved vehicles, fitted with static or inertia-reel three-point seatbelts, approved under regulation UN/ECE no. 16 or equivalent standards. It must not be used with two-point or lap seatbelts.
- Consult the list of car models and seats equipped with ISOFIX anchor systems (see inside) that have been
approved by the restraining system manufacturer.
Contact the restraining device manufacturer or retailer if you have doubts or require further information on the fitting of the Base i-Size in specific cars.
For more information, please contact the Peg Perego Assistance Department at the address customer.service@pegperegco.com
- This car seat comes with "Adjustable Side Impact Protection": improved protection against side impacts with the "simultaneous system" for headrest-harness adjustment.

WARNING
- Read the instructions carefully before use and keep them in the holder provided for future reference. Failure to closely follow the car seat installation instructions will put your child at risk.
The assembly and installation operations must be conducted by adults.
Always use a car seat when in the car. Never remove the child from the car seat when the vehicle is in motion. - Never leave a child alone and unsupervised in a car, not even for a short time. The temperature inside the vehicle can change rapidly and become dangerous for the child inside.
- Install this car seat facing the direction opposite to the direction of travel.
Install this car seat only on seats facing the direction of
travel. If the vehicle has rotating or repositionable seats, position them facing the direction of travel.
- Do not fit this car seat onto passenger seats which have active airbags. Deactivate the airbag before fitting the car seat. Using this car seat on seats with active airbags may cause serious injury or death in the event of an accident.
- Check that the child car seat is not blocked by a moving part of the seat or a door.
- Scrupulously follow installation instructions; do not use installation methods other than those recommended because they could cause detachment of the car seat.
Always use the harness when using this car seat. - Adjust the height and tension of the shoulder straps ensuring that they are snug to the child's body without constricting him/her too much. Check that the harness is not twisted and that the child does not release it.
- To avoid the risk of falling, always use the car seat harness even for transport outside the vehicle.
The car seat is not a substitute for a cot; if the child needs to sleep it is important to lie him/her down. - Do not use the child car seat if it is broken or if there are missing parts, or if it has been subjected to heavy impacts as a result of accidents, as it may have suffered structural damage which is not visible but is extremely hazardous.
-
Do not use the car seat without its fabric cover; this must not be replaced with one not approved by the manufacturer since it is an integral part of the car seat and the safety system.
-
Do not remove or replace the white polystyrene part under the seat, in the backrest and in the headrest, as it is essential for safety purposes.
- Do not leave the car seat in the vehicle when exposed to the sun. Some parts might heat up and be harmful to the delicate skin of the child -check before placing the child in the seat.
- Do not modify the product.
- Do not remove the adhesive and stitched labels since this might make the product non compliant with legal requirements.
- For any repairs, replacement parts and information about the product, contact the after-sales assistance service. Contact information is provided on the last page of this manual.
- Do not use accessories not approved by the manufacturer or by the competent authorities.
- If using a second-hand product, make sure it is a recent model, comes with instructions, and is fully functional in all parts. An obsolete product may not conform to safety standards, due to natural ageing of materials and updating of regulations. If you have any doubts, contact the manufacturer's customer service centre.
- Make sure there are no items of luggage or other unsecured items in the vehicle interior. They could injure the vehicle's occupants in the event of an accident.
- This product requires only minimal cleaning and maintenance. These operations must be performed by adults.
It is advisable to keep all the moving parts clean.
- Clean plastic parts periodically with a damp cloth. Do not use solvents or similar substances.
- Do not clean the polystyrene shock absorbing device with solvents or other similar products.
- Brush fabric parts to remove dust. If you wash fabric parts, follow the washing instructions on the laundry label.
- Protect the product from atmospheric agents: humidity, rain or snow. Extended exposure to sunshine can cause colour changes in many materials.
- Store the product in a dry environment.
WARNING: FOR USE AS A RECLINED CRADLE.
- Do not use the reclined cradle once your child can sit unaided.
- This reclined cradle is not intended for prolonged periods of sleeping.
- It is dangerous to use this reclined cradle on an elevated surface, e.g. a table.
Components of the Product
Inspect the content of the package and contact Customer Care if any items are missing. The child car seat includes:
c) Kinetic Pods: side protections
d) Headrest
e) Harness tension release button
f) Harness tension adjustment s
g) 3-point safety harness with shoulder straps
h) Lever for release from base
i) Headrest height adjustment button
I) Instruction manual compartment
m) Headrest covered with shock-absorbing expanded polystyrene foam (EPS)
n) Shell covered with shock-absorbing expanded polystyrene foam (EPS)
o) Dual Stage Cushion The car seat is ready for use: no assembly required.
Instructions for use with base
1 Primo Viaggio SLK features the Ganciomatic System for connection and release in the car with the Base i-Size.
To attach the Primo Viaggio SLK to the Base i-Size, align it with the connections and push it downwards until it clicks in place (fig_a). Make sure that the red/green indicators on the back of the base are in the green position (fig_b).
2 Press the two buttons on the handlebar, turn them and position against the vehicle seat.
3 To release the Primo Viaggio SLK from the Base i-Size, put the handlebar in the carry position and pull the lever on the backrest upwards while simultaneously lifting the car seat.
4 The car seat handlebar has four fixed positions. To rotate it, press the two buttons on the handlebar and move this to the required angle. Ensure it clicks into position.
Position A: the in-vehicle position;
- Position B: the position for transport by hand and for installation on a base, stroller or chassis;
Position C: this is the resting position;
Position D: stops the car seat from rocking.
Instructions for use without base
5 AMPORTANT! The car seat must be parallel to the ground. If necessary, use rolled-up towels or swimming pool float tubes under the car seat, in the folds of the vehicle's seats.
Fit the car seat with the child seated inside, remembering to secure the child with the harness. Fully lower the handlebar of the car seat (point 4-position A).
6 Slide the lower part of the vehicle seatbelt into the two guides on the car seat handlebar (fig_a) and buckle it (fig_b), ensuring the seatbelt is taut, as shown in the figure.
Grasp the upper part of the vehicle seatbelt and pass it behind the car seat backrest (fig_c).
7 Insert the belt into the rear guide (fig_a). Tighten the vehicle seat belt (fig_b). Installation is now complete.
8 To release the harness, press the red button on the crotch strap buckle (fig. a) and remove the straps. To engage the harness, place the two shoulder strap
tongues in position and insert them into the buckle of the crotch strap until they click into place (fig. b).
9 To slacken the harness, insert a finger through the seat opening (1), keep the metal button pressed, and with the other hand pull on the straps (2).
10 To tighten the straps until they are snug to the child's body, pull the central adjustment strap towards you.
CAUTION: Do not over-tighten the straps, and ensure you leave minimum slack.
11 IMPORANT! In winter, do not strap the child into the car seat wearing bulky, heavy clothing, and do not place blankets between the child's body and the harness. This could cause incorrect positioning of the safety harness, with serious consequences in the event of a collision.
Use a blanket or an approved Peg Perego accessory to protect your child from the weather.
12 The harness and the "Side Impact Protection" headrest can be adjusted simultaneously to 6 different heights so as to follow the growth of the child.
To adjust the height, press the rear height adjustment button (on the car seat backrest) and at the same time raise or lower the straps and headrest to the required position, ensuring that they click into place. Slacken the shoulder straps before adjusting the height of the harness and headrest.
13 The headrest may be set in 6 different positions.
14 The safety harness is at the right height when the slots in the backrest are at shoulder height or just below (green area), as shown in the figure.
Make sure the straps are not in the red area.
15 This car seat features the Dual Stage Cushion, a system composed of 2 separate cushions for even the smallest babies.
a: headrest reducer
b:seat reducer cushion
Do not use the Dual Stage Cushion with children over 61~cm in height and 9kg in weight.
16 The special shell shape is designed to rock your child. To rock the child gently, put the handlebar in the carry position, as shown (fig_a).
To prevent oscillation and stop rocking, lock the handlebar behind the backrest (fig_b).
17 The hood provides your child with shade and shelter.
IMPORTANT: The hood must not be used to lift the car seat because it might detach.
18 To remove the hood, release the elastic bands behind the handlebar (1), lift it and release it upwards (2).
19 The seat is fitted with Kinetic Pods, to ensure greater safety in the event of a side impact.
FULLY open the Kinetic Pod by turning it clockwise (fig_a). To return the pod in the initial position, turn it anti-clockwise (fig_b).
20 ATTENTION: ONLY open vehicle door side Kinetic Pod.
IMPORTANT: Make sure the Kinetic Pod situated on the side facing the inside of the car is never pulled out.
Removing the soft cover
21 To remove the "Dual Stage Cushion": unbutton the two buttons (fig_a) anchoring the headrest reducer to the seat reducer cushion and pull it off.
22 Open the harness and remove the shoulder straps. Remove the seat reducer cushion, sliding it off the crotch strap.
23 From the back of the car seat, pull the straps out the front.
24 Release the four elastic bands on the cover from underneath the handlebar (fig_a), pull out the crotch strap (fig_b) and remove the entire cover.
25 Slide off the headrest cover from the bottom first and then, carefully, over the two sides;
BE CAREFUL NOT TO BREAK POLYSTYRENE (EPS) PARTS.
Remove the soft cover in sequence, as shown in the figure.
Maintenance of the padding
Brush the fabric parts to remove dust.
- When washing, closely follow the instructions stated on the label sewn into the cover.
- Do not use chlorine bleach.
- Do not iron.
- Do not dry clean.
Do not remove stains with solvents. - Do not tumble dry.
How to cover the car seat
Proceed to perform the operations shown in figures 21 through 25 in reverse order.
The Original Accessory Peg Peregoo
Peg Perego accessories are designed as a useful, practical means of simplifying the lives of parents. Discover all your product's accessories on www.pegperego.com
Serial numbers
26 Underneath the side of the car seat you will find the approval label and another label bearing the following information: product name, production date and serial number.
27 The date of production appears on the harness.
This information may be of use to customers in the event of problems with the product.
Product cleaning
- This product requires minimal maintenance. Cleaning and maintenance must only be carried out by adults.
It is advisable to keep all the moving parts clean. - Clean the plastic parts periodically with a damp cloth. Do not use solvents or similar substances.
- Brush the fabric parts to remove dust.
-
Do not clean the polystyrene shock absorbing device with solvents or other similar products.
-
Protect the product from atmospheric agents: humidity, rain or snow. Extended exposure to sunshine can cause colour changes in many materials.
- Store the product in a dry environment.
Peg Perego S.p.A.
Peg Perego S.p.A. adopts a quality management system certified by TUV Italia Srl in accordance with the ISO 9001 standard. Peg Perego can make changes at any time to the models described in this publication for technical or commercial reasons.
Peg Perego after-sales service
If any parts of the item get lost or damaged, only use genuine Peg Perego spare parts. For any repairs, replacements, information on the products and sales of genuine spare parts and accessories, contact the Peg Perego Assistance Service and state the serial number of the product, if present.
tel.0039/039/60.88.213 e-mail customer.service@pegperegco.com website www.pegperegco.com
All intellectual property rights on the contents of this manual are property of Peg Perego S.p.A. and are protected by the laws in force.
The Original Accessory Peg Perego
The Original Accessory Peg Perego
The Original Accessory Peg Perego
Scaunul auto include:
TBbpE MHO. IpOBepe TaIN KOJIaHbT He e ycKaHa N, Ye DeTeTo He ro OCbo6OxJaBa.
3a da n36eHHepe pncKa OT naHaHe, BnHaRn n3non3BaIte KOJAHNTe Ha CTOnUeTO 3a KONA, DOpN 3a TpaHCnOPT N3BbH PpeBO3HOTcpeDCTBO.
CTOnUeTO 3a Kona He e 3aMeCTNTen Ha JeTCKO KpeBaTHe; aKO DeTeTO Tp6Ba Da cN, e BaXHO da e IerHaNo.
He n3non3BaIte DetCKOTo CTOnue 3a Kona, ako e CuyneHO nnA KO LNNCBAt Yactn nnAKO e 6nNo NODIOXeHO Ha TeKKn Bb3deYCTBnB Pe3yNTa Hn3NONOlyKn, TbN KaTO MoKe Da e npetbpnpno CTpykTypHO yBpeXdaHe, KoEt He e BuIMMO, Ho e N3KNIOUHTENHO ONaCHO.
He n3non3BaIe cTOnuTe 3a Kona 6e3 Taunuepeyra; THe Tp8Ba Da Ce 3aMeHc TakaBa, KOrTO He e OdopeHa OT npON3BOUInTe, Tb KaTo e Hepa3JeHnHa Yact OT cTOnuTe 3a Kona H CNTEmata 3a 6e3OnacHOCT.
He npemaxbaIte n He cmeHnIte 6raIata ctepnonopeHa qact noCedankata, B oBnerankata n B oBnerankata 3a rnaBa, kaTO TRe OOT cbIeCTBeHO 3HaueHne 3a UenTe Ha 6eONaCHOCTTa.
He octabnTe ctonyeTo 3a Kona B aBtOMobnna, KoraTo e Ha npka CbHueBa CBETnHa. HkOn qactn MoKe da ce HarpeT n Da hapaHr T dNkATnTa KA Ka HcTeTO -npOBepTe npEn Da NOCTaBnTe DeTeTO B cEdAnKaTata.
He moiPhiupaTne npodykta.
He oTcpaHraBaIte 3aIeneHTe nIu 3aIHTn eTNKeTu, TOBa MOKeJa HApBaBn IpoDyKTa HeCbBMecTUM CbC 3aKOHHTe N3NCKBaHn.
3a BCAKBA pEMOHTN, pe3epBHN qACTN INHOpMaun OTHOCHOPOyKTA,CBpXeTE Ce CbC OTDen CNEIPOdaKaBeHO 06cIyKBaHe. INHOpMaunTa 3a KOHTAe IpeIOCTaBeHa Ha NocIeHata CTpaHnUa OT BA pkoBOdCTBO.
He n3no3BaIte akcecoapn, KOTo He ca oDo6peHn O TnpoN3BODHTeTNI ONOT KOMPeTeHTHIne opraHn.
Ako n3non3BaTe npOdyKT BToPA yNtpe6a, yBepete ce, ye eCKopoIeH MoDen, INBa C HNCTpyKuIN e HaHbIHO fYHKUHOHaJIeBB BCNUKn HaCTN. OCTApJl npOdyKT MOKe Da He OTROBAPr Ha CTAnaptN 3a Be3OnaCHOCT NopaIn cTectBeHOTo CTapeEHe Ha MaTePnaIHTe n AKTuAIN3npaHe Ha HapeDInte.AKO Imate HraKaBn CBMHeHn, CBbpXeTe Ce ueHTbp 3a ObCnyKBaHe Ha KIneHTn Ha IPOIN3BOIDITen.
- YBepete ce, Ye Hma 6aagk nnpytn Heo6e0naceH npedmetn B nHTepnopa Ha aBTOMObna. Te 6nxMa mOrnn Da HapaHrT PbTHnCITe B aBTOMObna B cnyaHa Ha 3NONOlyka.
To3n npOnykT n3NCKBa cAmo MNHmAMHO NOUcTBaHe mNoDnPbJka. Te3n Opeaun Tp8Ba Da ce N3BbPWBAT OT Bb3paCTHn.
- PpenopbunTeHoe da nDbpxKe BCnKn DnKne ci ce yactn uactn.
- NounCTBaIte nepnoDnHNO nlaCTMaCObTe qactn C BnaJHa Kbpna. He n3no13BaIte pa3TBOpnten nn Noo6Hn BeuecTBA.
He nouictBaIte cTeepnoOpeneHITe cactn pa3TbOpnten nnn npO6Hn npOyKtn.
- N3yETKBAIte nIATA OT npax. Ako nepete TaIuIepeRrTa, CneBaIte HNCTpykUInTe 3a npaHc Ha eTNIKeTa.
- Na3ete npodykTa OT atmocphiepHnTe BnnaHnHa: BnaXHOCT, DbJNIN CHr. IpoBnKHTeHNO n3laRaHe Ha CnBnueBa CBETnHa MoKe Da npuHHn IpomEHn B UBeTa Ha MHOro MaTePnAaN.
CbxaHbAaTe npOyKaTb cyXa cpea.
I PENEYIPPEKDEHNE:3A UNOTPEBA KATO JIOJKA.
He n3non3BaIte KaTo cToJyTeKaTo JIOJa OT MOMeHTa, B KOITo JeTeTO MoKe Da CeIN camOCTOReTEnHO 6e3 yXkDa NOMOu.
He npedHa3NaueHo 3a npoDbnKnteHcBn.
- OnacHo e da ce n3noJ3Ba Bbpxy BnCOKn NOBbpxHOCTn, HAp. Maca.
KomnoHeHTn Ha npOdyKTa
PpOBepTe CbIbpXKaHHeTo Ha ONaKOBkTa N Ce CBbpXeTe C O6CnyXBaHe Ha KIneHTN, Ako JINNCBAt HAKON YactN.
TeCKOTO CToJHe 3a KOJa BKNIOUBA:
a) CeHHNK
b)Дрьжka
c)KHeTnHn TaNN:CTpaHnHa 3aunTa
d)O6neranka 3a rnaBa
e) ByToH 3a OCB6OxJaBaHe Ha HAnpeXeHneTO Ha KOJahNte
f) Pembk 3a perynipahe Ha KojahnTe
g) 3-TOUKOB npeJNa3eH KOJaC npe3paMkn
h) Noc3aOCBO6OxJaBaHeOT OCHOBaTa
i) BytoH 3a perynipaHe Ha BncounHata Ha o6JeIaKata 3a rnaBa
I) OTeJIeHHe 3a pbKOBoCDTO 3a ynoTpe6a
m) O6neranka 3a rnaBa, nokpura cbc wokoacopupa ana nHa (EPS)
n) Kopnyc, nokpnt cbc wokoabcopbupaa na npHa (EPS)
0)BBycTeHnHa Bb3rnaBnua
CToJUeTO 3a Kona e roTOBO 3a yNtpe6a: He ce n3nCKBa crNo6raHe.
Ihctpykun 3a ynoTpe6a c oCHOBaTa
1 Primo Viaggio SLK pa3noIara cbc cnCTemata Ganciomatic 3a cBbp3BaHe n OCBO6oxkDaBaHe B konata c/ot 6a3ata i-Size. 3a da npnKpeHne Primo Viaggio SLK KbM 6a3ata i-Size -IOdpABHeTe rC KOHEKTopHe n Ro HaTNCHeTe HANOly,doKaTO UpaKHe Ha MACTo (Φnr.a). YBepeTe ce, ye UepBeHo/3eNeHO INDnKAtOpHTe Ha Tbp6a Ha OCHOBATA Ca B 3eJIeHa No3uNra (Φnr.b).
2HaTnCHTe DbTa 6yToHa Ha dpBxKkTa,3aBbPTe Tn I03nIOHnpAte Cpeu cedJaKaTa Ha aBTOMObnla.
3 3a da ocbo6oDnTe Primo Viaggio SLK ot i-Size 6a3ata, nocTaBeTe dpBxKkata B no3uYra 3a HocHe u 3dbpnaIte noCTa Ha o6neralKaTaharope,doKaTo eHOBpeMeHHO NOBnIgAte CTOnUeTO.
4ДрьжкataHa cTOLJIeTO 3a KОЛа Има YeIeNpIn ΦИКСИпаHи no3nUu. 3a ДЯ DBIXKITE, HATINCHETe DbATA 6yToHa n
IpeMeCTeTe Do XeJIaHnB bTbN. YBepete Ce, Ye UpaKaBa B NO3UcNIA.
- N03nA: n03nTaB npeBO3HOTcpeCTBO;
I03nB:IO3n3a TpaHCnOpTnpAne Ha pbKa n 3a MOHTax BbpxOCHOBA, KOINuKa nn Wacn; - N03NUNC:TOBa e N03NUYATA 3a NOUINBka;
- N03nua D: cnnpa lioneeHTo Ha cTOnueTo 3a Kona.
Ihctpykun 3a ynoTpe6a 6e3 ochoba
5 BAXHO!CTonyeTo3aKoTaTpaObA da e
XOpH3OHTaJIHO.AKe e Heo6xOJIMO,INIOJOL3BaIte HABNTN KbpN ININ NpYBHN "MaKapOHN"3a 6aceHH NOI CTOnUeTO 3a KOJa, B TbHKIne Ha CeDAkKaTa Ha npeBO3HOTcpeCTBO. NocTaBeTe CTOnUeTO 3a KOJa C DeTTo CEJaIO BbTpHe, He 3a6paBraIte Da cNoKIne npEJa3HIne KOaHn Ha DetTo. HanbIHo CNyChete npBkkata Ha CTOnUeTO 3a KOJa (ToUKa 4 - No3uJIA).
6ПьзHTeДОЛHATAчAcHa ПпeДи3нЯКолан Ha aBTOMO6nBaBdBaTbODAu(yIe)Ha npbXKaTaHa CTOnUte 3a Kona(ФИr.a)иroЗakONuaTe(ФИr.b),KATO ce yBepnte,YeПeДи3HnATKOLAn e OINbHt,KakTo e NOKa3aHOHaФ尼ypata.
XBaHHe rOpHaTa YacT Ha npEJa3HnKoNaH Ha aBTOMObuna NTo npokapaiTe 3aD oBneraIkaTa Ha CTOnUeTO 3a KOna (Φn.r.c).
7 NocTabete KOJanaB 3aHnBaOaU (fur.a).3aterHeTe npedna3HNA KOJAH Ha npeBO3HOTcpeCTBO (fur.b). MoTtakbT Beue e 3abpweH.
8 3a da ocbo6oJte KonaHa, HataChTe UpeBHeHn 6yToH
Ha KaTapaMaTa Ha KOnaHa MExNy KpaKaTa (Φn.r. a) nCBaNETe KOnaHnTe. 3a Da 3axBaHETe KOnaHa, NOCTaBeTe DbTa e3NkA Ha KOnaHnTe B No3uŋr N rN NOCTaBeTe B KaTapaMaTa Ha KOnaHa 3a MExNy KpaKaTa, IDOKATO IIpaKaHt Ha MxCTOTO cN (Φn.r. b).
93a da pa3xna6te KOHa, BkapaTe npbct npe3 OTbopaB npeHaTa Yact Ha cedJaKaTAt(1), 3aJpKTe MeTaN H8 cyToH HATnCHaT N C pyrata pbKa n3DbpaN Te npe3pAMKnTe (2).
10 3a da 3aterheTe npe3pamKnTe,doKaTo npnneHAT NbTHO KbM TAnOTo Ha dTeTO, mIbPnaTte cHTpaHaTa neHTa 3a perylnpuAe KbM ce6e cn.
BHUMAHHE: He 3aTgraTe npekaneHo KOJahnte ne ce yBepTe, ye octabrTe MHHMaJIHa Xna6nHa.
11 BAXHO! Ppe3 3nMaTa He 3aKoNuaBaiTe DeTeTo B CTOnJIeTO 3a KOJa O6JIeHcO6eMnCTn, TeKKn Jpexn HHe NoCTaBAAte ODeJNA MExy TAnOTo Ha DeTeTo N KOJaHnTe. ToBa MoKe Da IOBeE Do HeIpaBnHo N03uONHnPaHe Ha npEdNa3eH KOaN CbC cepNo3Hn NocEnuIN B CnyAaHa C6NbCbK. IV3noJ3BaIe OJeAIO nnO O6bpH akceCoap Peg Perego, 3a da npedna3nTe DeTeTo cn OT BpeMeTo.
12 KonaHneu 3aunntata ot cpaHueh yapHa oBnerankata 3a rnaMoarat da ce perynpat eHOBpeMeHHo B6 pa3nHn BnCOOHn 3a IpocneIraBaHe pactexKa HaTeTeO 3a da perynpate BnCOHNATA, HATNCHEte 3aHnH 6yTOH 3a perynpae Ha BnCOHNATA (Ha Obnerankata Ha CTOnHTe 3a Kona) IN CbIoTO BpeMe NOBmHETe IIN CnyCHete 0bnErankata 3a rnaBa Do Heo6xOIMMa TnoNzir, KaTo Ce
yBepnte,ue 1paKaBa Ha MCTo. Pa3xla6te Ipe3pAMKNTe, npdi da perynipate BnCOuHaTa IM N Ta3n Ha oBneralkata 3a rnaBa.
13 O6neralkata 3a rnaBa moKe da 6bde HactpoeHa B 6 pa3nUH N03nU.
14 PpeNa3HnT KOHa HnPaBnHaTa BnCOunHa, KOraTo nPoCenIe B O6nerAankaTa Ca Ha BnCOunHaTa Ha pAmHeTe Nm MaKo NoD (3eNeHa 30Ha), KaTO e NOKa3aHO Ha fHypata.YBepete Ce, Ye KOaHnTe He ca B YepBeHaTa 30Ha.
15 ToBa cToUHe 3a Kona pa3nOnarac ,DuaStage Cushion, CNTema cbCTaBeH OT 2 OTdENH Bb3rnaBnIu Iopn 3a Hau-Manknte 6e6eta.
a:peykTopHa 06neraKata 3a rnaBa
b: Bb3rnaBnua - peyKTop Ha cdaIkaTa
He n3non3BaIte DBycteneHHaTbB3rnaBnua c eua h61 cm BncouHa u 9 Kr Terno.
16 CneuHaHaTa foopMa Ha Kopnyca e npedHa3HaueHa da IIOe BaWTo DeTe. 3a Da IIOeTe DeTeTo Nko, NOCTaBeTe DpbKkata B No3nui 3a HocHe, KaKTo e NOKa3aHO (fHr.a).
3a da npedotbpatnte TpenteH n da cnpete IIOeHeTo, 3akIIOUeTe dpjkata 3aD o6JIerAnkata (fur.b).
17 CeHHKbT ocunpypBa Ha BaWeto Detc cHn u yO. BAXHO: CehNKbT He Tpr6Ba Da ce n3NoJ3Ba 3a NOBdIraHe CTOnyTeo 3a KOJa, 3aIoTO MoKe da ce OTKaU.
18 3a da cBaInte ceHHnka,OCBO6oTe eIacTHHNTe IeHTN 3aI npJbXkata (1),noBUNHeTe ro nroocBO6oTe Harope (2).
19 CeJaIkata e cHa6eHa c KInHeTuHn TaII, 3a da ce ocIpyu nOBeue 6e3oNaChOcT B CnyaH Na CTpaHnueH ydap.
OTbOpTe HANbJIHO KINHTNCHNTe TaII, KaTO rN 3aBbPTnTE NO NOCOKA Ha YacOBHnKOBaTa CTrpeIka (fng.a).
3a da BbPHeTe TaNaTa B nbpBOHaayHa No3nUy, a 3abbpTeTe 6paTHo Ha yacOBHnKOBaTa CpteJa (fur.b).
20 BHIMAHHE: PA3BBAITE CAMO KINHETNUHATA TANA KbM BPATA HA ABTOMOBNJIA.
BAXKHO:YBepete ce,ue KINHeTuHaTa Tana
pa3nONoXeHa Ha CtpaHaTa, O6bPHaTa KbM BtpeWHOCTTHa ABTOMO6HnKOra He e n3BaTeHa!
PpeMaxBaHe Ha MeKUTe Bb3rJaBHNuKN
21 3a da npemaxheTe "IbOHHaTbB3rnaBnua": pa3KoHauite DBeTe KOnueTa (fur.a), 3akpenBaun peDyKTopa Ha o6neraKaTa 3a rnaBa KbM DObnHHTeJIHaTbB3rNaBnua n Hn3bpnaTe.
22 Pa3KoIyAte KOnaHa n CbAte Ipe3paMKnte. 3BaTe DOnbHnHTenHaTa Bb3rnaBnua Ha ceJaKaTa, KaTo H3XnY3nte OT DoHNn KOna (TO3n 3a MeJxky Kpaetata).
23 Ot 3aHaTa YacT Ha cTOnueTo 3a Kona n3dbpnaTe KOaHnTe HAbbN, ppe3 npedHata YacT.
24 Ocb6oTe cheTnpTe enactuHn IeHTOn OT oBvBkata OT nOd npKkata (fir.a), n3dbpnaTe KonaHa 3a MeJy Kpaeta (fir.b) nCBanTe qAnTo NOKpBaNo.
25Пьзн electe obneralkaTа 3a rnaBa nbpBO OT dOnHata CTpaHa n cIeT TOBa BHIMATEHNO ppe3 DBeTe CTPaH; BHIMABAITE DA HE CUYNTTE NOJNCTNUPEHOBITE (EPS) YACTN.
OTcTaHeTe MeKInTe Yactn NocJeIOBaTeJHo, KaKTo e nokaHO Ha fNrypata.
IopdpbXkHa TaunuepnTa
N3ueTKBaIe Tnata Otn npax.
Korato nepete, cneBaTe CTpNKTHO INHCTpyKUInTE pa3nONoXeHN BbPxy ETUKeTa Ha TaNluePnTt.
He n3no3BaIte 6eHHa / npenapatn c xlop.
He rnaeTe.
He n3noI3BaIte XIMnuecko uIcTeHe.
He oTcpaHbAaTe nTeHa c pa3TbOpnteI.
He cywete BCywnHaMaunHa.
Noctabraye Ha tanuepnraTa
I3nblheTe onepaunnte, noka3aHn Ha fynpyn 21 do 25 B o6paTeH pei.
OprrnHaJIHn akcecoapn Peg PeregO
AkecoapTe Peg Perego ca n3pa6oTeHn Taka, ye da
yIeCHrT KINBota Ha pOuNTeNTe.
Ötkpınfte BCnuk Tâx Ha: www.pegperegco.com
CepinHn Homepa
26 Pd ctpaHnHaT aac T ha cToJeTO 3a Kona ue
HamepuTe eTuKET CbC CJIeHaTa INHOpMaun: Ime Ha npOdykTA, DaTHa NpOUN3BODCTBO IN cepueH Homep.
27 IataHa npOn3BOcTBo e n3nncHa Bbpxy KonaHHTe. Taunnphiopmaunue Bn 6bpe none3Ha B cnyaHa npo6IeMn C npOdykta.
NouchTaHe Ha npOdyKTo
To3n npOyKt 3NCKBa MNHmMaHa NoDpBxKa.
NouchTaHeto NnoDpBxKaTatPra6Ba Da ce N3BbPwBaT
cAmO OT B3paCTHn.
- Na3eTe uHCTN BCNUK NINKceu Ce actn.
-ПочntВаиTe nepnoДИЧО ПпаCTмСОВИte чТС CBнжHa Kьрna. He n3пОЛЗВaIte pa3TBOPHTeIN nIn NOdo6Hn BeIeCTBa.
- N3yETKBAIte TaIIuepnraTo npax.
He nouchBaHte cTeepnoOpEnHe TaCTu (ydaPonOrnBuaOTo yCtpoNcTBO) C pa3TBOpHTeIN nn DpyrN IOdo6HN IPOdykTN.
- Na3eTe npOykTa OT aTMocΦepHbBnHnBnAaKHOCT, DbXd Nn CHr. PpOdbNkHTeHOTo n3naRaHe Ha CbHueBa CBETnHa MoKe Da pPnHn IpOMeHn B UBeTa Ha MHOro MaTePnAn.
CbxpaHbAaIte npOdyKaB cyxa cpea.
Peg Peregso.S.p.A.
Peg Perego S.p.A. npiema cnctema 3a ynpabneHne Ha KaueCTBOTO cepTnphiunpapa O TUV Italia Srl CbOTBeTCTBNE cBC CTaNapdT ISO 9001.Peg Perego MoKe Da HApabN IpomEn N IO BCAKO BpeMe Ha MOneJInte
ONCAHN B Ta3N Np6JIkaZn 3a TexHnueckn nnn TbpROBcN cJIIn.
CneepoJaX6eHo 06cnyXbaHe Ha Peg Perego
B cnuyan, che n3rybnuu nn nobpeunn HAKO yact, Ta Tp8oBa da ce 3aMeHcamao C opnHauHa TaKaBa, npounBeHea ot Peg Perego. 3a BcKaKbPemOHn, 3aMeHN, INOpMaqua 3a npOyKTne u npOdaXbnte Ha opnHauHn pe3epBn Yactn u akcecoapu, MoKeTe da ce CBpJxTe C o6cnjXbaUata Cnyk6ha Ha npMaTa n Da NocOHTe cepHnHn Homep Ha npOdyKt u daTAt Ha npON3BOODCTBO.
Ten.0039/039/60.88.213
Email: customer.service@pegperegco.com
Ye6caIr: www.pegperegco.com
Bcnu npaba Ha nHTeNeKtyaHa Co6CTBeHoc Bbpxy CbIbPkaHHeTo HA TOBa pbKOBOdCTBOTO Ca CO6CTBEHOCT Ha Peg Perego S.p.A. n ca 3aunTeHn OT deNCTBaunTe 3aKOHn.
The Original Accessory Peg Perego
The Original Accessory Peg Perego
The Original Accessory Peg Perego
The Original Accessory Peg Perego
I P E D U N P E X K D E H N E
BHNMaTeNBO npOHTne HnCTpyKuIN nepei EKCnnyataune, IN xpaHIne IN B CneuaNbHO OTBeHem MeCe DnI IN NOcNeDyIOUero nCNoIb3OBaHn. HetcaTeNbHoe CO6IOJeHne NHCTpyKuIN NO yCTaHOBKe ABTOMObHoro
KpeCJa MoKeT CtaTb PnUHoi ONaCHOCTn dIa BaWero pe6eHka.
Onepaunno c6opke n yctahOBKe u3dennn DONXHbI BblONHrTb TOJbKO B3pOcNble.
Bcerda nCnOJb3yIte aBTOKpeCNo npn nepeBO3Ke pe6eHka B aBTOMo6NHe.3aIpeaetcB bIHMaTb pe6eHka N3 aBTOKpeCna B DBNXjUeMcA aBTOMo6NHe.
HnB Koem Cnyae He octabnIte pe6eHka ODHORo 6e3 HAd3opa B MaunHe, daKe Ha KOPOTKoe Bpem. TempepaTpa BHyTpMaunHbI MOKet 6bICTPO MeHaTbCn I CTb ONaCHOI JIpe6eHKA B ABTOmO6Inne.COMHeHH O6paTnTeCb K npON3BOUNTENIO INI pOdaBuY 3TORO ABTOkpeCna.
YCTaHaBnBaIte aBTOKpeCNO B HApPaBHeHIN, IPOTINBOJONOXHOM OObHOMy HApPaBHeHIO DBHXeHNABTOMOHNIA.
- YctaHaBnBaIte aBtOKpeCNO TOnbKO Ha CnDEHbA, paCIOJIOKeHHbIe IIO HApBaJIeHHIO DBMKeHHN. Ecnn B ATOmO6nCe IMeIOCT NOBOPOTHbIe ININ nepeyCTaHaBnBaEMbIe CnDEHbA, yCTaHOBITe INI O HAtpBaIIeHHIO DBMKeHHN.
He yctahabnBaHTe 3TO ABTKpeCNO Ha naccaxnpckne CnDeHbco BKNIOUeHHbIMN NOyUkAMN 6e3ONaCHOCTN. BbKIOuayte NOyUkYb63ONaCHOCTN, npexJe YcTaHOBNTb ABTKpeCNO. IcNoJIb3OBaHIne 3TOro ABTOKpeCna HA CnDEhBX Co BKNIOUeHHbIMN NOyUkAMN 6e3ONaCHOCTN MOKeT CTaTB pINuHON cepBe3HbIX TpaBM INI CMEPTN B CNYue ABAPIN.
Y6eIntecb,TO DeTCKoe ABToKpeCNO He 6noknyepcTcB DnBxkyuIMCRACTaMn CnDEHbNIN DBepbIO.
- Ckpynye3Ho co6nloaTe nHCTpyKcnn no yctahOBke;
He npIMeHnIte DpyTne MeTOBblYCTaHOBKn, NOMMPOkOMeHnOBAHHbIX, NOCKoJIbKy 3TO MOKeT pINBeCTN KOTCOeHNHeHNO ABTOKpeCna.
- Pn3KcNpyataaun daHHoro aBtOKpeCna Bcerda nCNoIb3yIte pemHn 6e3onacHOCTn.
Otperynpyte BbICOTy HataKHeHne pemHe, yebINBUBNCB TOM,TO OHn npuIerAOT K TeNy pe6eHka, HO He CNIWKOM Tyo. POBepbTe, He NepeKpyeH nn pemeHb 6e3OpaCHOCTH CuJeHbY, N He CMOKeT nn pe6eHOK eO rCTeRHyTB.
Bo n36eKaHHe onaHcOCTn naDeHnB Bcerda npicTeRbAtepeMeHb 6e3oNaCHocTn aBTOMo6NJIbHOrKpeCna daKe IJnI nepeBO3KN BHe aBTOMo6NJIA. - ABTomOmbnHbOe KpeCNo He 3aMeHReT KpoBaTky,ecn pe6eHKy HAdo NocNaTb,TO OueHb BaXHO YNOXHTb eRO.
He nCnONb3yIte DeTcKoe ABTOKpeCNO B TAKNX CNYaX OHO CNOMaHO,OTCYTCBlyIOT KOMIOHEHTbl,N3dENIE NOBBePraNOCb 3HaHTeNBbIM yDapHBm HArpy3KaM B pe3yIbTaTe aBAPIN, NOCKoJIbKy 3TO MOKeT pINBcTNI K NOBPeKdEHINO eRO CTpyKTypbl - HeBUNIMOMY, HO Upe3BbUaHNO ONAChOMY.
He nCnoB3yIte abTOMo6nHbHoe KpeCNo 6e3 TKAHO NOBKN. O6NBky HeB3aMEnrTa Dpyro, He YTBepKDeHHO N3rTOBtTeMe KpeCna, TaK KaO hAraBnTeTcH HeOTbeMJeMo YAcTbKOpeCna N 06ecneuBAETeroBe3oNaCHOCTb.
He ydaIte H MeHnTe 6eBle noNCTnpONoBle Yactn NOc CnDEHbEM, B CNNHKe NIN 3aunTHbIX 6OKOBnHax, NCKoJIbKy OHn BaXhbl Dn oBeCneHnR 6e3OnaCHOCTn.
He octabnre abtOMObHbHOe KpeCIO B aBtOMo6nne NOI CONHcEM, TAK KAHEKOTOpBE DeTANMORYT neperpeTbca NOBpeNTb HekHyIODeTCKyIO KOxy. IpoBepTe TemnepaTy KpeCna Do TOR, KaK Bbl NOMeCTNE B Hero peBcHka.
He BHOCHTe 3MeHEnB N3dJIne.
He oToeHnHaTne nnKne n npuunTbte 3TuKeTKn.Vx OTCyTCTBnE MOKeT Bb3BaTb HecOoTBETCTBne N3dJIINr Tpe6oBaHnM CTaHdapTa.
ДЯ ВИПОПЕНИ ремонта,Замны DeТалей И NOЛУЧЕНИСпраБОКOBиЗДENINВblMOжTe OБразацьсвс Bс顺序бpoлнродakHORO 6ClyKNBAHAN.Ее peKBN3NTbnpuBedeHbHa nocneDHe CTpaHnue 3TOROPykoBOOCTBa.
He nCnoIb3yIte npHnAdIeXHOCTn, He oOoBpeHHbIe I3rTOOBtTeJEM NIM KOMNTEeHTbIMBlaCTaMNI.
Bcnyae npno6peHnna n3dennnc pyk yIOCTOBepbTecb,HTO 3TO HeDaBH BbIpyeHHa moJIb, npOaEtCn HNCTpyKUIMMn, N BCE ee KOMHOENTbl NOHOCtBFOyHKUOHaNbHbI. YCTapeBwee n3dne MoKeT He COOTBeTCTBOBaTb CTaHdpTaM 6e3oNaCHOCTn 13-3a CTapeHn MaTePnAIOB n 06HOBHeHn HopMaTINBbIX Tpe6oAHn. Pn HAnuHm COMHeHn OpaTNTecb B UcHTp KIneHTCKORO 06cnyKBaHN pOn3BOJNTeHn n3dennr.
Y6eNTecb,TOBcAIOHeABTOMO6NIAOTCYCTBYET 6araKnnHesakpeHHIeIpeMTebl.CJyue aBapNN OHMOrYT HaHeCTn TpaBMbl naccknpam IN BOINTEIO.
3TOI3JENHe HxKdaeTcR TOJIbKO B MINHIMaJIbHOM yXOe I OUNCtKe.3TN pOueDpybI DOJXHbI OCyUeCTBnAITb B3pocnble.
- Pekomehnyetcna copepkataB BCE DnKyueceCn B YNCTOTE.
- Pernoiueckn Ounuai Te nactkoobie actn BnaXHOI TkaHb. He nCnoB3yTe paTbOpnte nn noo6hble BeuectBa.
He nCTnTE NOINCTnPOJIOBOe ydaponorIooaIOoee ycTPOCTBO pACTBOpITeJIaMNI INN dpYrIMN IOnO6HbIMN npOdyKTAMN.
-ПОИСТИЕТКАНББЕДЕТАЛ ПЕТКО,ЧTOББУДАЛТБпьИ.ПиСТIPKEТКАНББIXDETAJIENCOБЛЮДАITEHHTPyKUINNOCTIPKEHa3TNIKETKE.
3auiiuaIte H3dennoe OT Bo3deIcTBnA tMoccepeHbIX OCAIKOB:BlaXHOCTN,DOXnIN CNERA.ⅡNTeJIbHOe BO3DeIcTBnE CONHeuHbIX Lyuee MoKET pNBecT N K I3MeHENIO CBeta MHOrNX MaTePnaIOB.
XpaHnTe IN3dennE B CyxOM MeCTe.
I PENEYNPEXKDEHNE: INCIOJIb3OBAHNE KPECNA B KAUCHETBE OTKNIDHOJIOJIbKN.
He noIb3yIeTc6 OTKnIHOJ IIOJIbKOJ, KOrJa BaIpe6eHOK yKe moKET cUdTeB 6e3 nocToPOHHeI NOMOUsI.
-Даннэ OTknнэлOBka He npedHa3HaueHaДЯ CHa B TeueHne npoOJXnTeNbHbIX nepNoODB BpeMeHn.
- OnacHO nCNoJb3OBAbT 3Ty OTKnHHyIO JIObnKy Ha BO3BblWeHHo NOBepXHOCTn, HAnpIMep, Ha CTOJe.
KomnoHeHtbln3denn
PaccmOTpnte copeKMMoe ynaKOBKN n npn OTCyTCTBNN KaNX-Ⅱ60 KOMNOHENTOB 6paTNTecb B cepBnCHyO cnJx6y.
B KOMNNEKT DetCKORO aBTOKpeCna BXOJrT:
a) Kaniooh
b)Pyuka
c) KInHeTnueeckne npedeoxpaHntbHbIe uNTkn: 6OKOBa3aunTa
d) Podronobnik
e) KhoNka BbCBO6OxJdHnpeMHe 6e3OnaCHOCTn
f) Pemeok perynipOBKn HaTKeHnpeMHei 6e3onacHOCTn
g) 3-ToueyHbIe pemHn 6e3OnaCHOCTN C PneueBbIMN JAMKaMn
h) Pyuag dny OTOeHHeHnO T6a3b
i) KhoNka pereynipOBKn BbICotbl NOIroNoBnKa
I) Otcek dny pykoBocCTBa nonb30BaTeNa
m) IopdronOBnK c nokpbTneM uDapponorloaioeero neHONONCTnpoA (EPS)
n) Kopnyc c noKpbTneM n3 ydaponornoaioeero neHONOINCTIPONA (EPS)
o) Dual Stage Cushion AToKpeCnO roTOBO K nCnoJIb3OBaHnIO: c6OpKa He Tpe6yETc.
HCTpyKcnnn no nCnoNb30BaHnIO C 6a30n
1 AbtoKpeCIO Primo Viaggio SLK ochaueHO CnCTeMoI Ganciomatic System dIy KpenneHn I ChTnB abTomO6nne c 6a3oN Base i-Size.
JINKpEJIeHnABTOKpeCna PrimoViaggio SLK Ha 6a3eBase i-Size coBMeCTnte erO c KpEJIeHnMn HnKaMMTE BnH3, NOKA ABTOKpeCNO HE BCTaHET Ha MeCTO COIeNkOM (PNC.a).Y6eNITecb, YTO KpaCHbIE/3eNeHbIE INdIKaTOpblB 3aHHe Nactn 6a3bI HaxoJrTcB 3eNEHOM nIOJOKeHn (PNC.b).
2 Haxmte DBe KhONKn Ha pyuKe n NOBepHnTe ee TaK, yTO6bl ynpetb B CnDEHe bA BtOMo6nJI.
3 TTo6bI OToCoeINHnTb ABToKpeCNo PrimoViaggio SLK OT 6a3bI Base i-Size, nobepHnTe pyky B noJooKeHne IJI nepeHocKn HaxMnTe pbUar Ha cNnKHe BBepx, OJHOBpeMeHHo NOnbIMaABTOKpeCNo.
4 Pyka abtokpea Imeet yeTbipe fncnpoBaHbIX nOxHeH.NyTo6bl nobepHyt b ee, HaxMnte DBe KHOKN Ha pyuke N yctAHOBITE ee noH HyKhbIM yrIOM. Y6eDNTecb, 7TO OHa 3aueKnHyNaCb B HyKHom NOIOKeHN.
- NonoXeHne A: NonoXeHne B aBtOMaUNHe.
IIOJXeHnE B:IOJIoxKeHnE IIN pyuHOI TpaHCnOpTnPbOKn IN dN yCTaHOBKn HA OCHOBaHN, HKAOLACKE NNN HA WACCN.
- IonoXeHne C: 3TO nONoXeHne onOpbl.
- NonoXeHne D: npenTCTByet KaaHnIO aBtOKpecna.
HCTpykuni no mCNoIb3OBAHnIO 6e3 6a3bl
5 BAXHO! ABTOKpeCNO CJeNyET yCTaHaBnBaTb npaJIeIbHO 3emIe, Pn HEOxOIMOCn NIOXHTe BYrOI CIIeHbA BTOMOBJN IIO ATOKpeCIO CBepHytBe NOnOTehua IIIN HyIbI DnI NaBaHnB B baccneHe.
YCTaHaBnBaA ABTOKpeCNo C CnJaUIM B HEm pe6eHcOM, He 3a6yDBe The 3aKpeNtB pe6eHka pemHrMa. NOnHOctbIO
Onyctnte pyky aBtOKpeCna (Touka 4 - noJoxKeHne A).
6 PpOyCTnTe HNKeHIO YacTb peMnBe3oNaCHOCTn ABTOMOBUNB DBe HApPABNIOUHe Ha pyKe ABTOKpeCna (pnc. a) n 3acteHnTe erO (pnc. b), y6EINBUnCb B TOM, UTo OH HAtaHyT, KaK NOKa3aHO Ha pncyHke.
Bo3bMnTe BepxHIOU qactb pemH 6e3oNaCHOCTn abTOMO6nI IN pONyCTNTe ero 3a CINHKo ABTOKpeCna(pnc.c).
7 BCTaBbTe peMeHb 3aJHIO HnPaBnIouyIO (pnc. a). 3aTHeTe peMeHb 6e3OnacHOCTn ABTOMOuINa(pnc. b). Tenepb abToKpeCNO yCTaHOBNeHO n 3aKpenneHo.
8IpaCCTeRnBaHnpeMHeHaXmnteHaKpaChyIO KHONKy Ha npJkke JAMKn, npoxoJaeM MeKdy HOrAMN, (pnc.a) n3BJeKeNTpe pEmHn.
TTo6bl 3aCTeHyTBpeMHN,yCTaHOBnTe a3bIyKn DByX nNeueBbIX pemHeB H yKHOe NOnOKeHne N BCTaBBTe INx Bnpkky JAMKN, pOxOJaueM MeKdy HOrAmN, DO 3aUeKnBaHnHa MeCTe (pnc. b).
9 TTo6blOcnaBntb pemHn, BCTaBbTe naneu B OTBepctne cnHehba (1), yIepXNBaH HaxaTO mTaJIINueckyIO KNHkY, a DpyrO pyKoI IOTAHHTe pemHn (2).
10 TTo6bHaTaNHyTb peMHn IINIOTHO npInerAHN KTeNype6eHka,NOTAHNTe CEHTpaNBbI pyuNPoBOUHbI peMeHb Ha ce68.
BHUMAHNE! He 3aTaryBaiTe peMHn CnHkoM cnIbHo, 6b3aTeNbHO OCTaBbTe He6oNbwoe cBO6OdHoe npocTpahCTBO.
11 BAXHO! 3nMO He cneIyET npucTeRnBaTbB abTOkpeCne pe6eHka BO6beMHoT TaKeNo OeXJe NN NOMEuTaB OeJNO MekNy TeNOM pe6eHka n
pemHm.3TO MOxET CTaTb npuHnOH He npabNIBHO NOLOXeHH pEMHe 6eONacHOCTn n cepbe3HbIX NocJeCTBn B Cnyae aBapnn.
IcnoIb3yIte OeJnO nn Oo6peHHyO Peg Perego npHaIaNExKHOCTb Ia 3aunTb peBekKa OT HeNoOrDbl.
12 Pemn n noIroBnK c 3aunToT on 6okoboro ydapa MoJHO peryNPOBaTb NO Bicote B 6 pa3nnHbIX NoIOXeHNx B COOTBeCTBNN C POCTOM pe6eHka. IaerpeynpoBAH NO Bicote HAKMITE Ha 3aHIO KNONky peYNIPOBKN BICOTb (Ha CnHKe ABTOKpeCna), ODHOBPemeHH NOHNMAIN ONYCKA PEMH N NOIROBHN B HxKHO E NOJOxEHe, INyEeNTecb, YTO OH 3aIKcNPOBANCb co UeNkOM. IpexJe cHpe peryNPOBaT bBCOTy PemHe n NOIROBnKa, OcnaObTe PneueBbIe PEMHn.
13IIOJIOOBHMKMOXHO yCTaHOBnTB B6pa3NnHbIX NOJOXKeHNI.
14 Pemn630nacHocn paCNOJXeHbHa npaBnIbHO BbICote,ecIN OTBepCTNa CnIHKe,B KOTOpBte BXOJr peMHn,pACNOJXeHbHa yPOBHe nIeU pe6eHka nn HEMHO Hxke (3eJeHaa 30Ha),KaK nOKa3aHo Ha pncyHke.
YIOCTOBepebTeCb, YTO pemHn He HaxoJrTcB KpaCHOn 3OHe.
15 ΘTo aBToKpeCNo OcHauSeHo cocToauei n3 2 OTdJIbHbIX noDyweK cnCTeMoI Dual Stage Cushion, KOTopar DeNaeT erO npuRoHbIM daXe dIra cambIX KPOUeHbIX MaJIbIweI.
a:ymeHbWnteNb NOIROBHNKa b:noyuka-ymeHbWnteNb Ia CNHeH He nCnObl3yIne CnCTemy Dual Stage Cushion dJeTein poCTOM Bblwe 61 cm u Becom 60onee 9 Kr.
16 CneuaHbHa foPma Kopnyca nOmoKet y6aHOKaTb BaUero pe6eHka.ДЯ HeXHO rYkauBaHnI nepeBcIte pyKy B noJoxHe nPeHocKn, KaK nOKa3aHo (pnc.a).
YTO6bI N36EkaTb HAKIOHOB ABTOKpeCna n OCTaHOBnTB IOKaUNBaHne, 3aФNKcnpyTe pyky 3a CnIHKOJ ABTOKpeCna (pnc. b).
17 KaioohoCo3daeTeHbN yIOT mAbha. BAXHO! 3anpeaaetcNoHNMaTb aBTOKpeCNO 3a Kaiooh, TAK KAK OH MOXET OTCOeHNHTbcr.
18 TTo6bI CHaTb KaHIOOH,OTCTeHHTe pe3nHKn 3a pyuKoI (1),noHNUMITE KaHIOOH IN CHMUTe erO,NOTAHyB BBepx (2).
19 ABToKpeCNo 60bOaHO KHeTneCKIMnpdoXpAHnTeBbIMn UNTkAmn Kinetic Pods nObeCneueHn6oJIbWee 6e3OnaCHOCTn np6OKOBOM CTOKHOBEHn. POJHOCTbHO tKpoTe Kinetic Pod, noBepHyB erOacOBoN CTpenke (Pnc.a).
YTo6bI BepHyTb ⅢrTok Kinetic Pod B nCxOJHoe NOIOXKeHne, NOBepHnTe pyuKy npOTnB YacOBOn CTpeKN (pnc. b).
20 BHIMAHHE! OTKpbBaTe TOJIbKO Kinetic Pod, paCNOIOXeHHbI CO CTOpOBHb IDBepn ABTomO6nI.BAXHO! CneIte 3a TEM, yTO6bl NtOK Kinetic Pod co CTOpOBhCaHOHa aBTOMo6nIbBcERda 3aIBNHyT B KOpnyc KpeCna.
CHATNE MARGKON O6NBKN
21ДЯСНТЯСNTeMbI Dual Stage Cushion BbINOJIHnTe TaKHe DeNCTBnR:OTcTeHnTe DBe KHOJKN (pnc.a),
KpeneuyeMehbWnteIbIOIROBnKa KIOyKe- yMeHbWNTeNIO DnCnChb, N BtTnHTe Ce.
22 PacTeHnTe pemHn 6e3oNaChocTn n CHmnte IneueBHe NaJIAKn. CImnte NodyuKy-ymeHbWnteIb dnaCnDeHb,CTaHyB ee c naXOBOro pemHra.
23 BbITAHHTe peMHn 6e30nacHocTN, nOTaHyB INX C 3aHHe CTOPOHbI ABTOKpeCna.
24 OtCTeHnTe YeTbpe pe3nHKn OBnBKn nOa pyKo (pnc. a), BbTiHnTe pemeHb, npoxoJauu Mekdy Hor (pnc.b), n CHIMITE OOBKY NOnHOCTbIO.
25 CHIMITE OMBKY NOIROBHNKA CHaHaNA CH3y, a 3aTeM aKkypaTHO C DByx CTOpOH. COBJIOAINTE OCTOPOXHOCTb, YTO6bl HE IOBPEINb DETALN N3 NOLNCTUPOJA (EPS).
IocJIeIOBaTeJIbHO CHIMnTe MrgKyIO O6NkY, KaK NOKa3aHO Ha pncyHke.
Yxo3a nodklaKoK:
OuHuaNTeTKaHeBbIe BCTaBKnOTnblIN
PnCTnPKeTOUHO CNEyIteMHCTpyKuINMaHa3TNKeTKe, BwHTOnBueXoN 3dEJIa.
HeOTBeINBaIeBxIopKe;
- He rnaDbTe yTIOrOM;
HeYNCNTTE CyXIM CNOOCOM BXMUMCCTKE; HeNCNOLb3yUte paCTBOpNTeIb IJI BbIEDeHINI PATEH;
He cyuHTe B cyuINKe Iya 6eIbC BpaauoUMc8 6apa6aHOM.
HaedeBaHHe 06uBKn Ha aBtOKpeCNo
BbIIOJIHnTe DeIcTBn, NOKa3aHHbIe Ha pncyHKax C 21 no 25 B o6paTHOM nopJKe.
The Original Accessory Peg Perego
PpHnAdneKHOCTn Peg Perego pa3pa6oTaHb KaK
NonE3HbIe n PpAKTNHyBle cpeDCTBa dNla O6nerHeHHa
JN3HN PoAnTeJIeN. O3HaKOMbTEcB co BcEMn
PpHnAdneKHOCTMn K BaUeMy I3dEInIO Ha Be6-caTte
www.pegperego.com.
CepnHbIe Homepa
26 Ha HnKHe NOBepxHOCTn ABTOKpeCna pacnoIooKeHa cepTINKAAUOHHa TabNtUka N eue OHa HaKnEeKa,Ha KOTOpOy Ka3aHa CNeDyIOoAra INHOpMaun: Ha3BaHne N3DeJIIn, DaTa IpnON3BOdCTBa N cepNIHbI HOMep.
27 Data npoun3BODCTBa yka3aHa Ha pemHAX. B cnuyae BO3HNKHOBeHn npo6IeM c n3dennem 3TN CbeHn MOry T noHaO6ntbca NOKyNaTeJAM.
UncTka n3dennr
Baue n3dene HxkdaetcB HeCIOXHOM yxoJe. Oepaunu NCTKN IyOda DOnKbI BbINONHrTb TOnbKO B3pocJIble.
- Pekomehnyetcra copepkaTb B uHCTOTE BCE DnBxuyueceyactn.
- PepnoDnueckOn OUnuAte NnactMaCCOBbie DeTaNN BJIaXHON TpRANKO, He NOJIb3yIITcB paCTBOpNTeJIMN CXODHBIMN BEECETBAMN.
- PoiuCTnTe UeTKoN TkAhnBie HaCTN, YTObbl ydaJIITb nbInb.
He ynCTnte ydaponornoaiooee ycTPONCBO n3 noNCTnpOJa pAcTBOpnteJIIM NIN CXODHbIMC HMMBeeCTBaMn.
3aunntte n3dene oT aTMocepHbIX OcAkoB -BObl,
CHERA NIO DOXKIAI NOCTOHHA H IN PPOJOJIKNTEJIbHAA NODBEPXHEHOCTb COINHeYHbIM JyUAM MOXeT Bbi3BaTb UCBETOBBIE N3MEHENH MHOHN MaTePnAnOB.
XpaHnTe N3dennE B CyxOM MeCTe.
Peg Perego S.p.A.
B KOMnHaHn Peg Perego S.p.A. BHepeHa CnCTema ynpabHeHa KauecTBom, ceptnuPpObaHHa TUV Italia Srl no cTahdApTy ISO 9001. KomnHaHn Peg Perego Imeet npBa BOHCOCITb B IIOoB MOMeHT N3MeHeHn B MoDeHn ONiCaHhBe H NaCToIeM IN3DaHn, NO npNCHAM TexHnueckoro nn KOMmepueckoro xapaKTepa
Cnyx6a o6cnykBaHnpeg Perego
B cnyuae ytepn nnpn akceccyapOB, npmehnTe TOnbKO fmpMeHHbe 3aNaChBe qactn npm3BOdCTBa kOmnaHn Peg Perego. DnBnBoJHeHHpeMoHTa, 3aMeHb 3aNaChbX qacteN nNoLyEHHnHOpMauno6 ycTpojCTBe o6paauTecb B cnYkby nocennpdaXHoro 06CnxyBaHn Peg Perego, coo6uBn, np ero HAnuHN, cepinHbH Homep npOdyKTA:
Cpok cnyX6bl: 3 roda.
TapaHTnHbI cpoK:12 MecaeB
TeJ.: 0039/039/60.88.213
e-mail customer.service@pegerego.com caNT B INHTepHeTe: www.pegerego.com
CoOTBeTCTBye Tpe6ObaHnM TexHnueCKOro perIaMeHaT a TP TC 007/2011
N3ROTOBtJIb: Peg Perego S.p.A. (Iner Npeero
C.II.A.); Aqpec: Via de Gasperi 50 - 20862 ARCORE
(MB), Italy (Bua de Facnepi 50 - 20862 Apkope
(M6), Utaa).
CtpaHa npOn3BODCTBa:ITaJIa.
EAC
| TR_Türkçe | |||
| R129 | UNIVERSAL | BELTED | 40-87 cm |
| Primo Viaggio SLK | "Primo Viaggio SLK" arabaiciencies koltuğu üç ayinoktada emniyet kemeri ile araca®, | nektada emniyet kemeri ile araca®, | |
| R129 | i-SIZE UNIVERSAL | ISOFIX | 40-87 cm |
| Primo Viaggio SLK+Base i-Size | Isofix®,systemi "Base i-Size" zeminii, Araçkoltu®,koltu®,un, oturma ve sirt kism!,arasindabulunan Isofix®,koltılarina sabitlenir. "Primo Viaggio SLK" arabaiciencies koltu®,zeminekancalanir.Araça montaj talimatlari,...in "Base i-Size"kullanım bilavuzunu inceleyiniz. | ||
The Original Accessory Peg Perego
The Original Accessory Peg Perego
The Original Accessory Peg Perego
He HAnTo TnChyTb. IpepeBipTe, Hn He nepekpyeHo pEmehi 6e3neKni, i Hn He 3MOxKe DNTHa cAmOCTiHOp03CTe6HyTuix.
ДлгзллбогннрИЗКупдIHнЗыВИКОПСТОВУТЕ рсIMиБ63NeKn ABTOKpICna npINpeHeCEHHI B HbOMYДNTUHIN NO3a ABTOMOBJEM.
- ABtOKpicNo He 3amHIOe CO6OIO nIKKO. RaKIO dNTnHi Tpe6a nocnatn, II Heo6xIDHO NOKnactn.
He BnKopncToBynte nntyae ABtOkpicno y taKnx BnnaKaX:BOHO 3nAmaHe a6o BiCyTHi YaCTHn YI KIO KpICNo 3a3HaBaNo 3NaHyx UdApHx HabaHTaKeHb B pe3yNbTaTI DOpoxHbO npriOOn, OckInbKn Ie MOrN0 npn3BecTn Do NOrO CTpyKtpHx NOsKOJKeHb - HeBNIMNX, AIE HaD3BuayHo He6e3NeuHX.
He BnKOpNCToBnyTe aBTOkPicNo 6e3 TkaHnHoi O6bNKn. LIO O6bNBy 3a6oPoHEo 3amHIn IHoIO, He CXBaJeHO BnPObHnKOM, OCKInbKN BOHa E HeBID'EMHO YoACTHNO aBTOkPicNa Ta Ioro CnCTemN 6e3neKn.
He BnDnAne i He MInyTe 6ini nonicnponoi yactHni nID cnDHHM, y CnHci ni ndroinHKy, Ockibko BOHn BaxnBi dna 3a6e3neueHH 6e3neKn.
He 3aHnWae abTOKpICNo ABTOMObINI niipnMM COHnHM npOMHHm,6oJeKi NOrO yactNH MoKyTB nepepiNcN O6NEKTN TeHdHTy WKIPY dNTHN; nepeBipnTe temepatypy abTOKpCna, nepw HIX NOaHTN Do HbOro DNTHNY.
HeMoDnΦikyIteBupi6.
He npnbpaate haknehi ta hauNTi etuketkn; 3a
ix BiccytoCTi Bpi6 He 6yde BBaxatnc TaKIM,IO BijnOBiAc YHHM CTAHdaptam.
ДлпpoBedeHЯpeMOHTy,3aMHn DeTaneN Ta OTpIMaHHI INΦOpMaJI npo Bnpi6 3BepTaIteCn DO cepBicnX CEHTPiB nicIaPdoJxHOro O6cnyROByBaHHa. BiIObIHa IINΦOpMaJIra 3aHaYeHa Ha octaHHI CTopIHci ZbOro NociBnKa 3 ekCnnyatauII.
He BnKOpncToByTe DoaTkoBe npnaJa,Ke He peKOMeHDoBaHe Bnpo6HkOM aOb KOMneTeHTHMn OpraHaMn.
Y pa3i npnd6aHHBnpo6y 3 pyk nepekoHaTecra,
IO ue HeDaBHO BnPyueHa MoDeIb, npOJaCTbcra
3 IHCTpyKziam, a BCI II KOMNoHEHTN NOBHICTIO
fynkuioHaJIbHI. 3aCTapINn Bnpi6 MoKe He BiINOBiDaTI
CTaHdApTAM 6e3neKnYeep3 npnpoJHe CTapIHNA
MaTepiAIB Ta OHOBNeHH HOpMaTHBHX BmOR. 3a
HaRBHOCTI 6yDb-RAKnx CymHIB 3BepHITcR Do CEHTpy
06CnyROByBaHHK NIIeHTIB BnPO6HnKa.
- PepecbiHtbcra, 00 B canoHi ABTomo6n Hemae 6baraxy nn iHux He3akpinHeHX npEmdetIB. Y BNanky abapii BOHN MOKyTb TpaBMyBaTu nacaxnipiB i BODiR.
- Lien Bnpi6 Bmarae Iiime MiHimalbHoro YIueHHN 06CnyrobyBaHH. Li npouedypn MaIOb BnKOHyBaTIN dopocni.
- PeKOMeHIOBaHO TpIMaTn B YIcTOTi BCI pyXOMI YaCTINH.
- NepiouHNO ouuuyte nactNKoBI detaI BONoroTkaHHIO.He BnKOpNCToByTe po3HHNKIB uIN Huxnoi6HNpeOBOH.
He nicttb nonicnpoBn npncptpi norlnhaHna
yapibpo3HHKamnHnIHNMnNOi6HMnpcOBNHAMn.
YCTITbTKaHHHIdeTaJIUItKOIOJINBUNaIeHHNINy. Iid Yac npAHnTKaHHHIX DeTaleJdOTpMmYntecBkazBOKi npAHn,3a3HaueHnx Ha etNKetu
3axuaiTe BnpiB iD BnNBy atmocepHnx fakTopiB: Bonorocti,douy TaChiRy. Tpnbane nepe6yBaHHa coHci MoKe npBeCTn Do 3miHn KOIbOpy 6araTbox MaTePianIB.
36epiraTe Bupi6 y cyxomy MiCi.
NONEPEDKEHHA:
BUKOPUCTAHN KPICNA B YKOCTI BIDKNHOJIIOJIbKN.
He KopncTyntecB iDknHn NIOJbKOIO, kKoBa7a dHTNa BKe MoKe cnDiTn 6e3 CTOpOHhboi DonomOrn.
-ДаHa BiДКИнДа ЛЮьKa He npиЗачЕн ДЯ сHy npOTЯROM TpNBaInx nepiOДIB Yacy.
He6e3neuHO BUKOPUCTOBByaTu IO BIDKnHy IIObky Ha BnCokiNOBepxHi, HApnPKnaI, Ha cToni.
KomnoHeHTn Bnpo6y
IpebeipTe Bmict ynapOBKn; y BnnaKky BiCyTHOcTI 6yDbRkNX KOMIOHENTIB 3BepHiTbCRA DO cepBicHOI CnyK6N.1o KOMNKeKTy DITraHOrO aBTOKpICNa BXOJrTb:
a) Kaniooh
b)Pyuka
c) KInTeuHi 3aNo6ixKhi 5ntKn: 6iHnn 3axnCT
d)ПдгогиВнuck
e) KhONka BnBbJIbHeHHHpeMeHIB 6e3NeKIN
f) PemieupeyriobHHHaTgry pemeHIB 6e3neKIN
g) 3-ToKoBi peMeHi 6e3NeKn 3 nneYOBmN peMeHMy
h)BaxinbIa3HimaHH36a3n
i) Khonka perynloBaHH BnCOTn nIDrOJIbHnKa
I) Bicik dny iHctpyKuii 3 BVKOpncTaHHa
m)Пдгогинк 3 nokpnTЯm 3 niHonponineHy,якпогинhaуdapn (EPS)
n) Kopnyc i3 nokpiTAM 3 nihonolictnpony, ake norlinhae yapu (EPS)
o) CnCTema Dual Stage Cushion AToKpIcNo roTOBe dIa BnKOpNCTaHHa: 36npaTn NOro He nOTpi6Ho.
Ihctpyku3 BnKOpncTaHHa6a3oIO
1 AToKpIcNo Primo Viaggio SLK 6bnaHaHe cntEmoIO Ganciomatic System nI KpInnEHHa I 3HImaHHa B abTomobini 3 6a3Ou Base i-Size.
Дякрінгьпггггггггггггггггггггггггg Base i-SizcymicITb IORO 3KpInnEHHHmIHaTNCaJIte DOHN3y,IOKN BOHO 3 KJIaCauHHM CTaHe Ha MlCue (MaI. a).IpececBidiuTbcra,ioчepBOHI/3eNEHi iINkAtOpu y 3aHII qactNIH 6aN TeNep y 3eNeHOMy nIoXeHHi (MaI. b).
2HaTnCHITb DBI KHNKn Ha pyuci, NOBepHITb ii i po3aWyIte TaK, 06 cpeTpHa CnDInHn ABTomO6iJa.
3Iio6BvID'eHaTnABToKpicNoPrimoViaggioSLKBiD
6a3n Base i-Size, nobephitb pyky B noIoxKeHHn I nnepeHceHHn i notarHt baxinb Ha cInHcBropy, BOHOuac nIHimaOu an ABTOKpicNo.
4 Pyuka abTOKpica na Mae yotnpi fikcoBaHnx noIOxehn. Uo6 nobepHytn ii, HATNCHTb Dbi KhoNKn Ha pyuci i BCTaHOIBtB i nd notpi6HmKytom. IpekoHaTeC, BOHa 3aifKcYBaIacra B NOTpi6Homy noIOxehHi.
-NonoxeHHA:nonoxeHHB aBTOMaunHi.
- IonoXeHHB: noXeHHdny pyHoro TpaHCnOpTyBaHHi dny yCTaHOBKn Ha 6a3i,Ha KOncui abo Ha waci.
- NoJoxeHHaC:ue noJoxeHHa onopn.
- NonoJKeHHa D: nepeKoJkae roJaHHIO ABTOKpicna.
Ihctpykui3 BnKOpncTahHn 6e3 6a3n
5 BAXJINBO! ABTOKpiCIO cnip po3aWOByBaTN npanenbHO 3emNI.3a Heo6xIHNOCTi cKOpNCaTteCra 3rOHyTmN pyuHnKaMn a6o HydNaMn dIy PnaBAHHB B baceHi, noknabuN iX y kyT cnDInHHaBTOMo6inpi abTOKpicNo.
BCTaHOBNIIOUOn aBTOKpICnO 3 dINTNHO B HbOMy, He 3a6yNbTe npNCtBeHyT dINTHy pemeHAm. NObHicTIO onyctIb pykny aBTOKpicna (TOUka 4 - NOJIOXeHHA).
6 PpOynctiB HnKnHc qactHy aBtOMo6InbHoro peMeHa 6e3neKn y dI ha npamHI Ha pyuCi aBTOkPicna (MaI. a) i 3acte6hItb NOro (MaI. b), npekoHaBwncb, 00 Bih HA TAYHTNI, kN OKa3aHO Ha MaIKOHky.
Bi3bMitb BepxHIO qACTINHy aBTOMO6IbHOro peMeHr 6e3neKn i npOTAHHtB 3a CnHHKOIO ABTOKpicna(Man.c).
7 BCTABTE pemihb y 3aHIO HappMHy (MaI. a). 3aTHiTb abTomobinbHn pemihb 6e3neKn(Man. b). Tenep abTOKpicNo BCTAHOBNeHO.
8 Ioo6 po3cTe6Hytn peMeHi 6e3neKn, HATNCiHtB ueBOHy KhoNky Ha npJxuI naxoBOrO peMeHa (Ma.n. a) i BnTnHITb peMeHi.
Ioo3aCTe6HyTu peMHu CnCTEmy, BCTaHOBITb 3N4KN DBOX NpeOOBx pemeHIB y NOTpiE NOJoxKeHHa I BCTABTe DO npRkHa naxOBomy pemeHi, 0o6 BOHN He 3aue6HyHnC3 KnaUaHHM (MaI.b).
9Ioo nocna6ntn peMeH, BCTaBte naneuB O TBip cnDINHra (1), yTPMHyOn MeTaNBy KHOKy, a iHIO pyKOIO NOTARHTb peMeHi (2).
10 Ⅱo6 HataRhytn pemeHi dIa IJbHoro npnraHn do Tina dntHH,NotarHITb ceHTpaIbHn peryIIOBaIbHn peMHb Ha ce6e.
YBAG! He 3aTaryTe nackn 3aHaTo cnIbHo, o6o'B'3KOBO 3aJIuTe HeBeJIkNBIJbHNI npocTip!
11 BAXJINBO! Y3mky He cnipncti6aTu aBtOKpicni DHTHy B 06'EMHOMy BaxkOMy Ond3i a6o KnaCTN KObpy MIX TINOM DTHHN i pemeHAM. Lc MoXe npu3BeCTn Do HnpabunbHoro nonoKeHHpeMeHIB 6e3neKn i3 cepno3HMn HaClIkaMn y pa3 abapii.
BukopncToByTe KoBpy a6o CxBaHEn Peg Perego akceCyapn3axnty nTINH BiD norOdi.
12 Pemehi Ta iinrolibnK 3axnctom Bid 60koboro ydapy, MoXHa perynIOBAtNo BucOTI B 6 pIHx noIOXeHHx, BiIOBIOHO 3pOCTy DITINH. IpyperynIOBaHH NO BUCOTI, HATNCHTb Ha 3aHIO KHONky peYNIOBAHRA BWCOTI
(ha cnHci ABtOkiCna), ODHouacHO nIHimaOnu 6o onyckauoh pemeHi i nroBnBnNoti6He nonoKeHH, i nepeKoHaTEc, 00 BOH 3aikCyBaINc3 KlaaHHAM. NepHixpernyIOBAtn BnCOTy pemeHi i nroBnBnKa, 3BInbHITb nIiOBI pemeHi.
13IiIOJIIBHnK MoXHa BCTaHOBJIOBaTn 6 NOJOKeHb.
14 Pemehi 6e3neKn po3taoBaHn H npabnblhi Bncoti, kio OTbOpn B CnHui, Bki BOHn BXOaTb, po3taoBaHn Ha pBHi nuee DntuHn a6o Tpoxn HxKye (3eneHa 0bactb), kNOKa3aHO Ha MaIOHky.
IpebcBiuTbcra, 0ppeMeHi He B UepBOHIO3OH.
15 Lle abtokpicno 06naHHe cncTeMoO Dual Stage Cushion, kA cknadaeTbC3 2 OKpemix npdyoik i pObit b Ioro npuaTHm HaBtB dIra HauKpnixTHiux MAnIOkiB. a: 3MeHsuBaay NiIgRonlBnka
b: NOyUka-3MeHuwBaH DnI CnIHHH
He BnKOpNCToBvTe CnCTeMy Dual Stage Cushion 1Ia ITeu 3pOcTOM 6Inbwe 61 cm Ta BaroIO 6Inbwe 9 Kr.
16 Cneliahba fopma Kopnyc y donomoxe 3akonucatn dHTHy. nna hixHoro 3akonncyBaHHnepeCTaTe pyky B noJooXeHHra nla nepeHeceHHra, k NOka3aHO Ha MaJIIOHky (MaI. a).
Ioo yHnKHyTN KOINBaHb aBTOkPicna i npnnHHTN 3aKoJNCyBaHHa, 3aΦiKcYte pyKy 3a CnIHKOIO (MaI.b).
17 Kaiooh CTBOpE TiHb i 3aTnWOK JMaIIOka.
BAXJIINBO!3a60pOHaETbCnHIMATn ABTOKpicNo 3a KaIOoOH, TaK AKB Bih MoXe BiD'HNATNC.
18 3nTn KAnIOwOH, BiCTe6HtB pe3nHK 3a pykoio (1), nHIMITb KaIooH oH 3HIMtB, NotarHyBwn Bropy (2).
19 ABTOKpICNo 06nHaHe KHeTNUHIMN 3aNo6iHXHMn ⅢNTkAMn Kinetic Pods nIg KpaIoro 3axncty niqac 6OKOBx 3ITKHeHb.
IOBHICTIO BIDKpNIte Kinetic Pod, nobepHyBmIyoro 3a rOHHNKOBIO CTPIKIO (MaI. a).
Ioo nobepHyTu uTOK Kinetic Pod y noaTkObe noloxeHHra, nobepHITb pyuKy npOTn roDHHNKOBoi CTpiKn (MaI, b).
20 YBAGA! BiKpBaTe TINbKN Kinetic Pod, po3aWOBaHn 3 6OKy DBepaT ABTomO6IJa.
BAXJINBO! CTeKTe, 06o po3aowBaHn 3 60ky caIOHy aTOMO6Ig IuTOK Kinetic Pod 6yB 3aBXn 3acyHytn do Kopnycy Kpicna.
3HARTM'RAKOIO66NBKU
21 Ⅲo6 3HrTn CnCTemy Dual Stage Cushion, BnKoHaite TaKi II: BiDcTe6HiTb DBi KNOpKn (MaI. a), Aki KpInnPaTb 3MeHswyBauch iNroIIBHnKa Do noDyWkn-3MeHswyBaay dnn CnDiHHa, I BtTARHiTb II.
22 Pocte6hitb pemehi 63nekn i 3Himtbnneoyi HaKnadkn. 3Himtbnnoyky-3MeHwByaun cnDHH, CTARHYBUN II 3 naXOBORo PEMeHa.
23 BntaHrHb peMeHi 6e3neKn, noTarHyBwn iX i3 3aHbOro 60ky abToKpIcna.
24 BiCTe6HITb YoTnppe3nHKo66NBKn nipykoO (Ma.n. a), BNTaHITb naXOBn peMihb (Ma.n. b) i 3HiMiTb 66NBky NOBHICTIO.
25 3HIMITb O66NkBy niIroJIIBnka CnoaTky 3HN3y, a NOTIM akypaTHO 3 DBOX CTOpIH.
ByIbTe DyK EOBEPXHI, IOB HE NIOUKOJNTN DETAJI 3 nonictuony (EPS).
IocnIOBHO,3HIMITbM'kyO6bNkY,IK NOKa3aHOHa MaIOHKy.
UuueHnPiiknaadKn
- npn npaHHI TOUHO DToPmMyTEcb IHCTpyKcii Ha etNKeTci, 10 BwNTa B YoXON BnO6y.
He BID6IIOHTe XnOpKOIO;
HeIJaNbTe npaCKOJ;
HeYnCTIe CyXIM CIOOCOB M B XIMNCTU;
HE BIKOPNCTOByIte po3HHHINK IJIY BIVBeHHe HJIAM
He cyuItb B cyuapui Ira 6iinn3Hn 3 o6epTOBIM 6apa6aHOM.
JaHaJrtn 06NBky Ha aBtOKpicno
BukohaTe iii, 3o6paXeHi Ha MaIIOHkax 3 21 do 25 y 3BOPOTHomy nopAky.
The Original Accessory Peg Peregoo
Akecyapn Peg Perego 6yni po3p0bneH B kocti Kopnchoi Ta npakTuHoi NiTpumKn, o6 cnpocTntu KTTaBkIB. NpeerhyTu Bci akcecyapn Dna BaWoTo npodykty Peg Perego Ha www.pegperego.com
CepiHi HomepI
26 Ha Huxkhi noBepxHi ABTOKpicna po3TaWObaHa
ceptnifikaHnTa6nUka Ta iHwa etnKETKa,Ha kii 3a3Haeho Taky iHopMaio:
Ha3Ba Bnpo6y, DaTa BnroTOBNeHHa Ta cepiHn HOMep.
27 Data BnroTOBneHHa HapemeHx 6e3neKn.
IHHOpMaicrTaHeYHarOJ KopNCTyBaueBi y pa3i BnHKnHeHn npo6nem 3Bnpo6om.
YnueHH Ta DOrJa
Bnpi6 Bmarae MiHimaIbHorO 06cnyroByBaHH. HsueHH Ta 06cnyroByBaHH Bnpo6y MaOTb BIKOHvBaTNC TIlbKn DOpocnIMN.
- PekomeHIOBaHO TpIMaTH B UcCTOTI BCI pyxOMi cactHH.
- PepiouHNO ouuuyte nactNKoBI deTJI BONoroIO TKaHHOIO, He BnKOpNCOTByIe po3UnHHNKiB qN iHNx NOi6Hnx peyOBH.
KopntyTeca ⅢTKOIO DnB BuaeHHN NnIy3 TKAHHHx YactNH.
He ncttb npntpiinornnnHaHnydapy 3 nonicnpony po3HHKamu nn Hmnnnoi6HmpeOBnham.
3axuaiTe BnpiB BiB nNBy aTMocfepHnx fakTopiB, BOIN,douy Ta CHIy;TPNBale nepebyaHHHa cOnCi MOXe npNBecTN Do 3MiHN KONbopy baraTbox MaTepianib.
36epirainteBnpi6ycyxomyMiCi
Peg Peregso.S.p.A.
B KOMnHaHn Peg Perego S.p.A.BHeIpeHa CnCTema ynpabNeHn KaueCTbOM,ceTnΦnUnpoBaHHa TUV Italia Srl no cTaHdApTy ISO 9001.Peg Perego B 6yNb-akn Yac MOKe BHOCHTN 3MiH N Do MoJeN, Bka3aHnx B daHi
iHCTpykui, 3TexHiuHx a6o KomepuHn Hn npuHn.
Peg Perego CEPBIC
Kuo y npu6bHOro Bamn Tobapy Peg Perego
NoWKoDnnncb a60 3ary6bnncb Detani, 3diCNHOte
peMOHT a60 3amHy nIiue opurIHahbHMn 3anaCHHMn
HaCTnHAM Peg Perego. Y pa3i Heo6xHocTi peMOHTy,
3aMIHN DeTanei, OTPmAHHH iHOpMaJIi Ipo IPOdykTN
Ta akcecyapn, 6yb Jnacka, 3B'axiTbc3 NOKaJIbHM
InCTpN6'IoTopom Peg Perego B YkpaHi (3 cepiHm
HomepOM npOdykTy Ta rapaHTiHm TaHOHom).
TeN. +38 (050) 32-69-131, (050) 32-65-682, (044) 574-95-41
φακc: +380 44 574-95-42
eJektpoHa nowTa info@amigotoys.com
a6o 3 cepbcno Cnyk6o Peg Perego B Itanii
tel.0039/039/60.88.213
e-mail customer.service@pegperegco.com
internet www.pegperegco.com
Yci npaba iHTeneKtyaIbHOI BnacHocTi, NOB'3aHi 3 BMICTOM uBOrO NOCi6Hnka 3 EKCNIyatau, HAnEkaTb KOMNaHII Peg Perego S.p.A. i 3axNiEHI YHHIM 3aKOHOdaBCTBOM.
"pI" go ailll lalal "Ia:
a0j>1-11111111
#
Lio jLg yIg IyIg 1yIyIyIyIyIy
sill cale:ll oia aio hlo puc Jaiunu g (g baiu)
jblolilib jzj
Hg 1
g a sll l 1. a 0a 1 Jabal noo pniw, a sll
0eao 1 aclab j2.45
aLcLgJg JgJgJgJgJgJgJg
JcLsLdAa aLauuauau Ldu 1y
JJIJIJIJIJIJIJIJIJIJIJIJIJIJIJIJIJIJIJIJIJIJIJIJIJIJIJIJIJIJIJIJIJIJIJIJIJIJIJIJIJIJIJIJIJIJIJIJIJIJIJIJIJIJIJIJIJIJIJIJIJIJIJIJIJIJIJIJIJIJIJIJIJIJIJIJIJIJIJIJIJIJIJIJIJIJIJIJIJIJIJIJIJIJIJIJIJIJIJIJIJ
sJwol8yswSle01g JlaBlaeao sJy
4gaggoLsclaoLcIafoJlab81
aIg aIgJgJgJgJgJgJgJgJgJgJgJgJgJgJgJgJgJgJgJgJgJgJgJgJgJgJgJgJgJgJgJgJgJgJgJgJgJgJgJgJgJgJgJgJgJgJgJgJgJgJg
101 1
aLggs 15, sclao cI Jla Jlae JlaeJ
eao 1a aIgglosLwgl baa aai
aogjooLs,clao jlc lio ayuulll aao ploaiuoi j. auiuui Jabll
aIgaiagai gai bgs
= 1
g2g 1jabla aJle
aL 1
j 8
21 1
1i0jLulJlalb21eao poaio Iocic Jolz1ofo
. Peg Pereg oLio no 1,
iilllol
gag aclj gj 1i jai jia jia jia jia jia jia jia jia
-base i-Size
glo 0jLJU JiaJI JEAO gS. i-Size oclgo aoluii
The Original Accessory Peg Pe
aLacg aoljgPeg Perego 1gwwS1paoai p
ilai iwi 1gww521 gai S. jdiJgllc gao8y
www.pegperego.com gjicS1gagllc Peg Perego
Lolwglgolololal 26
:Jlll Log1
Lwlil aag CJIg Cii11 wI
CJIg CJIg PJI 27
Gtll jbl gdlgmo ooi iog
iill 1
s = 1 - 12
0039/039/60.88.213
customer.service@pegperegco.com:
www.pegerego.com:
Lalai aegnnoa logyogg
LggoLg 1000000000000000000000000000000000000000000000000000000
| IT_Italiano EN_English FR_Français | DE_Deutsch | ES_Espanol | ||
| Dichiarazione di conformità | Declaration of conformity | Declaration du conformità | Konformitätserklärung | Declaración de conformidad |
| Product name | Denomination du produit | Bezeichnung des Produktes | ||
| Denominazione del prodotto PRIMO VIAGGIO SLK | PRIMO VIAGGIO SLK | PRIMO VIAGGIO SLK | PRIMO VIAGGIO SLK | Denominación del producto PRIMO VIAGGIO SLK |
| Codice identificativo del prodotto IMSX* | Product reference number | Identification du produit | Kennzeichnungcode des Produktés | Códico de identificación del producto IMSX* |
| IMSK* | IMSK* | IMSK* | ||
| Reference Standards (origin) | Standard du referement (origin) | |||
| R129/03 | R129/03 | Bezugsbestimmungen (Ursprüng) | Normativas de referencia (origen) | |
| Normative di riferimento (origine) | Declaration of conformity | Declaration du conformità | R129/03 | R129/03 |
| R129/03 | Peg Perego S.p.A. declares, under its own responsibility, that the item in question has undergone a series of internal tests and has been certified by external independent laboratories, in compliance with current legislation. | La société Peg Perego S.p.A. déclare sous sa responsabilité que l'article en question a fait l'objet d'essais de réception internes et qu'il est certifié par des laboratoires externes et indépendants conformément à la règlementation en vigueur. | Konformitätserklärung | Declaración de conformidad Peg Perego S.p.A. declares bajo su propria responsabilité que el arteculo considerado ha sido somelido a ensayos proprios y ha sido certificado por laboratorios externos e independantes de conformidad con las normas vigentes. |
| Dichiarazione di conformità | Date and place of Issue | Date et lieu du publication | Datum und Ort der Ausstellung | Fecha y lugar de expelled |
| Arcore, November 2021 | Arcore, November 2021 | Arcore, November 2021 | Arcore, Noviembre de 2021 | |
| Data e luogo di rilascio | Peg Perego S.p.A. via De Gasperi, 50 | Peg Perego S.p.A. Via De Gasperi, 50 | Peg Perego S.p.A. Via De Gasperi, 50 | Peg Perego S.p.A. Via De Gasperi, 50 |
| Arcore, Noviembre 2021 | 20862 Arcore (MB), ITALY | 20862 Arcore (MB), ITALY | 20862 Arcore (MB), ITALIEN | 20862 Arcore (MB), ITALIA |
| Peg Perego S.p.A. via De Gasperi, 50 | ||||
| 20862 Arcore (MB), ITALY | ||||
PRIMO VIAGGIO SLK
F10021011341
PEG PEREGO S.p.A.
Via A.De Gasperi,50
20862ARCORE (MB)ITALIA
tel. 0039 039 60881
Servizio Post Vendita/After Sale: tel. 0039 039 6088213

www.pegperegco.com
All of the intellectual property rights for the contents of this instruction manual belong to PEG PEREGO S.p.A. and are protected by the laws in force.
PegPerego

- The Original Accessory Peg Perego
- Thank you for choosing a Peg Perego product.
- Product characteristics
- WARNING
- WARNING: FOR USE AS A RECLINED CRADLE.
- Components of the Product
- Instructions for use with base
- Instructions for use without base
- Removing the soft cover
- BE CAREFUL NOT TO BREAK POLYSTYRENE (EPS) PARTS.
- Maintenance of the padding
- How to cover the car seat
- The Original Accessory Peg Peregoo
- Serial numbers
- Product cleaning
- Peg Perego S.p.A.
- Peg Perego after-sales service
- I PENEYIPPEKDEHNE:3A UNOTPEBA KATO JIOJKA.
- KomnoHeHTn Ha npOdyKTa
- Ihctpykun 3a ynoTpe6a c oCHOBaTa
- Ihctpykun 3a ynoTpe6a 6e3 ochoba
- BHUMAHHE: He 3aTgraTe npekaneHo KOJahnte ne ce yBepTe, ye octabrTe MHHMaJIHa Xna6nHa.
- He n3non3BaIte DBycteneHHaTbB3rnaBnua c eua h61 cm BncouHa u 9 Kr Terno.
- PpeMaxBaHe Ha MeKUTe Bb3rJaBHNuKN
- IopdpbXkHa TaunuepnTa
- Noctabraye Ha tanuepnraTa
- OprrnHaJIHn akcecoapn Peg PeregO
- CepinHn Homepa
- NouchTaHe Ha npOdyKTo
- Peg Peregso.S.p.A.
- CneepoJaX6eHo 06cnyXbaHe Ha Peg Perego
- I P E D U N P E X K D E H N E
- I PENEYNPEXKDEHNE: INCIOJIb3OBAHNE KPECNA B KAUCHETBE OTKNIDHOJIOJIbKN.
- KomnoHeHtbln3denn
- HCTpyKcnnn no nCnoNb30BaHnIO C 6a30n
- HCTpykuni no mCNoIb3OBAHnIO 6e3 6a3bl
- BHUMAHNE! He 3aTaryBaiTe peMHn CnHkoM cnIbHo, 6b3aTeNbHO OCTaBbTe He6oNbwoe cBO6OdHoe npocTpahCTBO.
- CHATNE MARGKON O6NBKN
- Yxo3a nodklaKoK:
- HaedeBaHHe 06uBKn Ha aBtOKpeCNo
- CepnHbIe Homepa
- UncTka n3dennr
- Cnyx6a o6cnykBaHnpeg Perego
- Cpok cnyX6bl: 3 roda.
- TapaHTnHbI cpoK:12 MecaeB
- NONEPEDKEHHA:
- BUKOPUCTAHN KPICNA B YKOCTI BIDKNHOJIIOJIbKN.
- KomnoHeHTn Bnpo6y
- Ihctpyku3 BnKOpncTaHHa6a3oIO
- Ihctpykui3 BnKOpncTahHn 6e3 6a3n
- 3HARTM'RAKOIO66NBKU
- ByIbTe DyK EOBEPXHI, IOB HE NIOUKOJNTN DETAJI 3 nonictuony (EPS).
- UuueHnPiiknaadKn
- JaHaJrtn 06NBky Ha aBtOKpicno
- CepiHi HomepI
- IHHOpMaicrTaHeYHarOJ KopNCTyBaueBi y pa3i BnHKnHeHn npo6nem 3Bnpo6om.
- YnueHH Ta DOrJa
- Peg Perego CEPBIC
- #
- Peg Pereg oLio no 1,
- iilllol
- The Original Accessory Peg Pe
- PRIMO VIAGGIO SLK
Brand : PEG PEREGO
Model : Double adapter GT4
Category : Stroller