Siltek TB 50D - Compressor Fini - Free user manual and instructions
Find the device manual for free Siltek TB 50D Fini in PDF.
User questions about Siltek TB 50D Fini
0 question about this device. Answer the ones you know or ask your own.
Ask a new question about this device
Download the instructions for your Compressor in PDF format for free! Find your manual Siltek TB 50D - Fini and take your electronic device back in hand. On this page are published all the documents necessary for the use of your device. Siltek TB 50D by Fini.
USER MANUAL Siltek TB 50D Fini
1 - Manufacturer's data
2 - CE mark and WEEE symbol
3 - Type / Code / Serial Number
4 - Air displacement expressed in (l/min) and (cfm)
5 - Air delivered by the compressor expressed in (l/min) and (cfm)
6 - Maximum operating pressure (bar and PSI), tank capacity (l), rotations per minute (RPM), weight (kg)
7 - Guaranteed sound power level in dB(A);
Measured sound power level in dB(A)
8 - Electric data: voltage (V), frequency (Hz), absorption (A), power in (kW) and (HP)
9 - Duty cycle
10 - Declaration of origin
11 - Year of production/manufacturing
FR Legende
11-Eto npaywns/kataaekun
PL Legenda:
Preserve this handbook for future reference
All users must read and fully understand all information contained in this owner's manual before assembling, operating, or maintaining this air compressor. Carefully review the following rules for safe operation and fully understand all warnings.
1. SAFETY RULES

This symbol indicates warnings to be read before using the product so as to prevent injury to the user.

Compressed air is a potentially dangerous form of energy; always take great care when using the compressor and its accessories.

Warning: the compressor may restart when power is restored following a blackout.
An ACOUSTIC PRESSURE value of 4 m. corresponds to the ACOUSTIC POWER value stated on the label located on the compressor, minus 20 dB.

THINGS TO DO
- The compressor must be used in a suitable environment (well ventilated with an ambient temperature of between +5^ and +40^ ) and never in places affected by dust, acids, vapours, explosive or flammable gases.
Always maintain a safety distance of at least 4 meters between the compressor and the work area.
-
Any coloring of the shroud of the compressor (for models envisaging this) during painting operations indicates that the distance is too short.
-
Insert the plug of the electric cable in a socket of suitable shape, voltage and frequency complying with current regulations.
-
Use extension cables with a maximum length of 5 meters and of suitable cross-section.
-
The use of extension cables of different length and also of adapters and multiple sockets should be avoided.
-
If the supply cord is damaged, it must be replaced by the manufacturer its service agent or similarly qualified persons in order to avoid a hazard.
Always use the switch I/O to switch off the compressor.
- Always use the handle to move the compressor.
Always disconnect power cord and air hose from the air compressor before transporting.
- When operating, the compressor must be placed on a stable, horizontal surface.

THINGS NOT TO DO
- Never direct the jet of air towards persons, animals or your body. (Always wear safety goggles to protect your eyes against flying objects that may be lifted by the jet of air).
- Never direct the jet of liquids sprayed by tools connected to the compressor towards the compressor.
-
Never use the appliance with bare feet or wet hands or feet.
-
Never pull the power cable to disconnect the plug from the socket or to move the compressor.
-
Never leave the appliance exposed to adverse weather conditions.
- Never transport the compressor with the receiver under pressure.
- Do not weld or machine the receiver. In the case of faults or rusting, replace the entire receiver.
-
Never allow inexperienced persons to use the compressor. Keep children and animals at a distance from the work area.
-
This appliance is not intended for use by persons (including children) with reduced physical, sensory or mental capabilities, or lack of experience and knowledge, unless they have been given supervision or instruction concerning the use of the appliance by a person responsible for their safety.
Children should be supervised to ensure that they do not play with the appliance.
- Do not position flammable or Nylon®/fabric objects closed to and/or on the compressor.
- Never clean the compressor with flammable liquids or solvents. Check that you have unplugged the compressor and clean with a damp cloth only.
The compressor must be used only for air compression. Do not use the compressor for any other type of gas. - The compressed air produced by the compressor cannot not be used for pharmaceutical, food or medical purposes except after particular treatments and cannot be used to fill the air bottles of scuba divers.
- To avoid serious burns, never touch the cylinder head parts or tubing during or immediately after operation.
- Pay attention to the work being carried out. Use common sense. Do not stand on the compressor. Do not allow the compressor to operate unattended.

THINGS YOU SHOULD KNOW
- To avoid overheating of the electric motor, this compressor is designed for intermittent operation (do not operate on more than a 50% duty cycle. If this air compressor pumps air more than 50% of one hour, then the compressor's capability is less than the air delivery required by the application. Always match the air volume requirements of the attachment or accessory with the air volume delivery of the compressor). In the case of overheating, the thermal cut-out of the motor trips, automatically cutting off the power when the temperature is too high. The motor restarts automatically when normal temperature conditions are restored.
- The compressor is equipped with a solenoid valve that allows air to be vented from the head, so as to facilitate the next restart of the compressor. Therefore, it is normal to feel vented air for a few seconds, when the compressor reaches the cut-off pressure (set by the manufacturer during the testing phase). The same phenomenon occurs even when the compressor is switched off.
- After switching off the compressor, you must wait three seconds before switching on the machine again.
-
When the compressor is plugged into an electrical source and the I/O switch is in the "ON" position, this compressor will cycle automatically.
-
Never touch any moving parts.
-
Keep all body parts, hair, clothing, and jewelry away from moving parts.
- Never operate the air compressor without all guards and shrouds in place.
-
Never stand on the compressor.
-
The compressor is fitted with a safety valve that is tripped in the case of malfunctioning of the pressure switch in order to assure machine safety.
-
The red notch on the pressure gauge refers to the maximum operating pressure of the tank. It does not refer to the adjusted pressure.
-
When fitting a tool, the flow of air in output must be switched off.
When using compressed air, you must know and comply with the safety precautions to be adopted for each type of application (inflation, pneumatic tools, painting, washing with water-based detergents only, etc.). - Never exceed the maximum allowable pressure recommended by the manufacturer of any attachment or accessory you use with this compressor.
- Please check that the air consumption and the maximum working pressure of the pneumatic tool and connection pipes (with the compressor) to be used, are compatible with the pressure set on the pressure regulator and with the amount of air supplied by the compressor.
The compressor's performance is guaranteed for operation between 0 and 1000 meters above the sea level.
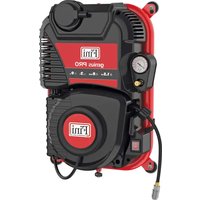
2. FEATURES (Pic. 1)
A. I/O Switch (ON/OFF): The I/O switch is the activation mechanism that is used to start and stop the compressor. When the switch is "On", the motor and pump will compress air until tank pressure reaches the upper limit of the factory set operating pressure. When tank pressure falls below the factory set "cut in" pressure, the compressor will again automatically start to compress air.
B. Regulated Pressure Gauge: The regulated pressure gauge indicates the amount of pressure that is allowed into the discharge line according to the setting of the regulator.
C. Regulator Knob: The regulator knob is used to adjust the air pressure that is available at the discharge line. The discharge air pressure is increased by turning the knob clockwise and decreased by turning the knob counter clockwise.
D. Drain Valve: Ball style valve that drains moisture from the tank when opened.
E. Quick Coupler: The quick coupler is used to connect the airline to your tool.
F. Safety valve: The safety valve is set to avoid over-pressurization of the air tanks. This valve is factory pre-set and will not function unless tank pressure reaches this pressure. Do not attempt to adjust or eliminate this safety device.
Any adjustments to this valve could cause serious injury. If this device requires service or maintenance, see an Authorized Service Center.
G. Handle for lifting/moving.
H. Rubber foot.
I. Intake air filter.
J. Pressure gauge: It indicates the tank pressure.
K. Pressure vessel.
L. Power cable.
3. SCOPE OF USE
The compressor is designed for generating compressed air for tools operated by compressed air.
Please note that our equipment has not been designed for use in commercial, trade or industrial applications. Our warranty will be voided if the machine is used in commercial, trade or industrial businesses or for equivalent purposes.
The machine is to be used only for its prescribed purpose. Any other use is deemed to be a case of misuse. The user/operator and not the manufacturer will be liable for any damage or injuries of any kind caused as a result of this.
4. ELECTRICAL GROUNDING INSTRUCTIONS
The compressor is equipped with a mains cable with shock-proof plug. Insert the plug of the electric cable in a socket of suitable shape, voltage and frequency complying with current regulations. Before you use the machine, make sure that the mains voltage complies with the specifications on the rating plate. Make sure that the ON/OFF switch is not in the I (ON) position. Long supply cables, extensions, cable reels etc. cause a drop in voltage and can impede motor start-up. In the case of low temperatures below +5^ , motor start-up is jeopardized as a result of stiffness.
5. PRE-START PROCEDURES
- Examine the machine for signs of transport damage. Report any damage immediately to the company which delivered the compressor.
- Verify that the tanks have been drained and are clear of any moisture or dirt.
- The compressor should be set up near the working consumer.
- Avoid long air lines and long supply lines (extensions).
- Make sure the intake air is dry and dust-free.
- Do not set up the compressor in damp or wet rooms.
- The compressor may only be used in suitable rooms (with good ventilation and an ambient temperature from +5^ to +40^ ). There must be no dust, acids, vapours, explosive gases or inflammable gases in the room.
- The compressor is designed to be used in dry rooms. It is prohibited
to use the compressor in areas where work is conducted with sprayed water.
5.1 Fitting the air filter (if not already assembled) Remove the transportation stop with a screwdriver or similar and screw the air filter (ref. I) securely to the equipment (Fig. 2a-2b). If supplied, insert the suction tube inside the filter cover (Fig. 2c).
6. OPERATING INSTRUCTIONS
- Check for correspondence between the compressor plate data with the actual specifications of the electrical system. A variation of ± 10% with respect to the rated value is allowed.
- Insert the plug of the power cable in a suitable socket checking that the I/O switch located on the compressor is in the OFF «O» position (Fig. 4).
- At this point, the compressor is ready for use.
- Operating on the I/O switch, the compressor starts, pumping air into the receiver through the delivery pipe.
-
When the upper calibration value (set by the manufacturer) has been reached, the compressor stops.
When air is used, the compressor restarts automatically when the lower calibration value is reached (2 bar between upper and lower).
The compressor continues to operate according to this automatic cycle until the I/O switch is turned (Fig. 4). -
Always wait at least 10 seconds from when the compressor has been switched off before restarting this.
-
The compressor is fitted with a pressure reducer (ref. C). Operating on the knob with the tap open (turning it in a clockwise direction to increase the pressure and in a counterclockwise direction to reduce it), air pressure can be regulated so as to optimize use of pneumatic tools.
The value set can be checked on the gauge (ref. B).
The set pressure can be taken from the quicklock coupling (ref. E). -
Please check that the air consumption and the maximum working pressure of the pneumatic tool to be used are compatible with the pressure set on the pressure regulator and with the amount of air supplied by the compressor.
Always pull out the plug and drain the receiver once you have completed your work.
7. CLEANING AND MAINTENANCE

Warning!
Pull the power plug before doing any cleaning and maintenance work on the appliance.

Warning!
Wait until the compressor has completely cooled down. Risk of burns!

Warning!
Always depressurize the tank before carrying out any cleaning and maintenance work.
7.1 Cleaning
- Keep the safety devices free of dirt and dust as far as possible. Wipe the equipment with a clean cloth or blow it with compressed air at low pressure.
- We recommend that you clean the appliance immediately after you use it.
-
Do not use cleaning agents or solvents; these may be aggressive to the plastic parts in the appliance. Ensure that no water can get into the interior of the appliance.
-
You must disconnect the hose and any spraying tools from the compressor before cleaning. Do not clean the compressor with water, solvents or the like.
7.2 Draining tank
The condensation water must be drained off each day by opening the drain valve (ref. D) (on the bottom of the pressure vessel) (fig. 3).
-
Verify that the compressor is turned Off.
-
Holding the handle, tilt the compressor toward the drain valve so that it's set in a lower position.
- Open gently the drain valve.
- Keep the compressor tilted until all moisture has been removed.
- Close the drain valve.

Warning!
Dispose of the condensation water in an environmentally compatible manner at the appropriate collection point.
7.3 Safety valve (ref. F)
The safety valve has been set for the highest permitted pressure of the pressure vessel.
It is prohibited to adjust the safety valve. Actuate the safety valve from time to time to ensure that it works when required. Turn the nut until it is completely loose. Then pull the nut with sufficient force until you can hear the compressed air being released (Fig. 5). Then release the nut, and screw it back on.
Always keep the safety valve and the surrounding area clean and free of obstructions.
7.4 Storage

Warning!
Disconnect the plug from the socket, vent the appliance and tools connected to it and empty the condensate.
Switch off the compressor and make sure that it is secured in such a way that it cannot be started up again by any unauthorized person.

Warning!
Store the compressor only in a dry location which is not accessible to unauthorized persons.
Always store upright, never tilted!
8. DISPOSAL AND RECYCLING
Pursuant to Directive 2012/19/EU on waste electricalonic equipment (WEEE).
The symbol carrying a crossed-out refuse container depicted on any equipment or the relative packaging means that, at the end of its useful life, said product must be disposed of separately from other waste.
The user must therefore take said equipment to the centres specialising in differentiated refuse collection of electric and electronic equipment or alternatively return it to the reseller when purchasing a new similar piece of equipment.
Thanks to differentiated refuse collection, discarded equipment can be sent to be recycled, treated and disposed of in an environmentally-friendly manner; this helps avoiding possible negative effects on the environment and on health and promotes the re-employment and/or recycling of the equipment's materials.
Any unauthorised disposal of the product by the user will result in the application of the fines provided for by the regulations in force.
9. TROUBLESHOOTING GUIDE
Note: Remove power source and drain tank pressure prior to making any repairs or adjustments.
| Fault Cause Remedy | ||
| The compressor stops and restarts automatically after a few minutes. | Tripping of the thermal cutout due to overheating of the motor. | Allow the compressor to cool down.ventilate the work area. |
| After a few attempts to restart, the compressor stops. | Tripping of the thermal cutout due to overheating of the motor (removal of the plug with the compressor running, low power voltage). | Activate the on/off switch. Ventilate the work area. Wait a few minutes. The compressor will restart independently. |
| The compressor does not stop and the safety valve is tripped. | Irregular compressor operation or pressure switch malfunction. | Remove the plug and contact the Service Center. |
Any other type of operation must be carried out by authorized Service Centers, requesting original parts. Tampering with the machine may impair its safety and in any case make the warranty null and void.
Warranty and repair.
In the event of defective goods or requirements for spare parts, kindly contact the sales point where you made your purchase.
FR
3. DOMAINED'APPLICATION
9. POSSIBLE ANOMALIES ET INTERVENTIONS ADMISES
TI INPENEI NA EEPETE
- TIA VA ATOPEUYETAI TUXOV UTEPHEPAVON TO NAEKTPIKOU KIVTNIPA, O OUITIEOTNG EXE OXEDAOTei YA DIAKOITTOMEVN LEIOTUPOYIA (MNV TO VETETE OE AIEIOTUPOYA VIA TEPIAOATEPO ATO TO 50% TOU KUKAU LEIOTUPOIAc. EAV O AEPOAUUMIEOTNc AVTAE AEPa TEPIAOATEPO ATO TO 50% MAc Wpac, TOTE N IKAVOTNA TOU OUIMIETN EVAI NYOTEPN ATO TV TAPOXN AEPa TOU ATTAIEITAI ATO TN EPAPNOy. Na AVTIOTIOIXETe TAVOTE TIC ATTAINEOIS TOYKOU AEPa TOU TAPAKKevou N TO EGPANTMAse M TYTAPOXN OYKOU AEPa TOU OUIMIETN). Se TEPINOW UNTEPHEPAVONS, EVEPYOTOEITAI O BEPUKOC BIAKOTINCS TOU KIVTNIPA, BIAKOTIVTAC autoMA TNY TPOPOODOA tAV N BEPOKPAIA EVAI TLOU UYNAN. O KIVTNIPA ESTRAVKKIVEITAI autoMA tAV ATAKAIOTAVTAl I KAVOVIKES UUVTKKEs EEPUKPAIASC.
Ooumtieotnc evai eotlliaoevoe me nkeptpouayvntkbaibda tou etitipetTei tv kkvwn Tou aepa ano tv kepaan, etoi wote va dieukauvbe i n tioevn eravekknon Tou oumtietn. Suvein, eivai quioaykova v EvtioeTE Tnv Edo yia mikpn diappon, yi Aiva deutepoAETTA, otav ouumtieotc paei stnyieia biakotn (Tou exei opiatei atto tov kataoakeuaatn kata tn diapkeia ts paocns Sokunis). To ibio qaivoe oubaive akopa kai otav ooumtieotnc evai atenepyoantnoevoe.
ApoouoBnOeTeTOUoUMTHeTN,TPETIEVA TEPiHVETE TOAUxIOToV Tpia
DeutepeoAETTTa PIV EEvpyoTOnoTe EaVto unXavnu.
Oraov O ouptieotns ouvdeetai ME katoia nAekpiik nTnykai O biakontns On/Off (epeytooinons/attvepytooinns) eivai otn 0eon "ON" (epeytooin), oouptieotns 8a aeitoupyoei autoupta.
-Mny ayyiTe TOTe ta kivoumuva Eaaptnata.
-Atnpeite 0e atoataon np ton oawatoc 0ac onwca ta aaiia, ta pouxa kai ta koogunata ato ta kivouveva eapntna.
Mny xepicote tote tv aepooutniotn av dev biokovtai ot n
Eoan touc ola ta TPOOTATEUTIKA KA KAUmuata.
Mny Tatate to ouuTIOIN.
O oumtieotns evai eonioevoe meia baaii oaoaaleiac n otioia evpyoioei rteepittwnouoouapyiaou biakontn ieanys ia va eaoaaiietan aoaepaaiou tou xavntuos.
H KOKKIV npuun otov eptnT nieoavapeetai ot neiyiTn Tneon aeitoupyia ng dEaevev. dEv avapeetai ot npuoiuev nieon.
Kata Tn ouvSeon Evoc TVEuapatikou Epyaaleiou e eva oawnaeou Tou otioiu bixetetai ouutieauveoc aepac atto tv aeopoumtiotn, PPETei OTwOHTOTE va diakOTTETAI n pon tou aepa atTOV eoO tou oawhyautou.
H xpon Tou TETIEOeouaepa otis diapoece TPOBaeTouevecxpoeic (poukwa, TVEUATika Epyaale, BaPn, kaopiouc me diauteuoc mvo je uatian bao, knt.) aatei Te ywann kai nyn npon Tuv TPOBaeToueewv Kavoviaowy ia KaTe Tepittwn Exuwipota.
Mny utepbaive TOTI INEYIOIN EITIPENTOEN TIEON TOU TPOTEVEIO kataokaouteoTOIOUoiTHOTE TAPEAKoevou n EApntmaos xonaiuioite To ooumieT.
- Inapakaalouie Elyte ot n katavalawan aepa, n meiyotn tien aneouyiac kai owlvec uovdeonc (mu To koutpoe) TOU xnpoiotiouovtai, eivai katalanac yia tvn tiou enoume opoei oTO puOmuotn eo0oukai yia tvn 0o0nta eepa Tou patexoyouk0uppeop.
OI EINIOEIS TOU OUMTNEI EVA EYUNUEVES YIA LEITOUPYIA METAU O KAI 1000 METPA TAVW ATO TIV ENTAPAVEIA TNS BAAOAS.
2. XAPAKTHPISTIKA (Eik. 1)
A. Diakottns On/Off (I/O) (evepyooinos/antvepyooinos): O diakottns eivai o uxavioos evepyooinos tou xpnoiotoitea iia tvn ekkivnon kai tn diakott n aeitoupyiac tou oupiieoth. Otv a diakottns eivai oe thon "On" (evepyooinan), o kivnpac kai n avtla a oumtieov aupe npexip n tiocn evnc vta paeoi ato avwato opio ncs epoyostiaikac puoiuavnc piienc aeitoupyiac. Otav n tiiean deaeayevns tneoi katow atto tvn epoataiaka pubiauevnt nekkiynoc, o ouptieotnc th eekivoei gava autopata tn ouptieon aepa.
B. Metpntncpuuioevns trio: O metpnncpuuioevns trioans UTODEIKVUEI TIV TOOTNTA TIEOANS TIOU EApexTAI OTN ypaun EKPONS OUPWVA ME TPOUION TOU PUIOTn.
C. Koupi puoiotn: To koupi puoiotn xpaoiortoeirai ia va puoiiei tviean aepa tou elai diaheoiun otyn yauun ekponc. H TIEON aepa ekponc auavetai av TEPIOTPEETO KOUPII DEIOOPa KAI MEIWETAI AV TEPIOTPEETO KOUPII apiotpOpa
D. Baβiδα αποτράγγιαίς: Baβiδα σφαρικόν τύτου του αποτράγγιει ηνυγραία αποτη δεξαμένήσαν ανοίει.
E. Taxuovvseooc: O taxuovvdoooc xpoioutoeirai va ouvdeTeTov aywO aepa Me to epyaleio ac.
F. Baβiδa ασαλειας: H βαβiδa ασαλειας puθμιζεια γιαν atοκεύγειαι n utερβολική συμιτίαη των δέαμενών εαρα. Autn n βαβiδa εἰναι εργοσταίακα προμθιομεύνη και δεν λειούρειν αν n πειον δέαμενης δεν φτάσει autn tyn tiŋn. Mny επιχερόπενον puθμισετήν αν atομακρύνετε autn tni διταξη ασαλειας.
Tuxovpu8iioeicnBaaBiaDaTnpoeivapokaiéouov oBapo tpaumatoo. Eav autn n diataen atanie epicn ouvtipnon, aeeuuvteie e eva eoouofoevo Kvtpo epic
G. Xeipolaβni yia avuwoon/etakivnon
H. Noidapaki OtnipiIg.
- Φιλτο πα ερα εἰσαγωνης.
J. Metpntrns mieons: via tvn avixveun n ts mieons aevncs.
K. oxei oien
L. Kaωδio tpoΦoδoσiας.
3. ΠΕΔΙΟ XPHΞHΣ
O oumuieTc exE oxediaote iYi TnV npayyn ouuTIEouvou aepa yia epyaleia tou aeitoupyov uoumuieueo aepa.
Na exete utouin oI O eGIOAIOG McEve xei oxediaotei yia xpion oe EHTOPIKES n BIOUNXAVIKES epapuoyec. H Evyunon mac akupuwetai av XpnoiTOIOINeTe To uXavnna OE EHTOPIKES n BIOUNXAVIKES epyaies n iia Tapemupeic oKOTouc.
To unxavnua pnteia va xnpoiotoeiialovo ia tov npokaoipaevo
aokto. OTOIAOHTOTE dAn XpON kPVETAI W KAKXPN. Ia TUXOV
bIaBes n Tpaunaiouous OTOIOUHNTOTE EIDous TPOKALOUVTAI
Aoyw KaNGs XpONs 0e uOuvetai OXPOTNS/xEPIOTNS KAI OXI o
kataaKeuaatns.
4. TAEH
O auiiieotc diathe eva kalwio tropooogiae Buaavektiko otouc kpaadauoc. Eiaayayete to qic tou nAekpioku kalwioou e iia pia ge To katalnnlo axnua, Tnv katalan taon kai ouxvotnta, Tou oumoppwvetai ue touc ixuvote cakoviouc. Ppv xnpoiotoinet To npxavna, Bepaiowte ont Taon biKTou oumopopewetai te Tpodiaypacs TNC VAIKIOAC yapaktniptikw. Beaiowte on OIAkOTTN ON/OFF 6ev Bipketai OTnEg1 (ON). Ta aikpiia kalwio tropooogiai, Itopeoktae, ta kapoulaia kalwioiu kTA. Tpokaoov TTwn taon KAI tnoeiv aetiv EKKIVQN TOU KIVTnpa. Se TEPITTN WAMV BEPUKPaaW KATU ato +5^, n EKKIVQN TOU KIVTnpa TIETAI OE KIVDUO Aoy akupiaac.
5. AIAIKAIZIEI PINTH EKKINHsH
2. LASTNOSTI (Slika 1)
8.LIKVIDACE A RECYKLACE

V souladu se smernici 2012/19/EU o zneškodnovani elektrickych a elektronickych zařizeni (OEEZ).
5. INPEdnyCKOBbIe INPOUcEyPbI
5.1 YcmaHOeKa e03dyuHoozo funbmpa (Ecnu ue He co6paH)
YdaJIte TpaHcIopTnpoBOUHbIe 3aRnyuKn npN NOMOIN OTBepTK INIOIO6bIM IHCTpyMeHOM IN pPOHNO pPBNHTInTe BO3dyuHbI KYNbTp (Det. I) KycTpoiCBy (pnc.2a-2b).
BCTaBBTe BCacBaHOuyo Tpy6ky B KpbIky fHbTpTa, ecnnpedycmOTpeHa (pnc.2c).
6. INHCTPYKUNI NO 3KCNJYATAUIN
-Пюоверпг,Чтобл пааметрь, уkaааHHые Ha 3abODСКТабнчke, COOTBEcTBOBaINФakTNUeCKMnapaMeTpAMeKTPuHecKn ppoBOdK; DOyncTMMoe KonebaHne HaprJaKeHnrcocTabJrEeT ± 10% OTHOMHaJIbHoro 3haHeHn.
BCTabBe BNky TOKOnDQBOJureo KabeRn BNOxOuHIOPO3eTKy, npOBepRB, YTOb6bIKONKa BXoD/ BbIXoD, paCNoIoxKeHHaJaKOMnPpeCope, HaxoDInaBc B bIKNIOUeHOM NIOJoxHeHN «O» (BbIKP) (pnc. 4).
Tenepb kOmnpeccop roTOB pa60Te.
C NOMOJIbI BIKNIQUaTeIe BAIO/BbIBoD, KOMnPceccop 3anyckaetcB pa6Oy, KaHae Bo3dyN HAnpaBnIe erO yepe3 HaHHeTaIeNbHyI ty6y B6ak.
- Pocne doctnkeHHa 3aHaHoro BepxHero ypoBna DaBHeHHa (yCTaHaNbAeTcnpnIbOHTeMe n pni okaTKe rTOBOrOKOMnPecoppa) KOMPecCOP OCTaHaBnBaTeC.
IIO Mepe paxoIOBaHnB O3dyXa DabNeHne B pecuBepe Naadet N, KOrda OHO IOCTrAeT HIXHrero 3aDaHHoro YOBHnra (pa3Hnla MExJy BePxHm I HxHm yOBHem DaBHeHn 2 6ap), KOMPecccop AToMaTuYeCKn BKNoUaETcR.
KoMPnecccp npOdoJkaeBT BbIOHnHTb 3OT TOUKNB A bTOmatneckOM peXmDoTexnop, nOKa He CpaOtaeTBIKNIOHTaeMbBBOD/BbBOID(pnc.4).
- EcIeHne6bOxDnMo Cpa3y JKe Nocne 3TOro ChOba BkNIOHTb KOMPiPeCCOP, TO nepeNd NOBTOhBM BKJIOUHeHMe CneJeYet BbIXDaTb, NO KpaHHei Mepe, 10 cekyHd.
B KOMNNEKT NOCTABKIN BCEX KOMNPeccopoB BXOINT peykTOP daBHeHNA (JET.C). Bpaaay pyuKy peykyTop pni OTKpBTOM kpahe (NOpepHyBERO no yacobON CTpeKne Iany yBENHNeA DABNeBn INpoTbN YacobON CTpeKNI DN yMeHbUeHnM) MOKHO OTpeYnpoBaT bDANHeN E03dyxdo ONTNMaNBHO OyOBN, PIMMeHNITeJIbHO K NHEBMOnHCTpymEHTAM.
- YCTAHOBNEHHOE 3HAeHHe DaBneHnM OXHcO CHTaTb C MaHOMETpa (Det.B).
OtperynpoBaHHOaBnEHe BbIaETcHa 6bIcTpoJeCTByIOyMyfTy (Te.E).
-
PnOBepntb, yTo6bl pacxod Bo3dyxa M akcunmnlhoe 3KnPyatauOHHOe daBNeHne NHEBMTueckoro NHTCPyMeHa 6bln COBmecTmblc DaBHeHne, ycTaHOBnEHbIM Ha peryJnIope daBHeHn, n C KOJIeCTBOM Bo3dyxa, NODaBaEMORo KOMnPecCOPOM
-
No 3aBepseHn pa60tbl octahOBnTB KOMnPecCOP, BbHyTB BnKy nIHTaOJcero Ka6eIg N3 pOeTKN iCpocTb daBHeHne N3 peCnBepa.
7. OUHCTKA IN TEXO6CJNYKINBAHNE

BHumaHue!
BbHUMaUme u3 po3emku nepe 0cemu pa6omamu no ouucmke u mexHuueckomy 0cbnykueauu wmeke 3ekmponumua.

BhumaHue!
Kdume do mex nop noka kompeccop ocmbHem nonHocmb! Onachocmb nonyumb oxozul

BHumaHue!
Ipepe ecemu paobomamu no ouucmke u mexhueckomy o6cnykueaHnO hyxho c6pocum daaeneue e emkocmu.
7.1 Oucmka
CopeKHTe 3aunTHbe npncnO6bENHn KAK MOxHO 6oJIe CBO6OHNIMOT bIIN n pR3n. IpOtpnE yctpoCTBO uCTO TpAKn OuNn O6yUteCKATBm BO3DyXOM IOJ HeBbCOHKM DABNEHem
- Mby pekomehyuem ouhuaTb ycTroponCTBO cpa3y noce nnojlb30baHna.
He nnonb3yIte cpeCTBa IIN OYNCK IN PACTBOpNTEN, OHN MORYT pa3bcTe bI NaCTMaccOBbe Detanu yCTpoiCTBA.CJeNTe 3a TEM, YTO6bl BO BHTpb yCTpoiCTBA He nonana BODa.
- YdaIte nepeo oucTko Hn BDO npa36pb13RbAHn n3 KOMPeccop. 3anpeeHO OuHau TB KOmpcecop BOo, pactBOPTelem INI NOObHMn CpeCTBaMn.
7.2 CnueHou 6aK
KoHcHcaUHHa BOa DoXHa CnBaTbC KaXbI DeHb NyTeM OTKpbITnCnBHOrO Klanana (no3.D) (Ha dHmue cocyda nD daBneHMe) (cm.pnc.3).
- Поверпь, что компессор поевен в пооженеOff.
- Ydeprknaa pyKu, HAKNOHtB KOMPecCOP K CINBHOMy KNaIaNHy, TAKM 6bpa3OM, YTo6bl OHN 6bln No3NUHOHPOBaHb Ha DNIUe 6aka.
- Nobepyt b CnBHO KNaan Hn OKpItna Knaana
- YdepKnBaTb KOMPecCOP HAKNoHeHHbIM Do nonHOro ydaeneBnaI.
5.3akpoTe cInBHOKnanaH

BHUMAHue!
Cdaume KOHDeHcam,He 3acopra npupody, e coomemcmeyouuunynkm c6opa omxodoe.
7.3 PedeoxpaHumelbHbI Knanah (dem.F)
PpeOxApaHnTeBnHKnanaH OtperynpoBaH Ha cAmoe BbICOKoe
DOnyCTHMoe DaBnEHe EMKOTN BbICOKo DabNeHn.
3AnpeuHo N3MeHnB perynpOBky npedeoxpAHnTeBnHO KnaHa.
TOrTO, YTO6bI PpeOxApaHnTeBnH KnAnaH np HeOBxOUMcO TcAp0an,
ero HyXho BpeMn OT BpeMeHN pINBOmTB B DeCTBne. NobepHytB
3aXIMHO KONlO, NOKa OH He 6ydt NnHOctBO OcnAbeNo. 3aTEM
HaTAYHyT 3aXIMHOe KOJIoo C DoCTaTOHON CnIO, NOKa He 6ydt
YCbCTBOBATCB BAxOD CKATO BO3dyxa (CM.puc.5). 3aTEM OTITyCTNB
3aXIMHOe KOJIIO n 3akpyTNTb erO.
CnedyT BcerDa NoDnepkHBaT yNCTOTy nOTcyTCTBne npenrTCTBn Dn
npedoxpAHnTeBnHO KNaHa H OkpykaOzero erO yactka.
7.4 NodunHuko8a onopa

BhumaHue!
I3eKume eunky u3 cemeoou po3emku, cmpaume eo3dyx u3 ycmpoocmau u ecex nooknloyenbix K hemy npubopoe, uonb3youux cxambl o3dyx, u cneum KeohdeHcam. 3aumume komnpcecop om hecankuoHpuoaeHHO2eKnOueHua.

BhumaHue!
XpaHume komppeccop monbko e cyxom u hedocmynHOM dnnocmopohHux Mecme. He onpokuBieamb, xpaHmb monbko e cmoaem noJoxeHu!
8. YTNIN3AUINI NTOPNCHA INPEPEPABOTKA
Yogusma suyu her gun drenaj vanasi (ref. D) (basin tankin in altenda) aclarak bosaltilmaldir (Sekil 3).
8. INDEPARTAREA $I RECICLAREA
Conform Directive 2012/19/UE cu privire la
eliminarea deseurilor de echipamente electrici si electronice (DEEE).