2000 Series DST2020 - Iron PHILIPS - Free user manual and instructions
Find the device manual for free 2000 Series DST2020 PHILIPS in PDF.
User questions about 2000 Series DST2020 PHILIPS
0 question about this device. Answer the ones you know or ask your own.
Ask a new question about this device
Download the instructions for your Iron in PDF format for free! Find your manual 2000 Series DST2020 - PHILIPS and take your electronic device back in hand. On this page are published all the documents necessary for the use of your device. 2000 Series DST2020 by PHILIPS.
USER MANUAL 2000 Series DST2020 PHILIPS
m = 311
一
1
m = 311
1
一
,一
English 6
Azorbaycanca 21
Bahasa Indonesia 36
Bahasa Melayu 51
Čestina 66
Dansk 81
Deutsch 96
Eesti 111
Espanol 126
Francais 141
Hrvatski 156
Italiano 171
Latviešu 186
Lietuviskai 201
Magyar 216
Nederlands 231
Norsk 246
O'zbek 261
Polski 276
Portugues 291
Portugues do Brasil 306
Româna 321
Shqip 336
Slovenscina 351
Slovensky 366
Srpski 381
Suomi 396
Svenska 411
Tieng Viet 426
Türkce 441
Türkmenge 456
Eλληνικα 471
Българскn 486
Kbiprbl34a 501
MaKeDoHcKn 516
Pycckn 531
Toounk 546
YkpaIHcbka 561
Ka3akwa 576
Ruwjntu 591
mnu 606
Johno 622
简体中文 638
繁體中文 653
HK68
a 683
698
6 English
Introduction
Congratulations on your purchase and welcome to Philips! To fully benefit from the support that Philips offers, register your product at www.philips.com/welcome. Read this user manual, the important information leaflet, and the quick start guide carefully before you use the appliance. Save them for future reference.
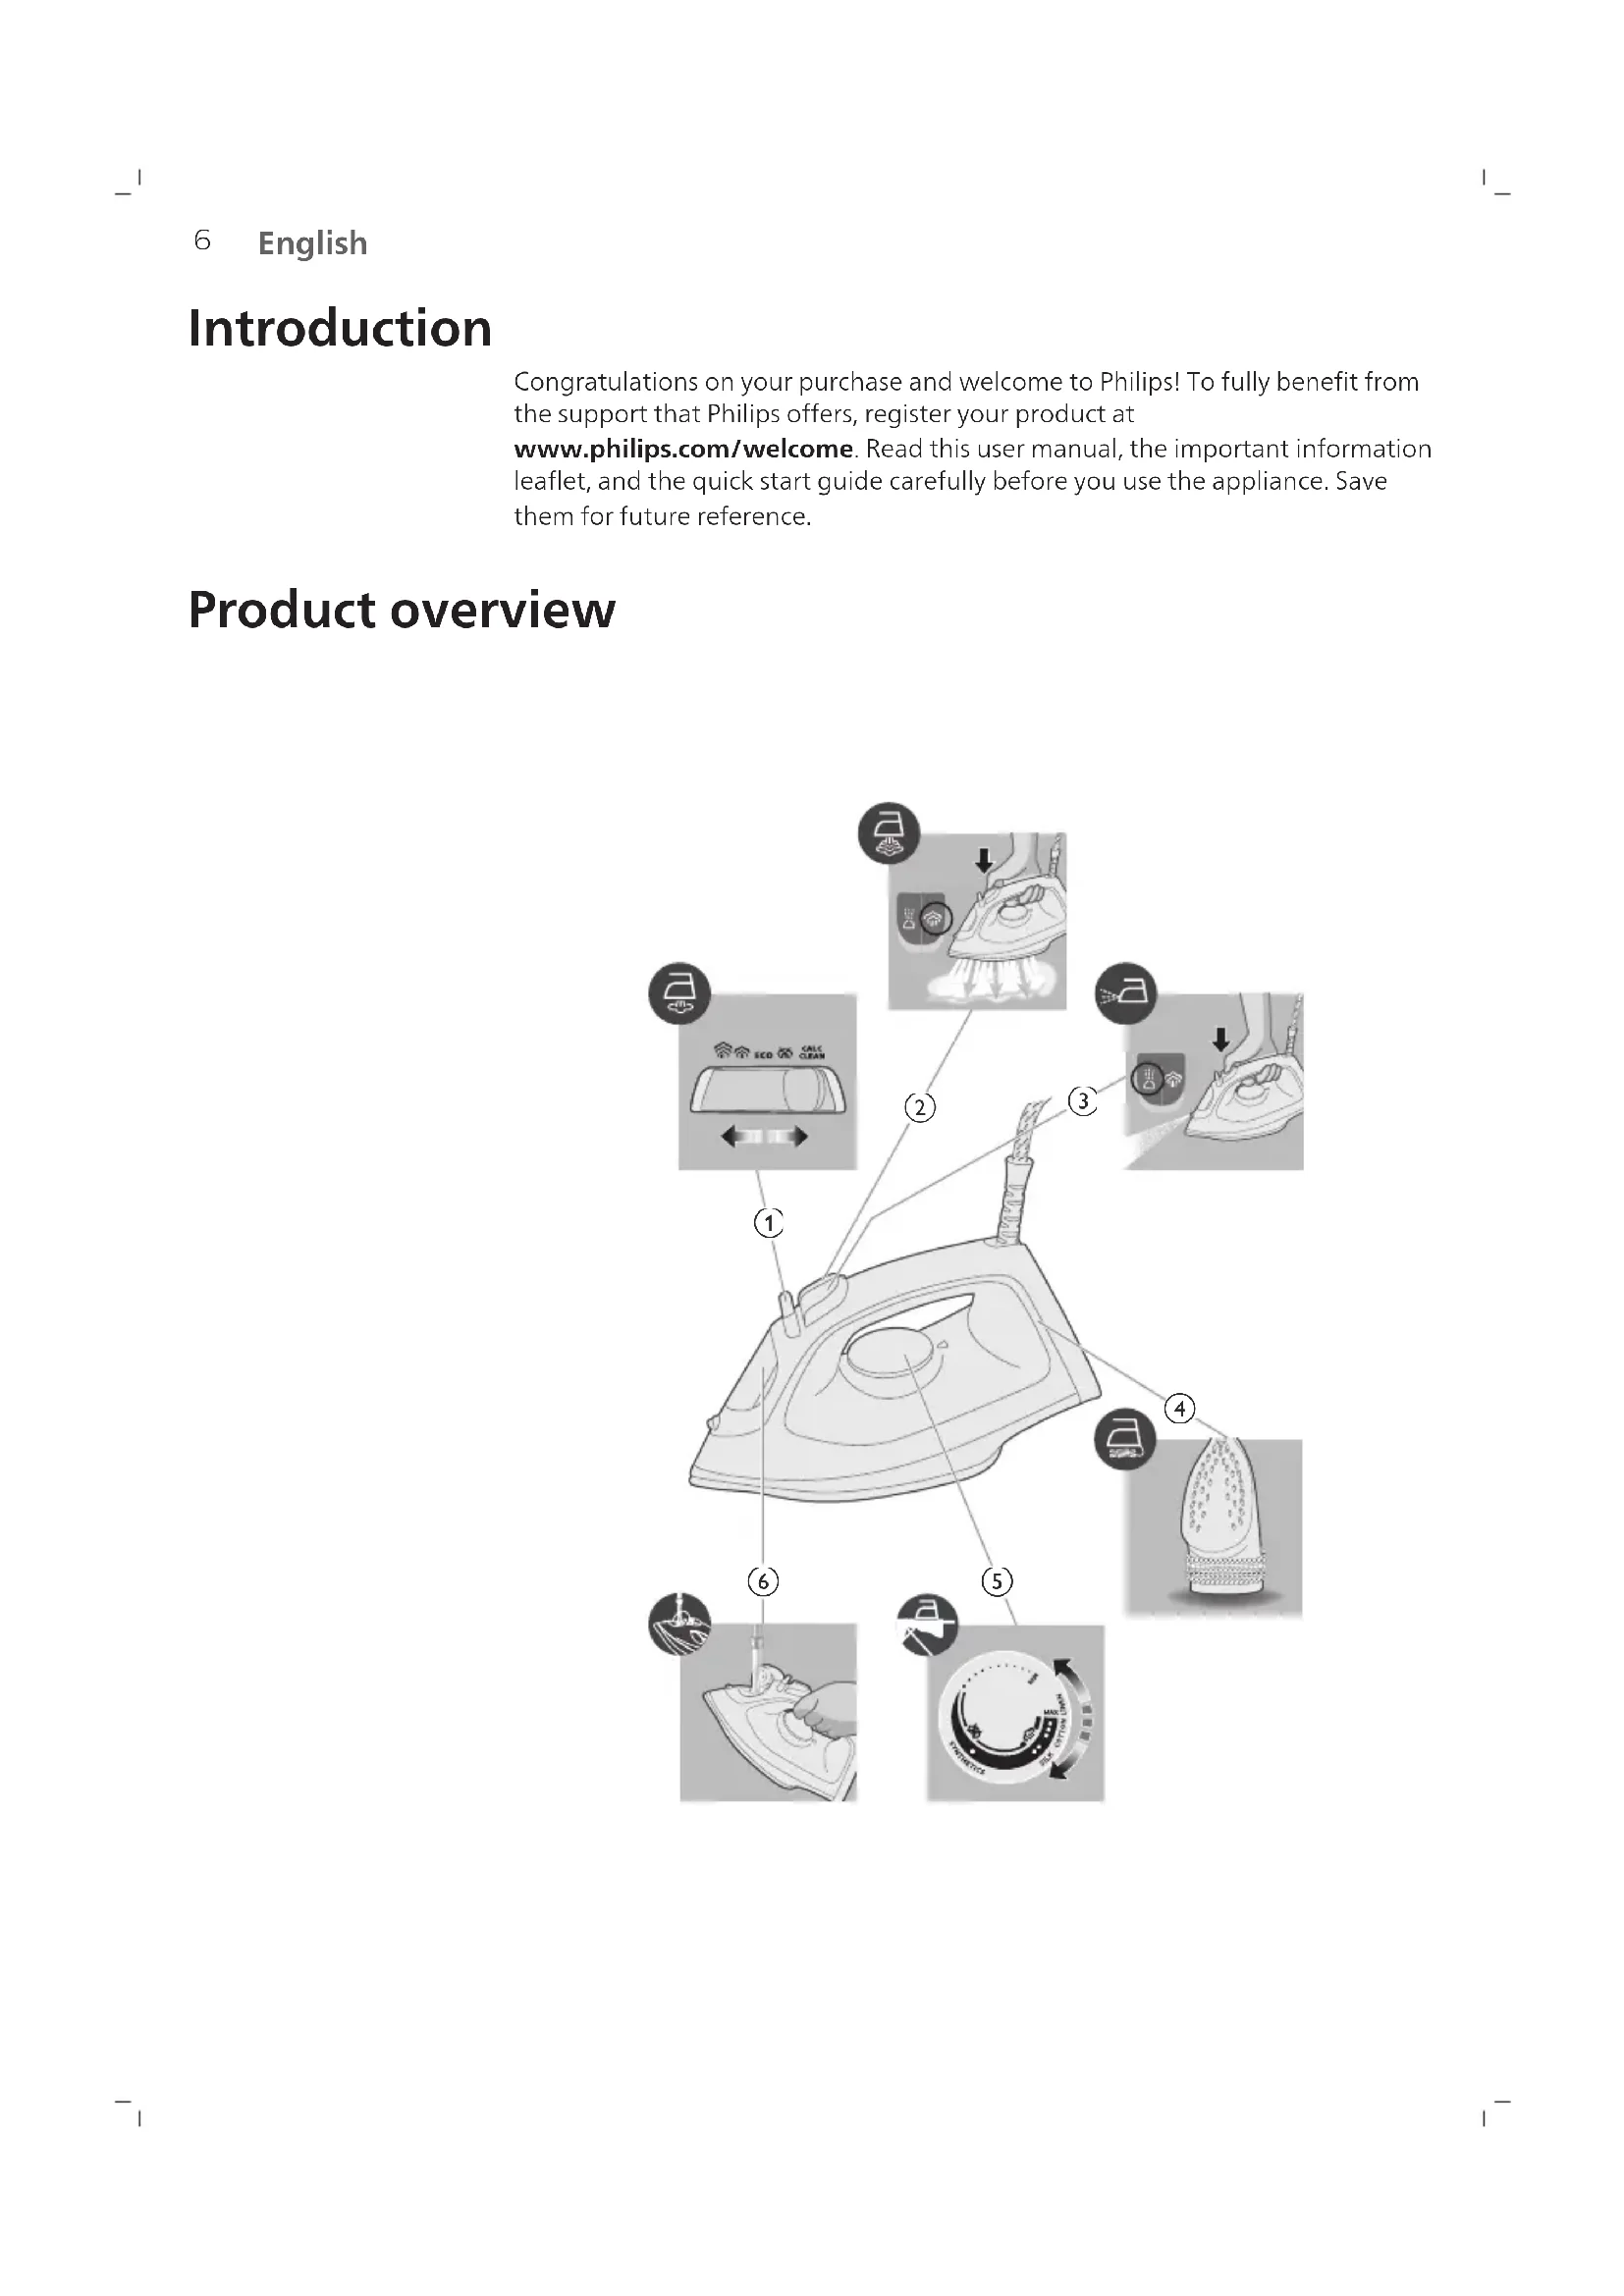
Product overview
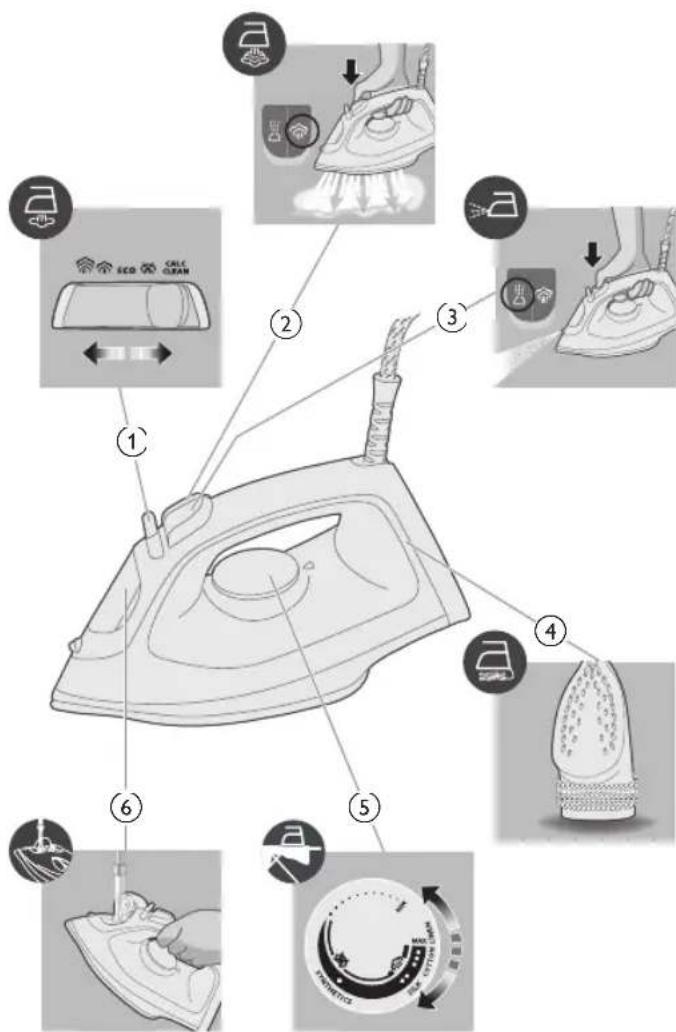
1 Steam selector
2 Steam boost button
3 Water spray
4 Cord winding
5 Temperature dial
6 Water tank lid
Using the appliance
Preparing for use
Note: The iron may give off some steam when you use it for the first time. This stops after a short while.
Type of water to use
The appliance is suitable to be used with tap water. However, if you live in an area with hard water, we recommend that you mix an equal amount of tap water with distilled or demineralized water. This will prevent fast scale build up and prolong the lifetime of the appliance.
Do not add perfume, water from the tumble dryer, vinegar, starch, descaling agents, ironing aids, chemically descaled water or other chemicals, as they may cause water spitting, brown staining or damage to your appliance.
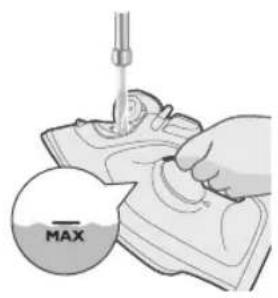
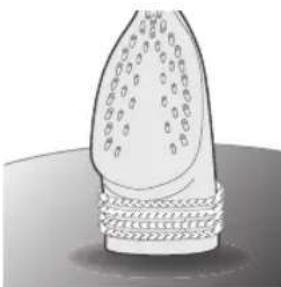
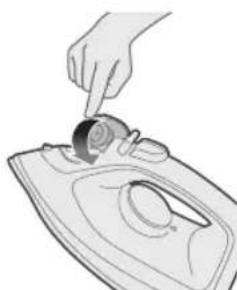
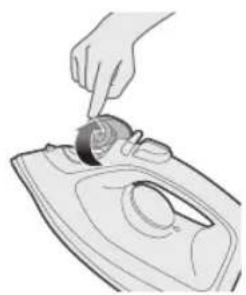
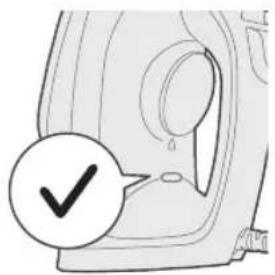
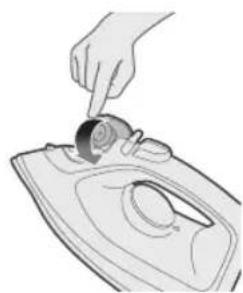
Filling the water tank

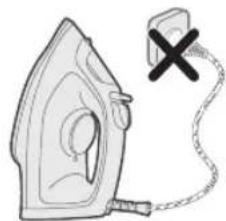
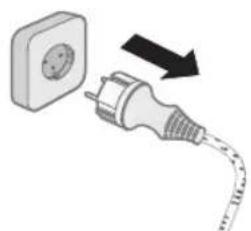
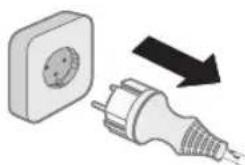
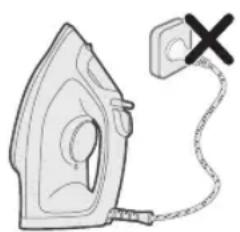
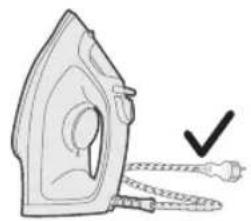
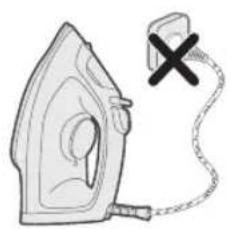
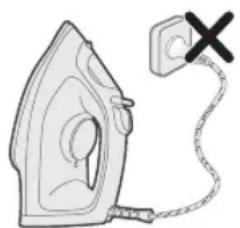
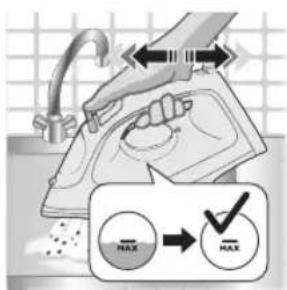
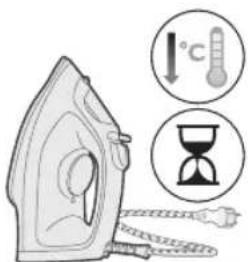
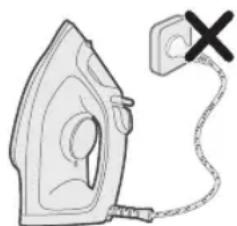
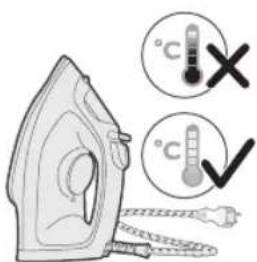
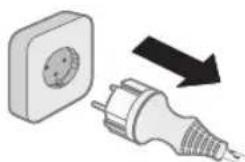
1 Do not plug in the appliance.
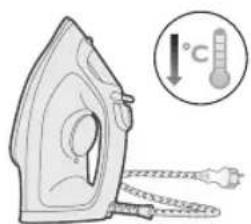
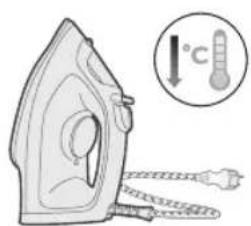
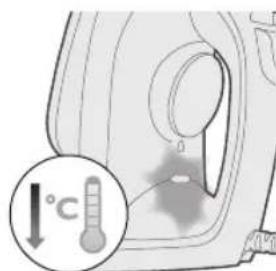
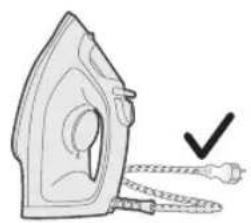
2 Ensure the appliance is cooled down.
8 English
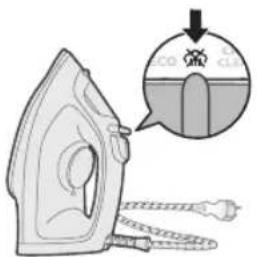
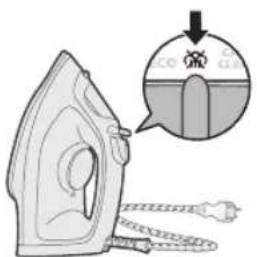
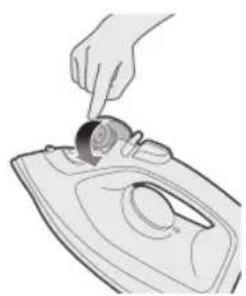
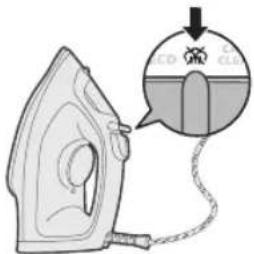
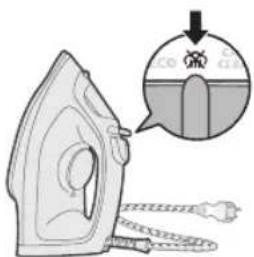
3 Slide the steam selector to the right to select no steam mode (dry ironing)
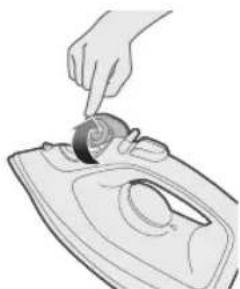
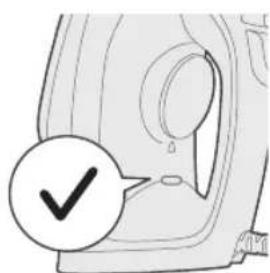
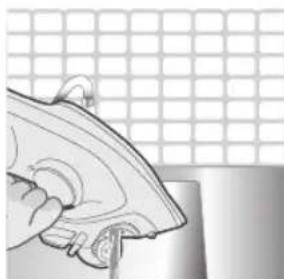
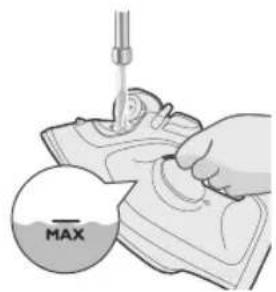
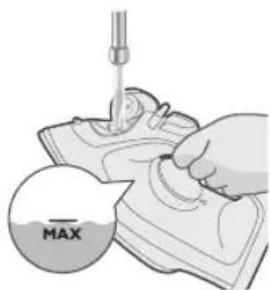
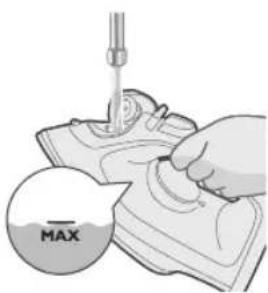
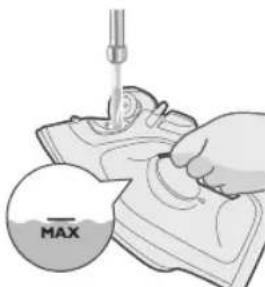
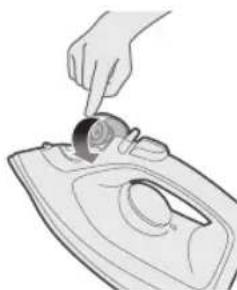
4 Flip open the water tank lid.

5 Fill water tank up to the MAX indication in the water tank.

6 Close the water tank lid firmly.
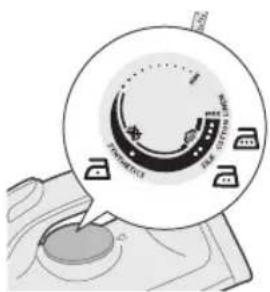
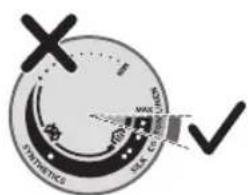
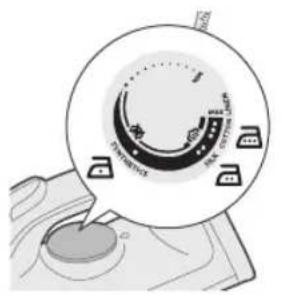
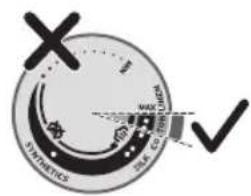
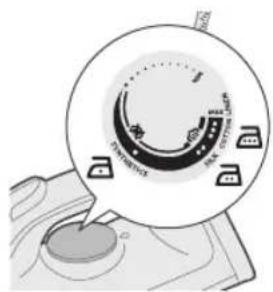
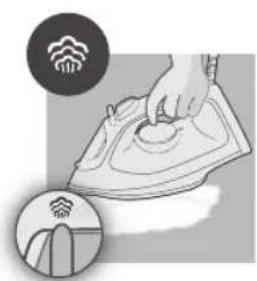
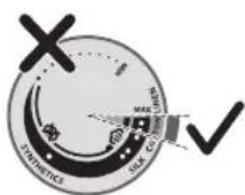
Setting the temperature
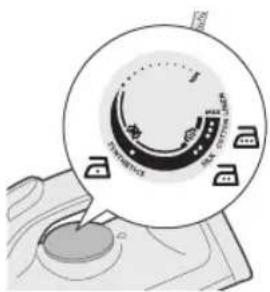
| MAX LINEN | / |
| COTTON | / |


SILK


SYNTHETICS
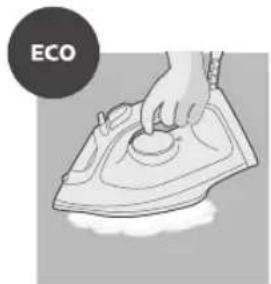
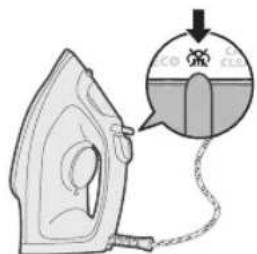
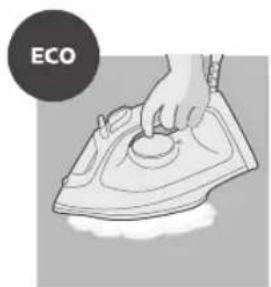
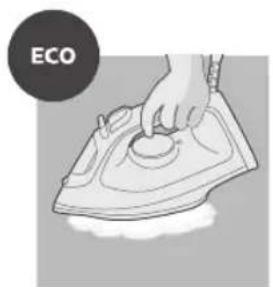
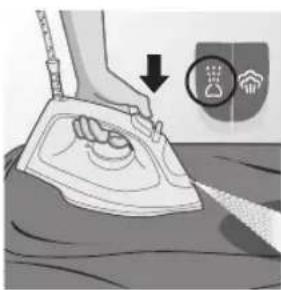
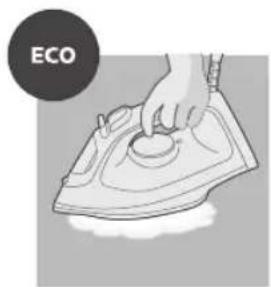
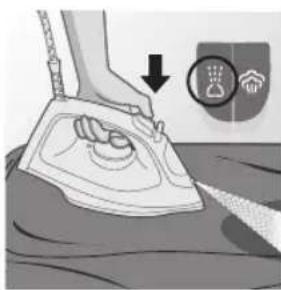
ECO setting: Minimum constant steam is delivered continuously for garments with less creases. This setting also saves energy.
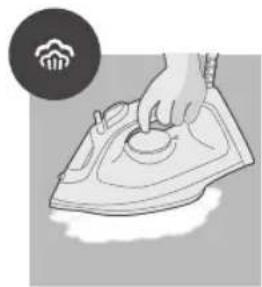
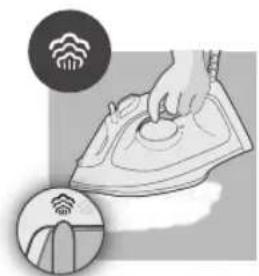
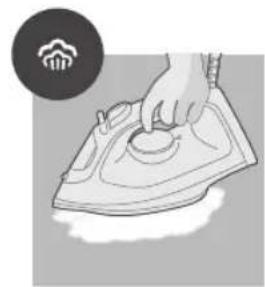
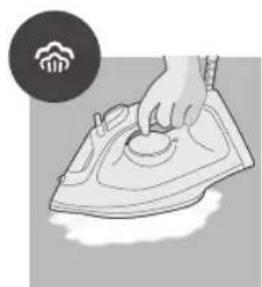
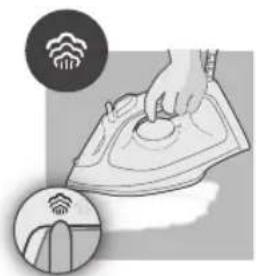
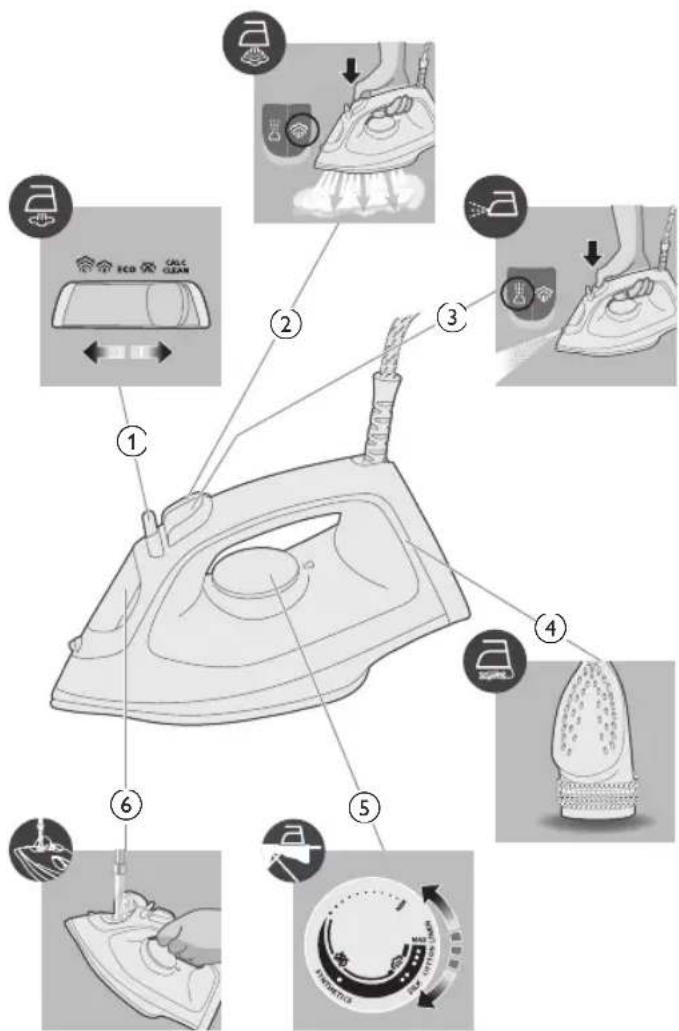
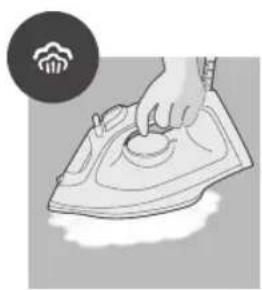
Two steam clouds: More constant steam is delivered continuously for tough creases.

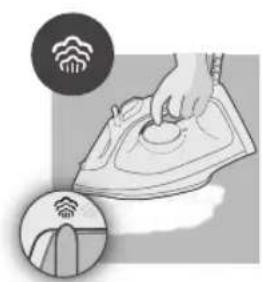
Three steam clouds: Maximum constant steam is delivered continuously for stubborn creases.
Using the appliance

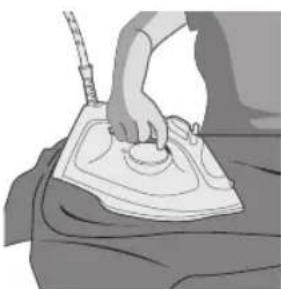
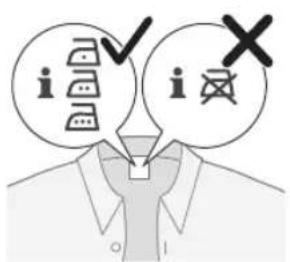
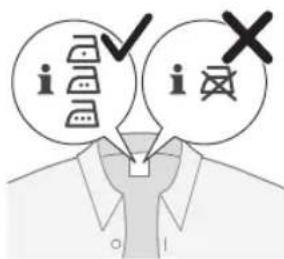
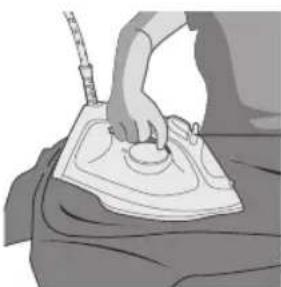
1 Check the garment label for the required ironing.
10
English
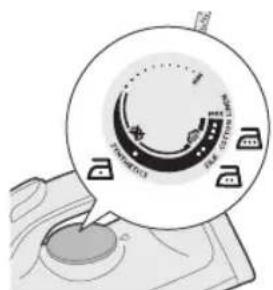
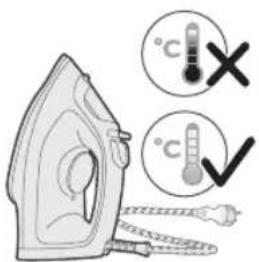
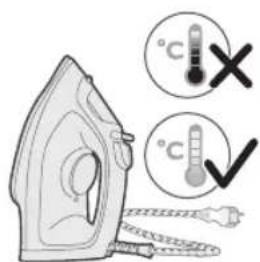
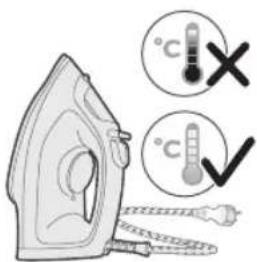
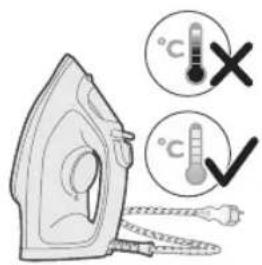
2 Set the temperature dial to the required ironing temperature by turning it to the appropriate temperature indication.

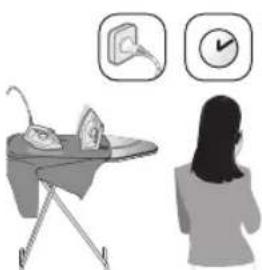
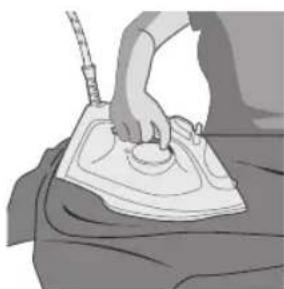
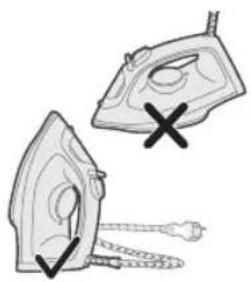
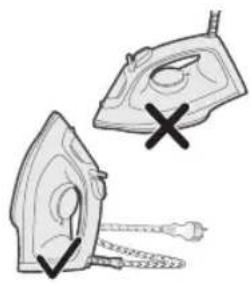
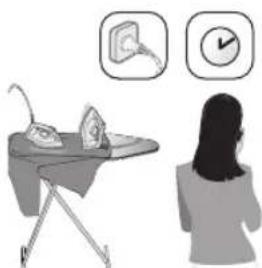
3 Allow the iron to rest on its heel.
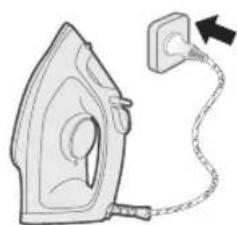
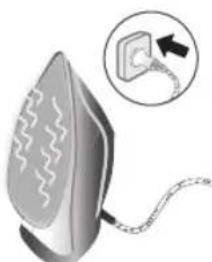
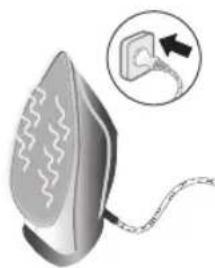
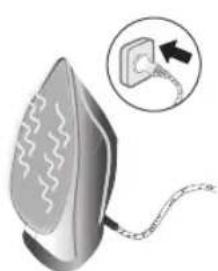
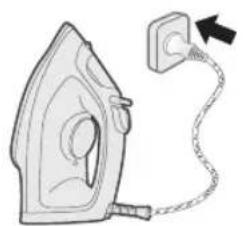
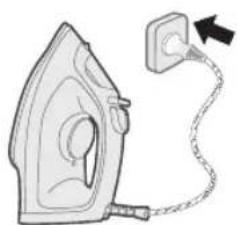
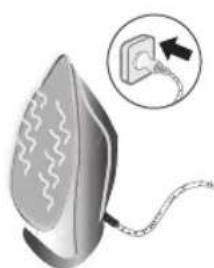
4 Plug the appliance in an earthed wall socket.

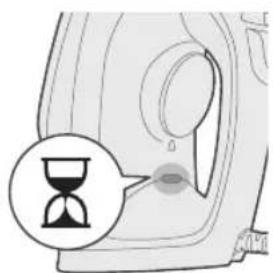
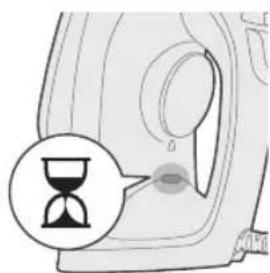
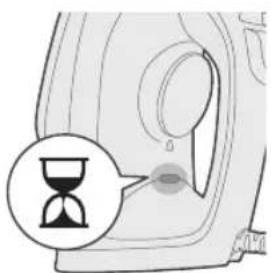
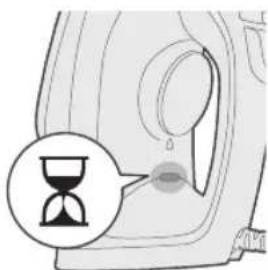
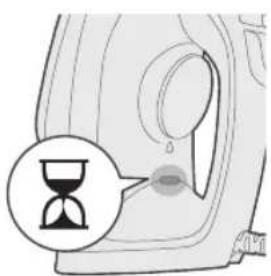
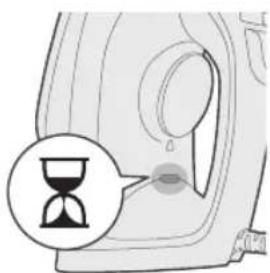
5 The iron ready light will light up, indicating iron is heating up.

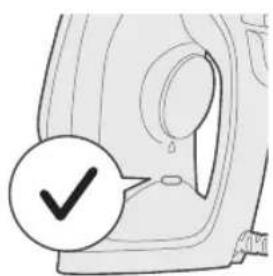
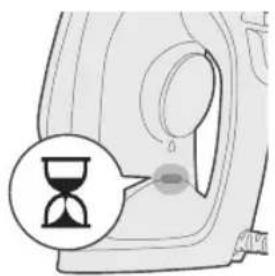
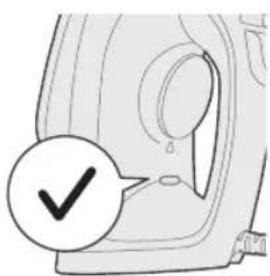
6 When the iron ready light has gone out, wait a while before you start ironing. The ready light will go on from time to time during ironing.
No steam/Dry ironing
1 Set steam setting to no steam setting.
2 After a short while, steam will cease during ironing.
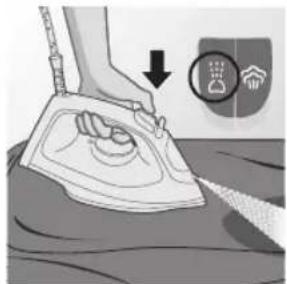
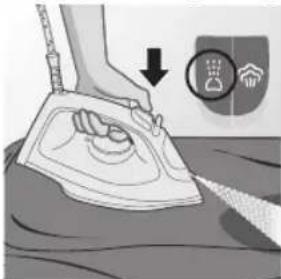
Water spray
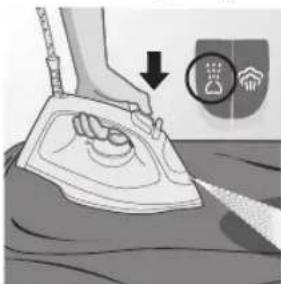
1 Set steam setting to no steam setting. Press and release the water spray button for a stream of mist to remove stubborn creases.
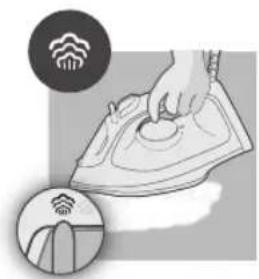
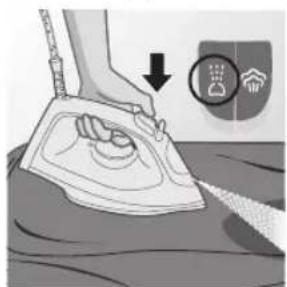
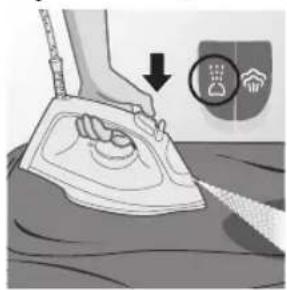
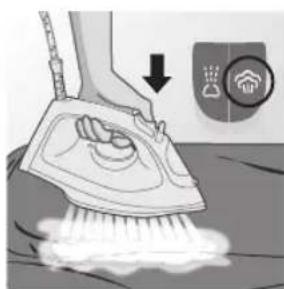
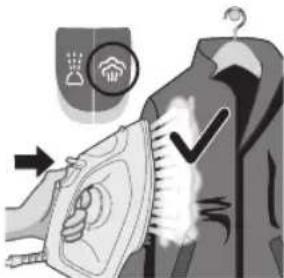
Steam boost

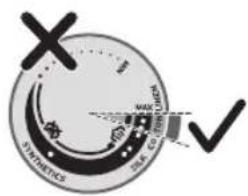
1 Set temperature dial to MAX setting between cotton and linen.
12 English
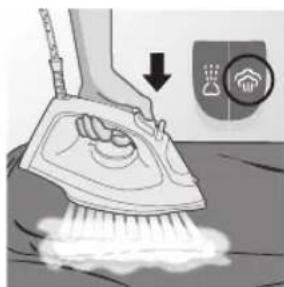
2 Press and release the steam boost button for a powerful boost of steam to remove stubborn creases.

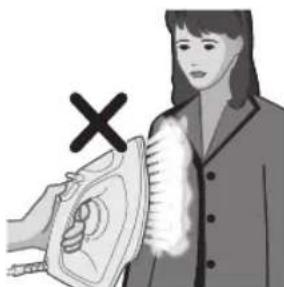
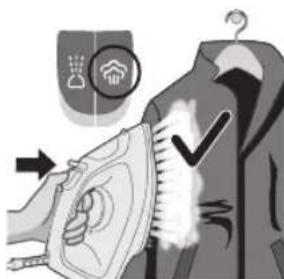
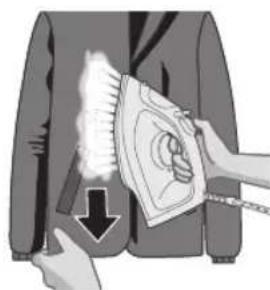
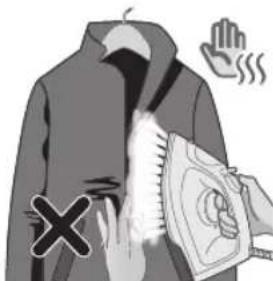
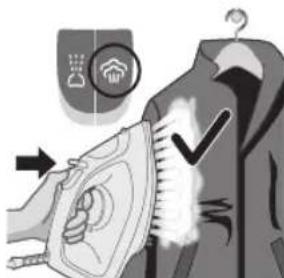
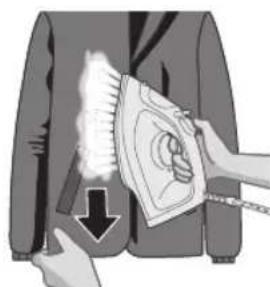
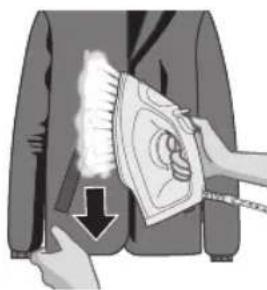
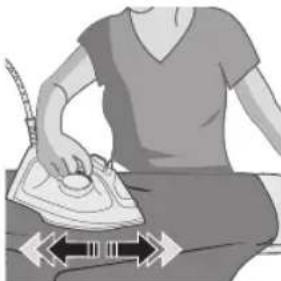
3 You can use the steam boost function when you hold the iron in vertical position for removing creases from hanging garments (for DST2020 and DST2030 only).
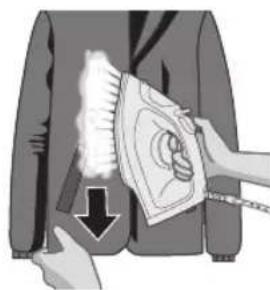
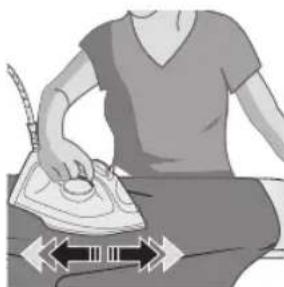
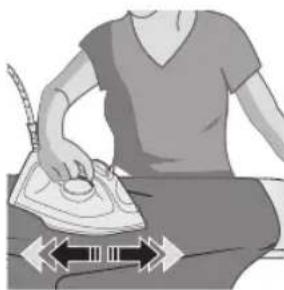
4 Pull and stretch your garment while applying steam boost to remove stubborn creases (for DST2020 and DST2030 only).
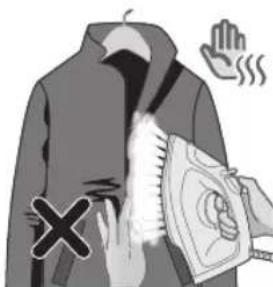
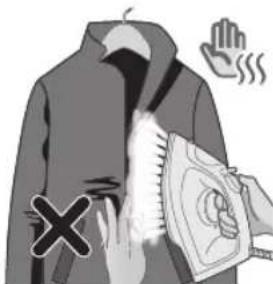
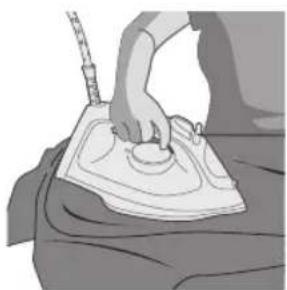
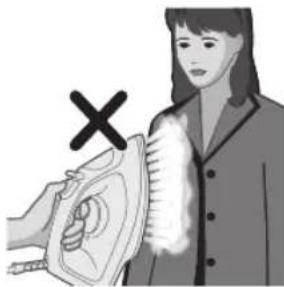
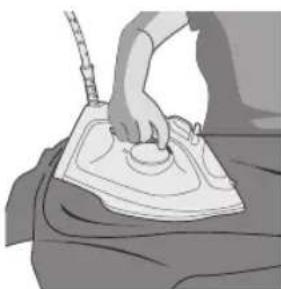
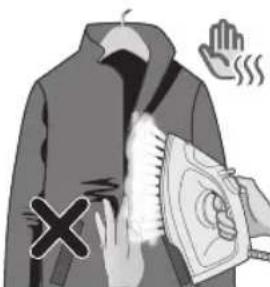
5 Do not use your bare hand as a supporting surface when you iron.
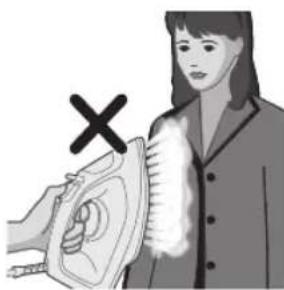
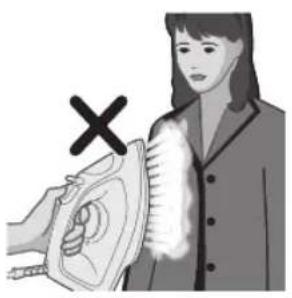
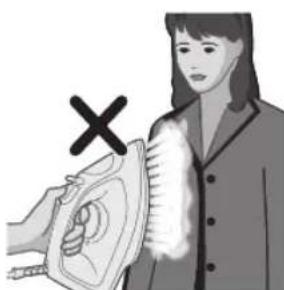
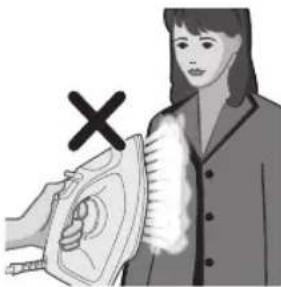
6 Do not position the appliance towards yourself/ another person.
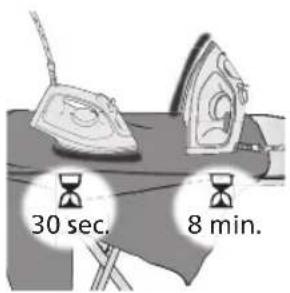
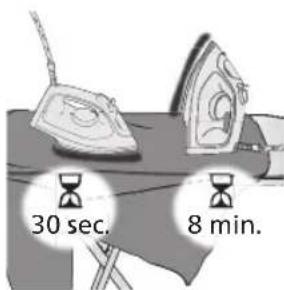
Auto shut off (DST2030)

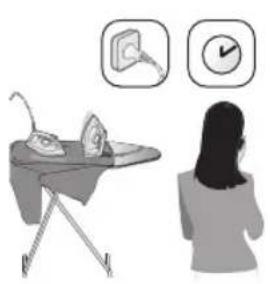
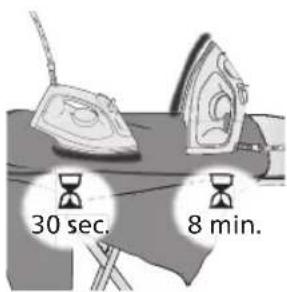
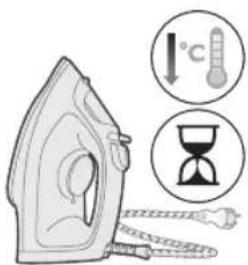
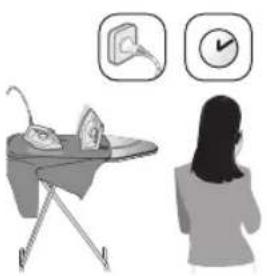
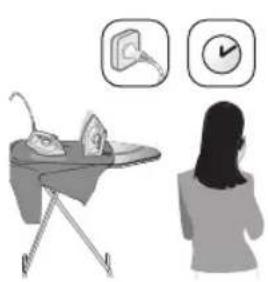
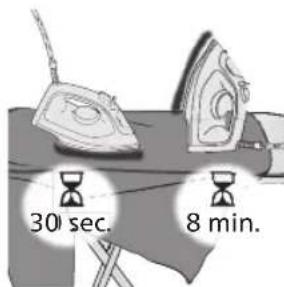
1 To give you a peace of mind, the appliance will cool down on its own if it is left unattended for a period of time.
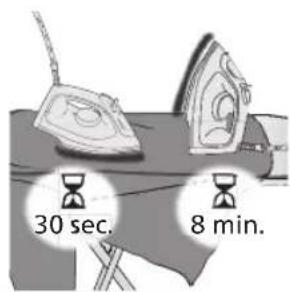
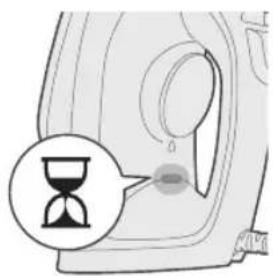
2 When the appliance is not in use for more than 30 seconds resting on its soleplate or 8 minutes resting on its heel/ base, the appliance will enter auto shut off mode.
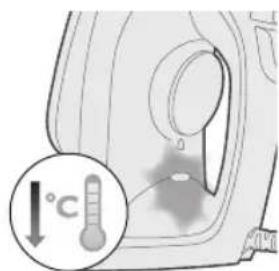
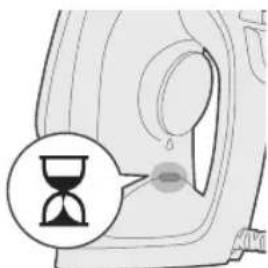
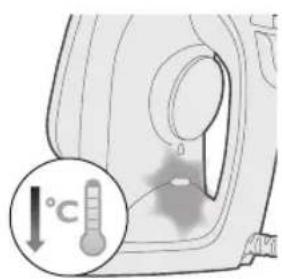
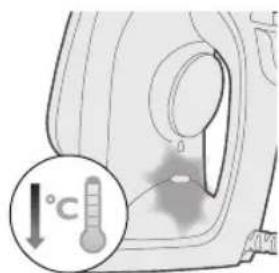
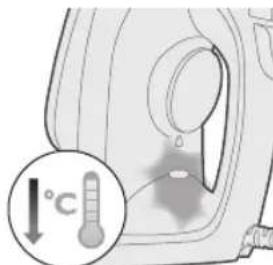
3 The temperature of the appliance will decrease in auto shut-off mode. The iron ready light will also flash non-stop to indicate the appliance is at auto-off status. To completely switch off the appliance, unplug the appliance from the socket.
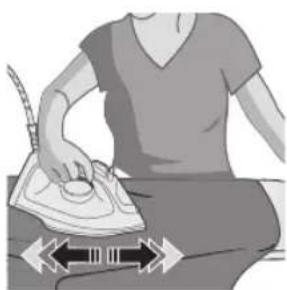
4 To let the appliance heat up again, pick up the appliance or move it slightly.

5 The iron ready light will light up, indicating the appliance is heating up.
14 English
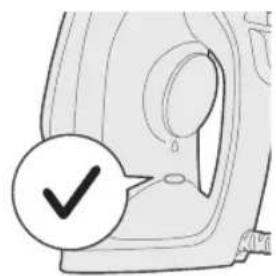
6 Once the iron ready light turns off, the appliance is ready to use.
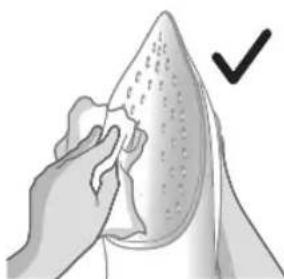
Cleaning and maintenance
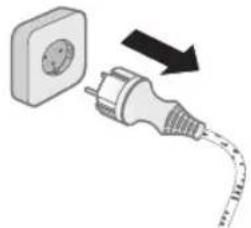
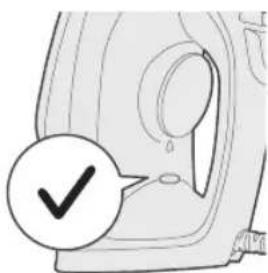
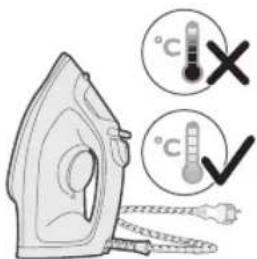
1 Ensure appliance is not plugged in.

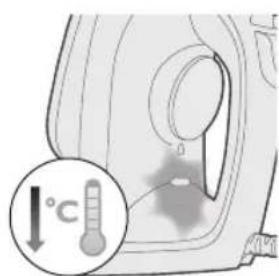
2 Ensure the appliance has cooled down.
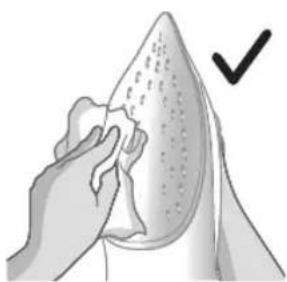
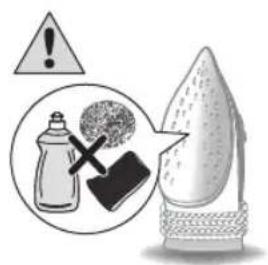
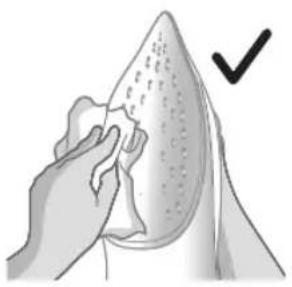
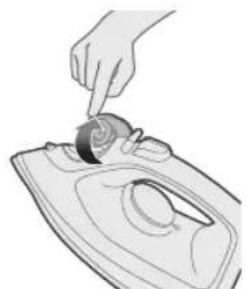
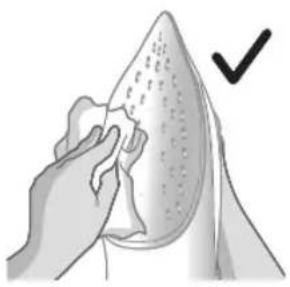
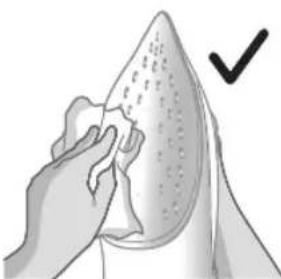
3 Wipe flakes and other deposit off the soleplate with a damp cloth.

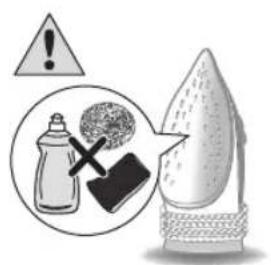
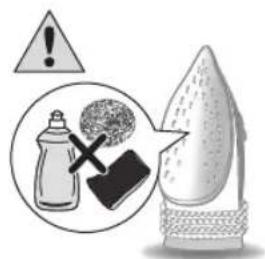
Note: To keep the soleplate smooth, avoid hard contact with metal objects. Never use a scouring pad, vinegar or other chemicals to clean the soleplate.

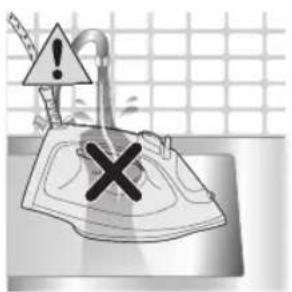
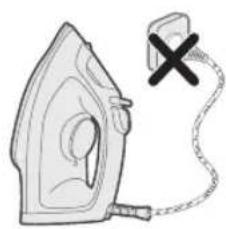
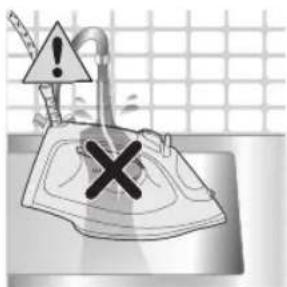
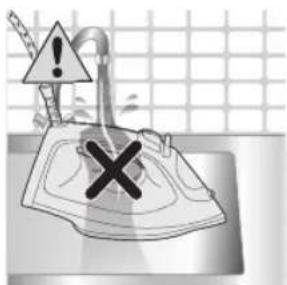
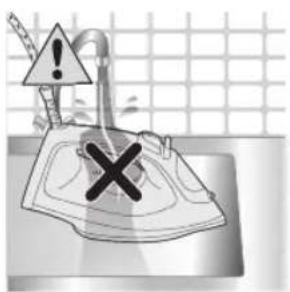
4 Do not wash/ clean the appliance under running water.
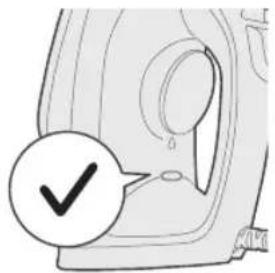
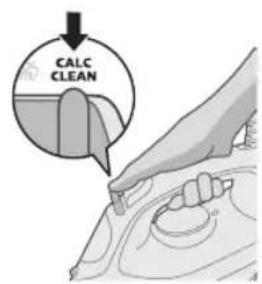
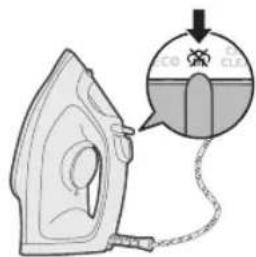
Calc-Clean

Tip: The Quick Calc Release function can be used at any time. If you live in a hard water area, use the function more frequently.
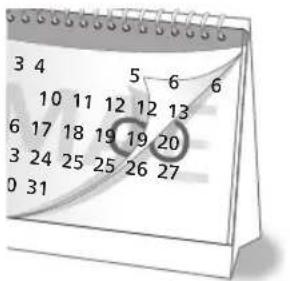
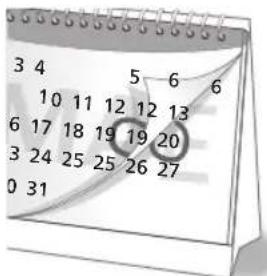
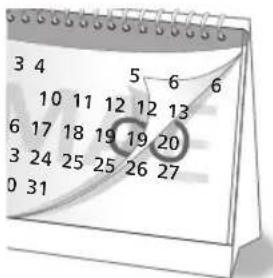
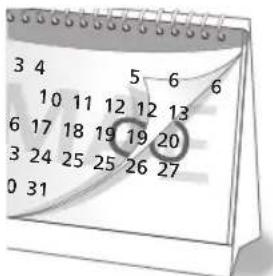
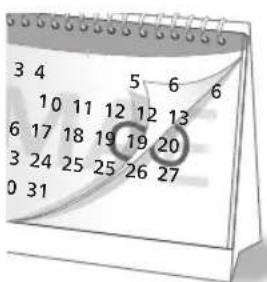
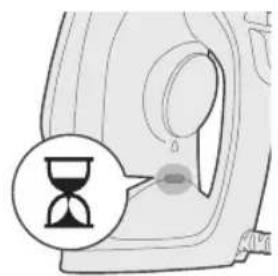
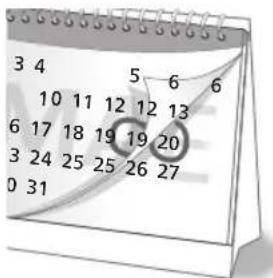
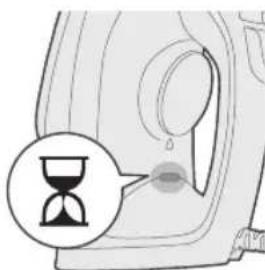
1 After 1 month of use, it is recommended to perform calc clean to remove scales collected from your appliance to prolong its life and ensure the appliance heats up.
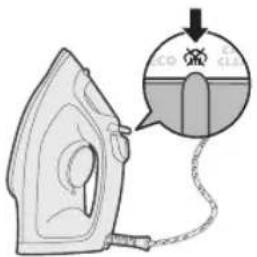
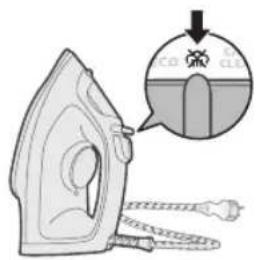
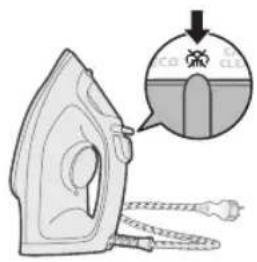
2 Make sure the iron is unplugged and the steam setting is set to no steam mode (dry ironing)
16
English
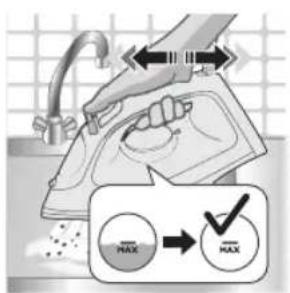
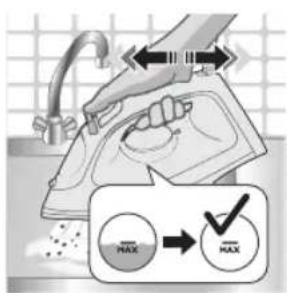
3 Fill the water tank to the MAX indication.

4 Set the temperature dial to MAX.

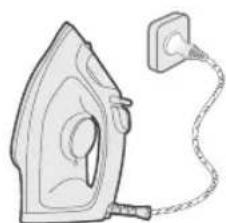
5 Plug in appliance to an earthed wall socket.
6 The iron ready light will light up, indicating the appliance is heating up.
7 Wait for iron ready light to go out.
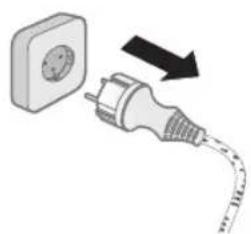
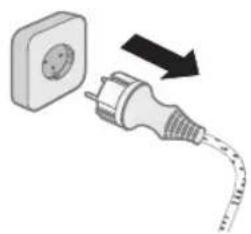
8 Unplug the iron.
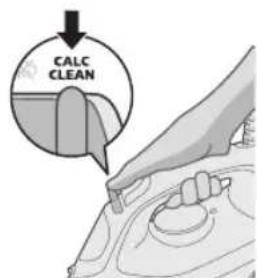
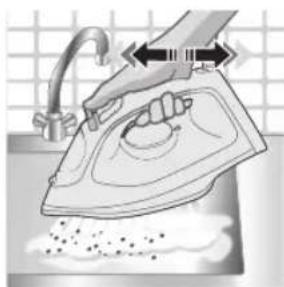

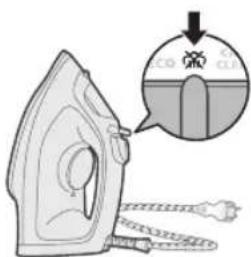
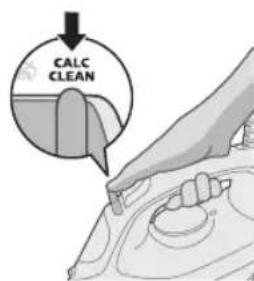
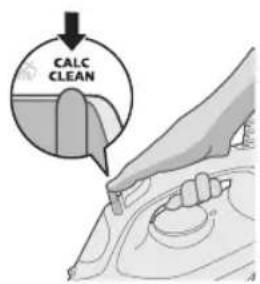
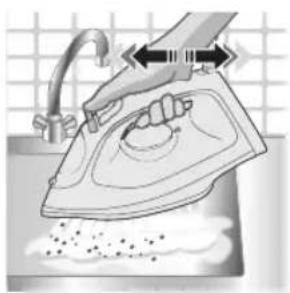
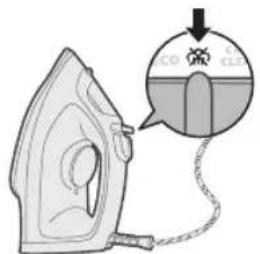
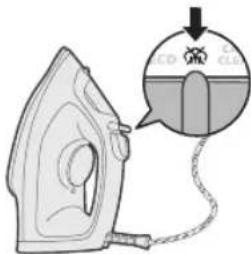
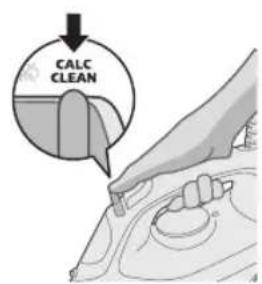
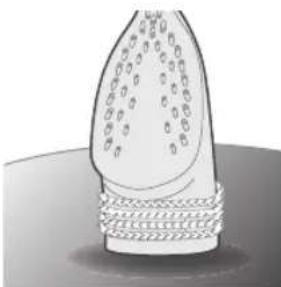
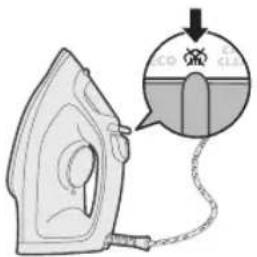
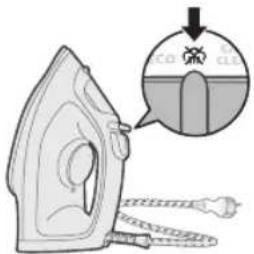
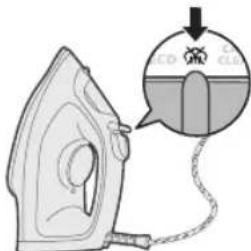
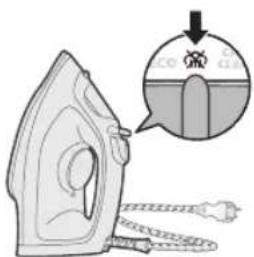
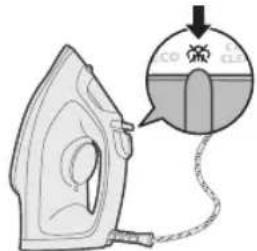
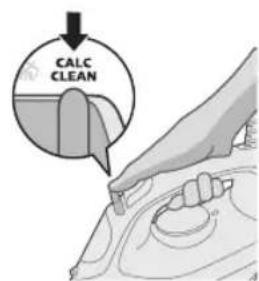
9 Slide the steam selector to the Calc-Clean position and hold it.
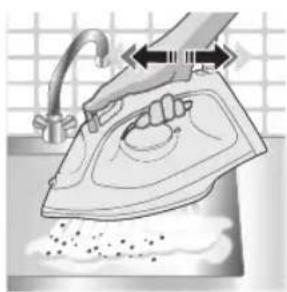
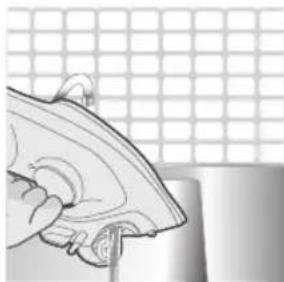
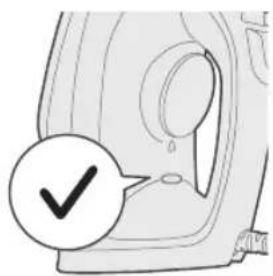
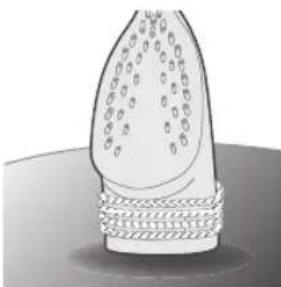
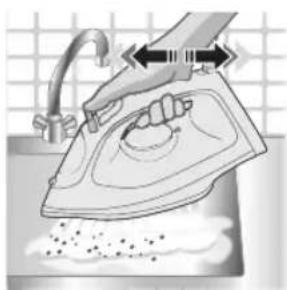
10 Hold the iron over the sink and gently shake the iron. Hot water and calc particles will be released from the soleplate.
Caution: While scale is flushed out, steam and boiling water also come out of the soleplate.
11 Continue to shake the iron until all the water in the water tank has been released.
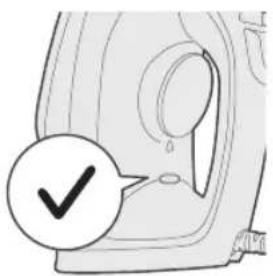
12 Plug in the appliance and let the appliance heat up to dry the soleplate. This takes about 2 minutes.
13 Let the iron cool down.
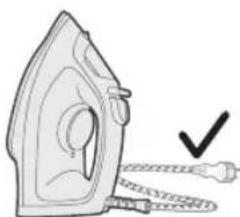
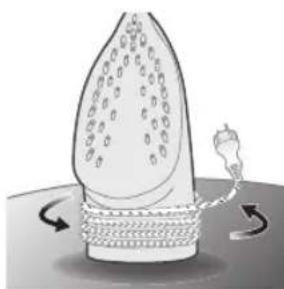
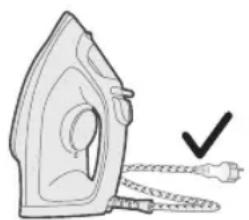
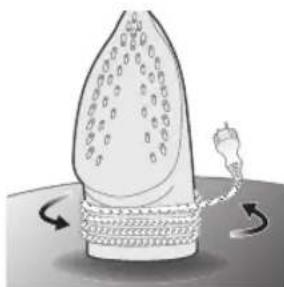
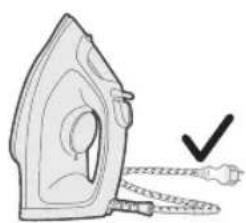
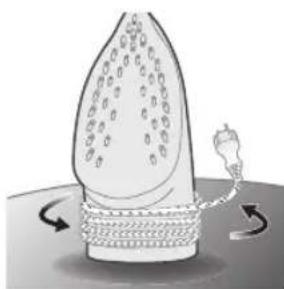
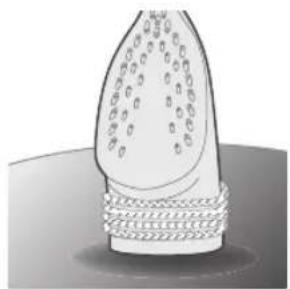
14 Wind the cord around the heel of the iron.
Storage
1 Slide the steam selector to select no steam mode (dry ironing)
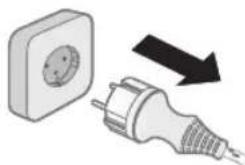
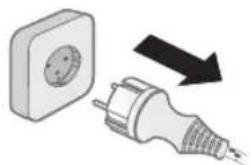
2 Unplug the appliance.

3 Let the appliance cool down.

4 Pour any remaining water out of the water tank.
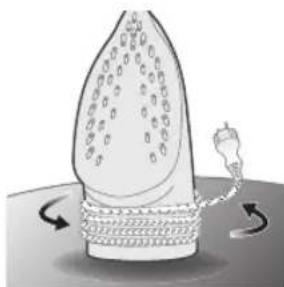
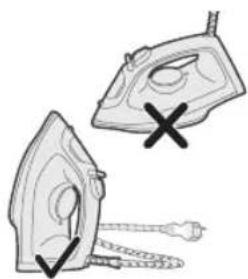
5 Wind the power cord around the main body of the appliance.
Trouble shooting
This chapter summarizes the most common problems you could encounter with the appliance. If you are unable to solve the problem with the information below, visit www.philips.com/support for a list of frequently asked questions or contact the Consumer Care Center in your country.
Problem Possible cause Solution
| The iron cannot remove wrinkles from the garment. | There is no steam during ironing. Fill the water tank and set the steam slider to | |
| The iron does not produce any steam. | There is not enough water in the tank. | Fill the water tank. |
| The steam slider is set to set the steam slider to . | ||
| The iron is not hot enough yet to product steam. | When the iron is heating up, the "iron-ready" light is steady on. When the iron is ready for use, the light turns off. | |
| Water droplets drips onto the garment during ironing. | You have used the boost function too often within a short period. | Continue ironing in horizontal position and wait a while before you use the steam boost function again. |
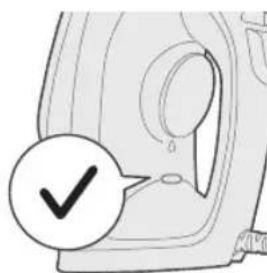
| You have not closed the water tank lid properly. | Press the lid until you hear a 'click'. | |
English
| The iron does not produce a steam boost. | You have used the steam boost function too often within a short period. | Continue ironing in horizontal position and wait a while before you use the steam boost function again. |
| The iron is not hot enough for ironing yet. | Wait until the ‘iron ready’ light has stopped flashing and lights up steadily. | |
| You have put a chemical into the water tank. | Rinse the water tank and do not put any perfume or chemicals into the water tank. | |
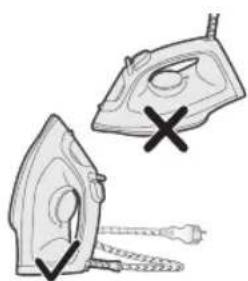
| Water drips from the soleplate after the iron has been unplugged. | The steam slider is set to set the steam slider to . | |
| You have put the iron in horizontal position with water still left in the water tank. | Empty the water tank after use, or store the iron in vertical position. | |
| The iron leaves a shine or an imprint on the garment. | The surface to be ironed was uneven, for instance because you ironed over a seam or a fold in the garment. | The iron is safe to use on all ironable garments. The shine or imprint is not permanent and disappears when you wash the garment. Avoid ironing over seams or folds. You can also place a cotton cloth over the area to be ironed to avoid imprints. |
Giris
| "MAX" | / / | |
| LINAS | ||
| ● ● ● | / / | |
| MEDVILNÉ |
204 Lietuviskai


SILKAS


SINTETIKA


4 Suv baki gopgog'ini chertib oching.

5 Suv bakini suv bakidagi MAX belgisigacha to'ldiring.
6 Suv baki qopqog'ini mahkam yoping.
Haroratni sozlash
| MAX ZIG'IRDAN TO'QILGAN MATO | |
| ●●● PAXTA | ●/● |
264 O'zbek


IPAK


SINTETIKA


Regular a temperature
| MAX LINHO | |
| ALGODÃO |
294 Portugues


SEDA


SINTÉTICO


4 Cihazi toprakl prize takin.
5 Utunun isindigini gosten utu hazirisiyanar.

5 Cihazi toprakl prize takin.
Arassalamak we abatlamak
1 Enjamyn toga dakylmandygyna goz yetiriñ.


2 Enjamyn sowandygyna goz yetiriñ.

3 Ütügün dabanynda galan übtukleri we islendik beyleki galyndylary cgygly mata bilen supürip ayryn.
SYNTHETICS (ΣYNθEτΙΚΑ)
Pouon ECO: Napexetau ouvexwç n éλaxiotn σαθepn noooteta atou yia uαouata με λiyótepeç toakioεic. Enion, autn pouon Εξοikovouéi evépyeia.

Δuo ouvefa atou: Napexetai ouvexw c nepioootepn noootnta atou yia tic duokolec taakiiei.
Tpia ouvvepha atmuo: Napexetai ouvexw c n meyiotn noootnta atmuou yia tic eioovc toakioeic.
XpnoTns ouokuens

1 ELeyTe TnV Etiketa Tou pouxou yia To anaitouveo oIdepwua.
2 PuθμioTe tov δiakóπtn θερμokpaoiaç σην επιθμnth θερμokpaoia oδερωμatoC, yupicovtac tov προτnν katαλληη ενδειη.
3 AfoTe to oidepo oe opthetaon.

4 2uvdeote tn oukeun o μa πiα μe yielwon.

5 H uxvia etouoitntac tou oidepou Oa avasei, unodekvovtac ot to oidepo epaivetai.

6 Otav oBnoeI n luxvia etouoTnTac oidepou, nepuevete liyo npiv apxioeteto oidepwa. Hluxvia etouoTnTac tha avabei kata diaotnata katatn diapkeia tou oidepwoatoc.
476 Eληνικα
Xwpic aTmuo/STeYvO oIePomega

6 He haoybae ypea KbM ce6e cn/dpyrOBeK.
ABTOMaTHUHO n3KJIIOuBaHe (DST2030)
1 3a da cte cnokonH, ypeBt ce cxnaicam, ako e octabeH 6e3 Haizop 3a onpeJeH nepnoD ot BpeMe.
2 KoraTo ypeBt He ce n3non3Ba 3a noBeue ot 30 cekyHn, koraTo e noctabeH Bbpxy rnaeaaT a NOBbpxHOCT, nIi 3a 8 MmHyTu, koraTo e noctabeH Bbpxy neTa/ochOBaTa, ypeBt uE Bne3e B pexM Ha aBTOMaTHNO NkNIOUbaHe.

3 Temnepaypata Ha ypeda ue ce noHxN B pexm Ha aBTOMaTnHO n3KJIIOUbaHe. CBeTINHHnT INDnKaTOP 3a FOTOBHOCT Ha IOTnra Ta cbio ue Mrra 6e3 npekcbaHe, 3a da NOKaxe, ye ypeDbTe B cbCTOHa He aBTOMaTHNO n3KJIIOUbaHe. 3a da IN3KJIIOUHTe HAnbInHO ypeDa, IN3KJIIOUte Ro OT KOHTaKA.

4 3a da octabte ypeda da ce harpee OTHOBO, BnHHeTe ro nIeKO rpoa3dBuxkeTe.
5 INHnKaTOpb3a FOTOBHOCT HaIOTnTa Iue CBeTHe, KOeTO O3HaayBa, YpeBt Ce HapraBa.
494 bIrapckn

6 CnEi KaTo HnDnKaTOpbT 3a rOToBHOCT Ha IOTnra Ta ce N3KnIOuN, ypeIbTe rOtOB 3a ynoTpe6a.
2IaMaHbIH My3daRaHbIH TeKwepnHn3.
3 YTyKTH aTbIHdArbl yIyNlKeKTepy xaHa 6aUka KaIbIKTapdbI HbIMdy yynpok MeHen cyPTyHy3.
3ckepyy:YtkyTH TaMaHbI DaMbIMa Xblmakai 6onyccy yHy, aI MeTaNda H xacalraH HpcsepeRe kaTy ypynycya H kon 6ep6eHn3. YtkyTH TaMaBH Ta3aJoo yyH 3u Kaayh XblKbUThbI, yKccty Je 6aWka XmNkattapdbI KOJIOHOHy3.
4 1aHaMaHdbI aBbIH cyHyH acTbIHJa Kyy6aHbI3/ Ta3aNa6aHbI3.
Ke63p Ta3a1oo
Kehei:"5aT Ke63eP Ta3aNoo" fynKcIycbH KaalaraH y6aKaT a KOnHOco 60not.
3repce n3 CyyHyN KaTyUlyry KOrOpY aMakTa XaWacaHb3, 6yI fynKcIyHb Te3- Te3dEHN KOLOHyHy3.
1 1aonHOHON KINHH, anbIH NHTeMoeHETyH y3apTyjXaHa
7aMaHbIH bCbIbIH KaMcbI3 KbIyy MaKcTbIHda 7aMaHbIHbI3Ja YoYJraH
Ke63pAnbIn caiyy uVH Ke63epn Ta3aJIOO nH aTKapbl Tpyy
cyHyUtaJat.

2 YyKTy po3eTkaH axbipaTbIraHbIH xHa 6yyCy3 peXIMnHe KOIOJIraHbIH TeKwepuHn3 (kyprak yTKTeo)

3 Cyu yelenHH MAX 6enrncnHe ueunn TOnTpyHy3.

4 TemnepaTypa TeprHuH MAX a6aIbHa KOUHy3.
5 LaaMaHdbj Xepre TytaWbIpbIraH po3eTKara raHa caBbIb3.

6 "YTyK daap" KepcetKyuy Kyuyn, WaMaHaB bCbIn KaTkaHbH KePCeTeT.

512 Kbiprbl34a
7 "YrKaJaep" KepcTeKyyHyH OuyuHy KytHy3.
8 YTyKTy po3eTkaJaH cyyyHy3.
9 Byy pekmnn "Ke63eP ta3aIoo" a6aIbHa XbIbIbIbI, KapMaT TpyHy3.

10 YTyK TY paKOBHaHbIH yCTyHe KapMaI, YTYK TY aKbIPbIH qaKaHbI3. TaMaHbIHbICbIK Cyy KaHa Ke63ep arBn 4bI rAT.
A6aJla:Ke63aparbinyibinXaTkaHdaYTVKTHaMaHBHaH 6yy MeHe KaHaNKaTkaH cyu daBkoIoo YbIrat.

11 Cyy yenreHHen cyy 6yTKyue TYkTu aanKa 6epnH3.
12 ⅢaHMaHbIpo3eTKara caHbIn, TaMaHbIH KypraTyy yUyH YTYK TY bICbITbHbI3. ByJ 6oJxOJI MeHeH 2 MyHOT CO3yJat.

13 YTyK TYToJyK My3JaTaBtIbI3.

14 WHypyyTyrKTH corOHHoryHa opon KOIOHy3.
CaKTOO

1 ByyCy3 peKIMn TaHDOo yHyN 6yy TaHdaTbIbI XbINDbipbIHbi3 (kyprak
2 LJaMaMaHdbipo3eTkdaHa CyypyHy3.

3LJaMaHaDbI TOnyK My3DaTbHbI3.

4 Cyy ueJenHne KaIraH cyyHy Teryn TaUHaHbI3.
KopncTeHe Ha anapaTOT
PonroTOBka 3a ynoTpe6a
3a6eneuka: npn npBTo KOpncTeHbe, nergaTa MoKe Ja NcnyTu MaNky napea. Toa Ke npctaHe 3a KpatKo BpeMe.
TIN BODA wTO Tpe6a da ja kOpncTnte
AnapaTOT MOKe Da Ce KopnCTn CO BODa OD YeIMa. MeIyToa, aKO XINBeTe BO Ioppaue Co TBpda BODa, BN npenopaUyBaMe Da n3MeuAte eHaKBa KOJIuHnA BODa OD YeIIma Co DeCTnInpaHa NII demnHepaIIn3npaHa BODa. OBa Ke cnpeuN 6p30 TaIooKeHe Ha 6nroPnKe Ro npoDolJn pa6OTHnOT BEK Ha anapaTOT.
He doaBajTe napmmpaHa B0da, B0da oM MaunHa 3a cywehe aHHTa, ouet, tnpak, cpeCTBa 3a OTcTpaHyBaHbe 6nrop, aNTbH 3a nElaBe, B0da wTo e xemckn mChncteHa oD 6nrop nI npyrn XEMKaJIn, 3aToa wTO MoKAT da npedn3BnkaaT HargIo nCpnyBaHBe Ha B0da, nojaba Ha KafeHn DaMKn IIN OwTeTyBaHBe Ha anapatot.
PonHeHa pe3epBoapOT 3a BOda
1 Hemojte da ro npNKnyyBaTe anapatoT.
2 PpOBepeTe daJIne ce oJaIaI anapaTOT.


3 IomeTeTe ro konyeTo 3a n36op Ha napea Haecho 3a da n36epepepeim 6e3 napea (cyo nergnahe)
4 OTbopeTe ro kanaKoT Ha pe3epBoapOT 3a BOJa.

5 HanoiheTope3epBoaopT3aBOdaO3HaKaTaMAXBope3epBoaopT.

6 LbpcTo 3aTBopeTe ro kanakOT Ha pe3epBoapOT 3a Boga.
NocTaByBaHbe TemnepaTypa
| MAX LINEN (ЛЕн) | / / |
| COTTON (ПАМУК) | / / |


SILK (CBNJIa)


SYNTHETICS (CNHTETNIKA)

Noctabka ECO: KOHTHynpaHO ce nCnyuTa MNHMaJHa KOHCTaHTHa KOJIyHnHa Ha napea 3a o6IeKa co nomakky ha6Opn. Obaa noctabka 3aWTeNyBa n eheprna.

Два oblaши Ha napea: KOHTINHynpacoHo ce nCnyuTa nOrOJIema KOHCTaHTHa KOLIChHa Ha napea 3a OTCTpaHyBaHbE Ha TBpDOKOpHnTe Ha6opn.
TpnooblauHa napea: KOHTnHynpaHo Ce nCnyuTa MaKcMmaHa KOHCTaHTHa KOJNUHa Ha napea 3a OTCTpaHyBaHe Ha TBpOkOpHnte Ha6opn.
KopncTeHbe Ha anapatOT

1 NorneHe ja etuketata Ha o6keT3a noTp6HTo nIrahe.

2 Nocabete ro perynatopot 3a Temnepatypa Ha noTpe6hata Temnepatypa 3a nerlahe Taka uTo Ke ro 3aBPTnte Ha COoDBeTHata O3Haka 3a Temnepatypa.

3 NocTabete ja nerIata BO nCnpaBeHa noLoX6a.

4 PnKnyeTe ro anapaTOT BO 3aEmjeH sUdEHN UTeKeP.

5 INHdkatopot „nerlata e noIrotBeHa" Ke noUHe da CBETn 3HaHn DeKa nErIata ce 3arpeBa.
6 Kora ke ce ncknyu nnndkaTOpOT,nerlaTa e noDrotBeHa",nouekajTe MaKy nped da 3anoyHeTe co nergaHbe.3a BpeMe Ha nergaHeto, INdkatopOT "nerlatae noDrotBeHa" Ke ce BKnyuBa NOBpeMeHo.
Be3 napea/CyBo nerlahe

IoproTOBka KncnoJIb3OBaHnIO np6opa
PnmeHne. Pn nepBOM nCNOJb3OBaHH yTHo Moxe TNOBJIbTbcn He6OJIbwoe KOJInuEcTBO dIbMa. Bckope RaJIeHne Ncye3HeT.
TINNCNOLb3yEmoBBObl
Pnp6op npirodeH nIcNoB0aHnC BODonpoBOHOBdo. OHaKo ecn BbIXBeT B perIOHe C JecTKoB BOO, peKOMeHdyETc CMeuBaTb BOOnpOBOHyO BOy C demHepaHn3OBaHHo B DOoB paBbIx npOpOpzHX. 3To nomoxet n36exaTb 6bictporo o6pa3OBaHn HaKnn N npOanT cPok cnjx6bl np6opa.
Bo n36eKaHne nOaBLeHnI npoTeueK, KopuHHeBbIX pTEn IJIIOBpeXdEHNr npi6opa He nCNoIb3yIte dUxN, BODY n3 cyuINbHOIMaUNHbI, yKcyc, KpaXMaI, cpeCTBa ONUCTKN OT HaKUnI, IO6aBKnDЯ rIaJKeHnI, XmMueckne BeIecTBA N BODY, NOdBepRShyUocOuNCtke OT HaKUnI C nCNoIb3OBAHnEm XmMueckNX cpeCTB.
3aopoJIHeHne pe3epByapa IJRA BOIbI
1 He noДКЛЮЧАЕприборклелктрocети.

2 Y6eNTecb, yTO npn6Op octbl.


3 CnBnHbTe nepeKlIOuATEnb npa BnpaBO, TTo6bI Bbl6paTb peKm 6e3 npa (cyxoE rnaKeHne)
4 OTKnHbTe KpbIuKy pe3epByapa Dn BODbI.
5 3aONHnTe pe3epByap BOOOnpOBOHOBHOO JO OTMeTKN MAX.
6 IIOTHo 3aKpOte KpbIuKy pe3epByapa DnBODbl.
534 Pycckn
HacrtpoiKa TempepatypbI
6 Korda uHnIkaTop roTOBHOCTn norachet, 3TO 6yJeT O3Haayatb, 4TO npu6Op roTOB K pa6ote.
Ounstka n yxod
1Y6eIHTecb,HTO npn6Op He NOKJIIOUeH K 3JNeKTPOCeTn.

2Y6eHNTecb,HTo npu6op ocTbI.

540 Pycckn
3 Bbtpnte BnaXHOI TkaHbIO XNONbHaKUNN INpyrne npedMeTbC NOIOWBBI.
PnmuMeaHne.ДЯ NOdpeKxHnRAJAKoN NOBepXHOCTN NOOWBbl
I36eAaTe KOHTaKaTaNBeSeN C MeTALNuYeCKMn OObEKTAMn. He
NCNoJIb3yInTe MeTALNuYeCKyU r6Ky, yKcyc N dpyrNe XUMKaTbI DnI OuNCTKn
IOIoWbbl.
3anpeuaeTc npombIBaT np6op npoToHoi BOIo.
Calc-Clean
Cobet.ФункцЯ Quick Calc Release ДocTyна ДяakTиBaциь Любoe Врем. EcIn Bbl XnBte BpernoHe CжecTKO BODOn, nCNoJb3yIte ee qaue.
1 Pocne OndHoro Mecaa nCnoJb3OBAHn np6opa peKomeHnyetc 3anyctntb ouNCTky OT HaKnHn, yTo6bI ydaJIbTb OCTaTKn HaKnHn, cKONNBunecr B np6ope, npoJInTb erO cPOK cnJyK6bI n ObecneuHTb ONTMalhbHn HarpeB.

2 Y6eNTecb, yTO yTIOr OTKIOUeyH OT 3JIeKTPocetn, a nepeKIOuateIb npa BbICTabIeH B NOIOXeHne 6e3 npa (cyxoE rJaxeHne)

3 3aONHnTe pe3epByap BOOOnpOBOHOBHOO JO OTMeTKN MAX.

4 C nOmoIbu Dncka BbIepeNte Tempeatypy MAKC.

5 PoiKJIIOHTe np6Op K 3a3eMHeHHo pO3eTKe.
6 3aropntc nHnKatop roTOBHOCTyTOra; np6Op HaxoNTcB COCTOHN HaPeBa.
542
Pycckn

7 NdoxKdTe, noka 3OT INHdkaTOp He noracheT.

8 OTKHIOHTeYTOrO TJIeKTPoCeTu.
9 CnBnHbTe noJ3yHok npa B noJoxeHne Calc-Clean n ydepXnBaIte ero B 3TOM noJoxeHN.
10 YdepxNBa yTIO Ha paKOBHHO, akkypaTHo BCTpXHnTe erO. Yepe3 nooBBy HauHET NOdaBaTbCra TOpqyA BODa C cactNuAMn HakuNn.
BHHMaHHe! Pn BbMbBaHn HaKnn Ype3 NDoWBy 6yTe TnOaBaTb ropAyn np n KInrTOK.

11 PpOOnJaTe BCTPaxNBaTb yTHOr, NOKa pe3epByap IJIy BOdbI He OncyTeeT.

12 POKJIIOUHTe np6op K 3NEKTPocTe n daIte emy HArpeTbcra, YTO6bl IPOOUBa yTIORa BbICoxla. POKJIIOUeHne 3AHMaet npImepHO 2 MmHyTbi.

13 DaIte yIry octbIb.

14 O6MoTaIe ceTeBOH yHp BOKpy 3aHHe YacTn np6opa.
XpaheHne

1IpepeBnTe nepeKJIouaTeNb npa B pexm 6e3 npa (cyxoerJaxKeHne)
2 OTKJIIOUHTe npu6op oT 3NeKtpocetN.

3 DaIte npnbopy octbItb.
4 BbIeTe octaTKn BOdbu n3 pe3epByapa.

5 O6MotaTe ceTeBOH uHyp BOKpyr OCHOBHO uactn np6opa.
YctpaHHe HencnpaBHOCTeI
B daHno rnaBe npnbdeHb np6bEmb, KOToPbI HaNoOee qacto BO3NkaHT npn EKcnnyatau np6bopa. EcIn cAmocToTeNbHO CnpaBntbcra C Bo3HNKUnm np6bEmam He ydaetc, CM. CNUCOK qacto 3aDaBaembIX BOpocOB Ha Be6-CTpaHnce www.philips.com/support nnn o6paTntecb B ceHTp noDpeXKn notpe6nteJe B BaWei cTpaHe.
PpO6JIeMa Bo3MOxHna npuHa PeueHne
| He ydaetcya ydañtbcckladičncs TKaHn yTórom. | Bo Bpemra rllajekhna He noJaetcny nap. | HanoJHnTe pe3eRByap dny BoDbl n yctaHOBnTe nepeKljuCteJb peXIMOB noJaun napa B noLoJxHne |
| YtIg He BvipaBaTaBaet nap. B pe3eRByape HeidocTaToUH BOdbl. | 3aNoJHnTe pe3eRByap dny BoDbl. | |
| PiPeKljuCteJb peXIMOB noJaun napa yCTaHOBLeH B noLoJxHne | UcTaHOBnTe nepeKljuCteJb peXIMOB noJaun napa B noLoJxHne | |
TaH3nMOTn ECO: ByfN xaIaIaIaIaIaIaIaIaIaIaIaIaIaIaIaIaIaIaIaIaIaIaIaIaIaIaIaIaIaIaIaIaIaIaIaIaIaIaIaIaIaIaIaIaIaIaIaIaIaIaIaa. H TaH3m IHHyHIn 3HeprtnraPo cappa MekyHa.

Dy a6pn 6yF: 6yFn 6eTapn DOUMn naBacta 6apOn KaTxon kKpaB pacoHnda Meuaba.

Ce a6pn 6yF: ByfM MaKcImaJIn DoUIM naBacta 6apOn KaTxon RaKpaB paCoHnDa MeuBaA.
Ictnfoan daCTROX

1 TaFan nn6ocpo 6apon np3MOJkyHnn 3apyr TaTNIk KyHei.
2 YaBbAnxapopatpo 6a xapopatn 3apynn np3MOnkyh rgyoTa, onpo 6a HnHOnDnxHaan MyBoΦnKxapopat Ta6nI nIxed.

3 Bnrgopei, KI np3MOJ np noHaaw nCTa.

4 CmN dap3MOJpo 6a BaCnakn DeBopn Bacn KyHei.

5 HnHOnDnxHaan OMOaGarN 6yF cypy3OH MeWaaBaN,Kn a3 OH WaxOaT MeNxA,Kn DaP3MOJ ramp Wya nCTOdaact.
6 BaKTe Kn HnwoHnIxHaHdAn dap3MOJ XOMyU Wyd, NeW a3 OFo3N dap3MOJ KapdaH Kame nHTn3Op UaBeD. XaHROMn dap3MOJkyHn HnwoHnIXaHdAn Omoaru 6yF rox-rox, fpy3OH MeuBaI.
БуFcHecr/Дap3MOJkyHnN xuSK
1 TaH3NMOr6yFpO 6a TaH3NMOr6e 6yF Mykappap KyHeJ.

2 Na c a3 Ja K MydtaN KyTOX 6yf xaHromn daP3MOKHy KaTb MerapdaI.
Пошпдун o6
1 TaH3UMOTn 6yfpo 6a TaH3UMOTn 6e 6yF MyKappap KyHe, TyrMaN nouHaHn o6po 6bapon qapaehn Tymah naxw KyHeB Ba paxo KyHeD, To KaTxOn MyCTaxkAmpo XaMBoP KyHeI.
552 Toynk
TaKBnAyn 6yF

1 YaBaan xapopatpo 6a TaH3nMOTn MAKC 6aHH naxTa Ba KaTOH TaBH KyeI.

2 Bapon 6apTapaHamydaHn KaTbXoN KALOH TyrMaN TaKBrAeN 6yFpo naxu KyHeB Ba cap dIXeI.

3 LMyMo MeTaBOHeI d fyHKcIaN TaKbIaTn 6yFpo XaHROMn 6a TaBpN amyI HnroUdOuTaHn daP3MOn 6apon DaP3MOJ KapdaH JIn6ocxON OBe3OH nCTnΦoJa KyHeI (TaHxo 6apon DST2020 Ba DST2030).

4 XaHROMn HCTnfoDa 6ypaHn TaCBArTb 6yF 6apOn xaMBOp kApdaHn KaTxON Myctaxkam JIbOcN xUdo PaKeKaWeB Ba Iap03 KyHeD (TaHXo 6apOn DST2020 Ba DST2030).

5 XaHROMn da3MOJ kaPdAn dactn lyuPo xaMuyH caTx nCTnfoDa ha6apei.
6Дactroxpo 6a xud e waxcn nirap paBOHa hkyneI.
XoIaTn XomyukHnn xudkop (DST2030)
1 Bapon opomn m ymo, aarmpyndatn tyloh 6exapaKa T Hrox doTa WabaD, daCTROX, 6a TaBpn xydkop xyHyk MeuabaD.

2 BaKe KI nactrox nap tyin 3nEa a3 30 coHna nap pyn noN xyd e 8 daKnKa nap noHa/noraun HIOX IOU Ta WAbd, dactrox 6a xonatn XOMyKuHN xykOp BOpund MeuaBd.
3 Xapopatn dactrox, dap xolatn xomyknynn xydkop nact MewaBAD. HnohnxaHan "omdaTn nap3mon" aawmaK me3aHa, To Hnwoh Dnxad, Kn daCTROx, dap xolatn xomyknynn xydkop BOpN uyaact. Bapon npppa xomykapdaHn daCTROx, daCTROxpo a3 BacnaKn bapK ydo KyHei.
4 Bapon ny6opa ramp uyaHn daTROX, daCTROxpo ripeE kame xapaKaT dnxE.
5 HnHnHaan OmoaIap3mon yp3oH MeaBa,Kn a3 OH IaxOaT MeHXa,Kn daTROx rapM Wya nCTOdaact.
6 BaKTe Kn HnHOnHnXaHaN OMOdaHn DaP3MOJ XOMyM MeuBaN, daCTROX, 6apon nCTnfoDa OMOda act.
To3aKynBa HnroXdopn
1 BoBapn XocnI KUHe, KN daCTroX 6a BaCnaKn 6apKn naBacT NaWydaact.

2 BoBapu XocnI KUHeN, KN DaCTROX xyHyK WUdaaCT.


3 Kapaxu Ba nirap 6okmoHdxopo a3 3epn no npo 60 Maon Hamn Ba To3a KyHei.

Uapx: Bapon xamBOp Hnroox DooTaHn CaTxn PoEHN TaxTa, Hary3opei, KI OH 6o aXeON MetaII TAmoc rnpaI. Bapon To3a KapdaHn 3epn noR nCpaHxOu a6pa3NB, CnPKo Ba Dnrag MaBOOn KIMNEBnpo NCTnΦoJa Ha6apei.
4 Dactroxpo nap 3epn o6n paBOH wcytaH/To3a KapdaH MymKIn HecT.
Calc-Clean
MacnxaT:ФyHKcnaq Quick Release Calc-po yap xap BaKT nCTnΦoJa 6ypdaH mykIn act. Arap ymo yap k MntaKaan 6o o6n caX T3nDaI KyeI, IN ΦyHKcnaqpo 3yd-3yd nCTnΦoJa 6apeI.
1 Paac a3 1 Moxu nctnfoa TaBcna IoJa MeWabad, KI KapaxxOn dap DaCTROXn Wymo qambuyapo 6o cyHKcnrae Calc-Clean To3a KyHeD, To Myxnatn nctnfoa6apnn daCTROxpo daP03 KyHaD Ba rApMn daCTROxpo TaBMnKyHaD.
2 BoBapn Xocnn KyHei, KI dAp3MOn YyDo KaPda Wyaact Ba TaH3mOTn 6yF 6a xOJaTTn 6yF rY3oWtHaWyDaaCT (dAp3MOkynn xyuK)
3 3apfnoTo HnHOnHnXaHaN MAKC npKyuHei.

4 YaBbannxapopatpo6aMAKC TaunH KyneI.

5 TaXn3oTpo TaHxO 6a BaCnakn DeBopu 3aMnH naBacK KyHeI.
6 HnwoHnXaHnO mOdaHn dap3moJ fpy3oH Meuaba, Kn a3 OH waxoata MeiNxad,Kn daTROx rapM wyda nCTOdaact.

7 HHTn3Op 1aBeN, KI HnHooHINxHaHdAn OMOdaRn DaP3MOJ XOMyW IaBaD.

8Дap3MOnpo a3 BaCnak yydo KyHeI.

9 IHTnxO6kyHaHdAn 6yIpo 6a MaBKeBu Calc-Clean JarXoHeD Ba OHpo Hurox, dopei.

10Дap3monpo nap 6oON dactwyk HnroXdopei Ba nap3monpo oxncta yH6oHe.Obn rapm Ba 3appaxon kapaxw a3 nOJxopuM MewaBaHd.

OroxXaHromTo3aKapdaHnKapaxa a3noa 3ep,xaMuyHbBa06u
11 To OH IaMe, KI TAmOMn 063apfN O6 xoJI HaJABaI, yH6OHNaHpo IIOOMa IINXeI.

12 Iactroxpo 6a 6apK naiBact Kyeed Ba 6n3opei, KN daCTROX rapM uBaA, To NOHn OHPO xyuK KyHaD. IN TaKpN6ah 2 daKnKa MernpaI.
13 BnI3opeJdap3MOJ xyHyK WaaBd.

14 Cmpo np aTPOn noHn oxaH neoHei.
3axupa
1 HHTnxO6KyHaHdAn 6yFpo JnafxoHei, To xoJatn 6yFpo Xomyu KyHei (Jaap3MOJkyHnn xyuK)
2 Iaactroxpo a3 6apK yydo KyHeI.


3Bun3opei,naCTROx nyppa xyHyk waBaI.

4 06n 6okmohapo a3aepno o6 pe3e.

5 CmM 6apKpo da patoqn kopyn acocnn daactrox To6 duxei.
Ба rtapaф карданушкелOT
H6o6 MyKJIOTN MaBMyIaPInHePo, KI yMo 6o daTROx dyOp Meoei,
aMb6act mekyHaI. Arap yMo HameTaBOHeD MaCbIaIApO 6o MaBlyMOTn 3epHH
XaN KyHeD, 6a www.philips.com/support TaupnO bapeN, 6apon pynxTu
cABONxON 3yD -3yD IOdaWabAHDa e 6o MapkaN Hiroxy6uHN
UCTeBMOJIkyHaHaIarO Hap KINbApN xyn TaMOC rpeD.
Mysknnot Ca6a6n 3xtmmoi PoXu xaI
PiIroTOBka Do BnKOpncTaHHa
Ppimitka. Piauc nepworo BnKOpncTaHna 3 npackmoke BxOaHTnpa.Le He3a6apom npnnnHtbcra.
TnBODn,kycnid BkOpncTOByBaTu
Длпсгю можнавикоростовыВоу 3-пд крана.Однakякio ВиЖиБеВобlacti 3хорстКою BODOI,Мп peKOMeHdYEMO Bam 3MiшУВаTNВpIBnIX nponopciЯx BODy 3-пд КранаТа дИстЛьвогану abo DeMINEHepaJIЗOBaHy BODу.ЦзANO6iratUME wBnIDKOMy yTBOpEHHIO HaKNpy Ta nOIOBxNtB CTPOK cnyXbNпрстpoю.
He dozaBaTe napfymu, Body i3 cyunlboHoi Maunn, ouet, KpoxMaJIb, 3acobn npotn Hakny, 3acobn dI pyacyBaHHa, BODy nicra ximichoro BvdaJIeHNHaKny uHni xiMiyi peoyBHH, OCKIbKn BOH MoKyTb cnpuHHTn po36pn3kyBaHHa BOn, noRBy KopuHBeNx Pnam Yn NOsKOJKeHH npncTroO.
HanoBHeHHpe3epByapaIJIBAOIN
1 He niD'εnHynte npncpti do mepeki.
2 IpebeipTe, u npictpi oxoNoHyB.

3 IepecyHbTe peryIaTOp napn BnpaBo nIa Bn6opy pexmMy "6e3 npn" (npacyBaHH 6e3 BiInapIOBaHH)

4 BiKpnIe KpnUkpe3epByapa IJIa BOIN.
5 HanobHitb pe3epByap BOIOIO IO no3HaKn "MAX".
6 ⅢIbHo 3aKpInTe KpnKpypeepByapa DnBODn.
HanaWtYBaHHa Tempepatypn
| MAX LINEN | / |
| COTTON | / |
564
YKpaIHcbKa


SILK


SYNTHETICS

HaataybaHHa ECO: minimalbna noctiHa noada npn 6e3 nepepbn nI npacyBaHH oJry 3 HeBENKOIO kInbKiCTIO cKlaIOK. Ie hataybaHH TaKoX 3aoaJxky eheprio.
Ди napoviхмари: 6iьш noctiHa noDAHa napи 6e3 nepePBn Дя npacyBaHn Baxkx CKlaDOK.
TpnapoBixMapn:MaKcunmaJIbHa noCTiHa nOaHa napn 6e3 nepebpI npacyBaHHHaDBAKKxCKJaIOK.
BnKOpncTaHnI npncToPO
1 NepeBipTe 3NaueHHaOnyCTmOiTemNepaTpyn npacyBaHHoJrhy Ha etKeTci.

2 Bn6epitb peryIaTOpOM Tempepatyn notpi6Hy tempeatpy npacyBaHH, noBepHyBUn Noro y BiINOBiIDne NOLOKeHH.

3 NocTaBTe npacky Ha n'raTy.

4Pi'dEHaHTe npucTpio 3a3eMneHoj po3eKn.

5 3acBITNbCraIINikKaTOp roTOBHOcti npackn, NOBIOMNIOHOn npo II HarpiBaHHa.

6 KOnn 3rache iHnkaTOp roTOBHOCTI npackn, 3aueKaHTe TPOXn npeed THM, kN noHHATn npacyBaTI. IiD Yac npacyBaHHa HnkaTOp roTOBHOCTI ac BiD aCy 3acBiYBaTMetbcra.
6e3 napn/npacyBaHHa 6e3 BiDnapuBaHHa

1 Bn6epiTb HalaawTyBaHHa "6e3 napu".
2 He3a6apom npapa nepectaneHe noDaBaTncn iD nac npacyBaHHra.
P03ПЛIOBaU BOIN
1 Bn6epitb HanaaHTyBaHna "6e3 nap".HaTncHtB Ta yTpmyTe KhoNky po3nnIeHHB OAn dI npaHi npi HoI npu N BuJaIeHHcKlaIHNx CKnAIOK.
Iapobni ydap
1 3a donomoroio perylraTopa TemnepaTyPi Bu6epiHaIaWtByBaHHra MAX mix 6aBOBHOIO NBoHOM.

2 Hatncitb i BiDnyctiB KhoNky napOBoro ydapy, 06 otpumatn notyxhni napOBn ctpymih dI npacyBaHH Baxknx CKnaOK.
6 3acBITntbca iHdNkatop roTOBHOCTi npackn, nobidomny npo HarpibaHH npuctpoi.

7 3auekaIte, nOKn iHdNkATop roTOBHOCTi npackn 3raChe.
572 yKpaIHcbka
8 Bi'ειηαίητη npacky Biμmepexi.
9 PepeCyHbTe peryIaTOp npu y noJoxeHHa BuaJIeHHHaKIny Calc-Clean i 3aikcyTe Ioro.
10 TpmaHn npacky Ha paKOBnHO, notpycITb HeIO. I3 niOswBn 6yde BnIJIaTncra rapya BODa N acTockn HAKIny.
YBara!PiIyacBuaJeHHHaKunny3NiOuBnTaKoX BxOndTbnapa Ta KInnaBaOda.
11 IpoDObxuIe ctpuyBaTn npackoIO, nOKn 3 pe3epByapa dny BODn He BnJIETbcra Bcra BOda.
12 Pid'eHaHte npncpti Jo MepeXi Ta daIte Nomy Harpitncs, 0o6 BnCyuHTn NiOswBy. Lc TpNBaTmE 6Jn3bKo 2 XBnINH.
13 DaTe npacu oxoJohytn.
14 HamotaTe wHyp Ha n'ry npackn.
36epirahnna
1 Ipecyhbe peyIaTOp npn nBbOpy pexmMy "6e3 npu"(npacyBaHna 6e3 BiInpHOBaHH)

2 Bi'ειηαη Te npncπi B iδ Mepexi.
3 DaIte npncToIO oxoJIoHyTN.
4Bunnte3aunuKBOUN3peepByapa.
5 HamotaTe Ka6eIb XINBJIeHHa Ha Kopnyc npncpoJ.
YcyHeHH HeCnpaBHOCTeH
U cybomy po3di ni noaHO ochoBNI npo6IeMn, kI MOxTy bHnKHyTu nID qac BnKOpNCTaHHI npiCtpoIO. Jkso BN He B 3Mo3i BnpiHTn npo6IeMy 3a DOnomoroio IHopMaui, noaHOI HIXue, BiDjdaIte Be6caNT www.philips.com/support dIra neperJy cncKy noupeHx 3aHTaHb a60 3BepHiTbcra do UcHTpy obCyroByBaHHN KJIeHTIB y CBOII KpaIH.
PpO6IeMa MoXJIbA npUHnHa BpiuHeHHa
PnJaIaHbIJIaTbIH cy Typi
Acnantbky6bip cybImeH 6ipre kOJdaHyf a60aIbI. AaIa,erep ci3iH aydaHbIbI3da KepMeK cy 6oIca, 6i3 ky6bip cybIH Ta3apTbINFaH HeMece MNHepaJIcBIsAHFaH cyMeH TeH MeJIWepe apAnacTbIPyDbI YcBiHaMbI3. ByJ KaKTbIH Te3 XInHaNByIH bIH aIdbIH aJaDbI XaHe acnantbIH KbI3MeT eTy Mep3iMH y3apTaIbI.
Niccybl, KeTipriu 6apabHaHn aIbIHfAn cybl, cipke cybl, YtIKTeyre KemeKTeceTIH cyblKTapbl, XIMNAJIk KOJMeH KaK KeipeTIH cybl HeMece 6aKa xIMNAJIk 3aTTapbl KocnaHb3, ce6bi Onap cybl H OTbIPyblHa, KOHbIP daKTapblH KaIybiHa ce6en 6Olybl HeMece KypblIFbIHb3aKbIMdaybl MymKiH.
Cy bIDbcbIH TOJTbIPy
1 KypbIJfBhlbpo3eTKaFaKocnHbI3.
2 KypblfblHbCyblTbn aIbHb3.

3 Bycbl3 pexmni (kypfak ytktey) anay ywiH by TaHaftbIHTbI OHFa cbipfbItbIHbI3.

4 CyblbCblHbH KaKaNaFbH ayapbn aWbHb3.
5 Cy bIDbcih MAX (EH KOF.) KOpceKiUHe DeiH cyMeH ToTbIpbHb3.
6 Cy bIDbICb KaKaNafBmblkTan KaabHb3.
TempepatpaHbI opHaTy
| MAX (Ен joФ.) | ☆/☆ |
| 3blfbIP | |
| MAKTA | ☆/☆ |
| XIBLEK | ECO |
| СИHTETИKA | ☆ |

ECO napametpi: a3 KbipTbICTb KNIMepre eH a3 TypaKtbi 6y MeJIwepi XeTKi3IneI. CoHbImeH katap, 6yI napametp KyaTyHeMdeNdi.
Eki 6y 6ynbl: KaTbI KbIpTbICTapFa eH KEN TpyaKtbl 6y MeIwepi XekTkiziJeI.
Yw 6y 6yNTb: KaTbKbipTbCTapFa eH KOn TypaKaTb6y MOnpei XeTkiNei.
580 Ka3akwa
KypblfblHbI KOJaHy
1 KInMHH 3TNKEKacbHaH KaJaiyTikTeyRe 6OnaTBHbH aHbIKTaI aBbHbI3.

2 TemnepaTypa dHreIerIH yTikTey TemnepaTypacbHa cAke KeJTeIH KepceKlUKe aHaJIbIpy apKbIbI opHaTbIHbI3.

3 YtikTi Ta6aHbIbIH KbipbMeH Typfbl3bIHbI3.

4 KypbIbnHbI Xepre TynbIkTaJIFaHa Ka6bpFa po3eTkacbiHa KocbiHbI3.

5 «Ytik daihih JAMbi KaHbIn, YtIK Kbl3bn KaTkaHbH KepceTei.

6 YtikTeydi 6actap aIdbIHda, «Ytik daIbIH» IaMbI coHreHHe H coH KIiJKeHe KyTe TpybIH3. YtIKTeN KaTkaHda, «Ytik daIbIH» IaMbI aHda-caHda KaIHaHbIN OTbIpadbl.
Bycb3/Kypfak yTiktey

1 By npaMeTpih 6ycb3 npapaMeTpine opHaTbHb3.

2 Bipa3 yaKbTTaH KeiH, YtIKTey Ke3iHne 6y ToKtaIbI.
CyaawKbIw
1 By napameptiH 6ycb3 napameptihe opHaTbIb3. KaTbI KbIpTbIcTapdbI KeTipy yuH TymaH afbHbI ywiH cy 6ypkTyMecin 6acBn, 6ocTaHb3.
Буды Кшеничу

1 MaKaTa MeH 3bIfbIp MaTa apacbHdaftb TeMnepaTpyeHreIerIH MAX (EH KOF.) napaMeTpIHe KObHbI3.

2 KaTbI KblptbIcIapbl KeIpy ywiH 6ybl KyweTyre apHaIFaH 6ybl KyweTy TyMecin 6acbin, xi6epe calhbl3.

3 Inyi Typrfah Knimdepereri Kbiptbctapdbi KeTipy ywiH yTikTi TiriHeH ycTan Typbin 6yDbI KyweNt fyHKunrcbIH naJaHaHyfa 6oJaDbI (DST2020 XaHe DST2030 yJrInepiHne).
4 KaTbI KblptbIcTapbl KeTipy ywiH 6ybl KyweuTy yHKUraCbiH KOJaHaFKe3Je KImDi Tapbln, co3bHb3 (DST2020 XaHe DST2030 YrInepiHne).
5 Ytiktereh Ke3e Je KaHaHa W KOnbHbI6e H YcTan TpyMaHbI3.
6 KypbIbIbHbI e3iH3re/6acka aamfka kapaTnaHbI3.
ABTOMaTTbI Tpyde cEHy (DST2030)
1 C3 aHaHnamay yuH KypbIbI 6enrini 6ip yaKbIT 6oBkaFaIaycbI 3 KaIca, e3diirHeH cyubl.
2 KypbIbI Ta6aHbIme KOyblfHa, 30 ckyHdTaH apTbIK HeMece KbIPbHa/ta6aHbHa TpybIN 8 MNHyTTaH apTbIK NaJaHaHbIMaca, KypbIbI abTomattI Typde eWipy peKmIHe eTei.
3 ABtOMaTTbI eWipy pexIMHde KypblfHbH TemnepaTpaCbI TEmeHnei. YtIK daBH» WAMbI Da Kypblfbl ABTomaTTbI TypDe eWipy KyiHe etKeHH KepcTeY yuH ToK TaCybl XbInbblKaTaNbI. KypblfHbI ToJIbFbIme H eWipy yuH KypblfHbI po3EkaHaXbIPAbHbI3.

4 KypblfBhl KaTadaH Kb3dbpy ywiH KeTepiH3 Hemece KiWKeHe Ko3FaHb3.
5 «By daa bH» WAmbI Jka HbIN, KypblfBhlBn, Kb3bIN JkaTKaHbH KOpceTeJI.

6 «Ytik daaibH» WAmbl cehreHHeH KeiH, KypblfblbI naJaHaHyfa 6oJaJIbI.
Ta3aay XeHe KytY
1 KpypbIJIfbl po3eTKaFaXaJIFaH6aFaHbIH TeKcepIH3.


2 KypbIINFBHbIH CyyBH KaMTaMaCb3 etiH3.


3 YtikTih Ta6aHbIHdaftby ynnekTepei XaHe 6acka KaIdbkTapdbI bIMkbIn sy6epeKneh cyptin ketiphi3.

EckeTne: YtiktiH actbIHfbl Ta6aHbIH teric etin caKTay ywiH, OHbl MetaIbI 3aTTapFa KaTbI COfydah cak 6ony kepeK. YtikTIH actbIHfbl Ta6aHbIH Ta3aIay ywiH KbipTaBH u6bepeK, cipKe cybIH Hemece 6acka XIMnJIbIK 3aTTapDbI KOJaHaF a60JMaIdbI.

4 KypblfHbI aFbIHbI cyMeH XyMaHbI3/Ta3JaMaHbI3.
Calc-Clean
Kehe: XbIaam KaKaTah 6ocaty fhyKunraCih Ke3 KeIreH yaBtTa naJaAnaHyf aBoJaBi. Erep cybi KepMeK aMakra TpycaHb3, fhyKunraHbXn i naJaAnaHbHb3.
1 1 aN KOJaHaHaHn KeiH, KypblfblHbH iWJHe XnHaHaH KaKTapbl KeTipy YwIH KaTbI Ta3aJFaH XeH, 6yI - KypblfblHbH Kb3MeT Mep3iMih y3apTaBbIXaHe KypblfblHbH Kb3ybiKAMTaMaCbI eTeDi.
2 KypbIy Kyat KeiHeh axbipaTbHaHbH XaHe 6y napameTp i 6ycbl3 pexmInHe (6ycbl3 yTikTey) praHbH TeKcepiH3.

3 Cy bIDbcIH MAX (EH, KOF.) KepceTkWHe neiH TOnTbipbHb3.

4 TemnepaTpaHb peTey dHreerin EH XOF. mHine KoBHBi3.

5 KypbIhfbHbI Xepre TybIKTaJFaH po3eTKaFA Kocblb3.

6 By naBHn] ambl KhaHbIN, KpypbIbnHbIH KbI3bIN KaTkaHbIN KOpceTeJI.
7 «YrK DaHbIH» WAM CHeHWe Kytih3.

8 Ytikpi po3eTkdaHa aXbpaTbHbI3.

9 By TaHdaFbIbTa KaKaTah Ta3anay KyiHe cbIPfBtBIn, yCTan TpybHb3.

10 Ytikpi paKOBHaHbH yCTiHne yCTaHbI3 da, YtIKTI aKbIPbH waKaHbI3. YtIK TaBaHbHaH bICTbK cy MeH KaK 6eKeTepi WbIfaBl.
EckepTy: KaTap cymen Waibin KeTei, KaHaFaH cy XaHe 6y YtIKTH TaabaHn Hbifa 6actaIbl.
11 Cy bIbIcIbIHdAfbI cy ToJIbIbIMeH aKaHaHaYtIKTi KaIme cINKn 6epiH3.

12 KypbIbIbIpo3eTKaFa TbIFbn, Ta6aH Kypfaybl ywiH KbI3dbIpbHbI3. 5yI WamameH 2 MHyT aIaBbl.
13 YtikTi cyblbIn aIbHb3.

14 CbIMbiH KpyblfBiHbI aRfbHa opaHbI3.
CaKlay
1 Bycbi3 pexnmi (Kypfak ytiKtey) Hany ywiH 6y TaHdaftbIbIH CblPflTbIHbI3.
2 KypblfHbI TOK Ke3iHeHaXkbpaTbHbI3.


3 KypbIaNfBiHbCyblTbnKoBhlb3.

4 Cy bIbIcIbIH aH Ke3 KeJIrE h KaJIFaH cyIbITorIH3.

5 KyaT cbIMbIH KpybIFbIHbIH KopnycbHa opaHbI3.
AkaayIbIKTapdbI Ta6y JxHe Koo
ByI Tapayda Kypalna opbIH aIybi MymKiH eH KeN Ke3DecetIH akayblkTap XnHaKtTaNfAH. Erep TEmeHderi aknapaTbIH Kemerim Hmaceleni Wewe anMacahb3, www.philips.com/support Topa6bHa Kipin, Xni KoBlnaTbH CypaKTap TiImH KapaHb3 Hemece eJIH3deri TyTbIHyUbInapDbI KOJday optaIbFbHa xa6aplaacbl3.
MaceleblkTumalce6e6iJewimi
| Ytik КлимнIH KBiPTbIcTapbIH KeIte aJImaIdbl. | YtikTeReHde 6yШыКайды.Су bIDbICbIH TOЛТырьIN,бy СырБыITпaSCbIH TИМIne KОьВиHbI3. | |
| Ytik 6y ШьFapMaIdbl. bIДыICTaftbI cyжETKIIkCiz.Су bIDbICbIHаСу КьВиHbI3. | ||
| Бу сырБыITпaSCbI cIyniH Коьылfан. | Бу сырБыITпaSCbIH cIyniH КоьыlHbI3. | |
| Ytik 6y ШьFapу ушIN жeТерПiktTei bICTbIK eMec. | Ytik КызINЖаТКан Ke3DE,«Ytik ДaьИH»ШamBy YHemI XaHbIN Турды. Ytik пaДаланУfa дaьИH БоЛFaHda ShAM eShedi. | |
| Ytiktey kezihende cy tamshbilaapbl knimre tycedi. | Kblicka yaaklt apalibfbyHda 6ydbl kyuweiTy φyHKZnrcbH TbIM kni koldaHbIn xi6epren 6oIaPb3. | KəJIeHeHEn KɔBbIn, yɪtkTeydi jælfactbɪpa 6epiɪzɪ3, an 6ydbl kUweɪty φyHKZnrcbH kaɪtaɪdah kOLdaHapdah 6þbɪn kiʌkehe kiɪde Tþbɪbɪ3. |
| Cɪs bɪdbɪcɪbɪn Kaɪnaftbɪn dɪþbɪctan XaɪnnaɪfaH 6oIaPb3. | KɑkNaKTbɪ «CbɪpT» etKEN dɪbɪbɪc sɪþkKaɪnɪla 6aɪbɪbɪ3. | |
| Ytɪk 6y aflbɪmbl h shbɪfapmaɪdbl. Mymkɪn cɪs 3 kɪbɪcka yaɪbɪt apalbɪfbiHnda 6y aflbɪmbl φyHKZnrcbH TbIM kni KOLdaHbɪn xɪ6epren 6oIaPb3. | KəJIeHeHEn KɔBbIn, yɪtkTeydi jælfaCTbɪpa 6epiɪzɪ3, an 6ydbl kUweɪty φyHKZnrcbH kaɪtaɪdah kOLdaHapdah 6þbɪn kiʌkehe kiɪde Tþbɪbɪ3. | |
| Ytɪk yɪtkTey yʊɪn xæterplɪkTeɪ bɪCTbɪk eMec. | «Yɪk daɪbɪn» ŠaMbɪ Xbɪbɪbɪktaybɪn TOKTaTbɪn, yɪdɪkci3 xænɪfənla Kʊtiɪ3. | |
| Cy bɪdbɪcɪbɪn Xɪmɪnɪbɪk 3aT KOSbɪn xɪ6epren 6oIaPb3. | Cy bɪdbɪcɪbɪn Šaɪbɪbɪk 3xəne cy bɪdbɪcɪbɪn eɪbɪp niːccy hemec Xɪmɪnɪbɪk 3aɪtap KʊɪMaɪbɪ3. | |
| Ytɪktɪ ToktaH cybɪpɪn Koɪfahan keɪn yɪtkɪn taɪbɪn ha n Cy tamshbɪnən Tɪp. | By cbɪpfɪtnaɪcbl iʊniH koɪbɪfən. | By cbɪpfɪtnaɪcbl iʊniH koɪbɪfən3. |
| Cɪs yɪktɪ, iʊɪnde cybɪ 6ola Tɪpɑr, kəlɪbey yctaɪbɪmɪbɪn Kaɪfən 6oIaPb3. | PaiɪdaɪnHaHnHn Keɪn cy bɪdbɪcɪbɪn 6ocatbɪnɪ3 hemec yɪtkTi tɪɡɪhen Koɪbɪbɪ3. | |
| Ytɪk kɪmnde xуltbɪp i3 hemece běnlr i kal'dbɪpábl. | YtɪkTeletɪn 6et teric emec, Mbɪcaɪbɪ, kaɪtbɪ 6yɪmɛn yɪtkTeɪn XaɪtkaɪdɪkTah hemec kɪmnde 6þkTeɪn'ren xεp 6oɪfənɪbɪtən. | Ytɪkti 6apbɪk yɪtkTeɪyre 6oɪaTbɪn kɪmɪdepèn Kayinci 3 naɪdaɪaHɪfa 6oɪaɪbɪ. Xbɪtlbɪp Tɪpɑrɪbɪmec xəne kɪmɪdɪ jxɪfənlaɪdɪ. Tiricstep hemec 6þkTeɪnreH xεpɪpe ɑtɪHen yɪtkTeɪmɪ3. Coɪdən-ək, xúltbɪp 6elɪr kɑl'dbɪpMaɪy wɪsin ol aʊmʌkka mɑkTa Šwɪbepek Koʊfə 6oɪaɪbɪ. |
Ltpwnipajniu
Cunnhwunnnu bup quwu ywwugnjuwup u punh qwniun Philips: Philips h unwugnuw wugnujanitung hundtp oqnutni huwun qnwugtp atn wunwupu wjuuntn www.philips.com/welcome: Uunpu oqnuqnpnting unw yunnwgtb wju atntwnp, ywnpuntntynjntutn wunntuulnn pnilgun u huiunun nintbnnygn: Hwbp nwwup hbnwquwnu oqnutni huiwn:
Uunwuph nunhwunipunipawqhn

1 9innn2ni uwwuynwnpuu zuobuh nunnnpauu nyawu
2 Nidin qinnn2n unuul ynau
32nh gnnughn
4 Lunh hughu
5 2bnuunhawuh ywnqwynnhz
62nh unwnwh yuuhwnhz
Uunph oqnwwqnpnwn
Lwwuwnpuunni
L2nui. Unnnilju wunghu wquu oqunwqnbihu hwnwun 5 hnnp puuwyniajuw qinnh wnawuyh: ywn dwwuww wig wju ulwnwnu 5:
rntuuhg nupn ubnp 5 oqnuqnnotl
Uwn hnun 5 dnnwh gnuo qunwqnndu whuu: Uwju, bab nip
wunni tip wuwuh unwnwopni, nnbn gn h uunnauwu wunhawun
pwn 5, funhninnbup unwuh dnnwh gnnn hwnutl pnnw dyu
ntuhnuaqugluog htn hwlwwpuwun yuup: Tw uywhh
tuunwphununwlnu uytwnuwgh uwnh ljuqn:
Uh wultuwrnp odwutihp, nwnuwngh gnn, pwwu, ouw, uunuwph uwpnuw, uwnuulwu oduunwuy hongutn, phuhwu uhongutnnu uwpnuw gnn yuu phuhwu wjuynatn, guuh nn nwnup yunnu tu unwugutg ngh gujuntn, 2wquwluwqnyu potn yuu yuwut atn uwnp:
2nh hughuh gunu
1Uhuhwgtpuwnp:

2 Rounqbp, nn uwnp uwnn huh:


3 Unwug qinnn2ni wnnnilyu wntdu u punntin huaun (nn wnnnuiu) qinnn2ni uwnuynwnu wntduh nunnnyau ynu npptp nuh w
4 Cngbinu pugtp gnh hghuh ywhunh:
5 2nh hghun gnpuuhugh hghuh unw u2w MAX u2wqh0n:
6 Uunn chwup gnh unwnwhuwhunh
594 Ruijnttu
huuTu yunqwU nntI gnuuunhawun
| MAX ynhc | 命/命 |
| ●●● FUUPU | 命/命 |
| ●● UTSUU | ECO |
| ● UnlətShy qnrroquput | 命 |

ECO nbdhu. 9nnn2n tluwqwnju puwuyh wunutg uwwuynwnu phs
dwptn nutgnn hwqnwnu wnnytini hwuon: Uj nbdhp uuu huwunu5
tuynpuutnghwu:

ninnn nni nni wnu. nnnn2ni wuhih 2wn puwuh wununb g uwwuwunwni ndwn unnnnylnn dnptnn hnpatgubini hwwwn

9nnn2n bnp wuy. 9nnn2n nnwulqnypuwuh wununubu uwnuwunwnu suhwqwug hnnpdhpun hnpgubni hwuwn:
Uwnph oqunwqnpnwn

1 Unnqhp huaqniunh uhnwup unnnluyu wuhnuob2un nduh lhnwnbnt huuiun:
2 2nnuunhawu h gnighn uuhuwupwnnuiwu uywhugnn 2nnuunhawu unw nnnntu wju gnuunhawu hwwuunwuwu uh2h unw:
3 Anu unbp, nn wnnnun uh yhnnp unwpuu w nui nu wju yuquw d hawynu np nnuwuh
4 3nuuuph lunn uhuugnb hnnwugulw uwnuwgh:

5 «Unnnuunu unnuununun» gnighsh njuun yunuh gnuug nuun, nn unnnnun unupwnui:

6 np Unnnuiu uwnnuun gnigh h njuh uuaqni t, wuhgwuTu uh wugtp wanniyu uh unnp uwwup: Unnnuiu uwnnuun gignh njuu dauwuw u nnwuw yuunh wanniyu duwuwu:
Unuug qnllnn2nl/2nn wwnnilni

1 9nnn2nl ywnqwnnnn nnp wunug qnnn2nl wnnyu uoh unw:
2 4wna duiuuiwu wug uinnuihuh qinnn2hu unwnunh:
2nh gnnuughn
1 Gnnn2n yunqwnnnn nntp wnuug qinn2n wnnniu u dhuh dn: Utnub p uug pannp gnngnugnuu Lyauu uwhwug ndun wnnuu nn duptnn hupagutin huiwn:
9nnp2ni ndtnuugni
1 Fuupuuh L uununwubnuh unnnluyu huiwn gbanuwunhawh gnigh2 uwhuwtp MAX-h ynu:

2 Nudn qinnn2hnu hnn 8uipbn huipgubni hwiun ubnup u pug npnp qinnn2n unwu undwn:

3 Anip yunnn bp oqnuqnnti «Nidtn qinn2ni unu» qnnounnyen, bp wnnnui uwhnui bp nnnwhjug nhnpnl ywhluu dhawunl hwqwnh dwiptn hnpatgutini hwiun (uhwu DST2020 L DST2030 ntupnu):

4 hnnn dnwn nndn qinnn 1nnuu uynunhunatguthu p2ndu aqtp dtn hwnn (uhwu DST2020 u DST2030 npnu):
5 Unnulbhu abn ubny abnp nnuubhbu hduw uuylntbu uh oquwnnp
6 Uwuhbp uwnp abn ywu ubynh2 hnw:
Uunnuun wuguinu u nduh (DST2030)
1 nn2 wuiuuiw uunug huiinnnjuw uwni ngpnu uunpu hupunnnnyu uwnu wwhnuynu np huquunnjnp
2 Uwnpu wunnuuyn yanwnu wugunui 5 wugwnu u nbduh, baa wju sh oounwannouu wnnnlywu wuyantuh un nu nnuu wauynu wubh puu 30 uwnyu u nnunwuh/huph unu 8 nnub:
3 Uunnuu wugunu uohunghnwnhauu nulwqnu 《Unnuiu uwnuun>gnighn uyun unwnun paunanl gnuu nn, nn uunpu wunnuun utnunu wugunut: Unpu wppnnjup wuguntni huwun wuguntp wju tluynwuuyu uwwuhyg:
4 Nnuuuaqh uunpn unnhg unupuuiu, utngnbp uunnp yuu jatulwuh 2undtp wju:

5 «Unnniuyu uunnuun» gnighsh injun yunuh gnyg unwnl, nn uunnp unpuuni:

6 Uunp uunnwn 5 oounqnnnu hwn, npe «Unnnu wun uunwnuun» gnighsh nyun unwnu:
Uupnnu unthuhwuw uwwwnun
1 Rwunqulap, nn uunp vhwugwol ywnnwhu:

2 Ruaunqub, nn uwnp uwnbI:

600 Ruijnttu
3 hnunu2nnnuwnnuh uwhh wunuwohg hbnwugnp uunuwopn u wJ uwnuynn:

L2nui. Unnniyn nnuyntbn hnpi uwhbin hwn hnphnnn 1 unynu hnuiwhtl utunwnuylwu unwnyubnh htun 1n2n 2hnuhg: Unnlih unuh hwoh wgnwu hwwn bp uh oqwnqnptip ubunwnuwl uwnynnnu uwniu, pwguh yuu wjl phuhwl uynptn.
4 Uwnp uH yugtp/uwpntp hnunn gnh unu:
Calc-Clean uunuogph uwpnui qnnounny
Unnhninn. Unwq Calc Release tuaunuoph uwnu w qnnwnnyen yunnn 5 oounuannoug wuyugw uwh: paa wnnu bp wjuuhh unwnopnu, nnptn 2nh y2nnnpwu wunhawupwnan 5, wju $ntulghwu wultih hwauhu oounuqnbp:
1 Calc clean uunuuph uwpnuu qnnounnyan hnphnnp unpnuu lhpwnb oqunwannnuhg 1 whu wug abn uunphg uunuuph yinunwynubn hbnugutni hwun bnyunugutnu npw bnunwuggnjntu nu wunhnulnuunph unpwugnu:
2 Rwnqup, nn wnnniu wugunuog huh yunnwug, u qinnn2n yunqwnnnnng huh wug qinnn2n wnniluutbdhuh (nn wnnilnu) unw

3 2nh hughu Iongpu uhuu MAX u2wqhd:

4 2nuiuunhawith gnighp MAX-h unw:
5 Uwnp uanp tuhugut hnnuugu wunnuht:

6 «Unnnuwwu wunwnuun» gnighsh njuun yunuh gnuug unun, nn uwnnp unwpuunu:
602 3uJnttu
7 Uwubu uhtu «Unnniuu wunnuun» gnighshinyu wunynh:
8 Unnniyu wugunbp:
9 9nnn2nl ywnqunl nnhn npnbp Calc-Clean nnhnph unuu wnuwubu wuhtp:

10 Unnnu ywhtp uugwnuwh unu qqn2nntu wuhuwuntap wju: Swp 2nnp u tunulwgh uwwuhutn uannu h uylntuhg: 2nqwnu. Lunuuph uwnu wuu wuuwuy uwlntuug nnu quu wlu 2nnp h uwnu gnnn:

11 Cwnniuuybpawuhwunlwnnui, uhuu gnh hughwh wupnnn nn n uwnyh:

12 Uhwgnbpwnpynnnuhyu rannp wju unpwuu, nnuuugh uwwnuh unwh hwnuwrnnw: nuhwun ywhugh unn 2 nnu:
13 annnupnnnlyuunzhi:
14 Lunn yuapwipwnnuyh nntuuyh 2nng:
Nuhniun
1 Unwug qinnn2ni unnniuyu nduhui puunbnin huiwn (nn wnnnu) uwhgntip qinn2ni uunuulwnpuuui duhuh punnjuu Lyuuln
2 Uugunntu uwnp uwnnuhg:
604 Ruijntu

3 0nnnp, nn uunpu wupnnnnpu wunh:

42nh hughhygh jawhbp wugwog ginn:
5 Rnuuph Iwn ywnawapuunph 2nng
Uuuu npniapniutnh ninnn
Uj qunu tniu wugw u wutwnwnwnwud hunhnutnn, nnnup yunnu tu hunnhui uunph ounwannduu wuuu: bta gqynnnwnu uunnnp iutl unnu npuwrntbnywnunjuwu ounpuuup, wjgbtp www.philips.com/support hwauwhuwh unn nn hnngtnh wuaun ywn nhup abtnpnnn qnonn wauwhunnnubn uwwwny utuunnu:
hunhn 3uwnwynn uwnndun Lnioniu
| Unnnnyn sh yunnnuwun hunpagutl huaqniunh δwipttn: | Unnnnyu wu duwuwu qinnn2h nnnu sh quhu: | Qnn n gntp gnh hugh u t2u qnnn2n uwwunwunwuu yhnwuynh npt mcduh Unw: |
| Unnnnyn qinn2h sh unawwnu: | Qnh hugh u b2 puwunwn puwunynuap uqn 24w: | Qnn n gntp hugh u b2: |
| Qnnn2n uwwunwunwuu yhnwuynh nnuuδ 5 | Qnnn2n uwwunwunwuu yhnwuynh npt | |
| Unnulip ngu wujupw uunp 5, nnuuugh qinnp2h uwnuwpwuh: | Uhue unen unpwunuuf t, «Unnulipwuuwwwn» gniagh inju wuaanuauu nuu nuu t; lnp uwnpuwwwn t oqunqnduwu, inju wuaunuui t | |
| Unnulipu uunu wunlhyg gnh uwwahubn bu lywnu hwwuunh uynu: | 2tn unnuhg qnnn2ni unu wu qnnduunnyeh oounwannnonuun zuwuquug hwawwhuwih t bnti lynp dwnuwrwhuwwunlwnu: | Cunniluwltp unnuliyu hnnhqnuwut uhp uhn uwwut, uhuu uungh uwwuwwuup oounwannotq qnnn2ni unu wu nitughwu: |
| 7np uunqhu sbo uwhu1t gnh uwhunhnsn: | Ujutu uwhu t uwhunhnsn, nnuuugh uunngh domegau uuh: | |
| Unnulip quinn2ni unnu sh ywnuwnu: | 7np duunu wunuwwuwwunlwnu unu np 2wn huwuh bp ounwannodl qinnn2ni unu wunitughwu: | Cunniluwltp unnuliyu hnnhqnuwut uhp uhn uwwut, uhuu uungh uwwuwwuup oounwannotq qnnn2ni unu wu $nitughwu: |
| Unnulip uynu pwnuwwuwwu wunp 5 uwnuyltini hwnuwn: | Uunuutp, uhusu «Unnulipwuu wunnuwnuunu » gniagh uynu wunu uunu uunu u: | |
| 7np phuuhu wu uynu aep i gnti gnh uwhlhy ube: | Lulugtp ugh ughupu uhp uwhu wunuugtp wjuntin pnunuwrhutn uwu phuwhuwu uynepa: | |
| Unnulip unuuh hwnuwoh gnin t ywnu wunluyu tityunwunuug uunnuh g wugunbing hunn: | 7np uwnu wunuwwuwwu wunhwnuhyo nnuuwa t | 7np uwnu wunuwwuwwu wunhwnuhyo nnp |
| 7np uwnu wunu wunltyb p hwnuwwu wunp uhnu wunuhyu hghuniu nne gniu uunu gbi: | Ounuwanpting htnn nwnuwwuug pgh ughy uunu wunu uunu uunu wug nhpnl: | |
| Unnulip ounwannotting htnn yunnh uwnu whj l ywnu unnlu htnp t uunu: | Unnulip uwnu wunu wunltyb uwnu wunlru uwnu wunu whj uunu haunu htnp uynu uunu uunu wunu wunu u: | Unnulip uwnu wunu wunlru uwnu wunu wunu u: |
606 nnn
vuaiaovau
2gsm6y6gonn,mmam6ymongmgoognnngygnns.

3 800869n mmonmab goada3gdou sbomn mnnn nn n 536n3, mnongmnb gogd mgnndab uohg3

46ymnab m8gmynnb n3bgynn gblgnon.

5 2g3b0 gnnn n8g mgsn d8g sboym MAX 6n8ymoaeg.

6 dyosnoo oosbygon bynab m8g3yfnnb os3sbgynn.
03m0yfnu 0sy6ds
| MAX bghm bghm | |
| ●●● dudds | |
| ●● sodngydn | ECO |
| ● bn600000 |
ECO 3m0d0fnn: mnonn n 6nndomn nn monogmdn b yqan gn n 6mgoa
aon 6o300n 8ouu6mnoag. 6 mgn an 8mao3b mafo fmo

mnn mngnnu ngnnn: goo nboaunna mngnnn anmogos bno 6030000000000000

LsAn mmonmnnn mnydgm: mnondmnb aundommyn mmoogbmndn dgaon3n
anmgoos bdoosm n 630gdo n 8oobmdo.
626 johmogno 66
am6ymonmmndu ymyj6

1 bnnn 80000000000000000000000000000000000000000000000000
2 0g3mfoynb gnoaon no gdoanu ooyamnol ng 0g3mfoyns8g 0oogom nbn bnnssom gnagmfoyns8gnannngnbl bsayomgon.
3 800gjgm jommb anb g68g.

4 4gmonmamymnmmdo gnnmnoaonngmnm

5 yomb 88omndb 6oynno sn6ngdo, m3 agonnogob, mda gom 3bcmogdo.
6 mmogg jombl 88omnl 6oany mo Bgmdos, ooyamgonl o8ygdoadg
mbo bn oongoo. ooyamgonllo 6oany mnm oo qnn onbongdo.
mnnn m n 8n/aae nn gomgdo
1 gssy6gon mnonmnl 3nngdgn mnongmn 8g 3g
2 330jnn gnmab agng, gogmgonu gnmmb mngnna ammgos
6ymnb 8bbmy
1 00000000000000000000000000000000000000000000000000000000000000000000000000
628
Johmoymo 6o
mmonjmmn 8dmonng
1 000y6o0g30n00mnb 200gnoomdojbnosyn 3nnogm8g
2 6000000 6000000 dmngm mnnn gabgmgog nann
3 mnojmdnab 6mogonnb 6dmngonb g6d0nab 6amy6o s033
gudmgogmn nomb 30nogymn agmoadmmsan gogmnlbs,
hdmnoogymn 66b6dmmn6630bn dmbamdgmoq (dbmmDST2020 0s DST2030 dmoggmndnmb).
4 aamgog oaggon ond306n 65uogmnn mngn n 66mgonb gongmngn bgy6gnnb agmy6gndsb haofoa 63300d n dmsaegmog (abmmg DST2020 6DST2030 amggmngnbn).

5 and30mn bgmn sm gdmny6mnn Luymog6 8goo3nmo, mngluo3 ny6doom mndjml.
6 6n andsmonom am6ymongm0s od3636 / b3o 3nnm36gnb36
30mdoyfnn 8amnmn3nb ngn (DST2030)
1 036n bn23nbn23n, ambymnnmo msnboaog 8gno, ng do 330yn 3nmnnu 863gmmdo yymyoqom qo3do.

2 mmgglg3 am6ymongmmos 30 68g 20n b6n 35 gmmosan 90 gaa nbn 86ynnu 6d3mmosan 38b8/dm8g, nan aog3o 30mfoa mno n ggnadn.
3 30mndynnn 2dmmnngn mndan dmymonmn n 30mns
aagmngos. gnmu 8omnu 6oynm 50gndn 9nndn 6, m
angmonng, nma dmyongmo 30mdyfnn 4amnnn
ammdmndn. amymonmnl bmym 8bssn, aamnmon
amymongmo 8ogugmno5.

4 ambymonmmnab gmbbsaabaegmoog 68000000000000000000000000000000000000000000000000000000000
630 johmognn 66
5 mngmnl 8omnlo 6oynms onbogds, moa ngonongds, mda omngmdo sbgmo

6 mmammbn yombl 600yms gonnondgo, amymonmmdo gdmuyg6do mdo
aBg3s03ds 0s am3ms-6b3s
1gsh6y6gon,mmd am6ymongmmsn mnnb agmngm.


2 0m5g6gnn, mda a5ymnmmds gogmnmo.

3 dnnnno 5 amnngm ng 606gmon nn b3b 68gon b3gon 6gnon.

g6n36: yombl dmnl ngmy3nl agb6mny6dmo 0n3ng5 ngnmgon mnonmbu 6860056 agbdo. dmnl gabsyog3o0mo 0fndomynos Lgbn mgydaml, dfmnl 56 ub30 jndnynn 6ngonmgjnl 6a my6do.

4amymommmos m gongbmon/ga6n6gmon gaoon6m 6ymn.
6gogonu ammngdo
m830: 6o8jbn b6nogn ammnngn ng6dnnb aodmy6do 6jonbang m
gmmu nmb agsdmoqnn. ng and36bu ngnm6an bnbo 6yomns,
oamny6gon g6bdno jgm mn bann.
1 1 m3n b a3my6gndn b2d008, m3m256gjymn6bogonl ammnqds,
anbn g3mgoaunn cinnmb 8ub66mdgn3o00
am6ymnonmnol 86bgmcndn j8m63cmlbysmo.
632
Johmoymo 6o

2 0m6y6gmon, mnn gnnn mnnn nnnn nn nnnn nn nnnn nn nnnn nn nnnn nn nnnn nn nnnn nn nnnn nn nnnn nn nnnn nn nnnn nn nnnn nn nnnn nn nnnn nn nnnn nn nnnn nn nnnn nn nnnn nn nnnn nn nnnn nn nnnn nn nnnn nn nnnn nn nnnn nn nnnn nn nnnn nnnn nn nnnn nn nnnn nn nnnn nn nnnn nn nnnn nn nnnn nn nnnn nn nnnn nn nnnn nn nnnn nn nnnn nn nnnn nn nnnn nn nnnn nn nnnn nn nnnn nn nnnn nn

3 30306060606060606060606060606060606060606060606060606060606060606060606060606060606060606060606060606060

4 3g3g3g3g3g3g3g3g3g3g3g3g3g3g3g3g3g3g3g3g3g3g3g3g3g3g3g3g3g3g3g3g3g3g3g3g3g3g3g3g3g3g3g3g3g3g3g3
5 amymonmmos gaoaogyamgogbgaon gogmong.

6 mngmnb 8bmonb 6yngmo n6gdo, moa ngonog do, mdo amymongmo dbgmo.

7 gomgmonb 8omnb 6ongmnb 8onn3b.

8 yom aoggbgongoo6 oadmogfmgon.
9 mmonmnb 3mbmmnmo 6oogonb85 86g6gnb 0gmdmmdan
000y6000000000
10 yom 6yomn o38 gongmngon 658g 265mngon. jnmb dmngs6
6yomn 6yomn 66ogjnl 66ngmgoa m3v.
gogmnbngds: 60gjnb gdmgbnbs yombdnngs sb30
gndmgds gdmncgl mngnn no gynngy
pilrLsJxu#iH#J#J#J#J#J#J#J#J#J#J#J#J#J#J#J#J#J#J#J#J#J#J#J#J#J#J#J#J#J#J#J#J#J#J#J#J#J#J#J#J#J#J#J#J#J#J#J#J#J#J#
续音
1.5
| / / | الله�� | |
| العربية | ||
| / / | ● ● ● | |
| ● ● ● |
686 a


Jduln nn nssll jolgio Jyraaall lss no dJlal o:ECO slc! aoll slln no sllx li gge,dlj IeLxly
aal jolgio jaiwall jjoll o jall jlaipjiblau
aaioll jolgo Jiau wll joi 1

j4jll plss
- a ball 100
aall 687
2aJjdl aJj
.
- 10,12,14 10( 10)
- 65b
- | an - a1| = 2| an - a1| 2 ,即 bn = na1 + an
6gillcg#dllc
J 1
688 a
1J 1/2
1."JxJ"
- 1 eui j
elljj
1dfo jj
aaiiill uclll oalll j
jll jje
- U

aall 689
2uocill 00
.(bDST2030g DST2020 (j)
- C 与中心 CO
4sjb)aa. (bsDST203og DST2020
-
Ss11 s11 6
-
· = | | · | |
690 a

(DST2030)
- gll 0
2gJdai 1
- D_ ACD = 12
12g>dlj g

aall 695
13.2.3. 与 S S L
PHILIPS and the Philips Shield Emblem are registered trademarks of Koninklijke Philips N.V. and are used under license.
This product has been manufactured by and is sold under the responsibility of Versuni Holding B.V., and Versuni Holding B.V. is the warrantor in relation to this product.
2024 © Versuni Holding B.V.
642001009690 (02/2024)