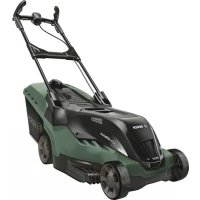
USER MANUAL AdvancedRotak 36950 BOSCH
www.bosch-pt.com/serviceaddresses
Transport
Warning! Read all safety warnings and all instructions. Make yourself familiar with the controls and the proper use of the product. Please keep the instructions safe for later use!
Explanation of symbols on the machine

General hazard safety alert.
Read instruction manual.

Make sure that bystanders are not injured by foreign objects being thrown away.

Warning: Keep a safe distance to the product when operating.

Caution: Do not touch rotating blades. Sharp blade(s). Beware of severing toes or
fingers.

Switch off and remove isolator switch before adjusting, cleaning and before leaving
the product unattended for any period.

Not applicable.

Wait until all machine components have completely
stopped before touching them. The blades continue to rotate after the machine is switched off, a rotating blade can cause injury.

Do not use the product in the rain or leave it outdoors when it is raining.

Beware electric shock hazard.

Not applicable.

Only use the battery charger indoors.

Battery charger contains a safety transformer.
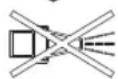
Do not use a high-pressure washer or a garden hose to
Clean the machine.

Carefully check the area where the tool is to be used for wildlife and pets. Wildlife
and pets may be injured while the machine is in operation. Thoroughly check the working area and remove any stones, sticks, wires, bones and foreign objects. When using the machine, ensure that no wildlife, pets or small tree stumps are hidden in the dense grass.
Operation
- Never allow children or people unfamiliar with these instructions to use the product. Local regulations may restrict the age of the operator.
When not in use store the product out of reach of children.
- Never allow children, persons with physical, sensory or mental limitations or a lack of experience and/or knowledge and/or people unfamiliar with these instructions to use the product. Local regulations may restrict the age of the operator. Children should be supervised to ensure that they do not play with the product. Never work while people, especially children, or pets are nearby. The user is responsible for accidents or hazards occurring to other people or their property. Do not wear open rubber shoes or sandals when using the product. Always wear sturdy shoes and long trousers. Do not use barefoot. Thoroughly inspect the area where the machine is to be used and remove all stones, sticks, wires, bones and other foreign objects. Before using, always visually inspect to see that the blades, blade bolts and cutter assembly are not worn or damaged. Replace worn or damaged blades and bolts in sets to preserve balance. Mow only in daylight or in good artificial light.
- Avoid mowing in bad weather conditions especially when there is a risk of lightning.
- Avoid operating the machine in wet grass, where feasible. Walk, never run.
- Never operate the machine with defective guards or shields, or without safety devices, for example deflectors and/or grass catchers in place. We would advise you to wear ear protection for your own convenience. Never operate the product when you are tired, ill or under the influence of alcohol, drugs or medicine. Working on banks can be dangerous: - Do not mow on excessively steep slopes.
- Always be sure of your footing on slopes or wet grass.
- Mow across the face of slopes never up and down.
- Exercise extreme caution when changing direction on slopes.
Use extreme caution when stepping back or pulling the machine towards you. Never mow by pulling the mower towards you. Wait until the blades stop if the machine has to be tilted for transportation when crossing surfaces other than grass and when transporting the machine to and from the area to be mowed. Do not tilt the machine when starting or switching on the motor.
- Switch on the motor according to the instructions with feet well away from rotating parts. Do not put hands or feet near or under rotating parts. Always stand clear of the discharge zone when operating the machine.
- Never pick up or carry the machine while the motor is running.
- When storing, make sure that all 4 wheels of the garden tool stand on the ground/floor. Only lift the garden tool with the carrying handle. Use the carrying handle with care. Do not modify the machine. Unauthorized modifications can impair the safety of your machine, lead to increased noise and vibrations, and poor performance.
Leaf Collect
The leaf collect blade has been designed to allow you to pick up autumn leaves from your lawn. In order for this functionality to work within optimal parameters, please note the following:
- Only collect leaves with the machine set at maximum cutting height.
- Collect leaves from your lawn only.
- Before collecting leaves inspect the area where the machine is to be used and keep people, pets, glass structures and cars away from use.
Remove the isolator switch:
- Whenever you leave the machine.
- Before clearing a blockage.
- Before checking, cleaning or working on the machine.
- After striking a foreign object. Inspect the machine for damage and change the blade as necessary.
- If the machine starts to vibrate abnormally (check immediately).
Maintenance
Always wear gardening gloves when handling or working near the sharp blades. - Keep all nuts, bolts and screws tight to ensure safe working with the product. - Check the grass bag frequently for wear or deterioration. Check the grass catcher frequently for wear or deterioration. Inspect the product and replace worn or damaged parts for safety. Ensure replacement cutting means of the right type are used. Ensure replacement parts fitted are Bosch-approved. Before storing, make sure that the product is clean and free of residue. If necessary, clean with a soft dry brush.
Safety Instructions and Recommendations for Optimal Handling of the Battery
Ensure the product is switched off and the isolator key is in the off position before inserting the battery.
Inserting the battery into a product that has the switch on can cause accidents.
Use only Bosch batteries intended specifically for this product. Use of any other batteries may create a risk of injury and fire. Do not open the battery. There is a risk of short-circuiting.

Protect the battery against heat (e.g., against continuous intense sunlight), fire, water, and moisture. There is a risk of explosion.
- Keep the battery not being used away from paper clips, coins, keys, nails, screws or other small metal objects, that can make a connection from one terminal to another. Shorting the battery terminals together may cause burns or a fire. In case of damage and improper use of the battery pack, vapours may be emitted. Ventilate the area and seek medical help in case of complaints. The vapours can irritate the respiratory system. Only use the battery with products from the manufacturer. This is the only way in which you can protect the battery against dangerous overload. The battery can be damaged by pointed objects such as nails or screwdrivers or by force applied externally. An internal short circuit may occur, causing the battery to burn, smoke, explode or overheat. Do not short-circuit the battery. There is a risk of explosion. Protect the battery against moisture and water.
- Store the product and battery only within a temperature range between -20°C and 50°C. As an example, do not leave the battery in the car in summer. Occasionally clean the venting slots of the battery using a soft, clean and dry brush.
Safety Warnings for Battery Chargers

Read all safety warnings and all instructions. Failure to follow the safety warnings and instructions may result in electric shock, fire and/or serious injury.
Save all safety warnings and instructions for future reference.
Use the battery charger only when you fully understand and can perform all functions without limitation, or have received appropriate instructions.
- Never allow children, persons with physical, sensory or mental limitations or a lack of experience and/or knowledge and/or people unfamiliar with these instructions to use the
battery charger. Local regulations may restrict the age of the operator.
Supervise children at all times. This will ensure that children do not play with the battery charger. Charge only Bosch lithium-ion batteries with a capacity above 2.0 Ah (10 battery cells or more). The battery voltage must match the battery charging voltage of the charger. Do not charge non-rechargeable batteries. Otherwise there is a danger of fire and explosion.

Keep the battery charger away from rain or moisture. Penetration of water in the battery charger increases the risk of an electric shock.
- Keep the charger clean. Dirt poses a risk of electric shock. Always check the charger, cable and plug before use. Stop using the charger if you discover any damage. Do not open the charger yourself, and have it repaired only by a qualified specialist using only original replacement parts. Damaged chargers, cables and plugs increase the risk of electric shock. Do not operate the charger on an easily ignited surface (e.g. paper, textiles, etc.) or in a flammable environment. There is a risk of fire due to the charger heating up during operation. Do not cover the ventilation slots of the battery charger. Otherwise, the battery charger can overheat and no longer operate properly. For increased electrical safety, we recommend using a residual current device with a max. tripping current of 30 mA. Before using, always check your residual current device.
Symbols
The following symbols are important for reading and understanding the original instructions. Please take note of the symbols and their meaning. The correct interpretation of the symbols will help you to use the product in a better and safer manner.
| Symbol Meaning |
| ↑ | Movement direction |
| ↓ | Reaction direction |
| Wear protective gloves |
| Weight |
| Switching on |
| O | Switching off |
| ✓ | Permitted action |
| × | Prohibited action |
| CLICK | Audible noise |
| Accessories/Spare Parts |
Intended Use
The garden product is intended for domestic lawn mowing. The garden product is not intended for hedge cutting, trimming, shredding, etc.
The garden product is intended for lawn mowing at ground level.
Technical Data
| Lawnmower AdvancedRotak | 36-650 | AdvancedRotak 36-660 | AdvancedRotak 36-690 | Advanced Rotak 36-750 |
| Article number | | 3 600 HB9 604 | 3 600 HB9 605 | 3 600 HB9 607 | 3 600 HB9 702 |
| 3 600 HB9 672 | 3 600 HB9 673 | | 3 600 HB9 771 |
| Rated voltage V 36 36 36 36 | | | | | |
| Bowl diameter cm 42 42 42 46 | | | | | |
| Height of cut mm 25 - 80 25 - 80 25 - 80 25 - 80 | | | | | |
| Capacity, grass bag | 150 50 50 50 50 | | | | |
| Lawnmower AdvancedRotak | AdvancedRotak36-650 | AdvancedRotak36-660 | AdvancedRotak36-690 | AdvancedRotak 36-750 |
| Weight according to EPTA-Procedure 01:2014 | kg 17.5 16.5 17.5 17.5 | | | | |
| Serial number see type plate on garden tool |
| Permitted ambient temperature |
| - during charging | °C 0 ... +45 0 ... +45 0 ... +45 0 ... +45 | | | | |
| - during operation | °C +5 ... +50 +5 ... +50 +5 ... +50 +5 ... +50 | | | | |
| - during storage °C -20 ... +50 -20 ... +50 -20 ... +50 -20 ... +50 | | | | | |
| Battery Li-Ion Li-Ion Li-Ion Li-Ion |
| Rated voltage V 36 36 36 36 | | | | | |
| Article number/Capacity |
| - 2 607 336913/1 607 A3502V | Ah - 2 x 2.0 -- | | | | |
| - 2 607 336915/2 607 337047 | Ah 4.0 - 4.0 4.0 | | | | |
| - 1 607 A35058 | Ah - - - - | | | | |
| Number of battery cells |
| - 2 607 336913/1 607 A3502V | | - 10 -- | | | |
| - 2 607 336915/2 607 337047 | | 20 - 20 20 | | | |
| - 1 607 A35058 | | - - - - | | | |
All values in this manual are measured for usage below or equal to 2000 meters above nominal sea level.
| Lawnmower Advanced | Rotak 36-850 | Advanced Rotak 36-890 | Advanced Rotak 36-905 | Advanced Rotak 36-950 |
| Article number | | 3 600 HB9 802 | 3 600 HB9 803 | 3 600 HB9 606 | 3 600 HB9 901 |
| 3 600 HB9 872 | | | |
| Rated voltage | V | 36 | 36 | 36 | 36 |
| Bowl diameter | cm | 46 | 46 | 42 | 46 |
| Height of cut | mm | 25 - 80 | 25 - 80 | 25 - 80 | 25 - 80 |
| Capacity, grass bag | l | 50 | 50 | 50 | 50 |
| Weight according to EPTA-Procedure 01:2014 | kg | 17.5 | 17.5 | 17.5 | 17.5 |
| Serial number see type plate on garden tool |
| Permitted ambient temperature |
| - during charging | °C | 0 ... +45 | 0 ... +45 | 0 ... +45 | 0 ... +45 |
20|English
| Lawnmower Advanced | Rotak 36-850 | Advanced Rotak 36-890 | Advanced Rotak 36-905 | Advanced Rotak 36-950 |
| -during operation °C +5 ... +50 +5 ... +50 +5 ... +50 +5 ... +50 | | | | |
| -during storage °C -20 ... +50 -20 ... +50 -20 ... +50 ... +50 | | | | |
| Battery Li-Ion Li-Ion Li-Ion Li-Ion | | | | |
| Rated voltage V 36 36 36 36 | | | | |
| Article number/Capacity | | | | |
| -2 607 336 913/1 607 A35 02V | Ah - - - - | | | | |
| -2 607 336 915/2 607 337 047 | Ah - - 2 x 4.0 2 x 4.0 | | | | |
| -1 607 A35 058 Ah 6.0 6.0 - - | | | | |
| Number of battery cells | | | | |
| -2 607 336 913/1 607 A35 02V | | - - - - | | | |
| -2 607 336 915/2 607 337 047 | | - - 20 20 | | | |
| -1 607 A35 058 20 20 - - | | | | | |
All values in this manual are measured for usage below or equal to 2000 meters above nominal sea level.
| Charger AL 3620 CV AL 36V-20 |
| Article number | EU | 2 607 225 657 | 2 607 226 273 |
| UK | 2 607 225 659 | 2 607 226 275 |
| AU | 2 607 225 661 | 2 607 226 277 |
| KO | 2 607 225 667 | 2 607 226 279 |
| Charging current | A | 2.0 | 2.0 |
| Charging period (battery discharged) | | | |
| - Battery with 2.0 Ah | min | 65 | 65 |
| - Battery with 4.0 Ah | min | 125 | 125 |
| - Battery with 6.0 Ah | min | 185 | 185 |
| Weight according to EPTA-Procedure 01:2014 | kg | 0.55 | 0.55 |
| Protection class | | ☐/II | ☐/II |
| AdvancedRotak
36-650 | AdvancedRotak
36-660 | AdvancedRotak
36-690 | AdvancedRotak
36-750 |
| 3 600 HB9 604 | 3 600 HB9 605 | 3 600 HB9 607 | 3 600 HB9 702 |
| 3 600 HB9 672 | 3 600 HB9 673 | | 3 600 HB9 771 |
Noise emission values determined according to EN 60335-2-77.
Typically the A-weighted noise levels of the product are:
| - Sound pressure level | dB(A) | 73 73 | 73 73 | | |
| - Sound power level | dB(A) | 87 87 | 87 87 | | |
| - Uncertainty K | dB | =2.5 | =2.5 | =2.5 | =2.5 |
| Vibration total values ah (triax vector sum) and uncertainty K determined according to EN 60335-2-77 |
| - Vibration emis-sion value a1 | m/s2 | <2.5 | <2.5 | <2.5 | <2.5 |
English|21
| AdvancedRotak36-650 | AdvancedRotak36-660 | AdvancedRotak36-690 | AdvancedRotak36-750 |
| 3 600 HB9 6043 600 HB9 672 | 3 600 HB9 6053 600 HB9 673 | 3 600 HB9 6073 600 HB9 7023 600 HB9 771 | |
| - Uncertainty Km/s | 2 | = 1.5 = 1.5 = 1.5 = 1.5 | | |
| Advanced Rotak 36-850 | Advanced Rotak 36-890 | Advanced Rotak 36-905 | Advanced Rotak 36-950 |
| 3600 HB9 802 | 3600 HB9 803 | 3600 HB9 606 | 3600 HB9 901 |
| 3600 HB9 872 | | | |
Noise emission values determined according to EN 60335-2-77.
Typically the A-weighted noise levels of the product are:
| - Sound pressure level dB(A) | 73 73 73 73 | |
| - Sound power level dB(A) | 87 87 87 87 | |
| - Uncertainty K dB | =2.5 = 2.5 = 2.5 = 2.5 | |
| Vibration total values ah (triax vector sum) and uncertainty K determined according to EN 60335-2-77 |
| - Vibration emis-sion value \( a_h \)m/s2 | <2.5 < 2.5 < 2.5 < 2.5 | |
| - Uncertainty Km/s2 | =1.5 = 1.5 = 1.5 = 1.5 | |
Mounting and Operation
| Action Figure Page |
| Delivery scopeA) | A 367 |
| Unfolding the handle | B 368 |
| Adjusting the working height | |
| Grassbox fitting/removing C 369 | |
| Setting the height of cut D 370 | |
| Inserting the battery E 370 | |
| Operation | F 371 |
| - Inserting the isolator switch | |
| - Switching on | |
| - Mowing | |
| - Switching off | |
| - Removing the isolator switch | |
| Removing the battery G 372 | |
| Working advice "mowing" H 373 | |
| Level indicator, grassbox empty/full | I 374 |
| Fold down handle | J 375 |
| Blade maintenance/Blade replacement | K 376 |
| Selecting accessories | L 376 |
A) Accessories shown or described are not included with the product as standard. You can find the complete selection of accessories in our accessories range.
Starting Operation
For Your Safety
Warning! Switch off, remove the isolator switch and the battery before adjusting or cleaning. The same applies when the cable to the switch in the handle is damaged, cut or entangled. The blade continues to rotate for a few seconds after the machine is switched off. Caution: Do not touch the rotating blade.
Charging the Battery
The battery is equipped with temperature monitoring that allows charging only in the temperature range between 0°C and 35°C. In this manner, a high battery service life is achieved.
Note: The battery is supplied partially charged. To ensure full battery capacity, completely charge the battery in the battery charger before using for the first time.
The lithium-ion battery can be charged at any time without reducing its service life. Interrupting the charging procedure does not cause damage to the battery.
The "Electronic Cell Protection (ECP)" protects the lithium-ion battery against deep discharging. When the battery is empty, the product is switched off by means of a protective circuit: The product no longer operates.
Do not continue to press the On/Off switch after an automatic shut-off of the product. The battery could become damaged.
Observe the notes for disposal of the battery.
Inserting/Removing the Battery
Note: Using unsuitable batteries can lead to malfunctions or damage the machine.
Insert the charged battery. Ensure the battery is inserted correctly.
To remove the battery from the machine, press the battery unlocking button and pull the battery out.
Charging Procedure
The charging procedure starts as soon as the mains plug of the charger is plugged into a socket outlet and the battery is inserted onto the charger.
Due to the intelligent charging method, the charging condition of the battery is automatically detected and the battery is charged with the optimum charging current, depending on battery temperature and voltage.
This gives longer life to the battery and always leaves it fully charged when kept in the charger for storage.
Meaning of the indication elements on the charger (AL 3620 CV/AL 3640 CV/AL 36V-20)
Rapid-charging Procedure
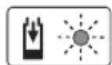
The rapid-charging procedure is indicated by flashing of the green battery charge indicator.
Battery charge indicator: During the procedure, the three green LEDs light up one after another and briefly go out. The battery is fully charged when the three green LEDs light up continuously. This occurs again approx. 5 minutes after the battery has been charged.
Note: The rapid-charging procedure is only possible when the battery temperature is within the allowable charging temperature range, see section "Technical Data".
Battery charged

Continuous lighting of the green LED indicator indicates that the battery is fully charged.
Additionally, a signal tone sounds for approx.
2 seconds, which acoustically indicates that the battery is fully charged.
Afterwards, the battery can be removed for immediate use. When the battery is not inserted, continuous lighting of the LED indicator indicates that the mains plug is inserted in the socket outlet and that the battery charger is ready for operation.
Battery temperature below 0°C or above 45°C

Continuous lighting of the red LED indicator indicates that the temperature of the battery is not within the allowable charging temperature
range, see section "Technical Data". As soon as the allowable charging temperature range is reached, the battery charger automatically switches to rapid charging.
When the battery is not within the allowable temperature range, the red battery LED lights up when inserting the battery into the battery charger.
No charging procedure possible
If a different malfunction of the charging procedure is present, this will be indicated through flashing of the red LED indicator.
The charging procedure cannot be started and the battery cannot be charged (see section Troubleshooting).
Charging Advice
With continuous or several repetitive charging cycles without interruption, the charger can warm up. This is not meaningful and does not indicate a technical defect of the battery charger.
A significantly reduced working period after charging indicates that the battery is used and must be replaced.
Observe the notes for disposal.
Battery Cooling (Active Air Cooling)
The fan control integrated into the charger monitors the temperature of the inserted battery. When the battery temperature is above 30°C , a fan cools down the battery to the optimal charging temperature. The fan generates a ventilation sound when switched on.
If the fan is not running, the battery temperature is within the optimum charge-temperature range or the fan is defective. In this case, the charging time of the battery might be extended.
Working Advice
Battery charge-control indicator
The battery is equipped with a charge-control indicator, which indicates its charge condition. The charge-control indicator consists of 3 green LEDs.
Press the charge-control indicator button to actuate the charge-control indicator. After approx. 5 seconds, the charge-control indicator goes out automatically.
The charge condition can also be checked when the battery is removed.
LED Indication Battery Capacity
| Continuous lighting of 3 green LEDs | ≥2/3 |
| Continuous lighting of 2 green LEDs | ≥1/3 |
| Continuous lighting of 1 green LED | ≤1/3 |
Flashing of 1 green LED Reserve
When no LED lights up after pressing the button, then the battery is defective and must be replaced.
For safety reasons, the charge condition of the battery can only be checked when the garden product is at a standstill. During the charging procedure, the three green LEDs light up one after the other and briefly go out. The battery is fully charged when the three green LEDs light up continuously. The three green LEDs go out again approx. 5 minutes after the battery has been fully charged.
Temperature Monitoring Indicator of the battery
The red LED of the temperature monitoring indicator signals that the battery or the electronics of the garden product (with battery inserted) are not within the optimum temperature range. When this occurs, the garden product will not operate or not at full capacity.
Temperature Monitoring of the Battery
The red LED flashes when pressing the button or the On/Off switch (with battery inserted): The battery is outside of the permitted operating temperature range.
The battery switches off at a temperature above 70°C until the allowable operating-temperature range is reached again.
Temperature Monitoring of the Garden Product's Electronics
The red LED lights up continuously when pressing the On/Off switch: The temperature of the garden product's electronics is below 5°C or above 75°C .
At a temperature above 90°C , the electronics of the garden product switch off until the temperature is within the allowable operating-temperature range again.
Cutting Capacity (Battery Operating Duration)
The cutting capacity (battery operating duration) depends on lawn properties, such as grass density, moisture content, grass length and height of cut.
Switching the machine on and off frequently during cutting will also reduce the cutting capacity (battery operating duration).
To improve the cutting capacity (battery operating duration), it is recommended to cut more frequently, increase the cutting height and walk at an appropriate pace.
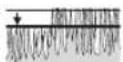
The example below shows the connection between cutting height and cutting capacity with regard to three batteries.
Cutting Conditions
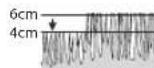
Very thin, dry grass
Cutting capacity Battery with 2.0 Ah up to 250 m
Battery with 4.0 Ah up to 500 m
Battery with 6.0 Ah up to 750 m
To increase the run time an additional battery can be purchased from an authorised customer service agent for Bosch garden products.
Troubleshooting


Problem Possible Cause Corrective Action
| Motor refuses to start Internal wiring of garden tool defective Contact Bosch customer service agent |
| Battery discharged Recharge battery | |
| Battery too hot/cold Allow to cool/warm | |
| Grass too long Max. allowed grass height 30cm on highest
height-of-cut setting | |
| Motor protector has activated Allow motor to cool and increase height of cut | |
| Isolator switch not inserted correctly/fully Fit correctly | |
| Garden tool functions intermittently | Internal wiring of garden tool defective Contact Bosch customer service agent | |
| Motor protector has activated Allow motor to cool and increase height of cut | |
| Machine leaves ragged finish
and/or
Motor labours | Height of cut too low Increase height of cut | |
| Cutting blade blunt | Replace cutting blade (see figure K) |
| Possible clogging Switch garden tool off and disengage isolator
switch
Check underneath the garden product and clear
out as necessary (always wear protective gloves) |
| Blade fitted upside down Refit blade correctly | |
| Blade not rotating
while garden product
switched on | Cutting blade obstructed Switch garden tool off and disengage isolator
switch
Clear obstruction (always wear protective gloves) |
| Problem Possible Cause Corrective Action |
| Blade nut/bolt loose Tighten blade nut/bolt (27 Nm) |
| Excessive vibrations/noise | Blade nut/bolt loose Tighten blade nut/bolt (27 Nm) |
| Cutting blade damaged | Replace cutting blade (see figure K) |
Battery and charger
| Problem Possible Cause Corrective Action |
| Red battery charge in- dicator on charger flashes | Battery not (properly) inserted Properly insert battery in charger | |
| Battery contacts contaminated Clean the battery contacts (e. g. by inserting and removing the battery several times) or replace the battery | |
| No charging procedure possible | Battery defective Replace the battery | |
| Battery charge indic- ator on charger does not light up | Mains plug of battery charger not plugged in (properly) | Insert mains plug (fully) into the socket outlet |
| Socket outlet, mains cable or battery charger de- fective | Check the mains voltage; have the battery char- ger checked by an authorised after-sales service agent for Bosch power tools |
Maintenance and Service
Battery Maintenance
Warning! Switch off, remove the isolator switch, battery and grass bag before adjusting or cleaning. Always wear gardening gloves when handling or working near the sharp blades.
Use the following procedures to enable optimum usage of the battery:
- Protect the battery against moisture and water.
- Store the machine and battery only within a temperature range between -20°C and 50°C. As an example, do not leave the battery in the car in summer.
- It is recommended that the battery is not stored within the product but stored separately.
- Do not leave the battery in the product in direct sunlight.
- The ideal storage condition for the battery is 5°C. Occasionally clean the venting slots of the battery using a soft, clean and dry brush.
A significantly reduced working period after charging indicates that the battery is used and must be replaced.
After-Sales Service and Application Service
Our after-sales service responds to your questions concerning maintenance and repair of your product as well as spare parts. You can find explosion drawings and information on spare parts at: www.bosch-pt.com
The Bosch product use advice team will be happy to help you with any questions about our products and their accessories.
In all correspondence and spare parts orders, please always include the 10-digit article number given on the nameplate of the product.
Great Britain
Robert Bosch Ltd. (B.S.C.)
P.O.Box 98
Broadwater Park
North Orbital Road
Denham Uxbridge
UB95HJ
At www.bosch-pt.co.uk you can order spare parts or arrange the collection of a product in need of servicing or repair.
Tel. Service: (0344) 7360109
E-Mail: boschservicecentre@bosch.com
You can find further service addresses at:
www.bosch-pt.com/serviceaddresses
Transport
The contained lithium-ion batteries are subject to the Dangerous Goods Legislation requirements. The batteries are suitable for road-transport by the user without further restrictions.
When being transported by third parties (e.g.: air transport or forwarding agency), special requirements on packaging and labelling must be observed. For preparation of the item being shipped, consulting an expert for hazardous material is required.
Dispatch battery packs only when the housing is undamaged. Tape or mask off open contacts and pack up the battery in such a manner that it cannot move around in the packaging. Please also observe the possibility of more detailed national regulations.
Disposal

The garden product, batteries, accessories and packaging should be sorted for environmental-friendly recycling.

Do not dispose of garden products and batteries/rechargeable batteries into household waste!
Only for EC countries:
According to the European law 2012/19/EU, electrical and electronic equipments that are no longer usable, and according to the European law 2006/66/EC, defective or used battery packs/batteries, must be collected separately and disposed of in an environmentally correct manner.
Battery packs/batteries:
Li-Ion:
Please observe the instructions under Transport.
www.bosch-pt.com/serviceaddresses
Transport
www.bosch-pt.com/serviceaddresses
Transport
www.bosch-pt.com/serviceaddresses
Transport
www.bosch-pt.com/serviceaddresses
Transport
Battery cooling (Active Air Cooling)
Flashing 1 green LED Reserve
www.bosch-pt.com/serviceaddresses
Transport
Bosch Service Center
Telegrafvej 3
2750 Ballerup
Spare parts can be ordered online or a repair order can be created at www.bosch-pt.dk.
Service Center phone: 44898855
Fax: 44898755
E-mail: vaerktoej@dk.bosch.com
www.bosch-pt.com/serviceaddresses
Transport
Bosch Service Center
Telegrafvej 3
2750 Ballerup
Denmark
Tel.: (08) 7501820 (within Sweden)
Fax: (011) 187691
You can find more contact information for service here:
www.bosch-pt.com/serviceaddresses
Transport
The lithium-ion batteries included are subject to the requirements for dangerous goods. The user can transport the batteries by road without further obligations.
www.bosch-pt.com/serviceaddresses
Transport
www.bosch-pt.com/serviceaddresses
Transport
The fan (Active Air Cooling)
The fan is controlled by the temperature control of the battery. If the battery temperature exceeds 30°C, the battery is cooled by a fan that reduces the battery temperature. The fan does not produce any air noise.
If the fan is working, then the battery temperature is reduced to the ambient temperature range. The fan is efficient. In the second case, the charging time increases.
Operating conditions
Battery charge indicator
The battery is equipped with a charge status indicator, which shows the charge status of the battery. The charge status indicator consists of 3 LED lights.
The battery charge indicator shows the charge status. The charge status indicator lights up automatically for about 5 seconds.
The charge status can be checked at any time when the battery is removed from the tool.
LED indicators
3 green LEDs ≥ 2/3
www.bosch-pt.com/serviceaddresses
The contained lithium-ion batteries are subject to the Dangerous Goods Legislation. The batteries can be transported by the user without further requirements.
When, however, the battery is dispatched by third parties (e.g. air transport or forwarding agency), special requirements on packaging and labelling must be observed. For the preparation of the item being sent, consulting an expert for hazardous material is required.
Only dispatch the battery if the housing is undamaged. Tape open contacts and pack up the battery so that it cannot move around in the packaging.
Please also observe possibly more detailed national regulations.
Disposal

Machines, batteries, accessories and packaging should be sorted for environmental-friendly recycling.
environment.

Do not dispose of machines and batteries into household waste!
Only for EU countries:
Disposal of waste batteries and waste electrical and electronic equipment in accordance with Directive 2012/19/EU and Directive 2006/66/EC: batteries and accumulators that are defective or exhausted must be disposed of separately so that they can be recycled in an environmentally friendly manner.
Batteries/Rechargeable batteries:
Battery packs:
Please note the instructions for safe transport.
Türkçe
Güvenlik Talimatı
Yanıp sönen LED rezerve
www.bosch-pt.com/serviceaddresses
Taşıma
Akümülatör 2,0 Ah do 250 m
Akümülatör 4,0 Ah do 500 m
Akümülatör 6,0 Ah do 750 m
Robert Bosch Sp. z o.o.
www.bosch-pt.com/serviceaddresses
Transport
Bosch Service Center PT
K Vapence 1621/16
692 01 Mikulov
www.bosch-pt.com/serviceaddresses
Transport
www.bosch-pt.com/serviceaddresses
Transport
The enclosed lithium-ion batteries are subject to the requirements for the transport of dangerous goods. These batteries may be transported by the user on the road without further measures.
When sending by third parties (e.g., by air transport or through a forwarding agent), attention must be paid to special requirements for packaging and labeling. In such a case, an expert for the transport of dangerous goods must be consulted without fail when preparing the shipment.
Only send batteries if their packaging is not damaged. Tape over open contacts and pack the battery so that it cannot move around in the packaging. Please also observe any additional national regulations.
Disposal

www.bosch-pt.com/serviceaddresses
Transport
Read the operating instructions.

Ensure that the protruding parts do not injure anyone nearby.

Danger: Maintain a safe distance from the working tool.
H.

Caution: Do not touch the rotating knives. The knives are sharp. You can be seriously injured.

Turn off the garden tool and disconnect the power plug before performing maintenance or cleaning, and whenever you leave the tool unattended, even for a moment.

Immediately.

Before touching the parts of the garden tool, wait until all parts have come to a complete stop. The blades continue to rotate for a while after the tool is turned off and can cause serious injury.

Do not use the product in the rain or expose it to rain.



Avoid high pressure or garden hoses.

Carefully check the area where the garden tool is used.
For hidden pets and small animals. Pets and small animals can be injured while the tool is in operation. Carefully check the area where the garden tool is used, and remove all stones, sticks, wires, bones, and other foreign objects. When using the garden tool, always make sure that there are no hidden pets, small animals, or small children in the tall grass.
Operation
Never allow the product to be used by children or by persons unfamiliar with these instructions. Local regulations may
Restrict the operator's age. When the product is not in use, store it out of the reach of children.
Never allow the product to be used by children, or by persons with reduced physical, sensory, or mental capabilities, or with insufficient experience and knowledge, or by persons unfamiliar with these instructions. Local regulations may restrict the operator's age. Supervise children and do not let them play with the product. Never use the garden tool when other people, especially children, or pets are nearby. The operator or user is responsible for accidents or damage caused to other people or their property. Do not use open-toed shoes or sandals when working with the product. Always wear sturdy shoes and long trousers. Never use the product barefoot. Carefully inspect the work area and remove stones, sticks, wires, bones, and other foreign objects. Before use, always check the knives, knife bolts, and the knife assembly for signs of wear or damage. To avoid imbalance, always replace all worn or damaged knives and knife bolts at the same time.
Knife assembly for signs of wear or damage. To avoid imbalance, always replace all worn or damaged knives and knife bolts at the same time.
Use the tool only in daylight or good artificial light. Never operate the tool in the rain, especially when a thunderstorm is approaching. As far as possible, do not use the tool on wet grass. Always walk calmly, never run. Never use the tool with damaged guards or shields or without safety devices, e.g., without the deflector or grass catcher. For personal protection, we recommend always using hearing protection. Do not use the tool if you are tired or ill, or under the influence of alcohol, drugs, or medication. Work on slopes can be dangerous:
- Do not mow on particularly steep slopes.
- On slopes or wet grass, always keep a firm footing.
On sloping surfaces, always work across the slope, never work in an upward or downward direction.
Be especially careful when changing direction on slopes.
Be extremely careful when you are pulling the tool towards you or pushing it away from you. When mowing grass, always push the tool in front of you and never pull it towards you. The blades must be stopped if you need to tilt the mower for transport, cross areas not covered with grass, or move the mower to or from the area where you intend to mow. Do not tilt the mower when starting the engine or switching it on. Switch on the mower as described in the operating instructions, making sure that your feet are at a sufficient distance from the rotating blades. Do not put your hands or feet near or under rotating parts. Keep away from the discharge opening. When working with the mower, keep a safe distance from the discharge zone.
Never lift or carry the mower while the engine is running. Make sure that when storing the mower, it stands on all four wheels on the ground. Lift the mower only by the handles for transport. Handle the transport handles carefully. Do not make any modifications to the electrical system. Unauthorized modifications can affect the safety of the electrical system and lead to strong vibrations and reduced performance.
Mulching
The mulching blade has a shape that allows collecting leaves on the lawn in autumn. To achieve optimal results, observe the following:
-Collect leaves only at the maximum mowing height. -Collect leaves only on your own property. -Before collecting leaves, inspect the work area and do not allow other people, pets, glass objects, or vehicles to be in the vicinity.
Disconnect the spark plug connector
- Always, when leaving the mower unattended. -Before clearing blockages.
- Check the tool for damage and clean it before and after each use.
- After contact with sharp objects: immediately check the garden tool for damage and replace the blade if necessary.
- If the garden tool starts to vibrate unusually, check it immediately.
Maintenance
When handling or working near sharp blades, always wear garden gloves. Check all nuts, bolts, and screws before each use to ensure the tool is in safe working condition. Regularly check the condition and wear of the grass catcher. Regularly check the condition and wear of the grass catcher. Check the tool for damage and replace worn or damaged parts. Use only the specified blades for the garden tool.
For replacement, use only original spare parts from Bosch. Before storage, check that the tool is clean and free of organic residue. If necessary, clean it with a dry cloth.
Safety instructions for optimal handling of the battery
Make sure the garden tool is switched off and the plug is disconnected before inserting the battery. Inserting the battery into a switched-on garden tool can lead to an accident. Use only the specified Bosch batteries for the garden tool. Using other batteries may result in injury and fire hazard. Do not open the battery. This creates a risk of short circuit.

Protect the battery from high temperatures (e.g., from prolonged exposure to sunlight), fire, and moisture. This creates a risk of explosion.
Keep the battery away from paper clips, coins, keys, nails, screws, and other small metal objects that could cause a short circuit. A short circuit between the battery contacts can lead to burns or fire. If the battery is damaged or used improperly, liquid may leak. Ventilate the area and consult a doctor if you experience any health issues. Inhaling vapors can irritate the respiratory tract. Use the battery only in the manufacturer's products. Only then is the battery protected from dangerous overload. Sharp objects such as nails or screwdrivers, as well as external force, can damage the battery. This can lead to an internal short circuit, overheating, explosion, or fire of the battery.
Do not short-circuit the battery. This creates a risk of explosion. Protect the battery from moisture and water. Store the garden tool and battery only at temperatures between -20°C and 50°C. For example, do not leave the garden tool in a car in summer. Periodically clean the ventilation slots of the battery with a soft, dry brush.
Safety instructions for charging devices

All instructions for this tool must be observed. Failure to follow the instructions listed below may result in electric shock, fire, and/or serious injury.
Save these safety instructions for future reference.
Use the charger only in the manner described in its function or as described in the instructions.
Never allow children or persons with limited physical, sensory, or mental capabilities or lack of experience and knowledge, or persons unfamiliar with these instructions, to use the charger. Local regulations may restrict the operator's age. Do not leave children unattended. They must not play with the charger. Charge only lithium-ion rechargeable batteries with a capacity of 2.0 Ah (from 10 cells). The battery voltage must match the charging voltage of the charger. Do not charge non-rechargeable batteries. Otherwise,
there is a risk of fire and explosion.
Protect the charger from moisture. Penetration of water into the charger increases the risk of electric shock.

Keep the charger clean. Dirt can lead to electric shock. Before each use, check the charger, cable, and plug. Do not use the charger if damage is detected. Do not open the charger yourself; repairs should only be carried out by qualified personnel and only using original spare parts. Damaged chargers, cables, and plugs increase the risk of electric shock. Do not use the charger on highly flammable surfaces (e.g., paper, textiles, etc.) or in explosive atmospheres. Heating of the charger during charging creates a risk of fire. Do not cover the ventilation slots of the charger. Otherwise, the charger may overheat and fail. For electrical safety, it is recommended to use a residual current device with a tripping current of 30 mA. Before work, always check the residual current device.
Symbols
The following symbols will help you read and understand the operating instructions. Remember the symbols and
their meanings. Correct interpretation of the symbols will help you work better and more safely with the product.
Insert the rechargeable battery. Make sure the battery is fully inserted.
To remove the battery from the tool, press the battery release button and pull out the battery.
Charging process
The charging process starts immediately after plugging the charger plug into the socket and subsequently placing the battery in the charger.
Immediately after turning on the charger, insert the battery into the charging slot and then place the battery in the charger.
The charger automatically detects the battery charge level and selects the optimal charging current depending on the temperature and voltage of the battery.
This battery, when stored in the charger, is always fully charged thanks to this.
Meaning of the indicator elements on the charger (AL 3620 CV/AL 3640 CV/AL 36V-20)
Rapid charging
Rapid charging is indicated by the green battery charge indicator.
Battery indicators: During the charging process, the green LEDs light up one after the other and then go out. The battery is fully charged when the green LEDs light up continuously. Approximately 5 minutes after the end of charging, the green LEDs go out.
Note: Rapid charging is only possible if the battery temperature is within the permissible range, see section "Technical data".
Battery charged

Continuous lighting of the green LED signals that the battery is fully charged.
Additionally, after approx. 2 seconds, an acoustic signal sounds, indicating that the battery is fully charged.
Immediately after this, the battery can be removed and used.
Without inserted battery, continuous lighting of the LED indicator signals that the mains plug is connected to the socket and the charger is ready for operation.
Battery temperature below 0°C or above 45°C
Continuous lighting of the red LED indicator signals that the battery temperature is outside
the permissible temperature range, see section "Technical data". After returning to the permissible temperature range, the charger automatically switches to rapid charging mode.
If the battery temperature is outside the permissible range, the red LED lights up when the battery is inserted into the charger.
Charging impossible
If charging is impossible despite the battery being inserted, the red LED flashes.
The charging process has not started.
The battery has reached the end of its service life and must be replaced.
Observe the disposal instructions.
Cooling of the battery (Active Air Cooling)
The integrated fan control system in the charger monitors the temperature of the inserted battery. If the battery temperature exceeds 30°C, the fan cools it to the optimal charging temperature. The activated fan creates noise during operation.
If the fan does not work, this means that the battery temperature is in the optimal range or the fan is defective. In this case, the charging time of the battery increases.
Operation indicator
Battery charge indicator
The battery is equipped with a charge indicator that shows its charge level. The charge indicator consists of green LEDs.
To activate the charge indicator, press the button on the charge indicator. Fig. The charge indicator goes out automatically after 5 seconds.
The charge level can also be checked on the removed battery.
| СbvToDnOHaH INdNkaZnaHЯ EmKocTb aKKyMylAToPа |
| HenpepbIbHoe cBveeHne 3
Зеленьх СbvToDnOdoB | ≥2/3 |
| HenpepbIbHoe cBveeHne 2
Зеленьх СbvToDnOdoB | ≥1/3 |
| HenpepbIbHoe cBveeHne 1
Зеленого СbvToDnOda | ≤1/3 |
| Мигане 1 зеленого СbvTo-
Диoga | РezерВ |
If after pressing the button no LED lights up, the battery is defective and must be replaced.
For safety reasons, checking the charge level of the battery may only be performed with the tool in operation.
During the charging process, the green LEDs light up and go out in sequence. The battery is fully charged when the green LEDs are lit continuously. Approximately one hour after the end of charging, the green LEDs go out.
Battery temperature control indicator
The red LED of the temperature control indicator signals that the battery of the cordless power tool (with the battery inserted) is outside the optimal temperature range.
In this case, the power tool does not work or does not work at full power.
Battery temperature control
The red LED lights up when the on/off switch is pressed (with the battery inserted): the battery is outside the permissible temperature range.
At temperatures above 70°C, the battery switches off until it returns to the permissible temperature range.
Tool temperature control
The red LED lights up continuously when the on/off switch is pressed: the temperature of the power tool is below 5°C or above 75°C.
At temperatures above 90°C, the power tool switches off until it returns to the permissible temperature range.
EFFECTIVENESS OF SCREWDRIVING
(Battery operating time)
Frequent switching on and off of the power tool during screwdriving also reduces the effectiveness of screwdriving (battery operating time).
To increase the scanning productivity (continuous working time of the battery), it is recommended to lower the scanning height and move the scanner at a moderate speed.
The following example shows the relationship between the scanning height and the scanning productivity for different battery types.
Scanning conditions
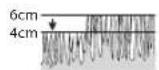
Paper type, substrate
Scanning productivity
Battery 2.0 Ah – up to 250 m
Battery 4.0 Ah – up to 500 m
Battery 6.0 Ah – up to 750 m
To increase the working time, you can use an additional battery, which can be purchased from the Bosch service department for cordless tools.
Troubleshooting

| Пюблесь Возимоча Рожима Устрахени |
| Двигател升降а-ется | Поврждана вунтейнaya рождка садового Иструмени.
Разравен akкуменоклару Загдente akкуменорны무туpeю
Аккуменок升降а升降сь升降сь升降升降升降升降升降升降升降升降升降升降升降升降升降升降升降升降升降升降升降升降升降升降升降升降升降升降升降升降升降升降升降升降升降升降升降升降升降升降升降升降升降升降升降升降升降升降升降升降升降升降升降升降升降升降升降升降升降升降升降升降升降升降升降升降升降升降升降升降升降升降升降升降升降升降升降升降升降升降升降升降升降升降升降升降升降升降升降升降升降升降升降升降升降升降升降升降升降升降升降升降降升降升降升降升降升降升降升降升降升降升降升降升降升降升降升降升降升降升降升降升降升降升降升降升降升降升降升降升降升降升降升降升降升降升降升降升降升降升降升降升降升降升降升降升降升降升降升降升降升降升降升降升降升降升降升降升降升降升降升降升降升降升降升降升降升降升降升降升降升降升降升降升降升降升降升降升降升降升降升降升降升降升降升降升降升降升降升降升降升降升降升降升降升降升降升降升降升降升降升降下降升降升降升降升降升降升降升降升降升降升降升降升降升降升降升降升降升降升降升降升降升降升降升降升降升降升降升降升降升降升降升降升降升降升降升降升降升降升降升降升降升降升降升降升降升降升降升降升降升降升降升降升降升降升降升降升降升降升降升降升降升降升降升降升降升降升降升降升降升降升降升降升降升降升降升降升降升降升降升降升降升降升降升降升降升降升降升降升降升降升降升降升降升降升降升降升降升降升降升降降落升降升降升降升降升降升降升降升降升降升降升降升降升降升降升降升降升降升降升降升降升降升降升降升降升降升降升降升降升降升降升降升降升降升降升降升降升降升降升降升降升降升降升降升降升降升降升降升降升降升降升降升降升降升降升降升降升降升降升降升降升降升降升降升降升降升降升降升降升降升降升降升降升降升降升降升降升降升降升降升降升降升降升降升降升降升降升降升降升降升降升降升降升降升降升降升降升降升降升降投降升降升降升降升降升降升降升降升降升降升降升降升降升降升降升降升降升降升降升降升降升降升降升降升降升降升降升降升降升降升降升降升降升降升降升降升降升降升降升降升降升降升降升降升降升降升降升降升降升降升降升降升降升降升降升降升降升降升降升降升降升降升降升降升降升降升降升降升降升降升降升降升降升降升降升降升降升降升降升降升降升降升降升降升降升降升降升降升降升降升降升降升降升降升降升降升降升降升降升降升升降升降升降升降升降升降升降升降升降升降升降升降升降升降升降升降升降升降升降升降升降升降升降升降升降升降升降升降升降升降升降升降升降升降升降升降升降升降升降升降升降升降升降升降升降升降升降升降升降升降升降升降升降升降升降升降升降升降升降升降升降升降升降升降升降升降升降升降升降升降升降升降升降升降升降升降升降升降升降升降升降升降升降升降升降升降升降升降升降升降升降升降升降升降升降升降升降升降升降 升落升降升降升降升降升降升降升降升降升降升降升降升降升降升降升降升降升降升降升降升降升降升降升降升降升降升降升降升降升降升降升降升降升降升降升降升降升降升降升降升降升降升降升降升降升降升降升降升降升降升降升降升降升降升降升降升降升降升降升降升降升降升降升降升降升降升降升降升降升降升降升降升降升降升降升降升降升降升降升降升降升降升降升降升降升降升降升降升降升降升降升降升降升降升降升降升降升降升降升降降低升降升降升降升降升降升降升降升降升降升降升降升降升降升降升降升降升降升降升降升降升降升降升降升降升降升降升降升降升降升降升降升降升降升降升降升降升降升降升降升降升降升降升降升降升降升降升降升降升降升降升降升降升降升降升降升降升降升降升降升降升降升降升降升降升降升降升降升降升降升降升降升降升降升降升降升降升降升降升降升降升降升降升降升降升降升降升降升降升降升降升降升降升降升降升降升降升降升降升降降至升降升降升降升降升降升降升降升降升降升降升降升降升降升降升降升降升降升降升降升降升降升降升降升降升降升降升降升降升降升降升降升降升降升降升降升降升降升降升降升降升降升降升降升降升降升降升降升降升降升降升降升降升降升降升降升降升降升降升降升降升降升降升降升降升降升降升降升降升降升降升降升降升降升降升降升降升降升降升降升降升降升降升降升降升降升降升降升降升降升降升降升降升降升降升降升降升降升降升降升华升降升降升降升降升降升降升降升降升降升降升降升降升降升降升降升降升降升降升降升降升降升降升降升降升降升降升降升降升降升降升降升降升降升降升降升降升降升降升降升降升降升降升降升降升降升降升降升降升降升降升降升降升降升降升降升降升降升降升降升降升降升降升降升降升降升降升降升降升降升降升降升降升降升降升降升降升降升降升降升降升降升降升降升降升降升降升降升降升降升降升降升降升降升降升降升降升降升降升降升高升降升降升降升降升降升降升降升降升降升降升降升降升降升降升降升降升降升降升降升降升降升降升降升降升降升降升降升降升降升降升降升降升降升降升降升降升降升降升降升降升降升降升降升降升降升降升降升降升降升降升降升降升降升降升降升降升降升降升降升降升降升降升降升降升降升降升降升降升降升降升降升降升降升降升降升降升降升降升降升降升降升降升降升降升降升降升降升降升降升降升降升降升降升降升降升降升降升降升降升值升降升降升降升降升降升降升降升降升降升降升降升降升降升降升降升降升降升降升降升降升降升降升降升降升降升降升降升降升降升降升降升降升降升降升降升降升降升降升降升降升降升降升降升降升降升降升降升降升降升降升降升降升降升降升降升降升降升降升降升降升降升降升降升降升降升降升降升降升降升降升降升降升降升降升降升降升降升降升降升降升降升降升降升降升降升降升降升降升降升降升降升降升降升降升降升降升降升降升降降幅下降降下降下降下降下降下降下降下降下降下降下降下降下降下降下降下降下降下降下降下降下降下降下降下降下降下降下降下降下降下降下降下降下降下降下降下降下降下降下降下降下降下降下降下降下降下降下降下降下降下降下降下降下降下降下降下降下降下降下降下降下降下降下降下降下降下降下降下降下降下降下降下降下降下降下降下降下降下降下降下降下降下降下降下降下降下降下降下降下降下降下降下降下降下降下降下降下降下降下降下降下降下下下下下下下下下下下下下下下下下下下下下下下下下下下下下下下下下下下下下下下下下下下下下下下下下下下下下下下下下下下下下下下下下下下下下下下下下下下下下下下下下下下下下下下下下下下下下下下下下下下下 下下下下下下下下下下下下下下下下下下下下下下下下下下下下下下下下下下下下下下下下下下下下下下下下下下下下下下下下下下下下下下下下下下下下下下下下下下下下下下下下下下下下下下下下下下下下下下下下下下下下
3aemeiteh cckmnytce hcy hcy hcy hcy hcy hcy hcy hcy hcy hcy hcy hcy hcy hcy hcy hcy hcy hcy hcy hcy hcy hcy hcy hcy hcy hcy hcy hcy hcy hcy hcy hcy hcy hcy hcy hcy hcy hcy hcy hcy hcy hcy hcy hcy hcy hcy hcy hcy hcy hcy hcity hcy hcy hcy hcy hcy hcy hcy hcy hcy hcy hcy hcy hcy hcy hcy hcy hcy hcy hcy hcy hcy hcy hcy hcy hcy hcy hcy hcy hcy hcy hcy hcy hcy hcy hcy hcy hcy hcy hcy hcy hcy hcy hcy hcy hcy hcy hcy hcy hcy hcopy hcopy hcopy hcopy hcopy hcopy hcopy hcopy hcopy hcopy hcopy hcopy hcopy hcopy hcopy hcopy hcopy hcopy hcopy hcopy hcopy hcopy hcopy hcopy hcopy hcopy hcopy hcopy hcopy hcopy hcopy hcopy hcopy hcopy hcopy hcopy hcopy hcopy hcopy hcopy hcopy hcopy hcopy hcopy hcopy hcopy hcopy hcopy hcopy hcopy hopy hcopy hcopy hcopy hcopy hcopy hcopy hcopy hcopy hcopy hcopy hcopy hcopy hcopy hcopy hcopy hcopy hcopy hcopy hcopy hcopy hcopy hcopy hcopy hcopy hcopy hcopy hcopy hcopy hcopy hcopy hcopy hcopy hcopy hcopy hcopy hcopy hcopy hcopy hcopy hcopy hcopy hcopy hcopy hcopy hcopy hcopy hcopy hcopy hcopy hscopy hcopy hcopy hcopy hcopy hcopy hcopy hcopy hcopy hcopy hcopy hcopy hcopy hcopy hcopy hcopy hcopy hcopy hcopy hcopy hcopy hcopy hcopy hcopy hcopy hcopy hcopy hcopy hcopy hcopy hcopy hcopy hcopy hcopy hcopy hcopy hcopy hcopy hcopy hcopy hcopy hcopy hcopy hcopy hcopy hcopy hcopy hcopy hcopy hcopy hCopy hcopy hcopy hcopy hcopy hcopy hcopy hcopy hcopy hcopy hcopy hcopy hcopy hcopy hcopy hcopy hcopy hcopy hcopy hcopy hcopy hcopy hcopy hcopy hcopy hcopy hcopy hcopy hcopy hcopy hcopy hcopy hcopy hcopy hcopy hcopy hcopy hcopy hcopy hcopy hcopy hcopy hcopy hcopy hcopy hcopy hcopy hcopy hcopy hcopy h copy hcopy hcopy hcopy hcopy hcopy hcopy hcopy hcopy hcopy hcopy hcopy hcopy hcopy hcopy hcopy hcopy hcopy hcopy hcopy hcopy hcopy hcopy hcopy hcopy hcopy hcopy hcopy hcopy hcopy hcopy hcopy hcopy hcopy hcopy hcopy hcopy hcopy hcopy hcopy hcopy hcopy hcopy hcopy hcopy hcopy hcopy hcopy hcopy hcopy h-copy hcopy hcopy hcopy hcopy hcopy hcopy hcopy hcopy hcopy hcopy hcopy hcopy hcopy hcopy hcopy hcopy hcopy hcopy hcopy hcopy hcopy hcopy hcopy hcopy hcopy hcopy hcopy hcopy hcopy hcopy hcopy hcopy hcopy hcopy hcopy hcopy hcopy hcopy hcopy hcopy hcopy hcopy hcopy hcopy hcopy hcopy hcopy hcopy hcopy h Copy hcopy hcopy hcopy hcopy hcopy hcopy hcopy hcopy hcopy hcopy hcopy hcopy hcopy hcopy hcopy hcopy hcopy hcopy hcopy hcopy hcopy hcopy hcopy hcopy hcopy hcopy hcopy hcopy hcopy hcopy hcopy hcopy hcopy hcopy hcopy hcopy hcopy hcopy hcopy hcopy hcopy hcopy hcopy hcopy hcopy hcopy hcopy hcopy hcopy hCOPY hcopy hcopy hcopy hcopy hcopy hcopy hcopy hcopy hcopy hcopy hcopy hcopy hcopy hcopy hcopy hcopy hcopy hcopy hcopy hcopy hcopy hcopy hcopy hcopy hcopy hcopy hcopy hcopy hcopy hcopy hcopy hcopy hcopy hcopy hcopy hcopy hcopy hcopy hcopy hcopy hcopy hcopy hcopy hcopy hcopy hcopy hcopy hcopy hcopy h |
Battery and charging device
www.bosch-pt.com/serviceaddresses
Transport
The contained lithium-ion batteries are subject to the requirements for the transport of dangerous goods. The batteries can be transported by the user by road transport without the need to comply with additional regulations.
When transported by third parties (e.g., by air freight or forwarding agent), special requirements for packaging and labeling must be observed. In this case, when sending the goods, the involvement of a dangerous goods expert is required.
If the housing is not damaged, the battery can be packed. Seal the open contacts of the battery so that it does not get into the packaging. Please also observe any additional filling instructions.
Disposal

Power tools, batteries, accessories, and packaging should be sorted for environmentally friendly recycling.
Do not dispose of power tools and batteries in household waste!

Do not dispose of power tools and batteries in household waste!
Only for EU countries:
According to the European Directive 2012/19/EC, waste electrical and electronic equipment, and according to the European Directive 2006/66/EC, damaged or exhausted batteries must be collected separately and brought to an environmental recycling center.
Batteries must be collected separately and brought to an environmental recycling center.
Batteries:
Lithium-ion:
Please observe the notes in the transport section.
Ukrainian
Safety instructions. Warning! Read the following safety instructions carefully. Familiarize yourself with the control elements and the correct use of the device. Keep the operating instructions for future use.
Symbols on the power tool

General safety warning.

Read the instructions before operating.

Follow the instructions for care, so that the device does not harm people.
People nearby.

Warning: Ensure safe operation before testing, when it is

Caution: Do not touch the blades, as they rotate. Blades are sharp. Keep fingers
and hands away.

Preventive maintenance or repair or first time
Do not use the tool without a load, turn it on and off by disconnecting the power.

Not applicable.

Do not touch the parts of the power tool, they may be hot. After using the power tool, allow it to cool down before handling.

Do not use the tool in wet conditions; it should not get wet.

Protect yourself from electric shock with the tool.

Not applicable.

Use the charger only in dry conditions.

The charger is equipped with a safety transformer.
The manufacturer's instructions for use of the word tool should be followed carefully.

Carefully check the tool for the presence of wild and domestic animals.
Wild or domestic animals may be injured during the use of the word tool. Carefully check the area where you will use the word tool, and remove stones, sticks, wires, bones, and other foreign objects. During the use of the word tool, make sure that there are no hidden wild or domestic animals or small animals in the dense grass.
Operation
Never allow the tool to be used by persons who are not familiar with these instructions. National regulations may restrict the age of the operator. If you do not work with the tool, store it out of reach of children.
Never allow the tool to be used by persons with limited physical, sensory, or mental capabilities or lack of experience and knowledge, or by persons who are not familiar with these instructions. National regulations may restrict the age of the operator.
Watch children to ensure they do not play with the tool.
Never use the tool when people, especially children, or pets are nearby.
The user is responsible for accidents, injuries to third parties, and damage to property.
Do not use the tool with bare feet or sandals. Wear sturdy shoes and long trousers. Never use the tool barefoot.
Carefully inspect the area where you intend to use the tool and remove stones, sticks, wires, bones, and other foreign objects.
Before using the lawn trimmer, check that the cutting head and line are not damaged or worn. To avoid imbalance, replace the line and cutting head together.
Mow grass only in daylight or in good artificial light.
Do not work with the lawn trimmer in bad weather, especially when a thunderstorm is approaching.
If possible, do not use the tool on wet grass. Walk, never run. Never use the tool with damaged guards or without guards, e.g., without the deflector and/or without the grass catcher. For your own safety, we recommend using protective goggles. Do not use the tool if you are tired or sick, or if you are under the influence of alcohol, drugs, or medication. Mowing grass on slopes can be dangerous: - Do not mow grass on excessively steep slopes. - On slopes and wet grass, always ensure that you have a firm footing. - On slopes, mow across, not up and down. - Be especially careful when turning on slopes. Be very careful when you pull or push the tool towards you. When mowing grass, always push the tool forward and never pull it towards you.
Never point the tool at yourself or others, do not carry it by the cord, and do not place it where you might trip over it or where it is allowed to be placed when the blades are not moving. Do not point the tool at yourself or others when starting the engine. Start the tool as described in the operating instructions and make sure your feet are at a sufficient distance from the blades. Do not put your hands and feet near rotating parts, and do not hold them near such parts. Keep a safe distance from the discharge opening when working with the tool. Never lift or carry the tool while the motor is running. Make sure that when storing the tool, it stands on all four wheels on the ground. Lift the tool only by the handle. Handle it with care. Do not make any modifications to the electric tool. Unauthorized modifications may affect the safety of the electric tool and lead to increased noise and vibration and reduced productivity.
Assembly
The mower is delivered in a form that requires assembly. To achieve optimal results, proceed as follows:
- Set the mower to the maximum cutting height. - Place the mower on its side. - Before starting work, inspect the cutting blade and keep children, animals, glass objects, and machines at a distance.
Remove the discharge chute
- When you store the tool without the bag. - Before you remove the grass catcher. - Before you check or clean the tool, or perform any work on it. - After hitting a foreign object: Check the tool for damage and replace if necessary. - If the tool starts to vibrate abnormally (check immediately).
Maintenance
Always wear sturdy gloves when assembling
or working near sharp blades.
Check all nuts, bolts, and screws for tightness and ensure the product is in a safe working condition. Regularly check the condition and tightness of the blade mounting bolts. Regularly check the condition and tightness of the blade mounting bolts. - Check the blade and the blade mounting for wear or damage. Use only genuine blades intended for the tool. Make sure that new parts match the originals. Before storage, check that the blade is clean and free of grass clippings. If necessary, clean it with a dry cloth.
Safety instructions and instructions for optimal handling of the battery
Before inserting the battery, make sure the tool is switched off and the blade is stopped. Inserting the battery into a switched-on tool may cause an accident. Use only genuine Bosch batteries intended for this tool. Using other batteries may cause injury and fire hazard. Do not open the battery. There is a risk of short circuit.

Store the battery away from high temperatures (e.g., from direct sunlight), fire, and water. There is a risk of explosion.
Store the battery that is not currently in use away from paper clips, coins, keys, and other small metal objects that could bridge the contacts. Short-circuiting the battery contacts may cause burns or damage. If the battery is used improperly, it may leak acid. If the acid gets into your eyes, rinse them thoroughly with water and consult a doctor immediately. Improper use may cause irritation of the respiratory tract. Use the battery only in products from the manufacturer. Only under such conditions will the battery be protected from dangerous overloads. Do not expose the battery to sharp objects, e.g., nails or screwdrivers, or to external force. Internal short-circuiting, overheating, fire, or rupture of the battery may occur. Do not disassemble the battery. There is a risk of explosion. Keep the battery away from water and moisture. Store the battery only at temperatures between -20°C and 50°C. Do not leave the battery in a car in hot weather. Periodically clean the battery contacts with a dry, clean cloth.
Safety instructions for the charger

Read all warnings and instructions. Failure to follow the safety instructions and the manual may result in electric shock, fire, or
serious injury.
Keep all safety rules and instructions for future reference.
Use the charger only if all its functions are fully under your control and you are not limited in their use by physical or mental conditions, or by lack of experience or knowledge, unless you have been given supervision or instruction concerning use of the appliance by a person responsible for your safety.
Never allow children or persons with limited physical, sensory, or mental capabilities or persons lacking experience and knowledge to use the charger unless they are supervised or instructed.
Follow the instructions. National regulations may restrict the permissible age of use.
Watch over children. Children must not play with the charger. Charge only lithium-ion batteries with a capacity of 2.0 Ah (from 10 battery cells). The battery voltage must match the charging voltage of the charger for the batteries. Do not charge batteries that are not designed for repeated recharging. Otherwise, there is a risk of damage or explosion.

Protect the charger from rain and moisture. Ingress of water into the charger increases the risk of electric shock.
Before using the charger, read all instructions and warnings. If the charger is damaged, there is a risk of electric shock. Before each use, check the charger, cable, and plug. Do not use a charger that has been dropped or damaged. Do not open the charger yourself; repairs should only be performed by qualified personnel and only with original parts. A damaged charger, cable, or plug can cause electric shock. Do not use the charger on flammable surfaces (e.g., paper, textiles) or in a fire-hazardous environment. Due to heating of the charger during charging, there is a risk of fire. Do not cover the ventilation openings of the charger. The charger may overheat and fall. For further instructions, see the manual.
USE ONLY WITH THE ORIGINAL BATTERY PACK
MAX. CHARGING CURRENT 3.0 A
BEFORE USE, CHECK THE CHARGER AND BATTERY PACK.
218|Ukrainian
SYMBOLS
The following symbols are used in this manual, when you read and understand the operating instructions. Remember the symbols and their meanings. Correct understanding of the symbols will help you use the device correctly and safely.
The power tool is intended for cutting grass in the household.
The power tool is not intended for trimming bushes, cutting grass along edges, or trimming.
The power tool is intended for cutting grass at ground level.
Technical data
It is recommended that the battery pack be fully charged.
To remove the battery pack, press the battery pack release button and pull out the battery pack.
Charging
Charging begins when the plug of the charger is inserted into the socket and the battery pack is inserted into the charger.
With the intelligent charging system, the charging process of the battery pack is automatically detected and charging is carried out with an optimal current depending on the temperature and voltage of the battery.
This preserves the battery pack, and when stored in the charger, it will always be fully charged.
Indicator functions (AL 3620 CV/AL 3640 CV/ AL 36V-20)
The battery charge indicator lights up green when the battery is charging.
The indicator element on the battery: during charging, the lights go on one by one and then go out. The battery is fully charged when the green light is on continuously. About 5 minutes after the battery is fully charged, the green light goes out again.
Note: If the charger is wet, or if the battery temperature is outside the permissible charging temperature range, see the 'Technical Data' section.
Battery charging

The continuous green light of the indicator indicates that the battery is fully
charged.
Approximately 2 seconds later, a sound signal will sound, indicating that the battery is fully charged.
After this, the battery can be removed and used immediately.
If the battery is not inserted,
the continuous green light of the indicator indicates that the device is inserted into the socket and the charger is ready for operation.
Battery temperature below 0°C or above 45°C

The slow green charging indicator light indicates that the battery temperature is
outside the permissible temperature range, see the 'Technical Data' section. After the temperature returns to the permissible temperature range, charging resumes automatically. If the battery temperature is outside the permissible charging range, the charging indicator light on the battery will flash green.
Charging possible
The charger is equipped with a charge status LED indicator. The charging process cannot start,
if the battery is not connected properly (see section "Troubleshooting").
Charging indication
During fast charging cycles, or when the cycles repeat continuously one after another, the charger may heat up. However, this is not
dangerous and does not indicate a malfunction of the charging device.
A significant reduction in charging time indicates that the battery has reached the end of its service life and needs to be replaced.
Please follow the instructions for disposal.
Battery cooling (Active Air Cooling)
The integrated fan control system in the charger monitors the temperature of the installed battery. If the battery temperature exceeds 30°C, the battery is cooled by the fan to the optimal charging temperature. The fan operates only when needed.
If the fan does not operate, the battery temperature is within the optimal range or the fan is faulty. In such a case, the charging time of the battery may be extended.
Operating instructions
Battery charge indicator
The battery is equipped with a battery status indicator, which shows the charge level of the battery. The battery status indicator consists of green LEDs.
Press the battery status indicator button to activate the battery status indicator. After a few seconds, the battery charge indicator turns off automatically.
The charge level can also be checked when the battery is removed.
Battery charge indicator
| Постойе CBИЕнna 3
Зелених CBITLOДIOДВ | ≥2/3 |
| Постойе CBИЕнna 2
Зелених CBITLOДIOДВ | ≥1/3 |
| Постойе CBИЕнna 1
Зеленио CBITLOДIOДa | ≤1/3 |
| Блиманna 1 зеленио
CBITLOДIOДa | РezерВ |
When the indicator lights up, do not use the tool. The battery must be charged.
Using the safety instructions, the state of charge of the battery can be checked even when the tool is switched off.
When charging, the indicator lights up one after another and then the green lights go out. The battery is fully charged when all green lights are lit continuously. Approximately 5 minutes after the battery is fully charged, the three green lights go out again.
Battery temperature control indicator
The red indicator light of the temperature control signals that the battery or the electronics of the garden tool (with built-in battery) are outside the optimal temperature range. In this case, the garden tool does not work or does not work at full power.
Battery temperature control
The red light comes on when the button is pressed or when the tool is switched on (with built-in battery): the battery temperature is outside the permissible range.
If the temperature exceeds 70°C, the battery switches off until the temperature returns to the permissible range.
Electronics temperature control of the garden tool
The red light flashes continuously when the button is pressed: the electronics temperature of the garden tool is below 5°C or above 37°C. If the temperature exceeds 90°C, the electronics of the garden tool switch off until the temperature returns to the optimal range.
Runtime (working time of the battery)
The runtime (working time of the battery) depends on the quality of the lawn, the density of the grass, the moisture, the height of the grass, and the cutting height.
Frequent switching on and off of the garden tool during mowing also reduces the productivity (working time of the battery).
To optimize the runtime (working time of the battery), it is recommended to mow more often, increase the cutting height, and work at the appropriate speed.
The diagram shows the relationship between the cutting height and the cutting width for three battery packs.
Operating instructions
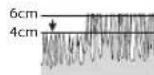
Dry point, dry grass
Cutting capacity
Battery pack 2050 m² 2.0 Ah.
Battery pack 500 m² 4.0 Ah.
Battery pack 70 m² 6.0 Ah.
You can have the battery pack repaired at an authorized Bosch service center for power tools.
Troubleshooting


www.bosch-pt.com/serviceaddresses
Transport
The contained lithium-ion batteries are subject to the Dangerous Goods Legislation requirements. The user can transport the batteries by road without further requirements.
When transporting by third parties (e.g., air transport or forwarding agency), special requirements on packaging and labeling must be observed. For the preparation of the item being shipped, consulting an expert for hazardous material is required.
Only dispatch the battery pack if the housing is undamaged. Tape or mask off open contacts and pack up the battery such that it cannot move around in the packaging. Please also observe the possibility of more stringent national regulations.
Disposal

Used tools, batteries, and packaging must be disposed of in an environmentally friendly way through recycling.

Do not throw used tools and batteries into household waste!
Disposal for EU countries:
According to the European Directive 2012/19/EC and the European Directive 2006/66/EC, used electrical and electronic tools and used or defective batteries must be collected separately and recycled in an environmentally friendly manner.
Batteries:
Power tools:
Please follow the instructions in the transport section.
Kazakh
Eurasian Economic Union (EAEU) Conformity
Manufacturer
Country of origin
The product has been tested and complies with the requirements of the technical regulations of the Customs Union.
The product is marked with the EAC conformity mark.
The manufacturer is responsible for the conformity of the product with the technical regulations.
The product has been certified according to the requirements of the Customs Union.
The battery is charged using the charging device.
First charge
Before first use, charge the battery fully. If the device has not been used for a long time, it may be necessary to charge it for a longer period.
The charging process is carried out in accordance with the safety requirements specified in the manual.
Battery usage
- If the device is not going to be used for a long time, charge it fully before storage. - If the device is not going to be used for a long time, remove the battery and store it separately.
Battery storage
- If the device is not going to be used for a long time, charge it fully before storage. - Store the device in a cool, dry place. - Do not immerse the device in water.
Battery replacement
- Remove the battery cover and the battery. - Install the new battery.
Service and maintenance
- If the device is not working properly, contact the service center.
Storage
Store the device in a cool, dry place. Avoid exposure to high temperatures and direct sunlight. - Keep the device away from heat sources. - Do not store the device in a humid environment. - For information on storage conditions, refer to the manual (section 1). - Store the device at temperatures between +5°C and +40°C. Do not exceed 80% relative humidity.
Cleaning
The manufacturer's warranty is valid only if the machine is operated in accordance with the operating instructions and the warranty terms specified in GOST 15150 (version 5). The ambient temperature range is from -50°C to +50°C. The relative humidity should not exceed 100%.
Safety instructions
Warning! Read all safety instructions carefully. Read the instructions for connecting the electric motor, control elements, and their safe use. Keep these instructions for future use.
Symbols on the electric motor

Safety instructions for connection.

Read the operating instructions.

Persons who are not trained should be kept away.
Pay attention to the warning signs.

Caution: When the electric motor is running, keep a safe distance from it.

Be careful: Do not touch the rotating parts.
The rotating parts of the motor are dangerous. Keep hands and clothing away from them.

Before cleaning or maintaining the electric motor, or before approaching it closely
for any reason, disconnect the electric motor from the power supply and ensure that it cannot be accidentally switched on again.

Operating instructions.

Before installing the electric motor, check its insulation.
TOKTaTbInbIn TpybHa DeiH KyTiHi3.
3NeKtp6yIbIMdbI eWipin icTeH 1bIfapFaHda da 3NeKtp6yIbIM nbIshaKTapbl ani de aHaNbIn Typa 6epin, JkapanaHyf anapa anaDbI.

3neKtp 6yibIMdbi XaybIH XaybIN TpyfHaDa KOJaHbAHyI3 Hemece OHbl
XaybIH aCTbIHJa KaJIbIbIPMaHbI3.

3NeKtpcOKKbIaH CaKaTahbI3.
KoIdaHbIMaIdbI.

3NeKtp KyaTtahDbIpfbIuH TeK KaHa Kypfak 6eImmepeKeKoJaHbIHbI3.

3neKtp KyaTtahDbipfbIbbl Kayinci3dk TpaHcΦopMaTopbIMeH

Ka6DbikTaIFaH.
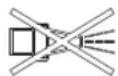
BaK əJIeKtp6yIbIMbIH Ta3aIay yIiH eWkaWah KOFapbl
JeHreIi KbcIMMeH iTeHTa3aay KpybIbIapbH Hemece 6aK IHaHrinepi KOndaH6aHbI3.

BaK KypaIbI KOJaHaBbIaTbIH KepeKaHyapnapKHe Ka6aMbI aHApdbIH KO
6onybIMyKnT TEKcepin aIbIHb3. 3neKtp KypaI KOJaHbIbIN JaTKaHda XaHyapnap XaHe Xa6aBbI aHdap XapaKaTTaHbIN KaYbIMyMKIn. KypaI KOJaHbIaTbIH aMakTbIMyKnT TEKcepIN, OHda 6oNaTbIH tac, TaIK, cbIMdAp, cyKeTpexHe 6eTdE 3aTTapDbH 6apNbIFbIH Ocbl aMakTaH
aIbIN TaCTaHbI3. KypanDbI KOJaHy 6apbcbIHda KaIbIH, WEN apacbIHda aHap, Jauhyapnap Hemece WaftbIH aTOMAPaIapbl 6Ola anaTbIHbIH eckepin XypiH3.
Backapy
Do not allow children to touch the electric bulb or come into contact with the bulb's cooling fins. It is possible to check the bulb's heating by touching it with the back of your hand. If the bulb is hot, do not let children touch it until it has cooled down. Do not allow children, disabled, sensory or mentally impaired persons, or persons lacking experience and knowledge, or persons who are not familiar with the bulb's operating instructions, to use the electric bulb. It is possible to check the bulb's heating by touching it with the back of your hand. You must supervise children to prevent them from playing with the electric bulb. When the bulb is in operation, children, the elderly, or
228|Kazakh
pets should not be allowed to touch it.
The electric bulb or its operation may be hazardous for persons with reduced physical, sensory, or mental capabilities, or for those lacking experience and knowledge, unless they are supervised or instructed. Do not use the electric bulb if the glass is cracked or broken. Do not use the bulb if the cord or plug is damaged. If the bulb is dropped or damaged, unplug it immediately. - Always disconnect the bulb from the power supply before cleaning or maintenance. Do not immerse the bulb, cord, or plug in water or other liquids. To prevent electric shock, do not touch the bulb, cord, or plug with wet hands. - Do not use the bulb outdoors or in damp or wet locations.
If the bulb is used in a damp location, especially near a bath or shower, do not use it with an extension cord. Do not use the bulb if the cord or plug is damaged. Do not look directly at the light source. Do not use the bulb if the glass is cracked or broken, or if the bulb has been dropped or damaged. Do not use the bulb if the cord or plug is damaged. If the bulb is damaged or broken, do not use it. - The bulb may become hot during operation:
- Do not touch the bulb while it is on.
- Do not place the bulb on or near flammable surfaces.
- Do not cover the bulb with any material.
Do not touch the bulb with wet hands, and do not use it near water or heat sources.
- KynamaJIbI eHicTepe6aFbIT 03repTyIHi3e aca bany JxHe MyKnrt apekeT etiHi3.
ApTkKa KapaJ KypreHi3e Hemece 6aK 3neKtp6yHbIMbIH TaPTkAHyHbI3da aca 6aay XaHe MyKnT apeKeT etHi3. - Wen wanKaH yaKbITTa 6aK 3neKtp6yBIMbIH bINfN anFa Kaai Ntepe OTbIPbIN KypiH3, OHbl EwKaWah DeHeH3re Kaai TapTnA HbI3. Bak3neKtp6yHbIMbIH TaCbImaIay yuHn eHKeNtKeHiHizde,HeMece YCTiHdE wOJ KOK JeppeH 0TKeHiHizde, XaHe bak 3neKtp6yHbIMbIH WOn WabIaTbIH XepRe XaHe WOn WabIFaH JepDeH TaCbIMaIdaFaHbIHbI3Da 3neKtp6yHbIM PbIwaKTapbl TOKtaTbIN, icKe KocbIMa KaBInTa 6onybl Tnic. Ko3FaNTKbIITbI 1ce KocKaHda Hemece Jyprize6actaHaHbIHbI3da 6ak3neKtp6yibIMbIH ayapMaHbl3. BaK 3eKtp6yHbIMbIH KOJaHy HcayIbIbIHda KepceTirReHdei icKe Kocbl, e3IH3diH aKTapblbI3dbIH KypaIbIH aHaIbIT typaTBH 6oJIweKTePiH e3ak apalbIKTa 60nybHa Ha3ap aydapblbI3. KoIaPbIHb3beH aKaTapbIHb3dbl aHaBbIN TpyaTbH 6eIWeKTepeiHe
XaKbIH Hemece OnapdbIH,actbIHfbI XafblHaYCTAmHaBl3.
BaK3neKtp6yHbIMbIMeHxymbic icTeReHiHizde OHbIH WbIFapy 6oIWeHie KapaJ XetKIniKTi apaBikTa Typblhbl3. Ko3faNTkbIbI icTe 60nbT pyfah 6aK 3neKtp6yNbIMbIH eWkaWah KTepeMeH3 Hemece TaCbImaHbI3. BaK3neKtp 6yHbIMbIH caKTay yaKbITbIHda OHbIH,4 aKaTapbIHbIH, 6apNbIFbl XepDe TpyFaHbHa K03 XeTKi3IHi3. BaK 3eKtp 6yHbIMbIH TeK KaHa OHbIH TacbMaIay TYTKaCbIHaH YCTaN KTepeiH3. TacbMaIay TYTKaCbIH abaHnTbIPA KOndaHbIHbI3. Kypanbl e3repy 60bHwa e66ip KymbICTapbIH 36acbHb36eH etki36eH3.PyKcat etimereH e3repy KymbICTapbl 3JIeKtp6bYbIMbIHb3DbIH Kayinci3diriH 3aKbIMdaI, UybIJaP MeH Bn6paunapdbIH KyweiTin, Kypal KymbcblbIH HaapnaNyHbHa anapa aanaBl.
XanbipakTapdbI XnHay
XaNbpaKaTapDbI XnHay yuH apHaHaFAnbIaFbIKy3deri XaNbpaKaTapDbI 03iHi3dIH rYn3apbIHbI3daH XnHa aIaNbHdAn KbInbIN daMbITbIN bIbIFapbINFaH. OcbI cyHKcHbIH eH OHtaNbI HOTnxKeIepHe KeTe anybl YuH TMeHderinepre caepeket etYiH3 na3bIM:
230|Ka3aKa
- KaNbIpaKaTapDbI TeK KaHa KypaIbIH MaKcHMaIbIK Kecy 6nIKTiIHe JxHaHbI3.
- XanbipapTapDbI TeK KaHa 03iH3diH γI3apblHbI3Da XHHaHbI3.
- KaNbIpaK XnHay aIbIHda anDbIMeH KymbIC anaHbIH TeKcepi anbln, aamdapbl, yM Manapbln, AnHeKeTeh KacalFaH 6YbIMdapbl XHe KJIKTepDi OcbI JepReH Y3aKaTa YCTaHbI3.
3neKtp Ti36ek TKTaTKbIWBiH 6ocatbin axbipaty
- BaKənEeKtp6yHbIMdbI 6aKbInaycbl3 KaIDbipIn KeTyHiz KepeK 6oJIbIn KaIfAHda ePkAshaH. -ByraTaynapbI KeTipin KIOU aIbIHaH.
- BaK 3JIeKTp6yHbIMbIH TeKcepReHl3Ie, Ta3aJaFaHbIHbI3Ha HeMece 3JIeKTp6yHbIM 6ObHIIu XMbICTapDbI eTKi3ReHHi3Ie.
- Baca 3aTAPMeH COKKbIbIN KaIFaHHaH KeiH; 6aK 3JIeKTp6yIbIMbIHda 3aKbIMDaHFaH He 6y3bIbFAH JepnepiH naiDa 6oJFaH 6oImaHaBH Depey TekcepIn,KepeK 6oJcA PbIaFbIH aybICTbIPbI aJIbIHbl3.
- BaK əJIeKTp6yIbIMbl KaIbITaFbIdaI emec iipinien bactaca (pepey TeKcepin anbIHbI3).
Kypan Kytimi
riangleright ΘTkip nbIwaKaTap aHMaFbIHda apekeTein Hemece xymbcic icTei
Jyprheni3e opkawah aphaib6ak konfantapbH KIn JypiH3.
Bak 3neKtp 6yibIMbImeH Kayinci3 Tpyde JyMbIC icTeyIH KaMTamacbl3 eTe any yuH comdap, 6ypaHaMaIap MeH 6ypaHaIapbIHbIH 6apNbIFbl TypaKTbl Tpyde 6ekitirreHin Tekcepin aHbI3. - ⅢeTay ce6eTIH To3bIn KETIN KETnerEHIN YdaNbI TEKcepIN KypiH3. - Μεπ γctay ce6etihde to3bɪn ketɪn Ketneherɪn JepJIepiHbap He JOK 6onybɪn ydaɪbɪ TeKcepiŋ Kypɪniʒ. Bak 3neKtp 6ynbimbIH TeKcepin, TO3bIN Hemece 6y3bINbIN KEtKeH 6eJWeKTePi KAYINCi3iK ce6entepiHeh ayblCTbIPbIHbI3. TeKaHaOcbI6aK3JIeKTp6yHbIMbl ywiH apHaJIFaH KeceTIH nbIwaKTapbIH KOJdaHbIHbI3. AybICTbIPbIaTbIH 6eKeTepi BoW HnPMcBihbIH 6yHbIMdapbl 6oHaHbHa Ha3ap aydApbl3. CaKtayfKaIO aANbIHaH aINbIMeH 6aK3neKTp 6yNbIMHbIH Ta3a XHe KaIbIKTapcbl3 KaIbINTa 60nFaHbIH TeKcepin aNbHbI3.KepeK 6oNa, KymCaK KypFaK KbIIaKaNeH Ta3aHaHbl3.
Kayinci3dk HycKaynapbMeH aKKymyIaTOpdbIOHTaIIbI Typde naIdaIahy 6oBbIHwa HycKaynap
AkkymyIaTOpbl KypanFa eHri3y anbHaHa andbimEn 6ak 3neKtp6yBmHbIn eWipin KoBilFaHbN XeHe 3nKtp Ti36ek TokTaTkbUb6ocatbIn aXbipatbIn KOblFaHbIN TeKcePin anbHb3.AkkymyIaTOpbl
Kocbltn Typhah 6ak 3neKtpbMbHa eHri3y anaTapFa anapa anadbl.
TeKaHaOcb6aK3eKtp6yHbIMbYwIH apHaHaFa apHaBb Bosch aKKymIaTOpnapbH KOnDaHbHb3. BaCa Tpyi akKMyIaTOpnapDbI KOJaHy JkaPaHaHy XHe ePt Kayi6he anapa anaDbI. AkkymyTopb1 aunha3. Kbicka tynbikany Kayini 6ap.

AkymyaTOpdbI bICTbIKaH (Mbicanb, y3aK yaKbIT 60bIKyN CAYnEneHYiH De), OTTaH cydAn XHe bINFaDAn KOPFaHbI3. KApblny kayi6I 6ap.
KoIaHbIMaHaAkkymyTOpBk KaFa3 KblcIbPbIbTapDah,TbHdApDah,KiTTepDhen, HHepeDh,6paHdaIapDah Hemece KOHTAKTTapFa 6eTe eI aIbTH Baca MeTAN 3aTAPDaH anbc XepDe caKaTahlb. AKKMyIaTOpDbH KOHTAKTTapbl apacbHdaFb KbICKa Mepzimdi TybKTany Ce6eBiHek Kyin Kany HeMece ept naJa bOlyb MyMkiH. AkkymyTOpda3akbIMdaHafanKepneip6ap6onFaHa Hemece onDpybcnaDanaH6arAnXaFdaJa6 by MyMkH. By KafdaJaXMybICayMaBfHaTa3a aya Kiprizin,waftmAp 6oNca,dpirepreXyriHiz. By TbHbCany KonDaBHITIPKeHdipy MyMKH. Byn akKymyIaTOpDbI TeK KaHa OcbI eHdpYiEhIMpeIpHe IaDanaHbHbI3. CoI apKblbIakKymyIaTOpDbI KayiPi, apTbIK KytKeYteH caKaTaCbI3. Were Hemece 6ypaybiu cnaKtby uytb3aTTap Hemece cbiptkbecep apkblnbakymynarotop 3akbIMdaHyb MyMKIN. Bynkckta Tnybtanyfa anbin kenin, aKKMyJnTOp KaHybl, TyTH WbIfapBy, XapblbHemece Kbl3bn KeTyI MyMKIN. AkkymyTOpBbH Kbicka TybiktanybH etKl36eH3. KapbyN kayi6i 6ap. AKKMyIATOpblCybIKbIKTapdaHKaHe bINFaIbIKTaH Kopfan KpyiH3. Bak3neKtp6yHbIMbIH TemnepaIpyaayMaftb-20°C KHe 50°CaapanbIbHda6oNfAHKepePpeFaHa cKaTaHbI. BAK 3neKtp6yHbIMbIH, MbIcAlb, Ka3Da KeIiTe KaIdbipMaHbI. AkkymyIITopbIH XeIeTeCaHbIaynapbIH MyMCaT3aXeHe KpyfKaKbIIwakKeH aHa CaHa MyKnT Ta3anAnKypiH3.
KyaTtAnDbIpy KypanDapbl ywiH Kayinci3dk HycKaynbikTapbl

Kayinci3ik 60ybuHwa HycaynapbI MeH caKaTHdbpynpabH6apbIFbH OKblHb13.
Kayinci3dik 60bibHwa HycaynbKtapbi Meh CaKaTaNbypaBn YcTaHbay He opbHdAmay
3NEKTP COKKbICbHa, oPT WbIFyblHa XHe/HEmece aybip KaapaTaNHyFa anapa anybi MymkiH.
This appliance can be used by children aged from 8 years and above and persons with reduced physical, sensory or mental capabilities or lack of experience and knowledge if they have been given supervision or instruction concerning use of the appliance in a safe way and understand the hazards involved. Children shall not play with the appliance. Cleaning and user maintenance shall not be made by children without supervision.
Keep the appliance and its cord out of reach of children less than 8 years of age. If the supply cord is damaged, it must be replaced by the manufacturer, its service agent or similarly qualified persons in order to avoid a hazard.
Children, persons with reduced physical, sensory or mental capabilities, or lack of experience and knowledge, or persons unfamiliar with these instructions and/or not understanding them, and/or not familiar with this appliance, shall not use this appliance unless they are supervised or instructed. Keep the appliance and its cord out of reach of children less than 8 years of age.
Children shall be supervised to ensure that they do not play with the appliance. Cleaning and user maintenance shall not be made by children without supervision. Only use the charger provided with the appliance. Use only the original charger specified by the manufacturer. Do not charge non-rechargeable batteries. This can cause fire or explosion.

Store the appliance in a dry place, away from rain and moisture.
Do not immerse the appliance in water or any other liquid.
Before first use, fully charge the battery. Charge the battery for at least 10 hours. Do not charge the battery for more than 24 hours. Use only the charger provided. Do not use the appliance if the battery is damaged. If the battery is damaged, it must be replaced by the manufacturer or a qualified person. Do not dispose of the battery in fire. Do not expose the battery to high temperatures. The battery must be recycled or disposed of properly. Do not short-circuit the battery. Do not use the appliance if the battery is leaking. If the battery leaks, avoid contact with skin and eyes. If contact occurs, rinse with water and seek medical advice.
Belt
The belt is used to carry the appliance. Keep the belt and its accessories out of reach of children. The belt is not a toy.
Belt clip

Battery pack
| Бени Марба |
| Peakuzя баftы |
| Кор广泛关注 Клидаьни Кли лурипя |
| Салмаftы |
| Иске косу |
| Өшіру |
| ✓ | Рүкат etілген Колдану оpekeTTepi |
| X | Рүкат etілmerен Колдану opekeTTepi |
| CLICK | Естітін šувіndap |
| Кураздас bәлшөтөр/Косялбі
Бәлшөтөр |
Charging port
Usage
The appliance is intended for household use only. Do not use it for commercial purposes.
By6ak3neKtp6yHbIMbi 6ytanapdbkcey tericTey xHeT.6. yuiH MaKcattanmaFaH.
Ocbak3neKtp6yblmbIgyn3apdaBfWENTIKepTONbipak DeHreInHeNcYwIH apHaFan.
Technical specifications
| Keramshankbills AdvancedRotak | AdvancedRotak | AdvancedRotak | Advanced |
| 36-650 | 36-660 | 36-690 | 36-750 |
| Фиим Немperi | 3 600 HB9 604 | 3 600 HB9 605 | 3 600 HB9 607 | 3 600 HB9 702 |
| Атылы керneyi B 36 36 36 36 | | 3 600 HB9 673 | | 3 600 HB9 771 |
| Пышak Tуркысын eнi | CM 42 42 42 46 | | | |
| Кесу биiktiri MM 25 - 80 25 - 80 25 - 80 25 - 80 | | | | |
| Шел устay ceбетин Калемi | л 50 50 50 50 | | | |
| "ЕТА-Procedure 01:2014" КужатINA сай салмafbl | Кг 17,5 16,5 17,5 17,5 | | | |
| Серийн Немperi | 6ak щеktрБУМынТаftашасынДа Караньз |
| свiptы Temперацынчийтабынды Deнгейi |
| - Кашиандиру ворьсbingda | °C 0 ... +45 0 ... +45 0 ... +45 0 ... +45 | | | |
Kazakh|233
| Keramshankbills AdvancedRotak | AdvancedRotak | AdvancedRotak | Advanced |
| 36-650 | 36-660 | 36-690 | Rotak 36-750 |
| - icke kocbilly,
koilanfahanda | °C +5 ... +50 +5 ... +50 +5 ... +50 +5 ... +50 | | | |
| - caqtay
keziende | °C -20 ... +50 -20 ... +50 -20 ... +50 -20 ... +50 | | | |
| Актуларларларларларларларларларларларларларларларларларларларларларларларларларларларларларларларларларларларларларларларларларларларларларларларларларларл柏林 | | | | |
| Ateaylbyi kepheyi B 36 36 36 36 | | | | |
| Бимнемирii/Kуаты | | | | |
| - 2607 336
913/
1607 A35
02V | Ah - 2 x 2,0 -- | | | |
| - 2607 336
915/
2607 337
047 | Ah 4,0 - 4,0 4,0 | | | |
| - 1607 A35
058 | Ah -- -- | | | |
| Актуларларл柏林а | | | | |
| - 2607 336
913/
1607 A35
02V | - 10 -- | | | |
| - 2607 336
915/
2607 337
047 | 20 - 20 20 | | | |
| - 1607 A35
058 | -- -- | | | |
The parameters given in this operating manual are for a voltage of 2000 V or a voltage of 2000 MΩ.
| Keramshankbasi Advanced | Rotak 36-850 | Advanced Rotak 36-890 | Advanced Rotak 36-905 | Advanced Rotak 36-950 |
| Фан Иемір | | 3 600 HB9 802 | 3 600 HB9 803 | 3 600 HB9 606 | 3 600 HB9 901 |
| 3 600 HB9 872 | | | |
| Атылы Керneyi B 36 36 36 36 | | | | | |
| Пышak Турковский си CM 46 46 42 46 | | | | | |
| Кесу биiktiri | MM | 25 - 80 | 25 - 80 | 25 - 80 | 25 - 80 |
| Шел устay себетинякелемi | л 50 50 50 50 | | | | |
| "EPTA-Procedure01:2014" кухасына садсалмавi | КГ | 17,5 | 17,5 | 17,5 | 17,5 |
| Серийлы Кемірattурасынійуарыndы.Deнг'rei |
| сыrtклы Temпера typасынійуарыndы Deнг'rei |
| - Каатандырьбарысунда | °C | 0...+45 | 0...+45 | 0...+45 | 0...+45 |
| - icke кocьліп,колдан fal'da | °C | +5...+50 | +5...+50 | +5...+50 | +5...+50 |
| - садтay kezieнde | °C | -20...+50 | -20...+50 | -20...+50 | -20...+50 |
234|Kazakh
| Keranшankbii Advanced | Advanced | Advanced |
| Rotak 36-850 | Rotak 36-890 | Rotak 36-905 |
| Аккуларов линник hoндык линник hoндык линник hoндык | | | |
| Атылы Керneyi B 36 36 36 36 | | | |
| Өнím Немipi/Куаты | | | |
| -2607 336 913/1607 A35 02V | Ah -- -- | | | |
| -2607 336 915/2607 337 047 | Ah -- 2 x 4,0 2 x 4,0 | | | |
| -1607 A35 058 Ah 6,0 6,0 -- | | | |
| Аккуларов ушьikтарын саны | | | |
| -2607 336 913/1607 A35 02V | | -- -- | | |
| -2607 336 915/2607 337 047 | | -- 20 20 | | |
| -1607 A35 058 20 20 -- | | | | |
The parameters given in this operating manual are for a voltage of 2000 V or a voltage of 2000 MΩ.
Operating instructions AL 3620 CV AL 36V-20
| Одим Неміп EU 2 607 225 657 2 607 226 273 | | |
| UK 2 607 225 659 2 607 226 275 | |
| AU 2 607 225 661 2 607 226 277 | |
| KO 2 607 225 667 2 607 226 279 | |
| Куатандау товы A 2,0 2,0 | | |
| Куатандау укытBI (аKKумлалтор Куатсыдамп калганда) | | |
| - Куаты 2,0 Ан akкумлалторларда | МИH | 65 65 |
| - Куаты 4,0 Ан akкумлалторларда | МИH | 125 125 |
| - Куаты 6,0 Ан akкумлалторларда | МИH | 185 185 |
| "ЕРТА-Procedure 01:2014" КУЖаТыга саï calmaftы | КГ | 0,55 0,55 |
| Сактыксын'tьбы | | [ ]/ [ ] |
Battery charging

The battery charging procedure is described in the instructions for the battery.
Fully charge the battery before first use.
The battery is fully charged when the indicator lights up green for 2 seconds after charging.
After that, the battery can be removed from the charger.
If the battery is not fully charged, connect the battery to the charger and wait until the indicator lights up green.
The battery temperature should be between 0°C and 45°C.

Accumulator hot air drying necessary liquid level and temperature control rules
Temperature sensors control. Before using the temperature sensor, see the "Technical Manual". If the temperature sensor is not installed correctly, the temperature control device will automatically control the drying process.
Accumulator temperature sensors control. When the temperature sensor is not used, the control device will not heat the accumulator liquid and hot air channels.
Drying process malfunctions
If another fault occurs during the drying process, this fault will be indicated by the drying control panel's liquid level indicator.
The liquid level indicator will show the fault.
This fault may occur at the start of the drying process or during accumulator drying (see "Troubleshooting" section).
Drying process malfunctions
If the drying process is interrupted or the drying cycles are not completed, the drying control panel will indicate the fault. These faults may be of the following types
If the fault is not eliminated, the drying control panel will indicate a technical fault.
Before starting the drying process, check the accumulator liquid level and its condition.
Check the liquid level in the accumulator.
Accumulator liquid (Active Air Cooling)
The drying control panel is equipped with a cooling fan that controls the accumulator temperature. If the accumulator temperature exceeds 30°C, the cooling fan will operate until the drying temperature is reached. The fan will continue to operate until the temperature drops.
If the cooling fan does not operate, check the accumulator temperature sensor or the fan itself. This may cause the accumulator to overheat during drying.
PaindanaHy 6oibHwa HycKaynap
AkkymyIaTOpdbIn KyaTaHaDbipbIny KyiH KepcetKi
AkkymyIaTOp e3iH KyattAdbipbbln KaTkaH KannbH KepcetetIH KyattAdbipbny KyHH KepcTeKlImeH Ka6bIKtanFaH. KyattAdbipy KyHH KepcTeKlU 3 Xacbl Tcyti XapbkDIOHTbIK WAMdApbiHaH TypaBl.
KyaTAnDbpy KyinH KepCetinyi H 6nceHdpy yuH KyaTAnDbpy KyinH KepCetkiTu TYmeWirH bacbI3. IAmamen5cekyHdTan KeiH KyaTAnDbpy KyinH KepCetkiUe-3-eImen Ewii KaJaBt.
AkkymyIaTOpdbH KyaTaHaDbipbIy KyiN aKkymyIaTOp KpaIaHa NbIfapbIbIn KoIbIraH Da TeKcepye 6oJaIb.
6aK3neKTp6yibIMhbln 3NeKTPOHnKacbH 6akbnay kyneci
Kb3bnTycjXapbIKDnOaTBkWaMbI Kocy/ewipy axbipAtkbshB6ackaTaPakTbTypDeKaHbIn TpaDbI: Bak3neKtp6bymbiHBn3neKtpoHHKaCbIHbH tempepatpcbl5 ° C TemeHipeK Hemece 75 ° C Kofapbipak 60bnIn typ.
Bak3neKtp6yBbIMhH,3neKtpOHHKacbl,TeMnepaTypa deHrei 90°C Kofapbipak 6oIFaHa, KaTadaH naibkTbI yFapbHdbJxMbIC TemnepaTpacbHa XeTKeHHe DeiH 03- eImen EwipinKobIaNbl.
Kecy hTmXkenepi (akKymnAToPdbIH, aBTOHOMdbIK KymbIC yaKbl)
Kecy hntxkepi (akmynATOpdbH aBOHOHMbIK Kymbc yaKbTI) ryn3apDih WEN KaBHDbIFbl, bINFaIbINbIFbl, WEN y3bIHbFlMeH WEN 6NIKTiri CNAKTb KepcETKIITepiHe baNaHbCTb 60ana.
Bak3neKtp6yIbIMdbI wen wab6 bpbciba JxIKocbln JxHe 8ipy Kecy HATnxKepeiH IN TEmHeTeIN KanybHa anapadbl (AKkMyIaTOpdbH ABTOHOMbIK XyMbIC yaKbTIb). Kecy HATnxKepeiH (AKkMyIaTOpdbH ABTOHOMbIK XyMbIC yaKbTIb) apTbpy yin H KipeK wen waby, Kecy 6NIKTIRIH XOFapblNaTy XaHE NaibkTbIXyMbIC KbIaMdbIbIFbIMe KyyPna3bIM.
TeMeHne KepcTinReH MbIcAn Kecy 6niktiri MeH Kecy HtNKeJIepi apacbIHdAfbI AKKMyJITopFa KaTbICTb60aTbH e3apa BaIIaNbICbIH KepcTeJI.
238|Ka3aKa
Kecy wapTapsi
6cm 4cm
+
Aca kya,kyprakwen
Kecy Hataxxepei
KyaTb2,0Ah
aKkymyIaTOpIapJa
250m²deHH
Katelepdi 6enriney


Kecy wapTapsi
KvTb 4.0Ah
aKKyMnyTOp
KyaTb6,0Ah
aKKyMnyTOpnapda
500M²dejinH
750m²deHH
AkkymyIaTOBbIH aBOTHOMdbIK yMbIC yaKbITbH 3apTy wih BOW KOMnAHnCbIH apHaBI KbIMET KepeTc optaIKTapbIH H6aNekTp6yBMdApbi YwIH KocbIMwa aKKMyIaTOBbIH caTbI anybl3Fa 60laDb.
| Ko3fALTb1w 1cke
KocbImai Typ | Бак 3лeКТр6уьымьн iшк ka6eь куиeci
6у3blIraH | Бош КОпmaнясын KBИМET KERCEТу
optaIbIbIMen xa6apnacbIbI3 |
| АKKуMЛЯТОР КУATСIДАнг KaIraH AkKуMЛЯТОрды КУATTaNDbIpyal anlbHbI3 | |
| Шen ТьIM Y3bI H EN JxOfarby lshen Kecy napametpimeH bENrIeHReH
МakcHmALdbIg YHapBbIbI dy WBtIbI aMbIbI3 | |
| Ко3fALTb1w 3KorFAhBcIbI KocbIbI py KeTI Koz3fALTb1w cybITbI anbI, kecy 6nIKTirH
JxOFarbIpaK KbIbIOpHaTbIbI3 | |
| ЗлeКТр tIb6ek ToKtAteKbIbI dy PybIc eHri3IinMerH/
ToIbIbIMeH eHri3IinMerH | Дурьс eHri3IIn3 |
| БaK 3лeKТр6уьымь
ТOKТалларmenЖуMbIC
ICTEN TYP | БaK 3лeKТр6уьымьн iшк Ka6eь JxUeCi
6у3blIraH | Бош КОпmaнясын KBИМET KERCEТу
optaIbIbIMen xabapnacbIbI3 |
| Ко3fALTb1w 3KorFAhBcIbI KocbIbI py KeTI Koz3fALTb1w cybITbI anbI, kecy 6nIKTirH
JxOFarbIpaK KbIbIOpHaTbIbI3 | |
| БaK
3лeKТр6уьымьH
Kecy hətnjkeci
6ipKekni 6olmair
XaHe/Hemec
Ko3fALTb1w 3peH
KуMbIC ICTEN TYP | Кecy 6nIKTiri TbIM TEmeH Kecy 6nIKTIRH JxOfarbIpaK DeHreIe OPhaTbIH3 | |
| Пьшавы дeКIP | Пьшавы aybIcIbIbIbI3 (К сypетIN KapaHbI3) |
| Бiterin KaIybl MymKIn BaK 3LeKTP6uBbIMbI h oWipin, 3LeKTP tI36eK
TOKТaTbIbIbI bOcaTbI aMbIbI3 | |
| БaK 3LeKTP6uBbIMbIbH aCtBbIFbI KaFbIbH
Tekcepin, KepeK bOnca JxAbcIbN he iShiNe Kipin
KanfaH 3aTAPdAN TaZalaHbI3 (aPkaaH bak
KoIraHuaHapbIbN kIn jxPrH3) | |
| Пьшak kite Typde eHri3Iin opHaTbIinaH ПьшakbIbIaH | Пьшak combH/Пьшak bYpaHdaCbH NbIK KbIbIN
6ekitini3 (27 Hm) |
| БaK 3LeKTP6uBbIMbH
KocKaHHaH KeiH
Пьшak aiHaMaH Typ | Пьшak wen apkblb 6eRettelin Typ BaK 3LeKTP6uBbIMbI h oWipin, 3LeKTP tI36eK
TOKТaTbIbIbI bOcaTbI aMbIbI3 | |
| БeRer etin TpyaH 3aTAPdAN aMbIbI nactaHbI3
(aPkaaH bak KonflaHuaapbIbN kIn jxPrH3) | |
| Пьшak combI/Пьшak bYpaHdaCbI duPybc
6ekitiniMeRerH | Пьшak combH/Пьшak bYpaHdaCbH NbIK KbIbIN
6ekitini3 (27 Hm) |
| KaTbI Bn6paunap/
шулдаг | Пьшak combI/Пьшak bYpaHdaCbI duPybc
6ekitiniMeRerH | Пьшak combH/Пьшak bYpaHdaCbH NbIK KbIbIN
6ekitini3 (27 Hm) |
| Пьшak 3aKbIMdaHafH | Пьшak bH aybIcTbIbIbI3 (К сypетIN KapaHbI3) |
"Robert Bosch" (Robert Bosch) Kft.
Almaty
Republic of Kazakhstan 050012
Muratbayev, 180, "Termes" LLP, 7, Kabat
Tel.: +7 (727) 331 3100
Fax: +7 (727) 233 0787
E-Mail: ptka@bosch.com
You can find the addresses of service centers and collection points on our website: www.bosch-professional.kz
For other service centers and collection points, please refer to:
www.bosch-pt.com/serviceaddresses
Disposal
Batteries must be disposed of in accordance with environmental regulations. Do not dispose of batteries in household waste.
Warning: This device contains a lithium-ion battery. Do not dispose of it in household waste. Please follow local regulations for proper disposal.
The battery must be removed before disposal. The battery must be disposed of properly. If necessary, contact a qualified service center.
See table

Electrical equipment, batteries, and packaging materials should be disposed of in an environmentally friendly manner.
Do not dispose of them.

Do not dispose of electrical equipment and batteries/accumulators in containers intended for household waste!
For EU countries only:
According to Directive 2012/19/EU, waste electrical and electronic equipment (WEEE) and, according to Directive 2006/66/EC, spent batteries/accumulators must be collected separately and recycled in an environmentally sound manner.
Batteries/accumulators:
Li-ion:
Please follow the instructions for disposal.
Romanian
Battery charged

Battery discharged
Symptoms Possible cause Remedy
Electric power tool service
Strada Horia Macelariu Nr. 30-34, sector 1
013937 Bucuresti
www.bosch-pt.com/serviceaddresses
Transport
The integrated Li-Ion batteries comply with the requirements of the legislation on the transport of dangerous goods. The batteries can be transported by road without restrictions by the user.
Do not expose the power tool to rain; do not leave it outdoors.
Battery.

Protect it from electric shock.

Do not operate this power tool.

Use the charger only in dry rooms.

The charger is equipped with a safety transformer.
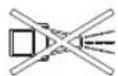
To clean the power tool, do not
use a water jet or steam cleaner.

Carefully read the safety instructions and the warnings before using the power tool.
The power tool was used. During operation on the machine, animals or people could be endangered. Carefully inspect the area where the machine will work, and remove stones, branches, wires, bones, and other solid objects. When using the machine, be careful that no hidden objects or animals, domestic animals, or small children remain in the grass.
Maintenance
Do not allow children to operate the power tool without supervision, not familiar with the instructions for its use. It is possible that national regulations restrict the age of the operator of the power tool. When the power tool is not in use, store it in a place inaccessible to children.
Do not allow the machine to be used by persons with limited physical, sensory, or mental capabilities, or with insufficient knowledge and experience, who are not familiar with these instructions. It is possible that national regulations restrict the age of the operator of the power tool.
- Children must be under constant supervision to prevent the danger of them playing with the power tool. In no case use the power tool if people or domestic animals are nearby. The operator is responsible for any accidents or hazards to other people or their property. Do not work with the power tool while you are tired or under the influence of alcohol. Wear stable, non-slip shoes and long trousers. Never work with the power tool barefoot. Always check the work area beforehand, removing stones, branches, wires, bones, and other solid objects. Before use, check that the blades, fastening screws, and the cutting device are not damaged or worn. Replace worn or damaged blades and fastening screws in the set to avoid imbalance during operation. Mow only in daylight or in very good artificial light. Do not use the trimmer in bad weather conditions,
especially in thunderstorms.
If possible, do not use the power tool when the grass is wet. Work at a calm pace, never rush. Never work with the power tool if the protective devices or covers are damaged or have been repaired. Protective devices, e.g., protective cover or guard, must be replaced. We recommend for your safety to work with hearing protection (ear muffs). Do not use the power tool when you are tired or ill, or when you are under the influence of alcohol, drugs, or medication. Working with the trimmer can be dangerous:
- Do not touch steep slopes.
- On slopes or in wet grass, be careful to maintain a stable footing. -When mowing slopes, mow across the slope, never up and down. -When changing direction on slopes, be especially careful. When walking backwards or pulling the power tool, be extremely careful.
When using the grass trimmer, always hold the tool firmly and never point it at people. When you carry the grass trimmer, to bring it, when you are working, do not place it near or under rotating parts. When you start or stop the grass trimmer, the cutting head must be kept still. During startup or when the motor is running, do not touch the grass trimmer's cutting head. Start the grass trimmer as described in the operating instructions, making sure the cutting head is at a safe distance from the rotating parts. Do not place your hands or feet near or under rotating parts. While working with the grass trimmer, keep a safe distance from the discharge zone. Never lift it, etc. Do not operate the grass trimmer while the motor is running. When you put the grass trimmer away for storage, make sure it is on the ground with the cutting head and wheels. Lift the grass trimmer only by the handle.
For transport. Be careful with the handle for transport. Do not make modifications to the machine's construction. Unauthorized modifications may compromise the safety of the machine and cause accidents and injuries.
Grass catcher
The grass catcher is equipped with a special profile that allows efficient collection of cut grass from the lawn. To get the best results from this function, the following rules must be followed:
-Collect grass only when the mower deck is set to the maximum cutting height. -Collect grass only from the lawn. -Always dispose of the collected grass at a safe distance from people, pets, glass objects, and vehicles.
Disconnect the power supply
-When you step away from the grass trimmer. -Before removing or installing parts, or when clearing blockages. -When you are checking, cleaning, or performing maintenance on the grass trimmer.
- After each use, check the grass trimmer for damage and, if necessary, send it for repair. -If the grass trimmer starts to vibrate abnormally, perform an immediate check.
Maintenance
When you need to perform maintenance near the blades, work with protective gloves. To ensure safe operation of the grass trimmer, make sure all nuts, bolts, and screws are tightened. Periodically check that the blade for the grass is not worn or damaged. Periodically check that the blade for the grass is not worn or damaged. Check the grass trimmer for greater safety and replace worn or damaged parts. Use only blades specifically designed for the grass trimmer. Make sure that the parts you install are made of wood.
Before storing, make sure the power tool is clean and free of debris. If necessary, clean it with a dry, soft brush.
Instructions for optimal use of the battery pack
Before inserting the battery pack, make sure the power tool is switched off. Inserting the battery pack into a power tool that is switched on can lead to accidents. Use only the battery pack specified for this power tool. Using other battery packs can cause fire or injury. Do not open the battery pack. There is a risk of short circuit.

Protect the battery pack from heat, e.g., from prolonged exposure to direct sunlight, fire, water, and moisture. There is a risk of explosion.
Store unused battery packs away from metal clips, coins, keys, nails, screws, or other small metal objects that could bridge the contacts. Short circuiting the contacts can cause burns or fire. If the battery pack is damaged or used incorrectly, liquid may leak from it. Avoid contact with the liquid; if contact occurs, rinse with water and seek medical advice. Leaking liquid can cause irritation or burns. Use the battery pack only in products from the manufacturer. This is the only way to protect it from dangerous overloading. The battery pack can be damaged by sharp objects, e.g., nails or screwdrivers, or by external impact. This can cause an internal short circuit, and the battery pack may catch fire, smoke, explode, or overheat. Be careful not to short circuit the contacts of the battery pack. There is a risk of explosion. Protect the battery pack from moisture and water. Store the power tool only within a temperature range of -20°C to 50°C. For example, do not leave the power tool in a car during summer.
Periodically clean the ventilation slots of the battery pack with a soft, dry brush.
Instructions for safe operation of the charger

Read all safety instructions for the machine. Failure to follow the safety instructions can lead to electric shock, fire, and/or serious injury.
electric shock, fire, and/or serious injury.
Keep all safety instructions and instructions for use for future reference.
Use the charger only if you understand well how to control all its functions or if you have received instructions on how to do so.
Charge the device in advance so that it can be used in case of fire, with limited physical, sensory, or mental capabilities, or for those who are not familiar with the instructions. It is possible that national regulations may restrict the age of the operator of the power tool. The charger is designed to be used only with the specified battery. Charge only the rechargeable battery with a capacity of 2.0 Ah (10 battery cells). The nominal voltage of the battery must match the charging voltage of the charger. Do not attempt to charge ordinary (non-rechargeable) batteries. When charging other rechargeable batteries, there is a risk of fire or explosion.

Disconnect the charger from the power supply before cleaning. Water entering the charger increases the risk of electric shock.
Keep the charger clean. There is a risk of electric shock due to contamination. Before use, check the charger, cable, and plug. If you find damage, do not use the charger. Do not attempt to open the charger yourself; repairs should only be carried out by qualified technicians using original spare parts. Damaged chargers, cables, and plugs increase the risk of electric shock. Do not leave the charger operating on a flammable surface (e.g., paper, cloth, etc.) or in a flammable environment. To avoid heating of the charger during operation, do not cover the ventilation openings of the charger. Otherwise, the charger may overheat and stop functioning properly. For better electrical safety, it is recommended to connect the charger to a residual current device (RCD) with a maximum trip current of 30 mA. Before starting work, check the RCD.
Symbols
The symbols below are important for reading and understanding the operating instructions. Please remember the symbols and their meanings. Correct interpretation of the symbols will help you use your product better and more safely.
For your safety
Warning! Before cleaning or performing maintenance, disconnect the power tool from the power supply, disconnect the charger from the power supply, and remove the battery. If the cable is damaged, unplug it immediately. Even after the power tool is disconnected, the blade continues to rotate for a few seconds due to inertia. Warning: Do not touch the rotating blade.
Charging the battery
The battery has a temperature control that allows charging only in the temperature range between 0°C and 35°C. This increases the battery's lifespan.
Note: The battery is supplied partially charged. To achieve the full capacity of the battery, charge the battery completely with the charger before first use of the power tool.
The rechargeable battery can be charged at any time without reducing its service life. Interrupting the charging process does not damage the battery.
The rechargeable battery is protected against deep discharge by the "Electronic Cell Protection (ECP)". When the battery is discharged, the power tool switches off via a protective circuit: the power tool no longer runs and cannot be switched on.
Do not continue to press the On/Off switch after the power tool has switched off automatically. This can damage the battery.
Observe the instructions for disposal of the batteries.
Inserting/Removing the Battery
Note: Using an unsuitable battery can lead to malfunction or damage to the machine.
Insert the charged battery. Make sure that the battery is fully inserted.
To remove the battery from the machine, press the battery release button and pull it out.
Charging
The charging process starts as soon as the mains plug of the charger is plugged into a socket and the battery is inserted into the charger.
Thanks to the intelligent charging process, the state of charge of the battery is detected and it is charged with the optimal current depending on the battery temperature and voltage.
This extends the service life of the battery and, when stored in the charger, it is always fully charged.
Meaning of the indicators on the charger (AL 3620 CV/AL 3640 CV/AL 36V-20)
Rapid charging
The rapid charging process is indicated by the green LED flashing on the battery.
The charging indicator on the battery charger: During the charging process, the three green LEDs light up sequentially and then go out. When the three green LEDs start to light up continuously, the battery is charged. After approx. 5 minutes they go out.
When the battery is fully charged, the three green LEDs go out.
Note: The fast charging mode is activated only if the battery temperature is within the permissible range, see section Technical data.
Battery

Continuous green LED: The battery is fully charged.
During charging, an acoustic signal sounds for approx. 2 seconds, indicating that the battery is fully charged.
The battery can be removed for use.
Continuous green LED: When a battery is inserted, this indicates that the device is connected to the mains and the charger is ready for operation.
Battery temperature is below 0°C or above 45°C

Continuous red LED: The battery temperature is outside the permissible range.
Charging range, see section Technical data. When the temperature reaches the permissible charging range, the charger automatically switches to fast charging mode.
If the battery temperature is outside the permissible range, the red LED on the battery charger lights up when the battery is inserted.
Charging is not possible
Charging problems are indicated by the red LED flashing.
The charging process cannot be completed; charging the battery is not possible (see troubleshooting).
Repeated charging, especially after several consecutive charges of the battery without disconnecting the charging device, may cause it to heat up. This is normal and does not indicate a technical defect in the charging device.
A significantly reduced operating time after a full charge indicates that the battery is worn out and needs to be replaced.
Follow the charging instructions.
Battery cooling (Active Air Cooling)
The built-in electronic control of the fan in the charging device regulates the temperature of the inserted battery. If the battery temperature is above 30°C, the battery is cooled to the optimal temperature for charging with the
power of the fan. The operation of the fan creates a slight air flow.
If the fan does not work, the battery temperature is in the optimal range or the fan is defective. In the latter case, the charging time of the battery is extended.
Operating instructions
LED indicator for battery status
The battery is equipped with an LED indicator that shows the level of charge. The LED indicator lights up when the battery is inserted.
Press the button for the battery charge level to turn on the LED indicator. After approx. 5 seconds, the LED indicator goes out automatically.
The battery status can also be checked when it is removed.
LED indicator for battery capacity
Green LED lights up 2/3 of the way
The green light indicator lights up continuously at ≥1/3.
The green light indicator lights up 1/3 continuously.
The green light indicator is in reserve.
If the button is pressed and the light does not light up, the battery is damaged and must be replaced.
The charging procedure for the battery can only be performed when the power tool is at rest.
During the charging process, the three green lights light up sequentially and then go out. When the three green lights light up continuously, the battery is charged. Approximately 5 minutes after the battery is fully charged, the three green lights go out.
Battery temperature indicator
The temperature control system indicates that the battery or the electronics and the power tool (with battery inserted) are not in the optimal temperature range. In this case, the power tool does not work or works with reduced power.
Battery temperature control
If the button is pressed and the indicator lights up continuously, the battery temperature is within the permissible working range.
If the temperature reaches 70°C, the battery switches off until it reaches the permissible working temperature range again.
Temperature control system for the electronic control of the power tool
If the button is pressed and the indicator lights up continuously, the temperature of the electronic control of the power tool is below 5°C or above 75°C.
At a temperature of 90°C, the power tool switches off until the temperature falls back into the permissible working range.
Cutting performance (battery operating time)
The runtime (operating time on the battery) depends on the properties of the grass, e.g., the frequency, humidity, height, as well as the cutting height.
The runtime is also limited due to frequent switching on and off of the hedge trimmer during operation (operating time on the battery).
To optimize the runtime (operating time on the battery), cut less frequently, increase the cutting height, and work at a moderate speed.
The following example shows the relationship between the cutting height and the runtime with one battery charge.
Conditional cutting
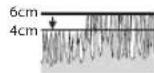
Thick, dry grass
| ПОНЗВОДЛТЕЦНOCТ ha ря-занe | ㎡ |
| Акymунatорна 6batерnia c2,0 Ah | ㎡ |
| Акymунatорна 6batерnia c4,0 Ah | ㎡ |
| Акymунatорна 6batерnia c6,0 Ah | ㎡ |
To increase the operating time, you can purchase an additional battery from your Bosch power tools dealer.
Troubleshooting


Symptoms Possible Cause
| Еlektrodkи ratlen che
ce Bklnouba | Выtrightение elektroquieckn deфekt ha gradihckny
elektroponhtpyment | Оьberпес ce кьм оторизран серви з ha boш |
| Акулаторнata 6atepanye e pa3pedeha 3apejete akymylatopnata 6atepanye | |
| Акулаторнata 6atepanye e TBbprde ctydeha/ro-
peua | Оставе akymylatopnata 6atepanye da ce 3atot-
niw/oxlaeni |
| Трава e TBbprde Bvscoka MaKcHmAlNo ДууctHmata BvscOuHa Ha TpeBata
prn HacrtpoiBaHe Na hai-BvscOko Kocene e 30 cm |
| Заштata ha elektropondvrgatela ce e 3aedyctBa-
na | Изчakайо охлajdaheTo Ha elektropondvrgatela и
настойу КоLЯma BvscOuHa Na рязache |
| Прекльвот ha elektroquiecka tfa Bepira He e B
правинот поэця/Ne e Bkapan npabinlo | Поставе Г поразино |
| Граднскй rat elektro-
HHCTPyment pa60TN C
прекьсвотя | Выtrightение elektroquieckn deфekt Na gradihckny
elektroponhtpyment | Оьberпес ce кьm оторизран серви з ha boш |
| Заштata ha elektropondvrgatela ce e 3aedyctBa-
na | Изчakайо охлajdaheTo Ha elektropondvrgatela и
настойу КоLЯma BvscOuHa Na рязache |
| Граднскй rat elektro-
HHCTPyment OCTABY He-
rabno okocena Tpeba
n/inn | Висуната Na рязane e TBbprde Малka HacrtpoiTe Na go-rolma BvscOuHa Na рязane | |
| Ножовete ca 3aTbIeHn | Сменete hoja (Вижte ФгураК) |
| СимпTom Вьзмохна ринчина OTстраные |
| eilektropondыгателета-baotу trудно | Вьзмохно e машинatableда e зацалая и бл_OKра-
нa | Изкlioоче градинския[eilektropondу менти
празьсва на[eilektpruceckaразы Верига
Проберete долнatable сиза на градинския[eilek-
trpoшючреньп и при необхочимост OTстраны
Заванлес расеця (разботete винагс с под-
пазни рькавици) |
| Hожьт e монtripан нерравлино Могшиейные HOжа правлино | |
| След Вьковache на градинския[eilektro-
ннстумент HOжьт неce заврау ta | Hожьт e сnilno 3aцалан с трева Излioчete градинския[eilektropondу менти
празьсва на[eilektpruceckaразы Верига
OTстраны причinasны за SFOKрале (разботete
Винагс с подпалду рькавици) | |
| Гайка/TВита на HOжа e разлабена 3aterг悔ете райка/TВита на HOжа (27 Nm) | |
| Сmilny вибрацни/шу m | Гайka/TВита на HOжа e разлабена 3aterг悔ете райka/TВита на HOжа (27 Nm) | |
| Hожьт e nobpeden | Сmedete HOжа (винке Фгура К) |
Battery for the device
Service sculelectric
Strada Horia Macelariu Nr. 30-34, sector 1
013937 Bucuresti, Romania
Tel.: +359(0)70013667 (Bulgarian)
Email: BoschServiceCenterBG@ro.bosch.com
www.bosch-pt.com/bg/bg/
You can find further service addresses at:
www.bosch-pt.com/serviceaddresses
Transport
The contained lithium-ion batteries are subject to the Dangerous Goods Legislation requirements. The batteries can be transported by the user on public roads without further requirements.
When transported by third parties (e.g. air transport or forwarding agency), special requirements on packaging and labelling must be observed. For the preparation of the item being shipped, consulting an expert for hazardous material is required.
Dispatch the battery only if the housing is not damaged. Tape open contacts and pack up the battery in such a manner that it cannot move around in the packaging. Please also observe possibly more detailed national regulations.
Disposal

Power tools, rechargeable batteries, accessories and packaging should be sorted for environmental-friendly recycling.
Do not dispose of power tools and batteries/rechargeable batteries into household waste!

Only for EC countries:
According to the European Directive 2012/19/EU, power tools that are no longer usable, and according to the European Directive 2006/66/EC, defective or used battery packs/batteries, must be collected separately and disposed of in an environmentally correct manner.
Batteries:
NHTHEBO-NOHH:
Mona, cna3BaIte yka3aHnraTb pa3deJa TpaHcnpTpapaHe.
Macedonian
Safety instructions
Warning! Before use, read the following instructions carefully. Familiarize yourself with the controls and proper use of the product. Keep the instructions for future reference or consultation.
Meaning of symbols on the device

General safety rules.

Do not use the product when it is wet, and do not leave it in the rain.

Protect from electric shock.

Do not immerse in water.

Use only in dry rooms.

Connect only to a safety transformer.
For the device, do not use
high-voltage cable or rubber hose.

Check the machine thoroughly before use to ensure it is in good working order.
Domestic animals. Pets and domestic animals may be injured during use of the machine. Check the machine carefully for proper operation and remove any stones, branches, wires, bones, or other objects. When operating the machine, keep a safe distance.
Ensure that there are no hidden pets or domestic animals, as well as children, in the working area.
Operation
Never allow children or persons who are not familiar with these instructions to use the device. Local regulations may restrict the age of the operator. Keep the device out of reach of children when not in use. Do not allow children, persons with reduced physical, sensory, or mental capabilities, or lack of experience and knowledge, unless they have been given supervision or instruction concerning use of the appliance in a safe way and understand the hazards involved, to use the device. Local regulations may restrict the age of the operator. - Children should be supervised to ensure that they do not play with the device. Never use the device near people, especially children and pets. The operator is responsible for accidents or hazards to others. Do not use the openings or guards for cleaning when using the device. Wear sturdy boots and long trousers. Never use the device barefoot. Carefully inspect the terrain where you will use the mower.
Remove stones, branches, wires, bones, and other objects.
Before each use, check that the blade, blade bolts, and the cutting assembly are not worn or damaged. Replace worn or damaged blades and bolts to keep the mower balanced. Mow only in daylight or in good artificial light. Avoid mowing in bad weather, especially when there is a risk of lightning. Do not use the mower on wet grass. When mowing, do not rush. Do not use the mower with damaged guards or without proper safety devices, such as the deflector or grass catcher. We recommend wearing hearing protection. Do not use the device if you are tired or under the influence of alcohol, drugs, or medication. Using the mower on slopes can be dangerous: - Do not mow on excessively steep slopes. - On slopes or wet grass, ensure stable footing and a secure stance. - On slopes, always mow across the face, never up and down.
Mow across the face of slopes, never up and down.
Be especially careful when changing the direction of the mower.
Be careful with the mower. Do not use the mower on yourself. Stop the engine when you need to carry the machine, over surfaces that are not grass, and when carrying the machine to and from the mowing area. Do not tilt the device when plugging in the mower. Keep the motor away from the blades at a safe distance. Do not put your hands and feet near the rotating parts. When mowing, stand as far as possible from the mower. Do not carry the mower and do not expose the motor to rain. When storing the device, be careful that it is stable on all four wheels. Carry the device only by the handle. Handle the handle with care. Do not throw the device.
Non-compliance with modifications may affect the safety of the device, causing
Increased vibration and noise.
Grass catcher
The grass catcher is designed so that all grass clippings can be collected. To achieve maximum efficiency of this function, follow the instructions:
- Collect grass when mowing at maximum height. -Collect grass only on dry grass. -Before collecting grass, check the terrain for stones, animals, glass objects, and cars.
Remove the device from the socket
- Whenever you leave the mower unattended. -Adjusting the cutting height. -Cleaning, checking, and servicing the machine. -Ventilation in enclosed spaces. Before ventilation, check the machine and make necessary repairs. -If the mower starts vibrating uncontrollably (check the blade).
Maintenance
Always wear protective gloves when working with the blades or in their vicinity.
Check all nuts, bolts, and screws are tightly fastened to ensure safe operation with the device. Regularly check the condition of the grass catcher for wear and damage. Regularly check the condition of the grass catcher for wear and damage. Regularly inspect the device and replace worn or damaged parts. When replacing the blade, the new blade must be suitable for the device. Always use original spare parts. When storing the device, it must be dry. Clean it with a brush and water.
Safety instructions for optimal battery use
Ensure the device is switched off and unplugged before inserting the battery. Inserting the battery while the device is running may cause injury. Use only the battery specified for this device. Use of other batteries may cause damage or fire. Do not open the battery. There is a risk of short circuit.

Protect the battery from heat, e.g., from prolonged exposure to sunlight, fire, water, and moisture. There is a risk of explosion.
When not using the battery, keep it away from paper clips, coins, keys, nails, screws, and other small metal objects that could cause a connection from one terminal to another.
If the battery is damaged or not used properly, it may leak. Insert fresh air and if there is damage, seek medical help. The battery may irritate the skin. Use the battery only in the product specified by the manufacturer. Only in this way will the battery be protected from dangerous overloading. The battery may be damaged by sharp objects such as nails or by impact or by being dropped. It may cause an internal short circuit, the battery may catch fire, emit smoke, explode, or overheat. Do not short-circuit the battery. Otherwise, there is a risk of explosion. Keep the battery away from water. Store the battery within a temperature range of -20°C to 50°C. Do not leave the battery in a car in summer, for example. The battery must be charged only with the specified charger. The charger is a sealed unit.
Safety instructions for the charger

Read all safety warnings and instructions.
Failure to follow the safety warnings and instructions may result in
electric shock, fire, and/or serious injury. Keep all safety warnings and instructions for future reference.
Use the charger only after you have read and understood all functions and can apply them without limitation, or after you have received the necessary instructions.
Do not allow children or persons with limited physical, sensory, or mental capabilities or lack of experience and knowledge to use this device unless they are supervised. Local regulations may restrict the age of the user. Supervise children. Also ensure that children do not play with the device.
Only use Bosch lithium-ion battery chargers with a capacity of 2.0 Ah (from 10 battery cells). The battery voltage must match the charging voltage of the charger. Do not attempt to charge non-rechargeable batteries. Otherwise, there is a risk of fire and explosion.

Keep the charger away from rain or moisture. Water entering the charger increases the risk of electric shock.
Do not open the charger. If it is damaged, there is a risk of electric shock. Before each use, check the charger, cable, and plug. Do not use the charger if you notice any damage. Do not open the charger yourself; have it repaired only by a qualified technician using only original replacement parts. A damaged charger, cable, or plug increases the risk of electric shock. Do not use the charger on a flammable surface (e.g., paper, textiles). Keep it away from flammable materials. There is a risk of fire due to heating during charging. Do not cover the ventilation openings of the charger. Otherwise, the charger may overheat and not function properly. For increased electrical safety, we recommend using a residual current device with a maximum trip current of 30 mA. Always check the plug before use.
Symbols
The symbols are explained and interpreted for use. Please read the symbols carefully. The correct interpretation of the symbols will help you use the device properly.
Meaning

Movement direction

Reaction direction
270|Macedonian
| Ознaka 3начеBE |
| Hocete заштейни ракавици |
| Текина |
| Влочува bene |
| Искльчува bene |
| √ | Дозвoleна Фунkedиja |
| Ознaka 3начеbe |
| X | Збразец akци |
| CLICK | Чуда на суна |
| ДODаТна onрема/peзервни дени |
Use with appropriate changes
Consult the changes for use with auxiliary devices. The device is not intended for floor polishing.
The device is intended for mowing grass on sloping ground, etc.
Technical data
| Косачka за范围内 | | AdvancedRotak 36-650 | AdvancedRotak 36-660 | AdvancedRotak 36-690 | Advanced Rotak 36-750 |
| Бpoj на arтник | | 3 600 HB9 604 3 600 HB9 672 | 3 600 HB9 605 3 600 HB9 673 | 3 600 HB9 607 3 600 HB9 702 3 600 HB9 771 | |
| Номинален
нанон | V 36 36 36 36 | | | | |
| ШирINA на
кушистю на
сechinото | сm 42 42 42 46 | | | | |
| Висина на
козende | mm 25 - 80 25 - 80 25 - 80 25 - 80 | | | | |
| Волимен, торба
за范围内 | I 50 50 50 50 | | | | |
| Текина
соглесно EPTA-
Procedure
01:2014 | кг 17,5 16,5 17,5 17,5 | | | | |
| Серскпбpoь видя на ratнисту п loчka на косачкata |
| Доволега Temпера typа на okолинатa |
| - по поные °C 0 ... +45 0 ... +45 0 ... +45 0 ... +45 |
| - по уnotpeба °C +5 ... +50 +5 ... +50 +5 ... +50 +5 ... +50 |
| - по сладиралье | °C -20 ... +50 -20 ... +50 -20 ... +50 -20 ... +50 |
| БатериJA Пинум-JOHSCA Пинум-JOHSCA Пинум-JOHSCA Пинум-JOHSCA |
| Номинален
нанон | V 36 36 36 36 | | | | |
| Бpoj на arтник/Kanaцитet |
| - 2 607 336
913/
1 607 A35
02V | Ah - 2 x 2,0 -- | | | | |
| - 2 607 336
915/
2 607 337
047 | Ah | 4,0 - | 4,0 | 4,0 | |
Macedonian|271
| К一步一步 заТрева | AdvancedRotak36-650 | AdvancedRotak36-660 | AdvancedRotak36-690 | AdvancedRotak 36-750 |
| -1607 A35058 | Ah - - - - | | | |
| Бразов на的基础上的各种 кени |
| -2607 336913/1607 A3502V | | -10 - - | | |
| -2607 336915/2607 337047 | | 20 - 20 20 | | |
| -1607 A35058 | | - - - - | | |
Safety instructions for use at altitudes up to 2000 meters above sea level.
| Kocauka за Трева Advanced | 3 600 HB9 802 | 3 600 HB9 803 | 3 600 HB9 606 | 3 600 HB9 901 |
| Rotak 36-850 | Rotak 36-890 | Rotak 36-905 | Rotak 36-950 |
| Бpoj на(apтник) | | 3 600 HB9 802 | 3 600 HB9 803 | 3 600 HB9 606 | 3 600 HB9 901 |
| 3 600 HB9 872 | | | |
| Номинален(hалов V 36 36 36 36) | | | | | |
| ШирINA на Кучштetedу на ceчелOTO | см 46 46 42 46 | | | | |
| Висина на косенье MM 25 - 80 25 - 80 25 - 80 | | | | | |
| Волимен, торба за Трева | 50 50 50 50 | | | | | |
| Текина сordласно EPTA-Procedure 01:2014 | кг 17,5 17,5 17,5 17,5 | | | | |
| Серскпбpoj вди ѩатпснота плоча на косачкata | | | | | |
| Дозвoleна Temпература на okолинatable | | | | | |
| - рри палеге °C 0 ... +45 0 ... +45 0 ... +45 0 ... +45 | | | | | |
| - рри улог trade °C +5 ... +50 +5 ... +50 +5 ... +50 +5 ... +50 | | | | | |
| - рри складралье °C -20 ... +50 -20 ... +50 -20 ... +50 -20 ... +50 | | | | | |
| Батериja | Плтум-JOHSCA Плтум-JOHSCA Плтум-JOHSCA Плтум-JOHSCA |
| Номинален(hалов V 36 36 36 36 | | | | | |
| Бpoj на(apтник)/Калачитet | | | | | |
| - 2 607 336 913/1 607 A35 02V | Ah | - | - | - | - |
| - 2 607 336 915/2 607 337 047 | Ah | - | - | 2 x 4,0 | 2 x 4,0 |
| - 1 607 A35 058 | Ah | 6,0 | 6,0 | - | - |
| Бpoj на(bатерский); Keли | | | | | |
| - 2 607 336 913/1 607 A35 02V | | - | - | - | - |
| - 2 607 336 915/2 607 337 047 | | - | - 20 20 | | |
| - 1 607 A35 058 | | 20 20 | - | - | |
Safety instructions in this manual were measured when used at altitudes up to 2000 meters above sea level.
| Полnahу | AL 3620 CV | AL 36V-20 |
| Баша на aptимл | EU | 2 607 225 657 | 2 607 226 273 |
272 | Macedonian
| Полоч AL 3620 CV AL 36V-20 |
| UK 2 607 225 659 2 607 226 275 |
| AU 2 607 225 661 2 607 226 277 |
| KO 2 607 225 667 2 607 226 279 |
| Сtrува за полоче A 2,0 2,0 | |
| Вреема на полоче (празна bатериja) | |
| - bateprija co 2,0 Ah мин 65 65 | |
| - bateprija co 4,0 Ah мин 125 125 | |
| - bateprija co 6,0 Ah мин 185 185 | |
| Текина соглесно EPTA-Procedure 01:2014 | кг 0,55 0,55 |
| Класа на заштita | ☐/☐ /☐ ☐ |
Information on the battery
| AdvancedRotak
36-650 | AdvancedRotak
36-660 | AdvancedRotak
36-690 | AdvancedRotak
36-750 |
| 3 600 HB9 604 | 3 600 HB9 605 | 3 600 HB9 607 | 3 600 HB9 702 |
| 3 600 HB9 672 | 3 600 HB9 673 | | 3 600 HB9 771 |
Battery safety per EN 60335-2-77
The measured value of the vibration emission is usually:
| - 3bvyen prnncok dB(A) | 73 73 73 73 | | | |
| - 3bvyha jaunha dB(A) | 87 87 87 87 | | | |
| - Hecnugnpocst K dB | =2,5 | =2,5 | =2,5 | =2,5 |
Vibration emission value (vector sum of the three axes) uncertainty K according to EN 60335-2-77
| -Вреedingнaitemисида визbacни停下来 | m/s2 | <2,5 | <2,5 | <2,5 | <2,5 |
| -НессύгόνοιςΚ | m/s2 | =1,5 | =1,5 | =1,5 | =1,5 |
| Advanced Rotak 36-850 | Advanced Rotak 36-890 | Advanced Rotak 36-905 | Advanced Rotak 36-950 |
| 3 600 HB9 802 | 3 600 HB9 803 | 3 600 HB9 606 | 3 600 HB9 901 |
| 3 600 HB9 872 | | | |
Declared vibration emission value according to EN 60335-2-77
The measured value of the vibration emission is usually:
| - 3bvyen priniticos k dB(A) | 73 73 73 73 | | | |
| - 3bvyha jaunha dB(A) | 87 87 87 87 | | | |
| - Hesnugnpocst K dB | =2,5 | =2,5 | =2,5 | =2,5 |
Vibration emission value (vector sum of the three axes) uncertainty K in accordance with EN 60335-2-77
| -Вреedingнaitemисида визбрашияah | m/s2 | <2,5 | <2,5 | <2,5 | <2,5 |
| -НеслугноctК | m/s2 | =1,5 | =1,5 | =1,5 | =1,5 |
Installation and use
| Üel Ha KopiCTRBeTo CInka CTrpaHa |
| ОБем Ha IncpopakaA) | A 367 |
| OTbopa№ Ha paKata | B 368 |
| ПилагуВа№ Ha paBoTHa T BИСиНa | |
| Монтupa№ I OТСТРУВа№ Ha KocSe№ D 370 | C 369 |
| ПоdecуВа№ Ha BИСиНa T Ha KocSe№ E 370 | |
| Вметунва№ Ha 6ateprnja E 370 | |
| Уnotpe6a | F 371 |
| - Вметнete Геолкгчнот | |
| прекинвач | |
| - Вklучete | |
| - Кocete | |
| - Иckлучete | |
| - Изва对接е Геолкгчнот | |
| прекинвач | |
| Изва对接е ja 6ateprnja G 372 | |
| П overdуп徴уВа№ рпri paBoTa | H 373 |
| "КocSe№" | |
| СbethиЗakOT ЗAkОрпNTа 3a TpeBa | I 374 |
| празна/полna | |
| СklonnyВа№ Ha р acquКATA J 375 | |
| ОджуВа№/ЗаменHa ceuNiTа T K 376 | |
| Избор Ha onpema L 376 | |
A) The device is intended for use with the standard base. The device can be placed on the charging station.
Charging
For your safety
Warning: Unplug the device, remove the battery insulation tab before any adjustment or cleaning. The same applies if the cable is damaged, cut, or frayed. After unplugging the device, wait a few seconds. Warning: Caution - do not touch the contacts.
Charging the battery
The battery is equipped with a temperature monitor that allows charging only at temperatures from 0°C to 35°C. This ensures the durability of the battery.
Tip: The battery is partially charged. To fully charge the battery, before first use, let it charge until it is fully charged.
Lithium-ion batteries can be charged at any time without reducing their service life.
The charging process does not damage the battery.
The battery is protected against deep discharge by "Electronic Cell Protection (ECP)". When the battery is empty, the machine is switched off by a protective circuit: the machine will not operate.
Do not press the On/Off switch any further after the automatic shut-off.
The battery may be damaged.
Pay attention to the note on charging the battery.
Inserting/Removing the battery
Note: Using unsuitable batteries may lead to malfunction or damage to the device.
Insert the charged battery. Check that the battery is correctly inserted.
During the intensive charging process, the charging status is automatically detected and the battery is charged with optimal capacity depending on the temperature of the battery.
This prevents the battery from being overcharged.
Meaning of symbols on the charger (AL 3620 CV/AL 3640 CV/AL 36V-20)
Rapid charging
The rapid charging process is indicated by rapid flashing of the green charge indicator.
Battery indicator: During the charging process, the green LED lights up and goes out briefly. The battery is fully charged when the green LED lights up continuously. Approximately 5 minutes after the battery is fully charged, the green LED goes out again.
Note: Rapid charging is only possible if the battery temperature is within the permitted temperature range, see "Technical Data".
The battery is full
The green light on the battery indicator signals that the battery is fully charged.
After about 2 seconds, the signal turns off, indicating that the battery is fully charged.
The battery can then be used as needed.
When you remove the battery, the green light on the charging indicator signals that the charging adapter is connected to the power outlet and is ready for operation.
Battery temperature from 0°C to 45°C
The green light on the charging indicator signals that the temperature is within the allowed range.
Charging limits, see the chapter "Technical Data". When the allowed temperature limits are reached, charging stops automatically at full charge.
If the battery temperature is not within the allowed range, the red light on the battery indicator lights up when the battery is inserted.
Charging is not possible.
If there is an error during charging, the red light flashes.
Charging of the battery cannot start or the battery cannot be charged (see the chapter "Troubleshooting").
Charging advice
Continuous or intermittent charging without interruption may cause the charger to overheat. This is harmless and does not indicate a technical defect in the charger.
Short operating time after charging indicates that the battery is worn out and must be replaced.
Pay attention to the disposal notes.
The battery is equipped with Active Air Cooling.
The built-in fan is activated to control the temperature of the built-in battery. As long as the battery temperature is below 30°C, the fan will cool the battery until it reaches the charging temperature. The activated fan creates a ventilation sound.
If the fan is running, the battery temperature is within the optimal charging temperature limits, and the fans are working. In this case, the charging time of the battery is extended.
Checking the battery level
Battery level indicator
The battery is equipped with an indicator that displays the battery level. The battery level indicator consists of 3 green LEDs.
Press the button to activate the battery level display.
After about 5 seconds, the indicator turns off automatically.
The battery level can also be checked by inserting the battery.
| LED-npknaz Kanaçntet ha 6atepijata |
| Постоно с Bretе на 3
Зелени лед сигнади | ≥2/3 |
| Постоно с Bretе на 2
Зелени лед сигнади | ≥1/3 |
LED display of battery capacity
Steady light on 1/3 green LED
Flashing of 1 green LED
If the LED does not light up after switching on, the battery is defective and must be replaced.
For safety reasons, the battery level can only be checked when the battery is inserted.
During the charging process, the three green LEDs light up one after another and then go out briefly. The battery is fully charged when the three green LEDs light up continuously. About 5 minutes after the battery is fully charged, the three green LEDs turn off again.
The battery may be damaged when the temperature is exceeded.
First, the battery and the electronics of the mower (with the battery inserted) are not at optimal temperature. In this case, the mower may work, but it will not work with full quality.
With the mower switched on, the battery capacity (battery runtime) is reduced. To achieve optimal capacity (battery runtime), let the mower cool down to a reasonable temperature.
The following example shows the relationship between the operating conditions and the battery runtime.
Operating conditions

4 cm
Very weak, dry grass
Grass height
Operating conditions for grass
Battery with 2.0 Ah up to 250 m
Battery with 4.0 Ah up to 500 m
Battery with 6.0 Ah up to 750 m
To extend the operating time, you can purchase an additional battery from your local service center.
Troubleshooting


Symptom Possible cause
| MOTOROT He ce
ВКЛУЧУВа | Немправим Bнатушии Исталции ВО
КOCAчКATA | Овратуе ce Bo Bosch сухьа за корисиц |
| Прastsна батериja Наолные ja batepersijaata | |
| Батерида e пемногу топla/ладна Пуштete batepersijaда за сагree/олд� | |
| Трава e певиска Масс. дзвoleна висна на Трава e 30 cm co
нaj rolема висна на Косец | |
| Актыврана e зашитata на моторот od
прегва bene | Пуштete до се олдп motорот и поингете Г
сейлatura |
| Клочт за пolaцида не e павлино/notponlno
стaven | |
| КOCAчКATA paBOTИ со
празкин | Немправим Bнатушии Исталции ВО
КOCAчКATA | Овратуе ce Bo Bosch сухьа за корисиц |
| Актыврана e зашитata на моторот od
прегва bene | Пуштete до се олдп motorot и поингете Г
сейлatura |
| Урeding КСИ
Нерамномерно
И/ИМOTOP paBOTИ{Teшko | Сeyнлatura поставени пенискп Г поингете Г сейлatura | |
| Тano сени | |
| Можно зашива bene 3ragнete ro уpeodи и сckлуне剂量 und hanoуа bene | |
| Прobерete по КOCAчКATA и по по trpeба
и счпстete ja (секогаш посete зашитни
ра��иц) |
| СeyнлOTO монитрано наonaу монtripajte ro сeuiloto od павлина страиа | |
| ПО ВКЛУЧВавeto Na
КOCAчКATA сeuiloto He
CEВТИ | СeyнлOTO e залеттою сөрва 3ragнete ro уpeodи и сckлуне剂量 und hanoуа bene | |
| От相对较е щ рени КСИ
Заштни рakавиц) |
| Паба нахртka/-завrtka 3aterнete ja habrtkata/-завrtkata (27 Nm) | |
| Jakи вибрашии/
Бүүва | Паба нахртka/-завrtka 3aterнete ja habrtkata/-завrtkata (27 Nm) | |
| СeyнлOTO e oштeteho | Замене Г сeuilanoTO (Види слиka K) |
Battery and charger
The problem can be taken
If the battery is not (correctly) placed in the charger, place the battery correctly in the charger
The red light for battery charging
The battery contacts are worn out. Clean the battery contacts; e.g.
The charging process is not possible
If you have placed the battery correctly and it still does not charge, replace it if necessary
Tel./fax: 02/2467610
Mob.: 070595888
D.P.T.U. "ROJKA"
JANE LUKOVSKI 66: T. U. AUTOKOMANDA 69
1000 Skopje
E-mail: servisrojka@yahoo.com
Tel: +389 2 3174-303
Mob: +389 70 388-520, -530
You can find the service address on the back of the device:
www.bosch-pt.com/serviceaddresses
Transport
The built-in batteries are subject to the legislation for dangerous materials. The batteries can be transported by the user without additional requirements.
When transporting by third parties (e.g., air transport or forwarding agency), special requirements for packaging and labeling must be observed. In such case, when preparing the item, consultation with a dangerous goods expert is required.
Transport the batteries only if the housing is undamaged. Tape the open contacts and pack the battery in such a way that it cannot move in the packaging. Please also observe the possibly more detailed national regulations.
Disposal

Electric tools, batteries, accessories, and packaging should be sorted for recycling.

Do not dispose of electric tools and batteries in household waste!
Only for EU countries
According to the European Directive 2012/19/EU, electric and electronic equipment that is no longer usable, as well as according to the European Directive 2006/66/EC, defective or exhausted batteries and accumulators must be collected separately and brought to a recycling facility, and this is not to be disposed of in the environment.
Batteries:
Li-ion:
Please observe the notes in the transport section.
Serbian
Safety Notes. Caution! Carefully read the following instructions. Familiarize yourself with the controls and the intended use of the product. Please keep the instruction manual in a safe place for future reference.
Explanation of symbols on the garden tool

General warning instructions.

Read the operating instructions.

Be careful that thrown objects do not injure people nearby.

Warning: Keep a safe distance from the product while it is running.

www.bosch-pt.com/serviceaddresses
Transport
Lithium-ion batteries are subject to the requirements of dangerous goods legislation. The user can transport the batteries by road without further packaging.
When shipping via third parties (e.g. air transport or forwarding agent), special requirements regarding packaging and labeling must be observed. An expert for dangerous goods must be consulted when preparing the item for shipment.
Only send the battery if the housing is undamaged.
Tape off open contacts and pack the battery in such a way that it cannot move around in the packaging. Please also observe any additional national regulations.
Disposal

Garden tools, batteries, accessories, and packaging should be recycled in an environmentally friendly manner.
Do not dispose of garden tools and batteries/accumulators in household waste!
For EU countries only:
According to the European Directive 2012/19/EU, electrical and electronic devices that are no longer usable, and according to the European Directive 2006/66/EC, defective or used batteries/accumulators must be collected separately and taken for environmentally friendly recycling.
Batteries:
Li-Ion:
www.bosch-pt.com/serviceaddresses
Transport
www.bosch-pt.com/serviceaddresses
Transport
Li-ion batteries built into the power tool are subject to the dangerous goods transport law. The user can transport the batteries by road without any further requirements.
When transporting by other means (e.g., by air or freight), special requirements for packaging and labeling must be observed. When preparing the shipment for transport, consult an expert on dangerous goods transport. Transport the battery only if its housing is not damaged. Tape off open contacts and pack the battery so that it cannot move around in the packaging. Please also observe any additional national regulations.
Disposal

Garden tools, batteries, accessories, and packaging should be taken for environmentally friendly recycling.

Do not dispose of garden tools and batteries/accumulators in household waste!
For EU countries only:
In accordance with the European Directive 2012/19/EU, electrical and electronic devices, and in accordance with the European Directive 2006/66/EC, defective or used batteries/accumulators must be collected separately and taken for environmentally friendly recycling.
Active air cooling
www.bosch-pt.com/serviceaddresses
Removal
www.bosch-pt.com/serviceaddresses
Battery
The lithium-ion batteries supplied with the product are subject to the regulations for the transport of dangerous goods. The user can transport the batteries by road without any further requirements.
If the battery is shipped by third parties (e.g., by air transport or through a forwarding agency), special requirements regarding packaging and labeling must be observed. For this reason, a dangerous goods specialist must be consulted when preparing the shipment.
Only ship the battery if its housing is not damaged.
Tape off open contacts and pack the battery in such a way that it cannot move around in the packaging. Please also observe any national regulations regarding the transport of batteries, if applicable.
Good, dry sole
Cutting performance
Batteries with 2.0 Ah up to 250 m
Batteries with 4.0 Ah up to 500 m
Batteries with 6.0 Ah up to 750 m
To extend the operating time, additional batteries can be purchased at an authorized Bosch garden tools service center.
Setting the tripping mechanism


Symptom Possible cause Remedy
www.bosch-pt.com/serviceaddresses
Transport
The contained lithium-ion batteries are subject to the Dangerous Goods Legislation requirements. The user can transport the batteries by road without further requirements.
344 | Lithuanian
When shipping by third parties (e.g. by air transport or forwarding agency), special requirements on packaging and labelling must be observed. For preparation of the item being shipped, consulting an expert for hazardous material is required.




__SUPPIMER__
A. µ α

30 89
| Advanced Rotak 36-750 | AdvancedRotak 36-690 | AdvancedRotak 36-660 | AdvancedRotak 36-650 | الله IMMEDIATELY |
| | | | الله 42424246 مورزه بورزه |
| | | | الله 25-8025-8025-8025-8025-8025-8025-8025-8025-8025-8025-8025-8025-8025-8025-8025-8025-8025-8025-8025-8025-8 |
| | | | الله 50505050مrawnames |
| | | | الله 17,516,517,517,517,517,517,517,517,517,517,517,517,517,517,517,517,517,517,517,517,517,517,517,517,517,517,51 |
| الله IMMEDIATELY | الله 17,516,517,517,517,517,517,517,517,517,517,517,517,517,517,517,517,517,517,517,517,517,517,517, | الله 17,516,517,517,517,517,517,517,517,517,517,517,517,517,517,517,517,517,517,517,517,517,517,517, | | |
| 45+...0 | 45+...0 | 45+...0 | 45+...0 | aegyphos | - |
| 50+...5+ | 50+...5+ | 50+...5+ | 50+...5+ | aegyphos | djiy#s sic - |
| 50+...20- | 50+...20- | 50+...20- | 50+...20- | aegyphos | djiy#s sic - |
| aegyphos | aegyphos | aegyphos | aegyphos | aegyphos | p# |
| | | 36363636 | g# | ### |
| - | - | 2x2,0 | - | aclsw | 336 607 2 - /913 A35 607 1 02V |
| 4,0 | 4,0 | - | 4,0 | aclsw | 336 607 2 - /915 337 607 2 047 |
| - | - | - | - | aclsw | A35 607 1 - 058 |
| - | - | 10- | - | | 336 607 2 - /913 A35 607 1 02V |
| | 2020 | 20- | | 336 607 2 - /915 337 607 2 047 |
| - | - | - | - | | A35 607 1 - 058 |
Electronic Cell Protection/(ECP-10)
www.bosch-pt.com/serviceaddresses






GpOgUgUjI OlaaiwI gUJgUaioL jbluUlgil gilo g poLc uI labu. sinu CgLoWuPoLc UJ CwJy qq. dyaw Sis GosuogoojUqaygUwJsOlaaiwI
| الإستعمال | الإستعمال |
| الإستعمال | الإستعمال |
| الإستعمال | الإستعمال |
| الإستعمال | ال,envelop
الإستعمال |
| ال,envelop
ال,envelop | |
| ال,envelop
ال,envelop | |
| ال,envelop
ال,envelop | |
| ال,envelop
ال,envelop | |
| ال,envelop
ال,envelop | |
| ال,envelop
ال,envelop | |
| ال,envelop
ال,envelop | |
| ال,envelop
ال,envelop | |
| ال,envelop
ال,envelop | |
| ال,envelop
ال,envelop | - |
| ال,envelop
ال,envelop | - |
| ال,envelop
ال,envelop | - |
| ال,envelop
ال,envelop | - |
| ال,envelop
ال,envelop | - |
| ال,envelop
ال,envelop | - |
| ال,envelop
ال,envelop | - |
| ال,envelop
ال,envelop | - |
| - | - |
| - | - |
| - | - |
| - | - |
| - | - |
| - | - |
| - | - |
| - | - |
| - | - |
| - | - |
| - | - |
| - | - |
| - | - |
| - | - |
| - | - |
| - | - |
| - | - |
lkiwsjlolalawl jIgO
jbi jgsw bao jij jg g jiej jj i .cwi o sdi j jai jn jg s gls swaaw jy jy g jiej jj . cwi o swi diqj j bi jo g jds di jbi jd n oj 59 jj jg g jiej jj . cwi o sji
Jg jgS Jd bgo .Sg S01j jL 0
Sis oJolu Jiaobla gsi jlw olss u jssgds .sis oai sju
4.
Jusu 1 (sjL jS k s) u j Ug Ssw Jn e I a j g oJd, Cgb j pK j J J J J J J J J J J J J J J J J J J J J J J J J J J J J J J J J J J J J J J J
J
J
J
J
J
J
J
J
J
J
J
J
J
J
J
J
J
J
J
J
J
J
J
J
J
J
J
J
J
J
J
J
J
J
J
J
J
J
J
J
J
J
J
J
J
J
J
J
J
J
μbμ
6cm
+
(1)
Sg SjI Jus
| 2m 250 l | Ah 2,0 l |
| 2m 500 l | Ah 4,0 l |
| 2m 750 l | Ah 6,0 l |
Jolal jilj gJg JgS Uo JgUuJgUj SjBosch jao sluJl jLj
gwhpajjoojjw
Jg jgj
size


| daiya daiya Bosch |
| |
| |
| |
| |
| |
| |
| |
| |
| |
| |
| |
| |
| |
| |
| |
| |
| |
| |
| |
| |
| |
| |
| |
| |
| |
| Nm 27) dais aas /aas /aas /aas /aas /aas /aas /aas /aas /aas /aas /aas /aas /aas /aas /aas /aas /aas /aas /aas /aas /aas /aas /aas /aas /aas /aas /aas /aas /aas /aas /aas /aas /aas /aAS /aas /aas /aas /aas /aas /aas /aas /aas /aas /aas /aas /aas /aas /aas /aas /aas /aas /aas /aas /aas /aas /aas /aas /aas /aas /aas /aas /aas /aas /aas /aas /aas /aas/ | |
| Nm 27) dais aas /aas /aas /aas /aas /aas /aas /aas /aas /aas /aas /aas /aas /aas /aas /aas /aas /aas /aas /aas /aas /aas /aas /aas /aas /aas /aas /aas /aas /aAS /aas /aas /aas /aAS /aas /aas /aAS /aas /aas /aAS /aas /aas /aAS /aas /aAS /aas /aAS /aas /aAS /aas /aAS /aas /aAS /aas /aAS /aas /aAS /aas /aAS /aas /aAS /aas /aAS /aas /aAS /aas /aAS /aas /aAS /aas /aAS /aas /aAS /aas /aAS /aas/ | |
Therefore, sin(5x - 2x) = 8/5
-(5,11,5), (9,8,9)
www.bosch-pt.com
www.bosch-pt.com/serviceaddresses
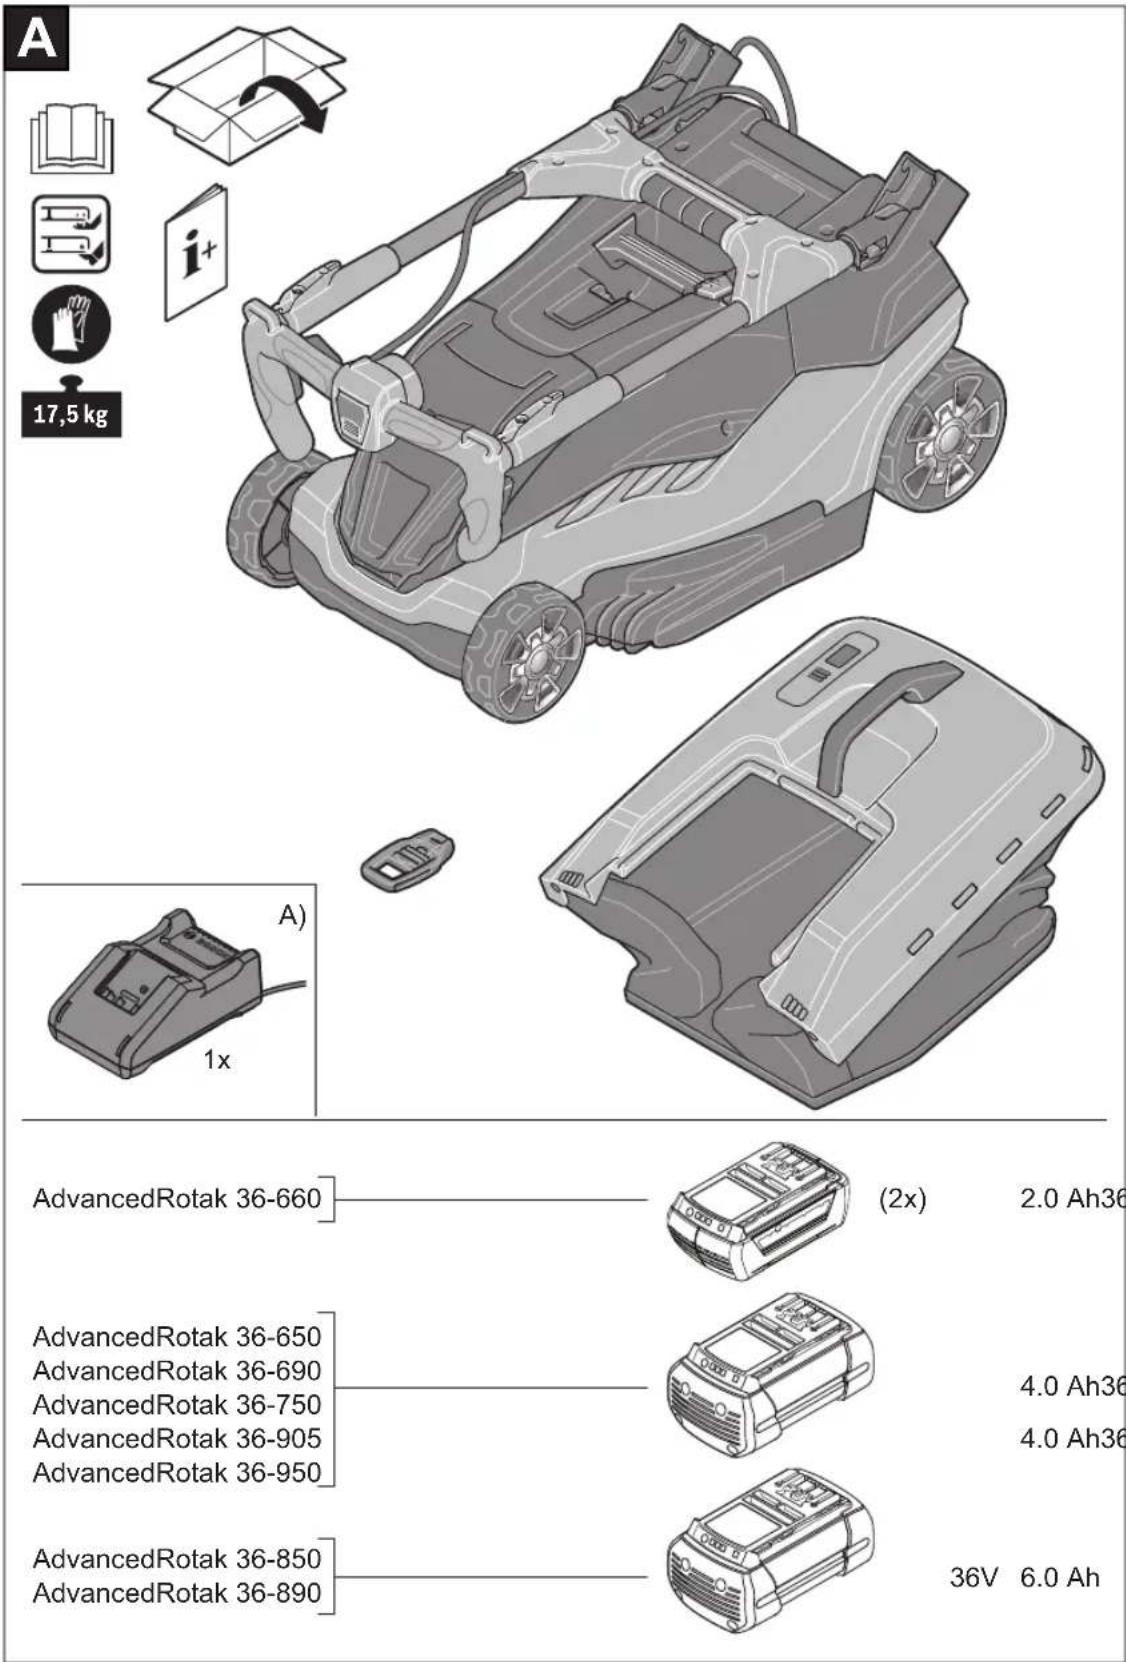
368
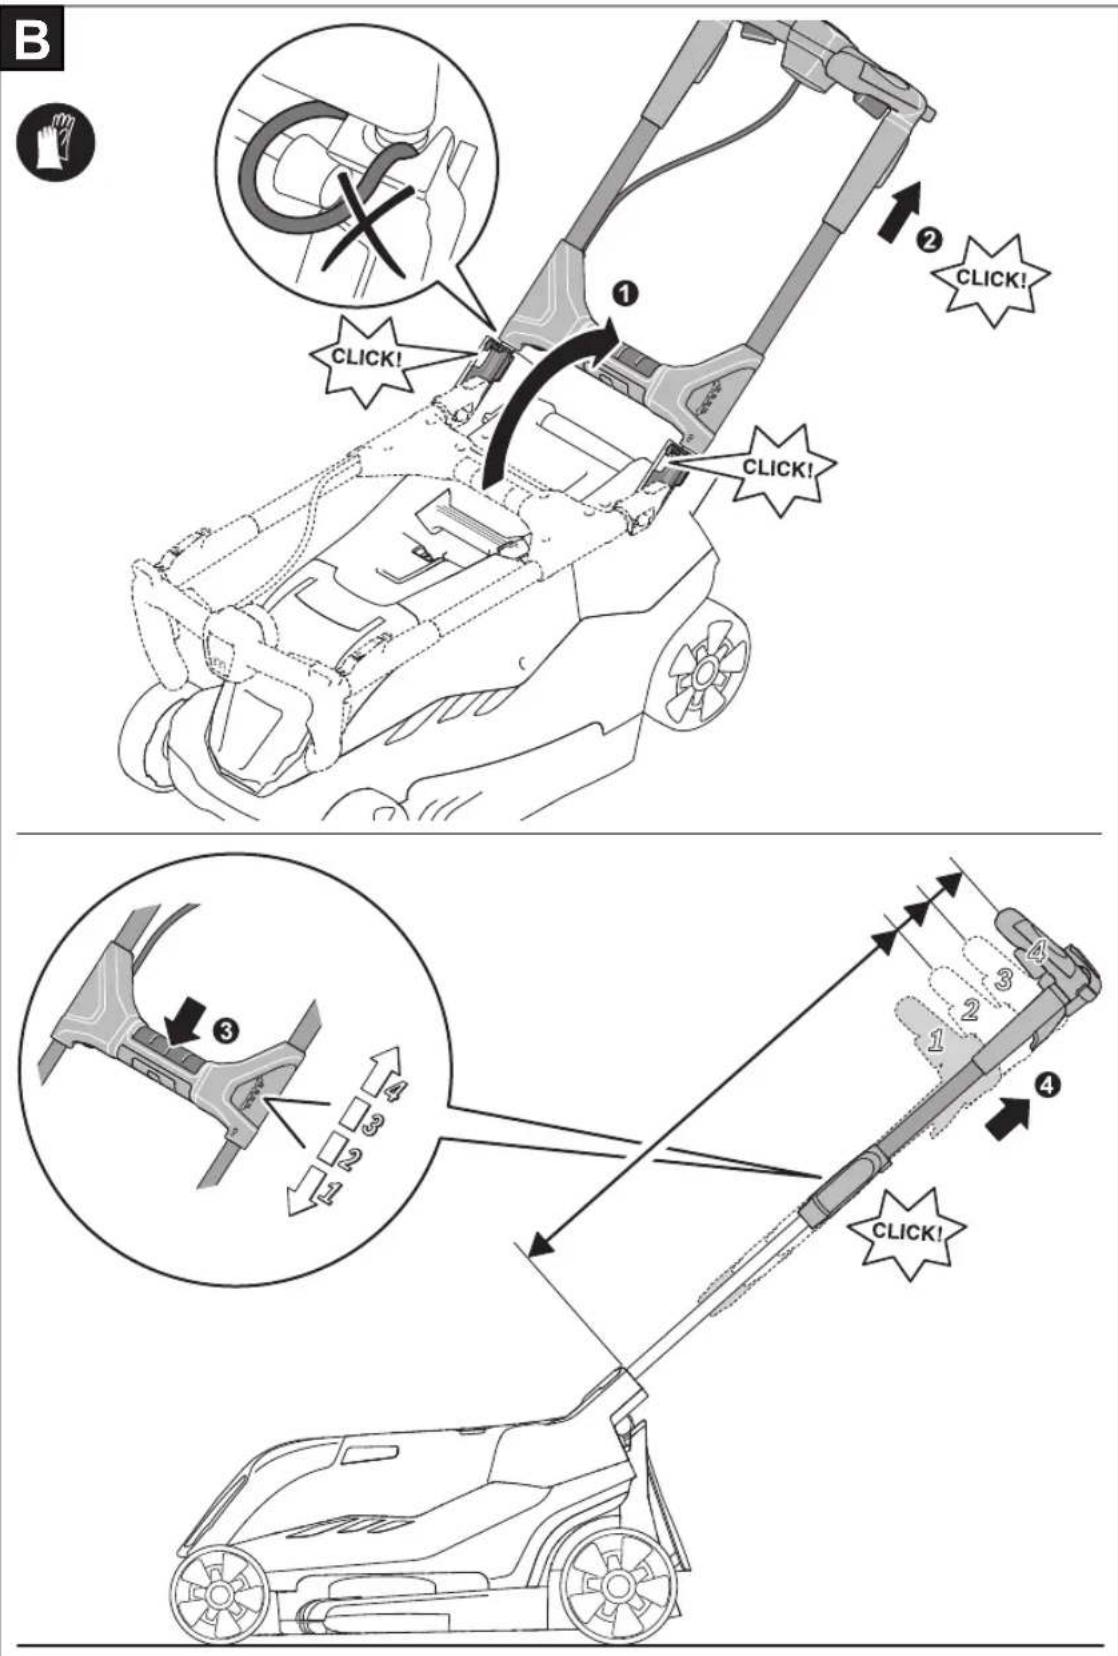
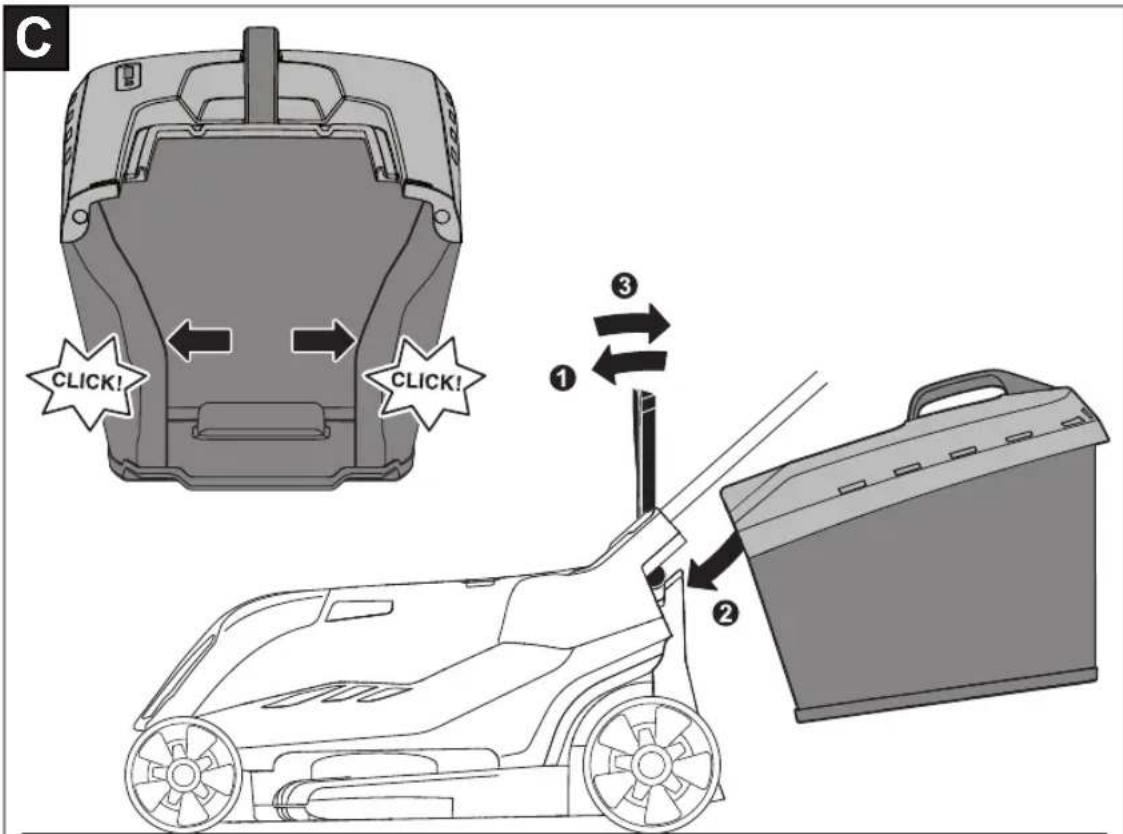
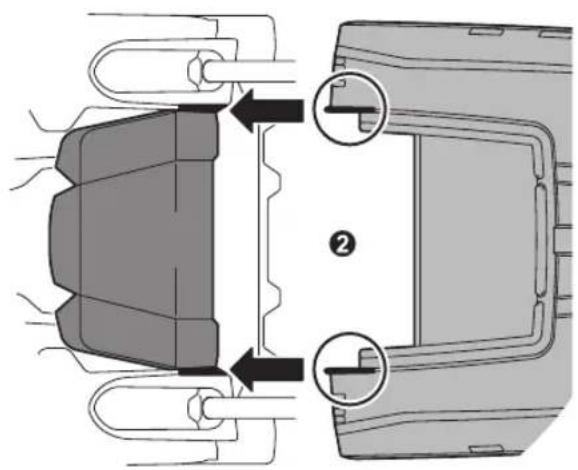
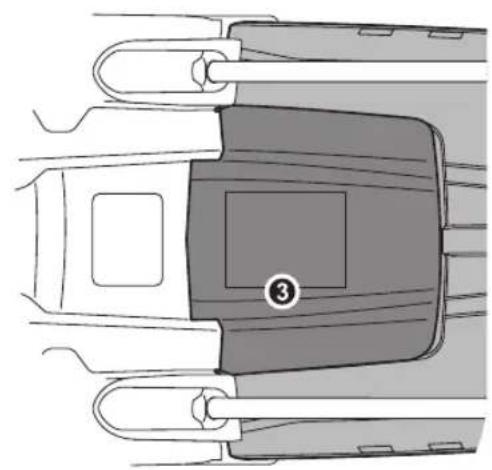
370
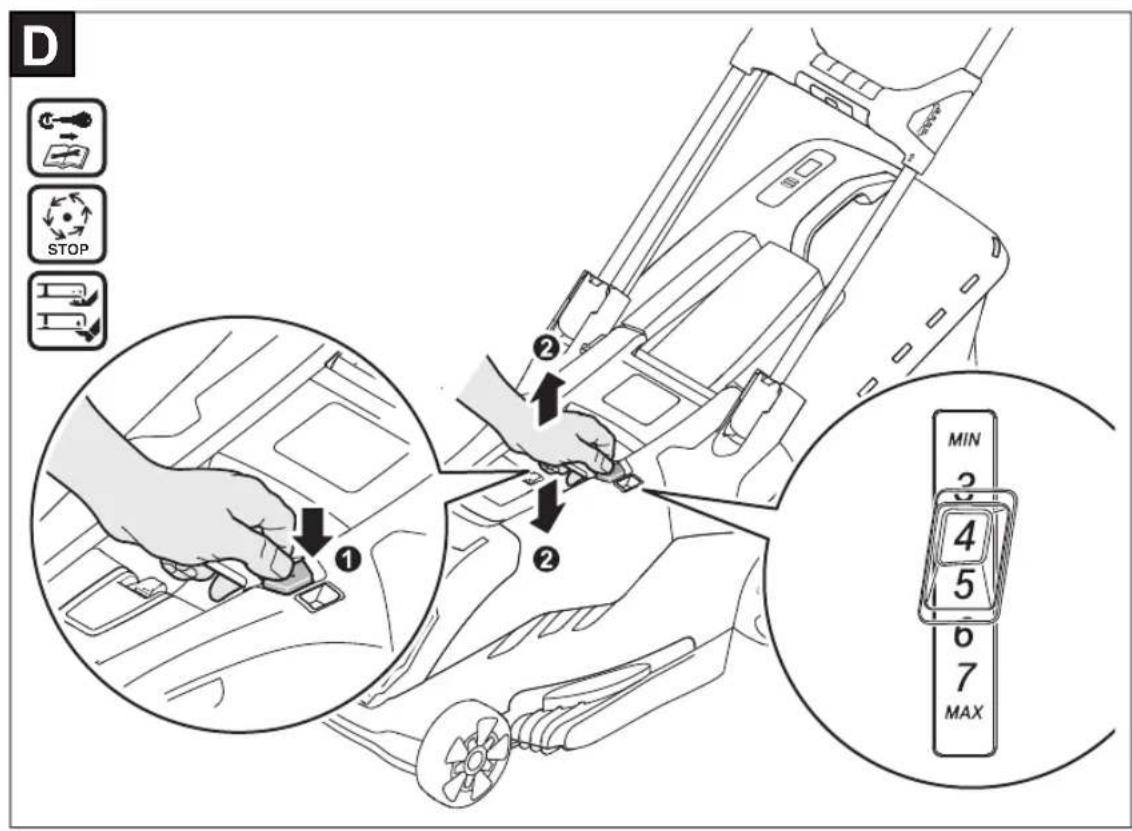
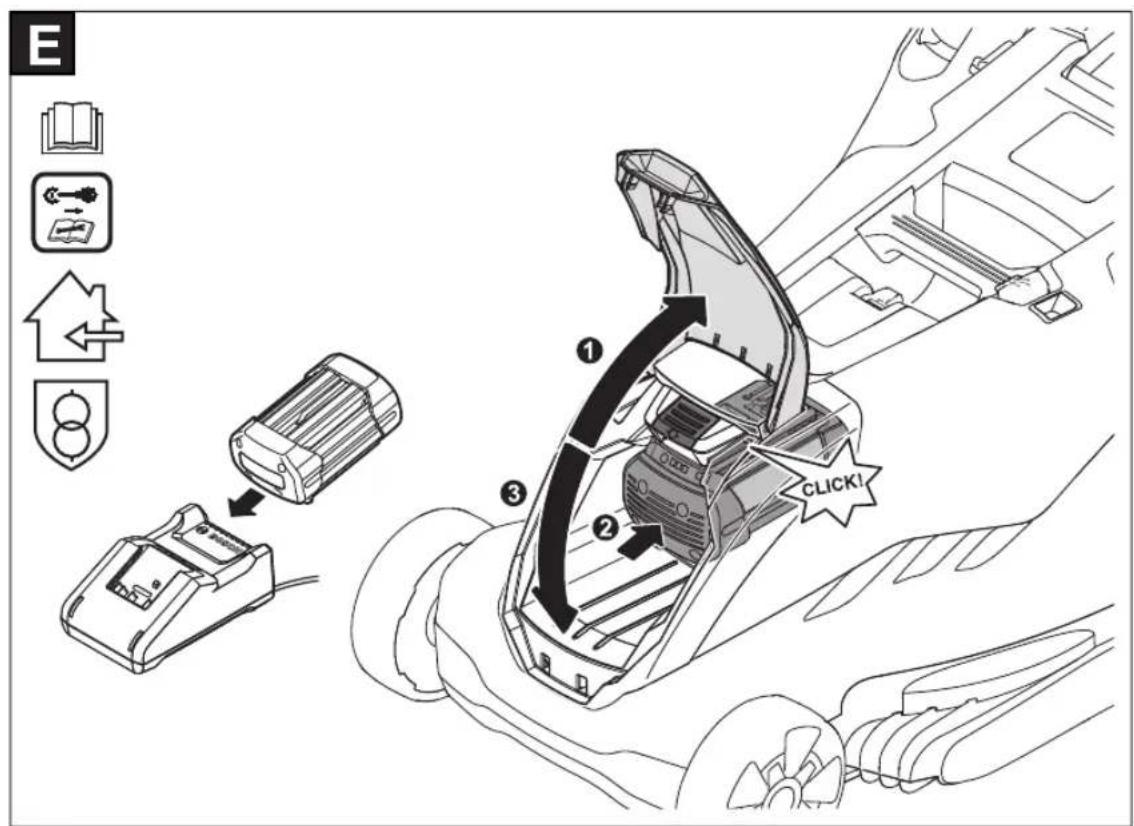
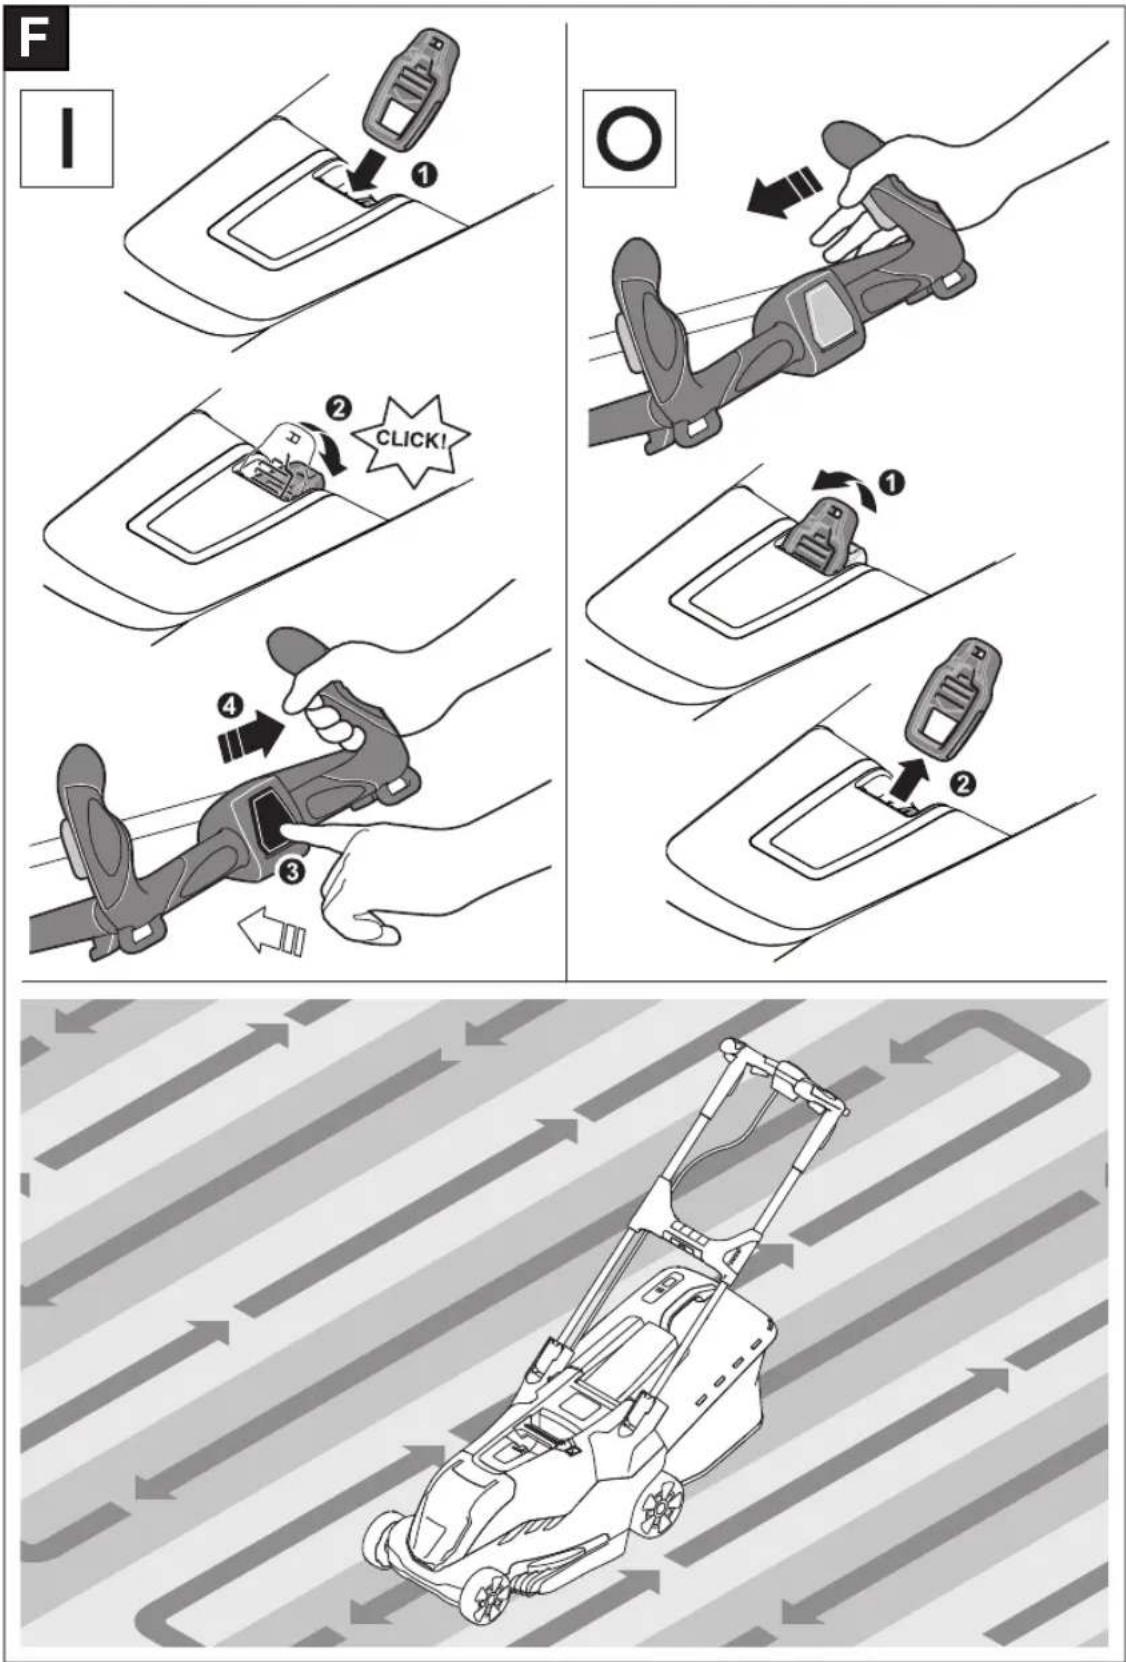
372
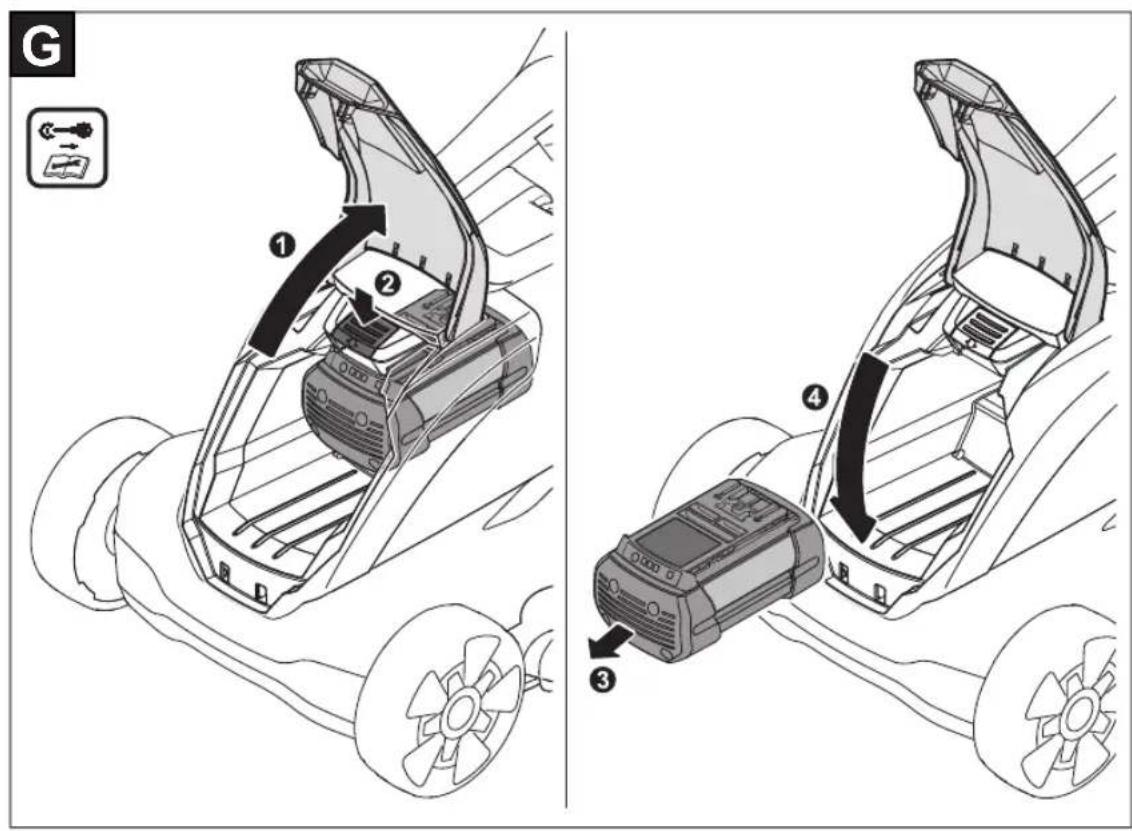
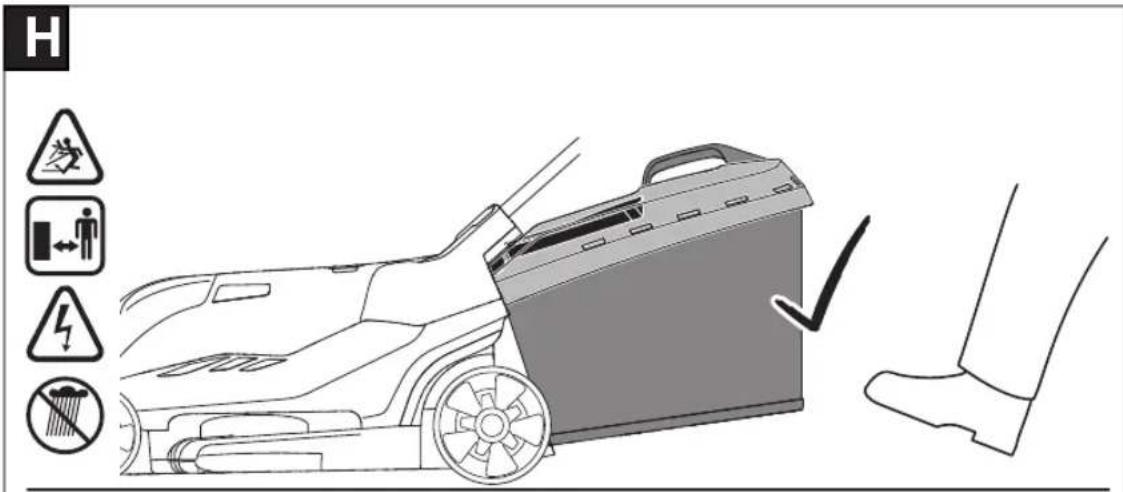
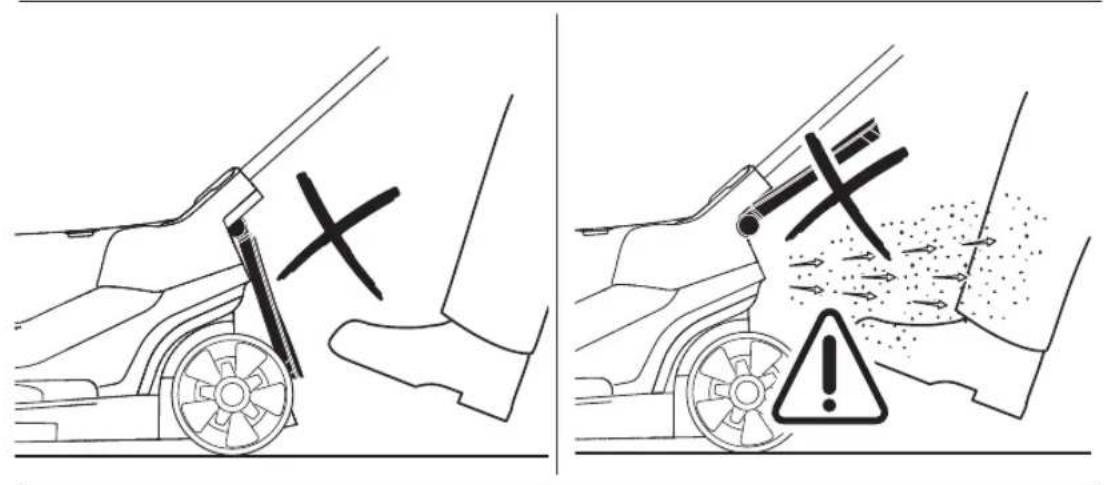
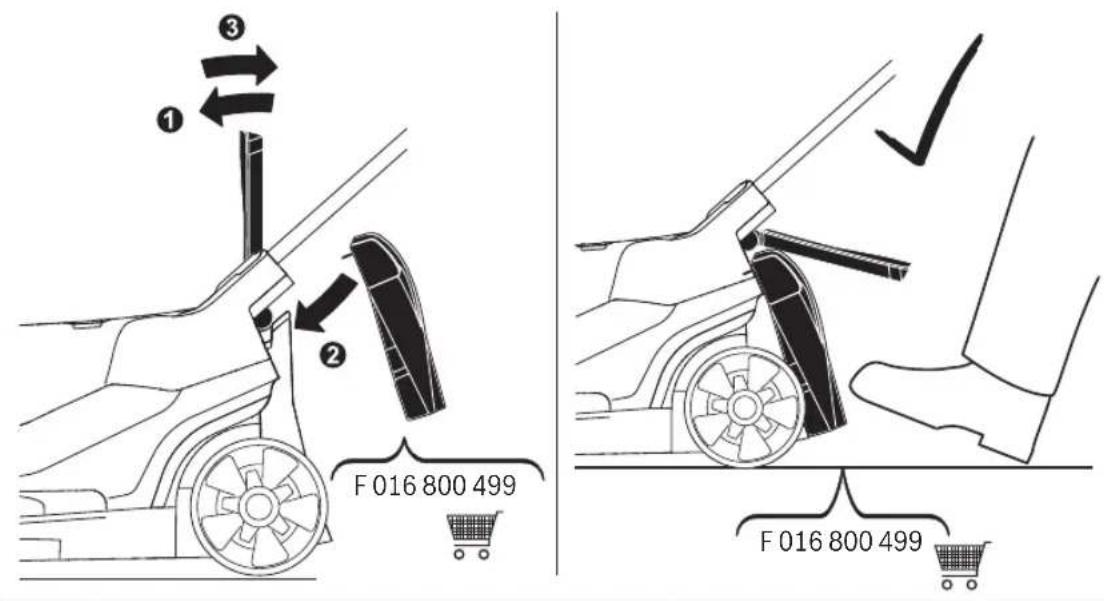
374
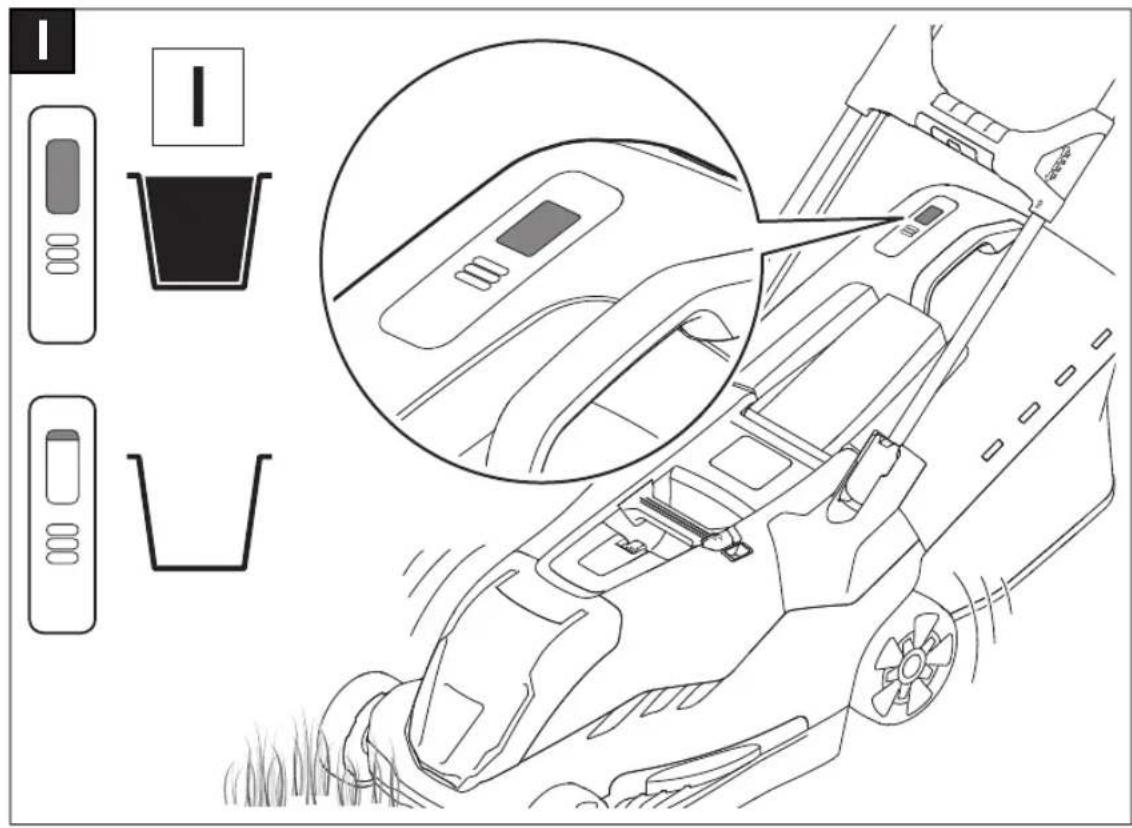


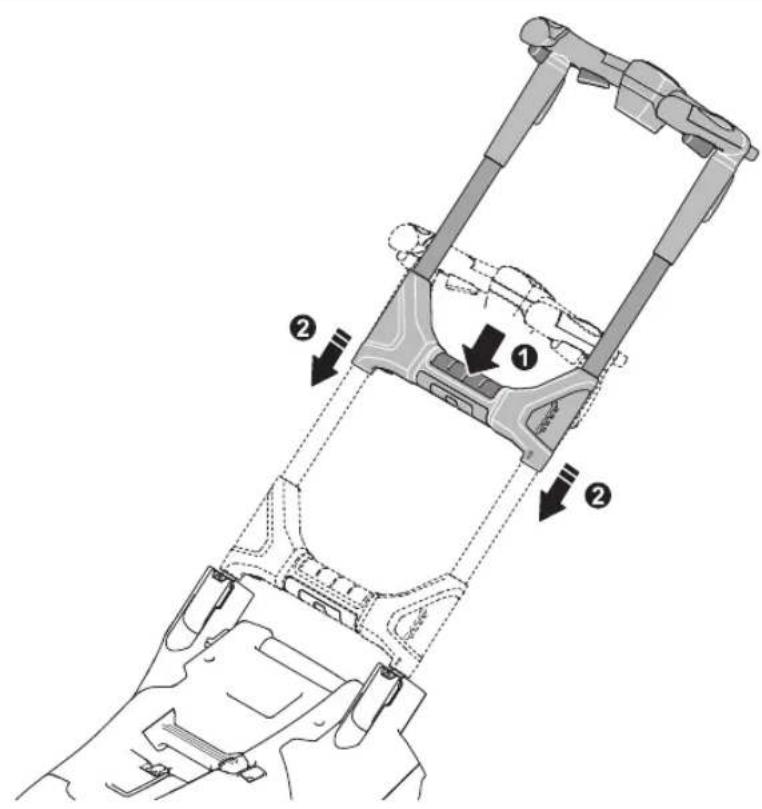
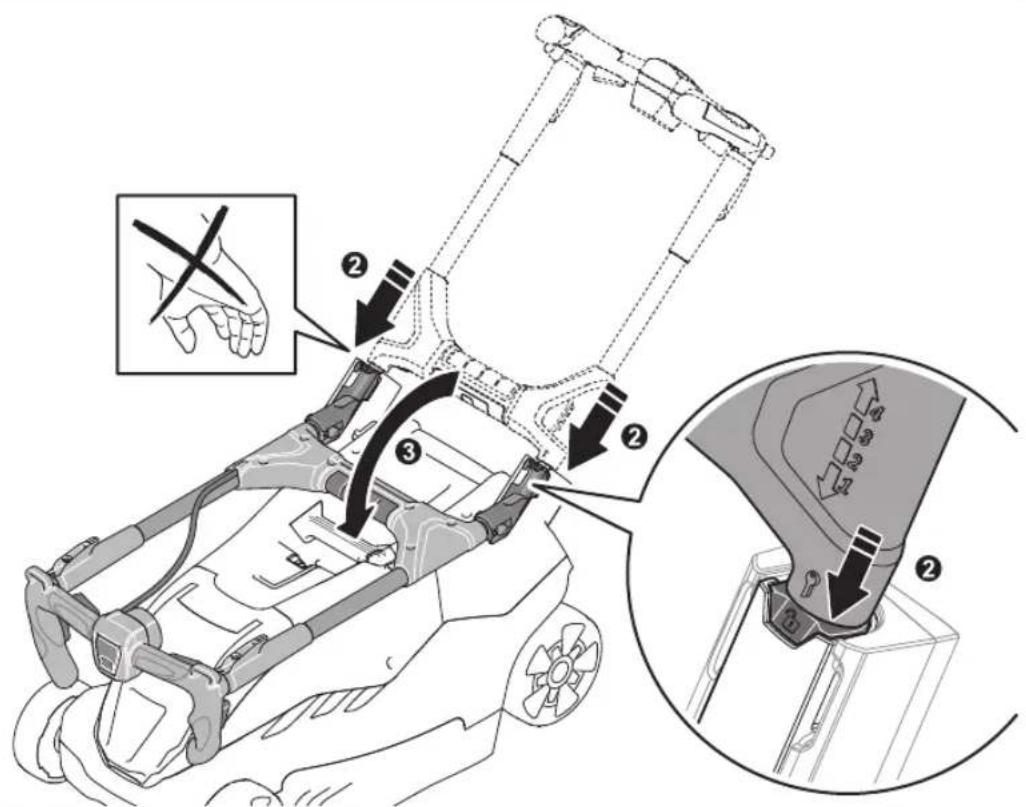
376


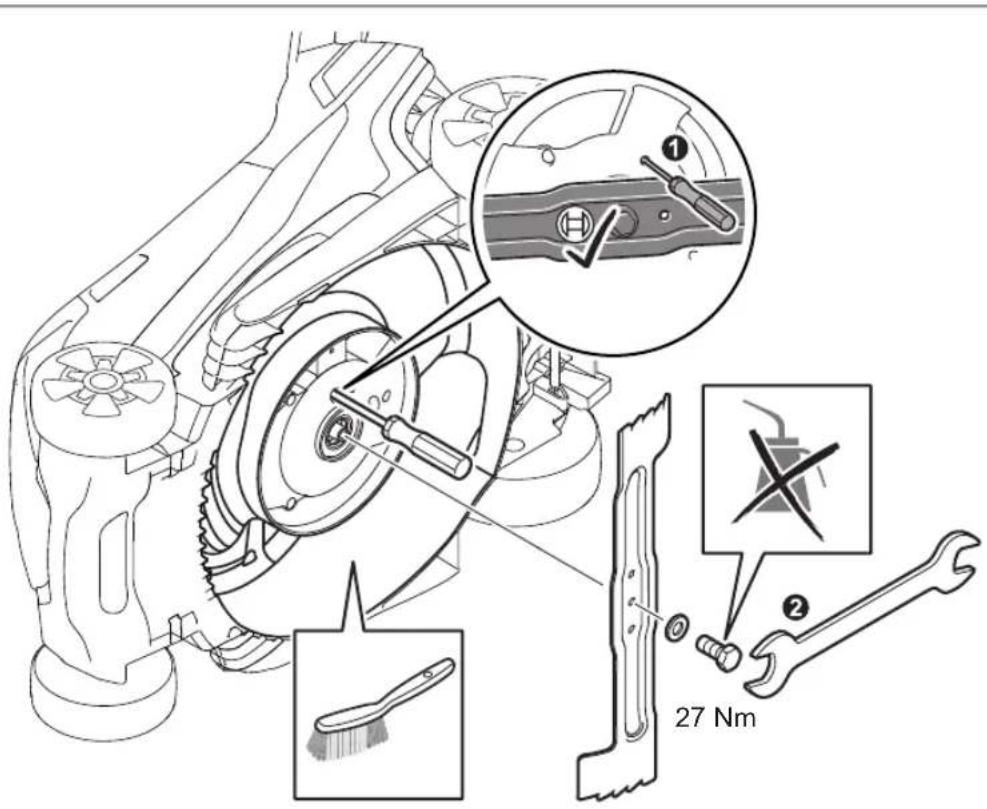


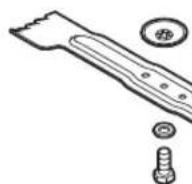
F016800504 F016800505
F016800499
F016800292
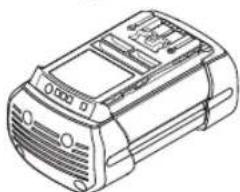
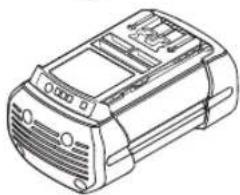
2.0Ah 2607336913/ 1607A3502V
4.0 Ah 2607336915/ 2607337047
6.0Ah 1607A35058
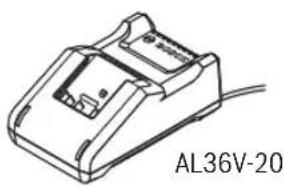
F016800497
| de | EU-Konformitätserklärgung | Wir erklärren in alleiniger Verantwortung, dass die genannten Produkte allen einschlagigen Bestimmungen der nachfolgenden aufgeführten Richtlinien und Verordnungen entsprechen und mit folgenden Normen übereinstimmen. |
| Rasenmäher | Sachnummer |
| en | EU Declaration of Conformity | We declare under our sole responsibility that the stated products comply with all applicable provisions of the directives and regulations listed below and are in conformity with the following standards. |
| fr | Déclaration de conformité UE | N° d'article |
| Tondeuse | N° d'article |
| es | Declaración de conformidad UE | Declaramos bajo nuestra exclusiva responsivenessidad, que los produits nombrados cumplen con todas las dispositions correspondentes de las Directivas y los Regimientos Mentionados a continuación y está en conformidad con lasamblestables. |
| Cortacésped | No de articulo |
| pt | Déclaration de Conformidade UE | Declaramos sob{nossa exclusiva responsivenessidad que os produits Mentionados cumprem todas as dispositions e os regulamente indicados e está em conformidade com as seguintes normas. |
| Corta-relvas | N.° do produit |
| it | Dichiarazione di conformità UE | Dichiariamo sulla notre piena responsabilità che i prodotti indicati sono conformi a tutte le disposizioni pertinenti delle Diretive e dei Regolamenti elencati di seguito, nonché alle segunti Normative. |
| Tosaerba | Codice prodotto |
| nl | EU-conformiteitsverklaring | Wij verklaren op eigen verantwoordelijkheid dat de genoemde producten voldoen aan alle desbeteffende bepalingen van de hierna genoemde richtlijnen en verorderingen en overeenstemmen met de volgende normen. |
| Gazonmaaier | Productnumber |
| da | EU-overensstemmelseserklaering | Vi erklær someneansvarlige, at det beskreve Produkt er i overensstommelse med alle gældende bestemmelse i følgende direktiver og forordninger og opfylder følgende standarder. |
| Plæneklipper | Typenummer |
| sv | EU-konformitetsförklaring | Vi forklar under eget ansvar att de námnda produkterna uppfyl-ler kraven i alla gällande bestämelse i de nedan angivna direk-tiven och forordningarnas och att de stämmer överens med föl-jande normer. |
| Gräsklippare | Produknummer |
| no | EU-samsvarserklæring | Vi erklær under neansvar at de nevnte Produktene i overensstommelse med alle relevante bestemmelse i direktivene og forordningene nedenfor og med følgende standarder. |
| Gressklipper | Produknummer |
| fi | EU-vaatimustemmukaisuusvakuutus | Vakutamme t Athen, etta mainitut tuotteet vastaavat kaikkia seu-raavien direktivien ja asetusten asiaankuulvia vaatimuksia ja ovat seuraavien standardien vaatimusten mukaisia. |
| Ruohonleikkuri | Tuotenumero |
| el | Δηλωση πιστότητας EE | Δηλωσουμε Μαπολείσική μας ευθύνη, διτα τα αναφερόμενa προίντα ανιτοιαύνινον σε ἀλες τις σχέτικες διατάξεις των πιο κατωναφερόμενων υθηγίνων και κανονιαύμων και ταυτίζουνται με τα ακόλουθα προτυμα. |
| Xλοοκοπική μηχανή | Aριθμός ευρετηρίου |
| tr | AB Uygunluk beyani | Tek soruamu olarak, tanımlanan ürünun asağidaki)yönnetmelik ve direktifilerin geleçeri bil butün hülçumlinerine ve asağidaki standartlara uygun olduguñu banyenan ederiz. |
| Çim biçme makinesi | Ürün kodu |
| pl | Deklaracja zgodnosci UE | Oświadczamy z pełnă odpowiedzialnoscia, ze niniejsze produkty odpowiadajā wsystkim wymaganiom ponižej wyszczegól-nionych dyrektyw i rozporzędźén, oraz ze są zgodne z nastepuja-cymi normami. |
| Kosiarka | Numer katalogowy |
| cs | EU prohlášeni oshodě | Prohlášujeme na vyhradní zo:dovédnost, ze uvedeny výrobek splíŋje vsechna prísluṇá ustanoveni niže uvedenych směrnica anafízeni aje vsoulad snásledujćími normami.* |
| Travni sekačka | Objednaci Číso |
| II | |
| sk | EU vyhläsenie ozhode | Vyhlasujeme na vyhradnú zodpovednost, ze uvedený vyrobok splína všetky príslužné ustanovenia nižsé uvedenych smernić anariadeni aje vsúlade snasledujúcimi normami: | |
| Kosacka na trávu | Egyedüli felèlósèggi kijelentjuk, hogy a megnevezett termékek megfelelnek az alábbiakban felsorolársa kerulô irányelvek és ren-deletek valamennyi idevágó elóirásainak és megfelelnek a kõvet-kezö szabványoknak. | |
| Fünylrógép | 3600 HB9 6053600 HB9 673 | |
| hu | Eu konformítasi nyilatkozat | Egyedüli felèlósèggi kijelentjuk, hogy a megnevezett termékek megfelelnek az alábbiakban felsorolársa kerulô irányelvek és ren-deletek valamennyi idevágó elóirásainak és megfelelnek a kõvet-kezö szabványoknak. | |
| ru | 3600 HB9 605 | Möby 3600 HB9 605 | |
| Галлоргела | Товарный NO | |
| uk | 3600 HB9 605 | Миогалуем по лану удиноюу OTBETCTBEHNOCTb, чу наразынные рождьпс.
Названы пождьп CBOTBTCTBYOT BCМ дей сныцим,
празынсянам Нжухая ЗАньпс.
Нштоизнадухл:
Дзретгелы воробу вдочьд;
Браознадухл:
Служая рождьп:
Нштоизнадухл:
Враознадухл:
Служая рождьп:
Враознадухл:
Служая рождьп:
Враознадухл:
Враознадухл:
Враознадухл:
Враознадухл:
Враознадухл:
Враознадухл:
Враознадухл:
Враознадухл:
Враознадухл:
Враознадухл:
Враознадухл:
Враознадухл: | |
| kk | EO сөйекстik маглүмдамасы | Оз кayалкершлидөд олларгэндөдөдөдөдөдөдөдөдөдөдөдөдөдөдөдөдөдөдөдөдөдөдөдөдөдөдөдөдөдөдөдөдөдөдөдөдөдөдөдөдөдөдөдөдөдөдөдөдөдөд线索.
Здөдөдөдөдөдөдөдөдөдөдөдөдөдөд线索.
Здөдөдөд线索.
Здөдөд线索.
Здөд线索.
Здөд线索.
Здөд线索.
Здөд线索.
Здөд线索.
Здөд线索.
Здөд线索.
Здөд线索.
Здөд线索.
Здөд线索.
Здөд线索.
Здөд线索.
Здөд线索.
Здөд线索.
Здөд线索.
Здөд线索.
Здөд红线.
Здөд红线.
Здөд红线.
Здөд红线.
Здөд红线.
Здөд红线.
Здөд红线.
Здөд红线.
Здөд红线.
Здөд红线.
Здөд红线.
Здөд红线.
Здөд红线.
Здөд红线.
Здөд红线.
Здөд红线.
Здөд红线.
Зд æнлары
Зд øлары
Зд øлары
Зд øлары
Зд øлары
Зд øлары
Зд øлары
Зд øлары
Зд øлары
Зд øлары
Зд øлары
Зд øлары
Зд øлары
Зд øлары
Зд øлары
Зд øлark
Зд øлark
Зд øлark
Зд øлark
Зд øлark
Зд øлark
Зд øлark
Зд øлark
Зд øлark
Зд øлark
Зд øлark
Зд øлark
Зд øлark
Зд øлark
Зд øлark
Зд øлark
Зд øлark
Здøлark
Здøлark
Здøлark
Здøлark
Здøлark
Здøлark
Здøлark
Здøлark
Здøлark
Здøлark
Здøлark
Здøлark
Здøлark
Здøлark
Здøлark
Здøлark
Здøлark
Zoliapové | Möby 3600 HB9 6053600 HB9 673 |
| rk | EO сөйекстik маглүмдамасы | Оз кayалкершлидөд олларгэндөдөдөдөдөдөд线索.
Названы пождьпс.
Названы пождьпс.
Здөдөд线索.
Здөд线索.
Здөд线索.
Здөд线索.
Здөд线索.
Здөд线索.
Здөд线索.
Здөд线索.
Здөд线索.
Здөд线索.
Здөд线索.
Здөд线索.
Здөд线索.
Здөд线索.
Здөд线索.
Здөд线索.
Zoliapové | |
| ro | Declaration de conformitate UE | Declaration pe proprie raspundere сä produselementionate core-spund tutur disposizitiilor relevante ale directivelor sì regle-mentáril enumerate in cele ce urmeazà sì sunt in conformitate cu urmátoarele standarde. | |
| bg | EC Deklaración 3a cboTBeTCTBVE | Спълha OTROBOPHOCT Hne DeKLAPARIPAME,Ye noocouhenite
ПождУТКИ OTTOBAPAT Na BCSUKN BAVIND N3NCKBAHЯ NaDEKTHIBITE N pAOIPOEIDITE NO-DONU Y CBO TBTCTBA Ha
Служая рождьп:
Служая рождьп:
Служая рождьп:
Служая рождьп:
Служая рождьп:
Служая рождьп:
Служая рождьп:
Служая рождьп:
Служая рождьп:
Служая рождьп:
Служая рождьп: | |
| mk | EU-Nsajaba 3a coobpa3noct | Coцюсано огворонoc HTJabYBaMaMe,Да КОпшане
ПрочьбODи CE BO CORNACHOCT CO сите релеванчп И оредьп ha
Служая рождьп:
perуларын и рождьп и сь BO CORNACHOCT CO
Служая рождьп:
perуларын i da su skladu sa sledečim standardima. | |
| sr | EU-izjava o usaglašenosti | Na sobstvenu odgovornost izjavljagem, da navedeni proizvodi odgovaraju svim dotićnim odredbama naknadno navedenih smernica u uredaba i da su skladu sa sledečim standardima. | |
| sl | Izjava o skladnosti EU | Izjavljamo pod izključno odgovornostjo, da je omenjen izdelek v skladu z vsemi relevantnimi dolovi direktiv in uredb ter ustreza naslednjim standardom. | |
| hr | EU izjava o sukladnosti | Pod punom odgovornošcu izjavljagem da navedeni proizvodi odgovaraju svim relevantnim odredbama direktiva i propisima navedenima u nastavku i da su skladni sa sljedećim normama. | |
| et | EL-vastavusdeklaratsion | Kinnitame ainuvastutajatena, et nimetatud tooted vastavad jär-gnevalt loetletud direktiviide ja määruste kõikidele asjaomastele nõutele ja on kooskūlas järgmiste normidega. | |
| lv | Deklaracija par atbilstibu ES standartiem | Mës ar pilnu atbildibu pazinojam, ka šeit aplukotie izstrādājumi atbilst visium tālik minētajās direktivās un rikojumos ietvertajām saistosajām dostādnēm, kā ar sekojosiem standartiem. | |
| lt | ES atitikties deklaracija | Atsakingai pareiškiame, kad issvardyi gaminai atitinka visius pri-
valomus Žemiaiu nurodytu direktvyu ir reglamentu reikalavimus ir sioos standartus. | |
| Zoliapové | Gaminio numeris | |
| AdvancedRotak 36-650 | 3600 HB9 6042600 HB9 672 | |
| AdvancedRotak 36-660 | 3600 HB9 6053600 HB9 673 | |
1609 92A 5WB| (15.07.2020) Bosch Power Tools
III
| AdvancedRotak 36-690 | 3600 HB9 607 | EN 60335-1: 2012+A11:2014+A13:2017+A1:2019 |
| AdvancedRotak 36-750 | 3600 HB9 702 | +A2:2019+A14:2019 |
| 3600 HB9 771 | EN 60335-2-77:2010 |
| AdvancedRotak 36-850 | 3600 HB9 802 | EN 55014-1:2017+A11:2020 |
| 3600 HB9 872 | EN 55014-2:2015 |
| AdvancedRotak 36-890 | 3600 HB9 803 | EN IEC 63000:2018 |
| AdvancedRotak 36-905 | 3600 HB9 606 | |
| AdvancedRotak 36-950 | 3600 HB9 901 | |
| IV |
| de | 2000/14/EG: Gemessener Schalleistungspiegel 87 dB(A), Unsicherheit K = 2,5 dB, garantieter Schalleistungspiegel 88 dB(A) |
| Bewertungsverfahren der Konformität gemäß Anhang VI. Produktkategorie: 32 |
| Benannte Stelle: DEKRA Certification B.V. Meander 1051, 6825 MJ Arnhem, Netherlands, Nr.0344 |
| Technische Unterlagen bei:* |
| en | 2000/14/EC: Measured sound power level 87 dB(A), uncertainty K = 2,5 dB, guaranteed sound power level 88 dB(A) |
| Conformity assessment procedure in accordance with annex VI. Product category: 32 |
| Notified body: DEKRA Certification B.V. Meander 1051, 6825 MJ Arnhem, Netherlands, Nr.0344 |
| Technical file at:* |
| fr | 2000/14/CE: niveau de puissance acquistique mesuré 87 dB(A), incertitude K = 2,5 dB, niveau de puissance acquisti-que garanti 88 dB(A) |
| Procédure d'évaluation de conformité selon l'annexe VI. Catégorie de produit: 32 |
| Centre de contrôle cité: DEKRA Certification B.V. Meander 1051, 6825 MJ Arnhem, Netherlands, Nr.0344 |
| Dossier technique auprès de:* |
| es | 2000/14/CE: niveau medio de la potentia acústica 87 dB(A), tolerancia K = 2,5 dB, nivalgaritazoado de la potencia acústica 88 dB(A) |
| Método de evaluación de la conformidad según anexo VI. Categoría de producto: 32 |
| Lugar denominado: DEKRA Certification B.V. Meander 1051, 6825 MJ Arnhem, Netherlands, Nr.0344 |
| Documentos tíncicos de:* |
| pt | 2000/14/CE: Nível de potência acústica medio 87 dB(A), insegurarva K = 2,5 dB, nivalde potência acústica garanti-do 88 dB(A) |
| Proceso de avaliación da conformidade de acordo com o anexo VI. Categoria de produits: 32 |
| Organismo notificado: DEKRA Certification B.V. Meander 1051, 6825 MJ Arnhem, Netherlands, Nr.0344 |
| Documentação técnica pertencente à:* |
| it | 2000/14/CE: livello di potenza sonora misurato 87 dB(A), incertezza K = 2,5 dB, livello di potenza sonora garantito 88 dB(A) |
| Procedimento di valutazione della conformità seconda l'Allegato VI. Categoria prodotto: 32 |
| Ente incaricato: DEKRA Certification B.V. Meander 1051, 6825 MJ Arnhem, Netherlands, Nr.0344 |
| Documentazione Tecnica presso:* |
| nl | 2000/14/EG: gemeten geluidsvermögensniveau 87 dB(A), onzekerheid K = 2,5 dB, gegardeerd geluidsvermögens-niveau 88 dB(A) |
| Beordelingsmethode van de overeenstemming volgens bijlage VI. Productcategorie: 32 |
| Aangewezen instantie: DEKRA Certification B.V. Meander 1051, 6825 MJ Arnhem, Netherlands, Nr.0344 |
| Technisch dossier bij:* |
| da | 2000/14/EF: Målt lydefektniveau 87 dB(A), usikhered K = 2,5 dB, garanteret lydefektniveau 88 dB(A) |
| Overensstammelsversdieringsprocedure som omhandlet i bilag VI. Produktkategori: 32 |
| Bemyndiget organ: DEKRA Certification B.V. Meander 1051, 6825 MJ Arnhem, Netherlands, Nr.0344 |
| Tekniske bilag ved:* |
| sv | 2000/14/EG: Uppmatt bullernivä 87 dB(A), osakerhet K = 2,5 dB, garanterad bullernivä 88 dB(A) |
| Konformitetens bedömningsmetod enligt bilaga VI. Produktkategori: 32 |
| Angivet provningsstände: DEKRA Certification B.V. Meander 1051, 6825 MJ Arnhem, Netherlands, Nr.0344 |
| Teknisok dokumentation:* |
| no | 2000/14/EC: Målt lydefektnivä 87 dB(A), usikheret K = 2,5 dB, garanteriert lydefektniva 88 dB(A) |
| Samsvarsvurdieringsmetode i henhold til vedlegg VI. Produktkategori: 32 |
| Bemyndiget organ: DEKRA Certification B.V. Meander 1051, 6825 MJ Arnhem, Netherlands, Nr.0344 |
| Teknisok dokumentasjön hos:* |
| fi | 2000/14/EY: mitatto aïnitehotaso 87 dB(A), epävarmuus K = 2,5 dB, taattu aïnitehotaso 88 dB(A) |
| Vaatimustemukaisuuden arviointimenetelmä liitteen VI mukaisesti. Tuotekategoria: 32 |
| Ilmoitetu laitos: DEKRA Certification B.V. Meander 1051, 6825 MJ Arnhem, Netherlands, Nr.0344 |
| Tekniset asiakirjat saatatana:* |
| C€ |
| el | 2000/14/EK: Метрелов постору seviyesi 87 dB(A), оваофальский = 2,5 dB, удиumenуменny постору seviyesi 88 dB(A).Δiaбuaia αξολονηοις τοῦ τοῦτας σύμφωνα με το πάράτημα VI. Катуopia пioίντος: 32Avафέρουνονος оуав闳цός: DEKRA Certification B.V. Meander 1051, 6825 MJ Arnhem, Netherlands, Nr.0344Tekυκά ἀγροσα στη: |
| tr | 2000/14/EC: οΙζινιen ses gúču seviyesi 87 dB(A), tolerans K = 2,5 dB, garanti edilen ses gúču seviyesi 88 dB(A)Uygunluk degelerindirme yontemi ek VI uyarinca. Ürün kategorisi: 32Onaylanmigi kurulus: DEKRA Certification B.V. Meander 1051, 6825 MJ Arnhem, Netherlands, Nr.0344Teknik belgelerin bulundugu yer: |
| pl | 2000/14/WE: pomierzony poziom mocy akustycznej 87 dB(A), niedewnosć K = 2,5 dB, gwarantowany poziom mocyakustycznej 88 dB(A)Procedura oceny zgodnosci zgodnie z załacznikiem VI. Kategoria produktów: 32Jednostka certyfikujaca: DEKRA Certification B.V. Meander 1051, 6825 MJ Arnhem, Netherlands, Nr.0344Dokumentacja techniczna:* |
| cs | 2000/14/ES: zmeřená hladina akustického vykonu 87 dB(A), nejistota K = 2,5 dB, zarucné háladina akustického vykonu 88 dB(A)Metoda posouzení shody podle dodatku VI. Kategorie vyrobku: 32Uvedená zkušební institute: DEKRA Certification B.V. Meander 1051, 6825 MJ Arnhem, Netherlands, Nr.0344Technické podklady u:* |
| sk | 2000/14/ES: odmeraná hladina akustického vykonu 87 dB(A), neistota K = 2,5 dB, zarucné háladina akustického vykonu 88 dB(A)Metóda posúdenia zhody podla dodatku VI. Kategoría vyrobku: 32Uvedená skusobná institūcia: DEKRA Certification B.V. Meander 1051, 6825 MJ Arnhem, Netherlands, Nr.0344Technické podklady má spolovost:* |
| hu | 2000/14/EK: Miert hangteljesitmény -szint 87 dB(A), szórás K = 2,5 dB, garantál'thangteljesitmény -szint 88 dB(A)A konformitàki kiétrékalési elárast lásd a VI Függelékben. Termékkategória: 32Megnevezett intézet: DEKRA Certification B.V. Meander 1051, 6825 MJ Arnhem, Netherlands, Nr.0344Mûsžaki dokumentumok megörzési pontja:* |
| ru | 2000/14/EC: Изера:<br>уровени звуково мошносту 87 dB(A), порешисту K = 2,5 dB, rapантура:<br>уровени звуково мошносту 88 dB(A)Пюседу ооч:<br>соштев:<br>соштев:<br>соштев:<br>соштев:<br>соштев:<br>соштев:<br>соштев:<br>соштев:<br>соштев:<br>соштев:<br>соштев:<br>соштев:<br>соштев:<br>Си:<br>си:<br>си:<br>си:<br>си:<br>си:<br>си:<br>си:<br>Си:<br>си:<br>Си:<br>Си:<br>Си:<br>Си:<br>Си:<br>Си:<br>Си:<br>Си:<br>Си:<br>Си:<br>Си:<br>Си:<br>Си:<br>Си:<br>Си:<br>Си:<br>Си:<br>Си:<br>Си:<br>Си:<br>Cá:<br>Cá:<br>Cá:<br>Cá:<br>Cá:<br>Cá:<br>Cá:<br>Cá:<br>Cá:<br>Cá:<br>Cá:<br>Cá:<br>Cá:<br>Cá:<br>Cá:<br>Cá:<br>Cá:<br>Cá:<br>Cá:<br>Cá:<br>Cá:<br>Cá:<br>Cá:<br>Cá:<br>Cá:<br>Cá:<br> |
| uk | 2000/14/EC: Виміріна звукова потукісту 87 dB(A), потукіа K = 2,5 dB, rapантува звукова потукісту88 dB(A)Пюседу ооч:<br>пюседу:<br>пюседу:<br>пюседу:<br>пюседу:<br>пюседу:<br>пюседу:<br>пюседу:<br>пюседу:<br>пюседу:<br>пюседу:<br>пюседу:<br>пюседу:<br>пюседу:<br>Пюседу:<br>пюседу:<br>пюседу:<br>Пюседу:<br>Пюседу:<br>Пюседу:<br>Пюседу:<br>Пюседу:<br>Пюседу:<br>Пюседу:<br>Пюседу:<br>Пюседу:<br>Пюседу:<br>Пюседу:<br>Пюседу:<br>Пюседо:<br>Пюседо:<br>Пюседо:<br>Пюседо:<br>Пюседо:<br>Пюседо:<br>Пюседо:<br>Пюседо:<br>Пюседо:<br>Пюседо:<br>Пюседо:<br>Пюседо:<br>Пюседо:<br> Пюседо:<br>Пюседо:<br>Пюседо:<br>Пюседо:<br>Пюседо:<br>Пюседо:<br>Пюседо:<br>Пюседо:<br>Пюседо:<br>Пюседо:<br>Пюседо:<br>Пюседо:<br>Пюседу:<br>Пюседу:<br>Пюседу:<br>Пюседу:<br>Пюседу:<br>Пюседу:<br>Пюседу:<br>Пюседу:<br>Пюседу:<br>Пюседу:<br>Пюседу:<br>Пюседу:<br> Пюседу:<br>Пюседу:<br>Пюседу:<br>Пюседу:<br>Пюседу:<br>Пюседу:<br>Пюседу:<br>Пюседу:<br>Пюседу:<br>Пюседу:<br>Пюседу:<br>Пюседу:<br>Пюседи:<br>Пюседи:<br>Пюседи:<br>Пюседи:<br>Пюседи:<br>Пюседи:<br>Пюседи:<br>Пюседи:<br>Пюседи:<br>Пюседи:<br>Пюседи:<br>Пюседи:<br>Пюседи:<br> Пюседи:<br>Пюседи:<br>Пюседи:<br>Пюседи:<br>Пюседи:<br>Пюседи:<br>Пюседи:<br>Пюседи:<br>Пюседи:<br>Пюседи:<br>Пюседи:<br>Пюседи:<br>Пюседу:<br>Пюседу:<br>Пюседу:<br>Пюседу:<br>Пюседу:<br>Пюседу:<br>Пюседу:<br>Пюседу:<br>Пюседу:<br>Пюседу:<br>Пюседу:<br>Пюседу:<br>Ту:[Ф�ы:<br>Tу:[Ф�ы:<br>Tу:[Ф�ы:<br>Tу:[Ф�ы:<br>Tу:[Ф�ы:<br>Tу:[Ф�ы:<br>Tу:[Ф�ы:<br>Tу:[Ф�ы:<br>Tу:[Ф�ы:<br>Tу:[Ф�ы:<br>Tу:[Ф�ы:<br>Tу:[Ф�ы:<br>Tу:[Ф�ы:<br>Tу:[Ф果:<br>Tу:[Ф果:<br>Tу:[Ф果:<br>Tу:[Ф果:<br>Tу:[Ф果:<br>Tу:[Ф果:<br>Tу:[Ф果:<br>Tу:[Ф果:<br>Tу:[Ф果:<br>Tу:[Ф果:<br>Tу:[Ф果:<br>Tу:[Ф果:<br>Tу:[Ф果:<br>Tу:[Ф果:<br>Tу:[Ф果:<Br>Ту:[Ф果:<Br>Ту:[Ф果:<Br>Ту:[Ф果:<Br>Ту:[Ф果:<Br>Ту:[Ф果:<Br>Ту:[Ф果:<Br>Ту:[Ф果:<Br>Ту:[Ф果:<Br>Ту:[Ф果:<Br>Ту:[Ф果:<Br>Ту:[Ф果:<Br>Ту:[Ф果:<Br>Ту:[Фь:<Br>Ту:[Фь:<Br>Ту:[Фь:<Br>Ту:[Фь:<Br>Ту:[Фь:<Br>Ту:[Фь:<Br>Ту:[Фь:<Br>Ту:[Фь:<Br>Ту:[Фь:<Br>Ту:[Фь:<Br>Ту:[Фь:<Br>Ту:[Фь:<Br>Ту:[Фь:<Br>Tу:[Фь:<Br>Ту:[Фь:<Br>Ту:[Фь:<Br>Ту:[Фь:<Br>Ту:[Фь:<Br>Ту:[Фь:<Br>Ту:[Фь:<Br>Ту:[Фь:<Br>Ту:[Фь:<Br>Ту:[Фь:<Br>Ту:[Фь:<Br>Ту:[Фь:<Br>Ту:[Фль:<Br>Ту:[Фь:<Br>Ту:[Фь:<Br>Ту:[Фь:<Br>Ту:[Фь:<Br>Ту:[Фь:<Br>Ту:[Фь:<Br>Ту:[Фь:<Br>Ту:[Фь:<Br>Ту:[Фь:<Br>Ту:[Фь:<Br>Ту:[Фь:<Br>Ту:[Фь:<Br>时 |
| ko | 2000/14/EC: Изера:<br>небуяна дусы sonore 87 dB(A), incertitudine K = 2,5 dB, nivalgarant al puteri sonore 88 dB(A)Procedură de evaluarare a conformitatei potrivit Anexei VI. Categorie produse: 32Organism notificat: DEKRA Certification B.V. Meander 1051, 6825 MJ Arnhem, Netherlands, Nr.0344Documentatie tehnica la:* |
| bg | 2000/14/EO: Изера:<br>NИВо на звукова за мочиост 87 dB(A), Neoproduzione leocst K = 2,5 dB, rapa:[ri:n]no HIBo ha звукова за мочиost 87 dB(A), Neoproduzione leocst K = 2,5 dB, rapa:[ri:n]no HIBo haMOùncôts ha звука 88 dB(A) |
VI
| Métod à ouencha Ha cboTBeCTBHeTo CbIaChNo pRnloJHne VI. Kateropn IpoDyKT: 32
Ceptnfchpauo opraH: DEKRA Certification B.V. Meander 1051, 6825 MJ Arnhem, Netherlands, Nr.0344
Texhuecka dokumentaunipn:* |
| mk | 2000/14/EC: Измерedo НИВо Ha 3bUча щачina 87 dB(A), HeSsIgypnoct K = 2,5 dB,ЗагаHTIpaHo NИВо Ha 3bUча
jaunna 88 dB(A)
Постankа за пioцени на соobpaanocstс соред пioлог Vl. KateropnJa Ha пioивдо; 32
Назанeо ТELо: DEKRA Certification B.V. Meander 1051, 6825 MJ Arnhem, Netherlands, Nr.0344
Тechнчka dokumentaunja kaj:* |
| sr | 2000/14/EC: izmereni nivo ostvarene buke 87 dB(A), nepouzdanost K=2,5 dB, garantovani nivo ostvarene buke
88 dB(A)
Postupak ocenjivanja usaglašenosti prema prilogu VI. Kategorija proizvoda: 32
nadležna instanca: DEKRA Certification B.V. Meander 1051, 6825 MJ Arnhem, Netherlands, Nr.0344
Тechnička dokumentaci ja kod: * |
| sl | 2000/14/ES: Izmerjena raven zvočne moci 87 dB(A), negotovost K = 2,5 dB, zagotovljena raven zvočne moci
88 dB(A)
Postopek za presojo skladnosti v skladu s prilogo VI. Kategorija izdelka: 32
Pristojni organ: DEKRA Certification B.V. Meander 1051, 6825 MJ Arnhem, Netherlands, Nr.0344
Тechnična dokumentaci pri:* |
| hr | 2000/14/EZ: Izmjerena razina učinka buke 87 dB(A), nesigurnost K = 2,5 dB, zajamčena razina učinka buke 88 dB(A)
Postupak ocjenjivanja sukladnosti prema dodatku VI. Kategorija proizvoda: 32
Tijelo za ocjenjivanje sukladnosti: DEKRA Certification B.V. Meander 1051, 6825 MJ Arnhem, Netherlands,
Nr.0344
Тechnička dokumentaci se moze dobiti kod: * |
| et | 2000/14/EÜ: Mõödetud helivöimsustase 87 dB(A), mõötemääramatus K = 2,5 dB, garanteeritud helivöimsustase
88 dB(A)
Vastavusehindamise meetod vastavalt lisale VI. Tootekategoia: 32
Teavitut asutus: DEKRA Certification B.V. Meander 1051, 6825 MJ Arnhem, Netherlands, Nr.0344
Тechnilised dokumendid saadaval:* |
| lv | 2000/14/EK: izméritais troksna jaudas limenis ir 87 dB(A), izkliede K ir = 2,5 dB, garantētais troksna jaudas limenis ir
88 dB(A)
Atbilstibas novertēsana ir veikta saskañā ar pielikumu VI. Izstradājuma kategorija: 32
Deklarëtā pärbaudes vieta: DEKRA Certification B.V. Meander 1051, 6825 MJ Arnhem, Netherlands, Nr.0344
Тechniskā dokumentācja no:* |
| lt | 2000/14/EB: iSmatuotas garso galios lygis 87 dB(A), paklaida K = 2,5 dB, garantootas garso galios lygis 88 dB(A)
Atitikties vertinimas atliktas pagal prieda VI. Gaminio kategorija: 32
Notifikuota jstaiga: DEKRA Certification B.V. Meander 1051, 6825 MJ Arnhem, Netherlands, Nr.0344
Technine dokumentacja saugoma:* |
| BOSCH* Robert Bosch Power Tools GmbH, PT/ECS,
70538 Stuttgart, GERMANY |
| Henk Becker Helmut Heinzelmann |
| Chairman of Executive Head of Product Certification |
| Management |
| ### i.v. ### |
| Robert Bosch Power Tools GmbH, 70538 Stuttgart, GERMANY
Stuttgart, 15.07.2020 |