HG5012K - Heat gun MAKITA - Free user manual and instructions
Find the device manual for free HG5012K MAKITA in PDF.
| Product type | Heat gun |
| Brand | Makita |
| Model | HG5012K |
| Voltage (depending on version) | 230 V, 120 V or 100 V |
| Frequency | 50/60 Hz |
| Power (depending on voltage) | 1600 W / 1800 W / 2000 W |
| Max temperature (position II) | 500 °C (some versions up to 650 °C) |
| Adjustable temperature range | 80 - 650 °C (depending on version) |
| Airflow (position I/II) | 250 - 550 l/min depending on setting |
| Dimensions (L x W x H) | 230 x 80 x 240 mm |
| Weight (without cable) | 0.58 - 0.63 kg depending on version |
| Protection class | II (double insulation) |
| Number of switch positions | 3 (0, I, II) |
| Electronic adjustment | Yes (temperature and airflow) |
| Digital display | Yes (for C versions) |
| Preset functions | 14 programs (shrinking, welding, stripping, etc.) |
| Standby mode | Yes |
| Cool Down mode | Yes |
| Safety | Double insulation, overheat protection, automatic shut-off |
| Main uses | Shrinking, plastic welding, paint stripping, drying, forming, brazing, disinfection |
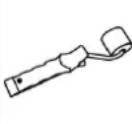
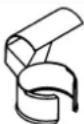
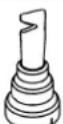
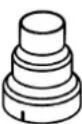
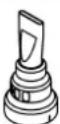
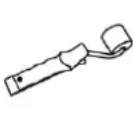
| Included accessories | Original nozzles (depending on version) |
Frequently Asked Questions - HG5012K MAKITA
User questions about HG5012K MAKITA
0 question about this device. Answer the ones you know or ask your own.
Ask a new question about this device
Download the instructions for your Heat gun in PDF format for free! Find your manual HG5012K - MAKITA and take your electronic device back in hand. On this page are published all the documents necessary for the use of your device. HG5012K by MAKITA.
USER MANUAL HG5012K MAKITA
text_image
HG651C 1 2 3 0 1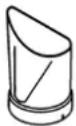 |  | 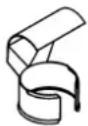 |  |  |  |  | 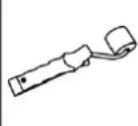 | |
| A | ● | ● | ● | |||||
| B | ● | ● | ● | ● | ||||
| C | ● | ● | ● | ● | ● | ● | ● | ● |
Inbetriebnahme
WARNING: Non-observance of the safety rules while working with the hot air tool can lead to fire, explosion, electric shock or
burns. Read the operating instructions before using the tool and always observe the safety rules. Save these instructions and give them to persons that have not been instructed before they use the tool.

WARNING: A damaged casing or an opened unit can lead to a hazardous electric
a damaged unit into operation. Do not drill into the casing, e.g., to attach a company label. Before any work on the unit, pull the mains plug.

WARNING: A damaged power cord can lead to a hazardous electric shock. Check
the unit when the power cord is damaged. Always have a damaged cord replaced through a specialist. Do not wrap the cord around the unit and protect it from oil, heat and sharp edges. Do not carry the unit by the cord and do not use the cord to pull the plug from the outlet.

WARNING: Do not work in rain or in a moist or wet environment. This can lead to a hazardous electric shock. Keep the unit
dry. Store the unit in a dry location when not in use. Consider the weather conditions. Do not work in wet sanitary facilities. Avoid body contact with grounded cables or surfaces, such as pipes, radiators, ranges and refrigerators.

WARNING: Connect power tools that are used in the open via a residual current circuit breaker (RCCB).

WARNING: Danger of explosion! The hot air tool can explosively ignite combustible fluids and gases. Do not work in a potentially
explosive environment. Check the surrounding before starting to work. Do not work on fuels or gas containers or in their vicinity, even when they are empty.

WARNING: Danger of fire! Heat can reach combustible materials that are hidden behind coverings, in ceilings, floors or cavities, and
ignite them. Inspect the work area before starting to work and in case of doubt, abstain from using the hot air tool. Do not point the unit at the same spot for extended periods.

WARNING: Danger of fire! An unsupervised operating hot air tool can set fire to objects that are close by. The unit must be supervised
at all times during operation. When allowing the switched off unit to cool down, always place it down vertical and standing. Allow the unit to cool down completely.

WARNING: Danger of fire! When working plastics, varnish or similar materials, gases develop that are easily inflammable and can
lead to explosions. Be prepared for flames to develop and keep suitable fire-extinguishing means at hand.

WARNING: Danger of intoxication! When working plastics, varnish or similar materials, gases develop that can be aggressive or
toxic. Avoid breathing in vapours, even when they appear to be harmless. Always provide for good ventilation of the work area or wear a respirator.

WARNING: Danger of injury! The hot air jet can injure persons or animals. Touching the hot tube of the heating element or the nozzle
leads to skin burns. Keep children and other persons away from the unit. Do not touch the tube of the heating element or the nozzle when they are hot. Do not use the unit as a hair dryer; it develops much more heat than a hair dryer. Do not use the unit to heat up fluids or to dry objects or materials that are destroyed through the influence of hot air.

WARNING: Unintentional starting or unexpected switching on of the heating element after actuation of the thermal relay can lead
to injuries. Make sure that the switch is set to OFF when connecting the unit to the mains supply. Switch the unit OFF when the thermal relay has actuated.

WARNING: Danger of injury! Using an air-flow reflection nozzle that is not suitable for your unit can lead to burns. Use only original
accessories for your model that are listed in these operating instructions.

WARNING: Danger of injury and fire! The hot air tool is dangerous for children. Keep the hot air tool out of the reach of children

DANGER: Danger of overheating! Incorrect handling can lead to an accumulation of heat and thus damage the unit. Do not operate the
unit when it is placed down horizontally or when pointed downward. The air-intake opening and the nozzle must not be covered. Use only nozzles that are suitable for your unit.

Recycle raw materials instead of disposing as waste. The unit, accessories and packaging should be sorted for environmentally-
friendly recycling.
IMPORTANT SAFETY INSTRUCTIONS\*
This appliance has a polarized plug (one blade is wider than the other). To reduce the risk of electric shock, this plug is intended to fit in a polarized outlet only one way. If the plug does not fit fully in the outlet, reverse the plug. If it still does not fit, contact a qualified electrician. Do not modify the plug in any way.
READ THESE INSTRUCTIONS
Warning: Extreme care should be taken when stripping paint. The peelings, residue and vapors of paint may contain lead, which is poisonous. Any pre-1977 paint may contain lead and paint applied to homes prior to 1950 is likely to contain lead. Once deposited on surfaces, hand to mouth contact can result in the ingestion of lead. Exposure to even low levels of lead can cause irreversible brain and nervous system damage; young and unborn children are particularly vulnerable.
Before beginning any paint removal process you should determine whether the paint you are removing contains lead. This can be done by your local health department or by a professional who uses a paint analyzer to check the lead content of the paint to be removed. LEAD-BASED PAINT SHOULD ONLY BE REMOVED BY A PROFESSIONAL AND SHOULD NOT BE REMOVED USING A HEAT GUN.
Persons removing paint should follow these guidelines:
- Move the work piece outdoors. If this is not possible, keep the work area well ventilated. Open the windows and put an exhaust fan in one of them. Be sure the fan is moving the air from inside to outside.
- Remove or cover any carpets, rugs, furniture, clothing, cooking utensils and air ducts.
- Place drop cloths in the work area to catch any paint chips or peelings. Wear protective clothing such as extra work shirts, overalls and hats.
- Work in one room at a time. Furnishings should be removed or placed in the center of the room and covered. Work areas should be sealed off from the rest of the dwelling by sealing doorways with drop cloths.
- Children, pregnant or potentially pregnant women and nursing mothers should not be present in the work area until the work is done and all clean up is complete.
6.* Wear dust respirator mask or a dual filter (dust and fume) respirator mask which has been approved by the Occupational Safety and Health Administration (OSHA), the National Institute of Safety and Health (NIOSH), or the United States Bureau of Mines. These masks and replaceable filters are readily available at major hardware stores. Be sure the mask fits. Beards and facial hair may keep masks from sealing properly. Change filters often. DISPOSABLE PAPER MASKS ARE NOT ADEQUATE. - Use caution when operating the heat gun. Keep the heat gun moving as excessive heat will generate fumes which can be inhaled by the operator.
- Keep food and drink out of the work area. Wash hands, arms and face and rinse mouth before eating or drinking. Do not smoke or chew gum or tobacco in the work area.
- Clean up all removed paint and dust by wet mopping the floors. Use a wet cloth to clean all walls, sills and any other surface where paint or dust is clinging. DO NOT SWEEP, DRY DUST OR VACUUM. Use a high phosphate detergent or trisodium phosphate (TSP) to wash and mop areas.
- At the end of each work session put the paint chips and debris in a double plastic bag, close it with tape or twist ties and dispose of properly.
- Remove protective clothing and work shoes in the work area to avoid carrying dust into the rest to the dwelling. Wash work clothes separately. Wipe shoes off with a wet rag that is then washed with the work clothes. Wash hair and body thoroughly with soap and water.
* Applicable for cUL listed products only.
Technical Data
| A B C | ||||||||||||||||
| Voltage [V] 230 120 100 230 120 100 230 120 100 230 120 100 | ||||||||||||||||
| Frequency [Hz] 50/60 50/60 50/60 | ||||||||||||||||
| Power [W] 1600 1200 1100 | 1800 1400 | 1200 2000 | 500 1300 | |||||||||||||
| Current con- [A]sumption | 7 10 11 | 8 12 12 9 | 3 13 | |||||||||||||
| Switch positions | 0 - | - || | 0 - | - || | 0 - | | |||||||||||||
| Temperature | Position[°C][°F] | I | II | I | II | I | II | Manually adjustable | Electronically adjustable and controlled | |||||||
| 350 | 500 | 500 | 500 | 100-550 | 80-550 | 80-550 | 80-650 | 80-650 | 80-650 | |||||||
| 660 | 930 | 930 | 930 | 210-1020 | 180-1020 | 180-1020 | 180-1200 | 180-1200 | 180-1200 | |||||||
| Air flow | Position[l/min][cfm] | I | II | I | II | I | II | I | II | I | II | I | II | Electronically adjustable | ||
| 350 | 500 | 250 | 400 | 250 | 400 | 250 | 550 | 250 | 450 | 250 | 450 | 200-550 | 200-500 | 200-500 | ||
| 12.5 | 17.5 | 8.8 | 14 | 8.8 | 14 | 8.8 | 19.5 | 8.8 | 16 | 8.8 | 16 | 7-19.5 | 7-17.5 | 7-17.5 | ||
| Weight without cord | [kg][lbs] | 0.58 | 0.60 | 0.63 | ||||||||||||
| 1.28 | 1.32 | 1.39 | ||||||||||||||
| DimensionsL x B x H | [mm][inch] | 230 x 80 x 240 | ||||||||||||||
| 9.1 x 3.2 x 9.5 | ||||||||||||||||
| Protection class | II/ □ (Double insulated) | |||||||||||||||
Intended Use
When observing the safety rules and using the original accessories, this hot air tool is intended for all applications with hot air that are listed in these operating instruction
| Applications | A | B C | |
| Shrinking of shrinkdown tubing, solder connectors and solder terminals, packaging and electrical components. | ● | ● | ● |
| Deforming of articles made from acrylic, PVC, and polystyrene, tubing, plates and profiles, as well as moist woods. | ● | ● | ● |
| Welding of thermoplastic polymer, flooring materials of PVC and linoleum, PVC-coated fabric, tar-paulins and foils. | ● | ● | |
| Soldering of tin, special silver solder, SMD elements, cable lugs, and for loosening soldered connec-tions. | ● | ● | |
| Paint removal - Removal of old and even thick coatings of oil paint, varnish and synthetic plaster. | ● | ● | ● |
| Drying of colour shade samples, filler, adhesives, construction joints and stucco forms. | ● | ● | ● |
| Joining adhesives - Large-surface gluing with contact adhesives, activation of pressure-sensitive adhesives, acceleration of bonding processes, releasing of bonding points as well as releasing or bonding of edge band or venee. | ● | ● | ● |
| Defrosting of icy stairs and steps, door locks, trunk lids, car doors or water pipes, as well as for defrosting refrigerators and ice boxes. | ● | ● | ● |
| Disinfection - With hot air of 600 °C, you can quickly rid animal sties/stables of bacteria. Wood-worm infestation can be controlled (Caution: Danger of fire! Do not heat up the wooden surface exces-sively). | ● | ● |
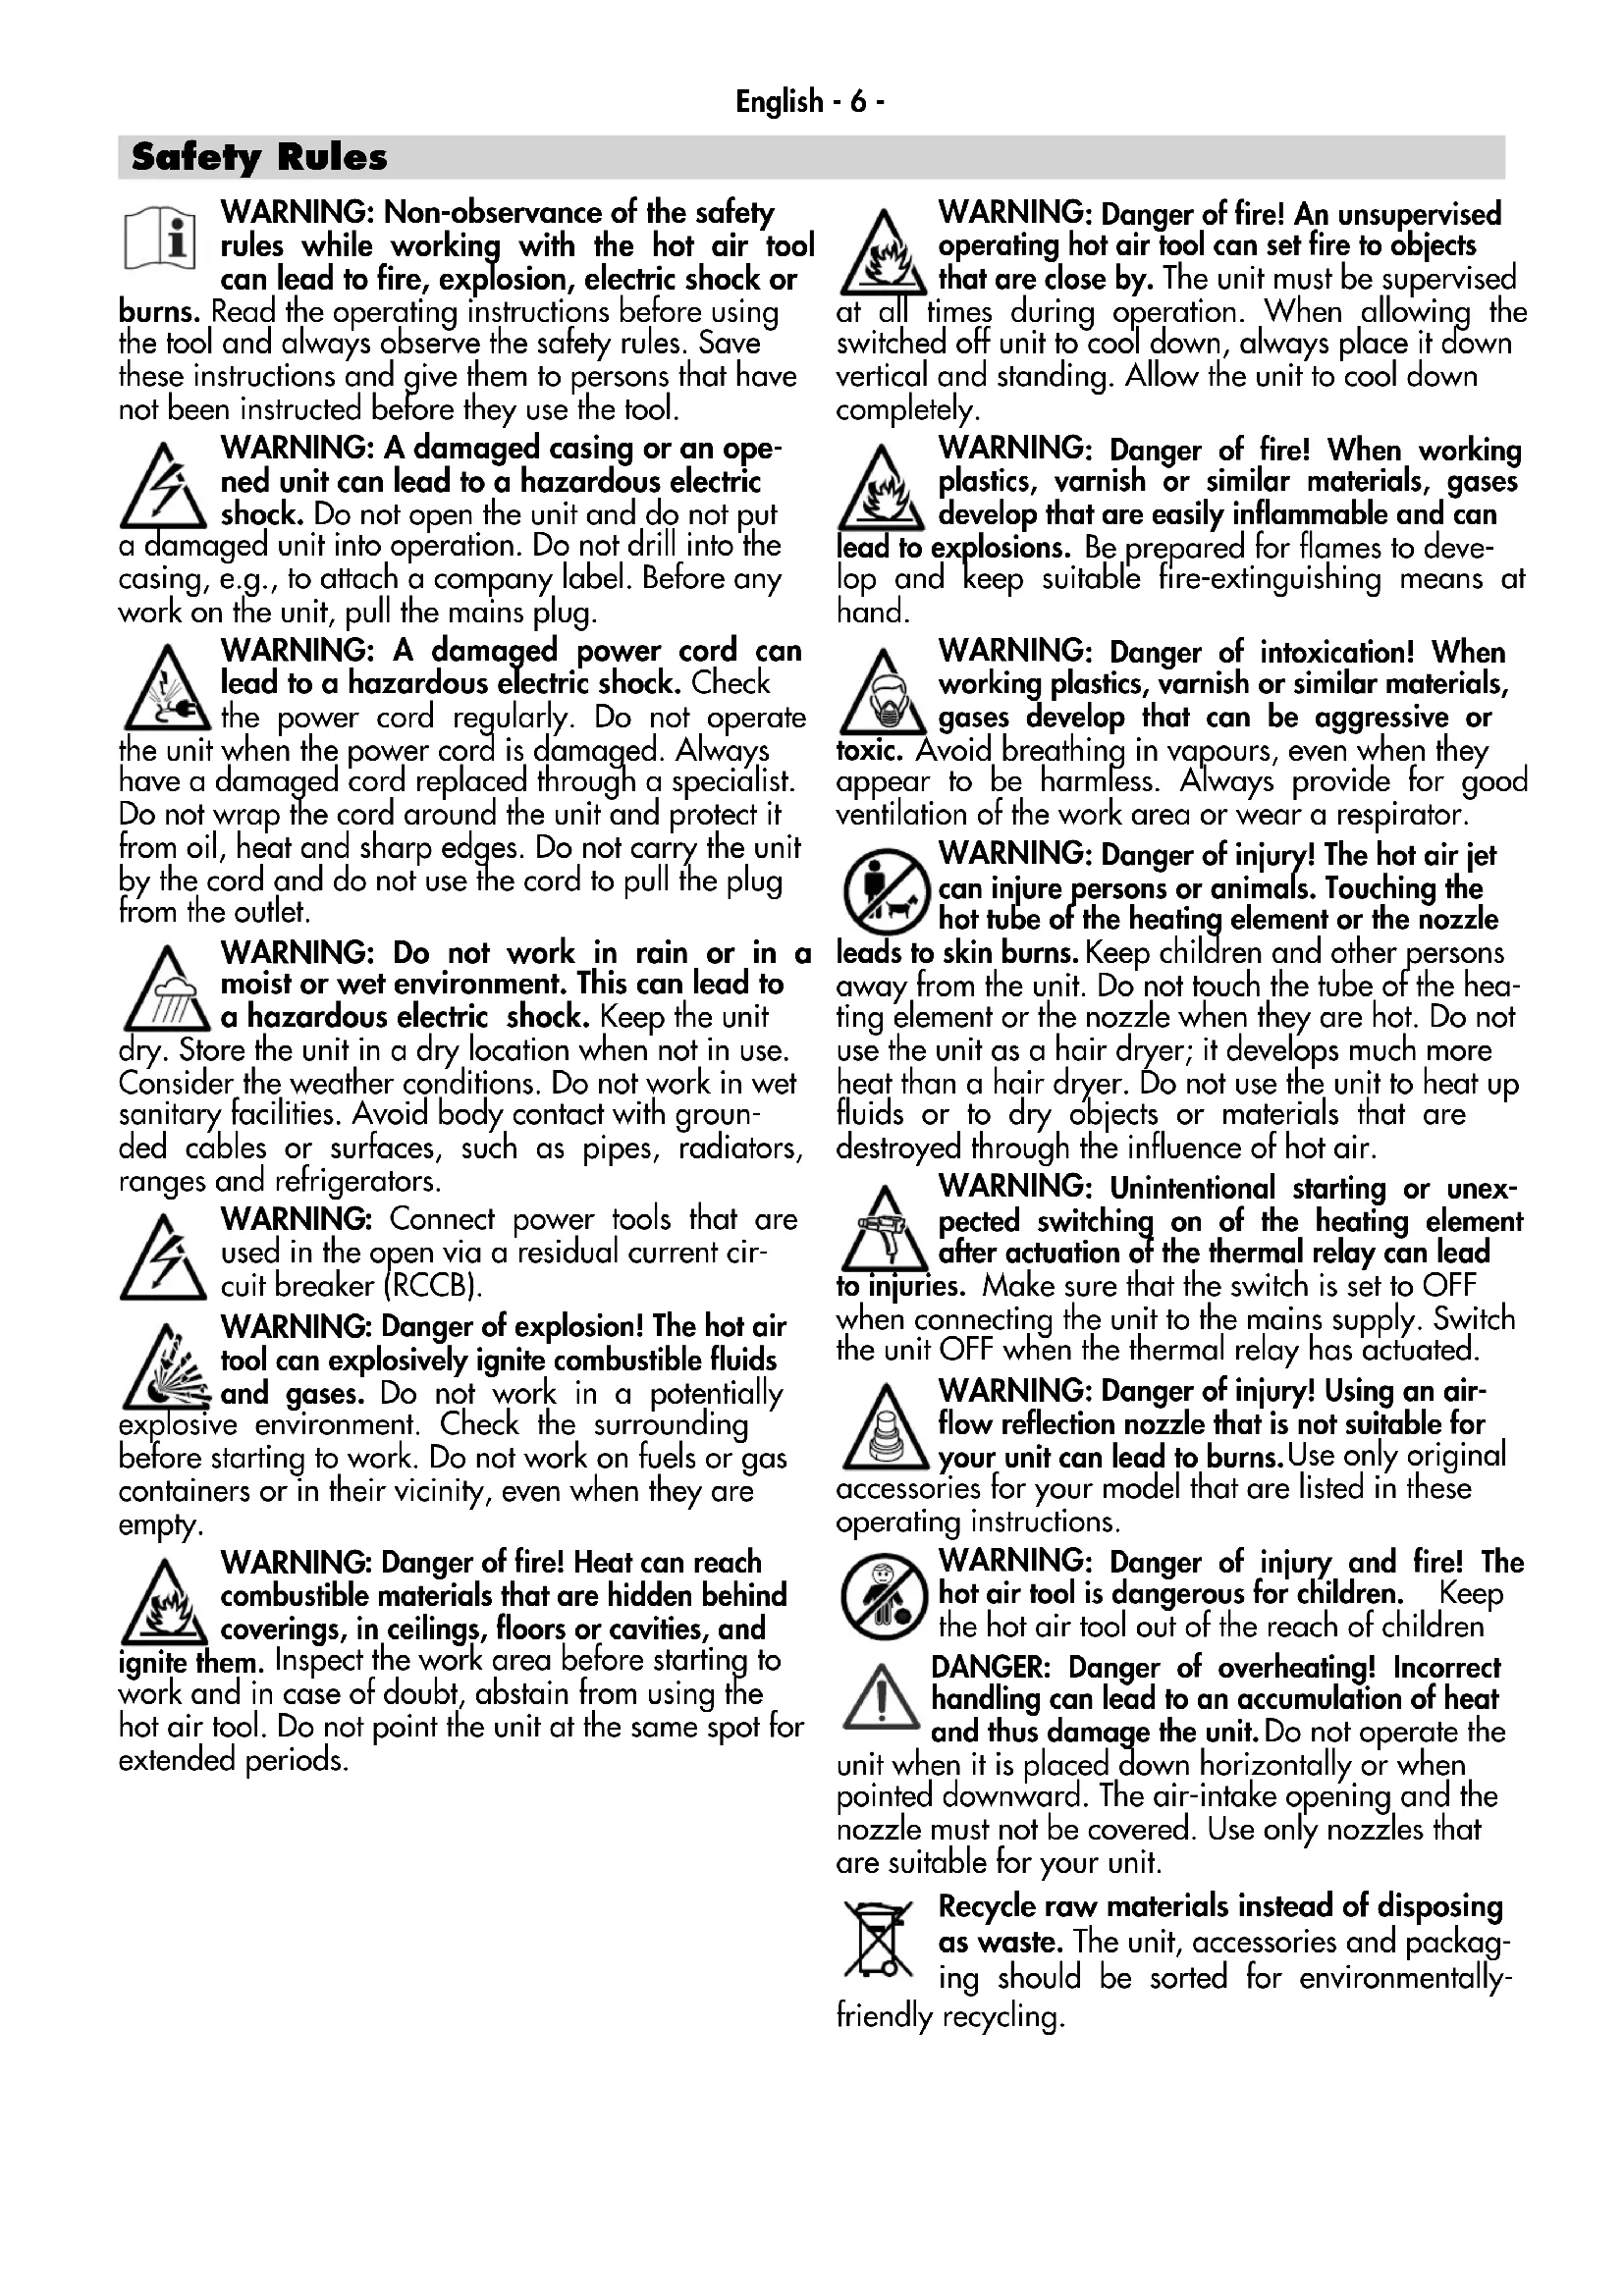
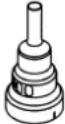
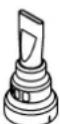
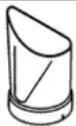
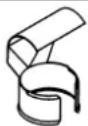
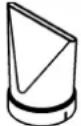
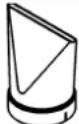
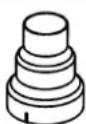
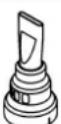
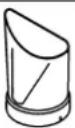
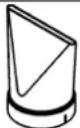
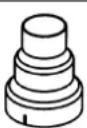
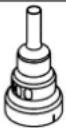
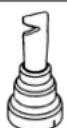
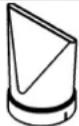
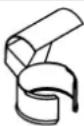
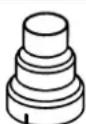
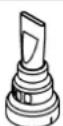
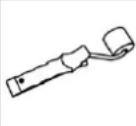
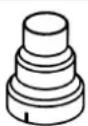
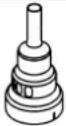
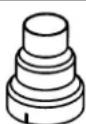
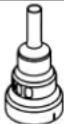
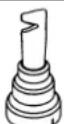
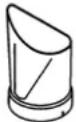
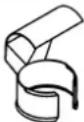
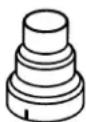
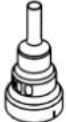
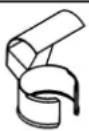
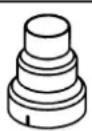
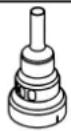
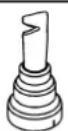
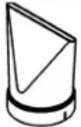
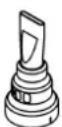
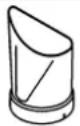
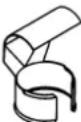
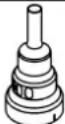
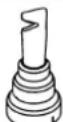
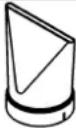
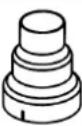
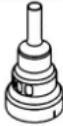
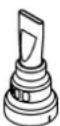
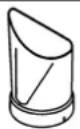
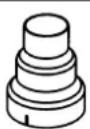
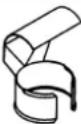
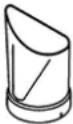
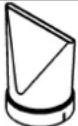
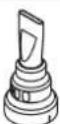
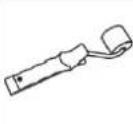
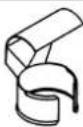
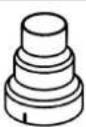
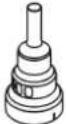
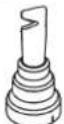
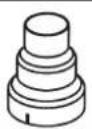
Attaching the Nozzle onto the Heating-element Tube 3
A falling down nozzle can set an object on fire. Nozzles must be mounted firmly and secure on the unit.
⚠ Touching a hot nozzle can lead to serious burns. Before attaching or replacing a nozzle, allow the unit to cool down completely or use a suitable tool.
A hot nozzle can set a surface on fire. Place down hot nozzles only on fire-proof surfaces.
An incorrect or defective nozzle can lead to heat accumulation and damage the unit. Use only original nozzles according to the table that are suitable for your unit.
 |  |  |  |  |  |  |  | |
| A | ● | ● | ● | |||||
| B | ● | ● | ● | ● | ||||
| C | ● | ● | ● | ● | ● | ● | ● | ● |
Putting into Operation
Observe the mains voltage: The voltage of the power source must agree with the value given on the name-plate of the unit. Extension cords must have a conductor cross section of 2 × 1.5 mm^2 min.
Switching On:
| A: Set the switch 1 to I or II. | Set the switch 1 to 0. |
| B: Set the switch 1 to I or II. Set the temperature controller 2 as required. | To cool the unit off, set the switch 1 to II and the temperature controller 2 to MIN. When the unit has cooled off, set the switch 1 to 0. |
| C: Set the switch 1 to I. Select the desired program or program the temperature and air flow as required (see “Settings”). | To cool off the unit, have it operate on COOL DOWN (see “Settings”).When the unit has cooled off, set the switch 1 to 0. |
Adjusting the Settings on the Display 2
Begin the selection with the SELECT pushbutton (menu). Note: When an indication flashes in the display, a change can be initiated with either PLUS or MINUS. Repeated actuation of SELECT leads to the next step.
Language selection, temperatur

flowchart
graph LR
    A["SELECT MENU"] --> B["ENGLISH"]
    B --> C["SELECT MENU"]
    C --> D["FAHRENHEIT"]
    D --> E["SELECT MENU"]
    E --> F["SAVE"]
    F --> G["1x"]
    G --> H["1x"]
    H --> I["SELECT MENU"]
    I --> J["Portugues"]
    J --> B
    style A fill:#f9f,stroke:#333
    style I fill:#f9f,stroke:#333
Selecting the function program

flowchart
graph LR
    A["SELECT MENU"] --> B["1-FREE"]
    B --> C["WELDING"]
    C --> D["1 x SELECT MENU"]
    D --> E["-450°C"]
    E --> F["410°C"]
    F --> G["1 x SELECT MENU"]
    G --> H["-"]
    H --> I["+"]
    I --> J["Output"]
    style A fill:#f9f,stroke:#333
    style J fill:#bbf,stroke:#333
- 1-Free setting 80 °C/5 8. Welding PPEPDM 280 °C/5
- 2-Free setting 80 °C/5 9. Welding HD-PE 300 °C/3
- Shrinking 450 °C/5 10. Welding PP 320 °C/3
- Forming 500 °C/4 11. Welding PVC-U 340 °C/3
- Soldering copper 650 °C/3 12. Welding ABS 360 °C/3
- Drying paint 650 °C/5 13. Welding PC 370 °C/3
- Paint stripping 425 °C/5 14. Welding floor-foil 450 °C/3
The keyword of the selected function program is indicated by flashing. Longer text begins to move after 2 seconds and returns to the keyword after 2 passes. Within this period, the SELECT pushbutton can be pressed again to adjust the temperature or the air flow.
Selecting STANDBY or COOL DOWN

flowchart
graph LR
    A["STAND BY"] --> B["COOL DOWN"]
    B --> C["STAND BY"]
    C --> D["STAND-BY"]
    D --> E["SELECT MENU"]
    E --> B
- Select STANDBY when interrupting your work for short time. The energy absorption is reduced.
- At the end of your work, always select COOL DOWN. When the unit has cooled off, switch it off and pull the plug from the receptacle.
Avvertenze

 |  |  |  |  |  |  |  | |
| A | ● | ● | ● | |||||
| B | ● | ● | ● | ● | ||||
| C | ● | ● | ● | ● | ● | ● | ● | ● |
Messa in funzione
 |  |  |  |  |  |  |  | |
| A | ● | ● | ● | |||||
| B | ● | ● | ● | ● | ||||
| C | ● | ● | ● | ● | ● | ● | ● | ● |
Mise en service
 |  |  |  |  |  |  |  | |
| A | ● | ● | ● | |||||
| B | ● | ● | ● | ● | ||||
| C | ● | ● | ● | ● | ● | ● | ● | ● |
Puesta en marcha
 |  |  |  |  |  |  |  | |
| A | ● | ● | ● | |||||
| B | ● | ● | ● | ● | ||||
| C | ● | ● | ● | ● | ● | ● | ● | ● |
 |  |  |  |  |  |  |  | |
| A | ● | ● | ● | |||||
| B | ● | ● | ● | ● | ||||
| C | ● | ● | ● | ● | ● | ● | ● | ● |
Ingebruikneming
 |  |  |  |  |  |  |  | |
| A | ● | ● | ● | |||||
| B | ● | ● | ● | ● | ||||
| C | ● | ● | ● | ● | ● | ● | ● | ● |
Ibrugtagning
 |  |  |  |  |  |  |  | |
| A | ● | ● | ● | |||||
| B | ● | ● | ● | ● | ||||
| C | ● | ● | ● | ● | ● | ● | ● | ● |
Igangsetting
Ta hensyn til strømspenningen: Spenningen til strømkilden må stemme overens med angivelsene på apparatets typeskilt. Skjøteledningen må ha et tverrsnitt på min. 2 x 1.5 mm ^2 .
Innkobling:
 |  |  |  |  |  |  |  | |
| A | ● | ● | ● | |||||
| B | ● | ● | ● | ● | ||||
| C | ● | ● | ● | ● | ● | ● | ● | ● |
Käyttöönotto
 |  |  |  |  |  |  |  | |
| A | ● | ● | ● | |||||
| B | ● | ● | ● | ● | ||||
| C | ● | ● | ● | ● | ● | ● | ● | ● |
Driftstart
 |  |  |  |  |  |  |  | |
| A | ● | ● | ● | |||||
| B | ● | ● | ● | ● | ||||
| C | ● | ● | ● | ● | ● | ● | ● | ● |
Εκκίνηση
 |  |  |  |  |  |  |  | |
| A | ● | ● | ● | |||||
| B | ● | ● | ● | ● | ||||
| C | ● | ● | ● | ● | ● | ● | ● | ● |
Çalıştırma
 |  |  |  |  |  |  |  | |
| A | ● | ● | ● | |||||
| B | ● | ● | ● | ● | ||||
| C | ● | ● | ● | ● | ● | ● | ● | ● |
Uruchomienie
 |  |  |  |  |  |  |  | |
| A | ● | ● | ● | |||||
| B | ● | ● | ● | ● | ||||
| C | ● | ● | ● | ● | ● | ● | ● | ● |
Üzembe helyezés
 |  |  |  |  |  |  |  | |
| A | ● | ● | ● | |||||
| B | ● | ● | ● | ● | ||||
| C | ● | ● | ● | ● | ● | ● | ● | ● |
Uvedení do provozu
 |  |  |  |  |  |  |  | |
| A | ● | ● | ● | |||||
| B | ● | ● | ● | ● | ||||
| C | ● | ● | ● | ● | ● | ● | ● | ● |
 |  |  |  |  |  |  |  | |
| A | ● | ● | ● | |||||
| B | ● | ● | ● | ● | ||||
| C | ● | ● | ● | ● | ● | ● | ● | ● |
Punere în funcțiune
 |  |  |  |  |  |  |  | |
| A | ● | ● | ● | |||||
| B | ● | ● | ●● | |||||
| C | ● | ● | ● | ● | ● | ● | ● | ● |
Zagon
 |  |  |  |  |  |  |  | |
| A | ●● | ● | ||||||
| B | ●● | ●● | ||||||
| C | ● | ● | ● | ● | ● | ● | ● | ● |
 |  |  |  |  |  |  |  | |
| A | ● | ● | ● | |||||
| B | ● | ● | ● | ● | ||||
| C | ● | ● | ● | ● | ● | ● | ● | ● |
Kasutamine
 |  |  |  |  |  |  |  | |
| A | ● | ● | ● | |||||
| B | ● | ● | ● | ● | ||||
| C | ● | ● | ● | ● | ● | ● | ● | ● |
Darbo eiga
 |  |  |  |  |  |  | [XYZ5] | |
| A | ● | ● | ● | |||||
| B | ● | ● | ● | ● | ||||
| C | ● | ● | ● | ● | ● | ● | ● | ● |
Ekspluatēšana
 |  |  |  |  |  |  |  | |
| A | ● | ● | ● | |||||
| B | ● | ● | ● | ● | ||||
| C | ● | ● | ● | ● | ● | ● | ● | ● |
Работа с прибором
 |  |  |  |  |  |  |  | |
| A | ● | ● | ● | |||||
| B | ● | ● | ● | ● | ||||
| C | ● | ● | ● | ● | ● | ● | ● | ● |
Vërja në punë
 |  |  |  |  |  |  |  | |
| A | ● | ● | ● | |||||
| B | ● | ● | ● | ● | ||||
| C | ● | ● | ● | ● | ● | ● | ● | ● |
Puštanje u rad
Pridržavati se mrežnog napona: Napon izvora struje treba odgovarati podacima sa tipske pločice uređaja. Produžni kabel mora imati presjek od 2 x 1.5 mm².
Uključivanje:
| A: Namjestite prekidač 1 na I ili II. | Namjestite prekidač 1 na 0. |
| B: Namjestite prekidač 1 na I ili II. Podesite regulator temperature 2 prema potrebi. | Namjestite za hlađenje prekidač 1 na II i regulator temperature 2 na MIN. Kada se uređaj ohladi, namjestite prekidač 1 na 0. |
| C: Namjestite prekidač 1 na I. Odaberite željeni program ili programirajte temperaturu i struju zraka prema vašim željama (vidjeti „Podešavanja“). | Kod ohlađivanja ostavite uređaj da radi na COOL DOWN (vidjeti „Podešavanja“). Kada se uređaj ohladi, namjestite prekidač 1 na 0. |
 |  |  |  |  |  |  |  | |
| A | ● | ● | ● | |||||
| B | ● | ● | ● | ● | ||||
| C | ● | ● | ● | ● | ● | ● | ● | ● |
Puštanje u rad
Obratite pažnju na napon mreže: Napon strujnog izvora mora biti usaglašen sa podacima na tipskoj tablici aparata. Produžni kablovi moraju imati presek od min. 2 x 1.5 mm².
Uključivanje:
| A: Stavite prekidač 1 na I ili II. | Stavite prekidač 1 na O. |
| B: Stavite prekidač 1 na I ili II. Podesite regulator temperature 2 prema potrebi. | Stavite radi hladjenja prekidač 1 na II i regulator temperature 2 na MIN. Kada se aparat ohladi, stavite prekidač 1 na O. |
| C: Stavite prekidač 1 na I. Izaberite željeni program, ili programirajte temperaturu i struju vazduha prema Vašoj želji (pogledajte „podešavanje“). | Radi hladjenja neka aparat radi na COOL DOWN( pogledajte „Podešavanje“).Ako je aparat ohladjen, stavite prekidač 1 na O. |
 |  |  |  |  |  |  |  | |
| A | ● | ● | ● | |||||
| B | ● | ● | ● | ● | ||||
| C | ● | ● | ● | ● | ● | ● | ● | ● |
Стартување
 |  |  |  |  |  |  |  | |
| A | ● | ● | ● | |||||
| B | ● | ● | ● | ● | ||||
| C | ● | ● | ● | ● | ● | ● | ● | ● |
bggksfgmno ls63gdgmds
z_SOMZSMOBLF OBGM GEMJQ OEMF BGMN OB DSQS: GEMJQ OEMF BGMN OES GEMN OB DSQS YHOS GDMBGDMG OB DSQS YHOS GDMBGDMG OB DSQS, GEMN OEMF DWMG DGMN OB DSQS YHOS GDMBGDMG OB DSQS, GEMN OEMF DWMG DGMN OB DSQS. GEMN OEMF DWMG DGMN OB DSQS. GEMN OEMF DWMG DGMN OB DSQS. 2 × 1,5, 3d^2.
βδεωθδ:
:
A: 11-9y sb ll-9y.
10-%g.
U_2 u_1u_1u_1u_2u_2u_3u_4u_5u_6u_7u_8u_9u_10u_11u_12u_13u_14u_15u_16u_17u_18u_19u_20u_21u_22u_23u_24u_25u_26u_27u_28u_29u_30u_31u_32u_33u_34u_35u_36u_37u_38u_39u_40u_41u_42u_43u_44u_45u_46u_47u_48u_49u_50u_51u_52u_53u_54u_55u_56u_57u_58u_59u_60u_61u_62u_63u_64u_65u_66u_67u_68u_69u_70u_71u_72u_73u_74u_75u_76u_77u_78u_79u_80u_81u_82u_83u_84u_85u_86u_87u_88u_89u_90u_91u_92u_93u_94u_95u_96u_97u_98u_99u_100

^2 qnizwgnl: 4pwll fnsuhri wi uunuq: Gph wwpewlnpnid p wnuug ni zwnpmjwi uonwnqnpdih, wwqu dnn qnsuhn qwujni uonwnpwukpp kwqn kbi wjplh: 0qnwnqnpdje qnpdhp d'hyun slanknqwutampiu
(ξυλημη [θωδι υωψ]:
U. nquwud qnpdpp qphe mqnwduq uhswulq uhpuhu jp wunhpu zwnwpr: Dnqle, np qnpdpp wul fcnqndliu zwwl wup h ywnwur p yhpf wunhduwulu:

Q_n12wgn14 : U_pw14 pn'su'w'u quw'w: U_p12wnnlqw14 ujmph, lwqpp kwif 'sul'w' ujmph chun w2jwninhnc dwif'w'w'w ww'w' bu qwqhp, np'sq lpwnq bu zwn wnqn pn'su'wl h
amj\rbr: 'wulwwbu aqunpwnn bnp.p ζuwpwlnp amwzywnl lpwklfu h aqunpwnn aqwch p lpwlp dwpblm. ζuwfnp 'wulwwnbuwd dwpfwa dwpndpgr (ujm\rbr):

9qmczwnl: Pncwlnpwr wu qnuq: Upchwnlwr u ujmphh, lwghph lwwf wu u hjmlphh chn wzhwnbni dwiwwhl wnwqwund bu qwqbp, npnpe lwpqn b'wqphhl kwf Pncwlnp rthk:
^1 mwnqhp unwqwnq qwnbhp ubpuzbmyg, wwh bph upwup wuhfwnn bu phmd: znn wnbp, npwnhth wzhwnwnbnp wwl onwnhnhk l hplp zhswnncjjuin zwnlmp 'wnpwwnlnd uwwzwnpwuhz qhd'wl:

Q_n12wynl : L_n11w06p u_n11w11 q_n11w04 : S_w,p o_h d_n11w09j d_n11p l_wpn h ; d_n11w01 d_wpn l_w0g h_w0f h_w0w03h h_w0h ; S_w,p p_n11w01h h_w0f h_w0w01p2h d_n11w09p d_n11p m_n11 n_w0p01 l_wpn
_m _m _m _m _m _m _m _m _m _m _m^ _m _m _m _m _m _m _m _m _m, _m _m _m _m _m _m _m _m _m

Q_n1,2wgn1 : _1^nw_1w_2w_3w_4w_5w_6w_7w_8w_9w_10w_11w_12w_13w_14w_15w_16w_17w_18w_19w_20w_21w_22w_23w_24w_25w_26w_27w_28w_29w_30w_31w_32w_33w_34w_35w_36w_37w_38w_39w_40w_41w_42w_43w_44w_45w_46w_47w_48w_49w_50w_51w_52w_53w_54w_55w_56w_57w_58w_59w_60w_61w_62w_63w_64w_65w_66w_67w_68w_69w_70w_71w_72w_73w_74w_75w_76w_77w_78w_79w_80w_81w_82w_83w_84w_85w_86w_87w_88w_89w_90w_91w_92w_93w_94w_95w_96w_97w_98w_99w_100
( \text{f} _ { \mathrm { H } } \text { m } _ { 2 } \text { m } _ { 3 } \text { d } _ { 5 } \text { e } _ { 6 } \text { h } _ { 7 } \text { p } _ { 1 } : \text { f } _ { \mathrm { H } } \text { m } _ { 2 } \text { n } _ { 3 } \text { p } _ { 1 } \text { h } _ { 8 } \text { p } _ { 2 } , \text { n } _ { 3 } \text { p } _ { 1 } \text { f } _ { \mathrm { H } } \text { l } _ { 4 } \text { m } _ { 2 } \text { n } _ { 3 } \text { p } _ { 1 } \text { n } _ { 3 } \text { q } _ { 2 } \text { n } _ { 3 } \text { p } _ { 1 } \text { n } _ { 3 } \text { q } _ { 2 } \text { n } _ { 3 } \text { p } _ { 1 } \text { n } _ { 3 } \text { q } _ { 2 } \text { n } _ { 3 } \text { q } _ { 2 } \text { n } _ { 3 } \text { q } _ { 2 } \text { n } _ { 3 } \text { q } _ { 2 } \text { n } _ { 3 } \text { q } _ { 2 } \text { n } _ { 3 } \text { q } _ { 3 } \text { n } _ { 3 } \text { q } _ { 2 } \text { n } _ { 3 } \text { q } _ { 2 } \text { n } _ { 3 } \text { q } _ { 2 } \text { n } _ { 3 } \text { q } _ { 2 } \text { n } _ { 3 } \text { q } _ { 1 } \text { n } _ { 3 } \text { q } _ { 1 } \text { n } _ { 3 } \text { q } _ { 1 } \text { n } _ { 3 } \text { q } _ { 1 } \text { n } _ { 3 } \text { q } _ { 1 } \text { n } _ { 3 } \text { q } _ { 2 } \text { n } _ { 3 } \text { q } _ { 1 } \text { n } _ { 3 } \text { q } _ { 1 } \text { n } _ { 3 } \text { q } _ { 1 } \text { n } _ { 3 } \text { q } _ { 2 } \text { n } _ { 3 } \text { q } _ { 2 } \text { n } _ { 3 } \text { q } _ { 2 } \text { n } _ { 3 } \text { q } _ { 2 } \text { n } _ { 3 } \text { p } _ { 1 }]

Q_qm2wgn1f : q_nwn1wde_nwn1wn1nq_wn1wn1q : bph P_nleo_qnwnqnpdn1fb_plwpqwnlpzhdhqLnpe o_nwJhz_nnwnJhz_lmd_wnJh,np Q_hpqnrDgh z_wn1wn1wn1wn1wn1wn1wn1wn1wn1wn1wn1wn1wn1wn1wn1wn1wn1wn1wn1wn1wn1wn1wn1wn1wn1wn1wn1wn1wn1wn1wn1wn1wn1wn1wn1wn1wn1wn1wn1wn1wn1wn1wn1wn1wn1wn1wn1wn1wn1wn1wn3 , wwwn nwh lwpqn h
 |  |  |  |  |  |  |  | |
| A | ● | ● | ● | |||||
| B | ● | ● | ● | ● | ||||
| C | ● | ● | ● | ● | ● | ● | ● | ● |
0qmmqnρδnμΓp
( \text{II}_{\text{ZUNHPH}} \text{I}_2 \text{JN} \text{U} \text{I} \text{I} \text{I} \text{I} \text{I} \text{I} \text{I} \text{I} \text{I} \text{I} \text{I} \text{I} \text{I} \text{I} \text{I} \text{I} \text{I} \text{I} \text{I} \text{I} \text{II} \text{JN} \text{I} \text{I} \text{I} \text{I} \text{I} \text{I} \text{I} \text{I} \text{I} \text{I} \text{I} \text{I} \text{I} \text{I} \text{I} \text{I} \text{I} \text{I} \text{I} \text{JN} \text{I} \text{I} \text{I} \text{I} \text{I} \text{I} \text{I} \text{I} \text{I} \text{I} \text{I} \text{I} \text{I} \text{I} \text{I} \text{I} \text{I} \text{I} \text{T}\text{JN} \text{I} \text{I} \text{I} \text{I} \text{I} \text{I} \text{I} \text{I} \text{I} \text{I} \text{I} \text{I} \text{T}\text{JN}\text{I} \text{I} \text{I} \text{I} \text{T}\text{JN}\text{I} \text{I} \text{T}\text{T}\text{JN}\text{T}\text{T}\text{T}\text{T}\text{T}\text{T}\text{T}\text{T}\text{T}\text{T}\text{T}\text{T}\text{T}\text{T}\text{T}\text{T}\text{T}\text{T}\text{T}\text{T}\text{T}\text{T}\text{T}\text{T}\text{T}\text{T}\text{T}\text{T}\text{T}\text{T}\text{T}\text{T}\text{T}\text{T},\quad\left[\begin{array}{c:c:c:c:c:c:c:c:c:c:c:c:c:c:c:c:c:c:c:c:c:c:c:c:c:c:c:c:c:c:c:c:c:c:c:c:c:c:c:c:c:c:c:c:c:c:c:c:c:c:c:c:c:c:c:c:c:c:c:c:c:c:c:c:c:c:c:c:c:c:c:c:c:c:c:c:c:c:c:c:c:c:c:c:c:c:c:c:c:c:c:c:c:c:c:c:c:c:c:c:c@c:1,2,3,4,5,6,7,8,9,10,11,12,13,14,15,16,17,18,19,20,21,22,23,24,25,26,27,28,29,30,31,32,33,34,35,36,37,38,39,40,41,42,43,44,45,46,47,48,49,50,51,52,53,54,55,56,57,58,59,60,61,62,63,64,65,66,67,68,69,70,71,72,73,74,75,76,77,78,79,80,81,82,83,84,85,86,87,88,89,90,91,92,93,94,95,96,97,98,99,\quad\left[\begin{array}{c:cc:cc:cccccccccccccccccccccccccccccccccccccccccccccccccccccccccccccccccccccccccccccccccccccccccccccccccccccccccccccccccccccccccccccccccccccccccccccccccccccccccccccccccccccccccccccccccccccccccccccccccccccccccccccccccccccccccccccccccccccccccccccccccccccccccccccccccccccccccccccccccccccccccccccccccccccccccccccccccccccccccccccccccccccccccccccccccccccccccccccccccccccccccccccccccccccccccccccccccccccccccccccccccc:1,\quad\left[\begin{array}{c:cc:cc:cc:cc:cc:cc:cc:cc:cc:cc:cc:cc:cc:cc:cc:cc:cc:cc:cc:cc:cc:cc:cc:cc:cc:cc:cc:cc:cc:cc:cc:cc:cc:cc:cc:cc:cc:cc:cc:cc:cc:cc:cc:cc:cc:cc:cc:cc:cc:cc:CC:10000000000000000000000000000000000000000000000000000000000000000000000000000000000000000000000000000
U_hwg
| A' | U_nwq1u 1 w2wunh2p qubl | lwwd' || qpw: | U_nwq1u 1 w2wunh2p qubl 0-h qpw: |
| B' | U_nwq1u 1 w2wunh2p qubl | lwwd' || qpw: | U_nwq1u qnpdh2p wwnh, qnp. p wwnwq1u w2wunh2p 2-h qpw h |
| Qhp fwnwnhawsh hpnpqnwnph2p qnp. p 2-h qpw lwwq1w3d | Qhp fwnwnhawsh hpnpqnwnph2p 2-h, wjuh7p5u qhp: qpw: Zhsg | |
| wwqswqhg: | np qnpdh2p wwnh, qnp. p wwnwq1u w2wunh2p 0-h qpw: | |
| C' | U_nwq1u 1 w2wunh2p qubl | fwnph.p gwnhpw1h | U_nwq1u qnpdh2p wwnh, dwnh.p hnc1 npwns: COOL DOWN |
| Dwnhpw1u lww' Dwnhwnlnph.e Qhp fwnwnhawsh lp oth | (ωwjb1 z,blwnlwpncf) qpw «Uwjb1 z,blwnlwpncf» | |
| llwnd'wi zwnw4pp puw Qbp gwibqm [qjw' (Uwjb1 «I,klpwnlwpncf» pwdswnf): | pwdswnf): | |
| Zhsg np qnpdh2p wwnh, qnp. p wwnw2p 1 w2wunh2p 0-h qpw: |
c 2 bkrwth hwrqwnlprnle
Zunfwrwpn zh on zum d jwif r d'wubl pwnpm d jwu ubblqun (SELECT): 3mgnif: bfb btpwunf lbpluw d h zw jwnwpwm d jwu lqw f qulwq, wqu w sfa lqwthb c. zundwqnwnwauwnpw pllnu PLUS-1 qwd d'fmmu MINUS-1 oq"ntp jwul f qmbhubl: yphiu wqwal' abnfblnl ubblqun SELECT-p dfbup wngfunf kup zwynp pujlfsu:
Lbqllp pwnpmj, qkpulwwunhδwu

flowchart
graph LR
    A["SELECT MENU"] --> B["ENGLISH"]
    B --> C["SELECT MENU"]
    C --> D["FAHRENHEIT"]
    D --> E["1 x SELECT MENU"]
    E --> F["SAVE"]
    F --> G["RESET"]
    G --> H["1 x SELECT MENU"]
    H --> I["2 sec 1x PORTUGUES"]
    I --> B
    style A fill:#f9f,stroke:#333
    style H fill:#f9f,stroke:#333
Pumpt Lhrwnqng Dwnhre

flowchart
graph LR
    A["1 x SELECT MENU"] --> B["1-FREE"]
    B --> C["WELDING"]
    C --> D["1 x SELECT MENU"]
    D --> E["450°C"]
    E --> F["410°C"]
    F --> G["1 x SELECT MENU"]
    G --> H["+"]
    H --> I["-"]
    I --> J["+"]
    J --> K["1 x SELECT MENU"]
    K --> L["-"]
    L --> M["+"]
    M --> N["1 x SELECT MENU"]
- 1-###
80 °C/5 - knowlgnul PPEPDM
280 °C/5 - 2-wqwn lwpnwlnpnd 80 °C/5 9. bnwlgnid HD-PE 300 °C/3
- Чупяжынл 450 °C/5 10. knowingынл PP 320 °C/3
- 2kwqlnhunuf 500 °C/4 11. lnwlgnuuf PVC-U 340 °C/3
- 650 °C/3 12. bnuwlgmuU ABS 360 °C/3
- 650 °C/5 13. bnwlgmud PC 370 °C/3
- 425 °C/5 14. 450 °C/3
Punpulud dwnqth puwq kplncr l: Uqhth kphwp wkguwq uhpncr l: kplw1 2 qwjwhuqhy shan le qhwpuwncr l: 2 wnghshhgh shan qwh 'wwd'wwlqu' qmq Djm'up: UJn dwd'wwlq hqwthl b: hqlliu w'wqwd' abhqn SELECT-1, npubqlt snd'wwnwnwnlwa'dbyll Dph'wnwnhsw'up, wJuh'u p'u onh pw'wwlq m Djm'up:
Pumphl unkunj wJ STANDBY kwaF qwnch COOL DOWN

flowchart
graph LR
    A["S TAND BY"] --> B["COOL DOWN"]
    B <--> C["STAND BY"]
    C <--> D["STAND-BY"]
    D --> E["SELECT MENU"]
    E --> B
 |  |  |  |  |  |  |  | |
| A | ● | ● | ● | |||||
| B | ● | ● | ● | ● | ||||
| C | ● | ● | ● | ● | ● | ● | ● | ● |
正式操作
 |  |  |  |  |  |  |  | |
| A | ● | ● | ● | |||||
| B | ● | ● | ● | ● | ||||
| C | ● | ● | ● | ● | ● | ● | ● | ● |
使用開始
MAKITA Corporation, 3-11-8 Sumiyoshi-cho
Anjo, Aichi 446-8502, Japan
HG5012, HG551V, HG651C
MAKITA Corporation, 3-11-8 Sumiyoshi-cho
Anjo, Aichi 446-8502, Japan
HG5012, HG551V, HG651C
MAKITA Corporation, 3-11-8 Sumiyoshi-cho,
Anjo, Aichi 446-8502, Japan
bevestigt dat de warme-luchtventilatoren
HG5012, HG551V, HG651C
LEISTER Process Technologies,
Declaration of conformity
MAKITA Corporation, 3-11-8 Sumiyoshi-cho
Anjo, Aichi 446-8502, Japan
confirms that the hot air blowers
HG5012, HG551V, HG651C
manufactured by
LEISTER Process Technologies
Galileo-Strasse 10, CH-6056 Kaegiswil, in
the version put into circulation by us, fulfil EC
directives 2004/108 and 2006/95 and the
following standards were applied:
EN 55014-1, EN 55014-2, EN 61000-3-2,
EN 61000-3-3, EN 50366, EN 62233,
EN 60335-2-45
The right to make changes is reserved
Español
MAKITA Corporation, 3-11-8 Sumiyoshi-cho
HG5012, HG551V, HG651C
MAKITA Corporation, 3-11-8 Sumiyoshi-cho,
Anjo, Aichi 446-8502, Japan
HG5012, HG551V, HG651C
sfremstillet af LEISTER Process Technologies,
Galileo-Strasse 10, CH-6056 Kaegiswil, i
MAKITA Corporation, 3-11-8 Sumiyoshi-cho
Anjo, Aichi 446-8502, Japan
HG5012, HG551V, HG651C
prodotti da LEISTER Process Technologies,
Galileo-Strasse 10, CH-6056 Kaegiswil,
MAKITA Corporation, 3-11-8 Sumiyoshi-cho
Anjo, Aichi 446-8502, Japan
confirma, que os ventiladores de ar quente
HG5012, HG551V, HG651C
cumprem as directivas CE 2004/108 e
2006/95 e que formam aplicadas as
seguintes normas:
EN 55014-1, EN 55014-2, EN 61000-3-2,
EN 61000-3-3, EN 50366, EN 62233,
EN 60335-2-45
MAKITA Corporation, 3-11-8 Sumiyoshi-cho,
Anjo, Aichi 446-8502, Japan
bekrefter, at varmluftventilatoren
HG5012, HG551V, HG651C
MAKITA Corporation, 3-11-8 Sumiyoshi-cho Anjo, Aichi 446-8502, Japan
MAKITA Corporation, 3-11-8 Sumiyoshi-cho Anjo, Aichi 446-8502, Japonya
HG5012, HG551V, HG651C
3-11-8 Sumiyoshi-cho,
Anjo, Aichi 446-8502, Japonsko
η MAKITA Corporation,
3-11-8 Sumiyoshi-cho,
MAKITA Corporation, 3-11-8 Sumiyoshi-cho, Anjo, Aichi 446-8502, Japán
3-11-8 Sumiyoshi-cho,
Anjo, Aichi 446-8502, Japonia
3-11-8 Sumiyoshi-cho,
Anjo, Aichi 446-8502, Japonska
HG5012, HG551V, HG651C
HG5012, HG551V, HG651C
Shoqëria MAKITA Corporation, 3-11-8 Sumiyoshi-cho,
Anjo, Aichi 446-8502, Japoni
HG5012, HG551V, HG651C
u prodhuan nga
LEISTER Process Technologies
3-11-8 Sumiyoshi-cho,
Anjo, Aichi 446-8502, Japonija
HG5012, HG551V, HG651C
3-11-8 Sumiyoshi-cho,
Anjo, Aichi 446-8502, Japan
potvrđuje da puhalo za vrući zrak
HG5012, HG551V, HG651C
proizvedeno od strane tvrtke LEISTER Process Technologies, Galileo-Strasse
HG5012, HG551V, HG651C
izgatavota
LEISTER Process Technologies, Galileo-Strasse 10, CH-6056 Kaegiswil, kuru laižam tirgū, atbilst EK Direktīvām 2004/108 un 2006/95, un tika piemērotas šīs normas:
EN 55014-1, EN 55014-2, EN 61000-3-2,
EN 61000-3-3, EN 50366, EN 62233, EN 60335-2-45
MAKITA Corporation, 3-11-8 Sumiyoshi-cho,
Anjo, Aichi 446-8502, Japan
HG5012, HG551V, HG651C
mille on tootnud LEISTER Process
Technologies, aadressiga Galileo-
,MAKITA Corporation, 3-11-8 Sumiyoshi-cho,
HG5012, HG551V, HG651C
MAKITA Corporation, 3-11-8 Sumiyoshi-cho, Anjo, Aichi 446-8502, Japan
HG5012, HG551V, HG651C
proizveden od strane firme LEISTER
Process Technologies, Galileo-Strasse
10, CH-6056 Kaegiswil, u modelu koji je sa naše strane iznet na tržište, ispunjava uslove EZ direktive 2004/108 i 2006/95 kao i da poštuje sledeće standarde
EN 55014-1, EN 55014-2, EN 61000-3-2, EN 61000-3-3, EN 50366, EN 62233, EN 60335-2-45
HG5012, HG551V, HG651C
w
MAKITA Corporation (lmmwnnughwu), 3-11-8 Sumiyoshi-cho, Anjo, Aichi 446-8502, Japan
fiwuuwnnnu t, np HG5012, HG551V, HG651C wuhgh2h wunjmawptnwulwug fxtgtpn
wunwnpnluwð tã LEISTER Process Technologies, Galileo-Strasse 10, CH-6056 Kaegiswil lmŋu̱hg, p̱ŋ ṉmuv ūtn lp̱mʊ̱hg q̱wáwnph fhu̱gluwð wwnwugpwügh2tnp hnwlwugwgünu̱ tã EG-h gmgnu̱gtph 2004/108, 2006/95 wwfu̱u̱g2̱tnp u npuntn lyhpwnu̱wð tã ftanlu̱uwL Gnnputnp. EN 55014-1, EN 55014-2, EN 61000-3-2, EN 61000-3-3, EN 50366, EN 62233, EN 60335-2-45
HG5012, HG551V, HG651C
Tomoyasu Kato, Director
natural_image
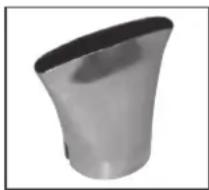
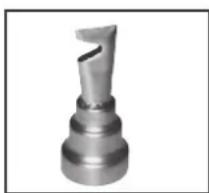
Metallic conical object with a curved top and flared base (no text or symbols visible)P-71417 HG5012 / HG551V HG651C
natural_image
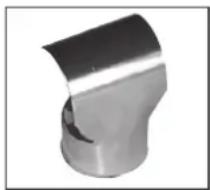
Metallic cylindrical object with smooth curved surfaces (no text or symbols visible)P-71423 HG5012 / HG551V HG651C

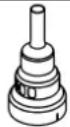
natural_image
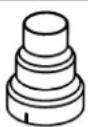
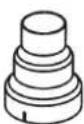
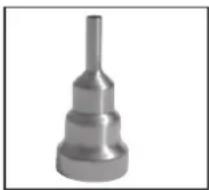
3D rendered image of a stepped cylindrical mechanical part (no text or symbols)P-71439 HG551V / HG651C
natural_image
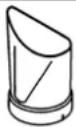
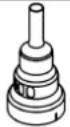
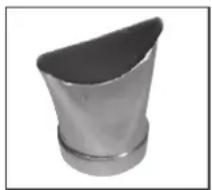
3D rendered image of a metallic pipe fitting (no text or symbols visible)P71445 HG5012 / HG551V HG651C
natural_image
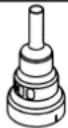
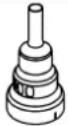
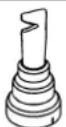
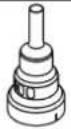
Metal mechanical component with stepped cylindrical shape and protruding shaft (no text or symbols visible)P-71451 HG651C
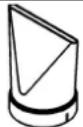
natural_image
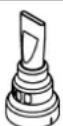
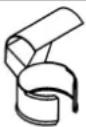
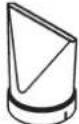
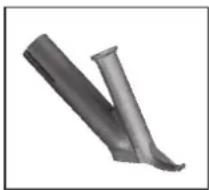
Two metallic cutting tool blades, one upright and one tilted (no text or symbols visible)P-71473 HG651C

natural_image
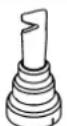
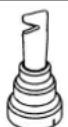
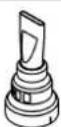
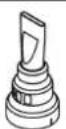
Metallic mechanical component with stepped shaft and flange (no text or symbols visible)P-71489 HG651C
natural_image
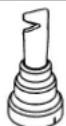
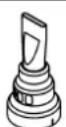
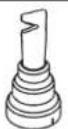
Metallic mechanical component with a protruding blade (no text or symbols visible)P-71495 HG651C

natural_image
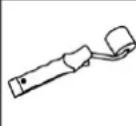
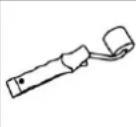
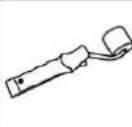
Close-up of a black mechanical tool with a curved handle (no visible text or symbols)P-71504 HG651C

natural_image
Close-up of a black-handled spatula or plunger tool against a white background (no text or symbols visible)P-71548 P-71554 PP, P-71510
natural_image
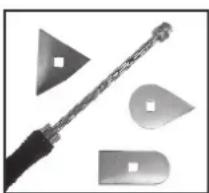
Close-up of a black metal tool with four metallic geometric shapes (triangle, teardrop, oval, and square) arranged on a white background, no text or symbols visible.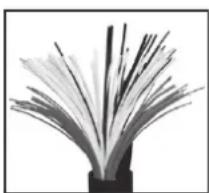
natural_image
Black-and-white illustration of a bundle of twisted cables or wires emerging from a dark base (no text or symbols)HDPE, P-71526 ABS, P-71532
Headquarters
MAKITA Corporation
3-11-8 Sumiyoshi-cho
Anjo, Aichi 446-8502, Japan
MAKITA INTERNATIONAL EUROPE LTD.
Michigan Drive, Tongwell, Milton Keynes, Bucks MK 15 8JD, United Kingdom