HG6531CK - Heat gun MAKITA - Free user manual and instructions
Find the device manual for free HG6531CK MAKITA in PDF.
| Product type | Heat gun |
| Brand | Makita |
| Model | HG6531CK |
| Supply voltage | 220-240 V~, 50/60 Hz |
| Nominal power | 2000 W |
| Temperature range | 50 °C to 650 °C (adjustable in increments) |
| Air flow | 200-550 L/min (adjustable) |
| Adjustment types | Temperature (+/- buttons) and air volume (+/- buttons) with LCD display |
| Preset modes | 14 modes (welding, stripping, forming, etc.) |
| Cooling function | Position 1: air at ~50 °C to cool before stopping |
| Thermal protection | Automatic shutdown in case of overheating (Error code 1 or 6) |
| Insulation | Double insulation (Class II) |
| Total length | 257 mm |
| Net weight | 0.71 kg |
| Power cable length | Approximately 2.5 m |
| Removable nozzle | Yes, several compatible accessories |
| Removable front cover | Yes, for access in tight spaces |
| Display | LCD (temperature, flow, mode) |
| Maintenance | Clean ventilation slots with a soft cloth; no lubrication |
| Repairability | Spare parts available via Makita after-sales service; repair by qualified professional |
Frequently Asked Questions - HG6531CK MAKITA
User questions about HG6531CK MAKITA
0 question about this device. Answer the ones you know or ask your own.
Ask a new question about this device
Download the instructions for your Heat gun in PDF format for free! Find your manual HG6531CK - MAKITA and take your electronic device back in hand. On this page are published all the documents necessary for the use of your device. HG6531CK by MAKITA.
USER MANUAL HG6531CK MAKITA
This appliance cannot be used by children or persons with reduced physical, sensory or mental capabilities or lack of experience and knowledge. Children shall not play with the appliance. Cleaning and user maintenance shall not be made by children.
If the supply cord is damaged, it must be replaced by the manufacturer, its service agent or similarly qualified persons in order to avoid a hazard.
A fire may result if the appliance is not used with care, therefore:
- be careful when using the appliance in places where there are combustible materials;
- do not apply to the same place for a long time;
- do not use in presence of an explosive atmosphere;
- be aware that heat may be conducted to combustible materials that are out of sight;
- place the appliance on its stand after use and allow it to cool down before storage;
- do not leave the appliance unattended when it is switched on.
INTENDED USE
Your heat gun has been designed for stripping paint, soldering pipes, shrinking PVC, welding and bending plastic as well as general drying and thawing purposes.

WARNING: Read this manual and general safety Instructions carefully before using the appliance, for your own safety. Your power tool should only be passed on together with these instructions.

The tool should be connected only to a power supply of the same voltage as indicated on the nameplate, and can only be operated on single-phase AC supply. They are double-insulated and can, therefore, also be used from sockets without earth wire.

Hot surfaces - Burns to fingers or hands.
DESCRIPTION
- Slide switch
- Temperature setting button (2a-, 2b+)
- Air volume setting button (3a-, 3b+)
- Confirmation button
-
LCD
-
Preset button
- Air inlet
- Front cover
- Nozzle
Check the appliance, the power cord, the power plug and all accessories for transportation damages.

WARNING: Packing materials are not toys! Children must not play with plastic bags! Danger of suffocation!
1 Heat gun
- 1 Set of accessories (Accessories may not be necessarily be included)
1 Instruction manual

When parts are missing or damaged, please contact your dealer.
GENERAL POWER TOOL SAFETY WARNINGS
Read all safety warnings, instructions, illustrations and specifications provided with this power tool. Failure to follow all instructions listed below may result in electric shock, fire and/or serious injury.
Save all warnings and instructions for future reference.
The term "power tool" in the warnings refers to your mains-operated (corded) power tool or battery-operated (cordless) power tool.
Work area safety
- Keep work area clean and well lit. Cluttered or dark areas invite accidents.
- Do not operate power tools in explosive atmospheres, such as in the presence of flammable liquids, gases or dust. Power tools create sparks which may ignite the dust or fumes.
- Keep children and bystanders away while operating a power tool. Distractions can cause you to lose control.
Electrical Safety
- Power tool plugs must match the outlet. Never modify the plug in any way. Do not use any adapter plugs with earthed (grounded) power tools. Unmodified plugs and matching outlets will reduce risk of electric shock.
- Avoid body contact with earthed or grounded surfaces, such as pipes, radiators, ranges and refrigerators. There is an increased risk of electric shock if your body is earthed or grounded.
- Do not expose power tools to rain or wet conditions. Water entering a power tool will increase the risk of electric shock.
- Do not abuse the cord. Never use the cord for carrying, pulling or unplugging the power tool. Keep cord away from heat, oil, sharp edges or moving parts. Damaged or entangled cords increase the risk of electric shock.
- When operating a power tool outdoors, use an extension cord suitable for outdoor use. Use of a cord suitable for outdoor use reduces the risk of electric shock.
- If operating a power tool in a damp location is unavoidable, use a residual current device (RCD) protected supply. Use of an RCD reduces the risk of electric shock.
- Use of power supply via an RCD with a rated residual current of 30mA or less is always recommended.
- Power tools can produce electromagnetic fields (EMF) that are not harmful to the user. However, users of pacemakers and other similar medical devices should contact the maker of their device and/or doctor for advice before operating this power tool.
- Do not touch the power plug with wet hands.
- If the cord is damaged, have it replaced by the manufacturer or his agent in order to avoid a safety hazard.
Personal Safety
- Stay alert, watch what you are doing and use common sense when operating a power tool. Do not use a power tool while you are tired or under the influence of drugs, alcohol or medication. A moment of inattention while operating power tools may result in serious personal injury.
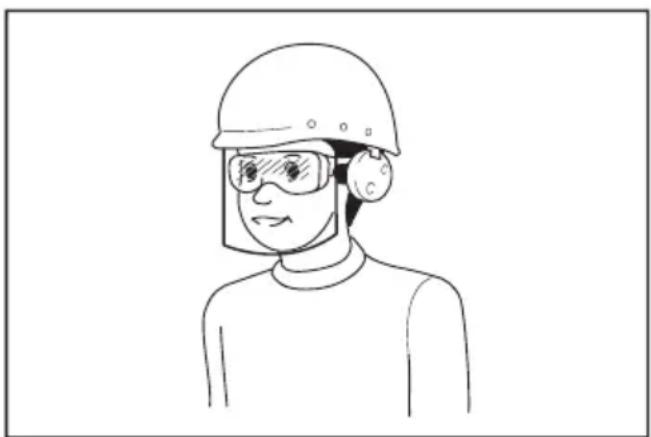
- Use personal protective equipment. Always wear eye protection. Protective equipment such
as a dust mask, non-skid safety shoes, hard hat or hearing protection used for appropriate conditions will reduce personal injuries.
- Prevent unintentional starting. Ensure the switch is in the off-position before connecting to power source and/or battery pack, picking up or carrying the tool. Carrying power tools with your finger on the switch or energising power tools that have the switch on invites accidents.
- Remove any adjusting key or wrench before turning the power tool on. A wrench or a key left attached to a rotating part of the power tool may result in personal injury.
- Do not overreach. Keep proper footing and balance at all times. This enables better control of the power tool in unexpected situations.
- Dress properly. Do not wear loose clothing or jewellery. Keep your hair and clothing away from moving parts. Loose clothes, jewellery or long hair can be caught in moving parts.
- If devices are provided for the connection of dust extraction and collection facilities, ensure these are connected and properly used. Use of dust collection can reduce dust-related hazards.
- Do not let familiarity gained from frequent use of tools allow you to become complacent and ignore tool safety principles. A careless action can cause severe injury within a fraction of a second.
- Always wear protective goggles to protect your eyes from injury when using power tools. The goggles must comply with ANSI Z87.1 in the USA, EN 166 in Europe, or AS/NZS 1336 in Australia/New Zealand. In Australia/New Zealand, it is legally required to wear a face shield to protect your face, too.
It is an employer's responsibility to enforce the use of appropriate safety protective equipments by the tool operators and by other persons in the immediate working area.
Power tool use and care
- Do not force the power tool. Use the correct power tool for your application. The correct power tool will do the job better and safer at the rate for which it was designed.
- Do not use the power tool if the switch does not turn it on and off. Any power tool that cannot be controlled with the switch is dangerous and must be repaired.
- Disconnect the plug from the power source
and/or remove the battery pack, if detachable, from the power tool before making any adjustments, changing accessories, or storing power tools. Such preventive safety measures reduce the risk of starting the power tool accidentally.
- Store idle power tools out of the reach of children and do not allow persons unfamiliar with the power tool or these instructions to operate the power tool. Power tools are dangerous in the hands of untrained users.
- Maintain power tools and accessories. Check for misalignment or binding of moving parts, breakage of parts and any other condition that may affect the power tool's operation. If damaged, have the power tool repaired before use. Many accidents are caused by poorly maintained power tools.
- Keep cutting tools sharp and clean. Properly maintained cutting tools with sharp cutting edges are less likely to bind and are easier to control.
- Use the power tool, accessories and tool bits etc. in accordance with these instructions, taking into account the working conditions and the work to be performed. Use of the power tool for operations different from those intended could result in a hazardous situation.
- Keep handles and grasping surfaces dry, clean and free from oil and grease. Slippery handles and grasping surfaces do not allow for safe handling and control of the tool in unexpected situations.
- When using the tool, do not wear cloth work gloves which may be entangled. The entanglement of cloth work gloves in the moving parts may result in personal injury.
Service
- Have your power tool serviced by a qualified repair person using only identical replacement parts. This will ensure that the safety of the power tool is maintained.
- Follow instruction for lubricating and changing accessories.
ADDITIONAL SAFETY INSTRUCTIONS FOR HEAT GUN
- Do not place your hand over the air vents or block the vents in any way.
The nozzle and accessories of this tool become extremely hot during use. Let these parts cool down before touching.
Always switch the tool off before putting it down.
Do not leave the tool unattended while it is switched on.
A fire may arise if the appliance is not used with care.
Heat may be conducted to combustible materials that are out of sight. Do not use in a damp atmosphere, where flammable gases may be present or near combustible materials.
Allow the tool to cool fully before storing.
Ensure adequate ventilation as toxic fumes may be produced.
Do not use as a hairdryer.
- Do not obstruct either the air intake or nozzle outlet, as this may cause excessive heat build-up resulting in damage to the tool.
Do not direct the hot air blast at other people.
Do not touch the metal nozzle as it becomes very hot during use and remains hot for up to 30 minutes after use.
Do not place the nozzle against anything while using or immediately after use. - Do not poke anything down the nozzle as it could give you an electric shock. Do not look down the nozzle while the unit is working because of the high temperature being produced.
Do not allow paint to adhere to the nozzle or scraper as it could ignite after some time.
Removing paint
- Do not use this tool to remove paint containing lead. The peelings, residue and vapors of paint may contain lead, which is poisonous. Any pre-1960 building may have been painted in the past with paint containing lead and covered with additional layers of paint. Once deposited on surfaces, hand to mouth contact can result in the ingestion of lead. Exposure even to low levels of lead can cause irreversible damage to the brain and nervous system. Young and unborn children are particularly vulnerable.
When removing paint, ensure that the work area is enclosed. Preferably wear a dust mask. - Do not burn the paint. Use the scraper and keep the nozzle at least 25mm away from the painted surface. When working in a vertical direction, work downwards to prevent paint from falling into the tool and burning.
- Dispose of all paint debris safely and ensure that the work area is thoroughly cleaned after completing the work.
MOUNTING THE CORRECT ACCESSORY (IF APPLICABLE)
Icon Description Purpose

Glass protection nozzle Protection windows when stripping frames
| Icon Description Purpose | |
| Reflector nozzle Soldering pipes | |
| Reduction nozzle Welding, sleeve shrinking (heat concentrated over small area) | |
| Wide-slot nozzle Drying, thawing (heat spread over wider area) | |
| Overlap welding nozzle Welding | |
| Solder sleeves reflector Soldering | |
| Welding nozzle Welding | |
| Pressure roller Press the surface of working piece | |
| Scraper Stripping paint and varnish | |
| Make sure that the tool is switched off and the nozzle has cooled down.Falling down nozzle may ignite objects on the floor. Nozzles must be mounted firmly and secure on the unit.Touching a hot nozzle can lead to serious burn.Before attaching or replacing a nozzle, allow the unit to cool down completely or use a suitable tool.A hot nozzle can set a surface on fire. Place down hot nozzles only on fire-proof surfaces.An incorrect or defective nozzle can lead to heat accumulation and damage the unit. Use only original nozzles according to the table that are suitable for your unit. | |
INSTRUCTIONS FOR USE

If you are not sure about the correct setting, start with a low temperature setting and gradually increase the temperature until you achieve optimum results.

Always observe the safety instructions and applicable regulations.

Use only one hand to hold the tool, do not place your other hand over the air vents.(Fig. 1)

Do not use the holes on the tool housing for the fall prevention purpose at high location.
Prior to operation
Mount the correct accessory for the application.
Switching on and off
Number of the slide switch means as follows. HG6530V:
0: OFF position
1: For cooling down with approx. 50^ airflow
2: For heating with low air volume
3: For heating with high air volume
HG6531C:
0: OFF position
1: For cooling down with approx. 50^ airflow
2: For heating
To switch the heat gun on, slide the slide switch (1) from 0 to one of the ON positions 1, 2 or 3.
To switch off the heat gun, set the slide switch to position 1 to cool off for a while, and then set the slide switch to position 0 (OFF).

The heat gun may give off some smoke shortly after switching on. This does not indicate a problem with the device.
Setting the temperature (HG6530V)
The temperature can be set with the slide switch (1) at position 2 or 3.
Press the temperature setting button + (2b) to increase the temperature, and - (2a) to decrease the temperature. The LCD (5) displays the present temperature of the airflow few seconds after the target temperature was set.
To switch the unit of the temperature between ^ C or ^ F , press + and - together.
Selecting the preset mode (HG6531C)
14 preset modes are available to quickly set the temperature and air volume suitable for major applications. Select the desired preset application as follows.
- Set the slide switch (1) at position 2. The LCD (5) displays the application name that was used at
the last time, and corresponding temperature and air volume settings. Few seconds later, the LCD displays the present temperature of the airflow.
- Press the preset button (6). The application name starts to scroll.
- Press the temperature setting buttons (2a/b) or air volume setting buttons (3a/b) to select the application. When the desired application name is displayed on the LCD, press the confirmation button (4) to decide it.

Whenever a setting is not confirmed by pressing the confirmation button (4) within 5-6 seconds, the device reverts to the previously confirmed setting.
Setting the temperature and air volume (HG6531C)
Change the temperature and air volume as follows. With the slide switch (1) at position 1, only the air volume can be changed.

With the slide switch at position 2, this procedure overwrites the preset temperature and air volume of the application currently displayed on the LCD.
- Set the slide switch (1) at position 1 or 2.
-
Press the temperature setting buttons (2a/b) to change the temperature. Press the air volume setting buttons (3a/b) to change the air volume. The indications of temperature and air volume on the LCD (5) start to blink.
-
Press the confirmation button (4) to confirm the setting. The temperature and air volume on the LCD stop blinking. Few seconds later, the LCD displays the present temperature of the airflow.

Whenever a setting is not confirmed by pressing the confirmation button (4) within 5-6 seconds, the device reverts to the previously confirmed setting.
Setting the display language and temperature unit (HG6531C)
- Set the slide switch (1) to position 1/2.
- Press and hold the preset button (6) until the language bar blinks.
-
To switch the unit of the temperature between ^ C or ^ F , press the temperature setting buttons (2a/b). To change the language, press the air volume setting buttons (3a/b). 10 languages are available: English, German, Italian, French, Spanish, Portuguese, Dutch, Swedish, Chinese and Japanese.
-
Press the confirmation button (4) to decide your setting.
Detachable front cover
The front cover can be removed when working at a narrow area.

Be careful of the hot nozzle. Removing the front cover increases the risk of burn with the bare hot nozzle.
Stripping paint
Mount an appropriate accessory.
Set a high air temperature.
Switch the tool on.
Direct the hot air onto the paint to be removed.
When the paint softens, scrape the paint away using a hand scraper.

Do not strip metal window frames, as the heat may be conducted onto the glass and crack it. When stripping other window frames, use the glass protection nozzle.

Do not keep the tool directed at one spot too long to prevent igniting the surface.

Avoid collecting paint on the scraper accessory, as it may ignite. If necessary, carefully remove paint debris from the scraper accessory using a knife.
Stationary use
This tool can also be used in stationary mode.
Place the tool onto a stable workbench.
- Secure the cable to prevent pulling the tool off the workbench.
Carefully switch the tool on.

Make sure that the nozzle always points away from you and any bystanders.

Make sure not to drop anything into the nozzle.
Cooling down
The nozzle and accessory become very hot during use. Let them cool down before attempting to move or store the tool.
To reduce the cooling time, switch the tool on at the lowest air temperature setting and let it run for a few minutes.
Switch the tool off and let it cool down for at least 30 minutes. Always place it vertical and standing.

When the inside of heat gun gets too hot, the indication on the LCD blinks.
In that case, set the slide switch to position 1 to cool down the tool. After cooling down fully, restart the operation.
If the LCD still blinks after the restart, contact your local Makita Service Center.
TROUBLE SHOOTING FOR HG6531C
| Problem Cause Solution | ||
| Error 1: LCD displays text “temp is over!” and temperature value keeps blinking. | The tool temperature is too high. For example: The outlet nozzle is blocked by something. | Cool down the tool. In case something blocks the outlet nozzle, remove it. If the LCD still blinks after the restart, contact your local Makita Service Center. |
| Error 2: LCD displays text “ktc is opening” and the number “1888” shown on the screen keeps blinking. | The circuit board is defective. | Ask your local Makita Service Center for repair. |
| Error 3: LCD displays text “ktc is short” and the number “1888” shown on the screen keeps blinking. | The circuit board is defective. | Ask your local Makita Service Center for repair. |
| Error 4: LCD displays text “ntc is opening” the number “1888” shown on the screen keeps blinking. | The circuit board is defective. | Ask your local Makita Service Center for repair. |
| Error 5: LCD displays text “ntc is short” the number “1888” shown on the screen keeps blinking. | The circuit board is defective. | Ask your local Makita Service Center for repair. |
| Error 6: LCD displays text “wind is clog!!” and temperature value keeps blinking. | The tool temperature is too high. For example: The outlet nozzle is blocked by something. | Cool down the tool. In case something blocks the outlet nozzle, remove it. If the LCD still blinks after the restart, contact your local Makita Service Center. |
MAINTENANCE AND CLEANING

Attention: Before performing any work on the equipment, pull the power plug.
Maintenance
- Your Power Tool has been designed to operate over a long period of time with a minimum of maintenance. Continuous satisfactory operation depends upon proper tool care and regular cleaning.
If the supply cord is damaged, it must be replaced by the manufacturer, its service agent or similarly qualified persons in order to avoid a hazard.
Lubrication
- Your power tool requires no additional lubrication.
Cleaning
To prevent overheating of the motor, keep the ventilation slots of the machine clean and free from dust and dirt.
Regularly clean the machine housing with a soft cloth, preferably after each use. If the dirt does not come off use a soft cloth moistened with soapy water.

Never use solvents such as petrol, alcohol, ammonia water, etc. These sol- vents may damage the plastic parts.
TECHNICAL DATA
| Model No: HG6531C HG6530V | ||||
| Voltage | 220-240V~ 110V~ 220-240V~ 110V~ | |||
| Power | 2000W 1400W 2000W 1400W | |||
| Temperature | | 50°C | 50°C | 50°C | 50°C | 50°C | 50°C | 50°C | 50°C | 50°C | 50°C | 50°C | 50°C | 50°C | 50°C | 50°C | 50°C | 50°C | 50°C | 50°C | 50°C | 50°C | | 50°C | 50°C | 50°C | 50°C | 50°C | 50°C | 50°C | 50°C | 50°C | 50°C | 50°C | 50°C | 50°C | 50°C | 50°C | 50°C | 50°C | 50°C | 50°C | 5. | | 50°C | 50°C | 50°C | 50°C | 50°C | 50°C | 50°C | 50°C | 50°C | 50°C | 50°C | 50°C | 50°C | 50°C | 50°C | 50°C | 50°C | 50°C | 50°C | 5 | | 50°C | 50°C | 50°C | 50°C | 50°C | 50°C | 50°C | 50°C | 50°C | 50°C | 50°C | 50°C | 50°C | 50°C | 50°C | 50°C | 50°C | 50°C | 50°C | 5 |
| Air flow | | 200-550L/M | 150-450L/M | 500L/M | 400L/M | 230L/M | 450L/M | 257mm 257mm | |||
| II 200-550L/M | II 150-450L/M | II 280L/M | II 550L/M | II 450L/M | ||||
| Overall length | ||||
| Net weight | 0.71kg 0.72kg | |||
- NOTE: 650^ C can be achieved only with the wide-slot nozzle, overlap welding nozzle or welding nozzle.
Default setting of the preset mode
| No. | Application name | Temperature | Air volume |
| 1 | FREE SET 1 | 250°C | 5 |
| 2 | FREE SET 2 | 500°C | 5 |
| 3 | SCRINKING | 300°C | 3 |
| 4 | FORMING | 250°C | 4 |
| 5 | SOLDERING COPPER | 650°C | 3 |
| 6 | DRYING PAINT | 650°C | 5 |
| 7 | PAINT STRIPPING | 450°C | 5 |
| 8 | WELDING FLOOR FOIL | 450°C | 3 |
| 9 | WELDING PPEPDM | 280°C | 3 |
| 10 | WELDING HDPE | 300°C | 3 |
| 11 | WELDING PP | 320°C | 3 |
| 12 | WELDING PVC-U | 340°C | 3 |
| 13 | WELDING ABS | 360°C | 3 |
| 14 | WELDING PC | 380°C | 3 |
ENVIRONMENT

Only for EU countries
Due to the presence of hazardous components in the equipment, used electrical and electronic equipment may have a negative impact on the environment and human health.
Do not dispose of electrical and electronic appliances with household waste!
In accordance with the European Directive on waste electrical and electronic equipment and its adaptation to national law, used electrical and electronic equipment should be collected separately and delivered to a separate collection point for municipal waste, operating in accordance with the environmental protection regulations.
This is indicated by the symbol of the crossed-out wheeled bin placed on the equipment.
A VERTISSEMENT
Overlap-lasmond Lassen
Bortskaf违法犯罪
Bortskaf isn't a good idea.
Bortskaf isn't the best idea.
Bortskaf isn't the best idea.
Bortskaf isn't the best idea.
Bortskaf isn't the best idea.
Móvo yia tics xwpe ts EE
Aoyw Tns TnapouiaacTwv Etnikivuvw ouatakwv eepwv oTov EgoTTIAOo, O xpnoiopoInuevoC nEeKPTIkoC kai nE-KTPOVIKOc EOTAIIOOC mTOpei va ExeApVNTIKETIDpaon 0To TEpi BaALov KAI tvn avPpwnuyeia.
Mnv aToppiTTETe TIG NkTKPIKc KAI nEKTPOVIKc OuaKEUc Mazi Me Ta oIKIaKa aToppimuata!
E u p a i k O i i tov atioBAnTo nAektpiKo kai nAektpoviko eOttlIoMo, KaOhC kai tNtTPOaapouoyn TnC oTNV eOvikn vOmoTeoi, o XpOAIOTIOINevoC nAektpiKoc kai nAektpovikoc eOToIaOcOa PPETeI va ouAleyetai Exwpiota kai va npadidetai OE ExwpiotOneio OauLoync yia 0ntiKaAtoBAnTa, to otioo Aietoupyei OuPwva ME Touc Kavovioouc TTPOaiaC TOI PeipalAAovTOc.
Auto UTOIDEIKVUETAI ATO TO OUMBOLO TOU DIAYPAmuEvou TPOXOPOU KADOU TPOBIOKETAI AVAPTNMEVO EITAVW OTOV EOTNIIOI.

UYARI
LISTE OVER PAKKEINNHOLD
FEILSØKING FOR HG6531C
VEDLIKEHOLD OG RENGJØRING

HG6531C:N VIANMAÄRITYS
PROBLEMU NOVER'SANA HG6531C
Problema lemesls Risinajums
MNHyT,HTO6bIOCTbITb.
He kacaTeCb cOnlOM dpyrHx npeMToB BO Bpemra60TbI nn Cpa3y nocJe ee OKOHuaHn.
He onyckaTe Hnueero BHytpb ConJa, TaK KaK 3TO MoKet npNBecTu K nopaxeHnIO 3NeKTpoTOKOM. He 3aRJaDbIbaNte B CONNo BO BpeMpa60tbl, TaK KaK n3 Hero BbIXoDNT Bo3dYxC BBICOKO TEMNEpaTyPoi.
He no3BoJrTe Kpacke npuJnnaTb K conJy nnCKpe6ky, TaK KaK Yepe3 HeKOtopoe Bpem OHa MOKeT BOCnJaMeHHTbcr.
YdaaneHue Kpacku
He noIb3yntecb nHCTpyMeHTOM dIydaIe-Hnra Kpackn, coedePxauei CbuHeu. B cNoIx, octatkax n napax Kpackn MoKeT coepKaTbcra JIOBtbi CBnHeu. 3dAnHn, NOcTpoEHhIe Do 1960 roa MorN 6bITb NOKpaWeHbI KpackoI CO CBnHcO, NOBepX KOToPOH HaHeceH cNoI dpyroJ Kpackn.
Nocne noBHeHnCNoI KpackHa nobepxHOCTn CBnHeu MoKet nonactb B pot uepe3 pyKn.Bo3deInCTBnE daxe He6oNbWoro KOINueCTBaCBnHcMoKet npNBecTn K Heo6paTMOMyNOBpeXDeHHO MO3ra n HEPBHO CNCTembl.Oco6eHHo BocnpmUHBbl K Hemy MaJIeHbKneH eue He poXDeHHbIe Detn.
Pn cHrTnn Kpackn y6eDntecb, YTo pa6oay 30Ha n3OInpObaHa. PekomeHdyetcna HadeBaTb pecnPapTop.
He cxirraTe kpacky. BocnoIb3yItecb ckpe6- Kom n depknte conno Ha pacctoHne He Mehee 25 MM OT OkpaWeHHoN NOBepxHOCTn. Pnp pa6Ote B BEPTKakJBHom HAnpaBJeHNn DBnraTecb BHN3, YTO6bl He donyCTNTb NaedHna Kpackn B INcHTpyMeHT n ee ropeHna.
OctopoxHo yTnH3npyTe BCE ocTaTkKn Kpackn c co6IHOeHHeM Hopm N y6eIntecb, YTO pa6o- 4a 30Ha TuaTeJbHo OuHueHa nocne 3aBep- 19 Hpa6oTbl.
BknioyeHue u ebiknoyeHue numaHua
Homep coknb3aero nepeknuatae 03haaet cnedyuuee.
HG6530V:
0:Полхенue"Быкнчeho"
1:Дя oxnaKeHnB O3dUHbIM NOTOKOM Tempepatypo np6n3ntelho 50^
2:ДяHarpeBaHnmaIbIMobemOM BO3dYxa
3:ДяHarpeBaHn60JIbUIMOBjemOM BO3dYxa
HG6531C:
Hacmpouka memnepamypb1 (HG6530V)
HacptponTb TemnepaTyPO MOKHO C NOMOuBIO CKOB3A- Uero nepeKluOHaTeIa(1) B no3uN 2 uN 3.
Haxmte KhoNky HacTpoKn TempeatypbI + (2b), yTo6bl yBeJIuHTb Tempeatypy n - (2a), yTo6bl CHn3ntb Tempeatypy. JkD (5) oTo6paXaET HaCTOryo Tempeatypy BO3duWHoro NOToka Yepe3 HeckOJbKO CekyHd NocNe TORO KaK 6blna yCTaHOBHeHa 3aDaHHaer Tempeatypa.
YTo6bI nepeKnIOuOaTb eINHnUbI n3MepeHnA TempeatypbI MeKdy ^ C nn , HaxMnte + n -oNHOpeMeHHO.
Bb6op npedycmaHOeHHO2o pekuma (HG6531C)
Docynho 14 npedyctaHOBneHHbIX pexnMOB dny
6bICTPOY yCTaHOBN TEMNEpATpybl N obbeMa BO3dyxa,
KOTOpBI NOxOINT DnRA 60bnWHNCtBA npINOKeHNI.
BbI6epnte npINOKeHne npedBaPHTeJIbHOy yCTaHOBN
cNeDyUoUM o6pa3OM.
- YctaHOBHTeCKOB3aHnepeKIOHuaTeHb (1) B noIooKeHne 2. KKD (5) oTo6paKaet Ha3BaHne npIIOXeHn, KOtOpoe 6blIO nCNOJb3OBAHO B npOoJIb pa3, a TaKke HAcTpoKn COOTBeTCTByUSei TempePaTybl NObbema Bo3dYxa. HeckOJIbKIMn cekyHdAmn No3dHee KKDoTo6paKaet TekyuHo TempePaTyp BO3dyuHoro Notoka.
- HaxMMTe KHOKNy IpeBapNTeNBHOH HAcTPOKn (6). HaunHaet npOKpyuBaTbCn HA3BaHne npNJIOKeHnA.
3.ДЯВыбopa npnJIOxHЯ,HAKMITE KHOJIKN(2a/b) HAcTpOyKn TemNepaTpyb NIN KHOJKN HaCTpoIKN 06bema BO3dyxa (3a/b).KOrda Ha3BaHne Tpe6yEmoro npnJIOxHЯ NOBtbcra HaKKD, YTO6bl BbIbpaT b erO,HAKMITE KHOJNKNoDTBePckDeHЯ(4).
Korda HactpoKa He noTBepeJaHa HaxaTne KhoNkNoTBepeJHeHn (4) B TeueHne 5-6 cekyH, yctahOBka BO3BpaaetcKa paHee NoTBepeJDeHHoH NaTpoKe.
Hacmpouka memnepamypbI u o6bema 03dyxa (HG6531C)
I3MeHnTe TemnepaTy n 06bEm BO3dyxa Cne- dyuum o6pa3om. Korda cKoNb3aun nepe- kIouaTeB (1) haoDntcB nNoJoxeHN 1, MOxHO I3MeHnTb ToJbKO 06bEM BO3dyxa.

Korda cKoJIb3aIuI nepeKnIOUaTeIb HaxOHTcB NonoXeHn 2,3a npOceDypa 3aNcblBaet HObIe daHHbIe NOBepx CTapbIX DaHHbIX 3aDaHHoT TempeTpybl NobBeMa BO3dYxa, OTO6paKaemoro Ha daHHbIMomeHT Ha KKD npINoxeHn.
- YctaHOBnte cKoJIb3aInepeKJIIOuataIb (1) B noJoxKeHne 1 uN2.
- HaxMnte KhoNk HactpoKn TemnepaTpyb (2a/b), yTo6bI n3MeHnTb TemnepaTpy. HaxMnte KhoNk HacTpOuKn 06bema BO3dyxa (3a/b), yTo6bI n3MeHnTb 06bem BO3dyxa. Ioka3aHnI TEmnpaTpyb n 06bema BO3dyxa Ha KKd (5) HaunHaIOT MInarTb.
- Haxmnte KhoNky noTBepeJdeHnra (4), YTo6bI noTBePntb HacTpoKy. TemepaTypa n o6bem Bo3dyxa Ha KKNepeCTaHOT mIratb. HeckonbKIMn cekyHdAmn no3dHee KKOn OTO-6paxKaETekyUTo TemepaTypu Bo3dyuHoro Notoka.

Korda HactpoiKa He noTBePkeHa haxaTneM KhoNknoTBePkeHnra (4) B TeueHne 5-6 ckyH, yCTaHOBka BO3BpaauaetcKa paHee noTBePkeDeHHoHacTpoKe.
Hacmpouka 3bika 3kpaHa u eduhuu bI u3MepeHu memnepamypbl (HG6531C)
- YctaHOBIne cKoJIb3aIuI nepeKJIIOUaTeIb (1) B noJoxKeHne 1/2.
- Haxmnte u ydepkmbaTe KhoNky npdeBapntbHn HAcTpoKn (6)do tex nop, noka 3bkoBa naHe b He NaHcET MraTb.
-
- TOp6bI nepeKIOHOTb eINHcU bI N3MepeHnra TemnpaTpybIMekdy ^ C INN HAKMITE KHOKN HACTPOIK NTEMNEPAtpbI (2a/b).TOp6bI n3MeHNTb I3bIK, HAKMITE KHOKN HACTPOIK oBbema Bo3dyxa (3a/b).DocTyNHb10 3bIKOB:AHRNIckn, HEMeKKn,ITaNBJHCKN,ΦpaHcy3CKN,NCNAHCKN,NOPTy- rAJIbCKN,TOJNaHDCKN,WBEdCKN,KNTaNCKn,I ANOHCKN.
- Haxmnte KhONkY noTBePckdHnra (4), UTo6bI Bbl6paTb CBOIO HAcTpOiKy.
CbeHna nepednKa KpbIioka
Pn pa6oTe B TecHOM npoctpaHCTBe nepeHIO KpbIiKy MOXHO CHrTb.

Pomnhte o ropayem conne. ChrTne nepeDHeN KpbIuKN NOBbluaeT pNCK NOnyueHn OXoRa, TAK KaK paKaJIeHHOe cOnlNo He 6yDet 3aKpbIto.
YdaJIeHue JIakokpacOHOzo NOKpbIMua
YcTaHOBInTe Heo6xOaMoe npucnoc6JIeHne.
YcTaHOBnTe BbICOKyIO TemNepaTyPy BO3Dyxa.
BknHouHTe HnHCTpyMeHT.
Hapabbte ctpyto ropeero Bo3dyxa Ha chimaemyo kpacky.
Iocne pa3mraHnKpackn CHMnTe ee cJoi n CnOoBIO pyHoro ckpe6ka.

He cHmMaTe Kpacky TaKIM CnOc6om c MetaIInuecknx OKOHbIX paM, TaK KaC tEeKJIO MoKeT HarpeTbcN TpeChyTb. Pn ChrTHn KpackC OKOHbIX paM N3 dpyroro MaTePnAna BOCNoJIb3yIteCb CONlOM DnAaNTbI CTeKJa.

He HanpaBnIte HNCTpyMeHT B OndHy TOUY B TeueHne CInuKOM DOJrOro BpeMeH, TAK KAK NOBepxHOCTb MOXET BOCNJaMeHHTbCra.

N36eAte cKoPNeHnKpackn Ha cKpe6Ke, TaK KaK OHa MoXeT 3aRopeTbCn. PnHHeOxOAnMoCTn aKKypaTHO CHMnTe cKoNHBWyOcH aCKpe6Ke Kpacky C NOMOsbH Hoxa.
NcnoIb3oeaHue cmauOHaPbIx ycNo8ux
3TOT INHCTpyMeHT TaKKe MOXHO NcNoJIb3OBaTb B CTAUNOHApHbIX ycNOBnX.
YctaHOBtte HnCTpyMeHT Ha yCToHBBiB BepcTaK.
3aФИКСИРУТЕ Ka6eJIb, YTO6bl erO HeIb3Я 6blINO DeHyTb u ypoHnTb nHCTpyMeHT C BepCTaka.
Octopoxho BkHouHTe NtTaHne HhctpyMeHa.

Y6eHNTecb, YTO conNo HanpaBHeHO B CTOPOHy OT Bac N Dpyrnx npCcyTCTByUOxN.

CTapaTecb HnHero He ypoHHTb B conNo.
OxnaXdeHue
Bo Bpempa60bI cOnIO n npHaJnEJIeKHOCTu CnIbHO HArpeBaHOTcI. IpeE TpAHCnOpTnpOBKoN uN XpaHeHNEM INCHTpymEtA daTe Nm OCTbITb.
I Dnra COKpaueHn BpeMeHn OCTbBaHnB KKnIOuHTe HNCTpyMeHT Ha cAmOHN3KO TEmnpaType N daIte emy nopabotb HeckoJbko MNHyT.
BbIKIOUHTe HNCTpymeHn DaIte emy octbItb TeueHHe He Mehee 30 MNHyT. O6raTeNbHO yCTaHaBnBaIte erO B BEptNKaJIbHOM NIOJKeHN.

Pn Ype3MepHom HarpeBaHmN BHy- TpeHHe Nactn TenNoBOro 0eHa Ha KK-dncnlee HauHaeT MraTb HndkaTop.
B 3TOM cIyuae yCTaHOBnTE NOJ3yHKObBI NpeKJIIOUaTeIb B NIOJOKeHne1, YTO6BI OXJaNTb INcTpymEHT. IocNe nONHOrO OxJaXdEHNr, nepe3aNyCTnTe onepauNIO.
Ecnn nocne nepe3arpy3kn HndkaTOp Ha XX-dncnlee npoDOnXaET MraTb, TO Bam cJeMyet o6paNTbcB R MeCTHbI cepBnchbl ueHtp Makita.
ПОИСК И YYSTPAHEHNE HENCINPABHOCTEДЯ HG6531C
TEXHINUeCKNE XAPAKTEPNUCTNKN
| Homepoel: HG6531C HG6530V | ||
| Hapraxehe 220-240B~ 220-240B~ | ||
| Mошност b 2000Вt 2000Вt | ||
| Tempepatура BoЗduшно Notoka | I 50°C 200-550л/МИN II 50-650°C 200-550л/МИN | I 50°C 500л/МИN II 50-650°C 280л/МИN III 50-650°C 550л/МИN |
| Ов sacа дина | 257MM 257MM | |
| Чисая масca | 0,71кг 0,72кг | |
Cmahdapmna hacmpouka npedycmaHOeHnozo pekuma
J 15 J 15 J 15 J 15 J 15 J 15 J 15 J 15 J 15 J 15 J 15 J 15 J 15 J 15 J 15 J 15 J 15 J 15 J 15 J 15 J 15 J 15 J 15 J 15 J 15 J 15
1 1 1 1 1 1 1 1 1 1 1 1 1 1 1 1 1 1 1 1 1 1 1 1 1 1 1 1 1 1 1 1 1 1 1 1 1 1 1 1 1 1 1 1 1 1 1 1 1 1
a 15 a 15 a 15 a 15 a 15 a 15 a 15 a 15 a 15 a 15 a
.6
.7
.8
.9
|
1
.2
.3
.4
.5
.6
.2
.4
5
.6
.2
5
.6
.2
.3
.4
5
.6
.3
.4
5
.3
.4
5
.6
.3
.6
.3
.4
5
.3
.4
.5
.6
.7
.8
.9
|
|
1
1
|
1
1
一
.1
.1
.1
.1
.1
gai j g o k j 1 oai j j
j i k jia jia jia jia jia jia jia jia jia jia jia jia jia jia jia jia jia jia jia jia jia jia jia jia jia jia jia jia jia jia jia jia jia jia jia jia jia jia jia jia jia jia jia jia jia jia jia jia jia jia j

g j 10000000000000000000000000000000000000000000000000000000000000000000

=

#
1
( 2b + 2a - ) = 2
( 3b + 3a - ) = 0 原因:不存在 Q( -1,4) .
S OBC = S COD + S_ BOC
LCD.5
6.6
10 × 5 × 5 × 5 .7
8
J9
(HG6531C) 0000000000
(HG6531C) 0j,dl a0o o0g g aal ad
1/1 gaoial 1 (1) jiaial laiial
(7)gall 1j gaii
1
aalal 3
A/b)
a(/b)0g 1
a jll a lly 1 yal 1 yj 1 jy
aaiiia iiaaiia aiaiaiaiaiaiaiaiaiaiaiaiaiaiaiaiaiaiaiaiaiaiaiaiaiaiaiaiaiaiaiaiaiaiaiaiaiaiaiaiaiaiaiaiaiaiaiaiaiaiaiaiaiaiaiaia
a. yalil 1yil (t) yilil jie bial 4
Jauu Jui joi ooi
Aaia aalaae 8 Jaell 8aai 8ai ai j
aiaiilai gai jin
(LCD 5 a a a a a a a a a a a a a a a a a a a a a a a a a a a a a a a a a a
1.5,5
(HG6531C)