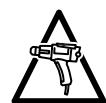
HG5012 - Heat gun MAKITA - Free user manual and instructions
Find the device manual for free HG5012 MAKITA in PDF.
User questions about HG5012 MAKITA
0 question about this device. Answer the ones you know or ask your own.
Ask a new question about this device
Download the instructions for your Heat gun in PDF format for free! Find your manual HG5012 - MAKITA and take your electronic device back in hand. On this page are published all the documents necessary for the use of your device. HG5012 by MAKITA.
USER MANUAL HG5012 MAKITA
| A | ● | ● | ● | |||||
| B | ● | ● | ● | ● | ||||
| C | ● | ● | ● | ● | ● | ● | ● | ● |
Inbetriebnahme
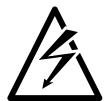
WARNING: Non-observation of the safety rules while working with the hot air tool can lead to fire, explosion, electric shock or
burns. Read the operating instructions before using the tool and always observe the safety rules. Save these instructions and give them to persons that have not been instructed before they use the tool.
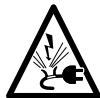
WARNING: A damaged casing or an opened unit can lead to a hazardous electric shock. Do not open the unit and do not put a charged unit into operation. Do not drill into the e.g., to attach a company label. Before any time in the unit, pull the mains plug.

WARNING: A damaged power cord can lead to a hazardous electric shock. Check the power cord regularly. Do not operate when the power cord is damaged. Always damaged cord replaced through a specialist. Wrap the cord around the unit and protect it, heat and sharp edges. Do not carry the unit cord and do not use the cord to pull the plug in the outlet.
WARNING: Do not work in rain or in a moist or wet environment. This can lead to a hazardous electric shock. Keep the unit more the unit in a dry location when not in use. Cover the weather conditions. Do not work in wet or dry facilities. Avoid body contact with ground, cables or surfaces, such as pipes, radiators, and refrigerators.
WARNING: Connect power tools that are used in the open via a residual current circuit breaker (RCCB).

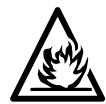
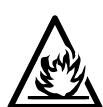
WARNING: Danger of explosion! The hot air tool can explosively ignite combustible fluids and gases. Do not work in a potentially live environment. Check the surrounding starting to work. Do not work on fuels or gasifiers or in their vicinity, even when they are
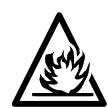
WARNING: Danger of fire! Heat can reach combustible materials that are hidden behind coverings, in ceilings, floors or cavities, and
ignite them. Inspect the work area before starting to work and in case of doubt, abstain from using the hot air tool. Do not point the unit at the same spot for extended periods.
WARNING: Danger of fire! An unsupervised operating hot air tool can set fire to objects that are close by. The unit must be supervised mes during operation. When allowing the off unit to cool down, always place it down and standing. Allow the unit to cool downely.
WARNING: Danger of fire! When working plastics, varnish or similar materials, gases develop that are easily inflammable and can
lead to explosions. Be prepared for flames to develop and keep suitable fire-extinguishing means at hand.

WARNING: Danger of intoxication! When working plastics, varnish or similar materials, gases develop that can be aggressive or
toxic. Avoid breathing in vapours, even when they appear to be harmless. Always provide for good ventilation of the work area or wear a respirator.

WARNING: Danger of injury! The hot air jet can injure persons or animals. Touching the hot tube of the heating element or the nozzle
leads to skin burns. Keep children and other persons away from the unit. Do not touch the tube of the heating element or the nozzle when they are hot. Do not use the unit as a hair dryer; it develops much more heat than a hair dryer. Do not use the unit to heat up fluids or to dry objects or materials that are destroyed through the influence of hot air.
WARNING: Unintentional starting or unexpected switching on of the heating element after actuation of the thermal relay can lead
to injuries. Make sure that the switch is set to OFF when connecting the unit to the mains supply. Switch the unit OFF when the thermal relay has actuated.
WARNING: Danger of injury! Using an airflow reflection nozzle that is not suitable for your unit can lead to burns. Use only original ties for your model that are listed in theseng instructions.

WARNING: Danger of injury and fire! The hot air tool is dangerous for children. Keep the hot air tool out of the reach of children

DANGER: Danger of overheating! Incorrect handling can lead to an accumulation of heat and thus damage the unit. Do not operate the
unit when it is placed down horizontally or when pointed downward. The air-intake opening and the nozzle must not be covered. Use only nozzles that are suitable for your unit.

Recycle raw materials instead of disposing as waste. The unit, accessories and packaging should be sorted for environmentally
friendly recycling.
IMPORTANT SAFETY INSTRUCTIONS*
This appliance has a polarized plug (one blade is wider than the other). To reduce the risk of electric shock, this plug is intended to fit in a polarized outlet only one way. If the plug does not fit fully in the outlet, reverse the plug. If it still does not fit, contact a qualified electrician. Do not modify the plug in any way.
READ THESE INSTRUCTIONS
Warning: Extreme care should be taken when stripping paint. The peelings, residue and vapors of paint may contain lead, which is poisonous. Any pre-1977 paint may contain lead and paint applied to homes prior to 1950 is likely to contain lead. Once deposited on surfaces, hand to mouth contact can result in the ingestion of lead. Exposure to even low levels of lead can cause irreversible brain and nervous system damage; young and unborn children are particularly vulnerable.
Before beginning any paint removal process you should determine whether the paint you are removing contains lead. This can be done by your local health department or by a professional who uses a paint analyzer to check the lead content of the paint to be removed. LEAD-BASED PAINT SHOULD ONLY BE REMOVED BY A PROFESSIONAL AND SHOULD NOT BE REMOVED USING A HEAT GUN.
Persons removing paint should follow these guidelines:
- Move the work piece outdoors. If this is not possible, keep the work area well ventilated. Open the windows and put an exhaust fan in one of them. Be sure the fan is moving the air from inside to outside.
- Remove or cover any carpets, rugs, furniture, clothing, cooking utensils and air ducts.
- Place drop cloths in the work area to catch any paint chips or peelings. Wear protective clothing such as extra work shirts, overalls and hats.
- Work in one room at a time. Furnishings should be removed or placed in the center of the room and covered. Work areas should be sealed off from the rest of the dwelling by sealing doorways with drop cloths.
- Children, pregnant or potentially pregnant women and nursing mothers should not be present in the work area until the work is done and all clean up is complete.
6.* Wear dust respirator mask or a dual filter (dust and fume) respirator mask which has been approved by the Occupational Safety and Health Administration (OSHA), the National Institute of Safety and Health (NIOSH), or the United States Bureau of Mines. These masks and replaceable filters are readily available at major hardware stores. Be sure the mask fits. Beards and facial hair may keep masks from sealing properly. Change filters often. DISPOSABLE PAPER MASKS ARE NOT ADEQUATE. - Use caution when operating the heat gun. Keep the heat gun moving as excessive heat will generate fumes which can be inhaled by the operator.
- Keep food and drink out of the work area. Wash hands, arms and face and rinse mouth before eating or drinking. Do not smoke or chew gum or tobacco in the work area.
- Clean up all removed paint and dust by wet mopping the floors. Use a wet cloth to clean all walls, sills and any other surface where paint or dust is clinging. DO NOT SWEEP, DRY DUST OR VACUUM. Use a high phosphate detergent or trisodium phosphate (TSP) to wash and mop areas.
- At the end of each work session put the paint chips and debris in a double plastic bag, close it with tape or twist ties and dispose of properly.
- Remove protective clothing and work shoes in the work area to avoid carrying dust into the rest to the dwelling. Wash work clothes separately. Wipe shoes off with a wet rag that is then washed with the work clothes. Wash hair and body thoroughly with soap and water.
- Applicable for cUL listed products only.
| A | B | C | ||||||||||||||
| Voltage | [V] | 230 | 120 | 100 | 230 | 120 | 100 | 230 | 120 | 100 | ||||||
| Frequency | [Hz] | 50/60 | 50/60 | 50/60 | ||||||||||||
| Power | [W] | 1600 | 1200 | 1100 | 1800 | 1400 | 1200 | 2000 | 1500 | 1300 | ||||||
| Current consumption | [A] | 7 | 10 | 11 | 8 | 12 | 12 | 9 | 13 | 13 | ||||||
| Switch positions | 0 - I - II | 0 - I - II | 0 - I | |||||||||||||
| Temperature | Position | I | II | I | II | I | II | Manually adjustable | Electronically adjustable and controlled | |||||||
| [°C] | 350 | 500 | 500 | 500 | 100-550 | 80-550 | 80-550 | 80-650 | 80-650 | 80-650 | ||||||
| [°F] | 660 | 930 | 930 | 930 | 210-1020 | 180-1020 | 180-1020 | 180-1200 | 180-1200 | 180-1200 | ||||||
| Air flow | Position | I | II | I | II | I | II | I | II | I | II | I | II | Electronically adjustable | ||
| [I/min] | 350 | 500 | 250 | 400 | 250 | 400 | 250 | 550 | 250 | 450 | 250 | 450 | 200-550 | 200-500 | 200-500 | |
| [cfm] | 12.5 | 17.5 | 8.8 | 14 | 8.8 | 14 | 8.8 | 19.5 | 8.8 | 16 | 8.8 | 16 | 7-19.5 | 7-17.5 | 7-17.5 | |
| Weight without cord | [kg] | 0.58 | 0.60 | 0.63 | ||||||||||||
| [lbs] | 1.28 | 1.32 | 1.39 | |||||||||||||
| Dimensions | [mm] | 230 x 80 x 240 | ||||||||||||||
| L x B x H | [inch] | 9.1 x 3.2 x 9.5 | ||||||||||||||
| Protection class | II/ [□ (Double insulated) | |||||||||||||||
Intended Use
When observing the safety rules and using the original accessories, this hot air tool is intended for all applications with hot air that are listed in these operating instruction
| Applications | A | B | C |
| Shrinking of shrinkdown tubing, solder connectors and solder terminals, packaging and electrical components. | ● | ● | ● |
| Deforming of articles made from acrylic, PVC, and polystyrene, tubing, plates and profiles, as well as moist woods. | ● | ● | ● |
| Welding of thermoplastic polymer, flooring materials of PVC and linoleum, PVC-coated fabric, tar-paulins and foils. | ● | ● | |
| Soldering of tin, special silver solder, SMD elements, cable lugs, and for loosening soldered connec-tions. | ● | ● | |
| Paint removal - Removal of old and even thick coatings of oil paint, varnish and synthetic plaster. | ● | ● | ● |
| Drying of colour shade samples, filler, adhesives, construction joints and stucco forms. | ● | ● | ● |
| Joining adhesives - Large-surface gluing with contact adhesives, activation of pressure-sensitive adhesives, acceleration of bonding processes, releasing of bonding points as well as releasing or bonding of edge band or venee. | ● | ● | ● |
| Defrosting of icy stairs and steps, door locks, trunk lids, car doors or water pipes, as well as for defrosting refrigerators and ice boxes. | ● | ● | ● |
| Disinfection - With hot air of 600 °C, you can quickly rid animal sties/stables of bacteria. Woodworm infestation can be controlled (Caution: Danger of fire! Do not heat up the wooden surface exces-sively). | ● | ● |
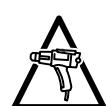
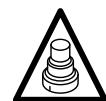
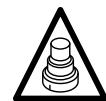
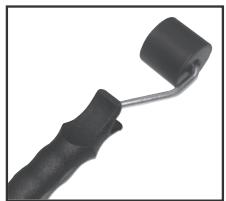
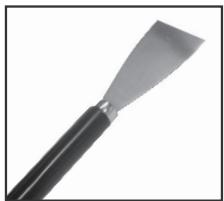
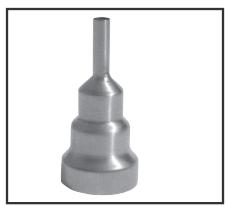
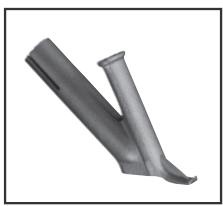
Attaching the Nozzle onto the Heating-element Tube 3

A falling down nozzle can set an object on fire. Nozzles must be mounted firmly and secure on the unit.

Touching a hot nozzle can lead to serious burns. Before attaching or replacing a nozzle, allow the unit to cool down completely or use a suitable tool.

A hot nozzle can set a surface on fire. Place down hot nozzles only on fire-proof surfaces.

An incorrect or defective nozzle can lead to heat accumulation and damage the unit. Use only original nozzles according to the table that are suitable for your unit.
| A | ● | ● | ● | |||||
| B | ● | ● | ● | ● | ||||
| C | ● | ● | ● | ● | ● | ● | ● | ● |
Putting into Operation
Observe the mains voltage: The voltage of the power source must agree with the value given on the nameplate of the unit. Extension cords must have a conductor cross section of 2 × 1.5 mm^2 min.
Switching On:
Switching Off:
A: Set the switch 1 to l or II.
Set the switch 1 to 0.
B: Set the switch 1 to I or II. Set the temperature controller 2 as required.
To cool the unit off, set the switch 1 to II and the temperature controller 2 to MIN. When the unit has cooled off, set the switch 1 to 0.
C: Set the switch 1 to 1. Select the desired program or program the temperature and air flow as required (see "Settings").
To cool off the unit, have it operate on COOL DOWN (see "Settings").
When the unit has cooled off, set the switch 1 to 0.
Adjusting the Settings on the Display 2
Begin the selection with the SELECT pushbutton (menu). Note: When an indication flashes in the display, a change can be initiated with either PLUS or MINUS. Repeated actuation of SELECT leads to the next step.
Language selection, temperatur

Selecting the function program

- 1-Free setting
80^ C / 5
- Welding PPEPDM
280 °C/5
- 2-Free setting
80^ C / 5
- Welding HD-PE
300 °C/3
- Shrinking
450^ / 5
- Welding PP
320^ C / 3
- Forming
500°C/4
- Welding PVC-U
340^ C / 3
- Soldering copper
650^ C / 3
- Welding ABS
360^ C / 3
- Drying paint
650^ / 5
- Welding PC
370^ C / 3
- Paint stripping
425°C/5
- Welding floor-foil
450 °C/3
The keyword of the selected function program is indicated by flashing. Longer text begins to move after 2 seconds and returns to the keyword after 2 passes. Within this period, the SELECT pushbutton can be pressed again to adjust the temperature or the air flow.
Selecting STANDBY or COOL DOWN
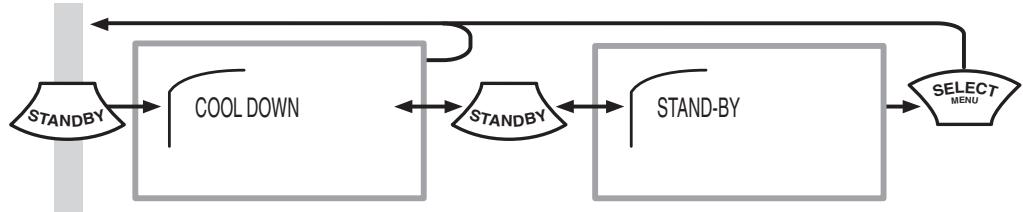
- Select STANDBY when interrupting your work for short time. The energy absorption is reduced.
- At the end of your work, always select COOL DOWN. When the unit has cooled off, switch it off and pull the plug from the receptacle.
Avvertenze

| A | ● | ● | ● | |||||
| B | ● | ● | ● | ● | ||||
| C | ● | ● | ● | ● | ● | ● | ● | ● |
Messa in funzione
| A | ● | ● | ● | |||||
| B | ● | ● | ● | ● | ||||
| C | ● | ● | ● | ● | ● | ● | ● | ● |
Mise en service
| A | ● | ● | ● | |||||
| B | ● | ● | ● | ● | ||||
| C | ● | ● | ● | ● | ● | ● | ● | ● |
Puesta en marcha
| A | ● | ● | ● | |||||
| B | ● | ● | ● | ● | ||||
| C | ● | ● | ● | ● | ● | ● | ● | ● |
| A | ● | ● | ● | |||||
| B | ● | ● | ● | ● | ||||
| C | ● | ● | ● | ● | ● | ● | ● | ● |
Ingebruikneming
| A | ● | ● | ● | |||||
| B | ● | ● | ● | ● | ||||
| C | ● | ● | ● | ● | ● | ● | ● | ● |
Ibrugtagning
| A | ● | ● | ● | |||||
| B | ● | ● | ● | ● | ||||
| C | ● | ● | ● | ● | ● | ● | ● | ● |
Igangsetting
Ta hensyn til strømspenningen: Spenningen til strømkilden på stemme overens med angivelsene på apparatets typeskilt. Skjeteledningen på ha et tversnitt på min. 2 × 1.5 mm^2 .
Innkobling:
Utkobling:
A: Sett bryteren 1 på l ell er II.
Sett bryteren 1 pa 0.
| A | ● | ● | ● | |||||
| B | ● | ● | ● | ● | ||||
| C | ● | ● | ● | ● | ● | ● | ● | ● |
Käytöönotto
| A | ● | ● | ● | |||||
| B | ● | ● | ● | ● | ||||
| C | ● | ● | ● | ● | ● | ● | ● | ● |
Driftstart
| A | ● | ● | ● | |||||
| B | ● | ● | ● | ● | ||||
| C | ● | ● | ● | ● | ● | ● | ● | ● |
Ekkivnon
IpoosE Tnv taon diktuou: H taon tnC nAekptipknc nnync npenv va tautcetai me v taon nou aov aapepetau otyn pivakida kataoKeuotn ts ouokueug. Tuxov kaawdia eunukovc [maalavTezEc] npenv daotoulaoxiotov 2 x 1,5 mm2.
Oεση σε λειτουργία:
| A | ● | ● | ● | |||||
| B | ● | ● | ● | ● | ||||
| C | ● | ● | ● | ● | ● | ● | ● | ● |
Calistirma
| A | ● | ● | ● | |||||
| B | ● | ● | ● | ● | ||||
| C | ● | ● | ● | ● | ● | ● | ● | ● |
Uruchomienie
| A | ● | ● | ● | |||||
| B | ● | ● | ● | ● | ||||
| C | ● | ● | ● | ● | ● | ● | ● | ● |
Uzembe helyezés
| A | ● | ● | ● | |||||
| B | ● | ● | ● | ● | ||||
| C | ● | ● | ● | ● | ● | ● | ● | ● |
Uvedeni do provozu
| A | ● | ● | ● | |||||
| B | ● | ● | ● | ● | ||||
| C | ● | ● | ● | ● | ● | ● | ● | ● |
| A | ● | ● | ● | |||||
| B | ● | ● | ● | ● | ||||
| C | ● | ● | ● | ● | ● | ● | ● | ● |
Punere in functiune
| A | ● | ● | ● | |||||
| B | ● | ● | ● | ● | ||||
| C | ● | ● | ● | ● | ● | ● | ● | ● |
Zagon
Upostevajte omrežno napetost: Napetost elektricega vira se mora ujemati s podatki na tipski plošćici naprave. Kabelski podaljski morajo imeti premer rajmanj 2 x 1.5 mm².
Vklop:
A: Premaknite stikalo 1 v položaj I ali II.
B: Premaknite stikalo 1 v položaj I ali II. Regulator temperature 2 nastavite glede na potrebe.
Izklop:
Premaknite stikalo 1 v položaj 0.
Napravo ohladite tak, da stikalo 1 premaknete v položaj II, regulator temperature 2 pa na MIN. Ko je naprava ohlajena, premaknite stikalo 1 v položaj 0.
C: Premaknite stikalo 1 v položaj I. IzberiteŽeleni program ali poljubno programirajte temperaturo in zračni curek (glejte „Nastavitve").
| A | ● | ● | ● | |||||
| B | ● | ● | ● | ● | ||||
| C | ● | ● | ● | ● | ● | ● | ● | ● |
Пускан eксплоатаця
BnmaBaTe 3a HapexeHneTo Ha 3axpaHbauTa MpeXa: HapexeHneTo Ha 3axpaHbauTa MpeXa Tpr6Ba Da CbBnaDa C daHHnte, n3ncaHn Ha TaBeJkata Ha eJeKtpOnHcTpymEHa. Ako n3noJ3BaTe ydIjnxTeJHn Ka6JIi, Te Tpr6Ba Da ca cbc CeueHne He no-MaIKo OT 2 x 1.5 mm².
BkJIIOUbaHe:
| A | ● | ● | ● | |||||
| B | ● | ● | ● | ● | ||||
| C | ● | ● | ● | ● | ● | ● | ● | ● |
Kasutamine
| A | ● | ● | ● | |||||
| B | ● | ● | ● | ● | ||||
| C | ● | ● | ● | ● | ● | ● | ● | ● |
Darbo eiga
Atkreipkite demesj j elektros tinklo jtampa: Elektros šaltinio jtampa privalo atitiki duomenis, nurodytus ant prietaiso tipinio skydelio. Prailginimo kabeliai privalo turéti min. 2 x 1.5 mm² dydžio skersmenj.
Jungimas:
| A | ● | ● | ● | |||||
| B | ● | ● | ● | ● | ||||
| C | ● | ● | ● | ● | ● | ● | ● | ● |
Eksplutešana
leverojiet tikla spriegumu: Stravas avota spriegumam jaatbilst datiem, kuri noraditi uz aparata firmas plaksnites. Pagarinajuma kabeliem jabut ar min. 2× 1.5mm^2 skersgriezumu.
leslēgsana:
Izslęgśana:
| A | ● | ● | ● | |||||
| B | ● | ● | ● | ● | ||||
| C | ● | ● | ● | ● | ● | ● | ● | ● |
Равotas с п résовором
YuHTbIbAaTe HapJxHne cetn: HapJxHne nCTOCHNkA TOKa DOJXHO COOTBcTcBOBaT DaHHbIM Ha TINIOBOI Ta6JIuKe npIbopa. Ka6eIb-ydlnHnteIb DoJxH e IMeTb nonepueHoe ceHne He MeHee 2 x 1,5 MM2.
BkJIouHne:
| A | ● | ● | ● | |||||
| B | ● | ● | ● | ● | ||||
| C | ● | ● | ● | ● | ● | ● | ● | ● |
Vérjá nè punè
Keni kujdes per tensionin erjetit: Tensioni i burimit trrymes duhet te perputhet me t dhcnat e cekura neta belen e pajisjes. Kabllote vazhduese duhet ta kenne njpe prerje torthore prej se paku 2× 1.5mm^2
Kyçija:
Shkycjia:
| A | ● | ● | ● | |||||
| B | ● | ● | ● | ● | ||||
| C | ● | ● | ● | ● | ● | ● | ● | ● |
Pušanje u rad
Pridržavati se mrežnog napona: Napon izvora struje treba odgovarati podacima sa tipske pločice urežaja. Produžni kabel mora imati presjek od 2 x 1.5 mm².
Uključivanje:
Isključivanje:
| A: Namjestite prekidač 1 na I ili II. | Namjestite prekidač 1 na 0. |
| B: Namjestite prekidač 1 na I ili II. Podesite regulator temperature 2 prema potrebi. | Namjestite za hladenje prekidač 1 na II i regulator temperature 2 na MIN. Kada se urežaj ohladi, namjestite prekidač 1 na 0. |
| C: Namjestite prekidač 1 na I. Odaberite Željeni program ili programirajte temperaturu i struju zraka prema vašim Željama (vidjeti „Podešavanja“). | Kod ohlaživanja ostavite urežaj da radi na COOL DOWN (vidjeti „Podešavanja“). Kada se urežaj ohladi, namjestite prekidač 1 na 0. |
Provesti podesavanja na displeju 2
Odabir započeti sa tipkom SELECT (meni). Napomena: Ako na displeju trepti tokazivanje, promjena se može provesti sa PLUS ili MINUS. Ponovni pritisak na SELECT dovodi do slijedećeg koraka.
Biranje jezika, temperature

Biranje programa rada

- 1-slobodno podesav. 80^ C / 5 8. Zavarivanje PPEPDM 280^ C / 5
- 2-slobodno podesav. 80^ / 5 9.Zavarivanje HD-PE 300^ / 3
- Skupljanje 450 °C/5 10. Zavarivanje PP 320 °C/3
- Oblikovanje 500 °C/4 11. Zavarivanje PVC-U 340 °C/3
- Meko lemljenje 650 °C/3 12. Zavarivanje ABS 360 °C/3
- Sušenje boje 650 °C/5 13. Zavarivanje PC 370 °C/3
- Uklanjanje boje 425 °C/5 14. Zavarivanje podnih folija 450 °C/3
Naziv odabranog funkcijskog programa ce se prikazati sa treptanjem. Dulji tekst se nakon 2 sek. počinje kretati i vracá se nakon 2 prolaza natrag na naziv programa. U tom vremenu se može ponovno pritisnuti SELECT tipka, za preragodbu temperature odnosno količine zraka.
Odabrati STANDBY ili COOL DOWN

- Odaberite STANDBY kada se rad na kratko prekida. Time ici se smanjiti utrošak elektrčne energije.
- Na kraju rada odaberite uvijek COOL DOWN. Isključite urežaj kada se ohladi i izvucite utikač iz mrežne uticnice.
Uputstva o sigurnosti

UPOZORENJE: Ne obracanje pažnje na uputstva o sigurnosti moze pri radu sa aparatima sa vrelim
| A | ● | ● | ● | |||||
| B | ● | ● | ● | ● | ||||
| C | ● | ● | ● | ● | ● | ● | ● | ● |
Pušanje u rad
Obratite pažnju na napon mreže: Napon strujnog izvora mora biti usaglasen sa podacima na tipskoj tablici aparata. Produžni kablovi moraju imati presek od min. 2 × 1.5 mm^2 .
Uključivanje:
Isključivanje:
| A: | Stavite prekidač 1 na I ili II. | Stavite prekidač 1 na O. |
| B: | Stavite prekidač 1 na I ili II. Podesite regulator temperature 2 prema potrebi. | Stavite radi hladjenja prekidač 1 na II i regulator temperature 2 na MIN. Kada se aparat ohladi, stavite prekidač 1 na O. |
| C: | Stavite prekidač 1 na I. Izaberite Željeni program, ili programirajte temperaturu i struju vazduha prema Vašoj Želji (pogledajte „podesavanje“). | Radi hladjenja neka aparat radi na COOL DOWN( pogledajte „Podesavanje“). Ako je aparat ohladjen, stavite prekidač 1 na O. |
C Izvršite podesavanja na displaju 2
| A | ● | ● | ● | |||||
| B | ● | ● | ● | ● | ||||
| C | ● | ● | ● | ● | ● | ● | ● | ● |
CTapTyBaHbe
Да се вима на habонот coстура: HaboHOT ha n3BOPOT Ha cTpyja Mopa da ODoRObapa Ha noJaToCuIte Ha Tabnukata 3a TInOT ha ypeIoT. Прдолжнот ka6eJ mopa da Иma пeceK od MnH. 2 x 1.5 MM².
BknyuBaHe:
IcknyuBaHbe:
A:Пoctabete ro npeknHyBaoy1HaI niiI.
IocTaBeTe ro npeKnHyBaHOT 1 Ha O.
B: Пoctabete ro npeknHybaot 1 ha I nII. Пoctabete ro perylaTopot 3a TempepaTpa 2 no notpe6a.
3a naDeHe, noCTaBeTe ro npeknHyBaUOT 1 Ha II n peryIaTOpOT 3a Temnapatypa 2 Ha MIN. OTKako ypeJOT Ke ce n3JaN, noCTaBeTe ro npeknHyBaUOT 1 Ha 0.
C:Пoctabete ro npeknHybaot 1 ha I. Odobepe ja cakahata nporpama nI nporpamipajte ja TemnepaTypaT a nCTpyeHbeto Ha BO3dYXOT cnopei BaunTe jEJIbN (BnDn ,POnecyBaHa).
3a nahebe noctabeTe ro ypeIoT ha COOL DOWN (BnuN ,POnecyBaHa).
Kora ypeIoT Ke ce n3JaI, noCTaBte ro npkeKnHyBaUOT 1 Ha 0.
BpseHe IopeCyBaHa Ha IncPJIeJ 2
CTapTyBaJTe ro n360pOT co konUeTo SELECT (MeH). YnataCTBO: Kora Ha dinCnIpeJOT Ke CBeTHe NOKaKByaU, MoKe da ce HanpaBn npomHa co PLUS nnn MINUS. NobTOpHTo npitncKaHe ha SELECT BOHN KOH cJeDHNOT YeKOp.
gdofoofofofofofofofofofofofofofofofofofofofofofofofofofofofofofofofofofofofofofofofofofofofofofofofofofofofofofo
gogds. gabbsb mgbvgs o odysmo gboobgy bgsymo. s sbgnoom jnfo, dsgmoos, sbtg bsodm bodol gsudsgoog. govssgogj gagggoa bsdydmbgkyogdoob gsdmoogb yksygm

gobosgds: gbsbgyds ygdjfoaogds
gbsdmoosgdoomgods bsmboaglsbddo
gboeysgsds. gssmoggds
jydoomno. sdydmo bnjbsgym yjgyoamn o
ososbgoals. gosobgmo yjgdoomdoogm
dbomng bgsosmoqb. by jdgmsbggm yjfoaomssgml
bjgolnygt. dmsoanogm bglvqgm, dooms
gdsymsb. os bsbg. sms oomn bgyol
doom no sdsmoqgmo sdoommoa mdoommo

3s20mbogds:by odysgdo bglbfo gmofo 3oosdo 56bgsbgojdo. sdsdgsdmofo 3oob 106gabomgbobgmoogobgobgods
bgsbgsygm y60s yqobsbom boaodmoydo.
gbsmogmofohbgogmos odabgol s06mojo. gdoomgboom
bgbsgym bgybobofoy mnsbgo. moogmbggmoi
ofojgd ydyg yzgboagmdoosb 6 dooydo,
soomdoosgogdo, jygool doqogdo
bgssmoqdo.

gmbgs: gos 0b jzg sdaaegbdo
gdo bgsygmdo hmoa oos

sogmbogos: sgonjodlsbdmoqgds! ggo
sogol bsogds agsdmoa gnojdoo kombgods
sogdsagodss, sb sggdsgdmofo.
dydsygon ggon jgosgsodg yogdo! gmoyn lgsygos 56
sbo (mogn bsq, obg (sno) bsogdssb sbo
dydsmsb.
sogmbogos: sbdmoI bsodmgs! sgoosds
Ogdsygdaglsdggms gdoomgmoI ygbgga
sogogdo, mgoomogsso msgmoa, gno, osgo
ggydo, gdoomgmo I bsgso boomogdool sgoos.
gysddgdo gdoomgmo I bsdyam sgoomg
gdoosdo by gdoomgboomgdo hgool
by doosomgdo hgool hgool goo
gmbgbs: bshdcbbodcggds! ggymsgym
000goggdgsbgo3gogokssosdsdgds
0doomgomsdsmshsbombdgdsogbogmo
5bgoobssosdmdol sbjbgogdyog
oohd. 3sdoomgbo gkgsa
gogomdabmngg yofoy gmoosdo. gogomdsb
dngos6g 0603ds.

gmbgbsbodmgo! sbdsbol,
oosdgsa oosgol osdggolsb
gdmooggs 66gdo, madgbos gogomoggdo
moosogdgos. gogobok dydabgydo
bgm bddgog g dcbgog dgsdgsgdo
fmdbgsy
0s dgsdms dsno sggjds. sssgdo sbdo bgsdo
dgoobhygm kddgogg os do gom aagg agoognolo
ggbsdmo bsdyngos.

gmbogds: dgsgob bsdadmgds!
sokol, gob go dbgdo sbogol
gdggobsbgdmoa g6gdo, madgbo
gbsdoogbgyo ybsdofo. gogm mowjmb
bobyj, moymo ybgmo s ybgsbgb. omybym
goymo yomglo ydgoom yogmo 6000000000000000000

gmbgds: gdsgdol bsodmoos! ggo
sgo ds ybsdmoos gdoosdo 6
sbo. gdoosdo
bsjgbol jbgos 2sdmo yggb jsbol bogsdggb. dmoaogm
dsjdo g o s6oogd 3oogdo bgybgsygdls! by jgbjdoom sbgm
dgmoaogmasdo agm gdsbgygym ggydgbol doaglsb
bsjgbbl. 5g 2sdmoogbom bgybgsygm odols 3sbdmoas. ob
gogdo gogdo gogdo gogdo gogdo gogdo gogdo gogdo gogdo gogdo gogdo gogdo gogdo gogdo gogdo gogdo gogdo gogdo gogdo gogdo gogdo gogdo gogdo gogdo gogdo gogdo gogdo gogdo gogdo gogdo gogdo gogdo gogdo gogdo g
gobogos: gdsgodlsdoadmgo! gwsyqns
g 86dbsgogogol sdjgyogol agdgggagkdsgmo gdoomg oos.
oogdo. bgsbysgol gmofohmgob 06
ooygbom, ood ygdmoqmo
0d00y0s06ds8g00m0sd0d0g00s000000
gmbgds:gsdgdobbsdoeogds!gbn o 1000000000000000000000000000000000000000000000000000000
gbsdmoos 0dofoombogdsygy. 0dooygbon dbamng oB
mgoobmyo kssosooa 6pOgdo, mdoogdo
oobsygoymos onjgbo dmoogmobzol Oobsdogdo
gbsdysoosaoi gdo.

gobogos: gdsgobgsbodobsdoadogos!
gno sbogobbgmsgom bsdoa dogdgoabogob.
gobsbgm gbsgmo dgdgobogobdoygmadg m.

gogobogos: ggsbgygolbsdoagomgds! sbgmoa
dabssagodgdsgdmsgdmfozgboksbqgdo
oosdokgbgkglgokgok
g bgybogb g yom g o yom yom yom yom yom yom yom yom yom yom yom yom yom yom yom yom yom yom yom yom yom yom yom yom yom yom yom yom yom yom yom yom yom yom yom yom yom yom yom yom yom yom yom yom yom yom yom yom yom yom yon.
| b\y\y\y\y\y\y\y\y\y\y\y\y\y\y\y\y\y\y\y\y\y\y\y\y\y\y\y\y\y\y\y\y\y\y\y\y\y\y\y\y\y\y\y\y\y\y\y\y\y\y\y\y\y\y\y\y\y\y\y\y\y\y\y\y\y\y\y\y\y\y\y\y\y\y\y\y\y\y\y\y\y\y\y\y\y\y\y\y\y\y\y\y\y\y\y\y\y\y\y\y\$ | ||
| a | B | C |
| ● | ● | ● |
| ● | ● | ● |
| ● | ● | ● |
| ● | ● | ● |
| ● | ● | ● |
| ● | ● | ● |
| ● | ● | ● |
| ● | ● | ● |
| ● | ● | ● |
| ● | ● | ● |
| ● | ● | ● |
| ● | ● | ● |
| ● | ● | ● |
| ○ | ● | ● |
3
gds ggsbghgs bsjgbds agbsdggms gsmf gnoa bsmgdoos ysgos. yoggmoos bsjgbds agosgog gssgog
ggbm bsjbgbsbdoosd gbsdmoosgdmoosgmoa bdoagfoy. bsjgbo gogbodols sb sdoomgmoolgsgogm
gds bs jds ds gbs osdmoos osdmoos osmgds, madggs 00 ggs. gmo bs jdgfo gogm bmdg
ggyyogmo sb ydsomgo kfojgbok sdoyyghosd agkodmgsdo mgdovgmo (bgyo sgmob gdo g bgybq
| A | ● | ● | ● | |||||
| B | ● | ● | ● | ● | ||||
| C | ● | ● | ● | ● | ● | ● | ● | ● |
bgsbsgmonssgmondo
o000000000000000000000000000000000000000000000000000000000000 2X1,542.
A: 1-8g61-8g.
B: 11-8g s5-8g. 2.
00g0g0g0g0g0g0g0g0g0g0g0g0g0g0g0g0g0g0g0g0g0g0g0g0g0g0g0g0g0g0g0g0g0g0g0g0g0g0g0g0g0g
3sbsg0g0g0g0g0g0g0g0g0g0g0g0g0g0g0g0g0g0g0g0g0g0g0g0g0g0g0g0g0g0g0g0g0g0g0g0g0g0g0g0g0g0g0g0g0g0g0g0g0g0g
C: gssgggm gsdmoogm 1-8g. sdoafoa bsbgymo 5oosds, sb oessmoaegdgm ydgqyqno 8sgo bgsgbygmoobsdj (obogg "gogbgos").
COOL DOWN-OB
(0000000000000000000000000000000000000000000000000000000000000000000000000000000000000000
C ydsodol gjodol ggsbdo golsmo 2-9g
Sdmebgs 0gds gdoom SELECT (gboy).doomngs: gobgogogg mmdgmoq abgysmabodgdsdggmos PLUS MINUS-oo (gagmogdok agofo. gdoegoo bdoxyoongog gsssoog o sbdgmoqdoom SELECT-b. jcb sdmebgs, gdsg

yj60s 300000000000000000000000

- 1-000000000000000000000000000000000000000000
- 2- mnnnnggns
- 3
- goggog
- 5
- loggdsgsgdmo
- 10000000000000000000
80^ / 5
80^ B / 5
450/5
500 ^ 8/4
650 ^ / 3
650 ^ / 5
425/5
- PEPDM 280/5
- 300°/3
- 320°/3
- 340% / 3
- 360 %/3
- 370^ B3 PC
- 450 b/3
d000000000000000000000000000000000000000000000000000000000000000000000000000000000
STANDBY 6 COOL DOWN- oS sDgBgSn

- ydsomols mgsbols b6dmo g yygolst sdofoqo STANDBY. dom ggdogm gbgoglsb
COOL DOWN. 3d000000000000000000000000000000000000000000000000000000000000000000000000000000
Pneph wulnnuunpjuu uuknupkunngn

9n2wnr: uunuunpjuuuhwunubpu m2wnmPjnn 2wnpuduklu wupgulnpu hun wunhduwufwuklupnn b wuybuklkwih,
wJpJnLuh, bIhIuPwUuIeNnuuug h wupuWd h qun
wJpUd gukh nnWgUuWup: uupuWgh p oonmuqnpduWu
IbIuPhjUul IuqnnuWghu u npshpp IuqubnHug uuuu U
wnuIumnpHpe uunuWmJjuu uunu quunuubmu: quuuubp
wJt IuuuWuh pp qpp uuuuWppe wJtu npshpp
oounmuqnpduMg uwwuJuI dUnpUuug, npTu p duunp
oounmuqnpduWuI qutunuBphu:
QnL2wngl: LwwuLWd npwunlp (qnpohp
LwnSwnu wwnughu fwn) uwr FwugUd qnpohp
kwnn kwnkguh kwnugh cwnuwr uwnuwr
kblwnuwh snwnugh cnwnuwr u
Pwghp h jh wunnhp qnnuulld qnphpml: Uh dwhlp knpuunp, npuuuh, oohuul, uflpuuyuh pshnuiu Jh npuugnud
lnpuumuuJf uup: qnhp h chun quunuld fnnup unhuu u
wunnuuuehghywnu uynunbpe u:
2nLzwnl: LwwuLwD hwpblpupnn bWunhyub LjwUph Lwurw DwnuWuWnp BhlwnpuWsu Cnuuug P wUwsh WwUygWuP: uppbnpwumnqbp wJt EhlwnpuWuu CnuuWp Hwhuunnh pnpd
zhu b1blpnuulu znuuuph qunmldjjuu nbuqmu:
znuuudb1blpnuulu znuuuph qunpblp uunpnuuubn uuhp
fuuuunqunhui yngni: Uquwduhpe b1blpnuulu znuuuph qunpblp
nnpdhpuu uucuupuuk wju jmygh, uumpujmyu uum
muppubuunuwh uuhjmcuubhy: Utbpue npdp pnnlml
b1blpnuulu znuuuph qunbhy, u ph oqnunqshw ujn lqupb,
b1blpnuulu znuuuph uynge qunpwuyu puwbln zuwup
2nLwJr: Uh wunbep wuahl mwhl qwr
wnuul, zuwahnu Wg rWuWJpnr: Hw kwnn
Lwunkgub1 Jwueghwurwunwunlp
Lblwnuwlw uwnuugwunuohwwuogw:
Pnpdpppuwhp np[thwulm] Pnpdpppoqmuwnpnhnubpmf
uupuusuhwju npwulm] nunppn jnu npdppebnuuuhl
uwuufwubhp: Uwunuhp wuy uhu juulubpmf:
Qbn,pIh mIbe qunumwugumwupbp quid wuuj
uwuufwubpndblmuwqud bhlpuwauu uuppuuipnmufubp,
tuuauopuhluuunmuuulubp, ounmgu uqllupubp,
mmpuyngtpubpquununpuuubp:
9m2wngn: Lhmuuulu upp, npu oumunpduu h uuuu uu uuupu, dhuugp uucuua uuuu uuuu uuuu

QnI2wnl: qJnL uIuW: Spuon 1nnn wpeunlq npnn L Wpuln nHuhh quqbnw qnBn pJus nghpumd uJphU h wunbpeuJrup hquinnn
ZhuunqunhpeuunununuuluhmugunuJgUJpp:Uh uununhpe qunbphquir quihfuwunubph fnnunuJpumf, uunqunh hphupwepnmmuH h:

9nLwng: qwhp fnuulr wu uq: npL qwnq
k wqhl wjplnn ujmphphl kwhuwwugukl,
npL qwnq k wulqum JwUswdIgukmI,
zwwuuhpnuI k uqniue jhuubuujukmuI:
| 0.0000000000000000000000000000000000000000000000000000000000000000000000000000000000000000000000000000 | A | B | C |
| 1.00000000000000000000000000000000000000000000000000000000000000000000000000000000000000000000000000 | ● | ● | ● |
| U.1000Acryl-,Ф.13-Ф.14LWpH(Б.1mLWpH),L.Polystyrol-С.1000WpH,В.1000WpH,С.1000WpH,Д.1000WpH,Б.1000WpH,С.1000WpH,Б.1000WpH,С.1000WpH,Б.1000WpH,С.1000WpH,Б.1000WpH,С.1000WpH,Б.1000WpH,С.1000WpH,Б.1000WpH,Б.1000WpH,С.1000WpH,Б.1000WpH,С.1000WpH,Б.1000WpH,С.1000WpH,Б.1000WpH,С.1000WpH,Б.1000WpH,SB.1000WpH,SB.1000WpH,SB.1000WpH,SB.1000WpH,SB.1000WpH,SB.1000WpH,SB.1000WpH,SB.1000WpH,SB.1000WpH,SB.1000WpH, SB.1000WpH,SB.1000WpH,SB.1000WpH,SB.1000WpH,SB.1000WpH,SB.1000WpH,SB.1000WpH,SB.1000WpH,SB.1000WpH,SB.1000WpH,SC.1000WpH,SC.1000WpH,SC.1000WpH,SC.1000WpH,SC.1000WpH,SC.1000WpH,SC.1000WpH,SC.1000WpH,SC.1000WpH,SC.1000WpH, SC.1000WpH,SC.1000WpH,SC.1000WpH,SC.1000WpH,SC.1000WpH,SC.1000WpH,SC.1000WpH,SC.1000WpH,SC.1000WpH,SC.1000WpH,Sc.1000WpH,SC.1000WpH,SC.1000WpH,SC.1000WpH,SC.1000WpH,SC.1000WpH,SC.1000WpH,SC.1000WpH,SC.1000WpH,SC.1000WpH,sc.1000WpH,SC.1000WpH,SC.1000WpH,SC.1000WpH,SC.1000WpH,SC.1000WpH,SC.1000WpH,SC.1000WpH,SC.1000WpH,SC.1000WpH,SB.1000WpH,SB.1000WpH,SB.1000WpH,SB.1000WpH,SB.1000WpH,SB.1000WpH,SB.1000WpH,SB.1000WpH,SB.1000WpH,Sc.1000WpH,Sc.1000WpH,Sc.1000WpH,Sc.1000WpH,Sc.1000WpH,Sc.1000WpH,Sc.1000WpH,Sc.1000WpH,Sc.1000WpH,Sc.1000WpH,SC.1000WpH,SC.1000WpH,SC.1000WpH,SC.1000WpH,SC.1000WpH,SC.1000WpH,SC.1000WpH,SC.1000WpH,Sc.1000WpH,Sc.1000WpH,SC.1000WpH,SC.1000WpH,SC.1000WpH,SC.1000WpH,SC.1000WpH,SC.1000WpH,SC.1000WpH,Sc.1000WpH,SC.1000WpH,Sc.1000WpH,SC.1000WpH,SC.1000WpH,SC.1000WpH,SC.1000WpH,SC.1000WpH,SC.1000WpH,SC.1000WpH,Sc.1000WpH,Sc.1000WpH,Sc.1000WpH,SC.1000WpH,SC.1000WpH,SC.1000WpH,SC.1000WpH,SC.1000WpH,SC.1000WpH,Sc.1000WpH,SC.1000WpH,SC.1000WpH,Sc.1000WpH,SC.1000WpH,SC.1000WpH,SC.1000WpH,SC.1000WpH,SC.1000WpH,SC.1000WpH,Sc.1000WpH,SC.1000WpH,Sc.1000WpH,Sc.1000WpH,SC.1000WpH,SC.1000WpH,SC.1000WpH,SC.1000WpH,SC.1000WpH,SC.1000WpH,Sc.1000WpH,Sc.1000WpH,SC.1000WpH,Sc.1000WpH,SC.1000WpH,SC.1000WpH,SC.1000WpH,SC.1000WpH,SC.1000WpH,SC.1000WpH,Sc.1000WpH,Sc.1000WpH,Sc.1000WpH,Sc.1000WpH,SC.1000WpH,SC.1000WpH,SC.1000WpH,SC.1000WpH,SC.1000WpH,Sc.1000WpH,SC.1000WpH,SC.1000WpH,SC.1000WpH,Sc.1000WpH,SC.1000WpH,SC.1000WpH,SC.1000WpH,SC.1000WpH,SC.1000WpH,Sc.1000WpH,SC.1000WpH,SC.1000WpH,Sc.1000WpH,Sc.1000WpH,SC.1000WpH,SC.1000WpH,SC.1000WpH,SC.1000WpH,SC.1000WpH,Sc.1000WpH,SC.1000WpH,Sc.1000WpH,SC.1000WpH,Sc.1000WpH,SC.1000WpH,SC.1000WpH,SC.1000WpH,SC.1000WpH,SC.1000WpH,Sc.1000WpH,SC.1000WpH,Sc.1000WpH,Sc.1000WpH,Sc.1000WpH,SC.1000WpH,SC.1000WpH,SC.1000WpH,SC.1000WpH,SC.1000WpH,Sc.1000WpH,Sc.1000WpH,SC.1000WpH,SC.1000WpH,Sc.1000WpH,SC.1000WpH,SC.1000WpH,SC.1000WpH,SC.1000WpH,SC.1000WpH,Sc.1000WpH,Sc.1000WpH,SC.1000WpH,Sc.1000WpH,Sc.1000WpH,SC.1000WpH,SC.1000WpH,SC.1000WpH,SC.1000WpH,SC.1000WpH,Sc.1000WpH,Sc.1000WpH,Sc.1000WpH,SC.1000WpH,Sc.1000WpH,SC.1000WpH,SC.1000WpH,SC.1000WpH,SC.1000WpH,SC.1000WpH,Sc.1000WpH,Sc.1000WpH,Sc.1000WpH,Sc.1000WpH,Sc.1000WpH,SC.1000WpH,SC.1000WpH,SC.1000WpH,SC.1000WpH,Sc.1000WpH,SC.1000WpH,SC.1000WpH,SC.1000WpH,SC.1000WpH,Sc.1000WpH,SC.1000WpH,SC.1000WpH,SC.1000WpH,Sc.1000WpH,Sc.1000WpH,SC.1000WpH,SC.1000WpH,SC.1000WpH,SC.1000WpH,Sc.1000WpH,SC.1000WpH,SC.1000WpH,Sc.1000WpH,SC.1000WpH,Sc.1000WpH,SC.1000WpH,SC.1000WpH,SC.1000WpH,SC.1000WpH,Sc.1000WpH,SC.1000WpH,SC.1000WpH,Sc.1000WpH,Sc.1000WpH,Sc.1000WpH,SC.1000WpH,SC.1000WpH,SC.1000WpH,SC.1000WpH,Sc.1000WpH,SC.1000WpH,Sc.1000WpH,SC.1000WpH,SC.1000WpH,Sc.1000WpH,SC.1000WpH,SC.1000WpH,SC.1000WpH,SC.1000WpH,Sc.1000WpH,SC.1000WpH,Sc.1000WpH,SC.1000WpH,Sc.1000WpH,Sc.1000WpH,SC.1000WpH,SC.1000WpH,Sc.1000WpH,SC.1000WpH,Sc.1000WpH,SC.1000WpH,Sc.1000WpH,SC.1000WpH,Sc.1000WpH,SC.1000WpH,Sc.1000WpH,SC.1000WpH,SC.1000WpH,Sc.1000WpH,SC.1000WpH,Sc.1000WpH,SC.1000WpH,Sc.1000WpH,SC.1000WpH,SC.1000WpH,Sc.1000WpH,Sc.1000WpH,SC.1000WpH,Sc.1000WpH,SC.1000WpH,Sc.1000WpH,SC.1000WpH,Sc.1000WpH,SC.1000WpH,Sc.1000WpH,Sc.1000WpH,SC.1000WpH,Sc.1000WpH,SC.1000WpH,Sc.1000WpH,SC.1000WpH,Sc.1000WpH,Sc.1000WpH,SC.1000WpH,SC.1000WpH,SC.1000WpH,Sc.1000WpH,SC.1000WpH,Sc.1000WpH,SC.1000WpH,Sc.1000WpH,SC.1000WpH,Sc.1000WpH,Sc.1000WpH,Sc.1000WpH,SC.1000WpH,Sc.1000WpH,SC.1000WpH,Sc.1000WpH,SC.1000WpH,Sc.1000WpH,SC.1000WpH,SC.1000WpH,SC.1000WpH,Sc.1000WpH,SC.1000WpH,Sc.1000WpH,SC.1000WpH,Sc.1000WpH,Sc.1000WpH,Sc.1000WpH,SC.1000WpH,SC.1000WpH,Sc.1000WpH,SC.1000WpH,Sc.1000WpH,SC.1000WpH,Sc.1000WpH,Sc.1000WpH,SC.1000WpH,Sc.1000WpH,Sc.1000WpH,SC.1000WpH,Sc.1000WpH,SC.1000WpH,Sc.1000WpH,SC.1000WpH,SC.1000WpH,Sc.1000WpH,SC.1000WpH,SC.1000WpH,Sc.1000WpH,SC.1000WpH,Sc.1000WpH,SC.1000WpH,Sc.1000WpH,Sc.1000WpH,Sc.1000WpH,Sc.1000WpH,SC.1000WpH,Sc.1000WpH,SC.1000WpH,Sc.1000WpH,SC.1000WpH,Sc.1000WpH,Sc.1000WpH,Sc.1000WpH,Sc.1000WpH,Sc.1000WpH,SC.1000WpH,Sc.1000WpH,SC.1000WpH,Sc.1000WpH,SC.1000WpH,SC.1000WpH,Sc.1000WpH,Sc.1000WpH,Sc.1000WpH,SC.1000WpH,Sc.1000WpH,SC.1000WpH,Sc.1000WpH,SC.1000WpH,SC.1000WpH,SC.1000WpH,Sc.1000WpH,Sc.1000WpH,SC.1000WpH,Sc.1000WpH,SC.1000WpH,Sc.1000WpH,SC.1000WpH,SC.1000WpH,SC.1000WpH,SC.1000WpH,Sc.1000WpH,Sc.1000WpH,SC.1000WpH,Sc.1000WpH,SC.1000WpH,Sc.1000WpH,Sc.1000WpH,SC.1000WpH,Sc.1000WpH,SC.1000WpH,SC.1000WpH,Sc.1000WpH,SC.1000WpH,Sc.1000WpH,SC.1000WpH,SC.1000WpH,Sc.1000WpH,SC.1000WpH,Sc.1000WpH,Sc.1000WpH,SC.1000WpH,Sc.1000WpH,SC.1000WpH,Sc.1000WpH,Sc.1000WpH,SC.1000WpH,SC.1000WpH,Sc.1000WpH,Sc.1000WpH,SC.1000WpH,Sc.1000WpH,SC.1000WpH,Sc.1000WpH,Sc.1000WpH,Sc.1000WpH,SC.1000WpH,Sc.1000WpH,Sc.1000WpH,SC.1000WpH,Sc.1000WpH,SC.1000WpH,Sc.1000WpH,Sc.1000WpH,Sc.1000WpH,Sc.1000WpH,SC.10025 |
SpuugmglhJH Jnqunlne 3- h

Bb aHJnR h qnnn n 100000000000000000000000000000000000000000000000000000000000000000000

| A | ● | ● | ● | |||||
| B | ● | ● | ● | ● | ||||
| C | ● | ● | ● | ● | ● | ● | ● | ● |
0nnnnpns
nunnnn nnnn nnnn nnnn nnnn nnnn nnnn nnnn nnnn nnnn nnnn nnnn nnnn nnnn nnnn nnnn nnnn nnnn nnnn nnnn nnnn nnnn nnnn nnnn nnnn nnnn nnnn nnnn nnnn nnnn nnnn nnnn nnnn nnnn nannn nnnn nnnn nnnn nnnn nnnn nnnn nnnn nnnn nnnn nnnn nnnn nnnn nnnn nnnn nnnn nnnn nnnn nnnn nnnn nnnn nnnn nnnn nnnn nnnn nnnn nnnn nnnn nnnn nnnn nnnn nnnn nnnn nnn
UhugubLc:
U.
A
U.nw1 0-
B U.wwu1 1wuuuunu2u uull |uulr |u:
nunnnn nnnn, nph.nwwu wuuuun 2-1 pwh h
hwwwwh uwnu npnpuu 2-1, wjuu. Pu: qhu: hug
np quooh ng, nph. uwwu uuuuunu 0-1 pwh:
2-1 1
C U.wwu1 1 wuununununununl: uunnupg uulwhpwnnnn nunr npwnnnn pnpnppnnpnnpnnpnnpnnpnnpnnpnnpnnpnnpnnpnnpnnpnnpnnpnnpnnpnnpnnpnnpnnpnnpnnpnnpnnpnnpnnpnnpnnpnnpnnpnnpnnpnnpnnpnnpnnpnnpnnpnnpnnpnnpnnpnnpnnpnppnnppnnppnnppnnppnnppnnppnnppnnppnnppnnppnnppnnppnnppnnppnnppnnppnnppnnppnnppnnppnnppnnppnnppnnppnnppnnppnnppnnppnnppnnppnnppnnppnnppnnppnnppnnppnnppnnppnnppnnppnnppnnppnnppnnppnnppnnppnnppnnppnnppnnpp
COOL DOWN (uununununununnub) uuuu uuuu uuuu uuuu uuuu uuuu uuuu uuuu uuuu uuuu uuuu uuuu uuuu uuuu uuuu uuuu uuuu uuuu uuuu uuuu uuuu uuuu uuuu uuuu uuuu uuuu uuuu uuuu uuuu uuuu uuuu uuuu uuuu uuuu
2kug npqnpdppmnnbg, qppe mwny1u 1wunwnr0-
2 kwwu uunwulnne
| A | ● | ● | ● | |||||
| B | ● | ● | ● | ● | ||||
| C | ● | ● | ● | ● | ● | ● | ● | ● |
正式操作
| A | ● | ● | ● | |||||
| B | ● | ● | ● | ● | ||||
| C | ● | ● | ● | ● | ● | ● | ● | ● |
使用開始
MAKITA Corporation, 3-11-8 Sumiyoshi-cho, Anjo, Aichi 446-8502, Japan
Declaration of conformity
MAKITA Corporation, 3-11-8 Sumiyoshi-cho, Anjo, Aichi 446-8502, Japan
confirms that the hot air blowers HG5012, HG551V, HG651C
manufactured by LEISTER Process Technologies, Galileo-Strasse 10, CH-6056 Kaegiswil, in the version put into circulation by us, fulfil EC directives 2004/108 and 2006/95 and the following standards were applied:
EN 55014-1, EN 55014-2, EN 61000-3-2, EN 61000-3-3, EN 50366, EN 62233, EN 60335-2-45
The right to make changes is reserved
Italiano
MAKITA Corporation, 3-11-8 Sumiyoshi-cho, Anjo, Aichi 446-8502, Japan
MAKITA Corporation, 3-11-8 Sumiyoshi-cho, Anjo, Aichi 446-8502, Japan
confirma, que os ventiladores de ar quente HG5012, HG551V, HG651C
MAKITA Corporation, 3-11-8 Sumiyoshi-cho, Anjo, Aichi 446-8502, Japan
bevestigt dat de warme-luchtventilatoren HG5012, HG551V, HG651C
MAKITA Corporation, 3-11-8 Sumiyoshi-cho, Anjo, Aichi 446-8502, Japan
bekrafter hermed at varmluftsbAESeren HG5012, HG551V, HG651C
MAKITA Corporation, 3-11-8 Sumiyoshi-cho, Anjo, Aichi 446-8502, Japan
bekrefter, at varmluftventilatoren HG5012, HG551V, HG651C
MAKITA Corporation, 3-11-8 Sumiyoshi-cho, Anjo, Aichi 446-8502, Japani
MAKITA Corporation, 3-11-8 Sumiyoshi-cho, Anjo, Aichi 446-8502, Japan
η MAKITA Corporation, 3-11-8 Sumiyoshi-cho,
Anjo, Aichi 446-8502, Iαπωνiα
HG5012, HG551V, HG651C
MAKITA Corporation, 3-11-8 Sumiyoshi-cho, Anjo, Aichi 446-8502, Japan
3-11-8 Sumiyoshi-cho,
Anjo, Aichi 446-8502, Japonska
HG5012, HG551V, HG651C
3-11-8 Sumiyoshi-cho,
Anjo, Aichi 446-8502, Japonija
patvirtina, kad karsto oro fenai
HG5012, HG551V, HG651C
MAKITA Corporation, 3-11-8 Sumiyoshi-cho, Anjo, Aichi 446-8502, Japan
HG5012, HG551V, HG651C
mille on tootnud LEISTER Process
3-11-8 Sumiyoshi-cho, Anjo, Aichi 446-8502, JnoHn
ДeКларпа, Ye npOdyKTHTe:
BENTINaTOpn 3a ropeu Bb3dyx
HG5012, HG551V, HG651C
3a KOINTO CE OTHACA Ta3N DeKnapaUN, IPOIN3BVEDEH N OT
LEISTER Process Technologies, Galileo-Strasse 10, CH-6056 Kaegiswil, визленьено, пусало OT на На пазараза, сьOTВETCTBAT на ИзИСКВанИТа наДиректви 2004/108/EO и 2006/95/EO и за сприлжени сдднITE стандарту:
EN 55014-1, EN 55014-2, EN 61000-3-2, EN 61000-3-3, EN 50366, EN 62233, EN 60335-2-45
PpOn3BoDHTeTcN 3ana3Ba npaBOTO Ha npomehn
Hrvatski
Izjava o sukladnosti
MAKITA Corporation,
3-11-8 Sumiyoshi-cho,
Anjo, Aichi 446-8502, Japan
HG5012, HG551V, HG651C
HG5012, HG551V, HG651C
n3rOToBJIeHHbIe KOMpaHnei LEISTER Process Technologies, Galileo-Strasse 10, CH-6056 Kaegiswil/LJIbeuapria, B BVInyUeHHOM HAMN IcPONHeHm yDObJIeTbOPaHT Tpe6oBaHnA M OCbueEBoPoeNckx DInpeKTHB 2004/108 n 2006/95 n UTO bJINn PrIMHeHbI CJIeDuOuIe HOpMaTINBbl:
EN 55014-1, EN 55014-2, EN 61000-3-2, EN 61000-3-3, EN 50366, EN 62233, EN 60335-2-45
CoxpaHReTc npaBO Ha 3MeHeHHA
SHQIP
Deklaraté Konformiteti
Shoqeria MAKITA Corporation,
3-11-8 Sumiyoshi-cho,
Anjo, Aichi 446-8502, Japoni
konfirmoi se ventilatorē t ājrit těnxehtē
HG5012, HG551V, HG651C
u prodhuan nga
LEISTER Process Technologies
(Teknologija e Procesit LEISTER), Rr.
Galileo 10, CH-6056 Kaegiswil, e cila éshte hedhur né qarkullim nga ne nén udhezimet e Unionit 2004/108 dhe
2006/95 pér t'u pērdorur duke pēmbushur
standartet né vijim:
EN 55014-1, EN 55014-2, EN 61000-3-2,
EN 61000-3-3, EN 50366, EN 62233, EN 60335-2-45
Subjekt indryshueshem
Latviešu
Atbillstibas sertifikats
MAKITA Corporation, 3-11-8 Sumiyoshi-cho, Anjo, Aichi 446-8502, Japana
HG5012, HG551V, HG651C
izgatavota
LEISTER Process Technologies, Galileo-Strasse 10, CH-6056 Kaegiswil, kuru laizam tirgū, atbilst EK Direktivām 2004/108 un 2006/95, un tika piemērotas šis normas:
EN 55014-1, EN 55014-2, EN 61000-3-2,
EN 61000-3-3, EN 50366, EN 62233,
EN 60335-2-45
Atstajam sev tiesibas veikt tehniskas izmainas
Srpski
MAKITA Corporation, 3-11-8 Sumiyoshi-cho, Anjo, Aichi 446-8502, Japan
HG5012, HG551V, HG651C
proizveden od strane firme LEISTER Process Technologies, Galileo-Strasse 10, CH-6056 Kaegiswil, u modelu koji je sa naše strane iznet na tržište, ispunjava uslove EZ direktive 2004/108 i 2006/95 kao i da poštuje sledeće standarde
EN 55014-1, EN 55014-2, EN 61000-3-2, EN 61000-3-3, EN 50366, EN 62233, EN 60335-2-45
H3jaba 3a coo6pa3HOCT
MAKITA KopnopejUn,3-11-8 CymnjoUn-oo
Anjo, Anyu 446-8502, Janonija
NOTBpDyBa DeKa, anapaTnTe 3a DyBaHBe TOnOJ BO3dYx
HG5012, HG551V, HG651C
IpoIN3BVeDEn OJIAJCTEP Ipouec TexHOnIoUnc, TaniNeo-LLtpace-6056, LJBajuaPnja-6056,KeRNCBn,Bo COcToj6aTa BO KoJa ce npuTeHN BO npomET OJ Haua CTrpHa, IN NCNoIHyBaat YCNOHTe Ha DInpeKTHBnTe Ha EV 2004/108 n 2006/95 n DeKa ce npImHeTn CJIeDNHTe HOpMn
EN 55014-1, EN 55014-2, EN 61000-3-2,
EN 61000-3-3, EN 50366, EN 62233, EN 60335-2-45
To 3aDpKByBame npaboto Ha
npomehn
中文
合规声明
Anjo, Aichi 446-8502, Japan
本公司在此声明,
由LEISTER Process Technologies
3-11-8 Sumiyoshi-cho,
Anjo, Aichi 446-8502, Japan
Ssbgab Gm 36nab gdoa
HG5012, HG551V, HG651C
Baaagbgy
LEISTER Process Technologies 品 _ 0 ^ 日
品 品 品 品 品 品 品 品 品 品 品 品 品 品 品 品 品 品 品 品 品 10
CH-6056 Kaegiswil s3smygmoj8b
EG 2004/108 2006/95 6mndgob
gdoomoygbosdgoogggo6mo8gdo:
EN 55014-1, EN 55014-2, EN 61000-3-2,
EN 61000-3-3, EN 50366, EN 62233,
EN 60335-2-45
Gcmoogbooogos
日本語
規則順守証明
邮便番号446-8502
愛知県安城市住吉町3丁目11番8号
株式会社 マキタ 日本
HG5012, HG551V, HG651C
I E G 規則2004/108
おは2006/95を順守し、以下の基準
を利用くださいますとをこに表記た
让我:
EN 55014-1, EN 55014-2, EN 61000-3-2,
EN 61000-3-3, EN 50366, EN 62233,
EN 60335-2-45
变更啊
P-71417
HG5012/HG551V
HG651C
P-71423
HG5012/HG551V
HG651C
P-71439
HG551V/HG651C
P71445
HG5012/HG551V
HG651C
Jb
zuiuunuuuGmjuuG
kujunupnpniajnlG
MAKITA Corporation (lnpnpuynuughua),
3-11-8 Sumiyoshi-cho,
Anjo, Aichi 446-8502, Japan
fuiununmu t, np
HG5012, HG551V, HG651C
Tomoyasu Kato, Director
P-71489
HG651C
P-71495
HG651C
P-71504
HG651C
P-71548
P-71451
HG651C
P-71473
HG651C
P-71473
HG651C
Headquarters
MAKITA Corporation
3-11-8 Sumiyoshi-cho
Anjo, Aichi 446-8502, Japan
MAKITA INTERNATIONAL EUROPE LTD.
Michigan Drive, Tongwell, Milton Keynes,
Bucks MK 15 8JD, United Kingdom