GD40DT35 - Scarifier GREENWORKS - Free user manual and instructions
Find the device manual for free GD40DT35 GREENWORKS in PDF.



| Product type | Cordless electric scarifier |
| Brand | Greenworks |
| Model | GD40DT35 (2504807) |
| Category | Lawn scarifier |
| Rated voltage | 40 V |
| Battery type | Lithium-ion (models 29717/29727) |
| Compatible charger | 2910907 |
| Working width | 36 cm (14 in) |
| Working depth | 1 cm (3/8 in) |
| Motor speed | 3600 rpm |
| Wheel size | 17.8 cm (7 in) |
| Weight (without battery) | 10.2 kg |
| Sound pressure level | 76.1 dB(A) (k=3 dB(A)) |
| Measured sound power level | 92.6 dB(A) |
| Guaranteed sound power level | 93 dB(A) |
| Vibrations (right handle) | 4.293 m/s² (uncertainty 1.5 m/s²) |
| Vibrations (left handle) | 3.121 m/s² (uncertainty 1.5 m/s²) |
| Main functions | Scarifying and aerating the lawn |
| Features | Folding handle, collection basket, safety lock button |
| Blade type | Tines (scarifying cylinder) |
| Maintenance | Regular cleaning of the underside, replacement of tines |
| Warranty | 2 years for domestic use, 30 days for professional use |
| Standards | EN 60335-1, EN 50636-2-92, EN 55014-1/2, EN 61000-3-2/3 |
| EU Directives | 2000/14/EC, 2006/42/EC, 2014/30/EU, 2005/88/EC |
Frequently Asked Questions - GD40DT35 GREENWORKS
User questions about GD40DT35 GREENWORKS
0 question about this device. Answer the ones you know or ask your own.
Ask a new question about this device
Download the instructions for your Scarifier in PDF format for free! Find your manual GD40DT35 - GREENWORKS and take your electronic device back in hand. On this page are published all the documents necessary for the use of your device. GD40DT35 by GREENWORKS.
USER MANUAL GD40DT35 GREENWORKS
text_image
greenworks TOOLS2504807
EN 40V DETHATCHER USER'S MANUAL 2
DE 40V Vertikutierer BEDIENUNGSANLEITUNG 7
ES DESCARIFICADOR 40 V MANUAL DE UTILIZACIÓN 12
IT SCARIFICATORE 40 V MANUALE D'USO 17
FR SCARIFICATEUR 40 V MANUE L D'UTILISATION 22
PT ESCARIFICADOR DE 40V MANUAL DE UTILIZAÇÃO 27
NL 40V VERTICUTEERMACHINE GEBRUIKERSHANDLEIDING 32
RU ОЧИСТИТЕЛЬ ГАЗОНА 40 В РУКОВОДСТВО ПО ЭКСПЛУАТАЦИИ 37
FI 40 V SAMMALEENREPIJÄ KÄYTTÄJÄN KÄSIKIRJA 42
SV 40 V VERTIKALSKÄRARE INSTRUKTIONSBOK 47
NO 40V VERTIKALSKJÆRER BRUKSANVISNING 52
DA 40 V VERTIKALSKÆRER BRUGERVEJLEDNING 57
PL SKARYFIKATOR 40 V INSTRUKCJA OBSŁUGI 62
CS 40 V VERTIKUTÁTOR NÁVOD K OBSLUZE 67
SK 40 V VERTIKUTÁTOR NÁVOD NA POUŽITIE 72
SL 40-V ENOTA ZA PREZRAČEVANJE INSTRUKTIONSBOK 77
HR PROZRAČIVAČ TRAVNJAKA, 40 V KORISNI ČKI PRIRU ČNIK 82
HU 40 V BORONA HASZNÁL ATI ÚTMUTATÓ 87
RO SCARIFICATOR 40 V MANUAL DE UTILIZARE 92
BG 40V АЕРАТОР РЬКОВ ОДСТВО ЗА УПОТРЕ БА 97
EL ΕΞΑΕΡΩΤΗΡΑΣ ΓΚΑΖΟΝ 40 V ΕΓΧΕΙΡΙΔΙΟ ΧΡΗΣΗΣ 102
AR
تلووف 40 شرق قعيم
مدختسملا ليلد
107
TR 40V ÇİM HAVALANDIRMA MAKİNESİ KULLANICI KILAVUZU 111
HE 40 116
LT 40 V SKARIFIKATORIUS NAUDOJIMO VADOVAS 120
LV 40 V ZĀLIENA SKARIFIKATORS LIETOTĀJA ROKASGR ĀMATA 125
ET 40V muruõhutaja KASUTAJAUHEND 130
English (Original instructions)
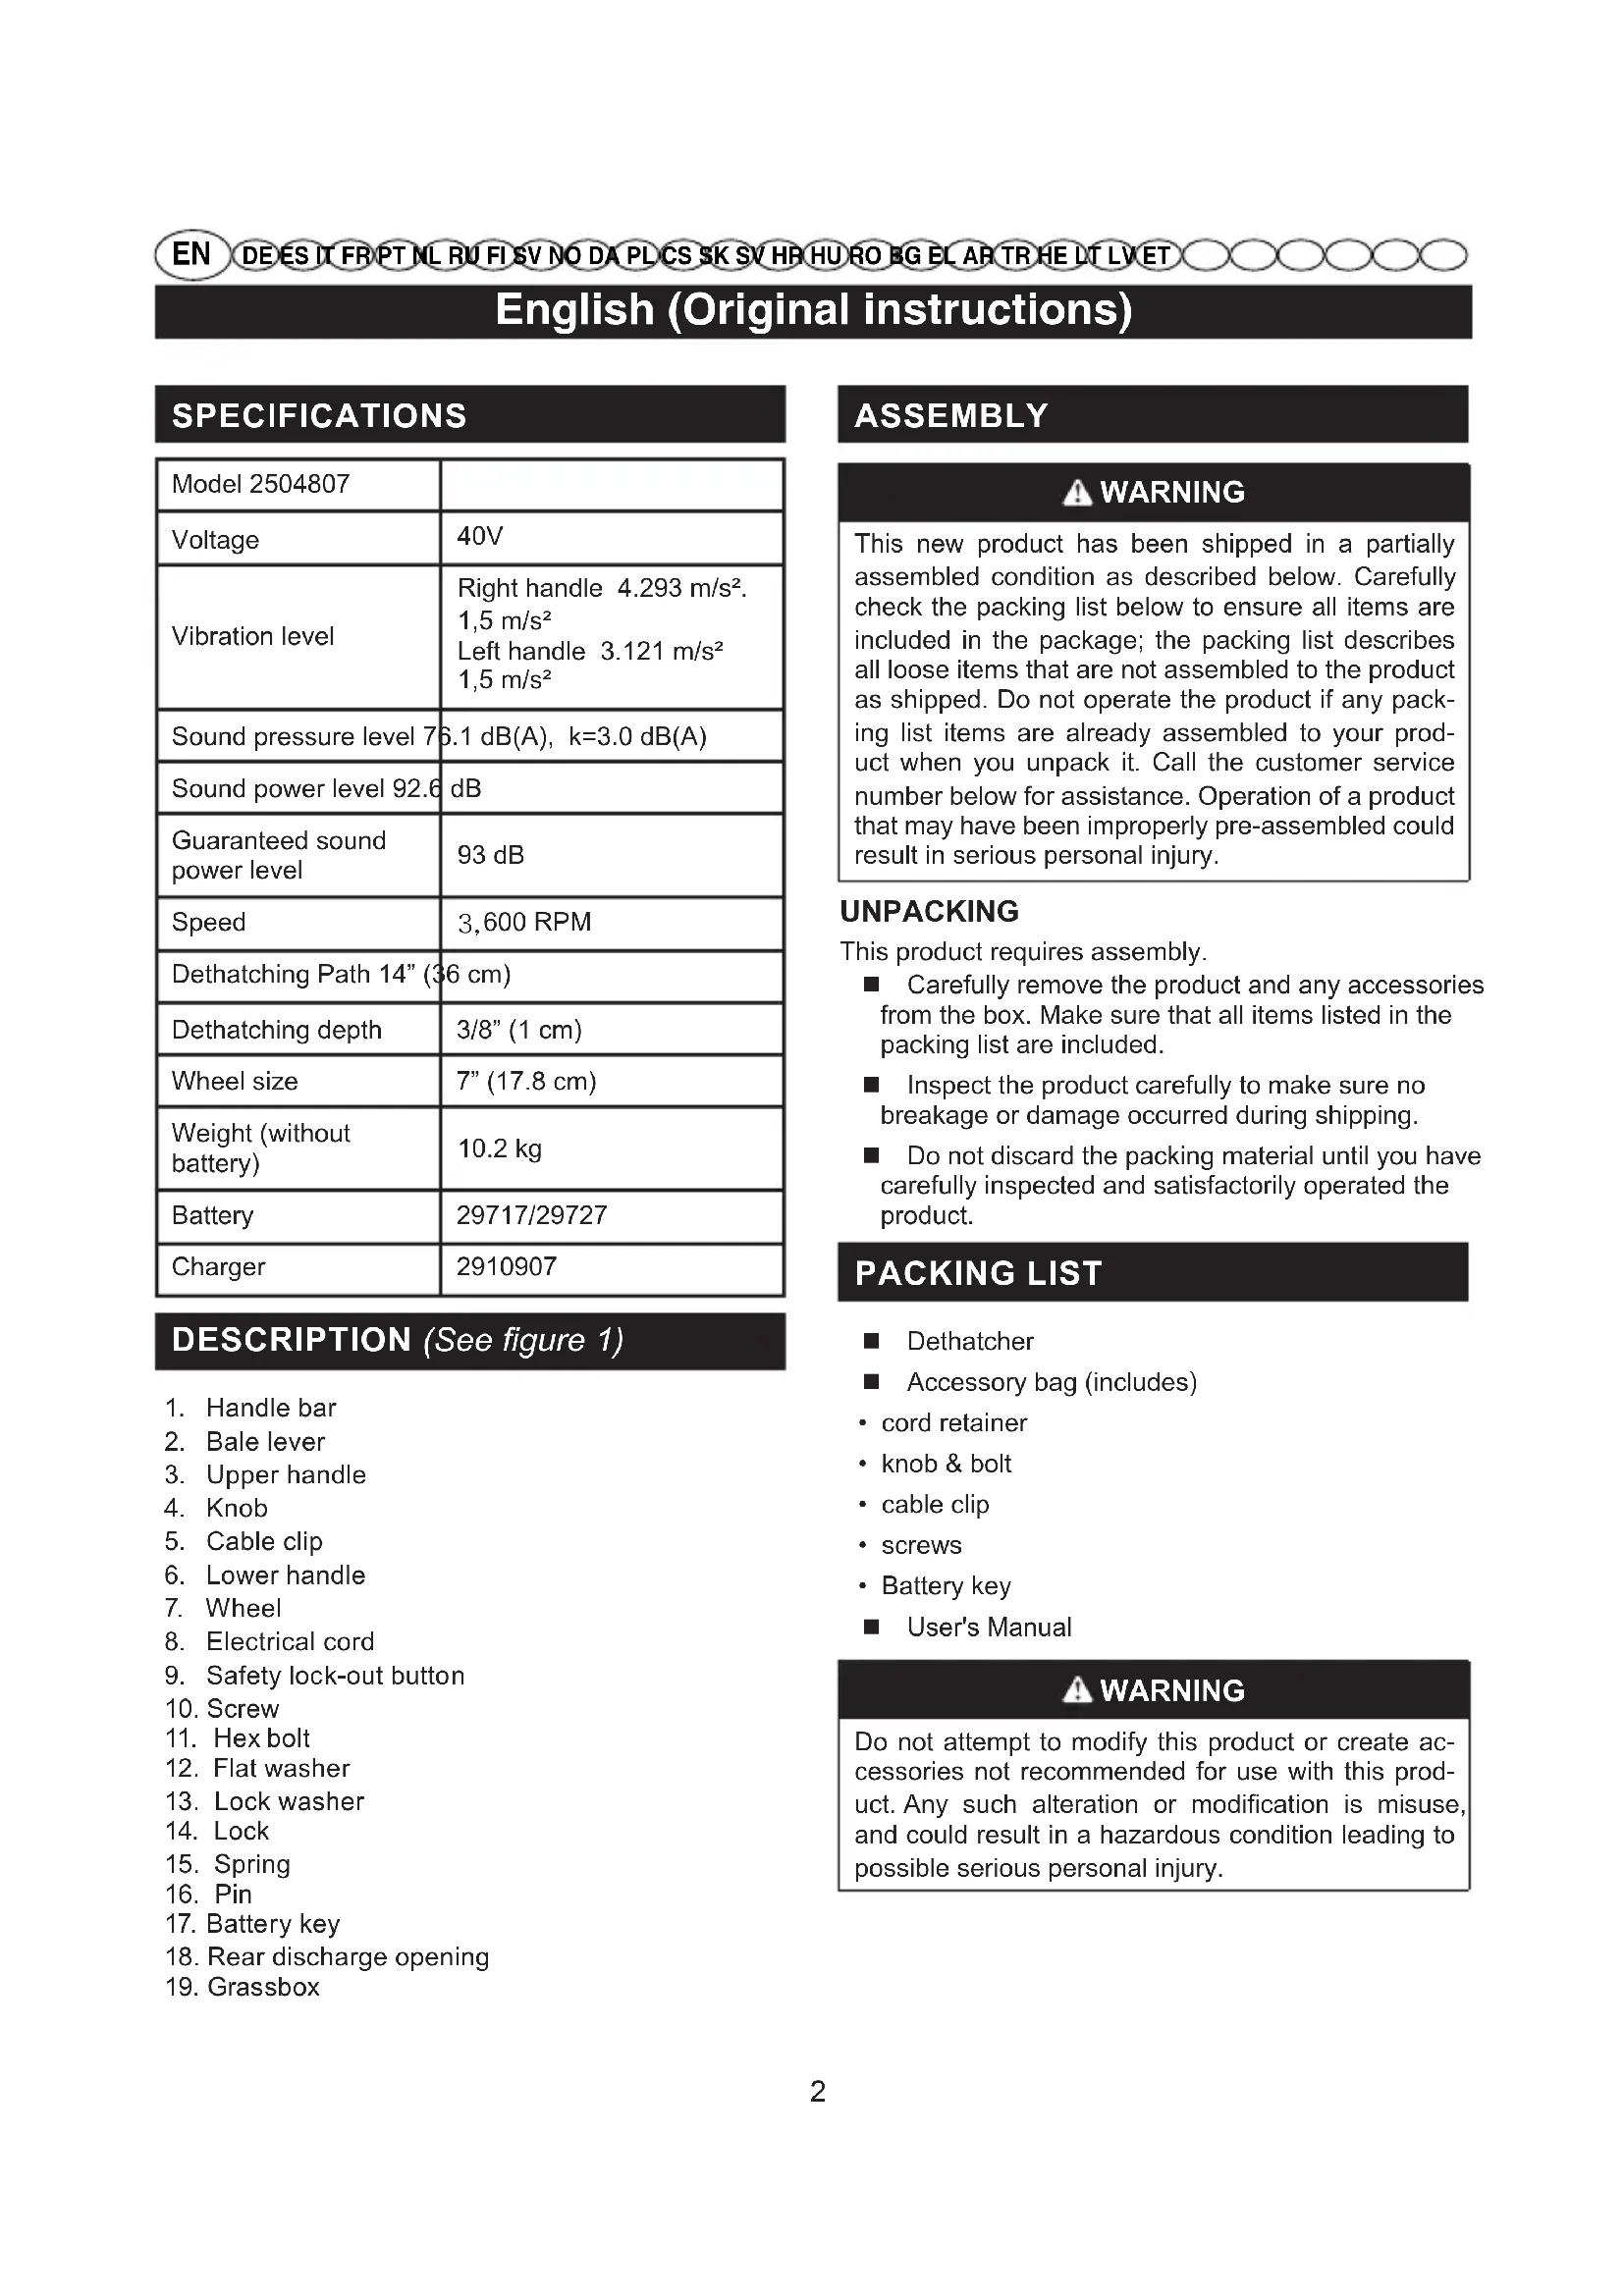
SPECIFICATIONS
| Model 2504807 | |
| Voltage | 40V |
| Vibration level | Right handle 4.293 m/s^2 . 1,5 m/s^2 Left handle 3.121 m/s^2 1,5 m/s^2 |
| Sound pressure level 7 | 6.1 dB(A), k=3.0 dB(A) |
| Sound power level 92.6 | dB |
| Guaranteed sound power level | 93 dB |
| Speed | 3,600 RPM |
| Dethatching Path 14" (36 cm) | |
| Dethatching depth | 3/8" (1 cm) |
| Wheel size | 7" (17.8 cm) |
| Weight (without battery) | 10.2 kg |
| Battery | 29717/29727 |
| Charger | 2910907 |
DESCRIPTION (See figure 1)
- Handle bar
- Bale lever
- Upper handle
- Knob
- Cable clip
- Lower handle
- Wheel
- Electrical cord
- Safety lock-out button
- Screw
- Hex bolt
- Flat washer
- Lock washer
- Lock
- Spring
- Pin
- Battery key
- Rear discharge opening
- Grassbox
ASSEMBLY
WARNING
This new product has been shipped in a partially assembled condition as described below. Carefully check the packing list below to ensure all items are included in the package; the packing list describes all loose items that are not assembled to the product as shipped. Do not operate the product if any packing list items are already assembled to your product when you unpack it. Call the customer service number below for assistance. Operation of a product that may have been improperly pre-assembled could result in serious personal injury.
UNPACKING
This product requires assembly.
■ Carefully remove the product and any accessories from the box. Make sure that all items listed in the packing list are included.
■ Inspect the product carefully to make sure no breakage or damage occurred during shipping.
■ Do not discard the packing material until you have carefully inspected and satisfactorily operated the product.
PACKING LIST
■ Dethatcher
■ Accessory bag (includes)
- cord retainer
- knob & bolt
- cable clip
- screws
- Battery key
■ User's Manual
WARNING
Do not attempt to modify this product or create accessories not recommended for use with this product. Any such alteration or modification is misuse, and could result in a hazardous condition leading to possible serious personal injury.
English (Original instructions)
WARNING
Stop the machine, and remove battery pack. Make sure that all moving parts have come to a complete stop. Failure to comply could result in accidental starting and possible serious personal injury.
WARNING
If any parts are damaged or missing do not operate this product until the parts are replaced. Using a product with damaged or missing parts could result in serious personal injury.
INSTALLING THE LOWER HANDLE(See figure 2)
■ Insert the lower handle (6) into the housing hole.
■ Using the supplied screws (10), fasten the lower handle to the housing using a star-head screwdriver (not supplied).
INSTALLING THE UPPER HANDLE(See figure 2)
■ Position the upper handle so the holes line up with the lower handle holes.
■ Insert the supplied hex bolt (11) through the hole from the outside of the handlebar.
■ Thread the knob (4) onto the hex bolt (11) to tighten securely into place.
INSTALLING THE GRASSBOX (See figure 3)
■ Lift the rear discharge door.
■ Lift the grassbox by its handle and place under the rear door, so that the hooks on the grassbox frame are seated into the slots in the handle bracket.
■ Release the rear door. When installed correctly, the hooks on the grassbox will rest securely in the slots on the handle brackets.
OPERATION
WARNING
Do not allow familiarity with products to make you careless. Remember that a careless fraction of a second is sufficient to inflict serious injury.
WARNING
Always wear eye protection. Failure to do so could result in objects being thrown into your eyes resulting in possible serious injury.
WARNING
Do not at any time let brake fluids, gasoline, petroleum-based products, penetrating oils, etc., Come in contact with plastic parts. Chemicals can damage, weaken, or destroy plastic which may result in serious personal injury. Only the parts shown on the parts list are intended to be repaired or replaced by the customer. All other parts should be replaced at an Authorized service center.
BATTERY REMOVAL (See figure 4)
■ Release the bale lever to stop the product.
■ Open the battery door to access the battery compartment.
■ Remove the battery key.
■ Press in and hold the battery release button with firm grip.
■ Remove battery pack from the product.
BATTERY INSTALLATION(See figure 4)
■ Lift and hold up the battery door.
■ Align the battery with the dethatcher's battery port.
■ Make sure the battery release button snaps in place and that battery is fully seated and secure in the dethatcher before beginning operation.
■ Insert the battery key.
■ If the machine is not going to be used immediately, do not insert the battery key.
■ Close the door.
STARTING THE DETHATCHER
■ Press and hold the safety lock-out button. This makes the bale switch operational.
■ Press the bale switch against to the handlebar to operate.
STOPPING THE DETHATCHER
■ Release the bale.
MAINTENANCE
The dethatcher cylinder can cause injuries! Prior to making adjustments, unplug unit and wait until the dethatcher cylinder has stopped. Wear heavy-duty work gloves when making adjustments. If the dethatcher cylinder is not yet worn but individual springs have broken, these must be replaced. Only identical replacement springs may be used.
English (Original instructions)
WARNING
Before inspecting, cleaning, or servicing the machine, turn the it off and remove the battery pack and wait until the dethatcher cylinder has stopped. Failure to follow these instructions can result in serious personal injury or property damage.
WARNING
Wear adequate clothing, gloves and goggles before carrying out any maintenance.
REPLACING THE TINES (See figure 5)
WARNING
In order to avoid serious personal injury, turn the it off and remove the battery pack before performing any maintenance.
Use only the manufacturer's original replacement parts.
■ Stop the machine, and remove battery pack. Allow sufficient time for moving parts to totally stop.
■ Turn the dethatcher over.
■ Remove the two star-shaped screws (11), the flat washer (13) and the lock washer (14) which secure the tine casing. Remove the two nuts on the opposite side with a star-head screwdriver.
■ Press the lock (15) on the edge of the shaft with a slotted screwdriver to separate the tine casing from the shaft.
■ Replace the worn or broken tines with new ones.
■ Fasten the tine casing back together using the flat washer and the lock washer in their original order.
WARNING
All the screws to mount the halves of the tine holder must have flat washer (13) and lock washer (14) on their threads to prevent screws from loosening during usage.
REPLACING THE TINES(See figure 6)
■ Remove the tine cartridge as demonstrated on figure 6.
■ Secure tine cartridge on a workbench.
■ Push out the pin using a screwdriver (Not Supplied). This may require the use of a rubber mallet if more strength is required.
■ Remove and discard the worn/broken tines.
■ Replace the tine into position and slide the pin back into place pressing the pin against a solid surface to pressure it back into place.
DANGER! THE DETHATCHER CYLINDER CAN CAUSE INJURIES.
Prior to maintenance, turn the it off and remove the battery pack and wait until the dethatcher cylinder has stopped. Wear heavy-duty gloves for performing maintenance. The lawn dethatcher should be cleaned after each use.
WARNING
WHEN SERVICING, USE ONLY IDENTICAL REPLACEMENT PARTS. USE OF ANY OTHER PARTS MAY CREATE A HAZARD OR CAUSE PRODUCT DAMAGE.
WARNING
TO AVOID SERIOUS PERSONAL INJURY, WEAR GOGGLES OR SAFETY GLASSES AT ALL TIMES WHEN OPERATING THIS UNIT. WEAR A FACE MASK OR DUST MASK IN DUSTY LOCATIONS.
WARNING
BEFORE INSPECTING, CLEANING, OR SERVICING THE MACHINE, DISCONNECT THE PLUG FROM POWER SOURCE AND WAIT FOR ALL MOVING PARTS TO STOP. FAILURE TO FOLLOW THESE INSTRUCTIONS CAN RESULT IN SERIOUS PERSONAL INJURY OR PROPERTY DAMAGE.
Avoid using solvents when cleaning plastic parts. Most plastics are susceptible to damage from various types of commercial solvents and may be damaged by their use. Use clean cloths to removedirt, dust, oil, grease, etc.
WARNING
DO NOT AT ANY TIME LET BRAKE FLUIDS, GASOLINE, PETROLEUM-BASED PRODUCTS, PENETRATING OILS, ETC., COME IN CONTACT WITH PLASTIC PARTS. CHEMICALS CAN DAMAGE, WEAKEN, OR DESTROY PLASTIC WHICH MAY RESULT IN SERIOUS PERSONAL INJURY. ONLY THE PARTS SHOWN ON THE PARTS LIST ARE INTENDED TO BE REPAIRED OR REPLACED BY THE CUSTOMER. ALL OTHER PARTS SHOULD BE REPLACED AT ANAUTHORIZED SERVICE CENTER.
English (Original instructions)
RISK OF INJURY AND PHYSICAL DAMAGE!
Do not clean the lawn dethatcher under running water (particularly under high pressure).
Do not use hard or pointed objects for cleaning the lawn dethatcher.
To save space, the lawn dethatcher can be folded up for storage by releasing the knobs.
Take care, during this process, that the power cable does not become trapped. Store the lawn dethatcher in a dry, closed space which children cannot access.
■ Turn the it off and remove the battery pack and wait until the dethatcher cylinder has stopped.
■ Always clean the bottom of the dethatcher after each use and before storage.
■ Carefully inspect all tines and cartridges for damage and replace when required.
This device must not be disposed of with normal household waste. It must be disposed of in accordance with local regulations.
DANGER!
The dethatcher cylinder can cause injuries.
English (Original instructions)
| TROUBLESHOOTING | ||
| PROBLEM POSSIBLE CAUSE SOLUTION | ||
| Abnormal noise. | Foreign objects on the dethatcher cylinder are hitting the dethatcher. | Switch off the dethatcher, wait until the cylinder has stopped rotating. |
| Clattering in the unit. Whistling sound. | Foreign objects blocking the dethatching cylinder. | Remove foreign objects. |
| Check the dethatcher immediately. | ||
| Whistling sound. Belt slipping. Contact an authorized service centre. | ||
| Motor will not s tart. Battery is not secure. Ensure that the battery is fully secured in the machine. Refer to Installing the Battery section in this manual. | ||
| The dethatcher is hard to push. | Blocked by foreign objects. | Switch off the motor, wait until the dethatcher has stopped rotating. Remove the foreign objects. After approximately one minute, switch on the dethatcher. |
| The grass is too tall. Mow the lawn before dethatching. | ||
| Dethatching results are not satisfactory. | Spring tine wear. | Adjust the dethatcher cylinder. |
| Belt faulty. | Contact an authorized service centre. | |
| Lawn has grown too tall. | Mow the lawn before using the dethatcher. | |
DESCRIPTION (See figure 1)
TUOTTEEN TEKNISET TIEDOT
WHEN SERVICING, USE ONLY IDENTICAL REPLACEMENT PARTS. USE OF ANY OTHER PARTS MAY CREATE A HAZARD OR CAUSE PRODUCT DAMAGE.
ADVARSEL
FOR Å UNNGÅ ALVORLIG PERSONSKADE MÅ SIKKERHETSBRILLER TIL ENHVER TID ANVENDES NÅR ENHETEN ER I BRUK. BRUK ANSIKTS- ELLER ST∅VMASKE PÅ STEDER MED MYE ST∅V.
ADVARSEL
BEFORE INSPECTING, CLEANING, OR SERVICING THE MACHINE, DISCONNECT THE PLUG FROM POWER SOURCE AND WAIT FOR ALL MOVING PARTS TO STOP. FAILURE TO FOLLOW THESE INSTRUCTIONS CAN RESULT IN SERIOUS PERSONAL INJURY OR PROPERTY DAMAGE.
ISÄETNING AF GRÅESBOKSEN (See figure 3)
VÝMĚNA HROTŮ (viz obr. 6)
The dethatcher cylinder can cause injuries! Prior to making adjustments, unplug unit and wait until the dethatcher cylinder has stopped. Wear heavy-duty work gloves when making adjustments. If the dethatcher cylinder is not yet worn but individual springs have broken, these must be replaced. Only identical replacement springs may be used.
Slovensko (Prevod originalnih navodil)
OPOZORILO
All new Greenworks Tools machinery is supplied with a 2 year parts and labour warranty from original date of purchase. A 30 day warranty is available for machines used professionally as Greenworks Tools are designed primarily to be used by DIY consumers.
This warranty is non-transferable.
LIMITATIONS
This warranty applies only to defective parts/components and does not cover repairs due to:
- Normal wear and tear.
- Routine tune up or adjustment.
- Damage caused by improper handling/abuse/misuse or neglect.
- Overheating due to lack of maintenance.
- Damage due to fittings/fasteners becoming loose/detached through lack of maintenance.
- Damage caused by cleaning with water.
- Machines serviced or repaired by non-authorised Greenworks Tools service centres.
- Machines incorrectly assembled or adjusted.
- Damage caused by improper use of the machine.
- Damage caused by improper winterisation (pressure washers)
-
Items considered as consumable parts are not normally covered by the warranty, including but not limited to:
-
Batteries
- Electric cables
- Blade and blade assemblies
- Belts
-
Filters
• Chucks and tool holders -
Certain products may contain components such as engines, transmissions from an alternative manufacturer, these items will be subject to the appropriate manufacturer's warranty policy except where Greenworks Tools Europe GmbH agrees to underwrite any claims outside the said manufacturer's warranty period.
- Second hand goods are not covered under this warranty policy.
- The fitting of spares, replacements or extra components which are not supplied or approved by Greenworks Tools Europe GmbH.
Warranty
To claim a warranty on any product under this policy a proof of original purchase is required. Credit card statement do not qualify as sufficient proof of purchase. In the first instance of a warranty event occurring the consumer should return the product to the original place of purchase with their proof of purchase. The machine will be sent to our central service facility and an inspection made. If the machine be found to be at fault it will be repaired and sent back to the address of the consumer free of charge. Machines that retail for less than €100 euros including sales taxes will generally be replaced.
If the central service facility finds that machine is not found to be at fault
then the consumer will be advised they will need to pay for the cost of the repair.
This warranty policy is subject to change from time to time to accommodate the needs of new products. A copy of the latest warranty policy will be available at www.greenworkstools.eu.

Greenworks Tools garantibetingelser for gjør-det-sely-maskiner
GARANTIPERIODE
| :הכלההוּרָהוּרָהוּרָהוּרָהוּרָהוּרָהוּרָהוּרָהוּרָהוּרָהוּרָהוּרָהוּרָהוּרָהוּרָה |
EN EC DECLARATION OF CONFORMITY
Manufacturer: Changzhou Globe Co., Ltd.
Address: No. 65 Xinggang Rd., Zhonglou Zone, Changzhou, Jiangsu, China
Name and address of the person authorised to compile the technical file:
Name: Peter Söderström
Adress: Hjortronvägen 3, 555 93 Jönköping, Sweden
Herewith we declare that the product
Category 40V dethatcher
Model 2504807
Serial Number ...... See product rating label
Year of Construction ...... See product rating label
■ is in conformity with the relevant provisions of the Machinery Directive
■ is in conformity with the provisions of the following other EC-Directives
2000/14/EC
2006/42/EC
2014/30/EU
2005/88/EC
And furthermore, we declare that
■ The following (parts/clauses of) European harmonised standards have been used EN 60335-1
EN 50636-2-92
EN 55014-1
EN 55014-2
EN 61000-3-2
EN 61000-3-3
Measured sound power level LWA: 92.6dB(A)
Guaranteed sound power level LWA: 93 dB(A)
Conformity assessment method to Annex VI / Directive 2000/14/EC&2005/88/EC
Place, date: Changzhou, 22/07/2016
Quality Director
Signature: Ted Qu Haichao (BEng, CEng, MIET)
Ted Qu
DE
Adresse: No. 65 Xinggang Rd., Zhonglou Zone, Changzhou, Jiangsu, China
Indirizzo: No. 65 Xinggang Rd., Zhonglou Zone, Changzhou, Jiangsu, China
FR DÉCLARATION DE CONFORMITÉ EC
Fabricant : Changzhou Globe Co., Ltd.
Adresse : No. 65 Xinggang Rd., Zhonglou Zone, Changzhou, Jiangsu, China
Endereço: No. 65 Xinggang Rd., Zhonglou Zone, Changzhou, Jiangsu, China
Adres: No. 65 Xinggang Rd., Zhonglou Zone, Changzhou, Jiangsu, China
Osoite: No. 65 Xinggang Rd., Zhonglou Zone, Changzhou, Jiangsu, China
Adress: No. 65 Xinggang Rd., Zhonglou Zone, Changzhou, Jiangsu, China
Adresse: No. 65 Xinggang Rd., Zhonglou Zone, Changzhou, Jiangsu, China
Adresse: No. 65 Xinggang Rd., Zhonglou Zone, Changzhou, Jiangsu, China
Adres: No. 65 Xinggang Rd., Zhonglou Zone, Changzhou, Jiangsu, China
Adresa: No. 65 Xinggang Rd., Zhonglou Zone, Changzhou, Jiangsu, China
Adresa: No. 65 Xinggang Rd., Zhonglou Zone, Changzhou, Jiangsu, China
Naslov: No. 65 Xinggang Rd., Zhonglou Zone, Changzhou, Jiangsu, China
Adresa: No. 65 Xinggang Rd., Zhonglou Zone, Changzhou, Jiangsu, China
Ime i prezime, i adresa osobe ovlaštene da sastavi tehničku datoteku:
Ime i prezime: Peter Söderström
Cím: No. 65 Xinggang Rd., Zhonglou Zone, Changzhou, Jiangsu, China
Adresa: No. 65 Xinggang Rd., Zhonglou Zone, Changzhou, Jiangsu, China
Adres: No. 65 Xinggang Rd., Zhonglou Zone, Changzhou, Jiangsu, China
Adresas: No. 65 Xinggang Rd., Zhonglou Zone, Changzhou, Jiangsu, China
Adrese: No. 65 Xinggang Rd., Zhonglou Zone, Changzhou, Jiangsu, China
Aadress: No. 65 Xinggang Rd., Zhonglou Zone, Changzhou, Jiangsu, China