
Perfect Plus - Saucepan WMF - Free user manual and instructions
Find the device manual for free Perfect Plus WMF in PDF.
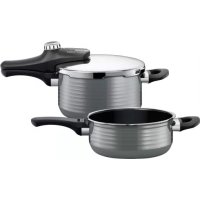
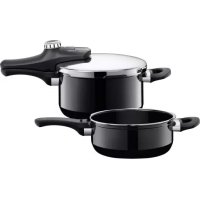
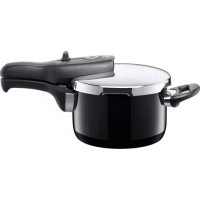
| Product type | Pressure cooker (pressure pot) |
| Brand | WMF |
| Model | Perfect Plus |
| Material | Stainless steel, TransTherm® base suitable for all hob types (induction compatible) |
| Available capacities | 4.5 L, 6.5 L, 8.5 L |
| Pressure levels | 2 levels: 1st ring ~110 °C (45 kPa), 2nd ring ~119 °C (95 kPa) |
| Safety systems | Safety valve, cooking indicator, residual pressure safety device, safety lock |
| Oven use | Not recommended |
| Minimum water quantity | 1/4 liter |
| Maximum filling | 2/3 of capacity (1/2 for foods that swell or foam) |
| Included accessories | Not specified (optional steam accessories: perforated basket, rack) |
| Care and cleaning | Dishwasher safe (lid and accessories), manual cleaning recommended for sealing ring |
| Warranty | 3 years (wear parts excluded: indicator gasket, safety valve, sealing ring) |
| Spare parts | Available for 10 years from WMF |
| Dimensions (approximate, 6.5 L model) | Diameter ~22 cm, height ~18 cm |
| Weight (approximate, 6.5 L model) | ~2.5 kg |
Frequently Asked Questions - Perfect Plus WMF
User questions about Perfect Plus WMF
0 question about this device. Answer the ones you know or ask your own.
Ask a new question about this device
Download the instructions for your Saucepan in PDF format for free! Find your manual Perfect Plus - WMF and take your electronic device back in hand. On this page are published all the documents necessary for the use of your device. Perfect Plus by WMF.
USER MANUAL Perfect Plus WMF
Operating instructions GB
Contents
- Safety Notes
- How to use the pressure cooker
- Notes on operation
- Cooking using your pressure cooker
- Four methods for pressure reduction
-
Care and maintenance of the pressure cooker Cleaning, storage, maintenance
-
Versatile use
-
Guarantee statement
-
Preclusion of liability
-
Troubleshooting
-
Table of cooking times
Accessories and spare parts See cover
1. Safety Notes
- Please carefully read the operating manual and all the instructions before using the WMF pressure cooker. Improper use may result in damage.
- Do not allow anyone to use the pressure cooker unless they have first read the operating manual.
- Keep children away from the pressure cooker while it is in use.
- Never use your pressure cooker in the oven. The high oven temperatures could damage handles, valves and safety devices. Never use the pressure cooker in the oven. The high temperatures can damage the handle, valves and safety mechanisms. The pressure cooker should only be used for its intended purpose, which is cooking food.
- Move the pressure cooker very carefully while it is pressurised. Do not touch hot surfaces. Use the handles and buttons provided. Use gloves if necessary.
- Only use the pressure cooker for the purpose intended.
- This appliance cooks with the aid of pressure. Improper use may result in burns. Take care to ensure that the appliance is properly closed before heating it up. You will find information on this in the operating manual.
- Never use force to open the pressure cooker. Before opening it, make sure that the internal pressure has completely reduced by checking that the boil indicator has descended fully into the handle. Please note that you must not touch the boil indicator.
- Never heat the pressure cooker without any water inside; this would cause serious damage to the pressure cooker. Minimum: 1/4 l water.
Important note:
Take care to ensure that the liquid never fully evaporates. This could result in food burning onto the pot and the pot being damaged by melting plastic parts. The hob could also be damaged by the aluminium in the base melting. If this should occur then switch off the heat source and do not move the pot until it has cooled down completely.
-
Never fill the pressure cooker to more than 2/3 of its capacity. If using foodstuffs which expand during the cooking process, such as rice or dried vegetables, fill the pressure cooker to a maximum of half its capacity and observe any instructions detailed in the operating manual with regards to this.
-
Never leave your pressure cooker unattended. Regulate the heat to ensure that the cooking indicator does not rise above the corresponding orange ring. If the heat is not turned down, steam will escape through the valve. Cooking times may change and the loss of liquid may result in function faults.
-
Only use the heat sources listed in the operatingmanual.
-
If you have cooked meat with the skin attached (such as ox-tongue), which may expand under the influence of pressure, take care not to pierce the meat while the skin remains expanded. This could result in burns.
-
In principle, always shake the pressure cooker before opening it to avoid pockets of steam spitting out; this could result in scalding. This is particularly important when releasing steam quickly or depressurising the pressure cooker under running water.
-
When releasing steam quickly or depressurising under running water, always keep your hands, head and body away from the danger area. You could otherwise be inju
red by escaping steam.
-
Before each use of your pressure cooker, check that the safety devices, valves and seals are working properly. Only then can the safe functioning of your pressure cooker be guaranteed. You will find information on this in the operating manual.
-
Do not use your pressure cooker to fry food in oil under pressure. Do not use the pressure cooker to fry food in oil under pressure. Improper use of the pressure cooker may result in injury.
-
Never interfere with the safety systems, except when carrying out the maintenance work specified in the operating manual.
-
Replace the wear parts (see warranty statement) at regular intervals. Parts showing apparent discolouration, cracks or other damage, or which no longer sit correctly, must be replaced with original WMF spare parts.
-
Only use original WMF spare parts. In particular, always use pots and lids of the same model.
-
Do not use the pressure cooker if it or parts of it are damaged or deformed, or if their function does not correspond with the description in the operating instructions. In this case contact your nearest WMF dealer or the customer services department at WMF Group GmbH.
Please keep this operating manual in a safe place.
2. How to use the pressure cooker
Before first use
2.1. Open the pot
Move the sliding indicator (7) to the end of the handle, using both ends. The indicators on the sliding indicator (7) must be set to AUF/OPEN (A).
Pivot the lid handle (5) to the right until the markings on the lid and the pot handle (6) are facing one another (8). Lift off the lid.
2.2. Cleaning the pot
Before first use, you should remove the labels and wash all parts of your pressure cooker (see section on "Cleaning").
Turn the lid over and detach the lid handle (5) from the lid. For this purpose, pull the orange slide (4) on the underside of the lid handle (5) towards the end of the handle as indicated by the arrow (C), fold down handle, and then detach (D). Remove the scaling ring (10) from the lid (O).
2.3. Closing the pot
Insert the handle into the lid and move the orange slide (4) across the lid rim until it audibly engages (E). Insert the sealing ring (10) into the rim of the lid such that it is located underneath the inwardly bent rim of the lid (6).
Replace lid (see marking on lid and pot handle) and turn lid handle to the left until the stop position has been reached (B). Move the sliding indicator (7) exactly to the position ZU/LOCKED.
The pot must not be assembled incorrectly. The pot may only be assembled in the intended manner.
3. Notes on operation
3.1. Checking the safety devices before each use
Ensure that the sealing ring (10) and lid rim are clean. Check that the ball is sitting visibly in the safety valve (9) on the underside of the lid (G).
If the ball should be located in the upper chamber of the safety valve / the automatic cooking system (9), remove the handle (5) and use your finger to press the ball into the lower chamber (F).
Remove the handle and check the main valve (3) for movcability by pressing with your finger (H).
Inspect the cooking indicator seal (2) visually to check for fit and damage.
Please note: Do not press down on the coo-king indicator seal, since this could result in damage to the residual pressure lock, and the functionality of your pressure cooker could no longer be guaranteed (P).
Insert the handle in the lid (E). Place the lid on the pot and close it (B).
3.2. Liquid volumes
At least 1/4 l of liquid is required to generate steam, regardless of whether you are cooking with or without inserts (12).
To ensure that your pressure cooker's functionality is not impaired, do not fill it to more than 2/3 of its capacity (M). When cooking foodstuffs which foam or expand heavily (e.g. stock, pulses, innards, compotes), only fill the pot to half its capacity. See the section on 'Preparing wholefood' for further information.
If you want to brown your food before cooking (e.g. onions, meat pieces etc.), you can use your WMF pressure cooker as a conventional pot. In order to complete the cooking, deglaze the cooker and add the requisite amount of liquid (at least 1/4 l) before closing the pressure cooker.
Caution! Never cook without sufficient liquid and take care to ensure that the cooking liquid never evaporates fully. Failure to observe the above may result in food getting burned, or in damage to the pot or its plastic handles.
4. Cooking using your pressure cooker
4.1. General
Your pressure cooker cooks food under pressure, i.e. at a temperature above 100 °C. This reduces cooking times by up to 70 %, a significant energy saving. Due to the short cooking time in steam the food's flavour, taste and vitamins are largely preserved.
4.2. Cooking with inserts
Depending on the size of your pressure cooker, you can cook with inserts (12) or a trivet (13). Inserts and trivets are available as accessories from your specialist dealer (see "Accessories and Spare Parts" inside the cover).
4.3. Heating
Place closed, filled pot onto a source of heat and set to maximum heat. Via the automatic heating system (9), which is simultaneously a safety valve, air escapes during this heating phase until the valve closes audibly and pressure can build up.
The cooking indicator (1) rises, the yellow pressure ring and the two orange cooking rings become visible (J).
Reduce the heat in good time and sufficiently, so that the orange cooking ring recommended in the recipe remains just visible.
4.4. Cooking times
The cooking time only starts once the ring recommended in the recipe is fully visible. Take care to ensure that the ring position remains stable. Regulate the heat accordingly. If the cooking indicator (1) falls below the required orange ring, you will have to turn up the heat a little.
This will slightly prolong the cooking time. If the cooking indicator (1) rises above the second orange ring, excess pressure will result. This pressure will escape audibly via the main valve (3) on the lid handle.
Remove the pot from the hob, wait until the cooking indicator has fallen to the second orange ring, and turn the heat back on. Pressure cooking facilitates shorter cooking times because the steam pressure in the pot results in higher temperatures.
First ring, approx. 110 °C for delicate foods such as fish or compote. (operating pressure 45 kPa, regulating pressure 130 kPa)
Second ring, approx. 119 °C for all other foods. (operating pressure 95 kPa)
Energy-conscious users will want to turn off the heat even before the end of the cooking time, since the heat stored in the pot will suffice to finish the cooking process. Cooking times may differ for same foodstuffs depending on quantity, form, and composition of the food.
4.5. Opening the pot
At the end of the cooking time remove the pressure cooker from the hob. On principle, the lid should only be opened and removed from the pot once the pot is depressurised. This means that the cooking indicator (1) must have fully disappeared into the handle (I).
The residual pressure lock ensures that the pot can only be opened once fully depressurised, i.e. once even the yellow pressure ring is no longer visible.
If the yellow ring is still visible (K), this means that the residual pressure lock has reacted. To release it, shortly move the sliding indicator (7) to the ZU/LOCKED position.
When all the steam has escaped, briefly shake the pot.
This will release any pockets of steam from the food. Such bubbles may form especially when cooking liquid or viscous foods, and they can spit out when removing the lid. Now turn the lid handle to the right as described, and open the pot.
4.6. Information on induction hobs
The TransTherm® universal base (11) is suitable for all hob types, also for induction.
In the case of induction hobs, a humming noise may develop if on a high heat setting.
This noise has technical causes and does not indicate that either your hob or your pressure cooker is defective.
The pot size must correspond to the size of the cooking zone. Otherwise - especially in the case of small diameters - the cooking zone (magnetic zone) may not respond to the pot base.

Induction
5. Three methods for pressure reduction
Important note:
If you have cooked foaming or expanding foods (e.g. pulses, stock, grains), you should not depressurise the pot using methods 2 or 3. Jacket potatoes will burst if you let steam out of the pressure cooker using method 2 or 3.
When quickly releasing steam using the sliding indicator, or under running water, always keep your hands, head and body away from the danger area. You could otherwise be injured by escaping steam.
Method 1
Remove the pot from the heat source. After a short time, the cooking indicator (1) will fall. Once it has fully disappeared into the handle (1), slowly move the sliding indicator to AUF/OPEN (A). During this procedure, any remaining residual steam will escape from under the lid handle. When no more steam escapes, shake the pot briefly so that any pockets of steam which have formed in the food can be released.
Method 2
In the case of foods with short cooking times (e.g. vegetables), slowly and gradually move the sliding indicator (7) in the direction of AUF/OPEN (A) until steam escapes underneath the lid handle.
Once the sliding indicator is fully at the AUF/OPEN position, steam is no longer escaping and the cooking indicator has fully dropped (1), shake the pot and then open it.
Method 3
If you are worried by the escaping steam, simply place the pot in the sink and run cold water over the lid (L), until the cooking indicator (1) has fully disappeared into the lid handle (I). Briefly shake the pot and then open it.
6. Care and maintenance of the pressure cooker
6.1. Cleaning
The pressure cooker should be cleaned after every use.
Unclip the lid handle and rinse off from both sides under running water (D) (N). Remove the sealing ring (10) from the lid (O) and rinse by hand.
The pot, lid and inserts can be washed in the dishwasher. Food residues should not be scraped off but soaked in water. Scald with a vinegar and water solution to remove lime deposits. The base of the pot should also be cleaned regularly.
6.2. Storage
Place the lid upside down on the pot after cleaning. After cleaning, store the sealing ring (10) separately to protect it.
6.3. Maintenance
Your pressure cooker is a technical appliance and its individual parts may be subject to wear-and-tear. Therefore, after prolonged use, you should check all the individual parts in accordance with the spare parts list. If any changes are apparent, the parts in question must be replaced. Only use original spare parts produced by the manufacturer.
Note: Any damage to the lid handle (5) will require a factory repair.
7. Versatile use
The advantages of pressure cooking do not only apply to standard methods of food preparation:
7.1. Cooking frozen food
Frozen food can be placed in the pot directly from the freezer. Meat must be defrosted slightly before browning. Vegetables can be placed in the insert straight from the packet. While the heating-up times will be prolonged, cooking times will remain the same.
7.2. Cooking wholefood
Wholefood often involves grains and pulses. Grains and pulses need not necessarily be soaked before cooking them in a pressure cooker. If they are not soaked, cooking times will be prolonged by about 50 %. As well as the minimum liquid volume of 1/4 l, at least 2 parts liquid must be added to 1 part grain/pulses. The residual heat from the hob can be used for final swelling. Remember that, when cooking foaming or expanding foods (grains, pulses), the pot can only be filled to half its capacity.
7.3. Making preserves
1 l preserving jars should be cooked in a 6.5 l or 8.5 l pressure cooker, while smaller jars should be cooked in a 4.5 l pressure cooker. Prepare the food to be bottled as normal. Pour 1/4 l water into the pot. Place the preserving jars into the perforated insert.
Cook vegetables/meat on the second orange indicator for approximately 20 minutes. Cook stoned fruit on the first orange indicator for approximately 5 to 10 minutes.
For releasing steam allow the pot to cool down slowly (method 1) – do not depressurize by means of the sliding indicator or under running water, as otherwise the juice will be spill out of the jars.
7.4. Juicing
You can use your pressure cooker to juice small quantities of fruit. Pour 1/4 l water into the pot. Place the fruit
in the perforated insert on top of the un- perforated insert; add sugar to taste. Cook using the second orange ring. The cooking time will be between 10 and 20 minutes, depending on the type of fruit. Depressurise the pot under running water (method 3). Shake briefly before opening.
7.5. Sterilising
Baby bottles, preserving jars etc. can be quickly sterilised. Place them in the perforated insert with the opening facing downwards. Add 1/4 l water and sterilise for 20 minutes using the second orange ring. Allow to cool down slowly (method 1).
7.6. Cooking with inserts
Depending on the size of your pressure cooker, you can cook with inserts or a trivet. Inserts and trivets are available as accessories from your WMF dealer. You can also cook several foods simultaneously in your pressure cooker. The inserts are used to separate the individual foods. First, place the food requiring the longest cooking time in the pot (without insert).
Examples
Roasts (20 min) - pot base Potatoes (8 min) - perforated insert Vegetables (8 min) - unperforated insert
First cook the roast for around 12 minutes. Then open the pot according to the instructions. Place the potatoes in the perforated insert on the trivet, place the vegetables in the unperforated insert, close the pot and cook for a further 8 minutes. If there is no major difference in cooking times, all inserts can be placed in the pot at the same time. Opening the pot during use allows steam to escape. Therefore, add a little more liquid to the pot than required.
8. Guarantee statement
We guarantee the perfect operation of the product and all its parts during the warranty period. The 3-year warranty period begins on the date that the product is purchased from the WMF specialist dealer, which must be documented by means of a guarantee voucher completed by the vendor.
If product defects arise during the warranty period, we will replace the defective parts for parts in full working order free of charge. Faulty parts can only be replaced by the WMF specialist dealer or the customer service department of the WMF Group GmbH in Geislingen. The warranty only extends to this claim. Additional claims from the warranty are excluded.
The guarantee voucher is to be presented to claim the warranty. It must be given to the customer together with the WMF pressure cooker. The customer must then present the completed voucher for any warranty claims. Naturally, your legal warranty entitlements are not limited by this guarantee declaration. During the warranty period, you are entitled to the legal warranty rights for subsequent fulfillment, withdrawal, reduction and compensation to the extent permitted by law.
The following are excluded from the warranty obligation:
- Cooking indicator seal - Safety valve - Sealing ring
These parts are subject to normal wear and tear. 10 year supply guarantee for spare parts.
9. Preclusion of liability
No guarantee is assumed for damage caused by the following:
- Inappropriate and improper use
- Incorrect or careless handling
- Improperly implemented repairs
- The fitting of spare parts which do not correspond to the original design
- Chemical or physical effects on the pot surfaces
- Non-compliance with these operating instructions
Name and address of the warranty provider
WMF Group GmbH
Eberhardstraße 35
The guarantee claim must be filed either directly with the guarantee provider or with an authorised WMF dealer.

10. Troubleshooting
If there is a problem, always remove the pressure cooker from the hob. Never use force to open!
| Pressure cooker problems | Cause | Rectification |
| Excessive heating-up period or the cooking indicator (1) does not rise. | Diameter of the hob is unsuitable. | Select hob which is suitable for the pot diameter. |
| Inappropriate heat level. | Set to the highest heat level. | |
| Lid incorrectly positioned. | Fully depressurise the pot, open the lid. Check that the sealing ring (10) is positioned properly and close the pot again. | |
| The ball in the safety valve (9) is not positioned correctly. | Fully depressurise the pot, open, remove handle, check the safety valve (9), check that the metal ball is positioned properly in the lid (F) and (G) close the pot again. | |
| Not enough liquid (at least 1/4 l). | Fully depressurise the pot, open the lid. Add liquid and close the pot again. | |
| Steam escapes from the lid. | Scaling ring (10) and/or pot edge are not clean. | Fully depressurise the pot, open the lid. Clean sealingring(10) and pot edge and close the pot again. |
| The sliding indicator (7) is not in position ZU/LOCKED. | Move the sliding indicator (7) to position ZU/LOCKED. | |
| Scaling ring (10) is damaged or hard (due to wear). | Correct the seating of the seals or replace with original WMF spare parts. | |
| Steam emerges continuously from the safety valve (9) (does not apply to the heating-up phase). | The ball does not sit correctly in the valve. The ball was forced into the upper chamber. | Fully depressurise the pot, open the lid and remove the handle. Force the ball into the lower chamber (F). Check the main valve (3) formoveability(G) and close the pot again. |
- Cooking time chart
Minutes
| Pork and Veale | Pork cut in strips | 5-4 | |
| Cooking temperature is at 2nd ring. Make sure there is at least 1/4 l of liquid. Special insert is not required with any dish. | Ragout of pork | 10-15 | |
| Joint of pork | 20-25 | Time depends on size and shape | |
| Veal cut in strips | 5-7 | ||
| Ragout of veal | 10-15 | ||
| Knuckle of veal | 25-30 | ||
| Veal tongue | 15-20 | Cover with water | |
| Joint of veal | 20-25 | Time depends on size and shape | |
| Beef | Meat loaf | 10-15 | |
| Cooking temperature is at 2nd ring. Make sure there is at least 1/4 l of liquid. Perforated insert required for beef tongueötiglötigt. | Marinated joint | 30-35 | |
| Tongue | 45-60 | ||
| Strips of beef | 6-8 | ||
| Gnulash | 15-20 | ||
| Roulades | 15-20 | ||
| Joint of beef | 35-45 | Time depends on size and shape | |
| Chicken | Boiling fowl | 20-25 | Max. 1/2 capacity |
| Cooking temperature is at 2nd ring and amount of at least 1/4 l, remain the same. Perforated insert needed for boiling fowl. | Chicken pieces | 6-8 | |
| Turkey leg | 25-30 | Depending on size | |
| Turkey ragout | 6-10 | ||
| Turkey escalope | 2-3 | ||
| Game | Rabbit | 15-20 | |
| Cooking temperature is at 2nd ring. Make sure there is at least 1/4 l of liquid. No special insert needed. | Loin of rabbit | 10-12 | |
| Venison | 25-30 | ||
| Venison stew | 15-20 | ||
| Lamb | Lamb stew | 20-25 | Mutton requires longer cooking time |
| Cooking temperature is at 2nd ring. Make sure there is at least 1/4 l of liquid. | Joint of lamb | 25-30 | Depends on size and shape |
| Fish | Fillet of fish | 2-3 | Steamed in own juice |
| Cooking temperature is at 1st ring. Make sure there is at least 1/4 l of liquid. No insert needed for ragout or stew. Otherwise use solid insert. | Whole fish | 3-4 | Steamed in own juice |
| Ragout or stew | 3-4 |
Minutes
Soups
| Cooking temperature is at 2nd ring. Make sure there is at least 1/4 l to a maximum of 1/2 capacity of cooker. Special insert not required. |
Vegetables
| Cooking temperature is at 1string. Make sure there is at least 1/4 l of liquid. For sauerkraut and beetroot, no insert required. For other dishes the perforated insert is required. From the beans onwards the cooking temperature increases (2nd ring). |
Pulses, Cereals
| Cooking temperature is at 2nd ring. Make sure there is at least 1/4 l to a maximum of 1/2 capacity of cooker. Using 2 parts water to 1 part cereal. Cereal not soaked in advanced needs 20 - 30 min. longer. |
Fruit
| Cooking temperature is at 1string. Make sure there is at least 1/4 l of liquid. |
| Peas, lentils | 12 - 15 | Suaked pulses |
| Beef broth | 25 - 30 | Correct for all meals |
| Vegetable soup | 5 - 8 | |
| Goulash soup | 10 - 15 | |
| Chicken soup | 20 - 25 | Cooking lime dependent on size |
| Oxtail soup | 35 | |
| Potato soup | 5 - 6 | |
| Aubergines, cucumbers, tomatoes | 2 - 3 | Steamed vegetables keep their colour better |
| Cauliflower, peppers, leek | 3 - 5 | |
| Peas, celeriac, kohlrabi | 4 - 6 | |
| Fennel, carruls, | 5 - 8 | |
| Savvy cabbage | ||
| Beans, curly kale, red cabbage | 7 - 10 | |
| Sauerkraut | 10 - 15 | |
| Bectroot | 15 - 25 | |
| Potatoes | 6 - 8 | |
| Potatoes, cooked in their skins | 6 - 10 | Potatoes cooked in their skins burst if in their skins steam is released fast |
| Peas, beans lentils | 10 - 15 | Cook large beans 10 min longer |
| Buckwheat, millet | 7 - 10 | Cooking time for soaked cereal |
| Maize, spelt grain | 6 - 15 | Cooking time for soaked cereal |
| Pudding rice | 20 - 25 | Cooking temperature at 1^st ring |
| Long-grain rice | 6 - 8 | |
| Brown rice | 12 - 15 | |
| Wheat, rye | 10 - 15 | Cooking time for soaked cereal |
| Cherries, plums | 2 - 5 | It is advisable to use the perforated insert |
| Apples, pears | 2 - 5 | It is advisable to use the perforated insert |
Cooking tipps and tricks
Cooking time begins as soon as the required cooking indicator ring is visible
Times given are guides
Choose preferably shorter times as food can always be cooked longer
Times given result in firmly cooked vegetables
The cooking temperature at 1st ring is 109^ and at 2^nd ring is 117^
Recipes are to be found at www.wmf.com
3. Pokyny pre obsluhu


- Operating instructions GB
- Contents
- Safety Notes
- Important note:
- How to use the pressure cooker
- Open the pot
- Cleaning the pot
- Closing the pot
- Notes on operation
- Checking the safety devices before each use
- Liquid volumes
- Cooking using your pressure cooker
- General
- Cooking with inserts
- Heating
- Cooking times
- First ring, approx. 110 °C for delicate foods such as fish or compote. (operating pressure 45 kPa, regulating pressure 130 kPa)
- Opening the pot
- When all the steam has escaped, briefly shake the pot.
- Information on induction hobs
- Three methods for pressure reduction
- Method 1
- Method 2
- Method 3
- Care and maintenance of the pressure cooker
- Cleaning
- Storage
- Maintenance
- Versatile use
- Cooking frozen food
- Cooking wholefood
- Making preserves
- Juicing
- Sterilising
- Cooking with inserts
- Examples
- Guarantee statement
- Preclusion of liability
- Troubleshooting
- Cooking tipps and tricks
- Pokyny pre obsluhu
Brand : WMF
Model : Perfect Plus
Category : Saucepan