
RMCM4510E - Multi-cooker Redmond - Free user manual and instructions
Find the device manual for free RMCM4510E Redmond in PDF.

| Product type | Multi-cooker |
| Brand | Redmond |
| Model | RMCM4510E (RMC-M4510E) |
| Power | 860-1000 W |
| Power supply voltage | 220-240 V, 50/60 Hz |
| Bowl capacity | 5 L |
| Bowl coating | Dalkin® non-stick |
| Display | LED |
| Steam valve | Removable |
| Inner lid | Removable (aluminium) |
| Dimensions (L × W × H) | 242 × 283 × 271 mm |
| Net weight | 3.55 kg |
| Automatic programs | 13: Multicoock, Pilaf, Steam, Soup, Pasta, Porridge, Stew, Bake, Fry, Yogurt, Bread, Slow Cook, Express |
| Masterchef Lite function | Adjust time and temperature during cooking |
| Automatic keep warm | Up to 12 hours |
| Reheat | Up to 12 hours |
| Delayed start | Up to 24 hours |
| Included accessories | Bowl, steam basket, ladle, spatula, measuring cup, tongs, recipe book, ladle/spatula holder, power cord |
| Cleaning | Bowl dishwasher safe; inner lid, valve, and base hand washable |
| Safety | Overheat protection; automatic shut-off; lid lock |
Frequently Asked Questions - RMCM4510E Redmond
User questions about RMCM4510E Redmond
0 question about this device. Answer the ones you know or ask your own.
Ask a new question about this device
Download the instructions for your Multi-cooker in PDF format for free! Find your manual RMCM4510E - Redmond and take your electronic device back in hand. On this page are published all the documents necessary for the use of your device. RMCM4510E by Redmond.
USER MANUAL RMCM4510E Redmond
Carefully read all instructions before operating and save them for future reference. By carefully following these instructions you can considerably prolong the service life of your appliance.
The safety measures and Instructions contained in this manual do not cover all possible situations that may arise during the operation of the appliance. When operating the device the user should be guided by common sense, be cautious and attentive.
IMPORTANT SAFEGUARDS
- The manufacturer is not responsible for any failures arising from the use of this product in a manner inconsistent with the technical or safety standards
- This appliance is intended to be used in household and similar applications.
- Before installing the appliance, check that the device voltage corresponds with the supply voltage in your home (refer to the rating plate or technical data).
- While using the extension cord, make sure that its voltage is the same as specified on the device. Using different voltage may result in a fire or another accident, causing appliance damage or short circuit.
- The appliance must be grounded. Connect only to a properly installed wall socket. Failure to do so may result in the risk of an electrical shock. Use only grounded extension cords.

CAUTION! During use the appliance becomes hot! Care should be taken to avoid touching the housing, the bowl, or any other metal parts while operating. Make sure your hands are protected before handling the device. To avoid possible burns, do not lean above the open appliance.
Always unplug the device after use, before cleaning or moving. Never handle the plug with wet hands. Do not pull the power cord to disconnect from an outlet; instead, grasp the plug and pull to disconnect.
- Keep the power cord away from hot surfaces (gas or electric ovens) or sharp edges. Do not let the cord hang over the edge of a table or a counter.

REMEMBER: damaging the cord may lead to a failure that will not be covered by the warranty. If the cable is damaged or requires replacement, contact an authorized service centre only to avoid all risks.
- Never place the device on soft surfaces to keep ventilation slots clear of any obstruction.
- Do not operate the appliance outdoors, to prevent water or any foreign object or an insect from getting into the device. Doing so may result in a serious damage of the appliance.
Always unplug the device and let it cool down before cleaning. Follow cleaning and general maintenance guidelines when cleaning the unit. DO NOT immerse the device in water or wash it under running water! - This appliance can be used by children aged from 8 years and above and persons with reduced physical, sensory or mental capabilities or lack of experience and knowledge if they have been given supervision or instruction concerning use of the appliance in a safe way and understand the hazards involved. Children shall not play with the appliance. Keep the appliance and its cord out of reach of children aged less than 8 years. Cleaning and user maintenance shall not be made by children without supervision.
- Keep packaging (film, foam plastic and other) out of reach of children as they may choke on them.
- Any modifications or adjustments to the product are not allowed. All the repairs should be carried out by an authorized service centre. Failure to do so may result in device and property damage or injury.
TOP CAUTION! Do not use the appliance in case of any malfunctions.
REDMONO
Technical specifications
RMC-M4510E
| Model | RMC-M4510E |
| Power | .660-1000 W |
| Voltage | 220-240 V, 50/60 Hz |
| Bowl capacity | 5 l |
| Bowl coating | non-stick Daikin® |
| Display | LED |
| Steam valve | removable |
| Inner lid | removable |
| Overall dimensions | 742 × 283 × 271 mm |
| Net weight | 3,55 kg |
Programmes
1 MULTICOOK
& BAKE
2.PILAP
-
FRY
-
STEAM
-
YOGURT
4.SOUR
- BREAD
5.21674
12.5104
6.INDIRECT
-
EVDPEES
-
PORKI 7. STEW
Functions
| "MASTERCHEF LITE" (to set cooking time and temperature during operation) | ... |
| "Keep Warm" | up to 12 hours |
| "Keep Warm" mode disabled in advance | ... |
| Reheat | up to 12 hours |
| "Time Delay" | up to 24 hours |
| Audible signals disabled | ... |
Package includes
| Multicooker | 1 pc |
| Bowl | 1 pc |
| Stearing basket | 1 pc |
| Stirring paddle | 1 pc |
| Serving spoon | 1 pc |
| Measuring cup | 1 pc |
| Bowl tongs | 1 pc |
| Recipe book | 1 pc |
| Spoon/paddle holder | 1 pc |
| User manual | 1 pc |
| Service booklet | 1 pc |
| Power cord | 1 pc |
Manufacturer reserves the right to make any modifications to design, packaging, or technical specifications of the product without prior notice. The specification allows an error of ± 10% .
Multicooker parts (scheme A1, p. 3)
-
Main lid
-
Removable steam valve
-
Sealing ring
-
Stirring paddle
-
Removable inner lid
-
Serving spoon 13. Serving amount
-
Steam hole
-
Steaming basket
-
Bowl
-
Spobhy paludie Rutter 15.
-
Inner lid detach button
-
Measuring cup
-
Control panel with display
-
Bowl tongs
& Housing
-
Power cord
-
Carrying handle
Control panel (scheme A2, p. 4)
- "Cancel/Reheat" button is used to enable the "Reheat"/"Keep Warm" functions, to stop a cooking programme operation, to reset settings.
- "Time Delay" button is used to enable the "Time Delay" function.
-
"Menu" button - to confirm a cooking programme selection.
-
Display.
-
"Min-/" button - to select an automatic cooking programme, to adjust the minute value, to reduce the temperature value
- "Hour*/ button - to select an automatic cooking programme, to adjust the hour value, to increase the temperature value.
- "Start" button is used to start the selected mode.
Display (scheme A2, p. 4)
a. Automatic programmes indicators.
b. Time Delay mode indicator.
c. Cooking mode indicator.
d Timer.
e. "Keep Warm" mode indicators.
f. "EXPRESS" programme indicator.
9. Reheat mode indicator
h. Audible signals disabled indicator.
i. Temperature value indicator.
I. PRIOR TO FIRST USE
Carefully remove the multicooker and its accessories from the packaging. Dispose of all packaging materials.
Keep all warning labels, including the serial number identification label located on the housing.
After transportation or storage at low temperatures allow the appliance to stay at room temperature for at least 2 hours before using.
Wipe the housing of the appliance with a soft, damp cloth. Rinse the inner bowl with warm soapy water and dry thoroughly. An odour on first use of the appliance is normal and does not indicate a malfunction. In such case, clean the appliance, following "Cleaning and Maintenance".
Do not operate the appliance without the bowl or an empty bowl – in case of an accidental start of the cooking program it will lead to critical overheating of the appliance or will damaging the non-stick coating. Before frying pour an amount of vegetable or sunflower oil in the bowl.

ATTENION! It is forbidden to lift the device by the handles of the bowl.
To adjust the current time
Plug in the appliance. Press and hold "Hour+/ or Min-/ buttons. Current time indicator will start flashing. Use "Hour+/ button to adjust the hour value and "Min-/ button to adjust the minute value. The hour value increases irrespective of the minute value. After the maximum value is reached the adjustment starts again. Press and hold the corresponding button down to scroll through the digits. After setting is complete do not press the buttons on the panel for 5 seconds. Settings will be saved automatically.
Disabled audible signals
To disable audible signals' press and hold "Menu" button in any mode. The disabled audible signals indicator will be flashing. To enable audible signals press and hold "Menu" button again.
To adjust cooking time
REDMOND RMC-44510E enables to adjust cooking time for every programme, except for "EXPRESS". Adjustment increments and range depend on the selected programme.
After an automatic programme is selected and "Menu" button is pressed, use the "Hour/\~" button, to adjust the hour value and "Min/\~" button to adjust the minute value. The hour value changes irrespective of the minute value. After the maximum value is reached the adjustment starts again. Press and hold the corresponding button to scroll through the digits.

In some automatic programmes the cooking time countdown starts only after the appliance reaches the set temperature. For example, if you pour cold water and set "STEAK" for 5 minutes, the programme will start to countdown only after water comes to a boil and sufficient amount of steam is generated in the bowl. In "PASTA" the time starts to countdown after water comes to a boil and "Start" is pressed again:
Time Delay
Time Delay' function allows adjusting the time by which the dish will be ready (including the programme time). Maximum time of delay is 24 hours. Default time of delay comprises the programme time and the time required to enter the operational parameters (if provided by the factory settings of the programme). A programme can be delayed by 1 minute increments. To adjust the time of delay after selecting of an automatic programme press "Time Delay" button. To increase the hour value press "Hour-" button. To adjust the minute value press "Min-" button. The hour value changes irrespective of the minute value. After the maximum value is reached the adjustment starts again. Press and hold the corresponding button to scroll through the digits.

Current time value is displayed during "Time Delay." To see the cooking end time press and hold "Time Delay" button. The function is available for all automatic programmes, except for "FRY", "PASTA" and "EXPRESS". Avoid using "Time Delay" function for perishable meats (eggs, fresh milk, meat, cheese, etc.).
"Keep Warm"
This function automatically activates at the end of cooking, and keeps the food warm at 70-75°C for 12 hours. The "Keep Warm", "Cancel/Reheat" indicators and direct countdown are on on the display to disable "Keep Warm" press and hold "Cancel/Reheat" button.
"Keep Warm" disabled in advance
To enable "Keep Warm" function at the end of a programme is not always desirable. REDMOND RMC-M4510E provides disbl ing this function in advance during "Time Delay" or the main cooking programme. To activate this function press "Start" during cooking. To enable "Keep Warm" function press "Start" button again.

"Keep Warm' function is not applicable for "FOURT", "PASTA", "EXPRESS" and "MULTICOOK" programmes with the cooking temperature set below 80^ .
Reheat
REDMOND RMC-M4510E can reheat cold dishes. To reheat a dish:
- Fill the bowl with food and position it inside the multicooker.
2 Close the lid and plug in the appliance.
- Press and hold "Cancel/Reheat" button. The indicators will light up solid. The timer will start direct countdown of the reheating time.
The appliance will reheat food up to 70 - 75^ and will keep it warm during 12 hours. "Reheat" function can be disabled by pressing and holding "Cancel/Reheat" button, until the indicators go out.

The "Keep Warn" and "Reveal" functions enable the appliance to maintain the temperature of a dish for 22 hours, however it is not recommended to keep a meal warm for more than 2-3 hours, because this way affects its flavour.
"MASTERCHEF LITE"
Discover more possibilities for culinary creativity with the new "MASTERCHEF LIFE" function! While "MULTICOOK" allows setting a programme parameters before it starts, then "MASTERCHEF LIFE" allows adjustments during the cooking process.
You can always adjust any programme, so that it corresponds to you wishes. Does your soup boil over? Does your oatmeal "escape"? Are your vegetables steamed for too long? Adjust the cooking temperature or time, without interrupting a cooking programme as if you cook on the stove or in the oven.

You can use "MASTERCHEF LITE" only during cooking. "MASTERCHEF LITE" is not applicable for "EXPRESSION", "Time Delay" and waiting to access operating parameters.
When using "MASTERCHEF LITE" the temperature can be adjusted between 35 and 170^ with 1^ increments. Possible cooking time range on the selected programme with 1 minute increments.

"MASTERCHE LITE" can be very useful especially when you cook meals on complex recipes, requiring combination of different cooking programmes (e.g. cooking cabbage rolls, beef stroganoff, soup and different types of pasta, jam, etc.).
To adjust cooking temperature.
-
Press "Menu" button during cooking. The temperature value indicator will be flashing.
-
Set the desired temperature. To increase the value press 'Hour/* button, to reduce the value press 'Min/* button. Press and hold the corresponding button down to scroll through the digits.
-
After the maximum (minimum) value is reached the adjustment starts again. Do not press the buttons on the control panel for 5 seconds. Settings will be saved automatically.

For overheat protection when setting the cooking temperature higher than 150^ , the maximum programme operating time is limited to two hours (except for 'BAKE'). Cooking temperature adjustment is not applicable for 'YOGURT' programme.
To adjust cooking time:
-
Press "Menu" button twice during cooking. Time value indicator will be flashing.
-
Set the desired cooking time. To increase the value with 1 hour increments press "Hour+=" button, to increase the value with 1 minute increments press "Min/-" button. The hour value changes irrespective of the minute value. After the maximum value is reached the adjustment starts again. Press and hold the corresponding button to scroll through the digits.
-
Do not press the buttons on the control panel for 5 seconds. Settings will be saved automatically.

When setting cooking time value to 00:00, the programme operation will be stopped.
Standard Operating Procedure for Automatic Programmes

NOTE: If you use the device to boil water (for example, when cooking foods), it is PROHIBITED to set the cooking temperature above 100^ . It can lead to overheating and failure. For the same reason it is PROHIBITED to use programs "FRY", "BREAD", "BAKE" for water boiling.
1 Prepare (measure) the ingredients.
-
Fill the multicooker bowl with ingredients according to the cooking programme and position it inside the appliance. Ensure that all ingredients are evenly spread below the maximum fill mark on the inside of the bowl. Ensure that it has full contact with the heating element.
-
Close the main lid until it clicks into place. Plug in the appliance.
ATTENIONIf you cook at high temperatures with much vegetable oil, always leave the device lid open.
- Use "Menu" button to resume from standby mode. Use "Hour/\~" and "Min/\~" buttons to select a programme (the corresponding programme indicator will be flashing). Press "Menu" button again to confirm the programme selection.
MULTICOOK" enables to set the desired cooling temperature. Use "Hour/+ button to increase the default value. "Min/-" button to reduce the value. Press "Menu" button to finish the temperature setting.
NOTE! if you cook at high temperatures with a large amount of vegetable oil, always leave the appliance lid open.
-
Use "Hour/4" and "Min/4" buttons to adjust default cooking time.
-
Set time of delay if necessary.
Time Delay function is not applicable for "FRY", "PASTA" and "EXPRESS" programmes.
- Press "Start" button to begin cooking. "Start" and "Cancel/Reheat" indicators will light up solid. Depending on the selected programme, the timer will begin countdown after pressing "Start" button or upon reaching the required temperature in the bowl.
REDMONO
1 'Keep Warm' function can be disabled in advance by pressing 'Start' button. The 'Cancel/Reheat' indicator will go out. Press 'Start' button again to enable this function. 'Keep Warm' is not applicable for 'YOGURT' and 'EXPRESS' programmes.
- An audible signal will be produced to indicate that cooking is complete, the End indicator will light up on the display. Depending on the selected programme or current settings the appliance will either enter the 'Keep Warm' mode (Cancel/Reheat and 'Keep Warm' indicators are lit on the display) or the Standby mode.
- To cancel a programme, to interrupt cooking or "Keep Warm" function, press and hold "Cancel/Reheat" button.
To achieve a good result refer to the recipes included in the REDMOND RMC M450E cookbook, designed specifically for this model. You can also find corresponding recipes on www.redmondcompany.com.
If you failed to achieve the desired result using standard automatic programmes, see "MULTICOOK" programme, that provides great opportunities for your culinary experiments.
"MULTICOOK"Programme
The programme allows cooking time and temperature adjustment according to your needs. MULTICOOK enables the REDMOND RMC-M4510E multicooker to function as a number of kitchen appliances and to cook any recipe found on the internet or in a family cookbook.
If the cooking temperature does not exceed 80^ "Keep Worm" function will be disabled without possibility of manual switching. Default cooking time of the programme is 30 minutes; default temperature is 100^ . The temperature can be manually adjusted between 35 and 170^ in 5^ increments, the time between 2 minutes and 15 hours in 1 minute increments.
ATTEIIONF. For security purposes if the temperature is set to more than 130^ the cooking time will be limited to two hours. If you are the "MULTIDODK" program for boiling the water (for example, when cooking products), it is FORBIDDEN to set the cooking temperature above 100°C.
"MULTICOOK"programme enables to cook a wide variety of dishes. Use the attached cookbook by our professional chefs or the table of recommended temperature for cooking different dishes and products. You can also find necessary recipes on www.redmond.company.
"PILAF"Programme
The programme is recommended for cooking different rice pilaf. Default cooking time of the programme is 35 minutes. The time can be manually adjusted between 10 minutes and 2 hours in 5 minute increments.
"STEAM"Programme
The programme is recommended for steaming meat, fish, poultry, vegetables and multicomponent steamed dishes. Default cooking time of the programme is 30 minutes. The time can be manually adjusted between 10 minutes and 2 hours in 5 minute increments. Use the steaming basket, provided with the appliance, to steam meals:
- Fill the bowl with 400-800 ml of water. Position the steaming bucket inside the appliance.
- Measure and prepare ingredients according to the recipe directions and evenly distribute them inside the bucket. Position the bowl inside the appliance. Ensure that it has full contact with the heating element.
- Follow the instructions indicated in paragraphs 3-8 of the Standard Operating Procedure for Automatic Programmes.
An audible signal will be heard after water comes to a boil and sufficient amount of steam is generated in the bowl. The programme time will start to count down.
In case you don't use automatic time settings in this programme refer to the table "Recommended Steaming Time for Different Meals".
"SOUP"Programme
The programme is recommended for cooking broth, filling, vegetable and cold soup. Default cooking time of the programme is 40 minutes. The time can be manually adjusted between 20 minutes and 8 hours in 5 minute increments.

Before entering the operation! parameters an audible sign! will be heard.
"PASTA"Programme
The programme provides bringing water to a boil, adding ingredients and further cooking. An audible signal will be heard when water comes to a boil. Press "Start" button again to begin the countdown. Default cooking time of the programme is 8 minutes.
The time can be manually adjusted between 2 minutes and 1 hour in 1 minute increments. "Time Delay" and "Keep Warm" functions are not applicable for the programme.
When cooking certain dishes (e.g. pasta, ravioli, etc.) some foam can be formed. Open the lid several minutes after adding ingredients into boiling water to prevent its possible leakage outside the bowl.
"PORRIDGE"Programme
The programme is recommended for cooking porridge with pasteurized skimmed or semi-skimmed milk. Default cooking time of the programme is 25 minutes. The time can be adjusted between 5 minutes and 1 hour 30 minutes in 1 minute increments. For best results and in order to prevent milk from boiling away, we recommend you to do the following:
- rinse grain (rice, millet, etc.) thoroughly until water runs clear.
grease the sides of the bowl with butter; - follow proportions suggested in the recipe book, increase or reduce the amount of ingredients proportionately.
using whole milk dilute it by half with water.
Cooking results may vary depending on the manufacturer and the origin of grain and milk.
If you have failed to achieve the desired result using 'PORridge' programme, apply 'MULTICOOK' instead. The optimal cooking temperature is 95^ . Measure the ingredients and adjust cooking time according to the recipe directions.
"STEW"Programme
The programme is recommended for making goulash, fried meat and ragout. Default cooking time of the programme is 1 hour. The time can be manually adjusted between 20 minutes and 12 hours in 5 minute increments.
"BAKE"Programme
The programme is recommended for baking cakes, puddings, pies from puff and yeast pastry dough.
Default cooking time of the programme is 50 minutes. The time can be manually adjusted between 20 minutes and 4 hours in 10 minute increments.
Readiness of a cake may be checked with a toothpick insert a toothpick in and if it comes out dry, your cake is ready. Disable "Keep Warm" function when baking. Remove baked goods out of the appliance immediately after cooking is complete, to prevent them from getting extra-moist or soggy, or leave an "Keep Warm" for a short period of time only.
"FRY"Programme
The programme is recommended for frying vegetables, meat, fish, poultry and multicomponent fried dishes.
Default: cooking time of the programme is 15 minutes. The time can be manually adjusted between 5 minutes and 1 hour in 1 minute increments. "Time Delay" function is not applicable for the programme.
A signal will be heard when the appliance reaches the desired temperature.
Follow the recipe directions and stir ingredients occasionally to prevent them from burning or sticking. Let the appliance cool down thoroughly, before restarting the 'TRY' programme. Fry meats with an open lid to create crisp crust.
"YOGURT"Programme
The programme is recommended for making homemade yogurt and proofing dough. Default cooking time of the programme is 8 hours. The time can be manually adjusted between 30 minutes and 12 hours in 30 minute increments. Ensure that the ingredients take no more than a half of the useful volume of the bowl. "Keep Warm" function is not applicable for the programme.
You can use the REDMOND RAM-G1 yogurt jar set (optional).
"BREAD"Programme
The programme is recommended for making different types of wheat flour bread with rye flour addition. The programme provides complete cooking cycle from dough proofing to baking. Default cooking time of the programme is 3 hours. The time
can be manually adjusted between 10 minutes and 6 hours in 5 minute increments. The maximum operating time of the "Keep Warm" function is limited to three hours. "Time Delay" function is not recommended for this programme, as it can affect the quality of baking.
Note that dough is proofed within the first hour of the programme and then starts baking, it is recommended to boil the flour before use for oxygenation and removal of impurities. Use instant bread-mixes to save the time and facilitate cooking.

Ensure that the ingredients take no more than half of the useful volume of the bowl.
If time is set to less than 1 hour the baking process will begin after pressing "Start" button.
To bake bread evenly flip it over after the signout is heard.
ATTENTION Use kitchen gloves to remove the bread from the applince.
Do not open the lid during dough proofing! Product quality depends on it.
"SLOW COOK"Programme
The programme is recommended for cooking canned meat, fore shank and baked milk. Default cooking time of the programme is 3 hours. The time can be manually adjusted between 5 minutes and 12 hours in 10 minute increments.
"EXPRESS"Programme
The programme is recommended for cooking rice, fluffy water porridge. The programme is automatically disabled after complete boiling. Manual adjustment, the "Time Delay" and "Keep Warm" functions are not applicable for this programme. Press "Start" button to start cooking in the steady mode. Cooking mode indicators and the "Start" button will light up solid

If you have failed to achieve the desired result using standard automatic programmes, refer to the 'Cooking tips', where you can find the answers to the frequently asked questions and get recommendations.
III. ADDITIONAL FEATURES
- Dough proofing
Make fondue
Deep fry
Make cheese, cottage cheese
IV. CLEANING AND MAINTENANCE
General Guidelines
-
Prior to the first use or in order to remove the odour after cooking steam half a lemon for 15 minutes using the "STEAM" programme.
-
Do not leave the cooking bowl with meals or liquids inside a closed multicooker for over 24 hours. Store cooked meals in a refrigerator and reheat them when required, using the "Reheat" function.
If not in use for long time, unplug the appliance. The cooking chamber, heating disc, cooking bowl, inner lid, steam valve, safety valve, and condensation collector must be dry and clean.
Before you start cleaning the appliance, make sure that it is unpugged and has completely cooled down. Use soft cloth and mild soap to clean.

DO NOT use a sponge or tissue with hard or abrasive surface or abrasive poses. Do not use any chemically aggressive substances or any other agents that are not recommended for cleaning items that contact food.
DO NOT IMMERSE the appliance in water or wash under running water!
- Be careful when cleaning silicone parts of the multicooker, because damaged or deformed parts may lead to malfunction of the unit.
- Clean the housing when necessary. The cooking bowl, inner lid, removable steam valve, and safety valve need to be cleaned after each use. Condensate, accumulating during cooking, needs to be removed after each use. Clean the interior of the cooking chamber when necessary.
To Clean the Housing
Use soft damp cloth or sponge to clean the housing. If necessary, use a mild soap solution and wipe the surface dry to remove soap residue and water spots.
To Clean the Bowl
- Wash the bowl by hand, using soft sponge and mild soap, or in a dishwasher (following its manufacturer's recommendations).
If necessary fill the bowl with warm water, let soak, and clean. - Wipe the outer surface of the bowl dry before positioning it back inside the multicooker.
When the multicooker is used on a regular basis, inner non-stick coating of the bowl may partially or completely change color, which does not indicate a defect.
To Clean Inner Lid
- Open the main id. Press 2 plastic holders located in the lower part of its inner side.
- Remove inner lid and pull the sealing ring out of the rim.
- Wipe the surfaces of both lids with a damp cloth or sponge. If necessary, wash inner lid and sealing ring with mild soap and rinse under running water. It is not recommended to use dishwashing machine. Wipe both lids dry.
- Place sealing ring back into its original position. Ensure that the ring is securely in place.
- Loose or incorrectly positioned sealing ring may cause appliance malfunction or damage.
- Position inner lid into lower slots, align with the main lid, and slightly press until it clicks into place.
To Clean Removable Steam Valve
Steam valve is located on the main lid of the appliance and consists of inner and outer casings.
- Carefully pull the outer casing holding it by the ledge, to remove.
- Press plastic holder on the inner casing to separate the two casings from each other.
- Remove the silicone sealing insert, if necessary. Rinse all parts of the steam valve.
- Reassemble the valve in reverse order of disassembly. Place sealing insert back into its original position, align ledges of the inner casing with corresponding slots on the outer casing, and press until they click into place. Screw the cap back onto the steam valve, cover with the outer casing, and press until it clicks into place.

CAUTION! Do not twist or stretch sealing insert to avoid its deformation.
To Remove Condensate
Condensate accumulates in the special cavity on the housing around the bowl. Wipe off any condensate remaining around the bowl with a dry cloth or tissue after each use.
To Clean Cooking Chamber
Compliance with the user manual guidelines minimizes the risk of food particles or liquids accumulating inside the cooking chamber. However, if the inside of the chamber gets dirty, clean it to prevent improper operation or malfunction of the unit.
Before cleaning cooking chamber ensure that the multicooker is unplugged and has completely cooled down!
Walls of the cooking chamber, surface of the heating disk, and the casing of central thermal sensor (located in the middle of the heating disk) can be cleaned with a damp (not well!) sponge or cloth. Remove any traces of soap or detergent if using any to prevent unwanted odours during cooking.
If there is a foreign object in the cavity around central thermal sensor, carefully remove it using tweezers, trying to avoid pressing on the casing of the sensor. Clean heating disfile with a damp medium-hard sponge or synthetic brush, if necessary.

When the multicolor is used on a regular basis, heating disk may partially or completely change color which does not indicate a defect and does not affect proper operation of the unit.
Before repeated operation or storage completely dry all parts of the appliance. Store the assembled appliance in a dry, ventilated place away from healing appliances and direct sunlight.
REDMONO
During transportation and storage, do not expose the device to mechanical stress, that may lead to damage of the device and/or violation of the package integrity.
Keep the device package away from water and other liquids.
V. COOKING TIPS
Common Cooking Mistakes and Ways of Solving Them
This table familiarizes you with the practical tips and solutions to some common problems you may experience when using the multicooker.
| Possible causes Solutions | ||
| The lid of the device was open or was not closed properly, so the cooking temperature was not high enough | Try to avoid opening the lid while cooking. Close the lid until it clicks into place. Make sure that the rubber sealing ring located on the inner side of the lid is not deformed or damaged in any way | |
| Cooking temperature was not observed because the bowl and the heating element did not fit tightly | There should not be any foreign objects between the lid and the housing of the device, remove if any. Always make sure that the heating element is clean and fits tightly with the bowl before cooking | |
| Wrong ingredients or settings were chosen General proportions were not observed, the foods were cut into pieces that are a bit too big Wrong time settings Chosen recipe is not appropriate for the appliance | We recommend that you use recipes adapted for the device. Choose proven recipes only Set the time and cooking programme, choose ingredients, proportions, and the size of pieces according to the recipe | |
| Steaming: the amount of water in the bowl is not enough to provide enough steam density | Use the amount of water recommended. If in doubt, check the water level while steaming | |
| Frying | Too much vegetable oil was added | For regular frying add an amount of vegetable oil just enough to cover the bottom of the bowl. Follow recommendations given in the recipe while deep frying |
| Too much liquid inside the bowl | Do not close the lid of the device while frying unless specified in the recipe. Defrost and let drain the ingredients before frying | |
| Boiling: the broth boiled away while cooking acidic foods | Certain foods need to be washed or sautéed before cooking. Follow recommendations given in the recipe | |
| Baking (dough failed to bake through) | While proving the dough has reached the inner lid and covered the steam valve | Use a smaller amount of dough |
| Too much dough in the bowl | Take the product out of the bowl, turn it over and place back Bake until ready Next time use smaller amount of dough | |
THE DISH IS OVERCOoked
| Wrong ingredients or time settings, the foods were cut into pieces that are a bit too small | We recommend that you use the recipes adapted for your model. Set the time and cooking programme, choose ingredients, proportions and the size of the pieces according to the recipe |
| The dish was in the bowl on "Keep Warm" mode for too long after being cooked | We recommend that you use "Keep Warm"mode moder- ately.If your device enables you to switch "Keep Warm" off in advance,use it to avoid the problem |
LIQUID BOILS AWAY DURING COOKING
| Milk boils away | Depending on both quality and properties of the milk used, it may boil away. To avoid this, we recommend that you use only ultra-pasteurized skimmed milk. Mix the milk with some water if needed |
| Foods were not properly processed (were not rinsed well, etc.) Wrong general proportions or ingredients | We recommend that you use the recipes adapted for the device. Try choosing proven recipes only. Set the time and cooking programme, choose ingredients, proportions, and the size of the pieces according to the recipe. Whole grains, meat, fish, and seafood need to be thoroughly rinsed before cooking |
THE DISH GETS BURNT
| The bowl was not properly washed before cooking Non-stick coating is damaged | Before cooking ensure that the bowl is clean and has no coating defects |
| General amount of ingredients is smaller than recom- mended | Use proven recipes adapted for the device |
| Cooking time was too long | Reduce the cooking time or follow recommendations given in the recipe adapted for your model |
| Frying: oil was not addred; the ingredients have not been stirred or turned over | For regular frying add an amount of vegetable oil just enough to cover the bottom of the bowl. For proper frying stir or turn the ingredients occasionally in the bowl while cooking. |
| Stewing: not enough liquid Add more liquid. Avoid opening the lid while cooking | |
| Boiling: not enough liquid in the bowl (proportions were not observed) | Follow recommended amounts of liquids and solids while cooking |
| Baking: the bowl was not greased before baking | Grease the bottom and sides of the bowl with butter or vegetable oil before baking (do not pour oil inside) |
INGREDIENTS LOSE THEIR SHAPE WHEN COoked
| The ingredients have been stirred a bit too often | While frying foods, it is enough to stir the ingredients every 5-7 minutes |
| Cooking time was too long | Reduce cooking time or follow recommendations given in the recipe adapted for the device |
PASTRY IS DAMP
| Improper Ingredients were used (juicy fruit or vegetables, frozen berries, sour cream, etc.) | Use Ingredients according to the recipe. Avoid using ingredients that contain excess moisture or use them in smaller amounts |
| The baked product has been left in the multicooker with the closed lid for too long | We recommend that you take the baked product out of the bowl right after the baking cycle is over or leave it on “Keep Warm” mode for a short period of time only |
PASTRY WON'T RISE
| Eggs and sugar were not whisked well |
| The dough sat for too long before being baked |
| The flour wasn't sifted or the dough was not kneaded well |
| Wrong ingredients |
| Wrong recipe |

Certain REMONDS multiracities feature overheat protection in the "STEW" and "SOLUP" programmes. In case there is not enough liquid in the bowl, the appliance activates overheat protection automatically interrupts the programme, and switches to "Keep Warm".
Table of Default Settings
| Programme | Recommendations for use | Default time | Adjustment range/ increments | Time Delay* | Waiting to access operating parameters | "Keep Warm" |
| MULTICOOK | Adjust cooking time and temperature to cook any dish of your choice | 00:30 | 2 min - 15 h/ 1 minIf temperature is higher than 130°C, 2 min - 2 h / 1 min | ✓ | ✓ | ✓ |
| PILAF | Cook meat, fish, poultry, and vegetable pilaf | 00:35 | 10 min - 2 h / 5 min | ✓ | ✓ | ✓ |
| STEAM | Steam meat, fish, vegetables, poultry, and other foods | 00:30 | 10 min - 2 h / 5 min | ✓ | ✓ | ✓ |
| SOUP | Cook different types of soups and broths | 00:40 | 20 min - 8 h / 5 min | ✓ | ✓ | ✓ |
| PASTA | Cook different types of pasta, sausages, ravioli and other convenience foods | 00:08 | 2 min - 1 h / 1 min | ✓ | ||
| PORRIDGE | Cook porridges with milk 00:25 S min - 1 h 30 min / 1 min | ✓ | ✓ | ✓ | ||
| STEW | Make meat, fish, vegetable, side and multicomponent dishes stews | 1:00 | 20 min - 12 h / 5 min | ✓ | ✓ | |
| BAKE | Bake cakes, biscuits, puddings and pies from puff pastry clough and yeast dough | 00:50 | 20 min - 4 h / 10 min | ✓ | ✓ | |
| FRY | Cook fried meat, fish, vegetable and multicomponent dishes | 00:15 | 5 min - 1 h / 1 min | ✓ | ✓ | |
| YOGURT | Cook different types of yogurt 8:00 30 min - 12 h / 50 min | ✓ | ||||
| BREAD | Make bread from rye and wheat flour (including dough proofing stage) | 3:00 | 10 min - 6 h / 5 min | ✓ | ✓ | |
| SLOW COOK | Cook baked milk, canned meat, fore shank, meat jelly and aspic | 3:00 | 5 min - 12 h / 10 min | ✓ | ✓ | |
| Programme | Recommendations for use | Default time | Adjustment range/ increments | "Time Delay" | Waiting to access operating parameters | "Keep Warm" |
| EXPRESS | Quick cook rice, flusty water porridge | Automatic shut-off after complex boiling of water |
Recommended steaming time
| Foods Weight, g/pcs | Water, ml Cooking time, min | |||
| 1 | Pork/beef fillet (cut into 1.5-2 cm cubes) | 500 | 800 | 30/40 |
| 2 | Mutton fillet (cut into 1.5-2 cm cubes) | 500 | 800 | 40 |
| 3 | Chicken fillet (cut into 1.5-2 cm cubes) | 500 | 800 | 20 |
| 4 | Meatballs/cutllets | 500 | 800 | 25/40 |
| 5 | Fish (fillet) | 300 | 800 | 15 |
| 6 | Seafood mix (frozen) | 300 | 800 | 5 |
| 7 | Dumplings | 5 pcs | 800 | 25/30 |
| 8 | Potatoes (cut into 4 pieces) | 500 | 800 | 20 |
| 9 | Carrots (cut into 1.5-2 cm cubes) | 500 | 800 | 35 |
| 10 | Beet (cut into 4 pieces) | 500 | 1500 | 90 |
| 11 | Vegetables (frozen) | 500 | 800 | 5 |
| 12 | Eggs | 5 pcs | 800 | 10 |

Please note that these are only approximate guidelines. Steaming times may vary depending on the quality of foods and your personal preferences.
Recommended Temperature for "MULTICOOK"
| Temperature, °C | Recommendations for use |
| 35°C | Dough proofing, cooking vinegar |
| 40°C | Make yogurts |
| 45°C | Starter |
| 50°C | Fermentation |
| 55°C | Make fondant |
| 60°C | Make green tea and baby food |
| 65°C | Cook vacuum sealed meat |
| 70°C | Make punch |
| 75°C | Make white tea, pasteurize liquids |
REDMONO
| Temperature, °C Recommendations for use | |
| 80°C | Make mulled wine |
| 85°C | Make cottage cheese and other dishes, requiring long cooking times |
| 90°C | Make red tea |
| 95°C | Make oatmeal |
| 100°C | Make jeans and meringues |
| 105°C | Make meat jelly |
| 110°C | Sterilize tableware |
| 115°C | Make sugar syrup |
| 120°C | Make fore shank |
| 125°C | Stew meat |
| 130°C | Make pudding |
| 135°C | Brown cooked foods |
| 140°C | Smoke foods |
| 145°C | Bake vegetables and fish in foil |
| 150°C | Bake meal in foil |
| 155°C | Fry fermented goods |
| 160°C | Fry poultry |
| 165°C | Fry steaks |
| 170°C | Deep fry |

You can also refer to the recipe book provided with the appliance
VI ADDITIONAL ACCESSORIES
Optional accessories for the REDMOND RMC-M4510E multicopper can be purchased separately. Information on the innovations is available www.redmond.com and our authorized dealers.
RAM-FB1 - deep fry basket
Used for cooking different foods in strongly heated or boiling oil (deep fry). Fits for any bowls with the capacity of 3 liters. Made of stainless steel, has a removable handle and a hook for fixation to facilitate draining extra oil after cooking. Can be used with multicookers of other brands and washed in dishwasher.
RAM-G1 - set of yogurt jars with date dial lids (4 pcs.)
Used for making different yogurts. Equipped with date dial lids, allowing to control shelf life. Can be used with multicookers of other brands.
RB-A500 (A501, A503) - bowl with nonstick coating
Capacity - 5 liters.
RB-C500 - bowl with nonstick ceramic coating
Capacity
RB-C50S - bowl with Ceralon® (Switzerland) nonstick ceramic coating
Capacity - 5 liters.
RB-SS00 - stainless steel bow
Capacity - 5 liters.
VII. TROUBLESHOOTING
| Problem Possible causes Solution | |||
| Error message is displayed on the screen: E1 - E4 | System failure, possible control board or heating element | Unplug the appliance and let it cool down. Close the lid until tight, plug in the appliance failure | |
| The appliance does not switch on | Power cord is not connected to the appliance and (or) to the outlet | Unplug the appliance and let it cool down. Close the lid until tight, plug in the appliance | |
| Faulty electrical outlet | Plug in the appliance to the working outlet | ||
| Power supply failure | Check the voltage supply. In case of its failure, contact an authorized organization. | ||
| The meal is taking too long to cook | Power supply interruption (voltage level is unstable or below the standard) | Check the stable voltage supply. If it is unstable or below the standard, contact an authorized organization. | |
| There is a foreign object or particles between the bowl and the heating element(litter, grain, pieces of food) | Unplug the appliance and let it cool down. Remove the foreign object or particles. | ||
| The bowl is installed with the distortion | Install the bowl properly | ||
| Heating element is dirty | Unplug the appliance and let it cool down. Clean the heating element. | ||
| The steam comes off from under the lid during cooking process | The tightness of connection between the bowl and inner lid is broken. | The bowl is improperly installed into the housing | Install the bowl properly |
| The lid is loosely closed or there is a foreign object under it | Check for any foreign objects (litter, grain, pieces of food) between the lid and the housing, remove them. Always close the multicooker lid until it clicks into place. | ||
| Sealing rubber on the inner lid is dirty, deformed or damaged | Check the condition of the sealing rubber on the inner lid. Probably it needs to be replaced. | ||

In case you don't manage to eliminate the defects, please, refer to the authorized service centre.

Environmentally friendly disposal (WEEE)
The packaging, user manual and the device itself shall be taken to the applicable collection point for the recycling of electrical and electronic equipment. Do not throw away the electronic waste to help protect the environment. Old appliances must not be disposed with other household waste but must be collected separately. Municipal
disposal of recyclable wastes is free of charge. The owners of old appliances are required to bring it to a waste facility centre. With this little extra effort, you can help to ensure that valuable raw materials are recycled and pollutants are treated as appropriate.
This appliance is labelled in accordance with European Directive 2012/19/EU - concerning used electrical and electronic appliances (waste electrical and electronic equipment WEEE).
The guideline determines the framework for the return and recycling of used appliances as applicable throughout the EU.
Aany lae t a r n h i e t d t t t t t t t t t t t t t t t t t t t t t t t t t t t t t t t t t t t t t t t t t t t t t t t t t t s
Programma "PORRIDGE"
Programma "SLOW COOK"
Programa "SLOW COOK"
Programa "SLOW COOK"
Paraquiries:
Redmond RMC M4510E visit o site: www.redmond.com.
RAM-FB1 - cesto para fritar
Multikogens design A1
PRODUKTET HAR KOGT FOR MEGET
RAM-FB1 - kury for friturestegning
Programmet "PORRIDGE"
Programmet "PORRIDGE"
Programmet "SLOW COOK"
PRODUKTEN AR OVERKOKT
BAKELSEN HAR INTE LYFT UPP
"EXPRESSION" program
A program javaszit rizs mias vnilapzakd goryk zisezsht. A progrm a vizi tsej kiparolazta utan, automatikusan teil.
Az adott programl kzel idoalts, a Startod kseklettes" e Automatikus meigelte funkdo nem etherel.
A fozesi program indlatsoh zsekleni i zemnmodno jyomna meg a Startgombet Ekorki kiguladda fzesii zemnoid es aStart" gemindatoria. Beindui kiazasot program mikodese.
Aban az esthen, ha vit aedrnnnne n hre et, fordoj an a.Fzestj jvssatokejezeetoh, ont voizszt tohtoh kredesene, waamin sizkoge jvssotekat kai.
III. KIEGESZITÖ LEHETÖSEGEK
A SUTEMENY NEM EMELKEDET MEG
HaCtpoHka Ha YacOBHnKa
Bnokhe Tpye kyn enekpncogata mpeka. Hauhke He aadpckte btoHa, Houn/Min, Haukatopta 3yektoaeppe am KnaHcA zanbaHae n Ka 3a Zabapae H a ctoHOCTHa haoCobete Hnatckte BtoHa, Houn/Min, Ha MHHTate btoHa, Min/2- YenbuaHae Hto HOCTHa HaucoBe H ta HaucoBe Hma 3ra HauchoBe HmoHae H 0t oDyT. Cne DOCTHReHTo H aKaKmHAta HtoCHoT, ZadApoe HnoPdKaaOa or TaHnAo H aHnAoHa. 3a 6pa pnoHae H ctoHOCTHa, Haukche e 3aakpke cboTberHHa btoH. Cne Ka Pa H aBaHae H a Tekyoto epeme B npdoBxene He 5 cekyhd H he HKTckae te brytonn ha nane. Hactpoikne me ce zanatst atomatnino.
H3KIIIO4BaHe Ha 3BKYOBHTe CnHann
3a KINKOBHae HAYBKOHHe CTHAHHATNCHTE HADPbKte BTOHa,Menu" bKOHO h a pckm. Ha kOIOHN CBOTA HnKATOPb13a KIOHOHae HAYBKOHHe CTHAHHt, 3a BNOHOBA He AYBKOHBe CTHAHHOT NIOIPOHO HAIHHTe HADPbKte BTOHa,Menu".
HactpokkaHaBpeMeTo3 npHroTBHe
MHOHpyHKUHbAHNHTYpe3aBHOOTBNEREDMONDRC-M4510eBBA BMSMOKHOCT3aCNOCTMOHO3aBnABHe HA MEOPTHO HApOTBHe 8BaOCAPOPAAOB, cEHO,EXPRESSION, CbNKATA 3pEynHPNAHE BMSMOKKHIMADANOH HA3d86A HOI Apoe bACsTcOtHbHDAHIOIIPDAPAAI aHIOTBOHIE.
Cn Knohopa H aatoaTHHMAH NpOAMRA H NATHKCAHETo H bTyToaMnu, HauoNtBHTo BHTo H houyT, 3a daZaIeTe TcHIOCTOA H aacoae, O Hyto, Mnyi - 3a ZdaAbeA H cHbTOCTOA H mNHYITr, UmeHHeHHeH tHO CTBOHTO H acoae, E HmHYITr CBAE HZHNCHOH EOIOTd. CReD oTOHATeto H MAKHNMAHATA HOHTOHT A nAPMTsO, DzAHOHtTO pNDkAoi, dNHOHTo H aHOHAto H zBaPOMHa HIOHHEHtO, HCHNTKe + 3a ZdApBe TcStBHeHHo.

Praa aonmaanmnaa nanaanana anananaanana anananaanana ananaanana ananaanana ananaanana ananaanana ananaanana ananaanana ananaanana ananaanana ananaanana ananaanana ananaanana ananaanana ananaanana ananaanana ananaanana ananaanana ananaanana ananaanana ananaanana ananaanana ananaanana ananaanana ananaanana ananaanana ananaanana
Otnarame Ha cTapHa npoppMaTa
FHyHnHa. Othanahe ha cnapa, 3a5a3bMoHcT3 3a3dAbane Ha sperenoe, koroTo anetHe Tp6ba 3a bde rotoB (Kato ce ot Htnae BpeHeta KO pabaHO HA nporpaMA), MauHmAHo BgeNe 30 anaIa He acapta 24 vae. BpeHeta 30 anaIa He cnpia 10 nepaaBipane e peMPOHa Hapobota H nporpaMA, HpeMBO, henoXyoMo H apy 3aOtroWae Ha pabotHe Tne napmpTe (ko 80a e npEkeDko oT pabPHHHe HACpOka Ha nporpaMA). CbNkTa 3a perynpKaHa BpeHeta 30 ot aIaHae HA cnapTa e 1MHya.
3a noimha o hmoetno 3a thnnae h a nctro, cne nnoptbpaedaa h na hba o anomathnva npopma hohnchite cytoia. Time delay'. 3a yenhaaahae h ao chroctia h ao cacotei hiakcnae oyho, Hoo/.a. 3a noimha ho tchohctia ha
MHHTATe -bYrOHa MinV.13KHeHHeHTo HcTROHcTa HcAocOBete HmHYTte cTaBa Hea3aHcHIO EDHOTpApyr.CnEe DCTHtAHBe HAKMKNHAta TcHcOHtHcN HAPMeBbpa, 3dABeAHBePnpDkBeKaTe OHTHAno HcHnAaSbHa.36bpa PpOHNsHa H3HHeHToH, HATCHeTe HcNAdSpEe CbTOBETHHbTyO.
Ito apnne na paoora nynapnmo. Oomagane no crnapo. no daucnse ce aodopaa oocmnnma no enayusio npaege. So do soudne enpenee sa zonanenoe no sanae, enaenee e sordanneepa yponee. Tine delay. Oynapnmo so amogane ne crnapo e dornnnae the sncu opeamnnpnnpnnpnnpnnpnnpnnpnnpnnpnnpnnpnnpnnpnnpnnpnnpnnpnnpnnpnnpnnpnnpnnpnnpnnpnnpnnpnnpnnpnnpnnpnnpnnpnnpnnpnnpnnpnnpnnpnpp
He ne rpeopnepnne nepnne pnnne nne nne nne nne nne nne nne nne nne nne nne nne nne nne nne nne nne nne nne nne nne nne nne nne nne nne nne nne nne nne nne nne nne nne nne nne nne nne nne nne nne nne nne nne nne nne nne nne nne nne
IopbpaHa HTeMnpaTpyaHa rTOBHTe ABOTMHNO NOpRbaHe)
Tae yhnnnncn cie Bbnoa HOBAMATNOHBOBcAe 130 pRIOKHOBBNae HAprrpOABATAa 39pRIOBHOBnE MOKe Da IIOBpOka TnepeoepoA hao roTOBOO 392rHnHbA 70-75C bnpOxHBeHnE 12 HcQA. Pn dReaIaIO AOTAHMOHIO HOBAIE CEBEN HIOHAKOPOR 130 ToHyOn, Cane 36pOBoBaBt HINKOAPOT, TPOPRAeBn E NpIKOTo OHnTHAE HAprrno 33 apoBt BdAnen Pekm.
IpHnHnHnHnHnHnHnHnHnHnHnHnHnHnHnHnHnHnHnHnHnHnHnHnHnHnHnHnHnHnHnHnHnHnHnHnHnHnHnHnHnHnHnHnHnHnHnHnHnHnH n Ht Ht Ht Ht Ht Ht Ht Ht Ht Ht Ht Ht Ht Ht Ht Ht Ht Ht Ht Ht Ht Ht Ht Ht Ht Ht Ht Ht Ht Ht Ht Ht Ht Ht Ht Ht Ht Ht Ht Ht Ht Ht Ht Ht Ht Ht Ht Ht Ht Ht H t H t H t H t H t H t H t H t H t H t H t H t H t H t H t H t H t H t H t H t H t H t H t H t H t H t H t H t H t H t H t H t H t H t H t H t H t H t H t H t H t H t H t H t H t H t H t H t H t H t H

3a 100000000000000000000000000000000000000000000000000000000000
IporpamaBREAD
Pprrpmae Ce pnpnepnba 3 nepehme Ha aepnnnepn Bneepn 0x npnneepn H no dabaebe Na pepebna Ppaepn.
Pprrpmae ppepepepepepepepepepepepepepepepepepepepepepepepepepepepepepepepepepepepepepepepepepepepepepepepepepepepepepepepepepepepepepepepepepepepepepepepepepepepepepepepepepepepepepepe pe
MaximamnoHoto apeme sa pabota ha ykuiy, Aromatnno no nppbahe 3a Ta n nporpane e orpaenno h a npa. He
ce npnpnepnne HNHNHBNHnHnHnHnHnHnHnHnHnHnHnHnHnHnHnHnHnHnHnHnHnHnHnHnHnHnHnHnHnHnHnHnHnHnHnHnHnHnHnHnHnHnHnHnHnHnHnHnHnHnH n HTHA TAN HAPoTAA HAPoTAA HAPoTAA HAPoTAA HAPoTAA HAPoTAA HAPoTAA HAPoTAA HAPoTAA HAPoTAA HAPoTAA HAPoTAA HAPoTAA HAPoTAA HAPoTAA HAPoTAA HAPoTAA HAPoTAA HAPoTAA HAPoTAA HAPoTaa HAPoTAA HAPoTAA HAPoTAA HAPoTAA HAPoTAA HAPoTAA HAPoTAA HAPoTAA HAPoTAA HAPoTAA HAPoTAA HAPoTAA HAPoTAA HAPoTAA HAPoTAA HAPoTAA HAPoTAA HAPoTAA HAPoTAA HAPoT AA HAPpAe Aae Aae Aae Aae Aae Aae Aae Aae Aae Aae Aae Aae Aae Aae Aae Aae Aae Aae Aae Aae Aae Aae Aae Aae Aae Aae Aae Aae Aae Aae Aae Aae Aae Aae Aae Aae Aae Aae Aae Aae Aae Aae Aae Aae Aae Aae Aae Aae Aae Aae Aee Aee Aee Aee Aee Aee Aee Aee Aee Aee Aee Aee Aee Aee Aee Aee Aee Aee Aee Aee Aee Aee Aee Aee Aee Aee Aee Aee Aee Aee Aee Aee Aee Aee Aee Aee Aee Aee Aee Aee Aee Aee Aee Aee Aee Aee Aee Aee Aee Aee AEEAEEAEEAEEAEEAEEAEEAEEAEEAEEAEEAEEAEEAEEAEEAEEAEEAEEAEEAEEAEEAEEAEEAEEAEEAEEAEEAEEAEEAEEAEEAEEAEEAEEAEEAEEAEEAEEAEEAEEAEEAEEAEEAEEAEEAEEAEEAEEAEEAEEAEE

Kozama cokame cycimakime, hmmadome me do he zaiwam noosee oon noaohom ononehohohohohohohohohohohohohohohohohohohohohohohohohohohohohohohohohohohohohohohohohohohohohohohohohohohohohohohohohohohohohohohohohohohohohohohohohohohohohohohohohohohohohohohohohohohohohohohohohah
Pn aepaae np anepae np anepae np anepae np anepae np anepae np anepae np anepae np anepae np anepae np anepae np anepae np anepae np anepae np anepae np anepae np anepae np anepae np anepae np anepae np anepae np anepae np anepae np anepae np anepae np anepae np anepaee
BIMAHMEIinanaeineyoxhenxpbkui,kaenmaaouadomezomoe xn6 om ypeo.
He ane aeneae nane na yede npv emnns no iinacase na neceonot Om mnaa aana cnaeacnmo na opedykma, knoe meane.
Iporpama.SLOWCOOK
Pnpma3a npe pnaHnauha 3 na npotBtne H naHXnn, knoTHn H na tactpnsKpH2HO mHko. BpmeTto a npotBtne H no npoaa5bHnepae 3 ta Taan npotpma e 3 vaca. BpmeTto a npotBtne Mcoe da bdo zadAedho puiHb H maHIO 0 Tm do 12 vac csc tbnk o npenpyeae 10 MOHNY.
Iporpama ,EXPRESS
Ipnpamada a npipnnae Haa 3a002 npnpinvne Hae npnepn pohnnnna Kauu c n oba. Ipnpamada npnpnnnna aatomarHNO XKNNNEA CHN, hnoTHO DNnHnne Hae NOJDA. B 13nnpnpma e nebBnBnOKn pnuho daJANHHe A npemTe 3 a npinnrtnne HcA HeDCTNIHn DYNKnnc HOnArane Hc TaPrrn . AotmatnrHn noopRnhaee
33 cTAPTHAHE HA nPpOgAMATA HA nPpRTOBANBE H pEKHM HA rTOBHOCT HATNCHETE BYTOHa_Start'. CEBTAH NIKKATOPTB 33 PEKHM HA nPpRTOBANBE H fOHOBOCT OCCBETNEHME HA BYTOHa_Start'. 3AnOpEA HbIbIeHMeTo HA ZADADEHATA nPpRTOBA.

Ara n a rnaa a aenrnnnne ane ennnnne ane ennnnne ane ennnnne ane ennnnne ane ennnnne ane ennnnne ane ennnnne ane ennnnne ane ennnnne ane ennnnne ane ennnnne ane ennnnne ane ennnnne ane ennnnne ane ennnnne ane ennnnne ane ennnnne
III. DIOJIbJIHNTeJIHH Bb3MOXHOCTN
BtacBaHe HA TECTD
- PnHOTBnHC HΦoH
PnHOTBHe HACTH CdbIOKO BpKHe
- PnHrOraHHe Ha H3BapA, CHPeHc
- PnroTaeHHe Ha DetcKa XpaHa
CTepM3aHnHa HOMAKHHCK CbDOBE
IV. NOДРБЖKA HA YPEDA
06u npabnna n npenopbkn
Ipeia pataa yoropeba ha yedza, kanto h 3o tprnephae ha HmKpHsHa 3x npa 3y eepnptroBtne Bn npenopoeBa de aobopbme 3h b en poapaekehe Ha 15 Knnnnn nnnoBbAHH o nprrnana...STAM.
He octabare 2a noBte O-24 hca Hauata c npOTeBxa XpHb a 3AIOBENH ype, KIN KOtA e Hauhne C BQA. Hauta c roTOBO tACTe MHO da ce na 3XkDnHMA n pRn HeoXOBHMOCT da ce cToOM XpHbTA B YpeA, KATO CE HNTHORA dyuKATA 3AOTONHE.
Aio npboep He ce KINON3B pOoBkTeHNO Bpe, 3aBkoTHeIO To EKCHueOT eEeKpUeCKATA MpeKa. PoeTof Kemepa, a TnBa HKOHO HApBeRtHINH DCK, BbIpuHHNt KaK, H KOANHbHa 3 MaNcKHe H Napa IpsDba Da Bda
PnIaIpaNCTHHe KIM TNOHAEHNA HcNEHbEMTO, YBpeCte Cc, cE JIKKHOHOOT OEeKTPCKOHTA MPEKs HnHATNO HOHIOHOHOHO. 3a NOKTHCTHE Na YKEU OJINHO EMEK MEKNA INENKAIHIN PEPAPAT AaMIE He aH cyo
34SAPAH984 CE ANONANOMO npu nnuonnne no nppea nppu nppu nppu nppu nppu nppu nppu nppu nppu nppu nppu nppu nppu nppu nppu nppu nppu nppu nppu nppu nppu nppu nppu nppu nppu nppu nppu nppu nppu nppu nppu nppu nppu nppu nppu nppu nppu nppu nppu nppu nppu nppu nppu nppu nppu nppu nppu nppu nppu nppu npuu nnnnne nnnnne nnnnne nnnnne nnnnne nnnnne nnnnne nnnnne nnnnne nnnnne nnnnne nnnnne nnnnne nnnnne nnnnne nnnnne nnnnne nnnnne nnnnne nnnnne nnnnne nnnnne nnnnne nnnnne nnnnne nnnnnee nnnnne nnnnne nnnnne nnnnne nnnnne nnnnne nnnnne nnnnne nnnnne nnnnne nnnnne nnnnne nnnnne nnnnne nnnnne nnnnne nnnnne nnnnne nnnnne nannnee
345PAHEHO E nonanemero ha xopnyca h ypeo 60a odo nno nncnemmo My no aodcmpy
BbEe BHHHnTnHn Pnn HnHnHnA Hn HnHnHnA Hn HnHnHnA Hn HnHnHnA Hn Hn Hn Hn Hn Hn Hn Hn Hn Hn Hn Hn Hn Hn Hn Hn Hn Hn Hn Hn Hn Hn Hn Hn Hn Hn Hn Hn Hn Hn Hn Hn Hn Hn Hn Hn Hn Hn Hn Hn Hn Hn Hn Hn Hn Hn Hn Hn Hn Hn H
Kopnchit ha Jau Kedetmo Mokae ja cne NocHc, Karato c da Hapck. Tahta, Bpuehner any kienkak kain kipnoknki Kaanha hsa yekane ha npabrae dba e ce nncbntcb cne bscn kcnnoanene h na pboba. Opaeeayuah be c npceca h npotroehna h xpantha b yede kongenl tpaebaa de cce orptarab cne bscn kcnnoanene h acypctibto. Bpuehne hnpoepohkctbe h paobothia kampe bpcja de c ne Kncnboi nohofoxdoikn.
Почмствано Корпуca
Pnnpaep 3a de hcnepnepnepnepnepnepnepnepnepnepnepnepnepnepnepnepnepnepnepnepnepnepnepnepnepnepnepnepnepnepnepnepnepnepnepnepnepnepnepnepnepnepnepnepnepnepnepnepnepnepnep
REDMONO
NoMCTBaHnMa yawata
MAMDA MIOA DE CE NCTT KERTO PABIO, C NOMDIA HA MSA MTA H A CPOCTO ZA MIMRA HA CIOBDE, TANGA H C QOMMAMBA MAMHIA (H C B I R O T E D E P A T O R) PAI PAOIDOTADUHAI
PnIcHIOAeBAMHbHTHeBaHbTaCtOaB0aHbOa HcAeBCTae Da Cc HAKHCBe KABTCEHO BPEMe, cIeKoTOA NHOHTe. PnEa DcNtOHXe MaTHaB CkPOyHa, ZdZbUKNKTHReHKTpHReD Go CYCO BbHbHbTA NOBPOXHO HAaOHJ. PnPeHDOHnHbHbHa HbBaTe A BbNOKHO BbHbAAVACNHrA PnONHsA HbAe TBAuBpEOHO HxaneMBOeNPOKpHMe. CmIo No CcEg CTo TaHb E nePnHbAe BApckHO HAaBHJI.
NoCTBaHe Ha BbTpewHnA JyMMHHeK KaNak
1 OToBopTe KaNACA Ha ypea
2. HATCHETE EIOHOBEMEHNO KAM YIINHPA IIBATAIIMACOBIA OIKCATOPBA BIOITATA CACT OF BPTMEHNTA CTPAHA KAKA. Se 3a 2pHARATE yCINHMB, D05HHTe BtPbHHN ANMYHNEB KANK KMM CECE CH HADONY. 3a DE CEOTENO OCHOB
3. NIOHCTe TNOBpXHOCTa HAp DaTaI KAnAka C MeKa BnKHaCandEka MInb TaNIO. NIOHcOxOHOCTM KIMHeTe CaAeHHA KAN KaN OoD3 CTpy, Kato KOnIOBaTe npEnapat 3a MHNE He cAoDBoe. B ToTH cTpyHe Ce paepeaa HAp HnOaHTe Hc BoDMOMHMA MaHINs.
4. Impihe je do cyko n dana kana.
5. Iocabe tae anynnnckai kakk a ropke hoekebe.Hanachte ndoaeknna aynnnncn akanac ochobnn anaKc Kcckn cHAnchte fne KcHcTOpTe 0 npkaeane.
NoDnBnHnKnAnan3nNpyKaHe Na npa
PINIOHNIKANAN 3AENYKAKNE Hnapa e nOCTABHn E NBNBNNIe TNDN K O RDNHNAKAN HA YPEAE Hc BCTABEN OT B-TPDEHN HnJIHNIKONPYC.
- BHMMATENHOHdppnateBbHMHNRKpnpy3aHpaTHATA6BbIbHbTHHATAHaKaNakArpeKbMc6eCm
- HatncheTne nactmacOBHn oHcTAPoT OOnHATA cTpHa HKnanaHn CbaNete BbTpueHHK HOpYc.
- PnH HeoXOuHMOT BHHMaTeHNO H3BaTepe TymKata Ha KnaHa. N3MHTe BCNUK qACTn Ha KnaHa.
- CIOBIBHABITO I CIBA B DABATR EPEI NOCTABRE TYPWKA HAI MRCTOI HA KIMCTO HAI KAHACHE XHAJIHTE HA OCHOBHTA HAI KH KANANA CBC COTBEHNTHE KADTHN HAI BPTEPK KOPYIC H CEDHINEK KOPYCITE DO JUPAKBAE, NOCTABERE NINHO KANANA 3a KYNCAGDE HAPNA TAEHDOTO HA KANANA YPEDA.
BNHMAIeT 10 do ce neopomponi oepopmpnemno h ywma no knaing, he ycpaiae a n he aydinae npu cao
OTcTpaHbAbe Ha konDEm3ata
B To mOeH KOHNbAeTc b cbea B c hneau H KxNnHa Knoepy HA ypeo Aoo YauuHa CogE 8KNOHnBaH Na Oyea OTOpTaHBAeRte OAcakaa B KxHnHa oKOo YauuHa KOHNbAeC nOeHAta H KxNkHeCAngHe
NoMCTBaHe Ma paOthata KaMepe
Ako CE cI38aTcIPOO YsKzHMeBHIOA T08a PbKOBOCTBO, B5MOKOHCKOTr ONTONADAE HAI TEHOCT, QHTAHMI XPHAI MIA 3MBP CKBHANB bIe aBoTHoTHa KAMPeA Hyaepa E MHMHANAHAI. Ako BCE pCE e IyNOIO NO-BoIECTBEH 3MBPCBHE, IO-BpKHOCTtHa h Kaopohlta KAMpe TpoBa dae No cNtOHK, 33 Da cE HeIOHNHePNHPaHbA tpoRa oHnnepeDHa Hyaepa
Kn nonnonnonne no nnonnonno Knno no ypeo knoe Bo ce npncnnae oed cokmoed e bns nnonnonne an en
CTPnHnHHTTECN Hn Hn Hn Hn Hn Hn Hn Hn Hn Hn Hn Hn Hn Hn Hn Hn Hn Hn Hn Hn Hn Hn Hn Hn Hn Hn Hn Hn Hn Hn Hn Hn Hn Hn Hn Hn Hn Hn Hn Hn Hn Hn Hn Hn Hn Hn Hn Hn Hn Hn H n H n H n H n H n H n H n H n H n H n H n H n H n H n H n H n H n H n H n H n H n H n H n H n H n H n H n H n H n H n H n H n H n H n H n H n H n H n H n H n H n H n H n H n H n H n H n H n H n H n H.
PnI nOAnaHbA KpNtBkOxOeUHApHbTeepoAHTK,OTcPbHte HbHmTHeCnHcHtE, Kato BHHMabTaDaHaHtNCbKaOpKcOe TaHdTHa. NpI pRcPbCABBaHnOaBpbXoCTTAHaNpHaepeTbnHnDkMoke Da cNoHbAanHbKnHHeNbOc Cbc PocDhTbOaDCTNCHETNNHcMeTt.
Pnpoepnoe enoanaa no yoepe, c apemmo moe 0 ce noanr nnnnna nnnnna nnnnna npnoe na qema Hnpoeonmou duc. Cao no cbe cu noo he e noohn ao Heuopnoocn o a ynpocnoa o u he aae H npooa maa my paoa.
V.CbBETI3AIIPINTOBTBHE
PpeKn pnprrno HauHH 3a OTCpaHBAHETO H
B 8 daa a a a a a a a a a a a a a a a a a a a a a a a a a a a a a a a a a a a a a a a a a a a a a a a a a a a aa
ACTMETO HE CE EC E CROTBNIO HAIbJHO
| Бльмουнн рлипуншима на рожима на ршианоу. | |
| Зборавлі Stуд зда STВОВРЕКANKA на Урета КИМ He StуВОВРКIM палгі, Зота经 STIMEРATURA на рожима He STOВОВРКIM pAVOLYKII. | |
| Чаша в Нарреталеня СЕМЕNT He ca B doobap kontak.Tурацкк КИСТЕРATURA на рожима He STOВОВРКIM doobapHe STOВОВРКIM STOВОВРКIM STOВОВРКIM STOВОВРКIM STOВОВРКIM STOВОВРКIM STOВОВРКIM STOВОВРКIM STOВОВРКIM STOВОВРКIM STOВОВРКIM STOВОВРКIM STOВОВРКIM STOВOVHII. | |
| Чаша в Нарреталеня СЕМЕNT He ca B doobap kontak.Tурацкк КИСТЕРATURA на рожима He STOВОВРКIM pAVOLYKII. | |
| Чаша в Нарреталеня СЕМЕNT He ca B doobap kontak.Tурацкк КИСТÉPРATURA на рожима He STOВОВРКIM pAVOLYKII. | |
| Чаша в Нарреталenя СЕМЕNT He ca B doobap kontak.Tурацкк КИСТÉPРATURA на рожима He STOВОВРКIM pAVOLYKII. | |
| Чаша в Нарреталenя СЕМЕNT He ca B doobap kontak.Tурацкк KIСТÉPРATURA STOВОВРКIM STOВОВРКIM STOВОВРКIM STOВОВРКIM STOВОВРКIM STOВОВРКIM STOВОВРКIM STOВОВРКIM STOВОВРКIM STOВОВРКIM STOВОВРКIM STOВОВРКIM STOВOVA. | |
| Чаша в Нарреталenя СЕМЕNT He ca B doobap kontak.Tурацкк КИСТÉP外ТURA STOВОВРКIM STOВОВРКIM STOВОВРКIM STOВОВРКIM STOВОВРКIM STOВОВРКIM STOВОВРКIM STOВОВРКIM STOВОВРКIM STOВОВРКIM STOВОВРКIM STOВОВРКIM STOвОВРКIM STOвОВРКIM STOвОВРКIM STOвОВРКIM STOвОВРКIM STOвОВРКIM STOвОВРКIM STOвОВРКIM STOвОВРКIM STOвОВРКIM STOвОВРКIM STOвОВРКIM STOвОВРKIM STOвОВРКIM STOвОВРКIM STOвОВРКIM STOвОВРКIM STOвОВРКIM STOвОВРКIM STOвОВРКIM STOвОВРКIM STOвОВРКIM STOвОВРКIM STOвОВРКIM STOвОВРКIM STO<|im_start|>ТУ. | |
| Псп ровете Naразу. b uashta HINa Tbepe MaKo BOA, KOTo He Me Moke Da Ochchupr DiocTAtNo PInbTHO Ha NauTe. | |
| Псп рьчесе: | С�хейн Stte TBpde MHIOr OIO To Hauata. |
| Псп obskhoobno Trpokhene e doctatny OclnTo Da NOKRbA dMHO HO YAHTA To HauTb CNO. | |
| Псп blysoBoTrpoKHe ChcDaeBaire YkUZaHINITa H CStOBETHATA peuota. | |
| He sazarbayre Kanaka Ha yepa prn poykaue oceBek Ako ToBa He e daedbo He peuotetra. Tepek Trpokhene zadzukovtne Praypaerte princkosmpaerhne Ipovdyk and Hauoty BeHouta or Tox. | |
| Псп роветe: HsKINlaBaeNa Hb BybBOHa nр роветe Na pOyduKTH c nobuShena KcMILAHIOCT. | |
| При却不ени (Techу pro ce e k anekdo): | В посяа на востане сес с за- плно за вторию karak и в鞘шию knankana за курашно на па. | Слароть в чашата по-hankо тсес. |
| Стоиме се Тбрдд Кного тсес в чашата | Изадete пониото по чашата, obshchete по оздого по слароть в чаше, сиз кето почелкес по рогottershiето do �огинот. При сиздашто пониоте по-hankо тсес в чашата. |
PPOJYKTbTCEEINPEBAPNI
| Стresses СТР的新 рирнибoga на Ндддддддддддддддддддддддддддддддддддддддддддддддддддддддддддддддддддддддддддддддддддддддддддддддддддд Задлеси (КИСМСВЕА) на Беретноа за пиротону Тьрпддддддддддддддддддддддддддддддддддддддддддддддддддддддддддддддддддддддддддддддддддддддддддддддддддд徳 Сразы митриотену сгогото сгсгс e сгоготу дьгпс дьгпс НД ВОТМУПОПТRAБЕ. | Mнор�льные рирорега (адамшара за тозн моротуyped) ростацу. Постава на сбставке, Каншт на Наррахьиму М, поророгину, Дарову на рироталу в поportотуyped Травло дьсстгета на риротонусян Проблеси л�атою на рироталу за ватуатун поставе в поportалу. Аксы в поportалу Моготуогуну моготалу Моготуогуну моготалу Моготуогуну моготалу Моготуогуну моготалу Моготуогуну моготалу Моготуогуну моготалу Моготуогуну моготалу Моготуогуну моготалу Моготуог肃а на рироталу рироталу Моготуог肃а на рироталу Mоготуог肃а на рироталу Mоготуог肃а на рироталу Mоготуог肃а на рироталу Mоготуог肃а на рироталу Mоготуог肃а на рироталу Mоготуог肃а на рироталу Mоготуог肃а на рироталу Mогotok Mогotok Mогotok Mогotok Mогotok Mогotok Mогotok Mогotok Mогotok Mогotok Mогotok Mогotok Mогotok Mогotok Mогotok Mогotok Mогotok Mогotok Mогotok Mогotok Mогotot Mогotok Mогotok Mогotok Mогotok Mогotok Mогotok Mогotok Mогotok Mогotok Mогotok Mогotok Mогotok Mогotok Mогotok Mогotok Mогotok Mогotok Mогotok Mогotok MогotOK Mогotok Mогotok Mогotok Mогotok Mогotok Mогotok Mогotok Mогotok Mогotok Mогotok Mогotok Mогotok Mогotok Mогotok Mогotok Mогotok Mогotok Mогotok Mогotok Mогotik Mогotok Mогotok Mогotok Mогotok Mогotok Mогotok Mогotok Mогotok Mогotok Mогotok Mогotok Mогotok Mогotok Mогotok Mогotok Mогotok Mогotok Mогotok Mогotok Mогotak Mогotok Mогotok Mогotok Mогotok Mогotok Mогotok Mогotok Mогotok Mогotok Mогotok Mогotok Mогotok Mогotok Mогotok Mогotok Mогotok Mогotok Mогotok Mогotok Mогotuk Mогotok Mогotok Mогotok Mогotok Mогotok Mогotok Mогotok Mогotok Mогotok Mогotok Mогotok Mогotok Mогotok Mогotok Mогotok Mогotok Mогotok Mогotok Mогotok Mогot: Mогot: Mогot: Mогot: Mогot: Mогot: Mогot: Mогot: Mогot: Mогot: Mогot: Mогot: Mогot: Mогot: Mогot: Mогot: Mогot: Mогot: Mогot: Mогot: Mогot: Mогot: Mогot: Mогot: Mогot: Mогot: |
PnBBAPEHE NPOOyKTbT N3KNHRA
ACTNETO3AFAPR
IPODyKTbT E H3FyBnΦOPMATA CN
TEHMBOTO E BIAJXHO
| Tâbône cheço tê párbúkrákhān pρóyuksa v āchúata. | Прочься поочиу пίркение пόвсátай состуно He no chýto ot Čečné 5-7 minúhyt. |
| 3dǎnk tê Tâbône dàl'to ďpèno 3a pírotrōhne. | Ścapikete pētroho Na pírotrōhne Mink cédʒaîne yúčázhásta b pěcúmét a,adderapá na Toška Moden ha yępá. |
-
YOGURT (OGURT)
-
BASTA
13.SLOWCOOK/PI
5.PAST A
-
SLOW COOK (POZVOLNE VARENI)
-
STEW (DUSENI)
Funkce
| MASTERCHEF LITE" (Regipeace Āsau a teplotsy probébu programu) | ano |
| Udržovani teplotskyholovych jidel (autochiv. | do 12 hodin |
| Preeběžné yvpnuti autochiveti. | ano |
| Ozhivani jidel | do 12 hodin |
| Odożeni startu | do 24 hodin |
| Yvpnuti zóukych signalni. | ano |
Vybaveni
| Multifunkizni hmec | 1 k |
| Misa | 1 k |
| Kontajer pro prilgravu na pafe | 1 k |
| Sberaska | 1 k |
| Plocha tizec | 1 kS |
| Odmena nadoba | 1 kS |
| Kleste na minu | 1 kS |
| Kinhra recepti | 1 kS |
| Orzua biajka/oudhice | 1 kS |
| Nakovod k oblaste | 1 ks |
| Servisni knizka | 1 ks |
| Bilografija | 1 ks |
Virozyte sc hovozhye provo nevozho vve zvloedu komploci taki teckychnich cchotarikov yroboi zh odzovno Iavnoi snyj produces, be prezhodnaya upomdati a tokoyich zhenich. Vechyckich specifikacii je povlaneja chtya 310
Slozeni multifunkcnihorhme (chemaA1, str.3)
1 Viko pifstroje
& Teleso pfistroje
2 Kruhov tesneni
9.Drzadlo pro pfenasei
-
SmimariyinitiPoklka
-
Salmaci bezpeccopostni ventil
-
Otvor pro unik pary
-
Plocha 12fco
-
Misa
-
Sbeaacka
-
Tlaicitko tveyeni vika
-
Konteyner pro pripravu na pahe
-
Ovadacipanel's displejem
-
Drzak sberaickyAlice
-
Odimema nadoba
-
Klesté na misu
-
Pfiovdiñshura
Ovladaci panel (chema A2, str. 4)
- Tlakko, Cancel/Reheat, Zrust/Ohve - zapnut/Vypnut fukche Ohveu, piferusen probahjico programu. priprawzrsudy snyast naizvost.
- "Tlachko,Time Delay" (Odozeni) - zapunuti rezimu odlozeneho startu.
- Tlačitko, Menu',Menu' - potvrzije vyber programu automatické připravy.
- DispJE.
- Tlaftko, Min/- (Min/-) - zvolenl automatickhe programu vafenl, snifenl teploty, zvolenl minutovych hodnot.
- Tlacitko, Hour/+, {Hod/} - zvoleni automatického programu vařeni, zvyěni teploty, zvoleni casovych hodnot.
- Tla2ko,Start' (Star) -zaputi nastaveneho rezimu piipravy.
Zobrazeni displepeje (schema A2; str. 4)
a. Indikatory automatickych programu.
b. Indikator nezimu odlozenenho startu.
c. Indikator rezimu priprawy.
d. Indikator casu.
e. Indikator rezimu autohfeyu.
f. Indikator programu.EXPRESSION*.
n.Indikator rezimu obliyani
h. Indikator wypnuti zvukovych signalu
I. Indikator uovne teploy
L PRED PRVNIM ZAPNUTIM
HRANA JE PREMALO KUHANA
| Možni vrzoli Raztopine | |
| Pokrov napravce je bil odprt ali ni bil pravilno zaprt, zato temperature kuhanji ni bila dovelj visoka | |
| Temperatura kuhanja niso opazili, ker se posoda in grenil element nista tesno prilegala | Med podkrovom in ohljem napravce ne sme biti nojenih tujh predmetov, fe obstajao.Pred kuhanji nedvo pazit, da je grenil element iust in ses tesno prilega skledi |
| Izhtrane so bile napań sestavine ai nastavitve.Splojni deležni niso bilu ugotovjen,Žvila so bila razrezana na koske, ki so bilu malo preveziki.Nastavitve ob napańem Gsu.Izbriani recepti ni primenen za napravce | P乡村振兴am, da uporabite recepte, priagojene na napravo.Izberite smo prezižkuse recepte.Nastavitve cas in kuhalmi program,Izberite sestavine, delze in velkost kosov po receptu |
| Parna kad: koltina vode v skledni din dovjit, da bi zadoslovala gostota pare | Uporabite pr乡村振兴olo koltina vode. Čste ve dvoimih, preveri te nivo vode med parjenjem |
| Cvtje | Dodan je bil prevec rastinskégo ala Za kritje dno sklede.Upostešavje proporacila, podana v receptu med globokim cvtijem |
| Prevec tekocine je v skledi | |
| Juha je zavrela, medtem ko je kuhala kisko hrano | Nekatera Žilva je treba prekuanji oprpati alli spečIUpostešavje nevodilva zu uporabro |
| Pečenje (te-sto ni ospelo speci slož) | Med dokarovanjem, da je testo doseglo nolranjiPokrov in prekilo parni ventil |
| Prevec testa je v skledi | |
HRANA JE RAZKUHANA
| Napañfe sestawine ali csovne nestawtie, zhwa mi soba razzetana na koske, dl so malo prenajñimi | Priporocamto, da uporabite recepte, piragojene za vaš modal Nastavite cas in kuhali program, lberite sestawine, deleze in veikost kosov po receptu |
| Jed je bila v skledi na "Keep Warm" načinu predolgo po kuhanju | Priporocamto, da uporabilate "Keep Warm" načina zmerno.Če var namravna amogola, da vnaprej preklopiţ "Keep Warm", jo uporabite, da se izugreile problemu |
TEKOCI VRIMED KUHANJEM
HRANA SE DOBI
| Mleko vre proć | Odwínso od kaktovosti in lastmosti uporabljeneqa mleka,lahko ta zavme. Da bi se temu izgnili, priprocarne, da uporabljate smo na ultra-pastizirano posneto mleko. Ce je potrebno,změsajte mleko z malo vode |
| Zvila niso bila pravilino predelana (niso bila dobro sprana itd.),Napárná spožina razmjeji ali sestavnne | Priprocarne, da uporabljute recepte, prilagojene za nagravo. Poskusi ižbrati samo dokazne recepte. Nestavite czis u kuhali program, Izberite sestavine, delezhe in velkost kosov po receptuCeia zina, meso, ribe in morske sadeze je treba prez pred kuhanjem temeljto spirati |
SESTAVINE IZGUBIJO SVOJO OBLIKO, KO SO KUHANE
POCDZAS GOTOWANIA PRODUKT WYGOTOWUJE SIE
WYPIEK WYSZEDL WILGOTNY
PROGRAMA .SLOW COOK"
Programa skirta trokliniami i kondensutoupiien viirti. Pagat nutsyijeminqamino lakas sudaro 3 val. Taip pat galmas rankinis gamino laiko nustaynatas kas 10 min, nuo 5 min. Ik 12 val
PROGRAMA..EXPRESS"
Programa skrta gretram nyir i biri kolski virum vandemje. Programa, Isvitus vanderui, Ijungia. Ranklin naostatg galimbayes i atidato paleimo bei automatino palisymno funckliu sloge programeta neja.
Gaminimo programai palestei, Laukimo rezime spauskite, Start'mytka, Isjungs gammatino, automatino pašildymo indicatorii ir,Start'mytka apśvietimas, Prasidens praskintu prográcijnos programmi wydvnivs.

Jei neodajurtis automohematis programonis epevnyo paiekti ioku etrata, persovskiyte slykia Maisto gamimno patarimur", kurlame raste alekym o diajozaiyko liakyanos kiaslunus in gausse reilinnga remedekoyeo.
III. PAPILDOMOS GALIMYBÉS
Testos kildinimas
Fondiu
GruzDlnimas
VarSkes, siriip virimas
Valku malsto gamyba
GAMINYS PRARADO SAVO PIRMINE FORMA
| Per daznai varzte prodktus | Kepdani lorastiniu budu, malykte patekaliqa ne daznila nei kas 5-7 minutes |
| Nustatete per litja malsto gaminimo Laikg | Sutrumpinkite gaminimo lalka arba laikyce recepto, prilaikyto siam prietaiso modeliiu, nurodymi |
KEPINYS DREGNAS
| Naudojote netinkamus, pemnyg daug dregnés savyte tu- nicius produktus (sultingus valisur ar darzoves, saldyas uogas, grintine ir pan.) | Rinkites kepinio recepte nurodytus produktus. Stenkijtes nenuadoti pemnyg dregnü produktju arba, jiegiu taj Imano- ma, naudokite minimalej i kieik |
| Gatavq patiekala per ilgal lalkete daugafunkclame puode | Pasistenkite i daugafunkcio puode i binti gatavq kepinj iktko, kai tik jis pagaminanas. Esant poreikui, gaminj trum- pan galite patiki daugafunkclame puode, esant jungtiam autternatinam païldyrmui |
KEPINYS NEISKILO
| Biogai iplakti klausinai su cukrumi | |
| Tešla, kurioje yra klinanfios medziagos, slovjo per iligai | Pageidaulina, kad büty naudojami patikrinti (priäti-kyli Šař pamětiso modelui) receptai. Produktiv parinkimas, parauosiamasis je apodorojimo bădis in proporcióni turi atitiki rekomendacijas |
| Nenušijopote milu arba biologai užminkěte tešla | |
| Padárette kokiu nors klaïdu dédami sedadamsias dalis | |
| Pasirinktas receptas netinka büts naudojamas šlu daugifunkcio puido modeliu | |

Daegyelle daegylenfunkcy puydu REDMOND modelly, esont nepokankomrak sckdy lkekul, prognocnse STEWt. SOUp su veikia sprouges nu jengrin pekntiKOMSIA. Toa atveju gaminima programa sustabamc, a daugstafunkc prud veikinnas persingj u cuminatine pesidyamre veiing.
Gaminimo programu bendra lentele (gamykliniai nustatmai)
| Programa | Naudojimo rekomendacjos | Gamlinimo trukme nunamoyoj | Gamlinimo trukmês diapazonas/Pokylio 2zingsmys | Régios príce darbo paramétry | Prádizos antelimnes, val Automatao paldymo funçcia, val | |
| MULTICOOK | Patiekalams gaminti pagal naudótojo nustatyus paruδimo baki parametrus bei temperatosiores paramétrus | 00:30 | 2 min - 15 val / 1 min (aukstau 150°C; 2 min - 2 val / 1 min) | ✓ | ✓ | ✓ |
| Programa | Nauodjimo rekomendacjos | Gaminlino trukme mumaryoj | Gaminlino trukmês diapazonas/Pokytéo Žingsnys | Hajimmas prir doardo paranemiu | Pradiklos ateljimos, val. Automatino passidymo funçica, val. | |
| PILAF Patiekalams iś ryżu gaminmui 00:35 10 min - 2 val / 5 min | ✓ | ✓ | ✓ | |||
| STEAM Produktuy gaminimas garunse 00:30 10 min - 2 val / 5 min | ✓ | ✓ | ✓ | |||
| SOUIP Suriobams virti 00:40 20 min - 8 val / 5 min | ✓ | ✓ | ✓ | |||
| PASTA Makarong virimas 00:08 2 min - 1 val / 1 min | ✓ | |||||
| PORRIDGE Verdant pielenBqk kǒsè | 00:25 | 5 min - 1.5 val / 1 min | ✓ | ✓ | ✓ | |
| STEW Produktuy trskinimas | 1:00 20 min - 12 val / 5 min | ✓ | ✓ | |||
| BAKE | Keksams, biskvitams, pyragams iš miele linés ir slučekniutos těžoskepti | 00:50 | 20 min - 4 val / 10 min | ✓ | ✓ | |
| FRY | Kepimas daržovses, měsa, zúvis | 00:15 | 5 min - 1 val / 1 min | ✓ | ✓ | |
| YOGURT | Jogurtams gaminti 8:00 30 min - | 12 val / 50 min | ✓ | |||
| BREAD Duonos | kapimas | 3:00 10 min -6 val / 5 min | ✓ | ✓ | ||
| SLOW COOK | Braising daržovses, měsa, zúvis | 3:00 | 5 min - 12 val / 10 min | ✓ | ✓ | |
| EXPRESS | Grełtas malsto gaminimas ryżial, kǒsè trupus ant vandens | Programa, Švýrs vandemiu, Šëvjungla | ||||

Nustatya vidutine körpmöne elements darbine temperature.
VÄROT PRODUKTSPÄRVÄRAS
| Värt rot piena putru piens parváris | Piena kvaliatae iupañas ir atkarjias no izgatovanas vietas un rafosanos procesa, lesakim imantot l'ikai pastee-relizitzu piena ar 2,5% tauku satur, ne jepavosianis, pienu var atzaidit ar izerano ideni |
| Sastawdalas piims varianas naov aoprodatas valir aoproda-tas neparezi (skliti naskalotas, utt.) Nav levirotas sastawdalu proportcjias vai produkti ir neparei-zi izvelétii | Izmantojet parbauditu (dotajam iencies modelim adaptetu) recepti. Sastawdalan um to proportcjui, sagatovazanas vidam, programmiun un gatavosanas (aikam ir jiaibst Izvēletajai receptei Graudaugus, galu, zivis un ioras produktus vienmīr tūpigi nomezajetpi piats gatavosanas |
EDIENS PIEDEG
| Traks i sliski iztihs péc pedéjías gatavoñas reizes. Irbojáts traika pretiepeğuna pärkäjums | Prims gatavoñas partecieñeties, ka traeks ir kartigi iztihs un traika pretiepeğuna slánis na bojáts |
| Kopéjáls produktu daudzurms ir mazíks par recepte i teicamfo | Iznamojej protaučbitu (doktam ierics modelim adaptetu) recepti |
| I ristatís parak ilëls gatavoñas laiki | Samazinjet gatavoñas laiki va sekojej receptes i teileku-miem, kura ir adaptèta dotajam ierics modelim |
REDMONO
| Cepot: esat azimusuši leitet tračka ellu, na samalisi va pavalu agripietzi gatavojami produkti! | Cepot leiejot tračka nedažd eijas - tā, láti pânil kītá nosegut tračka apkäu. Lai filodin věmířů Čeptos, tao periodskí i jámpašs va pč nečotečká laka lápejové Žú țruo pusi |
| Saujejot: tračka nav pletiekarni mitrūa daudzums | leiejot tračka volár kÍdikruma. Gatavoshansla kába bez nepiecieszambás neverjet va multikatla výku |
| Vráto: tračka nav pletiekarni daudzí kÍdikrma (nav levevoratas sastavdóu u proportcjáš) | levrojot parcelizas proportijá slarp kÍdikrýte un ciezarém sastovdalam |
| Miklas izstradji umiem: pírmis gatavoshans na lesměřěta tračka lekëjë Živna | Pírmis miklas jevićetovára tračka, jsémeřýdet Ša'apkäu un silanes ar svištu va ellu (nevjavig liet ellu kralkāl) |
PRODUKTS IR ZAUDJIS GRIEZUMA FORMU
| Produkti für parak biezi maists | Vienkärski cepot produitus, apmaisiert tos ne biezäk kä reizt 5-7 minute |
| Iriestafis pärak liets qalavošanas laiks | Samaziniet gatavošanak laiku vial sekojiet recepte ieteiko-miem, kura i adaptë tā dotajam ierieces modelim |
MIKLAS IZSTRADAJUMS IR MITRS
| Izmantotas nepiemierotas sastavdaljas, kas rada ilekcu mitru- mu (suligi darzeni va aigui, saidetas ogas, krejums, utt.) | Izvielijets sastavdaljas abihtsrö receptei. Névielijets ga- tavosanai produtukti, kur sator dautz mitruva va izmanto- lij tés piceis jasmača lautzumra |
| Gotavais izstradajums ir parak iligi turets aizvërtu multikatris | Izneimiet: izstradajum no multikatla uzurež职业技能 pagatová- săj. Ja ir nepieçefians, varat etstatt to uz nèilgu (käru i te- sleğtu automatistas silutiandan funksij |
MIKLAS IZSTRADAJUMS NAV UZRUDZIS
| Slikti sakkulas olas ar cukuru | Izmantojet parbaudtu (dota)am lice modelim adaptetu) recepti. Sastavdu la vleme! un proporcial, to sagatavosanas veizdam, programmai um gatavosanas laikam ir [aatbilst iye litajai receptei |
| Mikla parak figi ir stavjiusi er cepamo pulveri | |
| Nav izsjati milti var il slikti izmiciita mikla | |
| Pielautas kildes sastavdau je levietošana | |
| Izveleta recepte nav piemero tatavostana i smodej ma-tikata |

Daudzos REDMON multikatu modele is alszanztibes tielme preit ierices pankarana. Te idorbojas gajovanas, ja gatavejot or programmazn STEW un SOUw, trokai na viet pieteknii douste stiouma. Sinig jayum gotovodas programma pucice arabi on moutaipstipzadzus au manatristis silasanas reizmu.
Edena gatavoanas programmu apkopojuma tabula(rupnicas uzstadjuml)
| Programma | Lietošanas ieteikumi | Gatavošanas lalts pēč noldušepoma | Gatavošanas lalts diapazons/ lestattlans soles | Darba paragemtu sastinësjanma | Stara attilišana, stundas | Autovizidje |
| MULTICOOK | Dažadu edienu gatavošana ar lespejù leistattt gatavošana laiku un tempera-tūr | 00:30 | 2 min - 15 st / 1 min la temperature la iusstaka par 130°C: 2 min - 2 st / 1 min | ✓ | ✓ | ✓ |
| Programma | Lietošanas leileikūmī | Gatavošanas lalispičnólukusjūnni | Gatavošanas lalika diapazons/ testatišanas soils | Darba parameetu sasneigna | Staria atikišma, stundis | Autouristide |
| PIALF | Dažădu plova veidu galatošana (ar galu, zivirn, putru galu, därzerniemi) | 00:55 10 min - 2 st / 5 min | ✓ | ✓ | ✓ | |
| STEAM | Galjas, zivju, därzepu un citu produktu galatošana ar tväku | 00:50 10 min - 2 st / 5 min | ✓ | ✓ | ✓ | |
| SOUP | Bujonu, mérú, därzepu un auktsto zupu gatatošana | 00:40 20 min - 8 st / 5 min | ✓ | ✓ | ✓ | |
| PASTA | Makaronu gatatošana no daždarn kviësä kärinëm; císiju, pelmèpu un citu pusfabrilatu varišana | 00:08 2 min - 1 st / 1 min | ✓ | |||
| PORridge Piña | Piña putru gatatošana 00:25 5 min - 1 st 30 min / 1 min | ✓ | ✓ | ✓ | ✓ | |
| STEW | Galjas, zivju, putru galus, därzenu un citu daudzkomponentu edienu soutešana | 1:00 20 min - 12 st / 5 min | ✓ | ✓ | ||
| BAKE | Keksu, biskvitu, sacepumu, piragu no kartalmës un rauqa mildas cepšana | 00:50 20 min - 4 st / 10 min | ✓ | ✓ | ||
| FRY | Galjas, zivju, putru galus, därzepu un citu daudzkomponentu edienu cepšana | 00:15 5 min - 1 st / 1 min | ✓ | ✓ | ||
| YOGURT Dažădu jogurut gatatošana 8:00 30 min - 12 st / 30 min | ✓ | |||||
| BREAD | Maiges cepšana no rudzu un kviësü multiën (keskätot mildas rautzësanes etapu) | 3:00 10 min - 6 st / 5 min | ✓ | ✓ | ||
| SLOW COOK | Karsëta piñea, sutinatas gelas, stilbina, galerta gatatošana | 3:00 5 min - 12 st / 10 min | ✓ | ✓ | ||
| EXPRESS | Åtra risù gatatošana, odeni vanto irde- no putru gatatošana | Pé: visa idens týváfsa nas, programmata automa-tsk iizdgës | ✓ |

Seir noridido slideamento videja darba temperofo
TOIT EI SAANUD VALMIS
I. PIPIN ANO THN PPQTH XPHSE
ByaTe Ie pOooXn Tn oukeun Kai oA To eAptnjata OTo n oukeuaia. AapipTe OAn ta uukiaoukueuiaoc.

Bme emong enouovaroty eio ouvayow.
VI. ENINPOSOETA EAPTHMATA
(aTOKOVTai Xwpiota)
Mtope v atoakrjcte emptopoea eapnmuota oto oolukouc REDMOND RMC-M4510E ka va maBte yra ta vta tipovira REDMOND ony iotaoelia www.redmond.company h tataqatmepet eonmnuu ktnpouwiv.
RAM-FB1-kaAaθγiaTnyavioμελδi
XpnoiOaTeiia via yapejeepia diatopuov paoivTu o aeoi CeTo n BpaTo Aedi (apinoua). Elva cuiBatoe meoTtioe mIo Tu wupntKIOTrAC TnWv oA 3 Itox. KatakeKaUdaiNKe OAOEIButo aTaOI, Eei atooTiuJeVn AiBaIa kai vayTo yia eoiapiaJc sto tioyioia dieukluov an apoeicen, aoLIOou Tepeaeceu eTo aTO via yapejeepa. MtoPeI v xnpoiomongel Me Toaukueen dawLw TApoyauuyu. Duvatra va TAEviTa oTo AuVTnTio TnTu.
RAM-G1-OTYuaivwovdoxeiuvyiaiaouptiueapkeoataKotkia(4TEμ.)
Piopoeiayiayoadipemaiaadapopuivyaauypniu. To doxieiaexouv SEkIEc npaunviac Tnai EHTIePouV aEYEXTE IN AENIOU TPOAVOVA XPOJQAIANTBouV ME NAOKeUN dAauuTAPAYuyuW.
RB-A500 (A501, A503) - mroa va avtikolnnk nntpwo
Xwopntikorteta 5 Aitpa.
YCTPOHCTBO MYBTHBAPKn (CXEMA1, CIP.3)
1.KpuaKnA np60pa
2. YNMOHTHENTBHOE KNOBIO
3.CbEMHBAHHTpeHHRAKobuika
4. OTepeTne nBb bixoJa npa
5.4
6. KHONKA OTKOBTH KDHNUK
7. Hanb yipabnncn cnnneem
&Kopnyc
9. CemHH npapoeK kianan
10. nocka nooka
11. Yepnax
12. Kohrreinep nnohroBnHn Hn aoy
13. Mephik cakah
14. Why p3nepponrann
15.Pyka dna npehoCKn
16. Deepatentb nna cepnaka/tonnn
PahenbynpaBennn (CXM A2, CIP.4)
-
KnoHcA Cancp/Rehee -KNOHnHeHrOKnOHeHcy FIOHN P3ORpe8, npeRbAHne paoTb nporpmnnnprrto-
-
Khonka eTime Delays - EKNIHNEPEKMA YCTAHOBKN OTCPOKH CTAPA
3 KhoKnaeMenux - bIbOp aTOMaTHeCKo nporpaMmI nproToBneHnA.
A Dnne
5.KHnKxMin- -BbDop3HaueHHMmHHT BPEXMAxYCTAOEBK BYPENKINPMIOIaBENHIMDCPOHK CTADTA. - KHONCA Hour/- - Bb60d 3HaeHHA CCoB B PekHMAX YCTAHOBK BpeMeHN DnroTOBHeHH N CTCPoHKn CTaPTa.
7.KHOHkA xStarto-BKHOHcHHe SaaHHOrpeXnHa npHIOBHeHn.
YCTPOIcTB0 DoCnneA (CXEMA A2, CTp.4)
a. HnurkatoptbAbotOMATHECKHXIPODpAMM
b. Hngkatopeeknmaocpounkctapta
C. MHHKATOP PEXKMA NPKOTDBE
dMHKATOOP3HAeHHApeMeHH
e. INHINICATOPbI pexHMA ABTONODORpeBa.
f. HAMKATO npoPamM eXPRESSe.
q. Mdkkatop pekkma pa3orpeba.
hMHKATOPOTKNIOEN3BVKOBBXCHHANOB.
1. INHDAKATOP 3AueHHaTeMnepaTpybI
I.IPEPEDHAAYALOMNCIOJIb3OBAHIN
AkkpHIOO DcTbHe HaeJe Iero OOMNKeKToIe He XoOoBHe. YzAnke Bce yAnokOaHBe MepaHApHbI N pEkoAnHe Ha

Ooennnne nnnnne ennnnne ennnnne ennnnne ennnnne ennnnne ennnnne ennnnne ennnnne ennnnne ennnnne ennnnne ennnnne ennnnne ennnnne ennnnne ennnnne ennnnne ennnnne ennnnne ennnnne ennnnne ennnnne ennnnne ennnnne ennnnne
Pncnepcnnepepepepepepepepepepepepepepepepepepepepepepepepepepepepepepepepepepepepepepepepepepepepepepepepepepepepepepepepepepepepepepepepepepepepepepepepepepepepepepepepepepepepepepepepe pe
PHTOPHOTyNPOYCTOENKTHZAIIOHNIOHPOIOMOCHUY. ZAOHIMNPNOOCOXYB.ToK6E9KHOHNOBNNHOIOCTOHOHIOZANXPAI PEPNPOHCNIOLOABAHNRINPOPOBPOBOPOBDOEEOI NOHNOOHCYK
B hexoporo hoxoqemnunmucnoxu npooepn ooncnei yohoeohoeo eepn eepn oepn oepn noepn noepn noepn noepn noepn noepn noepn noepn noepn noepn noepn noepn noepn noepn noepn noepn noepn noepn noepn noepn noepn noepn noepn noepn noepn noepn noepn noepn noepn noepn noepn noepn noepn noe ope nnoe ope nnoe ope nnoe ope nnoe ope nnoe ope nnoe ope nnoe ope nnoe ope nnoe ope nnoe ope nnoe ope nnoe ope nnoe ope nnoe ope nnoe ope nnoe ope nnoe ope nnoe ope nnoe ope nnoe ope nne ope nne ope nne ope nne ope nne ope nne ope nne ope nne ope nne ope nne ope nne ope nne ope nne ope nne ope nne ope nne ope nne ope nne ope nne ope nne ope nne ope nne ope nne ope nne ope nne ope nae aee
OrcpuKa cTapra nporpammbi
FyKpOcAeOOPoHcIaOpIOBnOeIaIaIbIaIbIaIbIaIbIaIbIaIbIaIbIaIbIaIbIaIbIaIbIaIbIaIbIaIbIaIbIaIbIaIbIaIbIaIbIaIbIaIbIaIbIaIbIaIbIaIbIaIbaIIIOBIOEIOPOOHOIOPOOHOIOPOOHOIOPOOHOIOPOOHOIOPOOHOIOPOOHOIOPOOHOIOPOOHOIOPOOHOIOPOOHOIOPOOHOIOPOOHOIOPOOHOIOPOOHOIOPOOHOIOPOOHOIOPOOHOIOPOOHOIOPOOHOIOPOOHOIOPOOHOIOPOOHOIOPOOHOIOPOOHOIOPOO HOIOPOHOIOPOHOIOPOHOIOPOHOIOPOHOIOPOHOIOPOHOIOPOHOIOPOHOIOPOHOIOPOHOIOPOHOIOPOHOIOPOHOIOPOHOIOPOHOIOPOHOIOPOHOIOPOHOIOPOHOIOPOHOIOPOHOIOPOHOIOPOHOIOPOHOIOPOHOIOPOHOIOPOHOIOPOHOIOPOHOIOPOHOIOPOHOIOPOHOIOPOHOioPBOAOHOSIKISOEMONEOHPOOLONOKrta-1MHyQ
DnHnHnHnHnHnHnHnHnHnHnHnHnHnHnHnHnHnHnHnHnHnHnHnHnHnHnHnHnHnHnHnHnHnHnHnHnHnHnHnHnHnHnHnHnHnHnHnHnHnHn Hnnnnnnnnnnnnnnnnnnnnnnnnnnnnnnnnnnnnnnnnnnnnnnnnnnnnnnnnnnnnnnnnnnnnnnnnnnnnnnnnnnnnnnnnnnnnnnnnnnnnnnnnnnnnnnnnnnnnnnnnnnnnnnnnnnnnnnnnnnnnnnnnnnnnnnnnnnnnnnnnnnnnnnnnnnnnnnnn
PepBaHTeBHeO kIouenHe ABToNoDorpeBa
Bekovchenka bebotonoporena 0kOchivnieni pabotni proripamnii proritnozhenia bhaeata he cedra jzdenetibno. C yuyetom 3tzo, B kulyukhanepe npdmyohtombe Boaohokobte zabatpocemaneochko boAkyanfkh noB apemnai paobtsi fyuqinii 3rctapas nih ochshodny proripamnii proritnozhenia, JIJI na BOE pabotni proripamnii hakimite ikiomyx KStarb. Ychobu Choska aktononoporeng, noToHIO HauKHOY iStarb.

FAMMUMOMOPOLOMOE MOEOHNOVA NO OCAHMOHNOVA NPOPOPMY FOGURTAA EPASTAA.EXPRESSIONU NOI YOKONAKA BACNPOPOAMMEULTIOCKOO NEMMAPEYAMPOHNOVA KUNA 80CCT.
PazorpeB 6nIOA
MnBapKMOHOHNOHbOaIbIpaorpeBaXIOOHXGIO,INsAtora:
1 Pepenoknne npodnyb a ayu, yctanobnte ee B Kopnyc
Z3aKpOHTe KpOuKy, noKnIOUHTe npHbOp K 3neKtpocetn.
- Kanmihne H undepakabare HEcknoBcKekdy KCHKOy A cAeRrReHae. 3aRopetr coBETCTBOUOHE HnKdKATOPbHa HA Jnncnpe KnKIOHe. TaJImeh NAPHT BPOWOT BPEMEN PABoPBe.
NIOOIOI pOIOE 70-75C HgDn oepmabte EoB nopoeH cOeONH a THeHc 12 CIOI Pn HNOOHNOT BAOPTOB MNOK OHOANBOHNT, HNAGA N yepmabn Heckkno ceHnO KNCy IncNcy CAnet/Reheat, nokn H norocHT cooteBCTNYHNE HNDKATOH.

Eaeepnepnepnepnepnepnepnepnepnepnepnepnepnepnepnepnepnepnepnepnepnepnepnepnepnepnepnepnepnepnepnepnepnepnepnepnepnepnepnepnepnepnepnepnepnepnepnepnepnepnepnpnepepepepepepepepepepepepepepepepepepepepepepepepepepepepepepepepepepepepepepepepepepepepepepepepepepepepepepepepepepepepepepepepepepepepepepepepepepepepepepepepepepepepepepepepepe pe
ФИКИА经MACTEPUEΦЛAJT
OTKPOIte dae 6uee 6o0nOcHcTcE KINHHHDOHO TBOpeCTbA C HOBOy FHKHM E MACTPEUIEF JAIITX! ECNA npnprrnM "MULTIOCK" 03080BETNADAPHTMPOOoBtOoPpRnPHO 0do e3aONcyka,To, KIOHb5y FHKHIO MACTPEUIEF JAIITX! BYCKOEKEKEMHHTABTOOOHN NIOOCCCPOPTBOENHO
Bb 2e3e 60ckte hacpnto npabry oioh npoppmn Ta, TcObI Oha c08TcTOBaa AEMHO BAAMN KOKENHHM Buknlaa 2yn? Moohna Kaia yebcaert? Oboa Hau na ToBTOBcTc CHINKOM DoH? AmNHMe tne Tmepyapny kHk BEmn npnoTHOBnE, ne Iepbrrbaa pO npoppmn, kak CcUc BHa ToBTOBcTc Hau mnni Hk yJxOBXMAk

Ma MaMeTae Taee Taee Taee Taee Taee Taee Taee Taee Taee Taee Taee Taee Taee Taee Taee Taee Taee Taee Taee Taee Taee Taee Taee Taee Taee Taee Taee Taee Taee Taee Taee Taee Taee Taee Taee Taee Taee Taee Taee Taee Taee Taee Taee Taee Taee Taee TAeTAEE TAE TAE TAE TAE TAE TAE TAE TAE TAE TAE TAE TAE TAE TAE TAE TAE TAE TAE TAE TAE TAE TAE TAE TAE TAE TAE TAE TAE TAE TAE TAE TAE TAE TAE TAE TAE TAE TAE TAE TAE TAE TAE TAE TAE TAE TAE TAE TAE TAE TAE TaeTae TAEE TAEE TAEE TAEE TAEE TAEE TAEE TAEE TAEE TAEE TAEE TAEE TAEE TAEE TAEE TAEE TAEE TAEE TAEE TAEE TAEE TAEE TAEE TAEE TAEE TAEE TAEE TAEE TAEE TAEE TAEE TAEE TAEE TAEE TAEE TAEE TAEE TAEE TAEE TAEE TAEE TAEE TAEE TAEE TAEE TAEE TAEE TAEE TAEE TAEE TAEGTAEGTAEGTAEGTAEGTAEGTAEGTAEGTAEGTAEGTAEGTAEGTAEGTAEGTAEGTAEGTAEGTAEGTAEGTAEGTAEGTAEGTAEGTAEGTAEGTAEGTAEGTAEGTAEGTAEGTAEGTAEGTAEGTAEGTAEGTAEGTAEGTAEGTAEGTAEGTAEGTAEGTA
MENHEHNE TENTAPHTY PIRI HNCHOBOTAHN YKHNH NACTPELIEN FIAJI BOSKOHO B. khanaihoane 35 do 170^ ci quram 81 C°BOMKHOJIMHANO EPMENHIPTIOHORAOA BAKSHIT OBUPAHNOI IPOPMAHNI. UAI MCHENESHI - MEHTA.

FAMNNTMNACTMEPAHMAKEMKANAPANOOCOSENNOECECTAa200BUENEFOODNOcnoPNNHDMNHO 1nepnnnnne nnnnne Pnannnnnne Pnannnnnne Pnannnnnne Pnannnnnne Pnannnnnne Pnannnnnne Pnannnnnne Pnannnnnne Pnannnnnne Pnannnnnne Pnannnnnne Pnannnnnne Pnannnnne Pnannnnne Pnannnnne Pnannnnne Pnannnnne Pnannnnne Pnannnnne Pnannnnne Pnannnnne Pnannnnne Pnannnnne Pnannnnne Pnannnnne Pnannnnne Pnannnnne Pnannnnne Pnannnnne Pnannnnne Pnannnnne Pnannnnne Pnannnee Pp
H3MCHENHTeMnepaTypbnproToBHeHHA:
1.BoePbBnPoI npOpaAMnn PpTOAeHHe HAnmHHe KHOyE MEnx. NkMnKtOp 3aHHeN TcMepepyu Ha DcHae
2. 17a30b4eHtEeKHeMnTeHepRpyDyIyBvWHeHHeNkKaMBeHKe HcKHeHKe HcKHeHKe HcKHeHKe HcKHeHKe - KHeKHeHKe - KHeKHeHKe - KHeKHeHKe - KHeKHeHKe - KHeKHeHKe - KHeKHeHKe - KHeKHeHKe - KHeKHeHKe - KHeKHeHKe - KHeKHeHKe - KHeKHeHKe - KHeKHeHKe - KHeKHeHKe - KHeKHeHKe - KHeK HeHKe - KHeKHeHKe - KHeKHeHKe - KHeKHeHKe - KHeKHeHKe - KHeKHeHKe - KHeKHeHKe - KHeKHeHKe - KHeKHeHKe - KHeKHeHKe - KHeKHeHKe - KHeKHeHKe - KHeKHeHKe - KHeKHeHKe - KHeKHeH Ke HcHaHaTa
3.He HaxOMaTe XHONKa HA naHEn ynpaBHeHn a TeueHne 5 ckyHa NAmEHeHHa 6yDy CoPAneHb A bTOMATKeckm.
12a 103C KIOOHOHApE 100p0000000000000000000000000000000000000000000000000000000
H3MeHEHBApeHHnPnroTOBHeHn:
1.BoepaabaPtoPprrnTbHmBnPrrnoTbHmBnBaAekDhHXeMHTeKMeHkN HnHcHcTOp 3HaeHeMaApemEnHa Hd
2XHANTHOBE XHEMOEOE pRnHPOTRIOHN.1BxIeYHNEH3HcHHeuCuaTOM 1 HAcHKHmJIeKHOH KyOH/4, C HAOMI B HINHTY -KHOHYOgMIny-1N MHeHHN EHHHcHHeu cAOH N HMyH NPOHKOdAT BHeHcHMOH Opyr DApTy. PO HOCTOKHEH MACHKAMHBOI HZAHHEH YXTAHOKNO PpOJIOHATCA HcHAYA HINZAHOA. JBN BScPTPOX XMeHHENBHAeEH HAKMHCIOY IYHXKHEHBYHYKHOKHO
3.He haximaiTe XhONK Hn a naHEH ynpaBHeHH a teHee He 5 cekyH.NMaHeHH bdyT coXpAHeHb ATOmatHEck.
Eeu ymaohou muaauee apemn npuoomoeu 00:00, pabmo npocpmm Bycm oannoenno.
06mnpnepdokdeCTBn npMcnoIb3oBaHHAETOMaTHeCKHXpOpaMM

BAKHOE EEA HUNAIEYNEOPOBIO ANANENNAH BAOHINN NAPKATN PAKI POKDPOKND,3AIPENPAETCHYUMENHEA HINNHNNNNHNNNNNNNNNNNNNNNNNNNNNNNNNNNNNNNNNNNNNNNNNNNNNNNNNNNNNNNNNNNNNNNNNNNNNNNNNNNNNNNNNNNNNNNNNNNNNNNNNNNNNNNNNNNNNNNNNNNNNNNNNNNNNNNNNNNNNNNNN
1NoTROBtE (Otmpe) He6xOumme HnRpeKcnHs.
2. PAnmEHTH HINPENETHE B Mauy MybIaBnK B CIOCTABTCH N CPOPTANM NIOPTOBAENN B OCTABTae ee B OINTY PInpOba, CKeZTE 33 TaH, TcNOB EHNPEHTHNE, BKNONAIE KIOXOTC, HOAOQDHC HIKSE HAOKCNHOH OTMNTHA H BYNTEHN NOBEXOXKT CHAMH, YOeADTeCt, cTO AuaA UCTAHOBHe 6e perekooc N IOITHO CONPKNAECACr H aHPeBaTEBHNN IEMHEDTM.
3.3akpoTe KpaUky MyIbIbApKn Do 0eHka. PnOaONHe np6Op k AekPocetK.
Pnueoaeaeae Hxemopax npaoepnn Dnooyckcncs npnoeaneene npu oonmokn kouke, caedyne yk3aehn
BHIMAHIAE Eau aouoohnue hao oocaae meneepaoyc u cnoaohnoenb oohoo coomoeoepa paoonhoos OAOA, eceod oocaae hao kxuyu npkuao omnoohy.
4.ДиьхкогиэнржимахдампсгдуMnue.БыбергдунбхлбчугррмчngpnpotmchngcHnOmoHOTKCHHOU/8HmN-(COTOBETBryuHIMnHdKAPTDPQPOMPAHHaDJIeEyBETMHTb)PNTBepTeBIDBOPPOMPAMHnTOPAPHnHKAHATKHNKHOHkMn
Hnnpnne HULTCOOKN nocne noonneepnneau bnoopa nnoopnnnnaa aenone ycmnoanoe ane meneooyny pny naneae neae yane eane aeane aeane yane enane neane neane neane neane neane neane neane neane neane neane neane neane neane neane neane neane neane neane neane neane neane neane neane neane neane neane neane neane neane neane neane neane neane neane neane neane neane neane neane neane neane neane neane neane neane neane neane neane neane neane nne arne
5.ДANEMENHEB PBNCHI PINTAOAETAHNOY,CYTAHOANHOTNO YMOHNHOHO,HOONBOYE KHOHIOX (KHOH/×NMI/N-6. 6Pb NKHOXBQMOYCTAOHBATE BPEM OTOPOKI CTAPA.

DyNue 0mcnpnncnpnne nnoonnoa npocpnnr FRY, PASTu v EXPRESS.
REDMONO
7.ДулларускypрргdmnprpoToaHnHAKMATEKHNKx→StArOgTcA HNAtKATOpBnKONK→StArHxHCanelReChepaX.ObpTaHbNOrOCTeBnPbEMnPRnoTHoA,BAZHIMCtOfO bTaBpaHbNOrPpOToHnMnPrpOToHnEHa,NaHHeCaJyIocNoNeHakHnAe→StArHKnNoTOdOCTeKHeNkHeNxoOxOMeHmTeNKePAtyBaUae.
Hn Hn Hn Hn Hn Hn Hn Hn Hn Hn Hn Hn Hn Hn Hn Hn Hn Hn Hn Hn Hn Hn Hn Hn Hn Hn Hn Hn Hn Hn Hn Hn Hn Hn Hn Hn Hn Hn Hn Hn Hn Hn Hn Hn Hn Hn Hn Hn Hn Hn Hn
8. O 3abepeumn npnpammbn pnnnoaenehbaac onoobctn Tkybokcn Hna hcknnee TnoBtnc HndNbc End, Danee, 3abcbnOcHnOCT oBb0aHnpnnpmBnTnKycknNtckpoek, Npboep nepedet B KPNMn ATOIOPOPPEA (RPTH) Huknntopn knuyn of anp (Beapts) n aanpaa, Keen Wnny, na nneepnna a neynooonkana
9. TcHbCIMHnBtBtBtBtBtBtBtBtBtBtBtBtBtBtBtBtBtBtBtBtBtBtBtBtBtBtBtBtBtBtBtBtBtBtBtBtBtBtBtBtBtBtBtBtBtBtBtBtBtBtB
Hnnye Hnne Kneemnoepnnoepnnoepnnoepnnoepnnoepnnoepnnoepnnoepnnoepnnoepnnoepnnoepnnoepnnoepnnoepnnoepnnoepnnoepnnoepnnoepnnoepnnoepnnoepnnoepnnoepnnoepnnoepnnoepnnoepnnoepnnoepnnoepnnoepn no npreeoennnnne 0
Ea, no 5n7mmy mnnn, an ne ydsoc 600mns Jn62e9o 8p3y1nna n 6b6nXn 600mouuuecknx npompmnx, 600mny 600mny 600mny npompmny MULTCOOKs, 600mnp 600mnp 600mnp 600mnp 600mnp 600mnp 600mnp 600mnp 600mnp 600mnp 600mnp 600mnp 600mnp 600mnp 600mnp 600mnp 600mnp 60
PporpmaM
IaHnna pRpmaMnpehnaeHaepnnprrnne 6000 nnnnnae nnne aenennn neanennn ennnnne anenennn neannnnn neanennn neanennn neanennn neanennn neanennn neanennn neanennn neanennn neanennn neanennn neanennn neanennn neanennn neanennn neanennn neanennn neanennn neanennn neanennn neanennn neanennn neanennn neanennn neanennn neanennn neanann nne annnnnn nne annnnnn nne annnnnn nne annnnnn nne annnnnn nne annnnnn nne annnnnn nne annnnnn nne annnnnn nne annnnnn nne annnnnn nne annnnnn nne annnnnn nne annnnn nne annnnn nne annnnn nne annnnn nne annnnn nne annnnn nne annnnn nne annnnn nne annnnn nne annnnn nne annnnn nne annnnn nne annnnn nne annnnn nne annnnn nne annnnn nne annnnn nne annnnn nne annnnn nne annnnn nne annnn nne annnnn nne annnnn nne annnnn nne annnnn nne annnnn nne annnnn nne annnnn nne annnnn nne annnnn nne annnnn nne annnnn nne annnnn nne annnnn nne annnnn nne annnnn nne annnnn nne annnnn nne annnnn nne annnnn nne annann
EaHnneepnooyn npnooennn nepeepoeon 80C,pyeuee cnnnoedopoeo yodm oanouyoe fesos
NoMmHnHbNbnpaMMeKMLTTCIOOKbepehnpnoHrOeHHcCocBaeRer 50MHHT,rempeepa nprotoeHHn-H -100% DAnasOH pyHnYCTAHNOE HcAeHHpBpAeHHpOMeAMC CooBaeRer on 35-120°C c baoR 5°C. DAnasOH pyHnOyCTAHNOE BBepeHn- or 2 MNHJTOA 15 AOBC c BnB 1 MHTHny.
PipipmaHpiipinahnauHbnnpnpitotobneHHaBnBnBnBnBnBnBnBnBnBnBnBnBnBnBnBnBnBnBnBnBnBnBnBnBnBnBnBnBnBnBnBnBnBnBnBnBnBnBnBnBnBnBnBnBnBnBnBnBnBnB
Iporpamma STEAM
PnpnAaHAneHa n pnoTROBHeHn Hc, tNtK, PbMb, oBoeH e KHOrOcMOnTeHbX bKnH naRy, N yoKmHaHn 6peH nPiPOHeHn Bn pOpAMnCcoBtaBnEe 30 MInHT. BoMeKhA pyuBaY cTaHOBKa BpEmHn pRTOBHeHn E dKan- aH2010 mHIny JQ 2 hacos LgAor 3 MInHT.
HINPINTOBOEHHN BAHHOI NPOPMME MCOBbSyTE CENKANBHN KOTHEHPED (BXDQAT KOMNIKET)
1 Hanee 400-800 Mo Bo. Tyhanobte 4 wry kontheHep nnprotoBnHa npay.
2. Ommepre in nndotrobe npodnyi cangnpo palyo hnpnoe paoaonie kB KOHmne B Cbtae bky B Kpncip npabce, Ybdepe, Nt qua nno nno pnpcaiaeaer C Hapreatae hnnnemekn
3. Cnepyte yaaahnnm rhyhtos 3-8 oohero npopka dehctbn npn HnoaobaaHn Htonatmecknx npopamm
104 105
Ee 1000000000000000000000000000000000000000000000000000000000000000
TporpMa
Pepnnaaehn a n pnnrtoe hnnn 8yihnoh, aanaohn x noohx y noh3 mca, giaho, nnoo oooie.
Tpoymnna hnoe pnpnrnoe hno n npnmae coaneatet 40 mHyt. Boomnka pyaa a ctaanokba bpeenm hpnrtoe
nne anpaoae ot 20 mHyt to B 8 caco s cqaon 5 M Hyt.
Hnbaa o ao hao o npoae npapkemnpnpopnpocpocpocpocpocpocpocpocpocpocpocpocpocpocpocpocpocpocpocpocpocpocpocpocpocpocpocpocpocpocpocpocpocpocpocpocpocpocpoc
Iporpamma(PASTA)
PpIpyMAH pIpyCMPAHsAe IaBHeMBAo KIOKTHNBA, 3aRpySxy HAppeHbONx KINbHne BneprOeBnHN. O MOMHTE ZaHbIKBaNHO HOBXcMOCTRE A3yRyXbNPOKBOBnOgONeTbYBXKOBI ONTHN. ObaPbTHNOTCHETBPEKHe HPNOTHOHEHAAHNTCA NPOE PTOGDHOH NAKATK KHOTK #StarX.
No yohnHnHnA pEma pNtroBHeHnA a nporpAmHe coctaIae 8 mHyT. Bo3oHnKa pyuHa yctanBoHa BpeHn E npriToaHn HnB TaHnOe or 2 mHyT do 1 caca C aTaOM 8 mHyTHy.ΦYnKuHn KOrpOka cIpaTm A AstonToDorpee> 8 dAnHH o nporpAmHe HedntcyTHy.
Pn 100000000000000000000000000000000000000000000000000000000000000
Iporpamma PORRIDGE
Pepa3aHcHnDn nproToBnHn Kaun CnObn3oBnHn Tactep3oBnHoro MOnKa ManoX4pHOCTL
No yHIOHNOH NPOBPMI PNOBTOEHN B NOPIMNCH COBTAEN 25 MNYHT. BOZMOKHA pyuHCA yCTHOHBA EPNHNI PPNTOHEIN B HAIHONAOE TO 5 MNYHT DO 1/30 MXYCT C HAION 1 MNYHT.
YOBN BOKKBNB KINKANH NIKKAN H NNNHNT HNDXKNHN PESYNH, PEKONMBETICI INEPDAPOTDBENH MBDNHTHS CNEOYNOE DEACTTN
TATNNHNOONNNTB BcE ZnBIOHOOBHKe KpybI (PNC, Ppne, NIOHO H T) NOOCAHNMAER BPOJCEBOA HE CTAEI POAPNCHIO:
- NEPEN PNDROBNEHEM CM35B4Bb Hw MYNtBnDkCNHBOHBM MACON
CPOTO COIOBIOI BPTOPIOI,OMTEOI HINIPREMEITIKIOTIOH KTHHNTPEUEITIO8(YENHHTAIYK BYHNNH
PnHcnoB3oBaan HneBHoro MoNOKa pa3abnIbE ro nKtbbeO BoDok B nponopun 1:1.
C605c00000000000000000000000000000000000000000000000000000
EeuKzepaemai peyamnai a npopomhme ePONRNDGEe he bim oocnayhui, oocnaynayne cyeupeepanoh npopomnaiMULTCOCKx. OoHmnnnnae mnnnnpnnpnnn nn nnnn nn nnnnnnnnnnnnnnnnnnnnnnnnnnnnnnnnnnnnnnnnnnnnnnnnnnnnnnnnnnnnnnnnnnnnnnnnnnnnnnnnnnnnnnnnnnnnnnnnnnnnnnnnnnnnnnnnnnnnnnnnn
IporpMaMa «STEW»
Pepuaaehn aen npnoTobne Hryna, kapko pary.
No ymoanHIO aepnI pnoToboeHIO a nporpmae coctaet 1 tac. BoMoOnHO pyHNA YCTAHOa BPEHMe I pHTOToBEOHb E bAnHOA O20 MHNJ 12 HOACB C HAMR B M NHYI
IporpmaABAKE
PepnhaaehnaepnnproanepnKekcoa,3aneKaHOK nnporoo 3 npOKeBcBO Tecta.
No yohumnihimepnnpnohtoebeipnnpnnpeo 50 mHHT.Bo3MOKHO pUHCAyTHAOBA BpEHHN pRTOHOe H aHIOAEOE 20 mHHTO 40 cacoo 10 MHTN
Fomnoaocnbo kao nno npepum, aonny a hoe depeaahyo noany (yobnay), Ectu ee ayna u Hne 0e anenrnnn ene eae - bactn tonne.
Ipu npunnsanenei eamennn neanenpndn oynnnn nn yeknngn gnnnnn rnrnnnncn nopeepn geane. Fomnoaoh npdysm anakmeus ue mnynpnppe cyos no npnneppnne, nwn on the cnae anenm. Ectu nne nne anenmne, dnoceps anenrnnpdpoy nynsmpnepn ppe naeannnnnnppe
Nporpamma《FRY》
PepnHa3HaeHa dAeKPNMa, nTbbl, pbbH MHOROKOMHOEHTHX6NIO
IIOYMOHANKI PIMINIPDIOHEHNI INPPOPMANE COCTAHTHET 15 MMHTY, BDMOKKNA pyuHAYC XTHHOKBA EPMENKH PIMIOHNI HEMNIAHNEOHIOI 5 MHTY 104CA CABEHN 1 MHTY.
No doomukenu sdoannoe nnepeynpueoaneonn npubod nodacm sekyosou cuhan.
Bo 036xue nuae aen eaeuemoe pekeomoey eeneo anmpeayumnneepaoue
HOMOGENOMICS COORDINATOR. HEPES NODOMINUM CHROMOSPHORIN PEROXIDASE 1/2 (PDX1) (Disease homology domain containing 1)
IporpmaMxAYOGURT
PnIeHAnaHbA HIN BnBnBnBnBnBnBnBnBnBnBnBnBnBnBnBnBnBnBnBnBnBnBnBnBnBnBnBnBnBnBnBnBnBnBnBnBnBnBnBnBnBnBnBnBnBnBnBnBnBnBn
12
PporpmaaBREAD
PEKOMHEYETCAI BILBENHIE PAJIINHHK BIDX XRE6 433 NIIHHNHO KYHK INO BDOEHNHEK PAJIKH MYHK, IPOPGAMNA PNDQCMTPAETPNOHNI KANPAIIOPTOBEHNE TO pOCTOKHNI TECTO DA BOYENH. PO YMOHANHBO IN OPOPMATHE BEPNIOPTOBEHNE COHTAHNET 5 MNYC. BOSSKHOPLPVAHAY CHYAIHOK BEPMNH INPOTOOHENTBE BDAHAHONOT OE 10 MNYHTO 6 HAKOR C UQWCHYTAHNG 8 M NYH.
KAKMAHUNI BHPMS PABOJIY DAFNCHU TAOJADOPGRE BDAHON NPOPMAE OPBNHUMT EPMI KAHAGHE. HE KPEOMHNYEC ICS MLOBOBANHE DNKNUK TOKTOPOA CTAPTA, TAK HE KAQ TOK OMEK NOATAIKA KAEHTBO BUNKNEK.
CepyrrnHrnnnnae rnoa nne Hnne aonnne nnnnne nnnnne nnnnne nnnnne nnnnne nnnnne nnnnne nnnnne nnnnne nnnnne nnnnne nnnnne nnnnne nnnnne nnnnne nnnnne nnnnne nnnnne nnnnne nnnnne nnnnne nnnnne nnnnne nnnnne nnnnne nannnee nannnee nannnee nannnee nannnee nannnee nannnee nannnee nannnee nannnee nannnee nannnee nannnee nannnee nannnee nannnee nannnee nannnee nannnee nannnee nannnee nannnee nannnee nannnee nannnee nannnee nannnee nannnee nannnee nannnee nannnee nannnee nannnee nannnee
100 3000000000000000000000000000000000000000000
Iyj yuohoske pemehma nnooohnne hmeep 1 ioc aocn noonnnn knoa 2sttaa mnnnncr poeecc shenmouh.
BHHMAHME!Mnonsayine xyohmoe pyosuib 109 uaneen xne6o 3 np6opa.
He 0xpaoctime kpuu Mybmuapku H3nane paccmki meco!On maoa aacum anecemaaeepno npodymnc.
Iporpamma SLOW COOK
Pporpamma npednnaaehnna nna pnpnoTobneHHyueHHN ypbka.
P MyoHnHnHnB Eprn HrpoTobOBnHnB nIporpHnBe coctaBae 3 cua, Bo3KoHnHa pyuHa yCtObA BpemHN HnproTOBHeBnB B dHAnIOHO 01 MHTy 12 oBaoc 5 cLarom 10 KHTN.
IporpmaMa «EXPRESS»
PpnpmaaepnnaeHnne Hnnn pnnnne nnnn nnnn nnnn nnnn nnnn nnnn nnnn nnnn nnnn nnnn nnnn nnnn nnnn nnnn nnnn nnnn nnnn nnnn nnnn nnnn nnnn nnnn nnnn nnnn nnnn nnnn nnnn nnnn nnnn nnnn nnnn nnnn nnnn nnnn nnne
DnBzAeKpnprrnHmPnrotnoepnBBeEeKoHaeHnHaeHnKeHxOeKnKy
Eeu npn aonnoaannnnnnae anenennnne nane ennnnne neanennnne nne anenennnne nne anenennnne nne anenennnne
III. DONOHHTIELHbIE BO3MOXHOCTN
PaccnoKa Tecta
- pIuratoseHne H
- Pnrratobnehe Bc dpntpe
- Pnrotoanehe TBopora, cpa
IV. YXOД 3A ПИБОРМ
06upe npabnla n pekomehdazm
Pepa nepebny KcT0303BHeH PnO6o, a 3eKae JIeAENHANXaXaNIIeMILKu MmTHnBnKpe Noce pRTOEHEHIN BOKENHOENO EOBIOATBIE HBEH TEPHEHIN 15 MNHTIIOBOHNIIMH NIOIPOAMN 57A-1M.
He cne 324-108.
ECHBHEHcHbIyTaeHbOeHmHoeBpeK,0tKHeYrOeOeOeOeIOoRb.BoaHOA KApoe. BkHOHOA Hapel- BnHbHbNk, 14a, BvHbPENHKnKpUeKn aNapOBd kAnuONJouHgBuHbMnCnOxnn
PnEeHcHmNPKTbYnKCHKTEHdAeHcyBaeTe, HTO OTHKtOHO 0aTKePCoTeK HIOAHOCTbO tOeBIO DOKCHTKCHIOYI KINIKI KINIEKIIHJIEKIIHIEKIIIEKIECPECEKII II MHI IIOI EBCIOI.
3AaepaeTcUeuaeuepepepepepepepepepepepepepepepepepepepepepepepepepepepepepepepepepepepepepepepepepepepepepepepepepepepepepepepepepepepepepepepepepepepepepepepepepepepepepepepepepepepepepepepepepepepe pe
3ATPELACTCn npoyomn npnoa 60dy uun naneumoe eep noe pnye o
BbEaKyAPHTAHNQD PnKTE BESHOBHX JETAEF KYNTHARAGA KYN HPOPEKINHE MHNJIOFOOAMM NOKKITIPRBCNTK HENDAHNOHPOABOTPND06A
Kopyn KdydA MOKHO ONUOATs No MEPE 3aBTHNHE. Hauy, BHTYHINHO KbUHcy N CbHMHN PAPOBH KNANAH EHOxOBDMOOHNTbNOcne KAKDOKO HIOKTOBHOAHN PHPOEA. KOUGHcI, BOASyEeC B POPOCEP PpOBOTAEH KAMH B NkTBADKE, YQADATE NOOE KAKDOKO HOKTOBAOH yCPOCTH. BHTYHINHO NoeepXIOH TPOBOW KOMEH ONUOATs No EOHOxMOCHTN.
OuHCTKa Kopnyca
OHHHnE KOGYK HEDNHN NNNHKO KXHOH CANDENK OANI YKOB. BOOMNKHO PIMMEHEHE DEKAKTHIO HCTSEGERD
cpedtaa.Bo HbcknHn 03HnHnHnTneKOB aBnHnPa3abDnHa KpPcye pexomeyem nporepeBt ero nbeepxhcB hacyxo.
OuNTKaaaw
BOKOKTE OINHILY KAYK BKNYHN, HONJIYB YARIKYI KBYK C PCECTBOI RAN MNTA NOCYI, TAK A B NOCYMOHIO MUNIHIE (B COINTERTESC T. DEKOMENKIMIAE ENEOHNOSKIETAE).
PnHINHBNBAPBNHANHANHAN HAN HAN HAN HAN HAN HAN HAN HAN HAN HAN HAN HAN HAN HAN HAN HAN HAN HAN HAN HAN HAN HAN HAN HAN HAN HAN HAN HAN HAN HAN HAN HAN HAN HAN HAN HAN HAN HAN HAN HAN HAN HAN HAN HAN HAN HAN HAN HAN HAN HANHANHANHANHANHANHANHANHANHANHANHANHANHANHANHANHANHANHANHANHANHANHANHANHANHANHANHANHANHANHANHANHANHANHANHANHANHANHANHANHANHANHANHANHANHANHANHANHANHANHAN
OuHCTKa BHyTpEHNe KpbIaIKn
1 OtkpoTe Kpbikky HynbTaApOc.
2. B H N K E R I CHY BHTENHIN CTHOPOI KUHKHOI DKKHOH HEMKHOI KHEHIXI KUHKHOI KUHKHOI KUHKHOI KUHKHOI KUHKHOI KUHKHOI KUHKHOI KUHKHOI KUHKHOI KUHKHOI KUHKHOI KUHKHOI KUHKHOI KUHKHOI KUHKHOI KUHKHOI KUHKHOI KUHKHOI KUHKHOI KUHKHOI KUHKOO
3. Podjne na zheopnoeoch obce khepn kienb kienohn cangenr hnn nykcn Pn Hcnoaohnch bmoiye chiroy KpKlysny pod cyooyd, Hcnoyshcycpzdt 100hmyu noocy. Hcnoyshcycpzdt 200hmyu nB aHHckny ohy e Chyedey.
B. delphi eoe kpenk Hacyck
5. 3BCTAe KxPbIaB BnEaHnKHe bCIOEaTHc EoHMy HxPbIKy CIOHbOHN KpBbIKoL. HEOBnDmN YCHMnE IaHnHtAe HAOKATOpD DaIOJIeHa.
REDMONO
OcHCTKa CbEMHO npoBOrO KIanaHa
Pnabos kniin hynbneBc nnnnnae nea qae npkneepnnpnepnnpnepnnpnepnnpnepnepnepnepnepnepnepnepnepnepnepnepnepnepnepnepnepnepnepnepnepnepnepnepnepnepnepnepnepnepnepnepnepnepnepnepnepnepnepnepnepnepnepnepnepnepnepnepnepnepn
2. HadaBHTe Ha nactmaccobBfHkcatop HnKxHcTcPOHe KnaHa H cHHMTE BHTpeHHK KOxyX
3. Pn HcOxOaHocTH AKKypaTHo H3BNEKte pe3HHK KANANA, PONONTE BCE NACTH KANANA
4. PIOBHTHIOO CIOPOOIOIOIOIOIOIOIOIOIOIOIOIOIOIOIOIOIOIOIOIOIOIOIOIOIOIOIOIOIOIOIOIOIOIOIOIOIOIOIOIOIOIOIOIOIOIOIOIOIOIOIOIOIOIOIOIOIOIOIOIOIOIOIOIOIOIOIOIOIOIOIOIOIOIOIOIOIOIOIOIOIO
BIMAHHIE Bo aeeane deepnneae ne eanenee ne cpeyane n ne anenane enrnnne ene
YdaiHHeKoHcHcTa
B DAHNOI HONGKOHCNKTANSAE B CEAHNAHOBIOHNHOHACNHOH KAPCYI NPHOBAO3OOPXHTAIAO. NOCO KAKKOHC NOBHOBAOH KNYBTHAPOKY UADAIJIIEOT OCTABUHXB IN B NOONOT BOKPYU KOHNCHCI CNMOHOLK XPOHYONCANGPOK
OuHCTKa pa6oey KaMepeB
NIN TPOFOM COLOBENH YA33AHHI HANHOY POYOCTOBCTBA GEPOTHOCTBO NODAKIK KJXKOGTCH, YACHUCK TMILM KIM MYOPCA SHyTb PABOHE KAMPEH PNOBORA MNNHMAHIOE EOCQ CNUETCIEHHOH 3aRZTHNEHBE BCE XpnpO3WNO, CNEETD OHTCHNT NOBEXPCHNTPOAOH KAMPEH BO H36EKAHAHEHERKOPKEHPTPOABTOH NOLMOHNPMPOBA.
Pnepoe Hne oonnnn bpoooy Knoeey Mnybnoopk yjoumec, wot npooep onnneynen on nnnnncnccn 00
0000bce Tchekn bokohre Kamepe, noa xepnohctro HaparebteHoroDIOKHa KOKy cetaPbAHOr TepoHdAtuKz [pocaoJooK e cepedae HaperebteHoroDIOKHa MOKHO OHcTtBnyAkanEHNHe (Me KOOP) rybo k an CndetkO. EcnBu pRnmee 1000ee cpcTeO, heoXbDOHnI ToBnEHNsO BnNnEe NnneEeNnEeNnEeNnEeNnEeNnEeNnEeNnEeNnEeNnEeNnEeNnEeNnEeNnEeNnEeNnEeNnEeNnEeNnEeNnEeNnEeNnEeNnEeNnEeNnEeNnEeN npi neonncouen oipnrtoanenin nn.
Pn noaahnn Hnoopnnae Tne 7yynnohne Baoepy nncnpaHbno TnpnoaTnna Akykpatno ypatae KxnnctO, He
Haabnnn KaKxN kKxNk. Pn aBn nn nnnnnae Nnnae Nnnae Nnnae Nnnae Nnnae Nnnae Nnnae Nnnae Nnnae Nnnae Nnnae Nnnae Nnnae Nnnae Nnnae Nnnae Nnnae Nnnae Nnnae Nnnae Nnnae Nnnae Nnnae Nnnae Nnnae

Pn npnnnnnnnnnnnnnnnnnnnnnnnnnnnnnnnnnnnnnnnnnnnnnnnnnnnnnnnnnnnnnnnnnnnnnnnnnnnnnnnnnnnnnnnnnnnnnnnnnnnnnnnnnnnnnnnnnnnnnnnnnnnnnnnnnnnnnnnnnnnnnnnnnnnnnnnnnnnnnnnnn nn nannn nannn nannn nannn nannn nannn nannn nannn nannn nannn nannn nannn nannn nannn nannn nannn nannn nannn nannn nannn nannn nannn nannn nannn nannn nannn nannn nannn nannn nannn nannn nannn nannn nannn nn annn nn annn nn annn nn annn nn annn nn annn nn annn nn annn nn annn nn annn nn annn nn annn nn annn nn annn nn annn nn annn nn annn nn annn nn annn nn annn nn annn nn annn nn annn nn annn nn annn nn annn nn annn nn annn nn annn nn annn nn annn nn annn nn annn nn ann
XpAHHeHn TpaHcNoPTmPoBa
Iepn XpHnHnHm HIOBtOHN KcHbUaTHN OCHUTK NIOHOHTN APOOCHY SE cHbTnOBpA. XpHnHtI pRbB CxOH B HINHbPOMHmMnMe 10dAaON TNOIeBHeBnBnBnBnBnBnBnBnBnBnBnBnBnBnBnBnBnBnBnBnBnBnBnBnBnBnBnBnBnBnBnBnBnBnBnBnBnBnBnBnBnBnBnBnBnBnBnBnBnBn
PnTIOIIOIOIOIOIOIOIOIOIOIOIOIOIOIOIOIOIOIOIOIOIOIOIOIOIOIOIOIOIOIOIOIOIOIOIOIOIOIOIOIOIOIOIOIOIOIOIOIOIOIOIOIOIOIOIOIOIOIOIOIOIOIOIOIOIOIOIOIOIOIOIOIOIOIOIOIOIOIOIOIOIO
Hecoxmo bepeynakokny npbopa or nonadnna 80ndpynx kdo
V.COBETbI NO PnIroTOBNEHnIO
OuH6Kn npn pnpnoTOBHeHH H cNoCo6bI HX yCTpaHenH
BnepaeeHnHnEe HnEe HnEe HnEe HnEe HnEe HnEe HnEe HnEe HnEe HnEe HnEe HnEe HnEe HnEe HnEe HnEe HnEe HnEe HnEe HnEe HnEe HnEe HnEe HnEe HnEe
BIOHO HINPIROTOBHIOCb KOHua
| Возим khлп ринимblу Слобеду релейно Крашka рindoboda bula He zakpytra Крашу Тулгото нороту Tempeotуа type pindobodna bula He doctatotno Bacoga | В оре српоглочьян Здддддддддддддддддддддддддддддддддддддддддддддддддддддддддддддддддддддддддддддддддддддддддддддддддддд Здддддддддддддддддддддддддддддддддддддддддддддддддддд Н messац loptody mokphto Крашу Тулгото нороту Tempeotуа type pindobodna bula He doctatotno Bacoga |
| HekzimpaBnOCTb BoZIMKHeBHe pImHbNc BChocBucTpeHHe | ||
| Ha Jyckneebe Boz-HNKHO cooBcHHee OboBxOeE:Et E4 | Cxtemhna ooiHb6a, ZaOMKHe hpepeBpBncPbHOba. bVbXoH, Hc Tcpo PmIaY npBaIaeHNH Nn HApBeHc- tbeHIOI aMeHema | OtkiHneHte pIpeBpO or 2AIEKPCoTeB, duJeEmy octBtt. IipoeBpeBte NaHue HauuB cTjpyoBte H nOdoctaoHIOI oboBaHcpeDx B HnH. PkoLoo- tePbOpBpO KcIPOeHne pKAtkPCoTH e HcOa3aQayCTNe pnpOmeHMy, EcxpoIPOeHne yHcyTaeHEn, obaPb- tKeTecB c AotpO3OBHnBc CepKcnHc dIeHPr |
| PnIbOpB He BkIaHcTa | UHyp 2eKtpKnopTaNHHe He nOdoHouHcK KpIbOpBn H (nH) 2eKtpNueKcKoPozTe | UbOeHcTe, VTO cBcHbHn 2eKtpNupH, nOdoHouHcK COBtETbTcOaHcM PaBaeHMy nHpOpBc H aKloHcHc H pOeTeK |
| HekcnPabHbA 2eKtpNueKcKoPozTeBAKIOHcPpO | pOpBc HcpOpBHy IO pOeTeK | |
| B 2eKtpCocTe HET ToK | IpopeBte HauHnHc HapOpBnHn H aKtpCocTe. EcxOHO OHOTcIByTeT, oBpaIeHcK XcbOyKnAio- ceBn DoH oOgAnHcAiz | |
| BIOIOtoToBcHTC OIIHcHOn DINO | PipeBc C pIaTaNHE MOr 2eKTPCocTe (yUPOBHeH NpAHPaENH ToKHeTcAINH Nn HNKe HOpNb) | IpopeBte HauHnHc TcBcHbHn HapOpBnHc ToK HApOpBc. EcxOHO HcOteHcBnHbH Nn HNKe HOpNb, oBpaIeHcK bOcOyKnAio- ceBn DoH oOgAnHcAiz |
| MeKdy uauHs HAPeBATOBbHbN AnEMeHOM TnONAM NoctOPoHNH NpOeHd TcNAM HuaCtMb (HuCoP, Kpyu, KycOaM NpUa) | OtkiHneHte pIpeBpO or 2AIEKPCoTeB, duJeEmy octBtt. YdAmHte NoctOPoHNH pPeDHT MeN HcOth TcHbHc | |
| HaHa a KpOlye MybIbHApKv UOtaHOBHe NpOeHbO HApOpBc | UstAOBHe HauY pOeHbO, BeS nepeKoxoB | |
| HaRpeBatoHbN DIX CnHbO zatpOBN | OtkiHneHte pIpeBpO or 2AIEKPCoTeB, duJeEmy octBtt. OvOtHcTe HapOpBtHbN DIX | |
| Bo epema pIroHo TOBcHnK Hs-Oid KpyuHn pOpBb GbxOdh Nap | HapOpBc TpePte- TnOHebcoOpTcOoBHe HApOpBc NnOuHc NpOeHd HpOeHd NpOeHd PpOeHd NpOeHd PpOeHd | UaHa HApOpBO UOtaHOBHe B KpOlyr PpOpBc |
| KpUaHc 2aKpObla HnOeHtO HnOuTIO NnOuTIO KpyuKuHn NpOeHd TcNAM NpOeHd TcNAM TcNAM TcNAM TcNAM TcNAM TcNAM TcNAM TcNAM TcNAM TcNAM TcNAM TcNAM TcNAM TcNAM TcNAM TcNAM TcNAM TcNAM TcNAM TcNAM TcNAM TcNAM TcNAM TcNAM TcNAM TcNAN TcNAM TcNAN TcNAN TcNAN TcNAN TcNAN TcNAN TcNAN TcNAN TcNAN TcNAN TcNAN TcNAN TcNAN TcNAN TcNAN TcNAN TcNAN TcNAN TcNAN TcNAN TcNAN TcNAN TcNAN TcNAN TcNAN TcNAM TcNAN TcNAN TcNAN TcNAN TcNAN TcNAN TcNAN TcNAN TcNAN TcNAN TcNAN TcNAN TcNAN TcNAN TcNAN TcNAN TcNAN TcNAN TcNAN TcNAN TcNAN TcNAN TcNAM TcNAN TcNAM TcNAN TcNAN TcNAN TcNAN TcNAN TcNAN TcNAN TcNAN TcNAN TcNAN TcNAN TcNAN TcNAN TcNAN TcNAN TcNAN TcNAN TcNAN TcNAN TcNAN TcNAN TcNAM TcNAN TcNAN TcNAM TcNAN TcNAN TcNAN TcNAN TcNAN TcNAN TcNAN TcNAN TcNAN TcNAN TcNAN TcNAN TcNAN TcNAN TcNAN TcNAN TcNAN TcNAN TcNAN TcNAN TcNAN TcNAM TcNAM TcNAN TcNAN TcNAN TcNAN TcNAN TcNAN TcNAN TcNAN TcNAN TcNAN TcNAN TcNAN TcNAN TcNAN TcNAN TcNAN TcNAN TcNAN TcNAN TcNAN TcNAN TcNAN TcNAN TcNAM TcNAM TcNAN TcNAM TcNAN TcNAN TcNAN TcNAN TcNAN TcNAN TcNAN TcNAN TcNAN TcNAN TcNAN TcNAN TcNAN TcNAN TcNAN TcNAN TcNAN TcNAN TcNAN TcNAN TcNAM TcNAN TcNAN TcNAN TcNAM TcNAN TcNAN TcNAN TcNAN TcNAN TcNAN TcNAN TcNAN TcNAN TcNAN TcNAN TcNAN TcNAN TcNAN TcNAN TcNAN TcNAN TcNAN TcNAN TcNAN TcNAM TcNAN TcNAM TcNAN TcNAM TcNAN TcNAN TcNAN TcNAN TcNAN TcNAN TcNAN TcNAN TcNAN TcNAN TcNAN TcNAN TcNAN TcNAN TcNAN TcNAN TcNAN TcNAN TcNAN TcNAN TcNAM TcNAM TcNAN TcNAN TcNAM TcNAN TcNAN TcNAN TcNAN TcNAN TcNAN TcNAN TcNAN TcNAN TcNAN TcNAN TcNAN TcNAN TcNAN TcNAN TcNAN TcNAN TcNAN TcNAN TcNAN TcNAM TcNAM TcNAM TcNAN TcNAN TcNAN TcNAN TcNAN TcNAN TcNAN TcNAN TcNAN TcNAN TcNAN TcNAN TcNAN TcNAN TcNAN TcNAN TcNAN TcNAN TcNAN TcNAN TcNAN TcNAN TcNAM TcNAM TcNAM TcNAN TcNAM TcNAN TcNAN TcNAN TcNAN TcNAN TcNAN TcNAN TcNAN TcNAN TcNAN TcNAN TcNAN TcNAN TcNAN TcNAN TcNAN TcNAN TcNAN TcNAN TcNAM TcNAM TcNAN TcNAN TcNAN TcNAM TcNAN TcNAN TcNAN TcNAN TcNAN TcNAN TcNAN TcNAN TcNAN TcNAN TcNAN TcNAN TcNAN TcNAN TcNAN TcNAN TcNAN TcNAN TcNAN TcNAM TcNAM TcNAN TcNAM TcNAN TcNAM TcNAN TcNAN TcNAN TcNAN TcNAN TcNAN TcNAN TcNAN TcNAN TcNAN TcNAN TcNAN TcNAN TcNAN TcNAN TcNAN TcNAN TcNAN TcNAN TcNAM TcNAM TcNAM TcNAN TcNAN TcNAM TcNAN TcNAN TcNAN TcNAN TcNAN TcNAN TcNAN TcNAN TcNAN TcNAN TcNAN TcNAN TcNAN TcNAN TcNAN TcNAN TcNAN TcNAN TcNAN TcNAM TcNAM TcNAM TcNAM TcNAN TcNAN TcNAN TcNAN TcNAN TcNAN TcNAN TcNAN TcNAN TcNAN TcNAN TcNAN TcNAN TcNAN TcNAN TcNAN TcNAN TcNAN TcNAN TcNAN TcNAN TcNAM TcNAM TcNAM TcNAM TcNAN TcNAM TcNAN TcNAN TcNAN TcNAN TcNAN TcNAN TcNAN TcNAN TcNAN TcNAN TcNAN TcNAN TcNAN TcNAN TcNAN TcNAN TcNAN TcNAN TcNAM TcNAM TcNAM TcNAN TcNAN TcNAN TcNAM TcNAN TcNAN TcNAN TcNAN TcNAN TcNAN TcNAN TcNAN TcNAN TcNAN TcNAN TcNAN TcNAN TcNAN TcNAN TcNAN TcNAN TcNAN TcNAM TcNAM TcNAM TcNAN TcNAM TcNAN TcNAM TcNAN TcNAN TcNAN TcNAN TcNAN TcNAN TcNAN TcNAN TcNAN TcNAN TcNAN TcNAN TcNAN TcNAN TcNAN TcNAN TcNAN TcNAN TcNAM TcNAM TcNAM TcNAM TcNAN TcNAN TcNAM TcNAM TcNAN TcNAN TcNAN TcNAN TcNAN TcNAN TcNAN TcNAN TcNAN TcNAN TcNAN TcNAN TcNAN TcNAN TcNAN TcNAN TcNAN TcNAN TcNAN TcNAN TcNAM TcNAM TcNAM TcNAM TcNAM TcNAN TcNAN TcNAN TcNAN TcNAN TcNAN TcNAN TcNAN TcNAN TcNAN TcNAN TcNAN TcNAN TcNAN TcNAN TcNAN TcNAN TcNAN TcNAN TcNAN TcNAM TcNAM TcNAN TcNAM TcNAM TcNAM TcNAM TcNAM TcNAM TcNAM TcNAM TcNAM TcNAM TcNAM TcNAM TcNAM TcNAM TcNAM TcNAM TcNAM TcNAM TcNAM TcNAM TcNAM TcNAM TcNAM TcNAM TcNABHbC | ||

Bcayuee eae Hnncpnoecnmy cmpnne Hyeoocb, oepomunncs aasopn0aonnnn cpeauhny qennp.

3KoIorHueCckn 6eBpeDna yTHIN3aun (yTHIN3aun 3eKtpneCkoro H 3eKtPOHHORO 0bOpdyOBaHRA)
YTHANKHUYIKOKBIM, YKBOECD380 NIOBHOTBAM, a TAKKE CAMORO PnRbopa HeoXOBdAmPOHOB3DBMHTB COOTBECTC BEM C H EONIOTPOMARINNO NOpeBAPOTKIXOAO. IPOBMBATE SABOTY O6OxKJIAQeK CPEZ. HE BFOBcAEBTAE TAKKE YENBIMN BMECE C DOHNHIM BIBTOBIM MYCOPDN.
Hcnoa 300318e (ctaphe) npnpbdo he dooaoi biaobacpbaatc a c octalnbi Bstobim Mycoopom, OHNdoohin thmnohpsotBa otdebn. Blaanebnai CTaporo oboepoaoaohn 0031111111111111111111111111111111111111111111111
JANHAI HAPBOP HONJUHIN CIOBTETTREM N EEPRONEIKO JIAPKTHOSO 2017/9/EU, PENEYPHNPOWNI YINBHIMHN MNEKPTNHECKORO JIAKPOTKNHO SOOPODADHYA.
DJIHIOA DHEKPTMNEO OEPHTOHIOI EOTAOBNI X TYPBOAHNI N I PEPBOATOKE OTXOAIOB OTR 3NEXPTPHCCOX N 3NEXPTHOH NKPOPOB, DEKTHOUPHEA HCAE TEPTOPHOP EOBENEOEKO CoOXA.
REDMONO

Perei hia uoropocmaeoyu ue npzouy, ynoa npoovnane oncnukh x 2do exocnyamuaq i epejiaae Ioo 8 aoromci dbokhka. Poreanaiye kucapoknaya nupuy nyhao npoobdavmny mepei 000 cyaekb.
3aXoDa 6e3nK Ta IcTpykui, 10MiCtBb Ta bOmyoc16Hmky, He oxonNHOtoB Cbi MOxNHBI CNyAHTI, HIOMyOT BHNHKHYB n pOeckcE KcNtaytaa npnAhy. PID cac BnOKpCTAHNI pRcTPO KoPCTYbAN NOBHNN KEPyBaNTM 3doOBH NrydAm, 6yth ObepeKHHI yIzAAhym.
3AXOДиБEЗПЕКИ
Bnpo6HmK He Hece BiINoBIDaIbHocTi 3a NowKOJKeHH, BKNiKaHl HeOToPnMaHnM BMOR IOdo TexHkN 6e3neKn i npabIn EekCnIyataQI Bnpo6y.
JaHn enEeKTPoPnpnAia RbIae c6oIO 6aRaTOfHyHKioHaJIbHi npNCTPII pI npriOTyBaHH Iki B N6byOBHX yMOBX i MOKe 3AcTOcOByBaTHCA B KApTn pax, 3AmCkNX 6yDnHKAX a6o B IHnx NODi6Hx yMOBX HENpOMnCNoBOI ekCnnyataaII. PpomncloBe a6 6yB-ike Ihue HeuJIbOBE BHKOpCTAHNA npNCTPOHO Bye BBaxATNCnOPyuWeHNrM yMOB HaneXHOI ecKnNyataaII BnpoBy YCbOMy BnAnaky BnPoOHn He Hece BiINOBIAJbHOCTI 3a MoKInBi HacllKn.
IpeepiiknHnHm npncTpoIO o eneKtpomepexi nepebiTe, u3biraEcbcii Happyra 3 HOMHaBHOIO HAppyoIO XMBHeHH pniJaDy (DINB. TexHiXapaKtepnCTMkA 60 3aOboCky TaBnKy Bnpoby).
BukopncTObyIte nooobKyBauch,po3paXOBaHn Ha cnoKbAHny nOtykHCTb npnaJdy.HeOpTmuMaHHu ciE BmOrn MoKe npN3BeCTn Do KopoTKoro 3aMknAHHa 603aToPpHHa KaBeJIIO.
Плкюапгплбдпькдро розсok,цmaHt63a3eMJIeHH-ze 6ob'3KOBBA BmORA 3axNCTy BiID ypaKeHHeJekTPnHm CTpyMOM.BHKOPINCTOBYUOu NIOOBKyBau,pekeHaNTecg,IIO BIn TAKOX MaE 3a3eMJIeHH.

YB4A! Pid yac pobom npunady uo2o koprnyc, qawa i Memanebi demani haepiaiombc! Bybme obepekhi! Bukopucmoeyme kyxohni pykaui. U6b yukhymu oniky zapraoy npaoJe haxuIaumecn had npucmpoem npu biodkpuaahni kpuku.
BnKIOUaIte npnad 3 po3eTK nICJIe BnKOpNCTAHH, a TAKoK nID qac NOrO yIeHHA 60 nepeMIeHH. BnTgAIte eJeKtpoWHyp cyXmM pyKaM, yTPMMyOuH Ioro 3a BNky, a He 3a npobid.
He npTgAte uHyp eKtpOxNbIeHH B DBePHNX npop3ax a6o no6n3y dKepe Tenna. CTeXte 3a TM, u6 oEkeTPOsiHpy He nepeKpyUBAcB i He nepeHHABcR, He CTNKABc3 30CTpMM npeDMtAMn KytAMn i KpaMkMaM Me6nIB.

Pam'maum: bunadkoBe nowkodkeHH KabeHIO eNekmpoKuBHeH HMOKe npuzecmu do Henonladok, uO He bIDnoBADomb yMoabm a makoKdo ypokehnEeKmpocmpym. NowkodHexu eNekmpokabIbumazaepminho3AmHu8 cepic-uehpi.
He BCTaHOBIOH Te npIuaH Ma'Mky NOeBXHIO, He HAKPbAte IoroPi Da cpoBoTH-ze MoKe np3BcTeN do nepepribAHn i NolOMKn pncTPOIO.
3a6oPHeNo EKcNpyAuaio npnnaHy Ha BIDkPmToMy nobitpi -NotpannH HbONr h60 CTOpOHHX PpeMTeiB ycepeDmHy KOpIyCy npnCTpOHO MoKe npn3BeCTn Do NOrO cepno3Hnx NNOKOdXeHb.
IpeeduHnHm npnaJy nepeKoHaTecra, 0o Bin BiKIOUeHH BID eekTpomepeki i zikom npoxoob. Cybopo dOtpmyTeca IHcptykui 0do OunuHn npnaJy.

3A5OPOHReTbC3aHyppobamu Kopnyc npunady y body a6o nomi- amu uoz no ndcmpyminb bodu!
- DITAM BIKOM BiD 8 pOKi, a TAKOx OOC6am i3 OMBeKHeHMM F3HNNHM, CEHCOPHHM Nn PO3yMOBHN 3Ii6HOCTMa 460 3 HeIOCTaTHIM DOCBiDM 3HANHMM MOXHa KOpNCTyBaTNC PnIaNAD OM IINe HARJlOM I B TOMy pa3i, kAIO IX 6yIo NPOIHCTpyKTOBAHO CTOCOBH 6e3neHOrO BVKOpNCTAHN PnIaNdy IN BOHN YCBiOMJIIOHTb He63neky, NOB'3aHcy 3 IHO BVKOpNCTAHNM. ITN He MaHtB rpatn 3 PnIaNAD. TpImaTe PnIaNd I IHO MepexEbn WHP y Micci, HEIOCTynHOMy dIa DIteNo 8 pOKi. OUnSeHHN IOcIyROBvBaHN PnICrPoK He MoKyb 3IiNCHIOBAtNC DITbMn 6e3 HArNJa DY DOPoCInx.
PakybalbHm MATEpIaI (nIIBKa, nIHONJtct ToO) MoKe 6yTN He63neuHm IaI dItei. He63neka 3aDyXn! 36epiraTe yNakOBky B HeoCTyHOMy Ira ITei Micui.
3abopohenm camocihm peMOHT npilady a60 BheceHH 3mH IO no HOro KOHCTpykii. PeMOHT npilady NOBHHeN 3dINCHOBATnca BNHTKOBO qaxiBc em ABTOpH3OBAHO CepBic-ueHTpy. HenpopeciHn BVKOHa pObota MOKe np3BeCTn DO nOLOMKn npilady, TpaBM Ta nOWKOJXeHH MaHa.

YB4A! 3a6bOpnoHb uKOpucmaHH npuaody 3a 6ydb-kaux He-cnpaaHocmeu.
Texhih xapakTepmK
| Mückel | RMC M4510E |
| Iituyekht | 860-1000 T |
| Handyra | 220-240 B, 50/60 T |
| Zashkii bid yupakhenny ekeptprinham stypomom | KNK I |
| Obec huiui | 5 n |
| Pokhmita huiui | antamprnapne Daikun® |
| Dacmuk | centrologuon |
| Papokhen kolanan | zhimnien |
| Brypiliin kipinska | zhimna |
| Tabaparathi poskirk. | 242×283×271 KM |
| Bara heta | 3,55 km |
Pporpamn
- MULTICOOK (MYJbTHIOBAP)
2.PILAF(1008) - STEAM (HAI NAPI)
4.SOUP(CYI)
5.PASTA (MAKAPOHMI) - PORRIDGE (MOHCHA KALIA)
- STEW [TsyUKyBAHHR]
&BAKE(BINIHKA) - FRY (CMAXENHH)
- YOGURT (HORYPT)
- BREAD (XII5)
12.SLOW COOK TOM/IIHHR
Функцi
| #MCTEPUEFD#A##(Hana#aayzahnna Hauy ta temepeatpyr pnprrtyaehn b npoeici pobotn nporpamn. |
| P#tprkmanra te mepepatryr toboaikx ctraab (aontanlal/ripie) . 10 12 rdmH |
| Ponepejde BMMKHeHHa aontanlal/ripie. |
| Poaripraaiah ctraab . 10 12 rdmH |
| Bactroka stafty . 10 24 rdmH |
| BMMKHeHH 3#ykoabcx cmmhalib. |
Komnnektaia
| Мулиниарka | 1 UT |
| Чаа... | 1 UT |
| Конгелярдя погатуваши на napi... | 1 UT |
| Черпak... | 1 UT |
| Плеска поара... | 1 UT |
| Мира сокика... | 1 UT |
| Шточддя чуши... | 1 UT |
| Шур eнөнөнөнөнөнөн... | 1 UT |
| Кн�чд рechтп... | 1 UT |
| Тимандя чөрэнөнөнөн... | 1 UT |
| Инөстүүдү 3 ekсүлүүү... | 1 UT |
| Серебрахында... | 1 UT |
Bupuokuk, Mek npao Hn ececnna hnn do daouyH, KcunneKouu, a maxoXo do meknuKx npaepnueKx npoDy nuc odockkaeaeaeae caoi npoydci 53 do bocnKooe nooboeaeae npo dHnau. yKeNnux npakpncpuTnx ondyxcnsncsncn knuOxio = 10%
REDMONO
BydOBA MylbTbBapKn (CXEMA1, crop.3)
- Kpwnka npnay
2.YunbHOBanheKnue - 3iimua hntpiu uku
4.OTBIPJINBMBXQDVNAH
5.411a - KHONKA EIKKATTA KDHUNK
- NaheBiy npabHHH 3 xnnneem
& Kcpnyc
9.3HmHn npaBknnaan
10.Ппocкаджka - Yecmax
- KotheHep das noHOTyBaHH Ha papi
- Mina kongka
- lIyHn eNEXTOWHE PBNH
- Puwka ng nepnepnepnep
- Trmua dus nepnka/loekn
Pahenb ynpabniHn (cxema A, cip.4)
-
Kharka Kancse/Reheba (cAChyAeBnHbPoiRiB) - yIeHHeHBeHbMHeHHe HpykU pOriBaH, nepehBaHnbpoBtO pOporpAmrTPOPT3yBAH, CKdAHIKIOHCTYHOHIOHIOHIOHIOHIOH
-
Khonka eTime Delays (eBictpoKa) - yBMKHeHH pexkMy bactaoeneHH BictpoHH CTAPy
- Khonka Menux [MeHIOx - B6ip abTomamnHoi nporpamn npnrtoypan HA
- DacnneR
- Khonka Min/- (Xu/-) - Bnbp 3aueHH XunHH y peHHMx octahpeneHH qcy nprotybaHH TaBicptpoHH CTAPY.
- Khonka Houn/(fou/)-Bbip 3aehnra RnH ypeKmX BCTaHOeHnA cacy npriotybaHH Ta BIDCTPOCHN CTAPY
7.Khonka 5Starta (cTapx) -yEIMKHEHHH 3aHaHOpeKNNpynnpOryBaHH.
Bydoba dKnneA (CXema A2, CTOp.4)
a. INANKATOPA ABTOHAnHHN nporpaM.
hHukatoppeKMybDcTPOKnCTAPy.
C. (1) k_四 k_五 top pekmny npnHpy8HHA
dIHKaTOp 3aHcHbHcy.
e. Indkato np pexnnny aonionidpiy.
f. INKAKATOPnporpanxEXPRESSx
q. IHINKATOP pexmy po3ipiaHHA
hIHINKATOPBMMKHEHHS3BYKOBHXCHTHANIE.
1. INDHKAATOP 3HAeHHH TEmpePAtyp.
I INPEED NEPWIM YBIMKHEHHAM
Po3nakyIe Bp16, BxDanlbycNakyaBnHmATEplAaTpePnAnHnHaKeHH.

Ooo 0000000000000000000000000000000000000000000000000000000000
Ipcn nepnepnnne 050 eepnna 3 naaannn mnnnnnnpnnno neo6xohn bunpumn an npn a kinnnnonn nnnnnnnnnnnnnnn
NoTIOHO 1030HOTaHTe ENETPOUHIN. KOPN TPOANADY PTOPTI BONORO TAOHNIO. ZAIHHI DETAI pONPHTHE MKNBOO ODOIO, PETAHIO NPOCUYI INENENT HENPHNIAPENEE yIMKNEHSA E NKTPOPEXNO. 3BtOHNO IINAPNA HA TEEPY,PIBIE,ROPNIHARHbTHy ENEOBHnA TOK, UILRAPNA napA, LIO BHXODNTS 3 NapOBORO IONANIA, He NAPANLA HAI HINEP, ENKOPANIIH NIPKINHIN, ENKPOHNI INPNDAA t HINIPNNDAA BOH KARIPIANA, KIK NKNYB BYTN NOOKDKEHMHN PEPEI 3N2NHNBDYNIOHCITI TMENPATGY.
IepniprnoaHbAepehnaBcBaaB 10, uoc aeaaii BnBmBnBtBnBnHnBnBnBnBnBnBnBnBnBnBnBnBnBnBnBnBnBnBnBnBnBnBnBnBnBnBnBnBnBnBnBnBnBnBnBnBnBnBnBnBnBnBnBnBnBnBnBnBnBnBn
He anokalnme npofo 52 knoaonao haocepey yoofo 3 npaoxho hao - y paoi aenokdoao zao cyocnynpoqmu npooyanoe npooye do npkunoe npoeepnbo npoeepnbo npoeepnbo npoeepnbo npoeepnbo npoeepnbo npoeepnbo npoeepnbo npoeepnbo npoeepnbo npoeepnbo npoeepnbo npoeepnbo npoeepnbo npoeepnbo npoeepnbo npoeepnbo npoeepnbo npoeepnbo npoeepnbo npoeepnfo npoeepnfo npoeepnfo npoeepnfo npoeepnfo npoeepnfo npoeepnfo npoeepnfo npoeepnfo npoeepnfo npoeepnfo npoeepnfo npoeepnfo npoeepnfo npoeepnfo npoeepnfo npoeepnfo npoeepnfo npoeepnfo npoeepnfo npoeepnbo npoeepnbo npoeepnbo npoeepnbo npoeepnbo npoeepnbo npoeep

YBAATIthmnnnnoa 3 ayy dnepeeeennn 3 aenenee nee 3AEGPOHEHG.
II. EKΠΙΥΑΤΑΙΟΥΙΙβΤΗΝΑΡΚΙ
HanaWtbyaHHraDmHHMa
BctahOBHeHHaCy npHroTyBaHHa
Y Mythnaauii Hoama CamostHIO BCTAOHOMA HAC nprnTpyHAA DIA KOHOI nporpAMn, OOKH pORPAMn EXPRESS. KxO 3MHN I MOHNH DIANOH NACy, 30 a3a2e3b, 3a3eKanB d3b6hPON pRPMn pRTOrtyAHIN. PICN BIDOPY AOTMTHHIOI pPOPMn TATHTCHHEHNI KHOHN MHeUNB NKOPCtOByE KHOKN YHO/1-10, 60 cBTAHOH H3HHeH ROHN, I KHOKN YIM/1- -D8 PBOCTAOHNEH ZHAeHNe XHHIN, 3MHN ZHHeH ROHN i XBANN BIDyABnTcB HESAEKHO CDHd iD OHNO. PIOC DcEHHHMAKCMHbHO TzHHeHNAmpETRA HanaTuayBHaNn pRoOeBkTbc 3 NoAtky dian3oH. DnB 4AekAO 3MHN ZHHeH HAnChTt IPYmTNnne NTPOH KNHO.

V yekn aonmnnnun nopnnoe oiaa anenannnne noyn npnnaennnna nno nnnnna nnnnna na nna nnnnna nnnnna nnnnna nnnnna nnnnna nnnnna nnnnna nnnnna nnnnna nnnnna nnnnna nnnnna nnnnna nnnnna nnnnna nnnnna nnnnna nnnnna nnnnna nnnnna nnnnna nnnnna nnnnna nnnnna nnnnna nnnnnna nnnnna nnnnna nnnnna nnnnna nnnnna nnnnna nnnnna nnnnna nnnnna nnnnna nnnnna nnnnna nnnnna nnnnna nnnnna nnnnna nnnnna nnnnna nnnnna nnnnna nnnnna nnnnna nnnnna nnnnna nnnnee
Bicrtpoka cnapy nporgamn
- BCTAHOBH 33KAYH TENTHPETpy. DnB 36IbIHHEH HTHKXYE HKOHNY HOUH+/,DnA 3MeHHeHH - KHOKNY MIn-/,DnA
10001MHN HATCHNt. I yPHKNY HOTPY KHOHNY, PICNA DOCAHHEH MAXKHMABHOHO (HIMMAHBOHO) HAeHHA HBAATyBDH NPOOQBHcN 3 NOHTKY JIANAOH.
3.He HATNCKyIe KHOONK HA NAHENI ynpaBnHH BnpoD0x5 ekyH,3MINH 6dyTb 6epeXeHtA btonMTHNO.
13 13
Dn3mHn acny npnrtybAHn:
- PnKoPbOePnPpOAmPnPpOyAaBnnnHAtOHnKHOyMnEtnuHApOtOHeHHnHcHcyIaeNueHnepeXTH. 2. BcAnohB bakaHm nncpnrnoHnBnDnBnBnBnBnBnBnBnBnBnBnBnBnBnBnBnBnBnBnBnBnBnBnBnBnBnBnBnBnBnBnBnBnBnBnBnBnBnBnBnBnBnBnBnBnBnBnBnBnBnBn
3.He HAMCKyTe KONKHa NaHeni IynpaBnHH BIPPOeK 5kYHy 3MHN6yHy 6peKeHb AITOMaTHNO.

Aekoo oemohoeum maeene nay npomoybawm 00:00, p08my npopapw dyde yunieh.
3araIbHHn npaDOK dii niD yac BHKOpHCTAHNA ABTOMaTHHIN npoPam

BAKINHOBI KUO zu ukepcocnncnre npunl das kun'lenbodu (kupnukn, npun cipnnn npocnyk), 3450POHRCTCBACnncnnae Hcnpnnepyo npocnncnnae bdu 100C. Le koune npocnnc do nepeyni i nnonnu npocny 3 mri M npocnu 3450PONrBCR Scucnncmnnnur 22 kun nnnnn nn nuo oonpocnncnne BAKE, eFRY, eSEDA.
- Pnryte (Bimipn) HebxqH HpeHm
- CzteKtBtH IepnEeHbA hauu MyaIyIbIaHbM BIDIOIaDIO IO pOoPrrnnpnrpOryTbAHbNAn TaBaCTAE II a KOpYr. PmApdy, 2. CzteKt A TMM, 00c ycl IepnEeHbA, BIOIaHbM pRiHy, 3hAoIbIKs KHee Za MAcKbIaHbNAn BzHByTpiuB NopErpnX hauu. IpeKeHaTBeTc, 00 uua bctAHTaHbaEnBa 63 bepeKeoc1 tIbIaBcTcKaKbIaHbNAn cHemEtom.
- 3akmte Kpnkny MynbTbapkn Do knaaHn. Nknohtb npknad do eneKtpomepeki

YBA/1402360295700000000000000000000000000000000000000000000000000000000000000000

- 1000000000000000000000000000000000000000000000000000000000000000000000000000000000
V npnagmMULTICODKncnnaaednnaeauoepnnpnnpnnu au nneane eonnoanumbs bokny mepeopnnyy npnaynnnyn. Das noobenien cndaoanenr nnenehns uaneocpneynckn knoekn /-k, da ne anenwnn -xoxny Mniw-/- Daa zaepeunnnae naanennnnae mepeonpnnnnae nannnnnnn knxny #tnen.
5.ДИАМИСТANДAPTHOуacy npTpyBAAHBAKOPINCTOBYTe KONKxHouy/oMIny/-o
6.3a HeoobxdinHoc1 octahOBitb Hac BIDCTPOOK CTAPY.


DyHxie Bicompnca commy Hecocmmyno niooc gucopcmnae npoepn FRY, PASTA # EXPRESS.
7. 田3nyck nporpann nprrtybaa Hnnchih knoxy sStarts.Crananhyh hikatropn hnoonk sStarts i CancelyReheatax. 880pHm uHc ync nprrtybHH, 39Aeku bH, BhoHApnpnrnpn nprrtyBAH, KNOBHe bDpany nKAnKHe HnKnH sAe 4600 dO 1000dNCHHHHOHIOHIOHIOHIOHIOHIOHIOHIOHIOHIOHIOHIOHIOHIOHIOHIOHIOHIOHIOHIOHIOHIOHIOHIOHIOHIOHIOHIOHIOHIOHIOHIOHIOHIOHIOHIOHIOHIOHIOHIOHIOHIOHIO
de hcbocnncnnaa nana aodauo bucbmyhdydaknoa aonmndcnpy, hcmacnyu knohty eStnt, 3eane hndtnapop Knnnnae eCcned/Rehebaes, Iiepompe Huaenmehneae neKstiOe 8oAoe yIeHme dyhkyi. Oyckn mbermbepie Bcbocnncnno oio voc auoepnncnnae npkooem oYOGURT eEPRSs.
3. Ito 3aepnnpnn npnpnnnnn n BAC OIOIOIOTB TAYOON CINHAN, HAKI KIINI 38b1bHn HAMC XENDa, DAIJI, 3AENKO 6IOI BApHnnpn npnpnnn obooNNHn HAMATySHN, PpHNAI NEPeE 6 PKNK ABTONDiPIY (ROTHK INKARATO RHNKCA /Reheh) I HAMN IIOPOBae HApCINII OBO A EPNK
REDMONO
9.106 oxacaythy Baepey nporepynepeepaepnnpoeepnnpoeepnnpoeepnnpoeepnnpoeepnnpoeepnnpoeepnnpoeepnnpoeepnnpoeepnnpoeepnnpoeepnnpoeepnnpoeepnnpoeepnnpoeepnnpoeepnnpoeepnnpoeepnnpoeepnnpoeepnnpoeepnnpoeepnnpoeepnnpoeepnnpoepnnpoeepnnpoeepnnpoeepnnpoeepnnpoeepnnpoeepnnpoeepnnpoeepnnpoeepnnpoeepnnpoeepnnpoeepnnpoeepnnpoeepnnpoeepnnpoeepnnpoeepnnpoeepnnpoeepnnpoeepnnpoeepnnpoeepnnpoeepnnpoeepnnponeeKekky Kcokny XCancelReheat.

Dn ompananh kichao zeynnany npnoynckmck cokpncnannk peeernnma nnaonoyeaan mcpoe la do hodol do Myaenapnayknykniaknau, da ocnopene ciinuane das uiei konedit. bihooebnne peneiuu su mokor meemr hainu no comtinw www.credmon.company

Rn, no hyny, nre he aonbocn bdoaohao pny anno hnehnnx aeannnunnns npaaanrnnn eaepeanhy nnoepaany mULTICOOK, kna dokpoee neuene Hmkaoucni nn aanx icinipnncncknne
NporpamaMULTICOOK
Dana nporpama nprnHnuea nprnpotybaan cbr 38 a3aagnnn Knprrtyae nnaparnpann Tnepeatnyd q yacn nprrtoybaan. 3aagnn nporpani aMULTCOOKo Mymbtbeap 3k0e 3amnnu uyn Hkyh kxyonhh nprrab 1do30bnnt nprrnysatac pcrny aNprrno 3a dyb- mncnptltnr, 3akcknny v cpiy kylhnhknn hao b6kmm 3 hteyni.

Kaaa mnnnneepnnpnneanen nnnnnae 80oC, pnnnnae anannnnepey dyneumnnoe bae mnnnnnccnn
y nprrpami MULTICOOK 3tAaHApTnHn Hac nprrtoBHa 3aTbOHTb 30 xHHH, TnepepaIpy nprrtoBHa -100°C.
Dianaoy pnuHOIOCTBOHHeNMeTNMPOY B nprrpam cTAHOBt 55-170C 18 kOPKm y 5°C, Dianaoy pnuHOIOCTBOHHeNMeH NACy -BQ 2 XBNH Do 15 rOth 13 kOPKm 18 XBNH.

YBa4A3BnBbEsKu y psti ccmnoesnes mnnepnpyi n130°C wuc npouoayybnhy dy ooeckna 2eouanm Kaa du aauocpOaonrnpoy eKULTCOCKx dks knnnnnns odds (nnpuaed, npu npaiin npoydncial), 2ABPOHRTBCR acnnaaannnne mnnepnpy npnuoynnynueutn 100°
Pporpama «PILAF»
POrpmaI pRnHcHMeI nnnrnnrrnrrnne IeHHK HbEh. CnHApHnNnNnNnNnNnNnNnNnNnNnNnNnNnNnNnNnNnNnNnNnNnNnNnNnNnNnNnNnNnNnNnNnNnNnNnNnNnNnNnNnNnNnNnNnNnNnNnNnNnNn Nnnnnnnnnnnnnnnnnnnnnnnnnnnnnnnnnnnnnnnnnnnnnnnnnnnnnnnnnnnnnnnnnnnnnnnnnnnnnnnnnnnnnnnnnnnnnnnnnnnnnnnnnnnnnnnnnnnnnnnnnnnnnnnnnnnnn
Pporpama STEAM
Pnpuuuea nnnnne 100000000000000000000000000000000000000000000000000000000000000000000
HnnpHpyBaHHB BAHNI npPam BNKOpCNDyIe CNEaBnH KOTHeHep (BXOyBIOKOOMNExy)
1 HaHnre B 400-800 Mn BDO, BCTAHOBt y Hauy KOHTHeP d n pKpOryBaHHa H npi.
-
BImepnre Ta Hnntyte npnnrty 13 pTepnre, pinnmnpn nnnn 1x Knoeeppe TnKtne Tnne 8 knoepny npneppe, Iepneppe npnnrtnk Tnppnne Tnppnne Eepnepnre.
-
DopmytecBkAizIbKnyHKTb 3-8 aanbHoro npadky iin qac BnKOpctAHRAaTOMTHHHNpOpaM.

n aennnnne nnnnnnne ennnnnnne ennnnnnne ennnnnnne ennnnnnne ennnnnnne ennnnnnne ennnnnnne ennnnnnne ennnnnnne ennnnnnne ennnnnnne ennnnnnne ennnnnnne ennnnnnne ennnnnnne ennnnnnne ennnnnnne ennnnnnne ennnnnnne ennnnnnne
Pporpama SOUP
Pik3huea dnn pinnrtybna 6ybaohn, zanpabnHex, oboeavex ix oxoDx hyns i 3Mka, pmb4, tiaai2 abo OH. TaqdpnHn cnc pOrytBnHa b e npzepHn CTAnobkF 40 x5aONH. MokhoHne pyuhe BCTANOBH NAC yCp npiTbYBaHH B dianaoBH 8d, 20 XBAHN 10 & 8 DnK 3 KPOKm V 5XBAHN.

Pepa aaoaaa a paoa napaemn npnnaod nndrae aaeocu cunon. Bdoepusine npxuy npnnp 5 3rnnne hny s cyry.
PprrpaA 一 ^ 一 PASTA
Prrprrma nepreeBaaea oedenehna Bdoa no kinnn HbA aabaatakeHHH hnpoehttI I Xkne nanae nprrtoyahnn. Ipo moenr Hbaaia HbTa no heoecdin babaatkeHHH pOyckBb aocositcBbkyOBHN CmHnA 3acpOnTHnBdNkacy pRnToTBAAH NnoehcBaCnBIOFpHIOHO HauHHeHHH HONK (Starts).
TnAaepnnnnae ananen n ananen ananen ananen ananen ananen ananen ananen ananen ananen ananen ananen ananen ananen ananen ananen ananen ananen ananen ananen ananen ananen ananen ananen ananen ananen ananen ananen ananen ananen ananen ananen ananen ananen ananen

Pioi kipnaynnnnae hdekns (panpncnne, mnnnnnne nne aenrnnnne nnnnne. 100
Iporpama PORRIDGE
Pnnpnnnnnnnnnnnnnnnnnnnnnnnnnnnnnnnnnnnnnnnnnnnnnnnnnnnnnnnnnnnnnnnnnnnnnnnnnnnnnnnnnnnnnnnnnnnnnnnnnnnnnnnnnnnnnnnnnnnnnnnnnnnnnnnnnnnnnnnnnnnnnnnnnnnnnnnnnnnnnnnnnnnnnnnnnnnnnnnnnn
106 yuHHTy HnBnHnAaHnOka T3 OTHPMH HeoXbIaBpeyIbTat, peKOBHcyCTBaPepne pnproTByaHmM hKohoyStHnACTYnIi
PepnnoaepnnaeBcuiiHb03epnoBpym(pK,Pnka,PiOoTOo),NOKO BQa,SsM8AETBCB6POUECHE
- Peped npKToyBAHHM 3AauyBATH 4uW KybTHBaH BEPUKOBHM MACOM
JIOIJIPOJIMYIPOIIOJI, BIDIMKIOHIOI HIRPEIIHNI 3IKAI KIAIKMN 3KMIHN PEGITNI [MENHYAT ABO 601100000000000000000000000000000000000000000000000000000
- nq 8nBkOPHCTAHHE3bPAHOHOHOHOHOHOHOHOHOHOHOHOHOHOHOHOHOHOHOHOHOHOHOHOHOHOHOHOHOHOHOHOHOHOHOHOHOHOHOHOHOHOHOHOHOHOHOHOHOHOHOHOHOHOHOHOHOHOHOHOHOHOHOHOHOHOHOHOHOHOHOHOHOHOHOHOHOHOHOHOHOHOHOHOHOHOHOHOHOHOHOHOHOHOHOHOHOHOHOHO HO HO HO HO HO HO HO HO HO HO HO HO HO HO HO HO HO HO HO HO HO HO HO HO HO HO HO HO HO HO HO HO HO HO HO HO HO HO HO HO HO HO HO HO HO HO HO HO HO HO HO HO HO HO HO HO HO HO HO HO HO HO HO HO HO HO HO HO HO HO HO HO HO HO HO HO HO HO HO HO HO HO HO HO HO HO HO HO HO HO HO HO HO HO HO HO HO HO HO HO HOO HOO HOO HOO HOO HOO HOO HOO HOO HOO HOO HOO HOO HOO HOO HOO HOO HOO HOO HOO HOO HOO HOO HOO HOO HOO HOO HOO HOO HOO HOO HOO HOO HOO HOO HOO HOO HOO HOO HOO HOO HOO HOO HOO HOO HOO HOO HOO HOO HOO Hoo Ho Ho Ho Ho Ho Ho Ho Ho Ho Ho Ho Ho Ho Ho Ho Ho Ho Ho Ho Ho Ho Ho Ho Ho Ho Ho Ho Ho Ho Ho Ho Ho Ho Ho Ho Ho Ho Ho Ho Ho Ho Ho Ho Ho Ho Ho Ho Ho Ho Ho Ho Ho Ho Ho Ho Ho Ho Ho Ho Ho Ho Ho Ho Ho Ho Ho Ho Ho Ho Ho Ho Ho Ho Ho Ho Ho Ho Ho Ho Ho Ho Ho HoHoHoHoHoHoHoHoHoHoHoHoHoHoHoHoHoHoHoHoHoHoHoHoHoHoHoHoHoHoHoHoHoHoHoHoHoHoHoHoHoHoHoHoHoHoHoHoHoHoHoHoHoHoHoHoHoHoHoHoHoHoHoHoHoHoHoHoHoHoHoHoHoHoHoHoHoHoHoHoHoHoHoHoHoHoHoHoHoHoHoHoHoHoHoHoHoHoHoHoHo
Eeannnnnne ennnnnae ennnnne ennnnne ennnnne ennnnne ennnnne ennnnne ennnnne ennnnne ennnnne ennnnne ennnnne ennnnne ennnnne ennnnne ennnnne ennnnne ennnnne ennnnne ennnnne ennnnne ennnnne ennnnne ennnnne ennnnne ennnnne ennnnnee ennnnne ennnnne ennnnne ennnnne ennnnne ennnnne ennnnne ennnnne ennnnne ennnnne ennnnne ennnnne ennnnne ennnnne ennnnne ennnnne ennnnne ennnnne ennnnne ennnnne ennnnne ennnnne ennnnne enenn
Rn 100000000000000000000000000000000000000000000000000000000000
Pporpama STEW
PnAnaHcAeI pRrOyBbIy IyBaI, neHcI aI. CstAprrnHnIac nprrOyBbIy B nprpIaI cAnobHbI, 10 xHyH. MoKxNae yIe bactoAnenlncy acy proroyBbIy I bIaONzIO 20 XBNHnIO do 12 kHO 5 xBYHnIO.
IporpamaBAKE
Pnnaaehna da nprnrotybaHH KekcB, 3anikahok i nporib 3 dpixkoboro Ticta. TaiaaprrnH uac npnrtoybaHH a nporpaH taohb015 x8nnHm. MoKnnepe pyine octaohoeHH uay npnrtoybaHH a dianasOi BID 20 XBNHIO 4 rOHN H kppkOM y 10XKNHm.

Taeonmoe 100000000000000000000000000000000000000000000000000
Iid n npnnoynnnaa unnnnne pernenndyctacn annnnnnyo ynnnnnne aennnnnne no nnnnnnnae cnpaa. Fornnoe npnoynnncn 3 mnnnnnne npnnnne npnnnne npnnnne npnnnne npnnnne npnnnne npnnnne npnnnne npnnnne npnnnne npnnnne npnnnne npnnnne npnnnne npnnnne npnnnne npnnnne npnnnne npnnnne npnnnne npnnnne npnnnne npnnnne npnnnne npnnnne nnnnne npnnnne npnnnne npnnnne npnnnne npnnnne npnnnne npnnnne npnnnne npnnnne npnnnne npnnnne npnnnne npnnnne npnnnne npnnnne npnnnne npnnnne npnnnne npnnnne npnnnne npnnnne npnnnne npnnnne npnnnne
NporpamaFRY
IINHNNN H NNNNNN NNNNNN NNNNNN NNNNNN NNNNNN NNNNNN NNNNNN NNNNNN NNNNNN NNNNNN NNNNNN NNNNNN NNNNNN NNNNNN NNNNNN NNNNNN NNNNNN NNNNNN NNNNNN NNNNNN NNNNNN NNNNNN NNNNNN NNNNNN NNNNNN NNNNN NNNNNN NNNNNN NNNNNN NNNNNN NNNNNN NNNNNN NNNNNN NNNNNN NNNNNN NNNNNN NNNNNN NNNNNN NNNNNN NNNNNN NNNNNN NNNNNN NNNNNN NNNNNN NNNNNN NNNNNN NNNNNN NNNNNN NNNNNN NNNNNN NNN
Ficns dozhenne zaofof meepnpy npzayyaa npoed naeae
Iya uynkiennna nanaepanina hnoeepicnnepeokmnyocdo mnpyamnurca nncmpu kto knuu peemtni i nepoioumo nnonayumuyh hiin aai. Paeo noonnnnau oonapcnononnna npopnnr FyRd taoa npndnyn anonni onnnonnyo Peokmnyocnycn icbcokoynnnna npoknycnn 3 niakpnnn nnkpuKoo - eoeosnnnnn annnnnnnnnnnnnnnnnnnnnnnnnnnnnnnnnnnnnnnnnnnnnnnnnnnnnnnnnnnnnnnnnnnnnnnnnnnnnnnnnnnnnnnnnnnnnnnn
Iporpama YOGURT
PnHApHcAeI HnTnOyHbAHmDnAaHnHgNpyr1BtAoBnAaHbTaTc. StAnpDthnK hNpNpyrAahBa nBpOraHbTaTcAbnOhtB 80nnh. MoKnBeR syne octAhoBnHgNpyrAahBaBnHaBnO 50 XbHNHbO 12 Do3n1k B KPOKOM y 50 XbHNHbO. PnIAC3kAaHdNHPGcIe CTeKe 3Z Tm, 106 BoHnMnHnE h BinBae NnONoHnO KOPNCHO 06CmYau. FynHcA ateriApriyB e Dainl nporapn Heodcytn.
RMC-M4510E

Ia npnanae aonnne bnnne enane anenene nne neanennn enne enne enne enne enne enne enne enne enne enne enne enne enne enne enne enne enne enne enne enne enne enne enne enne enne enne enne enne enne enne enne enne enne enne enne enne enne enne enne enne enne enne enne enne enne enne enne enne enne enne ennee
Pporpama BREAD
Pekomekdybikdai BnHkNPAHbOMHnHNBHX dIbXb63 a 3a bckHcHOPoOgouHtA t 3 daobabHmHNTHO. Iporpama nepesbckn HIOHnKPNPPYrOaHb - iD hboTBOHnIH ta do bHINKH, Y nporpami cthaoptnHac npipohyraHs tchatoBH 3doHHK. Mokhne pyuhe octaHOeAHN acy pnpotyaeH biaanAoH b10 xBDHnDo 6 rokmk EKTOKHO B5 XBXH
Maikcnaaahnnnac poobrnoyduhynn a katoonolorgpeo y daan nporpam o obekeneh3 rdoohm. He pokemnayctybe bokpacthae hkyiBldtochka cnapry, okkshnae me moke bimnhyn ha kcbt BnHk. Heobxidybaxboyathni, uip 1pOepo npo'ednraa poobrpo npoppana dye bxtocbaHHN tctA, a notin - Besoepeorebdo HnBnAnen. Nepu hki bokpactat bat oboiho, rofo peokemnytcepbocnptbrd RaHcHnckn XCHmE YUCNHbDnOthn. Kdn Cxopcohna cacy Ta cspcnchoa pnpoyabeyhakpeKMAeYEMBOKpOHTOBaTOnrToT cyoi Tnui iIpn OTHyANH xIIa.

Iidac aaeauonnne nane 3a m, aod ao hou uunu He ouanue knae noohny kupnnoy ooy
Piin aacnncnnnne nnnnnnnnnnnnnnnnnnnnnnnnnnnnnnnnnnnnnnnnnnnnnnnnnnnnnnnnnnnnnnnnnnnnnnnnnnnnnnnnnnnnnnnnnnnnnnnnnnnnnnnnnnnnnnnnnnnnnnnnnnnnnnnnnnnnnnnnn
YBATAunapocnoyine kxykohny pkyoai 0n uoknnna Knoa npounoy.
Heidipnneepnnynnnneepnoe no ennnnne nnnnne nee nne nne nne nne nne nne nne nne nne nne nne nne nne nne nne nne nne nne nne nne nne nne nne nne nne nne nne nne nne nne nne nne nne nne nne nne nne nne nne nne nne nne nne nne nne nne nne nne nne nne nnee
IporpamaSLOWCOOK
Ipnpma npnHHe Hnn pnpOHTBnHn tykoBHnHO msc1 npbH. CnDzapnHnac npnpOtyBaHn B nporpani CTaONHtB 5 roHN M, MoNBe pyne bctAnOBeHHn Hacy npnpOryBaHn B dian3oHn B n 12 xBnHn do 12 roHN is kxpOH 10xRnHN
Iporpama EXPRESS
Pnpnma npnnaHnnae nnnnnpnntnna Hnna Tpnoaeehctn Kau HbO. Ippnpna nepeepaae aenatmneae Bmnnnne Hnna nno hno nnnnna Hnnaonn Hnna, Moxnckie bnyrno eaoanrnnnay cny npnoytaa, a noak yfHKu 3dactpnuka cratry AAnontopoeB a dain npnpaehneocnytni. Dany snyk npnpaehn pnpnnae Hnnaeepn E pekmn okyeaehn Hnncnch KnoKy Xsarts, CnanaNhybIhKnaptn Pekmy npnoytnsa HnnaCByBaHHn HmooX (Startx. PneHcBbKaHOBAACTAHOEBOH npnparn.
III.ДОДATKOBIMOKJIINBOCTI
BnctokaaHHH
PparatyaBnHnDn
PnHrOryBaHHy yΦmTopi
PprrnyaHHHcnpy
PnpyBaHHH DAty4oXaayBaHH
- Crepriniaa nocy
- Pactepaia piax npogyktie
IV.ДОГЛД 3A ПИЛАДOM
3aIbHI npabHa Ta peKoMeHpaaii
Pepnepnnn nnnnne nnnnnn nn nnnnnn nnnnnn nnnnnn nnnnnn nnnnnn nnnnnn nnnnnn nnnnnn nnnnnn nnnnnn nnnnnn nnnnnn nnnnnn nnnnnn nnnnnn nnnnnn nnnnnn nnnnnn nnnnnn nnnnnn nnnnnn nnnnnn nannn nannn nannn nannn nannn nannn nannn nannn nannn nannn nannn nannn nannn nannn nannn nannn nannn nannn nannn nannn nannn nannn nannn nannn nannn nannn nannn nannn nannn nannn nannn nannn nannn nann
He Bp3 3AHTB 3BAPKTH KHYBTHAHPU HAYI 3NNDOTROBOHO JAKHO 3AOHANREH ENOHO BHHH HIK HA24 RQH. AaH 3rTOBOO CTPAOB BMOKET EeepfH B XoDAMAHKY Ta 3a HIOXJHOCT POHPTM BY MHyTBAHPU, 3AOKOPACTOBOH FyHIO POPIEJIHAA
HIOB HN BHKDCHOTBEYI PIMI, TPOBAH NACIKHO BDOI KENKPEOPKEPOBOA KAMPA EBOKHOHNOHOBHBNH DNC, YAAU, BSYTHPII KUNCAI TO PONAPK KAFANM MAIBT BYT KHTCTHMN CYCNX.
Ieepn HIOKONPHNATH ONUHNEH BAOBPO, NEPOKHAIETC, BOH BIINBOHNOHENI BIE ENKPTOMPEKEO TANOBHIOXOLO. DIA ONUHNEH INIKOPKTOTYHO MTH KTHAYNI TO DENKLAMI 3AC0BDA NMTTO CNOTY.
34EOPPOHETCB eucpucnncn nio cnuuunuee npnuuty 2yux cepeemr ao 2yoe, oepouuui kao. TaKow H KNOA uKoepcnoaayu Lyu- xia Xnne apecuun ao imai peuouin, ne pekamohoo ani daocmocya h apeemnauo. 10
3ABOPOHREbCzrypysamknoynycnnpunayr sodyafoaonwnomuao20ndcmpyine eod
BbEbyeOpeBcHnRtNnRnRnRnRnRnRnRnRnRnRnRnRnRnRnRnRnRnRnRnRnRnRnRnRnRnRnRnRnRnRnRnRnRnRnRnRnRnRnRnRnRnRnRnRnRnRnRnRnRnRn
KOTy BOPKOYMOK OMOHOMAHTB KIPY ABQDHNHAA, HAY, BYHPTIOHO KPHNTHA YI SNNHAN PABONB KHATAH NEXO XIOHO AOKMPOHNIICN KAO HOKOPHTAHN PHNADQ, KOHNCHAT, YOYPOTOCCTBA pRouePc npTPOYTAHIN BIXI 6 MybntpA, BDAANNTIE NICKA BOHKOPHTAHN pRPOTKPO. BYHPTIIN NOBEPX1 pOBQVI KEMPEY PA saihnope5
OuHnEHHa KopnycY
OCHUYI KOPCY MOPCY MKOYO BONORO KYOKOHORA cepaekno 506 tykona. MOKNHE tactocyaHNA deiknHOTOn OMHAYBaTHAHOACBOYIO. IOB yHKNYHMOKHNKNNATbKaIK AI aq oan HA KOPCY, peKOMeHyEMo pTePTM HOr NOEPBNIO DOXCA.
OuHueHHaui
Kbokotee Oboythayu kay kyyvny, bboKPOCTOByouy Mky Bky 3a36I daMHTNIOpy, taK bNOcDyHmRnMaaHnni (BbIOBIOY do KBOEOKAMII II BPOBHNKI).
yai CnHnHbA 2aBcHnHnHn HnHnHn HnHn HnHn HnHn HnHn HnHn HnHn HnHn HnHn HnHn HnHn HnHn HnHn HnHn HnHn HnHn HnHn HnHn HnHn HnHn HnHn HnHn HnHn HnHn HnHn HnHn
y pasyepnnoeknye knojnyu naui nooknoa noho aao ycknoa mna kbo npby ehtpnuho antnhnpnroho nokpntta. He ne hszokno geodcy uauu.
OuHennBHyTpIiHb0I KpnKn
1 BgKpHte KPHuKy MybTHaApKn.
- YIKHIN KIATNI HNITRIN BOBO KYOKIO MUNOHNIOI NTOHIOI DU OENTHI POIAI NAOIOI IAIIOKHO KIFIOIOJ. HoNDOAIONOHK 2CUKY, NOHTIRBH BYTHIINKO KNUKIO TPOXIN HA SE BNA EAH, MOU BOHA IEIDENKAHB DII OCHONOH KNUKIOI
IIOPIITIOIIOEPOBIOOIOOIOIOIOIOIOIOIOIOIOIOIOIOIOIOIOIOIOIOIOIOIOIOIOIOIOIOIOIOIOIOIOIOIOIOIOIOIOIOIOIOIOIOIOIOIOIOIOIOIOIOIOIOIOIOIOIOIOIOIOIOIOIOIOIOIOIOIOIOIOIOIOIOIOIOIOIOIOIOIOIOIOIOIOIOIOIOIOIOIOOO - Bntpb o6nbi Kpnwn Docyxa
- Bcrtare xkuyy k eepn hnn Pnoe Hne 3nHny anmHbE ycku 0 cnoHBOXK uO, 3 HeSNHNN YCNHMM HnHtNn Hnclatopn o npaHnnnn
OuHHeHH 3HIMHoro napOBoro KnaHa
Napomki kllan BctaohaneB CneiaIbHomy HnHa HbeXHKnHpnKny I cKaaactocBa 3oBnHIOra Ta binypIbnHOO Kooxyk.
1.ObepexnootnHt308HiuHnKoKyx 3aBcTnyyBaIeNHeHHxKpuKb Bropy Ha Cebe.
2.HaHCHITbHa nactMaoBn fikcatop Ha HxhHbmy BoJ knaana Ta 3HmItb BnytpiuH KoxyX.
3. 3a Heo6xioHOCTO6epeXHO BIMITyMIOK KANANA.HPOMHHTB CCHACTHH KNANAHA
4.3101111111111111111111111111111111111111111111111111111111111
YBAFAI 106b ynnnnae deepnoa yana nana, he oxynydi ne no anynydiene if nooc hnnnnaonnna
REDMONO
BudanenHHKoHcCaty
OuHHeHH po6o0i KaMeepi
YyjKtOHOrOpTmAHINBnBzAIEoBnAMJIInrTcPyrNJIbHNOsipNCTbnpaNNiPeDHHa, YcAeHHIOKJxO60CHITARCEpeADHPOBOHJI KAMEPRnPKdAAHMIHNIbA. JApO CYTBE 32bpyHnEAE HcX CTQIOB, EOBXIIHO OMHNTNIOBpEOHJI KAMEPRI, SbOYHKYNTHNEXKOPEHOTIOBAO bOBO NPMNPAH

Pepn knn nnnnnae 0nepey nepepepepepepepepepepepepepepepepepepepepepepepepepepepepepepepepepepepepepepepepepepepepepepepepepepepepepepepepepepepepepepepepepepepepepepepepepepepepepepe pe
SINH CTHN HIOPOHO KAMPE, HOPKHO XHPARHIO HO JOKO DA T KOXU YIHTHO BTRPOHJIAO (postaOHAKAN ECEPJIAH) HAPBIRABHO JOKOKA) MOKHJA OHCTHI 80000 [HE MOKOJI] IYKO ABO CEPTEKOO, IYMO BHACOTOCBYE KIMNA ZACB, HEOBIOHO PETEHBO BHAIDHNI HO 3AAMNH, UIO BOYHKHO TNSBEH BEKASHIO HO 3AATYK, DC AC NAOLOBO PRTOTYBAHHI BIX. Y pasl HAIPIIHNH KOPKHO IN Y aaraihneHbHn DIOKOLA AEHPALHO TEPMOATIKKA BoepekhoB bAIIHITAA IHINCTOM, HE HAIPOKHO HA KOKJOI B4NKA.
Ypaa3aepydnneHnnoepnHnHarpnBnHoroDnKaMnHa BnKpOCTbTa anoIy npky cepEoi KpOcTl a0 Chrrnnny

YpuaiyepnepiEeKecuoyeiHpnpoohy 3 aocm Hooaon noao 06cnoon 3nno 9nno npaae 02do kue. He ne 3nnoe Hncpaanoe npccnnn 0e hne anae n pnoaeeinb 0o ooe poora.
36epirannra Ta TpaHcnprybaHH
NepedepiHnHm i noBtphok exknyatauio OHCTe H noBnHcno npcxuyin yci actHH
Pnnpny. 3bprpnaepy y cyxomBREHMOBAMHY Mici iioi iin HpaiaHbHx npnnr iipnHcx CPOHNNI PONHNE
Pi nTAC pTACHTCPOYAAHH Ta epHnAHA BApOeBHc TIIaBTH pNnAD MEKAHMHOMY ABMBy, KIOA KOKE pNkBCTNdo
PnNDKDEKHN HnDTOO TaeAoBHOUHUNCHOTYNAKQs
Heoixno bepertn ynaokny npnaay bid nortpaninHHBdoHn HnXpDnH.
V. IOPADNI OIOI PIPNFTYBAHH
POMHKn nic npnrtoybaHHra cnoocbIXhboor ycyhennn
Ynaaedae Knab TaebnBiaepao TnnoaNnA, npDpyckocnlo nTn aPn pOyctyBaHn i k AynThaagax, poanrAtoKoMnBnIpNnNnTa an Nnn BpuHnEe.
CTPABA OCTATOCHNO HE INIPOITOTYBAJAC
TPN BAPIHHI IPODYKT BKNHNAE
CTPABA TIPHTOPAC
| Пдас варлиma моллгима калшнгима моллсу | Яксы варлигима моллсу моллсу моллсу моллсу моллсу моллсу моллсу моллсу моллсу моллсу моллсу моллсу моллсу mоллсу mоллсу mоллсу mоллсу mоллсу mоллсу mоллсу mоллсу mоллсу mоллсу mоллсу mоллсу mоллсу mоллсу mоллсу mоллсу mоллcу mоллсу mоллсу mоллсу mоллсу mоллсу mоллсу mоллсу mоллсу mоллсу mоллсу mоллсу mоллсу mоллсу mоллсу mоллсу mоллсу mоун ун mогдяпима не релегов ( laquantoborodno对外开放 molegii prajnaya puetaienta. Падр варлигим; сючы bokh nonpepehyd obolosh, ponopovlny zakamakh. bidiabori- dathу поремедим. Liluhoeropdoyi krynn, MIO, PND yau pomerpodykyn 32abxdu petehero npoemdehyte du chyto bot doan |
| Порадуkt уразраи ду | Рекомл'dуры сөретүлэн розмогота роздук.TИМат knalan aldo rotyaatn 3 bilakр'tro xprinkoc |
Haayy Huyo nangao hongheng hui nanepocnado huo ngyoty BAHANHJ, Anpnpnphapnepnepnepnepnepnepnepnepnepnepnepnepnepnepnepnepnepnepnepnepnepnepnepnepnepnepnepnepnepnepnepnepnepnepnepnepnepnepnepnepnepnepnepnepnepnepnep
| 3a4aikhni 06 em zakladiqin pordyktu mehne, hsk pekomeh dye tce b peamii | 3eepitbfa do nepepeipnco [daantabanho] da haino mo- daii pnpalayi peemia |
| Bv cctahobm 33a170 aedkhi nac pprotyaahna | Cxcopitib cac pprotyaehn abio doptnyitece kkaibiook peema, daantobnoho i da haino moaii pnpady |
| Pidac cchckhenh: Bz d2ybn hahtn b hauy onio; he nepe- kiyyaian abio pao nepesertan prpdyntu, zuo rotyoctbta | Pidac zakhlirr ocbakn hnoite b buyoo pocrimn hoi oni - taok, buo hona noopnbaa da hau yonk tonumppm Dla pichmnhoro obocmavhya npoynx u auiy noptibio nepiopnkyo konpuytaz abio nepesertan cepea nebniu cax |
| Pidac tynkayhaen: b hauy hedeogctatnbo konor | Pdaiae b aauy bilue plnki. Pidac pnractybanha he aliopnbae kprnuky mynbthapck be npsebi |
| Pidac bacnapia: y hauy dyke mao pldnH (he otponkha pnpoupln impejtdent) | Tdpnnye pnpabnHOro cnilbduohne hpiu in Ta Tbe dxk impejtdent |
| Pidac binkkha: an he 3aactnn anhyptiu nobepxho hauy kaskom pepe, pprotyaahn | Pepa zaklaidko tri 3maayyte dno ta ctnkn hauy pekivnrmn MaKcM ono ppcnNHO oio Hc Hapro dHau batt no 8 bany! |
NPOJKT BTPATNB QDPMY HAP3KN
| Взэндто что пошиушларноюу вшио | Пд ддддддддддддддддддддддддддддддддддддддддддддддддддддддддддддддддддддддддддддддддддддддддддддддддддддд схоротс ддддддддддддддддддддддддддддддддддддддддддддддддддддддддддддддддддддддддддд ретета, дддддддддддддддддддддддддддддддддддддддд схоротс дддддддддддддддддддддддддддддддддддддд схоротс ддддддддддддддддддддддддд схоротс ддддддддддддддддддд схоротс ддддддддддддд схоротс ддддддддд схоротс ддддд схоротс схоротс схоротс схоротс схоротс схоротс схоротс схоротс схоротс схоротс схоротс схоротс схоротс схоротс схоротс схоротс схоротс схarbon схarbon схarbon схarbon схarbon схarbon схarbon схarbon схarbon схarbon схarbon схarbon схarbon схarbon схarbon схarbon схarbon схarbon схarbon схarbon схarbon схarbon схarbon схarbon схarbon схcarbon схarbon схarbon схarbon схarbon схarbon схarbon схarbon схarbon схarbon схarbon схarbon схarbon схarbon схarbon схarbon схarbon схarbon схarbon схarbon схarbon схarbon схarbon схarbon схarbon схCarbon схCarbon схCarbon схCarbon схCarbon схCarbon схCarbon схCarbon схCarbon схCarbon схCarbon схCarbon схCarbon схCarbon схCarbon схCarbon схCarbon схCarbon схCarbon схCarbon схCarbon схCarbon схCarbon схCarbon схCarbon схcarbon схCarbon схCarbon схCarbon схCarbon схCarbon схCarbon схCarbon схCarbon схCarbon схCarbon схCarbon схCarbon схCarbon схCarbon схCarbon схCarbon схCarbon схCarbon схCarbon схCarbon схCarbon схCarbon схCarbon схCarbon сх Carbon схCarbon схCarbon схCarbon схCarbon схCarbon схCarbon схCarbon схCarbon схCarbon схCarbon схCarbon схCarbon схCarbon схCarbon схCarbon схCarbon схCarbon схCarbon схCarbon схCarbon схCarbon схCarbon схCarbon схCarbon схarbon схCarbon схCarbon схCarbon схCarbon схCarbon схCarbon схCarbon схCarbon схCarbon схCarbon схCarbon схCarbon схCarbon схCarbon схCarbon схCarbon схCarbon схCarbon схCarbon схCarbon схCarbon схCarbon схCarbon схcarbon схcarbon схCarbon схCarbon схCarbon схCarbon схCarbon схCarbon схCarbon схCarbon схCarbon схCarbon схCarbon схCarbon схCarbon схCarbon схCarbon схCarbon схCarbon схCarbon схCarbon схCarbon схCarbon схCarbon схCarbon схcarbon схarbon схCarbon схCarbon схCarbon схCarbon схCarbon схCarbon схCarbon схCarbon схCarbon схCarbon схCarbon схCarbon схCarbon схCarbon схCarbon схCarbon схCarbon схCarbon схCarbon схCarbon схCarbon схCarbon схCarbon сх碳 схCarbon схCarbon схCarbon схCarbon схCarbon схCarbon схCarbon схCarbon схCarbon схCarbon схCarbon схCarbon схCarbon схCarbon схCarbon схCarbon схCarbon схCarbon схCarbon схCarbon схCarbon схCarbon схCarbon схCarbon сх carbon схCarbon схCarbon схCarbon схCarbon схCarbon схCarbon схCarbon схCarbon схCarbon схCarbon схCarbon схCarbon схCarbon схCarbon схCarbon схCarbon схCarbon схCarbon схCarbon схCarbon схCarbon схCarbon схCarbon схCarbon сх碳 сх碳 сх碳 сх碳 сх碳 сх碳 сх碳 сх碳 сх碳 сх碳 сх碳 сх碳 сх碳 сх碳 сх碳 сх碳 сх碳 сх碳 сх碳 сх碳 сх碳 сх碳 сх碳 сх碳 сх碳 схcarbon схcarbon схcarbon схcarbon схcarbon схcarbon схcarbon схcarbon схcarbon схcarbon схcarbon схcarbon схcarbon схcarbon схcarbon схcarbon схcarbon схcarbon схcarbon схcarbon схcarbon схcarbon схcarbon схcarbon схcarbon схCarbon схCarbon схCarbon схCarbon схCarbon схCarbon схCarbon схCarbon схCarbon схCarbon схCarbon схCarbon схCarbon схCarbon схCarbon схCarbon схCarbon схCarbon схCarbon схCarbon схCarbon схCarbon схcarbon схcarbon схcarbon схcarbon схcarbon схcarbon схcarbon схcarbon схcarbon схcarbon схcarbon схcarbon схcarbon схcarbon схcarbon схcarbon схcarbon схcarbon схcarbon схcarbon схcarbon схcarbon схcarbon схcarbon сх carbon схcarbon схcarbon схcarbon схcarbon схcarbon схcarbon схcarbon схcarbon схcarbon схcarbon схcarbon схcarbon схcarbon схcarbon схcarbon схcarbon схcarbon схcarbon схcarbon схcarbon схcarbon схcarbon схcarbon схcarbon сх Carbon Схcarbon Схcarbon Схcarbon Схcarbon Схcarbon Схcarbon Схcarbon Схcarbon Схcarbon Схcarbon Схcarbon Схcarbon Схcarbon Схcarbon Схcarbon Схcarbon Схcarbon Схcarbon Схcarbon Схcarbon Схcarbon Схcarbon Схcarbon Схcarbon Схcarbon СхCarbon Схcarbon Схcarbon Схcarbon Схcarbon Схcarbon Схcarbon Схcarbon Схcarbon Схcarbon Схcarbon Схcarbon Схcarbon Схcarbon Схcarbon Схcarbon Схcarbon Схcarbon Схcarbon Схcarbon Схcarbon Схcarbon Схcarbon Схcarbon Схcarbon Сх carbon Схcarbon Схcarbon Схcarbon Схcarbon Схcarbon Схcarbon Схcarbon Схcarbon Схcarbon Схcarbon Схcarbon Схcarbon Схcarbon Схcarbon Схcarbon Схcarbon Схcarbon Схcarbon Схcarbon Схcarbon Схcarbon Схcarbon Схcarbon Схcarbon Сх Carbon Схcarbon Схcarbon Схcarbon Схcarbon Схcarbon Схcarbon Схcarbon Схcarbon Схcarbon Схcarbon Схcarbon Схcarbon Схcarbon Схcarbon Схcarbon Схcarbon Схcarbon Схcarbon Схcarbon Схcarbon Схcarbon Схcarbon Схcarbon Схcarbon Cxcarbon Cxcarbon Cxcarbon Cxcarbon Cxcarbon Cxcarbon Cxcarbon Cxcarbon Cxcarbon Cxcarbon Cxcarbon Cxcarbon Cxcarbon Cxcarbon Cxcarbon Cxcarbon Cxcarbon Cxcarbon Cxcarbon Cxcarbon Cxcarbon Cxcarbon Cxcarbon Cxcarbon Cxcarbon CXcarbon Cxcarbon Cxcarbon Cxcarbon Cxcarbon Cxcarbon Cxcarbon Cxcarbon Cxcarbon Cxcarbon Cxcarbon Cxcarbon Cxcarbon Cxcarbon Cxcarbon Cxcarbon Cxcarbon Cxcarbon Cxcarbon Cxcarbon Cxcarbon Cxcarbon Cxcarbon Cxcarbon Cxcarbon C xcarbon C xcarbon C xcarbon C xcarbon C xcarbon C xcarbon C xcarbon C xcarbon C xcarbon C xcarbon C xcarbon C xcarbon C xcarbon C xcarbon C xcarbon C xcarbon C xcarbon C xcarbon C xcarbon C xcarbon C xcarbon C xcarbon C xcarbon C xcarbon C xcarbon Cxcarbon C xcarbon C xcarbon C xcarbon C xcarbon C xcarbon C xcarbon C xcarbon C xcarbon C xcarbon C xcarbon C xcarbon C xcarbon C xcarbon C xcarbon C xcarbon C xcarbon C xcarbon C xcarbon C xcarbon C xcarbon C xcarbon C xcarbon C xcarbon Cxcarbon Cxcarbon C xcarbon C xcarbon C xcarbon C xcarbon C xcarbon C xcarbon C xcarbon C xcarbon C xcarbon C xcarbon C xcarbon C xcarbon C xcarbon C xcarbon C xcarbon C xcarbon C xcarbon C xcarbon C xcarbon C xcarbon C xcarbon C xcarbon Cxcarbon C xcarbon Cxcarbon C xcarbon C xcarbon C xcarbon C xcarbon C xcarbon C xcarbon C xcarbon C xcarbon C xcarbon C xcarbon C xcarbon C xcarbon C xcarbon C xcarbon C xcarbon C xcarbon C xcarbon C xcarbon C xcarbon C xcarbon C xcarbon C xcarbon Cxcarbon Cxcarbon Cxcarbon C xcarbon C xcarbon C xcarbon C xcarbon C xcarbon C xcarbon C xcarbon C xcarbon C xcarbon C xcarbon C xcarbon C xcarbon C xcarbon C xcarbon C xcarbon C xcarbon C xcarbon C xcarbon C xcarbon C xcarbon C xcarbon Cxcarbon C xcarbon C xcarbon Cxcarbon C xcarbon C xcarbon C xcarbon C xcarbon C xcarbon C xcarbon C xcarbon C xcarbon C xcarbon C xcarbon C xcarbon C xcarbon C xcarbon C xcarbon C xcarbon C xcarbon C xcarbon C xcarbon C xcarbon C xcarbon C xcarbon Cxcarbon C xcarbon Cxcarbon Cxcarbon C xcarbon C xcarbon C xcarbon C xcarbon C xcarbon C xcarbon C xcarbon C xcarbon C xcarbon C xcarbon C xcarbon C xcarbon C xcarbon C xcarbon C xcarbon C xcarbon C xcarbon C xcarbon C xcarbon C xcarbon C xcarbon Cxcarbon Cxcarbon C xcarbon Cxcarbon C xcarbon C xcarbon C xcarbon C xcarbon C xcarbon C xcarbon C xcarbon C xcarbon C xcarbon C xcarbon C xcarbon C xcarbon C xcarbon C xcarbon C xcarbon C xcarbon C xcarbon C xcarbon C xcarbon C xcarbon C xcarbon Cxcarbon Cxcarbon Cxcarbon Cxcarbon C xcarbon C xcarbon C xcarbon C xcarbon C xcarbon C xcarbon C xcarbon C xcarbon C xcarbon C xcarbon C xcarbon C xcarbon C xcarbon C xcarbon C xcarbon C xcarbon C xcarbon C xcarbon C xcarbon C xcarbon Cxcarbon C xcarbon C xcarbon C xcarbon Cxcarbon C xcarbon C xcarbon C xcarbon C xcarbon C xcarbon C xcarbon C xcarbon C xcarbon C xcarbon C xcarbon C xcarbon C xcarbon C xcarbon C xcarbon C xcarbon C xcarbon C xcarbon C xcarbon C xcarbon C xcarbon Cxcarbon C xcarbon C xcarbon Cxcarbon Cxcarbon C xcarbon C xcarbon C xcarbon C xcarbon C xcarbon C xcarbon C xcarbon C xcarbon C xcarbon C xcarbon C xcarbon C xcarbon C xcarbon C xcarbon C xcarbon C xcarbon C xcarbon C xcarbon C xcarbon C xcarbon Cxcarbon C xcarbon Cxcarbon C xcarbon Cxcarbon C xcarbon C xcarbon C xcarbon C xcarbon C xcarbon C xcarbon C xcarbon C xcarbon C xcarbon C xcarbon C xcarbon C xcarbon C xcarbon C xcarbon C xcarbon C xcarbon C xcarbon C xcarbon C xcarbon C xcarbon Cxcarbon C xcarbon Cxcarbon Cxcarbon Cxcarbon C xcarbon C xcarbon C xcarbon C xcarbon C xcarbon C xcarbon C xcarbon C xcarbon C xcarbon C xcarbon C xcarbon C xcarbon C xcarbon C xcarbon C xcarbon C xcarbon C xcarbon C xcarbon C xcarbon C xcarbon Cxcarbon Cxcarbon C xcarbon C xcarbon Cxcarbon C xcarbon C xcarbon C xcarbon C xcarbon C xcarbon C xcarbon C xcarbon C xcarbon C xcarbon C xcarbon C xcarbon C xcarbon C xcarbon C xcarbon C xcarbon C xcarbon C xcarbon C xcarbon C xcarbon C xcarbon Cxcarbon Cxcarbon C xcarbon Cxcarbon Cxcarbon C xcarbon C xcarbon C xcarbon C xcarbon C xcarbon C xcarbon C xcarbon C xcarbon C xcarbon C xcarbon C xcarbon C xcarbon C xcarbon C xcarbon C xcarbon C xcarbon C xcarbon C xcarbon C xcarbon C xcarbon Cxcarbon Cxcarbon Cxcarbon Cxcarbon Cxcarbon Cxcarbon Cxcarbon Cxcarbon Cxcarbon Cxcarbon Cxcarbon Cxcarbon Cxcarbon Cxcarbon Cxcarbon Cxcarbon Cxcarbon Cxcarbon Cxcarbon Cxcarbon Cxcarbon Cxcarbon Cxcarbon Cxcarbon C Xcarbon C xcarbon C xcarbon C xcarbon C xcarbon C xcarbon C xcarbon C xcarbon C xcarbon C xcarbon C xcarbon C xcarbon C xcarbon C xcarbon C xcarbon C xcarbon C xcarbon C xcarbon C xcarbon C xcarbon C xcarbon C xcarbon C xcarbon C xcarbon C xcarbon C Xcarbon C xcarbon C xcarbon C xcarbon C xcarbon C xcarbon C xcarbon C xcarbon C xcarbon C xcarbon C xcarbon C xcarbon C xcarbon C xcarbon C xcarbon C xcarbon C xcarbon C xcarbon C xcarbon C xcarbon C xcarbon C xcarbon C xcarbon C xcarbon Cxcarbon CxCarbon CxCarbon CxCarbon CxCarbon CxCarbon CxCarbon CxCarbon CxCarbon CxCarbon CxCarbon CxCarbon CxCarbon CxCarbon CxCarbon CxCarbon CxCarbon CxCarbon CxCarbon CxCarbon CxCarbon CxCarbon CxCarbon CxCarbon CxCarbon CxCarbon CxC carbon CxC carbon CxC carbon CxC carbon CxC carbon CxC carbon CxC carbon CxC carbon CxC carbon CxC carbon CxC carbon CxC carbon CxC carbon CxC carbon CxC carbon CxC carbon CxC carbon CxC carbon CxC carbon CxC carbon CxC carbon CxC carbon CxC carbon CxC carbon CxC carbon CxC Carbon |
BIMIUKBA BMIIJIA BOIITOHO
| Byo BHKOPKISTAHN HeiHIOIaII HINIEHIN, IIO. KAIbIK HADHIHIOK OONIAI (KOKOJIITI OBOH) ABO OFPCK, ZAKOPOKH MADNI, CHETTA TOOLO | BHKOPKISTAHN InpEIGCII bIANIOIIIOA du peoetra BHKIOH HAMARAEIEC NbeHWPAT kI INHPEDIEH NPODKTIO, IIO MeCTHO IBO BarAO BOON, ABO BKKPCHEOTYE IX, IIOIO MOKH, B MINIMAI KI KIOCKO |
| BN nepeRTHAMI rroTOBY BHKIOH 6 zAKKTII MUYLTBIHAPRII | HAMARAEIEC BNIHOTBI BHKIOH 3 MyIeHTABIKOR OPODAY NKII NPOTIYHOMA, 33 NoEXOHDHOTKI KOTIEZ EMMIPODYT K MyLTBIHAPRII, 34 HETPBAHDIAC 12 YIIBKHNHEM ATOTIIOIIOB |
BUNIYKAHENIIDHNAAC
PnIaHbAeKJXaIeKbIeKbIeKbIeKbIeKbIeKbIeKbIeKbIeKbIeKbIeKbIeKbIeKbIeKbIeKbIeKbIeKbIeKbIeKbIeKbIeKbIeKbIeKbIeKbIeKbIeK
RAM-FB1-KOP3MNAJINCMaKeHHNyΦpHnTniP
BHKOHTOPAe3bI pRnroPeyaHJI 3nI bIOHINpOeE BcNHOIPOsIbI a60KINHNI OII (fepoTIP).PiXoTHaI Ia DByk-IAH cObOM H 3 nIPI. BIKOTONAE 3nKApKIOHOI tAI, KAc HIMyHpy KIOHAK o fikCAH H aaiiHaI NnonenHJI 3nI bAI yaiI oII nCnI pRnroPeyaHJI. MoKHeBA BIKOPCTAHJI a MybHTBAPAKHI IuHNK bEeDJI a KaHAAJ O6OBM H 3 nIPI. MoKHeBA M nCpOdMNJI kauHH.
RAM-G1-KOMNNEKT GaHOCK DnIryOpyr3 MaRKePAmH Na KpHkax (4 Wt.)
PIMINHANENI DAI PIPNITYOBHIB HIN BINHIOB. SAKHI MAJIHT BMAPKIRI DATI, IQU DOSSONIKOT KOTPOPNOSATI TEPHN PINDAHOCTL. MOXIMIRE BOPKICHTAHSA MAYBTHABKAMH INHU XEPIAD.
RB-A500(A501,A503)-4a7a3aHTnnpnapnHnOKpTTAM EHHCT-5nptB.
RB-C500-7a7a3KepaMHHNOKpHTTAM
EmHictb-5npiie.
RB-C505 - qaa3 kepamHMM noKPTTcM Ceralon (Baeuapain) cHnictb - 5 nptis.
RB-SSD0 - cTnanea huaa AHmHCT - 5 NTiPb
VII. IPEI 3BVEPTAHHIM DO CEPBICHTPY
| Hecrpablchb Mokhml npnvnnn | Cnoic6 yucnennia | ||
| Ha kncnlne bHHnnao noBldomreHnnpo nomkny: E1-E4 | CstcmeHn noKnHnA, moXnHn opeRer npnndy, bHXd 3 naay natayn uypaBnHnln abo aHepiabHoro eHemEny | BmKnHn noPnDnB iE neEcpTPOeRPeK, daire JxOy Hoxo- Hn. PpeRpe NoHbIc7 cHau in pncrpoI do cctattnor obcny rpoocdy u hN. PpOcnHn rpoae du eEcpTPOeR PcH 1 Hoxy 3 anlyntc npOpynH, Ruau ue da dcBacnH , seBnHn 8 aBopOcBae nn cepBnCHen TcH | |
| PnpnaHne BmKna- ctcb | UHyp eNekrponkBaHernn He NidonckHern do npnndy ta (ab6) eNepTPhoH poTeHN | IpeKpnadTReK, uO zHmHn enEcpTPOeRPeK, daire Oy Hn do ZbOanLHO ro pOzHmH na npnndy ta yBmKHe- Hn y poTeKN | |
| HecpTaHa n eNepKTHya PoTeKN | YbIKHn pnpnd y cOpaAny poTeKN | ||
| B eNekpOmepeK iHema C rpoym | IpePepie HaNtBnC Happyn b eEcpTPOeRPeK, Raio boH oBcUyte, seepHbco do oprcaHsau, uO oBcHyro- Bye Bax BydnH | ||
| CTpRa 1otyetc 3aHnDIO daH | Ipepeoi 3 XHnEHN HmB iD eNepTPOeRpeK (piteHn HApyn t CtpNy HecTobunH bdo Hnke 3a HOpN | Ipepeipie HaNtBnC stbBnH oHappyn b eEcpTPOeRPeK, Raio boH oBcUyte, seepHbco do oprcaHsau, uO oBcHyro- Bye Bax BydnH | |
| Mxq Chueo Ta HApynbHn HEmEnHOM npOraHn CTpOHN PpePmed abo HcTkn [CHMT, Kpyn, BcHAtOnHou K] | BbKKnHt Bnpnndy aD iE eNepTPOeRPeK, daire Toy oxoONOHn, BcHdAInb CTpOHN PpePmed abo Cactkn | ||
| QaAs a KopyrCJ MybLbHbArpk BCTaHosBHe HepiBn | BtAnKHe BcHuy pInH, Be3 nepeKocis | ||
| Harpibaihn DnC dXy 3abpOy Hnien | BmKHe Bnpnnd, aD iE eNepTPOeRpeK, daire Toy oxoONOHn, OChKHe Hapribaihn DnC | ||
| Pi#, cac npnrOtsaH- H 3-Pi KpKnH npnndy BvXoDaHb napa | PnpuysHa repMe- TtHnHcy TB XeHnHn CuaH ta BvHTHn Hko KpRnKn Myb TbHapKn | UaAs hepIto HcSta- HOBHea B KopyC npnndy | BtAnOHe BcHuy pInH, Be3 nepeKocis |
| KpXnHka ZakpHtA HeHbHn BO aD nla KpKnHn TocpAner CTpOHN PpePmed | Ipepeipie, Ta HmEs cTcOHN HpePmedB (CmHtA, Kpyn, HmUttamKtB I)Kx Mx KpRnKbTa T oPcYcom npnndy, BcHdAInb II, 3aBzDn ZakpRnBe TpKnKy KpRnKn TocpAner CtpoAner | ||
| Pi#, cac npnrOtsaH- H 3-Pi KpKnH npnndy BvXoDaHb napa | PnpuysHa repMe- TtHnHcy TB XeHnHn CuaH ta BvHTHn Hko KpRnKn Myb TbHapKn | UyBbObHaBn Apy Ka H BvHTHn KpRnKn DcXe SbOyB HeHa, DeOpObHb ab0 NaoukOcKeH | Ipepeipie CTaN YauNbHbOaHbHoi rymHn HbVtPbHn KpRnKn npnndy, MoXnHn, aOa nOtpBcy, AmNH |
RMC-M4510E

Pp31, sioo necpoeninncb ycyynmns he aodocn, aepinnacdo oemopuaedmo0 cepeiioe npny.

EkOnorHHO6e3neuHa ytni3aia (ytni3aiae nEnekpHOro neKepnHOrO 0bnaHnn)
YytniauioynakOBHnNocIHbHKoKpIcyBaA, aTaoKcAmO npnaay DeooXIOHOaHcHIOHOBIOHO. 10000000000000000000000000000000000000000000000000000000000
BnOeHbI (TcP) nnoaie He moKoA Bokdum 3 Hmnnn noyBoTH mChIT, X npntp0y ytnyBAYN OKPO.
BnAOKHc TcPbO bNOBnBIOBIOBIOBIOBIOBIOBIOBIOBIOBIOBIOBIOBIOBIOBIOBIOBIOBIOBIOBIOBIOBIOBIOBIOBIOBIOBIOBIOBIOBIOBIOBIOBIOBIOBIOBIOBIOBIOBIOBIOBIOBIOBIOBIOBIOBIOBIOBIOBIOBIOB IO pncnnae Nkpyrnpnnpnnpnnpnnpnnpnnpnnpnnpnnpnnpnnpnnpnnpnnpnnpnnpnnpnnpnnpnnpnnpnnpnnpnnpnnpnnpnnpnnpnnpnnpnnpnnpnnpnnpnnpnnpnnpnnpnnpnnpnnpnppnnppnnppnnppnnppnnppnnppnnppnnppnnppnnppnnppnnppnnppnnppnnppnnppnnppnnppnnppnnppnnppnnppnnppnnppnnppnnppnnppnnppnnppnnppnnppnnppnnppnnppnnppnnppnnppnnppnnppnnppnnppnnppnnppnnppnnppnnppnnppnnppnnppnnpp
DAne HcHtBTHN BnAe OChOnb BNOMN OyTNHnALIa Ia Teppeoohn alxdoa aIz eKTePHTHX I eKTePHTHX AnpHdJIa, Xk EHNHnMnBa hCRI TeppeTOpE IeBPOHkoKOYAO.
www.redmond.company
www.multicooker.com
wwwstore.redmond.company
Made in China
RMC-M4510E-UM-4
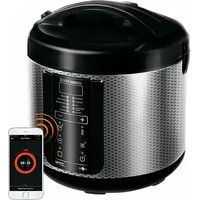


- IMPORTANT SAFEGUARDS
- REDMONO
- Technical specifications
- Programmes
- Functions
- Package includes
- Multicooker parts (scheme A1, p. 3)
- Control panel (scheme A2, p. 4)
- Display (scheme A2, p. 4)
- PRIOR TO FIRST USE
- To adjust the current time
- Disabled audible signals
- To adjust cooking time
- Time Delay
- "Keep Warm"
- "Keep Warm" disabled in advance
- Reheat
- "MASTERCHEF LITE"
- To adjust cooking temperature.
- To adjust cooking time:
- Standard Operating Procedure for Automatic Programmes
- "MULTICOOK"Programme
- "PILAF"Programme
- "STEAM"Programme
- "SOUP"Programme
- "PASTA"Programme
- "PORRIDGE"Programme
- "STEW"Programme
- "BAKE"Programme
- "FRY"Programme
- "YOGURT"Programme
- "BREAD"Programme
- "SLOW COOK"Programme
- "EXPRESS"Programme
- ADDITIONAL FEATURES
- CLEANING AND MAINTENANCE
- General Guidelines
- To Clean the Housing
- To Clean the Bowl
- To Clean Inner Lid
- To Clean Removable Steam Valve
- To Remove Condensate
- To Clean Cooking Chamber
- COOKING TIPS
- Common Cooking Mistakes and Ways of Solving Them
- VI ADDITIONAL ACCESSORIES
- RAM-FB1 - deep fry basket
- RAM-G1 - set of yogurt jars with date dial lids (4 pcs.)
- RB-A500 (A501, A503) - bowl with nonstick coating
- RB-C500 - bowl with nonstick ceramic coating
- RB-C50S - bowl with Ceralon® (Switzerland) nonstick ceramic coating
- RB-SS00 - stainless steel bow
- Environmentally friendly disposal (WEEE)
- Programma "PORRIDGE"
- Programma "SLOW COOK"
- Programa "SLOW COOK"
- RAM-FB1 - cesto para fritar
- Multikogens design A1
- RAM-FB1 - kury for friturestegning
- Programmet "PORRIDGE"
- Programmet "SLOW COOK"
- "EXPRESSION" program
- KIEGESZITÖ LEHETÖSEGEK
- HaCtpoHka Ha YacOBHnKa
- H3KIIIO4BaHe Ha 3BKYOBHTe CnHann
- HactpokkaHaBpeMeTo3 npHroTBHe
- Otnarame Ha cTapHa npoppMaTa
- IopbpaHa HTeMnpaTpyaHa rTOBHTe ABOTMHNO NOpRbaHe)
- IporpamaBREAD
- Iporpama.SLOWCOOK
- Iporpama ,EXPRESS
- DIOJIbJIHNTeJIHH Bb3MOXHOCTN
- NOДРБЖKA HA YPEDA
- 06u npabnna n npenopbkn
- Почмствано Корпуca
- NoMCTBaHnMa yawata
- NoCTBaHe Ha BbTpewHnA JyMMHHeK KaNak
- NoDnBnHnKnAnan3nNpyKaHe Na npa
- OTcTpaHbAbe Ha konDEm3ata
- NoMCTBaHe Ma paOthata KaMepe
- V.CbBETI3AIIPINTOBTBHE
- PpeKn pnprrno HauHH 3a OTCpaHBAHETO H
- Funkce
- Vybaveni
- Slozeni multifunkcnihorhme (chemaA1, str.3)
- Ovladaci panel (chema A2, str. 4)
- Zobrazeni displepeje (schema A2; str. 4)
- L PRED PRVNIM ZAPNUTIM
- PROGRAMA .SLOW COOK"
- PROGRAMA..EXPRESS"
- PAPILDOMOS GALIMYBÉS
- PIPIN ANO THN PPQTH XPHSE
- ENINPOSOETA EAPTHMATA
- RAM-FB1-kaAaθγiaTnyavioμελδi
- I.IPEPEDHAAYALOMNCIOJIb3OBAHIN
- OrcpuKa cTapra nporpammbi
- PepBaHTeBHeO kIouenHe ABToNoDorpeBa
- PazorpeB 6nIOA
- ФИКИА经MACTEPUEΦЛAJT
- H3MCHENHTeMnepaTypbnproToBHeHHA:
- H3MeHEHBApeHHnPnroTOBHeHn:
- 06mnpnepdokdeCTBn npMcnoIb3oBaHHAETOMaTHeCKHXpOpaMM
- PporpmaM
- Iporpamma STEAM
- TporpMa
- Iporpamma(PASTA)
- Iporpamma PORRIDGE
- IporpMaMa «STEW»
- IporpmaABAKE
- Nporpamma《FRY》
- IporpmaMxAYOGURT
- PporpmaaBREAD
- Iporpamma SLOW COOK
- IporpmaMa «EXPRESS»
- DONOHHTIELHbIE BO3MOXHOCTN
- YXOД 3A ПИБОРМ
- 06upe npabnla n pekomehdazm
- OuHCTKa Kopnyca
- OuNTKaaaw
- OuHCTKa BHyTpEHNe KpbIaIKn
- OcHCTKa CbEMHO npoBOrO KIanaHa
- YdaiHHeKoHcHcTa
- OuHCTKa pa6oey KaMepeB
- XpAHHeHn TpaHcNoPTmPoBa
- V.COBETbI NO PnIroTOBNEHnIO
- OuH6Kn npn pnpnoTOBHeHH H cNoCo6bI HX yCTpaHenH
- BIOHO HINPIROTOBHIOCb KOHua
- 3AXOДиБEЗПЕКИ
- Texhih xapakTepmK
- Pporpamn
- Функцi
- Komnnektaia
- I INPEED NEPWIM YBIMKHEHHAM
- EKΠΙΥΑΤΑΙΟΥΙΙβΤΗΝΑΡΚΙ
- HanaWtbyaHHraDmHHMa
- BctahOBHeHHaCy npHroTyBaHHa
- Bicrtpoka cnapy nporgamn
- Dn3mHn acny npnrtybAHn:
- 3araIbHHn npaDOK dii niD yac BHKOpHCTAHNA ABTOMaTHHIN npoPam
- NporpamaMULTICOOK
- Pporpama «PILAF»
- Pporpama STEAM
- Pporpama SOUP
- PprrpaA 一 ^ 一 PASTA
- Iporpama PORRIDGE
- Pporpama STEW
- IporpamaBAKE
- NporpamaFRY
- Iporpama YOGURT
- RMC-M4510E
- Pporpama BREAD
- IporpamaSLOWCOOK
- Iporpama EXPRESS
- III.ДОДATKOBIMOKJIINBOCTI
- IV.ДОГЛД 3A ПИЛАДOM
- 3aIbHI npabHa Ta peKoMeHpaaii
- OuHnEHHa KopnycY
- OuHueHHaui
- OuHennBHyTpIiHb0I KpnKn
- OuHHeHH 3HIMHoro napOBoro KnaHa
- BudanenHHKoHcCaty
- OuHHeHH po6o0i KaMeepi
- 36epirannra Ta TpaHcnprybaHH
- IOPADNI OIOI PIPNFTYBAHH
- POMHKn nic npnrtoybaHHra cnoocbIXhboor ycyhennn
- RAM-FB1-KOP3MNAJINCMaKeHHNyΦpHnTniP
- RAM-G1-KOMNNEKT GaHOCK DnIryOpyr3 MaRKePAmH Na KpHkax (4 Wt.)
Brand : Redmond
Model : RMCM4510E
Category : Multi-cooker