
ACUTA - Kitchen hood ELICA - Free user manual and instructions
Find the device manual for free ACUTA ELICA in PDF.




| Product type | Cooker hood |
| Brand | ELICA |
| Model | ACUTA |
| Use | Extraction version (external evacuation) or recirculation version (internal recycling) |
| Number of speeds | 3 normal speeds + 1 intensive speed (5 minutes) |
| Lighting | LED, replacement by authorized service |
| Delayed shut-off | Available: 20 min (speed 1), 15 min (speed 2), 10 min (speed 3), 5 min (intensive) |
| Filter saturation indicator | Yes, for grease filter and activated charcoal filter |
| Grease filter | Metal, cleanable once a month (by hand or dishwasher) |
| Activated charcoal filter | For recirculation version, replace at most every 4 months |
| Minimum distance between hood and cooking surface | 65 cm for electric cookers, 75 cm for gas or mixed |
| Electrical supply | 230 V ~ 50 Hz (according to rating plate) |
| Energy consumption | Low-energy LED, 90% savings compared to traditional bulbs |
| Cleaning | Damp cloth with neutral liquid detergent, no abrasives or alcohol |
| Safety | Unplug before maintenance, do not use without filter, do not flame under the hood |
| Installation | Wall mounting or under cabinet, requires a qualified technician |
| Air outlet diameter | Top outlet B, diameter equivalent to the exhaust pipe |
| Standards compliance | European safety and performance directives (EN/IEC 60335, etc.) |
Frequently Asked Questions - ACUTA ELICA
User questions about ACUTA ELICA
0 question about this device. Answer the ones you know or ask your own.
Ask a new question about this device
Download the instructions for your Kitchen hood in PDF format for free! Find your manual ACUTA - ELICA and take your electronic device back in hand. On this page are published all the documents necessary for the use of your device. ACUTA by ELICA.
USER MANUAL ACUTA ELICA
EN Instruction on mounting and use
RU Instruction on mounting and use
UK Instruction on mounting and use
KK Instruction on mounting and use
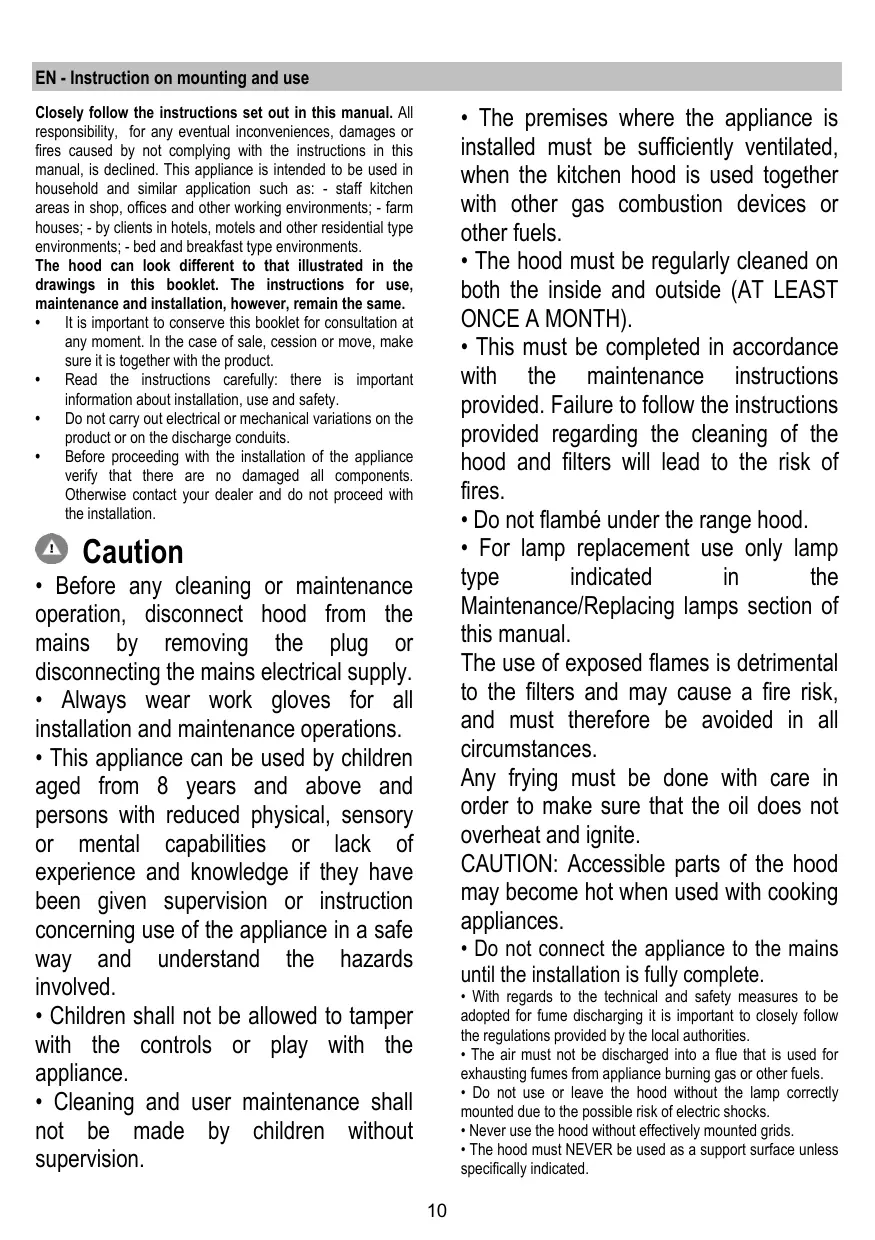
EN - Instruction on mounting and use
Closely follow the instructions set out in this manual. All responsibility, for any eventual inconveniences, damages or fires caused by not complying with the instructions in this manual, is declined. This appliance is intended to be used in household and similar applications such as: - staff kitchen areas in shops, offices and other working environments; - farm houses; - by clients in hotels, motels and other residential type environments; - bed and breakfast type environments.
The hood can look different to that illustrated in the drawings in this booklet. The instructions for use, maintenance and installation, however, remain the same.
It is important to conserve this booklet for consultation at any moment. In the case of sale, cession or move, make sure it is together with the product. - Read the instructions carefully: there is important information about installation, use and safety. - Do not carry out electrical or mechanical variations on the product or on the discharge conduits. - Before proceeding with the installation of the appliance verify that there are no damaged all components. Otherwise contact your dealer and do not proceed with the installation.
Caution
- Before any cleaning or maintenance operation, disconnect hood from the mains by removing the plug or disconnecting the mains electrical supply.
- Always wear work gloves for all installation and maintenance operations.
- This appliance can be used by children aged from 8 years and above and persons with reduced physical, sensory or mental capabilities or lack of experience and knowledge if they have been given supervision or instruction concerning use of the appliance in a safe way and understand the hazards involved. Children shall not be allowed to tamper with the controls or play with the appliance.
- Cleaning and user maintenance shall not be made by children without supervision.
- The premises where the appliance is installed must be sufficiently ventilated, when the kitchen hood is used together with other gas combustion devices or other fuels.
- The hood must be regularly cleaned on both the inside and outside (AT LEAST ONCE A MONTH).
- This must be completed in accordance with the maintenance instructions provided. Failure to follow the instructions provided regarding the cleaning of the hood and filters will lead to the risk of fires.
- Do not flambe under the range hood.
- For lamp replacement use only lamp type indicated in the Maintenance/Replacing lamps section of this manual.
The use of exposed flames is detrimental to the filters and may cause a fire risk, and must therefore be avoided in all circumstances.
Any frying must be done with care in order to make sure that the oil does not overheat and ignite.
CAUTION: Accessible parts of the hood may become hot when used with cooking appliances.
- Do not connect the appliance to the mains until the installation is fully complete.
- With regards to the technical and safety measures to be adopted for fume discharging it is important to closely follow the regulations provided by the local authorities.
- The air must not be discharged into a flue that is used for exhausting fumes from appliance burning gas or other fuels.
- Do not use or leave the hood without the lamp correctly mounted due to the possible risk of electric shocks.
- Never use the hood without effectively mounted grids.
- The hood must NEVER be used as a support surface unless specifically indicated.
- Use only the fixing screws supplied with the product for installation or, if not supplied, purchase the correct screws type.
- Use the correct length for the screws which are identified in the Installation Guide.
- In case of doubt, consult an authorized service assistance center or similar qualified person.
WARNING!
- Failure to install the screws or fixing device in accordance with these instructions may result in electrical hazards.
- Do not use with a programmer, timer, separate remote control system or any other device that switches on automatically.
- This appliance is marked according to the European directive 2012/19/EC on Waste Electrical and Electronic Equipment (WEEE).
- By ensuring this product is disposed of correctly, you will help prevent potential negative consequences for the environment and human health, which could otherwise be caused by inappropriate waste handling of this product.

- The symbol on the product, or on the documents accompanying the product, indicates that this appliance may not be treated as household waste. Instead it should be taken to the appropriate collection point for the recycling of electrical and electronic equipment. Disposal must be carried out in accordance with local environmental regulations for waste disposal.
- For further detailed information regarding the process, collection and recycling of this product, please contact the appropriate department of your local authorities or the local department for household waste or the shop where you purchased this product.
Appliance designed, tested and manufactured according to:
- Safety: EN/IEC 60335-1; EN/IEC 60335-2-31, EN/IEC 62233. Performance: EN/IEC 61591; ISO 5167-1; ISO 5167-3; ISO 5168; EN/IEC 60704-1; EN/IEC 60704-2-13; EN/IEC 60704-3; ISO 3741; EN 50564; IEC 62301.
- EMC: EN 55014-1; CISPR 14-1; EN 55014-2; CISPR 14-2; EN/IEC 61000-3-2; EN/IEC 61000-3-3. Suggestions for correct use to reduce environmental impact: Switch ON the hood at minimum speed when you start cooking and keep it running for a few minutes after cooking is finished. Increase the speed only in case of large amounts of smoke and vapor, and use boost speed(s) only in extreme situations. Replace the charcoal filter(s) when necessary to maintain good odor reduction efficiency. Clean the grease filter(s) when necessary to maintain good grease filter efficiency. Use the maximum diameter of the ducting system indicated in this manual to optimize efficiency and minimize noise.
Use
The hood is designed to be used either for exhausting or filter version.
Ducting version
The hood is equipped with a top air outlet B for discharge of fumes to the outside (exhaust pipe and pipe fixing clamps not provided). Connect the hood and discharge holes on the walls with a diameter equivalent to the air outlet (connection flange). Using tubes and discharge holes on walls with smaller dimensions will cause a diminution of the suction performance and a drastic increase in noise.
Any responsibility in the matter is therefore declined.
Use a duct of the minimum indispensable length.
! Use a duct with as few elbows as possible (maximum elbow angle: 90°). Avoid drastic changes in the duct cross-section.
Attention! If the hood is supplied with carbon filter, then it must be removed.
Filter version
In the case of not being able to discharge the fumes and the steam of cooking outside, the hood in the filter version can be used mounting the F deflector on the flue and one or more carbon filters (on the basis of the model possessed). The fumes and steam are recycled into the kitchen through upper grill H.
Attention! If the hood is not supplied with carbon filter, then it must be ordered and mounted.
Installation
The minimum distance between the supporting surface for the cooking equipment on the hob and the lowest part of the range hood must be not less than 65 cm from electric cookers and 75 cm from gas or mixed cookers.
If the instructions for installation for the gas hob specify a greater distance, this must be adhered to.

Electrical connection
The mains power supply must correspond to the rating indicated on the plate situated inside the hood. If provided with a plug, connect the hood to a socket in compliance with current regulations and positioned in an accessible area, after installation. If it is not fitted with a plug (direct mains connection) or if the plug is not located in an accessible area, after installation, apply a double pole switch in accordance with standards which assures the complete disconnection of the mains under conditions relating to over-current category III, in accordance with installation instructions.
WARNING!
Before re-connecting the hood circuit to the mains supply and checking the efficient function, always check that the mains cable is correctly assembled.
Mounting
Expansion wall plugs are provided to secure the hood to most types of walls/ceilings. However, a qualified technician must verify suitability of the materials in accordance with the type of wall/ceiling. The wall/ceiling must be strong enough to take the weight of the hood.
Do not tile, grout or silicone this appliance to the wall. Surface mounting only.
The hood is designed to be installed in a corner of the kitchen. In the case of the presence of panels and/or walls and/or lateral wall units, check that there is sufficient space to install the hood and that it is always possible to access the removable parts from the lower side.
Operation
The hood is fitted with a control panel with aspiration speed selection control and a light switch to control cooking area lights.
T1. Button ON/OFF lights (Led L1 lit) T2. Button OFF - Selection button suction speed (power) 1 (Led L2 lit) T3. Selection button suction speed (power) 2 (Led L2+L3 lit) T4. Selection button suction speed (power) 3 (Led L2+L3+L4 lit) T5. Selection button intensive suction speed (power) (Led L2+L3+L4 lit + Led L5 flashing) - duration 5 minutes - after which the hood automatically sets suction speed (power) 2.
Delayed switch-off of the hood (flashing LEDs):
It is possible to set the delayed hood switch-off by pressing again for more than 2 seconds the button of the suction speed (power) active at that time.
The available delayed switch-off options are:
Suction speed (power) 1:20 minutes
Suction speed (power) 2: 15 minutes
Suction speed (power) 3: 10 minutes
Intensive suction speed (power): 5 minutes
Filter saturation indicator
The hood is equipped with a function that warns the user, at regular time intervals, when the filters are saturated and it is necessary to perform their maintenance.
Grease filter saturation indicator: With the hood off (OFF), all suction speed (power) LEDs light up with a steady light for 40 seconds.
Activated charcoal filter saturation indicator: With the hood off (OFF), all suction speed (power) LEDs flash for 40 seconds.
Activation of the active charcoal filter saturation signal: normally, this function is disabled; to activate it,
switch off the hood (OFF) and simultaneously press buttons T3 and T5 for more than 3 seconds. LEDs L3 and L5 will start flashing.
To disable, repeat the operation: LEDs L3 and L5 light up with a steady light.
Resetting the filters' saturation indicator:
With the hood on (ON), press button T2 for more than 2 seconds; all LEDs will light up briefly.
Note: if necessary, repeat the operation in case both indicators (grease filter and activated charcoal filter) are active.
Maintenance
Cleaning
Clean using ONLY a cloth dampened with neutral liquid detergent. DO NOT CLEAN WITH TOOLS OR INSTRUMENTS. Do not use abrasive products. DO NOT USE ALCOHOL!
Grease filter
Fig. 16-18
Traps cooking grease particles.
The grease filter must be cleaned once a month using non aggressive detergents, either by hand or in the dishwasher, which must be set to a low temperature and a short cycle. When washed in a dishwasher, the grease filter may discolor slightly, but this does not affect its filtering capacity.
To remove the grease filter, pull the spring release handle.
Charcoal filter (filter version only)
Fig. 17
It absorbs unpleasant odors caused by cooking.
The saturation of the charcoal filter occurs after more or less prolonged use, depending on the type of cooking and the regularity of cleaning of the grease filter.
In any case it is necessary to replace the cartridge at least every four months.
The charcoal filter may NOT be washed or regenerated.
Circular charcoal filter
Apply one on each side as cover to both the shield grids of the motor impeller, then turn clockwise.
For the disassembly, turn counter-clockwise.
Replacing lamps
Fig. 19
The hood is equipped with a lighting system based on LED technology.
The LEDs guarantee optimum lighting, a duration up to 10 times as long as traditional lamps, and allow saving 90% electrical energy.
To replace lights, contact an authorized spare parts center.
Reset filter saturation indicator:
Signal for filter saturation
Exhaust air filter
In case of malfunction, the manufacturer accepts no responsibility.
The duct must be as short as possible. The duct must have as few bends as possible (maximum bend: 90°). Do not sharply reduce the duct cross-section!
Attention! If the hood is equipped with a filter with activated carbon, the filter must be replaced.
Filter saturation indicator
If it is not possible to remove the hood for cleaning, you can
Use the hood in the recirculation mode, mounting a deflector B in the ventilation duct and an activated carbon filter (depending on the model purchased). The air is discharged through the upper ventilation grille.
Attention! If the hood is not equipped with a filter with activated carbon, it must be installed before using the appliance.
MOnTnpaHe
MHHMaHHTO pa3CToHHe MEXdy NOBbpxHOCTTa, Ha KOrTO ce NOCTaBRT CbDOBete 3a TOBHe E Hai-NHCKATA qACT Ha kXHyENCKn acnPiATOP, Tp6Ba Da 6bDe He No-MAnKO OT 65cm B cnyaH a ENeKTPnuEckn Neekn Hne No-MAnKO OT 75cm, B cnyaH ra3oBN INI KOM6HNHPaHn neekn.
Ako B INCHPTyKUHnTe Ha ra3OBuYpeI 3a rotBHe e nocOeHo no-ToJIMo pa3CToHnE, To Tp8Ba Da ce Ima npEdn.

En.Bpb3ka
HanpexeHneTo B en.MpeXaTa Tp6Ba Da otroBapra Ha HanaPexeHneTo, KOeTo e NocOeHO Bbpyx EtNKeTa C daHHnTe 3a acnipatopa, noCTabEn OT bTpeuHata My cTpaHa. Ako e ChabdeH c UenCen CbpxeTe acnnpatopa KbM KOHTAK, CbOTBeCTBaUc Ha DeIcTBaUHte HopmN HAMnPauC ce Ha JecHO DoCTbHIO MRCTO DOpN i CNeL PrnkHIOVAHe HA MOtaxa. Ako He e ChabdeH c UenCeN (DInpeKTHo CBbP3BaHe KbM Pexkata), IUN UenCeJIbT He e Ha DOCTbHIO MRCTO CNeL PrnkHIOVAHe HA MOtaxa, hON03BaTE DByNOHOCEH PekbCBaC npoeHOPmTe, Taka Ye Da ce OcnIgyn PblHo N3KIOVAHe HA Pexkata npi CBpbXHAnpexeHne III, B CbOTBeCTBVe C npABINlAta 3a MOHTnPaHe.

BHIMAHNE!
Ipei Da CbPkTe OTHOBO acnnpaTopa KbM mpekaTn da npOBepTe daHfYHKUOnHpa npabINHO, npOBepe Ta nn Ka6Bt E MOHTpAn KAKTO Tp6Ba.
MOHTAX
Pn BCE TOBA, Bn npenopbYbAME da ce nocbBetbate c KbaIINΦmUpaH texHnK, 3a da CTE cnpyHn, Ye doCTABeHNte akcecoapn ca noDxOyAun 3a ueJTA. CTeHata, CbOTBeTHo TABAHbT, Tp8Ba Da 6bDat DoCTaBHyO CTabNIHn 3a da N3dbpxKAT Ha HATOBaBaNeto.
AcnipatopbTe npedHa3Hauen 3a nHCTaIIpaHe B bIbna KaXHraTa.
PnHaJIyMeTO Ha NaHeI,CTeH N/IIcSTpaHHyu KafoBe yBepTe Ce,Ye pa3NOnarate C DOCTaTBUHO MRCTO 3a da HCTaInpaTe acNpuTopa,Ne IMATE BNHaIg Be3npenTCTBeH DoCTbN Do NOBxHHte YAcTH O DOnHaTa cTpaHa.
Haun Ha ynoTpe6a
Acnpatobt cna6deneKcOMaHNO Ta6n C Bb3MOxHOCT 3apeyIpaHe ckOocTHa Ha acnpupaHe n IpeBkIOuBaTeI HaOCBETNeHMeTo Ha rotBapcknI PIOT.
3a6aBHeO n3KJIIOUbaHe Ha acnnpaTopa (CBeToIOIOIte npemrBaT):
Bb3MOxHc Da npGpAmipate 3a6abeHo N3KJIIOUbaHe Ha acnipatopa (OFF) KATO HATINCHETe OTHOBO N 3aJbPKNTE B npOblJXKeHne Ha NOBEeOT 2 cekyHm B MOMHa AKTINBIPAHATA CKOPCT (MOUHOCT) HA acnIPupaHe.
3a6abehOTO nKJIIOUbaHe e cbc cneHTo BpeMeTpaHe:
1-BACKOPOCT(MOUHOC)Haacnnpupahe:20MnHyTu 2-pa ckopoCt (MOUHOCT) Ha acnnpupahe: 15 MmHyTu 3-Ta ckopoCt (MOUHOC) Ha acnnpupaHe: 10 MInHyTn HHTe3nBbCA CKoPocT (MoIHOCT) Ha acnnpupahe: 5 MNHyTN
CnHahn3aunz 3a 3ambpcBaHe Ha nIITpnte
AcnipatopbT pa3nolaracf yHKun, npi K0rTo Ha onpeJeHEN INTEpBan OT Bpeme ce NOdaBa CNrHaJ, ye fHITPNTe ca 3aMbpcEH n e Heo6xOdmo da ce N3BbPsin noDpBkka.
CnHaHn3aun 3a 3ambpcBaHe Ha chnTbpa 3a Ma3HNHn: npn n3KJIIOueH acnnpatop (OFF) BCNUK CBeTOINOm 3a CKOpocCTTa (MOUHOCTTa) Ha acnnpuane ce 3aJeCTBat n OCTabAT BKJIOUeH N bIPOdbJIKeHne Ha 40 cekyHn.
CnHaJIH3aI3aMbpcBaHe HaΦnITbpa cakTNBeH BByIeH: npn n3KJIIOUeH acnIpaTOp (OFF) BCNUK CBeTOJNOi 3a ckOPOCTTA (MOUHOCTTA) Ha acnIpnpaHe npemIRBAT B npoIbJIKeHHe Ha 40 cekyHdN.
AkmubupaHaCu2Haun3aUma 3a 3ambpc8aHe Ha fummbpa c akmuehen b2nen: no npnHnCnHn3auyra e deakTbnBpHa. 3 da ja aKtnBpate n3KnUoTe acnnpaTop (OFF) HnatChete eHDOBpeMeHHo 6ytOnn T3 n T5 n 3adpbkte B npdoIjkeHne Ha noBeue ot 3cekydn.CbeToNDIOJnte
L3 n L5 1e 3anoyat da npemrBaT.
3a Da DeakTNBupate OTHOBO CnHnHaIIm3aunra
noBTopeTe onepaunra. CBeToDnOuL3 n L5 ce
BKNIOUByC NOCTOHHA CBETNIHa.
Hynpahe Ha cnHaun3aunra 3a 3ambpcBaHe Ha hnntpnte:
PnB KJIIOHEn acINpApToP (ON), HATNCHEte 6yTOH T2 n3aIpbXTe B pOIObJIKeHHe Ha NOBee ot 2 cekyHn. BcNKn CBeToDIOHNZe Ce BKJIIOUcat 3a KpaTko.
Benexka: ako n DBeTe CnHnI3aun (KaKTo Ta3n HaФиNTbpa 3a Ma3HnHn, Taka n Ta3n HaФиNTbpa c AKTINBEH BByJIe) ca AKTINBpuHn, NOBTOpe TE OepauJra.
NoDpBxKka
Cleaning
For cleaning, use ONLY a dry cloth moistened with neutral cleaning agents. DO NOT use sprays for cleaning appliances!
Avoid agents that contain abrasives
or solvents. DO NOT use alcohol!
Oil filter
Fig. 16-18
Filter the oil-containing parts after they have been removed.
Clean them with a soft cloth and neutral agents. If necessary, you can also clean them in the dishwasher at a low temperature using a short wash cycle.
Cleaning the oil filter in the dishwasher is possible, but this does not in any way impair its filtering capability.
To remove the oil filter, press the spring-loaded holders.
Active carbon filter (only for filter version)
Fig. 17
Press the locking tabs that are released at the front.
The active carbon filter should be replaced approximately every six months, depending on the type of cooking and how often you clean the filter.
In any case, it is necessary to replace the active carbon filter every four months or when the filter saturation indicator shows that it is necessary.
The grease filter is active.
Install the hood at the recommended height so that you are covered in front of the working area of the motor, then turn it clockwise.
For dismantling, turn it counterclockwise.
Lift the cover. Filters
Fig. 19
The hood is equipped with a lighting system with LEDs.
The LEDs guarantee optimal illumination, up to 10 times more powerful than traditional lamps, and allow 90% energy savings.
To replace the lamps, contact an authorized service center for spare parts.
the Installation Guide.
Use the hood with exhaust to the outside for appliances operating on gas or other fuels.
- Do not use the hood without lamps correctly installed, with the risk of electric shock.
- Never use the hood without the correctly installed filter grille!
- The hood should never be used as a support surface, unless explicitly indicated.
- Use only screws supplied with the product for installation, or if not included, purchase screws of the correct type.
- Install the correct length of screws as specified in the installation instructions. In case of doubt, consult the service center or qualified personnel.
WARNING!
- Failure to install the appropriate screws and accessories in accordance with these instructions may result in electrical shock hazards. Do not use the device with a programmer, timer, separate remote control, or any other device that switches on automatically.
This product is marked in accordance with European Directive 2012/19/EC on waste electrical and electronic equipment (WEEE).
By ensuring the correct disposal of this product, you will help prevent potential negative consequences for the environment and human health.

The symbol on the product or its accompanying documentation indicates that this product must not be treated as household waste. Instead, it should be handed over to the appropriate collection point for the recycling of electrical and electronic equipment.
Disposal must be carried out in accordance with local waste disposal regulations.
For more detailed information on the handling, disposal, and recycling of this product, please contact your local authorities, the waste disposal service, or the store where you purchased the product.
The device has been designed, tested, and manufactured in accordance with:
- Safety: EN/IEC 60335-1; EN/IEC 60335-2-31, EN/IEC 62233.
- Performance characteristics: EN/IEC 61591; ISO 5167-1; ISO 5167-3; ISO 5168; EN/IEC 60704-1; EN/IEC 60704-2-13; EN/IEC 60704-3; ISO 3741; EN 50564; IEC
62301.
EMC: EN 55014-1; CISPR 14-1; EN 55014-2; CISPR 14-2; EN/IEC 61000-3-2; EN/IEC 61000-3-3. Use the hood at the lowest speed when cooking, and leave it running for a few minutes after cooking to remove odors. Increase the speed only when necessary, for example, when cooking with large amounts of steam or smoke. Clean or replace the filters when necessary to maintain good performance. Use the maximum diameter of the ducting system as specified in this manual to optimize efficiency and minimize noise.
Use
The hood is designed to operate in extraction mode (air exhausted outside) or recirculation mode (air recirculated inside).
The hood exhaust outlet with the upper outlet opening in the wall discharges smoke outside (version with external air exhaust - the exhaust pipe and its fastening are not included in the kit). Connect the outlet to the exhaust pipe with a diameter corresponding to the air outlet opening (connecting flange).
Installing pipes with a smaller diameter will reduce the suction power of the air and sharply increase the noise level.
The manufacturer is not responsible for any damage caused by failure to follow the instructions.
Use a pipe with the minimum necessary length. Use a pipe with the minimum number of bends (maximum bend: 90°). Avoid sharp changes in the pipe section.
Attention! If the hood is equipped with a charcoal filter, remove it.
Recirculation version
If the discharge of smoke and steam from the kitchen is not possible, you can use the recirculation version. When installing the deflector and one or more charcoal filters (depending on your model), the filtered air is recirculated into the kitchen through the upper grille.
Attention! If the hood is not equipped with a charcoal filter, install it before use.
Installation
The distance between the lower edge of the hood and the cooking surface must be at least 65 cm for electric hobs, and at least 75 cm for gas or combination hobs.
If the installation instructions for the gas hob specify a greater distance, take that into account.

Electrical connection
The mains voltage must match the voltage indicated on the data plate located inside the appliance. If the hood is equipped with a plug, connect it to a suitable socket. It must comply with current regulations and be located in an accessible place. The hood can be switched on after installation. If the hood is not equipped with a plug (direct connection to the mains) or the socket is not in an accessible place, also after installation, use an approved two-pole switch that ensures complete disconnection from the mains under overvoltage category III, in accordance with the installation instructions.

Attention!
Install the power supply to the electrical system and verify its correct functioning, making sure the power cable is properly connected.
Installation
The extractor is equipped with a bracket for mounting it on a wall or ceiling. However, it is necessary to contact a qualified technician and ensure that the materials of the wall/ceiling are suitable for this type of installation. The wall/ceiling must be sufficiently strong, taking into account the weight of the device.
The extractor is designed for installation on a wall or ceiling.
In case of installation on a wall or for hanging side elements, check that there is enough space for installing the extractor, and that there is always the possibility of free access to the moving parts from the front side.
Operation
The extractor is equipped with control buttons for adjusting the extraction speed and for switching on the light to illuminate the work surface of the hob.
| L1 | L2 | L3 | L4 | L5 |
| T1 | T2 | T3 | T4 | T5 |
T1. Light on/off button (LED L1 on)
T2. Off button - Speed (power) selection button for air extraction 1 (LED L2 on)
T3. Speed (power) selection button for air extraction 2 (LED L2+L3 on) T4. Speed (power) selection button for air extraction 3 (LED L2+L3+L4 on) T5. Speed (power) selection button for intensive extraction (LED L2+L3+L4 on + LED L5 flashing - duration 5 minutes - after which the extractor automatically sets the speed (power) of extraction 2.
Delayed shutdown of the extractor (LED flashing):
It is possible to set a delayed shutdown of the extractor (off), by pressing and holding for more than 2 seconds the speed (power) button of extraction that is active at that moment.
The delayed shutdown times are only the following:
Speed (power) extraction 1: 20 minutes
Speed (power) extraction 2: 15 minutes
Suction speed (power): 10 minutes
Suction speed (power) intensive: 5 minutes
Filter saturation indicator
The exhaust air function alerts the user at regular intervals when filter saturation requires preventive maintenance.
Grease filter saturation indicator: With the exhaust air hood switched off (OFF), all suction speeds (powers) are activated with a flashing light for 40 seconds.
Activated carbon filter saturation indicator: With the exhaust air hood switched off (OFF), all suction speeds (powers) flash for 40 seconds.
Activation of the activated carbon filter saturation signal: The signal is deactivated to activate it, switch off the exhaust air hood (OFF) and press buttons T3 and T5 simultaneously for more than 3 seconds, then L3 and L5 flash.
To deactivate, repeat the operation, then L3 and L5 switch on with a flashing light.
Return to the initial position of the saturation signal
With the exhaust air hood switched on (ON), press button T2 for more than 2 seconds, then all LEDs switch on briefly.
Note: if necessary, repeat both operations in the case of two active signals (grease filter and activated carbon filter).
Maintenance
Cleaning
For cleaning, use only a soft cloth moistened with neutral liquid detergent. Do not use any tools for cleaning. Do not use products containing abrasive materials. Do not use alcohol!
Grease filters
Fig. 16-18
Remove the grease filter, located under the hood.
The filter should be washed with non-abrasive detergents, in the dishwasher or by hand at a low temperature, in an economical cycle.
Washing in the dishwasher may cause some discoloration of the grease filter, but its filtering characteristics remain absolutely unchanged.
To remove the grease filter, pull the spring-loaded handle of the filter towards you.
Charcoal filter (only for recirculation version)
Fig. 17
Remove the grease filters from the hood.
Saturation of the charcoal filter occurs after a more or less long period of operation, determined by the type of hood and the frequency of cleaning of the grease filters. In any case, replace the cartridge at the latest every 4 months.
The charcoal filter cannot be washed or regenerated.
Install the charcoal filter
Cover the filter with the protective grilles on both sides to protect the motor rotor, then insert the filter along the guide.
The plug is prepared for installation in the kitchen hood.
If the side panel is too tight or too loose, check that there is enough space for installation, so that it can be installed without obstacles, and that it fits from the rear side.
Operation
Control panel for the device with liquid level control and light control for illuminating the working surface.
2nd copy (dry): 15 minutes
3rd copy (dry): 10 minutes
4th copy (dry): 5 minutes
Liquid level indicators
The liquid level sensors are designed to signal the need for maintenance of the device.
Main liquid level indicator: When the device is turned off (OFF), all indicator lights flash for 40 seconds and then go out.
Additional liquid level indicator: When the device is turned off (OFF), all indicator lights flash for 40 seconds and then go out.
Additional liquid level sensor test: Before turning on the device, to test it, press and hold the OFF button and the T3 and T5 buttons simultaneously for 3 seconds. The L3 and L5 indicator lights will flash. This indicates that the device is ready for operation.
To reset the liquid level indicators:
When the device is turned on (ON), press the T2 button for more than 2 seconds; all indicator lights will turn off.
Note: If necessary, the indicators (main and additional liquid level) will be reset automatically when the device is turned on.
Technical maintenance
Cleaning
For cleaning, use only a soft cloth dampened with water. Do not use abrasive cleaners! Do not immerse the device in water!
Figure 16-18
The filter must be installed in the water supply line.
If the filter is not installed, the machine may be damaged by aggressive impurities at high temperatures. It is possible to install the filter without draining the machine, but then it must be cleaned of impurities. To remove the filter, turn off the water supply and open the drain valve.
Water filter (in the form of a water filter) 17-Figure
Install the filter in the water supply line.
The filter replacement interval depends on the water quality and the amount of water used. If the filter is clogged, it must be replaced. Regardless of the filter type, replace it at least every 4 months.
Do not use the filter if it is damaged or has been in contact with chemicals.
Replacing the water filter
To replace the filter, turn off the water supply and open the drain valve. Then remove the old filter and install a new one.
Cleaning
Figure 19
The housing is made of high-quality plastic based on modern technology.
The plastic parts are resistant to high temperatures, do not contain harmful substances, and are 90% recyclable.
To clean the parts, use a soft cloth and mild detergent.
17
19
L1
L2
L3
L4
L5
#
#
00
000
00
T1
T2
T3
T4
T5
RESET bdo 10000000000000000000000000000000000000000000000000000000000

EN/IEC 60335-2-31; EN/IEC 60335-1; EN/IEC 62233; EN/IEC 61591; ISO 5167-1; ISO 5167-3; ISO 5168; EN/IEC 60704-1; EN/IEC 60704-2-13; EN/IEC 60704-3; ISO 3741; EN 50564; IEC 62301.
EN 55014-1; CISPR 14-1; EN 55014-2; CISPR 14-2; EN/IEC 61000-3-2; EN/IEC 61000-3-3.
For a i aai, the minimum value of the denominator is k.
12
1
Therefore, the area of triangle OBC equals the area of triangle COD plus the area of triangle BOC minus the area of triangle BOC.
1.4:1 jj1, jj
a. = all a. all
A. (1)(2)
a 1
i 1
jill jai aol clog 2g:clalil a
jol jolni
i 1
15 jill a 3g 15
aui 1 aui iui aui
aIj j 10000000000000000000000000000
jie a jiyiyjaiy jia jiall Jg jy
A. + = 0 A. ,


- EN - INSTRUCTION ON MOUNTING AND USE
- CAUTION
- WARNING
- USE
- DUCTING VERSION
- FILTER VERSION
- INSTALLATION
- ELECTRICAL CONNECTION
- MOUNTING
- DO NOT TILE, GROUT OR SILICONE THIS APPLIANCE TO THE WALL. SURFACE MOUNTING ONLY
- OPERATION
- DELAYED SWITCH-OFF OF THE HOOD (FLASHING LEDS)
- FILTER SATURATION INDICATOR
- RESETTING THE FILTERS' SATURATION INDICATOR
- MAINTENANCE
- CLEANING
- GREASE FILTER
- FIG
- CHARCOAL FILTER (FILTER VERSION ONLY)
- CIRCULAR CHARCOAL FILTER
- REPLACING LAMPS
- RESET FILTER SATURATION INDICATOR
- SIGNAL FOR FILTER SATURATION
- EXHAUST AIR FILTER
- MONTNPAHE
- EN.BPB3KA
- BHIMAHNE
- MOHTAX
- HAUN HA YNOTPE6A
- CNHAHN3AUNZ 3A 3AMBPCBAHE HA NIITPNTE
- NODPBXKKA
- OIL FILTER
- ACTIVE CARBON FILTER (ONLY FOR FILTER VERSION)
- THE GREASE FILTER IS ACTIVE
- LIFT THE COVER. FILTERS
- RECIRCULATION VERSION
- ATTENTION
- RETURN TO THE INITIAL POSITION OF THE SATURATION SIGNAL
- GREASE FILTERS
- CHARCOAL FILTER (ONLY FOR RECIRCULATION VERSION)
- INSTALL THE CHARCOAL FILTER
- LIQUID LEVEL INDICATORS
- TECHNICAL MAINTENANCE
- WATER FILTER (IN THE FORM OF A WATER FILTER) 17-FIGURE
- REPLACING THE WATER FILTER
- L
- T
Brand : ELICA
Model : ACUTA
Category : Kitchen hood