VIAGGIO CONVERTIBLE - Convertible car seat PEG PEREGO - Free user manual and instructions
Find the device manual for free VIAGGIO CONVERTIBLE PEG PEREGO in PDF.
| Product Type | Convertible car seat group 2/3 |
| Brand | Peg-Perego |
| Model | Viaggio 2/3 Surefix |
| Approval | UN/ECE R44/04 |
| Child weight | 15 to 36 kg |
| Recommended age | Approximately 3 to 12 years |
| Installation type | 3-point seat belt or Surefix (Isofix) |
| Installation orientation | Forward facing |
| Headrest adjustment | 6 positions, height adjustable |
| Backrest recline | Yes, follows car seat recline |
| Cup holders | 2 removable side cup holders |
| Cover | Removable and washable fabric |
| Shock absorption | Integrated polystyrene (seat, backrest, headrest) |
| Maintenance | Clean with a damp cloth, no solvents |
| Spare parts | Only original Peg-Perego, contact customer service |
Frequently Asked Questions - VIAGGIO CONVERTIBLE PEG PEREGO
User questions about VIAGGIO CONVERTIBLE PEG PEREGO
0 question about this device. Answer the ones you know or ask your own.
Ask a new question about this device
Download the instructions for your Convertible car seat in PDF format for free! Find your manual VIAGGIO CONVERTIBLE - PEG PEREGO and take your electronic device back in hand. On this page are published all the documents necessary for the use of your device. VIAGGIO CONVERTIBLE by PEG PEREGO.
USER MANUAL VIAGGIO CONVERTIBLE PEG PEREGO
EN Instructions for use
FR Notice d'emploi
RU INHCTpykunno nIO nIb3OBaHnIO
TR Kullanim kilavuzu
HR/SRB/MNE/BiH Upute za uporabu
Thank you for choosing a Peg-Pérego product.
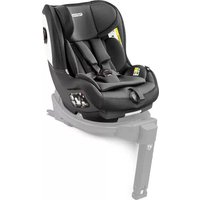
Car seat, Viaggio 2/3 Surefix, "Universal" model with belts
- Homologated in accordance with European standard UN/ECE R44/04 for children weighing from 15 to 36kg (app. 3 - 12 years).
- Compatible with most car seats, though not all.
- The child car seat can be correctly installed if the operation and maintenance manual of the vehicle specifies that it is compatible with "universal" fixing systems.
- This child car seat is classified as "universal" and meets more severe homologation criteria as compared to previous models, which did not have an homologation label.
- The child car seat can only be used in approved cars, fitted with safety belts with three static fixing points and winder, homologated in accordance with regulation UN/ECE R°16 or equivalent regulations.
- The use of safety belts with two fixing points or an abdominal fixing point is forbidden.
Car seat, Viaggio 2/3 Surefix, "Semi-universal" model, with belts and Surefix
- Homologated in accordance with European standard UN/CE R44/04 for children weighing from 15 to 36kg (app. 3-12 years).
L'aggancio con i connettori surefix garantisce una maggior stabilità e sicurezza in auto, ma non sostituisce la funzione delle cinture del veicolo. - The use of safety belts with two fixing points or an abdominal fixing point is forbidden.
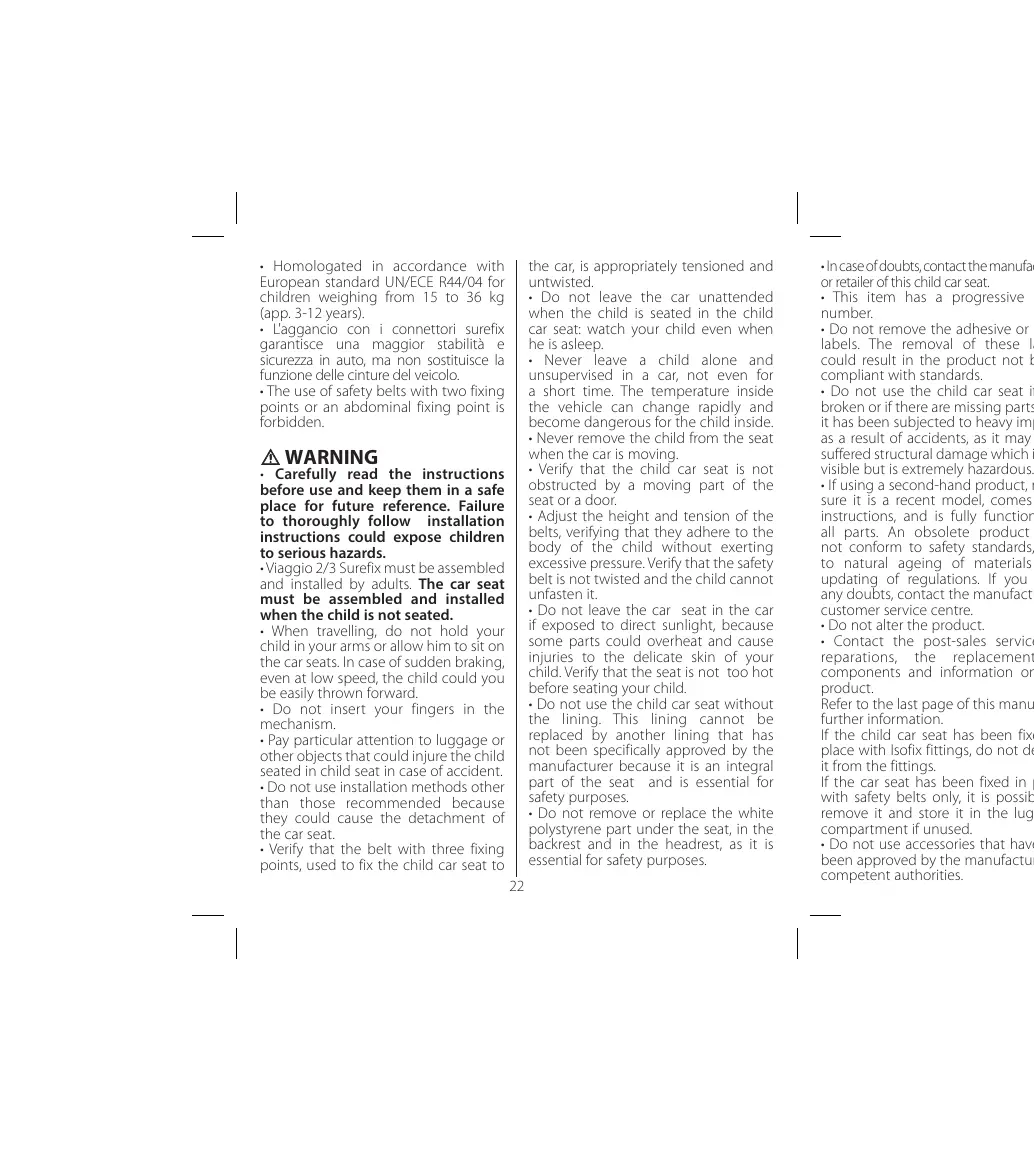
WARNING
- Carefully read the instructions before use and keep them in a safe place for future reference. Failure to thoroughly follow installation instructions could expose children to serious hazards.
Viaggio 2/3 Surefix must be assembled and installed by adults. The car seat must be assembled and installed when the child is not seated. - When travelling, do not hold your child in your arms or allow him to sit on the car seats. In case of sudden braking, even at low speed, the child could you be easily thrown forward.
- Do not insert your fingers in the mechanism.
- Pay particular attention to luggage or other objects that could injure the child seated in child seat in case of accident.
- Do not use installation methods other than those recommended because they could cause the detachment of the car seat.
- Verify that the belt with three fixing points, used to fix the child car seat to
the car, is appropriately tensioned and untwisted.
- Do not leave the car unattended when the child is seated in the child car seat: watch your child even when he is asleep.
- Never leave a child alone and unsupervised in a car, not even for a short time. The temperature inside the vehicle can change rapidly and become dangerous for the child inside.
- Never remove the child from the seat when the car is moving.
- Verify that the child car seat is not obstructed by a moving part of the seat or a door.
- Adjust the height and tension of the belts, verifying that they adhere to the body of the child without exerting excessive pressure. Verify that the safety belt is not twisted and the child cannot unfasten it.
- Do not leave the car seat in the car if exposed to direct sunlight, because some parts could overheat and cause injuries to the delicate skin of your child. Verify that the seat is not too hot before seating your child.
- Do not use the child car seat without the lining. This lining cannot be replaced by another lining that has not been specifically approved by the manufacturer because it is an integral part of the seat and is essential for safety purposes.
- Do not remove or replace the white polystyrene part under the seat, in the backrest and in the headrest, as it is essential for safety purposes.
and
ended child when
and in for inside and inside.
is not of the
of the to theerting safety cannot
he cancausecauseyourohot
without it be has by the integral for
white in the s it is
- In case of doubts, contact the manufacturer or retailer of this child car seat.
- This item has a progressive serial number.
- Do not remove the adhesive or sawn labels. The removal of these labels could result in the product not being compliant with standards.
- Do not use the child car seat if it is broken or if there are missing parts, or if it has been subjected to heavy impacts as a result of accidents, as it may have suffered structural damage which is not visible but is extremely hazardous.
- If using a second-hand product, make sure it is a recent model, comes with instructions, and is fully functional in all parts. An obsolete product may not conform to safety standards, due to natural ageing of materials and updating of regulations. If you have any doubts, contact the manufacturer's customer service centre.
- Do not alter the product.
- Contact the post-sales service for reparations, the replacement of components and information on the product.
Refer to the last page of this manual for further information.
If the child car seat has been fixed in place with Isofix fittings, do not detach it from the fittings.
If the car seat has been fixed in place with safety belts only, it is possible to remove it and store it in the luggage compartment if unused. - Do not use accessories that have not been approved by the manufacturer or competent authorities.
1. IMPORTANT
Viaggio 2/3 Surefix": this car seat, group 2/3, must be installed in the direction of travel.
- Do not install "Viaggio 2/3 Surefix" in an opposite or transversal location as compared to the direction of travel.
- It is always advisable to fit the child seat on the rear seats and on the passenger's side.
- If the child seat is installed on the front seat, it is advisable to place it as far as possible from the dashboard. If you experience problems during the installation of Viaggio 2/3 Surefix, try lifting the headrest without removing it.
Components of the product
- Inspect the content of the package and contact the Customer Care if some items are missing.
The child car seat includes: 1 headrest (a), 1 backrest (b), 1 seat (c).
Backrest and headrest are factory assembled. To assemble correctly the product please follow the instructions carefully.
Product assembly prior to use
- Rotate the red stops in the open position and slide the backrest in the housings located behind the seat as shown in the picture.
-
Keeping the product flat, close the red stops until a click is heard.
-
Lift the backrest of the child seat until you hear it click (fig_a).
The backrest can move between the two locks, as indicated in figure b. When the operation is completed, the product is free-standing.
Features of the product
6- The headrest can be adjusted in 6 positions. Lift the handle on the rear of the backrest and position it at the desired height.
IMPORTANT: as the child grows, it is necessary to adjust the height according to the stature of the child.
IMPORTANT: after completing the operation, try moving the headrest to verify that it is correctly fitted in place.
7. Viaggio 2/3 Surefix is fitted with two lateral and removable drink holders.
8. Viaggio 2/3 Surefix is fitted with a reclination system that guarantees maximum comfort. To recline the seat, pull the handle on the front and simultaneously lift the seat.
9. If possible, recline the car's backrest while the child is asleep and then recline the backrest of the child seat to the same slant.
The Viaggio 2/3 Surefix backrest will adapt to the slant of the car's backrest, guaranteeing greater comfort for your child.
Fitting the child car seat with the safety belts and Surefix fittings
For cars fitted with Isofix hooks
This method can be used only if the car is fitted with Isofix hooks.
- To stretch the Surefix hooks, press the button on the front inside the bag, as shown in the figure, and stretch them manually.
- Fix the Surefix connectors to the Isofix hooks of the car seat, verifying that they "click" in place. Tension the belt and simultaneously push the child car seat towards the backrest of the car seat.
IMPORTANT: after completing the operation, try moving the seat to verify that the Isofix fittings have been correctly hooked to the Isofix fittings. - To detach the Surefix connectors of the child car seat from the Isofix hooks, press the button on the front inside the bag and release the connectors belts in order to be able to manually detach them by pressing the safety lever situated on the hooks, as shown in the figure.
Fitting the child car seat with the safety belts For cars that are NOT fitted with Isofix fittings
13- Place Viaggio 2/3 Surefix on the car seat in the direction of travel, as shown in the figure, and place the child on the seat.
How to secure your child on Viagra 2/3 Surefix
14- Secure your child with the car safety belt as shown in the figure.
15. Fix the car safety belt to the car, ensuring that it clicks in place. Position the two sections of the belt as shown in the figure.
16. To complete the fixing, insert the safety belt diagonally in the upper slot above the child's shoulder.
IMPORTANT: if the belt is slack, tension it. Verify that the belt is always tensioned and untwisted.
- The safety belts are correctly positioned if the child's shoulders are below the intersection point of the safety belts, as shown in the figure.
IMPORTANT: the safety belts should not be too above or below the child's shoulders.
How to remove the lining from the bag
When removing the lining of Viaggio 2/3 Surefix, do NOT detach the three elements - headrest, backrest, seat - but keep them together.
REMOVE THE LINING FROM THE SEAT:
18- Detach the small hooks of the seat bag from the points and following the sequence shown in the figure. Remove the central belt.
- Remove the rigid ties as shown in the Figure.
REMOVE THE LINING FROM THE BACKREST:
- Remove the rear cover by pulling it outwards as shown in the figure.
21- Remove all the elastic straps. - Remove the bag.
REMOVE THE LINING FROM THE HEADREST:
- Remove the cover from the rear of the headrest by pulling it outwards and releasing the two elastic bands as shown in the figure.
- Remove the bag.
Maintenance of the padding
Brush the fabric parts to remove dust.
- When washing, closely follow the instructions stated on the label sewn into the cover.
- Do not use chlorine bleach.
- Do not iron.
- Do not dry clean.
Do not remove stains with solvents.
- Do not tumble dry.
How to reline the bag RELINING THE SEAT:
- Insert the rigid ties in the fabric of the seat, verifying that that the hooks project.
Fix the small hooks to the seat, starting from the three more external, insert the central belt into the slot, then fasten the two most internal hooks. - Fasten the side automatic buttons.
How to cover the car seat Proceed to perform the operations shown in figures 18 through 24 in reverse order.
Accessories
- Travel Bag Car Seat: practical travel bag that keeps the car seat clean and protected.
Serial numbers
26 The following information on Viaggio 2/3 Surefix is provided below the seat: product name, production date and serial number.
27. The homologation label of Viaggio 2/3 Surefix can be found in the lower section on the rear of the back rest.
Product cleaning
- This product requires a small amount of maintenance. Cleaning and maintenance must only be carried out by adults.
- It is advisable to keep all the moving parts clean.
- Clean the plastic parts periodically with a damp cloth. Do not use solvents or similar substances.
- Brush the fabric parts to remove dust.
- Do not clean the polystyrene shock absorbing device with solvents or other similar products.
- Protect the product from atmospheric agents: humidity, rain or snow. Extended exposure to sunshine can cause colour changes
in many materials.
- Store the product in a dry environment.
How to read the approval label
- This paragraph explains how to interpret the approval label (orange label).
- The label is double because this car seat is approved for two types of installation in cars:
- SUREFIX fixing system (the indication SEMI-UNIVERSAL indicates that the child car seat is compatible with the ISOFIX).
- Attachment systems using static or inertia-reel three-point safety belts (the term UNIVERSAL indicates compatibility of the car seat with vehicles fitted with this type of belt).
- The top of the label displays the trademark of the manufacturing company and the name of the product.
The letter E in a circle indicates the European approval mark and the number indicates the country that issued the approval (1: Germany, 2: France, 3: Italy, 4: Netherlands, 11: Great Britain, 24: Republic of Ireland). - Approval number: if it starts with 04, this indicates the fourth amendment (the one currently in force) of Regulation R44.
Reference standard: UN/ECE R44/04. - Production serial number: on issue of approval, each car seat is personalized with its own number.
PEG-PEREGO S.p.A.
Peg-Perego SpA adopts a quality management system certified by TUV Italia Srl in accordance with the ISO 9001 standard. Peg Pérego can make changes at any time to the models described in this publication for technical or commercial reasons.
Peg-Perego after-sales service
If any parts of the item get lost or damaged, only use genuine Peg Pérego spare parts. For any repairs, replacements, information on the products and sales of genuine spare parts and accessories, contact the Peg Pérego Assistance Service and state the serial number of the product, if present.
tel. 0039/039/60.88.213
All intellectual property rights on the contents of this manual are property of PEG PEREGO S.p.A. and are protected by the laws in force.
FR_Français
village offaitementela est
ez les qu'squ'a
e-auto
entre la
roduit
duit
en 6 arrirée auteur
re la égler par
ation ,placeril est
quipéraux
quiépérur un, tirernt et it.
Gasper 50-20862 ARCORE (MB), Italy
(Bva De Facrepi 50)
20862 Apkope (M5), IITaIIaI.
CtpaHa npOn3BODCTBa:ITanIa

TR_Türkçe
Pid Yac 36npaHH i BCTAHOBNEH H dTHHa He NOBHHa nepe6yBaTn B ABTOKpicni.
Пд.часоиДКИУжDHOMHYa9I He TpIMaHTe DnTNUHу KaPyKxI He ⅢO3BONJIHTe I CnDITN OyDb-DE B
abTOMoBjN, OKpIM ABTOKpICna. Y BnIaNky paNTOBORaJIbMbYBaHNH, HABITb HA MAniI IuNbIKOCTi, IUNTHaMOKe BVCKOB3HyTN, i II MOKe KINHTyBnepeD.
He BCTabJnTe nIbIcB MExaH3Mn.
- Pπιδιλίητε ΜΟςκυνήγ γυβαγοροΜιεύην δαγαχγ κυι ἀνιχόν τηρεμίΜΙθν BΑθΤΟΜΟΒίπι, Μύς ΦΟῦ Θε έραβΜγαινήν ὅβατόν Μακρίσην γ βυπαύκην αβαίρι.
He 3aTocObyIe iHsi MeToDN BCTAHOBENEHH, OKPIM PekOMeHDoBAnHX, OCKJIbKN CE MOKE pnp3BcTeN Do BiD'ChHaHHA bTOKpCJna.
-PepekohaIteca, 10 TpntOyKOBn peMHb 63neKKN, BIKOPNCTOByBAHn Ia KpInIeHHn DITraYOro ABTOKpICna B ABTOMObi, HaneKHm YHOM HAHTHytni HepepeKpyuHm.
ДитинаВАТОКРICи МаЗЗждпенибуати nIDнаглДOM;СTEXTe HABITb 3aCJIЯHOIOДNTIHOIO.
-yokohomyap3e 3aaniuane dntiny camy63 harnjdy B mauhi, Habitb Ha koptoknuiac.Temnepatya BCEpeiniH MauHHMOKe 5BvNDKo 3MiHOBATiCnI c tATN He62eNeuHOJ DnI dHTNIH B ABOTOMOJI.
3aBOpOHeNO BmAtMaN dIuTHy 3KpICNa B ABOTM06JIn, 1Qo pyxAeTbCn.
- Ptepeipte, He He 6JokyTeBcBAtOKpICIO pyxOMOIO actuHOIO cINiHnA bODePrtAMI.
Bidpernynte BOCOTI HATAR pemeHIB, nepekoHabwCb y TOMO, 10 BOH npinraaTOb DO TINA DNTINH, anE He NaTO TCHYtB. TpebePte, uH He peKpyuHo pemeHi 63neKei, iH ne 3MOKe DNTINHa camoCTiHOPOCTe6hTyix.
- He 3aIIaIte ABtOKpICNo y MaIIHn iN
- pIaMM COHrYHM pPOMIHbM, OCKINbKIn
IeAki qactHNI MOKytb neperpITmCci I TpaMbAYaTe HNDHTY dNTHUy kIPcy.IpeHJ HIX caJkATn DNTINH, nepeKoHaTec, 1O aBTOKpICNo He HADTo rapHe.
3a60pOHeN BnKOpIcTObyBatn ABtOKpICNo 6e 06bIKBm. LIO 66bIKBy He MoKaM HmiTn Ha iHny, He CXBaJIeHy BnPo6bHKOM CneUaIbHM YINOH, OCKiBKN BOHa E HeBIDcEMHOIO yACTHNO IO ABtOKpCna I BaXkInBa dIra 3a63neueHnE 63neKn.
- He BvdajIe i He MInHTe 6iNi noniCTnPOJBI CTaHNI NID CUIDIHMM, y CnIHcii NiTOrIONBHKO, OCKINBKo BOHBAKNNbI dA363neueHHN 63neKn.
- Y BINaIky CUMHIBIB 3eBepHITbCSI DO BIVo6hNkA a60 npOaBzu bfoTO aBtOKPcIa.
LLeB BUI6Mae pnporecbHbHy HmepauiHa cepTnPhiKaiiHni TabuCi, Po3TaIobAHI HnHXHNI POBEXHi CINIHNA.
He BuaIaJIe HakJIeEHI npIuHITeTtKTeKN. Lc MoKe NOpuyIHTN BiINOBiHInCTb BnO6y 3aKHOJaBcYbBnOMr
- He BnKOpNCTObYIte DITIaYe ABTOKpICNo y TAKNX BINAnkax: BOH 3JMaHE a60 BiCyTHi YCaTHIn N IYKaIO KpICNo 3a3HabANO 3HuYNHx UdAPHNX HabaHTAkeHb B pe3yIbTaTI DOPOJXhBoI PnIPoDN, OCKJIbKn CE MOJLO PnI3BcETIN Do IYORO CTpyKTynx NPOKJXeHb - HeBNDmHNx, Ane HAD3BnuHnHOHe63NeuHNX.
Y paazi npiIb6aHH Bnpo6y 3 pyK nepekoHaiTeC, uO ce HeabHO BnPyueHa MoJelb, pOpaetbC3 aHCTpykLJIaMM, a Bci I KOMNoHEHTNI NOBICTIO fynKioHaIbHi. 3actapInI BnIp6 MoJE He BIDnojdtAtcHaDaptA M
6e3neKn cepes npnpoHne cTapHHaMepeiIIB Ta OHOBHeHHa HOpMaTHBHXBIMOr. 3a HaBHcOti6yDb-kaHN CyMHIBB3BePHtBC Da CEHTpy OcbnyTOBvBaHHaKJIeHTIB BnO6HnKa.
- He MoDiNΦiKuIte Bvri6.
ДяpeMOHTY,3amHIN KOMIOHETIB TaOTPMAMHHI HΦOpMaJI npo BnPI6 3BepHIbCno CnyXbN iNcJIPOpaJXHO O6CNyROByAHNN. KOHTAKTHaDi a3HaueHo HA octAHNI CTOpIHJI zBOTO noci6nHa.
JaKIOI DITRAE ABTKOPICNO 3aΦIKCOBAHO 3a ONDOMOIO KIPINHeb Isofix, He BID'cHnYe IORo BID KIPInHeB.
-Як soo abTOKpICNo 3aΦIKCOBAHe JIiue 3a DONOMOTOIO pemeHIB 6e3neKIn, HEBIKOPICTOBYBaHE abTOKPcIO MoXHa 3HIMATn i 3eOpirATn B aGarxHOMy BIDcIQy.
- He BUKOPICTOBYIte PrinadJa, He 3aTBePjKHe BINOb6HnKOM a60 KOMNeTeHTHMn OpraHAMi.
1 BAXJINBO!
Viaggio 2-3 Surefix": ue aTOKpicnO rpynn 2-3 cnid BCTaHOBIOHOBATyn hAnPmky pxy ATOM6IIa.
HeBCTAHOBIIouteABTOKpicIO,Viaggio 2-3 Surefix"Ha cnIHINBAIbOMOJIa, po3MIeHNI pOnTI HApRMky pyxu nnepnEHIKUYIPO hOMy HApRMky.
- PekomeHDoBaHO 3aBxJn 9iInbHo nIDTAYBAtm DITRAe ABTOKpICNo DO CnIHn ABtOMo6Ig Nid cac BCTAHOBJIHH Ha 3aHbOMy CnIHHi a6036Oky nacaXnpa.
-Як soo abtOKpICNo BCTaHOBNeHa napeHbomy cndHHi, peKoMeHdObaHo pOzMIyBATn IYOr AkoMora Dani BlD
naheI npnilaib.
- y pazi BHNHKHeHH npo6nem 3i BCTaHOBJEHHm ABOKPcna Vlaggio 2/3 Surefix cnpo6yTe nihTn nidroniBHNK, He 3HimaOuyn Ioro
KomnoHeNTn Bpu6y
2-Nepebipte BMICYnAOKBKY;yBIIaNaky BIDCYTHOCTI 6yb-aknx KOMTOHEHITB 3BEPHbCIO DEPCBICIOn CNYKb.
ДО кOMПЕКТУ ДИТУСО АВТOKРСЛBAxOДТ: 1 nIgRONlBnK (a), 1 cπHnKa (b), 1 cnDINHnA (c).
CnHnKa nipIroBnHKoNocTaAOTbCBy BnO6hBNKOM y 3i6paHOMy BnRJIaDi.ДлпаразИнБугОЗьбрANHry 6bpiHAnHByBnO6by yBaXHO dotPmmyTeCE iHCTpykLii.
36npaHnBvpo6y nepeD BVKOpNCtAHNAM
3- NöBepHtB YepBOHI φikcatopn y BIXKPITe NIOXeHHI BCTABTE CINHKY B Hl3da, PO3taWobAHi 3a CNIHHM, AK NOKA3HO Ha ManIOHKY.
- He niiHimaoun Bnp6, 3akpnire cepBohi fikcato np do yTHoro klaaHaHa.
5.ПиДиHIMITb CINNHky DITRAYOBAToKpICNa, POKI He NOUyETe KlaaHaHHa(mal.a).
CnHnKa MoKe nepemiuSyBaTcR MIX dBOMa fikCaTopamM, RIK NOKa3aHO Ha ManIOhky b.
Picna 3abepuenn onepaui Bpi6 MOKe CToTn 6e3PiTpIMKn.
Функцвиpo6y
6-ⅡIQRJIBHVK MOXHa BCTaHOBNIOBATN B
6NoIOKHeB. PIIHIMITb pyUkHa 3aDHHIOBepXHi cINNHn I po3aUyIte nIroGIOIBNHK H a NtOPI6HNI BOCOTi.
BAXJIINBO! 3i 3poctaHHAM dInHnNotpi6HO perynIObTu BucOTy nIroJIBNkA BiNobIDo DO BoXHN Tia DInHn.
BAKJIINBO! Picna 3aKiHueHHA CnpOyHeNoBpyuHTnPiIgONIBHn, 106 nepeKoHaTcN, 10 bi Hn HalJeXHM YHOM 3aΦiKcoBaHn.
7Viaggio 2/3 Surefix 6bnaHANO DbOMA 6iYHMN 3cYBHMN PnCTaBkAMn dIra Hanoib.
8- Abtokpicno Viaggio 2/3 Surefix 06nbadnHaO CNTEMOIO 3mHIn Haxnly ДЯ МakcunmaIbHOrO KOMΦopty. Σo6 HaxnIITN CnDIIHH, NOTARHtB pyuKy Bpepei I BOIDHOAC πIDHaimTe CnDIIHH.
9-3a MOKINBOCTI MiHnTe HaxnCnIHKN aBTOKPCiJa, KOJI N dITnHa 3aCHE, a NotIM NOBeTpAtec DO NoTuAeTKOBORO NONOJEHn CnIHKn.
CnHnKa ABtOKpIcNa Viaggio 2/3 Surefix aanTYYeTbCS IO HAXNY NacKnpcBkORO cnIHnHa ABtOMoB6IN,IO rapaHTye 6JIbIshm KOMΦOpT dIy IaTHINH.
BcmaHOBLeHHa dumyO2o abmokpicna 3a donom02o peMeHIB 6e3neku i KpinIeHb Surefix Ira aBTOMo6iINB, o6laHaHnx rauchkamn Isofix
LcIe MeToD fikCaii MoJHa BIKOPNCTOBYBATNIJIUEBTOMy pa3i,RAKIO
abTOMo6JIb 6bNaHaHO rauKaMn Isofix.
DJa OTpMaHnH DOKnaHiwoi iHΦopMaui npo HaBHiCTb rauKb i
IXHE po3aUyBaHnI DIB.IHCTpyKuio 3
EckPiYaTaII abTOMo6JIb.
KpinnHeH Nurefix rapaHTyOt b kpaU cy tiiKcIb i 63neKy niD vac noi3dkn B aBtOMo6ini, npote He MOxYb 3aMInHt peMeHi 63neKn.
10-Ⅲo6 po3TyrHytn rayKn Surefix, HaTNCiHTb KHONKY CNEpeDu BCEPeDNiHaJKOFOO XOJa, KJK NOKa3AHO HaMaIHOky, Ni PO3TgHiTb rayKn BpyHy.
11. 3akpinitb 3eHybayu Sirefix haraykax Isofix ciDHHN ABTomO6iHn, nepeKHOABHsncb, 50 BOHN 3aue6bHnIcN 3 KnaUAHNM. Hatrpyte peMihb i BODHoc uTbOXAte NHTue aBTOKpICNo DO cINHK CuiHHN ABTomO6JIh.
BAKINBO! PICNA 3aKiHHeHHN OpeaJI CnpObyTe NobOpuyHTN cnIHn, 06 nepeKoHaTcN, 00 KpiInHn Isofix HaneJxHM YHOM 3eHneI 3 pO3HIMMa ISofix.
12. Ⅲo6 BiD'EnHATn po3HIMN Surefix IITraYoro ABTOKPCiA BI D raukB Isofix, HATNCIb KHNKY cnepey BcepeNiHa M'AKoYoXla IBIaNcyTb Pemehi 3'EDhyBaiv, Ⅲo6 ix MoKHa 6ynO BIDCTe6HyTN BpyHy, HATNCHyBnHa 3aNo6jxH BaKenI Ha ravkax, JIKoKA3HO HA MaNIOHKy.
BcmaHOBLeHHaDumyOzo aBmOkpcna 3a donomozo peMeHb6e3neku IraabTomO6iIB, HE o6naHaHnx
KpinnHnMn Isofix
- YctahOBiB abToKpICNo Viaggio 2/3 Surefix Ha CuiHnRA abTomO6iBa H naprMky pyxy,IK NOKa3AHO HA MaIIOHky,I NOcAdTb ONoHbOro DNTiHY.
Як ппстебуту ДИТИНУ В abToKpicNi Viaggio 2/3 Surefix
14.ПистебиТь ДИТИНУ рЕмEHМБЗнКИ АВТOMОБИЯ,ЯК ПOKAZAHОHaMaJIOHKY.
15-3acte6hHb pemHb 6e3neKn ABtOMo6iHa, nepeKOHABuNc b y TOMy, 10 bi 3aue6hByBC 3 KlaCaHHM. Po3aTuYe Dbi YaCTnH pemHe, Ja NOKa3aHO Ha MaJIIOHKy.
16-Ⅲo6 3aikhunni onepauiio, BCTABe pemHb 6bepeKn diaorhaIbHo yBepxHiOTiBD HND Pteuem DITNHI.
BAKJIIMBO!Якso pemihb 6e3neknocna6, natarHtntno. 3aBxnnpeheBipnte, no6 pemihb 6e3nekn6byhnatrytni hnepekpyehn.
17- Pemehi 6e3nekn npabnblHO pO3tauBOaHI, kIIO pIeui DInHHH NmKHe TOOKN BBeDEHnpeMeH 6e3neKn, KQkA3HaHO MaJIHOKY
BAXJIINBO! Pemehi 6e3neKe Nhe NOBHNI 6yTu pO3TaUOBaHI aHI 3aHaTTO BNCOKO, aHI 3aHaTTO HN3bKO IIOO IIOueH dIITNH.
AкЗнгИО66ИВКУМ'ЯКOrOухлa
3HIMAOUO6OBWBYABTOKPcnaViaggio2/3
Surefix,HE po3eJHyIe Tpu enEmeHTI - IITRONIBHKCNHKY,CNIDHHA.
3HIMAHNHObBKBK3CNIIHHA:
18-Bid'eHaHte MaIeHbKi rauKn M'AKORO YoXNa BID TOOK KpINJIENHH, DOTPMUYIONC NocIIOBHOCTI, NOKa3HOi HA ManIOHky. BITrHiB ueHTpaJbHNI peMHb.
19. Bi'ednaHae Te JokcTKe neTni, Ra NOKa3aHO Ha MaIIOHky.
3HIMAHHHOBBVBKN3I CINHKN:
20-3HmiTb 3aDIO KpuIKyU,NOTIRHYBUII IIaBOCHI,KJOKNA3aHO HA MAnIOHKY.
21·3HIMITb BcIpe3NHKn.
22·3HIMITb M'AKIN 0OXOJI.
3HIMAHHOBUBKN3 PIIΓΟJIIBHNUKA:
23HimtB KPMKy 33aDy NiTROIINHnka, 20TaeHyBwni HaaOBHI bIDcEDHaBwHN dBJIe3NHKJ, kY NOKa3AHO HaMlOHNyK.
24·3HIMITbM'AKNQOxON.
Oorla3a06NBKOIO
YnCTtB TkaHnHHI Detalji 01TKOIO DnBnDaneHHIy.
-Пд ус паднг вдахно DTОПМУТЕС
ИСТРКД,ЗАЗЧЕНХа ETKETД, КУ
рпштюdo 06БВКИ.
He BIKOPNCTOBYBATIN XNPHN BIBIDIOBAH.
- He npacyBaTn.
- He 3aCTOCOByBaTN xiMiuHy uNCTKy.
-HeBuaJrTnPmPo3HHKam.
- He cyuinti B cyuinbni Maunhi.
JaHnAaTm'M'akn yoxon HAJRAHNNOBBUBKN HA CUNIHNN:
BCTABTe JxOpCTKI NtTI BTKaHINHy cnDInHH, nepeKoHaBunCb y TOMy, 10
BOHNIOTpaIJIyIOITbHaJIeXHiMiCJIa.
UHnBnBnBnBnBnBnBnBnBnBnBnBnBnBnBnBnBnBnBnBnBnBnBnBnBnBnBnBnBnBnBnBnBnBnBnBnBnBnBnBnBnBnBnBnBnBnBnBnBnBn
LJei Bnpi6 Bmmae MiHimalbHorO 06cnyrobyBaHH. YUnSeHHN MaIOb BnCNYroByBaHH Bnpo6y
- PekomehIOBaHO TpIMaTH N BUCTOTI BCI pyxOMI CTAAHHN.
- PiepodiNHO OUHUYITE NtAChNKOBI detani BOJoroIO TKAHNHO. He BIKOPNCTOBYTe PO3HNNHKIB YN
iHnX NpOj6HnX peoBnH.
- PIOUCTITB UIICTKOIO TKAHHH ICACTIH NDAIIBENHHIPIY
He nctitb npictipn ngnHnHaHHy ydp3 nnolictpOJy po3HNHHKAMm cn HUNHMN NOIDHIMN peOBOHAMn.
3axuaiTe Bpi6 BiBnBy aTMocsephnxfakTopiB:BOJNOr, DoUy Ta Chiry. Tpmbanepe6byHna HA coChi MoKe npBcTe NDo 3MHN KOJIbOpY 6aRaTbOx MaTePiaJiB.
36epiraTe Bpi6 y cyxomy MiCi.
JaHTaTn cepTnphiiaiHy Ta6JNUky
- Y cIbOMy naparpadi NORcHIOeTbCS, JAK cHTaTIc cepTmphiAciJiHy Ta6JIuNky (opAHKBeAetIKETk).
L Ta6nUka NoBbHa, OckInbKn ABTOKpICNo cepTIOKOBaHe DnI KpINeHn B ABTOMoBini DBOMA CnOcO6Am:
CnCTema KpinIeHHa SUREFIX (MapkyBaHnA SEMI-UNIVERSAL (HanibHyHbEpcalHe) Bka3yε, 10 qDmTae ABTOKpICNo CymiCe 3 CNTeMaMl ISOFIX).
TtpoukOBHm n CTaTHHMn Ta IhepiuHBM pEmeHmN 63neKn (MapkyBaHH NIVERSAL (YHBEPCAJIbHE) Bka3ye Ha CymichCTb DnTuYOABTKPcIJa 3 TpaHCnOPTHMM 3acobAmo, OblaHaHMMu LIMM TnIaAMn pEmeHmB 63neKn).
- Y Bépxhni 卸ctnHITabnHKn HaeceHo TObAPHN 3aK KomnHaH-BuO6HnKa N h3By BVPO6y.
JIptepaE"y kpyekuy- zc CmBON eBpOeBcKoBI cTePnKiaqua, a
BIDNOBIDHNI HOMEP BKA3ye Ha KpaIHy,
JYA BINA DAECPINIKAT HA CEIN BUPi6 (1: HimeyuHnA, 2: PpaHui, 3: ItaIa, 4: HidepnaHnD, 11: Benika BpHTAHiTa 24: PecnybNiKa IpnahDi).
Homep ceptiikata: kkuio BIN nouHaTeb3 04, 0e ueBerta nonpaBAKa perIamEny R44 (UnHa zapa3).
3actocobvban CTaHdapt: UN/ECE R44/04.
- IopraKOBNOHOMepBINOPO: niCnla BnDaui cepTnphiKaTy KojHN BnPi6 NoTHaAeTbCBAJChHM HOMEOPM.
PEG-PEREGO S.p.A.
B Kompanhii Peg-Perego SpA BpObaJaKeHc CnCTeMy ynpaBllHna kicTIO, ceptiKoBAny TUV Italia Srl 3rIINO 3t cTaNaptOM ISO 9001.
Kompania Peg Pego 3aIiuae 3a Cooio npabO y 6ydb-kykuiac BHOCITM3mHUYoMDeni, ONCAnH yLiuyNbiKaJI3, 3TexHiuHIXYu KOMepuHIMHX MiPKyBaHb.
Picla npdaXne 06cnyroByBaHHa Peg-Perego
Y pa3i nouokdoxeHHN yBTPaN 6bIyKnX DetaneJ, BUKOPICROBYte TIIbKnOpirinHbJI 3anaChi qactInn Peg Pergo. I npoBeDeHHN 6yb-koROpemOHTy, ZamHiNo DetaneJ ta OPIMAHnH iΦOpmaui npo BpiO Ta npoJaX OpirinHbHNx 3apanChX qactInn I daTkoBOrO obnadHaHH 3eptaiTeCeIdo cepBicHnx ceHTPiB Peg Pergo I BkAzyIte cepiHnH Homep BnOby, RkIO BOH €.
Tei.:0039/039/60.88.213
Be3KoTObHn Homep: 800/147.414 (3i ctaioHapnHex Tepeohiv B Itanii)
En.nouta:assistenza@pegperego.it
Be6-caTt:www.pegperego.com
Yci npaba IHteneKtyaIbHOI BnacHocTi, NOJrA3HI 3 BMICTOM zBOPO NOCBNIKA 3 ekCnpyataqii, HaneKaTb KOMNaHII PEG-PEREGoS.P.a i 3axuieni YHHNIM 3aKOHoDaBCTBM.
psLai 1s102eao g wlll cllal
.
LisgSlll:
Jaeo JcbJeeao Juaai jgj
Adu 20 Lai 13jL
gJg 10
jLJIeao JJI JabiJJeao cuii jPsiu
.Lgilo JJdJg12g2
Jalnl JSL 1clic 1e: jllj
aayb aywll gabll aoo uoc
gihai ciia aolwll aojai plaiwi jhao
.
aaiisig aiiaolauu uaoa JaoJ aoi jaoj .dolssuiipac aill yaealgo
yaauiie laauiuulgusuiuuiuui 1
pL△1
Viaggio 2/3 Surefix* 2/3 a
"Viaggio 2/3 Surefix" aaaa 2 - 1
a aal jabal aao 0o yai lals caiy
eall lc liio JelJIJeoo J51 Lai
a a a a a a a a a a a a a a a a a a a a a a a a a a a a
eall sji slij jSLio 13i
JgJ. viaggio 2/3 Surefix
cillg<0
aossjSxJuslgoggelluggs
aai 1gai jL5iJ aoe
iioo:jLwJyaw31 JiahJSeo Joing
aJLS1g,g0g0g0g0g0s0g1
g 10
a 5
a_9 = 3 + 2 - 2 = 6
cijgai no g23 .Naeiinoo 15 12
.8gall g zogogLoS pJdI gawed
LjBa JLoX1 pJ> JxJxJ LCoS:Wx·16
Lalalai aieS Lc aogg 11 aagll aaia
S1. y000000000000000000000000000000000000000
Lgilo Jg jol
131 1111111111111111111111111111111
LQR = LQR
.ogagJg Cogog LaS
1jL 1g<.aLoell oio j0 fgiXl iic g
awai slali no LaiL slaljlc.
6 6
a 1
11111
LgEla21JbJyJbIgZgo:pa
aiole Jgol
JgJgJgJgS:W
LgISo gaiio LgJ 511 wJl i
Lolou 29o Viaggio 2/3 Surefix 7
Logcji 5cIgj
Viaggio 2/3 Surefix 8
aaiJal0x. ai< a>1 gaij JlaaiJal0!
1 1
.
aLJIgJIiJIO aJIg.
aJLol; a aLoLi JalJgS Loaic
JJIJI JJIJIJIJIJIJIJIJIJIJI
Viaggio 2/3 Surefix 2011
al jbl siu o 0o
aJyJ 0 aJyJg
1111
Jai jai 1
12g 1081 0
Surefix
Isofix
cLlIbAe aaiall oia pssui
.lsof1xJSLi
Lgjg jSli:Li oJg>Logell no su
15 150g
Surefix Lg. 1.
aLg.ajyJy jLg.Lj
a
Suresurefix
S
go 2all jLao g yjg all jyblr J
.
sallgo.aaol oyai all Jslil
Jwglj 1 J 1
1sIJI 1JLJI JIJI
1.
24.18 2000
BAC = = 3
11111111
aen:oyuunweac yuwu wua 25
Lai bi jolwJ 1eao Jc bld aLac
L0g
LwUwUwUwUwUwUwUwUwUwUwUwUwUwUwUwUwUwUwUwUwUwUwUwUwUwUwUwUwUwUwUwUwUwUwUwUwUwUwUwUwUwUwUwUwUwUwUwUwUwUw
3/2Viaggio 26
as jaidi el jaiy gao zhi biaiyu
aai bi
aayy y
gl a 1000
aIio 1
aai jai aai ai ae gai ai el jai ai.
1
CgoggLo5nJnJnJnJnJnJnJnJnJnJnJnJnJnJnJnJnJnJnJnJnJnJnJnJnJnJnJnJnJn
.
24
aIbJIgcl abJbI
Joaalil aillbll no aaii 1s21 Cunol
1
gala lcl aollllalal
Juslls
1511 0o o o o o o o o o o
.1g≤11 p#i:
.
a 20
.
"Peg-Perego"
jai jia jia jia jia jia jia jia jia jia jia jia jia jia jia jia jia jia jia jia jia jia jia jia jia jia jia jia jia jia jia jia jia jia jia jia jia jia jia jia jia jia jia jia jia jia jia jia jia jia jia jiall lalll
..r9.r7.1111:assistenza@:pegperego.itwww.pegperego.com
aS-PEGPEREGO 111-y
0g>gl a511 g2-gd100
gjllg20g
1 Lg j g aJg c J 1 Lg J aJg iJ g .
g J g J oJ Lg o J g J g J g J g J g J g J g J g J g J g J g J g J g J g J g J g J g J g J g J g J g J g J g J g J g J g J g J g J g J g J g J g J g J g J g J g J g J g J g J g J g J g J g J g J g J g J g J g J g J g Jg Jg Jg Jg Jg Jg Jg Jg Jg Jg Jg Jg Jg Jg Jg Jg Jg Jg Jg Jg Jg Jg Jg Jg Jg Jg Jg Jg Jg Jg Jg Jg Jg Jg Jg
jol jggs jia jai g s i aas .
. j 0 j 0 s5 4s y g
sgs jai aluag li yalmo pleso .
j c s s u o jl l u w g qil , j
jgl joi jy gao y gao jai
jwlq s s u s s glc u w j
04/UN/ECE R44 Li,12Li,12Li,12Li,12Li,12Li,12Li,12Li,12Li,12Li,12Li,12Li,12Li,12Li,12Li,12Li,12Li,12Li,12Li,12Li,12Li,12Li,12Li,12Li,12Li,12Li,12
g JaaJg jia Lai aai iai g 5i aag 5aeg 5aeg 5aeg 5aeg 5aeg 5aeg 5aeg 5aeg 5aeg 5aeg 5aeg 5aeg 5aeg 5aeg 5aeg 5aeg 5aeg 5aeg 5aeg 5aeg 5aeg 5aeg 5aeg
Lglaa ggsjia jai 45 jgaao .
glao jao jaii jai 45 jai jai iaii
iiia aai iai iai jgi aiie
agaaiaiaiaiaiaiaiaiaiaiaiaiaiaiaiaiaiaiaiaiaiaiaiaiaiaiaiaiaiaiaiaiaiaiaiaiaiaiaiaiaiaiaiaiaiaiaiaiaiaiaiaiaiaiaiaiaiaiaiaiaiaiaiaiaiaiaia
LUN/ECER16,laaiuLgaoiiaiyao 5yolaiuLgaoiaiyao Lyaaii gaoiaiyao Lgao
Viaggio 2/3 Surefix .gJIOI ISOFIX +4qL . "Universal"
04/UN/ECE R44 Li, Li, Li, Li, Li, Li, Li, Li, Li, Li, Li, Li, Li, Li, Li, Li, Li, Li, Li, Li, Li, Li, Li, Li, Li, Li, Li, Li, Li, Li, Li, Li, Li, Li, Li, Li, Li, Li, Li, Li, Li, Li, Li, Li, Li, Li, Li, Li, Li, Li, Li 12Li 3Li 5Li 36Li 15Li 11Li 10Li 9Li 8Li 7Li 6Li 5Li 4Li 3Li 2Li 1
i 10000000000000000000000000000000000000000000000000000000000000000000000000000000000
Ggio Jgno 15 gio jyj yj
9 gao gao gao gao jayd yai yao
cagao gao gao jayd yai yao
claoa yao l yao yao ayai ayai ayai
yao yao ayai yao
yao ayai ayai ayai
yao ayai ayai ayai
yao ayai ayai ayai
yao ayai ayai ayai
yao ayai ayai ayai
yao ayai ayai ayai
#
"Surefix 3-2 Giaggio
. . . . . . . . . . . . . . . . . . . . . . . . . . . . . . . . . . . . . . . . . . . . . . . . . . . . . . . . . . . . . . . . . . . . . . . . . .
.5555555555555555555555555555555555555555555555555555555555555555555555555555555555555555555555555555.
.111111111111111111111111111111111111111111111111111111111111111111
JgnooLeh
s1g 0yjwju jaiuui yglz2.2 juy Looi yiu wu gao slana h
1 = 2
yJySgLa ySlaCOW gSgSg
LLeJLLe1,
iiSjoo
LjIb. cugb:JIO gJolgc jI, Jgno