USER MANUAL LC 247S HUSQVARNA
LC 247, LC 247S, LC 247SP, LC 253S, LC 347V, LC 347VI, LC 353V, LC 353VI
EAC
| EN | Operator's manual | 6-19 |
| BG | Ръковскгво 3а ekсплогатуяя | 20-34 |
| CS | Navourd k použiti | 35-48 |
| DA | Brugsanvising | 49-62 |
| DE | Bedienungsanweisung | 63-77 |
| EL | Оьнуigсхриги | 78-93 |
| ES | Manual de usuario | 94-108 |
| ET | Kasutusjuhend | 109-122 |
| FI | КäytтööhJE | 123-136 |
| FR | Manuel d'utilisation | 137-151 |
| HR | Priručnik za korištenje | 152-165 |
| HU | Használati utasitás | 166-179 |
| IT | Manuale dell'operatore | 180-194 |
| LT | Operatoriaus vadovas | 195-208 |
| LV | Lietošanas pamacība | 209-223 |
| NL | Gebruiksaanwijzing | 224-237 |
| NO | Bruksanvising | 238-250 |
| PL | Instrukcja obstugi | 251-265 |
| PT | Manual do utilizesador | 266-280 |
| RO | Instructiuni de utilizesare | 281-295 |
| RU | Чужовскгво по заclпунатуши | 296-311 |
| SK | Navourd na obstluhu | 312-325 |
| SL | Navodila za uporabo | 326-339 |
| SR | Priručnik za rukovaoca | 340-353 |
| SV | Bruksanvising | 354-367 |
| TR | Kullanim kilavuzu | 368-381 |
| UK | Посicontник користуваца | 382-396 |
1


23
25
24
27
28
29

30
31
32
33
34
35
36
37
38
39
40
41
42
43
44
Contents
Introduction. 6
Safety. 7
Assembly 10
Operation. 10
Maintenance. 12
Transportation, storage and disposal. 15
Technical data. 15
EC Declaration of Conformity. 19
Introduction
Product description
The product is a pedestrian-controlled rotary lawn mower. The grass is collected in a grass catcher. Remove the grass catcher to get rear discharge of the grass. Attach a mulch kit (accessory) to cut the grass into fertilizer.
Product overview
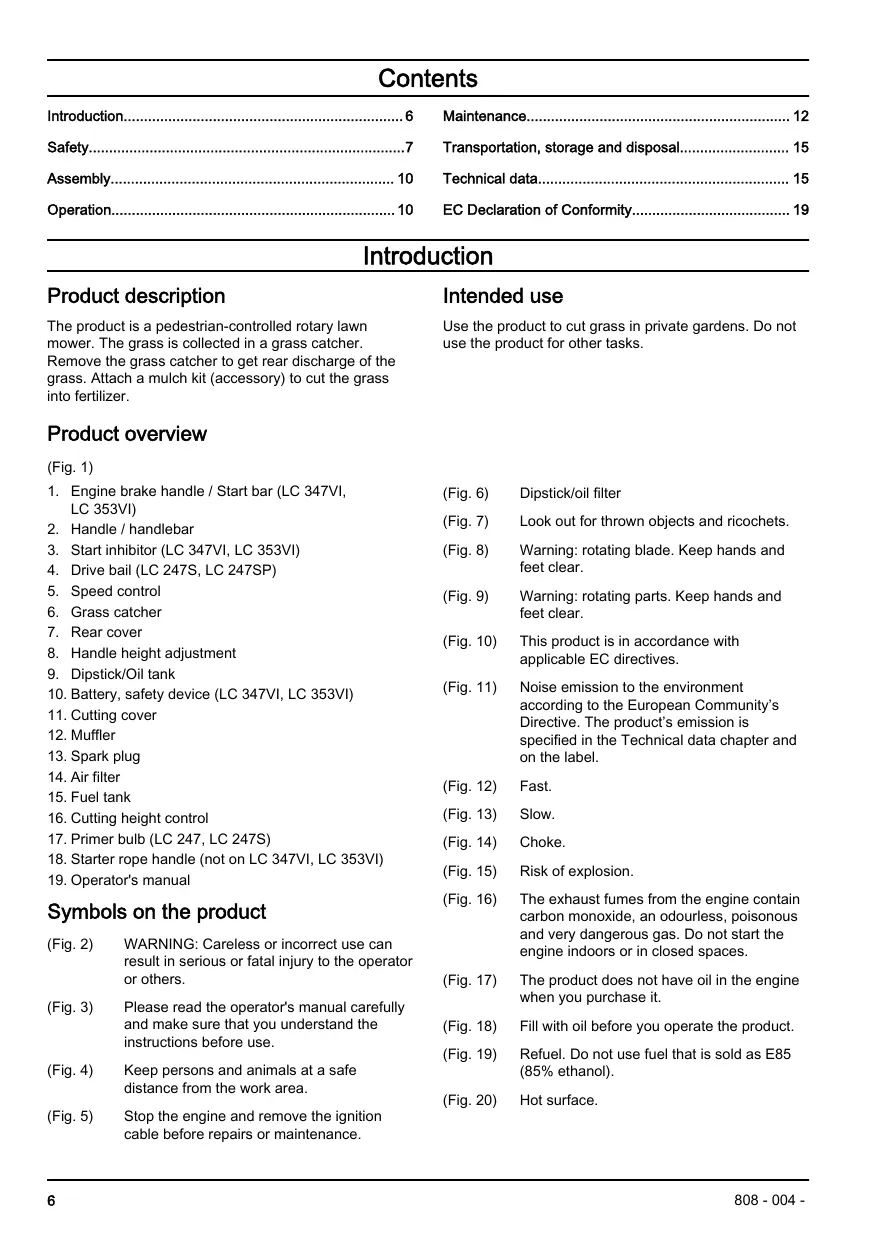
(Fig. 1)
- Engine brake handle / Start bar (LC 347VI, LC 353VI)
- Handle / handlebar
- Start inhibitor (LC 347VI, LC 353VI)
- Drive bail (LC 247S, LC 247SP)
- Speed control
- Grass catcher
- Rear cover
- Handle height adjustment
- Dipstick/Oil tank
- Battery, safety device (LC 347VI, LC 353VI)
- Cutting cover
- Muffler
- Spark plug
- Air filter
- Fuel tank
- Cutting height control
- Primer bulb (LC 247, LC 247S)
- Starter rope handle (not on LC 347VI, LC 353VI)
- Operator's manual
Symbols on the product
(Fig. 2) WARNING: Careless or incorrect use can result in serious or fatal injury to the operator or others.
(Fig. 3) Please read the operator's manual carefully and make sure that you understand the instructions before use.
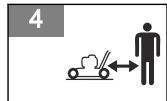
(Fig. 4) Keep persons and animals at a safe distance from the work area.
(Fig. 5) Stop the engine and remove the ignition cable before repairs or maintenance.
Intended use
Use the product to cut grass in private gardens. Do not use the product for other tasks.
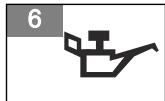
(Fig. 6) Dipstick/oil filter
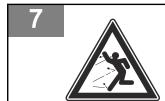
(Fig. 7) Look out for thrown objects and ricochets.
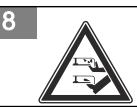
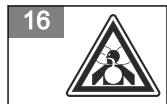
(Fig. 8) Warning: rotating blade. Keep hands and feet clear.
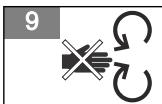
(Fig. 9) Warning: rotating parts. Keep hands and feet clear.
(Fig. 10) This product is in accordance with applicable EC directives.
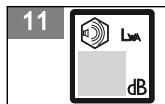
(Fig. 11) Noise emission to the environment according to the European Community's Directive. The product's emission is specified in the Technical data chapter and on the label.
(Fig. 12) Fast.
(Fig. 13) Slow.
(Fig. 14) Choke.
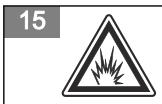
(Fig. 15) Risk of explosion.
(Fig. 16) The exhaust fumes from the engine contain carbon monoxide, an odourless, poisonous and very dangerous gas. Do not start the engine indoors or in closed spaces.
(Fig. 17) The product does not have oil in the engine when you purchase it.
(Fig. 18) Fill with oil before you operate the product.
(Fig. 19) Refuel. Do not use fuel that is sold as E85 (85% ethanol).
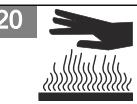
(Fig. 20) Hot surface.
(Fig. 22) Remove the safety switch (battery) before you do maintenance work or let the product stay out of view.
(Fig. 21) Scannable code.
Note: Other symbols/decals on the product refer to certification requirements for some commercial areas.
Euro V Emissions

WARNING: Tampering with the engine voids the EU type-approval of this product.
Product liability
As referred to in the product liability laws, we are not liable for damages that our product causes if:
the product is incorrectly repaired.
- the product is repaired with parts that are not from the manufacturer or not approved by the manufacturer.
- the product has an accessory that is not from the manufacturer or not approved by the manufacturer.
- the product is not repaired at an approved service center or by an approved authority.
Safety
Safety definitions
Warnings, cautions and notes are used to point out specially important parts of the manual.

WARNING: Used if there is a risk of injury or death for the operator or bystanders if the instructions in the manual are not obeyed.

CAUTION: Used if there is a risk of damage to the product, other materials or the adjacent area if the instructions in the manual are not obeyed.
Note: Used to give more information that is necessary in a given situation.
General safety instructions

WARNING: Read the warning instructions that follow before you use the product.
Work area safety

WARNING: Read the warning instructions that follow before you use the product.
- Remove objects such as branches, twigs and stones from the work area before you use the product.
- Objects that hit against the cutting equipment can eject and cause damage to persons and objects. Keep bystanders and animals at a safe distance from the product.
- Never use the product in bad weather such as fog, rain, strong winds, intense cold and risk of lightning. To use the product in bad weather or in moist or wet locations is tiring. Bad weather can cause dangerous conditions, such as slippery surfaces.
-
Look out for persons, objects and situations that can prevent safe operation of the product.
-
Look out for obstacles, such as roots, stones, twigs, pits and ditches. Long grass can hide obstacles.
- To cut grass on slopes can be dangerous. Do not use the product on ground that slopes more than 15^ .
- Operate the product across the face of slopes. Do not move up and down.
- Be careful when you go near hidden corners and objects that prevent a clear view.
Work safety

WARNING: Read the warning instructions that follow before you use the product.
- Use this product to cut grass lawns only. It is not permitted to use it for other tasks.
Use personal protective equipment. Refer to Personal protective equipment on page 8.
Make sure that you know how to stop the engine quickly in an emergency.
- Never start the engine in a closed space or near flammable material. The exhaust fumes from the engine are hot and can contain sparks which can start a fire.
- Do not operate the product unless the blade and all covers are attached correctly. An incorrectly attached blade can come loose and cause personal injury.
- Make sure that the blade does not hit objects such as stones and roots. This can do damage to the blade and bend the engine shaft. A bent axle causes heavy vibration and a very high risk that the blade becomes loose.
- If the blade hits an object or if vibrations occur, stop the product immediately. Disconnect the ignition cable from the spark plug. Examine the product for damages. Repair damages or let an authorised service agent do the repair.
- Never attach the engine brake handle permanently to the handle when the engine is started.
- Put the product on a stable, flat surface and start it. Make sure that the blade does not hit the ground or other objects.
Always stay behind the product when you operate it.
- Let all the wheels stay on the ground and keep 2 hands on the handle when you operate the product. Keep your hands and feet away from the rotating blades.
- Do not tilt the product when the engine is started.
- Be careful when you pull the product rearward.
- Never lift up the product when the engine is started. If you must lift the product, first stop the engine and disconnect the ignition cable from the spark plug.
- Do not walk rearward when you operate the product.
-
Stop the engine when you move across areas without grass, for example paths made of gravel, stone and asphalt.
-
Do not run with the product when the engine is started. Always walk when you operate the product.
- Stop the engine before you change the cutting height. Never make adjustments with the engine started.
- Never let the product stay out of view with the engine started. Stop the engine and make sure that the cutting equipment does not rotate.
Safety instructions for operation
Personal protective equipment

WARNING: Read the warning instructions that follow before you use the product.
- Personal protective equipment cannot fully prevent injury but it decreases the degree of injury if an accident does occur. Let your dealer help you select the right equipment.
- Use hearing protection if the noise level is higher than 85 dB.
- Use heavy-duty slip-resistant boots or shoes. Do not use open shoes or go with bare feet.
Use heavy, long pants.
- Use protective gloves when necessary, for example when you attach, examine or clean the cutting equipment.
Safety devices on the product

WARNING: Read the warning instructions that follow before you use the product.
- Do not use a product with defective safety devices.
- Do a check of the safety devices regularly. If the safety devices are defective, speak to your Husqvarna service agent.
To do a check of the cutting cover
The cutting cover decreases vibrations in the product and decreases the risk of injury from the blade.
- Examine the cutting cover to make sure that there are no damages such as cracks.
Battery (LC 347VI, LC 353VI)

WARNING: A defective battery decreases the safety of the product. Always use a battery approved by the manufacturer.
The battery gives power to the electrical start and is a safety device that prevents accidental start. Remove the battery when you do not operate the product and when you let it stay out of view.
Engine brake handle
The engine brake handle stops the engine. When the engine brake handle is released, the engine stops and the drive disengages.
To do an inspection of the engine brake, start the engine and then release the engine brake handle. If the engine does not stop in 3 seconds, let an approved Husqvarna service agent adjust the engine brake.
(Fig. 23)
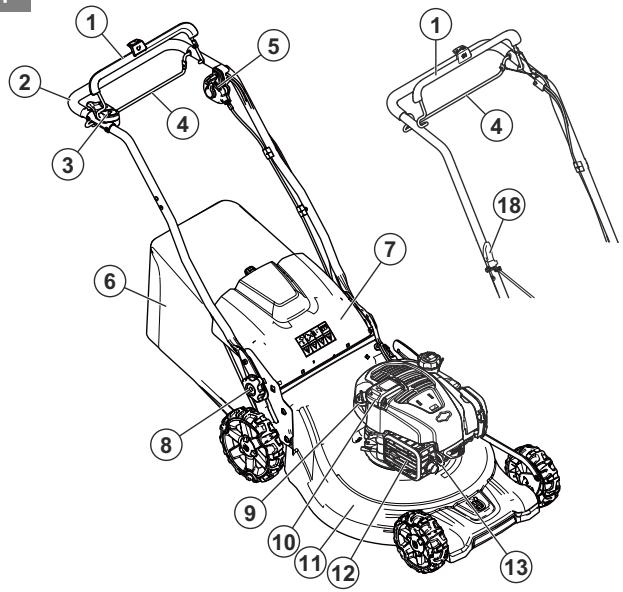
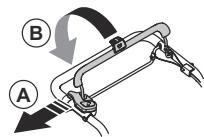
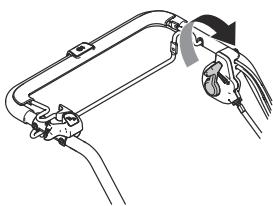
Start inhibitor
On model LC 347VI, LC 353VI the engine brake handle is also used as a start bar for the starter motor. Do a check of the start inhibitor to make sure that it prevents operation of the starter motor.
- Pull the start bar in the direction of the handlebar (B). The start inhibitor stops the movement.
- Push the start inhibitor out to the right (A). (Fig. 24)
- Release the start inhibitor and make sure that it goes back to its initial position.
Muffler
The muffler keeps the noise levels to a minimum and sends the exhaust fumes away from the operator.
Do not use the product if the muffler is missing or defective. A defective muffler increases the noise level and the risk of fire.

WARNING: The muffler becomes very hot during and after use and when the engine operates at idle speed. Be careful near flammable materials and/or fumes to prevent fire.
Fuel safety

WARNING: Read the warning instructions that follow before you use the product.
Safety instructions for maintenance

WARNING: Read the warning instructions that follow before you use the product.
- The exhaust fumes from the engine contain carbon monoxide, an odourless, poisonous and very dangerous gas. Do not start the engine indoors or in closed spaces.
Before you do the maintenance on the product, stop the engine and remove the ignition cable from the spark plug. On LC 347VI, LC 353VI, also remove the battery.
- Use protective gloves when you do maintenance on the cutting equipment. The blade is very sharp and cuts can easily occur.
- Accessories and changes to the product that are not approved by the manufacturer, can cause serious injury or death. Do not change the product. Always use accessories that are approved by the manufacturer.
If the maintenance is not done correctly and regularly, the risk of injury and damage to the product increases.
- Only do the maintenance as given in this owner's manual. All other servicing must be done by an approved Husqvarna service agent.
- Let an approved Husqvarna service agent do servicing on the product regularly.
- Replace damaged, worn or broken parts.
Assembly
Introduction

WARNING: Before you assemble the product, read the safety chapter. On LC 347VI, LC 353VI, also remove the battery.
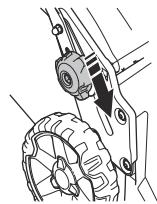
To assemble the handle
- Loosen the lower knobs.
- Move the knobs to the lower end of the grooves on the left and the right side of the product. (Fig. 25)
- Set the handle height in one of the 2 available positions.
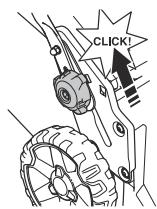
- Move the knobs up in the direction of the handle until they stop and you hear a click. (Fig. 26)
- Tighten the knobs fully.
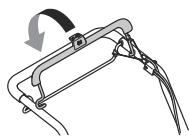
To set the product in transport position
- Loosen the lower knobs.
- Move the knobs to the lower end of the grooves on the left and the right side of the product. (Fig. 25)
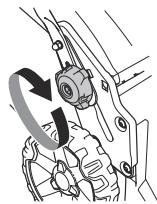
- Fold the handle forward. (Fig. 27)
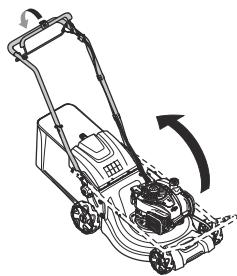
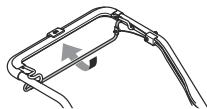
To set the product in operation position
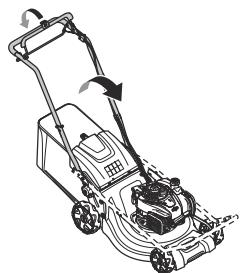
- Fold the handle to upright position. (Fig. 28)
- Move the knobs up in the direction of the handle until they stop and you hear a click. (Fig. 26)
- Tighten the knobs fully.
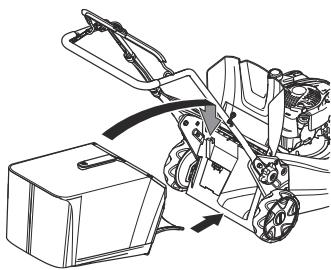
To assemble the grass catcher
-
Attach the grass catcher frame to the grass bag with the rigid part of the bag on the bottom. Keep the handle of the frame on top of the grass bag. (Fig. 29)
-
Attach the bottom section of the grass catcher frame in the groove on the bottom of the grass catcher.
- Attach the grass bag to the grass catcher frame with the clips. (Fig. 30)
- Lift the rear cover.
- Attach the grass catcher to the top edge of the chassis.
- Put the lower part of the grass catcher into the grass discharge channel. (Fig. 31)
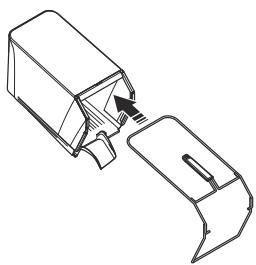
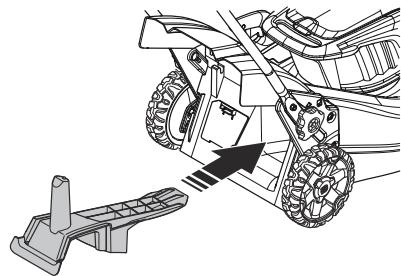
To assemble the mulch plug (accessory)
- Lift up the rear cover and remove the grass catcher.
- Put the mulch plug into the discharge channel. (Fig. 32)
- Replace the blade with the mulch blade that is supplied in the mulch kit. Refer to To replace the blade on page 13.
To cut grass without a grass catcher or mulch plug attached
- Lift up the rear cover and remove the grass catcher.
If a mulch plug and a mulch blade are attached, remove them.
- Close the rear cover before you operate the product.
When you operate the product, the cut grass discharges below the rear cover.
Operation
Introduction

WARNING: Before you operate the product, you must read and understand the safety chapter.
Husqvarna Connect
Husqvarna Connect is a free app for your mobile device. The Husqvarna Connect app gives extended functions for your Husqvarna product:
- Extended product information.
Information about, and help with, product parts and servicing.
To start to use Husqvarma Connect
- Download the Husqvarna Connect app on your mobile device.
- Register in the Husqvarna Connect app.
- Do the instruction steps in the Husqvarna Connect app to connect and register the product.
Before you operate the product
- Read the operator's manual carefully and make sure that you understand the instructions.
-
Examine the cutting equipment to make sure that it is correctly attached and adjusted. See To examine the cutting equipment on page 12.
-
Fill the fuel tank. See To fill fuel on page 11.
- Fill the oil tank and do a check of the oil level. See To do a check of the oil level on page 13.
To fill fuel
If available, use low-emission/alkylate gasoline. If low-emission/alkylate gasoline is not available, use good quality unleaded gasoline or leaded gasoline with octane number not less than 90.

CAUTION: Do not use gasoline with an octane number less than 90 RON (87 AKI). This can cause damage to the product.
- Open the fuel tank cap slowly to release the pressure.
- Fill slowly with a fuel can. If you spill fuel, remove it with a cloth and let remaining fuel dry off.
- Clean the area around the fuel tank cap.
- Tighten the fuel tank cap fully. If the fuel tank cap is not tightened, there is a risk of fire.
- Move the product a minimum of 3m (10 ft) from the position where you filled the tank before a start.
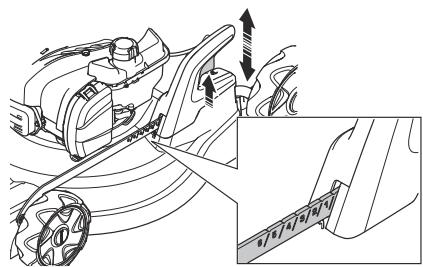
To set the cutting height
The cutting height can be adjusted in 6 levels.
- Move the cutting height lever rearward to decrease the cutting height.
- Move the cutting height lever forward to increase the cutting height. (Fig. 33)

CAUTION: Do not set the cutting height too low. The blades can hit the ground if the surface of the lawn is not level.
To start the product
- Make sure that the ignition cable is connected to the spark plug.
Manual start (not on LC 347VI, LC 353VI)
- For LC 247, LC 247S: The very first time you start the product, press the primer bulb 5 times. The next time you start the product when the engine is cold, press the primer bulb 3 times.
- Stay behind the product.
- Hold the engine brake handle against the handlebar. (Fig. 34)
- Hold the starter rope handle with your right hand.
-
Slowly pull out the starter rope until you feel some resistance.
-
Pull with force to start the engine.

WARNING: Do not twist the starter rope around your hand.
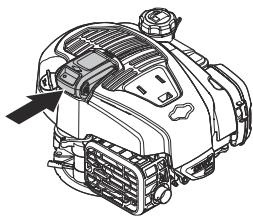
Electrical start (LC 347VI, LC 353VI)
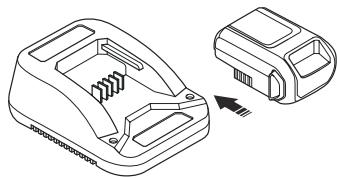
- Make sure that the battery is activated and charged. See To start the battery on page 13.
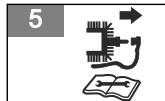
- Attach the battery to the engine. (Fig. 35)
- Push the start inhibitor out to the right (A).
- Pull the start bar (B) against the handlebar to start the starter motor. The starter motor stops when the engine starts. (Fig. 24)
To use the drive on the wheels
- For LC 247S, LC 247SP: Pull the drive bail in the direction of the handlebar. (Fig. 36)
- For LC 347V, LC 347VI, LC 353V, LC 353VI: Start the drive on the wheels with the speed control lever on the left side of the handle. Move the speed control lever forward to increase the speed and rearward to decrease the speed. (Fig. 37)
Before you pull the product rearward, disengage the drive and push the product forward approximately 10 cm.
- Release the drive bail to disengage the drive, for example when you go near an obstacle.
To stop the product
- To stop the engine, release the engine brake handle.
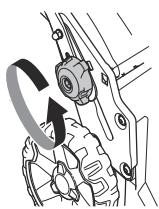
To remove the battery
To prevent accidental start of the engine, remove the battery on model LC 347VI, LC 353VI when the product is not in operation.
- Press the lock buttons (A) and pull the battery out. (Fig. 38)
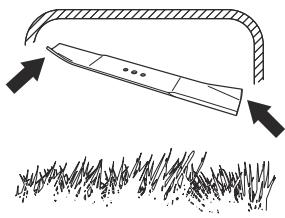
To get a good result
Always use a sharp blade. A blunt blade gives an irregular result and the cut surface of the grass becomes yellow. A sharp blade also uses less energy than a blunt blade.
- Do not cut more than 1/3 of the length of the grass. Cut first with the cutting height set high. Examine the result and lower the cutting height to an applicable level. If the grass is very long, drive slowly and cut 2 times if necessary.
- Cut in different directions each time to prevent stripes in the lawn.
Maintenance
Introduction

WARNING: Before you do maintenance, you must read and understand the safety chapter.
For all servicing and repair work on the product, special training is necessary. We guarantee the availability of professional repairs and servicing. If your dealer is not a service agent, speak to them for information about the nearest service agent.
Maintenance schedule

WARNING: For model LC 347VI, LC 353VI, always remove the battery before you do maintenance, repairs or clean the product.
The maintenance intervals are calculated from daily use of the product. The intervals change if the product is not used daily.
For maintenance marked with * see instructions in Safety devices on the product on page 8.
| Maintenance | Daily | Weekly | Monthly |
| Do a general inspection | X | | |
| Examine the oil level | X | | |
| Clean the product | X | | |
| Examine the cutting equipment | X | | |
| Examine the cutting cover and protective cover* | X | | |
| Examine the engine brake handle* | X | | |
| Examine the battery* | X | | |
| Examine the muffler* | | X | |
| Examine the spark plug | | X | |
| Change the oil (the first time after 5 h use, then after each 50 h use) | | | X |
| Change the air filter (after 50 h use) | | | X |
| Examine the fuel system | | | X |
To do a general inspection
- Make sure that all nuts and screws on the product are tightened correctly.
To clean the product externally
Use a brush to remove leaves, grass and dirt.
Make sure that the air intake on the top of the engine is not blocked.
- Do not use a high pressure washer to clean the product.
If you use water to clean the product, do not flush water directly on the engine.
To clean the inner surface of the cutting cover
- Empty the fuel tank.
- Put the product on its side with the muffler down.

CAUTION: If the product is put with the air filter down, the engine can become damaged.
- Hose down the inner surface of the cutting cover with water.
To examine the cutting equipment

WARNING: To prevent accidental start remove the ignition cable from the spark plug.

WARNING: Use protective gloves when you do maintenance on the cutting equipment. The blade is very sharp and cuts can easily occur.
- Examine the cutting equipment for damage or cracks. Always replace a damaged cutting equipment.
- Look at the blade to see if it is damaged or blunt.
Note: It is necessary to balance the blade after it is sharpened. Let a service center sharpen, replace and balance the blade. If you hit an obstacle that causes the product to stop, replace the damaged blade. Let the service center estimate if the blade can be sharpened or must be replaced.
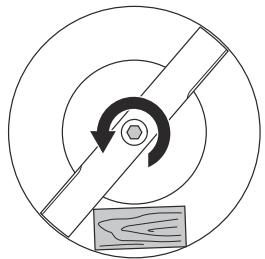
To replace the blade
- Lock the blade with a block of wood. (Fig. 39)
- Remove the blade bolt.
- Remove the blade.
- Examine the blade support and blade bolt to see if there are damages.
- Examine the engine shaft to make sure that it is not bent.
- When you attach the new blade, point the angled ends of the blade in the direction of the cutting cover. (Fig. 40)
- Make sure that the blade is aligned with the center of the engine shaft.
- Lock the blade with a block of wood. Attach the spring washer and tighten the bolt and washer with a torque of 70 Nm. (Fig. 41)
- Pull the blade around by hand and make sure that it turns freely.

WARNING: Use heavy duty gloves. The blade is very sharp and cuts can easily occur.
- Start the product to do a test of the blade. If the blade is not correctly attached, there is vibration in the product or the cutting result is unsatisfactory.
To do a check of the oil level

CAUTION: A too low oil level can do damage to the engine. Do a check of the oil level before you start the product.
- Put the product on level ground.
- Remove the oil tank cap with the attached dipstick.
- Clean the oil from the dipstick.
- Put the dipstick fully into the oil tank to give a correct picture of the oil level.
- Remove the dipstick.
- Examine the oil level on the dipstick.
- If the oil level is low, fill with engine oil and do a check of the oil level again.
To replace the engine oil

WARNING: Engine oil is very hot directly after the engine is stopped. Let the engine become cool before you drain the engine oil. If you spill engine oil on your skin, clean with soap and water.
- Operate the product until the fuel tank is empty.
- Remove the ignition cable from the spark plug.
- Remove the oil tank cap.
- Put a container below the product to collect the engine oil in.
- Tilt the product to drain the engine oil from the oil tank.
- Fill with new engine oil of the type recommended in Technical data on page 15.
- Do a check of the oil level. Refer to To do a check of the oil level on page 13.
Battery (LC 347VI, LC 353VI)

WARNING: A defective battery decreases the safety of the product. Always use a battery approved by the manufacturer.
The battery gives power to the electrical start and is a safety device that prevents accidental start. Remove the battery when you do not operate the product and when you let it stay out of view.
To start the battery
You need to start the battery before the first time you use it.
- Put the battery into the charger, see To charge the battery on page 13.
- Wait until a minimum of 1 green lamp comes on, approximately 10 seconds.
- Attach the battery to the engine, see Electrical start (LC 347VI, LC 353VI) on page 11.
To charge the battery
If only 1 or 0 lamp indicators on the battery are on, it is necessary to charge it. An empty battery is fully charged in 1 hour. To charge for shorter periods of time does not do damage to the battery.
- Put the battery in the battery charger. (Fig. 42)
- Connect the battery charger to a power socket, 220V, 50Hz.
Status for battery charge
| LED display on the battery | Status |
| LED 1 flashes | 0%-25% |
| LED 1 is lit, LED 2 flashes | 25%-50% |
| LED 1, LED 2 are lit, LED 3 flashes | 50%-75% |
| LED 1, LED 2, LED 3 are lit, LED 4 flashes | 75%-100% |
| LED 1, LED 2, LED 3, LED 4 are lit | Fully charged |
| Lamp indicator on the battery charger | Status |
| Constant red light | The battery charges |
| Flashing red light | The battery is too warm and will start to charge when the temperature is correct |
| Constant green light | The battery is fully charged |
| Flashing red and green light | The battery is damaged and must be replaced |
Air filter
An air filter that is used for a long time cannot be fully cleaned. Replace the air filter at regular intervals.
All models except LC 247, LC 247S have a paper filter. LC 247, LC 247S have a foam plastic filter.
Note: Always replace a damaged air filter.
To clean the paper filter
- Remove the air filter cover and remove the paper filter.
- Hit the filter against a flat surface to make the particles fall off.

CAUTION: Do not use solvent or compressed air to clean the paper filter.
- Put the air filter back. Make sure that the air filter fully seals against the air filter holder.
- Put the air filter cover back.
To clean the foam plastic filter
- Remove the air filter cover and remove the foam plastic filter.
- Clean the foam plastic filter with soap and water.
- Flush the foam plastic filter in clean water.
- Squeeze the water from the foam plastic filter and let it dry.

CAUTION: Do not use compressed air. It can cause damage to the foam plastic filter.
- Lubricate the foam plastic filter with engine oil.
- Press a clean cloth against the foam plastic filter to remove unwanted oil.
- Put the air filter back. Make sure that the air filter fully seals against the air filter holder.
- Put the air filter cover back.
To examine the spark plug

CAUTION: Always use the recommended spark plug type. Incorrect spark plug type can cause damage to the product.
- Examine the spark plug if the engine is low on power, is not easy to start or does not operate correctly at idle speed.
- To decrease the risk of unwanted material on the spark plug electrodes, obey these instructions:
a) Make sure that the idle speed is correctly adjusted.
b) Make sure that the fuel mixture is correct.
c) Make sure that the air filter is clean.
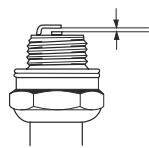
If the spark plug is dirty, clean it and make sure that the electrode gap is correct, refer to Technical data on page 15. (Fig. 43)
- Replace the spark plug if it is necessary.
To examine the fuel system
- Examine the fuel tank cap and the seal for the fuel tank cap to make sure that there are no damages.
- Examine the fuel hose to make sure that there are no leaks. If the fuel hose is damaged, let a service agent replace it.
To adjust the clutch wire
If the drive starts to feel slow, it is necessary to adjust the clutch wire.
- To increase the drive speed, turn the adjuster screw counterclockwise.
Note: If the drive is engaged when you do not pull the drive bail, it is necessary to extend the wire.
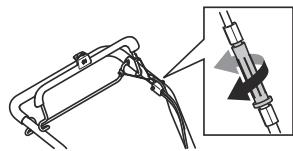
- To extend the wire and decrease the drive speed, turn the adjustment screw clockwise. (Fig. 44)
If the drive feels slow also after the adjustment, let an approved service agent replace the drive belt.
To adjust the clutch wire for the adjustable speed (LC 347V, LC 347VI, LC 353V, LC 353VI)
If the engine is started and the slowest speed cannot be engaged, it is necessary to adjust the speed control.
- To increase the drive speed, turn the adjuster screw counterclockwise.
Note: If the drive is engaged when you do not operate the speed control, it is necessary to extend the wire.
- To extend the wire and decrease the drive speed, turn the adjustment screw clockwise. (Fig. 44)
If the drive feels slow also after the adjustment, let an approved service agent replace the drive belt.
Transportation, storage and disposal
Transportation and storage
Disposal
- Obey the local recycling requirements and applicable regulations.
- Discard all chemicals, such as engine oil or antifreeze, at a service center or at an applicable disposal location.
- When the product is no longer in use, send it to a Husqvarna dealer or discard it at a recycling location.
- Discard the battery at a service center or discard it at a disposal location for used batteries.
Technical data
| LC 247 | LC 247S | LC 247SP | LC 253S |
| Engine |
| Brand | Briggs & Stratton | Briggs & Stratton | Briggs & Stratton | Briggs & Stratton |
| Displacement, cm3 | 125 | 125 | 140 | 163 |
| Speed, rpm | 2900 | 2900 | 2900 | 2800 |
| Nominal engine output, kW1 | 1.8@2900 | 1.8@2900 | 2.1@2900 | 2.4@2800 |
| Ignition system |
| Spark plug | Champion QC12YC | Champion QC12YC | Champion QC12YC | Champion XC92YC |
| Electrode gap, mm | 0.5 | 0.5 | 0.5 | 0.5 |
| Fuel and lubrication system |
| Fuel, unleaded, minimum octane number | 90 | 90 | 90 | 90 |
| Fuel tank capacity, litre | 0.8 | 0.8 | 0.8 | 1.0 |
| Oil tank capacity, litre | 0.5 | 0.5 | 0.5 | 0.5 |
| Engine oil2 | SAE 30/SAE10W-30 | SAE 30/SAE10W-30 | SAE 30/SAE10W-30 | SAE 30/SAE10W-30 |
| Weight |
| With empty tanks, kg | 27.5 | 29.5 | 30.0 | 32.4 |
| Noise emissions3 |
| Sound power level, measured dB (A) | 96 | 96 | 94 | 96 |
| Sound power level, guaranteed LwadB (A) | 96 | 96 | 96 | 97 |
| Sound levels4 |
| Sound pressure level at the operatör's ear, dB (A) | 85 | 85 | 84 | 85 |
| Vibration levels5 |
| Handle, m/s2 | 3.4 | 3.4 | 3.4 | 4.0 |
| Cutting equipment |
| Cutting height, mm | 20-75 | 20-75 | 20-75 | 20-75 |
| Cutting width, mm | 470 | 470 | 470 | 530 |
| Blade | Collect | Collect | Collect | Collect |
| Article number | 5882755-10 | 5882755-10 | 5882755-10 | 5797972-10 |
| Grass catcher capacity, l | 55 | 55 | 55 | 60 |
| Drive | |
| Speed, km/h | - | 4 | 4 | 4 |
| Start | |
| Electric starter | No | No | No | No |
| Battery | - | - | - | - |
| LC 347V | LC 347VI | LC 353V | LC 353VI |
| Engine |
| Brand | Briggs & Stratton | Briggs & Stratton | Briggs & Stratton | Briggs & Stratton |
| Displacement, cm3 | 163 | 163 | 163 | 163 |
2 Use engine oil of quality SF, SG, SH, SJ or higher. See the viscosity chart in the engine manufacturer's manual and select the best viscosity based on the expected outside temperature.
3 Noise emissions in the environment measured as sound power (LwA) in conformity with EC directive 2000/14/EC.
4 Noise pressure level according to ISO 5395. Reported data for noise pressure level has a typical statistical dispersion (standard deviation) of 1.2 dB (A).
Vibration level according to ISO 5395. Reported data for vibration level has a typical statistical dispersion (standard deviation) of 0.2m / s^2
| LC 347V | LC 347VI | LC 353V | LC 353VI |
| Speed, rpm | 2900 | 2900 | 2800 | 2800 |
| Nominal engine output, kW 6 | 2.4@2900 | 2.6@2900 | 2.4@2800 | 2.6@2800 |
| Ignition system |
| Spark plug | Champion XC92YC | Champion XC92YC | Champion XC92YC | Champion XC92YC |
| Electrode gap, mm | 0.5 | 0.5 | 0.5 | 0.5 |
| Fuel and lubrication system |
| Fuel, unleaded, minimum octane number | 90 | 90 | 90 | 90 |
| Fuel tank capacity, litre | 1.0 | 1.0 | 1.0 | 1.0 |
| Oil tank capacity, litre | 0.5 | 0.5 | 0.5 | 0.5 |
| Engine oil 7 | SAE 30/SAE 10W-30 | SAE 30/SAE 10W-30 | SAE 30/SAE 10W-30 | SAE 30/SAE 10W-30 |
| Weight |
| With empty tanks, kg | 30.0 | 32.0 | 32.8 | 34.2 |
| Noise emissions8 |
| Sound power level, measured dB (A) | 95 | 95 | 96 | 96 |
| Sound power level, guaranteed LwA dB (A) | 96 | 96 | 97 | 97 |
| Sound levels9 |
| Sound pressure level at the operator's ear, dB (A) | 84 | 84 | 85 | 85 |
| Vibration levels10 |
| Handle, m/s2 | 4.2 | 4.2 | 4.0 | 4.0 |
| Cutting equipment |
| Cutting height, mm | 20-75 | 20-75 | 20-75 | 20-75 |
| Cutting width, mm | 470 | 470 | 530 | 530 |
| Blade | Collect | Collect | Collect | Collect |
| Article number | 5882755-10 | 5882755-10 | 5797972-10 | 5797972-10 |
| Grass catcher capacity, I | 55 | 55 | 60 | 60 |
| Drive | |
| Speed, km/h | 2.8–5.0 | 2.8–5.0 | 2.8–5.0 | 2.8–5.0 |
| Start | |
| Electric starter | No | Yes | No | Yes |
| Battery | - | Li-ion 10.8V/15.7WH | - | Li-ion 10.8V/15.7WH |
Husqvarna AB, SE-561 82 Huskvarna, Sweden, tel: +46-36-146500, declares that the lawn mowers Husqvarna LC 247, LC 247S, LC 247SP, LC 253S, LC 347V, LC 347VI, LC 353V and LC 353VI from the serial numbers 2016xxxxxx and onwards comply with the requirements of the COUNCIL'S DIRECTIVE:
of May 17, 2006 "relating to machinery" 2006/42/EC
of February 26, 2014 "relating to electromagnetic compatibility" 2014/30/EU
of May 8, 2000 "relating to the noise emissions in the environment" 2000/14/EC
Information relating to noise emissions, see Technical data.
The following standards have been applied:
EN ISO 5395-1, EN ISO 5395-2, EN ISO 5395-2 Amd1, EN ISO 5395-2 Amd 2, EN ISO 14982
If not otherwise stated, the above listed standards are the latest published versions.
Notified body: 0404, RISE SMP Svensk Maskinprovning AB, Box 7035, SE-750 07 Uppsala has issued reports regarding the assessment of conformity according to annex VI of the COUNCIL'S DIRECTIVE of May 8, 2000 "relating to the noise emissions in the environment" 2000/14/EC.
The certificate has the number: 01/901/264, 01/901/265, 01/901/281, 01/901/282
Huskvarna, 2016-11-01

Claes Losdal, Development Manager/Garden Products (Authorized representative for Husqvarna AB and responsible for technical documentation)
CopepkHne
BbVeHne. 20
BessonachocT. 21
MOHTAK 24
Onepaia 25
PonnpbXka. 26
TpaHcnpToPAnHe,cbXpaHEnHe nIaXbPnIe. 30
TexHHueckn XapaKTepeHCTMkn 31
Deknapaia 3a CbOTBeTCTBHe Ha EO. 34
BbVeDeHne
Onncahne Ha npodykta
PnOyKbTe e neXeOHa potaOnHn Kocauka. TpeBaTa ce b6npa B KOU 3a TpeBa.CBaneTe Koua 3a TpeBa, 3a da ce noIyuN 3aNo paoTobapBaHe na TpeBaTa. NocTabete KOMnIeKT 3a MyuHpaHe (DOnbInHteNa pinaHneXhoCT), 3a da HapeKeTe TpeBaTa B Topa.
Obui npereHa npoodykta
(ФИ.1)
1.Дрьжka 3a сипачкata Na Двигател/стороватшнha(LC 347VI, LC 353VI)
2.Дрьжka/ynpabJIeHne
3. BnokpoBka Ha npckaHe (LC 347VI, LC 353VI)
4.Дьхka3a3aDbNVKBaHe(LC247S,LC247SP)
5. UnpaBneHnHa o6oPOTnTe
6. Kow 3a TpeBa
7. 3aDéhen kānak
8. PerylnapaHe Na BncoounHaTa Ha pBykaTa
9. Мерпелна пьчka/розервоар за масло
10. Akymyntop, npedna3Ho yctpoiCTBO (LC 347VI, LC 353VI)
11. Kanak cpeu npra3BaHe
12. Aycnyx
13. 3anaTneHa Cbeu
14. Bb3dyeuen qnIITbp
15. PeερBoaρ 3a ropnBO
16. YnpaBneHnHa BnCOnHaTa Ha p3aHe
17.Поdkачвашиnomma(LC247,LC247S)
18.ДрьхkaHa BxKetoHa CTapTepa(He ce OTHacr 3a LC 347VI,LC 353VI)
19.Инстукцяза ekcnloataця
CMMBOJIN Bbpx MaunHata
(ФИR.2) PPEДУПЕХДЕH涅: HemapлNBOTOин He npaBnHToIM nI3N03BaHe Mоже дdoBeDEdo cePNO3Ha noI phaTaNHa TpaBMa Na OpeaTopoN 3aO6KanJaITe Ro.
(Фиг.3) IpoouTeTe BHNMaTeNHO pKbOBOdCTBOTO 3a onepaToPA nCe yBepeTe, Ye pa3bIpate INHCTpyKuINTE, PpeDN Da N3PON3BaTe MaSInHATA.
PpeHa3NaYeHne
I3no13BaIte npOyKta, 3a da KocTe TpeBa B YacTHn rpaDInH. He n3no13BaIte npOyKta 3a dpyr 3aDaun.
(ФИг.4) ДьхтExopoTaNJXNBOHTHnTeHa6e3ONaCHO pa3CToRnHeOTpa6OTha3OHa.
(ФИ.5) Cnpete DniratentenI OTCtpaHete 3anaiTeNIIKAbenPpei peMOHTNI IN TeHXuYeckoOcbnyXBaHe.
(ФИ.6) Мерпелна npьчka/MaclenфиNTbp
(Фиг.7) Пазerte ce ot OTсачauи прдмети npKKoшETN.
(Фг.8) Ппсдурпждени:Бьртш ce HOK. Oсигурете npoctpaHCTBO OKOLO pьteTe Kрakata cI.
(Фг.9) Ппедурөхдөнү: Блртуши се част. Oсигурete поостранст BO OKОLO рьцete И кракатɑ с.
(Фиг.10) To3n npOdyKT OTROBaprHa n3NcKBaHnTa Ha npInnoKIMTe DnpeKTbnu HA EO.
(Фиг.11) 乌mOBn Emncn B OKonHaTa Cpea B cBtBeTCTBne C DnpeKtnBaTa Ha Ebponeckata ObuHocr.EmncnTe Ha npOyKa ca nocOeHn B pa3deJa 3a TEXNueckx XapakTeepntKn N Ha Ta6eKnata.
(Фиг.12) Бьрз0.
(ФИ.13) BaHNo.
(Фг.14) Cmkya.
(Фиг.15) Puck ot ekcnnoia.
(ФИ.16) Otpa6oTeHnIte rAgoBE OTdBvRatEna CbIbPjKAT BvIepeOJeONIC-MHOrO onaceH,otpOBeHra363mmpu3Ma.
CTapTnpaIte DbVraTeJIHa 3aKpnto IIN B 3aTbOpEnI pOcTpaHCTBa.
(Фиг.17) Пизakунbahe npodykTbT HЯma MacNo BдвогATEJI.
(Фиг.18) Hambhe macno, npedn da 3anoHete pa6ota c npo4yKta.
(Фиг.19) 3apexdahe.He n3noI3BaIte ropBO, Koeto ce npoaba kaTo E85 (85% etanon).
(Фиг.20) Tópeça noBbpxHocT.
(ФИR.22) Ппеди n3bршваеHaTeхнчесka
поДрьжka ИлппсдЯ оctавитe
машина заэн habиденье,OTCTранеТe
Клоча 3a БзonaCHOCT (akymyatopa).
(Фиг.21) KoD CBb3MOxHOCt 3a cKaHnpaHe.
3a6eexka: OctaHJInte cIMBONH/CTKepn Ha npOdykTa ce OTHACrTdo N3NCKBaHn PO OTHoUHeHne Ha cePTnФHKATn 3a HJKOHTbPROckn 3OHN.
Emicn Euro V

PPEyPPEKDEHNE:HaMeCaTaB DvIraTeJI npaBn HeBaJIInHO EC OoObpeHneTo Ha Tn H To3n IpOdyKT.
OTROBOPHOCT 3a npoodykta
KaKTo e NocOueHb B 3aOHnIte 3a OTROBOPHOCT 3a BpeN, pnpuHHeNOT CTOKn, Hne He HOCIM OTROBOPHOCT 3a UeTIn, npnuHHeNt ON hauNIA npDyKT, Ako:
- npOdykTbTe HnepaBnIHOppeMOHTnpaH.
- pOuYkTbTe pEMoHTnpaH C qaCTN, KONTO He ca OT npOn3BODnteIe IIN He ca OoobpeHn OT npOn3BODnteIe.
- npOyTbNMA pRnHAdJeKHOCT, KOrTO He e OT npOn3BODnteIa NIN He e Odo6peHa oT npOn3BODnteIa.
- pnoDyKbT He e peMoHTnpaH B Odo6peH cepBn3eH ueHTbp mnn OT Odo6peH opraH.
Бezonaachoct
DeΦnHmN 3a 6e3oNaChOCT
IpeDynpEckDeHnA,3Haa3aBnHMAnHe N6BeJekKc Ce n3NoI3BaT 3a yKa3BaHe Ha Oco6eHb BaxKn Yactn Ha HNCTpyKuYTA.

PNEyPExKdEHNIE: N3no3Ba ce, ako
IMa OnaCHOCT OHaHapnBaHe Nn CmBPT 3a
Opepatopa Nn 3a OKONHnTE, aKO He CE
Cn3BaTb INCHETpykUInTe B pKBOBDCTBOTO.

BHIMAHHE:Изпольва ce,akO Иma
ОпАСНСТ OT NOВРЕЖДАне Ha MauIMHATA,
Дугг Матерпали Или СбсEDнATERa 3Онa,akO
He CE CпЗВAT INHCTPyKUПNTe B
рБКOBODCTBOTO.
3a6eJekka:ИЗпОЛЗВа ce 3a пеДОCTЯВЕн noBueye nHΦopMaци, KOrTo e HeOxOДмьmaВ ДдЕнa CnTуаци.
ObunnHnCTpykun3a6e3oNaCHOCT

PPEyPPEKDEHNE: PpoyeTe CneDbauuTE npdynpaTeJIHH yka3AHn, PpeDu da n3non3BaTe MaunHaTa.
To3n npoDykt e onaCen, aKe ce n3NoTBA HnpeBAnH0 nnAKe ho Cte BnMATEnn. HeNa3BaHeTO ha NcHTpyKUnMe 3e 6BeONaOCT MoKe Da IObeDE NO HaparNABaHe nI IN CMbPT.
Ta3n Maunna Cb3daba eEnktpomarHHTNO Jone NO Bpeme Ha paobaT. Pn HnKoynocBnou Toba nOne MoKe Da INTEPpeepira c AKTMBHIN NIN NACNBH
MeiHnCKn IMnPaHaTn.3a Da HamaJIte PnCKa OT TeKko INI CMbPTOHOCHO HapAHBaHe, HMe npenOpByBaMe IInaTa C MeiHnHcKn IMnPaHTn Da ROBOPrC Nekapr Cn IN pOn3BOJNTeI Ha MeiHnHcNkIMnPaHT, PneI Da 3aNoHuHaT da pa60Tc Ta3n MaunHa.
BnHaH6bJeTe BnHMaTeHNH nNoDxOxJaDaTe pa3yMHO.AKHe oCTe CNrYpHn KAK da pa6oTne C npOdyKTA pRn CneuHaNA cNtuaa, cnpeTe n ce 06bPHTe KbM BaUaH dIbIbPa HUsqvarna,npedn da npOdbJXnTE.
- IMaIte npEdbN, Ye OpeaTOpbT Hocn OTROBOPHOCT 3a Heuactn CNyua, BKNUHbAun dpyrN XOpa NII TxAHOTIO MUYUeCTBO.
- PoiIbPkaIte npOyKta YBepeTe ce, ye pa3uHTaTe rCHO 3NaUITE u CTnKepeTte.
He no3b0nBaIte Ha kOroto n da e da pa6oTn c npOkyTA,doKaTO He CE yBepNTe,Ye e npOeu n pa6bpAn CbIbPjxHaeTo HA NcHTpyKzIyTA 3a ekCnloatauia.
He no3BolraBaTe Ha daeza da pa6oTc npOyKta.
-Дрьжerte Deца tanae ot pa6othata 30ha.Ппз ecIATO Bpeme Tpr6ba ДЯ рисьстВа OTROBOPe Hb3pacteH.
He no3BolraBaIte Ha Iina, KOIto He ca 3aNo3HaTn C HNCTpyKuInTe, da pa6oTt C npOdykTa.
BnHaHn Ha6JIIOdAbaTe IInca C hAmaleh fN3nUeckn nn yMCTBeH kanauNT, KOtIO n3nOJ3BaT npOyKta. Ppe3 cIyNoto Bpeme Tpr6Ba da npinCbCTBa OTROBOPe BV3paCTeh.
- He n3npo3BaBte npOdykta, aKc Tce yMOpEnH, 60JHnI nnI NOB B3deIeCTBneTo HaAnKoxOnI, NapKOTnIu nnI nekapctBa. Toba cTbctOHaNMe Ok3aBa
OTpuaTeIHO B3dEeCTBHe Bbpxy BaWTo 3peHne, 6DHTeNHOCT, KoOpDHauaNn InpueHka.
He n3no13BaIte npOdykTa, ako e Hen3npaBeH.
He npomehnTe TO3n npoDyKT INH He ro nIOnI3BaIte, aKo IMa BepoRTHOCT ToJ da e 6bn pOmHenOT OJpyr.
Be3onachocht ha pa60thata 6JIaCT

PPEyIPEXDEHNE: PpOeTeTe CnEaunTe npEynpTeJIHH yKa3AHNA, PpeDu Da n3non3BaTe MaunHaTa.
- Oćtrpahete npenrTCTBnKa Tko KNoHn, npbUKNi KambHn OT pa60THata 3oHa, npedn da n3noN3BaTe npodyKta.
- 06eKTHe, KOINTO CE yDpR T B pEKeIOTO
obpydBaHe, MORaT DA bSdAT mXbBpNeHn N da
npuHnT HapAHaBaHe Na liuata N uTeN Ha
npedMTHe. DpJxte CTpaHnTe HaNbOaTeNn
XkBOHTHe Na Be3oNaCHO pa3CTOrHne OT npOdyKTa.
Hnkora He n3non3BaIte npOykTa B looB vBpeMe - HnnpMep npmMbIgA, DbJd, CnHnB BTePoBE, MHOro CnENCTUD INPCK OT MbHIN. N3non3BaHTo ha npOykTa B looB vBpeMe IINB bByx BnaXHN IIN MOKpn TepEn E n3MopntelHo. JIoTO BpeMe MoKe Da c3daDe OanChu YcNoBn, KaTO HnnpMep Xlb3rABn NOBbPxHOCTN.
BHMMAaIe 3a IInua, pIeDMTe N CHTyauN, KOITOMaT da ca npuHnHa 3a HamaJIraBaHe Ha6e3Opachata pa6Ota H naPdYkTa.
BINIMABAaIte 3a npenTCTBnK kato KOpEn, KAmbHn, KNOHn, MMN KAnhBKn. Iblrata TpeBa MoKe da Kpne npenTCTBnK.
KochehtoHaTrebaHaCKnoHMOXeDa6bDe onaHO.He paOBeTeC pOyKa, KOrAto HAcIOHbT haNoBpXHOCTTa e NopebeOT 15^
- I3noJ3BaIte npOdykTa HanpeuHo Ha cKnloHa. He ce DnKJEte Harope u HaDony.
BHMABaIte, KORATO pEmHabate NOKpA3akPbAt bfln n npdmTeN, KOINTCKPbAT 3pntenHOTo Bn none.
Be3onachocT np pa60Ta

PNEpyIPEKxDEHNE: Ppoetete CnEbauite npdyeunTENyka3aHna, npde Da n3nO3BaTe MAUinhata.
I3n03BaJIte TozI npOdyKT cAmo 3a KocHe Ha MopabN. He ce donycka n3n03BaHTo My 3a dpyru zenn.
- I3noI3BaIe IuHn IpEJa3Hn CpeIcTbA. BIXKTe IuHn IpEJa3Hn CpeIcTbA Ha cTpaHnHa 22.
- YbepTe Ce, Ye 3Haete KaK 6bp3o Da CnpTe DBrIaTeJI npn abapnHa CNTuzaJna.
- HnKora He CTaptnaIte DBrInatela B3atBopeHOnpOCTpaNCTBO mIu 6bn3o Do 3anaJIIMM MaTePnAIm. Otpa6oteHnTE ra30Be OT BrInatela ca rOpesi nn
MOraT Da CbIbPkaT NcKpN, KOITO Da IpeiIN3BnKaT noKap.
He pa6oTeTe c npodykTa,doKaTo HOxBt N BCNUK Kanaun He ce MOHTnpaT npabuNHO. HenpaBUNHO MOnTHpAHHOT HOK MoKe Da ce pa3xla6n I da npuHnI TeneCha NobpeDa.
- YBepTe Ce, Ye HoxkT Hma Da ce Uypr B oBeKTH, KATO HAnpImep KaMbHn N KOpEHN. Toba MOKeJa da DOBEe Do NOpeHa Ha HOxHa N Do ORbBAHe Ha DByceKuONHHa Bn Ha DInratae. OrBaHata oc npedm3BnKbA CINHn BnOpaunn N Ima MHOro rJMaOnaCHOCT HOxkT Da ce pa3XnA6h.
Ako HOKbT ce yapn B HkaKB o6eKt nIe Ce nOnyat Bn6paun, cnpe Te BeHara npOykTa. N3KnOyete 3a ananitEnnHa Ka6en OT 3a ananitEnHata CBeu. IpOBepTe npOykTa 3a nobpei. PeMOnTupaite NobpeDITE nIIN NotPcTe OTOPI3pAHn cepBn3 3a TOBA.
Hikora He npnkpenyIte pBykata Ha cniparckata Ha dBiratenera 3a noctoHNO Bbpx DpBkKata, KORATO dBiratenere e CTAPITAPAH.
IocTabete npoDykTa Bbpxy cTaNHa, paBHa noBbPxHO TcTApnaiTe. YBepete ce, ye HOKbt He Ce DOnIPA B 3emrTa NIN Bdpyrn npedMeTn.
BnHaHcStOHTe 3aI npOdyKta, KOrato ro n3non3BaTe.
BcNkK konela Tpr6ba da 6bDat Ha 3emrTa n da Dpbxnte dpXkKaTc 2 pLue, koraTo paBoTnTe c npOyKtA. PpXte pLceTe KpaKaTa cn daneU ot BpTnIeTe ce octPeta.
He haklahaIe npOdykTa npu cTaptnpaH dBnraTeI.
Бьдete BHMateHnKoratoDbpnaTe npOykTaHa3a.
- HnKora He nobirraTe npOdykTa npN cTaptnpaH dBiratEn. Ako Ce hana Ta da BnuHReTe npOdykTa, mBpBO cnpTe dBiratEn nNkHouTe 3anJNTENHn Ka6en OT 3anJNTENHATA CBEU.
He ce DvIXeTe Ha3aI npu pa6Ota c npoDyKtA.
Cnpete DbrnateTn, KORATO npemHabate npe3 6bnactn 6e3 TpeBa, HapnpMeP NbTeKn Ot KaBn, kambk nn acfant.
- He Tnuaite C npOdykta, KOrato DbrVaTeIaT pa6oTn. BInarH xOJeTe, Korato pa6OtuTE C npOdykta.
Cnpete Dnuratena, npedna da npomeHInTe BnOcunHa nA p3aHe. HkOra He peryUnpai Te npi cIaptnaH Dnuraten.
Hikora He octabrayite pnoyka 63e nad30p, KoraTo dBiratentpaobtn. Cnpete dbratenei ne cy ybepeTe, ye peketoO obopdybaTe ne ce bptn.
Инструкции 3a 6e3oNaCHOCT 3a pa6ota
JIuHn npedna3HN cpeCTBa

PPEyPPEXDEHNE: PpOeTeTe CnEaunTe pEynpeInIeHNu Ka3AHna, PpeDu Da n3NoI3BaTe MaunHaTa.
ЛИЧНITE npEdn3Hn CpeDCTBa He n3KJIOUbAT n3ZIPO nscA OT hapaHЯBAHe, HO hAmJIaBt CTeENHa Na hapaHЯBAHoTo npri 3NOpONyKa. Heka BaIshnДmIbP Bn nomorHe da n36epete noIXOJaTO o6OpYBaHe.
- 13noJ3BaIte aHTnΦoHn, aKO HbTO Ha IyMa e NOBucOKO ot 85 dB.
Hocete 6otyunn nn oobknu, yctoynbnu Ha xbl3rahe. He hocete otBopeni oobknu n He xoTe 60cni.
- I3non3BaIte Dbln nantanoHOn OT 3dpab nlaT.
Korato e Heo6xOIMMO, Hocete 3aunTHn pKaBUN, Hanpimep, Korato 3akpenBaTe, npOBeRbATE nIN noNCTBaTe pexeToO o6OpyDbaHe.
Ппспocблени 3а 6ezoanchoCT haMaшинотa

PPEyPExEHEN: PpOeTeCneBauNTpeDyPteHnUka3AHH, PpeDu Da n3non3BaTe MaunHaT.
He n3no13BaIte MaIina Hc HeN3npaBn npncnoc6bIeHna 3a 6e3oNaCHOCT.
- Повераянше рedingов поспocбенита 3а 6e3oanachoct. Ако псncoc6beneHTa 3a 6e3oanachost ca depekTHn, robopeTe c Baunia cepBn3 Husqvarna.
3a npobepka Ha kanaka cpeuy npra3BaHe
KanaikbT cpeu nporbahe hamaJraBa Bm6paunite b npodykTu onachoCTTa oHapaHbaHe, npnuHHeN oT octpnoTo.
Be3oNaChOCT npa6ToC rOpHbO

PPEyIPEXDEHNE: PpOeTeTe CnEaunTe pEynpeInuYka3Anna, PpeDu Da n3No13BaTe MaunHaTa.
He BkIIOUChBaIte npOduKyTa, aKo BbPxy Hero nMa roPnBO nIN MOTOPHO MaNo. OTeCpAheTe HHexeAHOTo rOpNBo/MacNo n OCTaBeTe npOduKyTa da n3cbxHE.
Ako pa3neete ropuBO IO dpexnTe cn, cmehe Tn He3a6abHo.
BHMaBaiTe da He nonaIHe ropnBO bBypx TAnOTo Bn,TOBa MoKe Za DoBeDe Do TeeneChi YbpeXdAnH. Ako rnpBO nonaIHe bBypx TAnOTo Bn, n3noJ3BaIte canHy n BOda, 3a Da ro OToCTpaHnte.
He cIapuayTe npOyKta, aKO OT dBnIaTeJMa TeJ. IpoBepBaTe peoBHO dBnIaTeJra 3a TeOBe.
BnIMBaIeTc rOpBIOTo. FOrpBIOTo e 3anaJIIMO, nIapaeHnIaTc Ca BzPBOOAnchN MoRat da npInHnT TEneChN yBpeXdAnH Nm CMbpt.
HeBnIbAitepormbHnteN3napenHnToBaMOKe DaIOBeDeDoTeNEChnYBpeKdAnH.NyBepTe Ce, YeIMaDOCTaTbueh Bb3dyuWeH NOTOK.
He nyuheTe 6Jn3o do ropuboto nn DbrataTJe.
He noctabrayte ToPnI npEaMeTn 6n3o Do ropNbTo nIu Dnuratena.
He do6abayTe ropnBO, kOrato dBrVaTeTn pa6oTu.
- Ybepete ce, Ye Dbratent e n3ctnHan npedn 3apekdahe c ropuBO.
- Pπeɪn 3aερκdʌhe C rρινɔ O TBOPeTe 6aBHo kanaʊkata ha pe3ερbOapara 3a rρινɔ N oCobδoTe BHNATEHNO hʌŋrAHETO.
He do6abayTe roPBO KbM DnBnraTeIHa 3aKpNTo. HeoOCTaYHmHbZdUyWeH NOTOK MOKe Da DOBeDe Do hapaHReBaHe nIIcMbptNopadn 3aDyUbaAbe Hnn BvflnePoDeOHKc.
3aterHete kanaKnata Ha pe3epBOapa 3a rOpBOKoKpA. Ako kanaKnata Ha pe3epBOapa 3a rOpBHe e 3aterHata,IMApCK OT JNOnOnyka.
- Ппдз Двлоччд Вгатела,преметete npodukт ha-maКо ha 3 m/10 ft ot мястOTO, Къето CTe зареди рezepBOapa.
He 3apekdaTe pe3epboa4 3a ropnBO dorope. Tonnilnata npuHnHa yBEnuabaHe Ha oBema ha ropBOTO.OctabJeTMeRCTo B rOpHaTa YaCT Ha pe3epBoa4 3a rOpNBO.
IHCtpykun 3a 6e30nacHocT npI TexHnuecko o6cnykBaHe

PPEyPPEKDEHNE: PiopeTeTe CnEbaunTE npEynpeIeTENH yKa3AHNA, npEn Da n3NON3BaTe MaunHaTa.
- Otpa6oTeHnte ra3Obe OT dBnraTeTne CbIbPkaT BByrpeDcEN OKMc - MHOrO onaceH, OTPOBe r3 6e3 Mnpn3Ma. He cTatpnaTe DBeTneHa 3akpnto nIn B 3aTbOpEn npocTpcaHCTBa.
- Пгеди Т电商ншке обслуквае на поodyкта спете двигатул изklючete залиотелся Кабен OT залиотелна с蜱ц. Рпс LC 347VI, LC 353VI отскразену и akymуnatорpa.
Hocete 3aunTHnPbKabuN, KoraTo ue nI3pIbIbRAte DneIOCTn,CbIpa3AnC TeXHHueCKOTo 6OcnykBaHe napeKeIto OobpyDaBe.HoKbTe mHOro OtBpN MoKcTe Necho Da ce NopKcTe.
Akkceccapn n npomehn ha npodykta, konTo He ca oOobpeHn OT npoN3BOuNTeMa, MoRaT da doBeaTdo cepno3HO hapaHaBaHe nI cmBpT. He npabeTe npomehn no npodykta. BInHarn n3NoP3BaTte camo akcecoapn, konTo ca Oo6bpeHn OT npO3BOuNTeMa.
- Ako TexHnueCKOTO 06CnlyKBaHe He ce nIbnHLBA npaBnHO npedBOH, pckbT OT hapaHraBaHe n NOBpeHa Ha npdoyKta Ce yBennaba.
- ɪnɪŋhɪraBæTéTexHηUeCKToObCnIyKbaHe caMo KaKTo e nOcoUeHOB T OBA pIbKOBoDCTBO Ha co6CTBeHnKa. BcNkN octaHaJInc cepBn3Hn DeiHoctn TPrBaBa da ceɪnBbPbWbAT oOdopeH Husqvarna cepBm3.
- Позьоне одобpen Husqvarna cepBn3 peoBno da obcnykBa npodykta.
3aMeHeTe NOBpeHn, HIOcEH INI CUYeHN qACTN.
MOHTAX
BbVeDHeHne

PNEUYIPKDEHNE: Pnpa da crno6te Maunnata, npoetete rnaBata 3a 6e0anact. Pnp LC 347VI, LC 353VI OCTpAnethe n akymyntopa.
3aДа монтураTe рькхватkaTа
- Pa3xna6eTe doJHnITE KOnHcTa.
2.ПпемсгетeФнкcatopnteКМДОЛнЯ КраиHa KaHаJInteOTJЯВaTaNДСНaТaCTpaHa Na npOуKTA. (ФИr.25)
- 3aaiTe BInCOnHnHa Ta Ha dpbXkata BeDHO ot 2 Bb3MOxHN NIOLOKeHn.
4.Ппемесгетефксатогип по nocoka на дрьжкata, дokato cnpatи се уе урakbahe. (Фиг.26)
- 3aTeHHeTe HnBbNoΦKCaTopuTe.
LC 347VI, LC 353VI BnHaŋ nI3BaXdJaIte
akymynaTopa npedu Texnuecko
06cnykbahe, pemOH Tnn NouchBaHe Ha
MaushuHaTa.
Интервалпente 3a Тетхическо obслужвае ca n3uCnEHH a 3BavcHMoCT OT exeJdHeBHata yNtpe6a Ha npOdykT. Иntервалпente ce npOMeHrt, aKo npOdyKtBt He ce n3NoI3Ba exeJdHeBHO.
3a TeHHuecKO 6ObIyKbaHe, MapKIPAHO CbC *, BIXKTe HCHPTKYUHTe B PIncNoC6NeHnHa 3a Be3oNaChOCT Ha MaIIINHATA HA cTpaHnua 23.
IPENyIPEXEHEH: HocTe 3aunTHn
pbKaBnC, KOraTO 1e N3NJIHBAte
ДeиноCTN,СБьрзAHСТХнчecKOTO
O6cnyBaHe Ha pexeTo O6OpyDaBaHe.
HoxbTe Mhoro ocTbp IMoKeTe JecHO da ce nopexkeTe.
- Поберете рөгштө оборудваха за пов体育场н.
nyкhal'tин. Виаги замени төрөдөнтөрөшо оборудвах.
2.Погледнete Нжа,зада пазберетдами He e noBpeDeH nIIN 3aTbneH.
3a6eJk: HeoMIO e da 6aHcnpate HoKa cneI 3aTOBaHe. HOKt CE 3aTOBa, CMeHa I balaHcnpa O t cepBn3eH ueHTbP. Ako ydapnte npenrTCTBne I BCNeCTBnE Ha TOBa IpOdyKTb CTpe, CMeHeTe NOBpeENHn HOK. OCTabeTe CneuaNCTte B cepBn3a Da npeHcN TaII HNOXt JIe Tp8Ba Da ce 3aToHn, INI Da Ce CMeHN.
3a cmeHHe Ha HOKOBeTe
- 3actonopope Hoxa c dbpbhen 6nok. (Фиг. 39)
- CbaneTpnpdtpkzaaia 60nt Ha HOKOBete.
- CbaTe Hoxa.
- Поверете Нocа на Ножа и пидьржашиь солт на Нховete, за на Ви dentе далима пореди.
- Поверете далдускуннгт вл на dBirataл hy e orbnat.
- Korato noctabTRE HOBIA HOK, HACOHTE I3BNTITE KpanuHa HoKHa NO NocOka KbM Kanaka Ha pexeJIte uactn. (ФИг. 40)
- YbepeTe Ce, Ye HOKbTe IpoIpaBHe N cHTbpa Ha DByceKUOHHNBA BJI Ha DBrIaTeJIa.
- 3actonopete hoxa c nbpben 6Iok. IocTabepe npyxHHnHaTa 7aM6a n 3aterheTe 6oTna u 7aai6ata C Bbptraq MOMENT 70 Nm. (Phr.41)
- Pa3dBrKHe HOka Ha pKa n ce yBepe, Ye Toi Ce Bbptn Cbo6oJHO.

PNEyPExKdHHeN: N3non3baTne pBkABnIc BVCsOKa 3dpAByHa. HoXbTe MHoro ocTbp NMOKeTe JecHO da ce nOpexKeTe.
- CstapnpaIte npOdykTa, 3a da TeCTBaTe HOxA.Ako HOxbT He e NocTabeH npArBnHO, npOdyKbT Bn6pna IIN pe3yIITaTbT OT KOceHeTo e He3aDoBOJNTeHEn.
3a npoBepka Ha HNBOTo Ha MacNTo

BHIMAHHE: Tbprde HNCKOTO HnBO Ha
MaCnOTo MoKe Mda DIO BopeDa Ha
DbIrAteIa. IpoBepTe HnBOHa MaCnOTo,
npDei da cTatnpte npDyKta.
1.ПозиюнраiteMaшинataHa paВha NOBbpxHOCt.
2. Otrpahete kanaaKaTa ha pe3epBoapa c npKpeNaHa MepntenHa npbka.
3.Почиретe MacIoTO OT МерптEnHаТnpьчka.
4. ПOTONETe Мергелната пьчka докрай в розербараз за масло, за дожупес Точнинформая за НИВОТо на масно.
5. ɪЗbaɪteMepeɪteɪnHaTaɪpɒbɪka.
- BmKTe KOJIko e HnBOTO Ha MaCnOTo Ha MepuTeJHaTa npbUka.
- Ako HNBOTO Ha MacNoTo e HNCKo,doJeTe MOTOPHO MAcNO IOTHOBOIPOBepTe HNBOTo My.
3a cMaHa Ha MOTOPHOTo MaCNo

PPEUYPKEKDEHNE: MToPnoTO MaCNo e MHOro ropeo HenoCpeDCTBHeO CneI CNpAHeT OHa DBrAteTNe. OctabeTe DBrataTeJa n3ctnHe, npEi Da n3ToCHte MACNoTo.Ak pa3JeTe MToPHO MacNo BbPxY KoxaTa CN, NoChTe TcBc CaNHy I BOda.
- Pa6oTeTe c npOdyKta,doKaTo pe3epBoapa 3a roPnBO ce n3npa3Hn.
2.ИЗвадете заллтелпя кабел OT заллтелната CBeц.
- CbaneTe KanaykaTa Ha pe3epBoapa 3a MacNo.
4.Пocstabete cblnp npdykta,BkoTo da ce c6bepe MOTOPHOTo Macno.
- Hauhohe npodykta, 3a da n3teye MOTOPHOTo macno ot pe3epboapa 3a macno.
- 3apeTeC HOBOMOTOPHO MacNo OT npenopbuaHn TnB TexHueeCKX XapaKtepHCTNk Na cTpaHnca 31.
- Поберете НИВОТа HO MOTOPHOTо macNo. ВИкTe 3a npOBePkA Na HINBOTO Ha MacNToH O CTpaHnla 28.
Akymyjatop (LC 347VI, LC 353VI)

PNEyPPEXDEHME: DecekTHnIaT
akymatop hamama 6e0anachOCTHa
mauHnata. BnHaru n3nonBaIte
akymatop, oObopeH on pOnBbOHTeIa
AkyMnyaToptb3 aaxpaHb eeneKtpnueckn 3apTeP n e 3aunTHo yctpoIcTbO, KOeTO pneDTBpTaBA cnyauHIO nycaHe. KOrato He paBOTnTe C mAuHaNTu H KOrato J octabte 6be Ha6JIIoDeHHe, I3BaTe de AkyMnyaToPA.
3a6eJexKa:BnHaHn 3aMeHnTe nobpeH b3dyWeH pIITbP.
3a nouchBaHe Ha xapTneHnФntbP
-
Cbane Kaana Ha B3dyuHnHa pntbp nOTcpanHe xaptnehnHa pntbp.
-
YdapeTeФmTbpaBnIOsKaNOBbpxHOCT,3a da HakapateYactuNTeDa naHaT.

BHIMAHHE:He n3noJI3BaIte pa3TbOpTeI INI Bb3dYx NOD HAJIraHa 3a NOUcTBaHc Hx XApTneHnФINTp.
3.ПoctabeteВьздушнЯФиNTbpOBpaTHoHaMCTOTOМ.YepeTe ce,чeВьздушнЯФиNTbpHAnTbNHO npINIeBaКБmДьрЖаHaВьздушнЯФиNTbP.
4.Пoctabete KanakaHa Bb3dUnHnAФЛТьробраTHO Ha MЯCTOTO MY.
3a NOUCTBaHe Ha fIITbpa OT NopeCTa IJIaCTMaCA
- Cbane Ka naka Ha B3dyuHnna 4nnItpn maxheTne ppa ot npoeCTa nactmca.
2.ПоунsteteфилтbpaOTnopeCTaПlaCTmaca cbc canyHn BOda.
3.ИЗМИТЕФИЛТБРаOTПОЕСТАПпACTмACAВЧИСТАВODА.
4.ИЗТССКАЕ ВОДАТ OФИNTБРа OT NOPECTA ПЛACTMACA И ГО OCTABET DA ИЗСБХHE.

BHIMAHHE: He n3non3bai Te b3duyx noJn Hajiarahe. ToBa MOKe Da npuHInn NobpeDa Ha fNtBpa ot nopecta nnaCTmaca.
- Cmajete nntbpa ot nopecta nnaTmaca c MOTOPHO macno.
- ПпгИССЕТЕ УСТА КБРА ВБPyx ФИNTБра OT nopoета пл actмacia,зд за отстене HeXeNAHOTO macNo.
- NocTabete Bb3dyuHnHa qinItp obaTno Ha MCTOTO My. YBepeTe ce, che Bb3dyuHnIr T qinITbp HapIbIHO npIneBnBa KbM dPkaHa Na Bb3dyuHnHa qinITbp.
- Пoctabete kanaka ha Bb3dyuHnЯ Филтbp obpaTHO ha MЯCTOTO MY.
3a npoBepka Ha 3anaJIteJIHaTa CBeU

BHIMAHHE:ИЗнолзайытевиаги
Запаллentнгte севшиот пелорьаня
Вид.ИЗнолзbaнeto на запаллentна севши
OT Искрарынен тп може за поврди
пюдкту.
- Поверете залипелна С党支部, поBNrataлг e с понжега мошноct,сторра Турно ил paBOTи Ненравомерно пи обороти на пазенхд.
3a da haamnnte anochcttaon nnonadahe hnekenanHHmatepnHnBbpxyeNtpoHnHa 3anaJNTeHnata CBEU, CnEdbaHTe Teu INHCTpyKcHm:
a) Поберете дали оборOTITE на праЗня xoД са npавино руунпари.
b) YbepTe ce, ye ropBHaTa cMec e npabInHa.
c) YBepTeCe, Ye Bb3dUshnraT fnnItp e nCT.
Ako 3anaIteHnHaTcBceU e 3aMbpCeha, nouchTeTe r npoBepete DaIIN pa3CTOHNTO MEkDy eJIeKTPoDInTe e npabUNHO, Hapabete CnpabKa c TexMHcckx XapaKTepNCTNU Ha CTpaHnca 31. (Phr.43)
CmeHeTe 3anaJIteHnHaTa CbeU, aKo e Heo6xOdmo.
3a npobepka Ha ropNBHaTa cnCTema
- Поверете Канда Кота на pe3eрьога за 3а горво и ультэннелто Канда Кота на pe3eрьога за рогово, зада се уberпг,在е не са NOВЕДEH。
- PpOBepeTe MapKya 3a rOpNBoT0, 3a da ce yBepnTe, ye He Teue. Ako MapKyu7t 3a rOpNBoT e NOBpeHn, ToI Tpa6Ba da ce CMeHOn cEpBIm.
3a perylnipane Ha Ka6eHa CbeDnHtTeIa
Ako 3aDbNkBaHTo 3aNoBa Da ce 3a6abR, Heo6xOJMo e da perynipate KInIOTo Ha CbeHNHTeI.
- 3a da yBelenuHte ckOpocTHa Ha 3aDnXbaHeTo, 3aBbPTe BnHTa 3a peryInpaHe o6paTHo Ha YacOBnIKOBaTa CTpeJIka.
3a6eIexKa:AKO 3aDbNkBaHeTo E BkHoueHo, KOraTo He NbPnate DpBkKaTa 3a 3aDbNkBaHe, Heo6xOJIMO e Da yDJIKInTe JINOTO Ha CbeDNHInTeJ.
- 3a da ydbnKITE xINTOI n Da hAmalnte CkOPOCTTaHa 3aDbNKBaHe, 3abpTepeYnnpaunBnHT no YacOBHnKOBaTc TcpeNka. (Фиг.44)
Ako Bn ce ctpyBa, ye 3aDnBxBaHeto e 6abHo n cnei hactpOkiKaTa, 3aDnBxBaIuT peMbK Tpr6Ba Da ce CMeHN B ODo6peh cepBn3.
3a pergunpahe Ha JnIoTO Ha CbeHHTeJra 3a pergnpyeMnte o6oTo (LC 347V, LC 347VI, LC 353V, LC 353VI)
AkoDbirateJrpatobOTn,aHai-NicknteObopOTnHeMOrat da ce 3aedCTBaT,e Heo6xOIMo da perynipateYnpablenHeToHaOBOpOTne.
- 3a da yBénHuTHe CkOpocTtHa 3aDvBxBaHeto, 3aBbPTe BnHTa 3a peryInpaHe o6paTHo Ha YacOBnKOBaTa CTpeJIka.
3a6eJekka: Ako 3aDbNkBaHeTo E BkIIOyeHo, KOrato He pa6oTne C ynpabIeHneTo Ha o6OpOte, e Heo6xOIMo Da yDbIKNite XINlOTO.
- 3a da ydbnKITE xinnoTo n da hamaInTe ckopocTt a Ha 3aDbNKBaHe, 3abpTepeylnpaunBnHT no YacobHnKOBaTa cTpeKa. (ΦIr.44)
Ako Bn Ce cTpyBa, Ye 3aBnXbaHETO e 6abHo n CneI NaCTPOiKaTa, 3aDbNkBaunr peMbK TpRbBa Da ce CMeHN bOoOpeh CepBN.
TpaHcnpTnpaHe, cxbxaHHeHn n3XbPJIaHe
TpaHcnpT n cBxpaHeHne
- Pn cBxpaHeHTo I TpaHCnpOpTnpaHTo Ha npOyKTA IN rOpIBOTc Ce yBepTe, Ye HMa TeObe nIIN N3apEnHn. Nckpn IIN OTkPNT O8h, NaPImepOT eNektpueckn YpeDn IIN KOTn MoKe da Bb3HNKHe NoXap.
Binharn n3noJI3BaIte Oo6peHn KOHTeHepn 3a cbxpaHHeHne I TpHaCnpOpTupaHne Ha roPbBO.
- I3npa3Hepe3epBoaap3a rOpBBO, ppei Da np6epeTe npOyKa 3a cbXpaHEnHe 3a DbIbr nepoD OT BpEe. X3xBbPnTe rOpBTOHa noJxOxJaIO 3a ueTnMa MCTO
- Пикpenete подукту no Бзонасн Нчин no Вөрeme Ha Транслортuaнeto, за се п徴етратоврдунлэпогук.
CbXpaHraBaIte npOdyKta nOД KlnOu, 3a da npEoTbPaTne DoCTbNa Do Hero Ha Deua NII INI NIIca, KOINTO He ca yTbINHOMoUeHN Da rN3nON3BAt.
CbxpaaBae Te npOyKaTa Ha cyxo n He3aMp3BaAIO MRCTO.
N3XBbPJIaHe
Cb6IIOdaBaIte MeCTHITe I3NCKBAnHa 3a peuNKIpaHe n npInIOXkIMTe pa3npope6I.
- IxHBpIeTe BCNUKINXMNIKAN, KATO HApNIMepDIBaTATEHNO MACNo IInn aHTNΦn3, B cepB3eHcEHTbp INn Ha NOxDXoRJUO 3a CEJIa MRCTO.
Korato npodykTb T Bce He ce nnoIb3a, n3npateTe ro Ha Husqvarna dInb pIu ro IxBbPneHa MAnCTO 3a peUcKnipane.
I3npatete akymylatopar B cepbnaeH ceHTb npnn ro n3xbpnte Ha mCTo 3a denohnpaHe Na 3nON3BAnk aykmylatopn.
TexHnueckx xapaKTepeNCTIKN
| LC 247 | LC 247S | LC 247SP | LC 253S |
| Двигател |
| Mapka | Briggs & Stratton | Briggs & Stratton | Briggs & Stratton | Briggs & Stratton |
| РавOTEN обем, см³ | 125 | 125 | 140 | 163 |
| Скорост, об./min | 2900 | 2900 | 2900 | 2800 |
| Номинална изхоча мошноct на двигателя, кW 11 | 1,8噼и 2900 | 1,8噼и 2900 | 2,1噼и 2900 | 2,4噼и 2800 |
| Запалителна симстema |
| Запалителна с蜱ц | Champion QC12YC | Champion QC12YC | Champion QC12YC | Champion XC92YC |
| Разстаяные можду[eilektropondite, mm | 0,5 | 0,5 | 0,5 | 0,5 |
| Горовни Симозоча симстema |
| Горов, бezоловно, минимално okтунов Quисло | 90 | 90 | 90 | 90 |
| Вмостимост на розерваора за розв, плtripи | 0,8 | 0,8 | 0,8 | 1,0 |
| Вмостимost на розерваора за масло, плtripи | 0,5 | 0,5 | 0,5 | 0,5 |
| Моторно масло 12 | SAE 30/SAE 10W-30 | SAE 30/SAE 10W-30 | SAE 30/SAE 10W-30 | SAE 30/SAE 10W-30 |
| Тergо |
| С празши розерваори, кg | 27,5 | 29,5 | 30,0 | 32,4 |
| Шимов Emиси 13 |
| Нимо на звековата мошноct, Изөрөн a dB(A) | 96 | 96 | 94 | 96 |
| Нимо на звековата мошноct, rapантirраа [L-WA dB(A)] | 96 | 96 | 96 | 97 |
| Нима на звука 14 |
| Нимо нашима ри ухото на опература, dB (A) | 85 | 85 | 84 | 85 |
| Нима на вибацени 15 |
| Ръкхватka, m/s2 | 3,4 | 3,4 | 3,4 | 4,0 |
| Рекшо оборudане |
| Височина на ряазане, mm | 20-75 | 20-75 | 20-75 | 20-75 |
| ШирINA на ряазане, mm | 470 | 470 | 470 | 530 |
| Нож | Събигане | Събигане | Събигане | Събигане |
| Аrtikул homер | 5882755-10 | 5882755-10 | 5882755-10 | 5797972-10 |
| КаццитET на коша за трава, I | 55 | 55 | 55 | 60 |
| Задвхванe | |
| Сkopocst, km/h | - | 4 | 4 | 4 |
| Стартуpane | |
| Еlektrichiескистор | He | He | He | He |
| Акумалатор | - | - | - | - |
| LC 347V | LC 347VI | LC 353V | LC 353VI |
| Двигател |
| Mapka | Briggs & Stratton | Briggs & Stratton | Briggs & Stratton | Briggs & Stratton |
| РавOTEN obem, cm3 | 163 | 163 | 163 | 163 |
| Скорост, об./min | 2900 | 2900 | 2800 | 2800 |
| Номинална Иховна мошост на Двигателя, kW 16 | 2,4 пri 2900 | 2,6 пri 2900 | 2,4 пri 2800 | 2,6 пri 2800 |
| Запалтында систema |
| Запалтында с蜱ц | Champion XC92YC | Champion XC92YC | Champion XC92YC | Champion XC92YC |
| Разстаяные можду[eilektropondite, mm | 0,5 | 0,5 | 0,5 | 0,5 |
| Горовни смазоча систema |
| Горов, бezоловно, миммално OKтоно ч承载о | 90 | 90 | 90 | 90 |
| Вмостимост на pezerевогараза зерво, питри | 1,0 | 1,0 | 1,0 | 1,0 |
| Вмостимost на pezerевогараза масло, питри | 0,5 | 0,5 | 0,5 | 0,5 |
| Моторно масло 17 | SAE 30/SAE 10W-30 | SAE 30/SAE 10W-30 | SAE 30/SAE 10W-30 | SAE 30/SAE 10W-30 |
| Тergи |
| С празни pezerевогарази, кg | 30,0 | 32,0 | 32,8 | 34,2 |
| Шуровиемиси18 |
| НИВо на звековата моцност, Изөрөн a dB(A) | 95 | 95 | 96 | 96 |
| НИВо на звековата моцност, rapантүлүа [LWA dB(A)] | 96 | 96 | 97 | 97 |
| НИВа на звука19 |
| НИВо нашuma рrips ухOTO на оретаюра, dB (A) | 84 | 84 | 85 | 85 |
| НИВа на вибрац ninthe20 |
| Рыковbatka, m/s2 | 4,2 | 4,2 | 4,0 | 4,0 |
| Рожецю оборudвае |
| Височина на ряазанe, mm | 20-75 | 20-75 | 20-75 | 20-75 |
| ШирINA на ряазанe, mm | 470 | 470 | 530 | 530 |
| Hoxk | Сьбиганe | Сьбиганe | Сьбиганe | Сьбиганe |
| Аrtikун Homep | 5882755-10 | 5882755-10 | 5797972-10 | 5797972-10 |
| КалачтET на коша за трава, l | 55 | 55 | 60 | 60 |
| Задвухвае | |
| Сkopocst, km/h | 2,8-5,0 | 2,8-5,0 | 2,8-5,0 | 2,8-5,0 |
| Стартудаи | |
| Еlektрически стартур | He | Да | He | Да |
| Актулators | - | Плтыев-йонен, 10,8 V/15,7 WH | - | Плтыев-йонен, 10,8 V/15,7 WH |
Декларачnia 3a cBoTBeTCTBne Ha EO
Husqvarna AB, SE-561 82 Husqvarna,Шевся, тет.: +46-36-146500, Декларupa, ч Костачкахе Husqvarna, LC 247, LC 247S, LC 247SP, LC 253S, LC 347V, LC 347VI, LC 353V и LC 353VI сб серийни Homepa ot 2016xxxxxxи постедваши OTROBAPRT ha nИнckванята на ИПЕКТИВATA HA CьBETA:
OT 17 MaJ 2006 r., cBbP3aHa C MaJINH" 2006/42/EO
OT26feBpyapu 2014r.,"CBbp3aHn c eIeKtpomarHHeTmHATAcBbMecTmOCT" 2014/30/EC
OT8Ma2000r.,"Cbbp3aHn CShyMOBHTe EMNCIN B OKJHaTa Cpea" 2000/14/EO
3a INHΦopMaZIg OTHOCHO EMNCNITe Ha Uym, Bx. "TexHnueckn DaHHn".
PpIIOXeHcCa cneHnTe CTAndapTn:
EN ISO 5395-1, EN ISO 5395-2, EN ISO 5395-2 Amd1, EN ISO 5395-2 Amd 2, EN ISO 14982
Ako He yka3aNo npyro, noocuHnTe no-rope CTanapTc na noclendnTe ny6bnkyBaHn Bercm.
HOTnФицран оран: 0404, RISE SMP Svensk Maskinprovning AB, Box 7035, SE-750 07 Uppsala
I3daba OTcETN OTHOCHO UcEHKA tHa CbOTBeTCTBMEtO C npINOJeHne VI Na IINPEKTIIBATA HA CbBETA ot 8 MaJ 2000 r. "OTHOCHO uMOMBI EMCSIN BOKOIHaTa cpea" 2000/14/EO.
CepTnФиKaTbTe cHOMeP:01/901/264,01/901/265 01/901/281,01/901/282
Huskvarna, 2016-11-01
Claes Losdal, MeHHdkbP "Pa3pa60kN i Pa3BNTHe"/TpaHINCKn npOdyKtn"(YnblHOMoUeH npEdctaBnte 3a Husqvarna AB n oTRObOPHO nIe 3a texHueckata DOyMeHTaun
Obsah
Uvod. 35
Bezpečnost. 36
Montáž 39
Provoz. 39
Udrzba. 41
Pfeprava, skladovani a likvidace. 44
Technické udaje. 44
ES Prohlasei o shodé 48
Uvod
Popis výrobku
Batteri (LC 347VI, LC 353VI)

Hvis违法犯罪 and the prevention of crime.
Tehnilised andmed. 118
EU vastavusdeklaratsoon. 122
Sissejuhatus
Toote kirjeldus
01/901/281, 01/901/282
Huskvarna, 2016-11-01

Claes Losdal, aiandustoodete arendusdirektor
Akkumulator (LC 347VI, LC 353VI)

Akkumulator (LC 347VI, LC 353VI)

(Att. 21) Skenjams kods.
Piezime: Paejie uz izstradajuma noradfitie symboli/ uztimes attecas uz dazu tirdzniecibas nozaru prasibam.
Euro V emisija

BRIDINAJUMS: Motora atverśana anulé ši kedes zaga ES tipa apstiprinajumu.
Atbildiba par izstradajuma kvalatiti
Akumulators (LC 347VI, LC 353VI)

BRIDINAJUMS: Defektivs akumulators
samazina izstradajuma drosumu. Izmantojet
tikai tadi akumulatoru, ko ir apstiprinajis
ražotajs.
Akumulators nodrosina stravu elektriskajai
iedarbinăsanai unir drosibas ierice, kas novérš nejaušu
iedarbinăsano. Iznemiet akumatoru, kad nelietojat
izstradajumu un kad jus atstajat to bez uzraudzibas.
Dzineja bremzu rokturis
Dzinejabremzu rokturis aptur dzineju. Atlaizot dzineja bredzu rokturi, dzinejs apstajas un piedzina tieke deaktivizeta.
Akumulators (LC 347VI, LC 353VI)

BRIDINAJUMS: Defektivs akumulators
samazina izstradajuma drosumu. Izmantojet
tikai tadiu akumulatoru, ko ir apstiprinajis
ražotajs.
Sertifikata numurs: 01/901/264, 01/901/265, 01/901/281, 01/901/282
Huskvarna, 2016-11-01
Claes Losdal, nodalias vaditajs/darzkopibas izstradajumi (Pilnvarotais Husqvarna AB pärstavis, kas atbild par tehnisko dokumentaciju)
Inhoud
Inleiding. 224
Veiligheid. 225
Montage. 228
Werking. 229
Onderhoud. 230
Batteri (LC 347VI, LC 353VI)

Batteri (LC 347VI, LC 353VI)

ODPOWIEDZIALNOŚC ZA PRODUKT
Akumulator (LC 347VI, LC 353VI)

- Extended product information.
Information about, and help with, product parts and servicing.
Akumulator (LC 347VI, LC 353VI)

Arranque eletrico (LC 347VI, LC 353VI)
Pornire electrică (LC 347VI, LC 353VI)
- Asiguratvá cā bateria este activà sī incarcata. Consultatipentruapornibaterla pagina289.
- Conectati bateria la motor. (Fig. 35)
- Impingenti inhibitorul de pornire in afarà spre dreapta (A).
- Trageti bara de pornire (B)他们在某人前面的房间里做噩梦。Demarorul se oprește atunci cand pônește moturul. (Fig. 24)
Pentru autiliza transmisia per roti
| LC 347V | LC 347VI | LC 353V | LC 353VI |
| Deplasarea | |
| Viteză, km/h | 2,8-5,0 | 2,8-5,0 | 2,8-5,0 | 2,8-5,0 |
| Start | |
| Demaror electric | Nu | Da | Nu | Da |
| Baterie | - | Litiu-ion, 10,8V/15,7 Wh | - | Litiu-ion, 10,8V/15,7 Wh |
Husqvama AB, SE-561 82 Huskvarna, Suedia, tel.: +46-36-146500, declará ca masinile pentru tuns gazonul Husqvama LC 247, LC 247S, LC 247SP, LC 253S, LC 347V, LC 347VI, LC 353V sI LC 353VIincepándu numelele de series 2016xxxxx respecta cerintele DIRECTVEI CONSILIULUI:
Certificatul are numarul: 01/901/264, 01/901/265, 01/901/281, 01/901/282
Huskvarna, 2016-11-01

Claes Losdal, Director de Dezvoltare/Produse de grădina (reprzentant autorizat al Husqvarna AB Şi responsable cu documentata tehnica)
Copepkanne
BvBeHne. 296
Be3onachocTb. 297
C6opka. 301
3Kcnpnyatau.. 302
TexHueckoe obcnykBaHne 303
TpaHcnpTpObKa, xpaHene n yTuIn3aunna. 307
TexHHueckme daHHble. 307
DeknapauncoOTBcTbN EC. 311
BVeJeHne
OncaHne n3dJIINr
U3dJIne npedctabniet cobon neewexoHy oToPOnHyO raohOKocnky. Tpaba cobupaetcB a Tpaboc6OpHnik. CHNIMITE Tpaboc6OpHnik, qTObl Tpaba ot6paCbIbaNaCb Ha3aJ. UCTAHOBNTe KOMPiEKT dIy MUYbChIpOBaHnA (DOONHInTeIbHaN pINHaIeXHoCTb), yTOblNCIOBbATcKOWeHHyO TpABy B KaYeCTBe yDo6peHnI.
O63op n3dennia
(Pnc.1)
- RykoTka TOPMO3a DnBraTeIa / Pnyckobar pykoTka (LC 347VI, LC 353VI)
- RykoTka
- OrpauHnHTenb 3anycka (LC 347VI, LC 353VI)
- Петлma npmboda (LC 247S, LC 247SP)
- Perynipobka ckopoctn
- TpaBoc6opHnK
- 3aDnKa KpbIka
- Perynpyemam no Bicote pykoTka
- Ⅲyyn/MacnaHbI 6ak
- AkkyMnyTOp, 3aunTHoe yctpoiCTBO (LC 347VI, LC 353VI)
- Pěkúšář děka
12.Глштель
- Cbeya 3axirahan
14.BozduhnyiФильТр
- TOnJIbHbIy 6aK
- Pbyar perynilopOBKn BbICOTbCTpnjKKn
- pyu (LC 247, LC 247S)
- Pukka uHypa cTape (OTcyTCTbyET Ha LC 347VI, LC 353VI)
- RykoBoDCTBO no 3Kcnnyatau n
YcnoBhble 6o3NaeHnHa n3JeHn
(Pnc.2) PNEyUYPEXKDEHNE:He6peXnaI nn Hnepaunbna3kCnlyatauIaMOKeT npINBeCTN K cepe3HOI nn CmepTeIbHOIT TaPbME onepaTopo IN nDpyrNX nIc.
(Pnc.3) Ipeed hauanom pa60tby BHNMaTeNbHOnpouHTaTe pyKOBoCTBO NO 3KcNpyataun
Ha3naYeHne
I3dJIne IpeHa3NaHeO DnI CTpNKKn TpaBbI B
YacThbIX caJax. 3anpeaetcN cNoJIb3oBaT bI3dJIne
DnI dpyrNX BnIOB pa6OT.
Iy6eHntecb,HTO NOHMaeTe npBBeHeHHbIe 3DeCb HCTpyKcMn.
(Pnc.4) CneIITe 3a TEM, YTObI B 3OHe npOBeHnna paobT He b6blIO nocToPOHHN xIOJe mIN XNBOTbIX.
(Pnc.5) OctaHOBnTe DbIrataTeN b OTOcoeINHtE Ka6BeIb 3aXirAHH, IpeXJe YcEM npCTynatb K pEmOHTy Nnn Texo6CnyKBAHNU.
(Pnc.6) Ⅲyπ/MacnHbI Φnltp
(Pnc.7) Beperntecb OTcaknBaIOxN ppeMeTOB npKoWetOB.
(Pnc.8) BnHMaHHe:BpaaJIoUmci Hox. JepKInTe pyKn n HOrn Ha 6e3oNaChom pacCTOHN.
(Pnc.9) IpeDynpexdeHne:BpaaJIoUeNecyaCTn. DePxnte pykn n HOTn ha 6e3oNaChOM pacCTOHNIM
(Pnc.10) DAnHoe u3dene OTeBueaet Tpe6oBaHnA M COOTBeTcTBUOxN DupeKtNB EC.
(Pnc.11) 3MnCCnIyMaBOKpyKaIOUOcpeDy coTnACHOINPeKInBeEbponeckoro Coo6uEcTBa.3ByKOBoeN3nyeHneDaHHoro N3dJIeNpnpBeDeHO Bpa3dene "Texnueckne daHHbe" nHa NaCnpOpTHo Ta6nUKe.
(Pnc.12) BbIcTpo.
(Pnc.13) MeIeHNo.
(Pnc.14) Bo3duyuHa 3acIOnKa.
(Pnc.15) OnachocTb B3pbIbA.
(Pnc.16) BbIXIIOHbIe rae3bI n3 DnBraTeJIa CoepKAT OKNc bYrIpeOra He IMeIoUm 3anaXa, TOKCnHbI n Ype3BbHaJHO OAnChbI ra3. 3anPeuaetc3 aynckatb DnBraTeJIb nOMEueHm IIN B 3aMKHybIX npocTpaHCTbax.
(Pnc.17) Pnpno6peTaemoe n3dJeIne NoCTabnIeTc8 6e3 macnaB DnBraTeNe.
(Pnc.18) 3aJIeIte MaCNo nepeI haayIaOM 3KcIpyaTauIN u3dEInr.
(Pnc.19) BbINONHnIte 3aPnABKy TOnIaBOM.He IcNOLb3yIe TOnIaBIO, npOdaBaEmoe noD mapKoI E85 (codepxAnae 3aTnOHA 85%
(Pnc.20) TOpaYa NOBepxHocTb.
(Pnc.22) 3BNeKeITe 3aUHTbI BbIKIOuATEIb (akKMyJrTOp) nepeD BblIOJIHeHMe paOTo NO TexHueCKOMy O6CnyKbBaHIO IIN nepeD TeM, KaK OCTaBnTb N3dEne 6e3 npICMOTpa.
(Pnc.21) CkaHnpyeMbI KOd.
PmmeHne:OctanbIbe CnMbIb/HaKnEeKnHa n3denn OTHOCATr K CneIaNbHbIM Tpe6oBaHnM ceTnDfKaunB INpTeJeEHhBX KompeMecknx 3OnA.
COOTBETCTBNE ypOBHЯ TOKCnHbIX Bbl6pocOB cTaHapTy Euro V

PNEyPKeJHHe: B cnuyae BMeaTeBCTBa B paObTy DnBraTeIa DaHoe N3dJIeNpeCtahET COOTBeCTBOBAtb HOpMaTnBAM EC.
OTBETCTBEHHOCTb N3ROTOBNTeJIa
B COOTBECTBUN C 3aKoHAMN O6 OTBECTBeHHOCTN 130TROBNTEJMA He HecEM OTBECTBEHHOCTN 3a yueep6, Bly3BaHbNk 3KcPnIyatauMeN HaWero I3dEJIINBA B peuyttaTe:
HeHaIeXaUeropeMOHTaI3dEInna;
NcOJIb3OBAHnIaIpeMOHTaN3dEInIaHEOpINHnAHLbHbIXTeTaneIuINTeTaneI,He OoO6PENHHxPON3BODInteNEM;
IcNoJIb3OBAHnA HeOpINrHMaHBxI DOnOpNHTeBbHX IpnHaNDJXeKHOCTe INI npHaNDJXeKHOCTe,He Oo6PbHNbIX pOni3BOdITeM;
- pEmOHa N3JdJIeN B HEABTOpIIOBAHOBHOM CepBnCHOM
CHTpe IIN HeKBaIIuΦIuPObaHHbIM
CNEUaIINCTO;
Бe3onaichoctb
Ihctpykunno TeXnke 6e3oNaChOCTN
PnDynpExdHn, npDeOCTepExeHn n pIIMeUHn IcNtOnb3yOTc Dn BbIeJIeHn OOCo Baxhblx NpHKTOB pyKOBODCTBa.

PNEyIPEKxHEHc:NcnoJIb3yeTcR, KOrDa Heco6nIOHeHne IHCTpyKuyn pyKoBOvCIbTa MoKet npBecTn K TpaBMam nIi CmepTn OpeaTopa NIIh XaoDjaXnxCRAJDM NOCTOPOHNX IIN.

BHHMAHNE: IcnoIb3yETcra, KOrda Hecob6IbnDeHe Me INCTpyKlpi pyKOBoDCTBa MOKeT pInBeCTn K NOBpExdEHNIO n3dEInna, dpyrnx MaTePnAnOB mNn npIneRaIoSei TeppntOpnn.
PmmeHHe:IcnoIb3yetcIpnpeoCTabneHnI DOnOHNITeJIbHIxCBeDEHNI O KOHKpeTHOI CNTyaUNI.
TexHnka 6e3oNaCHOCTH

PNEyPPEKDEHNE: B 063aTeIbHOM
npraJke npouHTaTe cneDuOuIe
nHCTpyKuIN NO TEXNHKe 6e3OpNaCHOCTN,
npexJe CEM npcTynaTb KkCpNyatauIN
n3dEJIe.
- IaENJIme ppeH3aHaeHo NcKlOHTeBHO dIra cKaUbAHINr TpaBb Ha r3oHax. 3AnpeuAeTcR cNcONlb3OBaTb IaENJIme He NO H3aHaeHIno.
Ponb3yTeBcpeDCTBAMN INHINBHyanbHOI 3aunbI.Cm.paedENPeCDtBA INHINBHyanbHOI 3aunbIHa CTp.299
- Y6eIITecb, yTO Bbl 3HaTe, kA K6blCTpo OCTaHOBTb DBnIaTeJIb ABapNIHOr CNTyaUIN.
3anpeaaetc 3anyckaTb DniratB 3akpblOM nomeeHmI INI B6nIe JERKOBocnAmEHaNouxCMAtePnaIOB. BIXNONIbe raBbDniratTeN IMeOT BICOKYTO TneMnepaTy MOryT COdeRataN CKpbI, KOtOpbIE B CBOO OuepeDb MOrY TnpNBecCTN KNOkapyA
HnB Koem cnyae He nCnoJb3yIte N3dJIeNc OTCYCTBTOUcIMN INN HEnpABINbHO yCTaHOBHeHHbIMKoJyXAMN INN HOKOM. HenpABINbHO yCTaHOBHeHHbIMN HOK MoKet BbICBOODITBCrN pInuHInHt TBAPBMY.
CleIte 3a Tem, YTo6b I Hox He nnonai nOCTOpOHHe NpeMeTbI, HapnMpEe, KaMHn I KOpH. 3TO MOKET 3AtyNTb HOX n PnBcETN K uCKPnBLeHIO Bana DBrAteJI. PnI crnBaHm OCN yBeINuBaETcY yPoBeH bNbpaun, YTO MOKET npBcETN K ChnKeHIO NaedxHocT N KpENneHnHOka.
Bcnyae cToJIKHOBeHnI HOKa C noCTOpOHnIM npedMeTOM nIN BO3NHKHOBeHnBn6paunn He3aMeDnITeNbHO OCTAHOBuTE n3dENIe. OTCoeHNITE KaEBb OT cBeyn 3aXnraHn. PpOBepbTe n3dENIe Ha hAnUne NobpexdeHn. BbIOHNITE pEmoHT nobpejDeHn nIN o6paTInTeCb B aTOPI3OBAHbI cepBnCHbI ueHtp IJa BblONHeHnI peMOHTa.
3aNepeuaTcH Na NocToHHo OCHObe FmKcPOBaTb pyKoTky TOpMo3a DnIgatela npi pa6OtaIoTeM DnIgatene.
- Pn3aynycke n3dJeIne doJNXHO haoDInb8cHa yctOuHBOB,POBHO NOBepxHOCtN. Y6eDITceB,TO HOK He kacaetc rpyHTa HIN JIObOro dpyrOro npedmeta.
- Ppi pa6oTe c n3dJIeHem BcERda CToIte C3aIu.
- Pπn pa6oTe C n3dεΠην Eme K ΚοNEca ΚΟJIЖы CTOrTb Hα ΣEπIe;ДeρχIte pyKoIry OБeIMnpyaMn. He np6IiKaIe ty kNn HOrn K BpauaOuHmC8HOKAM.
3anpezaetcnaHkoHnTb 3ndeIne npnpa6oTaOuem DBrGaTeNe.
- Co6nIouaTe octopoxHocTb, KOrda TAreHete n3dene Ha3a.
3anpezaetcnoHIMMaTbN3dJIeIne npn pa60taoUoIeM DVBrAteIe.Ecnn Bam Heo6xOIMO noHHTbN3dJIeIe, CHa7a OCTaOHBnTe DVBrAteIb NOTCOEHNHITKe Ka6BeIb ON CBEu 3zKHaHAn.
3anpeaetcBniratbcna3ad npn pa6ote cn3dennm.
OctahabnnaBte Dbratetb, KOrda nepecekaete HENOKpbItIe TaPBO 3OHb, NaHpIMep, DOpOKNu3 rpaBra, KamHNAi acFaBtA.
3aIpeuatae6eBaTc n3dennm npn paOtaHouem DInrataTe. PaOtaTne Cn3dennm B cNOKOHOM TEMNE.
BbIIOUeTBeBnIaTeB, npExJe Ym IIMeHHTB BbICOTy cTpNkKn. Hb KcOe Cnyae He BbIOINJIpepyIPOBky npaBbOaUeBbIaTeB
HnB KOem cnyae He BbinyckaIte N3dJIeN 3N Bda npn paOToaOHe dmIratene. OctaHOBeT DeRarTeIy I y6eITeC, YTOpejxUee o6OpYDoBaHne He bpaAaTcR.
HCTpykunno6e3oNaCHOCTN BO BpeMa 3KcIpyaTaun
CpeCTBa INHINBHyaIbHoI 3aunTbI

PNEyPExKdHHe: B 063aTeIbHOM
npoJKe npOHTaTe cJeDyoUeune
nHCTpyKuIN NO TEXHNe 6e3OpaNCHOT,
pexJe CEM npICTynaTb K EKcPnyatauIN
n3dEJIe.
CpeICTBa ININBnUyalbHOH 3aunTbI He MOrytNONHOCTbIO NCKIOUHOt PNCN OJIYeHNI TPABMIo, HO npn HeCuaCTHom Clyuaye OHNCHNkaIOT TJeKcTeb TApBMIo.3aNoMoUIO NO pNaBInHOMy Bbl6Opy o6OpyOboHAnHOBpaauaTecb KdInepy.
Ecn npoBeHb yMa npBbIaet 85 d, cneNyET nCnOJIb3OBAt b 3aUHTbIe HayuHNIK.
IcnoIb3yIte npOHyIe, npOIOBocKob3aIuIme 60tINH. 3AnpeBaETC HaeBeA bT OkPbIyUo 6oyBb nIi pa6OtaTb 6OcIKOM.
- HaedeBaIte npOuHbIe IINHHbIe 6pIOKn.
- Pn Heo6xOIMOCtN HaeBaIte 3aIHTbIe nepuATkn, HapnpMep, Pn 3akpenJIeHN, npOBepKe IIN OYNCTE peKyuJero o6OpyDobAHNA.
3aunTHbIe yctpoiCTBa Ha n3deJIN

PNEyPExKdHHe: B 063aTeIbHOM
npoJKe npOHTaTe cJeDyoUe
nHCTpyKuIN NO TexNHke 6e3OpaNCHOT,
PexKdYe npCtynatb K EKcPnyatauIN
n3dEIn.
3anpeaaetcncnoIb3oBaTbH3deneC HnCnpaBHBIM 3aunTHbIMyCTpOCTBaMn.
- PeryraRho BbIIOJIHnIe npOBepKy 3aunTHbIX yCTpoiCTB. EcnIaunTHbIe ycTPOiCTBa HeuCnpabHbI, o6paTHeCB b cepBcNchbI ueTp Husqvarna.
Pexyuia Daekca Chnkaet yoBBeHb N6paunu 3dJIy npck TpabMnpOBaHnHOXOM.
- PnOBePbTe peKyuUdoKeN yubEnTecB, UTo Ha Nei OTCyTCTByHOT nobpeKDeHnA, TAKHe KaK TpeunHbl.
AkkymyTop (LC 347VI, LC 353VI)

PENPYPEXDEHNE: HenncpabHbI kAKyMnyTOp CnHexaET 6e3oPaCHOCTb n3DeJN. BcERda nCNObl3yTe ToJIbKO peKOMeHNDoBaHbN I npO3BODntEe m AKKyMnyTOp.
AkkymyIaTOp nOdaet nITaHne dIЯ 3JIeKtpnuecko 3aIyCKa n CnykNT 3aUmTHbIM yCTPOIcTBOM, npdeOTBpArzaUoMm CnyaHn h 3aYck. N3BNeKeIte AKKymyIaTOp, EcnB NbHe nCNoB3yeTe n3dJeNne IIN octabIaeTe erO 6e3 npncMoTpa.
PykoTka TopMo3a Dniratela
PykoTka TopM03a DbIrataTeI npedHa3naHaeHa dIra octaHOBKn DbIrataTeI. PnI OTNyCaHnn pyKoTkn TopM03a DbIrataTeI ocTaHabNbaeTcR, a pNBoDOTKluOyaeTcR.
AkkymyIaTOp (LC 347VI, LC 353VI)

IPEyPExDEHHe: HeucnpaBHy IAKyMnyTOp CnHexaet 6e3oPaCHocTb n3deJna. Bcerda nCnoIb3yTe ToJIbKO peKcOMeHNDoBaHbN npOIm3BOIdNelem AkyMnyTOp.
AkkymyIaTOp nOaTe nITaHne IJIa 3JeKtpnueckoT OaNcKa n CnyKt 3auNTbIM yCTPOICTBOM, npDeTOBpArsaUoCM m CnyaHn 3aYCK. N3BNeKeTIe AkkymyIaTOp, eCN bN He nCNOb3yeTe n3dJIeN IIN OCTabJIeTe erO 6e3 npNCMOTpa.
AknBaunnaakKymyIaTopa
Ipeep nepbo3KcnpyaataueneakkymnyToperaero Heo6xOaMoAKTNBnPoBaTb.
- UctahOBnTe AKKMyJnTOpB 3apJnHoe yCTpoNCTBO, CM.pa3dEe 3apJka AKKMyJnTOpHa cTp.305.
2.Дождnteсь,пoka 3aогрntcяхтбbl13eilehblnHdNKATOp (pnp6bn3nteIbNo 10 cekynd).
- 3aKpEnIte akkymyIaTOp Ha dIyratete, cm. pa3dien 3NeKtpnueckn 3anyck (LC 347VI, LC 353VI) ha ctp. 303.
3apka akkymyTopa
EcnHaakKymyIaTope roPHT ToIbKO 1 INDmKaTOp HnHreOPT HN OJHOro IHMNkAtOpA, HeO6XoDMo3apdntb akKymyIaTOp. IOnHocTbO pa3pRjKeHNbIaKKymyIaTOp 3apJkaeTc8 3a 1 Yac. 3apJkaB TceHneMeHbIeero IpomexyTkA BpeMeHn He nobpeKdaeTakKymyIaTOp.
- YCTaHOBnTE aKKyMnyTOp B 3apRdHoe yCTpOoiCTBO. (Pnc.42)
2.ПоДКИЮЧИТЕЗAPAДhoe yCTPОИСТВOKАЛЕKTPOOCETN (220B,50Γι).
CoctoHnHe 3aApKn aKkMyJITopA
| СbvToДиОдь дИсПлЕн ha
аKKуМУЛТоpe | Состони
e |
| СbvToДиОд 1 мrigаeТ. | 0%-25% |
| СbvToДиОд 1 roрNT, СbvToДиОд 2
mrigaeT. | 25%-50% |
| СbvToДиОды 1, 2 roрNT, СbvToДиОд
3 мrigaeT. | 50%-75% |
| СbvToДиОды 1, 2, 3 roрNT,
СbvToДиОд 4 мrigaeT. | 75%-100% |
| Сbvetoiodнь дисney ha
аKKумлтоpe | Состаянne |
| Горот сbvetoiodы 1,2,3,4 | Полный
уровень
зapяда |
Pereynipobka Tpoca czepeHnHa MoedeJx C peYnpOBKoCkOpocTn (LC 347V, LC 347VI, LC 353V, LC 353VI)
Ecni npi 3anyeHHOM Dniratene He MoKet 6bItb BKJIOueHa cama Hn3kA CKOPOCTb, Heo6XODIMOTpeyINPOBaTb MexAHm3M peyINPOBKN CKOPOCTN.
1.ДЯTO rTO6bI yBEniHnTb CKOpOCTb, NOBepHInTe BnHT perynipOBKn npOTnb YacOBo CTpeKN.
PpimmeaHHe: EcnnpBOD BkNIOaTeC, KOrDa BbI He nCOnBo3yeTe MEXAHm3peyUINpOBKn CKOpOCTn, Heo6XoIMMo yDInNHtB TPOC.
2. UTo6bI yDInHnTb TpOc n CHN3nTb CkOpocTb, NOBepHnTe BnHT pEryInpOBKn nO cAcOBn CTpeJIke. (Pnc. 44)
Ecnn npBOD kajetcMaJneHHbIM daKe NocpeIpynnpOBKn,Obpatntecb B aBTOpN3OBaHHbI cepBnchbl nentp dna 3amHebl npBODHOro pemHra.
TpaHcnpOpTnPOBka, XpaHeHne n yTuJIIn3aζIa
TpaHcnpTnpoBka n xpaHeHne
Ipeed nomeueHnemHa xpaHeHne I tpaHCnpTropOBKOIN3dEInnYTOPLNBA y6eINTecB OTCyTCTBNyTEyeKcNINNCnapeHnToPnIBa.NcKpbI NINNCTOCHNKOTKpBTOROOrH,NanPIMep,OT 3JIeKTPNUeCKmXyCTPOJcTB INN KOTIOB,MOrT npNBecTN K NOkApy.
BcERda nCnOJIb3yIte peKOMeHDoBAHHble KOHeTHePbI dIgXpaHEHm I TpaHCnOpTnPOBKn TOONIIBa.
- Пераимешием Иденина Длитеньhoeхаразеноне onopoxhnetToTNIBHBN6ak.Утлпизурчte TOnIbBO B CTeцальнопразнадзанeнномДг STOrO MeCTe
- HådæŋHO 3aɪkpeɪnɪte ɪsədɪne Ha bɒpemɪr Tpaɪncɒptɪnpovbɪkɪn ṅnlaɪ pɛndeʊTbpaʊeɪnɪ Nɒpɛkɒdɛhɪn iːnʌ bɑpɪn.
XpaHNTe iJedJIme B 3aepToTOM NOMEUeHnI,ДЯ npEDOTbPAuEHNIOcTyNA K I3dEINIODeTeI INI nOCTOPOHNXIIIC.
XpaHnTe n3dJIe M B cyXOM 3aUuIeHHOM OT Hn3Knx TEMpePAtyp MeCTe.
YTNIN3aIy
C6bIIOaIte MeCTHoe 3aKHOIaTeJIbCTBOI DeIcTByUoIne HOpMbI B O6laCTn IpepeBaOTKn.
- YtɪnɪmɪzɪpǔyīTe BCE XɪmɪnɪeCKMé BēuʒeCTBa, Tɑkɪme KAK MOTOPHoe MæcNo Iɪn N AHɪntɪpɪm3, B CepBιNCHOM ΚεHTpe IɪN B CteɪnʌbHɒ Pŋpeɪdɪa3HaueHΘm Dɪŋ ɜTOrO MecTe.
- Ecnn n3dennme 6oIbIe He 3KcPiyaTpyeTcra, otnpaBbTe ero dInepey Husqvarma nn yTuINn3npye T nyHKte nepepa6OtKn.
- Ytɪnɪn3ɪnyɪte aKKyMjIЯTOp B cepBvHOM ceHTpe nɪn B cneɪzaJIbHo πpeɪHa3HaueHem MecTe dɪŋ ytɪnɪn3aɪnɪn aKKyMjIЯTOpOb.
TexHnueckne daHHbIe
CepTnФmKaTu npncBoeH HOMep:01/901/264, 01/901/265,01/901/281,01/901/282
Huskvarna, 2016-11-01
Knae Iocan, DipeKtOp OTeJa pa3pa6oToK/Caobaa TeXnka (YonHOMOeHHb npEcdTabTeB Husqvarna AB u OTBeCTBeHHb 3a TexHnueckyIO Dokymentaunio)
Obsah
Uvod. 312
Bezpečnost. 313
Montaz. 316
Prevádzka 317
Udrzba 318
Preprava, skladovanie a likvidacia. 321
Akumulator (LC 347VI, LC 353VI)

Akumulator (LC 347VI, LC 353VI)

Batteri (LC 347VI, LC 353VI)

Batteri (LC 347VI, LC 353VI)

Akü (LC 347VI, LC 353VI)

Akü (LC 347VI, LC 353VI)

TEXHUYHE OBCJNYTOBYBAHHRA 388
TpaHcnpTyBaHHa,36epiranHa yTuHaiauaia 392
Texhui xiapaKTePiCTNI 392
Deknapaia Bidnoibidnocri EC. 396
Bctyn
Опис Виробу
LcB Bnip6-0ebpTaBHa ra3oHokocapka,KePobAna niiuMOnepatopom.Tpaba 3bnpaTbcraB Tpabo36ipHnk. DnToro,io6 Tpaba BnKdAnacr 33ady, np6epiB Tpabo36ipHnk.DnToro,io6 nepeTBOpTu Tpaby Ha do6bpBO, BCTaHOBIT npnaIadJa Iy MynbUyBaHHa (akcecyap).
OrnBvpo6y
(MaI.1)
- Puyka 3улиненядвигуна / Puyka 3anycky (LC 347VI, LC 353VI)
- Pучka/pуковаяка
- 06mexyBa3 anycky (LC 347VI, LC 353VI)
- Ппвідна ckоба (LC 247S, LC 247SP)
- PerynayTop wBvdkocti
- TpaBo36ipHnK
- 3aДнй кожух
- PerjTOp BucToN pyKoTkn
- BumipohBaIbHn cTpIXeHb/MacJHn 6aK
- Akymyntop, 3axnchipnpictpoi (LC 347VI, LC 353VI)
- Koxyx le3a
12.Глшник
- Cbiuka 3anaenHHa
- NobitprnHm fInbtp
15.Паловский6ak
- PerynTOp BvCoTn pi3aHnn
- Khonka Hacocca (LC 247, LC 247S)
- Pучka Tpoca CTapTepa (He Ha LC 347VI, LC 353VI)
19.ПосібніК Користувац.
CIMBOJIN Ha Bnpo6i
(Man.2) IONIEPEIXEHHA:He6bane YHnepaBnIbHe BINOPICHTAHNe MOpCnPHuHNITc eepo3ne a60 cMePeTbeNopaHEnHa KOpNCtByaue NInHxN ocIb.
(Man.3) Pered KopnCTyBaHnM Bnpo6m yBaXHo npouHTaTe NocBnK KopnCTyBa7a Ta nepekoHaTec, 20 Bu 3pO3ymn BcI BkA3IBK.
PpabNJIbHe BnKOpncTaHn
BukopncTOByIte Bnip6 nIg cKoUyBaHnI TpaBN B npBaTHnx caJax.3a6OpOn8TbcBnKOpNCTOByBatn npOdyKT dIra iHux 3abDaHb.
(Man.4) CToPOnHi oO6n Ta TBaPmH NoBmHHi 3hAxoDITncsHa 6e3neuHi BiDCTaHI BiD p06oOi 30HN.
(Man.5) Ipeed npoBeeHnem peMOHTnHex po6it a60 06cIyROByBaHH Heo6XiHO 3yINHnTn DBNrHy Ta BtYrHHTn npoBid 3anaIIOBAHHa.
(MaI.6) BmipioBaHbHn CTpHXeHb / macJHn H pInbTp
(Man.7) OctepiraTecra pikootey u6'kTrib, kIMoKytB BuIiTaN 3-iiD Bnpo6y.
(Man.8) Ybara: o6eptaIbHe Ie3o. He na6JInxKaIte do HbOro pyKu Ta HOrn.
(Man.9) YBara: o6epTaIbHi yactHn. He ha6nnKaIte Do hBOro pyKu Ta HOrn.
(Man. 10) LcEi BnpiB BiDnObiae BmOram EC.
(Man.11) PIBeH BnPOMiHOBaHNy Uy My B cepeoBNIe BiDIOBIAe DnpeKrBi CBpOeIcBKOi CnIbHOtN.PIBeH BnPOMiHOBaHNy UyMy Bnpo6y BkA3Ano B po3dini «TexniHdiHii I ha nacnpTHi Ta6nHci.
(MaI.12) WbNIOK.
(MaI.13) NobinbNo.
(Man. 14) 3acniHka.
(Man. 15) He6e3neka Bn6yxy.
(Man.16) BuxnonHi r3a3 3 dBvryHa mictb MOHOOKCnD ByrIeHOp, OtpyHnT Ta dyke He6e3neuHn ra3 6e3 3anaxy.
3a6bopnoHЯETbcra 3aBoNDTu Bnpi6 y npMiiueHHI YB 3aMKHeHOMy npocToPi.
(MaI. 17) YdBnryHHa MOMeHT npuδaHHB Bnpo6y macNo BiDCyTHc.
(Man. 18) Перед поатkom ekcnplyaataць Виробу заим Te MacNoу DInHyN.
(Man. 19) 3aIInTe naIInBO. He BnKOpncTObuYte naIInBO, JKe npOdaetbcsra E85 (85% eTaHOny).
(MaI. 20) Tapauna nobepxna.
(Man.22) Nepsh hix npobodtn texnichne 06cnyrobyaehna abo 3aunuaTn Bpi6 be3 Hargydu, BmMaTe BmMkaC cnCTeMn 6e3neKn (akymyTOp).
(Ma1.21) CkaHOBaHm KoI.
3BepHb ybary: Hsi no3haeHHa/bpKn Ha Bnpo6i CTocuyb8c cepTnphiKauihnx BmOr Ira neBnX TOPROBx 30H.
Bidiobidae BnMOraEMbponecBkoEkoIorHoro cTaHapTy EBo-5

PONIEPEKHEH: BHeceHHa 3MH y DnBryn no36abIe YHHoCTi ceTpNphiiaio EC dny zufo BVpo6y.
BiDnOBiDaIbHicTb 3a kicTb npOdykci
3riHIO i3 3aKoHOM npo BiIDOBiAdaIbHiCT b3 a KICTb npOduKuii MM He HecEMo BiNObIaIaNbHOcI 3a 5yDb-ki NOUKOdXeHNH, cnpuHHeHoi pOboTOO haux N BPO6IB, RkUIO:
Bupi6yno HnnpabunbHO BiDpeMOHToHaHO;
Bπiδ 6yno BIDPEMOHTOBAO i3 BUKOPNCTAHNM DeTaeNe, BIVTOBNEHnX He BINO6HnKOM a6o He 3aTBePdIXeHNHMM;
Bnpi6bnaHaHo aKcCeyapOM, BnroTOBHeHm He Bnpo6HnKoM a60 He 3aTBePdKeHm Hm;
BIVIO6ByNO BIDPEmOHTOBAOBHeAEBTOPI3OBAHOMy CepBICHOmy CEHTPi a60 HeABTOPI3OBAHOO KOMNAAHcIcO;
Бezneka
Bn3naueHnna 10o do 6e3neKn
PonepeJxehnna,3aTepeJxehnHa npMItKn cnykataDnHaronoWeHHHa OocobnBo BaxmBnx NonoJxehnHexoNoci6hka.

PONIEPEDXEHRA:Bka3yHaTe,ioBpasi nopruyenHHIhCTpykuH,NabeDenHXuCbOMY noci6nky,ICHyHe6e3neKa npaHenHnA bO Cmept onepatopu HnIHxNoci 3HaxoJTBcra NOpUy.

YBAGA:Bka3ye Ha Te, 10 B p3i npuyuHnHaIcHTpykui, HabeDeEHx y UcbOmy Noci6Nky, ICHyE He6e3neKa NoWkoJdKeHnBaVbO6y, IHux MaTepiAnib a6o HabKoNiHix o6 kTtB.
3BepHtbyBary:BukopncToBycTcBnIaHaanHHdoaTKoBoi iHΦopMauiIooI neBHOi ciTuayii.
3araJIbHI npabVIIa TeXHIKI 6e3neKIn

PONEPENKENH: Npwhix po3noatn BIKOPNCaHHBPO6y, yBaXHO npOHTaTe HabeDehi HNxHe nonepeKENH.
LcEbnip6MoKe 6yTu NHe63neHnM y pa3i HnpeBnBHO a6o He6aIBO BnKOpNCtAHN. IopuyenHn npabIn TeXhIKu 6e3NeKN MoKe npin3BeTNO TpaBM a6o CmeptI.
Пд ус рботи zufo Виpo6у tvbopocTbc8eIekTpomarHIThe nOle. Lc nole moKe 3a DeKnxUMOB B3aEMoDjTn 3 akTBHNmU yu naCBHMMeDNHMM imPnAHTaAM. Uo6 3mEHUnTI pN3NK TReKKnX a60 CmeptelhNt TpaBM, peKOMHeyEmOCo6am i3 MeNuHMM imNaHtataMn pOKOHcylbTyBaTncs3i CBOIM Nikapem i BWO6HKMMeDuHOro imNaHTaTY nepeD NOATKOM EKcNpyataci zufo Bvpo6y.
3aBxdi 6yIte o6eepkhi Ta kepyTece 3doobm rnydom. KaIO Bu MaTe CymHIBu zoDo TOrO, kKOpNCtBuBaTnC BPObOM y KOHKpeTHi CNTuayi, npinnHtb pOboty Ta npokOHcyblTyTece 3 dInlepom HUsqvarna.
- Pam'raaite, 10o onepatop Hece BiDnobidaIbnHictb 3a Heuacni BuaNAdKn, Bpe3yNbTaTi a KxN NOcTpaXdani Huii oOcbn a60 iXHe maHNo.
-Пдгимуге Вибicчtm.п配电онайеся,цо 3нки та налгейки 3нхадьсь вчтабельюм CTahi.
He do3B0JIaIe BnKOpNCTOByBaTn BiPio6 CTOpOHHIM JIOJAM DOKI He nepeKoHaTeCec, IIO BOHIN npOHTaII Ta 3pO3ymIn BeC 3MiCT NociBnKa KOpICTyBaHa.
He daabaTe BnKOpncToBvBaTu npuaD itram.
He niznyckaiTe do po6ooy 30Hn Ditei. Bina Bnpo6y, uO npaoc, mAc 3aBxNi nepe6bvatn BiDnOBaIbHa dopocna oc6ba.
He daBaIte BnKOpNCToBvBaTn npuAn oO6am, 0 He O3HaOMnJIncs 3 IHCTpyKUJIMN.
3aBXnHaIJaIaTe 3aOC6amN 3OBmExeHIMnΦi3NUHMN UINpo3yMOBIMM MoKNBOCTMa,IO BnKOpNCTOByIOb Bpi6.BinBPO6y,IO npauoC,
Maé 3aBXn npe6bVbTn BiNobiIaNbHa dOpocna oc6a.
3abopohraTbca BnKOpncTOBByBatn Bpi6, kIIO Bn BTOMHei, Xbopi, YNpepeSyBaTe NiD BNINBOM HapKOTNIk, anKOJIOrIOA 6O meNKaMEnTt. Li faKToPmAU To HerATNoHBN BnPIN Ha BAW 3ip, 3OcepeJKeHcHtB, CbiDOMict Ta KoOpDnauo pyXi
3a60pOHaTcBcBaNkOpNCtOByBaTN Bnpi y paai noRo heCnpabHocti.
3a6oPOnHReTbC8 3mHn B KOHCTpyKuIIO BPO6y HnBnKOpNCtOByBatn Bnpi6, JkUo E nio3pa, Uo NOrO 6yNo 3mHeNo CTOpOHHiMn Oco6amn.
Be3neKa Bpo6ooyi 30hi

PONEPENKENH: Npsh NiX po3noatn BIKOPNCaHNAPO6y, yBaXHO npOHTaTe HabeDeHi HNcYe PonepeKENH.
-Перед ВИКористунham ВИробу рибебер 3 ровочи 3они Bci rɪkn, поэу ta кamінь.
- PpEmdTn, loo NotpanJaTb Ha piaIaIbHe
obNaDHaHnA, MoKytB BiDnetITn Ta npaHInTn
CTopOHHix Oc6i abo nooiKaODnIH uI npEmdTn.
CTOpOHII ocOsb Ta TBapHHNoBnHHI 3hXaOHTnCSa
Ha 6e3neuHii BiDctahi BiD BnPo6y.
3a6bOpHЯETbCByBnKOpNCTObyBaTn Bnpi6 3a noraHOI noroHN Ha KUHTANT TymAHy, DOnuY, CnblHOrO BITpy, 3NaChHOrO xOnOy a60 rpo3m. Po6Toa B norAny norOdy a60 hOBONx dInJHKax BnCHaXyE. IOrana HoroJa MoCe tATn pRNUHNO He6e3neuHnx yMOB po6ToN, TaKHX kCNI3bKi nobepxHi.
- БерекiTbca oci6,праздметов ta ситуаць,як immokутв зашкоити bozepeнii рoboti вробу.
- BepekTbca nepeKoD ha KUtaNT KOpIHn, KaMHn, rIIOK, am a6o KaHab. Bucoka TpaBa MoKe npNXOByBatn nepeKoDn.
CkOuByaHnHa TpABN Ha CxHnAox MoKe 6yTn He63neHnM. He BVKOpHcTObYte BnPi6 Ha dIJIHKX i3 HaxiON MOnAd 15^
Bukopnctobyte Bnip6 ha cxnax y ropn30HTaIbHomy HaprMky. He pyxaTecB BExpix BHN3.
- Bydte o6epehni, Habnkaohncb do npnxObaHx Kytib Ta ppeDmetiB, kki MoKyTb 3akpnbTu none 3opy.
Texhika 6e3neK

PONIEPEKENH: Npew hix po3noatn BIKOPNCaHNAPO6y, yBaXHO npOHTaTe HabeDeHi HxJyHe nonepeKENH.
Bukopunctoyte Bnpi6 nIe dJa cKoUyBaHnTaP8nHx ra3OH.3a6OpOHeNo BkOpunctoyBaTnBnDn DaIHHnx ciJeN.
BinkopnctobyIte 3ac6bH iHdNbiyaHbHO 3axnCTy.
IINb. 3ac6bH iHdNbiyaHbHO 3axnCTy Ha cstopi3y
385.
ДиЗнTeСя,ЯБИДКO3yINHITNДВIryH B ekCTpeHcTyruaJIi.
3abopohraTbca 3anyckaTn DbinyH y 3akpntomy npimiuHHi a6o no6n3y JERK03aIMNCTHX matepiianBuxnonHi dmm MaHOb TB BOCKY temepaTy moKyTuMiCTn ICKpn, 1O MOkyTu npin3bectn Do noXekj.
3a6bOpOHaTeBcBnKOpNCTOByBaTn Bnpi6 Be3 npabunlHo BCTaHOBNEHO NeaTa BCIX KoxyXIB. HenpaunlHbHO BCTaHOBNeIe NzeMOxOBe BID'cHATNCsI INP3BcETN DO TpaBM.
Cniikkyte,i06 ne3o He 3aivnlaio cstopoHni npedmetnHa KWTanT KamHHa Ta KopIHn. Lc MoKe npu3BecTn Do NooKoJKeHHn Ie3a Ta 3rHnAHnBaIa DbnuHa. 3irHyTa BicBnKnkae 3naHi Bi6paui Ta npu3BOdNtB do pN3NKy Bi'dcHnHHn Ie3a BiD Bnpo6y.
- Y pa3i ydapy ne3a 06 6byj-kn CTOpOHnI npedMeT
YH NOBn Bi6paui HeaHNo 3yNHITb Bvpi6.
BiD'EDnaiTe npOBI 3anaJIIOBAHHN BID CbiChN
3anaIOBAHH. IpeBipRyTE BvPi6 Ha HABHICTb
NoKoJXeHb. BInpabJrTe NoWKoJxEHHa 60
3daBaiTe BvPi6 Ha pEmoHT B AToPn3OBAHn CEHTp
O6cnyroByBaHH.
3a6bopnojctbca3akpinTn pyky 3ynHennn DByrhyHa na pykOaTti, KOIN npaIOe DByrHy.
- PocTaBTe BnPi6 Na Tbepyi PiBHy NOBepXHIO Ta BBIMKHITb INoRo. PtI cybOMy Ne3o He NOBHINTO KpKATNc 3emNi a60 iHxu XpeMTeB.
Пицуас роботи 3 виробом 3аьждзалшайтесу поаду Нboro.
ПдчасpoobTu3Bnpo6omyciKoJecaMaIObTaIIMuATINHa3emni,aObndBi pyknTp6BaTpImaTnHa pyuci.TpImaTepyknTaHornHaBIDCTAHIBIDNE,IOOsepbTaOtCB.
He haxnayTe Bnip6, KOni DnBryh yBimKHeHm.
-Будъто obepexні пд часpyxу 3ворOTHOMy
нанрЯку.
3a6bOpOHReTbCn iDnHimaTN Bnip6 KOIN DnBryH yBMKHeHN. JkTOo BnIP6 Tpe6a nIDHTN, CNOATky BMKHITb DnBryH Ta BiD'cHaIte NpOBI d 3anaJIOBAHHaBnB DcBcIKn 3anaJIIOBAHHa.
- He pyxaiTecey y 3BOpOTHomy hAnpMky iD yac po60Tu 3 Bnpo6om.
BIMnKaIte DInrHyN iD ac pyxU che3 dInrHKn 6e3 TpaBn Ha KUnT DopIXoK i3 rpaBIO, KAMEHO a60 acFaJIbTy.
He 6iirate 3 Bnpo6om, KOIN DBIgYH yBIMKHeHNI. Pid cac po60nti 3 BPO6OM Heo6xIDHO xOHTN 3i 3BnuHNO UBNkICtIO.
BIMnKaIe DInrHyN, nepi HIX 3MiHOBaTn BnCOTy pi3aHHra. 3a6bOpHReTbc RbKOHyBaTn peryIIOBaHH npn BBIMKHeHOMy DInrHyHi.
3a6bopohraTbca 3aannuata N Bpi6 be3 hargny KoNN DbinyH npauoe. 3ynnHtB dbinyH Ta nepekoHaTeC, 10 pixyue o6naadHnHe o6epraTbca.
Ctah 3apdkaHHaKymyIToPA
| Свittлобiodний iнданкатор на akумлаяторi | Стаус |
| Блима€ свittлобiodний iнданкатор 1 | 0-25 % |
| Гороть свittлобiodний iнданкатор 1, 6лима€ свittлобiodний iнданкатор 2 | 25-50 % |
| Гороть свittлобiodнí iнданкатори 1, 2, 6лима€ свittлобiodнí iнданкатор 3 | 50-75 % |
| Гороть свittлобiodнí iнданкатори 1, 2, 3, 6лима€ свittлobiodнí iнданкатор 4 | 75-100 % |
| Гороть свittлобiodнí iнданкатори 1, 2, 3, 4 | Зараджени
повhicтою |
Ikuo iHue He 3a3HaeHo, MaIObCra Ha yBa3i OCTaHHI ony6blKobahi BepciBnEHaBeDeHNx CTAndaptTib.
YIIOBHOBAxHeHn OprAn:0404,RISE SMP Svensk Maskinprovning AB,Box 7035,SE-750 07 Uppsala
OpnIIOHINB 3BITN UOdo OUHKIN BiIDNOIBHocTi 3rIHO 3OoATKOM VI NPEKTNBU PAIN CC B1D 8 TpaBna 2000 pOKY «Pno UyMoBI BYKnDN H NaBKOIIHc epeDoBniue> 2000/14/EC.
CbioTBO Mae Homep:
Huskvarna, 2016-11-01

Knaeic Nocdan (Claes Losdal), dinpekTop i3 nITaHb pO3BnTky / npOdyukii dansaIBHmTuBa (yNOBHOaKeHnnpedctabHHK KOMnahii Husqvarna AB, uO bIDnojdae 3a texHiNY dOkymetaio)
Husqvarna
www.husqvarna.com
Original instructions
OpinnHnHn HnCTpyKnn PuvodniPokyny