
NILSBYN - Cooker IKEA - Free user manual and instructions
Find the device manual for free NILSBYN IKEA in PDF.

| Product type | Wall-mounted hood |
| Width | 598 mm |
| Depth | 450 mm |
| Total height (extraction mode) | 800 - 1080 mm |
| Total height (recirculation mode) | 800 - 1200 mm |
| Net weight | 10.4 kg |
| Total power | 70 W |
| Lighting | LED, 2 x 2.5 W, socket INAR MINILOCK |
| Grease filter | Metallic, dishwasher safe |
| Carbon filter (optional) | Cleanable and regenerable, 3-year lifespan |
| Airflow min/max | 260 / 450 m³/h |
| Noise at minimum speed | 48 dB(A) |
| Noise at maximum speed | 61 dB(A) |
| Energy efficiency class | A+ |
| Annual energy consumption | 16.0 kWh/year |
| Minimum distance to gas hob | 650 mm |
| Minimum distance to electric hob | 550 mm |
| Operation | Extraction or recirculation |
| Warranty | 5 years |
| Control panel | 3 extraction speeds + lighting |
Frequently Asked Questions - NILSBYN IKEA
User questions about NILSBYN IKEA
0 question about this device. Answer the ones you know or ask your own.
Ask a new question about this device
Download the instructions for your Cooker in PDF format for free! Find your manual NILSBYN - IKEA and take your electronic device back in hand. On this page are published all the documents necessary for the use of your device. NILSBYN by IKEA.
USER MANUAL NILSBYN IKEA
Please refer to the last page of this manual for the full list of IKEA appointed Authorized Service Centre and relative national phone numbers.
Safety instructions 7
Electrical connection 9
Installation 9
Description of the appliance 10
Control Panel 10
Cleaning and maintenance 11
What to do If... 13
Technical Data 14
Data Plate 16
Environmental protection advice 17
IKEA WARRANTY
18
Safety instructions
Before the first use
For your own safety and for the correct operation of the appliance, please read this manual carefully before installation and commissioning. Look at the warning pictures at the beginning of this manual carefully. For correct and complete installation, refer to the specific installation manual supplied with the product.
Always keep these instructions with the appliance, even if it is transferred to a third party. It is important for the users to be familiar with all the operating and safety features of the appliance.
⚠ The danger symbol, relating to safety, which warns of potential risks for the user and for others.
All safety-related messages will be preceded by the danger symbol and by the following terms:
⚠️ DANGER: indicates a dangerous situation which, if not avoided, will result in serious injuries.
⚠ WARNING: indicates a dangerous situation which, if not avoided, may result in serious injuries.
All safety warnings provide specific details concerning the possible danger, as well as instructions on how to reduce the risk of
injuries, damage and electric shock resulting from using the appliance in an improper way. Follow these instructions carefully.
• Make sure that the appliance has not been damaged during transport
- Remove the cardboard protections and any protective film and stickers from the accessories.
• Installation operations and electrical connections must be carried out by a qualified technician, following the manufacturer's instructions and in accordance with local safety regulations. Do not repair or replace any part of the appliance unless specifically recommended in the user manual.
- The appliance must be disconnected from the electrical power supply before performing any installation operation.
- WARNING: failure to install the screws or fastening elements indicated by the instructions may cause electrical hazards.
- By law, the appliance must be earthed. (Not possible for class II hoods identified by the symbol on the serial number plate).
- Do not pull the power cable to unplug the appliance from the wall socket.
- When installation is complete, the electrical components must no longer be accessible by the user.
- Do not touch the appliance with wet or damp body parts and do not use it barefoot.
- This appliance can be used by children over the age of 8 and by people with reduced physical, sensory or mental capabilities or with unsuitable experience and knowledge only if supervised and if they have received instructions on the safe use of the appliance and understand the risks involved. Children must be supervised to ensure they do not play with the device. Cleaning and routine maintenance must never be performed by children without adult supervision.
- All other maintenance operations must be carried out by a specialised technician.
- When drilling holes in the wall, take care not to damage electrical connections and/or pipes.
- The ventilation openings must always be directed towards the open air.
- The manufacturer shall not be held responsible for any damage caused by improper use or incorrect settings.
- Proper maintenance and cleaning ensure correct operation and the best performance of the appliance. Regularly remove all stubborn dirt from the surface to avoid grease build-up. Remove and clean or change the filter regularly. To do this, follow the instructions given in the paragraph "Cleaning and Maintenance".
- Do not cook food over the flame ("flambé") under the appliance. The use of open flames may cause a fire.
- Failure to follow the instructions when cleaning the hood and when cleaning and replacing the filters may result in the risk of fire.
- The exhaust air must not be discharged through the same duct used to extract the fumes generated by appliances burning gas or other fuels, but it must have an independent outlet.
- All national regulations regarding exhaust air must be complied with.
- There must be adequate ventilation if the hood is used with other appliances burning gas or other fuels. The negative pressure of the room must not be above 4 Pa (4 x 10⁻⁵ bar). For this reason, make sure that the room is well ventilated. If in doubt, contact an authorised service centre or a qualified professional.
- Do not leave pans on the stove unattended while frying food, as the oil used for frying can catch fire.
- Before touching the light bulbs, make sure that they are cold.
- Do not use or leave the hood without the light bulb correctly installed, because it might cause an electric shock.
- The hood is not a worktop: do not place objects on it or overload it.
- For all installation and maintenance operations, always use suitable work gloves.
- The appliance is not suitable for outdoor use.
⚠ WARNING: when the hob is on, the accessible parts of the hood may become hot.
WARNING: this appliance is heavy; the hood must be lifted and installed by two or more people only. The minimum distance between the hob and the lower part of the hood must not be less than 65 cm for hobs with gas or other fuel burners and 50 cm for electric cookers. Before installing, also check the minimum distances indicated in the hob manual. If the hob installation instructions indicate a greater distance, it must be taken into account.
Electrical connection
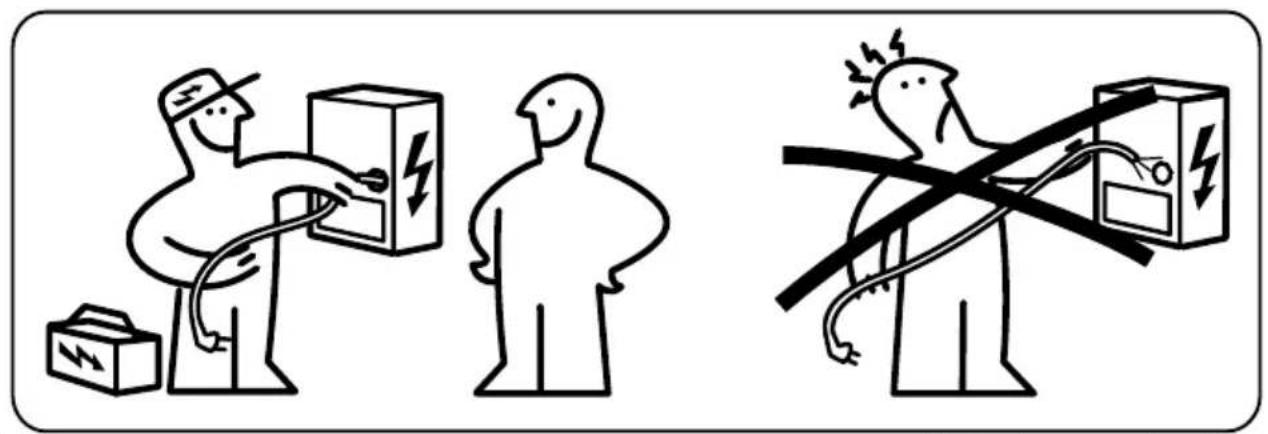
⚠ WARNING: All electrical connections must be made by an authorised installer. Make sure that the voltage indicated on the product plate corresponds to the mains voltage.
This information is indicated inside the hood, beneath the grease filter.
⚠ WARNING: If the hood is equipped with a plug, connect the appliance to a wall socket that complies with current standards, located in an accessible area. The hood comes with a special power cable
(type H05 VV-F); if it is damaged, ask the technical assistance service for a replacement.
If it is not equipped with a plug (direct connection to the mains), or if the nearest wall socket is not in an accessible area, install a standardised double-pole switch that provides complete isolation from the mains in the event of a category III overvoltage, in accordance with the wiring regulations.
WARNING: Do not weld the cables!
Installation
The hood is designed to be installed and used in "suction" or "recirculation" mode.
Suction version (see the symbol in the installation instructions)
The steam produced while cooking is sucked in and conveyed outdoors through an exhaust pipe (not supplied) connected to the hood steam outlet.
Make sure that the exhaust pipe is installed correctly in the air outlet using a suitable connection system.
Important: if already installed, remove the carbon filter(s).
Air recirculation version
(see the symbol in the installation instructions)
The air is filtered through one or more filters and then conveyed back into the room.
Important: make sure that there is correct air circulation around the hood.
Important: if the hood is not supplied with carbon filters, they must be ordered and installed before using the appliance. The filters are available at IKEA stores.
The hood must be installed away from particularly dirty areas, windows, doors and heat sources.
The accessories for wall mounting are not included because walls made of different materials require different types of accessories. Use fastening systems suitable for the walls in your home and appropriate for the weight of the appliance. For further details, contact a specialist dealer.
Keep these instructions for future reference.
Description of the appliance
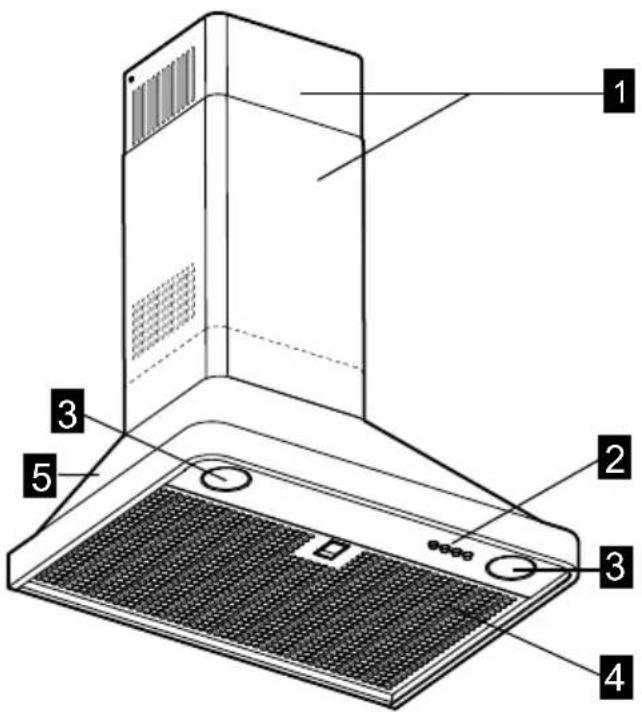
1 Chimney
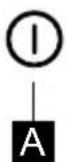
2 Control Panel
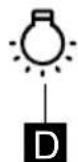
3 Light
4 Grease filter
5 Body
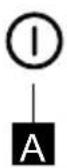
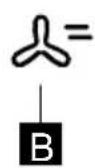
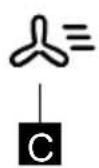
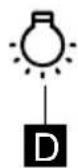
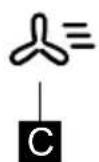
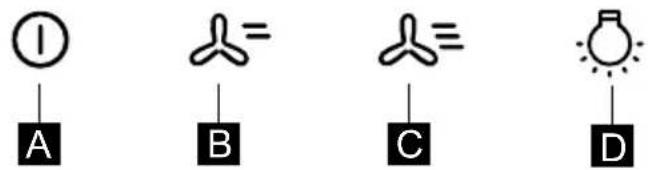
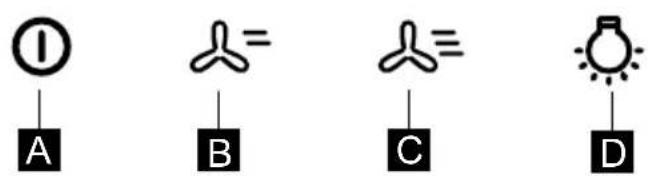
Control Panel
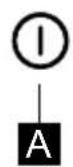

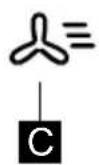

A Turns motor ON/OFF and speed 1
B Speed 2, A should remain pressed
C Speed 3, A should remain pressed
D To switch on the light, press the button.
Cleaning and maintenance
WARNING
- Disconnect the hood from the electrical power supply
- Clean the surfaces using a damp cloth. If very dirty, add a few drops of dishwashing liquid to the water. Dry with a dry cloth.
- Do not use tools or other cleaning instruments.
- Avoid using steam jet cleaners
IMPORTANT: do not use corrosive or abrasive detergents. If one of these products were to accidentally come into contact with the appliance, clean it immediately with a damp cloth.
Use specific detergents to clean the appliance and follow the manufacturer's instructions.
Do not use abrasive sponges, scourging pads or metal scrapers. In the long run, they may damage the surface
IMPORTANT: clean the grease filters at least once a month to remove any oil or grease residues.
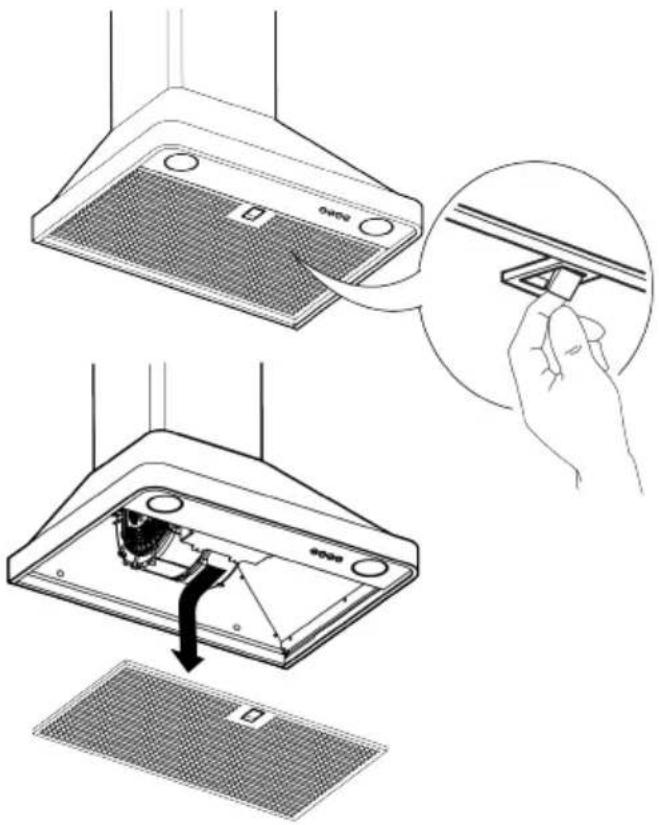
Washing the grease filter
The metal grease filter has an unlimited service life and must be washed once a month by hand or in the dishwasher at low temperatures on a short program.
If washed in the dishwasher, the grease filter may become slightly discoloured, but its filtering properties will not change.
Grease filter maintenance:
- Disconnect the hood from the mains.
- Remove the grease filter: pull the spring-release handle, and then pull out the filter downwards.
- After washing the grease filter, perform the operations in reverse order to reinstall it, making sure that it covers the entire suction surface.
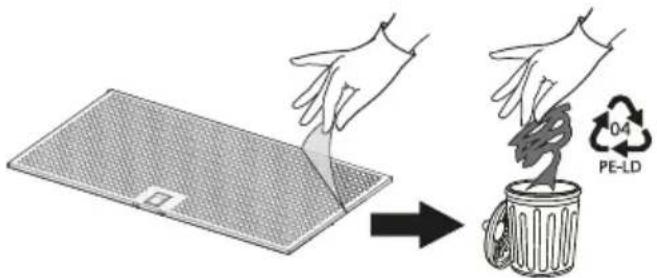
The grease filter protection must be disposed of as PE-LD 04 material, in accordance with local regulations.
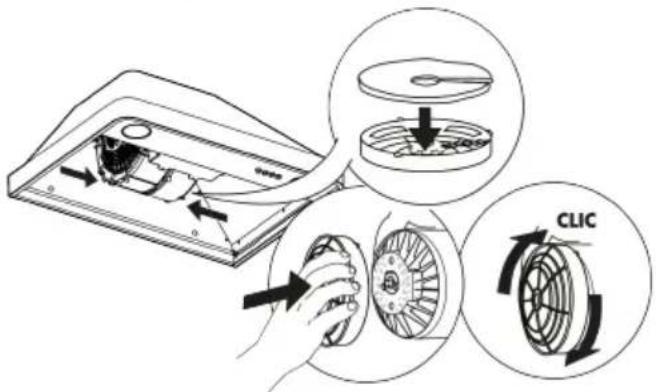
Carbon filter maintenance (if the hood is installed in air recirculation mode)
- Unplug the appliance or disconnect it from the power supply.
- Remove the grease filter.
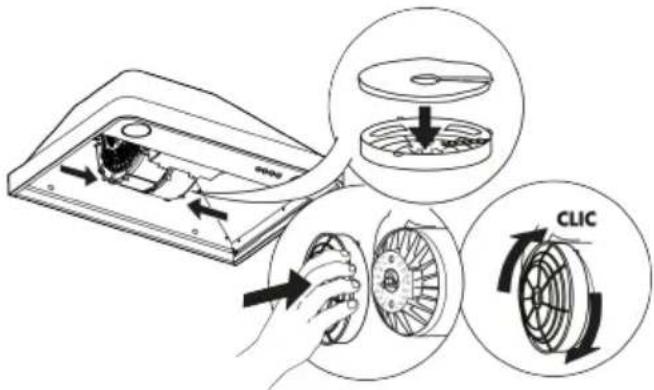
- If the carbon filters are already installed (two filters that cover the motor impeller protection grids) and they need to be replaced, turn the central handle counterclockwise to release them.
- Open the two filter shells.
ENGLISH
- Remove the two circular pads.
- Perform the operations in reverse order to install the new filters.
- Reinstall the grease filter. Unlike traditional carbon filters, this carbon filter can be cleaned and reactivated. With normal use of the hood, the filter should be cleaned once a month. The best way to clean the carbon filter is to wash it in a dishwasher at the highest temperature, using a normal dishwasher detergent. To prevent food particles or dirt from settling on the filter during washing and causing odours later, it is recommended to wash the filter on its own. After washing, to reactivate the filter, it must be dried in an oven at 100^ C for 10 minutes. The filter will retain its odour-absorbing capacity for three years, after which it must be replaced.
Light bulb maintenance
The hood is equipped with a LED lighting system.
LEDs provide optimal illumination, last up to 10 times longer than conventional lamps and save 90% of electricity.
To replace them, contact the Authorised Service Centre.
What to do If...
| Problem Possible cause Solution | ||
| The appliance does not work | There is no mains electrical power. | Check for the presence of mains electrical power.Turn off the appliance and restart it to see if the faults persists. |
| The appliance is not connected to the electrical supply. | Check if the appliance is connected to the electrical supply.Turn off the appliance and restart it to see if the faults persists. | |
| The hood's suction level is not enough. | The suction speed is too low. | Check the suction speed and adjust as necessary. |
| The grease filters are dirty 4. | Check that the filters are clean If not, clean the filters in the dishwasher. | |
| The anti-odors filters are dirty. | Check that the anti-odour filters are properly washed as recommended. | |
| The air vents are obstructed. | Check the air vents for any obstructions and remove as necessary. | |
| The light does not work. | The LED is broken 3 | For replacement, contact the Authorized Service Centre. |
Before contacting the Authorised Service Centre:
restart the appliance to see whether the problem has been solved. If not, turn it off again and repeat the operation after an hour.
If it is still not working after performing the checks listed in the troubleshooting guide and after restarting the appliance, contact the Authorised Service Centre, describing the problem clearly and providing the following information:
- the type of defect;
- the model;
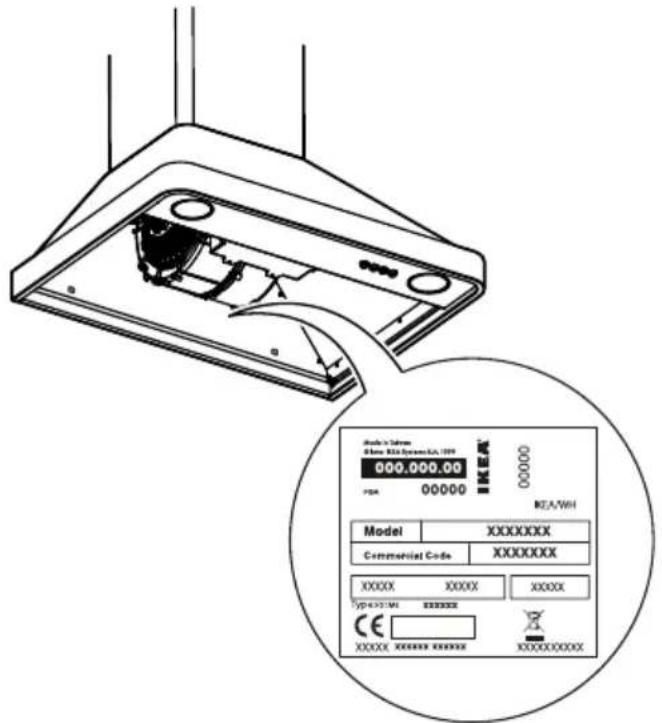
- the type and serial number of the appliance (found on the nameplate);
- the service code (the number found after the word SERVICE, on the nameplate located inside the appliance).
SERVICE
0000 000 00000
Technical Data
| Type of appli-ance | Wall-mounted Hood | ||
| Dimensions | Width mm 598 | ||
| Depth mm 450 | |||
| Total height in suction mode (min-max) mm 800-1080 | |||
| Total height in recirculation mode (min-max) mm 800-1200 | |||
| Total power W 70 | |||
| Light info | Type LED | ||
| Number & Power W 2 X 2.5W | |||
| Connection INAR MINILOCK | |||
| Minimum installation height - gas cooker | mm 650 | ||
| Minimum installation height - electric cooker | mm 550 | ||
| Product weight: NILSBYN 20612711 | Kg | 10.4 | |
| Product weight: NILSBYN 10602369 | Kg | 10.4 | |
| Product weight: NILSBYN 40612710 | Kg | 10.4 | |
| Product weight: NILSBYN 90612722 | Kg | 10.4 | |
| Product weight: NILSBYN 80612713 | Kg | 10.4 | |
| Product weight: NILSBYN 90612717 | Kg | 10.4 | |
| Product weight: NILSBYN 10612721 | Kg | 10.4 | |
| Product weight: NILSBYN 00612712 | Kg | 10.4 | |
| Product weight: NILSBYN 10612716 | Kg | 10.4 | |
| Product information in accordance with EU Regulation no. 65/2014 | |||
| Name of Supplier | IKEA | ||
| Model identification code | NILSBYN 20612711NILSBYN 10602369NILSBYN 40612710NILSBYN 90612722NILSBYN 80612713NILSBYN 90612717NILSBYN 10612721NILSBYN 00612712NILSBYN 10612716 | ||
| Annual energy consumption - AEC | Kwh/year | 16.0 | |
| Energy efficiency class | A+ | ||
| Fluid dynamic efficiency FDE | % | 29.9 | |
| Fluid dynamic efficiency class | To | ||
| Luminous efficiency LE | lux/W | 36.1 | |
| Luminous efficiency class lux To | |||
| Grease filtering efficiency - GFE % 85.1 | |||
| Grease filtering efficiency class B | |||
| Minimum air flow (normal power) m3/h 260 | |||
| Maximum air flow (normal power) m3/h 450 | |||
| Airflow setting in boost mode m3/h N/A | |||
| A-weighted sound power level of noise emissions at minimum speed | Db(A) re 1pW | 48 | |
| A-weighted sound power level of noise emissions at maximum speed | Db(A) re 1pW | 61 | |
| A-weighted sound power level of noise emissions in boost mode | Db(A) re 1pW | N/A | |
| Power consumption in off mode-P0 W 0.49 | |||
| Power consumption in standby mode-Ps W N/A | |||
| Product information in accordance with EU Regulation no. 66/2014 | |||
| Factor of increase over time - f 0.9 | |||
| Energy efficiency index - EEI 41.3 | |||
| Airflow measured at best efficiency point - QBEP m3/h 220 | |||
| Air pressure measured at best efficiency point - PBEP | Pa | 186 | |
| Maximum airflow - Qmax | m3/h 450 | ||
| Electric power consumption at best efficiency point - WBEP | W | 38 | |
| Rated power of lighting system - WL | W | 5.0 | |
| Average illuminance of the lighting system on the cooking surface - Emiddle | lux | 181 | |
Data Plate
The technical specifications and serial number indicated on the plate on the inner side of the appliance.
Environmental protection advice
The packaging material
The packaging is 100% recyclable and it is marked with the recycling symbol
The different parts of the packaging must not be dispersed into the environment; they must be disposed of in accordance with the regulations set out by the local authorities.
Scrapping the appliance
- This appliance is marked in compliance with the European Directive 2012/19/EC, Waste Electrical and Electronic Equipment (WEEE).
- Dispose of this product correctly to help prevent potential damage to the environment and to health.

The symbol on the product or documentation provided indicates that this product must not be treated as domestic waste, but must be taken to a suitable waste collection site for the recycling of electrical and electronic appliances.
Disposal of household appliances
- This product was made with recyclable or reusable materials.
Dispose of it in accordance with local waste disposal regulations. Before scrapping it, render it unusable by cutting the power cable. - For further information on the treatment, recovery and recycling of household appliances, contact your local competent office, your household waste collection service or the store where you purchased the product.
Suggestions for power saving
- Turn on the hood at the minimum speed when you start cooking and keep it running for a few minutes after you have finished cooking.
- Increase the speed only if there is a lot of smoke and steam and use the "Boost" speed(s) only in extreme situations.
-
Replace the carbon filter(s) when necessary to maintain good odour reduction efficiency.
-
Clean the grease filter(s) when necessary to maintain their efficiency.
- Use a duct with the maximum diameter indicated in this manual to optimise efficiency and minimise noise.
Declaration of Conformity €
This appliance has been designed, manufactured and marketed in accordance with:
- the safety objectives of the "Low Voltage" Directive 2014/35/EU and subsequent amendments;
- the ecodesign requirements of European regulations no. 65/2014 and no. 66/2014 in accordance with the European Standard EN 61591;
- the protection requirements of the "EMC" Directive 2014/30/EU.
Electrical safety is only guaranteed when the appliance is correctly connected to an earthing system that complies with current laws.
IKEA WARRANTY
How long does the IKEA warranty last?
This warranty is valid for 5 years from the date of purchase/delivery of your appliance from an IKEA store. You will need to show your original receipt as proof of purchase. Any servicing carried out during the warranty period does not extend the warranty period.
Who provides the service?
The assistance service chosen and authorised by IKEA will provide the service through its network of authorised Service Partners.
What does this warranty cover?
The warranty covers any manufacturing defects (functional defects), from the date of purchase/delivery of the appliance. This warranty applies to domestic use only. Any exceptions are described under "What is not covered by the warranty?". During the warranty period, repair costs
(spare parts, labour and travel costs of technicians) will be borne
by the assistance service, provided that access to the equipment for repair work does not involve any special costs. These conditions are in accordance with EU directives (No. 99/44/EC) and local regulations. Any replaced components become the property of IKEA.
How will IKEA solve the problem?
The assistance service appointed by IKEA to carry out the intervention will examine the product and decide, at its sole discretion, whether it is covered by the warranty or not. The IKEA Assistance Service or its authorised Service Partner, through their respective Service Centres, at their sole discretion, will repair the defective product or replace it with an equal product or one of equivalent value.
What is not covered by the warranty?
• Normal wear and tear
- Damage caused deliberately, damage caused by failure to comply with the operating instructions, incorrect installation or by connecting to an incorrect voltage.
Damage caused by chemical or electrochemical reactions, rust, corrosion or damage caused by water, including damage caused by the presence of excessive limescale in the water pipes. Damage caused by weather and natural events.
- Consumables, including batteries and light bulbs.
- Damage to non-functional and decorative parts that do not affect the normal use of the appliance, including scratches and colour differences.
- Accidental damage caused by foreign bodies or substances and damage caused by cleaning or eliminating clogging from filters, drainage systems or detergent trays.
- Damage to the following components: glass ceramic, accessories, baskets for cutlery and tableware, supply and drainage pipes, light bulbs and light bulb covers, grilles, knobs, coating and parts of coating. Unless it can be proved that such damage was caused by manufacturing errors.
- Cases in which functional detects are not found by the technician upon inspection.
- Repairs not performed by our authorised Assistance Service and/or by an authorised contractual Service Partner or if non-original spare parts are used.
- Repairs caused by incorrect installation or installation not in accordance with the specifications.
- Cases of improper use and/or non-domestic use of the appliance, e.g. professional use.
- Transport damage. If it is the customer who transports the product to his/her home or to another address, IKEA is not responsible for any damage that may occur during transport. On the other hand, if IKEA delivers the product to the customer's address, any damage to the product during transport will be covered by IKEA.
- Costs relating to the first installation of the IKEA appliance. However, if an IKEA service provider or its authorised partner repairs or replaces the appliance within the terms of this warranty, the service provider or authorised partner will reinstall the repaired appliance or install the replacement appliance, if necessary. These restrictions do not apply to regular work carried out by qualified technicians with original spare parts to adapt the appliance to the technical safety regulations of another EU country.
Application of national laws
The customer is the owner of the rights provided for by the Italian Legislative Decree no.206/2005 and this 5 (five) year IKEA warranty does not affect these rights which meet or extend the minimum legal rights of each country in terms of warranty. These conditions do not, however, limit the customer's rights, as defined by local laws, in any way.
Area of validity
For appliances purchased in one EU country and taken to another EU country, the services will be provided according to the warranty conditions applicable in the new country. The obligation to provide the service based on the warranty conditions exists only if the appliance complies with and is installed according to:
- the technical specifications of the country in which the application of the warranty is required;
- the safety information contained in the Assembly Instructions and in the User Manual.
The dedicated ASSISTANCE service for IKEA appliances
Do not hesitate to contact the Authorised Service Centre appointed by IKEA to:
- request technical assistance during the warranty period
- request information on the operation of IKEA appliances.
To ensure you get the best assistance, please read the assembly instructions and/or the instruction manual of the product carefully before contacting us.
How to contact us if you need assistance
Please contact the IKEA Service Centre. You will find the phone number on the last page of this manual.
In order to provide you with faster service, we suggest that you use the telephone numbers listed in this manual. Always refer to the numbers indicated in the manual of the appliance for which you require assistance. We advise you to always have available the IKEA code (8 digits) and the 12-digit code indicated on the label on your product.
i KEEP THE PURCHASE/DELIVERY DOCUMENT!
It is your proof of purchase and the warranty will not be valid without it. The receipt also features the name and the IKEA article number (8 digits) for each appliance purchased.
Need more help?
For any information not involving assistance, please refer to the Customer Service of your reference IKEA store. Please read the technical documentation provided with your appliance carefully before contacting us.
Inhalt
1 Camini
2 Pannello Comandi
3 Lampada
4 Filtro grassi
5 Scocca
Pannello Comandi
1 Pejse
2 Kontrolpanel
3 Lampe
4 Fedtfilter
5 Stel
Kontrolpanel


i BEHOLD DIT K∅B/LEVERINGSDOKUMENT!
1 Piper
2 Kontrollpanel
3 Lampe
4 Fettfilter
5 Hus
Kontrollpanel


Beskyttelsen på fettfilteret må kastes som PE-LD 04 materiale i samsvar med lokale bestemmelser.

^e Vedlikehold av karbonfilteret (hvis ventilatoren er blitt installert i luftresirkuleringsmodus)
natural_image
Illustration showing three scenarios: electric shock charging, person using a box with lightning bolt, and person crossing over electrical circuit (no text or symbols)Lamppujen huolto
1 Chaminés
2 Painel de comandos
3 Lâmpada
4 Filtro de gorduras
5 Corpo
Painel de comandos
1 Chimeneas
2 Panel de Mandos
3 Lámpara
4 Filtro de grasas
5 Carcasa
Panel de Mandos
1 Schoorstenen
2 Bedieningspaneel
3 Lamp
4 Vetfilter
5 Chassis
Bedieningspaneel
Údržba žárovek
Что делать, если...
Údržba žiaroviek
1 Kaminai
2 Valdymo skydelis
3 Lemputè
4 Riebalų filtras
5 Korpusas
Valdymo skydelis


Lempučių priežiūra
Lampas apkope
1 Lõõrid
2 Juhtpaneel
3 Lamp
4 Rasvafilter
5 Korpus
Juhtpaneel


Lambipirnide hooldus
Zaštitnik filtra za masnoću mora se odložiti kao PE-LD 04 materijal u skladu s lokalnim propisima.

Održavanje filtra s ugljenom (ako je napa postavljena u načinu rada s recirkulacijom zraka)
Održavanje žarulja
⚠ UPOZORENJE: Sva električna povezivanja moraju biti izvedena od strane ovlašćenog instalatera. Proverite da li je napon naveden na pločici proizvoda isti kao napon mreže.
Ova informacija je naznačena u unutrašnjosti aspiratora, ispod filtera za mast.
⚠ UPOZORENJE: Ako je aspirator opremljen sa utikačem, priključite uređaj na utičnicu, u skladu sa važećim propisima, koja se nalazi na pristupačnom mestu.
Aspirator je opremljen posebnim kablom za napajanje (tip H05 VV-F); u slučaju oštećenja zatražite od službe tehničke pomoći.
Ako nije opremljen sa utikačem (direktno priključivanje na mrežu), ili ako utičnica nije u pristupačnoj oblasti, instalirajte standardizovani bipolarni prekidač koji omogućava potpunu izolaciju od mreže u slučaju prenapona III. kategorije, u skladu sa važećim standardima.
⚠ UPOZORENJE: Nemojte zavarivati kablove!
Instalacija
Aspirator je dizajniran da se instalira i koristiVažno: uverite se da postoji odgovarajuća u režimu "usisavanja" ili "recirkulacije". cirkulacija vazduha oko aspiratora.
Usisna verzija (pogledajte simbolu uputstvima za instalaciju)
1 Kamini
2 Komandna tabla
3 Lampa
4 Filter za mast
5 Telo
Komandna tabla


A Dugme za UKLJUČIVANJE/
ISKLJUČIVANJE motora/dugme za
prvu brzinu
B Dugme za drugu brzinu, A mora ostati pritisnuto
C Dugme za treću brzinu, A mora ostati pritisnuto.
D Da biste upalili svetlo, pritisnite dugme.
Štitnik filtera protiv masti baca se kao materijal PE-LD 04 u skladu s lokalnim normama.

Održavanje filtera na ugljen (ako je napa postavljena na način ponovne cirkulacije vazduha)
- Uklonite utikač ili prekinite napajanje.
- Uklonite filter za mast.
-
Ako su filteri na ugljen već postavljeni (dva filtera koja prekrivaju zaštitne rešetke rotora motora) i potrebno je da ih zamenite, okrenite srednju ručku u smeru suprotnom od kazaljke na časovniku kako biste ih otključali.
-
Otvorite dva poklopca filtera.
-
Izvadite dve kružne postave.
-
Uradite u obrnutom smeru za postavljanje novih filtera.
-
Vratite filter za mast na mesto.
Za razliku od tradicionalnih filtera na ugljen, ovaj filter na ugljen se može čistiti i reaktivirati. Pri normalnoj upotrebi nape, filter treba čistiti jednom mesečno. Najbolji način za čišćenje filtera na ugljen je pranje u mašini za pranje sudova na najvišoj temperaturi, koristeći uobičajeni deterdžent za mašinu za pranje sudova. Da biste izbegli da se čestice hrane ili prljavština natalože na filter tokom pranja i uzrokuju smrad nakon toga, savetuje se da operete filter na ruke. Nakon pranja, da bi se ponovo aktivirao, filter se mora sušiti u pećnici na 100°C tokom 10 minuta. Filter će održati svoj kapacitet upijanja mirisa tri godine nakon čega mora da se zameni.
Održavanje lampica
Vzdrževanje sijalk
1 Bacalar
2 Kumanda Paneli
3 Lamba
4 Yağ filtresi
5 Gövde
Kumanda Paneli
Ampullerin bakımı
natural_image
Simple line drawing of two figures, one holding a battery and the other inside an electrical box (no text or symbols)
natural_image
Simple line drawing of a person standing with crossed lines and a device, no text or symbols presentViðhald Ijósaperu
لوحة التحكم