
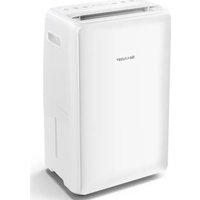
UD-P164P-W - Dehumidifier SHARP - Free user manual and instructions
Find the device manual for free UD-P164P-W SHARP in PDF.
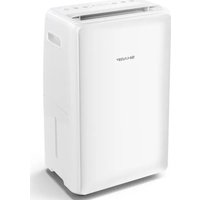


| Product type | Dehumidifier |
| Brand | Sharp |
| Model | UD-P164P-W |
| Dimensions (W x H x D) | 355 x 567 x 259 mm |
| Weight | 15.4 kg |
| Power supply | 220-240 V ~ 50 Hz |
| Energy consumption (30°C, 80% RH) | 270 W |
| Dehumidification (30°C, 80% RH) | 16 L/day |
| Dehumidification (27°C, 60% RH) | 9 L/day |
| Recommended room area | 29 to 38 m² |
| Refrigerant | R290 (propane) - 50 g |
| Water tank capacity | 3.8 L |
| Airflow | 146 m³/h |
| Main functions | Dehumidification mode, drying (laundry) mode, timer (1-8h), louver oscillation, child lock, memory, auto shut-off when tank full, automatic defrost, compressor protection |
| Humidity setting | CO - 40% to 70% in 5% increments |
| Fan speed | 2 speeds (low/high) |
| Continuous drainage | Yes, via a 15 mm diameter hose (not included) |
| Filter cleaning | Remove, vacuum or wash with warm water, dry completely before reinstalling |
| Safety | Auto shut-off when tank full, overheat protection, frost protection, shut-off if temperature out of range (1°C to 39°C), error code C1/C2/C8 |
| Operating temperature range | 5°C to 35°C |
| Power cord length | 200 cm |
| Repairability | Entrust to a qualified professional; do not disassemble yourself |
| Environmental information | Contains flammable R290 gas; do not puncture or burn; recycle at end of life according to WEEE regulations |
Frequently Asked Questions - UD-P164P-W SHARP
User questions about UD-P164P-W SHARP
0 question about this device. Answer the ones you know or ask your own.
Ask a new question about this device
Download the instructions for your Dehumidifier in PDF format for free! Find your manual UD-P164P-W - SHARP and take your electronic device back in hand. On this page are published all the documents necessary for the use of your device. UD-P164P-W by SHARP.
USER MANUAL UD-P164P-W SHARP
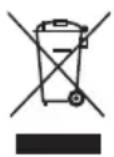
Your product is marked with this symbol.
It means that used electrical and electronic products should not be mixed with general household waste. There is a separate collection system for these products.
A. Information on Disposal for Users (private households)
1. In the European Union
Attention: If you want to dispose of this equipment, please do not use the ordinary dustbin!
Used electrical and electronic equipment must be treated separately and in accordance with legislation that requires proper treatment, recovery and recycling of used electrical and electronic equipment.
Following the implementation by member states, private households within the EU states may return their used electrical and electronic equipment to designated collection facilities free of charge*.
In some countries* your local retailer may also take back your old product free of charge if you purchase a similar new one.
- Please contact your local authority for further details.
If your used electrical or electronic equipment has batteries or accumulators, please dispose of these separately beforehand according to local requirements. By disposing of this product correctly you will help ensure that the waste undergoes the necessary treatment, recovery and recycling and thus prevent potential negative effects on the environment and human health which could otherwise arise due to inappropriate waste handling.
2. In other Countries outside the EU
If you wish to discard this product, please contact your local authorities and ask for the correct method of disposal. For Switzerland: Used electrical or electronic equipment can be returned free of charge to the dealer, even if you don't purchase a new product.
Further collection facilities are listed on the homepage of www.swico.ch or www.sens.ch.
B. Information on Disposal for Business Users
1. In the European Union
If the product is used for business purposes and you want to discard it:
Please contact your SHARP dealer who will inform you about the take-back of the product. You might be charged for the costs arising from take-back and recycling. Small products (and small amounts) might be taken back by your local collection facilities.
For Spain: Please contact the established collection system or your local authority for take-back of your used products.
2. In other Countries outside the EU
If you wish to discard of this product, please contact your local authorities and ask for the correct method of disposal.
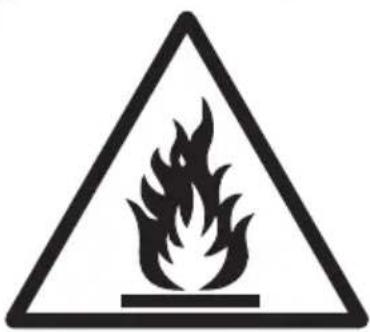
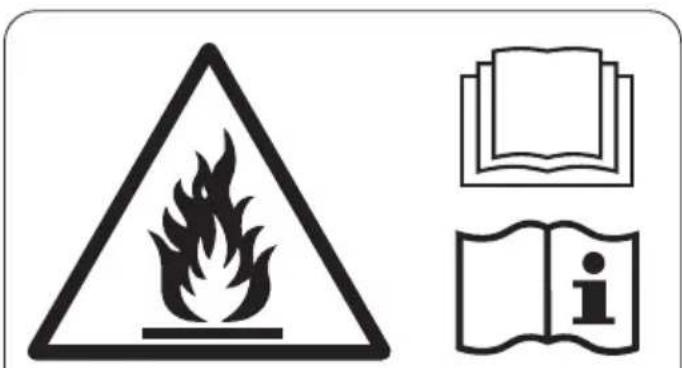
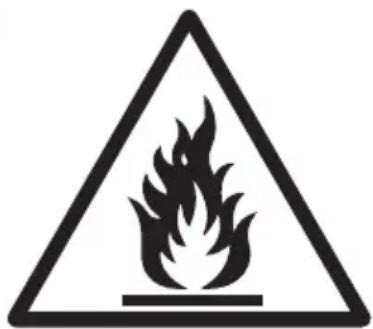
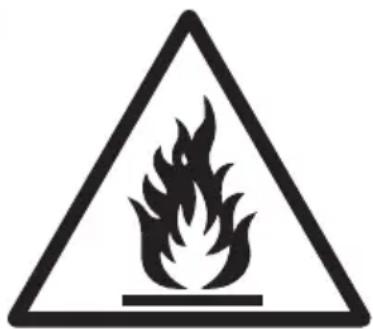
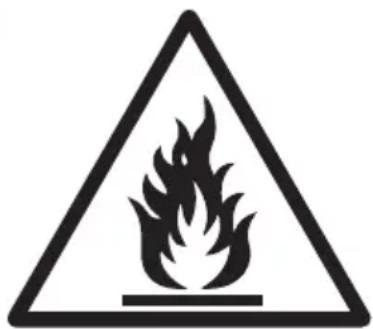
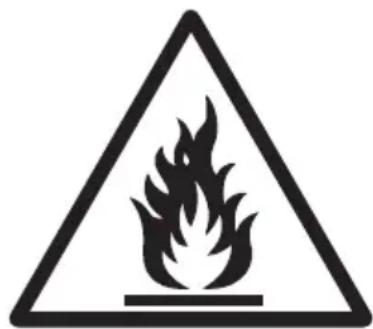
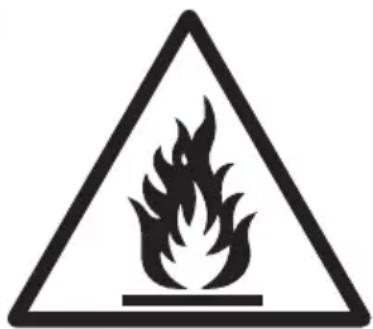
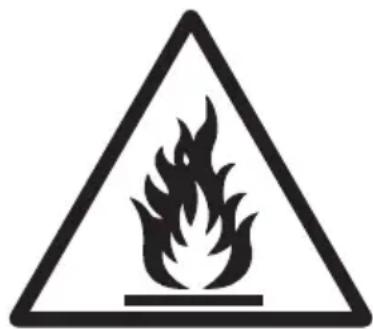
Flammable material. This appliance contains R290/Propane a flammable refrigerant. Do not attempt to re-gas the appliance. Do not release refrigerant to the atmosphere.
www.sharpconsumer.com/contact/
www.sharpconsumer.com/support/ www.sharpconsumer.com/
documents-of-conformity/

Additional warnings for appliances with R290 refrigerant gas (refer to the rating plate for the type of refrigerant gas used) READ THIS USER MANUAL CAREFULLY BEFORE USING THE APPLIANCE
R290 refrigerant gas complies with European environmental directives.
This appliance contains approximately 55g of R290 refrigerant gas. Do not pierce or burn.
Maintenance and repairs requiring the assistance of other qualified personnel must be carried out under the supervision of specialists in the use of flammable refrigerants.
For appliances using R290 refrigerants, a service and operation manual please refer to the ENGINEER INFORMATION section of this user manual.
Please read before operating your new Dehumidifier
- The dehumidifier draws air in through the air intake via the dust filter. This air is cooled to release the moisture and then exits the unit via the louvered vent at the top.
- The dehumidifier is designed to remove moisture from the air and collect this in its internal water tank for disposal. The process to remove moisture can take many hours and is not instantaneous. Depending on the size of the room and sources of moisture, not all moisture will be removed from the air.
- Do not install and use the unit before carefully reading this instruction guide. Please keep this manual for product warranty and future use.
- Use your dehumidifier with the correctly specified mains supply voltage.
- Do not place the machine near any heat sources as this may cause damage to the cabinet or cause a fire.
- Do not expose the unit to direct sunlight as this will avoid the decolouring of the plastic parts.
- Do not operate the machine in places with dust or corrosive/flammable/explosive gas.
- Give guidance if used by children.
- Do not disassemble, repair or replace the unit's spare parts by yourself. Only allow a professional person to repair the appliance.
- Place the machine on a flat and stable surface to prevent vibration and noise.
- Unplug from the mains supply when not in use.
- Never cover the machine when it is running. Make sure the air inlet and outlet are not blocked while in use.
- Do not spray water on the unit, as spraying water may cause malfunctioning and electric shock.
- Never pull the mains plug when your hands are damp or wet. Always switch off before unplugging to avoid electric shock.
- If you are not going to use the dehumidifier for a long time, turn off and unplug the mains plug, then pour away any water in the tank and wipe it clean.
- Do not pull the mains cable as this may cause damage.
- Do not insert your fingers or items into the unit as this may cause damage or electric shock. Before moving, pour the water out of the tank.
- When used in a low temperature and high humidity environment, please set the unit operating in laundry mode. In this condition the dehumidifier will operate continuously. Note: When drying clothes, please do not hang the clothes above the outlet as this will prevent water from dropping into the unit.
- When the machine is running, should make sure the minimum distance between the unit and the wall or other obstacles from all sides (top ≥ 60 cm; front ≥ 60 cm; back ≥ 50 cm; left ≥ 20 cm; right ≥ 20 cm).
- The appliance shall be installed in accordance with applicable country wiring regulations.
- Disconnect from the mains supply when cleaning the appliance. Children should be supervised to ensure that they do not play with the appliance.
- Cleaning and user maintenance shall not be carried out by children without supervision.
- If the mains lead is damaged, it must be replaced by the manufacturer, its service agent or similarly qualified persons in order to avoid a hazard.
- This appliance is for indoor use only and not for laundry room use.
IMPORTANT SAFETY INSTRUCTIONS
Always follow basic safety precautions when using electrical appliances, including the following:
WARNING - Always observe the following to reduce the risk of electrical shock, fire, or injury:
- Read all instructions before using the product. Only use with a 220-240 V AC/50 Hz mains supply.
- This appliance can be used by children aged from 8 years and above and persons with reduced physical, sensory or mental capabilities or lack of experience and knowledge if they have been given supervision or instruction concerning use of the appliance in a safe way and understand the hazards involved. Children shall not play with the appliance. Cleaning and user maintenance shall not be made by children without supervision.
- If the power cord is damaged, it must be replaced by the manufacturer, its service agent, a Sharp authorized Service Centre or similarly qualified persons in order to avoid a hazard. Contact the nearest Service Centre for any problems, adjustments, or repairs.
- Do not repair or disassemble the product yourself.
- Be sure to remove the mains supply before performing maintenance, when removing and attaching and replacing the filter and when not using for a long time. Failure to do so can cause a short circuit resulting in electrical shock or fire.
- Do not use the product if the power cord is damaged or if the connection to the wall outlet is loose.
- Do not insert fingers or foreign objects into the Air Inlet or Air Outlet.
- When removing the mains plug, always hold the plug and never pull on the cord. Failure to do so can cause a short circuit resulting in electrical shock or fire.
- Do not damage the power cord. Failure to do so can cause electric shock, heat generation, or fire.
- Do not remove the mains plug when your hands are wet.
- Do not use this product near gas appliances or fireplaces. When the product is operated with gas appliances in same room, ventilate a room periodically, otherwise it may cause Carbon monoxide poisoning.
- Do not operate the product in rooms where aerosol insecticides are present.
- Do not operate the product in rooms where there is oily residue, incense, sparks from lit cigarettes, or chemical fumes in the air.
- Keep the product away from water.
- Be cautious when cleaning the product. Strong corrosive cleansers can damage the exterior.
- When carrying the Main Unit, first remove the Water Tank, and then hold the Main Unit by the handles on both sides.
- Do not drink the water in the Water Tank.
- Clean the Water Tank regularly.
- When the Main Unit is not in use, dispose of the water in the Water Tank. Leaving water in the Water Tank can cause mold, bacteria, and bad odors. In rare cases, such bacteria can be a health hazard.
CAUTIONS CONCERNING OPERATION
- Do not block the Air Inlet or Air Outlet.
- Do not place the product near or on hot objects, such as stoves or heaters, or where it may come into contact with steam.
- Always operate the product in an upright position.
- Do not move the product when it is in operation.
- If the product is on easily damaged flooring, an uneven surface, or thick-piled carpet, lift it up when moving.
- Do not operate the product without the Air Intake cover properly installed.
- Clean the exterior with a soft cloth only. Do not use volatile liquids or detergents. The product surface may be damaged or cracked with Benzine paint thinner, alcohol or polishing powder.
- Do not sit on or lean on the product.
Installation
BEFORE FIRST USE Let the machine stand for 4 hours as this will allow the refrigerant to settle.
- Your dehumidifier must be operated in an enclosed area to be most effective.
- Close all doors, windows, and other outside openings to the room. The effectiveness of the dehumidifier depends on the rate at which new moisture-laden air enters the room.
- Place dehumidifier in a location that does not restrict air flow through the front of the unit.
- A dehumidifier operating in a room will have little or no effect in drying an adjacent enclosed storage area, such as a closet, unless there is adequate circulation of air in and out of the area. It may be necessary to install a second dehumidifier in the enclosed area for satisfactory drying.
- Ensure that the unit is placed on a stable and flat surface. If the surface is not stable there is a risk that the unit may be unstable and cause excessive vibration and that water will be released.
- The dehumidifier must have at least 20 cm of free space around it. Refer to the figure on page 1.
Locating the Unit
Avoid locations where furniture, fabrics, or other objects can come in contact with the product and interfere with the Air Inlet and Air Outlet. Avoid locations where the product is exposed to condensation or drastic changes in temperature. Appropriate room temperature is between 5°C to 35°C.
Place the product on a level and stable surface with sufficient air circulation. Place the product in the centre of the room for better air circulation. When placed on heavy carpet, the product may vibrate slightly.
Avoid locations with grease, oil smoke, alcohol, hypochlorous acid, or chemicals in the air. Doing so can cause the product exterior to crack. The surrounding walls and floor of the product may become dirty over time. When using the product for an extended period of time at the same location, periodically clean the walls and floor adjacent to it.
Operating environment
- Working temperature: 5°C to 35°C.
- This machine is suitable for indoors, e.g. Living room, study, office room, warehouse, basement, underground garage.
- Make sure the door and window are closed before turning on the unit to get the best result.
- Ensure that the unit is placed on a stable and flat surface. If the floor's surface is not even, there is a risk that the unit may be unstable and topple over. Also, excessive vibration and noise may result.
Components diagrams - parts names
Refer to the figures 2 and 3 on page 1 for the location of the following parts:
- Top casing
- Handle
- Control panel
- Front cover
- Louver (air outlet)
- Mains lead and plug
- Castor
- Water tank
- Drain pipe (not supplied)
- Air intake and dust filter
Operating Introduction - How to operate
Control panel
Refer to item 4 of the control panel on page 1.
The name and function of the control panel
- POWER - Press this button to switch the power on and off.
- MODE - Press this button to set the laundry mode or dehumidify mode.
- HUMIDITY - Press this button to set the desired humidity.
- TIMER/LOCK - Press this button to set the machine shutdown time. The display will show the shutdown time accordingly. Press this button for 3 seconds to turn the child lock function on or off; the lock icon will show or disappear on the display.
- SPEED - Press this button to adjust the fan speed (there are 2 fan speeds).
- SWING - Press this button to turn the swing function on or off.
- ON/OFF INDICATOR - Lights up when the unit is on, turns off when the unit is off.
- DRY INDICATOR - Turns on during the laundry function.
- DEHUMIDIFYING INDICATOR - Turns on when the unit is dehumidifying.
- DEFROST INDICATOR - Lights up when the unit is in the defrost mode.
- DISPLAY - Shows the current status of the dehumidifying function (humidity in the air) and other functions.
- TANK FULL - Lights up when the water tank is full.
- KEY LOCK INDICATOR - When the key lock is active, this indicator lights up.
- TIMER ON INDICATOR - When the timer is active, this indicator lights up.
- FAN SPEED INDICATOR - When the speed of the fan is high or low the respective light illuminates.
- LOUVER ON INDICATOR - When the louver is in operation, this indicator turns on.
Operating introduction
Power on
Plug in the appliance to the mains supply and press the POWER button, it will start and the air outlet louver will open.
When powered on, the unit will start to dehumidify with the fan set to high. The compressor will activate after three minutes.
If the appliance is turned off via the POWER switch and not unplugged from the mains supply, it will start up again in the same mode.
Power off
While the appliance is operating, press the POWER button to turn it off.
Mode setting button
You can change the mode of the dehumidifier to dry clothes or dehumidify. To do this press the MODE button.
- Laundry Function: When the DRY indicator is illuminated the unit will continually dehumidify whatever the ambient humidity is. The fan speed will be locked in the laundry function and can not be changed.
- Dehumidify Function: When the DEHUMIDIFY indicator is illuminated the unit will dehumidify the air. While in this mode, the fan speed can be set and the humidity setting can be controlled.
Humidity setting
To change the humidity level, press the humidity setting button. Each time the button is pressed, the display will change as follows: CO ~ 40% ~ 45% ~ 50% ~ 55% ~ 60% ~ 65% ~ 70% ~ CO. After setting the humidity level, the display will revert to the current moisture level detected by the internal sensor.
When the machine detects that the ambient humidity is 2% lower than the set humidity, the machine will stop dehumidifying, and the fan will keep working at low speed. When the machine detects that the ambient humidity is 2% higher than the set humidity, the machine will start dehumidifying and the fan will come back to work at the set speed. When the ambient humidity is ≤ 30%, the LO icon will be displayed; when the ambient humidity is ≥ 80%, the HI icon will be displayed.
CO means continuously dehumidify regardless of the ambient humidity. The machine default setting is CO when the machine is switched on initially.
When operating in the laundry function, the machine is running in CO status.
Timer
To start the timer function, press the TIMER button; the timer indicator will illuminate. On each press of the TIMER button, the display will change from 1 to 8 hours in 1-hour steps. 0H means that the timer mode is canceled.
While in the timer mode, if the water tank is full or if it enters the auto defrost mode, the unit will stop.
Fan Speed Setting
To control the speed of the fan, press the FAN button. There are two fan speeds: low or high. Each time the FAN button is pressed, the speed of the fan toggles between these two speeds. Note that the fan speed cannot be set while in the laundry mode.
Swing
To make the air outlet louver open and close continually, press the SWING button. Pressing the SWING button again disables this function.
Lock Function
To prevent accidental operation of the unit, the keypad can be locked.
Memory Function
- If the unit is turned off via the POWER button, when turned back on again it will resume from the function it was turned off in. Note that if the timer was set or if the unit was in the lock mode, these settings are not stored.
- If the mains power is disconnected while the unit is operating, it will not start automatically when the mains is reconnected. When the mains power is applied again, you will need to press the POWER button to restart operation. The unit will start up in the initial mode.
Water tank full auto-stop function
When the water tank is full, the unit will stop operation, the air outlet louver will close and a buzzer will sound. To reset, remove the water tank, empty and replace. When the empty water tank is put back into the unit, it will restart. Note that the compressor will take about 3 minutes to operate.
Auto defrost
If the unit is used in a low temperature environment, the internal evaporator may be covered by frost. In order to make sure the machine operates normally, the machine has auto-defrost function. Should the internal sensor detect a temperature of ≤ -1°C the machine will enter auto-defrost function. That means it will run continuously in the dehumidification mode for 30 minutes, then the machine will start the defrost cycle, the DEFROST light will illuminate, the compressor will stop and that fan will operate at high speed.
When temperature of evaporator is ≥ 2°C and the unit has been in the defrost mode for 10 minutes, the auto-defrost mode will turn off and the compressor turns on. At this point the unit will start to dehumidify and the DEFROST light will turn off.
While in the defrost mode and the temperature of the evaporator is ≥ 0°C for two minutes, the defrost function is cancelled.
Compressor protection function
Should there be a problem with the unit causing the compressor to stop, the compressor will turn off for 5 minutes. Normally the compressor will restart after 5 minutes, if it does not unplug the unit for an hour and try again. If it still does not start, call for service.
High/Low temperature protection function
If the unit detects that the ambient temperature is outside of the normal operating range of 1°C to 39°C, it will shut down and the error code C2 will flash in the display. When the normal operating range is reached, unplug the appliance from the mains supply for 30 seconds, reconnect the supply and turn the unit on.
Low humidity protection function
If the unit detects low humidity of < 30% the display will indicate LO and it will stop any dehumidifying action and the fan will operate at the lowest speed.
If the humidity is over 80% the display will indicate HI and keep dehumidifying.
High temperature fan speed switch function
When the unit is dehumidifying in a high temperature environment and the fan speed is set to low, it will switch automatically to the high speed. This is to prevent excessive load on the compressor. When the ambient air temperature reduces, the fan speed will return to the low setting.
Error codes
There are a number of error codes which may appear in the display, these are as below. When the error code is displayed, it will flash. If any of these error codes are experienced, call for service.
C1 - Indicates that there is a fault with the evaporator temperature sensor. In this condition, the unit will stop working. C2 - Indicates that there is a fault with the ambient air temperature sensor. In this condition, the unit will stop working. C8 - The temperature of the evaporator is checked every 8 minutes, if this is within ≤ 3°C of the ambient air temperature for 5 consecutive checks, the unit will shut down and the error code C8 is displayed.
Continuous drainage function
Should it be necessary to provide continuous drainage, this can be achieved by fitting a 15mm inner diameter pipe to the drainage hole on the rear of the unit. When installed, water will drain through the pipe and not into the water tank.
Ensure that the drainage pipe runs in a downwards direction, and is not bent or damaged in any way so that the water runs freely out of the unit. When fitting the drainage pipe, make sure that it is pushed all the way into the drainage hole so that it is pushed over the drain outlet which is located about 70mm inside the unit from the rear cover of the unit.
Refer to the 3 on page 1 for the location of the drainpipe connection port.
Maintenance
When cleaning your dehumidifier:
- Use a soft clean cloth.
- Do not use alcohol, gasoline, and other benzene chemical solvents.
- To clean the filter, remove it, then use a vacuum cleaner to clear any dust which may have built up. If necessary, use water to clean, then place it in a ventilated area until dry.
- Unplug the unit from the mains supply before cleaning.
Other advice:
- Before moving the unit, unplug the mains supply and pull out the water in tank.
- If not using the unit for a long time, unplug the unit from the mains supply, empty the water tank, wait for 2 days to make sure the unit inside completely dry before packing. Always store the unit in an upright position.
- Do not tilt the unit horizontally or turn upside down.
- If the unit requires repair, seek help of a professional person.
Engineer information
1. Cabling
Ensure that any cabling is not subject to wear, corrosion, excessive pressure, vibration, sharp edges or any other adverse environmental effects. Also be aware of any effect caused by aging or continual leaks. A halide torch (or any other detector using a naked flame) must not be used.
2. Detection of flammable refrigerants
DO NOT use any possible sources of ignition to search for refrigerant leaks. A halide torch (or any other detector using a naked flame) must not be used.
3. Leak detection methods
The following leak detection methods are deemed acceptable for systems containing flammable refrigerants.
Electronic leak detectors can be used to detect flammable refrigerants, but the sensitivity may not be adequate, or may need re-calibration (detection equipment shall be calibrated in a refrigerant-free area).
Ensure that the detector is not a potential source of ignition and is suitable for the refrigerant used. Leak detection equipment shall be set at a percentage of the LFL of the refrigerant and shall be calibrated to the refrigerant employed and the appropriate percentage of gas (25% maximum) is confirmed.
Leak detection fluids are suitable for use with most refrigerants but the use of detergents containing chlorine must be avoided as the chlorine may react with the refrigerant and corrode the copper pipework.
If a leak is suspected, all naked flames must be removed/extinguished. If a leakage of refrigerant is found which requires brazing, all of the refrigerant gas must be recovered from the system, or isolated (by means of shut off valves) in a part of the system both before and during the brazing process.
4. Removal and evacuation
When breaking into the refrigerant circuit to make repairs or for any other purpose, conventional procedures shall be used. However, it is important that best practice is followed since flammability is a consideration. The following procedure shall be adhered to: Remove refrigerant.
Purge the circuit with inert gas.
Evacuate.
Purge again with inert gas.
Open the circuit by cutting or brazing.
The refrigerant charge shall be recovered into the correct recovery cylinders. The system shall be "flushed" with OFN to render the unit safe. This process may need to be repeated several times. Compressed air or oxygen shall not be used for this task.
Flushing shall be achieved by breaking the vacuum in the system with OFN and continuing to fill until the working pressure is achieved, then venting to atmosphere, and finally pulling down to a vacuum. This processing shall be repeated until no refrigerant is within the system.
When the final OFN charge is used, the system shall be vented down to atmospheric pressure to enable work to take place. This operation is vital if brazing operations on the pipework are to take place. Ensure that the outlet for the vacuum pump is not close to any ignition sources and there is ventilation available.
5. Charging procedures
In addition to conventional charging procedures, the following requirements shall be followed.
Ensure that contamination of different refrigerants does not occur when using charging equipment.
Hoses or lines shall be as short as possible to minimize the amount of refrigerant contained in them.
Cylinders must be kept upright.
Ensure that the refrigeration system is earthed prior to charging the system with refrigerant.
Label the system when charging is complete (if not already).
Extreme care must be taken not to overfill the refrigeration system. Prior to recharging, the system must be pressure tested with OFN. The system must be leak tested on completion of charging but prior to commissioning. A follow-up leak test must be carried out prior to leaving the site.
6. Decommissioning
Before carrying out this procedure, it is essential that the engineer is completely familiar with the equipment and all its details. It is recommended good practice that all refrigerants are recovered safely. Prior to the task being carried out, an oil and refrigerant sample must be taken in case analysis is required prior to re-use of reclaimed refrigerant. It is essential that electrical power is available before the task is commenced.
Become familiar with the equipment and its operation.
Isolate system electrically.
Before attempting the procedure ensure that:
Mechanical handling equipment is available and being used correctly, the recovery process is always supervised by a competent person, and recovery equipment and cylinders conform to the appropriate standards.
a) Pump down refrigerant system, if possible. b) If a vacuum is not possible, make a manifold so that refrigerant can be removed from various parts of the system. c) Make sure that cylinder is situated on the scales before recovery takes place. d) Start the recovery machine and operate in accordance with manufacturer's instructions. e) Do not overfill cylinders. (No more than 80% volume liquid charge). f) Do not exceed the maximum working pressure of the cylinder, even temporarily. g) When the cylinders have been filled correctly and the process completed, make sure that the cylinders and the equipment are removed from site promptly and all isolation valves on the equipment are closed off. h) Recovered refrigerant shall not be charged into another refrigeration system unless it has been cleaned and checked.
7. Labelling
Equipment shall be labeled stating that it has been de-commissioned and emptied of refrigerant. The label shall be dated and signed. Ensure that there are labels on the equipment stating the equipment contains flammable refrigerant.
8. Recovery
When removing refrigerant from a system, either for servicing or decommissioning, it is recommended good practice that all refrigerant is recovered into cylinders. Ensure that only appropriate refrigerant recovery cylinders are employed. Ensure that the correct number of cylinders for holding the total system charge are available. All cylinders to be used are designated for the recovered refrigerant and labeled for that refrigerant, i.e., special cylinders for the recovery of refrigerant. Cylinders shall be complete with pressure relief valve and associated shut-off valves in good working order. Empty recovery cylinders are evacuated and, if possible, cooled before recovery occurs.
The recovery equipment shall be in good working order with a set of instructions concerning the equipment that is at hand and shall be suitable for the recovery of flammable refrigerants.
In addition, a set of calibrated weighing scales shall be available and in good working order. Hoses shall be complete with leak-free disconnect couplings and in good condition. Before using the recovery machine, check that it is in satisfactory working order, has been properly maintained and that any associated electrical components are sealed to prevent ignition in the event of a refrigerant release. Consult the manufacturer if in doubt. The recovered refrigerant shall be returned to the refrigerant supplier in the correct recovery cylinder, and the relevant Waste Transfer Note arranged. Do not mix refrigerants in recovery units and especially not in cylinders.
If compressors or compressor oils are to be removed, ensure that they have been evacuated to an acceptable level to make certain that flammable refrigerant does not remain within the lubricant. The evacuation process shall be carried out prior to returning the compressor to the suppliers. Only electric heating to the compressor body shall be employed to accelerate this process. When oil is drained from a system, it shall be carried out safely.
9. Fuses
The fuses below are mounted on the PWB.
FUSE 1: Walter 2010; AC 250V; T: 2A
FUSE: Walter 2010; AC 250V; T:6.3A or 5A
Troubleshooting
| Problem Cure | |
| Dehumidifi er does not work | Check that the unit is plugged into the mains supply and turned on. Check that the water tank is not full. If it is full, empty the tank. |
| Does not dehumidify | Check that the water tank is installed correctly. Check that the water tank is not full. If it is full, empty the tank. Clean the air fi Iter. Ensure that the air flow through the unit is not obstructed. |
| Does not remove enough moisture from the air | Reduce ventilation (closed doors and windows). Ensure that there are not too many sources of humidity. Ensure that the unit is not being used to dehumidify a room in excess of the size noted in the specifi caitons. |
| Unit does not run smoothly on the castors | Ensure that the castors are clean and not clogged with debris. |
What to do if the product interferes with radio or TV reception.
If the dehumidifier interferes with radio or television reception, try one or more of the following measures:
- Adjust or reposition the receiving antenna.
- Increase the distance between the product and the radio or TV.
- Connect the equipment into an outlet on a circuit different from that of the radio or TV receiver.
- Consult the dealer or a qualified radio or TV technician.
Technical specification
| Model UD-P16 / UD-P164 UD-P20 / UD-P204 | |||
| Dehumidifi cation (Litres per day) | 30 °C, 80% RH 16 20 | ||
| 27 °C, 60% RH 9 11 | |||
| Rated voltage | 220-240 V AC /50 Hz | 220-240 V AC /50 Hz | |
| Power consumption (W) | 35 °C, 90% RH | 310 W | 330 W |
| 30 °C, 80% RH | 270 W | 280 W | |
| 27 °C, 60% RH | 230 W | 250 W | |
| Air flow volume \( \left( {{\mathrm{m}}^{3}/\mathrm{h}}\right) \) | 146 | 175 | |
| Room Size \( \left( {\mathrm{m}}^{2}\right) \) | 29 to 38 | 35 to 46 | |
| Refrigerant | R290 | R290 | |
| Refrigerant volume (g) | 50 60 | ||
| Water tank capacity (l) | 3,8 | 3,8 | |
| Unit size (W x H x D in mm) | 355 x 567 x 259 | 355 x 567 x 259 | |
| Weight (kg) | 15,4 | 15,5 | |
| Cord length (cm) | 200 | 200 | |
| Standby power (W) | 0,25 | 0,25 | |
NOTE:
- RH - Relative Humidity
- Room size based on JEMA (Japan Electrical Manufacturers' Association) standard.
WARNING:
This product is marked with this symbol.
This means that used electrical and electronic products should not be mixed with general household waste. There is a separate collection system for these products.
A. Information on disposal for users (private households)
1. In the European Union
Attention: If you wish to dispose of this device, do not use a regular trash bin. The used electrical and electronic equipment must be collected separately in accordance with the legislation that governs the proper treatment, recovery, and recycling of waste electrical and electronic equipment.
In the member states of the EU, private households can return their used electrical and electronic devices to designated collection points free of charge. In some countries, your local retailer may take back your old device free of charge when you purchase a new product.
*For more information, please contact your local authorities.
If your electrical or electronic device has batteries or accumulators, they must be removed and disposed of separately, according to local requirements. By properly disposing of this product, you help to ensure the proper treatment, recovery, and recycling of waste, and prevent potential negative effects on the environment and human health, which could otherwise arise from improper disposal.
2. In countries outside the EU
If you wish to dispose of this product, please contact your local authorities to find out the correct disposal method.
For Switzerland: The used electrical or electronic equipment can be returned to the retailer free of charge, even if you do not buy a new product. Additional collection points are listed on the first page of www.swico.ch or www.sens.ch.
6. Information on disposal for end users
1. In the European Union
If the product has been used for business purposes and you wish to dispose of it:
For information on taking back products, please contact your nearest SHARP representative. You may be charged for the costs of take-back and recycling. Small products (and small quantities) may be taken back by the local collection point.
For Spain: Please contact the established collection system, or contact your local authorities for take-back of your used products.
2. In countries outside the EU
If you wish to dispose of this product, please contact your local authorities to find out the correct disposal method.
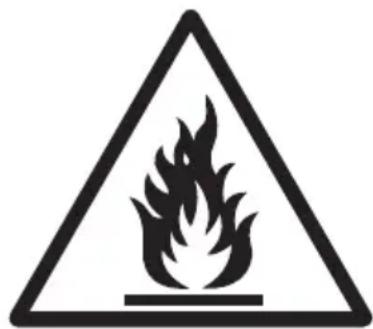
Refrigerant. This appliance contains the refrigerant R290/propane. Do not attempt to service it yourself. Do not release refrigerant into the atmosphere.
www.sharpconsumer.com/contact/
www.sharpconsumer.com/support/
www.sharpconsumer.com/documents-of-conformity/
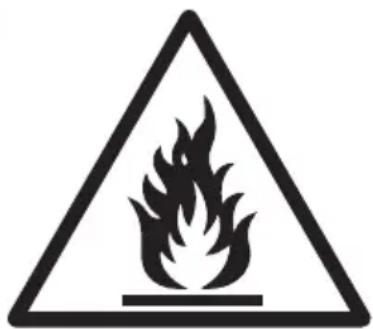
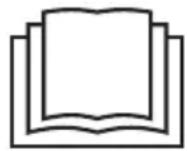

Additional warnings for appliances with refrigerant R290 (see the rating table for the type of refrigerant).
IMPORTANT: PLEASE READ THIS MANUAL BEFORE USING THE APPLIANCE
The appliance R290 is suitable for European electrical standards.
This device contains approximately 55g of R290 refrigerant. Do not puncture or incinerate.
Maintenance and repairs, as well as seeking help from qualified personnel, must be carried out under the supervision of a specialist in the use of flammable refrigerants.
For repairs, using R290 refrigerant, you can refer to the INFORMATION FOR ENGINEERS section of this manual.
Read the manual before using your new dehumidifier.
- The dehumidifier draws air from the room through the intake grille, passes it through a dust filter, and then cools it with the release of moisture. After this process, the air is expelled through the outlet grille, equipped with an air distribution flap. This device is designed to remove moisture from the air, collecting it in an internal reservoir. The dehumidification process can take a long time and may not fill the reservoir. Depending on the size of the room and the heat sources that generate moisture, it is possible that the moisture is not completely removed. Do not install or use this device before reading this manual thoroughly. Please read this manual carefully and follow all safety rules. Avoid using the device near flammable sources. Do not place the device close to heat sources. This may damage the housing or cause a fire. Do not expose the device to direct sunlight. Otherwise, the components may overheat and cause a fire. Do not use the device in places with corrosive, flammable, or explosive atmospheres. Monitor the device if it is in use. Do not disassemble, repair, or replace the spare parts of the device yourself. Allow only a professional to repair the device.
- The device must be placed on a flat and stable surface. Otherwise, vibrations may occur and the device may tip over. Disconnect the device from the electrical supply when not in use. Never cover the device while it is operating.
- Ensure that the air inlet and outlet are not blocked during use. Be careful not to let water enter the device while it is switched on. This could cause damage and a short circuit.
- The appliance must be connected to a power supply only through a socket with an earth contact. Before selecting the temperature, disconnect the appliance from the socket. Otherwise, an electric shock may occur. In case of malfunction, the appliance must be used for a longer period, disconnect it from the socket, empty the water from the reservoir, and then select the temperature. Do not pull the power cord to disconnect the appliance from the electrical outlet. This may cause damage. Do not place the appliance or objects in the device, as this may cause fire or electric shock. - Before moving the appliance, empty the water from the reservoir. When using the appliance in a room with high temperature and high humidity, the appliance may need to work for a longer time to dry the laundry. Under these conditions, the dehumidifier will work continuously. Caution: When drying laundry, do not place the laundry near the outlet, as this will prevent water from falling into the appliance. When the machine is working, you must ensure that the minimum distance between the appliance and the wall or other obstacles from all sides is (from above ≥ 60 cm; from front ≥ 60 cm; from back ≥ 50 cm; from left ≥ 20 cm; from right ≥ 20 cm).
- The appliance must be installed according to the attached wiring diagram for the electrical connection.
- Before cleaning the appliance with the power cord, when you unplug the device. -Children should be supervised to ensure that they do not play with the appliance. -Cleaning and maintenance should not be performed by children without parental supervision. In case the power cord is damaged, it must be replaced by the manufacturer, its service agent, or similarly qualified persons in order to avoid a hazard. This appliance is intended for household use only. Do not use it in other places.
IMPORTANT SAFETY INSTRUCTIONS
When using electrical appliances, basic safety precautions should always be followed, including:
WARNING - Read all instructions before using this appliance to reduce the risk of electric shock, fire, or injury:
- Read all instructions before operating the product. Use it only with a power supply of 220-240 V AC/50 Hz. This appliance can be used by children aged 8 years and above and persons with reduced physical, sensory, or mental capabilities or lack of experience and knowledge if they have been given supervision or instruction concerning use of the appliance in a safe way and understand the hazards involved. Children shall not play with the appliance. Cleaning and user maintenance shall not be made by children without supervision.
If the power cord is damaged, it must be replaced by the manufacturer, its service representative, a service center authorized by Sharp, or by a person with similar qualifications, to prevent any potential hazard. Contact the nearest service center for any problems, adjustments, or repairs. Do not attempt to repair or disassemble the product without professional help. - Make sure the appliance is unplugged from the mains before cleaning, when installing and removing the filter, and when not in use for a long time. Failure to do so may cause a short circuit, which could lead to electric shock or fire. Do not use the device if the power cord is damaged, or if you notice it is loose. Do not place the appliance near hot surfaces or in the inlet or outlet openings. - When disconnecting from the mains, pull the plug, not the cord. Otherwise, it may cause a short circuit, leading to electric shock or fire. Do not damage the power cord. Otherwise, you may get an electric shock, short circuit, or fire. Do not touch the appliance with wet hands. This product should not be placed near gas appliances or fireplaces. If the room is used with gas appliances, it is necessary to ventilate periodically. Otherwise, poisoning from carbon monoxide may occur. Do not use the product in rooms where there is a risk of aerosol or insecticide sprays. Do not use the product in rooms where there is humidity, dampness, or chemical vapors in the air. - Keep this product away from water. - Be careful when cleaning this product. Use cleaning agents that will not damage its surface. - Before cleaning the water tank, unplug the appliance. Use the cleaning brushes. - Do not drink water from the water tank. - Clean the water tank regularly. When the appliance is not in use, empty the water from the tank. If water is left in it, it may lead to the formation of mold, bacteria, and algae. In some cases, such bacteria can be dangerous to human health.
PRECAUTIONS REGARDING OPERATION
Make sure the inlet and outlet air vents are not blocked. Do not place the product near open flames (e.g., stoves or heaters) or in a place where it may come into contact with steam. Always use the product in an upright position. - Do not move this product while it is operating. If the product is placed on a surface that may be uneven, unstable, or on a soft carpet, it must be lifted when moving. Do not turn on the product without properly placing the cover on the inlet air vent. - When cleaning the appliance, use only a dry cloth. Do not interrupt the operation or use cleaning agents. The use of approved brushes or dust for cleaning may lead to damage or scratching of the surface. Do not sit on the product or lean on it.
Installation
The device is designed to be placed in the correct position for about 4 hours. The device should be placed on a flat surface.
- For high disinfection efficiency, the device must be placed in a closed room. 2. Close all windows and doors in the room. The disinfection efficiency depends on the speed at which the air in the room is circulated.
- Place the disinfection device so that the air flow in front of it is not obstructed in any way.
- The disinfection effect on an adjacent closed room (e.g., a corridor) will be minimal or zero, unless there is sufficient air circulation. It is possible that you may need to place an additional disinfection device to achieve satisfactory results.
- Make sure the device is placed on a stable and flat surface. If the base is unstable, vibrations and water leakage may occur.
- It is necessary to have at least 20 cm of free space on all sides of the disinfection device.
See Fig. 1 on page 1.
Placement
Avoid placing the device in places where furniture, fabrics, or other objects may come into contact with the air inlet and/or outlet and affect the air flow. Avoid placing the device in places where it would be exposed to condensation or large temperature fluctuations. Suitable operating conditions are at temperatures between 5°C and 35°C.
Place the device on a stable surface with sufficient air circulation. For best efficiency, the product should be placed in the center of the room. If placed on a soft surface, it may produce vibrations.
Avoid placing the device in places where fumes from oil or grease, corrosive vapors, or chemicals are present. This may cause damage to the device's coating.
Over time, nearby walls and floors may become stained. When using the air purifier for extended periods, periodically check the walls and floors in its vicinity.
Operating environment
Operating temperature: from 5°C to 35°C - The device is suitable for use in closed rooms, e.g., living rooms, offices, storage rooms, kitchens, basements, garages. To achieve maximum efficiency, before turning on the device, check that all doors and windows in the room are closed. Make sure the device is placed on a stable and flat surface. If the surface is uneven, the disinfection device will be unstable and at risk of tipping over. In addition, strong vibrations, noise, and water leakage may occur.
Component diagram - part names
Bx.24 3 hcp.1 omHocno pa3noloxHuemo Ha cneHume yacmu:
- Kopnyc 2.Дрьжka
- Панел за ураловнынne 4.Ппеденkanak 5.Bb3dyxopa3npedeNtEnHO KpIIO (n3XoEN Bb3dyweH OTBOP)
- 3axpaHbau Ka6en n uencen
- Konenue
- Pe3epBoap 3a Boga
- OToBnHbBaM aPkkyu (He e npdeOCTaBeH) 10.CmykatehenOTbOpnHnTbp3a npax
Pa6ota c ypea - BbBedeHne
Pahen 3a ynpabNeHne
Bx. 4Ha naHena 3a ynpaeneHue Ha cmp.1.
HaMeHOBaHne n OnncAHne Ha yHKunnte, BKnIOUeHN B NaHeJa 3a ynpabNeHne
- 3AXPAHBAHE - BKIOUOBAHe IN N3KIOUBAHe Ha 3axpaHBAHeTO.
- PEXKIM -HaTnCHeTe To3n 6yToH, 3a Da 3aJaTepeXkIM Ha npaHe nnPexkIM Ha o6e3BnaJxHraHe 3.BNAXHOCT-3aDaBaHe Ha JeHaHaTa CTeNeH Ha BnaXHOCT.
- TAIMEP/3AKIIOYBAHE -3aDaBaHe Ha Yac 3a N3KIOUBAHe. N36paHnT qac 3e 6bJe NOKa3AH Bbpy Dncnpe. PpHATnCKaHe. N3aDbpxaHa Hc 6yToHa 3a 3ceKynDn 3e 6bJe AKTNBpuHa INn DeakTNBpuHa FyHKuTa 3a 3aKIOUbaHe 3a DeTcKa 6e3oNaCHOCT. Bbpy Dncnpe 3e 6bJe NOKa3a HKOHa 3a 3aKIOUbaHe.
- CKOPOCT -perynipane Ha ckopocTHa BbptHe Ha BeHTnlaTopa (HannuHa ca Da pexkma).
- 3ABbPTAHE - BKIOUOBAHe MIn N3KIOUOBaHe Ha yHKnraTa 3a 3aBbptAHe Ha Bb3DyXopa3npeDenHToHTO KpINO.
- INДИКATOP 3A BKN./N3KJI.-CBETN, KOraTO ypeIbTe BKNIOUeH N3rAcBa npn N3KJIIOUbaHe.
- INHIMKATOP 3A CYWEHE - BkIIOUBa ce IIO BpeMe Ha FyHKnIraTa 3a npaHe.
- INHIMKATOP 3A OBE3BNAJXHBAHE - BKNIOUba ce, KOraTO yCTpoiCTBTOO6eBnAJHHBA.
- VHДИКATOP 3A OБE3CKPEЖABAHE - обознayчава DeиCTBnETo Ha peKIMa 3a o6e3CKpeЖABAHe.
- INCINNEI -NOKa3Ba TeKyuToO CTbCToHnE Ha yHKuYrTa 3a o6e3BnaJxHraBe (npoehTHaTBAaXHOCT Ha Bb3dyxa) n OCTaHaJIte cyHKUIN.
12. ПьIEH PE3EPBOAP - CBETBA, KORATo pe3epBoapbT 3a BODa ce NaIbJIH. 13. INДИКATOP 3A 3AKJIIOYBAHE HA BYTOHNTE - об03HAUba aKINBIPAHeTo Ha ФИHKIURA Ta 3a3AKJIIOYBaHe Ha6yTOHNTe. 14. INIHKATOP 3A TAIMEP-CBETBA, KORATO TaIMEPbTe aKTNBipah. 15. INHINKATOP 3A CKOPOCT HA BbPTHE HA BEHTNIATOPA - CbOTBETHNAT INHINKATOP ce AKTNBIPA npu 3aJaBaHe Ha 6aBHa Nn 6bp3a CKOPoCT Ha BbPTHe Ha BEHTNIATOpA. 16. INHINKATOP 3A ΦYHKU8 3ABbPTAHE - CBETBA npn aKTINBupaHe Na yHKU8Ta 3a 3aBbPtaHe Ha Bb3dyxopa3npedeJIeNTJHOTo KpNILO.
Работа с уреда
Включване
Включете уреда в електрическата мрежа и натиснете бутон ЗАХРАНВАНЕ. Обезвлажнителят ще се активира, а въздухоразпределителното крило ще се отвори. След като бъде включен, уредът ще започне да обезвлажнява въздуха в помещението, като вентилаторът ще работи с висока скорост на въртене. Компресорът ще се активира след три минути. Ако бъде изключен чрез бутон ЗАХРАНВАНЕ, без изваждане на щепсела от контакта, при следващото стартиране ще бъде активиран същият режим.
Изключване
Докато уредът работи, натиснете бутон ЗАХРАНВАНЕ.
Бутон за избор на режим
Можете да изберете между режим за сушене на пране или обезвлажняване. За да настроите, натиснете бутона за избор на режим.
1. Функция пране: Когато индикаторът DRY свети, уредът извършва непрекъснато изсушаване, независимо от околната влажност. Скоростта на вентилатора ще бъде заключена във функцията за пране и не може да бъде променяна. 2. Функция обезвлажняване: Ако индикаторът за обезвлажняване свети, уредът ще изпълнява обезвлажняване на въздуха. При работа в този режим скоростта на въртене на вентилатора може да бъде променяна, а настройката за степен на влажност на въздуха - регулирана.
www.sharpconsumer.com/documents-of-conformity/
Additional warnings for appliances with R290 refrigerant (see the type of refrigerant gas on the device label)
READ THIS USER MANUAL CAREFULLY BEFORE USING THE APPLIANCE
www.sharpconsumer.com/contact/
www.sharpconsumer.com/support/ www.sharpconsumer.com/
documents-of-conformity/

Additional warnings for appliances with R290 refrigerant gas (see the type plate for the type of refrigerant gas)
READ THIS USER MANUAL CAREFULLY BEFORE USING THE APPLIANCE
R290 refrigerant gas complies with European environmental directives. This appliance contains approximately 55g of R290 refrigerant gas.
www.sharpconsumer.com/support/ www.sharpconsumer.com/
documents-of-conformity/
documents-of-conformity/


Additional warnings for appliances with refrigerant gas
R290 (see the rating plate for the type
USE OF THE APPLIANCE
To connect the R290 appliance, it must be installed in accordance with European environmental regulations.
This appliance contains 55g of refrigerant R290.
Do not pierce or burn.
Maintenance and repairs must be carried out by qualified personnel in accordance with national regulations for flammable refrigerants.
For appliances using flammable refrigerant R290, refer to the
INSTALLER INFORMATION section of this manual
for the installation and operation manual.
documents-of-conformity/

www.sharpconsumer.com/support/
www.sharpconsumer.com/documents-of-conformity/

GENERAL SAFETY INSTRUCTIONS
www.sharpconsumer.com/documents-of-conformity/

www.sharpconsumer.com/support/
www.sharpconsumer.com/documents-of-conformity/


Additional warnings for appliances with refrigerant R290 (see the type plate for the refrigerant used)
PLEASE READ THIS USER MANUAL BEFORE USING THE DEVICE
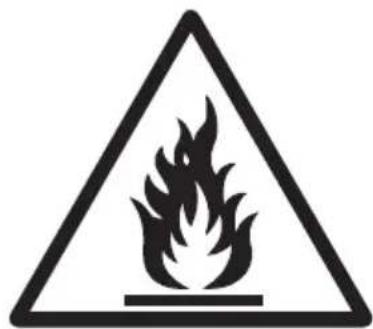
The refrigerant R290 complies with European environmental directives. This device contains approximately 55g of R290 refrigerant.
Do not puncture or burn.
Maintenance and repairs requiring the assistance of qualified personnel must be carried out under the supervision of an expert in the use of flammable refrigerants.
IMPORTANT SAFETY INSTRUCTIONS
Read before using your new dehumidifier
- The dehumidifier draws air in through the intake via the dust filter. The air is cooled to release moisture, and then exits the device through the exhaust vent with louvers on the top side.
- The dehumidifier is designed to remove moisture from the air and collect it in the built-in water tank for disposal. This process is not instantaneous; it may take several hours. Depending on the size of the room and sources of moisture, not all moisture may be removed from the air.
- Do not place or use the device before carefully reading this instruction manual. Keep this manual for future reference and to maintain the warranty.
- Use the dehumidifier with the specified voltage.
- Do not place the device near any heat sources, as this may cause damage to the housing or fire.
- Do not expose the device to direct sunlight, as this causes discoloration of plastic parts. Do not use the device in places with a lot of dust or corrosive/flammable/explosive gas.
- If children use the device, provide them with information for proper use.
- Do not disassemble, repair, or replace spare parts of the device yourself. Allow only a qualified person to repair the appliance.
- Place the device on a flat and stable surface to prevent vibration and noise.
- Unplug the device from the power supply when not in use. Do not cover the device while it is operating.
- Make sure the air intake and exhaust openings are not blocked during use.
- Do not spray water on the device as it may cause malfunction and electric shock. Do not unplug the power plug while your hands are wet or damp.
- Always turn off the device before unplugging it to avoid electric shock.

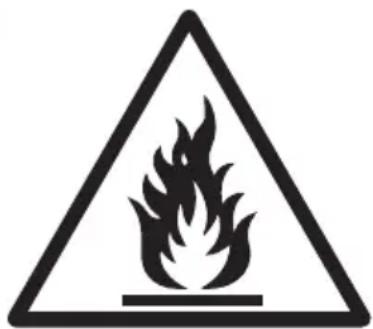

For information on collection, see: www.sharpconsumer.com/contact/, for information on warranty rights, see: www.sharpconsumer.com/support/ or contact the dealer where you purchased the product.
Declarations of conformity are available at: www.sharpconsumer.com/documents-of-conformity/
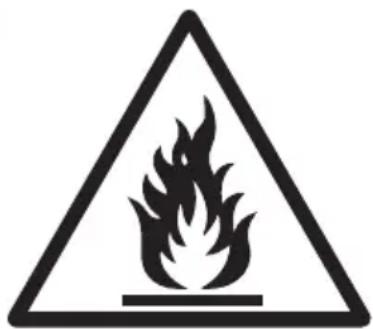

Additional warnings for devices with R290 refrigerant (see type of refrigerant on the rating plate)
READ THIS USER MANUAL CAREFULLY BEFORE USING THE DEVICE
R290 refrigerant complies with European environmental directives. This device contains approximately 55g of R290 refrigerant.


Cylinder must be kept upright.
www.sharpconsumer.com/documents-of-conformity/

www.sharpconsumer.com/documents-of-conformity/
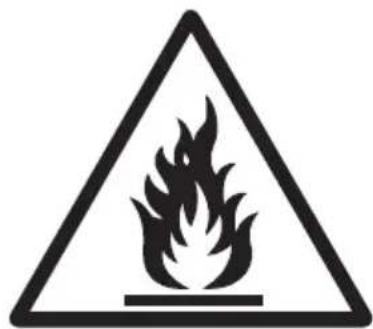
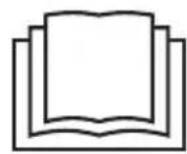

www.sharpconsumer.com/documents-of-conformity/
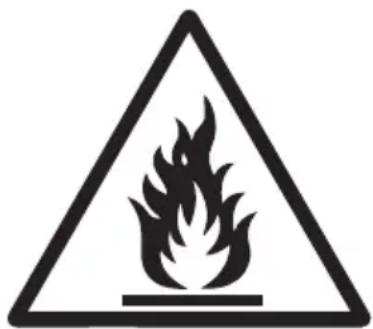
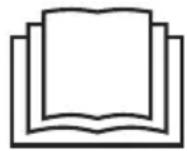

www.sharpconsumer.com/documents-of-conformity/

www.sharpconsumer.com/documents-of-conformity/
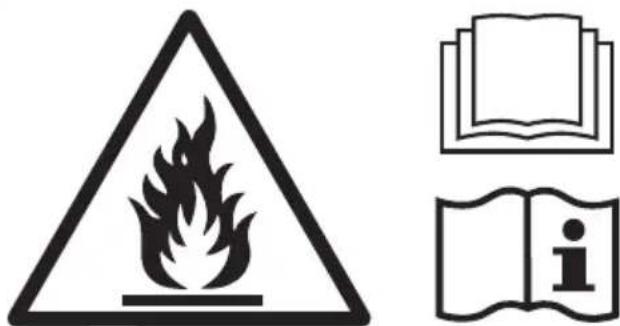
Additional warnings for appliances with refrigerant gas R290 (see the rating plate for the type of refrigerant gas used)
READ THIS USER MANUAL CAREFULLY BEFORE USING THE APPLIANCE
Refrigerant gas R290 complies with European environmental directives. This appliance contains approximately 55g of R290 refrigerant gas.
Do not puncture or burn.
Maintenance and repairs requiring the assistance of other qualified personnel must be carried out under the supervision of a specialist in the use of flammable refrigerants.
For appliances using R290 refrigerant gas, service and operating instructions can be found in the INFORMATION FOR ENGINEERS section of this user manual.
www.sharpconsumer.com/contact/
www.sharpconsumer.com/support/
www.sharpconsumer.com/documents-of-conformity/
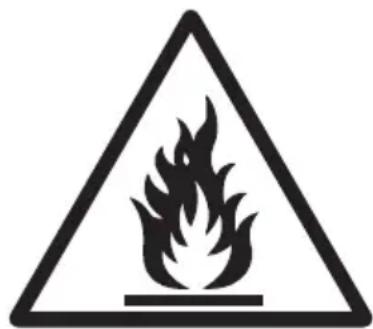

READ THIS USER MANUAL CAREFULLY BEFORE USING THE APPLIANCE
The refrigerant R290 complies with European environmental directives.
This unit contains approximately 55g of R290 refrigerant.
Do not puncture or burn.
www.sharpconsumer.com/contact/
www.sharpconsumer.com/support/
www.sharpconsumer.com/documents-of-conformity/

Please read the safety instructions before using the appliance with refrigerant R290 (see table with characteristics for normal information about the refrigerant used).
PLEASE READ THIS USER MANUAL CAREFULLY BEFORE USING THE APPLIANCE
The refrigerant R290 complies with European environmental directives.
This unit contains approximately 55g of refrigerant R290. Do not puncture or burn.
Maintenance and repairs that require the help of qualified personnel must be carried out by specialists trained in the use of flammable refrigerants.
For appliances that use refrigerant R290, see "INFORMATION FOR ENGINEERS" in the user manual for service and operational information.
IMPORTANT SAFETY INSTRUCTIONS
OPERATING MANUAL
Do not block the air intake or exhaust vents. Do not place the device on soft surfaces such as carpets, blankets, or in places where steam may come into contact with it. The device must be used in a vertical position. - Do not move the device during operation. - If you need to move the device, unplug it from the power outlet and carry it by the handle. Do not use the device without properly installing the air filter. Clean the outer surface with a dry cloth. Do not use harsh chemicals or abrasive cleaners. Benzene, alcohol, or other solvents may damage the surface of the device. Do not immerse or spray the product.
INSTALLATION
BEFORE OPERATION, place the device in a vertical position so that during its operation the condensate flows into the lower part of the cooling system.
1. For maximum efficiency, the dehumidifier should operate in a closed room. 2. Close all doors, windows, and other openings of the room. The efficiency of the dehumidifier depends on the intensity of air intake into the room. 3. Place the dehumidifier in a place where it will not obstruct the air flow to the front part of the device. 4. During operation, the dehumidifier may affect the humidity in adjacent rooms, for example, a bathroom. For this, it is necessary that such a room be connected by an opening to the room where the device operates, with air flows. For effective dehumidification in such a room, it may be necessary to install an additional dehumidifier. 5. Make sure that the device is placed on a flat surface. If the surface is uneven, there is a risk that the device will be unstable and vibrate strongly, and water may leak from it. 6. The dehumidifier must have free space around it for air circulation.
Fig. 1 on page 1.
Choosing a place for the device
Do not use the device in places where furniture, fabrics, or other objects may touch it, blocking the air intake or exhaust vents.
Do not use the device in places where moisture may condense on it and where there are significant temperature differences. The device can be used at temperatures from 5°C to 35°C.
Place the device on a table or horizontal surface in a place where sufficient air circulation is ensured. Air circulation will be better if the device is placed in the middle of the room. If the device is placed on a thick carpet, it may vibrate slightly.
Do not place the device in places where the air contains dust, smoke, alcohol, solvents, or chemical reagents. Otherwise, the body of the device may become covered with stains.
On tables near the device and shelves under it, dust may accumulate over time. When the device operates in the same place for a long time, periodically wipe the table, on which it is placed, and the floor, on which it stands.
OPERATING CONDITIONS
- Operating temperature: from 5°C to 35°C. The device is intended for indoor use, for example, in living rooms, cabins, offices, rooms, and in a garage.
- During operation, the device may produce harmful effects, so before turning on the device, it is necessary to protect the doors and windows of the room. It is recommended that the device be placed on a flat surface. If the surface is uneven, there is a risk that the device will be unstable and tip over. In addition, during operation, strong noise and vibration may occur.
Parts diagram. Part names
On page 213 of the manual, the arrangement of parts is shown:
- Housing
- Handle
- Control panel 4. Front cover
- Deflector (outlet) 6. Power cord
- Tip 8. Water tank
- Flexible hose (not included in the kit) 10. Air intake and filter
Basic operations. Operating procedure
Control panel
See the control panel on page 1.
Name and function of the control panel element
- ON/OFF button
- MODE - press the button to set the operating mode or standby mode
- The dehumidifier is installed with a water tank.
- TIMER/LOCK (TIMER/LOCK) - button for setting the device lock function. The display shows the corresponding icon. By pressing and holding this button for 3 seconds, you can turn the lock function on or off. This is accompanied by the appearance and disappearance of the lock indicator on the display.
- SPEED (SPEED) - button for setting the fan rotation speed (preferred fan rotation speed).
- SWING (SWING) - button to turn on/off the swing function.
- ON/OFF INDICATOR - lights up when the device is on; when the device is off, the indicator does not light up.
- DRY INDICATOR - lights up during the drying function.
- DRYING INDICATOR - lights up when the device operates in drying mode.
- DEFROST INDICATOR - lights up when the device operates in defrost mode.
- Display - shows the current drying state (air humidity) and other functions.
- TANK FULL (FULL TANK) - lights up when the water tank is full.
- KEYBOARD LOCK INDICATOR - lights up when the keyboard lock function is used.
- TIMER INDICATOR - lights up when the timer is operating.
- FAN SPEED INDICATOR - when the fan operates at low and high speed, the corresponding indicator lights up ("LOW" and "HIGH").
- DEFLECTOR INDICATOR - LIGHTS UP, DEFLECTOR IS ACTIVATED.
Main operations
Switching on
Insert the power plug into the socket and press the «ON» button. The device will switch on, and the deflector outlet will open.
The device will switch on and operate in drying mode with high fan speed. After three minutes, the compressor will start.
To switch off the device, press the «ON» button, do not remove the power plug from the socket. After switching off, it will continue to operate in the mode it was in before switching off.
Switching off
When the device is not in use, it can be switched off by pressing the «ON» button.
Mode setting button
To switch to drying mode, press the button for the mode.
1. Drying function: When the DRY indicator lights up, the device will continuously monitor the humidity in the room. The fan speed will be fixed in "Drying" mode and cannot be changed. 2. Drying function: When the DRY indicator lights up, the device will operate in drying mode. In this mode, you can set the fan speed and the desired humidity.
Humidity setting
To change the humidity value, press the humidity setting button. With each press, the display will change:
CO\~40%~45%~50%~55%~60%~65%~70%CO. After setting the desired humidity value, the display will show the set humidity value again.
When the humidity value drops 2% below the set value, the device will start drying, and the fan will operate at low speed. When the humidity value exceeds the set value by 2%, the device will stop drying, switching the fan to high speed.
When the water level drops to 30% or below, the «LO» (LOW) indicator lights up on the display; when it reaches 80% or more, the «HI» (HIGH) indicator lights up.
The «CO» (READY) indicator lights up to indicate continuous operation, regardless of the current water level value. After the first switching on of the device, the «CO» (READY) indicator lights up with a delay.
When operating in the heating mode, the machine operates in the CO status.
Timer
To use the timer function, press the TIMER button; the timer indicator lights up on the control panel. After each press of the TIMER button, the display changes to show the delay time from 1 to 8 hours. This indicates that the timer mode is set.
During operation in timer mode, the water tank may fill up, or the device will switch to automatic dispensing mode and turn off.
Adjusting the fan speed
To adjust the fan speed, press the FAN button. The fan speeds are low and high; each time you press the FAN button, the fan speed switches between these two speeds. Note that the fan speed cannot be set during the heating mode.
Rotation
The 106 air outlet deflector blades have been tilted and locked; press the «ROTATION» button. Pressing the «ROTATION» button again cancels this function.
Lock function
To prevent accidental switching on of the device, the keypad can be locked.
Memory function
- When you turn off the device with the «ON/OFF» button, after switching off, it will resume the same function that was active before switching off. Note that if the timer was set or the keypad was locked in the device, these settings are not saved.
- If the device is switched off during operation due to a power outage, it will not restart automatically after power is restored. To turn on the device after a power outage, press the «ON/OFF» button. Then it will resume operation in the initial mode.
When the water tank is full, the appliance will stop working, the deflector will close and an audible signal will sound. To resume operation, remove the water tank, empty the water and put the tank back in place. Once the water tank is replaced, the appliance will resume operation. Note that the compressor start will occur approximately 3 minutes after the appliance starts.
Automatic defrosting
If the ambient temperature is low, the evaporator may become covered with ice. To ensure normal operation of the appliance, the automatic defrost function is provided. If the set temperature is -1°C or lower, the appliance will switch to automatic defrost mode. This means that the appliance will operate continuously in cooling mode for 30 minutes, after which it will switch to defrost mode: the compressor will stop, and the fan will continue to operate at high speed.
If the evaporator temperature rises to 2°C or higher, and the appliance has been in defrost mode for at least 10 minutes, the defrost mode will be automatically disabled, and the compressor will be turned on. The appliance will resume cooling, and the DEFROST indicator will turn off.
If the appliance has been in defrost mode and the evaporator temperature reaches 0°C or higher for two minutes, the defrost function is canceled.
The following leak detection methods are considered acceptable for systems containing flammable refrigerants.
Electronic leak detectors may be used to detect flammable refrigerants, but their sensitivity may be insufficient or require recalibration (the detection equipment must be calibrated in a refrigerant-free zone). Ensure that the detector is not a potential source of ignition and is suitable for use with the refrigerant. The detection equipment must be set to the refrigerant's LFL (lower flammability limit) percentage and calibrated according to the refrigerant used, with the appropriate percentage of gas (maximum 25%).
Leak detection equipment must be suitable for flammable refrigerants, but it is necessary to avoid using other means that may
chlorine, as chlorine may react with the refrigerant and cause corrosion of metal pipes.
If a leak is suspected, all open flames must be extinguished.
If a refrigerant leak is found that requires brazing, all refrigerant must be recovered from the system or isolated (by means of shut-off valves) in a part of the system, both before and during the brazing process.
4. Removal and evacuation
When breaking into the refrigerant circuit for repairs or for any other purpose, standard procedures must be used. However, it is important to follow best practices, as flammability is a factor. The following procedure must be followed:
Remove the refrigerant.
PpOMMte KOHTyp iHePTHM rA3OM.
EbaykuoyTeca.
ПомИВаITE 3HOBY iHepTHM rA3OM.
BidkpniTe cXemy,po3p3aBm a6o npnpaBm.
XoIIOaoreHT Ma€ 6ytN BiIDHOBHeHH B npAbInbHi ZnIHApn DnA BiIDHOBHeHH.Cntema NOBHNa 6ytN «PpOMBaHa» OFN dA 3a6e3neueHH 6e3NeKn 6loKy. Lepnoec Moke 3HaIo6bNTncr NOBtOpTN KInbKa pa3iB. CTncHeNe NobITpr a6o KInceHb He NOBHHI BIKOPNCOTByBaTcN Cn4ZbOrO 3aBdaHHa.
ПомьногговпбоггдьсьшлхурьваыкумВсnteMi OFN ta npoobgeннam 3anobhenndo doocgrennha po6oory TCKy, nicra yoro cld 3dichnTu BeHTnlaqio do aTmocfepe, a notim 3HOBy CTbopNTu Bakyym. LcI npouec cld nOBtOpOBaTu, nOKi B CNTeMl He 3aIIuNTbcxOJIOaOareHTy. KOLIN BIKOPNCOTyETcb KInceBa 3aprJa OFN, cncTeMa nobunHa 6ytu BeHTnbObaHa do aTmocfepHOro TCKy, 06 npOBecTu p6boty. Lc onepaui E BAcknloIO, kkuo PnaHyOtbcn naKa trpybONpOBoDiB. IpekeohaiTeCya, lo Bxid BakuyMHoro Hacoca He 3haxOnTbcnoBn3y Dkepe 3aMmaHH i 3a6e3neueHa BeHTnlaizia.
5. Ipoueypr 3apAkn
Ha doataok do 3BnuayHnX npoueyp 3apJxKaHHa C1iD oTpmyBaTncb HAcTyNHX BmOR.
IpekeKohaiTec, 03a6pydHennp i3HMMXoJIOaReHTAMHe BID6yBaetbpcnBukopncTaHHi 3apdHorO 6naHaHH.
IiHaHn a6o liHHIOBHHI 6yTN kOMORA KOPOTWMN, uO6 mHiIM3yBaTN KInbKICTb XJNOOaREHTY B HIX.
UinHpi NOBHHi 6ytu 36epiratnca y BeptnkaIbHomy noIOJxehHI.
IpekehaiTeCra, 10 CNTeMa OXoIoJKeHHa 3a3eMJIeHa nepei 3apAkoIO CNTeMI XOIOAoREHTOM.
Помаркутсnte nctemу nicra 3aBepweHn 3apdkn (Якwo zuoro ue He 3po6neHo).
Iotpip6Ha MaKcImmaBHa ObepeXHicTb, 0o6 He nepenOBHTn CntEmy oxoJxKeHH.
IpepepeepaekkoCnCTema NOBHHa 6yTN pepebipeHa H TCK 3 OFN. CnCTema NOBHHa 6yTN pepebipeHa H BNTIK nICJIAepeHHe 3apAkn, aIe pepeB BVEeHm B EKcIpyatauio.Ipepe NOKHeHm Micu npoBOTn NOTpioHo pOBecTn DoaTkoBe TcTeYBaHHHa BNTOKn.
6. Demontage
Before carrying out this procedure, it is important that the engineer is fully acquainted with the equipment and all its details. It is recommended to practice - draining and refilling all coolants. Before starting, it is necessary to take a sample of oil and coolant for analysis in the container that will be reused for the drained coolant. It is necessary that the power supply is accessible before starting work.
Familiarize yourself with the equipment and its operation.
Switch off the electrical system.
Before starting the procedure, make sure that:
The machine's processing unit is accessible and used correctly; the refilling process is controlled
by a competent person; the equipment and cylinders are in accordance
with the relevant standards.
a) Drain the coolant system if possible. b) If not possible, loosen connections so that the coolant can be removed from different parts of the system. c) Before refilling, make sure the cylinder is placed on scales. d) Start the machine for refilling and follow the manufacturer's instructions. e) Do not overfill the cylinder. (No more than 80% of the volume). f) Do not exceed the maximum working pressure of the cylinder, even temporarily. g) When the cylinder is filled correctly and the process is complete, make sure that the cylinder and the unit are disconnected from the circuit, and all valves on the unit are closed. h) The recovered coolant must not be charged into another cooling system until it has been analyzed and verified.
7. Labeling
The equipment must be labeled to indicate that it has been put into operation and that the coolant has been replaced. The label must have a date and signature. Make sure that the label on the unit indicates that the unit contains coolant.
8. Recovery
When removing coolant from the system, or for servicing the unit, it is recommended to transfer the entire coolant into cylinders. Make sure that the appropriate cylinders for coolant recovery are used. Ensure the presence of the correct number of cylinders for storing the entire refrigerant charge. All cylinders used must be intended for recovered refrigerant and have the appropriate labeling, i.e., special cylinders for refrigerant recovery. The cylinders must be equipped with a non-return valve and appropriate shut-off valves for working pressure. Empty cylinders for recovery are cleaned and, if possible, cooled before starting recovery.
The recovery unit must be in working condition with a set of instruction manuals and must be suitable for recovering all types of refrigerants.
In addition, the unit must have a set of calibrated weights in working condition. The scales must be complete with parts that do not allow leakage and in good condition. Before using the machine for recovery, check that it is in proper working condition, correctly serviced, and that the electrical components are properly closed to prevent ignition in case of refrigerant leakage. Consult the manufacturer in case of doubt.
The refrigerant may be returned to the supplier of the refrigerant at the correct balance and for recovery, and the necessary transfer card must be issued. Do not pour refrigerants into recovery devices, especially in cylinders.
The compressor oil must be drained, checked, and evacuated to the accepted level so that the refrigerant charge does not get contaminated with oil. The evacuation process must be performed before returning the compressor to the suppliers. The electric heating of the compressor housing must be used to speed up the process. When the system is empty, it must be evacuated safely.
9. Spare parts
The spare parts listed below are installed by the manufacturer.
Fuses: Walter 2010; AC 250V; T:2A
Fuses: Walter 2010; AC 250V; T:6.3A or 5A
Troubleshooting
| Пюоблema Спосiod усуненя | |||
| Осушевач не пацюе | Перев颦, чь вставлина велka в салк В салк trpopozeту я чь ввимкино anapat. Перев颦, чь на Заловеньи бak ддя вори. Рожо се тak, влени лу. Anapat He ocyuve поитра | Перев颦, чь правирно встановеньибак ддя вори. Перев颦, чь на Заловеньибак ддя вори. Рожо се тak, влени лу. Очstыт поитрайни Фільtr. Переконайся в тому, сд о�пг reasonably notokу в anapat i 3 Нboro нацу He 3abaxа. Anapat He bidaядостань вологи З поитра | 3мени Тотik поитра у поиміцени (зачиніт дberі вій) Переконайся в тому, сд орзір поиміцени, De Bстановеньи anapat, He 6ільшіе вid заизану в Тхнічніх xapakтетпікax. |
| Колицатka He заши老人家 палвноcti nepecubаня anapata | Переконайся в тому, сд орзір поиміцени, Chcініт i He 3abpydnehi smittam. |
What to do if the TV or radio does not work.
Before contacting the TV or radio repair service, try to eliminate the faults by applying one or several of the following measures:
Changed the orientation or position of the receiving antenna; increased the distance between the device and the TV; plugged the device into a different electrical outlet; contacted the antenna or radio technician for help.
Technical specifications


- INFORMATION ON DISPOSAL FOR USERS (PRIVATE HOUSEHOLDS)
- IN THE EUROPEAN UNION
- IN OTHER COUNTRIES OUTSIDE THE EU
- INFORMATION ON DISPOSAL FOR BUSINESS USERS
- PLEASE READ BEFORE OPERATING YOUR NEW DEHUMIDIFIER
- IMPORTANT SAFETY INSTRUCTIONS
- ALWAYS FOLLOW BASIC SAFETY PRECAUTIONS WHEN USING ELECTRICAL APPLIANCES, INCLUDING THE FOLLOWING
- WARNING - ALWAYS OBSERVE THE FOLLOWING TO REDUCE THE RISK OF ELECTRICAL SHOCK, FIRE, OR INJURY
- CAUTIONS CONCERNING OPERATION
- INSTALLATION
- LOCATING THE UNIT
- OPERATING ENVIRONMENT
- COMPONENTS DIAGRAMS - PARTS NAMES
- OPERATING INTRODUCTION - HOW TO OPERATE
- CONTROL PANEL
- THE NAME AND FUNCTION OF THE CONTROL PANEL
- OPERATING INTRODUCTION
- POWER ON
- POWER OFF
- MODE SETTING BUTTON
- HUMIDITY SETTING
- TIMER
- FAN SPEED SETTING
- SWING
- LOCK FUNCTION
- MEMORY FUNCTION
- WATER TANK FULL AUTO-STOP FUNCTION
- AUTO DEFROST
- COMPRESSOR PROTECTION FUNCTION
- HIGH/LOW TEMPERATURE PROTECTION FUNCTION
- LOW HUMIDITY PROTECTION FUNCTION
- HIGH TEMPERATURE FAN SPEED SWITCH FUNCTION
- ERROR CODES
- CONTINUOUS DRAINAGE FUNCTION
- MAINTENANCE
- WHEN CLEANING YOUR DEHUMIDIFIER
- OTHER ADVICE
- ENGINEER INFORMATION
- CABLING
- DETECTION OF FLAMMABLE REFRIGERANTS
- LEAK DETECTION METHODS
- REMOVAL AND EVACUATION
- CHARGING PROCEDURES
- DECOMMISSIONING
- LABELLING
- RECOVERY
- FUSES
- TROUBLESHOOTING
- TECHNICAL SPECIFICATION
- NOTE
- WARNING
- IN COUNTRIES OUTSIDE THE EU
- INFORMATION ON DISPOSAL FOR END USERS
- ADDITIONAL WARNINGS FOR APPLIANCES WITH REFRIGERANT R290 (SEE THE RATING TABLE FOR THE TYPE OF REFRIGERANT)
- READ THE MANUAL BEFORE USING YOUR NEW DEHUMIDIFIER
- WHEN USING ELECTRICAL APPLIANCES, BASIC SAFETY PRECAUTIONS SHOULD ALWAYS BE FOLLOWED, INCLUDING
- WARNING - READ ALL INSTRUCTIONS BEFORE USING THIS APPLIANCE TO REDUCE THE RISK OF ELECTRIC SHOCK, FIRE, OR INJURY
- PRECAUTIONS REGARDING OPERATION
- PLACEMENT
- COMPONENT DIAGRAM - PART NAMES
- PA6OTA C YPEA - BBBEDEHNE
- PAHEN 3A YNPABNEHNE
- HAMEHOBAHNE N ONNCAHNE HA YHKUNNTE, BKNIOUEHN B NAHEJA 3A YNPABNEHNE
- РАБОТА С УРЕДА
- ВКЛЮЧВАНЕ
- ИЗКЛЮЧВАНЕ
- БУТОН ЗА ИЗБОР НА РЕЖИМ
- ADDITIONAL WARNINGS FOR APPLIANCES WITH R290 REFRIGERANT (SEE THE TYPE OF REFRIGERANT GAS ON THE DEVICE LABEL)
- ADDITIONAL WARNINGS FOR APPLIANCES WITH R290 REFRIGERANT GAS (SEE THE TYPE PLATE FOR THE TYPE OF REFRIGERANT GAS)
- ADDITIONAL WARNINGS FOR APPLIANCES WITH REFRIGERANT GAS
- R290 (SEE THE RATING PLATE FOR THE TYPE
- GENERAL SAFETY INSTRUCTIONS
- ADDITIONAL WARNINGS FOR APPLIANCES WITH REFRIGERANT R290 (SEE THE TYPE PLATE FOR THE REFRIGERANT USED)
- READ BEFORE USING YOUR NEW DEHUMIDIFIER
- ADDITIONAL WARNINGS FOR DEVICES WITH R290 REFRIGERANT (SEE TYPE OF REFRIGERANT ON THE RATING PLATE)
- ADDITIONAL WARNINGS FOR APPLIANCES WITH REFRIGERANT GAS R290 (SEE THE RATING PLATE FOR THE TYPE OF REFRIGERANT GAS USED)
- PLEASE READ THE SAFETY INSTRUCTIONS BEFORE USING THE APPLIANCE WITH REFRIGERANT R290 (SEE TABLE WITH CHARACTERISTICS FOR NORMAL INFORMATION ABOUT THE REFRIGERANT USED)
- OPERATING MANUAL
- CHOOSING A PLACE FOR THE DEVICE
- OPERATING CONDITIONS
- PARTS DIAGRAM. PART NAMES
- BASIC OPERATIONS. OPERATING PROCEDURE
- NAME AND FUNCTION OF THE CONTROL PANEL ELEMENT
- MAIN OPERATIONS
- SWITCHING ON
- SWITCHING OFF
- WHEN OPERATING IN THE HEATING MODE, THE MACHINE OPERATES IN THE CO STATUS
- ADJUSTING THE FAN SPEED
- ROTATION
- AUTOMATIC DEFROSTING
- IPOUEYPR 3APAKN
- DEMONTAGE
- LABELING
- SPARE PARTS
- WHAT TO DO IF THE TV OR RADIO DOES NOT WORK
- TECHNICAL SPECIFICATIONS
Brand : SHARP
Model : UD-P164P-W
Category : Dehumidifier