
UD-T104A - Dehumidifier SHARP - Free user manual and instructions
Find the device manual for free UD-T104A SHARP in PDF.
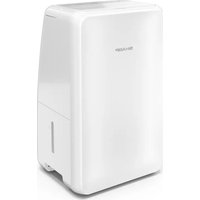


| Product type | Dehumidifier |
| Brand | Sharp |
| Model | UD-T104A |
| Dehumidification capacity | 10 L/day (30 °C, 80 % RH) |
| Rated voltage | 220-240 V AC / 50 Hz |
| Power consumption | 220 W (30 °C, 80 % RH) |
| Airflow | 90 m³/h |
| Maximum room area | 22 m² (JEMA standard) |
| Refrigerant | R290 (Propane), 35 g |
| Water tank capacity | 2 L |
| Dimensions (W × H × D) | 290 × 476 × 245 mm |
| Weight | 12 kg |
| Power cord length | 1.8 m |
| Standby power consumption | 0.42 W |
| Operating temperature | 5 °C to 35 °C |
| Humidity setting | 40%, 50%, 60%, continuous mode |
| Timer | 2 h, 4 h, 6 h or off |
| Laundry mode | Yes, clothes drying |
| Automatic shut-off when tank full | Yes, with audible alert |
| Automatic defrost | Yes, for low temperatures |
| Continuous drainage | Possible with 15 mm diameter hose |
| Compressor protection | 5-minute shutdown in case of problem |
| Memory function | Retains settings after power off |
| Filter cleaning | Removable dust filter, wash with water |
Frequently Asked Questions - UD-T104A SHARP
User questions about UD-T104A SHARP
0 question about this device. Answer the ones you know or ask your own.
Ask a new question about this device
Download the instructions for your Dehumidifier in PDF format for free! Find your manual UD-T104A - SHARP and take your electronic device back in hand. On this page are published all the documents necessary for the use of your device. UD-T104A by SHARP.
USER MANUAL UD-T104A SHARP
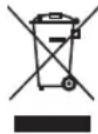
Your product is marked with this symbol.
It means that used electrical and electronic products should not be mixed with general household waste. There is a separate collection system for these products.
A. Information on Disposal for Users (private households)
1. In the European Union
Attention: If you want to dispose of this equipment, please do not use the ordinary dustbin! Used electrical and electronic equipment must be treated separately and in accordance with legislation that requires proper treatment, recovery and recycling of used electrical and electronic equipment.
Following the implementation by member states, private households within the EU states may return their used electrical and electronic equipment to designated collection facilities free of charge*.
In some countries* your local retailer may also take back your old product free of charge if you purchase a similar new one.
- Please contact your local authority for further details. If your used electrical or electronic equipment has batteries or accumulators, please dispose of these separately beforehand according to local requirements. By disposing of this product correctly you will help ensure that the waste undergoes the necessary treatment, recovery and recycling and thus prevent potential negative effects on the environment and human health which could otherwise arise due to inappropriate waste handling.
2. In other Countries outside the EU
If you wish to discard this product, please contact your local authorities and ask for the correct method of disposal. For Switzerland: Used electrical or electronic equipment can be returned free of charge to the dealer, even if you don't purchase a new product.
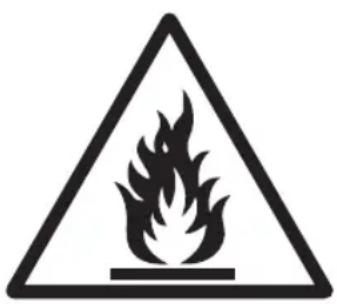
Further collection facilities are listed on the homepage of www.swico.ch or www.sens.ch. Flammable material. This appliance contains R290/Propane a flammable refrigerant. Do not attempt to re-gas the appliance. Do not release refrigerant to the atmosphere.
B. Information on Disposal for Business Users
1. In the European Union
If the product is used for business purposes and you want to discard it: Please contact your SHARP dealer who will inform you about the take-back of the product. You might be charged for the costs arising from take-back and recycling. Small products (and small amounts) might be taken back by your local collection facilities.
For Spain: Please contact the established collection system or your local authority for take-back of your used products.
2. In other Countries outside the EU
If you wish to discard of this product, please contact your local authorities and ask for the correct method of disposal.
www.sharpconsumer.com/contact/
www.sharpconsumer.com/support/ www.sharpconsumer.com/documents-of
conformity/
For service, please refer to www.sharpconsumer.com/contact/ for your warranty rights go to www.sharpconsumer.com/support/ or contact the retailer where you purchased your product.
Declarations of conformity are available from www.sharpconsumer.com/documents-of-conformity/
Contents
Please read before operating your new Dehumidifier 4
IMPORTANT SAFETY INSTRUCTIONS 5
Installation 5
Operating environment 6
Components diagrams - parts names 6
Control panel. 6
Operating introduction 6
Memory function. 6
Water tank full auto-stop function 6
Auto defrost. 6
Laundry mode 6
Compressor protection function 7
High/Low temperature protection function 7
Continuous drainage function 7
Maintenance 7
Troubleshooting 7
Technical specification 7
Engineer information. 8
Additional warnings for appliances with R290 refrigerant gas (refer to the rating plate for the type of refrigerant gas used)
READ THIS USER MANUAL CAREFULLY BEFORE USING THE APPLIANCE. R290 refrigerant gas complies with European environmental directives.
This appliance contains approximately 35g of R290 refrigerant gas. Do not pierce or burn.
Maintenance and repairs requiring the assistance of other qualified personnel must be carried out under the supervision of specialists in the use of flammable refrigerants.
For appliances using R290 refrigerants, a service and operation manual please refer to the ENGINEER INFORMATION section of this user manual.
Please read before operating your new Dehumidifier
- The dehumidifier draws air in through the air intake via the dust filter. This air is cooled to release the moisture and then exits the unit via the louvered vent at the top.
- The dehumidifier is designed to remove moisture from the air and collect this in its internal water tank for disposal. The process to remove moisture can take many hours and is not instantaneous. Depending on the size of the room and sources of moisture, not all moisture will be removed from the air.
- Do not install and use the unit before carefully reading this instruction guide. Please keep this manual for product warranty and future use.
- Use your dehumidifier with the correctly specified mains supply voltage.
- Do not place the machine near any heat sources as this may cause damage to the cabinet or cause a fire.
- Do not expose the unit to direct sunlight as this will avoid the decolouring of the plastic parts.
- Do not operate the machine in a place with dust or corrosive/flammable/explosive gas.
- Give guidance if used by children.
- Do not disassemble, repair or replace the unit's spare parts by yourself. Only allow a professional person to repair the appliance.
- Place the machine on a flat and stable surface to prevent vibration and noise.
- Unplug from the mains supply when not in use.
- Never cover the machine when it is running.
- Make sure the air inlet and outlet are not blocked while in use.
- Do not spray water on the unit, as spraying water may cause malfunctioning and electric shock.
- Never pull the mains plug when your hands are damp or wet. Always switch off before unplugging to avoid electric shock.
- If you are not going to use the dehumidifier for a long time, turn off and unplug the mains plug, then pour away any water in the tank and wipe it clean.
- Do not pull the mains cable as this may cause damage.
- Do not insert your fingers or items into the unit as this may cause damage or electric shock.
- Before moving, pour the water out of the tank.
- When used in a low temperature and high humidity environment, please set the unit operating in laundry mode. In this condition the dehumidifier will operate continuously.
- Note: When drying clothes, please do not hang the clothes above the outlet as this will prevent water from dropping into the unit.
- When the machine is running, should make sure the minimum distance between the unit and the wall or other obstacles from all sides (top ≥ 60 cm; front ≥ 60 cm; back ≥ 50 cm; left ≥ 20 cm; right ≥ 20 cm).
- The appliance shall be installed in accordance with applicable country wiring regulations.
- Disconnect from the mains supply when cleaning the appliance. Children should be supervised to ensure that they do not play with the appliance.
- Cleaning and user maintenance shall not be carried out by children without supervision.
- If the mains lead is damaged, it must be replaced by the manufacturer, its service agent or similarly qualified persons in order to avoid a hazard.
- This appliance is for indoor use only and not for laundry room use.
IMPORTANT SAFETY INSTRUCTIONS
Always follow basic safety precautions when using electrical appliances, including the following:
WARNING - Always observe the following to reduce the risk of electrical shock, fire, or injury:
- Read all instructions before using the product. Only use with a 220-240 V AC/50 Hz mains supply.
- This appliance can be used by children aged from 8 years and above and persons with reduced physical, sensory or mental capabilities or lack of experience and knowledge if they have been given supervision or instruction concerning use of the appliance in a safe way and understand the hazards involved. Children shall not play with the appliance. Cleaning and user maintenance shall not be made by children without supervision.
- If the power cord is damaged, it must be replaced by the manufacturer, its service agent, a Sharp authorized Service Centre or similarly qualified persons in order to avoid a hazard. Contact the nearest Service Centre for any problems, adjustments, or repairs.
- Do not repair or disassemble the product yourself.
- Be sure to remove the mains supply before performing maintenance, when removing and attaching and replacing the filter and when not using for a long time. Failure to do so can cause a short circuit resulting in electrical shock or fire.
- Do not use the product if the power cord is damaged or if the connection to the wall outlet is loose.
- Do not insert fingers or foreign objects into the Air Inlet or Air Outlet.
- When removing the mains plug, always hold the plug and never pull on the cord. Failure to do so can cause a short circuit resulting in electrical shock or fire.
- Do not damage the power cord. Failure to do so can cause electric shock, heat generation, or fire.
- Do not remove the mains plug when your hands are wet.
- Do not use this product near gas appliances or fireplaces. When the product is operated with gas appliances in the same room, ventilate the room periodically, otherwise it may cause carbon monoxide poisoning.
- Do not operate the product in rooms where aerosol insecticides are present.
- Do not operate the product in rooms where there is oily residue, incense, sparks from lit cigarettes, or chemical fumes in the air.
- Keep the product away from water.
- Be cautious when cleaning the product. Strong corrosive cleansers can damage the exterior.
- When carrying the Main Unit, first remove the WaterTank, and then hold the Main Unit by the handles on both sides.
- Do not drink the water in the Water Tank. Clean the Water Tank regularly.
- When the Main Unit is not in use, dispose of the water in the Water Tank. Leaving water in the Water Tank can cause mold, bacteria, and bad odors. In rare cases, such bacteria can be a health hazard.
CAUTIONS CONCERNING OPERATION
- Do not block the Air Inlet or Air Outlet.
- Do not place the product near or on hot objects, such as stoves or heaters, or where it may come into contact with steam. Always operate the product in an upright position.
- Do not move the product when it is in operation.
- If the product is on easily damaged flooring, an uneven surface, or thick-piled carpet, lift it up when moving.
- Do not operate the product without the Air Intake cover properly installed.
- Clean the exterior with a soft cloth only. Do not use volatile fluids or detergents. The product surface may be damaged or cracked with Benzine paint thinner, alcohol or polishing powder.
- Do not get or lean on the product.
Installation
Before first use, leave the appliance disconnected from the mains supply and stand for 4 hours. This will allow the refrigerant and compressor oils to settle.
- Your dehumidifier must be operated in an enclosed area to be most effective.
- Close all doors, windows, and other outside openings to the room. The effectiveness of the dehumidifier depends on the rate at which new moisture-laden air enters the room.
- Place the dehumidifier in a location that does not restrict airflow through the front of the unit.
- A dehumidifier operating in a room will have little or no effect in drying an adjacent enclosed storage area, such as a closet, unless there is adequate circulation of air in and out of the area. It may be necessary to install a second dehumidifier in the enclosed area for satisfactory drying.
- Ensure that the unit is placed on a stable and flat surface. If the surface is not stable, there is a risk that the unit may be unstable and cause excessive vibration and that water will be released.
- The dehumidifier must have at least 20 cm of free space around it. Refer to the figure on page 2.
Locating the Unit
Avoid locations where furniture, fabrics, or other objects can come in contact with the product and interfere with the Air Inlet and Air Outlet. Avoid locations where the product is exposed to condensation or drastic changes in temperature. Appropriate room temperature is between 5°C and 35°C.
Place the product on a level and stable surface with sufficient air circulation. Place the product in the centre of the room for better air circulation. When placed on heavy carpet, the product may vibrate slightly. Avoid locations with grease, oil smoke, alcohol, hypochlorous acid, or chemicals in the air. Doing so can cause the product exterior to crack. The surrounding walls and floor of the product may become dirty over time. When using the product for an extended period of time at the same location, periodically clean the walls and floor adjacent to it.
Operating environment
- Working temperature: 5°C to 35°C
- This machine is suitable for indoors, e.g., living room, study, office room, warehouse, basement, underground garage.
- Make sure the door and window are closed before turning on the unit to get the best result.
- Ensure that the unit is placed on a stable and flat floor surface. If the floor's surface is not even, there is a risk that the unit may be unstable and topple over. Also excessive vibration and noise may be result.
Components diagrams - parts names
Refer to the 2 and 3 on page 2 for the location of the following parts:
- Handle
- Control panel
- Louver (air outlet)
- Top cover
- Front cover
- Air intake and dust filter
- Drain pipe outlet
- Mains lead
- Side cover 10. Water tank
Control panel
Refer to the control panel on page 2.
- WATER FULL - Lights up when the water tank is full.
- DEFROST INDICATOR - Lights up when the unit is in the defrost mode.
- HUMIDITY LEVEL - shows the level of humidity set.
- HUMIDITY - Press this button to set the desired humidity.
- TIMER OFF INDICATOR - When the timer is active, this indicator lights up.
- TIMER - Press this button to set the machine shutdown time. The display will show the shutdown time accordingly.
- ON/OFF INDICATOR - Lights up when the unit is on, turns off when unit is off.
- ON/OFF - Press this button to switch the power on and off. Note: When a button is pressed, a bleep will be heard.
Operating introduction
Power on
Plug in the appliance to the mains supply and press the ON/OFF button, it will start and it will start to operate.
When powered on, the unit will start to dehumidify. The compressor will activate after five minutes.
If the appliance is turned off via the ON/OFF switch and not unplugged from the mains supply, it will start up again in the same mode.
Power off
While the appliance is operating, press the ON/OFF button to turn it off.
Humidity setting
To change the humidity level, press the HUMIDITY button. Each time the button is pressed, the display will change as follows: 40% → 50% → 60% → CONT → 40%. After setting the humidity level, the display will revert to the current moisture level detected by the internal sensor.
When the ambient humidity is 2% lower than the set humidity, the dehumidifying action will stop and the fan stops for 1 hour; the unit will not detect the humidity during this period. After 1 hour, the fan will start and work for 3 minutes during which time the ambient humidity is detected. When the unit detects that the ambient humidity is 2% higher than the set humidity, it will start dehumidifying and the fan returns to its set speed.
When operating in the dry clothes function, the machine is running in CONT status.
Timer
To start the timer function, press the TIMER button. Each time the button is pressed, the timer will cycle 2H, 4H, 6H, off. For 2H, 4H and 6H the respective light will illuminate.
Memory function
- If the unit is turned off via the ON/OFF button, when turned back on again it will resume from the function it was turned off in. Note that if the timer was set or if the unit was in the lock mode, these settings are not stored.
- If the mains power is disconnected while the unit is operating, it will restart automatically when it is reconnected. The unit will restart in the mode/function it was operating in prior to the mains disconnection.
Water tank full auto-stop function
When the water tank is full, the unit will stop operation, and the unit will bleep to remind you to empty the water tank. To reset, remove the water tank, empty and replace. When the empty water tank is put back into the unit, it will restart. Note that the compressor will take about 5 minutes to operate.
Auto defrost
If the unit is used in a low temperature environment, the internal evaporator may be covered by frost. In order to make sure the machine operates normally, the machine has auto-defrost function. Should the internal sensor detect a temperature of ≤ -1°C the machine will enter auto-defrost function. That means it will run continuously in the dehumidification mode for 30 minutes, then the machine will start the defrost cycle, the DEFROST light will illuminate, the compressor will stop and the fan will operate at high speed.
When temperature of evaporator is ≥ 2°C and the unit has been in the defrost mode for 10 minutes, the auto-defrost mode will turn off and the compressor turns on. At this point the unit will start to dehumidify and the DEFROST light will turn off.
While in the defrost mode and the temperature of the evaporator is ≥ 0°C for two minutes, the defrost function is cancelled.
Laundry mode
To enter the laundry mode, press the HUMIDITY button for 3 seconds. When in laundry mode, all 4 humidity indicator lights will illuminate. While in the laundry mode, the fan will operate at 1000 rpm and the dehumidification level is set to the continuous mode. After 6 hours in this mode, the fan will continue to run but at a lower speed of 800 rpm. This ensures that the dehumidifier runs more effectively once the clothes have lost most of their moisture.
The laundry mode can be cancelled at any time by pressing the HUMIDITY button for 3 seconds or by powering the unit off by the ON/OFF button.
When drying clothes, they will dry quicker if the room is smaller and the air is directed as shown in picture 4.
If the appliance is in the timer mode prior to entering the laundry mode, the laundry mode will continue until the end of the set time and stop. If the timer button is pressed while in the laundry mode, the unit will continue in the laundry mode until the end of the set time and stop.
Compressor protection function
Should there be a problem with the unit causing the compressor to stop, the compressor will turn off for 5 minutes. Normally the compressor will restart after 5 minutes. If it does not, unplug the unit for an hour and try again. If it still does not start, call for service.
High/Low temperature protection function
If the unit detects that the ambient temperature is ≤ 0°C or ≥ 40°C, it will shut down. In this condition, both the POWER and DEFROST lights will flash. While in this mode, the ON/OFF button makes a sound but does not work. To reset the unit, unplug the power and restart.
flash.
Continuous drainage function
Should it be necessary to provide continuous drainage, this can be achieved by fitting a 15 mm inner diameter pipe to the drainage hole on the rear of the unit. When installed, water will drain through the pipe and not into the water tank.
Ensure that the drainage pipe runs in a downwards direction, and is not bent or damaged in any way so that the water runs freely out of the unit. When fitting the drainage pipe, make sure that it is pushed all the way into the drainage hole so that it is pushed over the drain outlet which is located about 70 mm inside the unit from the rear cover of the unit.
Refer to the 3 on page 2 for the location of the drainpipe connection port.
Maintenance
When cleaning your dehumidifier:
- Use a soft clean cloth.
- Do not use alcohol, gasoline, or other benzene-based chemical solvents.
- To clean the filter, remove it, then use a vacuum cleaner to clear any dust which may have built up. If necessary, use water to clean, then place it in a ventilated area until dry.
- Unplug the unit from the mains supply before cleaning.
Other advice:
- Before moving the unit, unplug the mains supply and pull out the water in the tank.
- If not using the unit for a long time, unplug the unit from the mains supply, empty the water tank, wait for 2 days to make sure the unit inside is completely dry before packing. Always store the unit in an upright position.
- Do not tilt the unit horizontally or turn it upside down.
- If the unit requires repair, seek the help of a professional person.
Troubleshooting
| Problem Cure | |
| Dehumidi er does not work | Check that the unit is plugged into the mains supply and turned on. Check that the water tank is not full. If it is full, empty the tank. |
| Does not dehumidify | Check that the water tank is installed correctly. Check that the water tank is not full. If it is full, empty the tank. Clean the air liter. Ensure that the air ow through the unit is not obstructed. |
| Does not remove enough moisture from the air | Reduce ventilation (closed doors and windows). Ensure that there are not too many sources of humidity. Ensure that the unit is not being used to dehumidify a room in excess of the size noted in the speci caitons. |
| Unit does not run smoothly on the castors | Ensure that the castors are clean and not clogged with debris. |
What to do if the product interferes with radio or TV reception.
If the dehumidifier interferes with radio or television reception, try one or more of the following measures:
- Adjust or reposition the receiving antenna.
- Increase the distance between the product and the radio or TV.
- Connect the equipment into an outlet on a circuit different from that of the radio or TV receiver.
- Consult the dealer or a qualified radio or TV technician.
Technical specification
| Model UD-T10A, UD-T104A | |
| Dehumidi cation (Litres per day); 30 °C, 80% RH | 10 |
| Rated voltage 220-240 V AC/50 Hz | |
| Power consumption (W); 30 °C, 80% RH 220 | W |
| Air ow volume (m3/h) 90 | |
| Room Size (m2) Max 22 | |
| Refrigerant R290 | |
| Refrigerant volume (g) 35 | |
| Water tank capacity (l) | 2 |
| Unit size (W x H x D in mm) | 290 x 476 x 245 |
| Weight (kg) | 12 |
| Cord length (cm) 180 | |
| Standby power (W) | 0,42 |
NOTE:
RH-Relative Humidity
- Room size based on JEMA (Japan Electrical Manufacturers' Association) standard.
Engineer information
1. Cabling
Ensure that any cabling is not subject to wear, corrosion, excessive pressure, vibration, sharp edges or any other adverse environmental effects. Also be aware of any effect caused by aging or continual leaks. A halide torch (or any other detector using a naked flame) must not be used.
2. Detection of flammable refrigerants
DO NOT use any possible sources of ignition to search for refrigerant leaks. A halide torch (or any other detector using a naked flame) must not be used.
3. Leak detection methods
The following leak detection methods are deemed acceptable for systems containing flammable refrigerants.
Electronic leak detectors can be used to detect flammable refrigerants, but the sensitivity may not be adequate, or may need re-calibration (detection equipment shall be calibrated in a refrigerant-free area). Ensure that the detector is not a potential source of ignition and is suitable for the refrigerant used. Leak detection equipment shall be set at a percentage of the LFL of the refrigerant and shall be calibrated to the refrigerant employed and the appropriate percentage of gas (25% maximum) is confirmed.
Leak detection fluids are suitable for use with most refrigerants but the use of detergents containing chlorine must be avoided as the chlorine may react with the refrigerant and corrode the copper pipework. If a leak is suspected, all naked flames must be removed/extinguished. If a leakage of refrigerant is found which requires brazing, all of the refrigerant gas must be recovered from the system, or isolated (by means of shut off valves) in a part of the system both before and during the brazing process.
4. Removal and evacuation
When breaking into the refrigerant circuit to make repairs - or for any other purpose - conventional procedures shall be used. However, it is important that best practice is followed since flammability is a consideration. The following procedure shall be adhered to:
Remove refrigerant.
Purge the circuit with inert gas.
Evacuate.
Purge again with inert gas.
Open the circuit by cutting or brazing.
The refrigerant charge shall be recovered into the correct recovery cylinders. The system shall be "flushed" with OFN to render the unit safe.
This process may need to be repeated several times. Compressed air or oxygen shall not be used for this task.
Flushing shall be achieved by breaking the vacuum in the system with OFN and continuing to fill until the working pressure is achieved, then venting to atmosphere, and finally pulling down to a vacuum. This processing shall be repeated until no refrigerant is within the system. When the final OFN charge is used, the system shall be vented down to atmospheric pressure to enable work to take place. This operation is vital if brazing operations on the pipework are to take place. Ensure that the outlet for the vacuum pump is not close to any ignition sources and there is ventilation available.
5. Charging procedures
In addition to conventional charging procedures, the following requirements shall be followed.
Ensure that contamination of different refrigerants does not occur when using charging equipment.
Hoses or lines shall be as short as possible to minimize the amount of refrigerant contained in them.
Cylinders must be kept upright.
Ensure that the refrigeration system is earthed prior to charging the system with refrigerant.
Label the system when charging is complete (if not already).
Extreme care must be taken not to overfill the refrigeration system.
Prior to recharging the system, it must be pressure tested with OFN. The system must be leak tested on completion of charging but prior to commissioning. A follow-up leak test must be carried out prior to leaving the site.
6. Decommissioning
Before carrying out this procedure, it is essential that the engineer is completely familiar with the equipment and all its details. It is recommended good practice that all refrigerants are recovered safely. Prior to the task being carried out, an oil and refrigerant sample must be taken in case analysis is required prior to re-use of reclaimed refrigerant. It is essential that electrical power is available before the task is commenced. Become familiar with the equipment and its operation. Isolate system electrically.
Before attempting the procedure ensure that:
Mechanical handling equipment is available and being used correctly, the recovery process is always supervised by a competent person, and recovery equipment and cylinders conform to the appropriate standards.
a) Pump down refrigerant system, if possible. b) If a vacuum is not possible, make a manifold so that refrigerant can be removed from various parts of the system. c) Make sure that cylinder is situated on the scales before recovery takes place. d) Start the recovery machine and operate in accordance with manufacturer's instructions. e) Do not overfill cylinders. (No more than 80% volume liquid charge). f) Do not exceed the maximum working pressure of the cylinder, even temporarily. g) When the cylinders have been filled correctly and the process completed, make sure that the cylinders and the equipment are removed from site promptly and all isolation valves on the equipment are closed off. h) Recovered refrigerant shall not be charged into another refrigeration system unless it has been cleaned and checked.
7. Labelling
Equipment shall be labeled stating that it has been de-commissioned and emptied of refrigerant. The label shall be dated and signed. Ensure that there are labels on the equipment stating the equipment contains flammable refrigerant.
8. Recovery
When removing refrigerant from a system, either for servicing or decommissioning, it is recommended good practice that all refrigerant is recovered into cylinders. Ensure that only appropriate refrigerant recovery cylinders are employed. Ensure that the correct number of cylinders for holding the total system charge are available. All cylinders to be used are designated for the recovered refrigerant and labeled for that refrigerant, i.e., special cylinders for the recovery of refrigerant. Cylinders shall be complete with pressure relief valve and associated shut-off valves in good working order. Empty recovery cylinders are evacuated and, if possible, cooled before recovery occurs.
The recovery equipment shall be in good working order with a set of instructions concerning the equipment that is at hand and shall be suitable for the recovery of flammable refrigerants.
In addition, a set of calibrated weighing scales shall be available and in good working order. Hoses shall be complete with leak-free disconnect couplings and in good condition. Before using the recovery machine, check that it is in satisfactory working order, has been properly maintained and that any associated electrical components are sealed to prevent ignition in the event of a refrigerant release. Consult the manufacturer if in doubt.
The recovered refrigerant shall be returned to the refrigerant supplier in the correct recovery cylinder, and the relevant Waste Transfer Note arranged. Do not mix refrigerants in recovery units and especially not in cylinders.
If compressors or compressor oils are to be removed, ensure that they have been evacuated to an acceptable level to make certain that flammable refrigerant does not remain within the lubricant. The evacuation process
shall be carried out prior to returning the compressor to the suppliers. Only electric heating to the compressor body shall be employed to accelerate this process. When oil is drained from a system, it shall be carried out safely.
9. Fuses
The fuses below are mounted on the PWB.
FUSE 1: Walter 2010; AC 250V; T: 2A
FUSE: Walter 2010; AC 250V; T: 3.15A or 5A
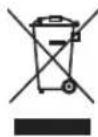
Attention:
Please note the crossed-out wheeled bin symbol.
This indicates that this electrical and electronic product should not be mixed with general household waste. There is a separate collection system for these products.
A. Information on disposal for users (private households)
1. In the European Union
Attention: If you wish to dispose of this product, do not use the ordinary dustbin.
The electrical and electronic equipment must be disposed of separately in accordance with the legislation that requires proper treatment, recovery, and recycling of waste from electrical and electronic equipment.
According to the practice of the member states, private households in the EU may return their waste electrical and electronic equipment free of charge to designated collection points.
In some countries, the local retailer may take back your old equipment free of charge when you purchase a new product.
*For more information, please contact your local authorities.
If your electrical or electronic equipment has a battery or accumulator, it must be removed and disposed of separately, in accordance with local requirements. Through the correct disposal of this product, you will help to avoid potential negative consequences for the environment and human health, which could otherwise be caused by inappropriate waste handling.
The recycling of materials helps to conserve natural resources and to protect the environment. By recycling this product, you contribute to the prevention of potential negative effects on the environment and human health, which could arise from improper disposal.
2. In countries of the EU
If you wish to dispose of this product, please contact your local authorities and ask for the correct disposal method.
For Switzerland: Used electrical and electronic equipment can be returned free of charge to the retailer, even without purchasing a new product.
The designated collection points are listed on the first page of www.swico.ch or www.sens.ch.
Flammable material. This product contains refrigerant R290/Propane, a flammable gas. Do not puncture or burn the appliance. Do not release refrigerant into the atmosphere.
5. Information on disposal and treatment for professional users
1. In the European Union
If the product has been used for business purposes and you wish to dispose of it:
Please contact your SHARP representative for information on returning the product. You may be charged for the costs of collection, treatment, and recycling. Small products (or small quantities) may be accepted by local collection points.
If you need to dispose of this product, please contact your local authorities for proper recycling of your used products.
2. In the EU
If you wish to dispose of this product, you can contact your local authorities to learn about the correct disposal methods.
www.sharpcomer.com/contact/
www.sharpcomer.com/support/ www.sharpconsumer.com/documents-of
conformity/
If service is required, visit www.sharpconsumer.com/contact/. To learn about your warranty rights, visit www.sharpconsumer.com/support/ or contact your local dealer.
You can find the Declaration of Conformity at www.sharpconsumer.com/documents-of-conformity/
Contents
Before using your new dehumidifier...11 Important safety instructions 12 Installation 12 Operating environment 13 Component diagram - part names 13 Control panel 13 Operation 13 Functions 14 Automatic defrosting function 14 Automatic dehumidifying 14 Dry mode 14 Compressor protection function 14 Protection against high/low temperature 14 Continuous drainage function 14 Maintenance 15 Troubleshooting 15 Technical specifications 16 Information for users 16
Before using your new dehumidifier
- The dehumidifier draws in air through the air inlet with the help of a fan. This air is cooled, and the moisture is removed, then it exits through the ventilation opening.
- The dehumidifier is designed to remove moisture from the air and collect the condensed water in a built-in water tank for disposal. The dehumidifying process may take a long time and is not immediate. Depending on the size of the room and the sources of moisture, the humidity will be gradually removed from the air. Do not install or use the device before carefully reading this user manual. Please keep this manual for the product warranty and future use.
- Operate the device only with the voltage specified in this manual. Do not place the device near heat sources. This may damage the cover or cause a fire. Do not expose the device to direct sunlight. Otherwise, the plastic components may deform or lose color. Do not use the device in places with corrosive, flammable, or explosive gases. Observe the device if it is in use. Do not disassemble, repair, or replace parts of the device yourself. Allow a qualified technician to perform repairs on the device.
- The device must be placed on a flat and stable surface. Otherwise, vibrations may occur.
- Do not use the appliance if it is damaged. Never cover the appliance while it is working.
- Make sure the air inlet and outlet are not blocked during use. Be careful not to let water enter the appliance while it is switched on. This could cause damage and short circuit. Never touch the appliance with wet hands or wet cloth. Before unplugging the appliance, switch it off and remove the plug from the socket. In case of malfunction, the appliance must be disconnected from the power supply. Do not pull the power cord while the appliance is plugged in. This may cause damage. Do not insert objects or fingers into the appliance, as this may cause injury or electric shock. -Precautions: If the appliance is used in an environment with high temperature and high humidity, set the appliance to dry mode. Under these conditions, the dehumidifier may not operate continuously. Note: If the appliance is not used for a long time, do not leave it on, as this will prevent the appliance from overheating. When the machine is operating, make sure the minimum distance between the appliance and walls or other objects is maintained on all sides (front ≥ 60 cm; rear ≥ 60 cm; left ≥ 50 cm; right ≥ 20 cm; top ≥ 20 cm). -The appliance must be installed according to the instructions for electrical connection.
- Check the connection to the power supply before using the appliance. -The appliance must be kept under supervision to ensure that children do not play with it. The appliance must not be used by children without adult supervision.
If the power cord is damaged, it must be replaced by the manufacturer, its service agent, or similarly qualified persons to avoid a hazard. This appliance is intended for household use only. Do not use it in industrial environments.
IMPORTANT SAFETY INSTRUCTIONS
If the appliance is switched off via the ON/OFF button and not unplugged from the mains, it is still connected to the power supply.
Switching Off
While the appliance is running, press the ON/OFF button to switch it off.
Setting the Humidity Level
To set the desired humidity level, press the HUMIDITY button. Each press of the button will display the next setting in sequence: 40% → 50% → 60% → CONT → 40%. After setting the humidity level, the display will show the current humidity level, measured by the built-in sensor.
When the ambient humidity is 2% higher than the set humidity, the dehumidifier will start and the fan will run at low speed for 1 hour; the device will open the humidity sensor through this period. After 1 hour, the fan will start and run for 3 minutes, during which the ambient humidity will be opened. When the device detects that the ambient humidity is 2% higher than the set humidity, it will start dehumidifying and the fan will return to the set speed. When the machine detects that the room humidity is 2% higher than the set humidity, the machine will start dehumidifying and the fan will run at the set speed.
During operation, the drying time for clothes, when the continuous mode is in "CONT" state.
Timer
To set the timer, press the TIMER button. Each press of the timer button will cycle through 2h, 4h, 6h, and off. For 2h, 4h, and 6h, the corresponding indicator light will illuminate.
Timer function
1. If the device is turned off via the ON/OFF button, when turned on again it will return to the mode it was in when turned off. Note that if a timer was set or the device was in a shutdown mode, these settings will be preserved. 2. If the pre-set shutdown is turned off while the device is operating, it will automatically reset when turned on again. The device will reset to the time/function it was operating in before the power supply was interrupted.
Automatic stop function when the water tank is full
When the water tank is full, the device will stop operating and emit a signal to remind you to empty the tank. To reset, remove the water tank, empty it, and put it back. When the empty water tank is placed back into the device, it will reset. Note that the compressor will start operating after about 5 minutes.
Automatic defrosting
If the device is used in a low-temperature environment, the internal evaporator may become covered with frost. To ensure normal operation, the device has an automatic defrosting function. If the internal sensor detects a temperature of ≤ -1 °C, the device will enter automatic defrosting mode. This means the device will stop dehumidifying for 30 minutes, after which it will start the defrosting cycle; the defrosting indicator light will illuminate, the compressor will stop, and the fan will run at high speed. When the evaporator temperature is ≥ 2 °C and the device has been in defrosting mode for 10 minutes, the automatic defrosting mode will turn off and the compressor will turn on. At that moment, the device will start dehumidifying and the defrosting indicator light will go out.
If the defrosting mode temperature of the evaporator is ≥ 0 °C for more than 10 minutes, the defrosting will be terminated.
If the defrosting mode temperature of the evaporator is ≥ 0 °C for more than 10 minutes, the defrosting will be terminated.
Washing mode
In Dry mode, the humidity button can be pressed at any time. In Dry mode, all 4 humidity indicator LEDs light up. While in Dry mode, the fan operates at 1000 rpm, and the dehumidification level is set to maximum. After 6 hours in this mode, the fan continues to operate, but at a lower speed of 800 rpm. This ensures that the dehumidifier works more efficiently, after the clothes have lost most of their moisture.
Dry mode can be turned off at any time by pressing the HUMIDITY button for 3 seconds or by turning off the unit via the ON/OFF button.
When drying clothes, they will dry faster if the load is smaller. The clothes should be hung as shown in picture 4.
If the unit is in timer mode and is about to enter Dry mode, Dry mode will continue until the end of the set time and then stop. If the timer button is pressed while the unit is in Dry mode, Dry mode will continue until the end of the set time and then stop.
Compressor protection function
If a problem occurs with the unit that causes the compressor to stop, the compressor will turn off for 5 minutes. Usually, the compressor will restart after 5 minutes. If it does not restart, turn off the unit for an hour and try again. If it still does not turn on, contact service.
High/Low temperature protection function
If the unit is installed in an environment where the ambient temperature is below 0°C or above 40°C, it will shut off. In this condition, both the POWER and DEFROST LEDs will blink. While in this state, the ON/OFF button emits a sound, but the unit does not operate. To reset the unit, unplug it and plug it back in.
Continuous drainage function
If continuous drainage is needed, a hose with an inner diameter of 15 mm can be connected to the drain outlet of the unit. Once installed, water will drain through it without collecting in the reservoir.
The hose must be placed downwards, without any kinks, so that water can drain freely.
To install the hose, press it until it fits over the drain outlet, then secure it with the drain clamp located 70 mm inside the unit.
See Fig. 3 on page 2 for the location of the drain hose connection.
Maintenance
Cleaning the dehumidifier
- Do not use the device near kerosene. Do not use spirits, benzene, or chemically dissolved substances on a gasoline basis. For cleaning the filter, use a vacuum cleaner to remove the collected dust. If necessary, use water for cleaning, after which leave the device in a ventilated area until it dries.
- When cleaning, disconnect the device from the electrical grid.
Other precautions:
- When storing the device, disconnect it from the electrical grid and drain the water from the reservoir. In case you do not plan to use the device for an extended period, disconnect it from the power supply, drain the water from the reservoir, and let it dry for 2 hours to ensure it is completely dry, then store the device in its packaging. Store the device in an upright position.
- Do not place it horizontally and do not place heavy objects on it.
- If repair is necessary, contact our service with the required qualification.
Troubleshooting
b) If vacuum is not possible, adjust the collector so that
the refrigerant can be removed from the system.
c) Ensure that the cylinders are placed on the scales before filling or recovery. d) Start the machine for recovery of the refrigerant according to the manufacturer's instructions. e) Do not overfill the cylinders. (Do not exceed 80% of the liquid volume). f) Do not exceed the maximum working pressure of the cylinder, even temporarily. g) When the recovery process is complete, ensure that the cylinders and the equipment are removed promptly and all valves and equipment are closed. h) The recovered refrigerant should not be recharged into another refrigeration system unless it has been tested.
7. Labeling
The equipment must be labeled indicating that it has been evacuated and charged with refrigerant. The label must be dated and signed. Ensure that the equipment has labels containing the type of refrigerant.
8. Recovery
When removing refrigerant from the system, either for servicing or decommissioning, it is recommended to recover the refrigerant into cylinders, ensuring that only approved recovery cylinders are used. Ensure that the cylinder is the correct type for the refrigerant and that the system is not overcharged. All cylinders used must be approved for recovery of refrigerant and marked for that refrigerant, for example, a special cylinder for recovery of refrigerant. The cylinders must be equipped with valves for releasing pressure and connecting to the recovery unit. The valves must be in good working condition. The recovery cylinders are evacuated and, if possible, cooled before filling.
The recovery equipment must be in good working condition with the instructions for the equipment available, and it must be suitable for recovery of the specified refrigerant.
The device must be used only with the complete set of accessories supplied, in good working condition. The connectors must be properly connected and in good condition. Before using the machine for recovery, check that it is in good working condition, properly maintained, and that all connected electrical components are sealed, to prevent accidental ignition or release of refrigerant. Consult the manufacturer for maintenance.
The recovered refrigerant must be returned to the refrigerant supplier in the correct recovery cylinder, with the corresponding transfer label. Do not mix refrigerants in recovery devices, and especially not in cylinders.
If compressors or compressor oil are to be removed, ensure that they have been evacuated to a safe level, to ensure that flammable refrigerant does not remain in the oil. The evacuation process must be carried out before returning the compressor to the supplier. Only electrical heating of the compressor housing should be used to accelerate this process. When oil is drained from the system, it must be done safely.
9. Fuses
The fuses are mounted on the PCB.
Fuse: Walter 2010; AC 250V; T:2A
Fuse: Walter 2010; AC 250V; T: 3.15A or 5A
Warning:
Your product is marked with this symbol.
www.sharpconsumer.com/contact/
www.sharpconsumer.com/support/ www.sharpconsumer.com/documents-of-
conformity/
Information about service can be found at www.sharpconsumer.com/contact/, information about your warranty rights can be found at www.sharpconsumer.com/support/ or contact the dealer where you purchased your product.
The declaration of conformity is available at www.sharpconsumer.com/documents-of-conformity/
Contents
www.sharpconsumer.com/contact/
www.sharpconsumer.com/support/ www.sharpconsumer.com/documents-of
conformity/
For information about service, please see www.sharpconsumer.com/contact/. For information about your warranty rights, please see www.sharpconsumer.com/support/ or contact the dealer where you purchased the product.
Declarations of conformity can be obtained from www.sharpconsumer.com/documents-of-conformity/
Contents
www.sharpconsumer.com/contact/
www.sharpconsumer.com/support/ www.sharpconsumer.com/documents-of
conformity/
Disposal of old electrical and electronic equipment
This product should not be disposed of with household waste.
There is a separate collection system for these products.
www.sharpconsumer.com/contact/
www.sharpconsumer.com/
www.sharpconsumer.com/support, documents-of-conformity/
For the declaration of conformity, visit www.sharpconsumer.com/contact/ for warranty rights, or visit www.sharpconsumer.com/support/ or contact the store where you purchased the product.
The declarations of conformity are available at www.sharpconsumer.com/documents-of-conformity/
Contents
Read before operating the new refrigerator. 39 IMPORTANT SAFETY INSTRUCTIONS. 40 Installation 40 Operating environment 41 Troubleshooting - parts names 41 Control panel 41 Introduction to operation 41 Display operation 42 Automatic operation for ice making 42 Automatic defrost 42 Operation of the freezer compartment 42 Protection operation 42 Protection against high/low temperature 42 Continuous operation 43 Maintenance 43 Troubleshooting 43 Technical specifications 43 Machine information 43
www.sharpconsumer.com/contact/
www.sharpconsumer.com/support/ www.sharpconsumer.com/documents-of-
conformity/
www.sharpconsumer.com/contact/
www.sharpconsumer.com/support/ www.sharpconsumer.com/documents-of-
conformity/
For service, visit www.sharpconsumer.com/contact/; for warranty rights, visit www.sharpconsumer.com/support/ or contact the store where you purchased the product.
IMPORTANT SAFETY INSTRUCTIONS 54
Installation 54
Operating environment 55
Component diagrams - part names 55
Control panel 55
IMPORTANT SAFETY INSTRUCTIONS
www.sharpconsumer.com/support/ www.sharpconsumer.com/documents-of
conformity/
www.sharpconsumer.com/contact/
www.sharpconsumer.com/support/ www.sharpconsumer.com/documents-of
conformity/
Technical specifications
www.sharpconsumer.com/contact/
www.sharpconsumer.com/support/ www.sharpconsumer.com/documents-of
conformity/
For service, visit www.sharpconsumer.com/contact/, and for warranty rights www.sharpconsumer.com/support/ or contact the dealer from whom you purchased the product.
Declarations of conformity are available at www.sharpconsumer.com/documents-of-conformity/
Contents
Read before using your new dehumidifier 72
IMPORTANT SAFETY INSTRUCTIONS. 73
Installation 73
Operating environment. 74
IMPORTANT SAFETY INSTRUCTIONS
www.sharpconsumer.com/contact/
www.sharpconsumer.com/support/ www.sharpconsumer.com/documents-of
conformity/
Contents
www.sharpconsumer.com/support/ www.sharpconsumer.com/documents-of
conformity/
For service, visit www.sharpconsumer.com/contact/ or for warranty rights, visit www.sharpconsumer.com/support/ or contact the retailer where you purchased this product.
The declaration of conformity can be found here: www.sharpconsumer.com/documents-of-conformity/
Contents
Read before using your dehumidifier. 93 IMPORTANT SAFETY INSTRUCTIONS 94 Installation 94 Operating environment 95 Component drawings - part names 95 Control panel 95 Introduction to use 95 Memory function 95 Automatic shut-off function when water tank is full...95 Automatic defrosting 95 Washing mode 96 Compressor protection function 96 High / low temperature protection function 96 Continuous water drain function 96 Maintenance 96 Troubleshooting and repair 96 Technical specifications 97 Engineer information 97

Additional warnings for appliances with R290 refrigerant (see rating plate to know which refrigerant the appliance uses).
IMPORTANT SAFETY INSTRUCTIONS BEFORE USING THE DEVICE.
www.sharpconsumer.com/contact/
www.sharpconsumer.com/support/ www.sharpconsumer.com/documents-of
conformity/
www.sharpconsumer.com/contact/
www.sharpconsumer.com/support/
www.sharpconsumer.com/documents-of-conformity/
For service, please see www.sharpconsumer.com/contact/, for your warranty rights, go to www.sharpconsumer.com/support/ or contact the dealer where you purchased your product.
Declaration of Conformity is available at www.sharpconsumer.com/documents-of-conformity/
Contents
www.sharpconsumer.com/support/ www.sharpconsumer.com/documents-of
conformity/
www.sharpconsumer.com/contact/
www.sharpconsumer.com/support/ www.sharpconsumer.com/documents-of
conformity/
For technical assistance, visit www.sharpconsumer.com/contact/, for your warranty rights, go to www.sharpconsumer.com/support/ or contact the retailer where you purchased the product.
www.sharpconsumer.com/contact/
www.sharpconsumer.com/support/ www.sharpconsumer.com/documents-of
conformity/
www.sharpconsumer.com/contact/
www.sharpconsumer.com/support/ www.sharpconsumer.com/documents-of
conformity/
www.sharpconsumer.com/contact/
www.sharpconsumer.com/support/ www.sharpconsumer.com/documents-of
conformity/
For service information, visit www.sharpconsumer.com/contact/, for your warranty rights, go to www.sharpconsumer.com/support/ or contact the store where you purchased your product.
Declarations of conformity are available at www.sharpconsumer.com/documents-of-conformity/
Contents
Before using the dehumidifier, carefully read the instruction manual ....148
IMPORTANT SAFETY INSTRUCTIONS 149
Installation. 149
Operating environment 150
www.sharpconsumer.com/support/ www.sharpconsumer.com/documents-of
conformity/
For service go to www.sharpconsumer.com/contact/, for your warranty rights go to www.sharpconsumer.com/support/ or contact the retailer where you purchased your product.
Declaration of conformity is available from www.sharpconsumer.com/documents-of-conformity/
Contents
Read before using your dehumidifier 161 IMPORTANT SAFETY INSTRUCTIONS 162 Installation 162 Operating environment. 163 Component diagram - part names 163 Control panel 163 Operating instructions 163 Memory function 163 Water tank full auto-stop function 163 Automatic defrosting 163 Laundry mode 163 Compressor protection function 164 High/low temperature protection function 164 Continuous drainage function 164 Maintenance 164 Troubleshooting. 164 Technical specifications 164 Engineering information 165

READ THIS USER MANUAL CAREFULLY BEFORE USING THE APPLIANCE
The refrigerant R290 complies with European environmental directives.
This unit contains approximately 35g of R290 refrigerant.
Do not puncture or burn.
www.sharpconsumer.com/support/ www.sharpconsumer.com/documents-of
conformity/
The user manual can be downloaded from the website www.sharpconsumer.com/contact/, and you can familiarize yourself with your rights under the warranty terms - at the address www.sharpconsumer.com/support/ or contact the dealer where the product was purchased. The declaration of conformity can be obtained at the address: www.sharpconsumer.com/documents-of-conformity/
Read the instructions before using the new air purifier. 167 Table of contents 168 Installation instructions 168 Operating conditions 169 Diagrams and part names 169 Control panel 169 Basic operations 170 Functions 170 Automatic shutdown when the tank is full...170 Automatic standby 170 Operating modes 170 Compressor protection function 170 Protection against power surges and overheating 170 Emergency stop function 170 Power 170 Troubleshooting 171 Technical specifications 171 Engineering information 171
Read the instructions before using the new air purifier.
The device is designed to draw air through the inlet using a fan. The air is cleaned, then exits the device through the outlet at the top. The device is intended for air purification and collection of dust in the internal tank for further disposal. The air purification process can take many hours and is not instantaneous. Depending on the size of the room and the degree of air pollution, not all air may be purified from the device. Do not install or use the device without fully reading this manual and instructions. Please keep this manual for product warranty and future use. Use the device only if the electrical outlet matches the specified rating. It is forbidden to place the device near open flames or heat sources - this can lead to damage to the housing or fire. Do not place it in a place where direct sunlight or heat can cause plastic parts to melt. It is forbidden to use the device in rooms with high dust content, as well as in the presence of flammable or explosive gas in the air. Use the device only under adult supervision; do not leave children unattended. Do not disassemble, repair, or replace parts of the device yourself. Allow repairs to be carried out by qualified professionals. - To prevent the device from creating noise or vibration, it should be placed on a flat, horizontal surface. When the device is not in use, unplug it from the electrical outlet. - Covering the device during operation is forbidden. - Ensure that the inlet and outlet of the device are not blocked during use. Do not spray water on the device: this can cause malfunction or electric shock. Unplug the device from the electrical outlet with dry hands; it is forbidden to do so with wet hands. - To avoid electric shock, before removing the plug from the electrical outlet, the device must be turned off. If the device is used for a long time, turn it off and unplug it from the electrical outlet, wait for it to cool down, and then clean it. When unplugging, do not pull the cord: this can cause damage. Do not insert objects or fingers into the device, as this can cause injury or electric shock. - Before cleaning the device, empty the water from the tank. - When using in conditions of low temperature and high humidity, please set the device operating mode to "dry mode". In such conditions, the device will operate continuously without interruption. - Note: After drying, please do not turn off the device immediately, as this may damage the device. During operation, the device must be placed at a safe distance from walls and other objects on all sides (top ≥60 cm; front ≥60 cm; rear ≥50 cm; left ≥20 cm; right ≥20 cm). The device must be installed in accordance with the rules for laying wires, which are used in the country of use. Disconnect from the power outlet when moving the device. Monitor the cord to ensure it does not get tangled with the device.
This appliance is intended for household use only. It is not intended for commercial use. To avoid danger, if the power cord is damaged, it must be replaced by the manufacturer, its service agent, or a similarly qualified person. - This appliance is intended for household use only; it is not intended for professional use.
IMPORTANT SAFETY INSTRUCTIONS
When using electrical appliances, basic safety precautions should always be followed, including the following:
WARNING! To reduce the risk of electric shock, fire, or injury, always follow these rules:
- Before using the device, read these instructions carefully. The appliance can only be connected to a power supply with a voltage of 220-240V~ and a frequency of 50Hz.
- Children aged 8 years and above, persons with reduced physical, sensory, or mental capabilities, or those lacking experience or knowledge, may use the device only under supervision, with instructions on safe use and understanding of the hazards involved. Children must not play with the device. Children must not perform cleaning or maintenance without supervision.
- To avoid danger, if the power cord is damaged, it must be replaced by the manufacturer, its service agent, an authorized Sharp service center, or a similarly qualified person. If any malfunction occurs, or if adjustment or repair is needed, contact the nearest service center.
- Do not repair the product or disassemble the main unit yourself.
- Make sure you have unplugged the power cord before performing maintenance, cleaning, and replacing parts, as well as when not in use. Improper handling may cause a short circuit, electric shock, or fire. Do not use the product if the cord or plug is damaged or if the outlet is loose. Do not insert fingers or foreign objects into the air outlet.
- Before performing maintenance, remove or install the filter, and also if the product is not used for a long time, unplug the unit from the electrical outlet. This may cause a short circuit, leading to electric shock or fire. Do not damage the power cord. Failure to follow these recommendations may result in electric shock, fire, or injury. Do not touch the plug with wet hands. Do not use the product near gas appliances. If the product is used in a room with gas appliances, ventilate the room periodically to avoid gas accumulation. Do not use the product in rooms where aerosol sprays are present.
The product is intended for use in dry rooms, away from moisture, sparks from ignition sources, or chemical vapors in the air. Keep the device away from water. Be careful with the device. Strong corrosive substances may damage the external surface. If you spill liquid on the device, wipe it with a dry cloth, then take the device by the handle, located on the side walls. Do not pour water, as it may get inside the device. Regularly check the water level. When the main unit is not in use, drain the water from the water tank. Stagnant water in the water tank can lead to the growth of mold, bacteria, and unpleasant odors. In humid conditions, bacteria can be hazardous to health.
WARNING FOR OPERATION
Do not block the air intake or exhaust outlets. Do not place the device on soft surfaces such as carpets, beds, or sofas, or in places where it might be exposed to steam. During operation, the device must be in a vertical position. Do not move the device during operation. If you need to move the device, first turn it off and unplug it. Do not use the device without installing the air filter. Clean the external surface only with a soft cloth. Do not use gasoline, solvents, or abrasive powders. The surface of the device may be damaged or scratched by gasoline, solvents, or abrasive powders. Do not sit or lean on the device.
INSTALLATION
BEFORE USING THE DEVICE, READ THE INSTRUCTIONS AND FOLLOW THEM. THIS WILL ALLOW THE COMPRESSOR TO OPERATE CORRECTLY.
1. For efficient operation, the device should be used in a closed room. 2. Close windows, doors, and other openings of the room. The efficiency of the device depends on the intensity of air exchange in the room. 3. Place the device in a location where it will not obstruct the airflow from the front part of the device. 4. The operation of the device may have little or no effect in adjacent closed rooms, such as rooms that do not have adequate air circulation. For effective operation in such a room, it may be necessary to install an additional device. 5. Make sure the device is placed on a flat, level surface. If the surface is uneven, the device may be unstable and vibrate strongly, and water may spill. 6. The device must have at least 20 cm of free space around it.
Fig. 1 on page 2.
Choosing a location for the device
Do not use the device in places where furniture, fabrics, or other objects may come into contact with it, blocking the air intake or exhaust outlets.
Do not use the device in places where condensation may form
and significant temperature differences occur. The device can be used at temperatures from 5°C to 35°C.
Place the device on a flat, stable surface with sufficient air circulation. Place the device in the middle of the room for better air circulation. If the device is placed on a heavy piece of furniture, it may vibrate slightly.
Do not place the device in places where the air contains dust, or where there are fumes from oil, paint, or hypochlorous acid. The device housing may become covered with dirt.
On the walls near the device and under it, dust may accumulate over time. When the device operates in the same place for a long time, periodically clean the walls near where it is installed and the floor on which it stands.
Operating conditions
- Operating temperature: from 5°C to 35°C. The device is intended for indoor use, for example in living rooms, bedrooms, offices, corridors, or in a heated garage. Humidification is most effective when the device is protected from drafts and windows are closed.
- Make sure the device is installed on a flat and level surface. If the floor surface is uneven, the device may be unstable and tip over. It may also cause increased vibration and noise.
Parts diagram. Part names
See Fig. 2 on page 2. The following parts are shown:
1. Handle 2. Control panel 3. Deflector (air outlet) 4. Top cover 5. Front cover 6. Air intake and filter 7. Water inlet 8. Power cord 9. Back cover 10. Water tank
Control panel
See Fig. 4. Control panel on page 2.
- WATER FULL (WATER TANK FULL) - lights up when the water tank is full.
- DEFROST indicator - lights up when the device operates in defrost mode.
- HUMIDITY LEVEL - shows the set humidity level.
- HUMIDITY - button for setting the desired humidity.
- TIMER OFF INDICATOR - When the timer is active, the indicator lights up.
- TIMER - Press the button to set the activation time of the device. The display shows the set time.
- ON/OFF INDICATOR - Lights up when the device is on; when the device is off, the indicator does not light up.
- ON/OFF - Press the button to turn the device on or off. Note: When the button is pressed, the indicator lights up.
Basic operations
Turning on/off
Insert the power plug into the electrical outlet and press the button (ON/OFF), the device turns on and starts operating.
When turned on, the device will start dehumidifying. The compressor activates after 5 minutes.
To turn off the device, press ON/OFF, do not unplug
from the electrical outlet, it turns off in the current mode.
Turning off
After the device operates, press the ON/OFF button to turn it off.
Humidity setting
To change the humidity value, press the HUMIDITY button: the value changes in the order 40%~50%~60%~CONT~40%. After setting the desired value, the display will show the current humidity value, which will be maintained.
When the ambient humidity is 2% higher than the set humidity, the dehumidifier turns on, and the fan runs for 1 hour; if the humidity is not detected during this period, after 1 hour the fan restarts and operates for 3 minutes, during which the ambient humidity is measured. If the humidity is detected to be 2% higher than the set humidity, it will continue dehumidifying, and the fan will return to the set speed. When the device is in continuous mode, if the humidity is 2% higher than the set level, the dehumidifier will operate, and the fan will run at the set speed.
Picapco60BpeKmCyuHnOJpyanapatnpaioe33aHaHm 3haueHHM (IOCTIINHO).
Timer
To set the timer function, press the TIMER button. Each press of the button ensures a timer cycle of 2, 4, or 6 hours. For 2, 4, and 6 hours, the corresponding indicator will light up.
Function of the timer
- If the device is turned off with the ON/OFF button, when it is turned on again, the timer function will be restored to the setting that was active before turning off. Note that if the timer was set or the device was in blocking mode, the settings will not be saved.
Automatic shutdown function in case of tank full
When the water tank is full, the device stops working and emits a signal about the need to empty the tank. To restart, remove the water tank, empty it, and put it back in place. When the empty water tank is placed back into the device, it will restart. Note that the compressor needs about 5 minutes to restart.
Automatic defrosting
If the device is used in low temperature conditions, the internal parts may become covered with ice. To ensure normal operation, the automatic defrosting function is provided. If the internal sensor detects a temperature of ≤ -1°C, the device activates the automatic defrosting function. This means that the device will operate continuously in drying mode for 30 minutes, after which it will defrost. The DEFROST indicator will light up, the compressor will stop, and the fan will operate at high speed. The temperature of the parts will rise to 2°C or higher, and the device will remain in defrosting mode for at least 10 minutes. Then the defrosting mode will be turned off, and the compressor will be turned on. The device will resume drying, and the DEFROST indicator will go out. If the device is in defrosting mode and the temperature of the parts during two minutes is 0°C or lower, the defrosting function will be cancelled.
Drying mode
To enter drying mode, press the HUMIDITY button for 3 seconds. During drying mode, all 4 humidity indicators will light up. During operation in drying mode, the fan operates at high speed 1000 rpm, and the dehumidifier is set to continuous mode. After 6 hours of continuous operation, the fan continues to work at low speed 800 rpm. This ensures more effective drying after a large amount of laundry.
Drying mode can be cancelled at any time by pressing the HUMIDITY button for 3 seconds or by turning off the device with the ON/OFF button.
The drying process will be more efficient if the room is smaller and the air is circulated, as shown in Figure 4.
If the device is in timer mode before switching to drying mode, the drying mode will continue until the set timer expires and then stop. If the TIMER button is pressed during drying mode, the device will continue to operate in drying mode until the set timer expires and then stop.
Check that the drain hose is connected to the bottom of the appliance and that there are no kinks or obstructions that could prevent the free flow of water from the appliance.
When installing the drain hose, make sure it is securely inserted into the drain outlet and that the hose clamp is tightened, positioned at a distance of 70 mm from the bottom of the appliance.
The procedure for installing the drain hose is shown in Fig. 3 on page 2.
Then
Connecting the water supply:
Use a clean cloth. Do not use abrasive cleaners, bleach, or chemical solvents based on benzene.
2. Detection of refrigerant leaks
Do not use any potential sources of ignition to search for refrigerant leaks. Do not use a halogen torch (or any other detector with an open flame).
3. Methods for detecting leaks
The following methods for detecting leaks are considered suitable for systems containing flammable refrigerants.
Electronic leak detectors may be used to detect flammable refrigerants, but their sensitivity may be insufficient or they may require recalibration (the detection device must be calibrated in an area free of refrigerant). Ensure that the detector is not a potential source of ignition and is suitable for use with the refrigerant. The detection device must be set to the percentage of the refrigerant's LFL and calibrated to the appropriate refrigerant and the appropriate percentage of gas (maximum 25%). Leak detection fluids are suitable for most refrigerants, but the use of detergents containing chlorine should be avoided, as chlorine may react with the refrigerant and corrode copper pipes.
If a leak is suspected, all naked flames must be removed or extinguished.
If a refrigerant leak is found that requires brazing, all refrigerant must be recovered from the system or isolated (using shut-off valves) in a part of the system away from the leak.
Then, before and during the brazing process, nitrogen should be purged through the system.
4. Removal and evacuation
Before starting the repair, the contour must be purged using the refrigerant.
To ensure the reliability of the contour, it is necessary to check the tightness. The following procedure must be followed:
Remove the cooling element.
Purge the contour with nitrogen.
Evacuate.
Purge again with nitrogen.
Open the circuit, repair or replace.
The cooling element must be completely filled with the correct refrigerant charge. The system must be purged to ensure the block's tightness. This process may need to be repeated several times. The system must not be used for other purposes.
The purging must be done by breaking the vacuum in the system and then continuing the filling until the working pressure is reached, after which ventilation to the atmosphere must be performed, and then a vacuum must be created again. This process must be repeated until the cooling element is completely filled. If a refrigerant charge is used, the system must be vented to atmospheric pressure before performing the work. This operation is important if pipeline repairs are planned. Ensure that the vacuum pump outlet is not near an ignition source and that ventilation is provided.
5. Charging procedure
Before starting the charging procedure, the following steps must be followed.
Ensure that the refrigerant is not released during the charging process.
The hoses must be as short as possible to minimize the amount of refrigerant in them.
The hoses must be kept in a vertical position.
Ensure that the cooling system is filled with the correct refrigerant charge.
The refrigerant system must be checked after charging is complete (if this has not been done).
Maximum tightness is required to prevent refrigerant leakage.
The system must be checked and tested for leaks. The system must be checked after charging is complete, but before commissioning. Before leaving the work site, it is necessary to conduct initial tests for leaks.
6. Decommissioning
Before performing this procedure, it is important that the engineer is fully familiar with the equipment and all its details. It is recommended good practice to recover refrigerants. Before performing the task, it is necessary to take oil and refrigerant samples for analysis, if the refrigerant will be reused. It is necessary that the power supply is accessible before starting work.
Familiarize yourself with the equipment and its operation.
Turn off the electrical power.
Before starting the procedure, make sure that:
Mechanical handling of the equipment is available and used correctly; the recovery process is controlled by a competent person; the equipment and handling comply with relevant standards.
a) Recover the refrigerant system, if possible. b) If vacuum is not possible, make a connection so that the refrigerant can be removed from various parts of the system. c) Before starting recovery, make sure that the cylinder is placed on the scales.
d) Start the recovery machine and operate it according to the manufacturer's instructions. e) Do not overfill the cylinder. (Not more than 80% of the cylinder volume). f) Do not exceed the maximum working pressure of the cylinder, even temporarily. g) When the cylinder is filled correctly and the process is complete, make sure that the cylinder and the equipment are immediately removed from the site, and all valves on the equipment are closed. h) Recovered refrigerant must not be put back into the cooling system unless it has been tested and verified.
7. Labeling
The equipment must be labeled, indicating that it has been decommissioned and the refrigerant has been removed. The label must be dated and signed. Make sure that the equipment has labels indicating that the equipment contains flammable refrigerant.
8. Recovery
When removing the refrigerant system, using appropriate tools, it is recommended to recover all refrigerant from the cylinders. Make sure that the cylinders used are suitable for refrigerant recovery. Ensure the availability of proper cylinders for storing the system's charge. All cylinders used must be approved for recovered refrigerant and have appropriate labeling, i.e., special cylinders for refrigerant recovery. The cylinder must be equipped with shut-off valves and appropriate relief valves in working condition. Recovery cylinders should be cooled, if possible, before recovery.
Before starting the repair, the unit must be disconnected from the power supply and the instructions for the given unit must be followed. The repair must be performed by qualified personnel.
In addition, a set of calibrated weights must be available in the working condition. The weights must be equipped with connectors that do not allow leakage and must be in proper condition. Before using the manipulator for repair, check that it is in proper working condition, correctly serviced, and that the electrical components are hermetically sealed. To avoid replacing the wrong cooler, consult the manufacturer if in doubt.
The recommended cooler must be installed in the correct position for the repair, and the necessary connection diagram must be provided. Do not bend the cooler in the repair devices, especially in the baths.
Before opening the compressor and compressor oil, make sure they are evacuated to the appropriate level to avoid the cooler remaining in the middle part. The evacuation process must be carried out before returning the compressor to the supplier. Only electric heating of the compressor housing must be used during the process. When oil is drained from the system, it must be done safely.
9. Fuses
The fuse is installed on the control board.
Fuse 1: Walter 2010; AC 250V; T:2A
Fuse: Walter 2010; AC 250V; T:3.15A or 5A


CC
Sharp Consumer Electronics Poland sp. z o.o.
Ostaszewo 57B, 87-148 Lysomice, Poland
Made in China
SDA/MAN/0331 V2
www.sharpcounter.eu
SHARP


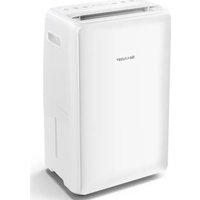
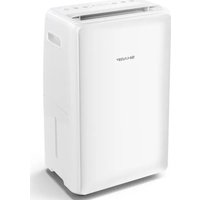
- INFORMATION ON DISPOSAL FOR USERS (PRIVATE HOUSEHOLDS)
- IN THE EUROPEAN UNION
- IN OTHER COUNTRIES OUTSIDE THE EU
- INFORMATION ON DISPOSAL FOR BUSINESS USERS
- CONTENTS
- PLEASE READ BEFORE OPERATING YOUR NEW DEHUMIDIFIER
- IMPORTANT SAFETY INSTRUCTIONS
- ALWAYS FOLLOW BASIC SAFETY PRECAUTIONS WHEN USING ELECTRICAL APPLIANCES, INCLUDING THE FOLLOWING
- WARNING - ALWAYS OBSERVE THE FOLLOWING TO REDUCE THE RISK OF ELECTRICAL SHOCK, FIRE, OR INJURY
- CAUTIONS CONCERNING OPERATION
- INSTALLATION
- LOCATING THE UNIT
- OPERATING ENVIRONMENT
- COMPONENTS DIAGRAMS - PARTS NAMES
- CONTROL PANEL
- OPERATING INTRODUCTION
- POWER ON
- POWER OFF
- HUMIDITY SETTING
- TIMER
- MEMORY FUNCTION
- WATER TANK FULL AUTO-STOP FUNCTION
- AUTO DEFROST
- LAUNDRY MODE
- COMPRESSOR PROTECTION FUNCTION
- HIGH/LOW TEMPERATURE PROTECTION FUNCTION
- CONTINUOUS DRAINAGE FUNCTION
- MAINTENANCE
- WHEN CLEANING YOUR DEHUMIDIFIER
- OTHER ADVICE
- TROUBLESHOOTING
- WHAT TO DO IF THE PRODUCT INTERFERES WITH RADIO OR TV RECEPTION
- TECHNICAL SPECIFICATION
- NOTE
- ENGINEER INFORMATION
- CABLING
- DETECTION OF FLAMMABLE REFRIGERANTS
- LEAK DETECTION METHODS
- REMOVAL AND EVACUATION
- CHARGING PROCEDURES
- DECOMMISSIONING
- LABELLING
- RECOVERY
- FUSES
- ATTENTION
- IN COUNTRIES OF THE EU
- INFORMATION ON DISPOSAL AND TREATMENT FOR PROFESSIONAL USERS
- IN THE EU
- BEFORE USING YOUR NEW DEHUMIDIFIER
- SWITCHING OFF
- SETTING THE HUMIDITY LEVEL
- TIMER FUNCTION
- AUTOMATIC STOP FUNCTION WHEN THE WATER TANK IS FULL
- AUTOMATIC DEFROSTING
- WASHING MODE
- CLEANING THE DEHUMIDIFIER
- OTHER PRECAUTIONS
- LABELING
- WARNING
- TECHNICAL SPECIFICATIONS
- READ THE INSTRUCTIONS BEFORE USING THE NEW AIR PURIFIER
- WHEN USING ELECTRICAL APPLIANCES, BASIC SAFETY PRECAUTIONS SHOULD ALWAYS BE FOLLOWED, INCLUDING THE FOLLOWING
- WARNING! TO REDUCE THE RISK OF ELECTRIC SHOCK, FIRE, OR INJURY, ALWAYS FOLLOW THESE RULES
- WARNING FOR OPERATION
- CHOOSING A LOCATION FOR THE DEVICE
- OPERATING CONDITIONS
- PARTS DIAGRAM. PART NAMES
- BASIC OPERATIONS
- TURNING ON/OFF
- TURNING OFF
- FUNCTION OF THE TIMER
- AUTOMATIC SHUTDOWN FUNCTION IN CASE OF TANK FULL
- DRYING MODE
- THEN
- CONNECTING THE WATER SUPPLY
- DETECTION OF REFRIGERANT LEAKS
- METHODS FOR DETECTING LEAKS
- CHARGING PROCEDURE
Brand : SHARP
Model : UD-T104A
Category : Dehumidifier