BR 304 C Adv - Industrial vacuum cleaner Kärcher - Free user manual and instructions
Find the device manual for free BR 304 C Adv Kärcher in PDF.
| Product type | Industrial vacuum cleaner / Friction floor cleaner |
| Brand | Kärcher |
| Model | BR 30/4 C Adv |
| Working width | 300 mm |
| Brush diameter | 60 mm |
| Brush speed | 1450 rpm |
| Theoretically cleanable area | 200 m²/h |
| Fresh water tank volume | 4 L |
| Dirty water tank volume | 4 L |
| Average power consumption | 820 W |
| Nominal voltage | 220-240 V |
| Frequency | 50/60 Hz |
| Suction power (air flow) | 26 L/s |
| Suction power (vacuum) | 13 kPa |
| Dimensions (L x W x H) | 390 x 335 x 1180 mm |
| Total weight (Adv) | 16 kg (16.5 kg with accessories) |
| Transport weight (Adv) | 12 kg (12.5 kg with accessories) |
| Protection class | I |
| Protection type | IPX4 |
| Operating temperature | +5°C to +40°C |
| Sound pressure level (LpA) | 72 dB(A) |
| Sound power level (LwA) | 85 dB(A) |
| Hand-arm vibration value | <2.5 m/s² |
Frequently Asked Questions - BR 304 C Adv Kärcher
User questions about BR 304 C Adv Kärcher
0 question about this device. Answer the ones you know or ask your own.
Ask a new question about this device
Download the instructions for your Industrial vacuum cleaner in PDF format for free! Find your manual BR 304 C Adv - Kärcher and take your electronic device back in hand. On this page are published all the documents necessary for the use of your device. BR 304 C Adv by Kärcher.
USER MANUAL BR 304 C Adv Kärcher
Saugen in Ecken (nur BR 30/4 C Adv)
Chairman of the Board of Management

S. Reiser
Director Regulatory Affairs & Certification
71364 Winnenden (Germany)
Tel.: +49 7195 14-0
Fax: +49 7195 14-2212
Winnenden, 2019/04/01
Technische Daten
Please read and comply with these original instructions prior
to the initial operation of your appliance and store them for later use or subsequent owners.
Contents
Safety instructions. EN 1
Function EN1
Proper use EN 1
Environmental protection . . . EN 2
Control elements. EN 2
Initial Start-Up EN 2
Operation EN2
Transport. EN 4
Storage EN4
Care and maintenance . EN 4
Faults EN 5
Accessories. EN 7
Accessories and Spare Parts. EN 7
Warranty EN 7
EU Declaration of Conformity. EN 8
Technical specifications . EN 8
Safety instructions
Before using the appliance for the first time, read and observe these operating instructions and the accompanying brochure:
Safety information for brush cleaning units, 5.956-251.0.
Hazard levels
△DANGER
Pointer to immediate danger, which leads to severe injuries or death.
WARNING
Pointer to a possibly dangerous situation, which can lead to severe injuries or death.
CAUTION
Pointer to a possibly dangerous situation, which can lead to minor injuries.
ATTENTION
Pointer to a possibly dangerous situation, which can lead to property damage.
Function
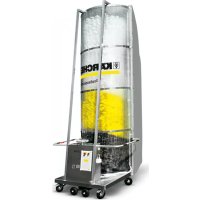
The scrubbing vacuum cleaner is used for the wet cleaning of level floors.
A working width of 300mm and a capacity of 4 l each of the fresh and dirt water reservoirs enable an effective cleaning of smaller surfaces.
The power supply operation allows a high capacity without a restriction of the working time.
Note:
The appliance can be equipped with various accessories depending on the cleaning task.
Please request our catalogue or visit us on the Internet at www.kaercher.com.
Proper use
Use this appliance only as directed in these operating instructions.
- This appliance is suited for the commercial use, e.g. in hotels, schools, hospitals, factories, shops, offices, and rental companies.
- The appliance may only be used for the cleaning of hard surfaces that are not sensitive to moisture and polishing operations.
The application temperature ranges from +5^ to +40^ . - The appliance is not suited for the cleaning of frozen grounds (e.g. in cold stores).
- The appliance may only be equipped with original accessories and spare parts.
- The appliance was designed for the cleaning of floors inside or of covered surfaces.
- The appliance is not intended for the cleaning of public traffic routes.
- The appliance is not suited for the use in potentially explosive environments.
Environmental protection

The packaging materials are recyclable. Please do not throw packaging in the domestic waste but pass it on for recycling.
Old units contain valuable recyclable materials. Batteries, oil and similar substances may not be released into the environment. Therefore please dispose of old units through suitable collection systems.
Electrical and electronic devices often contain components which could potentially pose a danger to human health and the environment if handled or disposed of incorrectly. However, these components are necessary for the proper operation of the device. Devices marked with this symbol must not be disposed of with regular household rubbish.
Notes about the ingredients (REACH)
You will find current information about the ingredients at:
www.kaercher.com/REACH
Control elements
Figure 1, see cover page
1 Handle
2 Water pump switch
3 Main switch for brushing/vacuuming operations
4 Carrying handle
5 Support bow in waste water tank
6 waste water tank
7 Fresh water tank
8 Fresh water tank lock
9 S i e v e
10 Cleaning head
11 Vacuum bar lift pedal
12 Release, park position
13 Suction tube
14 Suction tube connection
15 Suction nozzle (BR 30/4 C Adv only)
16 Brush roller
17 Vacuum bar
18 Unlocking button for the changeable brush
19 Cover waste water tank
20 Lock
21 Filling level display
22 Cable hook, rotating
23 Mains cable with mains plug
24 Suction tube handle (BR 30/4 C Adv only)
Symbols on the machine
| Suction bar in the suction position. |
| Water pump on/off |
Initial Start-Up
Figure 2, see cover page
Insert tube into the opening of the appliance at the end of the handle.
Press down and slide the handle into the appliance until it clicks.
Align the cable in the appliance and attach the lid as shown on the supplement sheet.
Operation
Fill fresh water reservoir
CAUTION
Risk of damage. Only use the recommended detergents. With other detergents, the operator bears the increased risk regarding the operational safety, risk of accident and reduced service life of the appliance. Only use detergents that are free of solvents, hydrochloric acid and hydrofluoric acid.
Follow the safety instructions for using detergents.
Note:
Do not use highly foaming detergents.
Observe the dosing notes.
Recommended detergents:
| Application Deter- | gent | Dosage |
| Everyday cleaner, al-kali-based | CA 50 C | 0,2 - 1,0% |
| Everyday cleaner, acidic, for sanitary applications, swimming pools, etc. Removes limestone deposits. | RM 738 | 0,5 - 3,0% |
| Wipe care EXTRA RM | 780 0,5 | - 2,0% |
| Floor base cleaner, acidic | RM 751 | 1,0 - 25% |
Remove the fresh water reservoir from the appliance.
Open the cover of the fresh water reservoir.
Pour in water/detergent mixture. Maximum temperature of the liquid 50^
Close the cover of the fresh water reservoir.
Insert the fresh water container into the appliance.
Establish mains contact
Swivel bottom cable hook upward and remove cable.
Check mains cable and plug for damage or breakage. Get them replaced only through customer service agent or an electrician.
Insert the mains plug into the socket.
Cleaning
△DANGER
Risk of injury on account of electric shock caused by a damaged mains connection. Do not let the mains connection come into contact with the rotating brushes.
ATTENTION
Risk of damage to the floor covering. The cleaning method for heavy soiling must only be used on floors suitable for this kind of cleaning.
Risk of damage to the fresh water pump if it runs dry because of empty fresh water tank. Monitor the filling level display and switch the water pump switch off if the fresh water tank is empty.
Normal soiling
Move the suction bar lift pedal to position ,suction off" (Fig. 3 - position "1/ ON", see inside front cover).
Press the park position release and swivel the handle toward the rear.
Set main switch for brush/vacuum operation to "1".
Activate the water pump switch.
Move the appliance over the surface to be cleaned.
Severe soiling
ATTENTION
Risk of damage to the floor covering. The cleaning method for heavy soiling must only be used on floors suitable for this kind of cleaning.
Move the vacuum bar lift pedal to position „do not suction off" (Fig. 3 - position "0/OFF" see inside front cover) and perform the cleaning as you would with normal soiling. The detergent liquid remains on the surface to be cleaned and has time to settle in.
Move the vacuum bar lift pedal to position "suction off" and reclean the surface.
Vacuuming in corners (BR 30/4 C Adv only)
Pull the suction tube out toward the top attach the suction nozzle and vacuum the dirt.
Remove the nozzle, replace the suction tube and insert handle.
Complete cleaning
Turn off the water pump switch.
Push the appliance a little further to vacuum up the remaining water.
Set main switch for brush/vacuum operation to "0".
Swivel the appliance handle forward and arrest in the park position.
Disconnect the main plug from the socket.
Emptying the waste Water tank
Note:
If the waste water tank is full, the float closes the suction channel. The suction operation is interrupted. Empty the waste water tank.
△WARNING
Please observe the local provisions regarding the wastewater treatment.
Turn off the appliance.
Position the appliance upright and arrest it in the park position.
Remove the fresh water reservoir from the appliance.
Swivel support bow downward and remove the waste water tank.
Lift the lock and remove the lid of the waste water tank.
Pour out dirt water.
The rinse the dirt water reservoir with clear water.
Replace the lid of the waste water tank and lock it.
Insert the waste water tank into the appliance.
Emptying the Fresh Water Reservoir
Remove the fresh water reservoir from the appliance.
Open the cover of the fresh water reservoir.
Pour out the cleaning liquid.
Close the cover of the fresh water reservoir.
Insert the fresh water container into the appliance.
Transport
CAUTION
Risk of personal injury or damage! Mind the weight of the appliance during transport.
Swivel the appliance handle forward and arrest in the park position.
Swivel the pushing handle backwards and push the appliance.
or
Lift appliance by the carrying handle and carry it.
When transporting in vehicles, secure the appliance according to the guidelines from slipping and tipping over.
Storage
CAUTION
Risk of personal injury or damage! Consider the weight of the appliance when storing it.
This appliance must only be stored in interior rooms.
Care and maintenance
△DANGER
Risk of injury by inadvertent startup of appliance and electrical shock.
Prior to all work on the appliance, switch off the appliance and pull the power plug.
ATTENTION
Risk of damage to the device on account of water leakage. Empty the waste water tank and the fresh water tank prior to performing maintenance tasks on the device.
Maintenance schedule
After the work
ATTENTION
Risk of damage. Do not sluice the appliance with water and do not use aggressive detergents.
Empty the waste water tank.
Clean the seals between the waste water tank and the appliance.
Empty the fresh water reservoir.
Rinse the appliance: Fill the fresh water reservoir with clear water (without detergent) and let the appliance run for one minute with the brush water supply turned on.
Empty the fresh water reservoir.
Clean the outside of the appliance with a damp cloth which has been soaked in mild detergent.
Clean the vacuum bar, check for wear and replace if required (see "Maintenance tasks").
Check the brush for wear and replace if required (see "Maintenance tasks").
Yearly
Have the prescribed safety inspection carried out by an electrician.
Maintenance Works
Replace the vacuum bar.
Note:
The vacuum bars are attached to the appliance with snaps and can simply be pulled off.
Move the suction bar lift pedal to position ,suction off" (Fig. 3 - position "1/ ON", see inside front cover).
Remove the fresh water reservoir.
Remove the waste water tank.
Lay the device on the reverse.
Pull off the vacuum bar downwards.
Insert the new vacuum bars and lock them into place.
Replacing the brush roller
Remove the fresh water reservoir.
Remove the waste water tank.
Lay the device on the reverse.
Press the release button for the brush roller and swivel the brush roller toward the bottom and pull it off the driver.
Place the new brush roller on the driver and lock into place on the opposite side.
Frost protection
In case of danger of frost:
Empty the fresh and dirt water reservoirs.
Store the appliance in a frost-protected room.
Faults
△DANGER
Risk of injury by inadvertent startup of appliance and electrical shock.
Prior to all work on the appliance, switch off the appliance and pull the power plug.
ATTENTION
Risk of damage to the device on account of water leakage. Empty the waste water tank and the fresh water tank prior to performing maintenance tasks on the device.
In case of faults that cannot be remedied using the table below please contact the customer service.
| Fault Remedy | |
| Appliance cannot be started | Check if the mains plug is connected. |
| Insufficient water quantity | Check fresh water level, refill tank if necessary. |
| Open the lock of the fresh water reservoir. If a vacuum is detected when the tank is opened, clean the ventilation valve in the lock of the fresh water reservoir. | |
| Clean the water distributor (see chapter "Cleaning the water distrib-utor"). | |
| Remove the fresh water tank and check the sieve for contamina-tion. If necessary, remove the sieve and clean it. | |
| Pull off the valve with filter on the fresh water reservoir (Fig. 4, see inside front cover) and rinse in lukewarm water. | |
| Fresh water reservoir drips when refilled | Pull off the valve with filter on the fresh water reservoir (Fig. 4, see inside front cover) and rinse in lukewarm water. |
| Insufficient vacuum performance | Empty the waste water tank. |
| Lock the waste water reservoir in place on the appliance. | |
| Clean the seals between waste water tank and cover and check for tightness, replace if required. | |
| Check the seals between the lid of the waste water tank and the appliance. Contact Customer Service if the seals are damaged. | |
| Check that all vacuum bars are locked into place in the cleaning head. | |
| Suction bar plugged, clean. | |
| Suction bar worn; exchange the front and rear suction bars. If both suction bars are worn, install new suction bars. | |
| Check that both suction tube parts are correctly attached to the suction tube connection. | |
| Check the suction tube and the suction channel in the cleaning head for obstruction and remove if necessary (see "Cleaning suction tube"). | |
| Check whether the cable behind the tanks has been routed flat and whether the included cover is attached. | |
| Insufficient cleaning result | Check the brush roller for wear, replace if required. |
| Brush does not turn | Check if foreign matters are blocking the brush roller; remove foreign matter if required. |
| Creaking sound, brush does not turn | Slip clutch was triggered. Switch off the appliance, check/clean the brush roller. |
Clean water distributor Clean suction tube
Take out the brush roller.
Pull the water distribution bar out of the brush tunnel (Fig. 5, see inside front cover).
Clean the irrigation channel and the opening in the water distribution bar under running water.
Remove the fresh water reservoir from the appliance.
Swivel support bow downward and remove the waste water tank.
Pull the suction tube connection out toward the rear of the appliance and swivel out both ends of the suction tube (Fig. 6, see inside front cover). The suction tube is separated and both ends are accessible for cleaning.
Pull the vacuum bar off toward the bottom, the suction channel in the cleaning head is accessible for cleaning (Fig. 7, see inside front cover).
Flush the suction hose and the suction channel with water or pull or push the obstruction out with a blunt object.
Accessories
| Accessories Description | Order number | |
| Roller brush, red | Universal brush for all floor coverings. | 4.762-428.0 |
| Roller brush, orange Special brush for textured floors such as safety tiles or grouts | 4.762-484.0 | |
| Roller brush, white Soft rush for sensitive floors and for polishing | 4.762-452.0 | |
| Roller brush, blue | Soft brush for deep cleaning of carpets | 4.762-499.0 |
| Microfibre roller Cleaning | brush made of microfibres with especially high cleaning performance, especially for fine stone tiles. | 4.762-453.0 |
| Spare suction lip | Made of natural rubber. 2 pieces required. | 4.777-320.0. |
| Spare suction lip, oil-resistant | For oil and grease contamination, such as in a kitchen or workshop. 2 pieces required. | 4.777-324.0 |
| Carpet cleaning kit Deep cleaning of textile surfaces. Consists of brush rollers, 2 suction bars, 1 l of detergent concentrate, 500 ml stain remover | 2.783-005.0 | |
Accessories and Spare Parts
Only use original accessories and spare parts, they ensure the safe and trouble-free operation of the device.
For information about accessories and spare parts, please visit www.kaercher.com.
Warranty
The warranty terms published by our competent sales company are applicable in each country. We will repair potential failures of your accessory within the warranty period free of charge, provided that such failure is caused by faulty material or defects in fabrication. In the event of a warranty claim please contact your dealer or the nearest authorized Customer Service center. Please submit the proof of purchase.
EU Declaration of Conformity
We hereby declare that the machine described below complies with the relevant basic safety and health requirements of the EU Directives, both in its basic design and construction as well as in the version put into circulation by us. This declaration shall cease to be valid if the machine is modified without our prior approval.
Product: Floor cleaner
Type: 1.783-xxx
Relevant EU Directives
2006/42/EC (+2009/127/EC)
2014/30/EU
Applied harmonized standards
EN 55014-1: 2006+A1: 2009+A2: 2011
EN 55014-2:2015
EN 60335-1
EN 60335-2-72
EN 61000-3-2: 2014
EN 61000-3-3:2013
EN 62233: 2008
Applied national standards
The signatories act on behalf of and with the authority of the company management.

Chairman of the Board of Management

S. Reiser
Director Regulatory Affairs & Certification
Documentation supervisor:
S. Reiser
Alfred Kärcher SE & Co. KG
71364 Winnenden (Germany)
Tel.: +49 7195 14-0
Fax: +49 7195 14-2212
Winnenden, 2019/04/01
Technical specifications
| Power | ||
| Nominal voltage V 220 | ..240 | |
| Frequency Hz 1~50/60 | ||
| Average power consumption | W | 820 |
| Protective class I | ||
| Type of protection IPX4 | ||
| Vacuuming | ||
| Cleaning power, air quantity | I/s 26 | |
| Cleaning power, negative pressure | kPa 13 | |
| Cleaning brush | ||
| Working width mm | 300 | |
| Brush diameter | mm | 60 |
| Brush speed | 1/min | 1450 |
| Dimensions and weights | ||
| Theoretical surface cleaning performance | m²/h | 200 |
| Fresh/waste water tank volume | I | 4 |
| Length x width x height | mm | 390 x 335 x 1180 |
| Transport weight (Adv) | kg | 12 (12,5) |
| Total weight (Adv) kg | 16 (16,5) | |
| Values determined as per EN 60335-2-72 | ||
| Hand-arm vibration value | m/s² | <2,5 |
| Uncertainty K | m/s² | 0,2 |
| Sound pressure level LpA | dB(A) | 72 |
| Uncertainty KpA | dB(A) | 1 |
| Sound power level LWA | dB(A) | 85 |
| Uncertainty KwA | dB(A) | 1 |

www.kaercher.com/REACH
2006/42/CE (+2009/127/CE)
2014/30/UE
Chairman of the Board of Management

S. Reiser
Director Regulatory Affairs & Certification
Responsible de la documentation :
S. Reiser
Alfred Kärcher SE & Co. KG
71364 Winnenden (Germany)
Tel.: +49 7195 14-0
Fax: +49 7195 14-2212
Winnenden, 2019/04/01
\section*{Caracteristiques techniques}
www.kaercher.com/REACH
2006/42/CE (+2009/127/CE)
2014/30/UE
Chairman of the Board of Management

S. Reiser
Director Regulatory Affairs & Certification
71364 Winnenden (Germany)
Tel.: +49 7195 14-0
Fax: +49 7195 14-2212
Winnenden, 2019/04/01
Dati tecnici
www.kaercher.com/REACH
Bedieningselementen
Schoonwatertank legen
Chairman of the Board of Management

S. Reiser
Director Regulatory Affairs & Certification
71364 Winnenden (Germany)
Tel.: +49 7195 14-0
Fax: +49 7195 14-2212
Winnenden, 2019/04/01
Technische gegevens
www.kaercher.com/REACH
Elementos de mando
Figura 1, vexe contraportada
2006/42/CE (+2009/127/CE)
2014/30/UE
Chairman of the Board of Management

S. Reiser
Director Regulatory Affairs & Certification
Responsible de documento:
S. Reiser
Alfred Kärcher SE & Co. KG
71364 Winnenden (Germany)
Tel.: +49 7195 14-0
Fax: +49 7195 14-2212
Winnenden, 2019/04/01
Datasétécnicos
www.kaercher.com/REACH
2006/42/CE (+2009/127/CE)
2014/30/UE

H.Jenner
Chairman of the Board of Management
S. Reiser
Director Regulatory Affairs & Certification
71364 Winnenden (Germany)
Tel.: +49 7195 14-0
Fax: +49 7195 14-2212
Winnenden, 2019/04/01
Dados技术和
www.kaercher.com/REACH
Betjeningeselementer
Fig 1, se omsgasside
1 Handtag
2 Afbryder vandpumper
3 Hovedafbryder børste-/sugedrift
4 Baeregreb
5 Baerebjole snavsevandstank
6 Snavsevandsbeholder
7 Ferskvandtank
8 Lag ferskvandtank
9 Siv
10 Rensehoved
11 Pedal "Lofte sugebjaelke"
12 Udløsning parkeringsstilling
13 Sugerør
14 Forbindelse suger
15 Sugedyse (kun BR 30/4 C Adv)
16 Børstevalse
Rense vandforderelen Rens sugeroret
2006/42/EF (+2009/127/EF)
2014/30/EU
Chairman of the Board of Management

S. Reiser
Director Regulatory Affairs & Certification
71364 Winnenden (Germany)
Tel.: +49 7195 14-0
Fax: +49 7195 14-2212
Winnenden, 2019/04/01
Tekniske data
Effekt
www.kaercher.com/REACH
Betjeningselementer
Bilde 1, se omsgassiden
1 Händtak
2 Bryter vannpumpe
3 Hovedbryter børste-/sugedrift
4 Baerehandtak
5 Baerebøyle bruktvannstank
6 Spillvannstank
7 Rentvannstank
8 Lås rentvannstank
9 Sil
10 Rengjøringshode
11 Pedal sugebomheving
12 Låsing parkeringsstilling
13 Sugerør
14 Forbindelse suger
15 Sugedyse (kun BR 30/4 C Adv)
16 Børstevalse
17 Sugebom
18 Laseknapp skiftebørste
19 Deksel spillvanntank
20 Lås
21 Fyllingsindikator
22 Kabelkroker, dreibare
23 Strömkabel med stöpsel
24 Händtak sugerör (kun BR 30/4 C Adv)
Symboler på maskinen
2006/42/EF (+2009/127/EF)
2014/30/EU

Chairman of the Board of Management

S. Reiser
Director Regulatory Affairs & Certification
71364 Winnenden (Germany)
Tel.: +49 7195 14-0
Fax: +49 7195 14-2212
Winnenden, 2019/04/01
Tekniske data
Effekt
www.kaercher.com/REACH
Reglage
Chairman of the Board of Management

S. Reiser
Director Regulatory Affairs & Certification
Dokumentationsbefullmaktigad:
S. Reiser
Alfred Kärcher SE & Co. KG
71364 Winnenden (Germany)
Tel.: +49 7195 14-0
Fax: +49 7195 14-2212
Winnenden, 2019/04/01
Tekniska data
Effekt
www.kaercher.com/REACH
Hallintalaitteet
Chairman of the Board of Management

S. Reiser
Director Regulatory Affairs & Certification
71364 Winnenden (Germany)
Tel.: +49 7195 14-0
Fax: +49 7195 14-2212
Winnenden, 2019/04/01
Tekniset tiedot
www.kaercher.com/REACH
Στοιχείαχειρισμόύ
Chairman of the Board of Management

S. Reiser
Director Regulatory Affairs & Certification
YTEUVOc Eyypaaw Tkunpiowcn:
S. Reiser
Alfred Kärcher SE & Co. KG
71364 Winnenden (Germany)
Tel.: +49 7195 14-0
Fax: +49 7195 14-2212
Winnenden, 2019/04/01
Texvika xapakntnpiOTIKa
www.kaercher.com/REACH
Kumanda elemanlari
Chairman of the Board of Management

S. Reiser
Director Regulatory Affairs & Certification
71364 Winnenden (Germany)
Tel.: +49 7195 14-0
Fax: +49 7195 14-2212
Winnenden, 2019/04/01
Teknik Bilgiler
Guc
CnpaunBaIte INx NO Hauemy kataJory nn nocTe Haaw caT B INHTepHete www.kaercher.com.
IcnoJb3OBaHne nO Ha3NaYeHnIO
IcnoJb3yInTe daHbIn np6Op nckIouHnTeJIbHO B COOTBETCTBm yKa3aHnMaM DaHHOpykoBOIDCTBaNo 3KcnIpyatauN.
-3TOT np6op npedHa3NaueH dIЯ npo- ceccnoHaJIbHOrO nCNoJIb3OBaHnI, T.e. B roCTnHnIax, shKoJax, 6OJIbHnIax, Ha npOMblIeHHbIX npeInpnIaTnx, B MaRa3nHax, oocax I B apeHdyembIX noMeuEHHx.
-He DoynycKaeTcN IsNoIb3OBAHnE npi6opa IJRA YNCTKN JKeCTKIN NOIOBbIX NOKpbITNI, YyBCTBNTeJIbHbIX K BO3DeIcTBIO BnI IN NOInpOBaHIO. DnaIaN0H pa6oueN TeMnepaTypbl coCTaBnAETOT +5^ DO +40^
MaTePnAn yNaKOBKn IOnIeJNt BToPnHOn npepa6oTke. Ipocb-6a He Bbl6paCbIBaTb yNaKOBky BMecTe CDOMaSHHMN OTXoJaMn, a cDaTb ee B nyHKT npneMa BToPnHOrO cbIpBra.
CTapbIe np6Opbl coepkaT
UeHHbIe nepepaTaBtBaembIe
MaTePnAJIbI, noJnxKaUne nepe-
Daue B nyHKTbI npEmKn BTOpuH
HO cbIpB. AkymyTAToPbI,
MacNo HnBIE NOO6HbIE MaTePnAJIbI He DOJxHbI NOnaDaTb B OKpykaOuSyo CpeDy. PoTOMy
MbI nPoCIM Bac cdaBaTb INyUTNI3OBaTb CTapbIe np6Opbl
Yepe3 COOTBeTCByIOUne CNCTeMblc6opa NoO6HbIX OTXODOB.
3JIeKTPnueckne n 3JIeKTPoHHbIe npn6Opbl
yacto copekataKOMnoHbI, KOtOpbl
pNI HeNPaBnIbHOM oBaPaeHNI INN He
HaIeXaIeYTuIN3aUIN pPeIcTAbJrOT
NOTEHuaJIbHyO ONaCHOCTb IJa IIODeN I
3KOJOrn. Tem He MeHee DaHbIe KOMnoH
HEo6XoDmbl IJa npaBnIbHO pa-
60TbI np6Opa. Pnp6Opbl, O6O3NaueHbIe
3TIM CnMBOJOM, 3aPpeSeHO yTuIN3nPoB
BaTB BMeCTe C 6bITOBbIM NTxODAMN.
Hnctpykun no npimeHeHIO KOMnoHeHTOB (REACH)
AkTyaIbHbIe CBeIeHnO KOMNoHEHTax npBVeIeHbI Ha Be6-y3Ie N0 CNeDyUoIeMy aIpecy:
www.kaercher.com/REACH
3JIeMeHTbI ynpaBJIeHnIa
Pnc. 1, cm. obopothyto ctopohy
1 P y q Ka
2 BbiknquateIb BOJHOrO Haocca
3「IaBbIi BbIKIOuTeIb "Pa6Ota co ⅢeTKaMn/pa6Ota BpeKIMe BCacbIBaHnra".
4 pykoTka JnH NoeHn np6opa
5XomyT dIpy noDBeckn pe3epByapa IJra3HOBIObl
6 Pe3epByap rpa3HOBdo
7 BaK uNCTOuBODJI
8БлokировkaбakaЧИСТОВьды
9 CeTuaTbI ΦnJIbTp
10 Moiouzni y3eJ
11 PedaIb noDbema BCacbBaIOx nHa-HOK
12 Pa36nokpOBka napkoBOUHO noNoXeHnA
13 BCacbBaIOUa Tpy6ka,
14 CoeHHeHne BCaCbBaIOUe Tpy6Kn
15 BcacbBaiouaa fopcyHka (ToIbko BR 30/4 C Adv)
16 8eToHbI BaJ
17 Bcabsbvaoua nlaactnka
18 De6IOKpyUOaJ KHOJa, CMeHna JTeKa
19 Kpbiuka pe3epByapa rpa3HOI BOdbI
20Блokировka
21 Yka3aTeNb ypoBnA
22 KpOuKn IJIa Ka6eJIa, BpaUaIOUncsca
23 CeTeBOI uHyp co wTeNCeJIbHOI BnI-KoI
24 Puyka BCacbIBaIOuSei Tpy6Kn (ToIbKO nnB R 30/4 C Adv)
CnmboJIbHaannapate
BcacbBaHne n3 yrnoB (ToNbko dny BR 30/4 C Adv)
→ BbItaunTb HaBepx BCacbIBaIOuTo py6ky n3 pyuKn, HadeTb BCacbIBaIOuOyUo φOpcyHky n npOn3BeCTn BCacblBaHne rpr3n.
YdaIITbΦopcyHky, NOMeCTIbHa Me- cTObBCaCtBaIOUTo Tpy6Ky 3aФnKcNpOBaTb pykY.
3aBepwnb ouncTk
→ BbIKIIOHTb BbIKIIOHTeJIeM BOJHOH HAcOC.
→ Nepemecntb npnbop eue pa3 Ha He-3HaunTeIbHoe pacCToHne n npOBecn BCacbIBAHne OCTaBWeJcra BObl.
YcTaHOBnTb NIOJoxKeHne "0" OCHOBHOro nepeKJIIOUaTeJIa "Pa6Ota co ⅢeTKaMn/ pa6Ota B peXIMe BCacCbIbAHN".
OTKnHyTb pyuKy Bnepei n 3aΦnKcnpoBaTb np6op B napKOBOHOM nOIOKeHHN.
BbTaUnte UTeNceIbHyIO BnIky n3 po-3eTKI.
YdaJIeHHe coDEpXmOro n3 pe3epByapa dIra rpa3HOB BODbl
Yka3aHHe:
Pn noHOM 6ake dIy rpa3HOB BObI NO- nIaBOK 3aKpbBaET BCacbIBaHcN KaHaI. PpoecC BCacbIBaHn IpepbBaetc. OnoPoxHNt b 6ak dIy rpa3HOB BObl.
△PENEYNPEXDEHNE
Coblaodaume MecmHbIe npednucnur no obaueHuO co cmoHybIMU bOdaMu.
→ BbIKHouHTe npu6op.
→Принонятб пибори 3aФИКсрOBaТ b erоВ napKOBOHOM ПОJOKEHIN.
BbHyTb pe3epByap dIy uNCToB OdbI n3 np6opa.
→ Πовернть Вииз Хомут Дпя pe3epByapa Дпя ряЗнов BODы И снгть pe3epByap.
→ ΠоДнЯТь 3amOK И снЯТь Крblшky pe3epByapa Дпя ГраЗнoi ВОдbl.
→ BbIITb rpa3HyO BDOy.
Pocne 3Toro npomOte pe3epByap nIra Tp3HOB BObI YnCToN BOIoN.
HaTeb KpbIuKy Ha pe3epByap dIra Tp3HOB BObl 3aΦNKCuPoBaTb ee.
BcTaBnTb pe3epByap dIra rpa3HOI BOdbI B aannapaT.
YdaJIeHne coIepXnMoRo n3 pe3epByapa dJa YnCToN BODbl
BbIHyTb pe3epByap IJIa YnCToN BOdBi n3 npnbopa.
OTKpbITb KpbIuKy pe3epByapa IJNA UNCTOIN BOIDJI.
→ BbIINrMoUyIO JxNdkOcTb.
3aKpbItb KpbIuKy pe3epByapa dny uNCTOJ BObl.
BctaBntb pe3epByap dJa YnCToB BoDbl B annapaT.
TpaHcNoptnpoBka
OCTOPOXHO
OnachocmbmpaMbU noBpeXdeHua!
Obpammb bHumahue Ha bec ycmpoucm-
ea npu mpaHcnpmupo6ke.
OTKInHyTb pyuKy BnpeiN 3aΦnKcnpoBaTb np6opBnapKOBOvHOM NOJoxeHN.
HaKIOHnTb Bn3 pykny n nepemecNTb np6op
BbICOKo nOdHЯTb npIbOp 3a pyKu npeHeCTn.
→Пипеськe annapaTВТрансорTHbIX cpeCTbax CNeДуET yuNTbIBaTb DeiCTByIO- lIe MeCTHbie rOcydapCTBeHHbIe HOpMbI, HanpaBJIeHHbIe Ha 3aUHTy OT cKoJIbXeHnI N OnpOKIdbIbAHnI.
XpaheHne
OCTOPOXHO
Onachocmbmpaembu nopekdeHua!
Obpammb eHumaHue Ha bec ycmpoucm- 6a npu xpaHeHu.
To yctpoCTBO pa3peaetcXpaHnTb TOIbKO BO BHyTpEHNX NOMeueHnX.
YxOДи TeXHnueckoe 06cIyXnBaHne
△ONACHOCTb
Onachocmb noyuueHua mpaembl om cnyuauHo 3anyuueHHo2o annapama u 3neKmpowoka.
Ipeod npoeedeHuem IIObix pa6om no o6cnykueaHuo ycmpoucmeo cneoyem bIKIOUumb u U38Ne4b WmencelbHyIO BUNKy u3 po3emku.
BHMHAHNE
Onachocmb nopejdeHua ycmpoucmea bimekaioue odou. Npeod npoeedeHuemexnueckozo obcnjkuabaun cneyem onopokHumb pe3epeyapbl dna 2p3-Hou u yucmo e0dbI.
Pa6oTbI NO TexHnueckomy 06cIyXnBaHnIO
3aMeHHTb BCacbIBaHOUne PJIaHNK
Yka3aHne:
BcacbBaIOUne pnaHKn npKpeNHeBk K np60py c nOMOu3aueJOK INX MOxHO JERKO CHrTb.
YcTaHOBnTb neaIb noIbema BCacblBaOuNX nlaHOK B NOIOKeHne "BCacblBaHne" (pnc. 3 - noIOKeHne "1/BKJI", cm. o6OpOTHyIO cToPOHy).
→ ChЯт b pe3epByap Дя чистоь Bodbl.
→ ChЯт b pe3epByap Дягязнов BOДы.
→ ΠολοχιTe npιδόρ ἀς δόκ.
BbITaHyTb BHN3 BCacBaIOUJIne nlaHKn.
BCTaBnTb HOBbie BCaCbIbAIOJIne INaH-KN IN 3aΦNKcnpOBaTb INX.
3aMeHnTb 贝ToHbI BaJI
→ ChЯт b pe3epByap Дя чистоь Bodbl.
→ ChЯТь pe3epByap Дпгязнов BOДыI.
→ Πολοχιτε πριδόρ ἀς δόκ.
→ HaxaTb Ha KhoNky pa36IoknpoBKn IeToUHOro BaJa, OTKInHyTb BaJ BHN3 N BblHyTb erO n3 3aXBaTHOrO yCTpOuCTBa.
HacaIbHOBbI 5eToHyBaJHa3aXBaTn3aΦHKcPObaTberoHa npOTNBOJIOxHOrCTOpOHe.
Cnctema 3aunTbI OT 3amep3aHna
Pn onacHocTu 3amOp03KOB:
→ CJNTb BOy n3 pe3epByapOB dIЯ ChTOI n rP3HOB BObl,
nocTaBnTb npnbop Ha xpaHeHne B He-3aMep3aIOUeM NOMEuEHN.
Helenaikn
△ONACHOCTb
Onachocmb noJyueHua mpaembl om cnyuauHo 3anyueHHo2o annapama u 3neKmpouoka.
Ipeod npoeedeHuem IIObix pa6om no o6cnykuaHU ycmpoucmeo cneoyem bkiuOumb u U38neubwmencelbHyu BuNKy u3 po3emku.
BHNMAHNE
Onachocmb nopejdeHua ycmpoucmba bimekaoue buo. Ipeod npoebeHuemexnuecko0o ocbnykuaHua cneyuem onopoxHumb pe3epeyapbl dna 2p3-Hou u yucmou bObl.
Пи HeиспраВноctяx,КOTOpьIe HeBO3-MOЖHO yCTpaHNTb C NOMOшьЮ dAnHOn Ta-6nцbl,CneDyET oBpaTHTbCЯВ cLnyK6by cepBnCHOrO 06cNyKINBaHnY.
OuHCTnTb BCacbIBaIOyU Tpy6ky
BbIHyTb pe3epByapДЯЧИСТОВODы n3 npn6opa.
Повернтув BHиЗ XOMуТ ДЯ pe3epByapa ДЯ Гязн ВОдbl И ChЯТb pe3epByap.
BbITaHyTb Ha3ad n3 npi6opa coeHHe Hne BcacbBaIOUe Tpy6Kn N BblDNHyTb o6a KOHua BCacbBaIOUe Tpy6Kn (pnc. 6, cm. obopOTHyO CTOpOHy). BcacbBaIOUa Tpy6ka pa3OMKHyTa n o6a KOHua DoCTyINHbI dIra IpoBeDeHnOuNCTKN.
Nocne TOrO, KaK BcAcbIbAIOUe PnAnHKn Tpy6kn 6yDyT BbITaHyTbI, MoXHO pOBOdntb OuNCTKy BCacbIBaIOUe Ro KaHaJa (pnc.7, cm. o6OpOTHyO CTOpOHy).
Промыть BCacbIBaIOUишlaHгИ BcaCbIBaIOUи KaHaI BODО ИИУдАNTb(BbITOKHyTb)Засор ппnomOUs Tyno- ro npedMeta.
PpHnHaJIeJXHOCTN
IpnHaJnEJXHOCTN 3anachbIe deTaJIIn
IcnoJb3yIte opnHaJIbHbIe npHaJdNeJx-HocTn 3aIpaCTn -ToIbKO OHI rapaHTnpyoT 6e3OJaChyIO 6ecnepeBoHyO pa-60Ty yCTpoiCTBa.
HnOpMaunO npHaJnxHOCTx 3a- nactx Bbl MoKeTe HaHTn Ha caTte www.kaercher.com.
TapaHTnA
B KaXdoI cTpaHe DeiCTByOT COOTBETCTBeHHO rapaHTnHbIe ycNoBnI, n3DaHHbIe yNoHOMOeHHoOpraHn3aCneE C6bItaHaWe IpoDyKuIN B daHNOI cTpaHE.Bo3MoXhIe HeNCnPaBHOCTn np6Opa B TeueHHe rapaHTnHOrO cPoka Mbl YcTpaHReM 6ecnIaTHO, ecnn npUHa 3akJIouaEcTcB DeΦeKTx MaTePnaIOB nIn Own6kax pnNn3rTOBLeHN. B cnYuae Bo3HnKHOBeHn
PpeTeH3n B TeueHne rapaHTnHoro Cpoka npocb6a obpaataBcra, Imeprn Ce6e Yek O NOKyIKe, B TOpROByO oprAHn3aunO, PpOdaBswUo Bam npnbop nN B 6bnxauyU yNoJHOMOeHHu CnyK6y cepBnCHoro o6CnyKuBaHna.
IaTa BbInycka OTo6paXaETcHa 3aBOndcko Ta6nueB 3aKOINPOBaHHOM BnE.
Pn 3OM OTdIbHbI cIcPbI nMeIOT cnedyuOe 3HaueHHe:
Пример: 30190
3 roD BbInycka
0 CTOnetHe BbInycka
1 DecaTnIeTne BbInycka
9 BTOPAIcnpa Mecaa BbInycka
0 nepBaIuOpa Mecaa BbInycka
TakIM 6pa3OM, B DaHHOM npimepe KOD 30190 03HaHaET daTy BbInycka 09/(2)013.
3aЯВленье o COOTBETCTBUN EU
HaCTOaM MbI 3aBnEeM, yTo HnKeyka-3aHbI np6Op nO CBOe KOHcEaH N KOHCTpyKuN, a TaKxe B OcyUeCTBLeEHOM N DONyUeHHOM HAMN K npOdaXe NCNoJIHeH N OTBeuaeT COOTBETCTByIOUm OCHOBHBIM Tpe6oBaHnM nO 6e3OpaCHocTn N 3DopOBbIO corlacho DnpeKTnBam EU. Ppi BHeceHN m3MeHeH, He corlaCoBAHHbIX C HAMN, DaHHoe 3aYBneHne TepReT CBOIO cnJy.
PpOdyKT OUHCTnTeJIb NOJa
Tun: 1.783-xxx
OchOBHbIe DnpeKTHBbI EU
2006/42/EC (+2009/127/EC)
2014/30/EU
Chairman of the Board of Management

S. Reiser
Director Regulatory Affairs & Certification
YIIOHOMOeHHbI COtpdHnK NO BeDeHNIO DOKyMeHToo6opota:
S. Reiser
Alfred Kärcher SE & Co. KG
71364 Winnenden (Germany)
Tel.: +49 7195 14-0
Fax: +49 7195 14-2212
Winnenden, 2019/04/01
TexHnueckne daHHbIe
www.kaercher.com/REACH
Kezelési elementek
Chairman of the Board of Management
S. Reiser
Director Regulatory Affairs & Certification
71364 Winnenden (Germany)
Tel.: +49 7195 14-0
Fax: +49 7195 14-2212
Winnenden, 2019/04/01
Muszaki adatok
www.kaercher.com/REACH
Ovládací prvky
2006/42/ES (+2009/127/ES)
2014/30/EU
Chairman of the Board of Management

S. Reiser
Director Regulatory Affairs & Certification
Zplnomocnéná osoba pro sestaveni dokumentace:
S. Reiser
Alfred Kärcher SE & Co. KG
71364 Winnenden (Germany)
Tel.: +49 7195 14-0
Fax: +49 7195 14-2212
Winnenden, 2019/04/01
Technické udaje
www.kaercher.com/REACH
Upravljalni elementi
Zadevne directives EU:
2006/42/ES (+2009/127/ES)
2014/30/EU
Chairman of the Board of Management

S. Reiser
Director Regulatory Affairs & Certification
71364 Winnenden (Germany)
Tel.: +49 7195 14-0
Fax: +49 7195 14-2212
Winnenden, 2019/04/01
Tehnični podatki
www.kaercher.com/REACH
Elementy obslugi
2006/42/WE (+2009/127/WE)
2014/30/UE
Chairman of the Board of Management

S. Reiser
Director Regulatory Affairs & Certification
Administrator dokumentaci: S. Reiser
Alfred Kärcher SE & Co. KG
71364 Winnenden (Germany)
Tel.: +49 7195 14-0
Fax: +49 7195 14-2212
Winnenden, 2019/04/01
Dane techniczne
Moc
www.kaercher.com/REACH
Elemente de operare
Directive UE respectate:
2006/42/CE (+2009/127/CE)
2014/30/UE
Norme armonizate utilizezate:
EN 55014-1: 2006+A1: 2009+A2: 2011
EN 55014-2: 2015
EN 60335-1
EN 60335-2-72
EN 61000-3-2: 2014
EN 61000-3-3:2013
EN 62233: 2008
Norme de aplicare nationale:
Chairman of the Board of Management

S. Reiser
Director Regulatory Affairs & Certification
71364 Winnenden (Germany)
Tel.: +49 7195 14-0
Fax: +49 7195 14-2212
Winnenden, 2019/04/01
Date tehnice
www.kaercher.com/REACH
Ovladacie privky
2006/42/ES (+2009/127/ES)
2014/30/EU
Uplatnované harmonizovane normy:
EN 55014-1: 2006+A1: 2009+A2: 2011
EN 55014-2: 2015
EN 60335-1
EN 60335-2-72
EN 61000-3-2: 2014
EN 61000-3-3:2013
EN 62233: 2008
Chairman of the Board of Management

S. Reiser
Director Regulatory Affairs & Certification
71364 Winnenden (Germany)
Tel.: +49 7195 14-0
Fax: +49 7195 14-2212
Winnenden, 2019/04/01
Technické udaje
www.kaercher.com/REACH
Komandni elementi
Slika 1, vidi ovoj
1 Rukohvat
2 Prekidač pumpe za vodu
3 Glavna sklopka za rad Četki i usisavanje
4 Rukohvat
5 Kuka za noosenje spremnika prljave vode
6 Spremnik prljave vode
7 Spremnik svjeze vode
8 Zatvarač spremnika svježe vode
9 Mrežica
10 Blok Čistica
11 Papučica dizača usisnih konzola
12 Bravica za parkirni položaj
13 Usisna cijev
14 Spoj usisne cijevi
15 Usisni nastavak (samo BR 30/4 C Adv)
16 Valjkasta Četka
17 Usisna konzola
18 gumb za odglavljivanje, zamjenska Četka
19 Poklopac spremnika prljave vode
20 Zatvarač
21 Pokazivač napunjenosti
22 Okretna kukica za kvačenje kabela
23 Strujni kabel sa strujnim utikačem
24 Rucica usisne cijevi (samo BR 30/4 C Adv)
Simboli na aparatu
2006/42/EZ (+2009/127/EZ)
2014/30/EU
Primijenjene uskladene norme:
EN 55014-1: 2006+A1: 2009+A2: 2011
EN 55014-2: 2015
EN 60335-1
EN 60335-2-72
EN 61000-3-2: 2014
EN 61000-3-3:2013
EN 62233: 2008
Primijenjeni nacionalni standardi:
Chairman of the Board of Management

S. Reiser
Director Regulatory Affairs & Certification
71364 Winnenden (Germany)
Tel.: +49 7195 14-0
Fax: +49 7195 14-2212
Winnenden, 2019/04/01
Tehnicki podaci
Snaga
| Nazivni napon V 220...240 | ||
| Frekvencija Hz 1~ 50/60 | ||
| Prosječna potrošnja energije | W | 820 |
| Klasa zašite I | ||
| Zašita IPX4 | ||
| Usisivanje | ||
| Snaga usisivanja, protok zraka | I/s 26 | |
| Snaga usisivanja, podtlak | kPa 13 | |
| Četka za Čišćenje | ||
| Radna širina mm 300 | ||
| Promjer Četki mm 60 | ||
| Broj okretaja Četki 1/mi h 1450 | ||
| Dimenzije i težine | ||
| Teoretski povrsinski učinak | m2/h | 200 |
| Zapremnina spremini-ka svježe/prljave vode | I | 4 |
| Duljina x širina x visina | mm | 390 x 335 x 1180 |
| Transportna težina (Adv) | kg | 12 (12,5) |
| Ukupna težina (Adv) | kg | 16 (16,5) |
| Utvržene vrijednosti prema EN 60335-2-72 | ||
| Vrijednost vibracije na ruci | m/s2 | <2,5 |
| Nepouzdanost K m/s | 2 | 0,2 |
| Razina zvučnog tlaka LpA | dB(A) | 72 |
| Nepouzdanost KpA | dB(A) | 1 |
| Razina zvučne snage LwA | dB(A) | 85 |
| Nepouzdanost KwA | dB(A) | 1 |

Pre prve upotrebe Vaseg uredaja procitajte ove originalno
www.kaercher.com/REACH
Komandni elementi
Slika 1, vidi omot
1 Ručka
2 Prekidač pumpe za vodu
3 Glavni prekidač za rad Četki i usisavanje
4 Ručka za noosenje
5 Kuka za noosenje rezervaora za prljavu vodu
6 Rezervoor prljave vode
7 Rezervoor za svežu vodu
8 Zatvarač rezervaora sveže vode
9 Mrežica
10 Blok Čistáča
11 Papučica dizača usisnih konzola
12 Bravica za parkirni položaj
13 Usisna cev
14 Spoj usisne cevi
15 Usisni nastavak (samo BR 30/4 C Adv)
16 Valjkastačetka
17 Usisna konzola
18 dugme za odglavljivanje, rezervna Četka
19 Poklopac rezervaora za prljavu vodu
20 Zatvarač
21 Indikator napunjenosti
22 Obrtne kukice za kaçenje kabla
23 Strujni kabl sa utikačem
24 Ručka usisne cevi (samo BR 30/4 C Adv)
Simboli na aparatu

Usisni stub u položaju za usisavanje.

2006/42/EZ (+2009/127/EZ)
2014/30/EU
Primenjene uskladene norme:
EN 55014-1: 2006+A1: 2009+A2: 2011
EN 55014-2: 2015
EN 60335-1
EN 60335-2-72
EN 61000-3-2: 2014
EN 61000-3-3:2013
EN 62233: 2008
Chairman of the Board of Management

S. Reiser
Director Regulatory Affairs & Certification
71364 Winnenden (Germany)
Tel.: +49 7195 14-0
Fax: +49 7195 14-2212
Winnenden, 2019/04/01
Tehnicki podaci
Snaga
| Nominalni napon V 220 | ...240 | |
| Frekvencija Hz 1~ 50/60 | 0 | |
| Prosečna potrošnja energije | W | 820 |
| Klasa zašite I | ||
| Stepen zašite IPX4 | ||
| Usisivanje | ||
| Snaga usisavanja, protok vazduha | I/s 26 | |
| Snaga usisavanja, podpritsak | kPa 13 | |
| Četka za Čišćenje | ||
| Radna širina mm 300 | ||
| Prečnik Četki | mm | 60 |
| Broj obrtaja Četki | 1/min | 1450 |
| Dimenzije i težine | ||
| Teoretski površinski učinak | m2/h | 200 |
| Zapremina rezervaara sveže/prljave vode | I | 4 |
| Dužina x širina x visina | mm | 390 x 335 x 1180 |
| Transportna težina (Adv) | kg | 12 (12,5) |
| Ukupna težina (Adv) | kg | 16 (16,5) |
| Izračunate vrednosti prema EN 60335-2-72 | ||
| Vrednost vibracije na ruci | m/s2 | <2,5 |
| Nepouzdanost K m/s | 2 | 0,2 |
| Nivo zvučnog pritiska LpA | dB(A) | 72 |
| Nepouzdanost KpA | dB(A) | 1 |
| Nivo zvučne snage LwA | dB(A) | 85 |
| Nepouzdanost KwA | dB(A) | 1 |

Ppei nIbPBoTo n3nOJI3BaHe Ha Bauny ypei npoyeTeTe ToBa
opuHaHNo HNCTpyKcyra 3a pa6oTa, DeiCTBaIte Cnopei Hero n rO 3ana3eTe 3a IIO-KbCHO N3PON3BaHe IIN 3a CNeDBAU npTEkAteI.
CbDbpxaHne
YkaHna 3a 6e3onacHocT...BG1
Функця BG1
YnOTope6a no npEHa3NaueHne BG 1
Ona3BaHe Ha okolHaTa cpea BG 2
ObnykBaun eJeMeHTn...BG2
PbBO npckane B eKcnnoata- 2B
Ecknoataua. BG3
TpaHcnpT. BG4
CbxaHHe BG5
PnKn nOdpbXka BG 5
Pobpei BG6
PpHaIeJxHocTn BG8
PnHaIeKHOCTn np3epBHN 7aactn. BG8
TapaHua BG8
ECДeKnapaun3a cBoTBETCTBnE. BG9
TexHnueckn daHHN .BG9
Yka3aHna 3a 6e30nacHOCT
Ipei Da ekcnloaTnpate ypea 3a nbpBn
PiB, npoTeTe n cb6nOdaBaIte HactO
raTO OyNbTbaHe 3a yNoTppe6a n npInIoKe
HaTa 6poUpya ,Yka3aHna 3a 6e3OnacHOCT
3a ypei, noocTbauC qETKn
5.956-251.0
CTeNeHn Ha onaCHOCT
ONACHOCT
Yka3aHue 3a HenocpeDcMbeHo apo3raua onachocm, kOmo bodu do mexku melecHu HapaHaeHua uNu do cMbpm.
△PENEYNPEXDEHNE
Yka3aHue 3a 6b3MOxHa onacha cumya- uja, KoMo MoKe da doBeDe do meKku meLechu HapaHraBuHu unu do CmbpM.
△PENEIA3JINBOCT
Yka3aHue 3a 8b3MOxHa onacha cumya- uja, Kjmo MoKe da doBeDe do Jeku Ha- paHraHua.
BHMHAHNE
Yka3aHue 3a 6b3MoXHa onacha cumya- uera, kOmo MoKe da doeede do MamepuanHu wemu.
Функця
TbpkaaTa n3cMyKbaaMaunHa ce n3- NOJ3Ba 3a MOKpo NocCTBaHe Ha paBn noDoBe.
Pa6oTHaTa ⅢnHa OT 300 MM N BmecTINMOCTTa Ha pe3epBOapa 3a YnCTa N MpbCHA BOda OT CbOTBeTHO 4 J N03BOJRABaT epeK-TNBHO NOUHCTBaHe Ha MaJIKN IOBbpxHO-CTN.
3aDéηCTBaHETOBMpexKaTa DaBa Bb3MOX-HOCT 3a BnCOKa PpON3BOJNTeJIHOCT 6e3 OρpaHηUeHηne Ha paδθHOTOBpeMe.
YkaHne:
BcbotBeTcBHe cbc 3aauataHa nouNCBaHe ypeDbT MoKe da 6bDe o6OpyDbH Cpa3nUHN npHaAnEeKHOCTN.
NonTaIte 3a HaunKaTaNr Hn Hn NoCetTe B INTEpHET Ha aDpec www.kaercher.com.
YnoTpe6a no npedHa3NaueHne
I3noI3BaIte To3n ypeI cAmO B CbOTBETCTBHe cbc 3aJaunTe B HactoTo YnbTBAHe 3a EKcNlOaTaun.
-To3n ypeE e roJeH 3a npocecnoHaJNa hyoTpe6a, Hanp. B XOTeN, yUHInu, 6oHNu, fapRn, mara3HH, oFncn I NOMeueHna PoD Haem.
- YpeIbT MoKe Da Ce I3NoJ3Ba CaMo 3a NouchTbaHe Ha He YyBCTBNTeJHn KbM BnaRa e He YyBCTBNTeJHn KbM NOInpa-He TBbpN IOBbpXHOCTn. TempeatypHnT O6XbAT Ha npInIoJxHne e MeKdy +5^ n +40^
- YpeIbT He e IooXoJa, 3a NoocCTBaHe Ha 3aMpb3HaJI N IOObE (HaIp. B XJaIINH NOMeUeHn).
- YpeIbT MoKe Da ce obOpyIbA cAmO c OpiuHaJIHn PruHaIeJexKHOCTN I pe3epBHN YactN.
- YpeIbT e pa3pa6oTeH 3a NOUcCTBaHe Ha IIOIOBE BbB BbTpEHH NpOcTpaHCTBa peCn. Ha NOKPITN NOBbpxHOCTN.
- YpeIbT He e InpeIHa3HaueH 3a NOuNCTBaHe Ha o6IecTBeHn TpaHCnOpTHn Pb-TnIua.
- YpeIbT He e IooXoJa3a npInIoKeHne B 3acTpaweHn OTeKcnIO3nO6-KpbXeHn.
www.kaercher.com/REACH
06cnyxbauni eIemeHTN
Фигура 1, ВикTe CTpaHnцaТа Ha КорицaТa.
PnKIOUbaHe Ha NOuNCTBaHcTeO
I3KJIIOUeTe npeKbCBAuHa BOHaTa NOMna.
Прдьлжete Да 6утate ypeda oоемалko,За Да ИЗСмчete OCTaHaIaTаВODa.
NocTaBete rnaBnna npeKbcBauch Pexm Ha yetKaHe/BCmyKbaHe Ha ,0".
3aBbptTe DpbKkata Hanpei n KcnpaIte B noIOXeHne npn napKnpaHe.
→ ɪəBaʌdTe Σeɪncεŋa OT KɔHtɑkTa.
I3npa3BaHe Ha pe3epBoapa 3a MpbchA Boda
Yka3aHne:
Pn nIbJeH pe3epBoap 3a Mpbcha Boda
NoIIaBbKbT 3aTbapr CMyKaTeHnra KaHaI.
N3cMysKBaHeTo ce npekbcBa. N3npa3HeTe
pe3epBoapa 3a Mpbcha Boda.
△PENEYNPEXDEHNE
Ja ce cna3eam mecHume pa3npope6u 3a pa6oma c omnaadHu bodu.
→ N3KJIIOUeTe ypeHa.
→ИЗправete урета и го Фиксанту в положене пи napкupahe.
→ Cbanepe3epBoapa 3a YnCTa BOda OT ypeDa.
3aBbptTe DpbkkaTa Ha pe3epBoapa 3a MpbchA BOda HApOny N CbaTe pe3epBoapa 3a MpbchA BOda.
Повдигнеле зakончankаи CBaileTe Ka-nakaHa pe3epBoapa 3a Мрсна Вда.
I3JIeIteMpbcHaTaBoDa.
HaKpape3epBoapbT 3a Mpbcha Boda da ce n3PnakHe c YnCTa BODa.
NocTaBeTe KaNaKa Bbpype3epBoapa 3a MpbcHa BOda n ro QHKcapaIte.
Пoctabete pe3epBoapa 3a Мрьсан BOДаВуpeДa.
CbxaHHeHTo Ha To3n ypeJ e n03BOJeHo cMo BbB BbTpEHH NOMEeHnJ.
PnXn n PnOaPbXka
ONACHOCT
Onachocm om hapaHbaHe npadu He npedHaMepeHo nomeaJn u yped u eJekmpueecku ydap.
Ipeu ecuku deu hocmu no ypda moa da ce u3knouu da ce u3baDu uencena.
BHUMAHNE
Onacnocm om ypekdahe 3a ype da npadu u3muaua boda. Ppedu deu Hocmu nooopbckama no ype da u3npa3Heme pe3ep6oapume 3a Mpbcha u 3a Yucma boda.
PnaH no noDpBxka
Cnepa6oTa
BHIMAHHE
Onachocm om yepexkahe. He npbckaume ypeda c eoda u He u3non3eaume aapeueHu noucmeau npenapamu.
→ N3npa3BaHe Ha pe3epBOap MpbchA BOda.
Почистеуньтэнята мжду pe-3ервога за мрбса Вда и урEDA.
→ИзпраЗнеTppe3epBoapa 3aЧиста BOДа
I3nIaKBaHe Ha ypeHa: HanbIHeTe pe-3epBoapa 3a YnCTa B0da C YnCTa B0da (6e3 nouchTbau npenapat) n pa6oTeC ypeDa eHa MNHyTa C BKIOueHo NO-daBaHe Ha B0da KbM YeTKITE.
→ИзпраЗнеTe pe3epBoapa 3a чиста BOda
YpeIbT Da ce NOUcTH OTBH C BnaJxEh, HATONEH B MEka NOpuCTBaUa Jyra napuaI.
→ПоунICTeTeJIeHTa3acMyKBaHe,пpoBepeTe 3aИЗHOCBaHeиСмeHETeПри He-OBxOДIMoCT(BIXTe,ДeйHOCTn NO ПОДдрьЖКaTa").
Повераянтуета 3a n3HOCbaHe, npn Heo6xOIMocTЯ cmeHЯTe (BIXTe "Дeино NO NOIDpBjKkata").
ExeroDHO
CmraHa Ha JeHtA 3acMyKbaHe
Yka3aHne:
JIeHTn 3aCMyKBaHe ce 3aKpenT Ha ypeDa c npyKHeH 3aTBOp N MORa TnpocTo Da ce N3DbpNaT.
Ппемecтete петанноюганeto Ha JIeHTa 3acMyKBaHe B NOLOXKeHne "n3cmykBaHe" (ФИR.3 - noLoXeHne ,1/ ON", BIXTe cTpaHncaTa Ha KopucaTa).
→ CbaIeTe pe3epBoapa 3a YnCTa BOda.
→ CbaIepe3epBoapa 3a MpbchA BOda.
YpeJa Da ce noJoxn HactpaHn.
→ ɪЗbaɪdTe Haɪɔŋy JænTa 3aÇmYKbaHe.
NocTaBeTe HOBaJIeHTa 3acMyKBaHe nЯФNKcnpaIte.
CmeHeteBaJkaCyeTka
→ CbaIeTe pe3epBoapa 3a YnCTa BOda.
→ CbaIepe3epBoapa 3a MpbchA BOda.
YpeJa Da ce noJoxn HacTpaHn.
→ПиTNCHeTe KOnYeTo 3a De6JIOKInpaHe Ha BaJIka Ha YeTKaTa, 3aBbPTeTeЯ HaДOLny IЯ CBaIeTe OT MAcTOTO Ha 3axBa- UaHe.
NocTaBeTe HOB BaIaK Ha YeTKaTHa MxCTOTO Ha 3axBaUaHe I rO fNkCnPaIte Ha npOTuBONoJoxHata CtpaHa.
PpeDna3BaHe oT 3aMpb3BaHe
Pn onaCHOCT OT 3ampb3BaHe:
I3neIte pe3epBoapnte 3a uNCTata N 3a Mpbchata B0da.
ПoctabeTe ypeDa B 3aunTeHO OT 3amPb3BaHe NOMEueHne.
Повсян
ONACHOCT
Onachocm om hapaHrahe nopadu He npedHamepeHo nomeeJau yped u eJekmpueeku yap.
Ipeu ecuku deu Hocmu no ypda moa da ce u3knouu da ce u3adu uencena.
BHIMAHNE
Onachocm om ypejdahe 3a ypea nopadu u3muaasa boda. Ppeu deHocmu no nodpbkama no ypea u3npa3heme pe-3epeoapume 3a Mpbcha u 3a Yucma boda. Prn nobpei, konTO He morat da 6bdaT otctpaHEn C NOMOHTa Ha Hactoata Ta6nua, NOBKAte cepBn3a.
| Helen3npaBnocT OToCTpA HЯBaHe | |
| Уретьт He може за сестура П探测ete Ддп e ВКлочен сцени. | |
| Недостатуно коли-чесво на вodаТДа ceПробери НИВОTO Ha ChIstа ТА ВODа, pri NeobхODIMOCТ Да с.donьлн Pe3eRBOapa. | |
| ОТьоре Зakончалкata Ha pe3eRBOapa 3a ChIstа ВODа. Ако priOTВарянeto ce установи, чь B pe3eRBOapa Има ВakуМ, ТразБаДа ce Рочисти BeHTиla 3a obe3Bb3dUшаванe B 3akONчалкata Nape3eRBOapa 3a ChIstа ВODa. | |
| Почисте ВODOPa3PpeIeNITeЯ (ВИХTe „Почистванe Ha ВODopa3PpeIeNITeЯ"). | |
| Сваletе pe3eRBOapa 3a ChIstа ВODa и探测ete цIkata 3a 3a-MьрсяВаня. Pri hyжda CBalte Te cEdkata и я Рочистe. | |
| ИЗваде ТЕ ВENTILA C ФиЛТьра OT pe3eRBOapa 3a ChIstа ВODa (Фиг. 4, ВИХTe CTpaHATA Na KОPIцatura) и ГИЗПлakнeTe B XладkaВODa. | |
| Релеварьт за чи-sta ВODа кани пriи дo-niVBaHe | |
| ИЗваде ТЕ ВENTILA C ФиЛТьра OT pe3eRBOapa 3a ChIstа ВODa (Фиг. 4, ВИХTe CTpaHATA Na KОPIцatura) и ГИЗПлakнeTe B XладkaВODa. | |
| Небостаюною ност на пою ност Ha ИЗмУКВанe | Изразовны на peз扼вогор Мрьсни ВODа. |
| Фикши рaite peз扼вогор за мрьсни ВODа в урета. | |
| Да се поисяг улътэнята мжду peз扼вогор за мрьсни ВODа и калaka,да се поверят захерmetиуност,при необхочи- мост за се смени. | |
| Поверete улътэнята мжду калaka на peз扼вогор за mpьсни ВODа и урета.При поvereни улътэня поърсete сервиза. | |
| Поверete,дан лentesи засмУКВанe са Фикши рани в поисва- шата галва. | |
| Лента засмУКВанe e зашина, поис-teе. | |
| Лента засмУКВанe са ИЗонецни,размене пedingи пedingи засмУКВанe. Ако и дve-teе лentesи засмУКВанe са ИЗонец, поставе тюн ЗасмУКВанe. | |
| Поверete,дан чastITE на BCмУКatel徳а Трьба са CBьрзанi copektно с BCмУКatel徳а Трьбa. | |
| Поверete BCмУКatel徳а Трьбa и BCmUKatel徳яkanal в по- чесвацata галва 3a зашиваня,при необх.отстаре за- пшavenята (Вижte "Почистваи на BCмУКatel徳а Трьбa"). | |
| Поверete,дан кабелт захегвогор e поожен Кьм пю- ската систара и дал e постavenи пооженп可靠. | |
| Небостаюною ТAT OT поисваNETO | Валая на чекatingа за се повери за ИЗон�саге,при необхочи- мост за се смени. |
| Чекatinga He se Вьрtni | Поверete,дан чужди тewsе на са блokиралы валая на чек- ta,prnizneobxodimoc't Г остраhe. |
| Сьрцашшum,чetedа- Та He se Вьрtni | Пььзашлгст се с蜱синтел се e заадиства.Да се ИЗлочи уреда,да се повери/почист валая на чекatinga. |
NouchTbaHe Ha BODopa3npedeJInteJIa
→ CbaIeTe BaIIaKa Ha YeTKaTa.
→ИЗва对接е Лаисна Т ha BODopa3npedeЛпгельВтунela HaЧткata (Фиг.5,ВижTe CTpaHATA Ha KOpucaTа).
NOnCTeTe HAnOnTeJIHHaKaHaJI N OTBOpHTe BJaIChaTa Ha BOJOpa3PpeJeJIInTEJI NOI TeUaUa BOJa.
PpHnHaIeJXHOCTN pe3epBHN YactN
I3noJ3BaIte cAmO opuHaJIHn akceCoapn I opuHaJIHn pe3epBHN qactn, nTo3n Naun HocnpyraTe 6e3oNaChata n6e3npo6IemHa ekCnloaTaun Ha ypeDa. Moxete Da hamepTe uHΦopMaun 3a akceCoapn I pe3epBHN qactn Ha www.kaercher.com.
TapaHcna
BbB BcKa CtpaHa ca BaNnHn N3daDeHN Te OT OToPn3nPaHn Hn DnCTpn6yTop raPahCOnHn YcNoBn. EBeHTyaHn NOBpeDn Ha BaUnTe npNaAdJexKHOCTn igeOTCTpaHm B pAMKITE Ha rapaHcNoHnra CpOK 6e3nPaTHo, aKO CE Kacae 3a DepeKT B MaTepnaIInTe nnn Pnp Ipon3BOdCTBO. B cnyuay, Ye Tp86Ba Da npedABte npabOTO cn Ha n3no3BaHe Ha rapaHcNca Ce o6bpHete KbM CneuaJIIN3nPaHata TbpROBcKa Mpeka nn KbM Na-6n3KnBn OTOpn3napn cepBn3, KaTO npedCTaBnTE n DokyMeHTnte 3a NOKynkata.
ECДeКларацnia 3a
CbotBetCTBne
C HactoIto DeKnapaMe, Ye cHTnpaHaTa NO-DOJy MaunHa CbOTBcTcBa N0 KOHcEPln I KOHCTpyKua, KaTO I NO HaunHa IPOIN3BOcTBo, PpNJarAH OT Hac, Ha CbOTBcTHIne OCHOBN N3NCKBaHNr 3a TexHuecka 6e3ONaChocr 6e3BpeDHOCT Ha DnpeKtNBte Ha EC. Ppi npomEnr Ha MaunHaTa, KOnTO He ca CbINaCyBaHN c Hac, HactoMaTa DeKnapaUra rybn BaNNdHOCT.
PpOdyKT: Ypei 3a nooNCTBaHe Ha nOi
Tun: 1.783-xxx
Hamnpaun npinloxeHne DnpeKtNBn Ha EC:
2006/42/EO (+2009/127/EO)
2014/30/EC
Hamepnil npiloxeHne xapMOHN3npaHN cTaHdaptN:
EN 55014-1: 2006+A1: 2009+A2: 2011
EN 55014-2: 2015
EN 60335-1
EN 60335-2-72
EN 61000-3-2: 2014
EN 61000-3-3: 2013
EN 62233: 2008
PpHIOXIMNaHNoHaJIHn cTaHapTn
IopnncBaUnte Jnca DeiCTBaT OT IMeTO n KaTO PbHOMOuHnCi Ha ynpaBHTJHnOpraH.

H.Jenner
Chairman of the Board of Management

S. Reiser
Director Regulatory Affairs & Certification
ПьнHomошнК NOДOKум entaцята:
S. Reiser
Alfred Kärcher SE & Co. KG
71364 Winnenden (Germany)
Tel.: +49 7195 14-0
Fax: +49 7195 14-2212
TexHnueckn daHHN
| Мошист | ||
| Номинално наразоже- нце | V 220... | 240 |
| Чебта Hz 1~50/60 | ||
| Среда koючимерана мошист | W | 820 |
| Клас зашина I | ||
| Вид зашина IPX4 | ||
| Изсаньане | ||
| СMukaTeлна моши- ност, колочецво на Вьздуха | Л/сек 26 | |
| СMukaTeлна моши- нost, Вakуш | kPa 13 | |
| Почистваши чека | ||
| Работнаши рина ММ 300 | ||
| Диаметър на чеки-te | ММ 60 | |
| Овороти на чеки-te | 1/MIN | 1450 |
| Мерки и тergа | ||
| Teоретica по вьрх- ностна мошиrost | m²/h | 200 |
| Обem pezeервоар чис- Та/ мрьсна ВODа | Л | 4 |
| Дылжina xшиочини х Вincочиа | ММ 390 | x 335 x 1180 |
| Тergлри при Трапсөрт (Adv) | кг | 12 (12,5) |
| Овцио тergло (Adv) | kg 16 (16,5) | |
| Установени Storianstси сөлүхэн EN 60335-2-72 | ||
| Стойост на Вибра- ци nt e В obлacrтta на Длайт a - рькатa | M/cesk² | <2,5 |
| Hecinurgocst K | M/cesk² | 0,2 |
| Нимо на 3Byka LpA | dB(A) | 72 |
| HeystoyuBoCT KpA | dB(A) | 1 |
| Нимо на 3BykoBa moшост LWA | dB(A) | 85 |
| HeystoyuBoCT KWA | dB(A) | 1 |

www.kaercher.com/REACH
Teeninduselemendid
Joonis 1, vt ümbris
1 Käepide
2 Veepumba luliti
3 Harja-/imirežiimi pealuliti
4 Kandekäepide
5 Musta vee paagi kandesang
6 Musta vee paak
7 Puhta vee paak
8 Puhta vee paagi lukk
9 Soel
10 Puhastuspea
11 Imiotsaku tostmise pedaal
12 Parkimisasendi lukustusest vabastamine
13 Imitoru
14 Imitoru ühendus
15 Imidüus (ainult BR 30/4 C Adv)
16 Harjavalts
17 Imiotsak

Chairman of the Board of Management

S. Reiser
Director Regulatory Affairs & Certification
71364 Winnenden (Germany)
Tel.: +49 7195 14-0
Fax: +49 7195 14-2212
Winnenden, 2019/04/01
Tehnilised andmed
www.kaercher.com/REACH
Vadibas elementi
1. attels, sk. apversto lappusi
1 Rokt uris
2 Udens sukna sledzis
3 Suku/suksanas rezima galvenais sle-dzis
4 Rokturis aparata parnesāsanai
5 Netirā udens tvertnes rokturis
6 Netira udens tvertne
7 Tira udens tvertne
8 Tira udens tvertnes noslegs
9 Sietveida filtrs
10 Tirišanas galvina
11 Pedalis sukstanas stiopa pacelshanai
12 Staveshanas pozijas atblokeeshanas svira
13 Sūkšanas caurule
14 Sūkšanas caurules savienotājs
Chairman of the Board of Management

S. Reiser
Director Regulatory Affairs & Certification
Pilnvarotais sagatavot dokumentaciju:
S. Reiser
Alfred Kärcher SE & Co. KG
71364 Winnenden (Germany)
Tel.: +49 7195 14-0
Fax: +49 7195 14-2212
Winnenden, 2019/04/01
Tehniskie datum
Jauda
www.kaercher.com/REACH
Valdymo elementai
1 pav. Žr. viršelio puslapi.
1 Rankena
2 Vandens siurblio mygtukas
3 Pagrindinis valymo šepečiais/siurbom režimo mygtukas
4 Rankena
5 Užteršto vandens bako rankena
6 Užteršto vandens bakas
7 Švaraus vandens bakas
8 Šváraus vandens bako dangtelis
9 Sietelis
10 Valymo galva
11 Siurbimo rémelio pakélimo pedals
12 Laikymo padéties fiksatorius
13 Siurbimo vamzdis
14 Siurbimo vamzdžio jungtis
Chairman of the Board of Management

S. Reiser
Director Regulatory Affairs & Certification
71364 Winnenden (Germany)
Tel.: +49 7195 14-0
Fax: +49 7195 14-2212
Winnenden, 2019/04/01
Techniniali duomenys
Galia
| Nominali jtampa V 220 | ..240 | |
| Dažnis Hz 1~ 50/60 | ||
| Vidutinis galingumas W | 820 | |
| Apsaugos klase I | ||
| Saugiklio rūsis IPX4 | ||
| Siurbimas | ||
| Siurbimo galingumas, oro kiekis | I/s 26 | |
| Siurbimo galingumas, subatmosferinis slègis | kPa 13 | |
| Valymo šepetyss | ||
| Darbinis plotis | mm | 300 |
| Šepeciu skersmuo | mm | 60 |
| Šepecio sūkiu skaičius | 1/min | 1450 |
| Matmenys ir masé | ||
| Teorinis našumas | m2/h | 200 |
| Švaraus / purvino van-dens rezervuaru talpos | I | 4 |
| Ilgis x plotis x aukštis | mm | 390 x 335 x 1180 |
| Transportavimo svoris (Adv) | kg | 12 (12,5) |
| Bendroji masé (Adv) | kg | 16 (16,5) |
| Nustatytos vertès pagal EN 60335-2-72 | ||
| Delno/rankos vibraci-jos poveikis | m/s2 | <2,5 |
| Nesaugumas K | m/s2 | 0,2 |
| Garso slègio lygis LpA | dB(A) | 72 |
| Neapibrežtis KpA | dB(A) | 1 |
| Garso galios lygis LwA | dB(A) | 85 |
| Nesaugumas KwA | dB(A) | 1 |

Ipeed nepuim 3actocyBaHHaBaworo npnctroo npouHTae
IOpnirHaBHy IHCTpyKciIO 3 ekCnnyataaui, nicra zboRo diIte BiIDNoBIdHO Hei Ta 36epejItb ii IpnnoAunBo KOpNCtYBaHnHa6o dIy HAcTynHOrO BJaCHnka.
Переклik
Ppabnna 6e3nekn. UK 1
Приз nauseени . UK 1
PpaBnIbHe 3aCTocyBaHHa... UK 1
3axnCT HABKOINHbOro cepe- doBnua. UK 2
ElenMeHTn KepyBaHHra. .UK 2
Nepwe BBeDeHnB EeKnnyatauio UK 2
Ekcnnyataia UK 3
TpaHcnpTyBaHHra UK 4
36epiranHn UK 5
Iorna Ta texhuihe o6nyrobyBaHHa UK 5
Henolana. UK 6
Akecsyapu. UK 8
Ppnilaandry 3anaacni etani.. UK 8
TapaHTiA. UK 8
3aBa npB iDIOBIDHicTB EbponecboKOro cnIBTOBapnCTBa...UK 9
TexhiHi xapaKTepcntuKU 9
Ppabnla 6e3nekn
Ipeed nepshm BnKOpncTahnHm npnaDy cnid 03HaNoMntncs 3 iEIO iNCTpyKciEIO 3 ekCnIyataui IdoaHO6pOwypoIO 3 npabnI 6e3neKn iId yac po6oTI 3 uITKOBmIM MInouHMn anapatamn 5.956-251.0.
Pibehb He6e3nekn
△HE6E3NEKA
Bkaieka uodo He6e3neku, kka 6e3nocepedHb0 3aapoxy ma npuzodumb do makkux mpaem yu cmepi.
△NONEPEDXEHH
Bka3iBa zo do nomehuHOMoxnueoI He6e3neHoi cumyaui, zo moKe npu3ecmu do mxxkuxmpaem qu cmepi.
OBEPEXHO
Bkaieka uodo nomeuHno He6e3neuHoi cumyaui, kA moKe cnpuuHumu ompuMaHHa neKux mpaM.
YBATA
Bka3iBa zo do moXnboi nomeHuiHo He6e3neHiu cumyaui, zo moKe cnpuHuMu mamepiIbHI 36umku.
Pn3HaueHn
Maunha dny dory 3a nIporamn npn-3naeHa dny BonoRoro npnbpann pIBhoi niNOrn.
Hinpa o6ooi nobepxhi 300 MM Ta miCTKicTB pe3epByapib dny uNcToi Ta 6pydHOI BOINIO 4 I KOxHOrO 3a6e3neuyuToB epeK- TNBHy Mmky HeBeJIKNIX nobepxOHb.
KnBHeHnBaMpeXi 3a6e3neUc BnCOky npOdyKTnBHiCTb 6e3 o6MeJxHnY acy po-6oTn.
Bka3iBka:
BidnoiHDo KOxHoro i3 3aDaHb no Oun-
IeHHIO npicptiIMoKJINBO OCHaUyBaTn
pi3HM o6JaHaHHM.
3aHNTyIe 3a HauIM KaTaNorom a6o BIDBidaTe HaW caT B IHTepHeti www.kaercher.com.
PpaBnIbHe 3aCTocyBaHHa
BnKOpNCToBvBaTn DaHn npuJa BnHrTKoBO y BiNIOBIDHOCTI DO Bka3IBOK daHOi IHcTpykui 3 ekCnnyataui.
- Uein npictpiin npndaTHn dI npomncIOBOrO 3aCtOCyBaHHra, HApnKnaD, B roTeJnx, uKOJax, nikapHx, Ha a6pnKax, y mara3nHax, ophiax Ta opEHnHex niDnpneMCTbax.
-He donyckaetbca BnKOpncTaHn npi
IaNy dIy uIeHHra TBepnx nokpntiB,
UytIINBx DO BnNBy BOIOn Ta noIpyBaHHIO.
Diana3OH po6OuNX TempepaTy pJeXHTb
mIX +5C i +40C.
www.kaercher.com/REACH
ElenemEnKepyBaHHa
MaI.1, dIb. 3BOpOTHi6iK
1 P y K o R T K a
2Bumkau BODaHoro Hacoca
3 T O J N O B H N B N M Mn/po60Ta B peXmMi BCMOKTyBaHHa"
4 P y u Ka
5XomytIpynpiBicpnpe3epByapaI pydHOI BOn
6 Pe3epByap 6pyIHOI BOiN
7 Pe3epByap YncToi BOAn
8 3aTnckau Ha pe3epByap YncToi BOIN
9 CityactnФinbTp
10 Hocoba qactina
11 PedaJIb NiIyOMy BCMOKTyBaJIbHnx nHa-HOK
12 Po36IokyBaHnI napKyBaIbHoro noIO-JxehnI
13 BcmoKryBaJIbHr Tpy6ka
143'εДинання BCMOKТуВаЛьноТpyбкИ
15 BcmoKtUbaJIbHa φopcyHka (TilbKn BR 30/4 C Adv)
16 15iTkoBnBaJ
17 BcMoKtYBaJIbHa nIaCTnHa
18 KhoNka po36IokyBaHHaTkoBOro BaJIka
19 Kpnuka pe3epByapy 6pydnoi BODn
20 3aTncka
21 Nokaxnk pIBn
22 Raayn nna Ka6eIIO, 0o o6epTaIoTbcra
23 MepexeBn Ka6eJb 3 BNlkoIO
24 Puyka BCMOKtyBaJIbHOI Tpy6Kn (TINbKN BR 30/4 C Adv)
CnmboJIHa npncTpoi
n Ka Y "Po6oTa 3i 1tKa-
Ekcnnyataciia
3anOBHTn pe3epByap dIy qncToi BOHN
△OSEPEXHO
He6e3neKa nowko0dKeHn. 3acmocobya mu minbku peKomeHdoBaHi MuHi 3acobu. Y bunaDky buKOpucmaHH iHux MuHux 3acobie ekcnnyamyoua ocoba 6epe Ha ce6e nideuueHu pu3uk uodo 6e3neku pobomu, He6e3neku odepXaHH mpaM ma 3meHueHH mepMH cyxkbu npu cmpoio. BuKOpucmoEyamu nuwe mi MuHi 3acobu, uO He Micmmb po3yuHnku, coJMy ma nnabukoy (fmopucmooDheBy) kucnomy.
Dompumyamucra 6ka3ieok no mexhiu 6e3neku, haeedehux Ha ynakoeui 3acobie dnyuueHHa.
Bka3iBka:
He BnKOpNCToBvBaTn CnIbHo NiHnBi 3acO6n DnYuNueHHa.
DToPmMyBaTnCBA3iBOK3do3yBaHHa.
PekomeHdoBaHIMNUOy3ac06n:
BndaJIeHnI Bmicty 3 pe3epByapa IJIa6pydHOI BOIN
Bka3ibka:
Pn noBHomy 6aui dnn 6pydnoi BODn non- naBeue3akpnaBaEC BCMOKTyBaJbHn KaHaI. Ppoec BCMOKtyBaHHnepepNaEcTbcr. CnpoxHNt6ak dnn 3a6pydHeHOi BOni.
△NONEPEJXEHH
Cniodyume Micueeum Hopmam uodo cmiu Hux eod.
→ BnKlouciTb npncTpii.
→Пинятуnpистрий та задikсуbatи noroВ napkybaNBOMY NOJOKeHHI.
→ BnHrTn pe3epByap dJa YnCToI BOuN 3 npncTpoJ.
Повернту Виимьхомут Дпя pe3epByapa Дпя 6руноь Bodи Та 3нгп pe3epByap.
ПингТи 3amOK Ta 3HЯТи Кршky pe3epByapa dЯ 6pydHoI BODn.
→ BnIInTn 6pydHy BoDy.
→Писяцьо npomniTe pe3epByapДЯ 6pydHoi BOIN YNCTOIO BDOIO
HaJaTn KpnuKy Ha pe3epByap nna 6pydHOI BOnTa 3aqiKcbatn ii.
BcTaBnTn pe3epByap nIy6pydHoi BOIN B anapaT.
BndaJIeHnBaMicTy 3 pe3epByapa JIyNCTOi BOIN
→ BnHrTn pe3epByap IJIy YnCTOi BOI 3 npncTpoIO.
→ BiДкрптNi KpИшКу peЗерByapa YnCToi BOДи.
→ BnIIT MNUOHy piINHy.
→ 3akpnTn KpnUky pe3epByapa YncToI BOuN.
BctaBnTn pe3epByap dIy nIcToI BOni B anapaT.
TpaHcnpTyBaHHa
△OBEPEXHO
Hebe3neka mpaem ma nowkodxeH! Pmu mpaHcnpmyeaHHi cnid 3eephymu yeaay Ha eaay npucmpoio.
BidknHytn pykny BnepeTa 3aΦikCyBaTn npicpti y napkyBaIbHOMy nOJxHHi.
Haxnntu Bn3 pyky Ta nepemicttu npncpti a6o
Bucoko nIDHn npncpti 3a pyky Ta nepenectn.
→Припегевеши anapatyВ trpaHCnoptTHnx 3acobax ciiD BPaxOByBaTN MicueBi diouci DepxKaBHi HOpMn,Ha npabJIeHi Ha 3axNCT BiD KOB3aHHa Ta nepeKndaHHa.
36epirannn
△OSEPEXHO
He6e3neka mpaem ma nowkodxeHb! Ppu 36epiaaHHi 3eephymu yeasy Ha aasy npucmpoio.
LcE npnaMae 36epiraTncra Nnwe y BHy-tpiunx npmiueHHax.
Chairman of the Board of Management

S. Reiser
Director Regulatory Affairs & Certification
YnOBHOBaXeHn CnIBpO6iTHNk NO BeDeHHIO DOKyMeHToo6iry:
S. Reiser
Alfred Kärcher SE & Co. KG
71364 Winnenden (Germany)
Tel.: +49 7195 14-0
Fax: +49 7195 14-2212
Winnenden, 2019/04/01