XSolar LHN - Lighting STEINEL - Free user manual and instructions
Find the device manual for free XSolar LHN STEINEL in PDF.

| Product Type | LED House Number Lighting Fixture |
| Brand | Steinel |
| Model | XSolar LHN |
| Light Source | 4 LEDs, max. power 24 mW |
| Color Temperature | 4,000 K |
| Trigger Threshold | 2 lx |
| Power Supply | Solar panel + rechargeable LiFePO battery |
| Battery Capacity | 3,000 mAh (3.3 V) |
| Max. Autonomy | Up to 60 days (20 activations per night) |
| Recharging | Via solar panel or micro USB (5 V, max. 1 A) |
| Protection Rating | IP44 |
| Protection Class | III |
| Temperature Range | -20 °C to +40 °C |
| Dimensions (L x H x D) | 242 x 227 x 50 mm |
| Mounting | Outdoor wall mounting |
| Functions | Automatic dusk on/off, test mode, brightness adaptation |
| Switch | Program selection (OFF/ON) |
| Package Contents | Luminaire, wall bracket, screws, wall plugs, adhesive house number |
| Maintenance | Clean the solar panel with a soft cloth and mild detergent |
| Safety | Do not look directly at the LED, do not use in explosive areas |
| Warranty | 3 years (manufacturer) |
| Spare Parts | Replacement battery (ref. XSolar, 3.3 V 1.1 Ah, EAN 4007841008512) |
| Repairability | Battery replacement by the manufacturer or a qualified electrician |
Frequently Asked Questions - XSolar LHN STEINEL
User questions about XSolar LHN STEINEL
0 question about this device. Answer the ones you know or ask your own.
Ask a new question about this device
Download the instructions for your Lighting in PDF format for free! Find your manual XSolar LHN - STEINEL and take your electronic device back in hand. On this page are published all the documents necessary for the use of your device. XSolar LHN by STEINEL.
USER MANUAL XSolar LHN STEINEL
XSolar LH-N

GB ..... 8 Follow written instructions!
natural_image
Geometric diagram showing a triangle and a rectangle on a grid background (no text or symbols)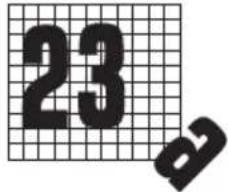
4.2
4.4


4.5

DE
Please read carefully and keep in a safe place.
– Under copyright. Reproduction either in whole or in part only with our consent.
-Subject to change in the interest of technical progress.
Symbols

Hazard warning!

Reference to other information in the document.
2. General safety precautions

Hazard from vapours or electrolyte fluid!
Vapours or electrolyte fluid may escape if the rechargeable battery is damaged or used improperly. Coming into contact with them may result in severe injury (e.g. loss of sight, acid burns).
- Never open the rechargeable battery enclosure or the rechargeable battery itself. - Do not allow vapours or electrolyte fluid to come into contact with your eyes. In the event of contact with eyes:
-Do not rub your eyes.
-Immediately rinse eyes with plenty of clean water (such as tap water).
-Seek medical advice.
- Do not touch any electrolyte fluid that has escaped.
- Immediately move product away from naked flamed or sources of heat.
- Immediately remove contaminated clothing.

Hazard from LED light!
Looking directly into the LED light when it is ON could damage your retina.
- Never look into the LED house number light at short range or for any prolonged period (> 5 minutes).
–The house number light must not be installed in potentially explosive atmospheres.
-For trouble-free operation, choose an installation site that is not exposed to vibration or shock.
- Protect the solar panel from mechanical strain (e.g, tree branches).
–The product must not be modified or altered in any way.
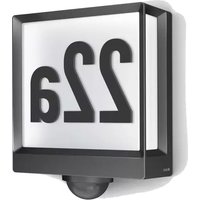
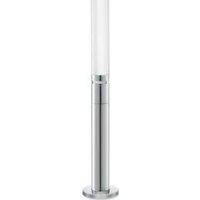
3. XSolar LH-N
Proper use
-LED house number light with photo-cell controller.
-For mounting on outdoor walls.
-House number light at places where no mains power is available.
-With independent power supply from solar panel and rechargeable battery.
-Switches ON automatically at dusk.
Package contents (Fig. 3.1)
Product dimensions (Fig. 3.2)
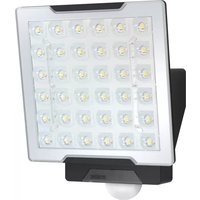
Product components (Fig. 3.3)
A Solar panel
B Programme selector switch
C Illuminated panel
D Base
E Micro USB charging socket
F Wall mount
Technical specifications for house number light
-Output: 4 LEDs, 24 mW max.
—Light-level setting: 2 lux
-Colour temperature: 4,000 kelvin
-Protection class: III
-IP rating: IP 44
-Temperature range: -20 °C to +40 °C
-Dimensions (W x H x D): 242 x 227 x 50 mm
Technical specifications for rechargeable battery
-High Power LiFePO Lithium-Ferrum-Phosphor battery
-Can be recharged at any time without shortening battery lifespan.
–Automatic recharging by highly efficient solar panel.
- Can be replaced by the manufacturer or qualified electricians.
-Rechargeable battery capacity: 3,000 mAh.
–Maximum lighting duration with one battery charge without recharging: 60 days at 20 switching operations a night.
-Micro USB charging socket: 5 V, 1 A max.
Recharging time depends on the site of installation (direct sunlight). Expect charging to take many times longer in winter or on rainy days.
4. Installation
- Check all components for damage.
- Do not use the product if the solar panel or LED panel is damaged.
Operating reliability will be limited if the product is used in adverse conditions (e.g. installed in shade or behind glass)
- Choose an appropriate site with plenty of sunlight for installing the solar panel (facing south).
- Avoid shade from porches, overhanging roofs or trees.
- Choose site with little extraneous / artificial light (street lighting etc.).
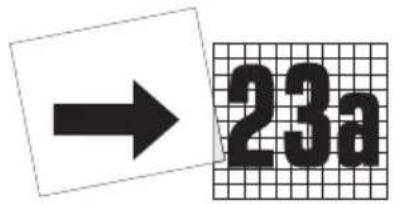
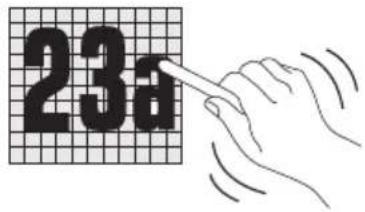
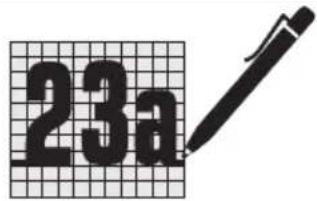
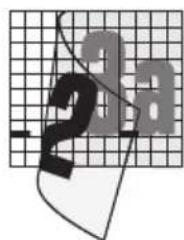
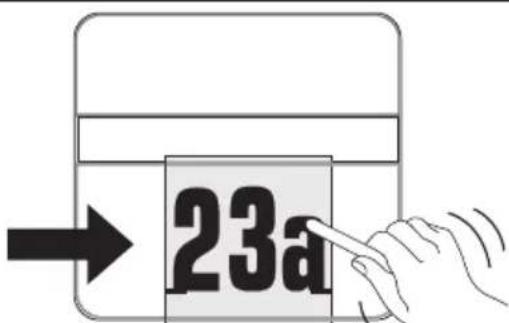
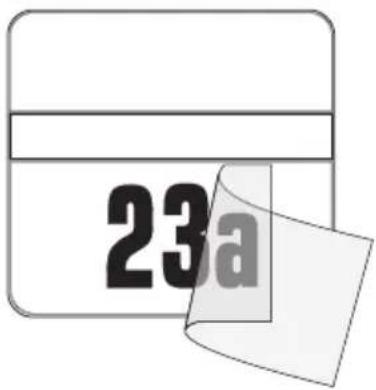
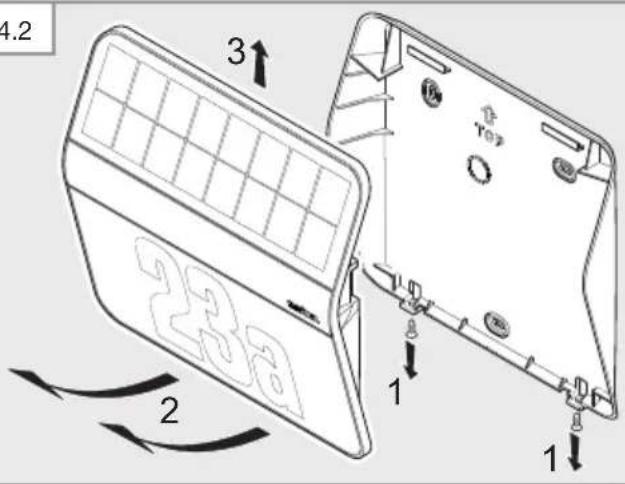
• Affix house numbers to illuminated panel (Fig. 4.1). - Separate base from wall mount (Fig. 4.2).
- Drill holes and insert wall plugs (Fig. 4.3).
- Screw-fasten wall mount to the wall (Fig. 4.3).
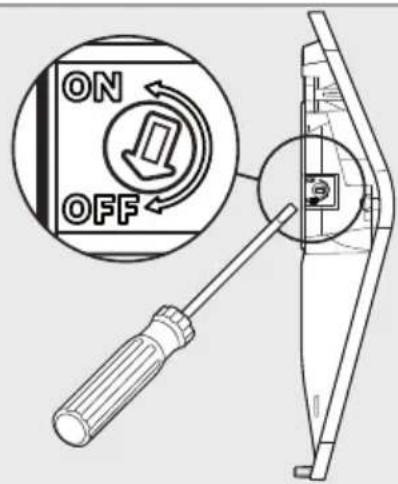
- Make settings (Fig. 4.4). "5. Operation"
- Mount base on wall mount and screw into place (Fig. 4.5).
5. Operation
Before using for the first time
- Activate house number light by setting the programme selector switch to ON. The house number light stays in test mode for one minute before it starts to work in its normal operating mode.
Test mode
In test mode the house number light is switched ON regardless of ambient brightness. The red LED is also lit in test mode. No LED light can be seen during the day because of its low level of brightness.
Setting the chosen operating mode by programme selector switch
-OFF: factory setting. The power consumers (LEDs) are deactivated.
-ON: house number light active. It switches ON when ambient light falls below the light level threshold (2 lux).
- Depending on battery charge, the house number light is adjusted to optimum brightness. The house number light switches OFF again automatically at dawn.
Charging the battery manually
The red LED flashes when battery capacity is low (e.g. in poor weather). The battery can be recharged with a standard micro USB charging adapter (not included). Battery recharging can take up to 6 hours.
Risk of damage to property from penetrating moisture
When open, the micro USB charging socket (E) is not protected from the ingress of water.
- Only recharge batteries in a dry room.
- Connect micro USB charging adapter.
- Red LED flashing: charging in progress.
The LED may take up to 10 minutes to start flashing if the battery has run down to very low level. - Red LED shows: battery is fully charged.
- Remove micro USB charging adapter. - Red LED goes out.
Risk of damage to property when light is not in use If the house number light is not used for a prolonged period (e.g. in storage), the battery may suffer irreparable damage from exhaustive discharge.
- Set programme selector switch to OFF.
- The battery must be on full charge before taking the light out of service.
- Regularly charge the battery while the light is not in use.
6. Malfunctions
Red LED flashing
-Battery capacity too low.
- Charge battery with micro USB charging adapter (not included).
House number light will not switch ON
-Battery capacity too low.
- Charge battery with micro USB charging adapter (not included).
-Programme selector switch set to OFF.
- Set programme selector switch to ON.
—House number light is being blinded.
- Avoid incidence of extraneous / artificial light.
Battery not charging
-Solar panel dirty.
- Clean solar panel with a soft cloth and mild detergent.
–Solar panel not installed in the best place.
- Check site of installation (as much direct sunlight as possible).
- It may no longer be possible to recharge the battery after many years of use.
- Get rechargeable battery changed (replacement XSolar battery, 3.3 V 1.1 AH, EAN 4007841008512).
- Please send the product well-packed to your nearest service station. The rechargeable battery must only be replaced by the manufacturer or qualified electricians.
7. Cleaning and Maintenance
The product requires no maintenance.
Regularly checking the product for damage can prolong its lifespan.
Removing dirt can help to make the product work longer.
Risk of damage to property
Using the wrong detergent can damage the house number light.
- Make sure detergent does not harm the surface.
- Clean house number light with a soft cloth and mild detergent.
If solar panel is dirty or weather has left deposits on it:
- Clean solar panel with a soft cloth and mild detergent.
8. Disposal
Electrical and electronic equipment, accessories and packaging must be recycled in an environmentally compatible manner.

Do not dispose of electrical and electronic equipment as domestic waste.
EU countries only:
Under the current European Directive on Waste Electrical and Electronic Equipment and its implementation in national law, electrical and electronic equipment no longer suitable for use must be collected separately and recycled in an environmentally compatible manner.

Do not throw devices, rechargeable batteries / batteries into household waste, fire or water at the end of their useful life.
Rechargeable batteries / batteries should be collected, recycled or disposed of in an environmentally friendly manner.
EU countries only:
In accordance with Directive 2006/66/EC, defective or spent rechargeable batteries / batteries must be recycled. Waste rechargeable batteries / batteries can be returned to the point of purchase or to a collection facility for hazardous substances.
9. Manufacturer's warranty
Manufacturer's warranty of STEINEL GmbH, Dieselstrasse 80-84, DE-33442 Herzebrock-Clarholz, Germany
All STEINEL products meet the highest quality standards. For this reason, we, the manufacturer, are pleased to provide you, the consumer, with a warranty under the following terms and conditions:
The warranty covers the absence of deficiencies which are proven to be the result of a material defect or fault in manufacturing and which are reported to us immediately after detection and within the warranty period. The warranty shall apply to all STEINEL products sold and used in Germany - excluding STEINEL Professional products.
You can opt for warranty cover in the form of repair or replacement which will be provided free of charge (if applicable, in the form of a successor model of the same or higher quality) or in the form of a credit note.
The warranty period for the STEINEL product you have purchased is 3 years (5 years for products from the XLED home range) in each case from the date on which the product was purchased.
We shall bear the shipping costs but not the transport risks involved in return shipment.
Statutory rights accruing from defects, gratuitousness
The warranty cover described here shall be applicable in addition to the statutory rights of warranty – including special consumer protection provisions – and shall not restrict or replace them. Exercising your statutory rights in the event of defects is gratuitous.
Exemptions from the warranty
All replaceable lamps are expressly excluded from this warranty. In addition to this, the warranty shall not cover:
– any wear resulting from use or any other natural wear of product parts or any deficiencies in the STEINEL product that are attributable to wear caused by use or other natural wear,
– any improper or non-intended use of the product or any failure to observe the operating instructions,
– any unauthorised additions, alterations or other modifications to the product or any deficiencies attributable to the use of accessory,
– supplementary or replacement parts which are not genuine STEINEL parts,
– any maintenance or care of products that is not carried out in accordance with the operating instructions,
– any attachment or installation that is not in accordance with STEINEL's installation instructions,
– any damage or loss occurring in transit.
Application of German law
The warranty shall be governed by German law excluding the United Nations Convention concerning the International Sale of Goods (CISG).
Making claims
If you wish to make a warranty claim, please send your product complete and carriage paid with the original receipt of purchase, which must show the date of purchase and product designation, either to your retailer or directly to us at STEINEL (UK) Ltd. – 25 Manasty Road, Axis Park, Orton Southgate, GB- Peterborough Cambs PE2 6UP United Kingdom. For this reason, we recommend that you keep your receipt of purchase in a safe place until the warranty period expires.
FR
natural_image
World map silhouette in grayscale, showing continents and oceans without any text or labelsContact
www.steinel.de/contact