
237540 - Dishwasher Hendi - Free user manual and instructions
Find the device manual for free 237540 Hendi in PDF.
| Product type | Professional dishwasher |
| Brand | Hendi |
| Model | 237540 |
| Category | Dishwasher |
| Usage | Professional (qualified personnel) |
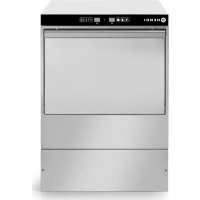
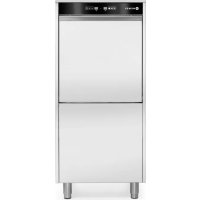
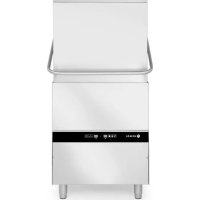
| Dimensions (W x D x H) | 750 x 880 x 1390 mm |
| Net weight | 135.5 kg |
| Power supply | 230 V / 50 Hz |
| Power consumption | 2.8 kW |
| Wash temperature | 62 °C |
| Rinse temperature | 85 °C |
| Capacity | 3 baskets (cycles of 60, 120, 180 seconds) |
| Wash programs | Short (1 min), Medium (2 min), Long (3 min) |
| Material | Stainless steel |
| Protection | IP44 |
| Water softener | Recommended (depending on water hardness) |
| Main functions | Drain pump, cold rinse, soft start, thermal protection |
| Maintenance | Regular filter cleaning, descaling |
| Safety | Automatic stop, overheating protection, door lock |
| Spare parts | Detergent and rinse aid dispenser, peristaltic pumps, heating elements |
| Repairability | Repair by authorized technician only |
| Warranty | 12 months |
Frequently Asked Questions - 237540 Hendi
User questions about 237540 Hendi
0 question about this device. Answer the ones you know or ask your own.
Ask a new question about this device
Download the instructions for your Dishwasher in PDF format for free! Find your manual 237540 - Hendi and take your electronic device back in hand. On this page are published all the documents necessary for the use of your device. 237540 by Hendi.
USER MANUAL 237540 Hendi
EN: Dishwasher, electronic User Manual pg. 3
Keep these instructions with the appliance.
For indoor use only.
BukopncToByBaTn TINbKu BCEpeDHH npMiuHb.
Thank you for purchasing this Hendi appliance. Read this manual carefully, paying particular attention to the safety regulations outlined below, before installing and using this appliance for the first time.
Safety regulations
- The appliance is intended for professional use and can be operated only by qualified personnel. This appliance is not intended for household use.
- Only use the appliance for the intended purpose it was designed for as described in this manual.
- The manufacturer is not liable for any damage caused by incorrect operation and improper use.
- Keep the appliance and electrical plug away from water and other liquids. In the event the appliance falls into water, immediately remove the power plug from the socket. Do not use the appliance until it has been checked by a certified technician. Failure to follow these instructions will cause life threatening risks.
- Never attempt to open the housing of the appliance by yourself.
- Do not insert objects into the housing of the appliance.
- Do not touch the plug with wet or damp hands.
DANGER OF ELECTRIC SHOCK! Do not attempt to repair the appliance by yourself, repairs are only to be conducted by qualified personnel. - Never use a damaged appliance! When it's damaged, disconnect the appliance from the socket and contact the retailer.
- WARNING! Do not immerse the electrical parts of the appliance in water or other liquids.
- Never hold the appliance under running water.
- Regularly check the power plug and cord for any damage. When damaged it must be replaced by a service agent or similarly qualified person in order to avoid danger or injury.
- Make sure the cord does not come in contact with sharp or hot objects and keep it away from open fire. Never pull the power cord to unplug it from the socket, always pull the plug instead.
- Make sure that the power cord and/or extension cord do not cause a trip hazard.
- Never leave the appliance unattended during use.
- WARNING!As long as the plug is in the socket the appliance is connected to the power source.
- Turn off the appliance before unplugging it from the socket.
- Connect the power plug to an easily accessible electrical socket so that in case of emergency the appliance can be unplugged immediately.
- Never carry the appliance by the cord.
- Do not use any extra devices that are not supplied together with the appliance.
- Only connect the appliance to an electrical outlet with the voltage and frequency mentioned on the appliance label.
- Never use accessories other than those recommended by the manufacturer. Failure to do
so could pose a safety risk to the user and could damage the appliance. Only use original parts and accessories.
- This appliance should not be operated by persons with reduced physical, sensory or mental capabilities, or persons that have a lack of experience and knowledge.
- This appliance should, under any circumstances, not be used by children.
- Keep the appliance and its power cord out of reach of children.
- WARNING: ALWAYS switch off the appliance and unplug from power socket before cleaning, maintenance or storage.
Special Safety Regulations
- This dishwasher is delivered with water inlet and outlet hoses. According to its construction, the connection of the machine to water and power supply must be performed by an authorized and locally recognized installer by keeping the existing specifications.
- Before connecting the appliance, check that the connection data on the data plate (voltage and connected load) match the mains electricity supply.
- No technical modifications are allowed in this appliance. The manufacturer is not responsible for any possible damages resulting due to modifications.
- The same applies in case that the appliance is used for any other purpose except the one anticipated, in case of fault or improper use. The water inside the dishwasher is not potable.
- Use, maintenance and repair of dishwasher should be performed only by persons familiar with these works and informed for any possible risks.
Water softeners

CAUTION: all appliances requiring constant connection with the water supply system (including this appliance) must have an additional water softener attached in order to remove calcium and magnesium compounds. The softener must be used in compliance with the manufacturer's recommendations set out in the user's manual.
- If the softener is not attached or is misused and/or regenerated, the distributor shall reject all complaints entailing repairs required due to the limescale build-up in the appliance.
- It is recommended to use softeners from the wide range offered by HENDI. Ask your HENDI sales representative for assistance in the selection of the appropriate model. We recommend the following agents for the proper regeneration of the softeners: Salt tablets, 25 kg bags - code: 231265
| General Hardness of water | ||||
| °dGH | °fH | mmol/l | °e | Water softener |
| above 24 above 40 above 4,2 above 28 Necessary | ||||
| 18 - 24 | 32 - 40 | 3,2 - 4,2 | 22 - 28 | Necessary |
| 12 - 18 | 19 - 32 | 2,1 - 3,2 | 13 - 22 | Necessary |
| 4 - 12 | 7 - 19 | 0,7 - 2,1 | 5 - 13 | Necessary |
| below 4 | below 7 | below 0,7 | below 5 | Not required |
Intended use
-
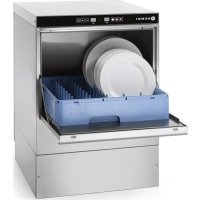
This appliance is intended for washing crockery, such as glasses, cups, plates and cutlery. Any other use may lead to damage of the appliance or personal injury.
-
Operating the appliance for any other purpose shall be deemed a misuse of the device. The user shall be solely liable for improper use of the device.
Grounding installation
This appliance is classified as protection class I and must be connected to a protective ground. Grounding reduces the risk of electric shock by providing an escape wire for the electric current.
This appliance is fitted with a power cord that has a grounding wire and grounded plug. The plug must be plugged into an outlet that is properly installed and grounded.
Preparation before first use
- Open the package. Before setting up the appliance, check it for any externally visible damage due to transportation. If in any doubt, call for a specialist to check it (from the authorized local dealer who sold the appliance).
- Place the dishwasher at the installation area, close to the necessary water and power supply (the ground should be sufficiently stable).
- Remove the protective foil protecting the steel housing of the dishwasher from scratches. Any remaining adhesive residue should be careful
ly removed. Do not use any scouring materials. Leaving the protective foil can cause difficult to remove adhesive glue foil to the dishwasher's steel housing.
- The appliance should be placed horizontally. Possible inclinations should be corrected using a spirit level.
- Following the successful installation, the dishwasher should be cleaned thoroughly with a conventional detergent before it is put into operation.
Connection to the water supply
ATTENTION: The connection with the water supply should be made according to the current safety standards.
The dishwasher may be connected to water supply with maximum inlet temperature 60^ / 130^ . In case you need connection with water supply of high temperature please contact our Factory or our distributor or our local dealer.
- The water supply hose should have a flap valve (non-return valve) according to DIN 1988.
- The water supply hose should be rinsed be
fore the appliance's connection.
- The water supply hose/pipe should have a minimum internal diameter of 16mm and the connection with the hose should be 3/4 inch.
- All hose collars should be adjusted in a fixed position before the appliance is put into operation.
- The dishwasher can be only connected to a well-functioning softener.
ATTENTION: The water pressure must be between 2 and 5 bar.
Drainage connection
- The outflow is accomplished through gravity force (natural flow). The outlet hose should be connected either directly to the main drainage - where a pipette for odours is anticipated, or water runs directly to a drainage well in the ground,
which has a pipette for odours.
ATTENTION: The outlet hose should not be placed higher than a level of 650mm from the lower side of the dishwasher's dispenser.
Electrical Network connection
ATTENTION: All electrical work must be carried out by a suitably qualified and competent person.
- The dishwasher operates under specific voltage depending on the type of the dishwasher.
- You should supply the power, depending on the appliance's power reception (the electrical connection should be made by authorized electricians). Specifications should be met according
Protective duct connection and voltage compensation
- The electrical safety of this appliance is ensured only if the protective duct has been connected and checked properly. The corresponding specifications should be met at this point (see paragraph 1.5).
- In addition, the appliance should include a voltage compensation system.
to the corresponding parts of DIN, VDE, D100, the EVU connection terms, the relevant ZH 1/37, chapter 7.2 - as well as the current specifications for accident prevention.
- Respectively, the appliance must be connected to a direct power supply electrical installation through an H07 RN-F cable with load relief of the appliance.
- For this reason, the backside of the appliance has a screw with the indication "voltage compensation".
- Following the electrical connection, the action of the protective duct, the voltage compensation and the insulation value should be checked according to the existing provisions of DIN VDE.
Technicalspecfication
| Item no. 230268 231753 237 | 540 231340 2365 | 7 236574 | ||||
| Type | 40x40 | 50x50 | Hood 50x50 | 50x60 | ||
| Max. hight of tableware [mm] | 295 | 335 | 400 | 450 | ||
| Operating voltage and frequency [V/Hz] | 230 / 50 400 | 50 230 | 50 | 400 / 50 | ||
| Rated input power [kW] | 2,8 | 6,6 | 2,8 | 8,6 | 5,0 | 7,1 |
| Temperature of washing / rinse water [°C] | 62 / 85 | |||||
| Standard equipment | Rinse aid and detergent dispenser and drain pump | Rinse aid and detergent dispenser | ||||
| Waterproof protection class | IP44 | |||||
| Amount (pcs.)/lenght of washing cycle (s.) | 3/60, 120, 180 | |||||
| Net weight (approx.) [kg] | 39 | 55 | 135,5 | 57 | ||
| Outer dimension [mm] | 470x510x(H)710 | 570x600x(H)830 | 750x880x(H)1390 | 595x730x(H)1340 | ||
REMARK: Technical specification is subjected to change without prior notification.
Instructions for the dishwasher's regular operation
- The appliance is exclusively used to clean dishes, cups, glasses, silverware, etc. following their use during lunches/dinners.
- You should pay special attention that the items to be washed are suitably placed for dishwashing.
Silverware should be cleaned from food residues,
if not washed right after lunch / dinner (colouring and spots from certain foodstuffs).
- Do not wash in this appliance items which has been in contact with acids, mineral oil, grease, gasoline or colours and solvents (industrial chemicals).
Preparation of dishes for washing
- Do not let food residues dry onto the dishes. In order to avoid filter blockage as well as the cleaning water to become dirty quickly, you should remove large food residues, olive pips, lemon peels, tooth picks, etc., before you place
the dishes in the basket.
We recommend you to leave in water for a while or rinse the glassware that has food residues dried on.
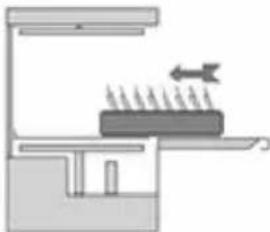
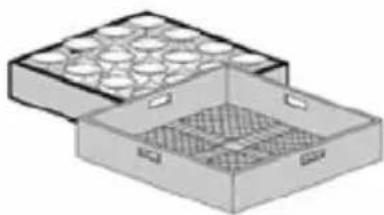
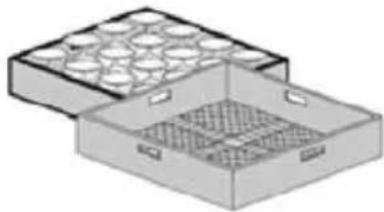
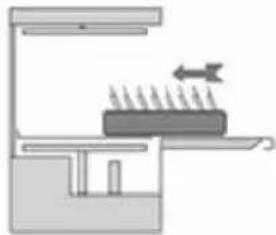
Filling of basket
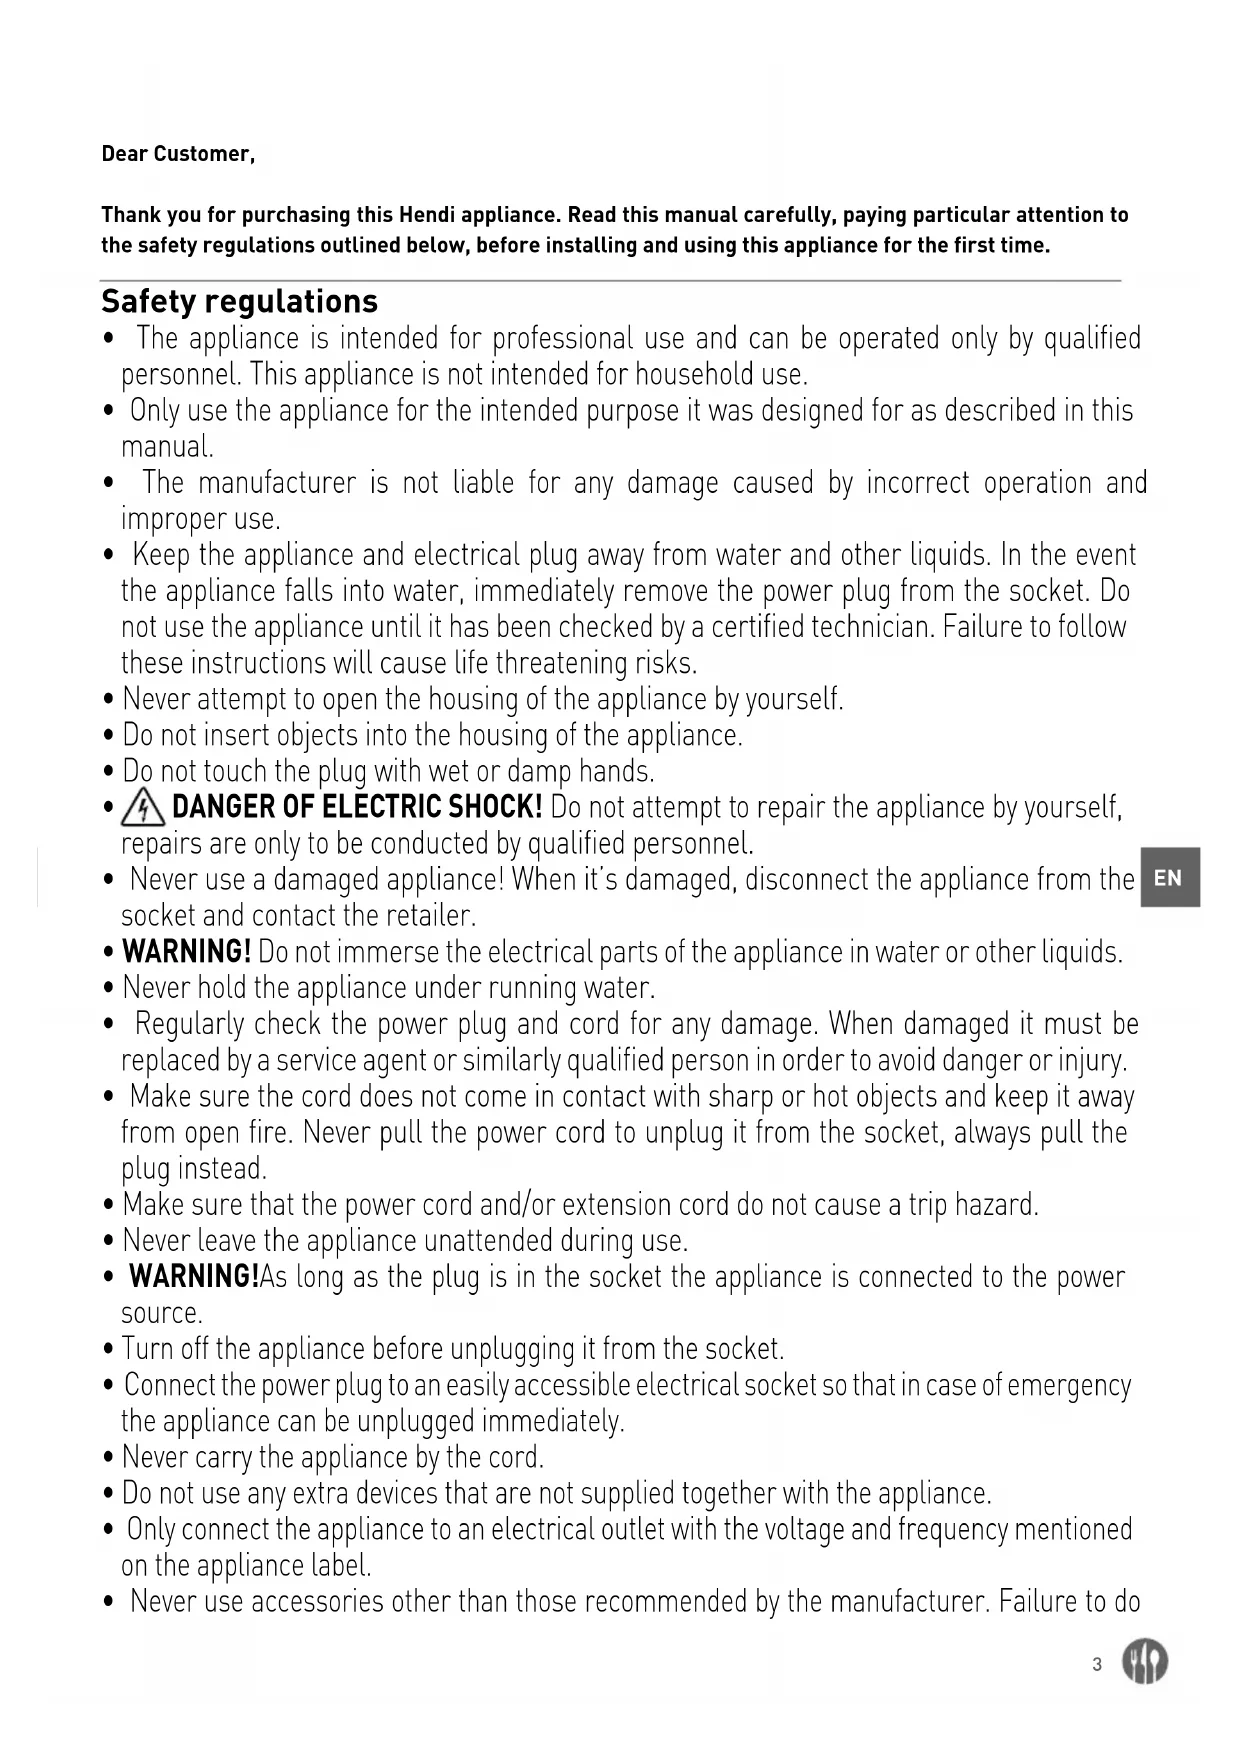
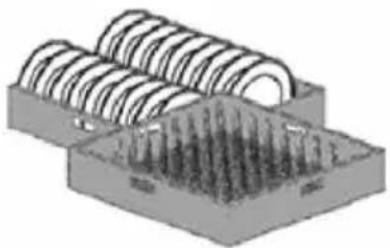
- Put glasses, cups, large plates, etc. with the opening facing down in the anticipated baskets. Do not pile one on top of the other.
- Glasses should not touch each other (damage in glass, stains due to contact).
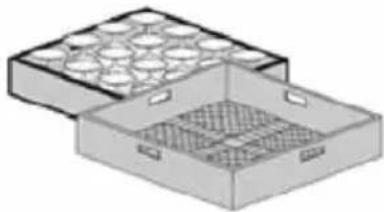
- Place cutlery in the appropriate basket made of
synthetic material, with the handle facing down. Silverware may be placed freely on the levelled plastic basket. In any case, you should avoid overloading the basket.
Water supply hoses should remain free (not blocked or stretched).
Correct insertion of the plates in the baskets with pins.
Correct insertion of glass in open baskets
Correct insertion of saucers and cutlery
Proper insertion of full baskets
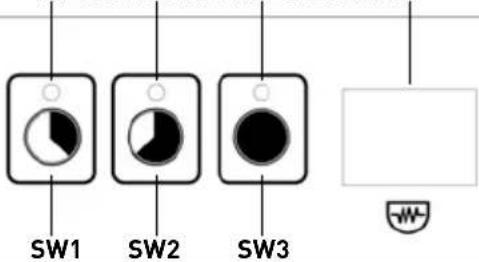
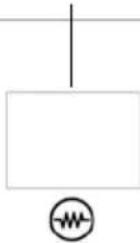
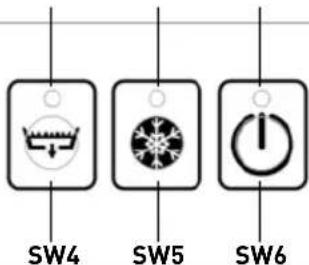
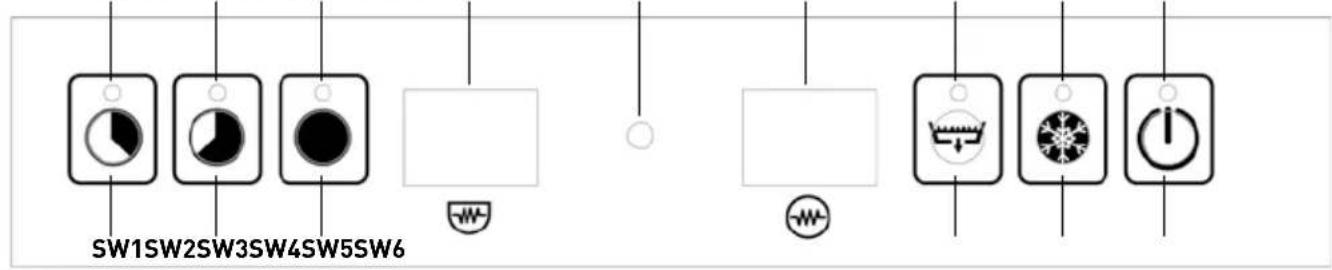
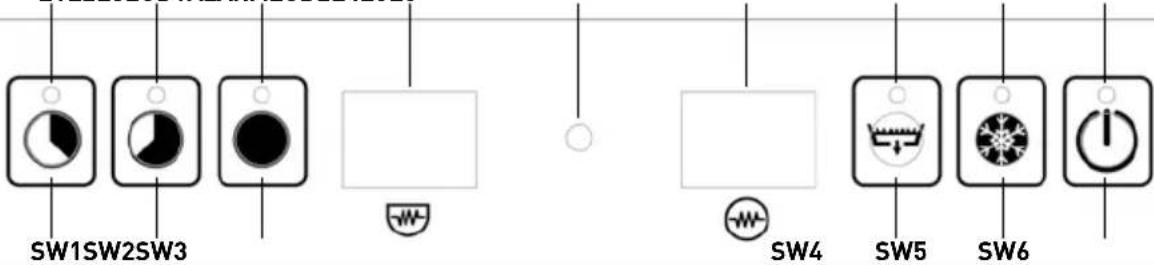
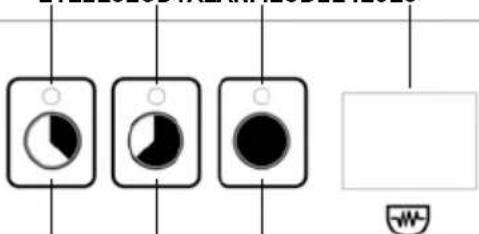
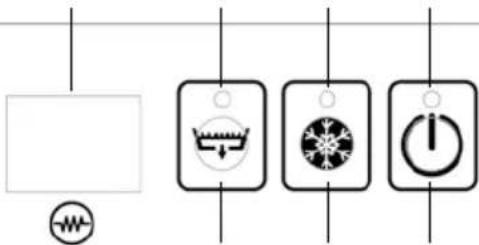
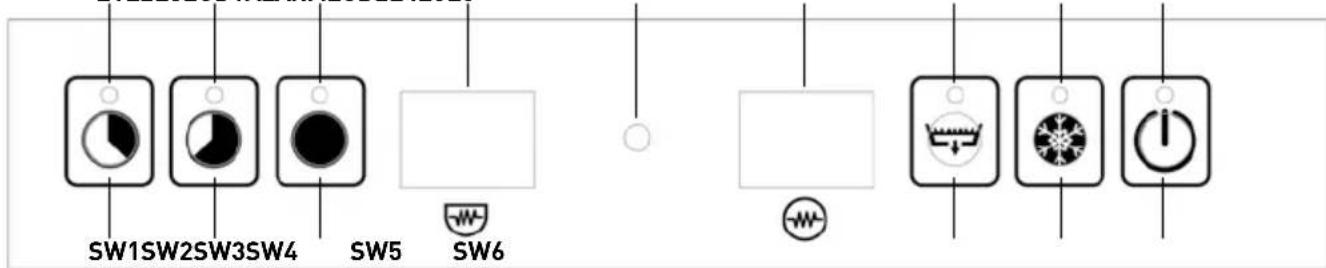
Control Panel
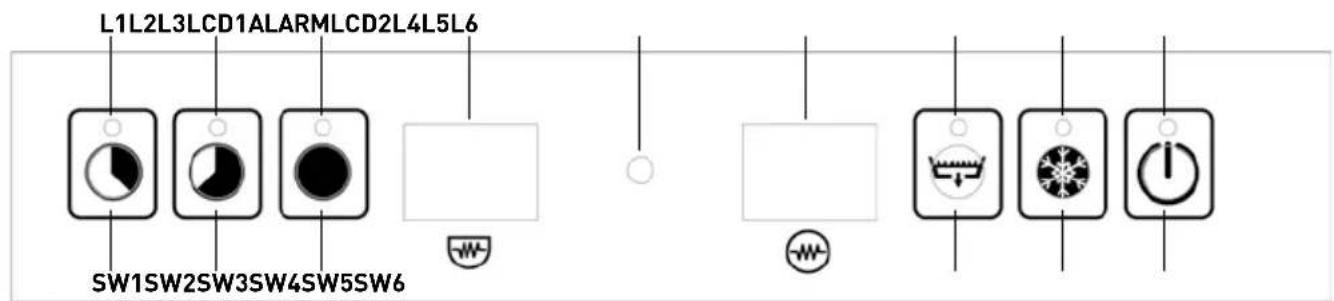
| BUTTON | NAME | DESCRIPTION | NOTES |
| SW1 | CT1 | Short Cycle Button | Duration 1 min |
| SW2 | CT2 | Medium Cycle Button | Duration 2 min |
| SW3 | CT3 | Long Cycle Button | Duration 3 min |
| SW4 | DB | Drain Pump Button | |
| SW5 | CRB | Cold Rinse Button | |
| SW6 | ON | ON/OFF Switch | |
| LED TABLE | COLOR | ||
| L1 | LED of short cycle selection | ||
| L2 | LED of medium cycle selection | ||
| L3 | LED of long cycle selection | ||
| L4 | Drain in Progress | ||
| L5 | Cold Rinse Selected | ||
| L6 | LED of ON/OFF Switch | ||
Switching ON
In order to start the machine, press the Button SW6 (ON) for 3 sec. The LED L6 flashes red and a buzzer sounds.
Procedures before washing
Since the washing machine is switched on, the boiler and the wash tank start filling with water. Next, the machine gets filled with detergent and rinse aid. During these, a "FILL" message appears on the Dash. After the tanks are filled with water and the necessary detergent and rinse aid liquids are captured, the boiler's heating resistance and the wash tank's heating resistance start working sequentially (after reaching boiler's temperature of operation, its resistance shuts down and the wash tank starts heating). On the LCD1 & LCD2
screens the current temperature of each tank is displayed alternately (when LCD 1 shows "bt" then LCD 2 displays boiler's temperature; when LCD 1 shows "tt", then LCD 2 displays tank temperature). In case that the wash tank's heating resistance is ON, a dot in the right lower corner of LCD1 is lit, while in case that the boiler's heating resistance is ON a dot in the right lower corner of LCD2 is lit. For that reason, symbol (representing the tank) is shown beneath of LCD1 & symbol (representing the boiler) is shown beneath of LCD2.

Standby
During Standby operation (after the automatic set up procedures), LCD 1 & LCD 2 should dis-play the temperature of the wash tank & boiler tank alternately.
- LCD1 - "bt" or "tt" (alternating)
- LCD2 - "--°C"
If the machine stays on Standby mode for more than 30 min, then it turns into sleeping mode for minimizing power consumption. When this occurs, LCD 1 & LCD 2 turn off and L6 is fla-shing. By pushing SW6, the machine is again ready for operation.
Thermo-Protection
In order to start the first washing cycle of the day, both temperatures in the tank and the boiler must reach operational values (60^\& 85^ respectively]. In all the other cycles, due to Thermo-Protector system, if the temperature in the boiler is not appropriate for rinsing, the washing cycle continues
until the rinse water becomes sufficiently heated. A message on the screen informs the user that the washing cycle continues; LCD1 shows the current value of the water temperature in the boiler and LCD2 shows "ht" (i.e. heating).
Washing Cycle Selection - Start
This washing machine has three washing cycle program options. The user could choose between short, medium and long program by pushing one of the buttons SW1, SW2 or SW3 accordingly. After pushing the corresponding button, the washing cycle starts automatically. UNLESS the door is accidentally open. In the latter case a message "door" is shown in the Dash and the washing starts again as soon as the door is closed. The remaining time (in seconds) is displayed on the Dash.
IMPORTANT: In case that the door is open accidentally before program is finished, the washing stops
and the timer resets. Therefore, in order to finish the cycle, you should start the procedure from the beginning.
NOTE: 10 sec before finishing main wash the draining pump starts working and it stops 10 sec after rinse cycle.
After completion of the washing cycle, a message "end" on the dash informs the user that the program is finished. The message appears until the door is opened again.
Draining
This machine has draining pump, so that the draining cycle is performed automatically. If you want to perform draining on demand, please remove the overflow hose that is placed on the wash tank and press the Button SW4. After 15 sec the draining starts and LED L4 flashes.
During draining, an internal check of the system is performed, ensuring that the heating resis-t-anc
es are switched off. In that sense, any possible overheating caused by heating resistances not immersed in water is avoided. As soon as draining stops, for the next 30 sec the system performs self-cleaning (door must be closed).
NOTE: After every On-Demand draining execution, the machine shuts down.
Filling of Detergent and Rinse Aid
This machine is equipped with peristaltic pumps for the rinse aid and the detergent filling. The filling inlets for each one are the two corresponding hoses which should be immersed in the appropriate tanks.
The filling procedure is performed in two stages. The initial filling (when you turn the machine on)
and additional re-fillings after each washing cycle: 1st Stage: During automatic preparation (before the first wash) the machine receives from the tank soap for 180 sec and rinse aid for 35 sec. This could be adjusted from the user th-rough the User Menu *Check Section "User Menu".
2nd Stage: During every complete washing & rins
ing cycle, the machine receives detergent for 13 sec and rinse aid for 12 sec. This could be adjusted from the user through the User Menu *Check Section "User Menu".
NOTE: In case that you need to adjust the Detergent or Rinse Aid from the User Menu, please bear in mind that for each second the corresponding pump captures the following liquid quantities:
Detergent pump: 0.83 ml/sec
- Rinse Aid pump: 0.19 mL/sec
By multiplying these quantities with the time duration (seconds) that the pump works, you can calculate the volume of each liquid that it is used.
WARNING: The machine receives rinse aid during washing cycle and detergent during rinsing cycle.
Cold Water Rinse
This machine has Cold Water Rinse operation. It could be activated in order to be performed after every washing cycle or for On Demand occasions. In order to perform a Cold Water Rinse after one washing cycle, press Button SW5 for 1 sec. A single sound buzz will inform you that the machine is set up for a single cold rinse performance. Then, LED L5 will be on, while the procedure is performed.
In case that you wish to perform Cold Water Rinse after each washing cycle, press hold But-ton SW5 for 5 sec while the machine is on Standby mode. A double sound buzz will inform you that the machine is set up for a cold rinse performance after every washing cycle [LED L5 will lit]. Should you undo the selection, please repeat the above procedure.
Shutting down the machine
In case that you want to shut down the machine, remove the overflow hose in the wash tank and press the Button SW4. The machine is going to drain automatically the used water, perform a self-cleaning cycle and then shut down. An alternative way is to press continuously the Button SW6 until the indication "OFF" appears in the first line of the screen (it will take about 5 sec). The recommended way is the first.
ECO Function
In case that the machine is in Standby operation for more than 15 minutes, the Boiler's temperature lowers in order to avoid unnecessary power con
sumption. During these intervals, if the door of the washing machine opens, the ECO Function stops.
Soft Start Function
This machine is equipped with Soft Start System that enables the water pump to start with lower
pressure and gradually increases it, so that the sensitive crystals are not damaged.
User's Menu
In order to enter the User's Menu, shut down the machine and press hold Buttons SW1, SW3 & SW6 at the same time for 3 sec with the door closed. LED L6 flashes and a beeper sounds three times. Message "conf" appears for a few seconds and the User's Menu is activated.
Find the parameter that you wish to adjust using Buttons SW3 and SW4 for navigation inside the menu. The corresponding parameter will be displayed on the screen.
Should you wish to increase the amount (+) , press Button SW1.
Should you wish to decrease the amount (-) , press Button SW2.
After defining the value, press Button SW5 once in order to register the value in the memory.
In the matrix that is presented below you can find a short description of the functions that can be ad
justed by the user, as well as their default values. In order to exit the User's Menu, press hold Button SW6 for 3 sec. The beeper sounds three times and message "off" appears on the screen. After closing the User's Menu, the machine is shut down.
| No | Parameter | Range | Default | Indication |
| 1 | TEMPERATURE MODE C/F C C | |||
| 2 | BOILER TEMPERATURE | 30-92°C | 85°C | bt |
| 3 | TANK TEMPERATURE | 30-70°C | 60°C | tt |
| 4 | DETERGENT TIME AT FILLING | 100 - 300 s | 180 s | dF |
| 5 | DETERGENT TIME AT CYCLE | 0 - 30 s | 13 s | dc |
| 6 | RINSE AID TIME AT FILLING | 0 - 90 s | 35 s | rF |
| 7 | RINSE AID TIME AT CYCLE | 0 - 30 s | 12 s | re |
| 8 | COLD RINSE | 0 (NO) - 1(YES) | 1 | Cr |
| 9 | DRAINING DURATION | 20 - 60 s | 25 s | Cd |
Maintenance and Repair
After 50.000 washing cycles, a Service reminding message will be displayed in the screen. Regular maintenance, performed by licensed technician
using original spare parts is essential for proper function of the machine.
Alarm Indications
If the system records any malfunction, then a warning message will be displayed on the screen. If such a condition occurs, please advise the fol
lowing table which describes the problem shortly. Should you need further assistance, don't hesitate to contact your local re-seller.
ALARM
PROBLEM DESCRIPTION
| Alarm 1 | Water filling time excession |
| Alarm 2 | The water level during draining is not reduced |
| Alarm 3 | Excess time of boiler heating |
| Alarm 4 | Excess time of tank heating |
| Alarm 5 | Water temperature in the boiler is above limits |
| Alarm 6 | Water temperature in the wash tank is above limits |
| Alarm 7 | Cold rinse alarm |
| Alarm 8 | Bath thermometer not connected |
| Alarm 9 | The bath tub thermometer is defective |
| Alarm 10 | Boiler thermometer not connected |
| Alarm 11 | The boiler thermometer is damaged |
| Alarm 12 | The washing cycle was completed but the boiler did not heat up properly (the heating time in the Thermo-protector function was exceeded). |
Troubleshooting

| PROBLEM CAUSE SOLUTION | ||
| The dishwasher does not operate properly | Connection interruption Check the connection | |
| You have not turned the switch of the appliance ON | Turn the switch ON | |
| Main switch / or fuse has not been activated / or it is faulty | Check the main switch / or fuse | |
| The switch of the appliance is faulty Refer to the authorized local dealer who sold the appliance or directly to the manufacturer | ||
| The water inlet valve is faulty | ||
| The door is not closed Close the door | ||
| You have not turned the water supply on | Turn the supply on | |
| The appliance operates, but the switch LED does not light on | The LED is faulty Change the LED | |
| Boiler heating does not operate | Switch or main switch or fuse has not been activated | Check the switch of the appliance and the main switch or fuse |
| The safety thermostat of the boiler is faulty | Refer to the authorized local dealer or the manufacturer | |
| The 93°C thermal fuse of the boiler is faulty | ||
| Pressure regulator is faulty | Refer to the authorized local dealer or the manufacturer | |
| “Boiler heating” relay is faulty | ||
| Boiler fuse is burned out | Refer to the authorized local dealer or the manufacturer | |
| Boiler heating operates, but LED does not turn on | Faulty LED Change LED | |
| Dispenser heating does not operate | Switch N1 of the appliance or main switch or fuse has not been activated | Activate the corresponding switch or fuse |
| “Compartment heating” relay is faulty | Wait | |
| The 85°C thermal fuse is faulty. The dispenser's fuse is burned out | The thermostat switch of 60°C heating is faulty | Refer to the authorized local dealer or the manufacturer |
| “Compartment heating” relay is faulty | ||
| Pump motor does not operate | Main switch or fuse is not activated. The door is not closed. | Activate the main switch or fuse Close the door |
| Main relay is faulty | Refer to the authorized local dealer or the manufacturer | |
| Pump motor is faulty | ||
| Program selection switch is faulty | ||
PROBLEM CAUSE SOLUTION
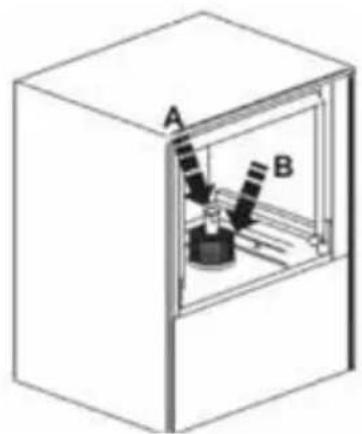
| Motor operates, but pump does not rotate | An object has jammed the pump fin | Refer to the authorized local dealer or the manufacturer |
| Salts or detergent have been petrified following non-operation of the appliance | Rotate the screw on the backside of the motor, until it rotates freely | |
| Items do not dry (dishes, glasses, etc.) | Compartment has no drying aid Insert drying aid to the compartment | |
| Drying valve is faulty | ||
| Program switch is faulty | Refer to the authorized local dealer or the manufacturer | |
| Rinsing arms do not rotate | ||
| Basket does not rotate | ||
Warranty
Any defect affecting the functionality of the appliance which becomes apparent within one year after purchase will be repaired by free repair or replacement provided the appliance has been used and maintained in accordance with the instructions and has not been abused or misused in any way. Your statutory rights are not affected. If the appliance is claimed under warranty, state where and
when it was purchased and include proof of purchase (e.g. receipt).
In line with our policy of continuous product development we reserve the right to change the product, packaging and documentation specifications without notice.
Discarding & Environment
When decommissioning the appliance, the product must not be disposed of with other household waste. Instead, it is your responsibility to dispose to your waste equipment by handing it over to a designated collection point. Failure to follow this rule may be penalized in accordance with applicable regulations on waste disposal. The separate collection and recycling of your waste equipment at the time of disposal will help conserve natural re
sources and ensure that it is recycled in a manner that protects human health and the environment.
For more information about where you can drop off your waste for recycling, please contact your local waste collection company. The manufacturers and importers do not take responsibility for recycling, treatment and ecological disposal, either directly or through a public system.

L1L2L3LCD1ALARMLCD2L4L5L6
DE
- LCD1 - "bt" of "tt" (afwissenfeld)
- LCD2 - "--°C"
ALARM PROBLEEM BESCHRIJVING
PROBLEM 00RZAAK OPLOSSING
PROBLEM CAUSE SOLUTION
L1L2L3LCD1ALARMLCD2L4L5L6
- LCD1 - "bt" o "tt" (alternative)
- LCD2 - "--°C"
PROBLEMA CAUSA SOLUZIONE
Introducerea corecta a paharelon in cosurile beschise.
PROBLEMÁ CAUZÁ SOLUTIE
IoproToBka neped nepBbIM nCnoJb3ObaHneM
- Chmnte ynaKOBky. Npeed hactpoikoYyctpoiCTBa npOBepbTe haInuHne BNDMbIX nobpeXdeHn np TpaHCnpTupOBke. Ecnn comHeBaetecb, npurlacnte cneuAnncTa dny npOBepkn (OT MeCTHO aBTopn3OBAHHoro dNcTpnbHTopa, KOTOpbI npOdaJ yCTpoiCTBO).
- YctaHOBHTe NocydomOeHyo MaunHy B CBoe MeCTO, PAnOM C Heo6XoIMbIM NCTOuHNKOM BObl N3NeKTpOnNTAHn (OCHOBaHne DoJxHo 6bITb DOCTaTOUHO yCTOuHHBbIM).
- CHHmnte 3aunTHyU PJIeHky, 3aunuauOuyo cTalbHoN KOpnyc NocyDomoeuHou MaunHbI OT paapanH. YdaInTe octopoxHo Bo3MOxHbI ocTaTKI
KJIEr. He noJIb3yIeTcB uHCTpyMeHTOM, KOToPbIMoXeT noUapAnaTb NOBepxHocTb. He yJaJIeHne 3aIuTHo nIeHN K MoXeT npVBecTn K o6pa30BaHIO JnIKoN PJIeHKN, KOToPyTO TpydHO yJaIITb N OHa npIJINHeT K CTaJIbHOMy KOpNcy NocydoMOeHuON MaUNHbl.
- YcTpoIcTBo D0JXHO 6bITb BblpOBHeHO. Bo3MOxHbIe OTKNoHEHnO T yPOBnD0JXHbI 6bITb Nc- npaBneHbIC NOMOuBIO BaTePnaca.
- После успшон установи и поед Вьогдь В зацию ТцаTeьно очирпесудомоeHyO MaunHy obiHbIM MOUIM CpeДCTBOM.
IopKnloeHne K BoDOnpoBoOy
BHUMAHNE: NODKIOUeHne KBOOIpoBoNy DOJX-HO OcyueCTBbTcB CooTBetCTBnC DeNCTByu-UMn CTaHdaptAm6e30NaCHOCTn.
IocydomoeuHa MaunHa DoJxHa 6bItb NoKluOyeHa K BODOpBoOy C MaKcMmaBHoN TeMnepaTpyo 60^ / 130^ .Ecnn Tpe6yeTcnaNoKluOeHnE K ropaeB OBe, o6paTntecb K BaWemy npoDaBu.
3aINBHOJ WnAHr DoJKeH 6bITb o6OpyOBAH wa- pOBbIM KnaHOM [oNHOHaPpABHeHHbIM), COOT-BETCTByIOUm CTAHApTy DIN 1988.
3aINBHOI JHaH Heo6xoIMo npomblpei
POnKJIuOHeHEm yCTpoIcTbA.
MHHMaIbHbI BHyTpEHn DnAmTep 3aJIbHOrO IHaIra DoJKeH CoCTaBnTb 16 MM, a NOpKJIuOe-Hne K IHaHry DoJXHo 6bITb 3/4 IIOMa.
- Ipei BBOOM yCTpoIcTBA B 3KcNpyaTuHo BCE _laH 乙 IJHaHra npOHO yKePnTe.
- NocydomoeyHy MaunHy MoXHO NOKIOHTb TOnbKO C 3ΦeKTHBHO paOtaHouIm yMraHTeJIem.
PoiKJIIOUeHHe K KaHaJIIN3aIIN
-「pabntaunonHna KaHn3aun (ecteBHeHHbI cTOK).CInBHOJ nlaHr noKlOHTe HenocpeiCTBeHHo K OCHOBHomy CInBy, B KOtOpom nped-ycmOTpeh cnfoH, yctpaHouuHn HeepnATHbI 3a-
Paxn INHapnyB KaHaJIIN3aCNU CnfoHOM.
BHIMAHHE: CnBHOJ WNaHr He DoJXeH Haxo- DntbCra Bblwe 650 MM OT dHa Do3aTopa IJRA NocyDOMOeHOr MaunHbl.
IopKJIIOUeHne K 3JIeKtpnueckoCetN
BHUMAHNE:Bce 3JIeKTpueckne pa6oTbI DoJXHbI BblIOJIHrTbcra T0JIbKO KBaJIuΦnUcpOBaHHbIM n aB-Topn3OBAHHbIM cepBnCHbIM ueHTpOM.
- NocydomoeuHa MaunHa pa6oTaet npn onpeJeHHOM HapjXeHIn, B 3aBNCmOCTN OT MoJIyycTpoIcTBa.
- IopdaBaemar MoHocTb DoJxHa 6bITb aaantnpoBaha KnapaMeTpam ycTpoiCTBa (JIeKtpnueckoe
NoKIOUeHne DOKHO BbIIOJIHrTbcra ToIbKO aBTOpN3OBAHHbIM cepBnCHbIM ceHTpOM).DOLXHBcO6IIOaTbcra cTaHapTb DIN,VDE,D100,yCIOBnna NoKIOUeHnEAVU,noLoKeHnZH 1/37,pa3-DeI 7.2,a TaKxpeJeCTByuOuHe MeCTHbe npabnataTexnKn 6e3oNaChocn.
- YcTpoIcTBo DoJxHo 6bITb NoDKHoueHo K 3JIekTpuecko cEtnc nOmoUbIO ka6eHr HO7 RN-F.
IopKJIoueHne 3aunTHoro npoBODnKa n KOMpeHcaqna n3MeHeHH HapJxKeHn
- ΘleKtpo6e3oNaacHocTb yCTpoiCTBa o6ecneuBa-etcra TOnbko npn ycIOBnN NpOKeBepKn 3aUHTHO rpoBOJHnKa. 3decb DOnxHbI 6bITb BblONHeHbI COOTBeTCTByUzne Tpe6OBaHnA (cmotpn n.1.5).
Kpome Toro, yctpoiCTBO DOJXHO IMeTb CnCTemy KOMpeHcauN N3MeHeHna HapjKeHna.
Ha3aHne naneHn yctpoNCTBa eCtB BuHT 6o03Ha-
YeHHbI, KaK «KOMpeHcaZnI N3MeHeHn Happr-XeHnra»".
- Iocne nodkluyeHnK 3JIeKtpueecko CETn INnoKluyeHn 3auHTHO npOBOnHka npOBepbTe COBMeCTMIOCTb CNTeMbI KOMNeHcaUN n3MeHeHnHaNPJxKeHn N3HaueHn N3OJaUN c HopMaTINBHBIM DOkUMeHTaM DIN VDE.
TexHnueckne xapaKTepeNCTKn
| Homepnpodukta 230268 231 | 753 237540 231340 | 236567 236574 | ||||
| Tin 40x40 50x50 | Курльные 50x50 | 50x60 | ||||
| Мakсималовая Велиота посydы [MM] | 295 335 400 | 450 | ||||
| Равочец наразожения и чASTOTа [В/Гц] | 230 / 50 400 | 50 230 / 50 | 400 / 50 | |||
| Расхов постейамоюшости [Вт] | 2,8 | 6,6 | 2,8 | 8,6 | 5,0 | 7,1 |
| Tempepatура воры ддясторкii / оралackиваши [°C] | 62 / 85 | |||||
| Столартое оборUDовке | Дозатор оралackиваши и моюшего среadingва, сизноги наесс | Дозатор оралackиваши и моюшего сremeства | ||||
| Клascьоюнcopeоницадости | IP44 | |||||
| Колчесто [шт.] / Роб-дожиileьнocсыцлambы [c.] | 3/60, 120, 180 | |||||
| Вес нето [пrim.] [kr] | 39 | 55 | 135,5 | 57 | ||
| Размеры [MM] | 470x510x(H)710 | 570x600x(H)830 | 750x880x(H)1390 | 595x730x(H)1340 | ||
ПРИМЕЧАНЕ:Текнисторухухун StokyT 6bIb n3MeHeHb 6e3 yBeDOMNeHn.
Hnctpykunno Tekyuee 3Kcnnyatau nocydomoeho MaunHBi
- UcpoIcTBo npeHa3HauEHO TOnbKO IJIaMbITbI NocyIbI, YaIeK, CTaKaHOB, cepe6pHoi NocyIbI N T. D. (B 3aBucmOCTn OT MoJeN).
- 06paTne ocoboe BnHMaHne Ha npaBnIbHoe pa3-MeueHne NocydbI BycTroNCTBe.
- Cepe6pnyo nocydy cneNyET ouHCTnTb ot octaKOB Niun, ecnn OHa He 6bla BbIMIta cpa3y no
Cne nCnoB3OBAHn(HeKOTOpbI npOdykTbI MOryT Bbl3BaTb obecuBeuVBaHne nNoBnE HnTeH).
He moTe BycToe nocdy, KOTopar mema KaHTaKT C KNCIoTAMN, MInHepaJIbHbIMM MacnAmN, XnpamN, 6eH3nHom, KpacnteJMyu npactBopnTeJMaN (npomblneHHbIMxUMKaTaM).
IodrotobKa nocdybla Mblb
- He no3B0JnTe, yTo6bIOCTaTKn eIbI 3acoxnHa nocyde. yTo6bI n36exKaTb 3acopeHnnaIbTpOBn 6bICTpOro 3aRpa3HeHnna IpomblBOUHO BODbl, ydaJIaIte 6oJIe KpyNbIe OCaTKn NiuN, cEmeu
KN, 3y60nCTK n T.D. n3 nocydbI nepei NOMEeHnEM IN B KOp3nHy.
Bcnyae ocTaKOB nUH Ha cTeKJIe, Mbl peKomeHdyem BbIMaUHbAHne IIN ONoJaCKBaHHe.
3anOpHeHne KOp3nHbI
- CtaKaHbI / pHOMKn, yAaKn, 6oJIbUne TapeJKN n T.I. CNeIyET NIOJXITb BBepx IHom B COOTBeTCTByIOuNne KOp3INbI. He cTaBbTe nocuNy oNDHy Ha npuyu.
- CtaKaHbI / pIOMKn He IOnJXHbI cOpnKacTaBc.
- NpOJKeTe cToIobBle npI6Opbl B noDxoJaUyIO
KOp3nHy n3 nlaCTnKa, pykamn Bn3. Cepe6pyHyo nocydy moXHo cBo6oJHO pa3IoxNtB ha nlaCTNKOB0n KOp3nHe. N36eraIte nepenonHeHHa Kop3nHi. LnaHri, noDBoJnne Body, He doJXHbI 6bITb 3a6loKnpoBaHbI (n3OrHyTbI) nn pactaHyTbl.

PpaBnIbHoe pa3MeueHne TapeIOK B KOp3Hax Co TbipMn.
PpabnIbHoe pa3MeueHne cTeKJI BOTKpbITbIX KOp3HHax.

PpaBnIbHoe pa3MeueHne NOCTaBOK nCTOIOBbIX npnbopOB.
PpaBnIbHoe BLOKeHne NOHbIX Kop3nH.
Panaelb ynpablenn
L1L2L3LCD1ALARMLCD2L4L5L6
L1L2L3LCD1ALARMLCD2L4L5L6
| TIPKA | NAZIV | OPIS | NAPOMENE |
| SW1 | CT1 | Gumb kratkog ciklusa | Trajanje 1 min |
| SW2 | CT2 | Tipka za srednji ciklus | Trajanje 2 min |
| SW3 | CT3 | Gumb za dugi ciklus | Trajanje 3 min |
| SW4 | DB | Gumb pumpe za izbacivanje vode | |
| SW5 | PLOČA | Gumb za hladno ispiranje | |
| SW6 | NA | Prekidač za uključivanje/isključivanje | |
| LIJEVANI STOL | BOJA | ||
TIPKA NAZIV OPIS NAPOMENE
L1 LED lampica za odabir kratkog ciklusa
L2 LED srednjeg ciklusa
L3 LED zaruljica odabira dugog ciklusa
L4 Praznjenje urina u tijeku
L5 Odabrano hladno ispiranje
L6 LED sklopka za uključivanje/isključivanje
Uključivanje
ZaPokretanje stroja, pritisnite tipku SW6 (ON) na 3 sekunde. LED LL6 treperi crveno i oglasava se zvučni signal.
PROBLEM PRICINA RESENI
IiIroTobKa nepei nepuM BnKOpncTaHHaM
Bidkpinye ynakobky. Nepw Hix BCTaHOBIOBATnpnla, nepebipte noro Ha HABHicb 6ydb-aknx3OBHIxHIX NowkoJXeHb, NOB'zAHnx i3 TpaHCnOpTyBaHHm. KIo y Bac BuHKnCymHIB, 3BepHITbcrdo faxibq, 06 nepeBiPrtu noRo (y ABTOpN3OBAHO rMoCueBOrO DInepa, kN npoab npnaI.
- Nomicitb nocydomnHy MaunHy B Micce yctahOBKn, 6n3bko Do Heo6xHoi BoN Ta Jxepena XNBHeHHa (3emna NobHHa 6ytn DocTaTHbO Cta6ibHOIO).
3HIMITb 3axnchy fobry, 3axuauoyn ctaeBn KOpnyc NocydomnHoMaunn BiD NOpnnH.
Bydb-ri 3aunu anre3nBy cnid o6epexHo Bn daunTu. He BNkOpncToBnyTe wliyBaIbHi MaTePiaann. Raio 3aunuTn 3axnchy foJbry, KneKy KneNoBry fOJbry Moxe 6yt N Baxko BndaunTu 3i ctaJeBOr KOpNcy nocyDmHHOi MaunHn.
- Ppunad cni, CTaBnTn rOpN3oHTaJIbHo. MoKInBi BiXnIeHHa Cni, KOpNryBaTu 3a DonomorOc cnnpTOBOro pIBHa.
- Picna ycniunho BcTaHOBJeHHn NocydomnHy MaunHy cnPeTeNbHO OunchTn 3BnuHm MnouHM 3acobom, nepu HIX BOHa bye BBeDeHa Beknnyataio.
L1L2L3LCD1ALARMLCD2L4L5L6
SW1SW2SW3SW4SW5SW6
UA
PpoeDpynpepn npaHnHa
Ockibkn npalbHa Maunha yBimKHeHa,BoJnep i pe3epByap dI npaHnnouHaIOb 3anpaBnTnc BDOIO. NToIM MaunHa 3anOBHOCTbcMnOum 3acobm I onoNICKyBaue.MiD qac zufo Ha Tnpe 3'ABnEtcnoBIDOMLeHHA FILL>.PiCnToR,ak pe3epByapn 3anOBHeHIO Ta Heo6xDiHi pDInHn Dnra MNoUOrO 3aco6y Ta onoNICKyBaua 3axOnneHi, HarpIBaBHN Onip HarpIBaHuTa HarpIBaBHN Onip pe3epByapa dI npomBaanHn NouHaIOb TnpaObTu nocIIOBHO (nicna DoCraHHeHHr Temny HarpIBaHHn HarpIBaHu Oepizoyo OTbOpy Ioro onip BmmKaETbcA, a 6ak InpomBaanHn nouHaeh HarpIBatnc).Ha LCD1 i LCD2 nonepeMHNO BiDo
6paxaetbca noToHa TeMepaTpa KoxHoro pe3epByapa (KoI Ha PK-dncnlei 1 BiO6paxaetbcra bt), a Ha PK-dncnlei 2 BiO6paxaetbcra TemepaTpa 6oJIepa; KoI Ha PK-dncnlei 1 BiO6paxaetbcra tt), Ha PK-dncnlei 2 BiO6paxaetbcra TemepaTpa pe3epByapa). RaIoo HarpBaIbHn onip pe3epByapa IpnomBaHHy YBIMKHEHO, y npabomy HxHbOMy KyTI PK-LCD1 3aropaeTbcra TocKa, a y BnJaKy, RaIoo HarpBaIbHn onip HarpBaaya YBMKHEHO Kpanky B npabomy HxHbOMy KyTI LCD22. 3 uei npuHN cmbol (uo npedctabnae pe3epByap) BiO6paxaetbcra nID LCD1, a cmbol (uo npedctabnae co6oIO kOtIo) - niD LCD2.
PeknOuyiKyBaHHa
IiD yac po60n B pexnmi ouikybaHHa (nicra aBtoMaTHuHOro hanaTuBaHHa) PK-dncnnei 1 i PK-dncnnei 2 noBHHi nonepeMHIO BiTbOpOBaTu Tempepatyp pe3epByapa dnn MaTT Ta baka nn 6oJnepa.
- LCD1 - «bt» a6o «tt» [noueproBo]
- LCD2 - << - °C>>
KuO MaunHa 3aHuaetbC B pexnmi ouikyBaHH 6Ibwe 30 Xbnnn, BOHa nepeTbOpHeBcRa Ha peXm cHy dIra Minimiaui eheprocnoxnBaHH. Y taKomy pa3i PK-dncnne1 i PK-dncnne2 3rachnyt b, a L6 noHc 6nmatn. Hatnckaoyn SW6, MaunHa 3HOBy roTOBa do po6OTn.
Cnctema Thermo-Protector
Uo6 po3noatn nepu nn ppaHna 3a Deh, Tempepatya B baky Ta 6oJepi NobHHa DoCraTn po6oHx 3NaueHb [60°C Ta 85°C BiDNoBIDHO]. Bycix iHux uKlax uee3 cncTeMy Thermo-Protector, kso Tepepatya B 6oJepi He nixOHTb IJa IonockAHn, uKn npaHn TpNBae Do Tnx nip, nokn
BODa DnI NOLOCKaHH He CTAHe DoCTaTHbO HArpiToIO. NObiOMJeHH Ha ekpaH iHΦOpMye KopncTyBaua npo npoDobXeHH uNKly npaHH; PKLCD1 NOKa3ye NOTouH 3HaueHH TeMpePaTpyn BOnu B6oJnepi, a LCD2 nOKa3yE
Bn6ip zukny npaHHn - noaToK
LpapbHa MaunHa Mae Tprn onu nporpaMnpaH. KopntyBaMuKe Bn6patN KopoTky, cepenHTo Ta DOBry npoPamy, HATNCHyBwn OndHy 3KhoNOK SW1, SW2 a6o SW3. Iicna HATncHeHHa BiNoBIDHOI KhoKNi npaHn 3ayncKaetbc8aBTOMaTHUHO, kUO DBepraTa BnnapKOHe BiDHNHeHi. B octaHbomy BnAdky Ha naHeli npuaibB BiobpaXacTbcNobIOomJeHH «door», i npaHn3ayncKaetbc3HOBy, kTilbKn DBepzraTa 3aunHeHi. Yac, 03aunWBc (y cekyHdx), BiobpaXacTbc8Ha Tne.
BAKJINBO:KaKuoDbepuraBiiKnpuBaHbCBA
naKoBO Do 3aBepWeHH nporpaMn, MTTyNHH-ctbcra TaMep cKndaetbcra. Tomy, uOb 3aBepuNTuNKl, cnId p03NoaTu npoueDpycNoaTkY.
PIMITKA.3a 10cekynddo3aBepweHHnochOB-Horo npaHn3nVBn Hacoc nouHae npaIOBaTN i 3ynHaeTbcqyepe3 10cekyndnicny nooCKaHH.
Iicra 3aBepweHnHa nKnny npaHnHa naHeni npnaIiB 3'ABnEtbcnoBIDOMnEHn «end» npo 3aBepweHH nporpaMn. NobIDOMneHH 3'ABnEtbc,DOKN DBepura3HOBy He BIDHNHTbcra.

3nB
Ley npnaad 6nlaHaHO 3nBnHm Hacocom, TOMy
zukl 3nBy BnKoHyetbca ABTomaTuHo. KaO Bu
xouete BnKoHaTn 3nBaHHa BODn 3a Notpe6oU,
6ybIb Iacka, BnMItb 7IaHr nepenOBHeHHra, kNn
po3MiueHn Ha pe3epByapi dny npomuBaHH, iHaTNCiTB KhoNky SW4. Ype3 15 cekynd po3noChTeb
cra 3nBaHHa, a cbITIOIDHn IHdkaTop L4 noHne
6limatn.
Iiuc 3nBaHH BkoHcyTbcBHytpiwn nepe
Bipka cnCTemn, kara rapaHTye, 0o onanIOBaJIbHI pe3ncn BmKHeNo. Y cboMy BnIaNky 3anO6raTbcra 6yNb-Ke moKInBe nepepiBaHH, BnKlnKaHe Ha-rpiaHHam, kne He 3aHypene y BoNy. Nicna 3ynHKn DpehaKy npotrrom HAcTyHnx 30 cekyHd, cnCTema BnkoHye camoouueHH (Dbepra TnoBHHi 6ytN 3akpiTi).
PUMITKA:Пся КОЖHorO BUKOHaHHa 3JIbAHH 3a 3aHTOM MaUNHa BUMKaEtbcr.
3anOBHeHH MmOyoro 3acoby Ta onoJicKyBaay
LmaHnHa 06laHaHa nepiStaBtunHm Haocamn dIy onoNicKyBaA ta HAnOBHeHHa MIOUHO3acO6y. BnyckHi OTbOpN dIy 3aNoBHeHHa dIy KOKHOro 3 Hx -Ce IBa BiINobiHni WlnAHn, kI cIi3aHypOBaTu y BiINOBiHi pe3epByapn.
IpoceDypa HanoBHeHH BIKOHyETbcra y Dba etann.
NoataKOBe HanoBHeHH (KoIN BN BMnKaTe Ma-xiH) Ta DoataKobi HanoBHeHH NiCJ KoxHoTo uNKny npaHH:
1-η etan:Пд часавTomuhoi nirotoBkn (nepeДпершим паннм) MaunHa Otpmye 3 Mnilape3epByapa npotrrom 180 ckynd i onolickybaa npotrrom 35 ckynd. Ze moXHa BiDperyIIOBaTN B MeHIO KOpNCTyBaA *P03HaTe po3diJ «MeHIO KoPnCTyBaA».
2-η eTan:ПiДчac koxhoro nobHoro zukny npaHnHa TaNIOscKaHHMaunHa OTPmUy MmOchN 3ac6 npotraRom 13 cekynd, a ononickyBau - npotraRom 12 cekynd. Lc moxHa HalaawTyBaTu 3 KopncTyBaua ye
pe3 MeHIO KopnCTyBaHa *IpeBipTe po3iJ «MeHIO KopnCTyBaHa>.
IPNMITKA:ЯкwoBamnotpi6HoHanaWtBuTn3acicДлЯпаHHa6OdoonomIXHn3acicДлЯnoCKaHHaMeHIOKOpNCtYBaHa,naM'raTe,IoДляKOKHOIceKHyDnBiIDNoBIDHnHAcOCBIOBHeTaKi piDKi KINbKOcTi:
HacocДЯ MNUOyoro 3ac06y:0,83M/ceK
HacocДЯонолickyBaHHa:0,19M/ceK
POMHOKINBUNi KINbKOCTI Ha TpNBaJIcTb (ceKyn) pO6OTn HAcOca, BN MoXeTe ObUncInTu 6'Em KOxHoi BnKOpNCtAoHoi piHNH.
NONEPEJXEHH:MaunHa oTpmye onolickyBaH nIac uKny npAHra Ta MIOUCh 3ac6 niJ cac Kny noLOCKaHH.
PonockaHHxOJHOI BOH
LmaHnha npaue B pexnmi xoJHOI BOH. IIMOxHa AKTINByBAtn DnBnKoHaHHn iicn KoxHoToUKNy npaHn a6o DnBnAKnB, KOIn nOTpiHo.
Uo6 BnKoHaTnpOMBaHnXoJOnHO BoJIO nICJL OJHO OIKJy npaHH, HATNCiTB KhoNky SW5 iYtpMnyTe II npotrOm 1 cekyn. Odn3BykoBn CnHAn NOIOMtB npTo, I0 MaunHa HalaWTOBaHa DJI BnKoHaHH OJHO XoJOnHO noLoCKaHH. NcIe ZbOro BMkaetbcraCbitNoiOHN iHKnKaTop L5 niD qac BnKoHaHH npoueDpyn.
Ku Bo 6aKaTe BkoHaTu NoIocKaHHxOJHOi BoNn iCnA KoXHOro uKny npAHn, HATNCHTb iYtpmUyTe But-ton SW5 npotraom 5 cekyHd, nOK mAsnHa nepe6yBaB peKmIo ouikyBaHH. NcIe KoxHOro uKny npAHn LyHae NOBiiHn 3ByKO-Bn CnHaj, AKn NOBIDOMJne Ipo Te, 0MaunHa HanaSToBaHa Ha xOJOnHe noIocKaHH (CBITbcr iHdkaTOp L5). KaBo BN cKacyTe Bn6ip, NobTopitb BnueBkazAnHy npoueDpy.
BIMKHeHHMaunHn

KIO BxOyTe BmKHyT MaunHy, BnMItb IJNaHr nepenOBHenB pe3epByapi IJ npomBaHH Ta HATNCHT b KONky SW4. MaunHa ABTomatNuHO 3JIbAE BiIpaBObAHy BOy, BIKOHye cIKKn camoOuHsEHN, a NotIM BmHKaETbcA. AJIbTePhaTHBHM cnocobm e nociHe HATnCKaHH KONKn SW6, DOKN B nepwomy pIky ekpHa He 3'ABITbcr iHnKaia «OFF» (ue 3aime 6bn3bko 5cekynd). PekoMeHDobAHn cnoci- nepshn.
Функця EKO
KaMo MaunHa npaoc B pexnmi oukybaHH 6iB-We 15 XbnnH, Temnepatypa Boiler 3nxyetbcra, 06 yHnKHytn 3aBOro eheprocnoxnBaHH. Ka
IbepaTnpaalbHoiMaunHnBiduHrbc, yHKui EKO 3ynnHtbc.
Функця Soft Start
MaHnHa 0bnHnHa cnCTeMoO Soft Start, Ka 03B0JRE B0JHOMy HAcOcy 3aNcKATncs3 HxKuM
TnCKOM i NoctynoBO 36iIbIyBaTN NOrO, Uo6 He no- uKOJNTN UyTNIIBi KpIcTaII.

Meho KopncTyBaay
Uo6 ybiin B MeHIO KOpNCTyBaHa, OHOaCHO BMKHTb MaunHy Ta HATNCHTb KHOKN SWSW1, SW3 Ta SW6 i ytpmnyte ix npotraom 3 cekyni 3aKpntuMn DBePcTamn. CbitnoioDnH nIHNkA-Top L6 MNTtB, I Tpui lyHae 3BykoBn cnHn. Ha KInbKa cekyHd 3'ABnEeTbcr NOBIDOMJeHHRA
3HaNdIbnapaMeTp,akn noTpip6Ho BiDpeRyIIOBAtu, BnKOpncToBvOuH KOnKn SW3 Ta SW4 nHaBiraui B MeHIO.BiNoBIDHn npaMeTp BiO6pa3ntbcra Ha ekpani.
Якwo Bn 6axaete 36iNbwnKinbkiCTb (+) ,HaTnc-HITb KhoNky SW1.
KuO Bn 6aKaTe 3MeHunTn KInbKiCTb [-], HATNC-HITb KHONKy SW2.
PicnBn3HaueHHaHaeHHHaTNCHTb KHONKY SW5 oIN pa3, 06 3apeectpyBaTH 3HaueHH B na'rti.
Y HabeHin HxHcMe Matpui MoXHa 3HaHTN KopoTKn Onnc yHKui, rki MoKe HalaTuBAt N KopunctyBaay, a TAKoK iX 3HaueHHa 3aAMOBuyBaHHM.
Uo6 BnTu 3 MeHIO KOpNCTyBaHa, HATncHiTb i yTpmyTe KhoNky SW6 npotraom 3 cekyHd. Tpu pa3nLyHae 3ByKOBu CnHaI i Ha ekpaHI 3'ABnEeTbcr NOBIDOMJIeHHA «off>. PicJRAkPITMa MeHIO KOpNCTyBaHa MaUNHa BUMNKaETbcra.
Hi InapaMeTp Diana3oH 3a 3amOBuyBaHHm Noka3aHH
| 1 PEXKIM TEMПЕРATУРИ C/F C C | ||||
| 2 | TEМПЕРATУРА БОДЛЕРА | 30-92 °C | 85°C | bt |
| 3 | TEМПЕРATУРА PEЗЕРВУAPА | 30-70 °C | 60°C | tt |
| 4 | чAC ПРANня ПРИ HANOВHEHнI | 100-300 c | 180 c | dF |
| 5 | чAC ПРANня ПДчAC ZUKNКЛУ | 0-30 c | 13 c | dc |
| 6 | чAC ПРИГOTУВAHнЯ OПОЛICKУВACHа ПРИ 3АПОВHEHнI | 0-90 c | 35 c | rF |
| 7 | чAC OПОЛICKУВACHа ПДчAC ZUKNКЛУ | 0-30 c | 12 c | Знову |
| 8 | хОюдne ПОJOCKAHнЯ | 0 (HI) - 1(TAK) | 1 | Cr |
| 9 | ТРИВАЛICTь ДЕРХAJУ | 20-60 c | 25 c | Cd |
Texhiehe 06cnyroByBaHHa Ta peMOHT
Iicra 50 000 uKlIB npaHna ha ekpaH i 3'ABtbcnOBiOmLeHH 3 cepBicHm HaraNyBaHHM. PeryIrpHe texHiue o6cIyroByBaHH, 0u BIKOHyETbcra
JIiueH3OBaHIM φaxibcEm 3 BnKOpNCTaHHm OpnIHaJIbHnx 3aNaChNX yactNH, MaBaxJIbBe 3HaueHHdIHaJIeXHO ΦyHKUioHyBaHHMaIHH.
Noka3aHHIdoCnHanyTpBOrn
Якwo cntema 3apeectpye HecnpaBnictb,Ha ekpaHi 3'YBNTbcn nonepeJxByalbHe nobioomlenHH. Ypa3i BnHKHeHH TaKoi yMOBN,6yNb IaCKa,O3Ha-OMTecb 3 HabeJeHOu HnxYe TaBnueo,B kki
OncaHa npo6nema Hau6nKuHm Yacom. KaO BaM noTpi6Ha DoaTKoBA DOnOMora, He BaraTeC3BepTaTNCdo MicceBOrnpoDaBzra.
CNHANTPBBOV
ONIC PPOBJIEMN
L1L2L3LCD1ALARMLCD2L4L5L6
| MYGTUKAS | VARDAS | APRAŠYMAS | PASTABOS |
| SW1 | CT1 | Trumpo ciklo mygtukas | Trukmè 1 min. |
| SW2 | CT2 | Vidutinio ciklo mygtukas | 2 min. trukmè |
| SW3 | CT3 | Ilgo ciklo mygtukas | Trukmè 3 min. |
| SW4 | DB | Siurblio išleidimo mygtukas | |
| SW5 | CRB | Šalto skalavimo mygtukas | |
| SW6 | NUO | JUNGIMO / IŠJUNGIMO jungiklis | |
| ŠVIESOS DIODU LENTELE | SPALVA | ||
| L1 | Trumpo ciklo pasirinkimo šviesos diodas | ||
| L2 | Vidutinio ciklo pasirinkimo šviesos diodas | ||
| L3 | Ilgo ciklo pasirinkimo šviesos diodas | ||
| L4 Vyksta drenavimas | |||
| L5 | Pasirinktas štallas skalavimas | ||
| L6 | IJUNGIMO / ISJUNGIMO jungiklio šviesos diodas | ||
Jungimas
ALARM POPIS PROBLEMU
PROBLEM SPOSOBUJE RIESENIE
PKS Hendi South East Europe SA
5 Metsovou Str.
18346 Moschato, Athens, Greece
Tel: +30 210 4839700
Email: info@pks-hendi.com
Hendi Polska Sp. z o.o.
ul. Firmowa 12
62-023 Robakowo, Poland
Tel: +48 61 658 7000
Email: info@hendi.pl
Hendi Italia S.R.L.
Via Leonardo da Vinci 4
39100 Bolzano [BZ], Italy
Tel: +39 800 727 438
Email: office.italy@hendi.eu
Hendi Food Service Equipment GmbH
Ehring 15
1208, 12/F Exchange Tower
33 Wang Chiu Road, Kowloon Bay, Hong Kong
Tel: +852 2154 2618
Email: info-hk@hendi.eu
Hendi Food Service Equipment Romania S.R.L.
Str. 13 decembris 94A, Hala 14
Braşov, 500164, Romania
Tel: +40 268 320330
Email: office@hendi.ro
FindHendi on internet:
www.hendi.eu
www.facebook.com/HendiToolsforChefs
www.linkedin.com/company/hendi-food-service-equipment-b.v.
www.youtube.com/HendiEquipment
- Changes, printing and typesetting errors reserved.
- Änderungen, Druck- und Satzfehler vorbehalten.
Wijzigingen, druk- en zefouten voorbehouden. - Zastrzega sie möliwość zmián, btędow w druku i sktatzie.
- Sous réserve d'erreurs de modification, d'impression et de composition.
- Con riserva di modifiche, errori di stampa e composizione.
- Rezervate modificarile, tiparirea si erorile de tiparire.
- Mby octabJHem 3a c06oI npabo BHOCNTb N3MeHeHH, OuN6Kn neatn Ha6opa.
- EnpuadovraaAayec,krunwnon kalotxieoBeda.
- Pridržane su promjene, pogreške u ispisu i slanju slova.
Zmény, chby tisku a szby vyhrazeny.
-Avaltozatatasok,nyomtatasiésabetuzesi hibak fenntartva.
-Bci npaba 3axuenehi 0do 3miH, MoKJIbI nomJIK npky Ta BepCTKN.
- Neid juhiseid voidakse muuta ja need voivad sisaldada trukivigu.
- Šī instrukcija var tikt mainita, tajā ātap var but drukas kūdas.
- Sios instrukcijos gali buti keiçiamos, jose taip pat gali pasitakytispausdinimo klaidu.
- Alterações, impressão e erros de composicao reservados.
- Reservado el derecho a realizar modificaciones, errores de im-presión y lipografia.
Zmeny, chby v tlaci a sadzbe vyhradené.
- Spremembe, liskanje in lipnaslavitev napake shranjenih.
- Safety regulations
- Special Safety Regulations
- Water softeners
- Intended use
- Grounding installation
- Preparation before first use
- Connection to the water supply
- Drainage connection
- Electrical Network connection
- Protective duct connection and voltage compensation
- Instructions for the dishwasher's regular operation
- Preparation of dishes for washing
- Filling of basket
- Control Panel
- Switching ON
- Procedures before washing
- Standby
- Thermo-Protection
- Washing Cycle Selection - Start
- Draining
- Filling of Detergent and Rinse Aid
- Cold Water Rinse
- Shutting down the machine
- ECO Function
- Soft Start Function
- User's Menu
- Maintenance and Repair
- Alarm Indications
- Troubleshooting
- Warranty
- Discarding & Environment
- IoproToBka neped nepBbIM nCnoJb3ObaHneM
- IopKnloeHne K BoDOnpoBoOy
- PoiKJIIOUeHHe K KaHaJIIN3aIIN
- IopKJIIOUeHne K 3JIeKtpnueckoCetN
- IopKJIoueHne 3aunTHoro npoBODnKa n KOMpeHcaqna n3MeHeHH HapJxKeHn
- Hnctpykunno Tekyuee 3Kcnnyatau nocydomoeho MaunHBi
- IodrotobKa nocdybla Mblb
- 3anOpHeHne KOp3nHbI
- Panaelb ynpablenn
- TIPKA NAZIV OPIS NAPOMENE
- Uključivanje
- IiIroTobKa nepei nepuM BnKOpncTaHHaM
- PpoeDpynpepn npaHnHa
- PeknOuyiKyBaHHa
- Cnctema Thermo-Protector
- Bn6ip zukny npaHHn - noaToK
- 3nB
- 3anOBHeHH MmOyoro 3acoby Ta onoJicKyBaay
- PonockaHHxOJHOI BOH
- BIMKHeHHMaunHn
- Функця EKO
- Функця Soft Start
- Meho KopncTyBaay
- Texhiehe 06cnyroByBaHHa Ta peMOHT
- Noka3aHHIdoCnHanyTpBOrn
- Jungimas
Brand : Hendi
Model : 237540
Category : Dishwasher