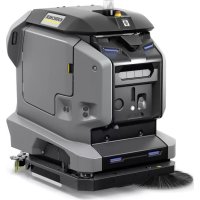
KIRA B 50 - Robot vacuum Kärcher - Free user manual and instructions
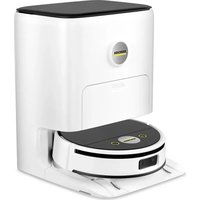
Find the device manual for free KIRA B 50 Kärcher in PDF.



| Product type | Professional robot vacuum and floor washer |
| Brand | Kärcher |
| Model | KIRA B 50 |
| Power supply | Rechargeable lithium-ion battery |
| Charging time | Approximately 8 hours (fully discharged battery) |
| Usage | Indoor, flat moisture-resistant floors |
| Operating temperature range | +5 °C to +40 °C |
| Maximum water height | 1 cm |
| Sensors | Distance and optical sensors (laser class 1) |
| Emergency stop | Emergency stop button |
| Safety switches | Two safety switches (braking in manual mode) |
| Autonomous operation | Programmable with zone delimitation by barriers |
| Maintenance and cleaning | Clean sensors regularly; check tightness |
| Spare parts and repairability | Use only authorized Kärcher spare parts; repairs by authorized service center |
| Compliance | EU directives according to declaration of conformity |
| Accessories | Docking station (optional), charging cable, brushes included |
Frequently Asked Questions - KIRA B 50 Kärcher
User questions about KIRA B 50 Kärcher
0 question about this device. Answer the ones you know or ask your own.
Ask a new question about this device
Download the instructions for your Robot vacuum in PDF format for free! Find your manual KIRA B 50 - Kärcher and take your electronic device back in hand. On this page are published all the documents necessary for the use of your device. KIRA B 50 by Kärcher.
USER MANUAL KIRA B 50 Kärcher
Deutsch 2
English 5
Français 8
Italiano 11
Español 15
Português 18
Nederlands 21
Türkçe 24
Svenska 27
Suomi 30
Norsk 33
Dansk 36
Latviešu 39
Lietuviškai 42
Polski 45
Magyar 48
Čeština 51
Slovenščina 54
Românește 57
Hrvatski 60
Srpski 63
Русский 66
Українська 70
Казакша 94
Български 77
日本語 80
中文 83
繁體中文 85
한국어 88
العربية 93
Inhalt
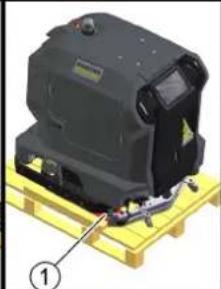
① Holzklotz
① Brett
②Kantholz
① Kantholz
② Brett
①Ladekabel
②Tür Gerätefach
①Netzbuchse
② Docking-Port
Gerät überprüfen
⚠️WARNUNG
Unfallgefahr
H. Jenner
Chairman of the Board of Management
S. Reiser
Director Regulatory Affairs & Certification
71364 Winnenden (Germany)
Tel.: +49 7195 14-0
Fax: +49 7195 14-2212
Winnenden, 2021/11/01
Contents
General instructions .... 5
Intended use 5
Safety instructions.... 5
Unloading....6
Charging the battery 7
Downloading the operating instructions.... 7
Checking the device....7
Switching on the device 7
Displaying the operating instructions on the touch
screen 7
Rules for autonomous operation.... 7
Troubleshooting guide....8
Declaration of Conformity 8
General instructions
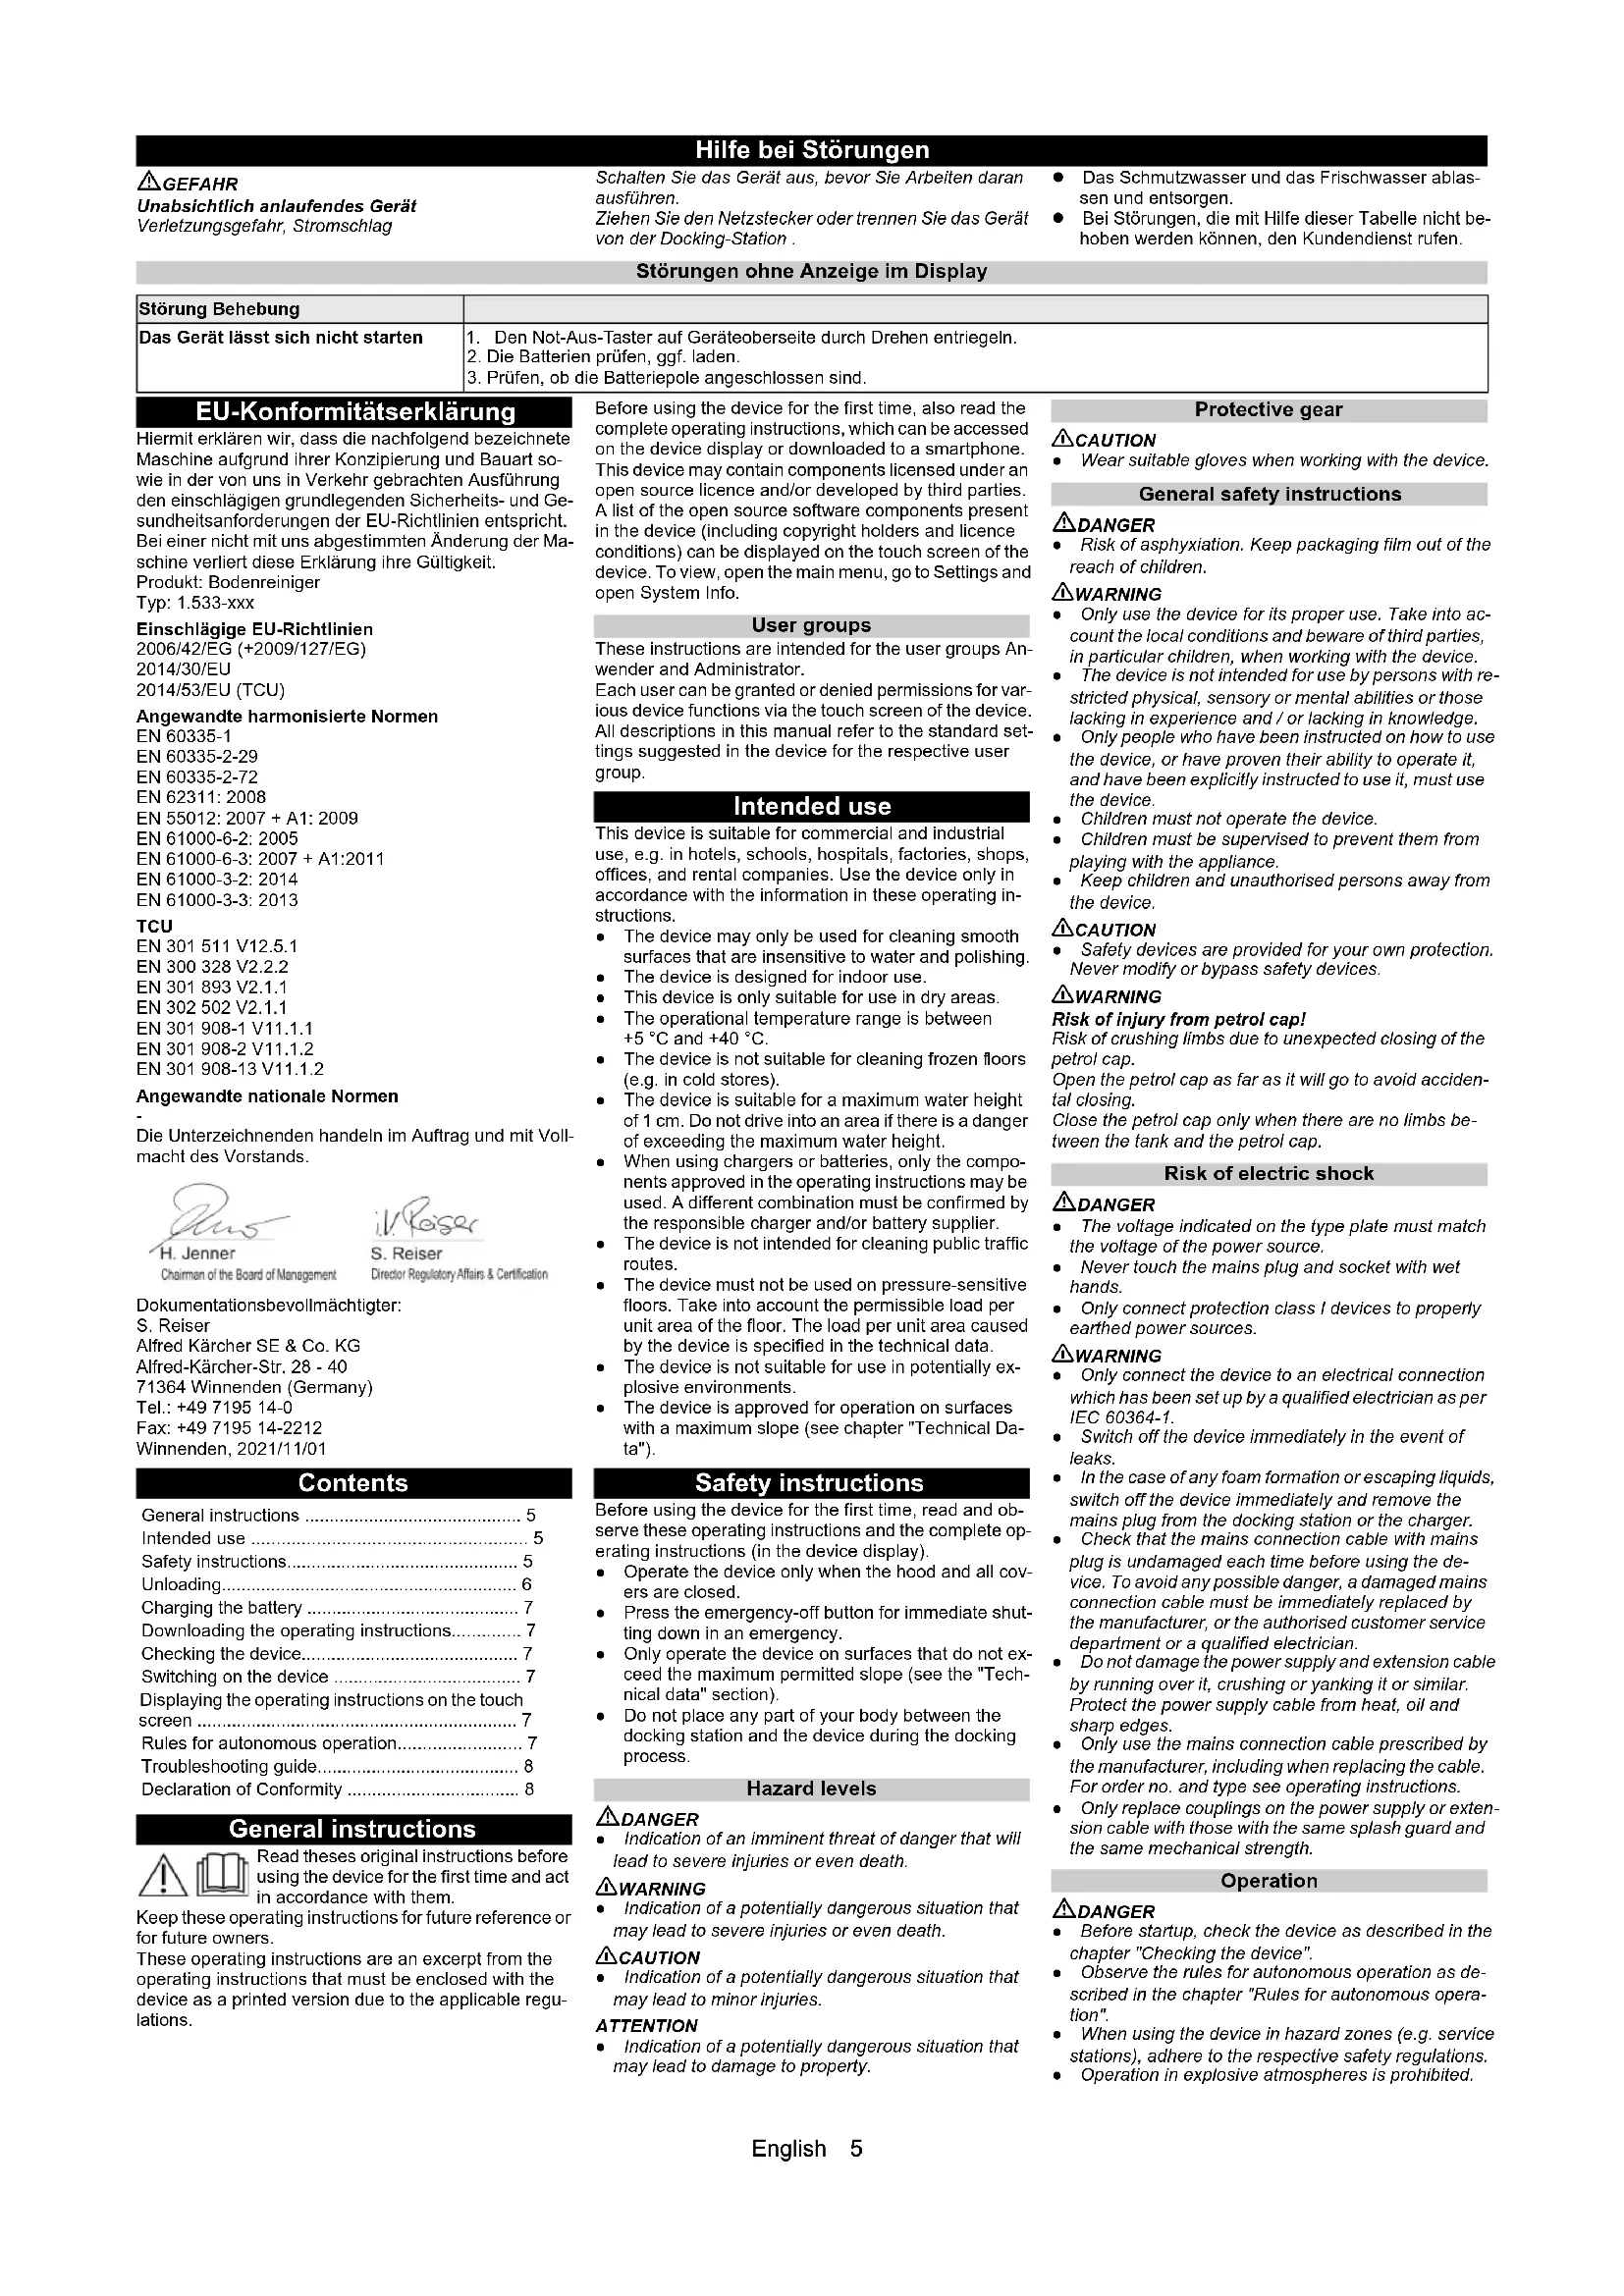
Read theses original instructions before using the device for the first time and act in accordance with them.
Keep these operating instructions for future reference or for future owners.
These operating instructions are an excerpt from the operating instructions that must be enclosed with the device as a printed version due to the applicable regulations.
Before using the device for the first time, also read the complete operating instructions, which can be accessed on the device display or downloaded to a smartphone. This device may contain components licensed under an open source licence and/or developed by third parties. A list of the open source software components present in the device (including copyright holders and licence conditions) can be displayed on the touch screen of the device. To view, open the main menu, go to Settings and open System Info.
User groups
These instructions are intended for the user groups An-wender and Administrator.
Each user can be granted or denied permissions for various device functions via the touch screen of the device. All descriptions in this manual refer to the standard settings suggested in the device for the respective user group.
Intended use
This device is suitable for commercial and industrial use, e.g. in hotels, schools, hospitals, factories, shops, offices, and rental companies. Use the device only in accordance with the information in these operating instructions.
- The device may only be used for cleaning smooth surfaces that are insensitive to water and polishing.
• The device is designed for indoor use.
• This device is only suitable for use in dry areas. - The operational temperature range is between +5 °C and +40 °C.
- The device is not suitable for cleaning frozen floors (e.g. in cold stores).
- The device is suitable for a maximum water height of 1 cm. Do not drive into an area if there is a danger of exceeding the maximum water height.
- When using chargers or batteries, only the components approved in the operating instructions may be used. A different combination must be confirmed by the responsible charger and/or battery supplier.
- The device is not intended for cleaning public traffic routes.
- The device must not be used on pressure-sensitive floors. Take into account the permissible load per unit area of the floor. The load per unit area caused by the device is specified in the technical data.
- The device is not suitable for use in potentially explosive environments.
- The device is approved for operation on surfaces with a maximum slope (see chapter "Technical Data").
Safety instructions
Before using the device for the first time, read and observe these operating instructions and the complete operating instructions (in the device display).
- Operate the device only when the hood and all covers are closed.
- Press the emergency-off button for immediate shutting down in an emergency.
- Only operate the device on surfaces that do not exceed the maximum permitted slope (see the "Technical data" section).
- Do not place any part of your body between the docking station and the device during the docking process.
Hazard levels
DANGER
- Indication of an imminent threat of danger that will lead to severe injuries or even death.
WARNING
- Indication of a potentially dangerous situation that may lead to severe injuries or even death.
CAUTION
- Indication of a potentially dangerous situation that may lead to minor injuries.
ATTENTION
- Indication of a potentially dangerous situation that may lead to damage to property.
Protective gear
CAUTION
- Wear suitable gloves when working with the device.
General safety instructions
DANGER
- Risk of asphyxiation. Keep packaging film out of the reach of children.
WARNING
- Only use the device for its proper use. Take into account the local conditions and beware of third parties, in particular children, when working with the device.
- The device is not intended for use by persons with restricted physical, sensory or mental abilities or those lacking in experience and / or lacking in knowledge.
- Only people who have been instructed on how to use the device, or have proven their ability to operate it, and have been explicitly instructed to use it, must use the device.
• Children must not operate the device. - Children must be supervised to prevent them from playing with the appliance.
- Keep children and unauthorised persons away from the device.
CAUTION
- Safety devices are provided for your own protection. Never modify or bypass safety devices.
WARNING
Risk of injury from petrol cap!
Risk of crushing limbs due to unexpected closing of the petrol cap.
Open the petrol cap as far as it will go to avoid accidental closing.
Close the petrol cap only when there are no limbs between the tank and the petrol cap.
Risk of electric shock
DANGER
- The voltage indicated on the type plate must match the voltage of the power source.
- Never touch the mains plug and socket with wet hands.
- Only connect protection class I devices to properly earthed power sources.
WARNING
- Only connect the device to an electrical connection which has been set up by a qualified electrician as per IEC 60364-1.
- Switch off the device immediately in the event of leaks.
- In the case of any foam formation or escaping liquids, switch off the device immediately and remove the mains plug from the docking station or the charger.
- Check that the mains connection cable with mains plug is undamaged each time before using the device. To avoid any possible danger, a damaged mains connection cable must be immediately replaced by the manufacturer, or the authorised customer service department or a qualified electrician.
- Do not damage the power supply and extension cable by running over it, crushing or yanking it or similar. Protect the power supply cable from heat, oil and sharp edges.
- Only use the mains connection cable prescribed by the manufacturer, including when replacing the cable. For order no. and type see operating instructions.
- Only replace couplings on the power supply or extension cable with those with the same splash guard and the same mechanical strength.
Operation
DANGER
- Before startup, check the device as described in the chapter "Checking the device".
- Observe the rules for autonomous operation as described in the chapter "Rules for autonomous operation".
- When using the device in hazard zones (e.g. service stations), adhere to the respective safety regulations.
• Operation in explosive atmospheres is prohibited.
- Never spray or vacuum fluids, flammable gases, explosive dusts as well as undiluted acids and solvents. These include petrol, paint thinners or heating oil, which can form explosive vapours or mixtures through suction air turbulence, also acetone, undiluted acids and solvents because these attack the materials used in the machine. - Never use the device to extract any burning or smouldering objects.
WARNING
- Never use the device to vacuum up people or animals.
- Do not use the device on slippery floors.
- On inclined surfaces, do not exceed the value for the angle of inclination to the side and in the travel direction in the operating instructions.
- Wear tight-fitting clothing to avoid being caught by rotating parts (no tie, no long, wide skirt, etc.).
CAUTION
- Check the device and the accessories each time before operation, in particular the mains connection and extension cable, to make sure it is safe and working correctly. Pull out the mains plug in case of any damage and do not use the device.
• Never operate the device unattended. - Do not transport passengers with the device.
- Never open the cover while the motor is running.
- The device is not suitable for sucking dust that is harmful to health.
ATTENTION
- Do not operate the device at temperatures below 0 °C.
- The device is not a vacuum cleaner. Do not extract more liquid than you sprayed. Never use the device for extracting dry dirt.
- The device is only suitable for use on the coats listed in the operating instructions.
- The device is suitable for damp to wet soil up to 1 cm water height. Do not drive into areas where the water height is more than 1 cm.
- Observe the legal regulations when disposing of waste water and brine.
- Do not use the device outdoors.
Operation with detergent
CAUTION • Keep the detergent out of the reach of children. • Never use the recommended detergents undiluted. These products are operationally safe since they do not contain any acids, alkali or substances that are harmful to the environment. Should detergents come into contact with eyes, rinse these out immediately and thoroughly using water and seek medical attention immediately. The same applies if detergents are swallowed. • Only use the detergents recommended by the manufacturer and observe the application, disposal and warning instructions of the detergent manufacturers.
Battery
Lithium-ion batteries are built into this device. These are subject to special criteria. Removal and installation as well as testing of defective batteries may only be carried out by Kärcher customer service or a qualified specialist.
For storage and transport instructions, please contact your Kärcher Customer Service.
DANGER
Modifications and alterations to the device are not per- mitted.
You must not open the battery, there is a danger of a short circuit. Irritating vapours or corrosive liquids can also escape.
Do not expose the battery to strong sunlight, heat or fire. There is a danger of explosion.
Do not operate the charger in an explosion-hazard environment.
Do not use a dirty or wet charger.
Ensure sufficient ventilation during the charging process.
Danger of explosion. Keep naked flames away from the battery or the battery charging room, and do not generate sparks or smoke in the vicinity of a battery of a battery charging room.
Danger of explosion. Do not place any tools or objects on the battery, i.e. on the end poles and cell connectors.
WARNING
Check the device and the mains cable for damage before each use. Do not use damaged devices and have damaged parts repaired by qualified personnel only. Keep children away from batteries and charger.
Do not charge damaged batteries. Have damaged batteries replaced by Kärcher customer service.
Do not throw a defective battery in the household rubbish. Inform Kärcher Customer Service.
Avoid contact with fluid leaking from defective batteries. In case of accidental contact, rinse the liquid with water. In case of contact with the eyes, consult a doctor as well.
CAUTION
Be sure to observe these operating instructions. Adhere to the recommendations of the legislature regarding the handling of batteries.
The mains voltage must match the voltage indicated on the type plate of the device.
Operate the battery only with this device. It is forbidden and dangerous to use it for other purposes.
Devices with rotating brushes
CAUTION
- Unsuitable brushes endanger your safety. Only use the brushes supplied with the device or brushes recommended in the operating instructions.
Care and service
⚠ WARNING
- Before cleaning, service, replacing parts and switching over to another function, you must switch off the device and remove the ignition key. Disconnect the mains plug on mains-operated devices. On battery-operated devices, pull the battery plug or disconnect the battery.
CAUTION
- Have repair work, installation of spare parts and work on electrical components carried out by the authorised customer service only.
- Repairs may only be carried out by approved customer service sites or staff qualified in this area who are familiar with all relevant safety instructions.
- Clean the water lever limit facility regularly, checking for any signs of damage.
ATTENTION
- Pay attention to the safety inspection for mobile devices for industrial use in accordance with the locally applicable regulations
- Short-circuits or other damage. Do not clean the device with a hose or high-pressure water jet.
Accessories and spare parts
⚠️ CAUTION • Only use accessories and spare parts which are approved by the manufacturer. Only original accessories and original spare parts ensure that the appliance will run fault-free and safely.
Transport
CAUTION
- Shut the motor down prior to transportation. Secure the device, taking into account its weight. See chapter Technical data in the operating instructions.
Safety devices
△CAUTION
Missing or modified safety devices
Safety devices are provided for your own protection. Never modify or bypass safety devices.
Note
The safety functions of the device are not affected in the absence of a network connection.
Emergency-off button
If the emergency off button is pressed, all cleaning and driving functions are stopped immediately.
Safety switch
The device stops if both safety switches are released during manual operation.
In autonomous operation, actuation of a safety switch triggers an operating pause of 10 seconds.
Distance sensor
The distance sensors detect obstacles and cause the device to circumnavigate the obstacles. The distance sensors comply with laser protection class 1 according to IEC 60825-1:2014.
Optical sensor
The optical sensors detect obstacles and cause the device to circumnavigate the obstacles. The optical sensors comply with laser protection class 1 according to IEC 60825-1:2014.
Docking station
This device is suitable for commercial and industrial use, e.g. in hotels, schools, hospitals, factories, shops, offices, and rental companies.
WARNING
Users must be adequately instructed in the use of the docking station.
Use the docking station in dry areas only.
Unplug the docking station mains plug from the mains socket before carrying out any maintenance work.
Prevent the mains cable of the docking station from coming into contact with the rotating brushes of the floor cleaner.
CAUTION
Use the docking station indoors only Store the docking station indoors only.
Warning symbols
Observe the following warnings when handling the batteries:
| Observe notes in the instructions for the battery, on the battery and in these operating instructions. | |
 | Wear eye protection. |
 | Keep acids and batteries away from children. |
 | Risk of explosion |
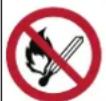 | Fire, sparks, open flames and smoking are prohibited. |
 | Risk of acid burns |
 | First aid. |
 | Warning |
 | Disposal |
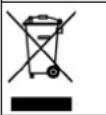 | Do not throw batteries in the bin. |
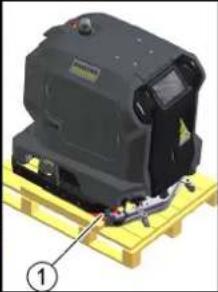
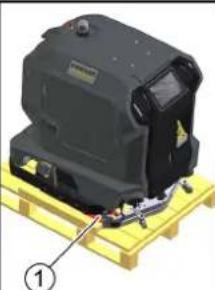
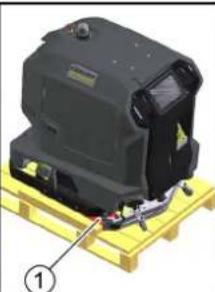
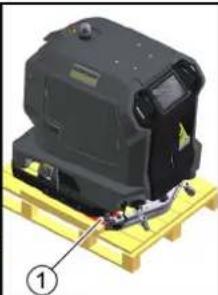
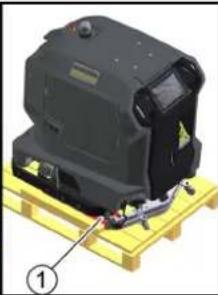
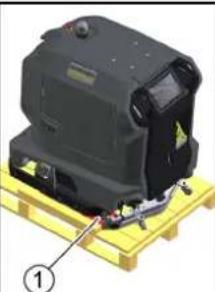
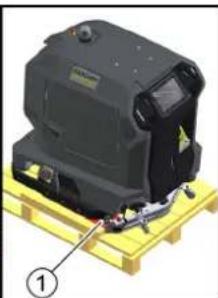
Unloading
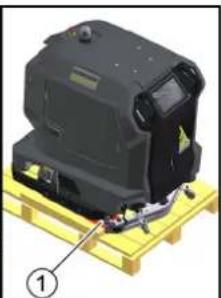
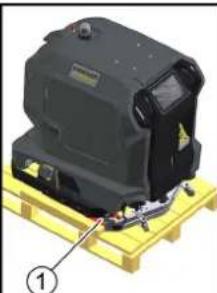
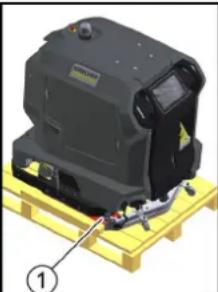
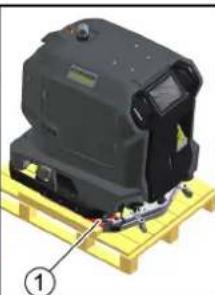
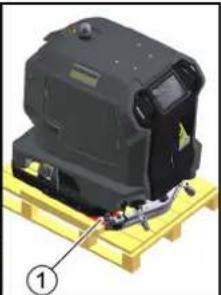
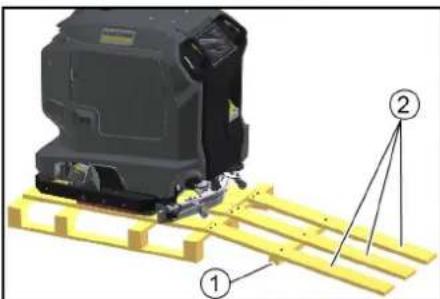
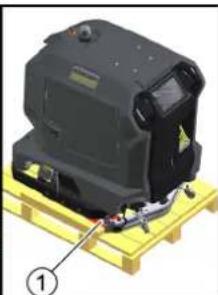
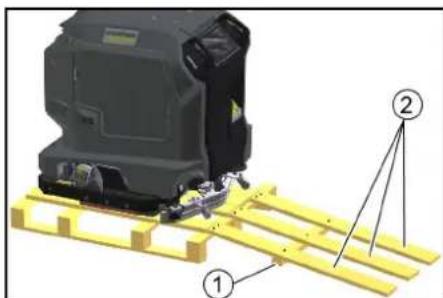
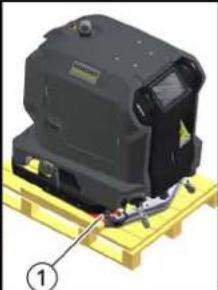
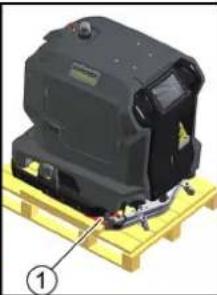
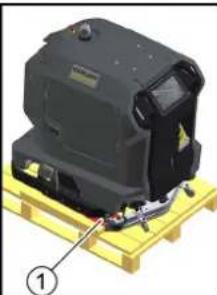
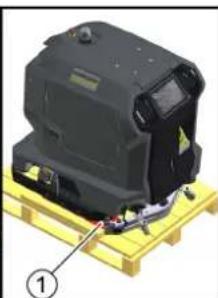
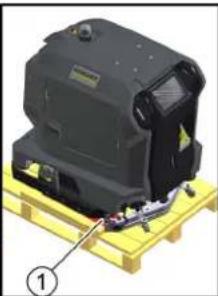
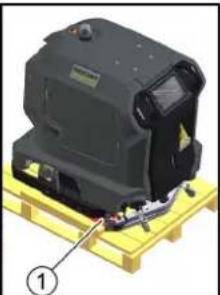
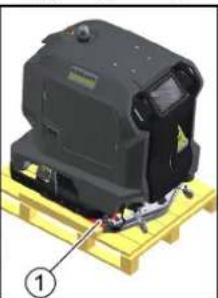
- Remove the cardboard box together with the wooden reinforcing timbers from the wooden base.
- Remove the strap.
- Unscrew the two blocks.
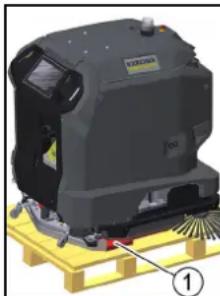
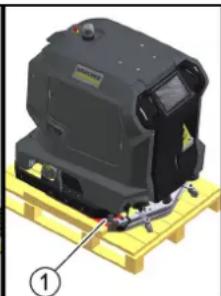
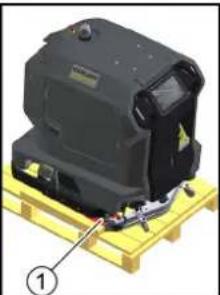
① Wooden block
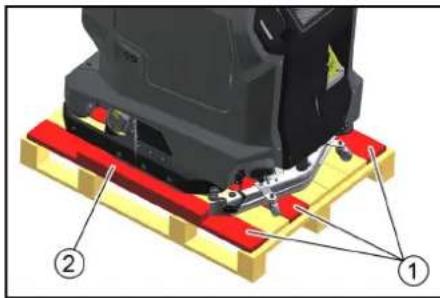
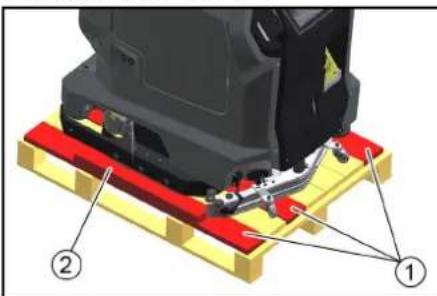
4. Unscrew the boards and the squared timber from the wooden base.
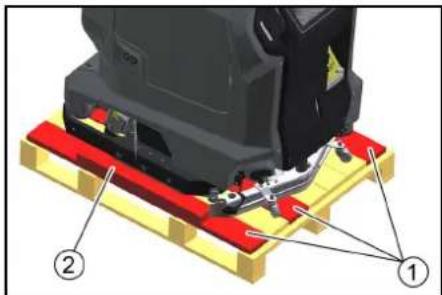
① Board
②Beam
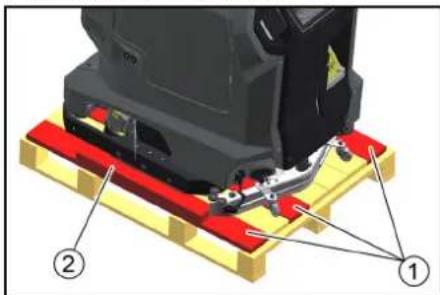
5. Use the unscrewed boards and the squared timber to lay a ramp behind the wooden base.
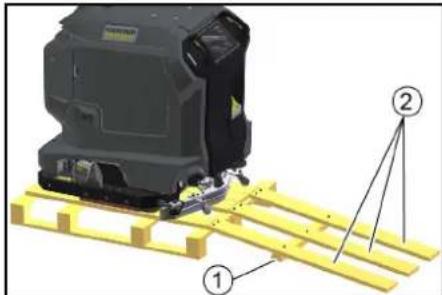
①Beam
② Board
6. Fix the boards and the squared timber with the previously removed screws.
7. Pull the device backwards off the wooden base.
Charging the battery
The battery is automatically charged when operating with a docking station.
Without docking station:
- Open the door of the device compartment.
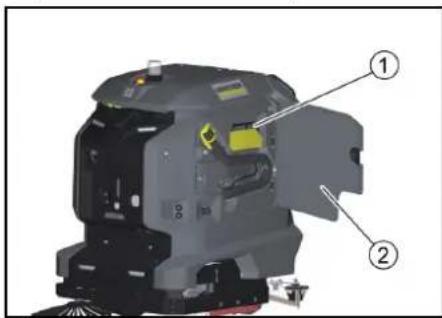
① Charging cable
②Device compartment door
a Pull out the charging cable.
b If the device does not have a charging cable, plug a mains cable with an IEC plug into the mains socket on the docking port.
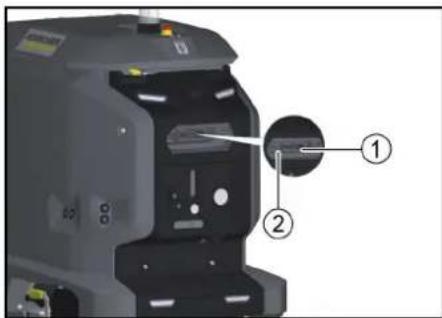
① Mains socket
②Docking port
- Plug the mains plug of the charging cable into a mains socket. The charging process begins automatically. The charging state is displayed on the touch screen.
The device cannot be used during the charging process.
The charging process takes about 8 hours when the battery is fully discharged.
-
Unplug the mains plug from the socket after the charging process has finished.
-
Stow the mains cable in the device compartment or unplug the power cable from the docking port.
Downloading the operating instructions
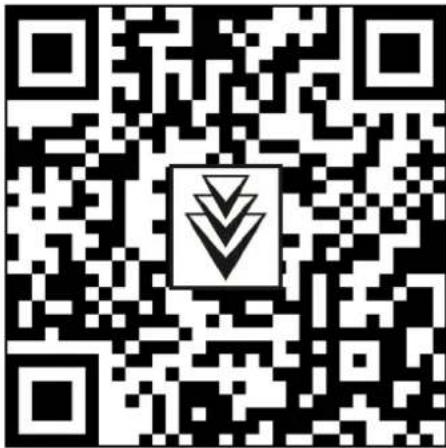
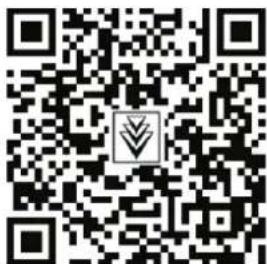
After startup, the operating instructions of the device can be displayed on the touch screen. If the operating instructions are also downloaded to a smartphone, the operating steps can be read in parallel with the operation.
- Scan the following code on the smartphone and follow the instructions to download the operating instructions.
Checking the device
WARNING
Danger of accident
A damaged or defective device can lead to accidents during operation.
Check the device before use and report any damage or malfunctions to the person responsible.
Do not use the device if it is damaged or malfunctions. 1. Check the device for leaks.
-
Check the functionality of the emergency-off button.
-
Check both safety switches for function (does the device brake when both safety switches are released in manual operation?).
DANGER
Danger of accident due to defective safety switches Shut the device down immediately if one or both safety switches do not reliably return to the non-actuated posi- tion.
-
Check the sensors for soiling, clean if necessary.
-
Restart the device.
-
Check the function of the sensors (does the device detect obstacles?).
Switching on the device
-
Unlock the Emergency-Off button by turning it.
-
Press the start button.
The device starts up.
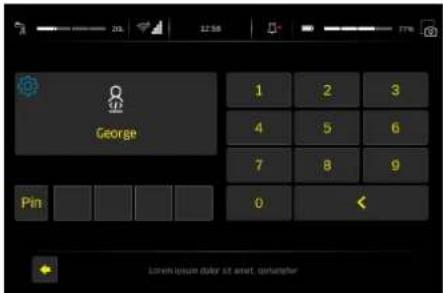
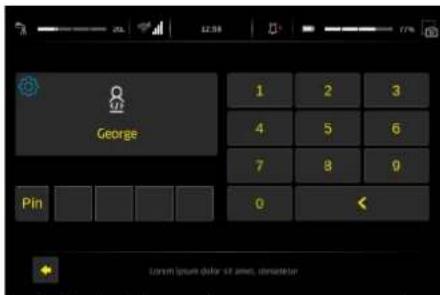
- Wait until the log-in screen is displayed on the touch screen.
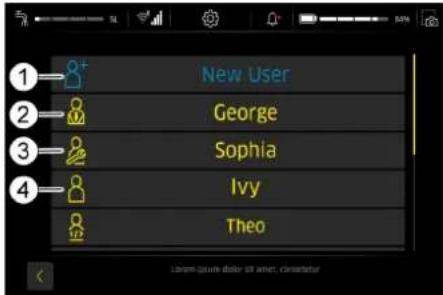
① New user
②Administrator
③ Service
④ Anwender
- Administrator: Can use the full range of functions of the device and has all user permissions.
• Service: Only available for customer service.
- Anwender: Can use the range of functions defined by the permissions granted by Administrator.
4. Create a new user profile.
5. Assign a password.
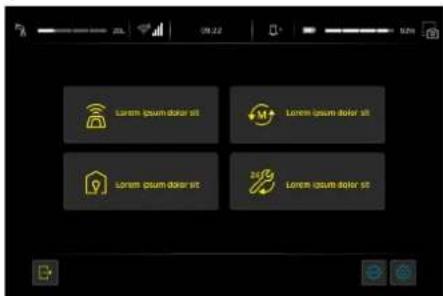
The executable functions are displayed in the main menu.
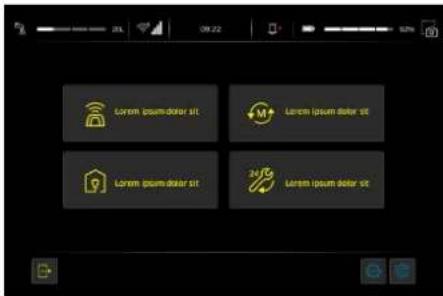
① Main menu
Displaying the operating instructions on the touch screen
The operating instructions enclosed with the device only cover the activities for startup and a troubleshooting guide in case of a defective touch screen.
The complete operating instructions can be called up and displayed on the touch screen after the device has been started up.
-
Press the "Wartung" button in the main menu.
-
Press the "Bedienungsanleitung" button The operating instructions are displayed on the touch screen.
Rules for autonomous operation
For the reliable and safe execution of autonomous operation, the following rules must be observed.
- Limit the cleaning area with barriers at the following points:
- Steps
- Stairs
- Escalators, moving walkways
- Lifting platforms
- Do not place ladders, scaffolding or other temporary obstacles in the cleaning area.
- Do not leave electric cables or other low obstacles (up to 15 cm high) in the cleaning area.
- Routes for autonomous operation must not pass through lifts or automatically opening doors. Use lifts and automatic doors only in manual operation.
- Keep a sufficient distance away from water basins and glass surfaces.
- Avoid direct, strong light incidence (e.g. low sun) on the sensors.
- Avoid crossing strong light/shadow boundaries.
- In autonomous routes, do not approach roller doors head-on but parallel to the door.
- Mark the cleaning area with warning signs and provide notice of wet floors.
Troubleshooting guide
DANGER
Inadvertently starting up device
Risk of injury, electric shock
Switch the device off before working on it.
Unplug the mains plug or disconnect the device from the docking station.
- Drain and dispose of the waste water and fresh water.
- Contact Customer Service in the case of malfunctions that cannot be corrected using this table.
Malfunctions without information shown on the display
Malfunction Rectification
| The device cannot be started |
-
Unlock the emergency-off button on the upper side of the unit by turning it.
-
Check the battery and charge if necessary
-
Check that the battery terminals are correctly connected.
Declaration of Conformity
EU Declaration of Conformity
We hereby declare that the machine described below complies with the relevant basic safety and health requirements in the EU Directives, both in its basic design and construction as well as in the version placed in circulation by us. This declaration is invalidated by any changes made to the machine that are not approved by us.
Product: Floor cleaner
Type: 1.533-xxx
Currently applicable EU Directives
2006/42/EC (+2009/127/EC)
2014/30/EU
2014/53/EU (TCU)
Harmonised standards used
EN 60335-1
EN 60335-2-29
EN 60335-2-72
EN 62311: 2008
EN 55012: 2007 + A1: 2009
EN 61000-6-2: 2005
EN 61000-6-3: 2007 + A1:2011
EN 61000-3-2: 2014
EN 61000-3-3: 2013
TCU
EN 301 511 V12.5.1
EN 300 328 V2.2.2
EN 301 893 V2.1.1
EN 302 502 V2.1.1
EN 301 908-1 V11.1.1
EN 301 908-2 V11.1.2
EN 301 908-13 V11.1.2
National standards used
The signatories act on behalf of and with the authority of the company management.
Chairman of the Board of Management
S. Reisen
Director Regulatory Affairs & Certification
Documentation supervisor:
S. Reiser
Alfred Kärcher SE & Co. KG
Alfred-Kärcher-Str. 28 - 40
71364 Winnenden (Germany)
Ph.: +49 7195 14-0
Fax: +49 7195 14-2212
Winnenden, 2021/11/01
Declaration of Conformity (UK)
We hereby declare that the product described below complies with the relevant provisions of the following UK Regulations, both in its basic design and construction as well as in the version put into circulation by us. This declaration shall cease to be valid if the product is modified without our prior approval.
Product: Floor cleaner
Type: 1.533-xxx
Currently applicable UK Regulations
S.I. 2008/1597 (as amended)
S.I. 2016/1091 (as amended)
2014/53/EU (TCU)
Designated standards used
EN 60335-1
EN 60335-2-29
EN 60335-2-72
EN 62311: 2008
EN 55012: 2007 + A1: 2009
EN 61000-6-2: 2005
EN 61000-6-3: 2007 + A1:2011
EN 61000-3-2: 2014
EN 61000-3-3: 2013
TCU
EN 301 511 V12.5.1
EN 300 328 V2.2.2
EN 301 893 V2.1.1
EN 302 502 V2.1.1
EN 301 908-1 V11.1.1
EN 301 908-2 V11.1.2
EN 301 908-13 V11.1.2
National standards used
The signatories act on behalf of and with the authority of the company management.
Chairman of the Board of Management
S. Reiser
Director Regulatory Affairs & Certification
Documentation supervisor:
S. Reiser
Alfred Kärcher SE & Co. KG
Alfred-Kärcher-Str. 28 - 40
71364 Winnenden (Germany)
Ph.: +49 7195 14-0
Fax: +49 7195 14-2212
Winnenden, 2021/11/01
Contenu
Vérifier l'appareil
⚠AVERTISSEMENT
Risque d'accident
2006/42/CE (+2009/127/CE)
2014/30/UE
2014/53/EU (TCU)
H. Jenner
Chairman of the Board of Management
S. Reiser
Director Regulatory Affairs & Certification
71364 Winnenden (Germany)

①Tavola
②Listello squadrato
Senza docking station:
H. Jenner
Chairman of the Board of Management
S. Reiser
Director Regulatory Affairs & Certification
71364 Winnenden (Germany)
Tel.: +49 7195 14-0
Fax: +49 7195 14-2212
Winnenden, 01/11/2021
①Bloque de madera
①Tabla
② Madera escuadrada
① Madera escuadrada
②Tabla
2006/42/CE (+2009/127/CE)
2014/30/UE
2014/53/EU (TCU)
Chairman of the Board of Management
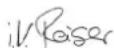
S. Reiser
Director Regulatory Affairs & Certification
71364 Winnenden (Germany)
Tel.: +49 7195 14-0
Fax: +49 7195 14-2212
Winnenden, 01/11/2021
Indice
2006/42/CE (+2009/127/CE)
2014/30/UE
2014/53/EU (TCU)

H. Jenner
Chairman of the Board of Management
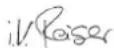
S. Reiser
Director Regulatory Affairs & Certification
Winnenden, 2021/11/01
Inhoud
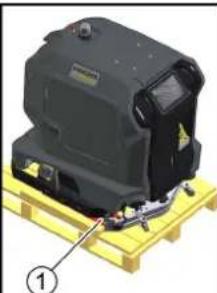
①Houten blok
①Plank
②Kanthout
①Laadkabel
②Deur apparaatvak
a Trek de laadkabel eruit.
Apparaat controleren
⚠ WAARSCHUWING
① Nieuwe gebruiker
② Administrator
③ Service
④ Anwender
Chairman of the Board of Management
S. Reiser
Director Regulatory Affairs & Certification
71364 Winnenden (Germany)
Tel.: +49 7195 14-0
Fax: +49 7195 14-2212
Winnenden, 2021/11/01
İçindekiler
Genel uyarılar 24

① Ahşap blok
①Tahta
②Kenar kereste
①Kenar kereste
②Tahta
①Şarj kablosu
①Güç girişi
① Yeni kullanıcı
② Denetleyici
③Servis
④Operatör
2006/42/AT (+2009/127/AT)
2014/30/AB
2014/53/EU (TCU)
Chairman of the Board of Management
S. Reiser
Director Regulatory Affairs & Certification
Winnenden, 2021/11/01
Innehåll
Allmän information 27
①Bräda
②Träbalk
①Vägguttag
②Dockningsport
Kontrollera maskinen
△VARNING
Olycksrisk
Chairman of the Board of Management
S. Reiser
Director Regulatory Affairs & Certification
D-71364 Winnenden (Germany)
Tfn: +49 7195 14-0
Fax: +49 7195 14-2212
Winnenden, 01.11.2021
Sisältö
Yleisiä ohjeita 30
①Puupalkki
①Lauta
②Tukipuu
①Verkkopistorasia
②Telakointiportti
H. Jenner
Chairman of the Board of Management
S. Reiser
Director Regulatory Affairs & Certification
71364 Winnenden (Germany)
Puh.: +49 7195 14-0
Winnenden, 1.11.2021
Indhold
Generelle merknader 33
Forskriftsmessig bruk 33
Sikkerhetsinstrukser.... 33
Laste av 35
Lade batteri 35
Last ned bruksanvisning 35
Kontroller apparatet 35
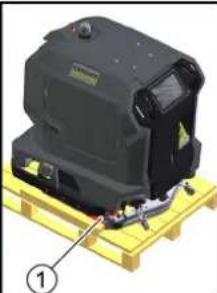
①Treblokk
① Planke
②Firkantlist
①Ladekabel
②Dør enhetsrom
a Trekk ut ladekabelen.
①Stikkontakt
②Dokking-port
- Stikk pluggen til ladekabelen i en stikkontakt. Oppladingen gjennomfares automatisk. Ladetilstanden vises på berøringsskjermen. Maskinen kan ikke brukes mens lading pågår. Når batteriet er helt utladet, tar ladingen ca, 8 timer.
- Når ladingen er ferdig, trekker du pluggen ut av stik- kontakten.
- Oppbevar strømledningen i enhetsrommet eller koble strømledningen fra dokkingporten.
Last ned bruksanvisning
Kontroller apparatet
ADVARSEL
Fare for ulykker
2006/42/EF (+2009/127/EF)
2014/30/EU
2014/53/EU (TCU)
Anvendte harmoniserte standarder
EN 60335-1
EN 60335-2-29
EN 60335-2-72
EN 62311: 2008
EN 55012: 2007 + A1: 2009
EN 61000-6-2: 2005
EN 61000-6-3: 2007 + A1:2011
EN 61000-3-2: 2014
EN 61000-3-3: 2013
TCU
EN 301 511 V12.5.1
EN 300 328 V2.2.2
EN 301 893 V2.1.1
EN 302 502 V2.1.1
EN 301 908-1 V11.1.1
EN 301 908-2 V11.1.2
EN 301 908-13 V11.1.2
H. Jenner
Chairman of the Board of Management
S. Reiser
Director Regulatory Affairs & Certification
71364 Winnenden (Germany)
Tlf.: +49 7195 14-0
Winnenden, 2021/11/01
Indhold
①Ladekabel
② Läge til opbevaringsrum
①Stikkontakt
②Dokningsport
Kontrol af maskinen
ADVARSEL
Fare for ulykker
En beskadiget eller defekt maskine kan føre til ulykker under driften.
2006/42/EF (+2009/127/EF)
2014/30/EU
2014/53/EU (TCU)
H. Jenner
Chairman of the Board of Management
S. Reiser
Director Regulatory Affairs & Certification
71364 Winnenden (Germany)
Tlf.: +49 7195 14-0
Fax: +49 7195 14-2212
Winnenden, 2021/11/01
Saturs
①Koka klucis
① Dēlis
② Brusa
lerīces pārbaude
⚠ BRĪDINĀJUMS
Negadijumu risks
H. Jenner
Chairman of the Board of Management
S. Reiser
Director Regulatory Affairs & Certification

Mediné trinka
①Lenta
② Medinius tašus
① Medinis tašas
②Lenta
①krovimo laidas
1 Maitinimo lizdas
②Prijungimo prievadas
Mašinos tikrinimas
⚠️JSPÉJIMAS
①Naujas naudotojas
② Prižiuretojas
③ Aptarnavimas
④Operatorius
H. Jenner
Chairman of the Board of Management
S. Reiser
Director Regulatory Affairs & Certification
①Deska
②Kantówka
① Kantówka
②Deska
2006/42/WE (+2009/127/WE)
2014/30/UE
2014/53/EU (TCU)
Chairman of the Board of Management
S. Reiser
Director Regulatory Affairs & Certification
71364 Winnenden (Germany)
Tel.: +49 7195 14-0
①Fatuskó
①Deszka
②Élléc
① Hálózati aljzat
②Dokkoló port
H. Jenner
Chairman of the Board of Management
S. Reiser
Director Regulatory Affairs & Certification
Winnenden, 2021/11/01
Obsah
2006/42/ES (+2009/127/ES)
2014/30/EU
2014/53/EU (TCU)
H. Jenner
Chairman of the Board of Management
S. Reiser
Director Regulatory Affairs & Certification
Winnenden, 2021/11/01
Kazalo
Splošni napotki....54
Namenska uporaba....54
Varnostna navodila.... 55
Raztovarjanje 56
Polnjenje baterije 56
Prenesite navodila za uporabo 56
Preverjanje naprave 56
Vklop naprave 57
① Lesena klada
4. Iz lesene podkonstrukcije odvijte deske in tramove.
①Deska
②Tram
5. Za leseno podkonstrukcijo postavite rampo z odvijačenimi deskami in tramovi.
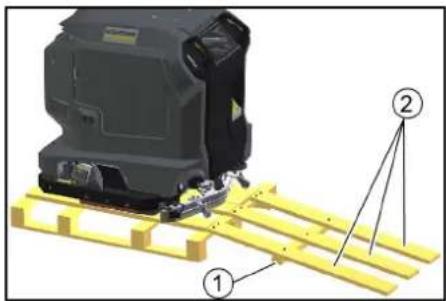
①Tram
②Deska
6. Pritrdite deske in tramove s predhodno odstranjenimi vijaki.
7. Napravo povlecite nazaj z lesene podkonstrukcije.
Polnjenje baterije
Pri obratovanju s priključno postajo se baterija samodejno polni.
Brez priključne postaje:
- Odprite vrata predala aparata.
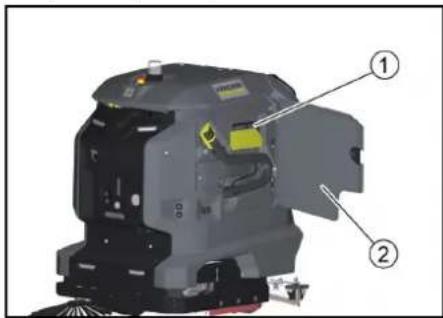
①Polnilni kabel
②Vrata predala aparata
Preverjanje naprave
△OPOZORILO
Nevarnost nesreče
① Nov uporabnik
② Nadzornik
③ Servis
④Upravljavec
2006/42/ES (+2009/127/ES)
2014/30/EU
2014/53/EU (TCU)
Chairman of the Board of Management
Director Regulatory Affairs & Certification
① Butuc din lemn
1 Scândură
②Lemn fasonat
①Lemn fasonat
② Scândură
Directive UE relevante
2006/42/UE (+2009/127/UE)
2014/30/UE
2014/53/EU (TCU)
Norme armonizate aplicate
EN 60335-1
EN 60335-2-29
EN 60335-2-72
EN 62311: 2008
EN 55012: 2007 + A1: 2009
EN 61000-6-2: 2005
EN 61000-6-3: 2007 + A1:2011
EN 61000-3-2: 2014
EN 61000-3-3: 2013
TCU
EN 301 511 V12.5.1
EN 300 328 V2.2.2
EN 301 893 V2.1.1
EN 302 502 V2.1.1
EN 301 908-1 V11.1.1
EN 301 908-2 V11.1.2
EN 301 908-13 V11.1.2
Standarde nationale aplicate
Chairman of the Board of Management
S. Reiser
Director Regulatory Affairs & Certification
71364 Winnenden (Germania)
Tel.: +49 7195 14-0
Fax: +49 7195 14-2212
Winnenden, 2021/11/01
Sadržaj
Opće napomene 60
① Drveni klin
①Daska
② Drveni blok
- Postavite rampu iza drvene podkonstrukcije s odvr-nutim daskama i drvenim blokovima.
① Drveni blok
②Daska
6. Pričvrstite daske i drveni blok s prethodno uklonjenim vijcima.
7. Povucite uređaj unatrag s drvene podkonstrukcije.
Punjenje akumulatora
Kada radi sa stanicom za spajanje, baterija se automat- ski puni.
Bez stanice za punjenje:
- Otvorite vrata pretinca uređaja.

① Kabel za punjenje
② Vrata pretinca uređaja
① Mrežna utičnica
② Priključak stanice za spajanje
Provjera uređaja
⚠UPOZORENJE
Opasnost od nezgoda
2006/42/EZ (+2009/127/EZ)
2014/30/EU
2014/53/EU (TCU)
Primijenjene uskladene norme
EN 60335-1
EN 60335-2-29
EN 60335-2-72
EN 62311: 2008
EN 55012: 2007 + A1: 2009
EN 61000-6-2: 2005
EN 61000-6-3: 2007 + A1:2011
EN 61000-3-2: 2014
EN 61000-3-3: 2013
TCU
EN 301 511 V12.5.1
EN 300 328 V2.2.2
EN 301 893 V2.1.1
EN 302 502 V2.1.1
EN 301 908-1 V11.1.1
EN 301 908-2 V11.1.2
EN 301 908-13 V11.1.2
Primijenjene nacionalne norme
H. Jenner
Chairman of the Board of Management
S. Reiser
Director Regulatory Affairs & Certification
Opunomoćenik za dokumentaciju:
S. Reiser
Alfred Kärcher SE & Co. KG
Alfred-Kärcher-Str. 28 - 40
71364 Winnenden (Njemačka)
Tel.: +49 7195 14-0
Telefaks: +49 7195 14-2212
Winnenden, 01.11.2021
Sadržaj
Opšte napomene 63
Namenska upotreba....64
Sigurnosne napomene....64
Istovar 65
Punjenje baterije 65
Preuzimanje uputstva za upotrebu 65
Provera uređaja 65
Uključivanje uređaja 66
Prikaz uputstva za rad na ekranu osetljivom na dodir 66
Pravila za autonoman rad 66
Pomoć u slučaju smetnji 66
① Drveni blok
①Tabla
② Drvena kocka
- Postavite rampu iza drvene potkonstrukcije sa odvrnutim daskama i drvenim blokovima.
①Drvena kocka
②Tabla
-
Pričvrstite daske i drvene blokove prethodno izvađenim zavrtnjima.
-
Povucite uređaj unazad sa drvene potkonstrukcije.
Punjenje baterije
Pri radu sa priključnom stanicom, baterija se automatski puni.
① Kabl za punjenje
② Vrata na pregradi uređaja
① Mrežna utičnica
Provera uređaja
⚠UPOZORENJE
Opasnost od nesreće
Oštećeni ili neispravni uređaj može dovesti do nezgoda tokom rada.
Proverite uređaj pre upotrebe i prijavite sva oštećenja i kvarove odgovornoj osobi.
① Novi korisnik

③ Service
④ Anwender
- Administrator: Može da koristi pun obim funkcija uređaja i ima sve dozvole za korisnike.
• Service: Dostupno samo za korisničku službu. -
Anwender: Može da koristi opseg funkcija definisanih ovlašćenjima koja su data od strane Administrator.
-
Kreirajte novi korisnički profil.
-
Dodelite lozinku.
2006/42/EZ (+2009/127/EZ)
2014/30/EU
2014/53/EU (TCU)
Primenjene harmonizovane norme
EN 60335-1
EN 60335-2-29
EN 60335-2-72
EN 62311: 2008
EN 55012: 2007 + A1: 2009
EN 61000-6-2: 2005
EN 61000-6-3:2007+A1:2011
EN 61000-3-2: 2014
EN 61000-3-3: 2013
TCU
EN 301 511 V12.5.1
EN 300 328 V2.2.2
EN 301 893 V2.1.1
EN 302 502 V2.1.1
EN 301 908-1 V11.1.1
EN 301 908-2 V11.1.2
EN 301 908-13 V11.1.2
Primenjene nacionalne norme
-
Potpisnici deluju po nalogu i uz punomoć upravnog odbora.
H. Jenner
Chairman of the Board of Management
S. Reiser
Director Regulatory Affairs & Certification
Lice ovlašćeno za dokumentaciju:
S. Reiser
Alfred Kärcher SE & Co. KG
Alfred-Kärcher-Str. 28 - 40
71364 Winnenden (Germany)
Tel.: +49 7195 14-0
Winnenden, 2021/11/01
Содержание
Общие указания 66
①Деревянный блок
①Доска
②Деревянный брус
①Деревянный брус
②Доска
① Зарядный кабель
① Сетевая розетка
② Стыковочный порт
Проверка устройства
△ПРЕДУПРЕЖДЕНИЕ
①Новый пользователь
② Супервизор
③Сервисный техник
④ Оператор
H. Jenner
Chairman of the Board of Management
S. Reiser
Director Regulatory Affairs & Certification
71364 Winnenden (Germany)
Тел.: +49 7195 14-0
Факс: +49 7195 14-2212
Перевірка пристрою
⚠ПОПЕРЕДЖЕННЯ
R. Jennifer
Chairman of the Board of Management
S. Reiser
Director Regulatory Affairs & Certification
71364 Winnenden (Germany)
Тел.: +49 7195 14-0
Факс: +49 7195 14-2212
1Колодка
①Дошка
② Дерев'яний брус
① Дерев'яний брус
②Дошка
①Зарядний кабель
(1) Гніздо живлення
② Порт док-станції
Перевірка пристрою
ECKEPTY
Chairman of the Board of Management

S. Reiser
Director Regulatory Affairs & Certification
71364 Winnenden (Germany)
Тел.: +49 7195 14-0
Факс: +49 7195 14-2212
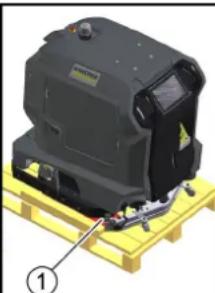
① Дървено трупче
①Дъска
②Дървена греда
①Дървена греда
②Дъска
① Мрежова букса
②Докинг порт
Проверка на уреда
△ПРЕДУПРЕЖДЕНИЕ
①Нов потребител
H. Jenner
Chairman of the Board of Management
S. Reiser
Director Regulatory Affairs & Certification
71364 Winnenden (Germany)
Тел.: +49 7195 14-0
Факс: +49 7195 14-2212
Виненден, 2021/11/01
目次
一般的な注意事項 80
規定に沿った使用 80
安全注意事项 80
荷下ろし 82
バッテリーを充電する 82
取扱説明書をダウンロードする 82
機器を点検する 82
機器をオンにする 82
①充電ケーブル
②機器収納部のドア
a 充電ケーブルを引き出します。
①コンセント
②ドッキングポート
機器を点検する
警告
事故の危険
①木块
- 从木质基座上拧下木板和方木。
①板
②方木
①方木
②板
①充电线
②设备舱的门
①电源插口
②对接端口
- 将充电线的电源插头插入插座。
充电过程自动进行
在触摸屏上显示充电状态。
在充电过程中不得使用设备。
检查设备
警告
事故危险
①新用户
②主管
③服务
④操作人员
①木塊
- 從木質基座上擰下木板和方木。
①板
②方木
①方木
②板
檢查設備
警告
事故危险
①新使用者
②管理人
③服務
④操作員
在主功能表中顯示可執行的功能。
①主功能表
在觸控式螢幕上顯示操作說明書
①나무 분목
①豆豆
②각목
①사목
②
①충전 케이문
②장비 수납칸 도이
a 중전 케이ecn을 됐습니다.
①전원 소켓
②도킹 포트
장비 점검
△ 경고
خشبة ①
②
1جديد
②رقم
③د#
④مشغ
① القائمة الرئيسية
① الكتابة الخشية
① كابل الشحن
②باب درج الجهاز
① مقبس کهرباني
② منぐذ Arbeitsاء
THANK YOU!
Register your product and benefit from many advantages.
www.kaercher.com/welcome ★★★★★

Rate your product and tell us your opinion.
www.kaercher.com/dealersearch
Alfred Kärcher SE & Co. KG
Alfred-Kärcher-Str. 28-40
71364 Winnenden (Germany)

- INHALT
- ① HOLZKLOTZ
- GERÄT ÜBERPRÜFEN
- ⚠️WARNUNG
- UNFALLGEFAHR
- CONTENTS
- GENERAL INSTRUCTIONS
- USER GROUPS
- INTENDED USE
- SAFETY INSTRUCTIONS
- HAZARD LEVELS
- DANGER
- WARNING
- CAUTION
- ATTENTION
- PROTECTIVE GEAR
- GENERAL SAFETY INSTRUCTIONS
- RISK OF INJURY FROM PETROL CAP
- RISK OF ELECTRIC SHOCK
- OPERATION
- OPERATION WITH DETERGENT
- BATTERY
- DEVICES WITH ROTATING BRUSHES
- CARE AND SERVICE
- ⚠ WARNING
- ACCESSORIES AND SPARE PARTS
- TRANSPORT
- SAFETY DEVICES
- △CAUTION
- MISSING OR MODIFIED SAFETY DEVICES
- NOTE
- EMERGENCY-OFF BUTTON
- SAFETY SWITCH
- DISTANCE SENSOR
- OPTICAL SENSOR
- DOCKING STATION
- WARNING SYMBOLS
- UNLOADING
- CHARGING THE BATTERY
- DOWNLOADING THE OPERATING INSTRUCTIONS
- DANGER OF ACCIDENT
- SWITCHING ON THE DEVICE
- DISPLAYING THE OPERATING INSTRUCTIONS ON THE TOUCH SCREEN
- RULES FOR AUTONOMOUS OPERATION
- TROUBLESHOOTING GUIDE
- MALFUNCTIONS WITHOUT INFORMATION SHOWN ON THE DISPLAY
- DECLARATION OF CONFORMITY
- EU DECLARATION OF CONFORMITY
- TCU
- NATIONAL STANDARDS USED
- DECLARATION OF CONFORMITY (UK)
- CONTENU
- VÉRIFIER L'APPAREIL
- ⚠AVERTISSEMENT
- RISQUE D'ACCIDENT
- ①BLOQUE DE MADERA
- ①TABLA
- ② MADERA ESCUADRADA
- ① MADERA ESCUADRADA
- ②TABLA
- INDICE
- INHOUD
- APPARAAT CONTROLEREN
- İÇINDEKILER
- ① AHŞAP BLOK
- ①TAHTA
- ②KENAR KERESTE
- ①KENAR KERESTE
- ②TAHTA
- ①ŞARJ KABLOSU
- ①GÜÇ GIRIŞI
- ① YENI KULLANICI
- ② DENETLEYICI
- ③SERVIS
- ④OPERATÖR
- INNEHÅLL
- △VARNING
- OLYCKSRISK
- SISÄLTÖ
- INDHOLD
- LAST NED BRUKSANVISNING
- KONTROLLER APPARATET
- KONTROL AF MASKINEN
- ADVARSEL
- SATURS
- LERĪCES PĀRBAUDE
- ⚠ BRĪDINĀJUMS
- NEGADIJUMU RISKS
- ⚠️JSPÉJIMAS
- ①FATUSKÓ
- OBSAH
- KAZALO
- POLNJENJE BATERIJE
- PREVERJANJE NAPRAVE
- △OPOZORILO
- NEVARNOST NESREČE
- DIRECTIVE UE RELEVANTE
- NORME ARMONIZATE APLICATE
- SADRŽAJ
- PUNJENJE AKUMULATORA
- PROVJERA UREĐAJA
- ⚠UPOZORENJE
- OPASNOST OD NEZGODA
- PRIMIJENJENE USKLADENE NORME
- PRIMIJENJENE NACIONALNE NORME
- PUNJENJE BATERIJE
- PROVERA UREĐAJA
- OPASNOST OD NESREĆE
- PRIMENJENE HARMONIZOVANE NORME
- PRIMENJENE NACIONALNE NORME
- СОДЕРЖАНИЕ
- ①ДЕРЕВЯННЫЙ БЛОК
- ①ДОСКА
- ①ДЕРЕВЯННЫЙ БРУС
- △ПРЕДУПРЕЖДЕНИЕ
- ПЕРЕВІРКА ПРИСТРОЮ
- ⚠ПОПЕРЕДЖЕННЯ
- 1КОЛОДКА
- ①ДОШКА
- ② ДЕРЕВ'ЯНИЙ БРУС
- ① ДЕРЕВ'ЯНИЙ БРУС
- ②ДОШКА
- ①ЗАРЯДНИЙ КАБЕЛЬ
- ГНІЗДО ЖИВЛЕННЯ
- ② ПОРТ ДОК-СТАНЦІЇ
- ECKEPTY
- ① ДЪРВЕНО ТРУПЧЕ
- ПРОВЕРКА НА УРЕДА
- 目次
- 機器を点検する
- 警告
- 事故の危険
- ①木块
- ①板
- ②方木
- ①方木
- ②板
- ①充电线
- ②设备舱的门
- ①电源插口
- ②对接端口
- 检查设备
- 事故危险
- ①木塊
- 檢查設備
- 在觸控式螢幕上顯示操作說明書
- ①나무 분목
- ①豆豆
- ②각목
- ①사목
- ②
- ①충전 케이문
- ②장비 수납칸 도이
- 장비 점검
- THANK YOU
Brand : Kärcher
Model : KIRA B 50
Category : Robot vacuum