
PM1600 - Paint mixer SCHEPPACH - Free user manual and instructions
Find the device manual for free PM1600 SCHEPPACH in PDF.
| Product type | Paint mixer |
| Brand | Scheppach |
| Model | PM1600 |
| Power supply | 230 V~, 50 Hz |
| Power consumption | 1600 W |
| Number of speeds | 2 (0-580 rpm / 0-780 rpm) |
| Mixer thread | M14 |
| Protection class | II |
| Weight | 5.2 kg |
| Sound pressure level | 93.1 dB (uncertainty 3 dB) |
| Sound power level | 101.1 dB (uncertainty 3 dB) |
| Vibrations (emission value) | 2.9 m/s² (uncertainty 1.5 m/s²) |
| Included supplies | Connecting shaft, 2 mixer attachments (K3+K4), 2 spare carbon brushes, 19mm and 22mm open-end wrenches, manual |
| Main functions | Mixing of liquid and powdery building materials (paints, mortars, adhesives), progressive speed regulator, switch with safety lock |
| Maintenance and cleaning | Clean with a soft brush or damp cloth; do not use running water or high-pressure cleaners; replace worn carbon brushes |
| Safety | Wear safety goggles, ear protection, dust mask; protection class II; double insulation |
| Spare parts | Carbon brushes (5907803001), right mixing rod (5907800702), left mixing rod (5907800701), attachment (3907801009), connecting shaft (3907801008) |
| General information | Legal warranty; complies with EU directives; recommended for non-commercial use |
Frequently Asked Questions - PM1600 SCHEPPACH
User questions about PM1600 SCHEPPACH
0 question about this device. Answer the ones you know or ask your own.
Ask a new question about this device
Download the instructions for your Paint mixer in PDF format for free! Find your manual PM1600 - SCHEPPACH and take your electronic device back in hand. On this page are published all the documents necessary for the use of your device. PM1600 by SCHEPPACH.
USER MANUAL PM1600 SCHEPPACH
natural_image
3D rendering of a mechanical mixing tool with a rotating handle and coiled spring (no text or symbols visible)
Made in P.R.C.
PM1600
| DE | Elektro-Farb- und MörtelrührwerkOriginalbetriebsanleitung | 5 |
| GB | Electric paint and mortar stirrerTranslation of original instruction manual | 18 |
| FR | Malaxeur électriqueTraduction des instructions d'origine | 28 |
| IT | Agitatore per vernici e malte elettronicoLa traduzione dal manuale di istruzioni originale | 39 |
| NL | Elektrische verf- en mortelmengerVertaling van de originele gebruikshandleiding | 50 |
| ES | Mezclador de pintura y mortero de bateríaTraducción del manual de instrucciones original | 61 |
| PT | Agitador de argamassa e tinta elétricoTradução do manual de operação original | 72 |
| CZ | Elektrické míchací zařízení barev a maltyPřeklad originálního návodu k obsluze | 83 |
| SK | Elektrické miešadlo farieb a maltyPreklad originálneho návodu na obsluhu | 93 |
| HU | Elektromos festék- és habarcskeverőEredeti használati utasítás fordítása | 103 |
| PL | Elektryczne mieszadło do farb i zaprawTłumaczenie oryginalnej instrukcji obsługi | 114 |
| HR | Električna miješalica lakova i mortaPrijevod originalnog priručnika za uporabu | 125 |
| SI | Električni mešalnik za barvo in maltoPrevod originalnih navodil za uporabo | 135 |
| EE | Elektriline värvi- jamördisegamismehhanismOriginaalkäitusjuhendi tõlge | 145 |
| LT | Elektrinis dažų ir skiedinio maišytuvasOriginalios naudojimo instrukcijos vertimas | 155 |
| LV | Elektriskais krāsas un javas maisītājsOriginalās lietošanas instrukcijas tulkojums | 165 |
| SE | Eldriven färg- och murbruksblandareÖversättning av original-bruksanvisning | 175 |
| FI | Sähkötoiminen maalin ja laastin sekoittajaKäännös alkuperäisestä käyttöohjeesta | 185 |
| DK | Eldrevet maling- og mørtelrøreværkOversættelse fra den oprindelige betjeningsvejledning | 195 |
| NO | Elektrisk malings- og mørtelrøreverkOversettelse av den originale brukerveiledningen | 205 |
| BG | Електрическа бъркачка за боя и хоросанПревод на оригиналното ръководство за експлоатация | 215 |
| GR | Нлектрікоç аναδευτήρας κονιαμάτων καιχρωμάτωνΜετάφραση του πρωτοτύπου των οδηγιών χρήσης | 227 |
| RO | Amestecător electric de vopsea și mortarTraducere din manualul de exploatare original | 239 |
| RS | Električna mešalica za boju i malterPrevod originalnog uputstva za upotrebu | 250 |
| TR | Elektrikli boya ve harç karıştırma cihazıOrijinal kullanım talimatı çevirisi | 260 |
1


natural_image
Close-up of a hand using a tool to adjust or install a mechanical component, no visible text or symbols.
Günzburger Straße 69
D-89335 Ichenhausen
Verehrter Kunde
Homepage: https://www.scheppach.com/de/service
Explanation of the symbols on the device
 | Read the operating and safety instructions before start-up and follow them! |
 | Wear eye protection. |
 | Wear hearing protection. |
 | Wear a breathing mask! |
 | Protection class II |
 | The product complies with the applicable European directives. |
 | The product complies with the applicable Serbian directives. |
Table of contents: Page:
- Introduction....20
- Description of the product (fig. 1)....20
- Scope of delivery 20
- Proper use 20
- General safety information 21
- Technical data....23
- Unpacking 23
- Assembly (fig. 2 - 4)....24
- Commissioning 24
- Maintenance and care 24
- Repair & ordering spare parts 25
- Electrical connection 25
- Storage 26
- Disposal and recycling....26
- Troubleshooting 27
- Declaration of conformity 272
1. Introduction
Manufacturer:
Scheppach GmbH
Günzburger Straße 69
D-89335 Ichenhausen
Dear Customer
We hope your new tool brings you much enjoyment and success.
Note:
In accordance with the applicable product liability laws, the manufacturer of this device assumes no liability for damage to the device or caused by the device arising from:
- Improper handling,
• Non-compliance with the operating manual,
• Repairs carried out by third parties, unauthorised specialists.
• Installing and replacing non-original spare parts,
• Application other than specified, - Failures of the electrical system in the event of the electrical regulations and VDE provisions 0100,
• DIN 57113 / VDE 0113 not being observed.
Please consider:
Read through the complete text in the operating manual before installing and commissioning the device.
The operating manual is intended to help the user to become familiar with the machine and take advantage of its application possibilities in accordance with the recommendations.
The operating manual includes important instructions for safe, proper and economic operation of the device, for avoiding danger, for minimising repair costs and downtimes, and for increasing the reliability and extending the service life of the device.
In addition to the safety instructions in this operating manual, you must also observe the regulations applicable to the operation of the device in your country.
Keep the operating manual package with the machine at all times and store it in a plastic cover to protect it from dirt and moisture. They must be read and carefully observed by all operating personnel before starting the work.
The device may only be used by personnel who have been trained to use it and who have been instructed with respect to the associated hazards. The required minimum age must be observed.
In addition to the safety instructions in this operating manual and the separate regulations of your country, the generally recognised technical rules relating to the operation of such machines must also be observed.
We accept no liability for accidents or damage that occur due to a failure to observe this manual and the safety instructions.
2. Description of the product (fig. 1)
- Connection shaft mixer attachment
- Mixer attachment right-turning
- Drive shaft
- 2-speed switch
- Handle
- Motor
- On/off switch
- Circuit breaker for ON/OFF switch
- Speed controller
3. Scope of delivery
Item Quantity Designation
| 1 1x Connection shaft mixer attach-ment | |
| 2 2x | Mixer attachment K3 + K4 |
| 2x Replacement carbon brushes | |
| 1x Open-ended spanner 19 mm | |
| 1x Open-ended spanner 22 mm | |
| 1x Operating manual | |
4. Proper use
The machine has been designed to mix liquid and powdery building materials such as paint, mortar, adhesive, plaster and similar substances. The relevant mixing action (which depends on the consistency of the materials and the quantity that has to be mixed) must be set up for the appropriate mixing tool.
The product may only be used in the intended manner. Any use beyond this is improper. The user/operator, not the manufacturer, is responsible for damages or injuries of any type resulting from this.
An element of the intended use is also the observance of the safety instructions, as well as the assembly instructions and operating information in the operating manual.
Persons who operate and maintain the product must be familiar with the manual and must be informed about potential dangers.
The liability of the manufacturer and resulting damages are excluded in the event of modifications of the product.
The product may only be operated with original parts and original accessories from the manufacturer.
The safety, operating and maintenance specifications of the manufacturer, as well as the dimensions specified in the technical data, must be observed.
Please note that our products were not designed with the intention of use for commercial or industrial purposes. We assume no guarantee if the product is used in commercial or industrial applications, or for equivalent work.
5. General safety information
General power tool safety warnings
⚠ Warning!
Read all safety warnings, instructions, illustrations and specifications provided with this power tool.
Failure to follow all instructions listed below may result in electric shock, fire and/or serious injury.
Save all warnings and instructions for future reference.
The term "power tool" in the warnings refers to your mains-operated (corded) power tool or battery-operated (cordless) power tool.
1. Work area safety
a) Keep work area clean and well lit. Cluttered or dark areas invite accidents.
b) Do not operate power tools in explosive atmospheres, such as in the presence of flammable liquids, gases or dust. Power tools create sparks which may ignite the dust or fumes.
c) Keep children and bystanders away while operating a power tool. Distractions can cause you to lose control.
2. Electrical safety
a) Power tool plugs must match the outlet. Never modify the plug in any way. Do not use any adapter plugs with earthed (grounded) power tools. Unmodified plugs and matching outlets will reduce risk of electric shock.
b) Avoid body contact with earthed or grounded surfaces, such as pipes, radiators, ranges and refrigerators. There is an increased risk of electric shock if your body is earthed or grounded.
c) Do not expose power tools to rain or wet conditions. Water entering a power tool will increase the risk of electric shock.
d) Do not abuse the cord. Never use the cord for carrying, pulling or unplugging the power tool. Keep cord away from heat, oil, sharp edges or moving parts. Damaged or entangled cords increase the risk of electric shock.
e) When operating a power tool outdoors, use an extension cord suitable for outdoor use. Use of a cord suitable for outdoor use reduces the risk of electric shock.
f) If operating a power tool in a damp location is unavoidable, use a residual current device (RCD) protected supply. Use of an RCD reduces the risk of electric shock.
3. Personal safety
a) Stay alert, watch what you are doing and use common sense when operating a power tool. Do not use a power tool while you are tired or under the influence of drugs, alcohol or medication. A moment of inattention while operating power tools may result in serious personal injury.
b) Use personal protective equipment. Always wear eye protection. Protective equipment such as a dust mask, non-skid safety shoes, hard hat or hearing protection used for appropriate conditions will reduce personal injuries.
c) Prevent unintentional starting. Ensure the switch is in the off-position before connecting to power source and/or battery pack, picking up or carrying the tool. Carrying power tools with your finger on the switch or energising power tools that have the switch on invites accidents.
d) Remove any adjusting key or wrench before turning the power tool on. A wrench or a key left attached to a rotating part of the power tool may result in personal injury.
e) Do not overreach. Keep proper footing and balance at all times. This enables better control of the power tool in unexpected situations.
f) Dress properly. Do not wear loose clothing or jewellery. Keep your hair and clothing away from moving parts. Loose clothes, jewellery or long hair can be caught in moving parts.
g) If devices are provided for the connection of dust extraction and collection facilities, ensure these are connected and properly used. Use of dust collection can reduce dust-related hazards.
h) Do not let familiarity gained from frequent use of tools allow you to become complacent and ignore tool safety principles. A careless action can cause severe injury within a fraction of a second.
4. Power tool use and care
a) Do not force the power tool. Use the correct power tool for your application. The correct power tool will do the job better and safer at the rate for which it was designed.
b) Do not use the power tool if the switch does not turn it on and off. Any power tool that cannot be controlled with the switch is dangerous and must be repaired.
c) Disconnect the plug from the power source and/or remove the battery pack, if detachable, from the power tool before making any adjustments, changing accessories, or storing power tools. Such preventive safety measures reduce the risk of starting the power tool accidentally.
d) Store idle power tools out of the reach of children and do not allow persons unfamiliar with the power tool or these instructions to operate the power tool. Power tools are dangerous in the hands of untrained users.
e) Maintain power tools and accessories. Check for misalignment or binding of moving parts, breakage of parts and any other condition that may affect the power tool's operation. If damaged, have the power tool repaired before use. Many accidents are caused by poorly maintained power tools.
f) Keep cutting tools sharp and clean. Properly maintained cutting tools with sharp cutting edges are less likely to bind and are easier to control.
g) Use the power tool, accessories and tool bits etc. in accordance with these instructions, taking into account the working conditions and the work to be performed. Use of the power tool for operations different from those intended could result in a hazardous situation.
h) Keep handles and grasping surfaces dry, clean and free from oil and grease. Slippery handles and grasping surfaces do not allow for safe handling and control of the tool in unexpected situations.
5. Service
a) Have your power tool serviced by a qualified repair person using only identical replacement parts. This will ensure that the safety of the power tool is maintained.
⚠ WARNING!
This power tool generates an electromagnetic field during operation. This field can impair active or passive medical implants under certain conditions. In order to prevent the risk of serious or deadly injuries, we recommend that persons with medical implants consult with their physician and the manufacturer of the medical implant prior to operating the machine.
Mixer safety instructions
a) Always hold the power tool with both hands on the intended handles. Loss of control can cause personal injury.
b) Ensure sufficient ventilation when mixing flammable materials to avoid a hazardous atmosphere. Developing vapour may be inhaled or be ignited by the sparks the power tool produces.
c) Do not mix food. Power tools and their accessories are not designed for processing food.
d) Keep the cord away from the working area. The cord may be entangled by the stirrer.
e) Ensure that the mixing container is placed in a firm and secure position. A container that is not properly secured may move unexpectedly.
f) Ensure that no liquid splashes against the housing of the power tool. Liquid that has penetrated the power tool can cause damage and lead to electric shock.
g) Follow the instructions and warnings for the material to be mixed. Material to be mixed may be harmful.
h) If the power tool falls into the material to be mixed, unplug the power tool immediately and have the power tool checked by a qualified repair person. Reaching into the mixing container with the power tool still plugged in can lead to electric shock.
i) Do not reach into the mixing container with your hands or insert any other objects into it while mixing. Contact with the stirrer may lead to serious personal injury.
j) Start up and run down the power tool in the mixing container only. The stirrer may bend or spin in an uncontrolled manner.
Residual risks
Even when this power tool is operated properly, residual risks still remain. The following hazards may arise in connection with the design and construction of this power tool:
- Lung damage if suitable dust protection mask is not worn.
- Hearing damage if suitable hearing protection is not worn.
- Damage to health resulting from hand/arm vibration if the device is used over an extended period of time or if it is not properly operated and maintained.
6. Technical data
Rated voltage 230 V\~ 50 Hz
| Power consumption 1600 W | |
| Idling speed | 0-580 rpm / 0-780 rpm |
| Mixing tool mount M14 | |
| Protection class II | |
| Weight 5.2 kg | |
Subject to technical modifications!
Noise and vibration
Sound and vibration values were measured in accordance with EN 62841.
| Sound pressure level L_pA | 93.1 dB |
| Uncertainty K_pA | 3 dB |
| Sound power level L_WA | 101.1 dB |
| Uncertainty K_WA | 3 dB |
Wear hearing protection.
Excessive noise can result in a loss of hearing.
Total vibration emission values (vector sum of three directions) determined according to EN 62841.
Vibration emission value ah = 2.9 m/s Uncertainty K = 1.5 m/s
Additional information for electric tools Warning!
The specified vibration emission value has been measured according to a standardised testing procedure and can be used for comparison of one power tool with another; and may change depending on the way in which the power tool is used and in exceptional cases may be higher than the specified value.
The specified vibration emission value can be used to compare one power tool with another.
The specified vibration emission value can also be used for an initial estimation of the impair.
Keep the noise level and vibration to a minimum!
- Only use devices which are free of defects.
- Maintain and clean the device at regular intervals.
- Adapt your working methods to the device.
- Do not overload the device.
- Have the device checked if necessary.
- Switch the device off if it is not in use.
- Wear gloves.
7. Unpacking
- Open the packaging and carefully remove the product.
- Remove the packaging material, as well as the packaging and transport safety devices (if present).
- Check whether the scope of delivery is complete.
- Check the product and accessory parts for transport damage. In the event of complaints the carrier must be informed immediately. Later claims will not be recognised.
- If possible, keep the packaging until the expiry of the warranty period.
- Familiarise yourself with the product by means of the operating manual before using for the first time.
- With accessories as well as wearing parts and replacement parts use only original parts. Spare parts can be obtained from your specialist dealer.
- When ordering please provide our article number as well as type and year of manufacture for the product.
ATTENTION!
The device and the packaging are not children's toys! Do not let children play with plastic bags, films or small parts! There is a danger of choking or suffocating!
8. Assembly (fig. 2 - 4)
Attention!
Always make sure the device is fully assembled before commissioning!
1) Turn the connection shaft mixer attachment (1) clockwise into the mixer attachment (2). (Fig. 2)
2) Then screw the assembled mixer rod (1 + 2) into the drive shaft (3). (Fig. 3).
DANGER!
Use only a mixing paddle that is designed and suitable for the material to be mixed. A wrong mixing paddle may put strain on the power tool which may damage the tool and lead to accidents!
Remove the mixing paddle from the drive shaft by turning it counterclockwise. The paddle may sit quite tight in its holding fixture. If this is the case, the fixture must be secured with a key against turning with the paddle. (fig. 4)
9. Commissioning
Attention!
Always make sure the product is fully assembled before commissioning!
Turning on (fig. 1)
Press and hold the circuit breaker (8) for the ON / OFF switch; now you can press the ON / OFF switch (7) to start the handheld mixer. Once the tool is running properly you can release the ON / OFF switch, turning off the circuit breaker (8).
Turning off (fig. 1)
Release the ON / OFF switch (7). The circuit breaker for the ON / OFF switch (8) turns off automatically.
Speed controller (fig. 1)
With the speed controller (9), the power tool's speed can be gradually adjusted. The type of material to be mixed determines the speed rate that is required. Practice will teach you the optimal speed required by the respective material.
2- speed gear (fig. 1)
The device is equipped with a 2-speed gear. If the gear selection switch cannot be locked, turn the stirring staff a little.
- For the speed selection turn the switch (4) by 180^ .
- speed: 0 rpm - 580 rpm
- speed: 0 rpm - 780 rpm
Only operate this switch at standstill of the machine.
Working with the paint and mortar stirrer
- When changing the stirrer, the mains plug must be pulled out.
- When dipping into the mix or removing it from the mix, work at a reduced speed. After complete immersion, increase speed to maximum to ensure adequate motor cooling.
- Guide the machine through the mixing vessel during the mixing process. Mix until the entire mixture has been completely worked through.
• After completing the mixing work, clean the stirrer.
Area of application of the agitators (fig. 1)
- The left-turning agitator (2a) is used for low-viscosity substances such as: Different types of paints, varnishes, glazes, wallpaper paste, sealing compounds, bitumen, chemicals, red lead, cement slurries.
- The right-turning agitator (2b) is used for high-viscosity substances such as: Adhesive and ready-mixed mortars, adhesive binders, gypsum, lime, cement plaster, screed, concrete, tile adhesive, glue, putty, pastes, granulate.
10. Maintenance and care
Before each maintenance and cleaning work:
- Switching off the device
- wait for standstill of the beater
• Pull out the mains plug
Use only original parts. Other parts can result in unexpected damages and injuries.
Maintenance and repair work beyond this is only allowed to be carried out by the manufacturer or authorized service staff.
Store unused equipment in a dry, locked place out of the reach of children.
Observe the following to maintain the operability of the machine:
- Keep vent slits clean and free from obstructions.
- Remove dust and dirt using a cloth or a soft brush.
-
Do not clean the machine with running water or high-pressure cleaners.
-
Do not use solvents for the synthetic parts (petrol, alcohol, etc.) as these can damage the synthetic parts.
- Clean the beaters.
- The agitator is equipped with carbon brushes. Have the carbon brushes be replaced by the customer service if they are worn
Regularly check the beater for damages for your own safety. Immediately replace any damaged beater. Always replace the beaters in pairs.
Check the shaft on a regular basis. An agitator with defective shaft must no longer be used. Have the device be repaired by the customer service.
11. Repair & ordering spare parts
After any repair or maintenance work, make sure that all safety-related parts are in place and in perfect condition. All parts which may cause injury must be kept where they are inaccessible to children or others.
Attention: According to the German Product Liability Act, no liability is accepted for damage caused by improper repairs or by not using original spare parts.
Such work should be performed by a customer service centre or an authorised specialist. The same applies to accessory parts.
Connections and repairs
Connections and repair work on the electrical equipment may only be carried out by electricians.
11.1 Ordering spare parts
Please provide the following information when ordering spare parts:
- Model designation
- Article number
- Type plate data
Spare parts / accessories Article no:
Carbon brushes 5907803001
Mixer rod right-turning 5907800702
Mixer rod left-turning 5907800701
Mixer attachment 3907801009
Connection shaft mixer attachment 3907801008
11.2 Service information
With this product, it is necessary to note that the following parts are subject to natural or usage-related wear, or that the following parts are required as consumables.
Wearing parts*: Mixer attachment, mixer rod, carbon brushes
* may not be included in the scope of delivery!
Spare parts and accessories can be obtained from our Service Centre. To do this, scan the QR code on the front page.
12. Electrical connection
The electrical motor installed is connected and ready for operation. The connection complies with the applicable VDE and DIN provisions. The customer's mains connection as well as the extension cable used must also comply with these regulations.
- The product fulfils the requirements of EN 61000-3-11 and may only be used at the following connection points: This means that use of the product at any freely selectable connection points is not allowed.
- Given unfavourable conditions in the power supply the product can cause the voltage to fluctuate temporarily.
- The product is intended solely for use at connection points that
a) do not exceed a maximum permitted supply impedance "Z" (Zmax. = 0.25 Ω), or
b) have a mains constant current carrying capacity of at least 100 A per phase.
- As the user, you are required to ensure, in consultation with your electric power company if necessary, that the connection point at which you wish to operate the product meets one of the two requirements, a) or b), named above.
Damaged electrical connection cable
The insulation on electrical connection cables is often damaged.
This may have the following causes:
- Pressure points, where connection cables are passed through windows or doors.
- Kinks where the connection cable has been improperly fastened or routed.
- Places where the connection cables have been cut due to being driven over.
• Insulation damage due to being ripped out of the wall outlet.
• Cracks due to the insulation ageing.
Such damaged electrical connection cables must not be used and are life-threatening due to the insulation damage.
Check the electrical connection cables for damage regularly. Ensure that the connection cables are disconnected from electrical power when checking for damage.
Electrical connection cables must comply with the applicable VDE and DIN provisions. Only use connection cables with designation H05VV-F.
The printing of the type designation on the connection cable is mandatory.
Connection type X
If the mains connection cable of this device is damaged, it must be replaced by a special connection cable which can be obtained from the manufacturer or its service department.
AC motor
- The mains voltage must be 220 - 240 V\~.
- Extension cables up to 25 m long must have a cross-section of 1.5 square millimetres.
Connections and repair work on the electrical equipment may only be carried out by electricians.
Please provide the following information in the event of any enquiries:
• Type of current for the motor
• Data of machine type plate
13. Storage
- The whole machine and all accessories must be thoroughly cleaned.
- Store the machine always out of children's reach. Put it in a secure position in a dry and safe place where no extremely high or extremely low temperatures may occur.
- Protect the stored machine from direct sunlight; put it in a darkened area, if feasible.
- Do not wrap the machine into bags or covers made of nylon or plastic, as dampness may develop.
14. Disposal and recycling
Notes for packaging

The packaging materials are recyclable. Please dispose of packaging in an environmentally friendly manner.
Notes on the electrical and electronic equipment act [ElektroG]
![SCHEPPACH PM1600 - Notes on the electrical and electronic equipment act [ElektroG] - 1](/content/2026/03/577337/images/48bd4974e9cf1c6b6bc03e692c31e640ca5119ebb664686a7173cf574f9bec8b.jpg)
Waste electrical and electronic equipment does not belong in household waste, but must be collected and disposed of separately!
- Used batteries or rechargeable batteries that are not installed permanently in the old appliance must be removed non-destructively before disposal. Their disposal is regulated by the battery law.
- Owners or users of electrical and electronic devices are legally obliged to return them after use.
- The end user is responsible for deleting their personal data from the old device being disposed of!
- The symbol of the crossed-out dustbin means that waste electrical and electronic equipment must not be disposed of with household waste.
- Waste electrical and electronic equipment can be handed in free of charge at the following places:
- Public disposal or collection points (e.g. municipal works yards)
- Points of sale of electrical appliances (stationary and online), provided that dealers are obliged to take them back or offer to do so voluntarily.
- Up to three waste electrical devices per type of device, with an edge length of no more than 25 centimetres, can be returned free of charge to the manufacturer without prior purchase of a new device from the manufacturer or taken to another authorised collection point in your vicinity.
- Further supplementary take-back conditions of the manufacturers and distributors can be obtained from the respective customer service.
- If the manufacturer delivers a new electrical appliance to a private household, the manufacturer can arrange for the free collection of the old electrical appliance upon request from the end user. Please contact the manufacturer's customer service for this.
- These statements only apply to devices installed and sold in the countries of the European Union and which are subject to the European Directive 2012/19/EU. In countries outside the European Union, different regulations may apply to the disposal of waste electrical and electronic equipment.
15. Troubleshooting
| Problem Possible cause Remedy | ||
| Motor does not start. | No power supply (power failure) Check fuses | |
| Mains cable defective. | Exchange defect cable, respectively check extension cable, (by electrician) Never use defect lead | |
| Motor or switch faulty. | To correct the problem, refer to the manufacturer or other approved service centre. | |
| Unusual vibrations | Beater defective. Replace the beater. | |
| Chuck defective. | To correct the problem, refer to the manufacturer or other approved service centre. | |
| Non-intended material to be mixed. | Incorrect processing. Follow the processing instructions from the supplier. | |
| The device starts up, but blocks when the load is low and may switch off automatically. | Extension cable too long, or cross-section too small. | Extension cable at least 1,5 mm ^2 , maximum 25 m long. |
| Socket too far away from main connection, and cross-section of connection lead too small. | Cross-section of at least 2,5 mm ^2 in longer cables. | |
Günzburger Straße 69
D-89335 Ichenhausen
Cher client,
Günzburger Straße 69
D-89335 Ichenhausen
Egregio cliente,
Günzburger Straße 69
D-89335 Ichenhausen
Geachte klant,
Günzburger Straße 69
D-89335 Ichenhausen
Estimado cliente:
Günzburger Straße 69
D-89335 Ichenhausen
Estimado cliente,
Günzburger Straße 69
D-89335 Ichenhausen
Vážený zákazníku,
Günzburger Straße 69
D-89335 Ichenhausen
Vážený zákazník,
Günzburger Straße 69
D-89335 Ichenhausen
Kedves Ügyfelünk!
Günzburger Straße 69
D-89335 Ichenhausen
Szanowny Kliencie,
Günzburger Straße 69
D-89335 Ichenhausen
Poštovani kupci,
Regulator brzine (sl. 1)
Regulatorom brzine (9) može se kontinuirano namje- stiti brzina vrtnje uređaja. Vrsta miješanog materijala određuje potrebnu brzinu. Optimalnu brzinu najbolje se odrediti u praksi.
Günzburger Straße 69
D-89335 Ichenhausen
Spoštovani kupec,
želimo vam veliko veselja in uspeha pri delu z vašo novo napravo.
Napotek:
Günzburger Straße 69
D-89335 Ichenhausen
Austatud klient!
Günzburger Straße 69
D-89335 Ichenhausen
Gerbiamas kliente,
Günzburger Straße 69
D-89335 Ichenhausen
Godātais klient!
Günzburger Straße 69
D-89335 Ichenhausen
Bästa Kund!
Günzburger Straße 69
D-89335 Ichenhausen
Arvoisa asiakas
Günzburger Straße 69
D-89335 Ichenhausen
Kære kunde,
Günzburger Straße 69
D-89335 Ichenhausen
Kjære kunde
Günzburger Straße 69
D-89335 Ichenhausen, Германия
Уважаеми клиенти,
Günzburger Straße 69
D-89335 Ichenhausen
Αξιότιμε πελάτη
Günzburger Straße 69
D-89335 Ichenhausen
Stimate client
Günzburger Straße 69
D-89335 Ichenhausen
Poštovani kupče
Regulator brzine (sl. 1)
Pomoću regulatora brzine (9) postepeno može da se podesi broj obrtaja uređaja. Vrsta materijala za mešanje određuje potrebnu brzinu. Odgovarajuću optimalnu brzinu najbolje ćete naučiti kroz praksu.
2-stepeni prenosnik (sl. 1)
Günzburger Straße 69
D-89335 Ichenhausen
İthalatçı:
EU Declaration of Conformity
| 2000/14/EG_2005/88/EG | |
| Noise: measured LWA= xx dB; guaranteed LWA= xx dB | |
| Annex V | |
| Annex VI | |
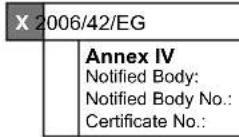
| X 2006/42/EG | |
| Annex IV Notified Body: Notified Body No.: Certificate No.: | |
| 2016/1628/EU | |
| Emission. No: |
Standard references:
EN 62841-1:2015/A11:2022; EN62841-2-10:2017; EN IEC 55014-1:2021; EN IEC 55014-2:2021;
EN IEC 61000-3-2:2019/A1:2021; EN IEC 61000-3-11:2019
This declaration of conformity is issued under the sole responsibility of the manufacturer.
The object of the declaration described above fulfils the regulations of the directive 2011/65/EU of the European Parliament and Council from 8th June 2011, on the restriction of the use of certain hazardous substances in electrical and electronic equipment.
Subject to change without notice
Documents registrar: Niko Vraschek
Günzburger Str. 69, D-89335 Ichenhausen
EU Declaration of Conformity
AB uygunluk beyanı
CE
Scheppach GmbH, Günzburger Str. 69, D-89335 Ichenhausen
| DE | erklärt folgende Konformität gemäß EU-Richtlinien und Normen für den Artikel | RO | declară următoarea conformitate corespunzător directivelor și normelor UE pentru articolul |
| GB | hereby declares the following conformity under the EU Directive and standards for the following article | GR | đenlăvlei tnu akolouh Σuμρόφωση σύμφωνα με tnu Oδηγία EE kai ta πρότιπα για to προϊόν |
| BG | декларира съответното съответствие съгласно Дирек-тива на EC и норми за артикул | TR | Burada açıklanan ürünün geleçli yönetmeliklere ve standartlara uygun oldugunu tamamen kendi sorumluluğumuz altında beyan ediyoruz. |
| RS | potvrđuje sledeću usklađenost prema smernicama EZ i normama za artikal |
| 2016/1628/EU | |
| Emission. No: |
Standard references:
EN 62841-1:2015/A11:2022; EN62841-2-10:2017; EN IEC 55014-1:2021; EN IEC 55014-2:2021;
EN IEC 61000-3-2:2019/A1:2021; EN IEC 61000-3-11:2019
This declaration of conformity is issued under the sole responsibility of the manufacturer.
The object of the declaration described above fulfils the regulations of the directive 2011/65/EU of the European Parliament and Council from 8th June 2011, on the restriction of the use of certain hazardous substances in electrical and electronic equipment.
Subject to change without notice
Documents registrar: Niko Vraschek Günzburger Str. 69, D-89335 Ichenhausen
Garantie DE
Apparent defects must be notified within 8 days from the receipt of the goods. Otherwise, the buyer loses its rights of claim due to such defects are invalidated. We guarantee for our machines in case of proper treatment for the time of the statutory warranty period from delivery in such a way that we replace any machine part free of charge which provably becomes unusable due to faulty material or defects of fabrication within such period of time. With respect to parts not manufactured by us we only warrant insofar as we are entitled to warranty claims against the upstream suppliers. The costs for the installation of the new parts shall be borne by the buyer. The cancellation of sale or the reduction of purchase price as well as any other claims for damages shall be excluded.
Garantie FR
Apparent defects must be notified within 8 days from the receipt of the goods. Otherwise, the buyer's rights of claim due to such defects are invalidated. We guarantee for our machines in case of proper treatment for the time of the statutory warranty period from delivery in such a way that we replace any machine part free of charge which provably becomes unusable due to faulty material or defects of fabrication within such period of time. With respect to parts not manufactured by us we only warrant insofar as we are entitled to warranty claims against the upstream suppliers. The costs for the installation of the new parts shall be borne by the buyer. The cancellation of sale or the reduction of purchase price as well as any other claims for damages shall be excluded.
Záruka CZ
Apparent defects must be notified within 8 days from the receipt of the goods. Otherwise, the buyer is rights of claim due to such defects are invalidated. We guarantee for our machines in case of proper treatment for the time of the statutory warranty period from delivery in such a way that we replace any machine part free of charge which provably becomes unusable due to faulty material or defects of fabrication within such period of time. With respect to parts not manufactured by us we only warrant insofar as we are entitled to warranty claims against the upstream suppliers. The costs for the installation of the new parts shall be borne by the buyer. The cancellation of sale or the reduction of purchase price as well as any other claims for damages shall be excluded.
Garantii EE
Apparent defects must be notified within 8 days from the receipt of the goods. Otherwise, the buyer's rights of claim due to such defects are invalidated. We guarantee for our machines in case of proper treatment for the time of the statutory warranty period from delivery in such a way that we replace any machine part free of charge which provably becomes unusable due to faulty material or defects of fabrication within such period of time. With respect to parts not manufactured by us we only warrant insofar as we are entitled to warranty claims against the upstream suppliers. The costs for the installation of the new parts shall be borne by the buyer. The cancellation of sale or the reduction of purchase price as well as any other claims for damages shall be excluded.
гаранция BG
- PM1600
- Verehrter Kunde
- Table of contents: Page:
- Introduction
- Manufacturer:
- Dear Customer
- Note:
- Please consider:
- Description of the product (fig. 1)
- Scope of delivery
- Proper use
- General safety information
- ⚠ Warning!
- Work area safety
- Electrical safety
- Personal safety
- Power tool use and care
- Service
- Mixer safety instructions
- Residual risks
- Technical data
- Subject to technical modifications!
- Noise and vibration
- Wear hearing protection.
- Additional information for electric tools Warning!
- Keep the noise level and vibration to a minimum!
- Unpacking
- ATTENTION!
- Assembly (fig. 2 - 4)
- DANGER!
- Commissioning
- Turning on (fig. 1)
- Turning off (fig. 1)
- Speed controller (fig. 1)
- 2- speed gear (fig. 1)
- Working with the paint and mortar stirrer
- Area of application of the agitators (fig. 1)
- Maintenance and care
- Before each maintenance and cleaning work:
- Repair & ordering spare parts
- Connections and repairs
- Ordering spare parts
- Service information
- Electrical connection
- Damaged electrical connection cable
- Connection type X
- AC motor
- Storage
- Disposal and recycling
- Notes for packaging
- Notes on the electrical and electronic equipment act [ElektroG]
- Troubleshooting
- Cher client,
- Egregio cliente,
- Geachte klant,
- Estimado cliente:
- Estimado cliente,
- Vážený zákazníku,
- Vážený zákazník,
- Kedves Ügyfelünk!
- Szanowny Kliencie,
- Poštovani kupci,
- Regulator brzine (sl. 1)
- Spoštovani kupec,
- Napotek:
- Austatud klient!
- Gerbiamas kliente,
- Godātais klient!
- Bästa Kund!
- Arvoisa asiakas
- Kære kunde,
- Kjære kunde
- Уважаеми клиенти,
- Αξιότιμε πελάτη
- Stimate client
- Poštovani kupče
- 2-stepeni prenosnik (sl. 1)
- İthalatçı:
- EU Declaration of Conformity
- Standard references:
- AB uygunluk beyanı
- Garantie DE
- Garantie FR
- Záruka CZ
- Garantii EE
- гаранция BG
Brand : SCHEPPACH
Model : PM1600
Category : Paint mixer