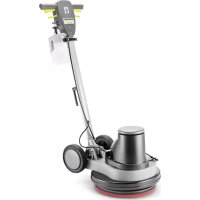
BDP 43400 C - Polisher Kärcher - Free user manual and instructions
Find the device manual for free BDP 43400 C Kärcher in PDF.



| Brand | Kärcher |
| Model | BDP 43400 C |
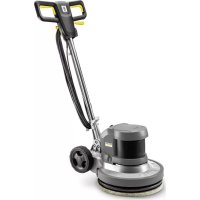
| Product type | Walk-behind single-brush polisher |
| Application | Professional (hotels, schools, hospitals, factories, stores, offices, rental companies) |
| Power supply | 240 V ~ 50 Hz, 1300 W (suction max. 1500 W) |
| Dimensions (L × W × H) | 650 × 470 × 1210 mm |
| Weight | 32 kg |
| Working diameter | 430 mm (brush or drive plate) |
| Rotation speed | 380 rpm |
| Contact pressure | 22 g/cm² (brush) |
| Surface capacity | 475 m²/h |
| Clean water tank capacity | 12 L (with optional kit) |
| Cable length | 15 m |
| Maximum permissible incline | 2 % |
| Sound pressure level (without suction) | 54.9 dB(A) |
| Sound power level (without suction) | 67.7 dB(A) |
| Vibration (hand-arm) | < 2.5 m/s² |
| Safety devices | Unlock button, motor stops when lever released |
| Routine maintenance | Clean housing with damp cloth; wash pads at up to 60 °C; replace filter bag and exhaust air filter (with suction kit) |
| Spare parts and accessories | Brushes, pads, drive plates, tank/suction/spray bottle kits, protective bar, filter bags, etc. |
| Warranty | According to country conditions; contact distributor or authorized service center |
Frequently Asked Questions - BDP 43400 C Kärcher
User questions about BDP 43400 C Kärcher
0 question about this device. Answer the ones you know or ask your own.
Ask a new question about this device
Download the instructions for your Polisher in PDF format for free! Find your manual BDP 43400 C - Kärcher and take your electronic device back in hand. On this page are published all the documents necessary for the use of your device. BDP 43400 C by Kärcher.
USER MANUAL BDP 43400 C Kärcher
Deutsch 5
English 12
Français 20
Italiano 28
Español 36
Português 43
Nederlands 51
Türkçe 58
Svenska 65
Suomi 72
Norsk 79
Dansk 86
Eesti 93
Latviešu 99
Lietuviškai 107
Polski 114
Magyar 122
Čeština 129
Slovenčina 136
Slovenščina 144
Româneşte 151
Hrvatski 158
Srpski 166
Ελληνικά 173
Русский 181
Українська 190
Български 198
中文 206
العربية 212
A
1
2
Inhalt
H. Jenner
Chairman of the Board of Management
S. Reiser
Director Regulatory Affairs & Certification
71364 Winnenden (Germany)
Tel.: +49 7195 14-0
Fax: +49 7195 14-2212
Winnenden, /09/01
Contents
General notes.... 12
Intended use 12
Safety instructions.... 13
Environmental protection 13
Accessories and spare parts...... 13
Scope of delivery.... 13
Control elements.... 14
Installation.... 14
Initial startup.... 14
Operation 15
Shutting down 16
Transport.... 16
Storage.... 17
Care and service.... 17
Troubleshooting guide...... 17
Warranty.... 18
Technical data 18
Declaration of Conformity.... 19
General notes

Read these original operating instructions and the enclosed safety instructions before using the device for the first time. Proceed accordingly.
Keep both books for future reference or for future owners.
Intended use
Use the device only in accordance with the information in these operating instructions.
- This device is suitable for commercial use, e.g. in hotels, schools, hospitals, factories, shops, offices, and rental companies.
- Only use the device for cleaning hard surfaces that are not sensitive to moisture and not sensitive to polishing.
- Use the device only at an ambient temperature between +5°C and +40°C.
-
Do not use the device for cleaning frozen floors (e.g. in cold stores).
-
Only equip the device with original accessories and spare parts.
- Only use the device for cleaning indoor floors or covered areas.
- Do not use the device for cleaning public traffic routes.
● The device must not be used outdoors. - Do not use the device in a corrosive environment.
- Never use the device in potentially explosive atmospheres.
- Only use the device on surfaces up to the maximum gradient specified in the "Technical data" section.
- Only connect accessories to the socket in the device that are listed in the “Accessories” chapter.
Safety instructions
Before using the device for the first time, read and observe these operating instructions and the accompanying brochure: Safety information for single disc machines, No. 5.956-659.0.
Safety devices
△CAUTION
Missing or modified safety devices!
Safety devices are provided for your own protection.
Do not bypass, remove or render ineffective any safety devices.
Unlocking button
The device cannot be started if the unlocking button is not pressed.
Environmental protection

The packing materials can be recy- cled. Please dispose of packaging in accordance with the environmental regulations.

Electrical and electronic devices contain valuable, recyclable materials and often components such as batteries, rechargeable batteries or oil, which - if handled or disposed of incorrectly - can pose a potential danger to human health and the environment. However, these components are required for the correct operation of the device. Devices marked by this symbol are
not allowed to be disposed of together with the household rubbish.
Notes on the content materials (REACH)
Current information on content materials can be found at: www.kaercher.de/REACH
Accessories and spare parts
Only use original accessories and original spare parts. They ensure that the appliance will run fault-free and safely.
Information on accessories and spare parts can be found at www.kaercher.com.
Accessories
| Description Order no. | |
| ABS tank complete BDP 43/400 C | 2.644-237.0 |
| ABS suction complete BDP 43/400 C | 2.644-238.0 |
| ABS spray bottle complete BDP 43/400 C | 2.644-239.0 |
| Impact protection ring, rubber | 6.994-155.0 |
| Brush for polishing D 430 6,37 | 0-044.0 |
| Brush, Palmyra 6,370-046.0 | |
| Brush for scrubbing D 430 6,3 | 70-047.0 |
| Pad drive board, pad D 430 6, | 370-063.0 |
| Pad, red 6.369-470.0 | |
| Polishing pad, white 6.369-469.0 | |
| Polishing pad, beige, with natural hair | 6.371-149.0 |
| Polishing pad, beige 6.371-08 | 1.0 |
| Diamond pad, green, 5 pieces | 6.371-238.0 |
| Diamond pad, white, 5 pieces | 6.371-256.0 |
| Diamond pad, yellow, 5 pieces | 6.371-257.0 |
Scope of delivery
Check the contents for completeness when unpacking. If any accessories are missing or in the event of any shipping damage, please notify your dealer.
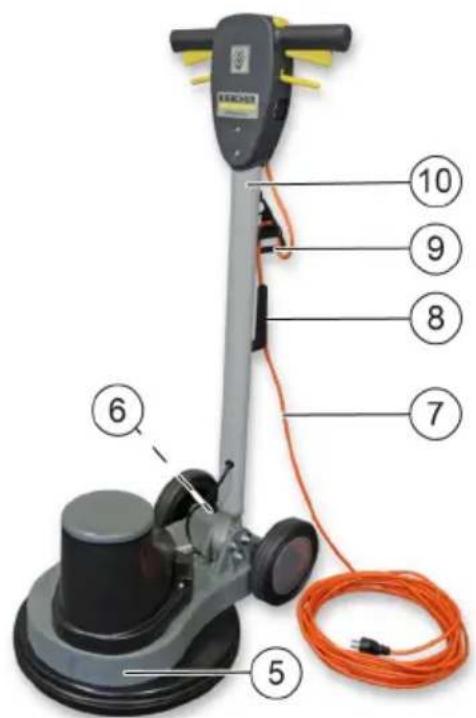
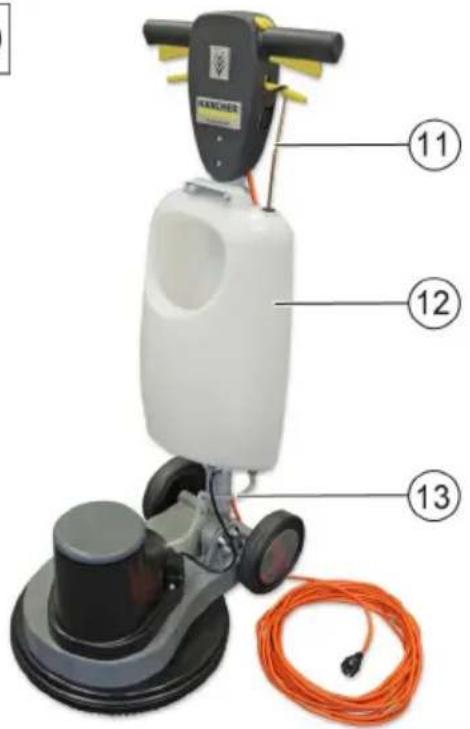
Control elements
Illustration A
①BDP 43/400 C
② BDP 43/400 C with tank attachment kit (ABS)
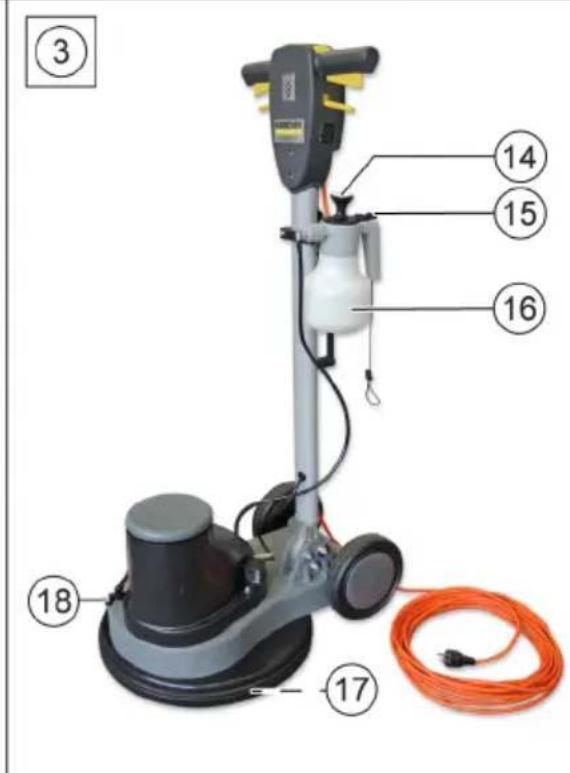
③ BDP 43/400 C with ABS spray bottle
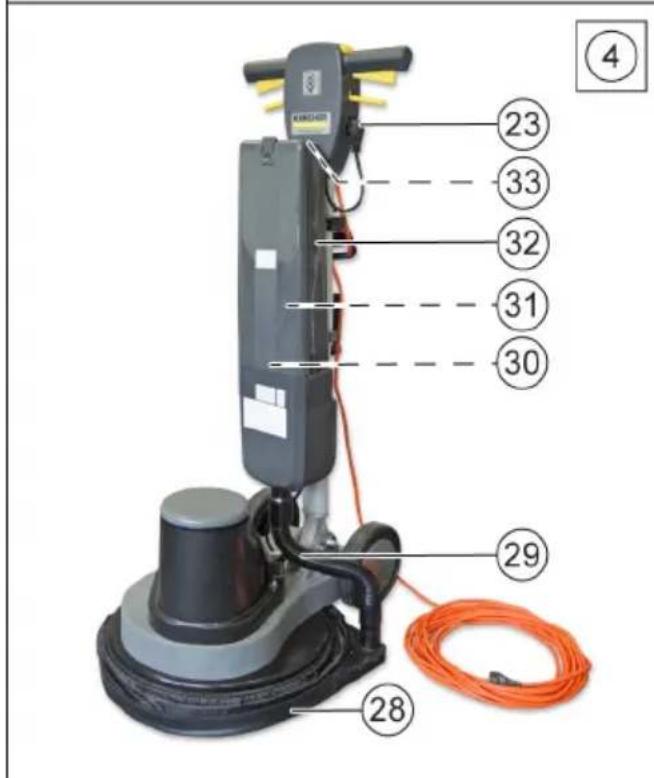
④ BDP 43/400 C with ABS suction
⑤Cleaning head
⑥Type plate
⑦ Mains connection cable with mains plug
⑧Cable hook, rotating
⑨ Strain relief
⑩ Thrust rod
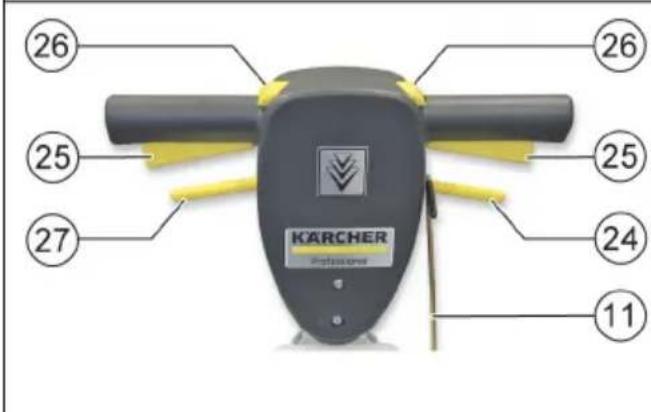
⑪ Pull rod*
⑫Tank*
⑬Hose for cleaning solution*
⑭ Pump rod**
⑮Spray lever**
⑯Spray bottle**
⑰Brush or pad drive board / pad
⑱ Spray nozzle**
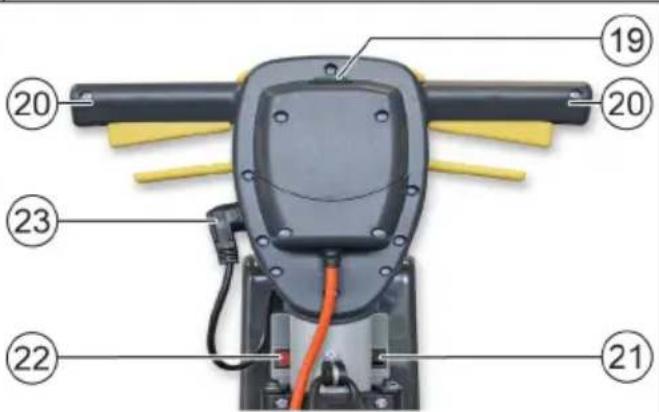
⑲Indicator light for mains voltage
⑳Handle
②1Suction switch ON / OFF***
22 Suction warning light***
⑳Suction mains plug***
⑳Lever for cleaning solution
25 ON/OFF lever
26 Unlocking button
⑳Tilt adjustment lever
28 Suction skirt***
⑲Suction hose***
③0 Exhaust filter***
③1 Dust bag***
③2Suction unit***
③3Suction power regulation slider***
* only with ABS tank
** only with ABS spray bottle
*** only with ABS suction
Installation
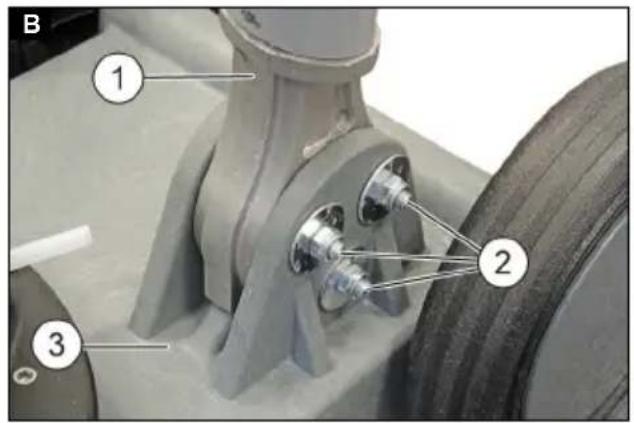
Mounting the push rod
- Align the holes in the push rod with the holes on the cleaning head.
Illustration B
① Thrust rod
② Screws (3 pieces)
③ Cleaning head
2. Insert the screws with washers, and tighten using stop nuts with washers (tightening torque: 25 Nm).
Note
Do not overtighten the stop nuts. The push rod must not jam in the mount, and must be tiltable without effort after unlocking.
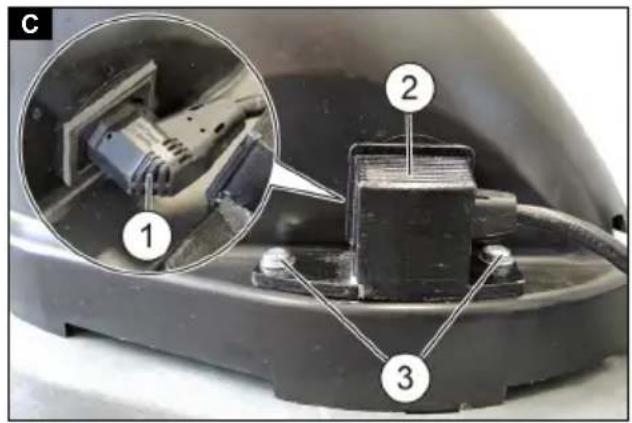
- Insert the plug into the socket on the cleaning head.
Illustration C
① Plug
② Bar cover
③ Screws(2 pieces)
-
Install the bar cover and tighten using screws with washers.
-
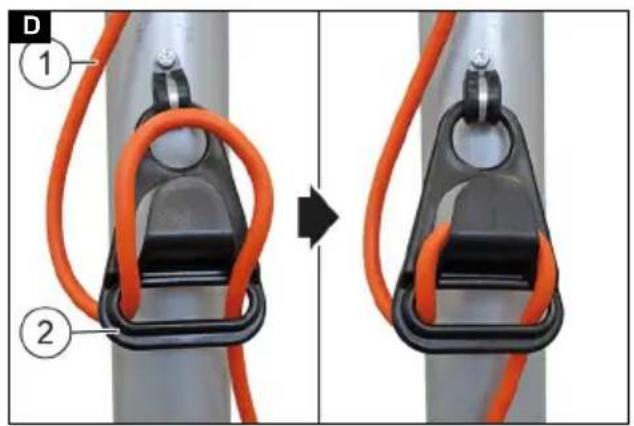
Attach the mains cable to the strain relief from below as shown.
Illustration D
① Mains cable
② Strain relief
Initial startup
Attaching the brush or the pad drive board with pad
- Select the brush suitable for the cleaning task or the corresponding pad with the pad drive board.
- Make sure that the mains plug is unplugged.
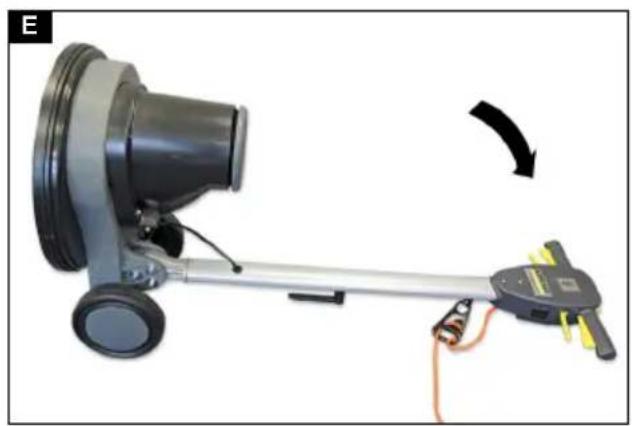
- Tilt the device backwards and place it carefully on the handle.
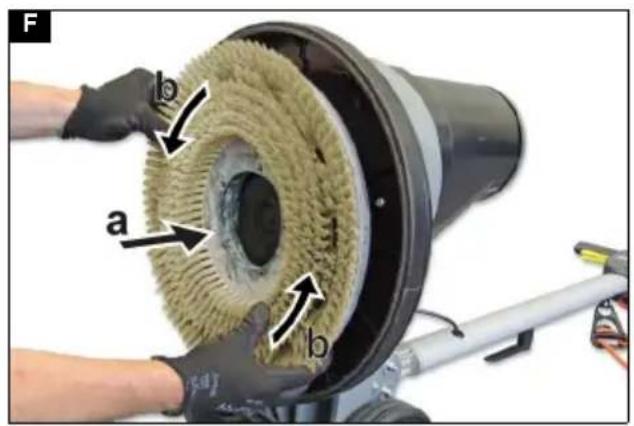
- Place the brush or the pad drive board on the device and turn it 45° anticlockwise. Illustration F
- After installing a pad drive board: Centre and press the pad onto the pad drive board.
- Erect the device.
Illustration E
Pour in the detergent (devices with ABS tank or spray bottle)
⚠ WARNING
Unsuitable detergents
Health risk, damage to the device
Use only recommended detergents. The operator carries all increased risks relating to operational safety and increased risk of accidents if using other detergents.
Use only detergents free of solvents, salt and hydrofluoric acid.
Adhere to the safety instructions stated on the detergent packaging.
ATTENTION
Risk of damage
A cleaning solution with a temperature above 50° C can damage the device.
Only pour the cleaning solution into the detergent tank or the spray bottle at a maximum temperature of 50° C.
- Pour in the cleaning solution.
a Devices with ABS tank: Fill up to the MAX mark in the tank.
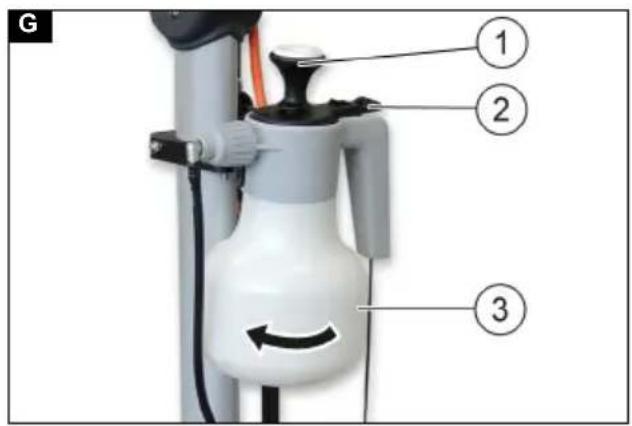
b Devices with ABS spray bottle: Unscrew the spray bottle container, fill up to the MAX mark and screw it back on. Operate the pump rod several times to build up pressure in the spray bottle.
Illustration G
① Pump rod
② Spray lever
③ Container
Operation
Adjusting the inclination of the push rod
⚠ WARNING
Danger of accident
The device can move uncontrollably if the push rod is adjusted while the motor is running.
Only adjust the push rod when the device is switched off.
- Pull the tilt adjustment lever and hold it in position.
- Bring the push rod into a comfortable position (about waist height).
-
Release the tilt adjustment lever.
-
Move the push rod up and down slightly until it latches into place.
Switching on the device
⚠ WARNING
Risk of injury
In the absence of ground friction, the brush or pad can reach very high speeds. They can be hurled away and cause injury. Do not switch on the device when the cleaning head is swung up.
The maximum permissible mains grid impedance at the electrical connection point (see Technical data) must not be exceeded.
Contact your electricity supplier in the case of any uncertainties regarding the mains grid impedance at your electrical connection point.
ATTENTION
Risk of damage
The floor covering can be damaged if the device is operated on the same spot for a long time.
Always move the device when it is switched on.
- Turn the cable hook upwards, and unwind the mains cable completely.
-
Insert the mains plug into a mains socket.
The "Mains voltage" indicator light lights up. -
Hold the handles firmly with both hands.
-
Press and hold the left or right unlocking button.
The unlocking buttons can only be pressed when the push rod is not vertical.
-
Pull the ON / OFF lever on the same side - the device starts.
-
Release the unlocking button.
-
Release the ON / OFF lever to interrupt operation.
Cleaning
- Switch the device on.
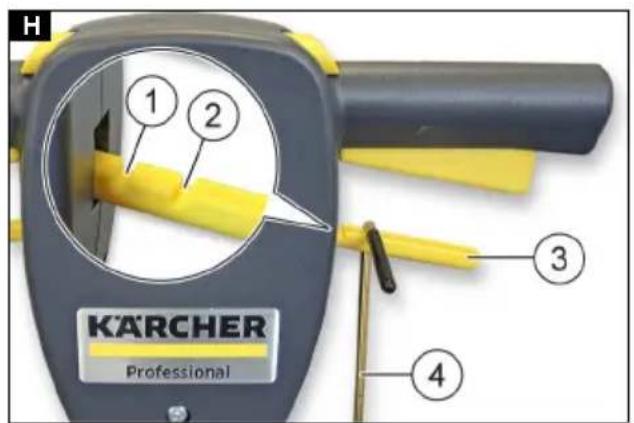
- Devices with ABS tank: Hook the pull rod into the inner or outer catch on the cleaning solution lever.
a Inner catch: When operating the cleaning solution lever, a reduced amount of cleaning solution is added. b Outer catch: When operating the cleaning solution lever, the maximum amount of cleaning solution is added.
Note
Release the cleaning solution lever 30 seconds before switching off the machine, as a certain amount of cleaning solution runs on.
Illustration H
①Inner catch
②Outer catch
③ Lever for cleaning solution
④ Pull rod
-
Devices with ABS spray bottle: If necessary, add cleaning solution by pulling the cleaning solution lever.
-
Push or pull the device over the surface to be cleaned.
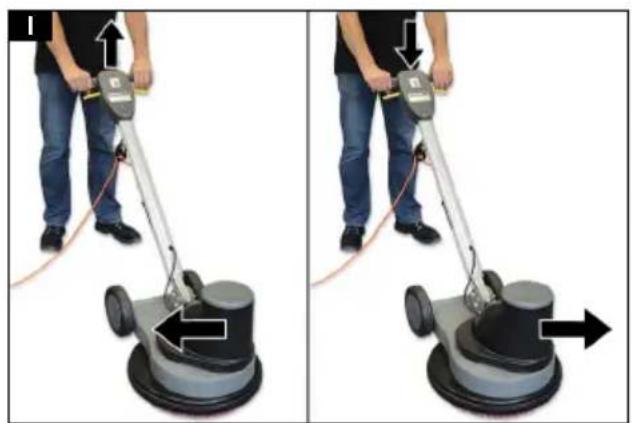
For lateral control, pull the handles slightly upwards - the device moves to the right.
Push the handles slightly down - the device moves to the left.
Illustration I
-
If the area is very dirty, run over it several times.
-
Then remove the waste water with a wet vacuum cleaner, or wipe it up with a cloth.
Suction (only devices with ABS suction)
ATTENTION
Risk of damage when vacuuming up liquids and damp dirt
The suction unit will be damaged if liquids and damp dirt are sucked up.
Only vacuum dry dirt, never liquids or damp dirt.
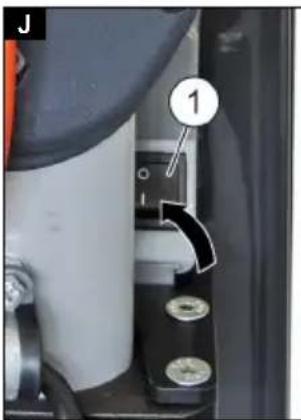
- Press the suction ON / OFF switch to the ON position.
- Switch on the device and move it over the surface to be vacuumed.
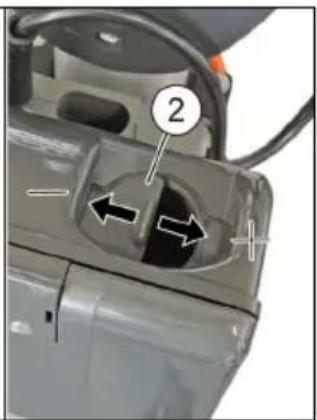
- To change the suction power, move the suction power regulation slider sideways.
Illustration J
①Suction OFF / ON switch
② Suction power regulation slider
Shutting down
- Pull the mains plug out of the socket.
- Pull the tilt adjustment lever and hold it in position.
- Bring the push rod into a vertical position.
- Release the tilt adjustment lever.
- Slightly move the push rod back and forth until it clicks into place.
- Devices with ABS tank or ABS spray bottle: Remove the remaining cleaning solution from the tank or spray bottle.
- Devices with ABS tank: Rinse and empty the tank with clear water.
- Devices with ABS spray bottle: Rinse and empty the spray system with clear water.
- Turn the cable hook down, and wrap the mains cable around the handle and cable hook.
- Remove the brush or the pad drive board with pad.
- Clean the device with a moist cloth.
Transport
△CAUTION
Failure to observe the weight
Risk of injury and damage
Be aware of the weight of the device during transportation.
- Pull the tilt adjustment lever and position the handle vertically.
- Release the tilt adjustment lever.
- Tilt the device back and transport to the destination.
- When transporting in vehicles, secure the device against rolling away, slipping and tipping according to the respectively applicable guidelines.
Storage
⚠️ DANGER
Danger of electric shock, danger of frost. Water entering the device can cause electric shock.
Water in the device can freeze and cause damage.
Only store the device indoors.
CAUTION
Failure to observe the weight
Risk of injury and damage
Be aware of the weight of the device during transport and storage.
- Store the device indoors only.
- Remove brush or pad / pad drive board.
ATTENTION
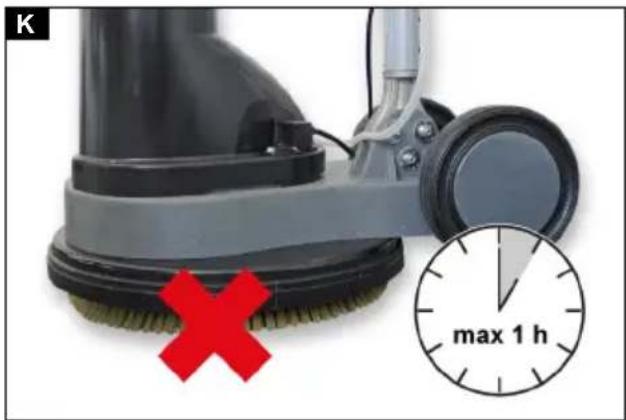
When the work is interrupted, do not place the device on the brush or the pad / pad drive board for longer than 1 hour, otherwise the brush or the pad / pad drive board will be damaged.
Illustration K
Care and service
WARNING
Risk of injury
The device may start up unexpectedly.
Be sure to pull the mains plug out of the socket before you start working on the device.
- Wash dirty pads at a maximum of 60° C.
- Clean the casing of the device with a damp cloth and then rub dry.
- Check the mains cable and mains plug for damage, have damaged parts replaced by an electrician.
Replacing the filter bag or exhaust filter (devices with ABS suction)
- Make sure that the mains plug is unplugged.
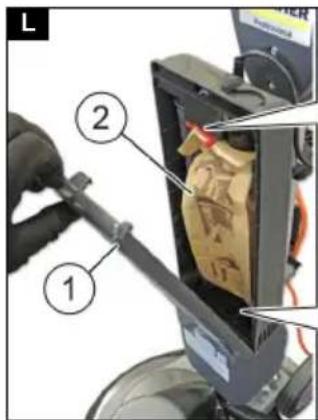
- Unlock the lid and remove. Illustration L
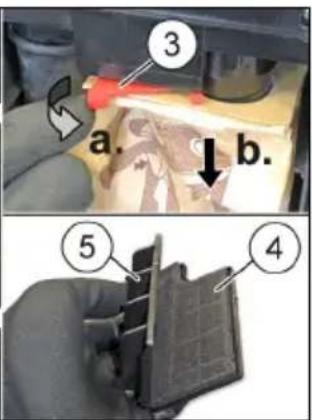
- Move the holder anticlockwise and remove the filter bag downwards.
- At the latest, after changing the filter bag 5 times: Pull out the exhaust filter holder and open it.
- Replace the exhaust filter.
- Install the exhaust filter and filter bag in the reverse order.
Troubleshooting guide
⚠ WARNING
Risk of injury
The device may start up unexpectedly. Be sure to pull the mains plug out of the socket before you start working on the device.
In the event of malfunctions that cannot be remedied using the following information, please contact customer service.
Unsatisfactory cleaning results
- Replace a dirty brush or pad.
- Replace a worn brush or pad.
- Check the suitability of the detergent used for the application.
- Check the suitability of the brush or pad used for the application.
The device vibrates strongly
- Check the brush or pad for damage, replace if necessary.
- Check the central position of the pad on the pad drive board, if necessary attach the pad centred.
- Check attachment of the pad, replace pad or pad drive board if necessary.
The brush or the pad do not turn
- Check whether foreign objects block the brush or the pad drive board, remove foreign objects if necessary.
- Plug the mains plug into the socket.
● The overload protection has triggered, let the device cool down for 30 minutes.
Devices with tank attachment kit Discharge of cleaning solution too low
- Fill the tank with cleaning solution.
- Attach the pull rod to the cleaning solution lever.
- Check the hose of the cleaning solution for kinks, eliminate kinks if necessary.
Devices with ABS spray bottle
Spray system does not spray or does not spray enough
- Pour cleaning solution into the spray bottle.
- Operate the pump rod several times to build up enough pressure.
- Clean the spray nozzle.
● Flush the spray system with clean water.
Devices with ABS suction
Suction does not work or suction power is too low
- Plug the mains plug into the socket.
- Insert the mains plug for suction on the device.
- Close the suction power regulation slider.
- Check the suction hose for correct seating on the suction unit and the suction skirt, attach it correctly if necessary.
- If the suction warning light lights up red:
a Check the suction hose for blockage, remove blockage if necessary
b Check the filter bag and the exhaust filter for contamination/blockage, replace if necessary.
- Check that the suction skirt is correctly seated on the cleaning head, attach correctly if necessary.
- Check the suction skirt for wear and damage, and replace if necessary.
Warranty
The warranty conditions issued by our sales company responsible apply in all countries. We shall remedy possible malfunctions on your device within the warranty period free of cost, provided that a material or manufacturing defect is the cause. In a warranty case, please contact your dealer (with the purchase receipt) or the next authorised customer service site. (See overleaf for the address)
Technical data
| BDP43/400C | ||
| Device performance data | ||
| Voltage | V | 240 |
| Phase ~ 1 | ||
| Frequency Hz 50 | ||
| Maximum permissible mains grid impedance | Ω | 0.401 |
| Power rating W 1300 | ||
| BDP | |
| 43/400 | |
| C |
Suction connection output W 1500 max.
Fresh water tank capacity I 12
Max. working area slope % 2
Surface performance m2/h 475
Pad
Brush / pad diameter mm 430
Brush / pad speed 1/min 380
Brush / pad contact pres- g/cm² 22 sure
Dimensions and weights
| Length | mm | 650 |
| Width | mm | 470 |
| Height | mm | 1210 |
| Weight | kg | 32 |
| Cable length m | 15 |
Determined values in acc. with EN 60335-2-67
| Hand-arm vibration value | m/s2 | <2,5 |
| Uncertainty K | dB(A) | 0,3 |
| Sound pressure level LpA | dB(A) | 54,9 |
| Peak sound level LpCpeak | dB(A) | 73,4 |
| Sound power level LwA | dB(A) | 67,7 |
| Sound level with suction LpA | dB(A) | 72,7 |
| Peak sound level with suction LpCpeak | dB(A) | 87,2 |
| Sound power level with suction LwA | dB(A) | 86,9 |
Subject to technical modifications.
220-
Declaration of Conformity
EU Declaration of Conformity
We hereby declare that the machine described below complies with the relevant basic safety and health requirements in the EU Directives, both in its basic design and construction as well as in the version placed in circulation by us. This declaration is invalidated by any changes made to the machine that are not approved by us.
Product: Floor cleaner
Type: 1.291-xxx
Currently applicable EU Directives
2006/42/EC (+2009/127/EC)
2014/30/EU
2011/65/EU
Commission Regulation(s)
(EU) 2019/1781
Harmonised standards used
EN 60335-1
EN 60335-2-67
EN 55014-1: 2006+A1: 2009+A2: 2011
EN 55014-2: 1997+A1: 2001+A2: 2008
EN 61000-3-2: 2014
EN 61000-3-3: 2013
EN 62233: 2008
EN IEC 63000: 2018
EN 61000-3-11: 2000
Conformity evaluation procedure used
2000/14/EC
National standards used
The signatories act on behalf of and with the authority of the company management.
H. Jenner
Chairman of the Board of Management
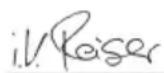
S. Reiser
Director Regulatory Affairs & Certification
Documentation supervisor:
S. Reiser
Alfred Kärcher SE & Co. KG
Alfred-Kärcher-Str. 28 - 40
71364 Winnenden (Germany)
Ph.: +49 7195 14-0
Fax: +49 7195 14-2212
Winnenden, /09/01
Declaration of Conformity (UK)
We hereby declare that the product described below complies with the relevant provisions of the following UK Regulations, both in its basic design and construction as well as in the version put into circulation by us. This declaration shall cease to be valid if the product is modified without our prior approval.
Product: Floor cleaner
Type: 1.291-xxx
Currently applicable UK Regulations
S.I. 2008/1597 (as amended)
S.I. 2016/1091 (as amended)
S.I. 2012/3032 (as amended)
Commission Regulation(s)
(EU) 2019/1781
Designated standards used
EN 60335-1
EN 60335-2-67
EN 55014-1: 2006+A1: 2009+A2: 2011
EN 55014-2: 1997+A1: 2001+A2: 2008
EN 61000-3-2: 2014
EN 61000-3-3: 2013
EN 62233: 2008
EN IEC 63000: 2018
EN 61000-3-11: 2000
Applied conformity assessment procedure
S.I. 2001/1701 (as amended)
National standards used
The signatories act on behalf of and with the authority of the company management.
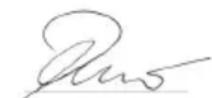
H. Jenner
Chairman of the Board of Management
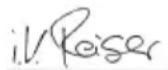
S. Reiser
Director Regulatory Affairs & Certification
Documentation supervisor:
S. Reiser
Alfred Kärcher SE & Co. KG
Alfred-Kärcher-Str. 28 - 40
71364 Winnenden (Germany)
Ph.: +49 7195 14-0
Fax: +49 7195 14-2212
Winnenden, /09/01
Contenu
2006/42/CE (+2009/127/CE)
2014/30/UE
2011/65/UE
Ordonnance(s) appliquée(s)
(UE) 2019/1781
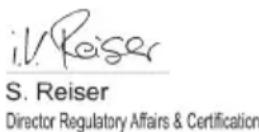
71364 Winnenden (Germany)
H. Jenner
Chairman of the Board of Management
S. Reiser
Director Regulatory Affairs & Certification
71364 Winnenden (Germany)
Tel.: +49 7195 14-0
Fax: +49 7195 14-2212
Winnenden, 01/09/
2006/42/CE (+2009/127/CE)
2014/30/UE
2011/65/UE
71364 Winnenden (Germany)
Tel.: +49 7195 14-0
Fax: +49 7195 14-2212
Winnenden, 01/09/
Índice
2006/42/CE (+2009/127/CE)
2014/30/UE
2011/65/UE
H. Jenner
Chairman of the Board of Management
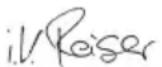
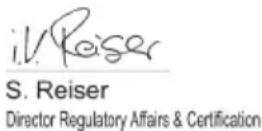
S. Reiser
Director Regulatory Affairs & Certification
71364 Winnenden (Germany)
Tel.: +49 7195 14-0
Fax: +49 7195 14-2212
Winnenden, /09/01
İçindekiler
2006/42/AT (+2009/127/AT)
2014/30/AB
2011/65/AB
Chairman of the Board of Management
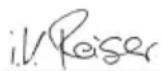
S. Reiser
Director Regulatory Affairs & Certification
H. Jenner
Chairman of the Board of Management
S. Reiser
Director Regulatory Affairs & Certification
D-71364 Winnenden (Germany)
Tfn: +49 7195 14-0
Fax: +49 7195 14-2212
Winnenden, 01.09.
Sisältö
Chairman of the Board of Management
S. Reiser
Director Regulatory Affairs & Certification
71364 Winnenden (Germany)
Puh.: +49 7195 14-0
①Bryter for oppsuging AV/PÅ
② Skyver for sugekraftregulering
Ta ut av drift
2006/42/EF (+2009/127/EF)
2014/30/EU
2011/65/EU
H. Jenner
Chairman of the Board of Management
S. Reiser
Director Regulatory Affairs & Certification
71364 Winnenden (Germany)
Tlf.: +49 7195 14-0
2006/42/EF (+2009/127/EF)
2014/30/EU
2011/65/EU
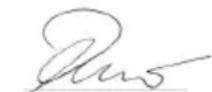
H. Jenner
Chairman of the Board of Management
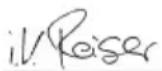
S. Reiser
Director Regulatory Affairs & Certification
71364 Winnenden (Germany)
Tlf.: +49 7195 14-0
Fax: +49 7195 14-2212
Winnenden, /09/01
Sisukord
Üldised juhised.... 93
2006/42/EÜ (+2009/127/EÜ)
2014/30/EL
2011/65/EL
Chairman of the Board of Management
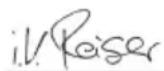
S. Reiser
Director Regulatory Affairs & Certification
71364 Winnenden (Germany)
Tel: +49 7195 14-0
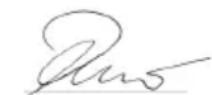
H. Jenner
Chairman of the Board of Management
S. Reiser
Director Regulatory Affairs & Certification
H. Jenner
Chairman of the Board of Management
S. Reiser
Director Regulatory Affairs & Certification
2006/42/WE (+2009/127/WE)
2014/30/UE
2011/65/UE
H. Jenner
Chairman of the Board of Management
S. Reiser
Director Regulatory Affairs & Certification
71364 Winnenden (Germany)
Tel.: +49 7195 14-0
Chairman of the Board of Management
S. Reiser
Director Regulatory Affairs & Certification
2006/42/ES (+2009/127/ES)
2014/30/EU
2011/65/EU
Chairman of the Board of Management
S. Reiser
Director Regulatory Affairs & Certification
2006/42/ES (+2009/127/ES)
2014/30/EÚ
2011/65/EÚ
Chairman of the Board of Management
S. Reiser
Director Regulatory Affairs & Certification
71364 Winnenden (Germany)
Tel.: +49 7195 14-0
Fax: +49 7195 14-2212
Winnenden, 01.09.
Kazalo
Splošna navodila.... 144
Namenska uporaba.... 144
Varnostna navodila 144
2006/42/ES (+2009/127/ES)
2014/30/EU
2011/65/EU
Uporabljena(-e) uredba(-e)
(EU) 2019/1781
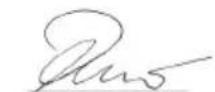
H. Jenner
Chairman of the Board of Management
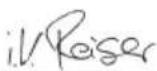
S. Reiser
Director Regulatory Affairs & Certification
Directive UE relevante
2006/42/UE (+2009/127/UE)
2014/30/UE
2011/65/UE
Regulament(e) utilizat(e)
(UE) 2019/1781
Norme armonizate aplicate
EN 60335-1
EN 60335-2-67
EN 55014-1: 2006+A1: 2009+A2: 2011
EN 55014-2: 1997+A1: 2001+A2: 2008
EN 61000-3-2: 2014
EN 61000-3-3: 2013
EN 62233: 2008
EN IEC 63000: 2018
EN 61000-3-11: 2000
Chairman of the Board of Management
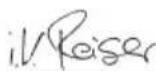
S. Reiser
Director Regulatory Affairs & Certification
71364 Winnenden (Germania)
Tel.: +49 7195 14-0
Fax: +49 7195 14-2212
Winnenden, /09/01
Sadržaj
Opće napomene.... 158
Pravilna uporaba.... 159
Sigurnosni napuci.... 159
Zaštita okoliša 159
2006/42/EZ (+2009/127/EZ)
2014/30/EU
2011/65/EU
Primijenjene uredbe
(EU) 2019/1781
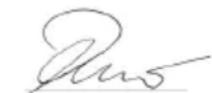
H. Jenner
Chairman of the Board of Management
S. Reiser
Director Regulatory Affairs & Certification
Opunomoćenik za dokumentaciju:
S. Reiser
Alfred Kärcher SE & Co. KG
Alfred-Kärcher-Str. 28 - 40
71364 Winnenden (Njemačka)
Tel.: +49 7195 14-0
Telefaks: +49 7195 14-2212
Winnenden, 01.09..
Sadržaj
Opšte napomene.... 166
Namenska upotreba.... 166
Sigurnosne napomene.... 166
Zaštita životne sredine 166
Pribor i rezervni delovi.... 166
Obim isporuke.... 167
Komandni elementi 167
Montaža 167
2006/42/EZ (+2009/127/EZ)
2014/30/EU
2011/65/EU
Primenjena(e) odredba(e)
(EU) 2019/1781
Primenjene harmonizovane norme
EN 60335-1
EN 60335-2-67
EN 55014-1: 2006+A1: 2009+A2: 2011
EN 55014-2: 1997+A1: 2001+A2: 2008
EN 61000-3-2: 2014
EN 61000-3-3: 2013
EN 62233: 2008
EN IEC 63000: 2018
EN 61000-3-11: 2000
H. Jenner
Chairman of the Board of Management
S. Reiser
Director Regulatory Affairs & Certification
Lice ovlašćeno za dokumentaciju:
S. Reiser
Alfred Kärcher SE & Co. KG
Alfred-Kärcher-Str. 28 - 40
71364 Winnenden (Germany)
Tel.: +49 7195 14-0
H. Jenner
Chairman of the Board of Management
S. Reiser
Director Regulatory Affairs & Certification
71364 Winnenden (Germany)
Tηλ.: +49 7195 14-0
Φαξ: +49 7195 14-2212
Winnenden, /09/01
Содержание
Общие указания 181
H. Jenner
Chairman of the Board of Management
S. Reiser
Director Regulatory Affairs & Certification
71364 Winnenden (Germany)
Тел.: +49 7195 14-0
Факс: +49 7195 14-2212
Chairman of the Board of Management
S. Reiser
Director Regulatory Affairs & Certification
71364 Winnenden (Germany)
Тел.: +49 7195 14-0
Факс: +49 7195 14-2212

71364 Winnenden (Germany)
Тел.: +49 7195 14-0
Факс: +49 7195 14-2212
Виненден, /09/01
目录
一般性注意事项 206
按规定使用 207
安全提示 207
环境保护 207
附件和备件 207
供货范围 207
操作元件 207
安装 208
投入运行 208
运行 209
停止运行 209
运输 210
存放 210
保养和维护 210
故障排除 210
质量保证 211
技术参数 211
THANK YOU!
MERCI! DANKE! iGRACIAS!

Register your product and benefit from many advantages.
www.kaercher.com/welcome


Rate your product and tell us your opinion.
www.kaercher.com/dealersearch
Alfred Kärcher SE & Co. KG
Alfred-Kärcher-Str. 28-40
71364 Winnenden (Germany)
- Inhalt
- Contents
- General notes
- Intended use
- Safety instructions
- Safety devices
- △Caution
- Unlocking button
- Environmental protection
- Notes on the content materials (reach)
- Accessories and spare parts
- Scope of delivery
- Control elements
- Illustration a
- Installation
- Mounting the push rod
- Illustration b
- Note
- Illustration c
- Illustration d
- Initial startup
- Attaching the brush or the pad drive board with pad
- Illustration e
- Pour in the detergent (devices with abs tank or spray bottle)
- ⚠ Warning
- Unsuitable detergents
- Attention
- Risk of damage
- Illustration g
- Operation
- Adjusting the inclination of the push rod
- Danger of accident
- Switching on the device
- Risk of injury
- The maximum permissible mains grid impedance at the electrical connection point (see technical data) must not be exceeded
- Cleaning
- Illustration h
- Illustration i
- Suction (only devices with abs suction)
- Illustration j
- Shutting down
- Transport
- Storage
- ⚠️ Danger
- Caution
- Failure to observe the weight
- Care and service
- Warning
- Replacing the filter bag or exhaust filter (devices with abs suction)
- Troubleshooting guide
- Unsatisfactory cleaning results
- The device vibrates strongly
- The brush or the pad do not turn
- Devices with tank attachment kit discharge of cleaning solution too low
- Devices with abs spray bottle
- Spray system does not spray or does not spray enough
- Devices with abs suction
- Suction does not work or suction power is too low
- Warranty
- Declaration of conformity
- Eu declaration of conformity
- Currently applicable eu directives
- Commission regulation(s)
- Harmonised standards used
- Conformity evaluation procedure used
- National standards used
- Declaration of conformity (uk)
- Currently applicable uk regulations
- Designated standards used
- Applied conformity assessment procedure
- Contenu
- Índice
- İçindekiler
- Sisältö
- Ta ut av drift
- Sisukord
- Kazalo
- Uporabljena(-e) uredba(-e)
- Directive ue relevante
- Regulament(e) utilizat(e)
- Norme armonizate aplicate
- Sadržaj
- Primijenjene uredbe
- Primenjena(e) odredba(e)
- Primenjene harmonizovane norme
- Содержание
- 目录
- Thank you
- Merci! danke! igracias
Brand : Kärcher
Model : BDP 43400 C
Category : Polisher