
DSLAX82U - Wireless Router ASUS - Free user manual and instructions
Find the device manual for free DSLAX82U ASUS in PDF.
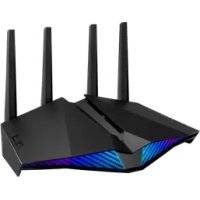



| Product type | VDSL/ADSL modem wireless router |
| Brand | ASUS |
| Model | DSL-AX82U |
| Wi-Fi standard | Wi-Fi 6 (IEEE 802.11ax) dual-band 2.4 GHz and 5 GHz |
| Maximum wireless speed | Up to 574 Mbps (2.4 GHz) + 4804 Mbps (5 GHz) |
| Ports | 1 x DSL (RJ-11), 1 x WAN (RJ-45), 4 x LAN (RJ-45), 1 x USB 3.1 Gen1 |
| Power supply | AC adapter 12 V DC, 2.5 A max. |
| Approximate dimensions | 240 x 150 x 50 mm |
| Approximate weight | 500 g |
| Operating temperature | 0°C to 40°C |
| Storage temperature | 0°C to 70°C |
| Operating humidity | 50% to 90% RH |
| Storage humidity | 20% to 90% RH |
| Wireless security | WPA2-PSK, WPA3-PSK, WPS |
| Main features | Integrated VDSL/ADSL modem, Wi-Fi 6 MU-MIMO, OFDMA, Aura RGB, VPN, parental controls |
| Maintenance | Clean with a soft dry cloth. Do not use chemicals. |
| Spare parts and repairability | No spare parts available. For any repair, contact ASUS support. |
Frequently Asked Questions - DSLAX82U ASUS
User questions about DSLAX82U ASUS
0 question about this device. Answer the ones you know or ask your own.
Ask a new question about this device
Download the instructions for your Wireless Router in PDF format for free! Find your manual DSLAX82U - ASUS and take your electronic device back in hand. On this page are published all the documents necessary for the use of your device. DSLAX82U by ASUS.
USER MANUAL DSLAX82U ASUS
U16649 / First Edition / July 2020
Table of contents
English 3, Bulgarian 8, Croatian 13, Czech 18, Danish 23, Dutch 28, Estonian 33, French 38, Finnish 43, German 48, Greek 53, Hungarian 58, Italian 63, Lithuanian 68, Latvian 73, Norwegian 78, Portuguese 83, Polish 88, Russian 93, Romanian 98, Spanish 103, Serbian 108, Slovak 113, Slovenian 118, Swedish 123, Turkish 128, Ukrainian 133
Package contents
VDSL/ADSL Wireless Modem Router, Power adapter, Network cable (RJ-45 cable), Quick Start Guide, Splitter (varies with region), DSL/phone cable (RJ-11 cable), Warranty card

NOTE: If any of the items is damaged or missing, contact your retailer.
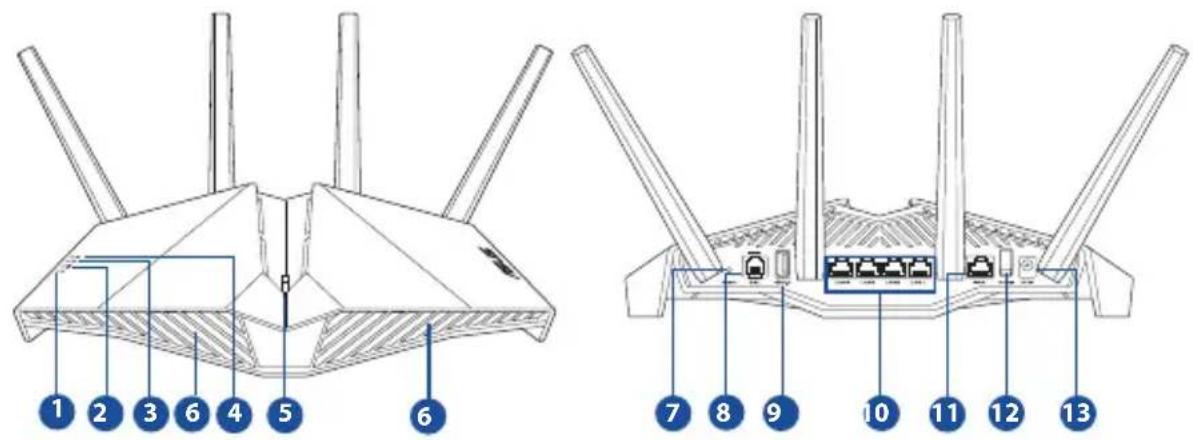
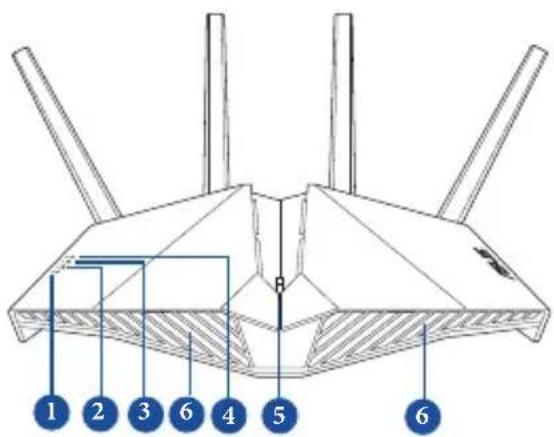
A quick look at your router
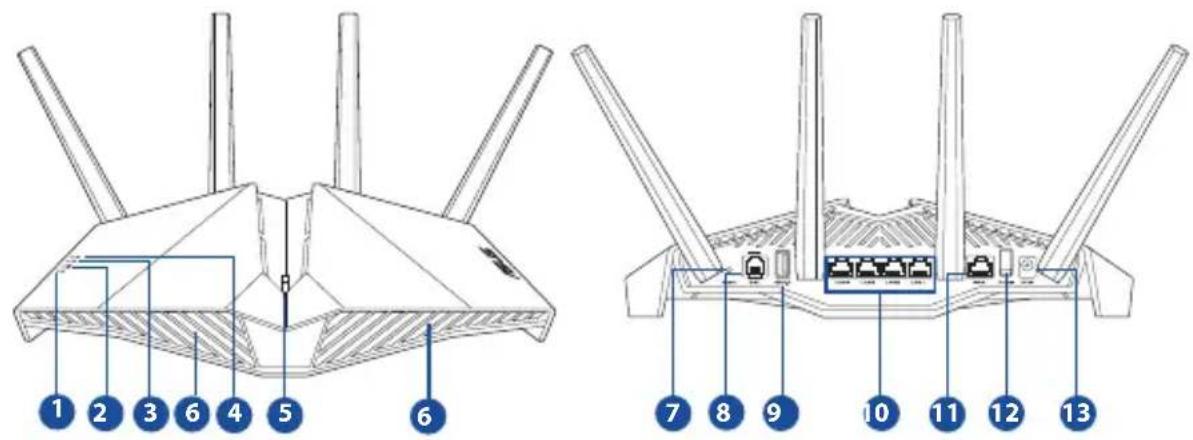
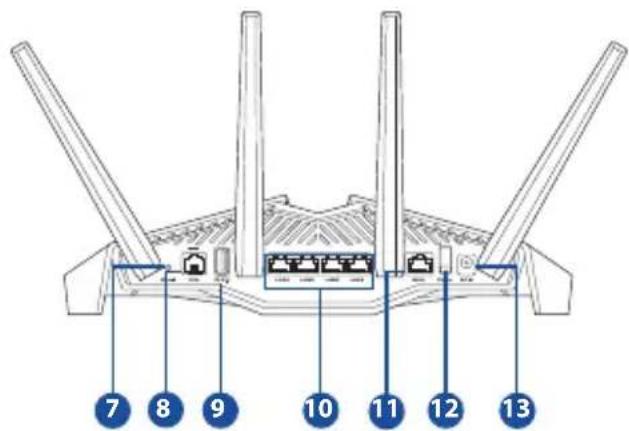
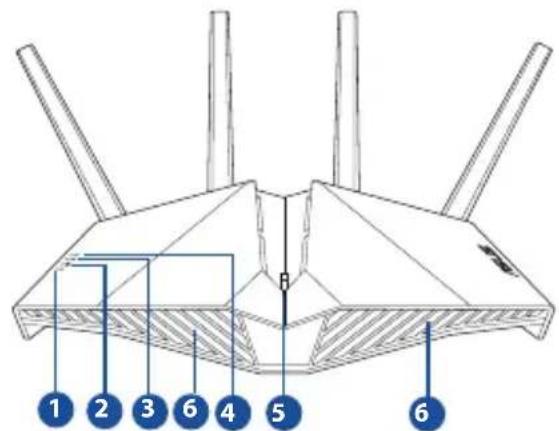
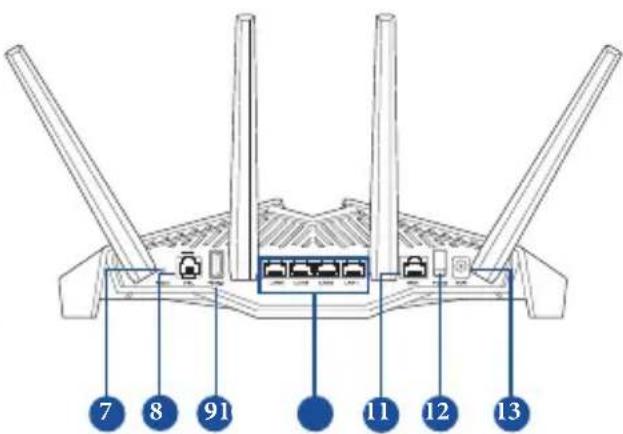
| 1. Power LED | 8. DSL port |
| 2. WiFi LED | 9. USB 3.1 Gen 1 port |
| 3. LAN LED | 10. LAN 1~4 ports |
| 4. DSL/WAN LED | 11. WAN port |
| 5. Aura LEDs/WPS/WiFi combo button | 12. Power switch |
| 6. Aura LEDs | 13. Power (DCIN) port |
| 7. Reset button |
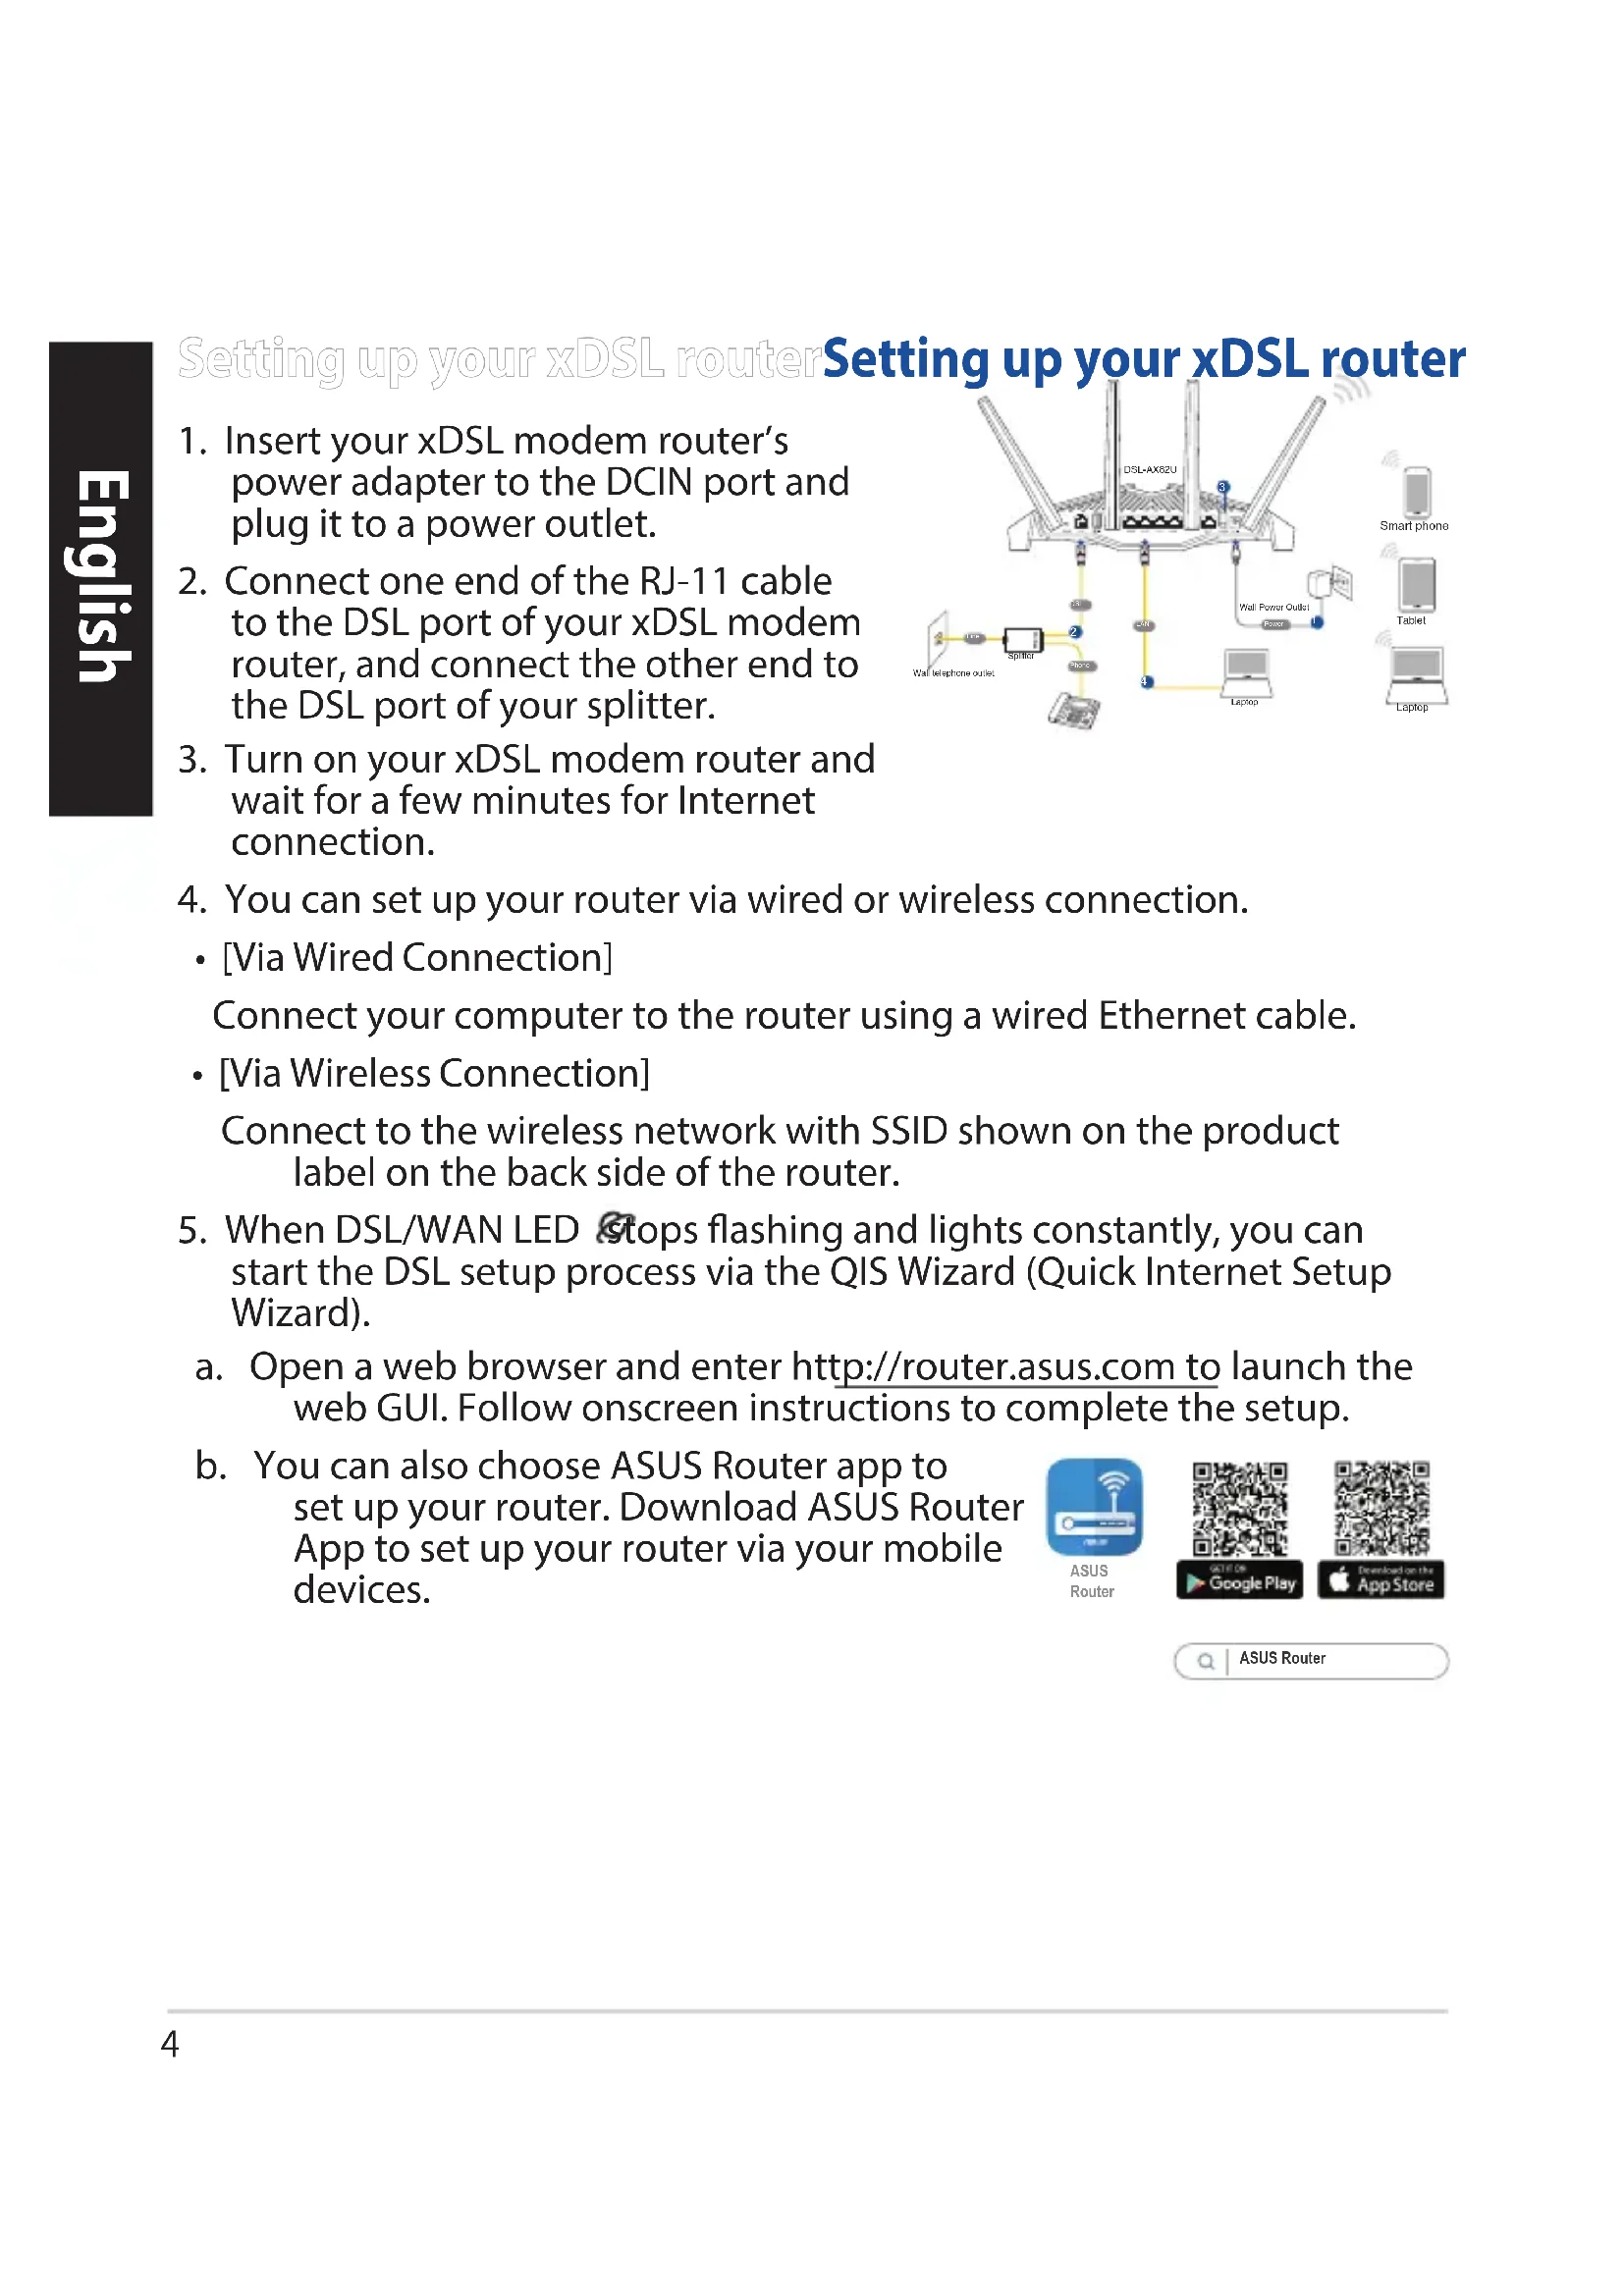
Setting up your xDSL router
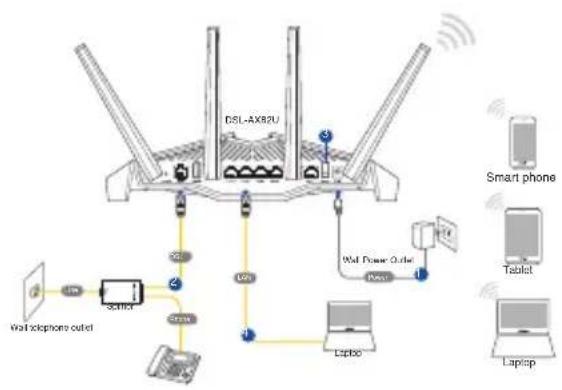
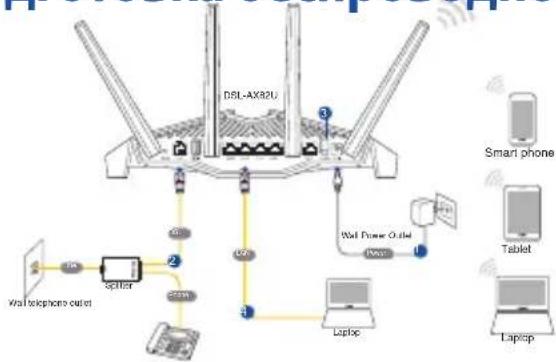
- Insert your xDSL modem router's power adapter to the DCIN port and plug it to a power outlet.
- Connect one end of the RJ-11 cable to the DSL port of your xDSL modem router, and connect the other end to the DSL port of your splitter.
- Turn on your xDSL modem router and wait for a few minutes for Internet connection.
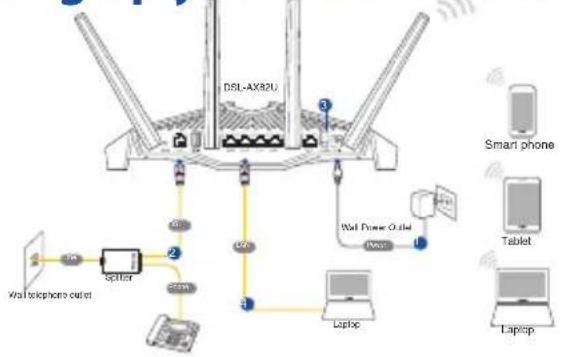
- You can set up your router via wired or wireless connection.
- [Via Wired Connection]
Connect your computer to the router using a wired Ethernet cable.
- [Via Wireless Connection]
Connect to the wireless network with the SSID shown on the product label on the back of the router.
- When the DSL/WAN LED stops flashing and lights constantly, you can start the DSL setup process via the QIS Wizard (Quick Internet Setup Wizard).
a. Open a web browser and enter http://router.asus.com to launch the web GUI. Follow the on-screen instructions to complete the setup.
b. You can also choose the ASUS Router app to set up your router. Download the ASUS Router App to set up your router via your mobile devices.
ASUS Router
ATDEF Google Play
Downloaded on the App Store
ASUS Router
NOTES:
- Use only the adapter that came with your package. Using other adapters may damage the device.
- Specifications:
| DC Power adapter DC Output: +12V with max. 2.5A current | |||
| Operating Temperature 0~40 °C Storage 0~70 | °C | ||
| Operating Humidity 50~90% Storage 20~90% | |||
NOTES:
- You can use either xDSL Modem or Ethernet WAN for Internet access.
- The default username and password for Web GUI are admin and admin.
- The auto-detection of your ISP connection type takes place when you configure your xDSL modem router for the first time or when your router is reset to its default settings. During the QIS process, you may need to key in the Internet account information that you obtained from your Internet Service Provider (ISP).
LED indications
| LEDs Indications | |
| Power LED | Color: White and red. Off: No power. Solid white: Device is working normally. Solid red: Device is working abnormally. Flashing red slowly: Rescue mode. Flashing white slowly: WPS or firmware upgrade in progress. |
| WiFi LED | Color: White. Off: No WiFi signal. On: Wireless system is ready. Flashing: Transmitting or receiving data via wireless connection. |
| LAN LED | Color: White. Off: No data activity or no physical connection. On: Ethernet connection is established. |
| DSL/WAN LED | Color: White and red Off: Both DSL and WAN cables are unplugged. Flashing red slowly: DSL is attempting to connect to a DSLAM. Solid red: Device is ready for configuration but Internet connection has not been established yet. Solid white: Internet connection is established. |
Button function
| Button Functions | |
| AURA LEDs/WPS/WiFi combo button | Press the button on the top cover for about 2 seconds to perform any of the following actions. ·Turning on or off the Aura LEDs (Default) Press for 1 second to change the Aura lighting effects. ·Starting the WPS process ·Turning on or off the WiFi connection Note: You can change the button function by going to Administration > System from the web GUI. |
FAQ
- Where can I find more information about the wireless router?
- Technical support site: https://www.asus.com/support
- You can get the user manual online at https://www.asus.com/support

| 1. LED на зхсановeto | 8. DSL nopт |
| 2. WiFi LED | 9. РорТ USB 3.1 Gen 1 |
| 3. LAN LED | 10. LAN1~4 пота |
| 4. DSL/WAN LED | 11. WAN пот |
| 5. Комбийдан бутон Aura LEDs/WPS/WiFi | 12. Бутон за вкlioочвае иизcommunicаи |
| 6. Aura LEDs | 13. РорТ зхсановeto (DCIN) |
| 7. Бутон за hyлIPAнe |
Setting up the xDSL router
- Connect the power adapter to your xDSL modem-router's power input, then plug it into a power outlet.
- Connect one end of an RJ-11 cable to the DSL port on your xDSL modem-router, then connect the other end to the DSL port on your splitter.
- Turn on your xDSL modem-router and wait a few minutes for the Internet connection.
- You can configure your xDSL router via a wired or wireless connection.
Download on the App Store
ASUS Router
NOTE:
- Use only the adapter that came with the package. Using other adapters may damage the device.
- Technical specifications:
| Adapter DC napajanja | DC izlaz: +12 V s maksimalnom strujom od 2.5 A | ||
| Radna temperatura 0 ~ | 40 °C Pohrana 0 ~ 70 | °C | |
| Radna vlažnost 50~90% | Pohrana 20~90% | ||
NOTES:
- You can use a mobile DSL modem or Ethernet WAN to access the internet.
- The default username and password for the Web GUI are admin and admin.
- Automatic detection of your ISP connection type occurs during the initial configuration of the xDSL modem router or when you reset the device to factory defaults. During the QIS process, you may need to enter the internet account information provided by your internet service provider (ISP).
LED indicators
| LEDs Indikatori | |
| LED napajanja | Boja: Bijela i crvena. Isključen: Nema napajanja. Stalna bijela: Urežaj radi uobičajeno. Stalno crveno: Urežaj radi nenormalan. Trepće sporo crveno: Način spašavanja. Trepće sporo bijelo: U tijeku je nadogradnja WPS-a ili firmvera. |
| LED za Wi-Fi | Boja: Bijela. Isključen: Nema Wi-Fi signala. Uključen: Bežični sustav je spreman. Trepće: Prenose se ili primaju podaci putem bežične veze. |
| LED za LAN | Boja: Bijela. Isključen: Nema podatkovne aktivnosti ili nema fizičke veze. Uključen: Ethernet veza je uspostavljena. |
| LED za DSL/WAN | Boja: Bijela i crvena. Isključen: DSL i WAN kabeli su iskopčani. Trepće sporo crveno: DSL se pokušava povezati na DSLAM. Stalno crveno: Urežaj je spreman za konfiguraciju, ali još se nilje uspostavlva veza s internetom. Stalna bijela: Internetska veza je uspostavljena. |
Button functions
ASUS Router
NOTES:
ASUS Router
NOTES:
Downloaded on the App Store
ASUS Router
NOTES:
Download on the App Store
ASUS Router
NOTES:
Download on the App Store
ASUS Router
NOTES:
Use of the device must comply with the instructions provided in the manual. Use of unauthorized devices may cause damage to the device or system. - Technical specifications:
https://www.asus.com/support
VDSL/ADSL 'bin' n 0in' n oxny (RJ-45) nwn nn nn
(RJ-11 72) 1970/DSL 72
(nnn nnwn)xon

| DSL 8.8 | 1 |
| USB 3.1 Gen 1.9WiFi .2 | |
| LAN 1~4.10 LAN .3 | |
| 11 | DSL/WAN .4 |
| 12 | /Aura WiFi /WPS .5 |
| (DC) 13 | Aura .6 |
| 019.7 |
1. Connect the xDSL modem to the wall jack.
2. Connect the DSL cable from the xDSL modem to the RJ-11 port on the router.
3. Connect the power adapter to the router and plug it into a power outlet.
[11]
Ethernet port [11]
15
ASUS Router
Google Play
Download on this App Store
a. Visit http://router.asus.com using a web browser.
b. Follow the on-screen instructions to complete the setup.
ASUS Router
:
| 2.5A 10V +12V:DC 790 | DC 790 x 790 | ||
| °C~-0 | °C~0 | °C~0 | |
| 90%~20 | IONX | 90%~50 | IONX |
Ethernet WAN xDSL
Download on the App Store
ASUS Router
NOTE:
Download on the App Store
NOTES:
- Use only the adapter included in the package. Using other adapters may damage the device.
- Specifications:
| PS maitinimo adapteris PS iëjimas: +12 V su maks. 2.5 A srove | |||
| Darbiné temperatura 0~40 | °C Storage 0~70 | °C | |
| Darbiné drègmè 50~90% | Storage 20~90% | ||
NOTES:
Download on the App Store
ASUS Router
NOTES:
Dreadword on the AppStore
ASUS Router
NOTES:
Developed on this AppStore
ASUS Router
NOTES:
- Connect the power adapter to the DC-IN port on the router and to a power outlet.
- Connect one end of the DSL cable to the DSL port on the wall and the other end to the DSL port on the router.
- Turn on the router and wait for the internet connection to be established.
- The router can be configured via a wired or wireless connection.
[Via a wired connection]
Connect the computer to the router using an Ethernet cable.
[Via wireless connection]
Connect to the wireless network with the SSID shown on the label attached to the back of the router.
- When the DSL/WAN LED stops blinking, you can start the DSL setup process using the QIS (Quick Internet Setup) wizard.
a. Open a browser and enter http://router.asus.com to open the web interface. Follow the on-screen instructions to complete the setup. b. You can also use the ASUS Router app to set up the router. Download the ASUS Router app for mobile devices to configure the router.
ASUS Router
ASUS Router
NOTES:
- Use only the power adapter supplied with the device. Using other power adapters may damage the device. Specifications:
- Where can I find more information about the wireless router?
- Technical support website: https://www.asus.com/support
- The user manual can be downloaded from the website https://www.asus.com/support
Download on the App Store
ASUS Router
NOTE:
Downloaded at the App Store
ASUS Router
NOTE:
Downloaded at the App Store
b. You can also set up your router
Download on the App Store
ASUS Router
NOTE:
Downloaded at the App Store
ASUS Router
NOTES:
Downloaded at the App Store
ASUS Router
- Connect the DSL modem router to the DSL port on the wall and to the power outlet.
2. Connect the RJ-11 cable to the DSL port on the xDSL modem router, and the other end to the DSL port on the wall jack.
- Turn on the xDSL modem router and wait a few minutes for the Internet connection.
- You can set up the DSL-AX82U via wired or wireless connection.
- [Wired connection] Connect your computer to the router using an Ethernet cable.
- [Wireless connection] Connect to the network (SSID) indicated on the label on the back of the router.
- If the DSL/WAN LED stops blinking and remains steady, you can start the DSL setup process through the quick setup wizard from the Internet.
a. Open a web browser and enter http://router.asus.com to launch the graphical web interface. Follow the on-screen instructions to complete the setup.
Download on the App Store

ASUS Router
Warning:
Use only with the supplied antenna. Using other antennas may damage the device. - Technical specifications:
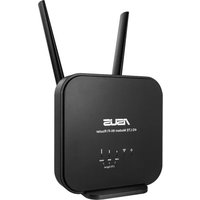
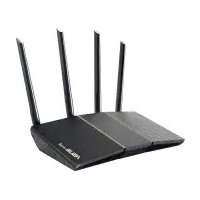
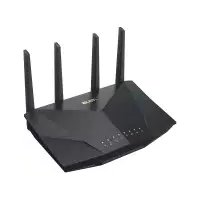
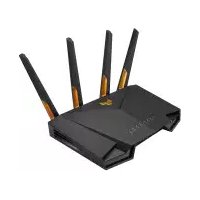
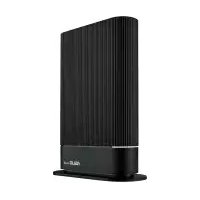
Brand : ASUS
Model : DSLAX82U
Category : Wireless Router