
TLM99 - Rangefinder STANLEY - Free user manual and instructions
Find the device manual for free TLM99 STANLEY in PDF.
| Product type | Laser Distance Meter |
| Brand | Stanley |
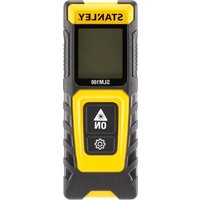
| Model | TLM99 / TLM99s / TLM99si |
| Range | 1 m to 30 m (4 in to 100 ft) |
| Accuracy | ± 2 mm (± 3/32 in) (favorable conditions up to 10 m) ; beyond, ± 0.25 mm/m |
| Resolution | 1 mm (1/16 in) |
| Laser class | Class 2 (IEC/EN 60825-1:2014) |
| Laser type | Visible red, ≤ 1.0 mW at 620-690 nm |
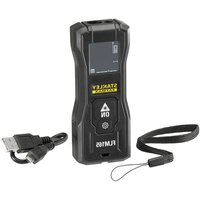
| Power supply | 2 AAA alkaline batteries (non-rechargeable) |
| Battery life | Up to 3000 measurements (2500 with Bluetooth) |
| Auto power off | Device after 90 s ; laser/backlight after 30 s |
| Main functions | Distance measurement, continuous measurement, area calculation, volume calculation, addition/subtraction of measurements, unit change (m, ft, in) |
| Connectivity | Bluetooth® (s and si models only) with STANLEY Smart Connect app |
| Dimensions (H x D x L) | 120 x 48.5 x 26 mm |
| Weight (with batteries) | 100 g |
| Operating temperature | 0 °C to +40 °C |
| Storage temperature | -10 °C to +60 °C |
| Warranty | 2-year (limited) + 30-day money-back guarantee |
| Safety | Laser class 2 – do not stare directly into the beam; read safety instructions |
Frequently Asked Questions - TLM99 STANLEY
User questions about TLM99 STANLEY
0 question about this device. Answer the ones you know or ask your own.
Ask a new question about this device
Download the instructions for your Rangefinder in PDF format for free! Find your manual TLM99 - STANLEY and take your electronic device back in hand. On this page are published all the documents necessary for the use of your device. TLM99 by STANLEY.
USER MANUAL TLM99 STANLEY
- User Safety
- Battery Safety
- Setup (Load Batteries)
Operation
Warranty - Error Codes
- Specifications
Retain all sections of this manual for future reference.
User Safety

WARNING:
Carefully read the Safety Instructions and Product Manual before using this product. The person responsible for the product must ensure that all users understand and adhere to these instructions.

WARNING:
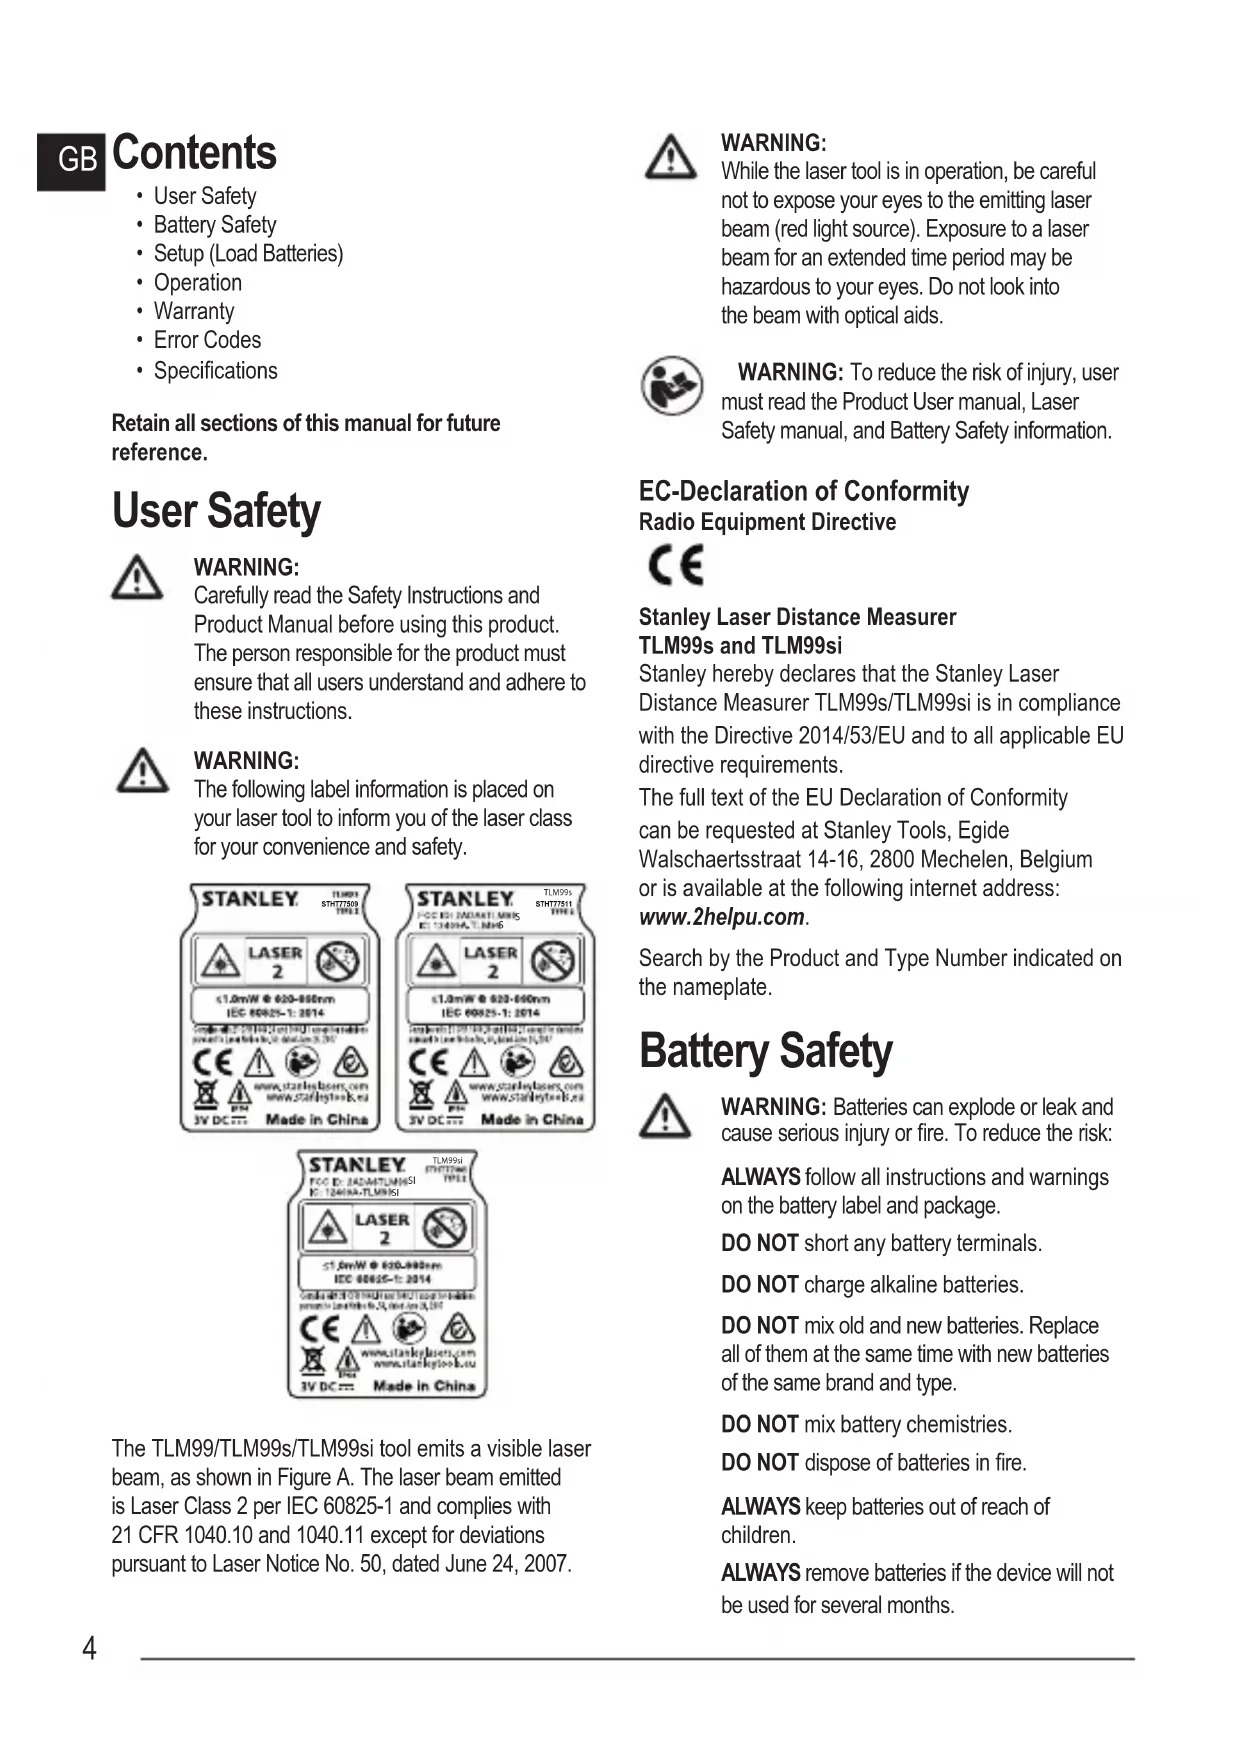
The following label information is placed on your laser tool to inform you of the laser class for your convenience and safety.
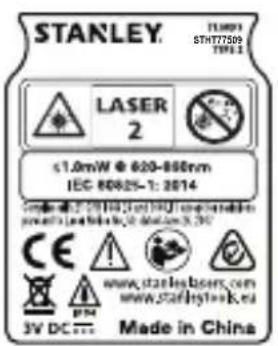
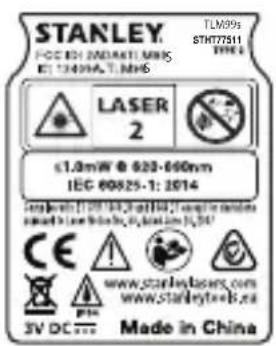
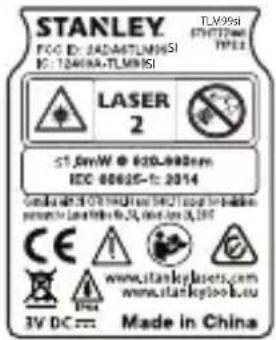
The TLM99/TLM99s/TLM99si tool emits a visible laser beam, as shown in Figure A. The laser beam emitted is Laser Class 2 per IEC 60825-1 and complies with 21 CFR 1040.10 and 1040.11 except for deviations pursuant to Laser Notice No. 50, dated June 24, 2007.

WARNING:
While the laser tool is in operation, be careful not to expose your eyes to the emitting laser beam (red light source). Exposure to a laser beam for an extended time period may be hazardous to your eyes. Do not look into the beam with optical aids.

WARNING: To reduce the risk of injury, user must read the Product User manual, Laser Safety manual, and Battery Safety information.
EC-Declaration of Conformity Radio Equipment Directive

Stanley Laser Distance Measurer TLM99s and TLM99si
Stanley hereby declares that the Stanley Laser Distance Measurer TLM99s/TLM99si is in compliance with the Directive 2014/53/EU and to all applicable EU directive requirements.
The full text of the EU Declaration of Conformity can be requested at Stanley Tools, Egide Walschaertsstraat 14-16, 2800 Mechelen, Belgium or is available at the following internet address: www.2helpu.com.
Search by the Product and Type Number indicated on the nameplate.
Battery Safety

WARNING: Batteries can explode or leak and cause serious injury or fire. To reduce the risk:
ALWAYS follow all instructions and warnings on the battery label and package.
DO NOT short any battery terminals.
DO NOT charge alkaline batteries.
DO NOT mix old and new batteries. Replace all of them at the same time with new batteries of the same brand and type.
DO NOT mix battery chemistries.
DO NOT dispose of batteries in fire.
ALWAYS keep batteries out of reach of children.
ALWAYS remove batteries if the device will not be used for several months.
NOTE: Ensure that the recommended batteries are used.
NOTE: Ensure the batteries are inserted in the correct manner, with the correct polarity.
Setup (Load Batteries)
- Locate the battery compartment latch on the back of the TLM99, TLM99s, or TLM99si tool (Figure #2).
- Using your finger, pull the latch up to unlock and remove the battery door (Figure D#1 and #2).
- Insert two AAA batteries, making sure to position the - and + ends of each battery as noted inside the battery compartment (Figure D#3).
- Slide the pins at the bottom of the battery door into the notches in the battery compartment (Figure D#4).
- Push the battery door down until it snaps in place (Figure D#5).
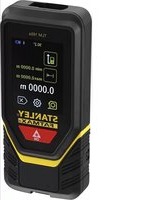
When the tool is ON, the battery level appears in the display window (Figure E#1).
Operation
Measuring Distance to a Wall or Object
- Click (Figure A#5) to turn on the tool.
- The tool will measure the distance from the bottom of the tool to the wall or object (Figure F#1).
To measure from the top of the tool instead of the bottom (Figure F#2), hold for 2 seconds. On the display window, the tool icon will change from 品 to Figure E#5).
- Point the laser at the top of the tool (Figure A#1) toward the wall or object whose distance you need to measure (Figure F).
- Click to measure the distance from the tool to the wall or object.
- At the bottom of the display window (Figure A#2), view the current measurement (Figure E #3).
To take a new measurement, click ON to move the current measurement up to the previous line on the display window (Figure E#2). Then repeat steps 2-5.
Measuring Distances Continuously
To take a series of measurements as you move around, change to Continuous Measure mode.
- Click (Figure A) #5) to turn on the tool.
- Point the laser at the top of the tool (Figure A#1) toward the wall or object whose distance you need to measure (Figure F).
- Click and hold for 2 seconds to turn on the Continuous Measure mode.
- At the bottom of the display window (Figure #2), view the current measurement (Figure #3), which will keep changing as you move the tool.
- To take the current measurement (from the tool to the wall or object) and exit Continuous Measure mode, click ON.
To take a new measurement, click to move the current measurement up to the previous line on the display window. Then repeat steps 2-5.
Measuring Area
You can measure the area of a wall, floor, or object.
- Click (Figure A) #5) to turn on the tool.
- The tool will measure the distance from the bottom of the tool to the wall or object (Figure F#1).
To measure from the top of the tool instead of the bottom (Figure F#2), hold for 2 seconds. On the display window, the tool icon will change from to (Figure E#5).
- Click to show on the display window (Figure E#4).
-
Measure the width.
-
Point the top of the tool at one side of the target (wall, floor, or object).
- Position the tool at one end of the target and point the laser dot across the width. (Figure #1 shows where to position the tool if you are measuring from the bottom of the tool.)
- Click to display the width measurement at the top of the display window.
5. Measure the length.
- Position the tool at one end of the target and point the laser dot across the length. (Figure #2 shows where to position the tool if you are measuring from the bottom of the tool.)
-
Click to display the length measurement on the second line of the display window.
-
View the Area measurement at the bottom of the display window (Figure E#3).
Measuring Volume
You can measure the volume of a room or object.
- Click (Figure A#5) to turn on the tool.
- The tool will measure the distance from the bottom of the tool to the wall or object (Figure F#1).
To measure from the top of the tool instead of the bottom (Figure F#2), hold for 2 seconds. On the display window, the tool icon will change from 串 to Figure E#5).
- Click twice to show on the display window (Figure E #4).
-
Measure the width.
-
Point the top of the tool at one side of the target (room or object).
- Position the tool at one end of the target and point the laser dot across the width. (Figure #1 shows where to position the tool if you are measuring from the bottom of the tool.)
-
Click to display the width measurement at the top of the display window.
-
Measure the length.
-
Position the tool at one end of the target and point the laser dot across the length. (Figure #2 shows where to position the tool if you are measuring from the bottom of the tool.)
-
Click to display the length measurement on the second line of the display window.
-
Measure the height.
-
Positon the tool at one end of the target and point the laser dot across the height. (Figure #3 shows where to position the tool if you are measuring from the bottom of the tool).
- Click to display the height measurement on the third line of the display window.
View the Volume measurement at the bottom of the display window (Figure E#3).
Adding Measurements
You can add two measurements to get a total measurement of the two distances.
- Click (Figure A) #5) to turn on the tool.
- The tool will measure the distance from the bottom of the tool to the wall or object (Figure F#1).
To measure from the top of the tool instead of the bottom (Figure F#2), hold for 2 seconds. On the display window, the tool icon will change from 品 to Figure E#5).
- Point the laser at the top of the tool (Figure A#1) toward the wall or object whose distance you need to measure.
- Click to measure the distance from the tool to the wall or object.
-
Indicate that you want to add this measurement to the next measurement.
-
On the TLM99 keypad, click + / - (Figure A#7).
-
On the TLM99s or TLM99si keypad, click (Figure B#1).
-
Point the laser at the top of the tool toward the next wall or object.
- Click measure the distance and add it to the previous measurement.
- View the total of the two measurements at the bottom of the display window (Figure E#3).
Subtracting Measurements
You can subtract one measurement from another.
- Click (Figure A#5) to turn on the tool.
- The tool will measure the distance from the bottom of the tool to the wall or object (Figure F#1).
To measure from the top of the tool instead of the bottom (Figure F#2), hold for 2 seconds. On the display window, the tool icon will change from 串 to Figure E#5).
- Point the laser at the top of the tool (Figure A#1) toward the wall or object whose distance you need to measure.
- Click to measure the distance from the tool to the wall or object.
-
Indicate that you want to subtract the next measurement from this measurement.
-
On the TLM99 keypad, click +/- twice.
On the TLM99s or TLM99si keypad, click twice. -
Point the laser at the top of the tool toward the next wall or object.
- Click to measure the distance and subtract it from the previous measurement.
- View the difference between the two measurements at the bottom of the display window (Figure E#3).
Changing the Unit of Measure
Once the current measurement is taken (the device is not in Continuous Measure mode), you can change the unit of measure from decimal ft (6.21 ft) to fractional ft (6'02"9/16) , fractional ft to meters (1.894m) , meters to inches (749/16 in), or inches to decimal ft.
- On the TLM99 keypad, click (Figure A#3).
On the TLM99s or TLM99si keypad, hold (Figure B#1) until you see the measurement change (2-3 seconds).
Using the TLM99s/TLM99si With

GB
If you have a TLM99s or TLM99si, you can use its Bluetooth® capability to pair it with the STANLEY Smart Connect application on your cell phone or tablet, and then record accurate measurements in your floor plans.
- From either or, download App Store
the STANLEY Smart Connect application to your cell phone or tablet. - Using the STANLEY Smart Connect application, capture the room or space for which you want to record the measurements, and build your floor plan.
- On the TLM99s or TLM99si keypad, click on to turn on the tool.
- If the Bluetooth® icon does not appear on the display window (Figure E#6), click on the keypad to turn on Bluetooth®.
- Use the STANLEY Smart Connect application to pair your cell phone or tablet to the TLM99s or TLM99si.
- Use the TLM99s or TLM99si to measure each wall in the room or space captured in the floor plan, and sync the measurements to the floor plan.
- Using the STANLEY Smart Connect application, save the floor plan.
Once you have saved the floor plan, you can export it to one of several different file formats, including PDF, DXF, or JPG, and print it or email it to other people (your realtor, home center, etc.).
Bluetooth
"THE BLUETOOTH® WORD MARK AND LOGOS ARE REGISTERED TRADEMARKS OWNED BY BLUETOOTH SIG, INC. AND ANY USE OF SUCH MARKS BY STANLEY TOOLS IS UNDER LICENSE. OTHER TRADEMARKS AND TRADE NAMES ARE THOSE OF THEIR RESPECTIVE OWNERS."
The tool can be turned off in either of these ways:
- Press and hold for several seconds (until the display window clears).
- If you do not use the tool for 90 seconds, it will automatically turn off.
Warranty
STANLEY warrants this product for a period of Two (2) years against deficiencies in material and workmanship. This LIMITED WARRANTY does not cover products that are improperly used, abused, altered, or repaired. Please call 866-786-5924 for more information or return instructions. Unless otherwise noted, STANLEY will repair without cost, any STANLEY product found to be defective, including parts and labor charges, or at STANLEY's option, will replace such tools or refund the purchase price, less the amount for depreciation, in exchange for the defective tool. THIS LIMITED WARRANTY EXCULES ALL INCIDENTAL OR CONSEQUENTIAL DAMAGES. Some states do not allow the exclusion or limitation of incidental or consequential damages, so these limitations may not apply to you. This TWO YEAR LIMITED WARRANTY gives you specific legal rights that may vary from state to state. In addition to the warranty, STANLEY Lasers are covered by: 30-Day Money Back Guarantee. If you are not completely satisfied with the performance of your STANLEY Laser for any reason, you can return it within 30 days from the date of purchase with a receipt for a full refund.
IMPORTANT NOTE: The customer is responsible for the correct use and care of the instrument. Moreover, the customer is completely responsible for periodically checking the accuracy of the laser unit, and therefore for the calibration of the instrument.
Calibration and care are not covered by warranty.
Error Codes
GB
If INFO appears on the display window with a Code number, perform the corresponding Corrective Action.
| Code Description Corrective Action | |
| 101 Received Signal Too Weak, Measuring Time Too Long | Use the target plate or change the target surface. |
| 102 Received Signal Too High Target is too reflective. Use the target plate or change the target surface. | |
| 201 Too Much Background Light Reduce the background light on the target area. | |
| 202 Laser Beam Interrupted Remove the obstacle and repeat the measurement. | |
| 203 Insufficient Power Replace the batteries. | |
| 301 Temperature Too High | Allow the device to cool down to a temperature within the specified Operating Temperature Range. |
| 302 Temperature Too Low | Allow the device to warm up to a temperature within the specified Operating Temperature Range. |
| 401 Hardware Error Switch the device on/off several times. If the error still occurs, return the defective device to the Service Center or distributor. Refer to the Warranty. | |
| 402 Unknown Error | Contact the Service Center or distributor. Refer to the Warranty. |
| Range .1m to 30m (4in to 100ft) | |
| Measuring Accuracy* ± 2mm (± 3/32in)* | |
| Resolution** 1mm (1/16in)** | |
| Laser Class Class 2 (IEC/EN60825-1: 2014) | |
| Laser Type ≤ 1.0mW @ 620-690nm | |
| Laser/Backlight Automatic Switch-off After 30s | |
| Unit Automatic Switch-off After 90s | |
| Continuous Measuring Yes | |
| Area/Volume Yes | |
| Battery Life (2 x AAA) Up to 3000 Measurements (2500 withBluetooth) | |
| Dimension (H x D x W) 120 x 48.5 x 26mm (4.72 x 1.91 x 1.02in) | |
| Weight (with Batteries) 100g (3.21oz) | |
| Storage Temperature Range -10°C ~ +60°C (14°F ~ 140°F) | |
| Operating Temperature Range | 0°C ~ +40°C (32°F ~ 104°F) |
| *Measuring Accuracy depends on the current conditions: ·Under favorable conditions (good target surface and room temperature), up to 10m (33ft). ·Under unfavorable conditions (bright sunlight, a very weak reflecting target surface, or large temperature fluctuations), the error can increase by to ± 0.25mm/m (± 0.003 in/ft) for distances over 10m (33ft). **Resolution is the finest measurement you can see. In inches, that is 1/16". In mm, that is 1mm. | |
Inhalt
- Klik pa te genge for at f vist padisplayet (ill. E #4).

4. Mal bredden.
OB3ATEJIbHO n3BneKaIte 6batape,ecn yctpoiCTBO He 6yJeT NcNoJIb30BaTbC8 B TeueHHe HECKoJIbKnx MecaueB.
INPIMMEUHNE:Y6eNTecb,TO IcnoIb3yIOCTpeKOMeHIOBaHHbI 6aTapeN.
PIMMEUHNE:Y6eNTecbB npaBnIbHOCTN yCTaHOBKn 6aTapeC cO6JIIOHeHem NOJpHOCTN.
Pojrotobka k pa6ot (yctahOBka 6aTaapeek)
-
HauDHTe KpbIshky 6aTapeHoro OTceKa Ha 3aHne CTOpOHe INCTpyMeHa TLM99, TLM99s, ININ TLM99si (pnc. C N2).
-
ПOTЯнITE зашилку Вьерх пальем, утобы СНЯТь Крblшky батарейного отсека (pnc. D) № 1 и № 2).
- YctaHOBnTe DBe 6aTapeu AAA, co6IIOJa nOJIpaHOCtB - H +, KaK OTMeueHo BHyTpIn 6aTapeHOro OTecka (pnc. D No 3).
- BcTaBbTe BbICTyIbI B HnKHei YacTn KpbIuKn 6aTapeHoro OTceKa B CneMaIbHbIe KaHaBKn B HnKHei YacTn 6aTaapeHoro OTdeLa (pnc. D No 4).
- Onyctnte KpbIuKy, noka He ycbluHte uJeNcK (pnc. D No 5).
EcnnHa dnCnnee nOaBnAeTcN INFO c Homepom Koda, npIMnte HaIpeKaune MepbI no yctpaHEnIO HeNCnpaBHOCTN.
A#5)3a BkIIOUBaHe Ha
- INHCTpyMeHTbT Ⅲe N3Mepn pa3CTOaHneTO OT DbHOTo Ha INHCTpyMeHTa Do CTehata NIN OBeKta (ФИгура F#1).
- KlnkHeTe Ha 4nHnHCTpyMeHTa.
ypa A#5) 3a BkIIOUBAHe Ha
2.ИHCTpyMeHTbT 电I3Mepn pa3CTOaHHeTO OT IbHOTo Ha INHCTpyMeHTa Do CTeHaTa NIN OBeKaT a (F#1).
3aДaИЗМерпгоТ roрнataчacTHa HnCTpyMeHTa, BmecTo OTdoHnTa (Фигура
2),3aIpbXTe 3a2ceKHydN.IKoHata
Ha INHCTpyMeHTa HaДиСпля Уе ce ПсpOMeHn OT Ha (Фигура E#5).
- Hacoute Na3epa B rophata qact Ha nHcTpymeHa (ФИгура A#1) KbM cTeHaTa IIN O6eKa, YNeTo pa3ctOraHHe Jeklaete Da N3Mpnte.
- KlnkHeHa 3a n3MepBaHc Hpa3CToHnETo OT INHCTpyMeHTa DO CTeHata nn OBeKtA.
- Tp6Ba Da ykaKeTe, ako XeJaTe Da IobaBnte TOBa N3MepBaHe KbM CJIeDbaOTo N3MepBaHe.
Ha KnaBnata Ha TLM99,KnKHeTe Ha +/-(Φnrgpa A#7).
Ha KnaBnata Ha TLM99s nn TLM99si, KnKHeTe Ha (F#rpa B#1).
- Hacouete Na3epa Ha rohpata ctpaHa Ha INCTpyMeHTa KbM CJIeDbaUaTa CTHe IIN OBeKT.
- KnKHeTe ,3a Da n3MepuTe pa3CToHHeTo I rO do6aBeTe KbM npEiNshOTo n3MepBaHe.
- Перлеса Te obaTa cMa OT DBeTe n3MePbHnB BdoHaT a qaT Ha dncnpe (F#rpa E#3).
I3BaXdaHe Ha I3MepBaHnA
Bne moxete da n3BaIte eHNO n3MepBaHe ot npuro.
- KlnkheTe Ha HnHctpyMeH
A#5)3a Da BkIIOUHTe
- INHCTpyMeHTbT Ⅲe n3Mepn pa3cToaHneTo OT IbHOTo Ha INHCTpyMeHTa Do cTeHaTa nn ObekTa (F#1).
N3KIIIOUBaHe Ha INHCTpyMeHTa
HnctpymEnbT MoKe Da 6bJe N3KIOUeH NO eINH OT CNeHNTE HaHHI:
- HatncheTe n 3a npbXkTe 3a HraKOJIko CeKHyDN (doKaTo DnCnJeT Ce N3uCTN).
Ako He n3noJI3BaTe INHCTpyMeHTa B npOdbJKeHHe Ha 90 cekyHn, ToI Ue ce n3KIIIOuH aBtOMaTHUHO.
TapaHcH
STANLEY ocnrypba rapaun 3a To3n npoduk 3a nepnoD ot (2) roDNH cpeuy nponyckn B maTePnaJa n n3pa60kata. Ta3n OPGAHNUEHA TAPAHU He npKpBa npOyKTo, KOHTo He ca n3NoI3BaHn No npedHa3NaueHne, cT8x e 3NOyNtpe6BaHO, IpomHeHH ca nn ca pemOnTpauH. MoJr N03BbHeTe Ha 866-786-5924 3a nobee uHOpMauN rIN INHCTpyKuN 3a Bpbuahe. OcbEN aKO He e 0t6eJra3aHO dpYro, STANLEY ue pemaHTnpa 6e3 3aJIaUaHe, BCEKn npOdyKT Ha STANLEY cyCTaHOBeHn DeFekTN, BKIOChTEHNO qactn n pa3XoJnte 3a Tpyd nn no n3bop Ha STANLEY, 3e 3aMeHN Ha TaKNBa INCTpyMeHTn nn 3e Bb3cTaHO BVMAta 3a 3akynBaHeto, NO-MaNka OT Cymata, 3a amOpTn3aUaN, B 3amHa Ha DeFekTHN INHCTpyMeHT. HACTOJATA OPGAHNUEHA TAPAHU NIKIIOUBA BCNUCKn CnyAHH NIN IOCNEIBAUNI UETN. HjkON UATOBHe N03BOJRAbT NIKIOUBAHTo NIN orpanuHaBaHTo Ha cnayAHH NIN 3aKOHOmePNuTn, Taka Ye Te3N orpaHUnEHH MOKe Da He Ce OTHacRr 3a Bac. Ta3n OPGAHNUEHA DBE TOIMSHA TAPAHU NIN DaBa ONpeDeNeHn KpNDUeCKn PpaBA, KOHTo MOrat Da BapnP aT OT eHa DbpxKaB v Dpyra. B DoNTbInHeHne KbM rapaHcNAta, Na3epnTe Ha STANLEY ca npKpTn OT: 30-dHeBHa rapAnu 3a BpBuane Ha napte. Ako He CTE HaTbIHO yDoBNETBopeHn ot pa6oTaT ha Baun Ja3ep STANLEY npadn HyaKaBa prnuHa, MoKTe Da Ro BbPHeTe B pamKeTe Ha 30 dHiOT daTata Ha NOKypka C KBITAHUra 3a PbIHO Bb3CTaHOBRAbe.
BAKHA 3A6EJEXKA: KnneHbTe oTROBOpEn 3a npabNHOTo n3noJI3BaHe n rpnKa 3a nHCTpyMeHa. OcBeH TOBa, KnneHTbTe HnblHo OTROBOpEn 3a nepNoDmHaTa npOBepKa Ha ToUHOCTTa Ha Na3ePnMaMdyI IN CNeDoBaTeJIHO 3a KaIb6pnpaHeTo Ha ypeJa.
KaIi6pnpaHTo N noDpBxKkata He ce NOKPnBaT OT rapaHcyra.
BG
KoIOBe Ha rpeuKa
Ako Ha dincnpe Ce noBn INFO c Homep Ha KOD, N3BbPwTe CbOTBeTHOTO KOPEKTHBHO DeiCTBVE.
| Кod Описанne Коригурашо Deяствае | |
| 101 Пслuchныт сигнал e Тьрдесаб, В��metо за Измервае e Тьрдес дылgo | Използвае мишинаты или поменete Zeileваразовьхноct. |
| 102 Пслuchныт сигнал e Тьрдесиlen | Цел ta e Тьрдes оtrapazbaца. Използвае мишинаты или поменete Zeileваразовьхноct. |
| 201 Тьрдес CBETьл ФОн Намалente ocbetпениeto Ha ФОн Ha Zeileваразовьхноct. | |
| 202 Лаверниот льч e пекьсанot OTstpane te пенит STBието и NOВторе мярkaça. | |
| 203 Небостаьуна мошноct Смение багэрпite. | |
| 301 Тьрдес Виска Tempepatура Octaberte ySTpoiSTBOTo Da ce oxлади до Tempepatура в рамкITE на орениения Диana3OH na pa6OTnata Tempepatура. | |
| 302 Тьрдес Ниска Tempepatура Octaberte ySTpoiSTBOTo Da ce zargee Do Tempepatура в рамкITE на орени trophy Диana3OH na pa6OTnata Tempepatура. | |
| 401 ХаODуерна гөшka Вкluочete и ИЗкнчote ySTpoiSTBOTo HЯКOLko Пытп. Ако гөшkaТа пordьлжава Da CSbUCTByBa, Вьрпete Deф ekTHOTO устристBO Na ZeHTьра 3a ceRBиЗно обслuyЖане или на дисrtpi6byTopa. Вижte 3a справka rapaцята. | |
| 402 Нетэнatable гөшka Свржete ce сцentьра 3a сөрВиЗно обслuyЖане или дисrtpi6byTopa. Вижte 3a справka rapaцята. |
Cpeunokauu
| Оьхват .1 M до 30 M (4инча до 100 Фута) | |
| Точност на Измервае * ± 2 ММ (± 3/32 Инчa)* | |
| Раздени телна способноct** 1 ММ (1/16 Инчa)** | |
| Клас на пазера Клас 2 (IEC/EN60825-1: 2014) | |
| Тил пазер ≤ 1,0 MB @ 620-690 НМ | |
| Лазер/фоново освettingе abTomатчно Изключвае | След 30 секунни |
| АВТOMATИНО ИЗКЛЮЧВАЕ на устриоството С | пед 90 секунни |
| ПроръжITOЕНИО ИЗМервае Дa | |
| Плоз/обем Дa | |
| ИздръжITOБСТ на сьATERЯта (2 x AAA) Do 30 | Сою мерваимя (2500 cBluetooth) |
| Размери (В x Д x Ш) 120 x 48,5 x 26 MM (4,72 | x 1,91 x 1,02 Инчa) |
| Тerglio (сьATERЯTE) 100g (3,21oz) | |
| TemператURA на сьхсанения -10° C ~ +60 C | 14° F ~ 140° F) |
| Диапазон на работнatable TemператURA 0° C ~ | +40° C (32° F ~ 104° F) |
| *TochocTTA по Измервае завис OTTekуцITE усlobWA: · Пиблогориятни усlobWA (добра цileва поьухноct и Tempepa typа вnomeшениeto) do 10 M (33 Фута). · Пин Heblогориятни усlobWA (ярka сльнueva с Bretлina, много слаба оразая зацileва поьухноct иrolемп Tempepaурни кoleбанia), решка差别да с у负载ни OT ± 0,25 MM/m (± 0,003 Инчa/фут) заразостонnia наd 10 M (33 Фута). **Раздени телна способноct e нал-dобраво To Измервае, koeto можete дa вдитe. В Инчов,_TOBA e 1/16". B MM, TOBA e 1 MM. | |
BG
Cuprins
© 2017 Stanley Tools
Stanley Europe, Egide Walschaertsstraat 14-16,
2800 Mechelen, Belgium
www.2helpU.com
Made in China
097396 - Rev C
August 2017

- User Safety
- WARNING:
- EC-Declaration of Conformity Radio Equipment Directive
- Stanley Laser Distance Measurer TLM99s and TLM99si
- Battery Safety
- Setup (Load Batteries)
- Operation
- Measuring Distance to a Wall or Object
- Measuring Distances Continuously
- Measuring Area
- Measure the length.
- Measuring Volume
- Adding Measurements
- Subtracting Measurements
- Changing the Unit of Measure
- Using the TLM99s/TLM99si With
- Bluetooth
- Warranty
- Error Codes
- Inhalt
- Mal bredden.
- Pojrotobka k pa6ot (yctahOBka 6aTaapeek)
- 2),3aIpbXTe 3a2ceKHydN.IKoHata
- I3BaXdaHe Ha I3MepBaHnA
- N3KIIIOUBaHe Ha INHCTpyMeHTa
- TapaHcH
- KoIOBe Ha rpeuKa
- Cpeunokauu
- Cuprins
Brand : STANLEY
Model : TLM99
Category : Rangefinder