USER MANUAL GST 12V70 Professional BOSCH
www.bosch-pt.com/serviceaddresses
Transport
WARNING
Read all safety warnings, instructions, illustrations and specifications provided with this power tool.
Failure to follow all instructions listed below may result in electric shock, fire and/or serious injury.
Save all warnings and instructions for future reference.
The term "power tool" in the warnings refers to your mains-operated (corded) power tool or battery-operated (cordless) power tool.
Work area safety
- Keep work area clean and well lit. Cluttered or dark areas invite accidents. Do not operate power tools in explosive atmospheres, such as in the presence of flammable liquids, gases or dust. Power tools create sparks which may ignite the dust or fumes.
- Keep children and bystanders away while operating a power tool. Distractions can cause you to lose control.
Electrical safety
Power tool plugs must match the outlet. Never modify the plug in any way. Do not use any adapter plugs with earthed (grounded) power tools. Unmodified plugs and matching outlets will reduce risk of electric shock. Avoid body contact with earthed or grounded surfaces, such as pipes, radiators, ranges and refrigerators. There is an increased risk of electric shock if your body is earthed or grounded. Do not expose power tools to rain or wet conditions. Water entering a power tool will increase the risk of electric shock. Do not abuse the cord. Never use the cord for carrying, pulling or unplugging the power tool. Keep cord away from heat, oil, sharp edges or moving parts. Damaged or entangled cords increase the risk of electric shock. When operating a power tool outdoors, use an extension cord suitable for outdoor use. Use of a cord suitable for outdoor use reduces the risk of electric shock. If operating a power tool in a damp location is unavoidable, use a residual current device (RCD) protected supply. Use of an RCD reduces the risk of electric shock.
Personal safety
Stay alert, watch what you are doing and use common sense when operating a power tool. Do not use a power tool while you are tired or under the influence of drugs, alcohol or medication. A moment of inatten
tion while operating power tools may result in serious personal injury.
Use personal protective equipment. Always wear eye protection. Protective equipment such as a dust mask, non-skid safety shoes, hard hat, or hearing protection used for appropriate conditions will reduce personal injuries. Prevent unintentional starting. Ensure the switch is in the off-position before connecting to a power source and/or battery pack, picking up, or carrying the tool. Carrying power tools with your finger on the switch or energizing power tools that have the switch on invites accidents. Remove any adjusting key or wrench before turning the power tool on. A wrench or a key left attached to a rotating part of the power tool may result in personal injury. Do not overreach. Keep proper footing and balance at all times. This enables better control of the power tool in unexpected situations. Dress properly. Do not wear loose clothing or jewelry. Keep your hair and clothing away from moving parts. Loose clothes, jewelry, or long hair can be caught in moving parts. If devices are provided for the connection of dust extraction and collection facilities, ensure these are connected and properly used. Use of dust collection can reduce dust-related hazards. Do not let familiarity gained from frequent use of tools allow you to become complacent and ignore tool safety principles. A careless action can cause severe injury within a fraction of a second.
Do not force the power tool. Use the correct power tool for your application. The correct power tool will do the job better and safer at the rate for which it was designed. Do not use the power tool if the switch does not turn it on and off. Any power tool that cannot be controlled with the switch is dangerous and must be repaired. Disconnect the plug from the power source and/or remove the battery pack, if detachable, from the power tool before making any adjustments, changing accessories, or storing power tools. Such preventive safety measures reduce the risk of starting the power tool accidentally. Store idle power tools out of the reach of children and do not allow persons unfamiliar with the power tool or these instructions to operate the power tool. Power tools are dangerous in the hands of untrained users. Maintain power tools and accessories. Check for misalignment or binding of moving parts, breakage of parts, and any other condition that may affect the power tool's operation. If damaged, have the power tool repaired before use. Many accidents are caused by poorly maintained power tools.
- Keep cutting tools sharp and clean. Properly maintained cutting tools with sharp cutting edges are less likely to bind and are easier to control. Use the power tool, accessories, and tool bits, etc., in accordance with these instructions, taking into account the working conditions and the work to be performed. Use of the power tool for operations different from those intended could result in a hazardous situation.
- Keep handles and grasping surfaces dry, clean and free from oil and grease. Slippery handles and grasping surfaces do not allow for safe handling and control of the tool in unexpected situations.
- Recharge only with the charger specified by the manufacturer. A charger that is suitable for one type of battery pack may create a risk of fire when used with another battery pack. Use power tools only with specifically designated battery packs. Use of any other battery packs may create a risk of injury and fire. When battery pack is not in use, keep it away from other metal objects, like paper clips, coins, keys, nails, screws or other small metal objects, that can make a connection from one terminal to another. Shorting the battery terminals together may cause burns or a fire. Under abusive conditions, liquid may be ejected from the battery; avoid contact. If contact accidentally occurs, flush with water. If liquid contacts eyes, additionally seek medical help. Liquid ejected from the battery may cause irritation or burns. Do not use a battery pack or tool that is damaged or modified. Damaged or modified batteries may exhibit unpredictable behaviour resulting in fire, explosion or risk of injury. Do not expose a battery pack or tool to fire or excessive temperature. Exposure to fire or temperature above 130°C may cause explosion. Follow all charging instructions and do not charge the battery pack or tool outside the temperature range specified in the instructions. Charging improperly or at temperatures outside the specified range may damage the battery and increase the risk of fire.
Service
Have your power tool serviced by a qualified repair person using only identical replacement parts. This will ensure that the safety of the power tool is maintained. Never service damaged battery packs. Service of battery packs should only be performed by the manufacturer or authorized service providers.
Safety instructions for jigsaws
Hold the power tool by insulated gripping surfaces, when performing an operation where the cutting accessory may contact hidden wiring. Cutting accessory
contacting a "live" wire may make exposed metal parts of the power tool "live" and could give the operator an electric shock.
Use clamps or another practical way to secure and support the workpiece to a stable platform. Holding the workpiece by hand or against your body leaves it unstable and may lead to loss of control. Keep hands away from the sawing area. Do not reach under the workpiece. Contact with the saw blade can lead to injuries. Only bring the power tool into contact with the workpiece when switched on. Otherwise there is danger of kickback if the cutting tool jams in the workpiece. Ensure that the footplate always rests securely while sawing. A jammed saw blade can break or lead to kickback. When the cut is completed, switch off the power tool and then pull the saw blade out of the cut only after it has come to a standstill. In this manner you can avoid kickback and can place down the power tool securely. Always wait until the power tool has come to a complete stop before placing it down. The application tool can jam and cause you to lose control of the power tool. Use only undamaged saw blades that are in perfect condition. Bent or dull saw blades can break, negatively influence the cut, or lead to kickback. Do not brake the saw blade to a stop by applying side pressure after switching off. The saw blade can be damaged, break or cause kickback. Only use the power tool with the base plate. If you do not use the base plate, you are at risk of not being able to control the power tool. Use suitable detectors to determine if there are hidden supply lines or contact the local utility company for assistance. Contact with electric cables can cause fire and electric shock. Damaging gas lines can lead to explosion. Breaking water pipes causes property damage. In case of damage and improper use of the battery, vapours may be emitted. The battery can set alight or explode. Ensure the area is well ventilated and seek medical attention should you experience any adverse effects. The vapours may irritate the respiratory system. Do not open the battery. There is a risk of short-circuiting. The battery can be damaged by pointed objects such as nails or screwdrivers or by force applied externally. An internal short circuit may occur, causing the battery to burn, smoke, explode or overheat. Only use the battery with products from the manufacturer. This is the only way in which you can protect the battery against dangerous overload.
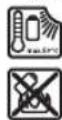
Protect the battery against heat, e.g. against continuous intense sunlight, fire, dirt, water and moisture. There is a risk of explosion and short-circuiting.
Product Description and Specifications

Read all the safety and general instructions. Failure to observe the safety and general instructions may result in electric shock, fire and/or serious injury.
Please observe the illustrations at the beginning of this operating manual.
Intended Use
The power tool is intended for making separating cuts and cut-outs in wood, plastic, metal, ceramic plates and rubber while resting firmly on the workpiece. It is suitable for straight and curved cuts with miter/bevel angles of up to 45°. Note the saw blade recommendations.
Product Features
The numbering of the product features refers to the diagram of the power tool on the graphics page.
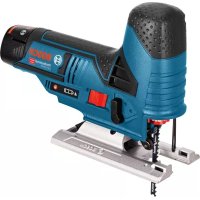
(1) Battery (2) Battery release button (3) Worklight button (4) Battery charge indicator (5) Stroke rate preselection thumbwheel (6) Temperature monitoring/overload protection indicator (7) On/off switch (8) Pendulum action adjusting lever (9) Base plate
(10) Guide roller (11) Saw blade receptacle (12) Guide for parallel guide (13) Saw blade a (14) Worklight (15) Hood for dust extraction (16) Extraction outlet (17) Glide shoe (18) Anti-splinter guard (19) Handle (insulated gripping surface) (20) SDS lever for saw blade release (21) Shock protection guard (22) Extraction hose (23) Base plate screw (24) Hex key (25) Scale for miter/bevel angles (26) Locking screw for parallel guide (27) Parallel guide with circle cutter
(28) Circle cutter centering tip a
a) Accessories shown or described are not included with the product as standard. You can find the complete selection of accessories in our accessories range.
Technical Data
| Cordless jigsaw GST 12V-70 |
| Article number | | 3601 EA1 0.. |
| Rated voltage V= 12 | | |
| No-load stroke rate n0A) | min-1 | 1500-2800 |
| Stroke mm 18 | | |
| Max. cutting depth | | |
| -in wood mm 70 | | |
| -in aluminium mm 3 | | |
| -in steel (unalloyed) mm 3 | | |
| Max. cutting angle (left/right) °45 | | |
| Weight according to EPTA-Pro-cEDURE 01:2014 | kg 1.7-1.9 | B) |
| Recommended ambient tem-perature during charging | °C 0 to +35 |
| Permitted ambient temperature during operationC) and during storage | °C -20 to +50 |
| Recommended rechargeable batteries | | GBA 12V... |
| Recommended chargers GAL 12... | | GAX 18... |
A) Measured at 20-25°C with rechargeable battery GBA 10.8V 2.0Ah. B) Depends on battery in use C) Limited performance at temperatures < 0°C
Noise emission values determined according to EN 62841-2-11.
Typically, the A-weighted sound pressure level of the power tool is 75 dB(A). Uncertainty K = 5 dB. The noise level when working can exceed the volume stated. Wear hearing protection!
Vibration total values a_t (triax vector sum) and uncertainty K determined according to EN 62841-2-11:
Cutting boards with saw blade T 111 C:
a_B = 4.5 m/s², K = 1.5 m/s²
Cutting sheet metal with saw blade T 118A: a_h,M = 4.5 m/s², K = 1.5 m/s².
The vibration level and noise emission value given in these instructions have been measured in accordance with a standardized measuring procedure and may be used to compare power tools. They may also be used for a preliminary estimation of vibration and noise emissions.
The stated vibration level and noise emission value represent the main applications of the power tool. However, if the power tool is used for other applications, with different application tools or is poorly maintained, the vibration level and noise emission value may differ. This may significantly increase the vibration and noise emissions over the total working period.
To estimate vibration and noise emissions accurately, the times when the tool is switched off or when it is running but not actually being used should also be taken into account. This may significantly reduce vibration and noise emissions over the total working period.
To estimate vibration and noise emissions accurately, the times when the tool is switched off or when it is running but not actually being used should also be taken into account. This may significantly reduce vibration and noise emissions over the total working period.
Implement additional safety measures to protect the operator from the effects of vibration, such as servicing the power tool and application tools, keeping their hands warm, and organising workflows correctly.
Remove the battery from the power tool before carrying out work on the power tool (e.g. maintenance, changing tool, etc.). The battery should also be removed for transport and storage. There is risk of injury from unintentionally pressing the on/off switch.
- Remove the battery from the power tool before carrying out work on the power tool (e.g. maintenance, changing tool, etc.). The battery should also be removed for transport and storage. There is risk of injury from unintentionally pressing the on/off switch.
Use only the chargers listed in the technical data. Only these chargers are matched to the lithium-ion battery of your power tool.
Note: The battery is supplied partially charged. To ensure full battery capacity, fully charge the battery in the charger before using your power tool for the first time.
The lithium-ion battery can be charged at any time without reducing its service life. Interrupting the charging process does not damage the battery.
The lithium-ion battery is protected against deep discharge by the "Electronic Cell Protection (ECP)". When the battery is discharged, the power tool is switched off by means of a protective circuit: The application tool no longer rotates.
Do not continue to press the On/Off switch after the power tool has automatically switched off. The battery can be damaged.
To remove the battery (1), press the release button (2) and pull the battery downwards out of the power tool. Do not use force to do this.
Battery charge indicator
The three green LEDs of the battery charge indicator (4) indicate the state of charge of the battery (1). The battery charge indicator only lights up for five seconds after startup.
LED Capacity
Continuous lighting 3x green ≥ 2/3
Continuous lighting 2x green ≥ 1/3
Continuous lighting 1x green < 1/3
Flashing light 1x green Reserve
Flashing light 3x green Empty
If no LED lights up after switching the power tool on, then the battery is defective and must be replaced.
Inserting/changing the saw blade
When fitting or changing the saw blade, wear protective gloves. Blades are sharp and can become hot when used for prolonged periods of time.
Selecting the saw blade
You will find an overview of recommended saw blades at the end of these operating instructions. Only use saw blades with single lug shank (T shank). The saw blade should not be longer than required for the intended cut.
Use a narrow saw blade when sawing tight curves.
Clean the shaft on the saw blade before inserting it. A dirty shaft cannot be securely fixed in place.
Push the saw blade (13), with the teeth in the cutting direction, into the saw blade receptacle (11) until it clicks into place. The SDS lever (20) automatically springs back and the saw blade is locked in place. Do not push the lever (20) back by hand as you could damage the power tool.
Make sure when inserting the saw blade that the back of the saw blade is in the groove on the guide roller (10).
Check that the saw blade is seated securely. A loose saw blade can fall out and lead to injuries.
When ejecting the saw blade, hold the power tool in such a manner that no persons or animals can be injured by the ejected saw blade.
Turn the SDS lever (20) as far as it will go in the direction of the shock protection guard (21). The saw blade is released and ejected.
When machining sensitive surfaces, you can place the glide shoe (17) on the base plate (9) in order to prevent the surface from being scratched.
To position the glide shoe (17), hook it to the front of the base plate (9), push it up at the back and allow it to click into place.
The anti-splinter guard (18) (accessory) can prevent splintering of the surface while sawing wood. The anti-splinter guard can only be used with certain saw blade types and only at a cutting angle of 0° .
Slide the anti-splinter guard (18) into the base plate (9) from the front.
When using the glide shoe (17), the anti-splinter guard (18) is inserted into the glide shoe rather than the base plate (9).
The dust from materials such as lead paint, some types of wood, minerals and metal can be harmful to human health. Touching or breathing in this dust can trigger allergic reactions and/or cause respiratory illnesses in the user or in people in the near vicinity.
Certain dusts, such as oak or beech dust, are classified as carcinogenic, especially in conjunction with wood treatment additives (chromate, wood preservative). Materials containing asbestos may only be machined by specialists.
- Use a dust extraction system that is suitable for the material wherever possible.
- Provide good ventilation at the workplace.
- It is advisable to wear a P2 filter class breathing mask.
The regulations on the material being machined that apply in the country of use must be observed.
Avoid dust accumulation at the workplace. Dust can easily ignite.
Hood
Fit the hood (15) before you connect the power tool to the dust extraction system.
Attach the hood (15) to the power tool so that the bracket locks into place on the shock protection guard (21).
Remove the hood (15) when working without a dust extraction system and for metre/bevel cuts. To do this, pull the hood forwards off the shock protection guard (21).
Fit the extraction outlet (16) in the recesses of the base plate (9).
Connect a dust extraction hose (22) (accessory) to the extraction outlet (16). Connect the dust extraction hose (22) to a dust extractor (accessory).
You will find an overview of connecting to various dust extractors at the end of these operating instructions.
For optimum dust extraction, where possible use the anti-splinter guard (18).
The dust extractor must be suitable for the material being worked.
When extracting dry dust that is especially detrimental to health or carcinogenic, use a special dust extractor.
Operation
Operating modes
- Remove the battery from the power tool before carrying out work on the power tool (e.g. maintenance, changing tool, etc.). The battery should also be removed for transport and storage. There is risk of injury from unintentionally pressing the on/off switch.
Pendulum action settings
The pendulum action can be adjusted using three different settings, allowing the cutting speed, cutting capacity and the cut itself to be optimally adapted to the material that you want to cut.
You can also adjust the pendulum action during operation using the adjusting lever (8).
Level 0: No pendulum action
Level I: Low pendulum action
Level II: High pendulum action
The optimum pendulum level for each application can be determined by a practical test. Note the following recommendations:
- Select a lower pendulum level or switch off the pendulum action completely if you wish to produce a finer or cleaner cutting edge.
- Switch off the pendulum action when machining thin materials (e.g. sheets).
- Work on hard materials (e.g. steel) with low pendulum action.
- You can work on soft materials and saw wood using maximum pendulum action.
The base plate (9) can be swivelled to the right or left to make mitre cuts up to 45° .
The extraction outlet (16) and anti-splinter guard (18) cannot be used while mitre/bevel cuts are being made.
- Remove the extraction outlet (16) and the anti-splinter guard (18).
- For mitre/bevel angle 0° , there is a pin in a corresponding recess.
- Loosen the screw (23) with the hex key (24) until you can slide the base plate (9) in towards the battery (1). Let the pin slide into the guide groove.
- To adjust mitre/bevel angles, swivel the base plate (9) to the required position according to the scale (25). Every angle can be adjusted to 45° using a protractor.
- Retighten the screw (23).
Starting Operation
Inserting the battery
Note: The use of batteries unsuitable for your power tool can lead to malfunctions or damage to the power tool.
Insert the charged battery (1) into the battery receptacle until you feel it engage and it is securely locked in place.
Switching on the LED worklight
To switch the worklight (14) on or off, press the worklight button (3).
Do not look directly into the worklight; it can blind you.
Switching on/off
Make sure that you are able to press the On/Off switch without releasing the handle.
To switch on the power tool, slide the on/off switch (7) forwards so that "I" appears on the switch.
To switch off the power tool, slide the on/off switch (7) backwards so that "0" appears on the switch.
Restart protection
The restart protection feature prevents the power tool from uncontrolled starting after the power supply to it has been interrupted. Once the restart protection is active, the temperature monitoring/overload protection indicator (6) flashes continuously.
To restart the tool, set the on/off switch (7) to the off position and then switch the power tool on again.
Note: Rapidly switching the power tool off and on again may trigger the restart protection, meaning the power tool may not start up even if the on/off switch (7) is pressed. Set the on/off switch (7) to the off position and then switch the power tool on again.
Preselect the stroke rate
You can also preselect the stroke rate and change it during operation using the stroke rate preselection thumbwheel (5).
The required stroke rate is dependent on the material and the work conditions and can be determined using practical tests.
It is recommended that you reduce the stroke rate when placing the saw blade on the workpiece and when sawing plastic and aluminium.
During prolonged periods of use at a low stroke rate, the power tool may heat up significantly. Remove the saw blade and let the power tool run at the maximum stroke rate for around three minutes to cool down.
Temperature-dependent overload protection
In normal conditions of use, the power tool cannot be overloaded. If the power tool is overloaded or not kept within the permitted battery temperature range, the speed is reduced or the power tool switches off. At reduced speed, the power tool will run again at full speed once the permitted battery temperature is reached or the load is reduced. If it automatically shuts down, switch the power tool off, allow the battery to cool down, then switch the power tool back on.
Temperature monitoring/overload protection indicator
The red temperature monitoring/overload protection indicator (6) helps you to protect the battery against overheating and the motor against overload.
If the temperature monitoring/overload protection indicator (6) is lit up permanently in red, the temperature of the battery is too high and the power tool switches off automatically.
Switch the power tool off and allow the battery to cool down before you carry on working.
If the temperature monitoring/overload protection indicator (6) is flashing red, then the power tool is blocked and will switch off automatically.
Pull the power tool out of the workpiece. The power tool will continue to work at the set stroke rate as soon as the blockage is rectified.
Working Advice
- Remove the battery from the power tool before carrying out work on the power tool (e.g. maintenance, changing tool, etc.). The battery should also be removed for transport and storage. There is risk of injury from unintentionally pressing the on/off switch.
Switch the power tool off immediately if the saw blade becomes blocked.
Always use a sturdy support when working on small or thin workpieces.
Before sawing into wood, chipboard, building materials, etc., check for and remove any foreign objects such as nails, screws, etc.
Plunge cuts may only be applied to soft materials, such as wood, gypsum board, etc.
For plunge cutting, use only short saw blades. Plunge cutting is possible only with a litre angle of 0° .
Place the power tool so that the front edge of the base plate (9) rests on the workpiece, without the saw blade (13) touching the workpiece, and switch it on. On power tools with stroke rate control, select the maximum stroke rate. Press the power tool firmly against the workpiece and allow the saw blade to plunge slowly into the workpiece.
As soon as the base plate (9) rests fully on the workpiece, continue sawing along the required cutting line.
Parallel guide with circle cutter (accessory)
When working with the parallel guide with circle cutter (27) (accessory), the workpiece must be no more than 30mm thick.
Parallel cuts (see figure J): Loosen the locking screw (26) and slide the scale on the parallel guide through the guide (12) in the base plate. Adjust the desired cutting width as a scale value on the inside edge of the base plate. Retighten the locking screw (26).
Circular cuts (see figure K): Drill a hole large enough to push the saw blade through on the cutting line within the circle to be cut. Machine the drill hole with a router or file so that the saw blade can lie flush with the cutting line.
Position the locking screw (26) on the other side of the parallel guide. Slide the scale on the parallel guide through the guide (12) into the base plate. Drill a hole in the workpiece in the middle of the section to be cut out. Insert the centring tip (28) through the inner opening of the parallel guide and into the drilled hole. Adjust the radius as a scale value on the inside edge of the base plate. Retighten the locking screw (26).
Coolant/lubricant
As the material heats up along the cutting line when cutting metal, you should apply coolant or lubricant.
Recommendations for Optimal Handling of the Battery
Protect the battery against moisture and water.
Only store the battery within a temperature range of -20 to 50°C . Do not leave the battery in your car in the summer, for example.
Occasionally clean the ventilation slots on the battery using a soft brush that is clean and dry.
A significantly reduced operating time after charging indicates that the battery has deteriorated and must be replaced. Follow the instructions on correct disposal.
Maintenance and Service
Maintenance and Cleaning
- Remove the battery from the power tool before carrying out work on the power tool (e.g. maintenance, changing tool, etc.). The battery should also be removed for transport and storage. There is risk of injury from unintentionally pressing the on/off switch. To ensure safe and efficient operation, always keep the power tool and the ventilation slots clean.
Clean the saw blade receptacle regularly. For this, remove the saw blade from the power tool and lightly tap out the power tool on a level surface.
If the power tool becomes very dirty, this can lead to serious faults. For this reason, do not cut materials which generate large quantities of dust from below or overhead.
If the dust outlet becomes blocked, switch off the power tool, disconnect the dust extraction system and remove the dust and chips.
Apply a drop of oil to the guide roller (10) from time to time.
Check the guide roller (10) regularly. If worn, it must be replaced through an authorised Bosch after-sales service centre.
After-Sales Service and Application Service
Our after-sales service responds to your questions concerning maintenance and repair of your product as well as spare parts. You can find explosion drawings and information on spare parts at: www.bosch-pt.com
The Bosch product use advice team will be happy to help you with any questions about our products and their accessories.
In all correspondence and spare parts orders, please always include the 10-digit article number given on the nameplate of the product.
Great Britain
Robert Bosch Ltd. (B.S.C.)
P.O. Box 98
Broadwater Park
North Orbital Road
Denham Uxbridge
UB9 5HJ
At www.bosch-pt.co.uk you can order spare parts or arrange the collection of a product in need of servicing or repair.
Tel. Service: (0344) 7360109
E-Mail: boschservicecentre@bosch.com
You can find further service addresses at:
www.bosch-pt.com/serviceaddresses
Transport
The recommended lithium-ion batteries are subject to legislation on the transport of dangerous goods. The user can transport the batteries by road without further requirements.
When shipping by third parties (e.g., by air transport or forwarding agency), special requirements on packaging and labelling must be observed. For preparation of the item being shipped, consulting an expert for hazardous material is required.
Dispatch battery packs only when the housing is undamaged. Tape or mask off open contacts and pack up the battery in such a manner that it cannot move around in the packaging. Please also observe the possibility of more detailed national regulations.
Disposal

Power tools, rechargeable batteries, accessories and packaging should be sorted for environmental-friendly recycling.
Do not dispose of power tools and batteries/re-chargeable batteries into household waste!
Only for EU countries:
According to the Directive 2012/19/EU on waste electrical and electronic equipment and its transposition into national law, power tools that are no longer usable, and, according to the Directive 2006/66/EC, defective or drained batteries must be collected separately and disposed of in an environmentally correct manner.
If disposed incorrectly, waste electrical and electronic equipment may have harmful effects on the environment and human health, due to the potential presence of hazardous substances.
Only for United Kingdom:
According to The Waste Electrical and Electronic Equipment Regulations 2013 (SI 2013/3113) (as amended) and the Waste Batteries and Accumulators Regulations 2009 (SI 2009/890) (as amended), products that are no longer usable must be collected separately and disposed of in an environmentally friendly manner.
Battery packs/batteries:
Li-ion:
Please observe the notes in the section on transport (see "Transport", page 20).
www.bosch-pt.com/serviceaddresses
Transport
www.bosch-pt.com/serviceaddresses
Transport
www.bosch-pt.com/serviceaddresses
Transport
www.bosch-pt.com/serviceaddresses
Transport
Bosch Service Center
Telegrafvej 3
2750 Ballerup
At www.bosch-pt.dk you can order spare parts online or create a repair order.
Service Center phone: 44898855
Fax: 44898755
E-mail: vaerktoej@dk.bosch.com
www.bosch-pt.com/serviceaddresses
Transport
Level I small load
Level II large load
Bosch Service Center
Telegrafvej 3
2750 Ballerup
Denmark
Tel.: (08) 7501820 (within Sweden)
Fax: (011) 187691
You can find more service contact details here: www.bosch-pt.com/serviceaddresses
Transport
Step I small load
Step II large load
www.bosch-pt.com/serviceaddresses
Transport
www.bosch-pt.com/serviceaddresses
Transport
BaθμiδaOxωpiτalavvwo
www.bosch-pt.com/serviceaddresses
Transport
The contained lithium-ion batteries are subject to the Dangerous Goods Legislation requirements. The user can transport the battery by road without further requirements.
When transport is carried out by third parties (e.g. air transport or forwarding agency), special requirements on packaging and labelling must be observed. For the dispatch of the parcel, consultation with an expert for hazardous goods is required.
Dispatch batteries only when the housing is undamaged. Tape or mask off open contacts and pack up the battery such that it cannot move around in the packaging. Please also observe possibly more detailed national regulations.
Disposal

Lithium-ion batteries "Electronic Cell Protection (ECP)"
www.bosch-pt.com/serviceaddresses
Transport
Robert Bosch Sp. z o.o.
www.bosch-pt.com/serviceaddresses
Transport
Bosch Service Center PT
K Vapence 1621/16
692 01 Mikulov
You can order the repair of your machine or spare parts online at www.bosch-pt.cz.
www.bosch-pt.com/serviceaddresses
Transport
Recommended lithium-ion batteries are subject to the requirements of the law on dangerous goods. These
batteries can be transported by the user by road without further conditions.
www.bosch-pt.com/serviceaddresses
Transport
Recommended lithium-ion batteries are subject to the requirements for the transport of dangerous goods. These batteries may be transported by the user by road without further measures.
When sending by third parties (e.g., by air transport or through a freight forwarder), special requirements for packaging and labeling must be observed. In such a case, an expert on the transport of dangerous goods must be consulted without fail when preparing the shipment.
Only send batteries if their packaging is not damaged. Tape over open contacts and pack the battery so that it cannot move around in the packaging. Also observe any additional national regulations.
Disposal

www.bosch-pt.com/serviceaddresses
Transport
Keep these instructions for future reference.
The term "power tool" used in these instructions and specifications refers to power tools operated from the mains (with a power cord) and battery-operated power tools (without a power cord).
Workplace safety
Keep your work area clean and well lit. Cluttered or dark areas can lead to accidents. Do not operate power tools in explosive atmospheres, such as in the presence of flammable liquids, gases, or dust. Power tools create sparks, which may ignite dust or fumes. While operating a power tool, keep bystanders away from your work area. Distractions can cause you to lose control of the tool. The equipment is intended for use in household, commercial, and public areas, as well as in industrial zones with low power consumption, without the influence of harmful production factors. The equipment is intended for operation without constant presence of operating personnel.
Electrical safety
The power tool plug must match the outlet. Never modify the plug in any way. Do not use adapter plugs with earthed (grounded) power tools. Unmodified plugs and matching outlets will reduce risk of electric shock. Avoid body contact with earthed surfaces such as pipes, radiators, ranges, and refrigerators. There is an increased risk of electric shock if your body is earthed. Protect the power tool from rain and moisture. Water entering a power tool will increase the risk of electric shock. Do not use the cord for purposes other than its intended use. Never use the cord for carrying, hanging, or unplugging the power tool. Keep the cord away from heat, oil, sharp edges, or moving parts. Damaged or entangled cords increase the risk of electric shock. When operating a power tool outdoors, use an extension cord suitable for outdoor use.
Use of a cord suitable for outdoor use reduces the risk of electric shock.
If operating a power tool in a damp location is unavoidable, use a residual current device (RCD) protected supply. Use of an RCD reduces the risk of electric shock.
Personal safety
By being attentive, watch what you are doing and start work with the power tool sensibly. Do not use the power tool while tired or under the influence of drugs, alcohol, or medication. A moment of inattention while working with the power tool can lead to serious injuries. Use personal protective equipment. Always wear eye protection. Use of personal protective equipment, such as a dust mask, non-slip safety shoes, safety helmet, or hearing protection, depending on the type of work with the power tool, reduces the risk of injury. Prevent unintentional starting. Before connecting the power tool to the mains or battery, or before carrying the power tool, make sure it is switched off. Holding your finger on the switch or connecting the power tool to the mains with the switch on can lead to accidents. Remove any adjusting tools or wrenches before switching on the power tool. A tool or wrench left attached to a rotating part of the power tool can lead to injuries. Do not adopt an unnatural body posture. Always maintain a stable stance and keep your balance. This allows you to better control the power tool in unexpected situations. Wear suitable work clothing. Do not wear loose clothing or jewelry. Keep your hair and clothing away from moving parts. Loose clothing, jewelry, or long hair can get caught in moving parts. If dust extraction and collection equipment can be installed, ensure it is properly connected and used. Using a dust collector can reduce dust-related hazards. Good knowledge of power tools, gained through frequent use, should not lead to overconfidence and ignoring safety rules for handling power tools. One careless action within a fraction of a second can lead to serious injuries.
WARNING! In case of interruptions in the operation of the power tool due to a complete or partial power failure or damage to the power supply control, set the switch to the OFF position, making sure it is not locked (if present). Disconnect the plug from the socket or remove the battery pack. This prevents uncontrolled restart. Qualified personnel, in accordance with this manual, are those who are familiar with assembly, installation, commissioning, and maintenance of the power tool. Persons under 18 years of age are allowed to work with the power tool only after studying the technical description, operating instructions, and safety rules. The device is not intended for use by persons (including children) with reduced physical, sensory, or mental capabilities, or lack of experience and knowledge, unless they are under supervision or have been instructed in the use of the power tool by a person responsible for their safety.
Do not overstress the power tool. Use the correct power tool for your work. The correct power tool will do the job better and safer at the rate for which it was designed. Do not use the power tool if the switch does not turn it on and off. Any power tool that cannot be controlled with the switch is dangerous and must be repaired. Disconnect the plug from the power source and/or remove the battery pack, if detachable, from the power tool before making any adjustments, changing accessories, or storing power tools. Such preventive safety measures reduce the risk of starting the power tool accidentally. Store power tools out of the reach of children and do not allow persons unfamiliar with the power tool or these instructions to operate the power tool. Power tools are dangerous in the hands of untrained users. Maintain power tools and accessories. Check for misalignment or binding of moving parts, breakage of parts and any other condition that may affect the power tool's operation. If damaged, have the power tool repaired before use. Many accidents are caused by poorly maintained power tools. Keep cutting tools sharp and clean. Properly maintained cutting tools with sharp cutting edges are less likely to bind and are easier to control.
Use the power tool, accessories and tool bits etc., in accordance with these instructions, taking into account the working conditions and the work to be performed. Use of the power tool for operations different from those intended could result in a hazardous situation. Keep handles and grasping surfaces dry, clean and free from oil and grease. Slippery handles and grasping surfaces do not allow for safe handling and control of the tool in unexpected situations.
Use and maintenance of the battery tool
Charge the battery packs only in the chargers recommended by the manufacturer. Charging a device that is intended for a specific type of battery pack may create a fire hazard if used with other battery packs. Use only the battery packs that are specifically intended for this power tool. Using other battery packs may result in injury or fire hazard. Keep the battery pack away from paper clips, coins, keys, nails, screws, and other small metal objects that could short-circuit the contacts. Short-circuiting the battery contacts may cause burns or fire. If the battery pack is used improperly, liquid may leak from it. Avoid contact with this liquid. In case of accidental contact, flush with water. If the liquid gets into the eyes, additionally seek medical attention. Leaking battery liquid may cause skin irritation or burns. Do not use damaged or modified battery packs or tools. Damaged or modified battery packs may behave unpredictably, which could lead to fire, explosion, or risk of injury. Do not expose the battery pack or tool to fire or high temperatures. Fire or temperatures above 130°C may cause explosion. Follow all charging instructions and do not charge the battery pack or tool at temperatures outside the range specified in the instructions. Incorrect charging or charging at temperatures outside the specified range may damage the battery and increase the risk of fire.
Service
Repair of the power tool must be carried out only by qualified personnel and only with original spare parts. This ensures the safety of the power tool. Never service damaged battery packs. Battery packs may only be serviced by the manufacturer or an authorized service organization.
Safety instructions for electric tools
When performing work where the power tool may come into contact with hidden electrical wiring, hold the tool by the insulated gripping surfaces. Contact with a live wire can energize the metal parts of the power tool and lead to an electric shock. Secure the workpiece on a stable base with clamps or another suitable method. Holding the workpiece by hand or against your body does not ensure stable support, and it may slip out of control. Do not place your hands near the saw blade. Do not place your hands near the workpiece. There is a risk of injury if the blade comes into contact with your hands. Guide the power tool to the workpiece only when it is switched on. Otherwise, there is a risk of kickback if the tool jams in the workpiece. Ensure that the saw blade is firmly seated on the arbor before use. A loose saw blade may break or cause kickback. After completing the work operation, switch off the power tool; pull the saw blade out of the cut only after it has come to a complete stop. This prevents kickback and allows you to put down the power tool safely. Switch off the power tool completely only after you have removed it from the workpiece. The power tool may jam, which could lead to loss of control. Use only undamaged, flawless saw blades. Bent or dull saw blades may break; using such blades can negatively affect the quality of the cut or cause kickback. Do not brake the saw blade with lateral pressure after switching off. This can damage the saw blade, break it, or cause kickback.
Use the power tool only with the auxiliary handle. Without the auxiliary handle, there is a risk of losing control of the power tool. Use appropriate metal detectors to locate hidden electrical lines, gas pipes, or water pipes, or consult your local utility company. Contact with electrical wires can lead to fire or electric shock. Damage to a gas line can lead to an explosion. Damage to a water pipe leads to property damage. If the battery is damaged or used improperly, vapors may be emitted. The battery can catch fire or explode. Ensure fresh air supply and consult a doctor if discomfort occurs. Vapors can irritate the respiratory tract. Do not open the battery. This creates a risk of short circuit. Sharp objects, such as nails or screwdrivers, or external force can damage the battery pack. This can lead to an internal short circuit, fire with smoke, explosion, or overheating of the battery pack. Use the battery pack only in the manufacturer's products. Only then is the battery protected against dangerous overload.

Protect the battery pack from high temperatures, e.g., from prolonged exposure to sunlight, fire, dirt, water, and moisture. There is a risk of explosion and short circuit.
Product name and services

Read all safety instructions and instructions. Failure to follow safety instructions and instructions may result in electric shock, fire, and/or serious injury.
Please keep the illustrated operating instructions.
Intended use
The power tool is intended for sawing and cutting slots in wood, synthetic materials, metal, ceramic tiles, and rubber. It is suitable for straight and curved cuts with a bevel angle of up to 45°. Follow the recommendations for using saw blades.
Illustrated components
The numbering of the illustrated components is based on the illustration on the page with the figures.
(1) Battery (a) (2) Battery unlock button (3) Light button (4) Battery charge indicator (5) Adjustment wheel for stroke rate (6) Temperature control/overload protection indicator (7) Switch (8) Lever for setting the pendulum action (9) Base plate
(10) Guide for the saw blade (11) Saw blade clamp (12) Guide for parallel cuts (13) Saw blade (14) Base plate (15) Cover for dust extraction (16) Dust extraction hose (17) Base plate (18) Anti-slip insert (19) Handle (insulated gripping surface) (20) SDS lever for unlocking the saw blade (21) Contact protection (22) Dust extraction adapter (23) Screw for base plate (24) Hex key (25) Angle scale (26) Clamping screw for parallel guide (27) Parallel guide with circle cutting device (28) Centering tip for circle cutting
a) The illustrated and described accessories are included in the standard scope of delivery. The complete range of accessories can be found in our accessories program.
Technical data
Noise and vibration data
The noise level was determined in accordance with EN62841-2-11.
The A-weighted sound pressure level of the power tool is typically 75 dB(A). Uncertainty K = 5 dB. The noise level during operation may exceed the specified values. Wear hearing protection!
The total vibration value (vector sum of three directions) was determined in accordance with
EN62841-2-11
Cutting wood with a saw blade T 111C:
a _ h, B = 4, 5 M / c ^ 2, K = 1, 5 M / c ^ 2,
Cutting sheet metal with a saw blade
T118A:
a _ 1, M = 4, 5 M / c ^ 2, K = 1, 5 M / c ^ 2.
The vibration level and noise emission value specified in this instruction manual were measured according to the measurement method specified in the standard and can be used for comparison of power tools. They are also suitable for a preliminary assessment of vibration and noise exposure.
The vibration level and noise emission value are indicated for the main types of work with the power tool. However, if the power tool is used for other types of work with accessories not specified by the manufacturer or if maintenance is not carried out as prescribed, the vibration and noise emission values may differ. This can significantly increase the overall vibration and noise exposure over the entire working period.
For an accurate assessment of the vibration and noise exposure during a defined period of time, it is necessary
to also take into account the times when the tool is switched off or, although switched on, is not actually working. This can significantly reduce the vibration and noise exposure over the total working time.
Take additional safety measures to protect the operator from the effects of vibration, such as: maintenance of the power tool and working tools, measures to keep hands warm, organization of work processes.
Assembly
Before starting maintenance, changing the tool, etc., as well as during transport and storage, remove the battery from the power tool. In case of unintentional activation, there is a risk of injury.
Charging the battery (see Fig. A)
Use only the chargers specified in the technical data. Only these chargers are suitable for the lithium-ion battery of your power tool.
Note: The battery is supplied partially charged. To ensure full battery capacity, charge it completely before first use.
The lithium-ion battery can be charged at any time without reducing its service life. Interrupting the charging process does not damage the battery.
The lithium-ion battery is protected against deep discharge by "Electronic Cell Protection (ECP)". The protection circuit switches off the power tool when the battery is discharged - the power tool stops.
After the automatic switch-off of the power tool, do not press the On/Off switch any more. The battery can be damaged.
To remove the battery (1), press the unlocking button (2) and, pulling downwards, remove the battery from the power tool. Do not use force.
Battery charge indicator
The three green LEDs on the battery charge indicator (4) show the charge level of the battery (1). The charge indicator lights up for only 5 seconds after being activated.
| СbvToDnOД EмКоCTь |
| HenpebIbHbI CBET 3 зеленbIX CBToDnO-doB | ≥2/3 |
| HenpebIbHbI CBET 2 зеленbIX CBToDnO- doB | ≥1/3 |
| HenpebIbHbI CBET 1 зеленогo CBToDnO- da | <1/3 |
| MiraIGNHe 1 зеленогo CBToDnOda PeЗрВ | |
LED capacity
Three green LEDs lit: Charged. If no LED lights up when switched on, the battery is defective and must be replaced.
Fitting/Changing the sanding sheet
When fitting or changing the sanding tool, wear protective gloves. The sanding tool can become hot during use.
Selecting the sanding sheet
For an overview of recommended sanding sheets, refer to the operating instructions. Use only sanding sheets of the hook-and-loop type (with Velcro backing). The length of the sanding sheet must be longer than required for the intended sanding. For narrow sanding applications, use a narrow sanding sheet.
Fitting the sanding sheet (see figure B)
Clean the Velcro backing of the sanding sheet before fitting. A dirty Velcro backing cannot be securely fastened.
Insert the dust nozzle (13) with the teeth facing the cutting direction so that it engages in the holder of the dust nozzle (11). The SDS handle (20) automatically returns to its original position and the dust nozzle locks into place. Do not hold the handle (20) with your hand during this, as this may damage the power tool.
Insert the dust nozzle and make sure that the back of the dust nozzle is seated in the recess of the guide roller (10).
Check that the dust nozzle is seated securely. A loosely secured dust nozzle may fall out and injure you.
Removing the dust nozzle (see Fig. C)
When removing the dust nozzle, hold the power tool so that you do not injure people or animals around you.
Turn the SDS handle (20) forward as far as it will go in the direction of the dust extraction guard (21). The dust nozzle will unlock and can be removed from the holder.
Support shoe (see Fig. D)
When working on easily damaged surfaces, you can attach the support shoe (17) to the base plate (9) to prevent scratching the surface.
To attach the support shoe (17), hook it onto the front of the base plate (9), press it down at the rear from bottom to top, and let it engage.
Chip guard (see Fig. E)
The chip guard (18) (accessory) prevents chipping of the material when sawing wood. The chip guard can be used
only with certain types of dust nozzles, for example, the one for cutting at 0°.
Insert the chip guard (18) from the front into the base plate (9).
When using the support shoe (17), the chip guard (18) is inserted not into the base plate (9), but into the support shoe.
Dust and chip removal
Dust from some materials, such as paint containing lead, some types of wood, minerals, and metals, can be harmful to health.
Exposure to dust and inhalation of dust can cause allergic reactions and/or respiratory diseases in the operator or nearby personnel.
Certain types of dust, e.g., oak and beech, are considered carcinogenic, especially in combination with additives for wood processing (chromate, wood preservatives). Material containing asbestos may only be processed by specialists.
- If possible, use a dust extraction system suitable for the material. - Ventilate the work area well. - It is recommended to use a respirator mask with a P2 filter.
Observe the regulations applicable in your country for the materials being processed.
Avoid sparks in the work area. Dust can easily ignite.
Cover
Mount the cover (15) before connecting the power tool to the dust extractor.
Place the cover (15) onto the power tool so that the fastening engages in the recess on the anti-kickback guard (21).
When working without a dust extraction system or with a vacuum cleaner, remove the cover (15). To do this, pull the cover forward off the anti-kickback guard (21).
Connecting the dust extraction device (see Fig. F-G)
Insert the dust extraction hose (16) into the cutout in the base plate (9).
Slide the dust extraction hose adapter (22) (accessory) onto the dust extraction hose (16). Connect the dust extraction hose adapter (22) to a vacuum cleaner (accessory).
An overview of possible vacuum cleaners is provided at the end of these instructions.
For optimal dust extraction, set the anti-kickback guard (18) as close to the material as possible.
The tool is intended for processing the material.
Special means are used to protect against harmful dust and carcinogens.
Working with the tool
Operating modes
Before starting maintenance, tool change, etc., as well as during transport and storage, remove the battery from the power tool. Accidental activation poses a risk of injury.
Adjusting the pendulum action
The pendulum action allows you to optimally adjust the cutting speed, power, and the pattern of the cut surface to the material being processed.
Using the adjusting lever (8), you can set the pendulum action even while the power tool is running.
Pendulum action levels
Level I: weak pendulum action
Level II: strong pendulum action
The optimal pendulum action level can be determined by a test cut. When doing so, follow these recommendations:
- For thin workpieces, the lower the pendulum action level, the better. If the cut is to be particularly clean, select a lower pendulum action level or switch off the pendulum action altogether. - When working with soft materials (e.g., plastics), switch off the pendulum action. - When working with hard materials (e.g., steel), use a weak pendulum action. - For soft materials such as wood, you can work with maximum pendulum action.
Adjusting the cutting angle (see Fig. H)
The sole plate (9) can be turned to the left or right by up to 45°.
It is forbidden to use the dust extraction hose (16) as protection against material ejection (18).
- Remove the dust extraction hose (16) and the protection against splinters (18). - Attach the protection so that it fits into the corresponding groove. - Tighten the screw (23) using the hex key (24) until the support plate (9) is firmly fixed in the direction of the accumulator (1). Make sure that the support plate is in the guide groove. - To adjust the angle of inclination, turn the support plate (9) according to the scale (25) to the desired position. Using the protractor, any angle up to 45° can be set. - Retighten the screw (23).
Switching on the power tool
Installing the battery
Note: Using batteries not intended for this power tool may lead to malfunctions or damage to the power tool.
Insert the charged battery (1) into the battery holder so that it clicks into place and locks securely.
Switching on the work light
To switch on the work light (14), press the work light button (3).
Do not look directly into the work light; it may dazzle you.
Switch off the power tool and let the battery cool down before continuing to work.
The temperature control/overload protection indicator (6) lighting up red indicates that the power tool has jammed and will switch off automatically.
Pull the power tool out of the workpiece. After the cause of the jam has been eliminated, the power tool will continue to operate at the set speed.
Instructions for use
Before starting maintenance, changing tools, etc., as well as during transport and storage, remove the battery from the power tool. There is a risk of injury if the tool is switched on unintentionally. If the saw blade is blocked, switch off the power tool immediately. When working on small or thin workpieces, always use a stable support.
Check workpieces, pre-cut panels, building materials, etc. for foreign objects such as nails, screws, etc., and remove them if necessary.
Plunge cutting (see Fig. 1)
Plunge cutting can only be used for soft materials, e.g., wood, plasterboard, etc.
For plunge cutting, use only short saw blades. Plunge cutting is possible only at a cutting angle of 0°.
Place the power tool with the front of the base plate (9) onto the workpiece without the saw blade (13) touching the workpiece, and switch on the power tool.
If the power tool has a speed regulator, set the maximum speed. Press the power tool firmly against the workpiece and slowly plunge the saw blade into the workpiece.
As soon as the base plate (9) rests fully on the workpiece, continue cutting along the desired cutting line.
Parallel guide for circular cuts (accessory)
For working with the parallel guide with circle cutting device (27) (accessory), the workpiece thickness must not exceed 30 mm.
Parallel cuts (see Fig. J): Loosen the clamping screw (26) and insert the scale of the parallel guide into the guide (12) on the base plate. Set the desired cutting width on the scale at the inner edge of the base plate. Tighten the clamping screw (26) again.
Circular cuts (see Fig. K): Drill a hole in the workpiece inside the cutting circle, large enough to insert the saw blade. Ream the hole with a file so that the saw blade can be positioned flush with the cutting line.
Set the clamping screw (26) on the opposite side of the parallel guide. Insert the scale of the parallel guide into the guide (12) on the base plate. Screw the centering tip into the hole provided for this purpose.
Insert the centering tip (28) into the inner hole of the parallel guide and into the drilled hole. Set the radius on the scale at the inner edge of the base plate. Tighten the clamping screw (26) again.
Lubricant/coolant
When cutting metal, apply water or a lubricating/cooling agent along the cutting line.
Information on optimal handling of the battery
Charge the battery only with the specified charger.
Store the battery only in a temperature range of -20°C to 50°C. Do not leave the battery in a car in summer.
Periodically clean the ventilation slots of the battery charger with a dry, lint-free cloth.
A significant reduction in operating time after charging indicates aging of the battery and indicates the need for its replacement.
Follow the disposal instructions.
Maintenance and service
Maintenance of the tool
Before starting maintenance work, changing tools, etc., as well as when transporting and storing, remove the battery from the power tool.
There is a risk of injury when switching on unintentionally.
To ensure safe operation, keep the power tool and its ventilation slots clean.
Regularly clean the dust filter. To do this, remove the dust filter from the power tool and gently tap it on a flat surface.
Heavy contamination of the power tool can lead to impairment of functional capability. Therefore, do not blow material with heavy dust generation from below or above your head.
If the outlet opening for dust is clogged, switch off the power tool, remove the dust collector, and remove the dust chips.
Periodically lubricate the guide rail (10) with a thin layer of oil.
Regularly check the guide rail (10). A worn rail must be replaced in an authorized Bosch service center for power tools.
Sale of products is allowed in stores, departments (sections), and pavilions, provided that the products are protected from atmospheric precipitation and from exposure to sources of elevated temperatures (sharp temperature changes), including sunlight.
The seller (manufacturer) must provide the buyer with the necessary reliable information about the product, ensuring the possibility of its correct choice. Information about the product in the mandatory manner must contain data, the list of which is established by the legislation of the Russian Federation.
If the purchased product was in use and a defect (shortcoming) was discovered, the consumer must be provided with information about this.
During the sale of products, the following safety requirements must be met:
- The seller must bring to the attention of the buyer the company name of his organization, its location (address) and its operating hours; - Product samples in retail premises must provide the opportunity for buyers to familiarize themselves with the inscriptions on the products and exclude independent actions of buyers with the products, leading to the launch of the product, except for visual inspection; - The seller must bring to the attention of the buyer information confirming the compliance of these products with the established requirements, a mandatory certificate of conformity or a declaration of conformity; - The sale of products is prohibited in the absence (loss) of its identification features, with an expired shelf life, signs of spoilage and without instructions (manual) for operation, a mandatory certificate of conformity or a mark of conformity.
Service and consultation on application issues
The service department is responsible for all your questions regarding the repair and maintenance of your product, as well as spare parts. Drawings with an exploded view of parts or spare parts information can also be viewed at the address:
The Bosch team of employees providing consultations on the use of the product will be happy to answer all your questions regarding our product and its accessories.
Please, in all requests and orders, be sure to indicate the 10-digit product number from the product nameplate.
For countries: Russia, Belarus, Kazakhstan, Ukraine
Warranty maintenance and repair of power tools, in compliance with the requirements and norms of the manufacturer and manufacturer, are carried out on the territory of all countries only in authorized service centers (Robert Bosch). WARNING! Use of counterfeit products, which is not intended for operation, may cause harm to your health. The production and distribution of counterfeit products is prosecuted by law in administrative and criminal proceedings.
Russia
Authorized by the manufacturer organization: LLC "Robert Bosch" Vavutinskoe highway, bld. 24 141400, Khimki, Moscow region.
Tel.: +78001008007
E-Mail: info.powertools@ru.bosch.com
www.bosch-pt.ru
You can find the addresses of service centers at the link:
www.bosch-pt.com/serviceaddresses
In case of failure of the power tool within the warranty period due to the manufacturer's fault, the owner has the right to free warranty repair under the following conditions:
No mechanical damage; no signs of violation of the requirements of the operating instructions; presence in the operating instructions of a mark from the seller about the sale and the buyer's signature; compliance of the serial number of the power tool with the serial number in the warranty card; no traces of unauthorized repair.
The warranty does not apply to: - any malfunctions caused by force majeure; normal wear of the power tool, as well as all electrical.
The warranty does not cover repair, the need for which arises due to normal wear, reducing
the service life of such parts of the tool as contact brushes, wires, etc.
- natural wear (complete exhaustion of resource); - equipment and parts that fail as a result of incorrect installation, unqualified repair, incorrect use, violation of operating and storage rules; - malfunctions that occur as a result of overload of the power tool. (Unconditional signs of overload of the tool include: increased sparking, deformation or melting of parts and assemblies of the power tool, darkening or melting of the insulation of the motor wires under the influence of high temperature.)
Transportation
The recommended lithium-ion batteries are subject to the requirements for the transportation of dangerous goods. Batteries can be transported by the user by road without the need to comply with additional regulations.
When transporting by third parties (e.g., by air freight or forwarding agent), special requirements for packaging and labeling must be observed. In this case, when preparing the shipment, the involvement of a dangerous goods expert is required.
Send the battery only if the housing is undamaged. Tape or cover the open contacts of the battery so that it cannot move inside the packaging. Please also observe possibly additional national regulations.
Disposal

3. Never dispose of power tools and batteries with household waste. They must be taken to an ecological collection point for recycling.
Do not throw power tools and batteries into household trash!
Batteries:
Lithium-ion:
Read and follow the instructions in the Transport section (see "Transport", page 141).
Ukrainian
Safety Warnings
General Power Tool Safety Warnings
WARNING
Read all safety warnings, instructions, illustrations, and specifications provided with this power tool before using it. Failure to follow all instructions listed below may result in electric shock, fire, and/or serious injury.
Save all warnings and instructions for future reference.
The term "power tool" in the warnings refers to your mains-operated (corded) power tool or battery-operated (cordless) power tool.
Work area safety
Keep your work area clean and well lit. Cluttered or dark areas invite accidents. Do not operate power tools in explosive atmospheres, such as in the presence of flammable liquids, gases, or dust. Power tools create sparks which may ignite the dust or fumes. Keep children and bystanders away while operating a power tool. Distractions can cause you to lose control of the tool.
Keep your work area clean and well lit. Cluttered or dark areas can lead to accidents. Do not operate power tools in explosive atmospheres, such as in the presence of flammable liquids, gases, or dust. Power tools can create sparks, which may ignite the dust or fumes. While working with power tools, do not allow children or other people near the work area, as you may lose control of the power tool if you are not focused on the task.
Electrical safety
The power tool plug must match the outlet. Never modify the plug in any way. Do not use any adapter plugs with earthed (grounded) power tools. Unmodified plugs and matching outlets will reduce risk of electric shock. Avoid body contact with earthed or grounded surfaces, such as pipes, radiators, ranges and refrigerators. There is an increased risk of electric shock if your body is earthed or grounded.
Do not expose power tools to rain or wet conditions. Water entering a power tool will increase the risk of electric shock. Do not abuse the cord. Never use the cord for carrying, pulling or unplugging the power tool. Keep cord away from heat, oil, sharp edges or moving parts. Damaged or entangled cords increase the risk of electric shock. When operating a power tool outdoors, use an extension cord suitable for outdoor use. Use of a cord suitable for outdoor use reduces the risk of electric shock. If operating a power tool in a damp location is unavoidable, use a residual current device (RCD) protected supply. Use of an RCD reduces the risk of electric shock.
Personal safety
Stay alert, watch what you are doing and use common sense when operating a power tool. Do not use a power tool while you are tired or under the influence of drugs, alcohol or medication. A moment of inattention while operating power tools may result in serious personal injury. Use personal protective equipment. Always wear eye protection. Protective equipment such as dust mask, non-skid safety shoes, hard hat or hearing protection used for appropriate conditions will reduce personal injuries. Prevent unintentional starting. Ensure the switch is in the off-position before connecting to power source and/or battery pack, picking up or carrying the tool. Carrying power tools with your finger on the switch or energising power tools that have the switch on invites accidents. Remove any adjusting key or wrench before turning the power tool on. A wrench or a key left attached to a rotating part of the power tool may result in personal injury. Do not overreach. Keep proper footing and balance at all times. This enables better control of the power tool in unexpected situations. Dress properly. Do not wear loose clothing or jewellery. Keep your hair, clothing and gloves away from moving parts. Loose clothes, jewellery or long hair can be caught in moving parts.
If devices are provided for the connection of dust extraction and collection facilities, ensure these are connected and properly used. Use of dust collection can reduce dust-related hazards.
Always use the power tool with the correct battery pack or charger, and make sure they are properly maintained and used correctly. Using the wrong battery pack or charger can create a risk of fire. Good knowledge of power tools, gained through frequent use, should not lead to complacency and ignoring the safety principles. Careless handling can result in serious injury.
Proper handling and use of power tools
Do not overload the power tool. Use the power tool that is specifically designed for the work you are doing. With the correct power tool, you will get better results with less risk, working within the intended power range. Do not use the power tool with a damaged switch. A power tool that cannot be switched on or off is dangerous and must be repaired. Before adjusting anything on the power tool, unplug the tool from the socket and/or remove the battery pack. These preventive safety measures reduce the risk of accidental starting. Store power tools that you are not using away from children. Do not allow people who do not know how to use the power tool or who have not read these instructions to use it. Using power tools by untrained people can be dangerous. Take good care of the power tool and its accessories. Check that moving parts are properly aligned and not jammed, and that there are no broken parts or any other condition that could affect the operation of the power tool. Damaged power tools must be repaired before using them again. Many accidents are caused by poorly maintained power tools. Keep cutting tools sharp and clean. Properly maintained cutting tools with sharp edges are less likely to jam and are easier to control. Use the power tool and its accessories according to these instructions, taking into account the working conditions and the work to be performed. Using the power tool for operations for which it is not
intended could result in hazardous situations.
Keep handles and gripping surfaces dry, clean, and free from oil or grease. Slippery handles and gripping surfaces do not allow for safe handling and control of the power tool in unexpected situations.
Proper handling and use of power tools with rechargeable battery packs
Charge the battery packs only in the chargers recommended by the manufacturer. Use of a charger with a battery pack that it was not designed for may result in damage. Use only recommended battery packs with your power tool. Use of other battery packs may result in injury and damage. Do not store the battery pack in places with paper clips, coins, keys, nails, screws, or other small metal objects that can bridge the contacts. Shorting the battery terminals together may cause burns or a fire. If the battery pack is used improperly, liquid may be ejected from the battery; avoid contact with this liquid. If contact accidentally occurs, flush with water. If liquid contacts eyes, additionally seek medical help. Liquid ejected from the battery may cause irritation or burns. Do not use damaged or modified battery packs or power tools. Damaged or modified batteries may behave unpredictably, leading to fire, explosion, or risk of injury. Do not expose a battery pack or power tool to fire or excessive temperatures. Exposure to fire or temperature above 130°C may cause explosion. Follow all charging instructions and do not charge the battery pack or power tool outside the temperature range specified in the instructions. Charging improperly or at temperatures outside the specified range may damage the battery and increase the risk of fire.
Service
Have your power tool serviced by a qualified repair person using only identical replacement parts. This will ensure that the safety of the power tool is maintained.
Never service damaged battery packs.
Service of battery packs should only be performed by the manufacturer or authorized service providers.
Safety instructions for hedge trimmers
The tool can replace the protective electrical wiring, hold the tool by the insulated surfaces. Replacing the tool's wiring, which is under voltage, can lead to electric shock of the metal parts of the power tool and electric shock. Secure the workpiece on a stable base with the help of clamps or in another convenient way. Holding the workpiece by hand or pressing it against yourself does not ensure stable holding, and it can slip out of control. Do not put your hands in the cutting zone. Do not reach under the workpiece. Contact with the saw blade can cause injury. Use the power tool only with the workpiece inserted. When starting the power tool, there is a danger of kickback. Make sure that the support plate is always firmly attached to the base. When the blade tilts, it can move or cause kickback of the tool. After finishing the work operation, turn off the power tool; pull the saw blade out of the cut only after it has stopped. This way you can safely put down the power tool. Before putting down the power tool, wait until it has completely stopped. A running tool can get caught on something, leading to loss of control over the power tool. Use only undamaged, defect-free saw blades. Bent or dull saw blades can move, negatively affect the quality of the cut, or cause kickback. Do not press the saw blade sideways during operation. This can damage the saw blade, move it, or cause kickback. Use the power tool only with the support plate. If you work without the support plate, there is a risk that you cannot control the power tool. For work in walls, pipes, or electrical wiring, use appropriate detectors or contact the local electricity, gas, and water supply company. Damaged electrical wiring can cause electric shock. Damaged gas
pipes can cause explosion. Damaged water pipes can cause material damage.
In case of damage or improper use of the battery, vapor may escape. The battery may catch fire or explode. Ventilate the area and seek medical help if you feel unwell. Vapor may irritate the respiratory tract. Do not open the battery. There is a risk of short circuit. Protect the battery from contact with conductive objects, e.g., keys, coins, or metal parts of the tool. Possible short circuit, fire, formation of smoke, explosion, or overheating of the battery. Use the battery only in the manufacturer's products. Only under such conditions is the battery protected from dangerous overload.


Protect the battery from heat, e.g., from intense sunlight, fire, dirt, water, and moisture. There is a risk of explosion and short circuit.
CUTTING WOOD CHIPBOARD WITH THE SAW BLADE TIPS:
aB=4.5 M/s², K=1.5 M/s², based on the vibration emission value of the power tool T118A:
a _ h, M = 4.5 M / s ^ 2, K = 1.5 M / s ^ 2.
The specified vibration emission values in these instructions were measured according to the standard procedures; they can be used for comparison with other tools. They are also suitable for a preliminary assessment of the vibration exposure.
The specified vibration emission value applies to the main uses of the power tool. However, if the power tool is used for other applications, with different accessories or poorly maintained, the vibration emission value may differ. This may significantly increase the vibration exposure over the total working period.
For an accurate assessment of the vibration exposure, it is also necessary to take into account the periods of time when the tool is switched off or, although switched on, is actually not working. This can significantly reduce the total vibration exposure over the working period.
Identify additional safety measures to protect the operator from the effects of vibration, such as: maintaining the power tool and accessories, keeping hands warm, and organizing work processes.
ASSEMBLY
Before any manipulation with the power tool (e.g., maintenance, changing the tool, etc.), as well as during its transport and storage, remove the battery pack from the power tool. There is a risk of injury if the switch is accidentally pressed.
Charging the battery pack (see figure)
Use only the charger specified in the technical data. The charger is designed for the lithium-ion battery pack supplied with your tool.
Note: The battery pack is supplied partially charged. To ensure full battery capacity, fully charge the battery pack in the charger before first use.
The lithium-ion battery pack can be charged at any time without reducing its service life. Interrupting the charging process does not damage the battery pack.
The lithium-ion battery pack is protected against deep discharge by the "Electronic Cell Protection (ECP)". When the battery pack is discharged, the tool switches off by means of the protective circuit. The inserted tool no longer rotates.
Do not continue to press the switch after the power tool has switched off automatically. This can damage the battery pack.
Remove the battery pack from the power tool before any work on the power tool (e.g., maintenance, changing the tool, etc.). This also applies when the power tool is not in use.
Remove the battery (1), press the battery release button (2) and pull the battery out of the power tool, having pressed the button. Do not use in wet conditions.
Battery charge indicator
The three LEDs of the battery charge indicator (1) show the charge level of the battery. The charge indicator lights up for a few seconds after switching on.
Lighting
3 LEDs lit: ≥2/3
2 LEDs lit: ≥1/3
1 LED lit: <1/3
1 LED flashing: reserve
After switching off, the LEDs go out. If the battery is defective, replace it.
After switching off, the LEDs go out. If the battery is defective, replace it.
Mounting/replacing the saw blade
Mounting or replacing the saw blade must be done with protective gloves. The blade is sharp and may heat up during prolonged use.
Selecting the saw blade
You will find recommended saw blades at the end of these instructions. Use only saw blades of the single-hook type (with tail hook).
The saw blade must not be longer than necessary for the planned cut. For curved cuts, use a narrow saw blade.
Mounting the blade (see Fig. B)
Slide the blade tail into the slot before tightening. A loose blade tail cannot be closed properly.
Install the blade (13) with the teeth facing the cutting direction so that it fits into the recess in the blade slot (11). The SDS lever (20) automatically snaps back and locks the blade. Do not press the lever (20) by hand; you can also use a power tool.
After installing the blade, check that the blade back fits well in the groove of the guide roller (10).
Check the blade seat tightness. A blade that is not locked can fall out and cause injury.
Removing the blade (see Fig. C)
Removing the blade should be done with the power tool unplugged to avoid injury or damage.
Turn the SDS lever (20) to the stop in the direction of the anti-kickback protection (21). The blade is released and can be removed.
Support shoe (see Fig. D)
If the surface is uneven and easily damaged, you can place the support shoe (17) on the support plate (9), ensuring proper surface contact.
To attach the support shoe (17), hook it from the front onto the support plate (9) and press the rear part down until it clicks into place.
Anti-splinter guard (see Fig. E)
The anti-splinter guard (18) (accessory) prevents the wood surface from splintering during cutting. The anti-splinter guard can also be used for other types of blades and for cutting at 0°.
Slide the anti-splinter guard (18) from the front onto the support plate (9).
When using the support shoe (17), the anti-splinter guard (18) is inserted not into the support plate (9), but into the support shoe.
Such materials, e.g. ship coatings, containing lead, certain types of wood, minerals and metals, may be hazardous to health. Touching or inhaling them may cause you or persons coming into contact with them allergic reactions and/or respiratory diseases.
Wood dust, e.g. oak or beech dust, is considered carcinogenic, especially in combination with additives for wood treatment (chromates, wood preservatives). Materials containing asbestos may only be worked on by specialists.
- Thoroughly vacuum the material before sanding. - Work with good ventilation. - It is recommended to wear a respirator mask with P2 filter.
Follow the regulations for the disposal of treated materials in your country.
The dust extraction nozzle may clog. It can easily become blocked.
Cover
Mount the cover (15), before connecting the power tool to the dust extraction system.
Place the cover (15) on the power tool so that the locking mechanism against accidental contact (21) engages.
To remove the dust extraction nozzle, press the cover (15). To do this, press the cover, pulling it forward against the locking mechanism (21).
Connecting the dust extraction system (see Fig. F-G)
Insert the extraction adapter (16) into the opening in the base plate (9).
Place the dust extraction hose (22) (accessory) onto the extraction adapter (16). Connect the dust extraction hose (22) to a vacuum cleaner (accessory).
The list of possible vacuum cleaners is provided in these instructions.
For optimal dust extraction, mount the protective guard against material ejection (18) if possible.
The operator must be trained to work with the processed material.
For operating the device with a laser, gas, or dry air, special training is required.
Operation
Operating modes
The device is designed for operation with power tools (e.g., technical maintenance, replacement of working tools), as well as during its transportation and storage, keep the battery away from power tools. If the device is switched on unintentionally, there is a risk of injury.
Adjusting the pendulum strokes
The pendulum, pre-adjusted, allows you to adjust the cutting speed, power, and pattern according to the material being processed.
Using the wrench (8), adjust the pendulum strokes to the required power tool.
Pendulum strokes
Strokes with small pendulum
strokes
Stroke II with large pendulum
strokes
The optimal pendulum stroke level can be determined through practical testing. When doing so, consider the following tips:
- For smooth and clean cuts, the cutting edge must be sharp; for higher stroke levels, set the pendulum strokes or turn them off altogether. - For thin materials (e.g., sheet metal), turn off the pendulum strokes. - Process hard materials (e.g., steel) with small pendulum strokes. - In soft materials and when cutting wood, you can work with maximum pendulum strokes.
BctahOBneHHKytA Haxnny (DHB. Man. H)
Onophy nHTy (9)IINnHnHnIiHaxnOM MoXHa HaxnTNI Kytom do 45° npabOpuy aO libopyu.
Pnpo3nnIOBaHHi nHaxnOM BHTJXHHn NaIpy6ok (16) i 3axnCT BiD BnPbAHbHa MaTepiany (18) He MoKHa BHKOPNCTOByBaTH.
-3HIMITB BNTAHHn NaTpy6ok (16) i 3axnct BiD BnPbHaHHa MaTepiany (18). -Пи КуTi CkOcу O"uHnIHdpNHyN XBOCTOBK 3HaxOДТбСуВiДNoBiDHomY OTbopi. -BiDnCyTb TBHNT (23) KIOUcEM 3 BHyTpIuHIM WecTHrpaHHKOM (24) HAcTIbKN, Uo6 MoXHa 6yNo 3CyBaTH ONOPHY IINHTy (9) B HAnpRMyakymyTAToPA1. PpOnyCTb ZnIHINDPNHN XBOCTOBNK B HAnpMHN na3. -Ⅲo6 BCTaHOBHTN Kyt CKOY, HaxnHtB onOpHy PINTy (9) BiINObIJDHO Do IkaHN (25) B Heo6xIDHe NIOXKeHH. KopHcyUOncB KytOMipOM, KOxHn Kyt MOxHa BCTaHOBbATn Do 45° -3HOBYMiUHO3aTARHITbTBHT(23).
Noataokpo60tn
BctahOBnEnHnAkyMnyTOpHo6batae
Bka3iBka: BkOpnCTaHH aKymyIaTOpHx 6aTape, 10 He e np3HaueHMM nla yboro eKeTPOIHCTpyMeHTa, Moxe np3BeCTn do nepe6oIB y pObot i abo noKoJKeHHeKeTPOIHCTpyMeHTa.
YcTpOMITb3apAdkhenyakymnIaTOph6bataeIO(1)y KpiINHnDnAkymNlAToPHO6bataeI TAK,0o6BOHa BIDuyTHO yBIIwla y3aenneHHnHaHaiHIO 3aqiKcyBaJacb.
BMKaHHn iicBcITIOHbIbOro CBtIOJIOa
U6 yBIMKHyTH a60 BmKHyTH nICBtIOBAJIbHn CBITNOiO1 (14), HATNCHTb KHONKY nICBtIOBAJIbHO CBITNOiOa (3).
He nBtbc npMo B nicCBtHOBaIbHH CBtIOIO, Horo cBtNo MoKe 3acInnH Bac.
BMnKaHHBmKHaHH
BneBHITbcra, 0o Bn moKeTe npHBeCTu y iio BmHKau, He BiDnycKaOu pyKoRTKn.
Uo6 yBIMKHyTN enEKNPOHCTPymENT, NOCYbTe
BIMNKa(7)ynepe,o6cTANO BnHO CnMBON
To turn on the power tool, press the switch (7) and hold it. The symbol «O» will appear.
Lock-on button
The lock-on button locks the power tool in the on position, preventing accidental activation. When the lock-on button is engaged, the temperature control / overload protection indicator (6) will light up continuously.
To turn off the power tool, release the switch (7) and then turn off the power tool.
Note: If the lock-on button is engaged and the power tool is turned off, the lock-on function will not work, and the power tool will not operate even when the switch (7) is pressed. Turn off the switch (7) and then turn on the power tool again.
Presetting the stroke rate
Using the stroke rate setting knob (5), you can preset the stroke rate and adjust it during operation.
The required stroke rate depends on the material being processed; it can be determined through practical trials.
It is recommended to reduce the stroke rate when sawing plastic and aluminum.
When working with low stroke rates, the power tool may heat up significantly. The saw blade and the power tool may be damaged. Therefore, use the maximum stroke rate.
Overload protection
When using the power tool for its intended purpose, overload should not occur. In case of overload or exceeding the permissible battery temperature limits, the speed will be reduced or the power tool will turn off. If the speed has been reduced, the power tool will operate again at full speed only after the battery temperature has reached the permissible value or the overload has been eliminated. If the power tool turns off automatically, turn off the power tool, wait until the battery cools down, and then turn it on again.
Temperature control / overload protection indicator
The red temperature control / overload protection indicator (6) helps protect the battery from overheating, and the blue one from overload.
The temperature control / overload protection indicator (6) lights up continuously
When the battery temperature is too high, the power tool switches off automatically.
Switch the power tool off, let the battery cool down, then continue working.
The temperature control/protection indicator lights up during overload (6).
If the tool is overloaded, it switches off automatically.
Switch the power tool on for preparation. Only when it is switched on will the power tool operate at the set speed.
Working instructions
Before any work on the power tool (e.g., maintenance, changing the tool, etc.), as well as when transporting and storing it, remove the battery from the power tool. There is a risk of injury if the switch is accidentally actuated. Immediately switch off the power tool if the insert tool jams. Be prepared for high reaction torque causing kickback. When working on small or thin workpieces, use a stable support.
Before sawing wood, wood-based panels, building materials, etc., check for any foreign objects such as nails, screws, etc., and remove them as necessary.
Plunge cutting (see figure 1)
Plunge cutting may only be applied to soft materials, e.g., wood, plasterboard, etc.
For plunge cutting, use only short saw blades. The plunge cut can only be made at an angle of 0°.
Place the power tool with the front edge of the base plate (9) on the workpiece, without the saw blade (13) touching the workpiece, and switch it on. If the power tool has a speed adjuster, set the maximum speed. Press the power tool against the workpiece and slowly plunge the saw blade into the workpiece.
As soon as the base plate (9) rests fully on the workpiece, continue sawing along the desired cutting line.
Parallel guide with circle cutter (accessory)
For the parallel guide with circle cutter (27) (accessory), the workpiece thickness must not exceed 30 mm.
Adjusting the spread (see Fig. J): Loosen the locking screw (26) and insert the adjusting screw of the stop in the direction (12) of the support plate. Set the scale of the internal stop of the support plate to the required spread width. Tighten the locking screw (26).
Circular spreading (see Fig. K): Drill a hole in the center of the circle to be spread, so that the hole is sufficient for inserting the blade. Process the hole with a reamer or file so that the blade fits evenly to the spread line.
Locking screw (26) and adjusting stop. Insert the adjusting stop in the direction (12) of the support plate. Check the hole in the workpiece in the center of the cut, if necessary, drill it. Insert the centering pin (28) into the internal hole of the adjusting stop and drill the hole. Set the scale with the radius on the internal stop of the support plate. Tighten the locking screw (26).
Cooling/Lubricant
To avoid heating of the material during spreading of metals, use a cooling/lubricant.
Instructions for additional handling of the battery
Protect the battery from moisture and water.
Store the battery only at temperatures from -20°C to 50°C, in particular, do not leave the battery in the car.
Clean the ventilation slots of the battery regularly with a soft, dry brush.
Short operating time after charging indicates that the battery is worn out and needs to be replaced.
Follow the instructions for use.
Technical service
Technical service
Before all manipulations with the power tool (e.g., technical service, replacement of working tools), as well as during its transport and storage, remove the battery from the power tool. In case of unintentional switching on, there is a risk of injury. For proper and safe operation, keep the power tool and ventilation slots clean.
Regularly clean the blade. For this, remove the blade.
Electric power tools must be connected to a power supply with a voltage corresponding to the rating plate.
Strong electromagnetic interference can cause malfunctions. Therefore, do not place materials that are susceptible to interference on or near the tool.
If the tool is blocked, switch off the electric power tool, remove the battery, and then release the tool.
Periodically check the direction of rotation (10) on the selector switch.
Regularly check the direction of rotation (10). If it is faulty, it must be repaired by an authorized service center for electric power tools.
Service and consultation on usage
In the service center, you will receive a competent answer to your questions regarding repair and technical maintenance of your product. You can find detailed information about spare parts at: www.bosch-pt.com The Bosch team of specialists will provide consultation on the use of products and will be happy to answer your questions regarding the product and its accessories.
For all questions and orders for spare parts, please specify the 10-digit order number that is on the rating plate of the product. Warranty service and repair of electric power tools are carried out only at the manufacturer's or authorized service centers of Robert Bosch. WARNING! The use of counterfeit products is unsafe and can have negative health consequences. The distribution of counterfeit products is prohibited by law and is subject to criminal prosecution.
Ukraine
Bosch Service Center for Power Tools, vul. Krainya 1, 02660 Kyiv
Tel.: +380 44 490 2407
Fax: +380 44 512 0591
E-Mail: pt-service@ua.bosch.com
www.bosch-professional.com/ua/uk
The addresses of regional warranty service centers are listed in the warranty card.
Adepcn iHmHc cepBicHx uehtpIB HabeHeHO HnKue:
www.bosch-pt.com/serviceaddresses
TpaHcnopryBaHHa
Ha pekomeHIOBaHI niiEBO-ioHHI akymyTOpHi 6batapei pO3NOBcIOJkyTOBcBIMOMn IIOo TpaHCnOpTyBaHH He6e3neuHX BaHTaxiB. AkymyTOpHi 6batapei MoKyTB pepeBO3HTNC KOpNC TyBaueM aBTOMobInbHM TpaHCnOpTOM 6e3 Notpe6n DToPMaHH DoDAtKOBHX HopM. Ppi nepcinzi Tpetimm Oocabnn (Hap..: NobitprHMM TpaHCnOpTOM aO bTaPCnOpTHMM EKcneHITOPOM) notpi6Ho
doepjyBaTHcO6bHnBx BmOr yOyNAKOBN Ta MapkyBaHH. YCbomy BnAky y NiIroTOBui NocNIK NOHNHe 6patN yAcTb EKcnept 3 Hebe3neuHX BaHTaXiB. BiCnAte AkyMnTOpHy 6atapeo IInwe 3 HenoIKoJKeHm Kopnycom. 3akNeTe BIDKPIT KOHTAKTN Ta 3anakyte AkyMnTOpHy 6atapeio TAK, 0o6 BOHa He COBAnacByynakobci. DToPmMyTeca, 6ybNaCKa, taKox MOKNHX DoaTKOBHX HaioHbHN npinnCIB.
Ytunisaia

Enektpponpna,akymnyTophi6atapei npnana i ynakobky tpe63daBnHa ekonoriuho uCTy nobTophy nepeop6ky.
He BHKnDaTe eNeKTponpnaT akyMnyTopHi 6aTapei/6aTapeKn B No6yToBe CMITTA!
Jinwe dnn KpaH EC:
BIDNOBiDHO Do CBPoneCbKOI DnpeKTHBN 2012/19/EU OIO BIXOXIDENEKTPNHORo Ta eNEKTPONHORo ObnadHaHH TA II NepETBOPEHNNB HauioHANBE 3aKOHODABCTBO eNEKTPoinCTpyMeHTN, Aki BINbSe He npndaTHi DO BHKOPNCtAHHH, a TAKOK BiNDOBiHO Do CBPoneCbKOI DnpeKTHBN 2006/66/EC HecnpaBHn a6o BiNpaBoBaHI akymyIaTOpHI bataei/bataeKn NobHHI 3daBatncn OKpemoiYtNi3yBatncra EKONOrIHy QNCTHM CNOcOBom. PiHnEPaBnblHn ytnl3auiB iBDnPcaBoHAI eNEKTPuHi Ta eNEKTPOHNI pniadm MoKyTB MaTH uKiDiINBn BnHB Ha HAVKOIIWHe CEpeOBoHNe Ta 3dOpOB' IIOHNH Yepe3 MOXJIBy HAIBVICTb He6e3neuHX peOBHH.
AkymynTOpN/6aTapeeKn:
NITIEBO-IOHHI:
Bynbnacka,3BaKaJteHaBkaaibKnBpozdiNipTaHcnpTyBaHHA(INB.,TpaHcnpTyBaHHA",CTopihka149).
Ka3ak
Eypa3n8 3KOHOMkAnbIK OdaftbHa (KeDen OdaftbHa) Mywe MemLeKeTTep ayMaftbHda
The manufacturer's instructions for use, maintenance, and repair of the device are given in the operating manual. The device is designed for use in various fields. The device is manufactured in accordance with the technical specifications of the manufacturer.
150|Kazakh
The manufacturer's warranty obligations are given in the warranty card. The warranty period for the device is indicated in the warranty card.
Warranty period
The warranty period is calculated from the date of sale (date of transfer to the consumer) of the device, provided that the consumer complies with the rules of operation, transportation, and storage specified in the operating manual. The warranty period is indicated in the warranty card.
Operating conditions
If the device is operated in conditions of high humidity, dust, or aggressive environments, it is necessary to use protective covers or place the device in a protective housing.
Operating conditions
If the device is operated in conditions of high humidity, dust, or aggressive environments, it is necessary to use protective covers or place the device in a protective housing.
Safety instructions
- Do not operate the device with damaged housing or damaged power cord.
Type and frequency of maintenance
- Maintenance of the device should be carried out in accordance with the instructions.
Storage
When operating the device, it is necessary to observe the temperature conditions of the environment. It is necessary to protect the device from sudden temperature changes. Operation without protection is not possible. For operating conditions, refer to GOST 15150-69 (version 1). The device can be operated at ambient temperatures from +5°C to +40°C. The relative humidity should not exceed 80%.
Storage
When storing the device, it is necessary to ensure the absence of mechanical impacts on the device. It is not allowed to place heavy objects on the device packaging. For storage conditions, refer to GOST 15150-69 (version 5). The device can be stored at ambient temperatures from -50°C to +50°C. The relative humidity should not exceed 100%.
Safety Instructions
Safety instructions for electrical devices
WARNING
Read the safety instructions for this electrical device carefully.
Failure to follow the safety instructions, warnings, and diagrams may result in electric shock, fire, and/or serious injury.
Keep all safety instructions and warnings for future reference.
The safety instructions apply to electrical devices powered from the mains (with a cable) and electrical devices powered by batteries (without a cable).
Workplace Safety
Keep the workplace clean and well-lit. Cluttered or dark areas can lead to accidents. Do not operate electrical devices in explosive atmospheres, such as in the presence of flammable liquids, gases, or dust. Electrical devices create sparks that can ignite dust or fumes. Keep children and bystanders away while operating the electrical device. Distractions can cause you to lose control. In industrial applications, electrical devices are intended for use by qualified personnel in accordance with applicable regulations.
Electrical Safety
The plug of the electrical device must match the outlet. Do not modify the plug in any way. Do not use any adapter plugs with grounded (earthed) electrical devices. Unmodified plugs and matching outlets will reduce the risk of electric shock. Avoid body contact with grounded surfaces such as pipes, radiators, ranges, and refrigerators. There is an increased risk of electric shock if your body is grounded. Do not expose electrical devices to rain or wet conditions. Water entering an electrical device will increase the risk of electric shock. Do not abuse the cord. Never use the cord for carrying, pulling, or unplugging the electrical device. Keep the cord away from heat, oil, sharp edges, or moving parts. Damaged or entangled cords increase the risk of electric shock. When operating an electrical device outdoors, use an extension cord suitable for outdoor use. Use of a cord suitable for outdoor use reduces the risk of electric shock.
If operating the electrical device in a damp location is unavoidable, use a residual current device (RCD) protected supply. Use of an RCD reduces the risk of electric shock.
Electrical safety: Before connecting the device, it is necessary to check the protective grounding (RCD) and the integrity of the electrical circuit. The RCD must be checked for current leakage.
Safety precautions
Electrical safety: Do not touch the device with wet hands, do not use it in damp or wet conditions. Do not use the device near flammable liquids, alcohol, or steam. It is possible to get an electric shock if the device is used improperly. Do not touch the protective contacts. Wear protective gloves when working. Use only dry, clean cloths or protective covers to clean the device. Do not use aggressive cleaning agents. Before cleaning, unplug the device. If the device is used in a bathroom or near water, ensure that the power cord and plug are dry. Do not immerse the device in water or any other liquid. Do not use the device if the power cord or plug is damaged. Do not attempt to repair the device yourself. Contact a qualified technician. Keep the device away from heat sources. Do not cover the device while it is in use. Do not use the device with wet hands or bare feet. Do not touch the device with wet hands or bare feet. If the device falls into water, unplug it immediately and do not reach for it. Do not use the device if it has been dropped or damaged. Keep the device out of reach of children. Do not let children play with the device. Do not use the device near bathtubs, showers, or swimming pools. If the device is used in a bathroom, unplug it after use. Warning: To avoid electric shock, do not use the device near water. If the device falls into water, unplug it immediately and do not reach for it. (Translation)
KannbHa KeNtiPiH3. Keninik awaHbI po3eTkaHbWbIFapbHb13 HeMece anbIn - canMaBbAkkymyTAOpdbI axbipaTbHbI3. OcbI apeket apkbbl6aKnah6aTbH KaTia icke KocbNydbH anDbH aIacbI3.
AtaMbIu naIauany XeHInderI HcyckaybIKKa cainkec 6iniKt Kbi3MeTKeepnep KypamBHa 3neKTP KypaBlnpeTey, MOHTaXday, KOJaHbICKa eHI3y XeH OFaH Kb3Met KOpCteTy apeKeTepimeh TaHbIC TyfNafap KaTaDbI. 3NeKtp KypaBImen HxMblc icTeyre 18 Xacka tonfah, TexHnKaIbIK CnAITamaHbI, naDanaHy XehHideri HycKaynbkTbXHe Kayincdik epexenepiH Okbin WbIKKaH TylFaNapF pyKcat etinedi. He, ceim HeMece akbn-ou kabineTepi uekteyni Hemece Taxipnbeci meh 6lini keTKinikci aamap onapdbn Kayincizir yuiH kayantbTynfahBn 6aKbnahybHa 6oImaca Hemece 3neKtp KypanbH naDanaHy 6oBbHha Hyckay anMaFaH 6oNca, 6yblmbn naDanaHbaytnc.
3neKtp Kypanapabn naindanaHy khe KyTy
The crane is designed for lifting loads. The load hook must be lowered to the ground before using the electric crane. Do not use the crane without the necessary load. If the electric crane is not used for a long time, it should be checked. When repairing cables, replacing belts, or connecting the electric crane to the power supply, be careful to avoid electric shock. If the battery is low or disconnected, remove it from the electric crane. This action will prevent the electric crane from starting unexpectedly. The electric crane should be used only by trained and qualified personnel. Do not use the crane if the load exceeds the rated capacity. The crane should not be used for lifting people. The electric crane must be properly grounded. Do not use the crane if the ground wire is damaged or missing. The electric crane should be inspected regularly. Keep the crane away from children and unauthorized persons. Do not use the crane if the power cord is damaged. The electric crane should be stored in a dry and clean place. Do not use the crane in explosive or flammable atmospheres. Follow all safety instructions. Electric
cranes should not be used in explosive atmospheres.
Keep the control buttons and the hook clean, dry, and free of oil and grease. Do not use the control buttons and the hook if they are damaged.
Battery crane operation and use
If the battery is used with a charger, it must be connected to the battery terminals correctly. When connecting the battery to the charger, observe the polarity. If the battery is connected incorrectly, it may cause a short circuit. If the battery is not connected properly, it may cause a fire, explosion, or other hazards. Do not connect the battery terminals with metal objects or tools. Do not use the battery if it is damaged or leaking. If the battery leaks, avoid contact with the liquid. If the battery is damaged or leaking, do not use it. Do not expose the battery to high temperatures or direct sunlight. The battery can be used at temperatures up to 130°C. Follow all safety instructions when using the battery. Do not charge the battery at temperatures above the specified range.
Service
Only use the battery with the specified charger. Do not use the battery with other chargers. Do not use the battery if it is damaged. Only use the battery for its intended purpose or as described in the manual.
Safety instructions for use
Before using the device, read the safety instructions carefully. If the device
If the device is used improperly, it may cause electric shock or fire.
Before using the device, read the safety instructions carefully. The device can be used for cutting various materials. Follow the safety rules. The device is designed for cutting. Do not use it for other purposes. The electric cable must be connected to the mains. If the electric cable is damaged, it must be replaced by a qualified specialist. When working, follow the safety rules strictly. The cut material can be removed or turned over. Do not touch the electric cable with wet hands, and do not pull it out of the socket. When working with the device, hold it firmly. The electric cable must be kept away from sharp edges. Do not use the device if it is damaged. The cut material must be secured. The cut material can be removed, turned, or turned over. Do not stop the device by pressing the material. The material may be damaged, removed, or turned over. Use the device only with the specified voltage. Without the specified voltage, the device may be damaged. Use only original spare parts and accessories recommended by the manufacturer. Do not use the device with a damaged cable or plug. Do not use the device with a damaged housing. Do not use the device with a damaged battery. If the battery is damaged or worn out, it must be replaced. If the device is used in a damp environment, use a residual current device. This device can be used by children and persons with reduced physical, sensory or mental capabilities or lack of experience and knowledge if they have been given supervision or instruction concerning use of the appliance in a safe way and understand the hazards involved. Children shall not play with the appliance. Cleaning and user maintenance shall not be made by children without supervision.
Use this battery only with the specified charger. Do not use the battery with other chargers.
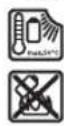
The battery must be protected from heat, fire, water, and moisture.
There is a risk of short circuit.
Electrical safety

Read all safety warnings and instructions. Failure to follow the warnings and instructions may result in electric shock, fire and/or serious injury.
Keep all warnings and instructions for future reference.
Work area safety
The electric tool is intended for cutting metal, plastic, and other materials. It is designed for cutting and trimming. Be careful with the material being cut.
Personal safety
The personal safety warnings and instructions are listed in the manual.
(1) Battery (2) Battery compartment (3) Charging indicator (4) Battery charge indicator (5) Belt clip for attaching to a belt (6) Temperature control / overheating indicator (7) Ventilation slots (8) Trigger lock (9) Trigger switch
(10) Release button (11) Front handle (12) Parallel guide (13) Front handle (14) Charger (15) Belt clip (16) Aspiration adapter (17) Dust bag (18) Base plate (19) Handle (insulated gripping surface) (20) SDS bit adapter
(21) Overload protection (22) Belt clip (23) Trigger switch lock (24) Depth stop (25) Brush wear indicator (26) Parallel guide lock (27) Adjustable parallel guide (28) Adjustable depth stop
a) Only use batteries specified in the manual. Using other batteries may cause damage.
Technical data
| Акку мелаторныхуka apa GST 12V-70 |
| Оним hemipi | 3601EA10.. |
| Номиналды керney V=12 | |
| Бос чурс саны n0A) | MHN-1 1500-2800 |
| Журіс MM 18 | |
| Мамс. Кесік тereпdiri | |
| -аразда мм 70 | |
| -аюмниде мм 3 | |
| -болату (kopытпалap) мм 3 | |
| Кесік bурьшы (con/он жak), Мамс. | 45 |
| Салмafы EPTA-Procedure 01:2014 kужатын саи | кг 1,7-1,9 |
| Заротay кezінderiУсынлaitын коршаган opta Temпepатypасы | °C 0 ... +35 |
| Жуmbіс КezінderiC)Же не сацтay кezінderi руkscat etin'reнКоршafан opta Temпepатypасы | °C -20 ... +50 |
| 丫сьнлaitын akку мелаторлар GBA 12V... | |
| 丫сьнлaitын зароташи | GAL 12... |
| Курьлaitap | GAX 18... |
A) At 20-25°C with a 10.8V 2.0Ah battery B) When the battery is fully charged C) At temperatures below 0°C
The tool is intended for the following use
Complies with EN62841-2-11 standards.
The vibration emission value is 5.75 m/s².
Wear ear protection. The noise level may exceed 80 dB(A).
The declared vibration values (hand-arm) and noise levels comply with EN62841-2-11:
154|Kazakh
Vibration emission value: a_h = 4.5 m/s², K = 1.5 m/s².
Vibration emission value: a_L,M = 4.5 m/s², K = 1.5 m/s².
The specified values are for the main applications and may vary depending on the actual use of the power tool. They should be used for comparison with other tools.
Before performing any work on the battery, disconnect it from the power supply. If the battery is used for any other purpose than intended, or if it is not used in accordance with the instructions, the battery may be damaged. This instruction is intended to prevent damage to the battery and to ensure its safe operation.
Before performing any work on the battery, it is necessary to check the battery and the connected devices for damage. This instruction is intended to ensure the safe operation of the battery and its components.
It is necessary to follow the safety rules when working with the battery, for example: do not short-circuit the battery terminals, do not expose the battery to moisture, do not deform the battery.
Charging
Batteries that are connected to the power supply (for example, for charging, maintenance, etc.) must be disconnected from the power supply before any work on the battery, and the battery must be disconnected from the power supply.
When connecting or disconnecting the battery, follow the instructions in the manual.
Battery charging (see figure)
We have provided the charging instructions in the technical manual. Only these charging instructions are suitable for your battery with the built-in electronic protection.
Note: The battery must be charged before use. To obtain the full capacity of the battery, it must be fully charged before first use.
The built-in electronic protection of the battery may be triggered if the battery is used incorrectly. The charging process is automatically terminated when the battery is fully charged.
The built-in electronic protection "Electronic Cell Protection (ECP)" protects the battery from overcharging. If the battery is overcharged, the protection circuit is activated: the battery is disconnected from the power supply.
The power supply must not be connected to the battery after the battery is fully charged. The battery can be disconnected from the power supply.
To remove the battery (1), press the release button (2) and remove the battery from the power supply. Do not use force.
Battery charge level indicator
The charge level indicator (4) shows the charge level of the battery (1) with three LEDs. The charge level indicator remains lit for 5 seconds after the battery is disconnected.
Reserve
Reserve capacity 3 hours
Empty
If the reserve capacity is not used, the battery may be damaged and must be replaced.
Battery maintenance
When replacing the battery, observe the polarity and do not reverse the connections.
Battery terminals should be kept clean and protected from short circuits.
Battery disposal
Dispose of the battery in accordance with local regulations. Do not dispose of it with household waste. The battery must be removed before disposal.
For short circuits, use battery protection devices.
Install the faucet (see fig. 3)
Place the faucet on the mounting surface. Tighten the mounting nut by hand.
Connect the water supply hoses (13) to the faucet's water inlet connections (11). Use the wrench (20) to tighten the connections. Turn on the water supply (20) and check for leaks.
The water supply hoses should be routed through the faucet's base opening (10) before installation.
The water supply hoses must be connected to the shut-off valves. Do not kink the hoses.
Connect the water supply (see fig. 3)
When connecting the water supply, ensure that the hot and cold water connections are correctly matched to the corresponding supply lines.
Use the wrench (20) to tighten the nuts (21) on the connections. The water supply hoses should be connected.
Install the drain (see fig. 4)
Before installing the drain, apply sealant (17) to the drain flange (9) and insert it into the sink opening.
Insert the drain (17) into the sink opening (9) and press down firmly.
Install the drain cover (see fig. 5)
The drain cover (18) (if applicable) should be placed over the drain opening and pressed down until it clicks into place. The drain cover must be installed at an angle of no more than 0° from the horizontal.
Insert the drain cover (18) into the drain flange (9) and press down.
When installing the drain cover (17), ensure that the drain cover (18) is properly seated in the drain flange (9).
UaHdbI JxHe XKoHkanaapDbI copy
KopraBH 60y, Keibip aafw copTtapbi, MHeepaIap Jxhe Metanlnap 6ap Keibip MATEpHAnIapDbIH Wahb DehcaBikKa 3nHdbI bonybMyMkH. UHaFa TIO XHE WAnDb JxTy naDanaHbIybda HEmec XaHbHdAfb aadmApda aneprnblbk peakunapblx HeHemce TBHbc KOnIabHbH aypyapbH Tybipyb MyMKIN. Keibip wan Typnepi, cicipce emeh xane WAMuAT aafBbHbH waHb, acipece, aafWbI eHey KaNbIKTapbIMe (xpomat, aafWbI kOpFay 3a) 6ipre kaHeporeHep 6oBIn ecentenei. Ac6ectik MatepHAn TE Kaha MaMaHdap apKbNb EHNenyi MyMKIN.
-MymkiHwiniirHwe Ocbi MaTePhaN yuH CaiKeC KeNetIH WauHCOPFbIHTb NaJDaNaHbHb3. JymbicOpHbHbHjXakcbjKeJeIeTinyHeK3KetK3iHa3. -P2 cy3ri cblhblnbdaflra3kafapdbi nndanaHycblbnaBl.
HneneTIN MATEPnAnDap yuH eniH3e KOnDaHbInaTBH YfapBIMnpDbI naHaNaHbIHbI3.
KymbocOpbHndaWahHbHxHHaMbayH KaadFaanaHbi. Haohai TyaHybMyMKIN.
Kantama
KanTama KaannarbiH (15) 3neKtp KypanbiH waHcopyFa Kocy anDbHaOpHaTbiHb3.
KanTamaHb1(15)ycTafbIuKaHacyaH KOpFaHbicka(21) kipeiHdE 3JNkTp KypalbHa OPhaTbHbI3.
KaTtAmaHbI (15) wAHCOPFbIcB3 kYMbIC ICTey XHe eHcTIK Kecik kacay yiwih anbIn TactaHbI. On yiwih KantTaMaHbI anFa Kaapan HAcyaDnKOpFaHbICTAH (21) TaTbIN anbHbI3.
WahcnpfbwnbXanFay(F-G cypeTrepinKapaHb3)
AcnpaunnKKeTKe Ky6bipdb1 (16) Tipey TaKTacblHbH (9) OyIFbHaOpHaTbHb3.
Wahcnpfbiw wnaHbH (22) (kepek-kaapak) KOHKanapdbacnpaunBik KeTKe Kybipra (16) KocbHb3. Copfbiw WnHaHbH (22) WaHcnpfbiwKa KocbHb3 (kepeK-kaPakTap).
OcbHyckaybIKTap akbpHnTa Typni WaHcopFbIHTapFa Kocy aicrepi KepcetirreH.
OnTMaJIbIshaHCopyYiHIMyMKiHdIrHHeJXapbNydaH CaKaTaNtBnPiNACTHaHbI(18)OpHaTbHbI3.
WHaHcOpFbIw EHNenetIH MaTePnAnFa CaiKec 60nybl KaKET. DeHCayNbIKKa 31RrH, O6bIP TyFbIaTbH HEmeCe Kypfak WHaHap YWiH apHaBb I WaHcOpFbIwTb NaJdaNaHbHb3.
Intended use
Intended use
The device is intended to be used with accessories (nozzles, attachments, service tools, etc.) in accordance with the instructions in this manual. Use only original accessories and spare parts.
Adjusting the thermostat
The thermostat regulates the temperature of the soldering iron tip. The temperature can be adjusted within a certain range.
Turn the temperature control knob (8) to adjust the temperature.
0 Thermostat knob
Temperature control
Temperature control knob
For optimal use, the thermostat knob can be adjusted to the desired temperature. See the table below:
If the soldering iron tip is dirty or oxidized, clean it with a damp sponge or use a tip cleaner. - Use only original tips (e.g., chisel, conical). - For heavy duty work, use a higher temperature setting. - Do not exceed the maximum temperature indicated on the tip.
Soldering iron tip (see figure)
The tip (9) can be rotated 45° for optimal positioning.
The nozzle (16) and the heat shield (18) can be removed for cleaning.
- Remove the nozzle (16) and the heat shield (18) before cleaning. - Do not immerse the tool in water. - When the tool is not in use, disconnect it from the power supply (1) and allow it to cool down. Store the tool in a dry place.
Turn the drilling mode switch (9) to the drilling mode (25) until it clicks into place. Then turn the drilling mode switch to 45° and set it to the drilling mode.
Inserting the battery
Installing the battery
Note: If the battery is not inserted into the power tool, it may be accidentally activated or the power tool may be switched on unintentionally.
Push the charged battery (1) into the battery holder until it clicks into place.
Removing the battery
To remove or replace the battery (14), press the battery release button (3).
Do not use force to remove the battery; it can be removed easily.
Removal/insertion
Use the release button to remove or insert the battery.
To turn on the power tool, slide the on/off switch (7) forward to the "I" position.
To turn off the power tool, slide the on/off switch (7) back to the "0" position.
Protection against reconnection
After the protection against reconnection has tripped, do not continue to operate the power tool. If the protection against reconnection has tripped, the temperature indicator (6) will light up continuously.
Kypic canbih andbih ana TaHay
Kypic cahbl andbih ana TaHayfa apHaHan peTteriU deHreNEk (5) Kemerimeh andbih ana TaHayra Hemece Kymbc Ke3HnDE 3reptyre 60ana.
Tana erinetih kypic cahbl Maepnai MeH Kymblc Kacay KaJdaBHa 6aIaNbHCTbl 60bln OH TzKipn6e apkblb aHbIKayfa 6oIaBl.
Apa nckicii daibihamafopaHata jhe nactmaca meh aIOMHHnDi eHdeyepeapaykblaamdbifbIH TMeHDeTy ycbhlnabl.
Aa KypicTeP caHbIHda y3ak yakbl TneKtp Kypanbl naIaNalAH OhBI KaTbI Kb3yBt TydbpyMymKiH.Apa IIOITocbH anBn 3neKtp KypabHbCaKnBHaTy WIn HAM. 3 MNHT MaKcMaNlBk Kypic CaHbHa icTeiHj3.
TemnepaTypara 6a#aHbCTbApTbIKKxKTey KopFaHbciB
TarabHdanybHa caiKec naIdaIahcHb3, 3neKtp KpaIbApTbIK KxyKTeJIeMdi. ApTbIK KxyKTeNHy Hemece pyKcat etInreH aKKMyJrTOP TmepaTpacbi apalbfIeTIce aHaIbIMdap caHbKicapbl, 3neKtp KpaIbIeWedi. TeMeHNerH aHaIbIMdap caHbIHDa 3neKtp KpaIbIaKKMyJrTOP pyKcat etInreH TmepaTpapaFKeTkeHHen COH Hemece TMeHNerH KxyKTeNy ToIbIK aHaIbIMdap caHbIMe Hymbc icTeiDi. ABTomaTTbI eWyde 3neKtp KpaIbH abTomaTTbPeTte eWipin, aKKMyJrTOPDb cyItbHb3 da, 3neKtp KpaIbH KaTa KocBbH3.
TemnepaTpaHb6akbIay/apTbIK KyKTeMeDen KopFaHbIC HNdkAToPbI
Kb3bnTycTe TmNepaTaPbH 6aKaIyay/aptbIK KytMeDeH KopFaHbc INHnKaTOPbI (6) aKKyMjTOpDbI KaTTbIK b3bn KeTydeH XHe KO3FaJTKbiUbIptbIK KytMe TcydEh Kopfayra KemeKTceedi.
TemepaTpaHb 6akblay/aptbkKyKTeMeHeN KOpFaHbc INnKaTOpB (6) y3ikci3 Kb3bl TycneH KaHbIn Tpyca, 6yn aKKymyTAp TEmepaTpaCb TBIM KOFapbl 6oJFaHbIN 6iDipei XHe 3JeKTp KpaIb ABToMaTTb Typee eWIn KaJaBl.
3JnKtp KypaBih eWipin, XyMbICTbI KaTfactbIpMac 6ypbH aKKymyIaTOpblc cybltHiB3.
TemnepaTypaHb6akblay/aptbkKXYTeMeHeH KOPFaHbIC HINnKaTOPbl (6) Kbl3bn TycneH XbInbIbIKTaC, 3NeKTp KypaBb Byfattanbln, ABTomatbl Typee Own Kanabl.
3Jektp KypabHdAaBHaDamaH TapbHbWbFapbHb3. ByfattanyKoHbIFAHH KeIH 3Jektp KypabIpeTtREH Kypic caHbIMeHKMbICbH KaNFaftcbpaBbl.
Before starting the battery, check the terminals of the electric circuit for corrosion, oxidation, and proper connection. During operation and charging, ensure the circuit is not short-circuited. Use only the specified type of battery. Follow the manufacturer's instructions for maintenance.
Before starting work with acids, alkalis, building materials, etc., wear protective gloves and safety glasses. If any of these substances come into contact with your skin or eyes, rinse immediately with plenty of water.
Waste materials (see figure 1)
Do not dispose of batteries, accumulators, or other electrical components with household waste. Dispose of them at designated collection points.
Use only the recommended fuses. Do not use fuses with a higher rating than specified.
Connect the battery cables (9) to the corresponding terminals (13) with the correct polarity. The maximum current draw is indicated on the battery. Before connecting the battery, ensure the terminals are clean and free of corrosion.
The terminal (9) must be connected to the positive terminal of the battery.
Parallel connection (if necessary)
For parallel connection, use the appropriate cable (27) (if necessary). The maximum current draw is 30 A.
Parallel connection (see figure 1): Connect the positive terminal (26) to the positive terminal of the battery (12) using the cable. The cable must be connected to the positive terminal of the battery. Tighten the terminal (26) securely.
Disconnect the cables (see figure 1): To disconnect the battery, first remove the negative cable, then the positive cable. To reconnect, connect the positive cable first, then the negative cable.
Tighten the terminal (26) securely. Connect the cable to the positive terminal (12) of the battery. Ensure the connection is secure. For additional support, use the bracket (28) to secure the cable. Connect the cable to the terminal and tighten the screw. Tighten the terminal (26) securely.
Waterproofing the battery
When using metal tools, be careful not to short-circuit the battery terminals. Use insulated tools if necessary.
Accumulator batteries must be kept away from open flames.
Accumulators must be protected from impacts and shocks.
Accumulators must be stored at a temperature of -20°C...50°C. Do not leave accumulators in a charger.
When installing accumulators, do not use a hammer, and do not damage the battery with sharp objects.
The manufacturer's instructions for charging the accumulator must be followed.
Do not short-circuit the terminals.
Technical maintenance and service
Service and maintenance
Before starting work with electrical equipment (installation, adjustment, maintenance, etc.), disconnect the power supply and take measures to prevent accidental reconnection. Use only insulated tools. For any work, use protective equipment and devices.
Do not touch live parts with wet hands. Before doing so, disconnect the electrical equipment from the power supply and ensure it is de-energized.
It is necessary to take measures to prevent the electrical equipment from being switched on accidentally. For this purpose, use warning signs and protective devices.
If the equipment is damaged, disconnect it from the power supply and contact the manufacturer or a qualified service center.
Disconnect the plug (10) from the socket before cleaning.
Disconnect the plug (10) from the socket. For repairs, contact the Bosch service center.
The device is intended for use in household and similar applications, such as in shops, offices, and other working environments, in farmhouses, by clients in hotels, motels, and other residential type environments, and in bed and breakfast type environments.
The product is intended for use by adults who have read and understood the instructions. The manufacturer is not liable for damage caused by improper use.
If the product is used for purposes other than those intended, or if it is used incorrectly, the warranty will be void.
During the use of the product, the following safety precautions must be observed:
- Before use, check the product for visible damage (cracks) and ensure that all safety devices are in place; - Do not use the product if the switch does not turn it on and off properly, and do not attempt to repair it yourself; - Store the product out of reach of children and unauthorized persons; - If the product is damaged or has missing parts, do not use it and contact the manufacturer or an authorized service center.
Service and Maintenance
Service and maintenance of the product should be carried out by qualified personnel only. For service, contact the nearest Bosch service center: www.bosch-pt.com
Bosch Service Center
158|Kazakh
The product is intended for use in accordance with the instructions.
For questions or to order spare parts, contact the service center. The product is designed for normal use.
All safety regulations and operating instructions must be followed. For any questions, contact "Robert Bosch"
Original or authorized service
The product must be disposed of properly. Do not dispose of it with household waste. Contact your local waste disposal service for information on proper disposal.
Kazakhstan
For questions, contact the local authorized service center:
"PoBept Bow"(Robert Bosch) KLIJC
AnImatbI K.
Kazakctan Pecny6nKacb050012
Mypat6aEBK.180y
"TepeMec" BO, 7 ka6aT
Ten.: +7 (727) 331 31 00
akc: + 7 (727) 2330787
E-Mail: ptka@bosch.com
CepBnCTIK Kbi3MeT KepcTeOpTaIbIKTapbl MeH Ka6blIay nyHKTePiH MeKeH-JaKaIbI TypaIbI ToJIbIK JxHe 0eKTI aknapaTTb CI3: www.bosch-professional.kz pecmN caTTah ana anacbi3
KbI3MET Kepcety optanbIKtapbIHbH 6aca da MeKeHkaJIaPbIH MbHa JKepeH KapaHbI3:
www.bosch-pt.com/serviceaddresses
3NeKtp KpyanbI Keninni naHanaHy Mep3imHIn iHnDe 0HdipyHHIN KecipireH ICTeH WbIKKaH KaFda, OHIM nci TMeHeI WaTAP opBHaFaHda Keninik BoBHua TerIH XeHDeyre Kykbblb6oNablb:
-MexaHnKanblk3aKbIMdapblH KOKTbFlfbl; -naDanaHy 60bHwa Hcykaybik TaIantapbHbH 63biny 6enrinepiHHKoTbIfbl; naDanaHy 60bHwHa HcyKaYbIKa CAtyBHBnCAty Tpyanb6enricHHxHe caTbAnanyuKoTaHacBnH6ap 6onyb; -3nEkpKypaBbCepnBbIKHemipHINKaHeKeinDk TaHObHdAfbCepnBbIKHemipHcainKectiri; -6iikci3xehdeybenrinepiHHKoKtBfbl.
Keninik Temenenderi KaFdaNapda KonDaHbImaDbI:
-0pc-MaxkopKaFdaIapbHa6aIIaHbICTbKe3 KeIreHcbHbIKTap; -6apblk3neKtp KpaandaepbHdaefdaa 3neKtp KypalbHbH KaBnTbTO3ybl.
Kanfabi KONTAKTInep, cbIMdap, kbIiwaKTap XHe T.6. CnKbTI Kypal 6oikTePiH KbI3MeT ety Mep3im H KICKAPtAtbH KaBntbTo3y HHTNKeCiHe KaKettiniri
TbyHdaFaH JeHDey KeiIik aacbHa KipMei:
- TaBnFN To3y (peycpTbH, TOnbI, naJdaNaHbinybI);
KaTe opHaTy, pyKcTaCbIs MOiHΦnKaunay, KaTe KOnlaHy, KbI3MeT KepCeTy HeMece caKay epExepePi 6by HAtnHexeiHe icTeH WbIKKaH JaBbIK NeH OHbIH 6oikTepi; -3neKtp KypaBbHa apTbIK KxyKTeMe TYCKEHHeOpbH aNFA haynap. (KypanFa apTbIK KxyKTeMe TYcyIH WapTcb3 6enrIepiHe MblHaNap KaTaDbI: Ky6blNy TYcHIn H naDa 6onyH HeMece 3neKtp KypaBb6bnIKeTI MeH TyHHepiHIN DeOpmaunrcbH HeMece KopbITbNByI, XorapbI TemnepaTypa acepiHEn 3neKtp K03FaNTkBiUHdaFbCmDap OKuaynaFbUHbH KapaObl Hemece KemipNeHy.i.)
Tacbimanday
YcbHbINFaN NITIN-HOHBIK AKKyMnyATOpnap Kayinti TayapnapFA KoBInaTbH TaIaTnPa 6BaHbHaBl.
NananahybakkymynTOpnapdbKeweKeocbIMka Kxattapcb3TacbMaanda ana.
YuiHui TynFaap (Mbicanb, aye KeNiri Hemece Xibiepy) opamara XHe Mapkanapra KOnBnAtpH apHaBt TaanTapdb caKtay Kepe. Xi6peyre daBHday Ke3Hne Kayinti KxKTepi Tacmnday MAmahBImeXabapnacy Kepek.
AkkymyIaTOpblkopnycb3akbImdIHa6oIcaRaHa Ki6eipH3.AuBkTyicneppeJKeiIMdeH3KaHe aakkymyIaTOpblOpamadaKo3FaMaIbHdApHaH3.KaKeT 6oIcA,KocbIMuaYTTbKepexepePdCaTaHb3.
Kedere kapaTy

3nektpKypanapdbi,akKymyaTOpnapdbi,
KepeK-kaPakTapblXaHe opay
MaTePnAnIaPbH 3KoIOnrIbIK TpyfIaHaN DpybcYtINn3aunayFa TancbpyKepek.
3neKtp KypaIapdbjKHe
aKKymyIATopnapbI/6atapennapbl y KOKbICbHaTactaMaHbI
Only for EU countries:
Do not dispose of power tools, batteries, and accessories together with household waste. They must be disposed of separately in accordance with Directive 2012/19/EU on waste electrical and electronic equipment and Directive 2006/66/EC on batteries and accumulators. Please follow local regulations for disposal.
Used electrical and electronic equipment and batteries contain hazardous substances that can be harmful to health and the environment. Dispose of them separately at designated collection points.
Batteries/accumulators:
Lithium-ion:
Please observe the notes in the operating instructions (see "Transport", page 158).
Romanian
Safety instructions
Service for power tools
Strada Horia Macelariu Nr. 30-34, sector 1
013937 Bucharest
www.bosch-pt.com/serviceaddresses
Transport
Lithium-ion batteries are subject to the legislation on the transport of dangerous goods.
Batteries can be transported by road without restrictions by the user.
Vibration values (vector sum for three directions and uncertainty) determined according to
EN62841-2-11
Vibration on the front handle with saw blade T 111C: aV = 4.5 m/s², K = 1.5 m/s²,
Vibration on the metal saw blade with saw blade T 118A: aM = 4.5 m/s², K = 1.5 m/s².
The vibration and noise emission values given in this instruction manual have been measured in accordance with the standard and may be used for comparison with other power tools. They are also suitable for a preliminary assessment of vibration and noise exposure.
The stated vibration and noise emission values are representative for the main applications of the power tool. However, if the power tool is used for other purposes, with different accessories or without proper maintenance, the vibration and noise emission may differ. This could significantly increase the vibration and noise over the entire period of use of the power tool.
For a more accurate assessment of vibration and noise, the periods when the power tool is switched off or running idle should also be taken into account. This could significantly reduce the vibration and noise emission over the entire period of use of the power tool.
Take additional safety measures to protect the operator from the effects of vibration, such as: maintaining the power tool and accessories, keeping hands warm, and organizing work patterns.
Assembly
Before carrying out any work on the power tool (e.g. maintenance, changing tools, etc.), as well as when transporting or storing it, remove the battery pack. There is a risk of injury if the trigger is accidentally pressed.
Charging the battery pack (see figure A)
Use only the chargers listed in the technical data section. Only these chargers are suitable for the lithium-ion battery pack used in your power tool.
Note: The battery pack is supplied partially charged. To ensure full battery capacity, fully charge the battery pack before first use.
The lithium-ion battery pack can be charged at any time without reducing its service life. Interrupting the charging process does not damage the battery.
The lithium-ion battery pack is protected against deep discharge by the electronic protection system.
Electronic Cell Protection (ECP). When the battery is inserted, the electronic instruments are not switched on. The instrument does not work until the battery is inserted.
After the automatic switch-off of the electronic instrument, do not continue to press the start switch. The battery may be damaged.
To insert the battery (1), press the release button (2) and slide the battery into the instrument. Do not use force.
Battery indicator
The green LED (4) indicates the charge level of the battery (1). The battery status indicator lights up for only 5 seconds after switching on.
LED indicator
Continuous lighting 3x green ≥ 2/3
Continuous lighting 2x green ≥ 1/3
Continuous lighting 1x green < 1/3
Flashing light 1x green reserve
Flashing light 3x green discharged
If after switching on the indicator does not light up, the battery is damaged and must be replaced.
Supply voltage
The instruments are designed for work with protective gloves. Working instruments with sharp edges and prolonged work may cause burns.
The cutting blade can be replaced at the end of this operating manual. Use only blades with a T-slot. The blade must not be higher than the required cutting depth.
When cutting with a small radius, use these blades.
Place the blade (see Fig. B).
When placing, check the blade. A blunt blade cannot be gripped securely.
Insert the blade (13) into the clamping jaw until the teeth are oriented in the cutting direction (11). The SDS mechanism (20) automatically releases backwards and the blade locks. Do not press the SDS (20) with your hand backwards, as you may damage the power tool.
When placing the blade, ensure that the cutting edge is aligned with the base plate (10).
Check that the blade is gripped correctly. A correctly gripped blade can be thrown out during operation and cause injury.
Remove the blade (see Fig. C).
When removing the blade, hold the power tool so that the blade does not injure people or animals nearby.
Press the SDS (20) in the direction of the base plate (21). The blade is released and can be removed from the holder.
Removing the base plate (see Fig. D).
To adjust the cutting angle on the base plate, you can place the anti-splinter guard (17) on the base plate (9).
To place the anti-splinter guard (17), first hook it at the front of the base plate (9) and then press it at the rear until it clicks into place.
Changing the saw blade (see Fig. E).
The saw blade (18) (not included in the scope of delivery) can prevent tearing of the workpiece when cutting in wood materials. The saw blade can only be used with certain blades and only at an inclination of 0°.
The adjustable part (18) is placed in the base part (9).
To install the anti-friction pad (17), the adjustable part (18) is placed in the base part (9), and then the anti-friction pad.
Dust extraction system
Dust, which is separated during the processing of materials such as lead-containing paints, some types of wood, minerals, and metals, can be dangerous to health. Contact with the skin and inhalation of such dust can cause allergic reactions and/or respiratory diseases in the operator or persons nearby.
Certain dusts, e.g., those separated during the processing of beech or oak, are considered carcinogenic, especially in combination with chemicals for wood treatment (chromium, preservatives, etc.). Processing of asbestos-containing materials is allowed only by appropriately qualified personnel.
- If possible, use a dust extraction system suitable for the material being processed. - Ensure good ventilation of the workplace. - It is recommended to use a breathing mask with filter class P2.
Follow your national laws and regulations, especially when processing the corresponding materials.
Avoid dust accumulation at the workplace.
The dust may ignite spontaneously.
Hose
Before connecting the extraction system to the power tool, mount the hose (15).
Place the hose (15) on the power tool so that its opening fits over the protective guard (21).
The hose (15) must be secured without dust leakage, e.g., with a clamp. Pull the hose towards the protective guard (21).
Connecting the dust extraction (see fig. F-G)
Place the dust extraction hose (16) into the opening of the base part (9).
Insert the cap (22) (not included in the kit) onto the nozzle (16). Attach the cap (22) to the vacuum cleaner (accessory).
The recommended method of connection to the vacuum cleaner is described in the operating instructions for the accessory.
To achieve the optimal degree of suction, if possible, place the intended part against the opening (18).
The vacuum cleaner used must be suitable for working with hazardous dust.
If during work a separate time for health protection from dust or carcinogenic dust is required, use a specialized vacuum cleaner.
Working with electric tools
Working tips
Before performing any work on the electric tool (e.g., maintenance, changing tools, etc.), when transporting or storing it, remove the battery. There is a risk of injury if the trigger is accidentally pressed.
Adjusting the oscillation frequency
Adjusting the three oscillation frequency levels allows optimal setting of the speed and cutting performance for the material being processed.
You can adjust the oscillation frequency levels even during operation.
Oscillation frequency level off
Low oscillation frequency level
High oscillation frequency level
The optimal oscillation frequency level is best determined through practical testing. The following are the recommended levels:
Adjust the wall-mounted oscillating drive. Press the button briefly when cutting grass to make it lower.
-Switch off the oscillating drive when cutting thick parts (e.g., branches).
-When cutting hard materials (e.g., wood), work with low oscillating drive. -When cutting soft materials, work with maximum oscillating drive.
Adjusting the cutting angle (Fig. F1, F2)
To work with angled cuts, the base plate (9) can be tilted up to 45°. When cutting at an angle, the guard (16) and the cutting guide (18) cannot be mounted. -Mount the guard (16) and the cutting guide (18). -When setting 0°, the saw blade must be engaged in the center opening. -Loosen the screw (23) with the hex key (24) so that you can move the base plate (9) according to the direction of the battery (1). Insert the saw blade into the guide channel. -To adjust the tilt angle in the desired direction, tilt the base plate (9) by reading the scale (25). With the help of the scale, the angle can be set up to 45°. -Tighten the screw (23) again.
Switching the LED lamp on/off
To switch the work light (14) on or off, press the button for the work light (3).
Do not look directly into the work light, you may be blinded.
Switching on/off
Make sure you can operate the trigger switch without releasing the handle.
To switch on the power tool, press the trigger switch (7) forward so that the symbol "I" is visible. To switch off the power tool, press the trigger switch (7) backward so that the symbol "0" is visible.
Protection against restart
The protection against restart prevents uncontrolled switching on of the power tool after a power failure. When the protection against restart is activated, the temperature control/overload protection indicator (6) lights up continuously.
To switch the power tool on again, first set the trigger switch (7) to the off position and then to the on position.
Note: If the power tool is switched off and on again too quickly, the protection against restart may be activated unintentionally, and the power tool will not switch on when the trigger switch (7) is pressed. Set the trigger switch (7) to the off position and then to the on position.
Preliminary setting of the frequency of the reciprocating movements
You can pre-set the frequency of the reciprocating movements before changing them during operation.
The required frequency of the reciprocating movements depends on the specific conditions and is determined by trial.
It is recommended to limit the frequency when cutting and when cutting plastic and aluminum profiles.
Prolonged work at low frequency of the reciprocating movements may cause the power tool to heat up significantly. Remove the power tool from the workpiece and let it run at maximum speed.
Temperature protection against overheating
When using the power tool in accordance with the instructions in this manual, the power tool cannot be overloaded. In case of excessive load or exceeding the permissible operating temperature of the battery pack, the speed is reduced and the power tool switches off. The reduced speed of the power tool is sufficient to continue working at the same speed until the battery pack reaches the permissible operating temperature or the load is reduced. In case of automatic shutdown, switch off the power tool, allow the battery pack to cool down, and then switch the power tool back on.
LED indicator of the temperature control/overload protection system
The LED indicator for temperature monitoring/overload protection (6) helps you to detect overheating of the battery pack and overload of the power tool during operation.
If the indicator for temperature monitoring/overload protection (6) lights up continuously in red, the temperature of the battery pack is too high and the power tool switches off.
Switch off the power tool and allow the battery pack to cool down before continuing work.
If the indicator for temperature monitoring/overload protection (6) flashes red, the power tool is blocked and switches off automatically.
Remove the power tool from the workpiece. Once the blockage is removed, the power tool continues to operate at the set frequency of the reciprocating movements.
Operation instructions
Before performing any work on the power tool (e.g., maintenance, changing the working tool, etc.), when transporting or storing it, remove the battery pack. There is a risk of injury from unintentional activation of the start switch. If the blade jams, switch off the power tool immediately. When working with thin or delicate materials, use a stable base.
Before drilling into wood, chipboard, or building materials, always check for the presence of metal objects such as nails and screws, and remove them if necessary.
Drill bits (see Fig. I.1)
Drilling with a hammer drill is only permitted in masonry, such as concrete or brick.
For drilling with a hammer drill, use only carbide-tipped bits. Drilling with a hammer drill is only possible at a 0° bevel.
Place the power tool on the base plate (9) with the front edge of the base plate, without the hammer drill (13) to align it with the cutting line. If the power tool has speed adjustment, set the maximum frequency of the impact mechanism. Press the power tool firmly against the base plate for a long time.
When the base plate (9) touches the surface with the cutting line, continue cutting along the desired line.
Accessory for plunge cutting and cutting along a circular arc (accessory)
When working with the accessory for plunge cutting and cutting along a circular arc (27) (additional accessory), the wall thickness of the workpiece to be cut can be at most 30 mm.
Straight cuts (see Fig. J): Loosen the screw (26) and insert the guide rail of the accessory for plunge cutting into the guide openings (12) of the base plate. While reading the scale, set the desired distance between the guide rail and the cutting line. Tighten the locking screw (26).
Circular cuts (see Fig. K): Drill a hole inside the workpiece to be cut, large enough for the saw blade to pass through. Cut the hole with a jigsaw blade, ensuring the saw blade can fit tightly on the cutting line.
Place the locking screw (26) on the other side of the support for plunge cutting. Insert the scale of the support for plunge cutting through the guide opening (12) of the base plate. Align the hole in the workpiece with the cutting line. Insert the pin (28) through the inner opening of the accessory for plunge cutting and into the hole in the workpiece. Adjust the radius of the arc, reading directly from the inner edge of the base plate. Tighten the locking screw (26).
Cooling-lubricating agent
To prevent interruption when cutting metal, you must apply a cooling-lubricating agent along the cutting line.
Instructions for optimal use of the rechargeable battery
Protect the rechargeable battery from moisture and water.
Charge the battery at ambient temperatures ranging from -20°C to 50°C. For example, do not leave the battery in a car in direct sunlight.
Periodically clean the ventilation slots of the battery with a soft, dry brush.
If the working time after charging is significantly reduced, this indicates that the battery is worn out and must be replaced.
Follow the instructions for disposal.
Maintenance and service
Maintenance and cleaning
Before performing any work on the power tool (e.g., maintenance, changing tools, etc.), remove the battery from the power tool when transporting or storing it. There is a risk of injury from unintentionally pressing the on/off switch. To work efficiently and safely, keep the power tool and its ventilation slots clean.
Regularly clean the tool holder and remove any chips. To clean the power tool, remove the battery and wipe the power tool with a soft, dry cloth.
Sudden braking of the power tool can lead to damage and malfunction. Therefore, do not use the power tool in materials that generate a large amount of dust.
If the dust extraction is blocked, switch off the power tool, remove the battery, and clean the dust extraction and the chips.
It is recommended to lubricate the drill chuck (10) with a drop of machine oil.
Regularly check the drill chuck (10). If it is worn, it must be replaced by an authorized Bosch service center for power tools.
Customer service and application advice
The service will answer your questions regarding repairs and maintenance of your product, as well as spare parts. You can find the contact details for spare parts at:
We reserve the right to make changes to our products and technical accessories without prior notice.
When making inquiries or ordering spare parts, please always quote the 10-digit order number printed on the type plate of the product.
Bulgaria
Robert Bosch SRL
Power tool service
Strada Horia Macelariu Nr. 30-34, sector 1
013937 Bucharest, Romania
Tel.: +359(0)700 13 667 (Bulgarian)
Fax: +40212331313
Email: BoschServiceCenterBG@ro.bosch.com
www.bosch-pt.com/bg/bg/
Other service addresses can be found at:
www.bosch-pt.com/serviceaddresses
Transport
The contained lithium-ion batteries are subject to the Dangerous Goods Legislation requirements. The batteries can be transported by the user on public roads without further requirements.
When transporting (e.g., during air transport of courier services), there are special requirements for the packaging and labeling of the item. For safety during the packaging of the parcels, consult the experts in the relevant field.
Dispose of the battery packs only if their housings are not damaged. Dispose of open contacts and terminals with insulating tape and pack the battery packs so that they cannot move in the packaging. Please, follow the national regulations.
Disposal

The power tools, battery packs, and accessories are designed to be able to be handed over for recycling of the raw materials contained in them.
Do not dispose of power tools, battery packs, or ordinary batteries in household waste!
Only for EU countries:
According to the European Directive 2012/19/EC on waste electrical and electronic equipment, power tools that can no longer be used must be collected separately and handed over for recycling of the raw materials contained in them, and according to the European Directive 2006/66/EC, defective or exhausted battery packs or ordinary batteries must be collected and handed over for recycling of the raw materials contained in them.
If you dispose of old electrical and electronic equipment improperly, hazardous substances may have a negative impact on the environment and human health over time.
Battery packs or ordinary batteries:
Lithium-ion:
Please, follow the transport markings (see "Transport", page 174).
Macedonian
Safety instructions
General safety warnings for power tools
WARNING-READ ALL SAFETY WARNINGS
The safety warnings and instructions provided in this document must be followed.
The power tool is intended for a specific purpose. Using it for other operations may lead to electric shock, fire, and/or serious injury.
Read all safety warnings and instructions for the user and for the device.
The term "power tool" in the safety warnings refers to your mains-operated (corded) power tool or battery-operated (cordless) power tool.
Work area safety
Keep work area clean and well lit. Cluttered or dark areas invite accidents. Do not operate power tools in explosive atmospheres, such as in the presence of flammable liquids, gases, or dust. Power tools create sparks which may ignite the dust or fumes. Keep children and bystanders away while operating a power tool. Distractions can cause you to lose control.
Electrical safety
Power tool plugs must match the outlet. Never modify
the plug in any way. Do not use any adapter plugs with earthed (grounded) power tools. Unmodified plugs and matching outlets will reduce risk of electric shock.
Avoid body contact with earthed or grounded surfaces, such as pipes, radiators, ranges and refrigerators. There is an increased risk of electric shock if your body is earthed or grounded. Do not expose power tools to rain or wet conditions. Water entering a power tool will increase the risk of electric shock. Do not abuse the cord. Never use the cord for carrying, pulling or unplugging the power tool. Keep cord away from heat, oil, sharp edges or moving parts. Damaged or entangled cords increase the risk of electric shock. When operating a power tool outdoors, use an extension cord suitable for outdoor use. Use of a cord suitable for outdoor use reduces the risk of electric shock. If operating a power tool in a damp location is unavoidable, use a residual current device (RCD) protected supply. Use of an RCD reduces the risk of electric shock.
Personal safety
Before using the power tool, pay attention to how it works and use it reasonably. Do not use the power tool if you are tired or under the influence of drugs, alcohol, or medication. A moment of inattention while operating power tools may result in serious personal injury. Use personal protective equipment. Always wear eye protection. Protective equipment such as a dust mask, non-skid safety shoes, hard hat, or hearing protection used for appropriate conditions will reduce personal injuries. Prevent unintentional starting. Ensure the switch is in the off-position before connecting to power source and/or battery pack, picking up or carrying the tool. Carrying power tools with your finger on the switch or energizing power tools that have the switch on invites accidents. Remove any adjusting key or wrench before turning the power tool on. A wrench or a key left attached to a rotating part of the power tool may result in personal injury. Do not overreach. Keep proper footing and balance at all times. This enables better control of the power tool in unexpected situations.
Dress properly. Do not wear loose clothing or jewelry. Keep your hair and clothing away from moving parts. Loose clothes, jewelry, or long hair can be caught in moving parts. If devices are provided for the connection of dust extraction and collection facilities, ensure these are connected and properly used. Use of dust collection can reduce dust-related hazards. Do not let familiarity gained from frequent use of the tool allow you to become complacent and ignore tool safety principles. A careless action can cause severe injury within a fraction of a second.
Use and care of power tools
Before using the power tool, read the instructions. Use the appropriate power tool for your application. With the appropriate power tool, properly, safely, and without risk, you can complete the work for which it is intended. Do not use the power tool if you cannot turn it on and off with the switch. Any power tool that cannot be controlled with the switch is dangerous and must be repaired. Unplug the power tool from the power source and/or remove the battery pack, if detachable, before making any adjustments, changing accessories, or storing the power tool. These preventive safety measures reduce the risk of accidentally starting the power tool. Store idle power tools out of the reach of children and do not allow persons unfamiliar with the power tool or these instructions to operate it. Power tools are dangerous in the hands of untrained users. Maintain power tools and accessories. Check for misalignment or binding of moving parts, breakage of parts, and any other condition that may affect the operation of the power tool. If damaged, have the power tool repaired before use. Many accidents are caused by poorly maintained power tools. Keep cutting tools sharp and clean. Properly maintained cutting tools with sharp cutting edges are less likely to bind and are easier to control. Use the power tool, accessories, tool bits, etc., in accordance with these instructions, taking into account the working conditions and the work to be performed. Use of the power tool for operations different from those intended could result in a hazardous situation.
Keep handles and gripping surfaces dry, clean, and free from oil and grease. Slippery handles and gripping surfaces do not allow for safe handling and control of the tool in unexpected situations.
Battery tool use and care
Recharge only with the charger specified by the manufacturer. A charger that is suitable for one type of battery pack may create a risk of fire when used with another battery pack. Use power tools only with specifically designated battery packs.
Use of any other battery packs may create a risk of injury and fire.
Keep the battery away from other metal objects, such as paper clips, coins, keys, screws, or other small metal objects that can cause a connection from one terminal to another. Shorting the battery terminals may cause burns or fire. If the battery leaks, the liquid may leak from the battery; avoid contact. In case of accidental contact, rinse with plenty of water. If liquid gets into the eyes, seek medical help immediately. Liquid leaked from the battery may cause irritation or burns. Do not use the battery or device if it is damaged or modified. Damaged or modified batteries may behave unpredictably and may cause fire, explosion, or risk of injury. Do not expose the battery or device to fire or high temperature. Exposure to fire or temperature above 130°C may cause explosion. Follow all instructions for charging and do not charge the battery or device outside the temperature range specified in the instructions. Incorrect charging or temperature outside the specified range may damage the battery and increase the risk of fire.
Service
Have the electrical device serviced by a qualified repair person using only identical replacement parts. This will ensure that the safety of the electrical device is maintained. Never repair damaged battery packs. Battery pack repair should only be carried out by the manufacturer or an authorized service provider.
Safety warnings for hedge trimmers
Hold the electrical device by the insulated gripping surfaces when cutting, to avoid contact with hidden wiring. If the cutting attachment comes into contact with a live wire, it may expose
Metal parts of the electrical device to live voltage and could give the operator an electric shock.
Depending on how you hold or handle the tool, you can ensure that the working surface is stable. As long as you hold the tool that is being processed with both hands, it will be unstable and you may lose control. Hold the tool straight and steady while it is being processed. Do not reach under the tool that is being processed. As long as you come into contact with the blades, there is a risk of injury. Turn off the electric tool when it is plugged in and being processed. There is always a risk of injury from the rotating parts as long as the tool that is being inserted is blocked in the tool that is being processed. Always hold the tool firmly, the base must be stable. The cutting blade can be hidden to avoid injury. When you have finished working, turn off the electric tool and pull out the plug. Wait until the tool has completely stopped before you remove the tool. The tool that is being inserted can be blocked and can lead to loss of control of the device. Use only sharp, undamaged blades. Damaged or blunt blades can break, have a negative effect on the cutting, or cause injury. Do not block the blade when switching off with the side switch. The blade can break, break off, or cause injury. Use the electric tool only with the base. When working without the base, there is a risk that you cannot control the electric tool. Use appropriate protective equipment to protect yourself from hidden electric cables or consult with a qualified electrician for working with electric energy. Contact with electric cables can lead to fire and electric shock. Gas detection can lead to explosion. Working in water every time causes gas detection. Gas detection and improper use of the battery can cause a fire. The battery can be blocked and explode. Provide fresh air and if there is damage, consult a doctor. The battery can cause skin irritation. Do not open the battery. There is a risk of short circuit.
The battery can be damaged by sharp objects such as nails or by impact with external force. It can cause an internal short circuit and the battery can be blocked, leak, explode, or overheat. Use the battery only in the product from the manufacturer. Only in this way will the battery be safely protected against overloading.

Protect the battery from heat, e.g., from prolonged exposure to sunlight, fire, dirt, water, and moisture. There is a risk of explosion and short circuit.
Description of the product and performance

Read all safety warnings. Failure to follow the safety warnings can result in electric shock, fire, and/or serious injury.
Pay attention to the symbols in the operating instructions and use them.
Use with appropriate accessories
Use the device for cutting wood, plastic, metal, ceramics, and similar materials on stable surfaces. For the first cut, the blade should be at an angle of 45°. Pay attention to the safety instructions for cutting.
Component illustration
The numbering of the figures with components is described in the electrical diagram on the graphic page.
(1) Battery (2) Battery release button (3) Work light switch (4) Battery charge indicator (5) Button for adjusting the previously selected number of working modes (6) Temperature/overload indicator (7) On/off switch (8) Handle for adjusting the oscillation (9) Main handle
(10) Water tank (11) Saw blade guard (12) Guide for parallel guide (13) Saw blade (14) Work light (15) Protective cover for suction
(16) Suction hose (17) Saw blade (18) Lock button (19) Handle (insulated gripping surface) (20) SDS-Plus for locking the saw blade (21) Protection against kickback (22) Suction hose (23) Screw for the main handle (24) Key with internal hex head (25) Bevel angle scale (26) Screw for adjusting the parallel guide (27) Parallel guide with circular scale (28) Screw for centering the circular scale
a) The illustrated and described equipment is not part of the standard delivery. The complete equipment can be found in our Equipment Program.
Technical data
| Батериа на убODна пILA GST 12V-70 |
| Бpoj на.dcн | 3601 EA1 0.. |
| Hominaleh Hanon V=12 | |
| Бpoj на pa6oTHi odOBi Bo
празно Na | min-1 1500-2800 |
| РавOTEN od mm 18 | |
| Мakc. Длобочина на peztot | |
| - BO дрBo mm 70 | |
| - BO anyMinnHym mm 3 | |
| - BO чeелк (нелегиран) mm 3 | |
| Агал за сечы (пебо/десho)
мakc. | 45 |
| Текиа сordасno EPTA-Proce-
dure 01:2014 | kg 1,7-1,9 |
| П repopачана okolna
Tempepatура рpr понecьe | °C 0 ... +35 |
| Дзволега okolna
Tempepatура рpr понecьeCl
пpr сдадраьe | °C -20 ... +50 |
| П repopачаны akumylatopски
батери | GBA 12V... |
| П repopачны поначи GAL 12... | GAX 18... |
A) Operating temperature 20-25°C with battery GBA 10.8V 2.0Ah.
B) Depending on the battery used
C) Limited length at temperatures < 0°C
Information on noise/vibration
The emission values for noise are determined according to EN 62841-2-11.
The sound pressure level of the electrical tool is typically 75 dB(A). Uncertainty K = 5 dB. The sound pressure level during operation may exceed the given values. Wear hearing protection!
The total vibration value a(h (vector sum of three directions) and uncertainty K are given in accordance with EN 62841-2-11:
Ceyhe Ha wneepnnoa co ceynno 3a nna T111C: aB=4,5m/s2,K=1,5m/s2
ceheHa MeTaneHIM COceHIO 3a Hnla T118A: aM=4,5m/s²,K=1,5m/s².
HnBoto Ha Bn6paunn HabeDeHO BO OBne yNaTcTa b BpeDnOCTa Ha emncjata Ha 6yuaBa ce n3mepeHN cnopei MePHN NOCTaKN N MOKAT Da CE KOPNCtat 3a CnopeD6a MeY eNEkTPuHn anAtn. IcTo Taka MoKe Da ce npnilarOdn 3a IpeDvPemeha IpOueHa Ha HNBTO Ha Bn6paunn N emncjata Ha 6yUaba.
HabeJeHoTo HnBO Ha Bn6paunn H BpeHocTa Ha emncjata Ha 6yaba rnpctaBbAat rnaBHnTe npmeHN Ha eNEKtpnHnot anat. DOKONKY eNEKTPnuHnO t anat ce KOpNCTHa dpytn pImMeHN, aanot ot WTO CE BMETHyBa OTCTanyBa oD HopMITE nHn HeDOBONHO Ce ODPKByBA, HNBOTO HA Bn6paunn H BpeHocTa Ha emcnjata Ha 6yuaMoXaT da OTCTanyBaAT. Oba MoKe 3HaUnTeHNO Da rO 3rOeMMn HNBOTO Ha Bn6paunn H emncjata Ha 6yuaBO cIeONkynHnO TepnoHa paBoTeHe.
3a npeuznHO OndpeyBaHBe HA NHBOTo HA BnBpaunn Emncjata Ha 6yUba, Tpe6a da ce 3eMe npEbnI nepnoDTo BO Koj yepDoT e NcknyeuH nn paBoTH, a HE BO MOMHTOT Kora e BO ynotpe6a. Oba Moke 3HaunTeHHO da rO haMaHn HNBOTo HA BnBpaunn IMncjata Ha 6yUba Bo 9eNoKpyHnO TnpNoH na paboHe.
YbpeTe rDOnONHnTeHNHe MeKn 3a Be36ednoct 3a aHTHa KOpNCnKOT OB BnJaHneTo O Bn6paunnte, KaKo Ha np.: OpJxByBaBe Ha eNEKTpuHnTe anaTH anaTHe 3a BMETHyBaBe, OpJxByBaBe Ha TOnHHata Ha dNaHKnTe, oprAHn3npaBe Ha TeKoT Ha paBoTa.
MoHTaxa
Ppe6nno KaKbA HHTepBHeuJa Ha eNeKtpnHnot anat (Ha np. OdpKyBaBe, 3aMeHa Ha anat nTH.) Kako n npn HerOB TpaHCnOpt NCKlaHpaBe, N3BaTe ja 6aTepujata OD Hero. PnHEBHMATEJIHO pNITNCaBe Ha npkeKHyBaOT 3a BkLyUyBaBe/HckLyUyBaBe NoCTOn ONaCHOCT OD NOBpeDn.
PonHebe Ha 6atepnjata (BnDn cnnka A)
KopHeTe Tn Camo NOnHaHTe KOnuTo ce HabeDeH BO TexNcKte NoaTo. Camo Obne ypeH 3a nonHeBe ce nOrOHN 3a JInTHm-JOHCKata 6aTePnJa 3a BaHnot eEnktpueH ypeD.
Hanomeha: BaTepnjata ce nCnpaUyBa deNymHO HanonHeta. 3a da ja HanoHnHte cenocho 6aTepnjata, nped npBata ynoTpe6a cTabeJe ha nonHauchdoKeHa ce HanonHn cenoCHO.
JINYM-JOHCKNTE 6aTePN MoKeJa ce HaONHAT Bo cekoe BpeMe,6e3 da ce HAMn HNBnOT KINBOTeH BEK.IpeKNHot npn nonHeBTo He nHaHTeTyBa Ha 6aTePnjata.
IInmJohckata6aTePnja e3aunTeHa od nla60K npa3Hebe co „Electronic Cell Protection (ECP)„ DoKOnky ce Hcnpa3Hb 6aTePnaja, enektpnHnot anat Ke ce ncknyu co NOMOW Ha 3aWHTHnot ppeKNHyBa: EektpnHnot anat He ce DnKxN Beke.
Pn aBtOMaTcKToHckNHyBaHbHe Ha eNEKTPuHHOT anat, He npTHCKajTe Ha npeKHyBaOH 3a
BknyBaBe/HcknyBaBe. Batepnjata MoKe da ce OWTEN.
Remove the battery (1) by pressing the release button (2) and pulling the battery out of the electrical tool. Do not use force.
Battery charge indicator
The three green LEDs on the battery charge indicator (4) show the state of charge of the battery (1). The charge indicator lights up only for 5 seconds after switching on.
LED capacity
Steady light 3 x green ≥ 2/3
Steady light 2 x green 1/3
Steady light 1 x green < 1/3
Flashing light 1 x green Reserve
Flashing light 3 x green Empty
If the LED does not light up after switching on, the battery is defective and must be replaced.
Inserting/replacing the saw blade
Before inserting or replacing the electrical tool, remove the battery. The saw blade may be sharp and can become hot during use.
Inserting the saw blade
The recommended saw blade for sawing can be found at the end of this manual. Use only saw blades with a suitable shank (T-shank). The saw blade should not be longer than necessary for the intended cut.
For cutting wood and plastic, use a wood saw blade.
The protective coating (18) (optional) can prevent damage to the surface when sawing wood. The protective coating can be used only with certain types of wood for cutting with a blade at an angle of 50°.
Note that the protective coating (18) is inserted into the base plate (9).
If you use the guide rail (17), do not insert the protective coating (18) into the base plate (9), but into the guide rail.
Removing the guide
Materials such as lead-based paints, certain woods, minerals, and metals may be harmful to health. Sanding or removing such material may cause allergic reactions and/or respiratory problems for the user or persons in the vicinity.
Certain types of dust, such as dust from oak or beech wood, are carcinogenic, especially when combined with additional substances (chrome, wood preservatives). Materials containing asbestos should be processed only by specialists.
Therefore, whenever possible, use a suitable dust extraction system for the material being processed.
- Ventilate the work area well.
- It is recommended to wear a protective mask when sanding with dust class P2.
Observe the relevant regulations in your country for the material you are processing.
Avoid direct contact with the workpiece. The tool may become hot.
Protective cap
Remove the protective cap (15) before connecting the power cord to the mains. Place the protective cap (15) on the power cord in such a way that the hands are protected from the plug (21).
The protective cap (15) is for operation without a mains connection, as well as for storage. Remove the protective cap and insert it into the plug (21).
Connecting the system for mains connection (see Fig. F-G)
Place the suction cups (16) into the recesses on the base plate (9).
Place the suction hose (22) (accessory) onto the suction cups (16). Connect the suction hose (22) with the suction unit for dust (accessory). The adapter for connecting different types of suction units can be found at the end of the operating instructions.
For continuous suction, if possible, attach the plug (18).
The suction unit for dust must be suitable for the material being processed.
When suctioning particularly hazardous dust, carcinogenic or allergenic dust, use a special suction unit.
Use
Operation
Before any intervention on the power tool (e.g., drilling, changing tools, etc.) as well as during its transport and storage, remove the battery from it. There is a risk of injury if the tool is accidentally activated for switching on/off.
Adjusting the oscillation
The oscillation can be adjusted steplessly and allows optimal adaptation of speed, power, and cutting to the material being processed.
With the adjustment wheel (8) you can set the oscillation during operation.
No oscillation
The optimal degree of sanding for the relative workpiece is determined with a shortened trial. For this purpose, follow the instructions:
- First, set the sanding degree to a lower value. Then, if necessary, increase it gradually until the desired result is achieved.
- For pre-treatment of thin materials (e.g., veneer), use sanding. - For hard materials (e.g., oak), work with low sanding. - For soft materials, the workpiece can be worked with maximum sanding.
Adjusting the angle of the miter (see figure H)
The base plate (9) can be adjusted for miter cuts at an angle of up to 45°
The suction nozzles (16) and the protective guard (18) are not used when working with the miter.
- Remove the suction nozzles (16) and the protective guard (18). - For miter cuts from 0°, the base plate is set in the corresponding slot. - Make sure that the screw (23) with the inner hex key (24) is loosened so that the base plate (9) can be moved in the direction of the battery (1). The base plate must be inserted into the guide groove. - To adjust the miter angle, set the base plate (9) according to the scale (25) in the scale slot. With the help of the angle, it can be adjusted up to 45°. - Retighten the screw (23).
Operation
Inserting the battery
Note: The battery terminals that are not suitable for the electrical connection can cause incorrect functioning or damage to the device.
Insert the charged battery (1) into the battery compartment until you hear it click into place.
Switching on the LED work light
To switch on/off the work light (14), press the work light switch (3).
Direct the tool towards the workpiece, so that it can be secured.
Switching On and Off
Make sure that you can press the switch for switching on/off without releasing the handle.
To switch on the power tool, press the switch for switching on/off (7) forward, so that the switch shows "1".
To switch off the power tool, press the switch for switching on/off (7) backward, so that the switch shows "0".
Restart Protection
The restart protection prevents uncontrolled starting of the power tool after a power interruption. Once the restart protection has been activated, the temperature control/overload protection indicator (6) flashes continuously.
To switch on again, press the switch for switching on/off (7) to the off position and then switch on the power tool again.
Note: If the power tool is switched off and on again, the restart protection may be activated and the power tool may not start. Press the switch for switching on/off (7) again.
Press the switch for switching on/off (7) to the off position and then switch on the power tool again.
Preselecting the Speed
With the speed preselection thumbwheel (5) you can preselect the required speed and also change it during operation.
The required speed depends on the material and the working conditions and can be determined by practical testing.
It is recommended to set the speed when setting the saw blade for the tool, as well as when cutting plastic and aluminum.
When working with a low speed, the power tool may heat up significantly. Set the saw blade for the tool and let the power tool run for about 3 minutes at maximum speed.
Protection against overload depending on temperature
Correct use cannot prevent the electric tool from being overloaded. When overloaded or working outdoors beyond the permitted temperature limits for the battery, the number of strokes is reduced and the electric tool is not switched off. When the number of strokes is reduced, the electric tool switches on again only after the permitted battery temperature is reached or when overload is reduced with the full number of strokes. When switching off automatically, switch off the electric tool, let it cool down, and switch it on again.
Temperature control / overload protection indicator
The red temperature control / overload protection indicator (6) helps you protect the battery from overheating and the motor from overloading.
If the temperature control / overload protection indicator (6) lights up continuously red, the battery temperature is too high and the electric tool switches off automatically.
Switch off the electric tool and let the battery cool down before continuing to work.
If the temperature control / overload protection indicator (6) flashes red, the electric tool is blocked and switches off automatically.
Pull the electric tool out of the material being processed. Remove the blockage, and the electric tool continues to work with the set number of strokes.
Working advice
Before any work on the electric tool (e.g. maintenance, changing tools, etc.) as well as during transport and storage, remove the battery from it. There is a risk of injury if the on/off switch is pressed unintentionally. If the saw blade jams, switch off the electric tool. Always use the support foot when processing small workpieces.
Sawing in wood, chipboard, building materials, etc. Check for foreign objects such as nails, screws, etc. and remove them.
Sawing with plunge cutting (plunge cutting)
Only soft materials such as wood, plasterboard, etc. may be processed with plunge cutting!
For plunge cutting, use only short saw blades. Plunge cutting is possible only with an angle of up to 0°
Place the electric tool with the front edge of the base plate (9) on the workpiece without the saw blade (13) touching the workpiece and switch it on. For electric tools with stroke rate control, set the maximum stroke rate. Press the electric tool against the workpiece and let the saw blade slowly plunge into the workpiece.
THE BASE PLATE (9) is placed on the surface of the part to be processed. Continue according to the bottom of the line.
Parallel stop with circular scale (optional)
For working with the parallel stop with circular scale (27) (optional), the part to be processed must protrude a maximum of 30 mm.
Parallel cutting (see figure J): Loosen the locking knob (26) and insert the stop into the base plate (12) through the slot. Set the cutting depth according to the scale on the inner side of the base plate. Tighten the locking knob (26).
Circular cutting (see figure K): The line is placed in the circle to be cut out. Drill a hole that is suitable for inserting the saw blade. Process the drilling with a file or router, so that the blade can easily follow the line for cutting.
Tighten the locking knob (26) on the other side of the parallel stop. Insert the stop into the base plate (12) through the slot. In the center of the part to be processed, in the opening to be cut out, drill a hole. Insert the centering pin (28) through the inner opening of the parallel stop into the drilled hole. Set the radius according to the scale on the inner side of the base plate.
Tighten the locking knob (26).
Lubrication/Maintenance
Before heating the material, apply lubricant. Maintenance: Clean the base plate.
Notes for optimal battery use
Protect the battery from heat and water.
Store the battery within a temperature range of -20°C to 50°C. Do not leave the battery in a car, for example, in summer.
Temporarily clean the openings for checking the battery with a cloth, then dry them.
If the short operating time after charging is displayed, the battery is worn out and must be replaced. Pay attention to the notes for disposal.
Cleaning and service
OdpxByBaBe n uHCTeBe
Ppe6nKakBa HHTepBEnuHa HeneKTPnHnO anat (Ha np. OpJxUbaHe, 3aMeHa Ha anat nTH.) KaKO n Pn HerOB TpaHcNoT nCKnaHpaBe, n3BaJeTe ja 6aTepnjata OD Hero. Pn HEBHMATEIHO pNITnCKaHe Ha npeKnHyBaOT 3a BkNpyBaHe/NCKnPyBaHe NOCTOn ONaCHOCT OINOBPeHN. OpxybaTe rHnCTHe nEKeTpHuHOT anat H OTBOpHTe 3a npoBETpyBaHe, 3a da MoXe Do6po H6e36eHNO da pa6oTHe.
PeOBHO uHCTe Ro npiaTOT 3a ceunnata 3a nna. 3a ro HcHCTNE, hBaTe Ro ceuNtO 3a nna oEneKtpnHnO t anat H TpONHe NcHo co eektpnHnO anat Ha paMaHa NOBpHnHa.
TOnEMHHeuCTOTmMOKAt DaIOBEdaTdoIpeukn BO fYHKUHOHPaHbTe.3aToa HeceYeTe OJDOyNnHaI rnaBa MaTePnJaII NTO pPaBAT MHOry npAunHa.
Iokony3ne03 npaunHa ce 3aThe, Ncknyte ro eNktpnHnot anat, n3BaTe Ro BCNCyBaOT 3a npaunHa n OTcpaHete n npaunHata nCTpyrotinHte.
IpoMaJcAte ro BoeueKnOT BaJajk (10) OdbpeMe-HabpeMe co HeKoJIky KaIKu MaCNo.
PepOBHO npOBepyBajTe ro BoDeyKnot Banjak (10).Dokonky e HCTPOWEH, MOPa Da Ce 3aMeHN BO OBnACTeHaTa cneuJaIIN3npaHa npOdaBHnca Bosch.
CepBncha cnyK6a H COBET np KOpHCTeBe
CepBnchata Cnyk6a Ke OngroBOpn Ha BaWnte npaaHa Bo Bpcka co nonpaBkata N opjkyBaHeto Ha BaWnO npo3BOD KaKo n pe3epBNHTe DenOBn. O3aKn 3a ekCnNo3na I INHopMaun 3a pe3epBNHTe DenOBn HcTo Taka Ke HajTe Ha: www.bosch-pt.com
TMMOT 3a COBetyBaBe npn KopnCTeHe Ha Bosch Ke BN NOMORHe DOKOLky HMaTe npaHaHa 3a HaHInTe pOn3BDoN onPema.
3a CNTe npaaHbHa HapaKHa pe3epBnI DenOBn,Be MoJIHe HabeTe Ro 10-uePpeHnO6poj OcneuNfKaunOHATA NLOUKA Ha npOn3BOoT.
Cebepha MaKeDoHja
Д.Д.Енковский
CabaKobayebuk 47H,6poj3
1000 Ckonje
E-mail: dimce.dimcev@servis-bosch.mk
Internet: www.servis-bosch.mk
Tel./fax: 02/2467610
Mob.: 070595888
D.P.T.U "ROJKA"
Janukurovski; T. Labutokom, Manaloka 69
1000 Skopje
E-mail: servisrojka@yahoo.com
Tel: +38923174-303
Mob: +389 70 388-520, -530
Additional addresses of service centers can be found at:
www.bosch-pt.com/serviceaddresses
Transport
Before disposal, the built-in lithium-ion batteries must be disposed of in accordance with the law on hazardous materials. The batteries can be transported only by the user, without the need for additional qualification.
When transporting by third parties (e.g., air transport or forwarding), special requirements for packaging and labeling must be observed. In this case, when preparing the shipment, an expert for hazardous substances must be consulted.
Transport the battery only if the housing is undamaged. Tape the open contacts and pack the battery in such a way that it cannot move in the packaging. Please also observe the possibly more detailed national regulations.
Disposal

Electrical devices, batteries, and accessories must be disposed of in an environmentally friendly manner.
Do not dispose of electrical devices and batteries in household waste!
Only for EU countries:
According to the European Directive 2012/19/EU on waste electrical and electronic equipment and its implementation in national law, electrical devices that are no longer usable must be collected separately and recycled. According to Directive 2006/66/EC, defective or exhausted batteries must also be collected separately and recycled.
If disposed of incorrectly, electrical and electronic equipment can have harmful effects
on human health and the environment, as hazardous substances may be present.
Batteries:
Lithium-ion:
Please observe the notes in the transport section (see "Transport", page 182).
Serbian
www.bosch-pt.com/serviceaddresses
Transport
Recommended lithium-ion batteries are subject to the requirements of dangerous goods regulations. The user can transport the batteries by road without further conditions.
When shipping via third parties (e.g., air transport or freight forwarding), special requirements regarding packaging and labeling must be observed. In such cases, a hazardous materials specialist must be consulted when preparing packages for shipment.
Only send battery packs when the housing is undamaged. Tape off open contacts and pack the battery pack so that it cannot move around in the packaging. Please also observe any further national regulations.
Disposal

Power tools, rechargeable batteries, accessories, and packaging should be sorted for environmentally friendly recycling.
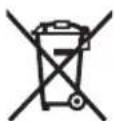
Do not dispose of power tools and rechargeable batteries/batteries in household waste!
For EU countries only:
According to the European Directive 2012/19/EU on waste electrical and electronic equipment and its implementation in national law, power tools that are no longer usable must be collected separately, and according to the European Directive 2006/66/EC, defective or depleted batteries must be collected separately and brought to an environmentally compatible recycling facility.
If electrical and electronic devices are disposed of improperly, potentially hazardous substances may have adverse effects on the environment and human health.
www.bosch-pt.com/serviceaddresses
Transport
The recommended lithium-ion batteries are subject to the requirements of the law on dangerous goods. The user can transport the batteries by road without restrictions.
www.bosch-pt.com/serviceaddresses
Transport
The recommended lithium-ion batteries are subject to the law on the transport of dangerous goods. The user can transport the batteries by road without any conditions.
If transport is carried out by a third party (e.g., air transport or freight forwarding), special requirements for packaging and labeling must be observed. When preparing such shipments for transport, a hazardous materials specialist should be consulted beforehand.
The battery can be transported by some means of transport only if its housing is undamaged. Cover the open contacts and pack the battery so that it cannot move in the packaging. Also observe any additional national regulations.
Disposal

Power tools, batteries, accessories and packaging should be taken for environmentally friendly recycling.
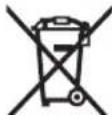
Do not dispose of power tools and batteries/rechargeable batteries in household waste!
For EU countries only:
In accordance with the European Directive 2012/19/EU on waste electrical and electronic equipment and its implementation in national law, unusable power tools, and in accordance with the European Directive 2006/66/EC, defective or exhausted batteries/rechargeable batteries must be collected separately and taken for environmentally friendly recycling.
In the event of improper disposal, waste electrical and electronic equipment may have harmful effects on the environment and human health due to the possible presence of hazardous substances.
www.bosch-pt.com/serviceaddresses
Transport
www.bosch-pt.com/serviceaddresses
Transport
The recommended lithium-ion batteries are subject to the regulations of the Dangerous Goods Act. The user can transport the batteries by road without additional conditions.
When shipping them via a third party (e.g., by air freight or other transport agency), special packaging and labeling regulations must be observed. Therefore, a dangerous goods transport specialist must be consulted when preparing the shipment.
Transport the battery only if its housing is not damaged. Cover the open battery contacts and pack the battery so that it cannot move in the packaging. Please also observe any national regulations related to battery transport, if they exist.
www.bosch-pt.com/serviceaddresses
Transport
The recommended lithium-ion batteries are subject to dangerous goods legislation. The user can transport the batteries by road without further requirements.
When shipping by third parties (e.g., air transport or forwarding agency), special requirements on packaging and labeling must be observed. For preparation of the item being shipped, consulting an expert for hazardous material is required.
www.bosch-pt.com/serviceaddresses
__SUPPIMER__
10
100 100
__SUPPIMER__
235
(a) ρ ≤ ρ ω 1
8
| GST 12V-70 | العربية الحرفية | العربية |
| 3601EA10.. | | العربية |
| العربية=12 | العربية |
| 1-العربية 28000-150000000000000000000000000000000000000000000000000000000000000000000000000000000000000000000000000000 | العربية |
| العربية18 | العربية |
| | العربية |
| العربية70 | - |
| العربية3 | - |
| العربية | - |
| | (العربية |
| 45 | ° | (العربية |


236
| LED àjou | GST 12V-70 | p# | EPTA-Procedure
01:2014 |
| μa#l ×2 jaiu## g#1/3 ≤1,7-1,9 | p#S | ρ35+...0 | ab###all oj#ll ### |
| μa#l ×1 jaiu## g#1/3 > |
| μa#l ×1 ## ### #j#l | | ρ50+...20- ab###all oj#ll ### | C###gawall |
| μa#l ×3 ## ### #j#l |
| |#.j#f l##j#ll ###### ## ## ## ## | | | | |
| .og#j#j#j#j#j#j#j#j#j#j#j#j#j#j#j#j#j#j#j#j#j#j#j#j#j#j#j#j#j#j#j#j#j#j#j#j#j#j#j#j#j#j#j#j#j#j#j#j#j#j# | | | |
| J#i#ll ###j#j#j#j#j#j#j#j#j#j#j#j#j#j#j#j#j#j#j#j#j#j#j#j#j#j#j#j#j#j#j#j#j#j#j#j#j#j#j#j#j#j#j#j#j#j#j#j#j#j#
GBA 18V. |
| #j#j#j#j#j#j#j#j#j#j#j#j#j#j#j#j#j#j#j#j#j#j#j#j#j#j#j#j#j#j#j#j#j#j#j#j#j#j#j#j#j#j#j#j#j#j#j#j#j# j#j#j#j#j#j#j#j#j#j#j#j#j#j#j#j#j#j#j#j#j#j#j#j#j#j#j#j#j#j#j#j#j#j#j#j#j#j#j#j#j#j#j#j#j#j#j#j#j#j# | GAL 12... | | |
| .og#j#j#j#j#j#j#j#j#j#j#j#j#j#j#j#j#j#j#j#j#j#j#j#j#j#j#j#j#j#j#j#j#j#j#j#j#j#j#j#j#j#j#j#j#j#j#
GAX 18... | | | |
aJALI abwI (E oJgll Jbl) gio (Lusj qdo) (18) juiil aqgl jns kssu 5. uaiiui iia Jaua
ApaJoo 25-20j1
GBA 10,8V 2.0Ah
(B C0°0>
4J 1 Jg aJLg
aIyll:la) aylyss Jlaclg 1 g Ialai sic laig (..lg sall JlsuWl Ujiae i jn aen eelie Lio. lejao uuc Jsw labg ulwll elao
(A ojjgJJI JJI) pS JJI Jn
6gJJJ
sag.1JUkwhauiyjssl 1abil spsall cy (2)uagai jIg baoi (1)psalgl 8.lawIJI ayuysll poasol ydag .Lil ogall psaun psjlln w all uuuu (1)psjlln w all (4)psjlln w all
Labg uui
LED
paix3paioo g2/3s
Juswulg
juiu 1jw gj g j juii uagol paii .0gaggl gog ooo
a a 9 ploj1 (18) oJwIg
(9)aclj 1
(9) 0xcll a y (18) a jai bawj gao .gji j
auiuulai) auiyssll oedjll jgl gI gaii sic Ig (..g. dlll lldi Ic baii sic agj yaiol jia liu. qijai .gaoo u Ksblbqlg sll aliao
1111
aJyI yI baiI ayI ayI ayI ayI ayI ayI ayI ayI ayI ayI ayI ayI ayI ayI ayI ayI ayI ayI ayI ayI ayI ayI ayI ayI ayI ayI ayI ayI ayI ayI ayI ayI ayI ayI ayI ayI ayI ayI ayI ayI ayI ayI ayI ayI ayI ayI ayI ayI ayI ayI
jull/juslbpw
Jc gjI jlll lgl sllg juc J JSLALL g jlaIg jaiy jauu J Jc gluiu I aowlo n . aauu o uo J JALI g /g aawwau J JUaWJ Lg J JLJIa Jn aq Jc J JILlg 100k, aouo J JUg J slgally bjuR sic laW 2g. uuuu uoo JUjogkl uola lo) wll Aal alal k Jall aall p u jg. (wll abal all sgall JLaa J no wguuWJ Lc 5g jil . quc ng Jbq
Robert Bosch Morocco SARL
JUJI JUJ 20300
+212529314327:
sav.outillage@ma.bosch.com
www.bosch-pt.com/serviceaddresses

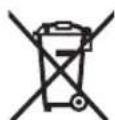
100 100 100 100
a 1
10 1000000000000000000000000000000000000000000
Bosch
240|w
JU 1 JU 1 JU 1 JU 1 JU 1 JU 1 JU 1 JU 1 JU 1 JU 1 JU 1 JU 1 JU 1 JU 1 JU 1 JU 1 JU 1 JU 1 JU 1 JU 1 JU 1 JU 1 JU 1 JU 1 JU 1 JU 1
0s s g j1 l 10jg o ss p uu 10000000000000000000000000000000000000000000000000000000
y jy yj yj yj yj yj yj yj yj yj yj yj yj yj yj yj yj yj yj yj yj yj yj yj yj yj yj yj yj yj yj yj yj yj yj yj yj yj yj yj yj yj yj yj yj yj yj yj yj yj yj y
jg s 1000000000000000000000000000000000000000000000000000000
241
The device is designed to be used in accordance with the instructions. This is a safety warning. (59)
The device should be used correctly. The user must read the instructions carefully.
The user should follow the instructions to ensure proper operation. (gj) The device should be used with caution.
The device is safe.
The device is safe.
The device should be used in accordance with the instructions. The user must read the instructions carefully. The device should be used with caution.
The device is safe.
The device should be used correctly. The user must read the instructions carefully.
The device is safe.
Electronic Cell Protection (ECP)
The device should be used in accordance with the instructions. The user must read the instructions carefully.
The device should be used in accordance with the instructions. (6)
The device should be used correctly. The user must read the instructions carefully.
Therefore, the area of triangle OBC equals the area of triangle COD plus the area of triangle BOC.
45° with respect to the line, as shown in figure (9). Then, draw the line.
This is garbled OCR text. It appears to be a mix of characters and words, possibly from a different document. Not usable.
This is garbled OCR text. Not usable.
This is garbled OCR text. Not usable.
This is garbled OCR text. Not usable.
This is garbled OCR text. Not usable.
This is garbled OCR text. Not usable.
1994834571 U
9821+42039000:Jai
This is garbled OCR text. Not usable.
www.bosch-pt.com/serviceaddresses
This is garbled OCR text. Not usable.
This is garbled OCR text. Not usable.

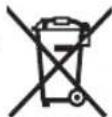
endurance StainlessSteel
T 118 AHM, ...
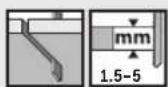
for plastics
cleanPP
T102D,..
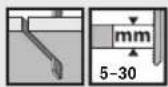
clean PVC
T102H,..
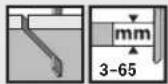
precision PVC
T 1044 HP,...
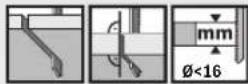
clean PMMA
T 102 BF, ...
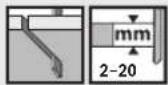
clean PC
T101A, ...
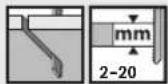
clean Carbon Fiber T108BHM,
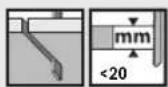
clean HPL
T128BHM,..
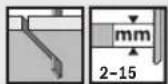
clean Plastic Composites
T301 CHM, ...
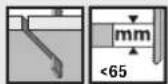
252
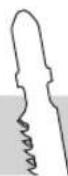
for special materials
precision
SoftMaterial T1013AWP,...

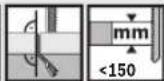
special
SoftMaterial T113A,...


special
ceramic T130RF,...

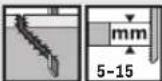
endurance
FiberPlaster T141HM,...


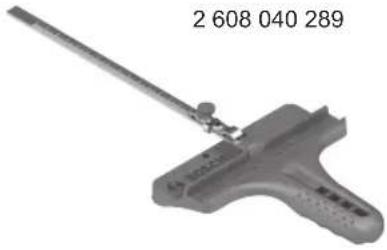
L-BOXX 102 2608438691
2608438121
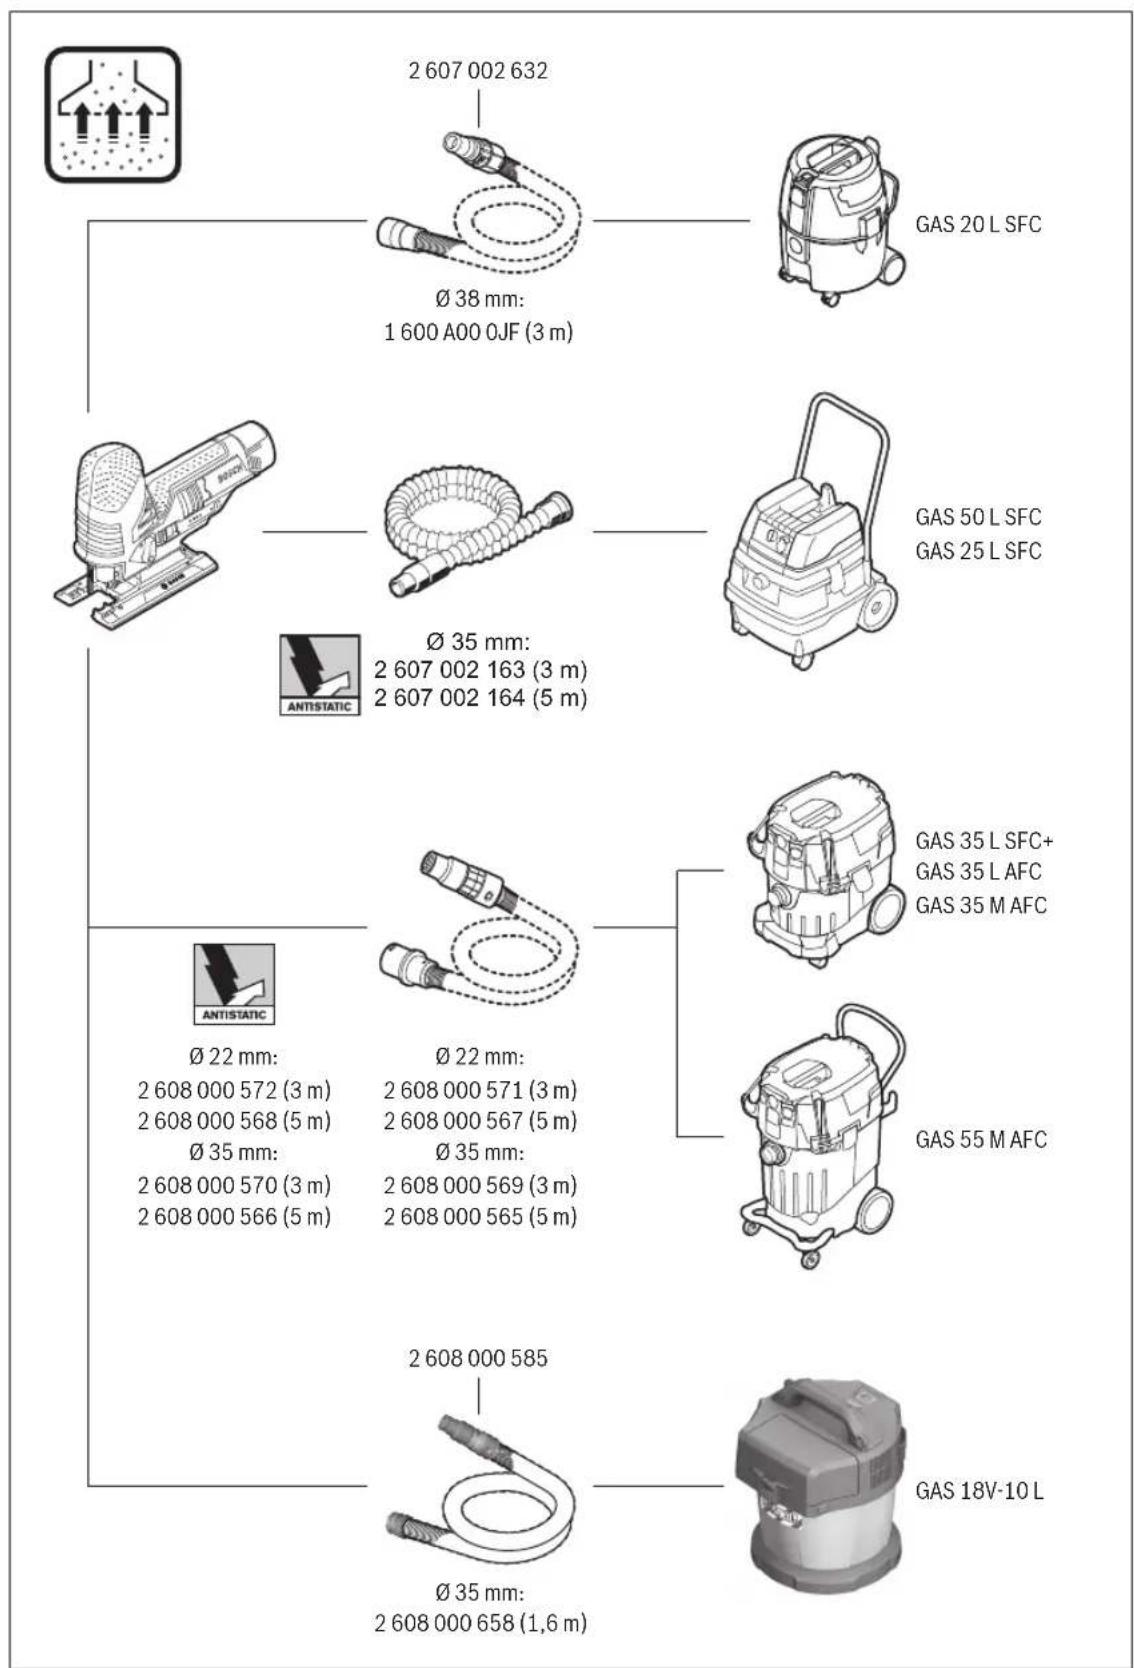
| de | EU-Konformitäserklarung | Wir erklären in alleiniger Verantwortung, dass die genannten Produkte allen einschlagigen Bestimmungen der nachfolgenden aufgeführten Richtlinien und Verordnungen entsprechen und mit folgenden Normen übereinstimmen. Technische Unterlagen bei: * |
| Akku-Stichsäge | Sachnummer |
| en | EU Declaration of Conformity | We declare under our sole responsibility that the stated products comply with all applicable provisions of the directives and regulations listed below and are in conformity with the following standards. Technical file at: * |
| Cordless jigsaw | Article number |
| fr | Déclaration de conformité UE | Nous déclarons sous notre propre responsabilité que les produits décrits sont en conformité avec les directives, règlements normatifs et normes énumérés ci-dessous. Dossier technique auprès de: * |
| Scie sauteuse sans fil | N° d'article |
| es | Déclaración de conformidad UE | Declaramos bajo nuestra exclusiva responsabilidad, que los produits nombrados cumplen con todas las dispositions correspondientes de las Directivas y los Reglementos Mentionados a continuación y stehen en conformidad con las作為 normas. Documentos tíncicos de: * |
| Sierra de calar actionada por accumulator | No de articulo |
| pt | Déclaração de Conformidade UE | Declaramos sob esta exclusiva responsabilité que os produits Mentionados cumprem todas as disposções e os regulamentos indicados e está em conformidade com as seguides normas. Documentação técnica pertentente à: * |
| Serra vertical sem fio | N.° do produits |
| it | Dichiarazione di conformità UE | Dichiariamo sulla mia piena responsabilità che i prodotti indicate sono conformi alla tutte le disposizioni pertinenti delle Direttive e dei Regolamenti elencati di seguito, nonché alle seguiti Normative. Documentazione Tecnica presso: * |
| Seghetto alternativea batteria | Codice prodotto |
| nl | EU-conformiteitsverklaring | Wij verklaren op eigenverantwoordelijkheid dat de genoemde producten voldoen aan alle desbetreffende bepalingen van de hierna genoemde richtlijnen en verordeningen en overeenstemmen met de volgende normen. Technisch dossier bij: * |
| Accudecoupee-zaag | Productnumber |
| da | EU-overensstemmelseserklaering | Vi erklær som eneansvarlige, at det beskreve produit er i overensstommelse med alle geldende bestemmelser i følgende direktiver og forordninger og opfylder følgende standarder. Tekniske bilag ved: * |
| Akku-stiksav | Typenummer |
| sv | EU-konformitetsförklaring | Vi forklarar under eget ansvar att de nämnda Produktterma uppfyller kraven i alla gällande bestämelse i de nedan angivna direktiven och fordordingarnas och att de stämmer överens med följande normer. Teknisk Dokumentation: * |
| Sladdlös sticksåg | Produktnumber |
| no | EU-samsvarserklæring | Vi erklær under eneansvar at de nevnte Produktene er i overensstmmelse med alle relevante bestemmelser i direktivene og forordningene nedenfor og med følgende standarder. Teknisk dokumentasjon hos: * |
| Batteridrevet stikksag | Produktnumber |
| fi | EU-vaatimustemmukaisuusvakuutus | Vakutamme tätten, etta mainitut tuotteet vastaavat kaikkia seuraavien direktiivien ja asetusten asiaankuulvia vaatimuksaja ja ovat seuraavien standardien vaatimusten mukaisia. Tekniset asiakirjat saatavana: * |
| Akkupistosaha | Tuotenumero |
| el | Δηλωη πιστότητα EE | Δηλωνομε εραπλείσικη μας ευθύνη, ὄτι τα αναφρούμενα προίντα ανιστοχούν οεόλες κε σεπικέδιατάξεις των πότων αναφρούμενων σθηγύν και κανονιμύν και ταυτίουσιμε τη με τα ακόλουθα πρότιμα. Tekvnika éyyrραρα στη: * |
| Σέγα μπαταρίας | Αριθμός ευρετηρίου |
| tr | AB Uygunluk beyani | Tek sorumluormal, tanımlanan ürünün asaqidaki)yönnetmelik ve direktiflerin geleçeri咻;bühülükürleine ve asaqidaki standartlara uygün oluguṇu beyan ederiz.Teknik belgelerin bulundugu yer: * |
| Akūlünekupaj testeresi | Ürün kodu |
| II | |
| pl | Deklaracja zgodnosci UE | Osciadczamy z pełna odpowiedzialnoscia, ze nineje}sze produkty odpowiadajw wsystkim wymaganiom ponizej wyszcżeglónionych dyrektyw i Rozporzadźne, oraz ze są zgodne z nastepujućymi normami. Dokumentacja techniczna:* | |
| Wyrzynarka Numer katalogowy akumulatorowa | |
| cs | EU prohląsieni oshodě | Prohląsujeme na vyhradní zodpovednost, ze uvedený vyrobek spólnej vsechna príslušné ustanovení nizé uvedených směrnic anárižení ale vsoulad snásledujícímnormami: TECHnické podklady u:* | |
| Akumulátorová ObjednaciCIDSO | Vyhlasujeme na vyhradní zodpovednost, ze uvedený vyrobek spólna vsetky príslušné ustanovenia nizsie uvedených směrnic anáriadení ale vsúlade snásledujícímnormami: TECHnické podklady má spolocnost:* | |
| sk | EU vyhląsenie ozhode | Egyedüli feleloşeggel kijelentjuk, hagy a megnevezett termékek megfelelnek az alábbiakban felsorolársa kerülo irányvelk és rendeletek valamennyi idevágo elöirásainak és megfelelnek a kõvetkező szabványoknak. Mûszaki dokumentumok megörzési pontja:* | |
| Akumulátorová VecnéCIDSO | 3aavbIeHne O COOTBETCTBn EC | |
| Akkumulátoros Cikkszám | 3aavbIeHne IO Nau Hau W EINHOLNUHYO OTBETCTBENHOCTb, UTO HauBaHbIe NPOdYKbIcooTBTCTBIVOT BCM DeJCTBVOUZIM NPEIDNCAHNIM HIXKEYA3AHbIX DIPKETINB I PACNOPJKeHn, A TAKKHe HIXKEYA3AHbIX HOPM. TexNHueckay DOKUMENTAÇN XPAHNTCAY:* | |
| hu | 3aavbIeHne O COOTBETCTBn EC | 3aavbIeHne IO Nau Hau W EINHOLNUHYO OTBETCTBENHOCTb, UTO HauBaHbIe NPOdYKbIcooTBTCTBIVOT BCM DeJCTBVOUZIM NPEIDNCAHNIM HIXKEYA3AHbIX DIPKETINB I POCNIOJDKEN, A TAKKHe HIXKEYA3AHbIX HOPM. TexNHueckay DOKUMENTAÇN 36EPiAcrTbC y:* | |
| Akkumulátorop- TOBAPNBOH NQ | 3aavbIeHne IO Nau Hau W EINHOLNUHYO OTBETCTBENHOCTb, UTO HauBaHbIe NPOdYKbIcooTBTCTBIVOT BCM DeJCTBVOUZIM NPEIDNCAHNIM HIXKEYA3AHbIX DIPKETINB I POCNIOJDKEN, A TAKPONIOJDKEN, A TAKKHe HIXKEYA3AHbIX HOPM. TexNHueckay DOKUMENTAÇN 36EPiAcrTbC y:* | |
| ru | 3aavbIeHne O COOTBETCTBn EC | 3aavbIeHne IO Nau Hau W EINHOLNUHYO OTBETCTBENHOCTb, UTO HauBaHbIe NPOdYKbIcooTBTCTBIVOT BCM DeJCTBVOUZIM NPEIDNCAHNIM HIXKEYA3AHbIX DiPKETINB I POCNIOJDKEN, A TAKPONIOJDKEN, A TAKKHe HIXKEYA3AHbIX HOPM. TexNHueckay DOKUMENTAÇN 36EPiAcrTbC y:* | |
| Akkumulátorop- TOBAPNBOH NQ | 3aavbIeHne IO Nau Hau W EINHOLNUHYO OTBETCTBENHOCTb, U TO HauBaHbIe NPOdYKbIcooTBTCTBIVOT BCM DeJCTBVOUZIM NPEIDNCAHNIM HIXKEYA3AHbIX DiPKETINB I POCNIOJDKEN, A TAKPONIOJDKEN, A TAKKHe HIXKEYA3AHbIX HOPM. TexNHueckay DOKUMENTAçN 36EPiAcrTbC y:* | |
| uk | 3aavbIeNo PBOVBIIDNICTB EC | 3aavbIeNo IO Nau Hau W EINHOLNUHYO OTBETCTBENHOCTb, UTO HauBaHbIe NPOdYKbIcooTBTCTBIVOT BCM DeJCTBVOUZIM NPEOJIPOJDKEN, A TAKPONIOJDKEN, A TAKKHe HIXKEYA3AHbIX DiPKETINB I POCNIOJDKEN, A TAKPONIOJDKEN, A TAKPONIOJDKEN, A TAKPONIOJDKEN, A TAKPONIOJDKEN, A TAKPONIOJDKEN, A TAKPONIOJDKEN, A TAKPONIOJDKEN, A TAKPONIOJDKEN, A TAKPONIOJDKEN, A TAKPONIOJDKEN, A TAKPIONOJDKEN, A TAKPIONOJDKEN, A TAKPIONOJDKEN, A TAKPIONOJDKEN, A TAKPIONOJDKEN, A TAKPIONOJDKEN, A TAKPIONOJDKEN, A TAKPIONOJDKEN, A TAKPIONOJDKEN, A TAKPIONOJDKEN, A TAKPION0JDKEN, A TAKPIONOJDKEN, A TAKPIONOJDKEN, A TAKPIONOJDKEN, A TAKPIONOJDKEN, A TAKPIONOJDKEN, A TAKPIONOJDKEN, A TAKPIONOJDKEN, A TAKPIONOJDKEN, A TAKPIONOJDKEN, A TAKPIONOOJDKEN, A TAKPIONOJDKEN, A TAKPIONOJDKEN, A TAKPIONOJDKEN, A TAKPIONOJDKEN, A TAKPIONOJDKEN, A TAKPIONOJDKEN, A TAKPIONOJDKEN, A TAKPIONOJDKEN, A TAKPIONOJDKEN, A TAKPIONoJDKEN, A TAKPIONOJDKEN, A TAKPIONOJDKEN, A TAKPIONOJDKEN, A TAKPIONOJDKEN, A TAKPIONOJDKEN, A TAKPIONOJDKEN, A TAKPIONOJDKEN, A TAKPIONOJDKEN, A TAKPIONOJDKEN, A TAKPIONODIaHOMER | |
| Akkumulátorop- TOBAPNBOH NQ | 3aavbIeNo PBOVBIIDNICTB EC | |
| Akkumulátorop- TOBAPNBOH NQ | 3aavbIeNo IO Nau Hau W EINHOLNUHYO OTBETCTBENHOCTb, UTO HauBaHbIe NPOdYKbIcooTBTCTBIVOT BCM DeJCTBVOUZIM NPEOJIPOJDKEN, A TAKPONIOJDKEN, A TAKPIONOJDKEN, A TAKPIONOJDKEN, A TAKPIONOJDKEN, A TAKPIONOJDKEN, A TAKPIONOJDKEN, A TAKPIONOJDKEN, A TAKPIONOJDKEN, A TAKPIONOJDKEN, A TAKPION0JDKEN, A TAKPION0JDKEN, A TAKPION0JDKEN, A TAKPION0JDKEN, A TAKPION0JDKEN, A TAKPION0JDKEN, A TAKPION0JDKEN, A TAKPION0JDKEN, A TAKPION0JDKEN, A TAKPION0JDKEN, A TAKPIONOJDKEN, A TAKPION0JDKEN, A TAKPION0JDKEN, A TAKPION0JDKEN, A TAKPION0JDKEN, A TAKPION0JDKEN, A TAKPION0JDKEN, A TAKPION0JDKEN, A TAKPION0JDKEN, A TAKPIONOJDKEN, A TAKPIONOJDKEN, A TAKPION0JDKEN, A TAKPION0JDKEN, A TAKPION0JDKEN, A TAKPION0JDKEN, A TAKPION0JDKEN, A TAKPION0JDKEN, A TAKPION0JDKEN, A TAKPIONOJDKEN, A TAKPION0JDKEN, A TAKPIONOJDKEN, A TAKPION0JDKEN, A TAKPION0JDKEN, A TAKPION0JDKEN, A TAKPION0JDKEN, A TAKPION0JDKEN, A TAKPION0JDKEN, A TAKPION0JDKEN, A TAKPIONOJDKEN, A TAKPIONOJDKEN, A TAKPIONOJDKEN, A TAKPION0JDKEN, A TAKPION0JDKEN, A TAKPION0JDKEN, A TAKPION0JDKEN, A TAKPION0JDKEN, A TAKPION0JDKEN, A TAKPIONOJDKEN, A TAKPION0JDKEN, A TAKPION0JDKEN, A TAKPIONOJDKEN, A TAKPION0JDKEN, A TAKPION0JDKEN, A TAKPION0JDKEN, A TAKPION0JDKEN, A TAKPION0JDKEN, A TAKPION0JDKEN, A TAKPIONOJDKEN, A TAKPION0JDKEN, A TAKPIONOJDKEN, A TAKPIONOJDKEN, A TAKPION0JDKEN, A TAKPION0JDKEN, A TAKPION0JDKEN, A TAKPION0JDKEN, A TAKPION0JDKEN, A TAKPION0JDKEN, A TAKPIONOJDKEN, A TAKPIONOJDKEN, A TAKPION0JDKEN, A TAKPIONOJDKEN, A TAKPION0JDKEN, A TAKPION0JDKEN, A TAKPION0JDKEN, A TAKPION0JDKEN, A TAKPION0JDKEN, A TAKPION0JDKEN, A TAKPIONOJDKEN, A TAKPIONOJDKEN, A TAKPIONOJDKEN, A TAKPIONOJDKEN, A TAKPION0JDKEN, A TAKPION0JDKEN, A TAKPION0JDKEN, A TAKPION0JDKEN, A TAKPION0JDKEN, A TAKPIONOJDKEN, A TAKPION0JDKEN, A TAKPION0JDKEN, A TAKPION0JDKEN, A TAKPIONOJDKEN, A TAKPION0JDKEN, A TAKPION0JDKEN, A TAKPION0JDKEN, A TAKPION0JDKEN, A TAKPION0JDKEN, A TAKPIONOJDKEN, A TAKPION0JDKEN, A TAKPION0JDKEN, A TAKPIONOJDKEN, A TAKPIONOJDKEN, A TAKPION0JDKEN, A TAKPION0JDKEN, A TAKPION0JDKEN, A TAKPION0JDKEN, A TAKPION0JDKEN, A TAKPIONOJDKEN, A TAKPION0JDKEN, A TAKPIONOJDKEN, A TAKPION0JDKEN, A TAKPIONOJDKEN, A TAKPION0JDKEN, A TAKPION0JDKEN, A TAKPION0JDKEN, A TAKPION0JDKEN, A TAKPION0JDKEN, A TAKPIONOJDKEN, A TAKPION0JDKEN, A TAKPIONOJDKEN, A TAKPIONOJDKEN, A TAKPIONOJDKEN, A TAKPION0JDKEN, A TAKPION0JDKEN, A TAKPION0JDKEN, A TAKPION0JDKEN, A TAKPION0JDKEN, A TAKPIONOJDKEN, A TAKPIONOJDKEN, A TAKPION0JDKEN, A TAKPION0JDKEN, A TAKPIONOJDKEN, A TAKPION0JDKEN, A TAKPION0JDKEN, A TAKPION0JDKEN, A TAKPION0JDKEN, A TAKPION0JDKEN, A TAKPIONOJDKEN, A TAKPIONOJDKEN, A TAKPION0JDKEN, A TAKPIONOJDKEN, A TAKPIONOJDKEN, A TAKPION0JDKEN, A TAKPION0JDKEN, A TAKPION0JDKEN, A TAKPION0JDKEN, A TAKPION0JDKEN, A TAKPIONOJDKEN, A TAKPIONOJDKEN, A TAKPIONOJDKEN, A TAKPION0JDKEN, A TAKPIONOJDKEN, A TAKPION0JDKEN, A TAKPION0JDKEN, A TAKPION0JDKEN, A TAKPION0JDKEN, A TAKPION0JDKEN, A TAKPIONOJDKEN, A TAKPIONOJDKEN, A TAKPIONOJDKEN, A TAKPIONOJDKEN, A TAKPIONOJDKEN, A TAKPION0JDKEN, A TAKPION0JDKEN, A TAKPION0JDKEN, A TAKPION0JDKEN, A TAKPIONOJDKEN, A TAKPION0JDKEN, A TAKPION0JDKEN, A TAKPION0JDKEN, A TAKPION0JDKEN, A TAKPIONOJDKEN, A TAKPION0JDKEN, A TAKPION0JDKEN, A TAKPION0JDKEN, A TAKPIONOJDKEN, A TAKPIONOJDKEN, A TAKPION0JDKEN, A TAKPION0JDKEN, A TAKPION0JDKEN, A TAKPION0JDKEN, A TAKPIONOJDKEN, A TAKPION0JDKEN, A TAKPION0JDKEN, A TAKPIONOJDKEN, A TAKPION0JDKEN, A TAKPIONOJDKEN, A TAKPION0JDKEN, A TAKPION0JDKEN, A TAKPION0JDKEN, A TAKPION0JDKEN, A TAKPIONOJDKEN, A TAKPION0JDKEN, A TAKPION0JDKEN, A TAKPIONOJDKEN, A TAKPIONOJDKEN, A TAKPIONOJDKEN, A TAKPION0JDKEN, A TAKPION0JDKEN, A TAKPION0JDKEN, A TAKPION0JDKEN, A TAKPIONOJDKEN, A TAKPION0JDKEN, A TAKPIONOJDKEN, A TAKPION0JDKEN, A TAKPION0JDKEN, A TAKPIONOJDKEN, A TAKPION0JDKEN, A TAKPION0JDKEN, A TAKPION0JDKEN, A TAKPION0JDKEN, A TAKPIONOJDKEN, A TAKPION0JDKEN, A TAKPIONOJDKEN, A TAKPION0JDKEN, A TAKPIONOJDKEN, A TAKPIONOJDKEN, A TAKPION0JDKEN, A TAKPION0JDKEN, A TAKPION0JDKEN, A TAKPION0JDKEN, A TAKPIONOJDKEN, A TAKPION0JDKEN, A TAKPIONOJDKEN, A TAKPIONOJDKEN, A TAKPION0JDKEN, A TAKPIONOJDKEN, A TAKPION0JDKEN, A TAKPION0JDKEN, A TAKPION0JDKEN, A TAKPION0JDKEN, A TAKPIONOJDKEN, A TAKPION0JDKEN, A TAKPIONOJDKEN, A TAKPIONOJDKEN, A TAKPIONOJDKEN, A TAKPIONOJDKEN, A TAKPION0JDKEN, A TAKPION0JDKEN, A TAKPION0JDKEN, A TAKPION0JDKEN, A TAKPIONOJDKEN, A TAKPIONOJDKEN, A TAKPION0JDKEN, A TAKPION0JDKEN, A TAKPION0JDKEN, A TAKPIONOJDKEN, A TAKPION0JDKEN, A TAKPION0JDKEN, A TAKPION0JDKEN, A TAKPION0JDKEN, A TAKPIONOJDKEN, A TAKPIONOJDKEN, A TAKPION0JDKEN, A TAKPION0JDKEN, A TAKPIONOJDKEN, A TAKPIONOJDKEN, A TAKPION0JDKEN, A TAKPION0JDKEN, A TAKPION0JDKEN, A TAKPION0JDKEN, A TAKPIONOJDKEN, A TAKPIONOJDKEN, A TAKPION0JDKEN, A TAKPIONOJDKEN, A TAKPION0JDKEN, A TAKPIONOJDKEN, A TAKPION0JDKEN, A TAKPION0JDKEN, A TAKPION0JDKEN, A TAKPION0JDKEN, A TAKPIONOJDKEN, A TAKPIONOJDKEN, A TAKPION0JDKEN, A TAKPIONOJDKEN, A TAKPIONOJDKEN, A TAKPIONOJDKEN, A TAKPIONOJDKEN, A TAKPIONOJDKEN, A TAKPIONOJDKEN, A TAKPION0JDKEN, A TAKPION0JDKEN, A TAKPION0JDKEN, A TAKPIONOJDKEN, A TAKPION0JDKEN, A TAKPION0JDKEN, A TAKPION0JDKEN, A TAKPIONOJDKEN, A TAKPION0JDKEN, A TAKPIONOJDKEN, A TAKPION0JDKEN, A TAKPION0JDKEN, A TAKPION0JDKEN, A TAKPIONOJDKEN, A TAKPION0JDKEN, A TAKPION0JDKEN, A TAKPION0JDKEN, A TAKPIONOJDKEN, A TAKPIONOJDKEN, A TAKPIONOJDKEN, A TAKPION0JDKEN, A TAKPIONOJDKEN, A TAKPION0JDKEN, A TAKPIONOJDKEN, A TAKPION0JDKEN, A TAKPION0JDKEN, A TAKPION0JDKEN, A TAKPIONOJDKEN, A TAKPION0JDKEN, A TAKPIONOJDKEN, A TAKPION0JDKEN, A TAKPIONOJDKEN, A TAKPION0JDKEN, A TAKPIONOJDKEN, A TAKPION0JDKEN, A TAKPIONOJDKEN, A TAKPION0JDKEN, A TAKPION0JDKEN, A TAKPIONOJDKEN, A TAKPION0JDKEN, A TAKPIONOJDKEN, A TAKPION0JDKEN, A TAKPIONOJDKEN, A TAKPION0JDKEN, A TAKPIONOJDKEN, A TAKPIONOJDKEN, A TAKPION0JDKEN, A TAKPIONOJDKEN, A TAKPION0JDKEN, A TAKPIONOJDKEN, A TAKPION0JDKEN, A TAKPIONOJDKEN, A TAKPION0JDKEN, A TAKPIONOJDKEN, A TAKPIONOJDKEN, A TAKPIONOJDKEN, A TAKPIONOJDKEN, A TAKPIONOJDKEN, A TAKPIONOJDKEN, A TAKPIONOJDKEN, A TAKPION0JDKEN, A TAKPIONOJDKEN, A TAKPION0JDKEN, A TAKPIONOJDKEN, A TAKPIONOJDKEN, A TAKPION0JDKEN, A TAKPIONOJDKEN, A TAKPION0JDKEN, A TAKPION0JDKEN, A TAKPIONOJDKEN, A TAKPION0JDKEN, A TAKPIONOJDKEN, A TAKPION0JDKEN, A TAKPION0JDKEN, A TAKPIONOJDKEN, A TAKPION0JDKEN, A TAKPIONOJDKEN, A TAKPIONOJDKEN, A TAKPION0JDKEN, A TAKPIONOJDKEN, A TAKPION0JDKEN, A TAKPIONOJDKEN, A TAKPIONOJDKEN, A TAKPION0JDKEN, A TAKPIONOJDKEN, A TAKPIONOJDKEN, A TAKPION0JDKEN, A TAKPIONOJDKEN, A TAKPION0JDKEN, A TAKPIONOJDKEN, A TAKPION0JDKEN, A TAKPION0JDKEN, A TAKPIONOJDKEN, A TAKPION0JDKEN, A TAKPION0JDKEN, A TAKPIONOJDKEN, A TAKPION0JDKEN, A TAKPION0JDKEN, A TAKPION0JDKEN, A TAKPIONOJDKEN, A TAKPION0JDKEN, A TAKPION0JDKEN, A TAKPIONOJDKEN, A TAKPION0JDKEN, A TAKPION0JDKEN, A TAKPIONOJDKEN, A TAKPION0JDKEN, A TAKPIONOJDKEN, A TAKPION0JDKEN, A TAKPIONOJDKEN, A TAKPIONOJDKEN, A TAKPION0JDKEN, A TAKPIONOJDKEN, A TAKPIONOJDKEN, A TAKPIONOJDKEN, A TAKPION0JDKEN, A TAKPION0JDKEN, A TAKPION0JDKEN, A TAKPION0JDKEN, A TAKPIONOJDKEN, A TAKPIONOJDKEN, A TAKPIONOJDKEN, A TAKPION0JDKEN, A TAKPION0JDKEN, A TAKPIONOJDKEN, A TAKPION0JDKEN, A TAKPION0JDKEN, A TAKPION0JDKEN, A TAKPION0JDKEN, A TAKPIONOJDKEN, A TAKPIONOJDKEN, A TAKPIONOJDKEN, A TAKPION0JDKEN, A TAKPIONOJDKEN, A TAKPIONOJDKEN, A TAKPION0JDKEN, A TAKPION0JDKEN, A TAKPION0JDKEN, A TAKPION0JDKEN, A TAKPIONOJDKEN, A TAKPIONOJDKEN, A TAKPIONOJDKEN, A TAKPIONOJDKEN, A TAKPION0JDKEN, A TAKPIONOJDKEN, A TAKPION0JDKEN, A TAKPION0JDKEN, A TAKPION0JDKEN, A TAKPION0JDKEN, A TAKPIONOJDKEN, A TAKPIONOJDKEN, A TAKPIONOJDKEN, A TAKPIONOJDKEN, A TAKPIONOJDKEN, A TAKPIONOJDKEN, A TAKPIONOJDKEN, A TAKPIONOJDKEN, A TAKPION0JDKEN, A TAKPIONoJDKEN, A TAKPIONoJDKEN, A TAKPIONoJDKEN, A TAKPIONoJDKEN, A TAKPIONoJDKEN, A TAKPIONoJDKEN, A TAKPIONoJDKEN, A TAKPIONoJDKEN, A TAKPIONoJDKEN, A TAKPIONoJDKEN, A TAKPION0JDKEN, A TAKPIONoJDKEN, A TAKPIONoJDKEN, A TAKPIONoJDKEN, A TAKPIONoJDKEN, A TAKPIONoJDKEN, A TAKPIONoJDKEN, A TAKPIONoJDKEN, A TAKPIONoJDKEN, A TAKPION0JDKEN, A TAKPION0JDKEN, A TAKPIONoJDKEN, A TAKPIONoJDKEN, A TAKPIONoJDKEN, A TAKPIONoJDKEN, A TAKPIONoJDKEN, A TAKPIONoJDKEN, A TAKPIONoJDKEN, A TAKPIONoJDKEN, A TAKPIONOJDKEN, A TAKPIONoJDKEN, A TAKPIONoJDKEN, A TAKPIONoJDKEN, A TAKPIONoJDKEN, A TAKPIONoJDKEN, A TAKPIONoJDKEN, A TAKPIONoJDKEN, A TAKPIONoJDKEN, A TAKPIONoJDKEN, A TAKPIONOJDKEN, A TAKPIONOJDKEN, A TAKPIONoJDKEN, A TAKPIONoJDKEN, A TAKPIONoJDKEN, A TAKPIONoJDKEN, A TAKPIONoJDKEN, A TAKPIONoJDKEN, A TAKPIONoJDKEN, A TAKPIONoJDKEN, A TAKPION0JDKEN, A TAKPIONOJDKEN, A TAKPIONoJDKEN, A TAKPIONoJDKEN, A TAKPIONoJDKEN, A TAKPIONoJDKEN, A TAKPIONoJDKEN, A TAKPIONoJDKEN, A TAKPIONoJDKEN, A TAKPIONoJDKEN, A TAKPIONOJDKEN, A TAKPION0JDKEN, A TAKPIONoJDKEN, A TAKPIONoJDKEN, A TAKPIONoJDKEN, A TAKPIONoJDKEN, A TAKPIONoJDKEN, A TAKPIONoJDKEN, A TAKPIONoJDKEN, A TAKPION0JDKEN, A TAKPIONoJDKEN, A TAKPION0JDKEN, A TAKPIONoJDKEN, A TAKPIONoJDKEN, A TAKPIONoJDKEN, A TAKPIONoJDKEN, A TAKPIONoJDKEN, A TAKPIONoJDKEN, A TAKPIONoJDKEN, A TAKPION0JDKEN, A TAKPION0JDKEN, A TAKPION0JDKEN, A TAKPIONoJDKEN, A TAKPIONoJDKEN, A TAKPIONoJDKEN, A TAKPIONoJDKEN, A TAKPIONoJDKEN, A TAKPIONoJDKEN, A TAKPIONoJDKEN, A TAKPION0JDKEN, A TAKPIONOJDKEN, A TAKPION0JDKEN, A TAKPIONoJDKEN, A TAKPIONoJDKEN, A TAKPIONoJDKEN, A TAKPIONoJDKEN, A TAKPIONoJDKEN, A TAKPIONoJDKEN, A TAKPIONoJDKEN, A TAKPIONOJDKEN, A TAKPIONoJDKEN, A TAKPION0JDKEN, A TAKPIONoJDKEN, A TAKPIONoJDKEN, A TAKPIONoJDKEN, A TAKPIONoJDKEN, A TAKPIONoJDKEN, A TAKPIONoJDKEN, A TAKPIONoJDKEN, A TAKPIONOJDKEN, A TAKPION0JDKEN, A TAKPION0JDKEN, A TAKPIONoJDKEN, A TAKPIONoJDKEN, A TAKPIONoJDKEN, A TAKPIONoJDKEN, A TAKPIONoJDKEN, A TAKPIONoJDKEN, A TAKPIONoJDKEN, A TAKPIONOJDKEN, A TAKPIONOJDKEN, A TAKPION0JDKEN, A TAKPIONoJDKEN, A TAKPIONoJDKEN, A TAKPIONoJDKEN, A TAKPIONoJDKEN, A TAKPIONoJDKEN, A TAKPIONoJDKEN, A TAKPION0JDKEN, A TAKPIONoJDKEN, A TAKPIONoJDKEN, A TAKPION0JDKEN, A TAKPIONoJDKEN, A TAKPIONoJDKEN, A TAKPIONoJDKEN, A TAKPIONoJDKEN, A TAKPIONoJDKEN, A TAKPIONoJDKEN, A TAKPION0JDKEN, A TAKPIONoJDKEN, A TAKPION0JDKEN, A TAKPION0JDKEN, A TAKPIONoJDKEN, A TAKPIONoJDKEN, A TAKPIONoJDKEN, A TAKPIONoJDKEN, A TAKPIONoJDKEN, A TAKPIONoJDKEN, A TAKPION0JDKEN, A TAKPIONoJDKEN, A TAKPIONOJDKEN, A TAKPIONoJDKEN, A TAKPIONoJDKEN, A TAKPIONoJDKEN, A TAKPIONoJDKEN, A TAKPIONoJDKEN, A TAKPIONoJDKEN, A TAKPIONoJDKEN, A TAKPION0JDKEN, A TAKPIONoJDKEN, A TAKPIONOJDKEN, A TAKPION0JDKEN, A TAKPIONoJDKEN, A TAKPIONoJDKEN, A TAKPIONoJDKEN, A TAKPIONoJDKEN, A TAKPIONoJDKEN, A TAKPIONoJDKEN, A TAKPION0JDKEN, A TAKPION0JDKEN, A TAKPIONoJDKEN, A TAKPION0JDKEN, A TAKPIONoJDKEN, A TAKPIONoJDKEN, A TAKPIONoJDKEN, A TAKPIONoJDKEN, A TAKPIONoJDKEN, A TAKPIONoJDKEN, A TAKPION0JDKEN, A TAKPION0JDKEN, A TAKPION0JDKEN, A TAKPION0JDKEN, A TAKPIONoJDKEN, A TAKPIONoJDKEN, A TAKPIONoJDKEN, A TAKPIONoJDKEN, A TAKPIONoJDKEN, A TAKPIONoJDKEN, A TAKPION0JDKEN, A TAKPION0JDKEN, A TAKPIONOJDKEN, A TAKPIONoJDKEN, A TAKPIONoJDKEN, A TAKPIONoJDKEN, A TAKPIONoJDKEN, A TAKPIONoJDKEN, A TAKPIONoJDKEN, A TAKPIONoJDKEN, A TAKPION0JDKEN, A TAKPION0JDKEN, A TAKPIONOJDKEN, A TAKPION0JDKEN, A TAKPIONoJDKEN, A TAKPIONoJDKEN, A TAKPIONoJDKEN, A TAKPIONoJDKEN, A TAKPIONoJDKEN, A TAKPIONoJDKEN, A TAKPION0JDKEN, A TAKPIONOJDKEN, A TAKPIONoJDKEN, A TAKPION0JDKEN, A TAKPIONoJDKEN, A TAKPIONoJDKEN, A TAKPIONoJDKEN, A TAKPIONoJDKEN, A TAKPIONoJDKEN, A TAKPIONoJDKEN, A TAKPION0JDKEN, A TAKPIONOJDKEN, A TAKPION0JDKEN, A TAKPION0JDKEN, A TAKPIONoJDKEN, A TAKPIONoJDKEN, A TAKPIONoJDKEN, A TAKPIONoJDKEN, A TAKPIONoJDKEN, A TAKPIONoJDKEN, A TAKPION0JDKEN, A TAKPIONOJDKEN, A TAKPIONOJDKEN, A TAKPIONoJDKEN, A TAKPIONoJDKEN, A TAKPIONoJDKEN, A TAKPIONoJDKEN, A TAKPIONoJDKEN, A TAKPIONoJDKEN, A TAKPIONoJDKEN, A TAKPION0JDKEN, A TAKPIONOJDKEN, A TAKPIONOJDKEN, A TAKPION0JDKEN, A TAKPIONoJDKEN, A TAKPIONoJDKEN, A TAKPIONoJDKEN, A TAKPIONoJDKEN, A TAKPIONoJDKEN, A TAKPIONoJDKEN, A TAKPIONOJDKEN, A TAKPIONoJDKEN, A TAKPIONoJDKEN, A TAKPION0JDKEN, A TAKPIONoJDKEN, A TAKPIONoJDKEN, A TAKPIONoJDKEN, A TAKPIONoJDKEN, A TAKPIONoJDKEN, A TAKPIONoJDKEN, A TAKPIONOJDKEN, A TAKPIONoJDKEN, A TAKPION0JDKEN, A TAKPIONOJDKEN, A TAKPIONoJDKEN, A TAKPIONoJDKEN, A TAKPIONoJDKEN, A TAKPIONoJDKEN, A TAKPIONoJDKEN, A TAKPIONoJDKEN, A TAKPION0JDKEN, A TAKPIONoJDKEN, A TAKPIONoJDKEN, A TAKPIONOJDKEN, A TAKPIONoJDKEN, A TAKPIONoJDKEN, A TAKPIONoJDKEN, A TAKPIONoJDKEN, A TAKPIONoJDKEN, A TAKPIONoJDKEN, A TAKPION0JDKEN, A TAKPIONoJDKEN, A TAKPION0JDKEN, A TAKPIONOJDKEN, A TAKPIONoJDKEN, A TAKPIONoJDKEN, A TAKPIONoJDKEN, A TAKPIONoJDKEN, A TAKPIONoJDKEN, A TAKPIONoJDKEN, A TAKPIONOJDKEN, A TAKPIONoJDKEN, A TAKPIONoJDKEN, A TAKPIONOJDKEN, A TAKPIONoJDKEN, A TAKPIONoJDKEN, A TAKPIONoJDKEN, A TAKPIONoJDKEN, A TAKPIONoJDKEN, A TAKPIONoJDKEN, A TAKPIONOJDKEN, A TAKPIONoJDKEN, A TAKPION0JDKEN, A TAKPION0JDKEN, A TAKPIONoJDKEN, A TAKPIONoJDKEN, A TAKPIONoJDKEN, A TAKPIONoJDKEN, A TAKPIONoJDKEN, A TAKPIONoJDKEN, A TAKPIONOJDKEN, A TAKPIONoJDKEN, A TAKPIONOJDKEN, A TAKPIONoJDKEN, A TAKPIONoJDKEN, A TAKPIONoJDKEN, A TAKPIONoJDKEN, A TAKPIONoJDKEN, A TAKPIONoJDKEN, A TAKPIONoJDKEN, A TAKPIONOJDKEN, A TAKPIONoJDKEN, A TAKPIONOJDKEN, A TAKPION0JDKEN, A TAKPIONoJDKEN, A TAKPIONoJDKEN, A TAKPIONoJDKEN, A TAKPIONoJDKEN, A TAKPIONoJDKEN, A TAKPIONoJDKEN, A TAKPIONOJDKEN, A TAKPION0JDKEN, A TAKPIONoJDKEN, A TAKPION0JDKEN, A TAKPIONoJDKEN, A TAKPIONoJDKEN, A TAKPIONoJDKEN, A TAKPIONoJDKEN, A TAKPIONoJDKEN, A TAKPIONoJDKEN, A TAKPIONOJDKEN, A TAKPION0JDKEN, A TAKPION0JDKEN, A TAKPION0JDKEN, A TAKPIONoJDKEN, A TAKPIONoJDKEN, A TAKPIONoJDKEN, A TAKPIONoJDKEN, A TAKPIONoJDKEN, A TAKPIONoJDKEN, A TAKPIONOJDKEN, A TAKPION0JDKEN, A TAKPIONOJDKEN, A TAKPIONoJDKEN, A TAKPIONoJDKEN, A TAKPIONoJDKEN, A TAKPIONoJDKEN, A TAKPIONoJDKEN, A TAKPIONoJDKEN, A TAKPIONoJDKEN, A TAKPIONOJDKEN, A TAKPION0JDKEN, A TAKPIONOJDKEN, A TAKPION0JDKEN, A TAKPIONoJDKEN, A TAKPIONoJDKEN, A TAKPIONoJDKEN, A TAKPIONoJDKEN, A TAKPIONoJDKEN, A TAKPIONoJDKEN, A TAKPIONOJDKEN, A TAKPIONOJDKEN, A TAKPIONoJDKEN, A TAKPION0JDKEN, A TAKPIONoJDKEN, A TAKPIONoJDKEN, A TAKPIONoJDKEN, A TAKPIONoJDKEN, A TAKPIONoJDKEN, A TAKPIONoJDKEN, A TAKPIONOJDKEN, A TAKPIONOJDKEN, A TAKPION0JDKEN, A TAKPIONOJDKEN, A TAKPIONoJDKEN, A TAKPIONoJDKEN, A TAKPIONoJDKEN, A TAKPIONoJDKEN, A TAKPIONoJDKEN, A TAKPIONoJDKEN, A TAKPION0JDKEN, A TAKPIONOJDKEN, A TAKPIONoJDKEN, A TAKPIONOJDKEN, A TAKPIONoJDKEN, A TAKPIONoJDKEN, A TAKPIONoJDKEN, A TAKPIONoJDKEN, A TAKPIONoJDKEN, A TAKPIONoJDKEN, A TAKPION0JDKEN, A TAKPIONOJDKEN, A TAKPION0JDKEN, A TAKPIONOJDKEN, A TAKPIONoJDKEN, A TAKPIONoJDKEN, A TAKPIONoJDKEN, A TAKPIONoJDKEN, A TAKPIONoJDKEN, A TAKPIONoJDKEN, A TAKPIONOJDKEN, A TAKPION0JDKEN, A TAKPIONoJDKEN, A TAKPIONOJDKEN, A TAKPIONoJDKEN, A TAKPIONoJDKEN, A TAKPIONoJDKEN, A TAKPIONoJDKEN, A TAKPIONoJDKEN, A TAKPIONoJDKEN, A TAKPION0JDKEN, A TAKPION0JDKEN, A TAKPIONoJDKEN, A TAKPIONOJDKEN, A TAKPIONoJDKEN, A TAKPIONoJDKEN, A TAKPIONoJDKEN, A TAKPIONoJDKEN, A TAKPIONoJDKEN, A TAKPIONoJDKEN, A TAKPIONOJDKEN, A TAKPION0JDKEN, A TAKPION0JDKEN, A TAKPIONOJDKEN, A TAKPIONoJDKEN, A TAKPIONoJDKEN, A TAKPIONoJDKEN, A TAKPIONoJDKEN, A TAKPIONoJDKEN, A TAKPIONoJDKEN, A TAKPION0JDKEN, A TAKPION0JDKEN, A TAKPION0JDKEN, A TAKPIONOJDKEN, A TAKPIONoJDKEN, A TAKPIONoJDKEN, A TAKPIONoJDKEN, A TAKPIONoJDKEN, A TAKPIONoJDKEN, A TAKPIONoJDKEN, A TAKPIONOJDKEN, A TAKPIONOJDKEN, A TAKPIONoJDKEN, A TAKPIONOJDKEN, A TAKPIONoJDKEN, A TAKPIONoJDKEN, A TAKPIONoJDKEN, A TAKPIONoJDKEN, A TAKPIONoJDKEN, A TAKPIONoJDKEN, A TAKPIONOJDKEN, A TAKPIONOJDKEN, A TAKPION0JDKEN, A TAKPION0JDKEN, A TAKPIONoJDKEN, A TAKPIONoJDKEN, A TAKPIONoJDKEN, A TAKPIONoJDKEN, A TAKPIONoJDKEN, A TAKPIONoJDKEN, A TAKPIONOJDKEN, A TAKPIONOJDKEN, A TAKPIONOJDKEN, A TAKPIONoJDKEN, A TAKPIONoJDKEN, A TAKPIONoJDKEN, A TAKPIONoJDKEN, A TAKPIONoJDKEN, A TAKPIONoJDKEN, A TAKPIONoJDKEN, A TAKPIONOJDKEN, A TAKPIONOJDKEN, A TAKPIONOJDKEN, A TAKPIONOJDKEN, A TAKPIONoJDKEN, A TAKPIONoJDKEN, A TAKPIONoJDKEN, A TAKPIONoJDKEN, A TAKPIONoJDKEN, A TAKPIONoJDKEN, A TAKPIONOJDKEN, A TAKPIONoJDKEN, A TAKPIONOJDKEN, A TAKPIONOJDKEN, A TAKPIONoJDKEN, A TAKPIONoJDKEN, A TAKPIONoJDKEN, A TAKPIONoJDKEN, A TAKPIONoJDKEN, A TAKPIONoJDKEN, A TAKPIONOJDKEN, A TAKPIONOJDKEN, A TAKPIONOJDKEN, A TAKPION0JDKEN, A TAKPIONoJDKEN, A TAKPIONoJDKEN, A TAKPIONoJDKEN, A TAKPIONoJDKEN, A TAKPIONoJDKEN, A TAKPION0JDKEN, A TAKPIONoJDKEN, A TAKPIONoJDKEN, A TAKPIONoJDKEN, A TAKPION0JDKEN, A TAKPIONoJDKEN, A TAKPIONoJDKEN, A TAKPIONoJDKEN, A TAKPIONoJDKEN, A TAKPIONoJDKEN, A TAKPION0JDKEN, A TAKPIONoJDKEN, A TAKPIONoJDKEN, A TAKPION0JDKEN, A TAKPION0JDKEN, A TAKPIONoJDKEN, A TAKPIONoJDKEN, A TAKPIONoJDKEN, A TAKPIONoJDKEN, A TAKPIONoJDKEN, A TAKPION0JDKEN, A TAKPIONoJDKEN, A TAKPIONoJDKEN, A TAKPIONOJDKEN, A TAKPION0JDKEN, A TAKPIONoJDKEN, A TAKPIONoJDKEN, A TAKPIONoJDKEN, A TAKPIONoJDKEN, A TAKPIONoJDKEN, A TAKPION0JDKEN, A TAKPIONoJDKEN, A TAKPION0JDKEN, A TAKPIONoJDKEN, A TAKPION0JDKEN, A TAKPIONoJDKEN, A TAKPIONoJDKEN, A TAKPIONoJDKEN, A TAKPIONoJDKEN, A TAKPIONoJDKEN, A TAKPION0JDKEN, A TAKPIONoJDKEN, A TAKPION0JDKEN, A TAKPION0JDKEN, A TAKPION0JDKEN, A TAKPIONoJDKEN, A TAKPIONoJDKEN, A TAKPIONoJDKEN, A TAKPIONoJDKEN, A TAKPIONoJDKEN, A TAKPION0JDKEN, A TAKPIONoJDKEN, A TAKPION0JDKEN, A TAKPIONOJDKEN, A TAKPION0JDKEN, A TAKPIONoJDKEN, A TAKPIONoJDKEN, A TAKPIONoJDKEN, A TAKPIONoJDKEN, A TAKPIONoJDKEN, A TAKPION0JDKEN, A TAKPIONoJDKEN, A TAKPIONOJDKEN, A TAKPIONoJDKEN, A TAKPION0JDKEN, A TAKPIONoJDKEN, A TAKPIONoJDKEN, A TAKPIONoJDKEN, A TAKPIONoJDKEN, A TAKPIONoJDKEN, A TAKPION0JDKEN, A TAKPIONoJDKEN, A TAKPIONOJDKEN, A TAKPION0JDKEN, A TAKPION0JDKEN, A TAKPIONoJDKEN, A TAKPIONoJDKEN, A TAKPIONoJDKEN, A TAKPION0JDKEN, A TAKPIONoJDKEN, A TAKPIONoJDKEN, A TAKPIONoJDKEN, A TAKPIONoJDKEN, A TAKPION0JDKEN, A TAKPIONoJDKEN, A TAKPIONoJDKEN, A TAKPIONoJDKEN, A TAKPIONoJDKEN, A TAKPION0JDKEN, A TAKPION0JDKEN, A TAKPIONoJDKEN, A TAKPIONoJDKEN, A TAKPIONoJDKEN, A TAKPION0JDKEN, A TAKPIONoJDKEN, A TAKPIONoJDKEN, A TAKPIONoJDKEN, A TAKPION0JDKEN, A TAKPIONoJDKEN, A TAKPION0JDKEN, A TAKPIONoJDKEN, A TAKPIONoJDKEN, A TAKPIONoJDKEN, A TAKPION0JDKEN, A TAKPIONoJDKEN, A TAKPIONoJDKEN, A TAKPIONoJDKEN, A TAKPION0JDKEN, A TAKPION0JDKEN, A TAKPIONoJDKEN, A TAKPIONoJDKEN, A TAKPIONoJDKEN, A TAKPIONoJDKEN, A TAKPION0JDKEN, A TAKPIONoJDKEN, A TAKPIONoJDKEN, A TAKPIONoJDKEN, A TAKPION0JDKEN, A TAKPION0JDKEN, A TAKPION0JDKEN, A TAKPIONoJDKEN, A TAKPIONoJDKEN, A TAKPIONoJDKEN, A TAKPION0JDKEN, A TAKPIONoJDKEN, A TAKPIONoJDKEN, A TAKPIONoJDKEN, A TAKPIONOJDKEN, A TAKPIONoJDKEN, A TAKPIONoJDKEN, A TAKPIONoJDKEN, A TAKPIONoJDKEN, A TAKPIONoJDKEN, A TAKPION0JDKEN, A TAKPIONoJDKEN, A TAKPIONoJDKEN, A TAKPIONoJDKEN, A TAKPIONOJDKEN, A TAKPIONoJDKEN, A TAKPION0JDKEN, A TAKPIONoJDKEN, A TAKPIONoJDKEN, A TAKPIONoJDKEN, A TAKPION0JDKEN, A TAKPIONoJDKEN, A TAKPIONoJDKEN, A TAKPIONoJDKEN, A TAKPIONOJDKEN, A TAKPION0JDKEN, A TAKPIONoJDKEN, A TAKPIONoJDKEN, A TAKPIONoJDKEN, A TAKPIONoJDKEN, A TAKPION0JDKEN, A TAKPIONoJDKEN, A TAKPIONoJDKEN, A TAKPIONoJDKEN, A TAKPIONOJDKEN, A TAKPION0JDKEN, A TAKPION0JDKEN, A TAKPIONoJDKEN, A TAKPIONoJDKEN, A TAKPIONoJDKEN, A TAKPION0JDKEN, A TAKPIONoJDKEN, A TAKPION0JDKEN, A TAKPIONoJDKEN, A TAKPIONoJDKEN, A TAKPION0JDKEN, A TAKPIONoJDKEN, A TAKPIONoJDKEN, A TAKPIONoJDKEN, A TAKPIONoJDKEN, A TAKPION0JDKEN, A TAKPIONoJDKEN, A TAKPION0JDKEN, A TAKPIONoJDKEN, A TAKPIONoJDKEN, A TAKPION0JDKEN, A TAKPION0JDKEN, A TAKPIONoJDKEN, A TAKPIONoJDKEN, A TAKPIONoJDKEN, A TAKPION0JDKEN, A TAKPIONoJDKEN, A TAKPION0JDKEN, A TAKPIONoJDKEN, A TAKPION0JDKEN, A TAKPIONoJDKEN, A TAKPION0JDKEN, A TAKPIONoJDKEN, A TAKPIONoJDKEN, A TAKPIONoJDKEN, A TAKPION0JDKEN, A TAKPIONoJDKEN, A TAKPION0JDKEN, A TAKPIONoJDKEN, A TAKPION0JDKEN, A TAKPION0JDKEN, A TAKPIONoJDKEN, A TAKPIONoJDKEN, A TAKPION0JDKEN, A TAKPIONoJDKEN, A TAKPION0JDKEN, A TAKPIONoJDKEN, A TAKPIONoJDKEN, A TAKPION0JDKEN, A TAKPIONoJDKEN, A TAKPION0JDKEN, A TAKPIONoJDKEN, A TAKPIONoJDKEN, A TAKPION0JDKEN, A TAKPION0JDKEN, A TAKPION0JDKEN, A TAKPIONoJDKEN, A TAKPION0JDKEN, A TAKPIONoJDKEN, A TAKPION0JDKEN, A TAKPIONoJDKEN, A TAKPION0JDKEN, A TAKPIONoJDKEN, A TAKPION0JDKEN, A TAKPIONoJDKEN, A TAKPION0JDKEN, A TAKPION0JDKEN, A TAKPIONoJDKEN, A TAKPION0JDKEN, A TAKPIONoJDKEN, A TAKPION0JDKEN, A TAKPIONoJDKEN, A TAKPION0JDKEN, A TAKPIONoJDKEN, A TAKPIONoJDKEN, A TAKPION0JDKEN, A TAKPIONoJDKEN, A TAKPION0JDKEN, A TAKPION0JDKEN, A TAKPIONoJDKEN, A TAKPION0JDKEN, A TAKPIONoJDKEN, A TAKPION0JDKEN, A TAKPION0JDKEN, A TAKPIONoJDKEN, A TAKPION0JDKEN, A TAKPIONoJDKEN, A TAKPIONoJDKEN, A TAKPION0JDKEN, A TAKPIONoJDKEN, A TAKPION0JDKEN, A TAKPIONoJDKEN, A TAKPION0JDKEN, A TAKPIONoJDKEN, A TAKPION0JDKEN, A TAKPION0JDKEN, A TAKPION0JDKEN, A TAKPIONo1ZSIOH | A
* |
| A | A | |
| A | A | |
| A | A | |
| A | A | |
| A | A | |
| A | A | |
| A | A | |
| A | A | |
| A | A | |
| A | A | |
| A | A | |
| A | A | |
| A | A | |
| A | A | |
| A | A | |
| et | EL-vastavusdeklaratsoon | Kinnitame ainuvastutajatena, et nimetud tooted vastavad järgnevalt
loetletud direktivide ja määruste kõikidele asjaomastele nõuetele ja on
kooskõlas järgmiste normidega.
Tehnilised dokumendid saadaval:* |
| Aku-tikksaag | Tootenumber |
| lv | Deklarăcija par atbilstibu
ES standartiem | Mës ar pilnu atbildibu pazinojam, ka šeit aplūkotie izstrādăjumi atbilst visiem
tälak minētajas direktivās un rikojumos ietvertajām saistošajam nostănēm,
kãari sekojosiem standartiem.
Tehniskã Dokumentăcija no:* |
| Akumulatora
figürzăgis | Izstrādăjuma numurs |
| lt | ES atitikties deklaracija | Atsakingai pareiškiame, kad švardtyi gaminiai atitinka visus privalomus
žemiau nurodytu direktvyv ir reglamentu reikalavimus ir siuos standartus.
Techniné Dokumentăcija saugoma:* |
| Akumullatorinis
siaurapjūklis | Gaminio numeris |
| GST 12V-70 3 601 | EA1 001 | 2006/42/EC EN 62841-1:2015
2014/30/EU EN 62841-2-11:2016+A1:2020
2011/65/EU EN 55014-1:2017+A11:2020
EN 55014-2:2015
EN IEC 63000:2018 |
| BOSCH * Robert Bosch Power Tools GmbH
(PT/ECS)
70538 Stuttgart
GERMANY |
| Henk Becker Helmut Heinzelmann
Chairman of Head of Product Certification
Executive Management
i.v. h.w. |
| Robert Bosch Power Tools GmbH, 70538 Stuttgart, GERMANY
Stuttgart, 15.07.2022 |
IV
C
Cordless jigsaw Article number
GST 12V-703601EA1001
We declare under our sole responsibility that the stated products comply with all applicable provisions of the regulations listed below and are in conformity with the following standards.
Technical file at: Robert Bosch Ltd. (PT/SOP-GB), Broadwater Park, North Orbital Road, Uxbridge UB9 5HJ, United Kingdom
Supply of Machinery (Safety) Regulations 2008
Electromagnetic Compatibility Regulations 2016
The Restriction of the Use of Certain Hazardous Substances in
Electrical and Electronic Equipment Regulations 2012
EN 62841-1:2015
EN 62841-2-11:2016+A1:2020
EN 55014-1:2017+A11:2020
EN 55014-2:2015
EN IEC 63000:2018

BOSCH
Vonjy Rajakoba
Managing Director - Bosch UK
Robert Bosch Power Tools GmbH, 70538 Stuttgart, Germany represented (in terms of the above regulations) by
Robert Bosch Limited, Broadwater Park, North Orbital Road, Uxbridge UB9 5HJ, United Kingdom
Martin Sibley
Head of Sales Operations and Aftersales
Robert Bosch Ltd. Broadwater Park, North Orbital Road, Uxbridge UB9 5HJ, United Kingdom, as authorised representative acting on behalf of Robert Bosch Power Tools GmbH, 70538 Stuttgart, Germany
Place of issue: Uxbridge Date of issue: 26/04/2021