
HW131 - Pressure washer MAKITA - Free user manual and instructions
Find the device manual for free HW131 MAKITA in PDF.
| Brand | Makita |
| Model | HW131 |
| Product type | Pressure washer |
| Usage | Domestic and light professional |
| Power supply | 230 V / 50 Hz |
| Rated power | 1500 W |
| Max operating pressure | 120 bar |
| Max water flow | 400 L/h |
| Max inlet water temperature | 40 °C |
| Max inlet water pressure | 10 bar |
| High pressure hose length | 8 m |
| Power cable length | 5 m |
| Dimensions (L x W x H) | 50 x 30 x 30 cm |
| Net weight | 10 kg |
| Sound level (LpA) | 75 dB(A) |
| Vibration (hand-arm) | < 2,5 m/s² |
| Safety device | Safety valve, gun safety (trigger) |
| Main functions | High pressure washing, detergent dosing, rotary nozzle (optional kit) |
| Included accessories | Lance, safety gun, HP hose, detergent tank, nozzle cleaning tool |
| Maintenance and cleaning | Clean water inlet filter every 50 h, clean nozzle, motor unblocking (if applicable) |
| Repairability | Spare parts available through Makita authorized service centers |
| General information | User manual available in several languages, declaration of conformity included |
Frequently Asked Questions - HW131 MAKITA
User questions about HW131 MAKITA
0 question about this device. Answer the ones you know or ask your own.
Ask a new question about this device
Download the instructions for your Pressure washer in PDF format for free! Find your manual HW131 - MAKITA and take your electronic device back in hand. On this page are published all the documents necessary for the use of your device. HW131 by MAKITA.
USER MANUAL HW131 MAKITA
3 INSTALLATION (FIG.2)
3.1 Montage

Attention - danger!
1 GENERAL INFORMATION (FIG.1)
1.1 Use of the manual
This manual forms an integral part of the appliance and should be kept for future reference. Please read it carefully before installing/ using the unit. If the appliance is sold, the Seller must pass on this manual to the new owner along with the appliance.
1.2 Delivery
The appliance is delivered partially assembled in a cardboard box.
The supply package is illustrated in fig.1.
1.2.1 Documentation supplied with the appliance
A1 Use and maintenance manual
A2 Safety instructions
A3 Declaration of conformity
1.3 Disposing of packaging
The packaging materials are not environmental pollutants but must still be recycled or disposed of in compliance with the relevant legislation in the country of use.
1.4 Safety signs
Comply with the instructions provided by the safety signs fitted to the appliance.
Check that they are present and legible; otherwise, fit replacements in the original positions.
E1 sign - Indicates that the appliance must not be disposed of as municipal waste; it may be handed in to the dealer on purchase of a new appliance. The appliance's electrical and electronic parts must not be reused for improper uses since they contain substances which constitute health hazards.
1.4.1 Symbols
E2 symbol - Indicates that the appliance is intended for professional use, i.e. for experienced people informed about the relative technical, regulatory and legislative aspects and capable of performing the operations necessary for the use and maintenance of the appliance.
E3 symbol - Indicates that the appliance is intended for non-professional (domestic) use.
2 TECHNICAL INFORMATION (FIG.1)
2.1 Envisaged use
This appliance has been designed for individual use for the cleaning of vehicles, machines, boats, masonry, etc, to remove stubborn dirt using clean water and biodegradable chemical detergents.
Vehicle engines may be washed only if the dirty water is disposed of as per regulations in force.
- Intake water temperature: see data plate on the appliance.
- Intake water pressure: below 10 bar.
- Operating ambient temperature over 0^ in accordance with standard EN 60335-2-79/A1 only for domestic model (see symbol E3).
2.2 Operator
The symbol on the front cover identifies the appliance's intended operator (professional or non-professional).
2.3 Improper use
Use by unskilled persons or those who have not read and understood the instructions in the manual is forbidden.
The introduction of inflammable, explosive and toxic liquids into the appliance is prohibited.
Use of the appliance in a potentially inflammable or explosive atmosphere is forbidden.
The use of non-original spare parts and any other spare parts not specifically intended for the model in question is prohibited.
All modifications to the appliance are prohibited. Any modifications made to the appliance shall render the Declaration of Conformity null and void and relieve the manufacturer of all liability under civil and criminal law.
2.4 Main components
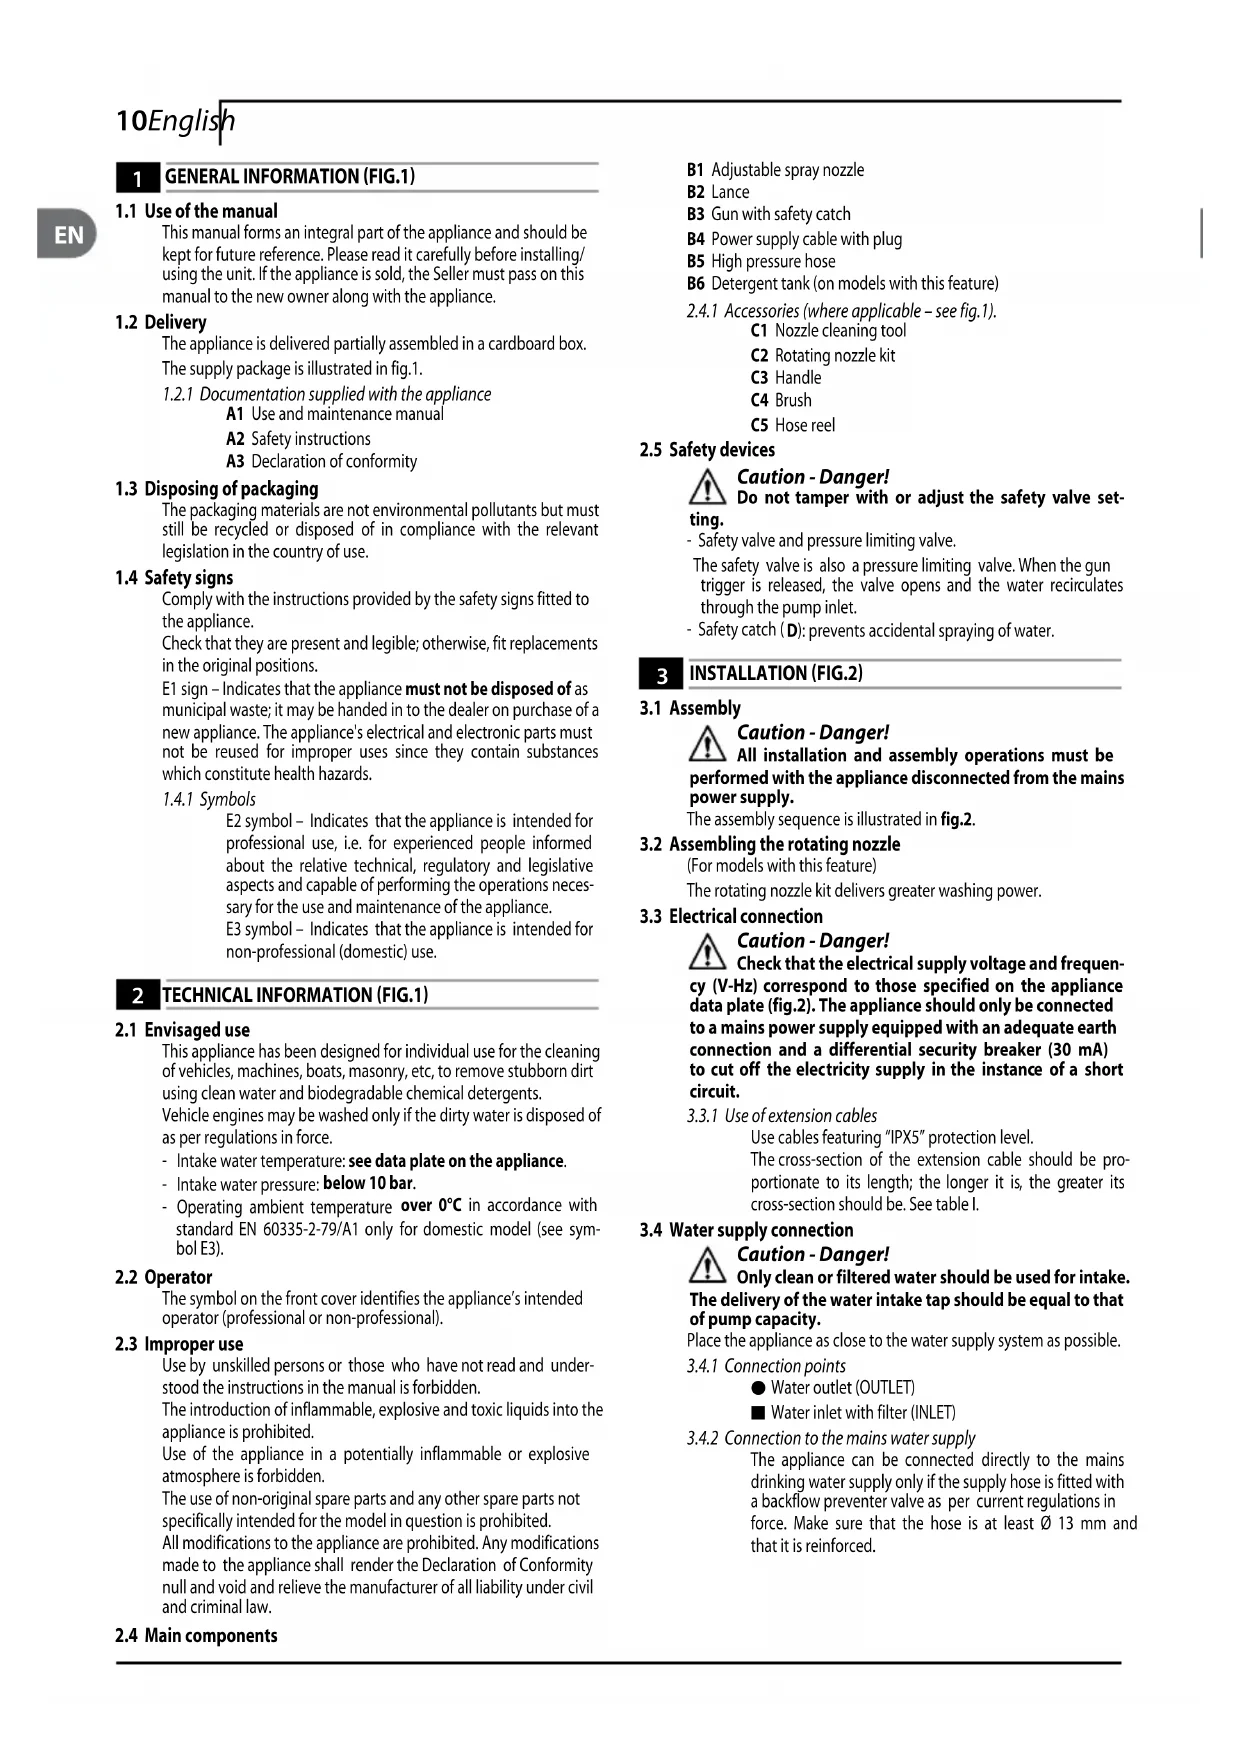
B1 Adjustable spray nozzle
B2 Lance
B3 Gun with safety catch
B4 Power supply cable with plug
B5 High pressure hose
B6 Detergent tank (on models with this feature)
2.4.1 Accessories (where applicable - see fig.1).
C1 Nozzle cleaning tool
C2 Rotating nozzle kit
C3 Handle
C4 Brush
C5 Hose reel
2.5 Safety devices

Caution - Danger!
Do not tamper with or adjust the safety valve set
ting.
- Safety valve and pressure limiting valve.
The safety valve is also a pressure limiting valve. When the gun trigger is released, the valve opens and the water recirculates through the pump inlet. - Safety catch (D): prevents accidental spraying of water.
3 INSTALLATION (FIG.2)
3.1 Assembly

Caution - Danger!
All installation and assembly operations must be performed with the appliance disconnected from the mains power supply.
The assembly sequence is illustrated in fig.2.
3.2 Assembling the rotating nozzle
(For models with this feature)
The rotating nozzle kit delivers greater washing power.
3.3 Electrical connection

Caution - Danger!
Check that the electrical supply voltage and frequency (V-Hz) correspond to those specified on the appliance data plate (fig.2). The appliance should only be connected to a mains power supply equipped with an adequate earth connection and a differential security breaker (30mA) to cut off the electricity supply in the instance of a short circuit.
3.3.1 Use of extension cables
Use cables featuring "IPX5" protection level.
The cross-section of the extension cable should be proportionate to its length; the longer it is, the greater its cross-section should be. See table 1.
3.4 Water supply connection

Caution - Danger!
Only clean or filtered water should be used for intake. The delivery of the water intake tap should be equal to that of pump capacity.
Place the appliance as close to the water supply system as possible.
3.4.1 Connection points
Water outlet (OUTLET)
Water inlet with filter (INLET)
3.4.2 Connection to the mains water supply
The appliance can be connected directly to the mains drinking water supply only if the supply hose is fitted with a backflow preventer valve as per current regulations in force. Make sure that the hose is at least 0.13mm and that it is reinforced.
4 ADJUSTMENT INFORMATION (FIG.3)
4.1 Adjusting the spray nozzle (for models with this feature) Water flow is adjusted by regulating the nozzle (E).
4.2 Adjusting the detergent (on models with this feature) Detergent flow is adjusted using the regulator (F).
4.3 Adjusting the detergent pressure
Set the adjustable nozzle on " to deliver detergent at the correct pressure (on models with this feature).
4.4 Adjusting the pressure (on models with this feature)
The regulator (G) is used to adjust the working pressure. The pressure is shown on the pressure gauge (where fitted).
5 INFORMATION ON USE OF THE APPLIANCE (FIG.4)
5.1 Controls
- Starter device (H).
Set the starter switch on (ON/1) to:
a) start the motor (in models without TSS device);
b) set the motor ready to start (in models with TSS device).
If there is a pilot light on the starter device, it should light up.
If the "low/high" settings are available, use them as follows:
Low: low pressure washing
High:high pressure washing
Set the starter device switch on (OFF/0) to shut down the appliance.
If there is a pilot light on the starter device, it should go out.
Water jet control lever (I).

Caution - Danger!
During operation the appliance must be positioned
wn in fig. 4 on a sturdy, stable surface.
5.2 Start-up

Caution - Danger!
Before starting up the appliance check that the water supply hose is connected properly; use of the appliance without water will damage it; do not cover the ventilation grilles when the appliance is in use.
On three-phase models for professional use, at first use start the appliance for a very short time to check that the motor is running in the correct direction. If the motor fan is turning anti-clockwise, exchange two of the three phase wires (L1, L2, L3) in the electrical plug.
1) Turn on the water supply tap fully.
2) Release the safety catch (D).
3) Depress the gun trigger for a few seconds and start up the appliance using the starter device (ON/1).
TSS models - In TSS models with automatic delivery flow cut-off system:
- when the gun trigger is released the dynamic pressure automatically cuts out the motor (see fig.4);
- when the gun trigger is depressed the automatic drop in pressure starts the motor and the pressure is restored after a very slight delay;
- if the TSS is to function correctly all gun releasing and depressing operations must be performed at intervals of less than 4-5 seconds.
To prevent damage to the appliance, when running do not stop the water jet for more than 10 minutes at a time.
5.3 Stopping the appliance
1) Set the starter device switch on (OFF/0).
2) Depress the gun trigger and discharge the residual pressure inside the hoses.
3) Engage the gun safety catch (D).
5.4 Restarting
1) Release the safety catch (D).
2) Depress the gun trigger and discharge the residual air inside the hoses.
3) Set the starter device on (ON/1).
5.5 Storage
1) Switch the appliance off (OFF/0).
2) Remove the plug from the socket.
3) Turn off the water supply tap.
4) Discharge the residual pressure from the gun until all the water has come out of the nozzle.
5) Drain the detergent tank.
6) Engage the gun safety catch (D).
5.6 Refilling and using detergent
When using detergent, the adjustable nozzle must be set on " " (on models with this feature).
Fill the tank with highly degradable detergent.
5.7 Recommended cleaning procedure
Dissolve dirt by applying the detergent mixed with water to the surface while still dry.
When dealing with vertical surfaces work from the bottom upwards. Leave the detergent to act for 1-2 minutes but do not allow the surface to dry. Starting from the bottom, use the high pressure jet at a minimum distance of 30~cm . Do not allow the rinse water to run onto unwashed surfaces.
6 MAINTENANCE (FIG.5)
Any maintenance operations not covered by this chapter should be carried out by an Authorized Sales and Service Centre.

Caution - Danger!
Always disconnect the plug from the power socket, be carrying out any work on the appliance.
6.1 Cleaning the nozzle
1) Disconnect the lance from the nozzle.
2) Remove any dirt deposits from the nozzle hole using the tool (C1).
6.2 Cleaning the filter
Clean the suction filter (L) and the detergent filter after every 50 hours of operation.
6.3 Unjamming the motor (on models with this feature)
In case of lengthy stoppages, limescale sediments may cause the motor to seize. To unjam the motor, turn the drive shaft with a tool (M).
6.4 End-of-season storage
Treat the appliance with non-corrosive, non-toxic antifreeze before storing it away for winter.
7 TROUBLESHOOTING
| Problem Possible causes | Remedy | |
| Pump does not reach working pressure | Nozzle worn Replace nozzle | |
| Water filter fouled Clean filter (fig.5) | ||
| Water supply pressure low Turn on water supply tap fully | ||
| Air being sucked into system Check tightness of hose fittings | ||
| Air in pump | Switch off the appliance and keep depressing and releas-ing the gun trigger until the water comes out in a steady flow. Switch the appliance back on again. | |
| Adjustable nozzle not positioned correctly Turn the adjust- stable nozzle (E) (+) (fig.3) | ||
| Pressure drops during use | Water intake from external tank Connect appliance to the mains water supply | |
| Intake water too hot Reduce temperature | ||
| Nozzle clogged Clean nozzle (fig.5) | ||
| Motor "sounds" but fails to start | Insufficient power supply | Check that the voltage of the mains power supply line is the same as that on the plate (fig.2) |
| Voltage loss due to use of extension cable Check charac eristics of extension cable | ||
| Appliance not used for a long period of time Contact youur nearest Authorized Service Centre | ||
| Problems with TSS device | Contact your nearest Authorized Service Centre | |
| Motor fails to start | No electrical power | Check that the plug is firmly in the socket and that the mains voltage supply is present (*) |
| Problems with TSS device | Contact your nearest Authorized Service Centre | |
| Appliance not used for a long period of time | Using the tool (L) unjam the motor from the hole at the rear of the appliance (in models with this feature) (fig.5) | |
| Water leakage | Seals worn | Have the seals replaced at your nearest Authorized Service Centre |
| Appliance noisy | Water too hot | Reduce temperature (see technical data |
| Oil leakage | Seals worn | Contact your nearest Authorized Service Centre |
| TSS versions only: motor starts even with gun trigger is released | Nozzle clogged Clean nozzle (fig.5) | |
| High pressure system or pump hydraulic circuit not watertight | Contact your nearest Authorized Service Centre | |
| TSS versions only: no water deliv- ery when gun trigger is depressed (with supply hose connected) | Nozzle clogged Clean nozzle (fig.5) |
If the motor starts and does not restart during operation, wait 2-3 minutes before repeating the start-up procedure (overload cutout has been tripped). If the problem recurs more than once, contact your nearest Authorized Service Centre.
1 ALLGEMEINE INFORMATIONEN (ABB. 1)
3 INSTALAÇAO (FIG.2)
3.1 Montagem

Atença-perigo!
Se a这其中, por much more than the usual way of doing so.
6.4 Armazenagem
3 INSTALLATIE (FIG.2)
3.1 Montage

Let op -gevaar!
3 INSTALLATION (FIG. 2)
3.1 Montering

Advarsel -fare!
Maskinen skal vare frakoblet i forbindelse medation og montering.
6.4 Opbevaring for winter
Lad maskinen kore med/DDIkke tarende eller giftig frostvase, for maskinen saettes til opbevaring for vinteren.
7 FEJLFINDING
1 GENEELL INFORMASJON (FIG. 1)
6 VEDLIKEHOLD (FIG.5)
2 TEKNISET TIEDOT (KUVA 1)
2.1 Kayttotarkoitus
1 ALLMÄN INFORMATION (FIG. 1)
3 INSTALLATION (FIG.2)
3.1 Montering
Varning-fara!
7 RIESENIE PROBLEMOV
High (BncoKo): Mne He npu BncoKo Hanrahe
Iocabete KIOUa Ha cTapeBa B no3uN (OFF/0), 3a da n3KIOUte ypea:
Ako mka KOHTponHa lamma Ha CTapTOBO TcPOINCTBO, Tp6Ba Da yrache.
6.2 NounctBaHe Ha hntbpa
IOnCTBaIte omntbpa 3a BCMyKBaHe (L) n omntbpa 3a DeTepeRHTa Ha BCEk 50 yaca pa6ota.
6.3 OTo6nokpuhe Ha MoTopa (pnpMoDJIeN C TOBa pnpCnOc6JeHne)
B cnuyaHa bIgri CNpaHn, BapOBIKOBn HATpyNBaHn MORaTda 6NOKupat paOtaHa MOTopa.3a da OT6NOKupate MOTOPa, 3aBbptete 3aBnKBaun Ban C nHCTpymeT(M).
6.4 CbXpaHbAne cIeKpaa Hce3oHa
Ppei CbxaHbAe 3a 3MaTa Ha MaunHaTa 3a NouchBaHe o6pa6oTe C HeKopo3nOHe HEtOKmUe aHTnΦpN3.
7 OTCTPAHRABAHE HA HEN3INPABHOCTN
| ПюбLEM Вьзможни | Прочини OTстраимао | |
| Помпата неdoesira pa60но наляганe | Износен Нарайник Замене Нарайник | |
| Немправен Boden Фелтbp Рочидente Фелтbp (фиг. 5) | ||
| Ниск Honягане на поаданata Boda OTbopete дokрай | Крана за поадане на вора | |
| В сисмата ce BCMyKba Bb3dux | Пюberete Ненисту Сычыпа на сбеденьейда на mapкучite | |
| Вьздух вnomлatura | Изк nullоче урета и насточе и оtnьскaitе счьka, дokato Bodata He 3anoyne Ддллзв равонеровnotok. Вькоче ot hOBO урета | |
| Р发电机чирать Нарайник He e noctaben prabvnho | Завл对接е р发电机чирь'mя Нарайник (E) (+) (фиг. 3) | |
| Налганeto сда lo в徕е наизллвае | Помане на вора OTьншen pezeрьогар Сьржete урета КьМ BodonpoBoDnata Мржа | |
| Вхаяцata Boda e Тьрде ropeza Ha manete Tempepatурata | ||
| Нakайник BT e заръстен Почидente Нарайниka (фиг. 5) | ||
| MOTorbyt "Издава звук",но не сструда | Нedingstobhyо онлайн онлайн 武者 | Пюberete дали Наржениcope на мржата e сьцото кату указаното на tabелкatinga (фиг. 2) |
| Загба на паложени лоради Изллване на удлжителен Kabел | Пюberete Харазковостоке на удлжителен Kabел | |
| Урет BT He iЗллван prodьлжитelно в徕е | Овадete се в hyд-блзки ульномошен Сервizен цentьр | |
| Пробlemи в TSS усточьтOTO Ohadete се в hyд-блзки ульномошен Сервizен цentьр | ||
| Енектомotorbyт не сеструда | Ная[elektrozaxpanbahe] | Пюberete дали Zeelenс耗е пьл'tHO в КонтактЯ и дали Има мржово наржение (*) |
| Пробlemи в TSS усточьтOTO Ohadete се в hyд-блзки ульномошен Сервizен цentьр | ||
| Урет BT He iЗллван prodьлжитelно в徕е | С пооча на Истчypementsa (L) otstparahete засаданeto на лесгомоторoga ot отвора на гьба на урета (при мodyдус с това риссocoblenee) (фиг.5) | |
| Изтуане на вора Изнosceni урета | Идмение ул'thinite bte hyд-блзки ульномошен Сервizен цentьр | |
| Урет BT e symmen BoDA t a e Tьрде ropeua | Hamalate Tempepa | Турatable (вж.Tekhiuchekite данни) |
| Изтуане на масло | Изнosceni ул'thinite li | Овадete се в hyд-блзки ульномошен Сервizен цentьр |
| Само за мoderу TSS:МOTorbytструда дори priи освобodedи спськ | Нakайник BT e заръстен Почидente Нарайниka (фиг. 5) | |
| Спсtemа差别 за виско Налгане илхдравличныа вера на помда се в BodOnenpOnpOnycklnBv | Овадete се в hyд-блзки ульномошен Сервizен цentьр | |
| Само за мoderу TSS: He iЗллза вора priи насточа на спська на писолета (при сььрдан захсаньмарку) | Нakайник BT e заръстен Почидente Нарайниka (фиг.5) |
Ako enektpomotopbctaptnpa,HO He ctapnpa nobtopno no BpeMe Ha pa6oTa, m3yakaIte 2-3 MNHyT npedn da nobtopnte ctapnpaata npouedypa (npekbcato e n3KIOUbaHTo npnpaHTOBaBaHe). Ako npo6JIemBt ce nobTopn, o6aTe ce b Hai-6JIN3KIn yNbIHOMOuec CepBn3eH ceHTbp.
1 OBUNIE CBEDEHNA(PMC.1)
2 TEXHmueCKNE CBEHeHn (PNC.1)
2.1 PpeDyCmOTpeHHoe McNoIb3OBAHnE
DAnHb npn60 npedHa3HaueHa dIy HnDnBnyaBHO MOKn ABTomawin, Maun, PnABCPeDCTB, KameHHo KnaKn I T.I., dIyUdaneHn CTOKMx 3aqr3HeHn C NOMOsbu YNCTO BODbl 6bnopa3naraOxxC XMMuecknx MOOxxCpeDCTB.
MoiKa DnIraTeNe TpaHcNOpTHbIX CpeCTB Pa3peWaETcR NIIb ToIbKO B TOM CNYae,ecm rpa3HaB BOa Co6npaETcR dInepepabOTKn CorlaCHO DeIeCTByIOUM HOPMaM.
- Tempeata yba Bdo ha BXOe: cm. nacnopthyto Ta6nky Ha np6ope.
Давлиейные Воблны в BXOдe: Mehee 106ap. - Pa6oay TaemepaTypa OkpykaIouei cpebl 6Oone 0°C no Hopme EN 60335-2-79/A1 toIbKO Inna MoJeN IInr 6bITOBORO nCnonb3OBAHn (cm. 3HaouK E3).
2.2 Oneparop
Ipy onpeene HnepaTopa, nCnoB3yUoOero np6op (npoeccnoHaBbHnn HnnpoeceooHaBbH) cm. 3HaQK, mHeouncnHa O6NoXke.
2.3 Hepa3peweHHOe HcnoIb3ObaHHe
3anpeaetcnaonb3oBaHne HeonbTHbIMn IIOdbMn,He npOHTabWMn Hne ycBOINBWMn npNBedeHHble B pyKOBoCTBe nHCTpyKun.
3anpeaetc nptaHne np6opa BocnnaMeHaoumncra,
B3pbB4aTbIMN I TOKcHbIMN BeIeCTBaMn.
3anpeaetcnaonb3oBaT np6op B noteHuaNbHO BocnlaMeHauoueCnB3pbBoOnaChoiatMocfepe.
3aIpeaaetcncnlo3b0aTbHeΦmpeHHbIe HnpeHa3NaueHHBe 1Jr daHHO MOdEIN npHnAdJeXHOCTN.
3anpeaaetc BHCNTB pnp6op n3MeHeHn. BheceHne n3MeHeHn npekpaaet deCTBNE DeKnapaun COOTBEcTBNN oCBO60KaET n3ROTOBnteIg rpaJdAChKO uYrOLOBHOITBECTBeHHOCTN.
2.4 OchOBhble qactu
B1 Perynipyemar ronobka
B2 ydnnHntelb
B3 NtctoIeT c npedoxpaHntTeMe
B4 3JnKTPnueckn WnHyp c BnIKoN
B5 甲nH BbICOKoTo daBneHn
B6 EmKoCTb CMOUzIM cpeDCTBOM (ecnI npEydCMATPBAeTCA)
2.4.1 IpuHaadnexHocmu (ecnu npedycmamppuaHomcna nocmaBke-cM.puc.1)
C1 INCHPTpymeHT dIy IcTkn IOnOBKn
C2 KomnneKT bpaauouecra opcyunk
C3 Puyka
C4 1
C5 HamatbBaTeIb IHaHa
2.5 3aunthbte yctpoictBa

Bhumahue, onachocmb!
He HapywaTe He n3MeHnTe NaKy npedoxpaHnteBHorO Klanaha.
IpeoXpaHntBbI KJIaapan HOrpaHHTeIb daBHeHn.
PepdoxpaHntbHn Knaan RaBnEeTc TaKke OrpauHntelem daBHeHH. Korda 3akpbBaetc NCToTe, Knaan OH KpbBaETc, IN BODa cNpkynpyEt Hepe3 3abOpHoe OTBepCTne Hacoca.
-пгдoxраннель (D):пгдотврацаet сучайю поаду стуи.
3 YCTAHOBKA (PNC.2)
3.1 MoHTax

Bhumahue, onachocmb!
Bce onepaun no yctanOBke m MoHTaKy DoONKbIy
HnHtbcn pnp OTKnIOUeHHOM OT 3NeKTpueckoCetW.
ope.
IocneIOBaTeNbHOCTb MOHTaKa CM. Ha pnc.2.
3.2 Yctanobka Bpaasaioeiercfopcynkn
IcnoB3yIte Ka6eIe coTeIeHbIO 3aunTbI "IPX5"
CeeyHne ydHnHTeBbHx Ka6ene dONKHO 6bTb nponopunohalbHo IN x dNHe: Yem dNHHee Ka6enb, Tem 6oJbwe dONXHO 6bTb CeeyHne, CM. Ta6nuy I.
3.4Поdkнluчимьвды

Bhumahue, onachocmb!
IcnoB3yute Nnub TOnbKO HnBtPobAHHyu nnHcyTO Body. KpaH nna NOKnIOeHN BODbl dONKeH oecneNBatb npoN3BOUntelbHOCTb, paBHyO npOn3BOUNTelbHOCTNaHocca.
PacnoJoxKeI np6Op kaMozHo 6nHex K BoDOnpOBoHOH cETN.
3.4.1 CoedunumenbHbe nampy6ku
BbXoD BoDbI (OUTLET)
BxOa BoDb cΦnIbTpOM (INLET)
3.4.2 IodkIoueHue K zoPocdkoB oDopnoBodho cemu
Pn60p MoKet 6b1b NOKIOUeH HENOCpeCTBeHHO K rOpOcKo BDOIOPOBOHO CTe NNTbeB OBObl NtBbKO B TOM CNYae, eCNI HA NTaIOUeTIpy6ye YCTAOBHeN PpAMO KNAnaH C ONOPOKHeHMe, COOTBETCYUIM DeICTBYIOUM HopMaM. Y6eNTecb, YTO Tpy6a IMeET DnAmETp He Mehee 13 MM, nTO OHyCINHeHa.
4 PEYIMPOBKA (CTP.3)
4.1 Perynpobka roNoBk (ecn npdeymatpmbaetc) Ipe npynpobkn ctpyn B0dy bpaaate roNoBky (E).
4.2 PerynnpobKa npaun Mouero cpeCTBa (ecnn npedymatpnaBaETc) BpaauTe peryaTOp (F) nla Do3npOBKn npaun M cpeCTBa.
4.3 Perynipobkna noaun moojoero cpeictBa
IpebeDnTe perynpyemyo roNoBky B noNoXeHne " I nOaun MOUcero cpeCTBa npn npabInbHOM daBHeHH (ecnn npedycMATpBAeTc).
4.4 Perynipobka daBleHna (ecn npedycmaTpaETcA
Bpaaaipe perynTOp (G) nI IN3MeHEnHa pa6Oeero daBneHn. DaBHeHne NOKa3bBAeTCHa MaHOMeTpE (npn HAIuHN).
5 CBEDEHNA IO 3KCNPLYATALUN (PNC.4)
5.1 OpraHbI ynpabLeHHa
- Nyckoboe yctpoieCTBO (H).
IpebeeTe nyckOoe yctpoCTBO B noLoXeHne (ON/1) n:
a) BKNIOHTe DnuratEnb (B MOdenjx 6e3 yctpoiCTBa TSS).
b) noIroTOBbTe DnBaTaeNb K pa6Ote (B moDEnx, O6OpyIOBaHbIX yCTpOINCTBOM TSS).
Ecnnyckooe yctpoictBO o6opyoBaHO KOHTpOblHn lamnoi, to OHa doJikha 3aropeTbcra.
PnHannnnnoJooKeHH"low/high"OHNpndHa3NaYeBbIa
Low: Moika npu Hm3kOM daBLeHm.
High: Moika npu BbICOKom daBHeHm.
IpebeDnTe npckOBoe yctpoCTBO B non.(OFF/0) nla octaHOBkn pa6oTb np6opa.
EcnnyckOBoe yctpoiCBO o60pyoBaHO KOHTpObnHn lamno, OHa doJHKHa nOrachYb.
- Pbyar ynpablenna Ctpye BoBbI (I).
BHumahue, onachocmb! Pnp6opdoJKeH yctaHaabnBaTbca Ha npOuyu u yctoayBuYIO nobepxHocTB, KaK nokaHHO (pnc.4).
5.2 BkIoUeHne
Bhumahue, onachocmb! Peped BkIouehnem np6opa y6eHTecb, 4TO OH npAIBNbHO NOKIOUeH K NITAHIO BOOJ. Pa6ota "BCxyo" MoKET nobpeNTb np6Op. Bo BPmra pa60tJI He 3aKpbBaIte BEHTNIAUONHbIe peWetKn.
Pnp nepbom 3anycke Tpexa3hblx MoJeNe nI npoecchohaBHorO NcNoB30BaHn BkJIOuHTe np6Op Ha KopoTKe Bpem dI npOBepKn HapPaBHeHn BpaSeHn DbratEn. Ecn BENTnIaTOp DBratEn BpaAaTeN npOTNB acoboi CpeKN,To NOMeHnTe MeCTAm NBe N3 Tpex a3 (L1,L2, L3)BneKtpuecko Bnke.
1)NonHocTbIO OTKpoIe KpaH BoOIpOBoHDHO CetN.
2) CHIMITE nIcTOnet C npEdoxpaHInTeA (D).
3) YIepKbBaIe NCTOEt OTKpbTbIM HECKoNtBKO CeKyH, NOcNe yero BkIOuHTe np6Op C NOMOuBIO NyckOBOrO yCTpOJCTBa (ON/1).
Moenn TSS - B moenTSS c aBtOMaTnuecknM OTKJIoueHneM Hanopa:
3aKpbBaI NCTOJET, DnHAMMueCKoe DaBHeHne aBTOMaTNeCKN BbIKIOuayETJeKTPNueCKm DnuratEnb (cm. pnc. 4);
-OTKpbIBa NICTOJe, NaIeHHe DaBHeHn ABOMaTNUeCKN 3ayncKae TbIraTeIn b N daBHeHne O6pa3yeTc H e6oJbSho 3aepKko;
IINPbHn pa60tbl TSS 3aKpbItne nOTKpbTne nCToeta He DOnJHKBO BInONHARbC INHTepBaJOM MeHee 4-5 ckyHd.
InpedotBpauenHn nobpeKdHn np6opa BO Bpem ero pa60tBe BbIKIOaHTe CtpyIO BODHa Bpem 6Oonee 10 MMHT.
5.3 OctaHOBka
1) NpeBeeDnTe nycKOoe yCtpoiCTBO B non.(OFF/0).
2) OTkpoTe nctOte n c6pocBe TaBneHn BHytpn WnHaHROB.
3)IOCTABBe TnCTOJET Ha npeOxoPAHHTeB (D).
5.4 NIOBTOPHOE BKNIOUChne
1) CHIMITE nIcTOnet C npEdoxpaHnTeY (D).
2) OTKpoIe TnCToJIe N BbIyCTuTe OCTaTOUHbI BO3dYx I3 ⅢJahroB.
3)IpebeeHTe nycKOoe yctpoCTBO B noJIOxHeHne (ON/1).
5.5 Otknoyehne
1)BbIKIOHTe npn6Op (OFF/0).
2) BbHbTe BnJIky n3 pO3eTKI.
3) 3akpoite BoDOpnoBoDnHbKpaH.
4) C6pocbte octatoohoe daBHeHne n3 nctOneta, BnIOTb do NONHOrO bItEkaHNBOdbI n3 rONOBKN.
5)OnopoxKnite emKoctbcmokuIm CpeDCTBOM.
6) NocTabBe TnCToTe Ha npEdoXpaHntB.
5.6 3anpaBka n noIb3ObaHne MOUHm CpeCTBOM
Moioee cpeCTBO DOJIXHO NOaBaTcBn npH HAXOXKeHH peryuemyoI roIOBKn B NoIOXeHN " (ecnn npeDyCMatPbAeTc).
3aIOnHnTe emKoCTb MOIOzIM CpeCDTBOM C BbICOKO CTeIeHbIO pa3NoJxehna.
5.7 Pekomehdaaunno npabunbHOH MoKe
Pactbopute rpa3b haHeceHem pa36abneHHoro B BOte moouero CpeCTBa Ha cyxyIO NOBepxHOCTb.
HaBepTKaJIbHbIX NOBepxHOCTX BbIIOJIHrTe DnIKKeHN CHN3y BBepx. BblEpeKNTe 1-2 MNHyTb, He CmblBaJ NOBepxHOCTb. 3aTeM OoHCTnte NOBepxHOCTb CTpye NOD BILCOKM DAJIbeHMeC pacctOHHra 60nee 30 cm, HauHHa CHN3y. N36eAte IonoJaHne cTEkaIOSe BObl Ha HeBbIMbTIble NOBepxHOCTn.
6 OBCJUYKUBAHNE(PNC.5)
Bce onepaunn 0cbnykubHn, He BkHoueHHbIe B daHHyIO rnaBy, DOnKhBi BblONHrbcra B OphiuaNbHom UeHTpe npOdaXn I 0cbnykubHn.
BHumahue, onachocmb!
! Npeed BbINOJIHeHEm IIO6bIX pa6oT Ha npu6ope BbIhTe BUNKy U3 cTeBOB po3ETK.
6.1 YnCTkaTOnOBKn
1) CHMIMTe ydNHInHte b cnCToIeTa.
2) OuHCTnTe OTBepCTne rOIOBKn npn nOMoOn cneuaJIbHorO INCHPTpymenta (C1).
6.2 UcTkaФmIbtra
OuetaTe 3a6OpHbI nltp (L) n nltp mooJero cpeCTBa uepe3 kaxdtle 50 cacob pa6Otbl.
6.3 Pa36JokpOBaHne DBratena (ecn npedycmatnpBaetca)
B cnyae npoDOnkHntenbHoro npocTo n3BcKOBBe OTIOKeHHaMOry Bb3BaTb 6nOKnPOBky DnRaTeN. Ira pa36nOKnPOBaHHdNBraTeN NOBepHnTe BaI DnRaTeN npn NOMOuINnpncnoc6JeHHa(M).
6.4 Xpanenne
Ipeed TEM, KaK NOMeCTnTb npi6Op Ha 3mHHe xpaHHe, BkLIOHTe
ERO C NCIOL3OBAHEM HeEJKOTO HETOKCNUHORO aHTMΦpN3a.
7 BO3MOXKhBIE HENCNPABHOCTM IN IX YCTPAHEHME
3 INSTALAREA (FIG.2)
3.1 Asamblarea

Atentie - Pericol!
Toate operatiunile de instalare 山 asamblare e efectuate cu aparatul deconnectat de la reteaua de ntare.
Asamblarea se face conform secventei fig.2.
3.2 Asamblarea duzei rotative
4 AYARLAMALAR (RES.3)
4.1 Kafanin ayarlanmasi (ongorulm ise)
Saliksanas process paradits 2.attila
3.2 Rotejosa uzgala montaza
(Modelos, kam tas ir).
Rotejsa uzaga komplekts nodrosina lielaku mazgasanas jaudu.
3.3 Elektribas pieslęgums

Uzmanibu-briesmas!
Parrliecinieties, vai strvas padeves spriegums un frekvence (V un Hz) atbilst radijumiem uz iceres dato plaksnites (2. attels). Ierice japiesledz tikai tadai strvas padevei, kas aprikota ar adekvatu zemejumu un diferenciala drosihas sledzi (30mA) , lai issavienojuma gadijumaelektribas padeve tiktu partraukta.
3.3.1 Paplasinajumkabela lietosana
Izmantojiet kabelus, uz kuriem noradits, IPX5" aizsardzibas limenis.
Paplasinajumkabelu skersgriezumam jabut
proporcionalam ta garumam;jo garaks kabelis, jo lielakam vajadzetu but skersgriezumam. Skatit I tabulu.
3.4 Udens padeves pieslęgums

Uzmanibu - briesmas!
lesucbutu jazmanto tikai tirs vail filtrets udens. Udens iesuces tapas veiktspejai jaatbilst sukna kapacitatei.
Novietojet ierici péc iespejas tuvak udens padeves vietai.
3.4.1 Piesleguma vietas
- Udens izplüde (OUTLET)
Udensiesucarfiltru(INLET)
3.4.2 Pieslegums udens padeves vadam
lerici iespëjams pieslegt tieši dzerama udens vadam tikai tad, ja padeves caurule aprikota ar atpakalplusmas blokvarstu atbilstosi attiecigajiem spekë eosajiem noteikumiem. Pärliecinieties, ka caurules diamets ir vismaz 0 13 mm un ta ir nostiprinata.
4 INFORMÁCIJA PAR REGULEŠANU (3.ATTÉLS)
4.1 Reguljams izsmidzinaanas uzgalis (modelos, kuriem tas ir) Udens plusmu kontrolle, regulejot uzgali (E).
4.2 Mazgāsanas lidzekla plusmas regulësana (modejos, kuriem ir šada funkcija)
Mazgāsanas lidzekla plusmu regule, izmantojot regulatoru (F).
4.3 Mazgāsanas lidzekla spiedena regulësana
Pagrieziet regulejamo uzgali uz "■", lui mazgasanas lidzeklis sasniegtu vajadzigo spiedenu (modelos, kuriem tas ir).
CmBON Ha nepeDnH Kpuu Bn3Nae nepe6aByBaHoro onepatopa npucrpo (npocecioan abo Hnpopecioan).
2.3 HenpaBnIbHe BnKOpuCTaHHa
3a6opohraETbca BnKOpCTAHH PnCtpoH HENiIroTOBHeHM IIOJAM a6o Tm, XTo He npOHTab Ta He 3pO3ymIB BkA3iBKN B Noci6Hky.
3a6opohertcb 3anOBHOBATn npncptiBorHehe63neHHMM, B6yXOBMM Ta TOKCNHMM piHNAMM.
3a6opohetaBc BnKOpncTahHn npntpoo B Micuax, de icHyec 3arpo3a BuHKHeHH noXeKi a6o Bu6xy.
3a6opohetaBcBnKOpncTOByBatn HeOpurihalbHi a6o 6ydb-ki iHui He np3haehi dIra daHOi moJI detani.
3a6opohetaTbca 6ydb-RAKIM CHHOM MOINphiKYBaTH Pnucptpi. BHeceHHa 6ydb-RAKIX 3mIH DO pncptpo aHyIOe DeKnapauio BiNobiIDHOCT Ta 3BInbHIOE BNPO6HnKa BId 6ydb-RAKIX cNBInbHnx abO npduuHnx 306OB'raHaB.
2.4 OCHOBHI KOMNOHEHTN
B1 HacaKa-po3nnIOBaay 3 MoKNNBicTio perynIOBAHH
B2 Tpy6ka
B3 Pictonet-po3nnHOBaU i3 3ano6iKHKOM
B4 Kaebj XmBHeHnI3 WTeNCeBHO BnIKoHO
B5 ⅢaHaH BucOKoTmCKy
B6 EmHicbIy MInOuX 3acO6IB (Ha MoDJIeX 3iEIO yHKLJIEIO)
2.4.1 DoadamKobi KomnoHeMu (de 3acmocOBHe -duB.Man.1)
C1 IHTpymEnTДЯчMuEHHHaCaAKn
C2 KOMIIJEKT NOBOPOTHOI HacaDNK
C3 Puyka
C4 UItKa
C5 KoTuWkaIaIwaHa
2.5 Pnpctpoi6e3nekn

Yeaza: He6e3ne4Ho!
He npuyuTe i He 3miHouTe HanaTuBaHb 3ano6ixnoro KnaHa.
- 3anobixhni klaapani klaanah o6mexeHHn TCKy.
3anobixhnn Knanah Cnykntb taokj i nna 06mexhen Tncky. Konn Biynckcaetcbn yckobn Baxinb nictoneta-po3nnIOBAva, knanah BiikpnBaetcbi BOa peuipkynoe uee3 BXiHn Kahan Hacoca. - 3an06iXnHk (D): 3an06irae BnuaKOBomy BntiKaHHIO BOHN.
3 YCTAHOBKA (MAJ.2)
3.1 36mnpaHH

Y6a2a: He6e3ne4Ho!
PnD qac BCTaHOBHeHH Ta 36npaHH npncptpi NOBHeH 6yTN BiE'EDHaHH BiD MepeKx KMBHeHH.
PocniobHicb 36npaHHa HabeHa Ha Man.2.
3.2 BCTaHOBHeHH NOBOpToHnHaCaKn
KaHo HnyckOBMy npnCTpoi E CnHnHa nAmna, BOHa NOBnHa nOTyXHyTN.
5.7 PekomeHdauii npabunbHoro MHTT
HaheciB MInOuHm 3aCi6,po3BeHEny BOiHa Ie cyxu NOBepxHo, 106 po3HHnTn TAKIM HINOM 6pyd.
HaBepTKKaIbHnX NOBEPXHx CnIg O6pO6nTn 6pyd 3HN3y DorOpn 3aIIuITb MIOUH N3acI6 Ha 1-2 XBNINH, ane He daIte NOBEPXHi BcOXHyTN. POnHnAIOU npauKOBATn 3HN3y, CKepyIte CTrpymInb BcOKOro TcCKy Ha NOBEPXHO 3 BiCTaHI OohaiMeHwe 30 cm.
Hamaraiirec3anobirtn CTiKaHHIO BODn Ha HEmTI dInaHKn nobepxhi.
6 OBCJNUYROBYAHHRA(MAJ.5)
Yci onepaui 06cnyrobyaHH, He 3raadiy u cybomy po3diNIOBHHI 3dInCHIOBAuNCy yOBHOBaKeHMM LcHTpOM npOdaKy Ta 06cnyrobyaHH.

Yeasa: He6e3ne4Ho!
Ipeq BnKoHaHHaM 6yDb-ynx po6it i3
06cnyrobybAHnH npncptpo 06OB'3KOBO BmMaHTe
ttenceIb ka6eIIO xINBHeHn3 pO3eTKn.
6.1 YnueHna HacaKn-po3nnIObaua
1)BID'eHainTe hacAnky-po3nnIObau BID Tpy6kn.
2) Nocntb OTBOPn po3nnIOBAa BiD 6pydy 3a DonomoroIO IHCTpymenta (C1).
6.2 YnueHHa fInbtra
BCMOKTOUHNI pINbTp (L) Ta pINbTp MNIOUX 3acO6IB cnID YnCTHTN nicra KOKHNx 50 roHN po6OTN.
6.3 Po36IokyBaHHMoTopa (Ha MoDJIeX 3 LiEIO yHKiEIO)
ypa3i npBAnx 3ynHnOK ypo60ti yTBOpEHnBaNnHnx BiKnlaeHb MoKe np3BeCtNo 3akImHoBaNnHOmotop.a 1o6 po36nOkyBaTn MOTOP, npOBepHITb Bedyu Ban 3a DonomOrO iHcTpymenta (M).
6.4 36epiranHn iD yac xonoHoro ce3ohy
Ipeed TmJ, AJK NOMICTTN pNCTPIH Ha 3MIOBE 36epirAHH, O6pOitb Ioro 3 BUNOPCTAHHM HeKopo03NBHO i HETOKCNUHOro aHTnΦp3y.
7 YCYHEHH HECIPABHOCTEIN
| ПюбLEMа Можлови рп. | Ичени Ворihuя | |
| Hacoc He doceira e pibna poobochor Tnckу | Зноча Насада-розимлобач 3амини Насаду-розимловач | |
| Заб rudенни Фль trpa Bodи Почистит Фль trp (man.5) | ||
| Ниький ТиCK подсч ВODи | Повись Вддкгп Кран подсч ВODи | |
| Всмokтуваня повитг в систему | Перевироти сцьнICTь пд'еданняшалгов | |
| Повитя в нас检i | Вимкітп рпострий. Прочьхупіе Натickати i Вддyncати рUCKOBи Baxьпь niCTOLeТа, дOKи ВODа He noчne noctурази рIBHIMnotOKOM. YbIMKHITb pricstriй 3HOу | |
| Неравiliansп пооженна ретуновагои hacadkn-розимловач | Поверись ретуновагу Hасаду-розимловач (E) (+) (man.3) | |
| Пid чac Викориссану пада e ТиСК | Забир ВODи BID6yBaETCBСI 3ZOBniShhBOrO pe3eRbByapa | Пд'едайte рпостriй до ВОдогрову |
| Надто rapяч ВODи на ВхDi | Зmedшte tempepatур | |
| Hacadka-розимловач засмчеса ПочистITь hacadku-розимловач (man.5) | ||
| Motop ryde, ale He zanyskaeTbca | Нedoстатные ХиВelenня | Перевиротe, чи нарuya в мереки живлиень Вдд�иаclсецфikaцii в tabлции на ристои (man.2) |
| Вtrpata наpopугу у 38'ЯЗКУ 3 Викорисагнam кабелю подовженья | Перевиротeхаркецпкабелю подовженья | |
| Простriй постaram doBroGrOу чasy He BvNKOPrSCTOBYBABCS | Зberнілься у наиблжчу укововagersь сервichiи цentр | |
| Пробlemи 3 мodyлems TTS | Зberнілься у наиблжчу укововagersь сервichiи цentр | |
| Motop He zanyskaeTbca | Hemac enektropeenerii | Перевиротe, чи stencelba Hынka NobHCSTU BCTablena Bpo3eTKU, a takoJ qu E happya B megexi (*) |
| Пробlemи 3 мodyлems TTS | Зberнілься у наиблжчу укововagersь сервichiи цentр | |
| Простriй постaram doBroGrOу чasy He BvNKOPrSCTOBYBABCS | Здомorozho injctprumentA (L) po36lOkuyte motop chepe OTbip на занii чашип пистою (Дд модаелу, як мадут тakim OTbip) (man.5) | |
| Витikання ВODи | Зношeniy uşilbHHOuChI npoklaidkn | Зberнілься у наиблжчу укововagersь сервichiи цentрдя замини покладok |
| Pruistrtir poloscho ryde | Надто ragая ВODа | Зmedшte tempepatур (дИВ. ТЕХИЧДani) |
| Витikання мacrtnila | Зношeniy uşilbHHOuChI npoklaidkn | Зberнілься у наиблжчу укововagersь сервichiи цentр |
| Лше ду vercii i3 modyem TTS: motop zanyskaeTbca habitb todi, koliу рухкови baxjinb nictoleta te hyatисhevо | Hacadka-розимловач засмчеса ПочистITь hacadku-рosis | Зberнілься у наиблжчу укововagersь сервichiи цentр |
| Дeфekt repretschnoctiy у сistemi Всбокого ТSCKу abo rida rabinichomу lanucryh yapacosa | Зberнілься у наиблжчу укововagersь сервichiи цentр | |
| Лше ду vercii i3 modyem TTS: koliу рухкови baxjinb nictoleta te hyatисуTO, ВODа He nodaeTbca (шалг подсч ВODи пд'EDhaHo) | Hacadka-розимловач засмчеса ПочистITь hacadku-рosis | Зberнілься у наиблжчу укововagersь сервichiи цentр |
Akyto MToP 3aynckaeTbC, ane He 3aynckaeTbC NOBTOPOH nIac po6OTn, noeKaTe 2-3 xBNHH, a notim nobTOpItb npOeDpy 3anycky (cnpaouBaB 3ano6iKNKepeBaHTaKeHH).
Akyo ce tpauntbcae pa3, 3bepnibtcno haN6nnKyoro yNoBHOaKeHOro cepbichoro ceHTpa.


- INSTALLATION (FIG.2)
- Montage
- Attention - danger!
- GENERAL INFORMATION (FIG.1)
- Use of the manual
- Delivery
- Disposing of packaging
- Safety signs
- TECHNICAL INFORMATION (FIG.1)
- Envisaged use
- Operator
- Improper use
- Main components
- Safety devices
- Caution - Danger!
- Do not tamper with or adjust the safety valve set
- ting.
- Assembly
- Assembling the rotating nozzle
- Electrical connection
- Water supply connection
- ADJUSTMENT INFORMATION (FIG.3)
- INFORMATION ON USE OF THE APPLIANCE (FIG.4)
- MAINTENANCE (FIG.5)
- TROUBLESHOOTING
- ALLGEMEINE INFORMATIONEN (ABB. 1)
- INSTALAÇAO (FIG.2)
- Montagem
- Atença-perigo!
- INSTALLATIE (FIG.2)
- INSTALLATION (FIG. 2)
- Montering
- Advarsel -fare!
- Opbevaring for winter
- FEJLFINDING
- GENEELL INFORMASJON (FIG. 1)
- VEDLIKEHOLD (FIG.5)
- TEKNISET TIEDOT (KUVA 1)
- Kayttotarkoitus
- ALLMÄN INFORMATION (FIG. 1)
- Varning-fara!
- RIESENIE PROBLEMOV
- OTCTPAHRABAHE HA HEN3INPABHOCTN
- OBUNIE CBEDEHNA(PMC.1)
- TEXHmueCKNE CBEHeHn (PNC.1)
- PpeDyCmOTpeHHoe McNoIb3OBAHnE
- Oneparop
- Hepa3peweHHOe HcnoIb3ObaHHe
- OchOBhble qactu
- 3aunthbte yctpoictBa
- YCTAHOBKA (PNC.2)
- MoHTax
- Yctanobka Bpaasaioeiercfopcynkn
- 3.4Поdkнluчимьвды
- PEYIMPOBKA (CTP.3)
- CBEDEHNA IO 3KCNPLYATALUN (PNC.4)
- OBCJUYKUBAHNE(PNC.5)
- Xpanenne
- INSTALAREA (FIG.2)
- Asamblarea
- Atentie - Pericol!
- Asamblarea duzei rotative
- AYARLAMALAR (RES.3)
- Rotejosa uzgala montaza
- Elektribas pieslęgums
- Uzmanibu-briesmas!
- Paplasinajumkabela lietosana
- Udens padeves pieslęgums
- Uzmanibu - briesmas!
- Piesleguma vietas
- Pieslegums udens padeves vadam
- INFORMÁCIJA PAR REGULEŠANU (3.ATTÉLS)
- HenpaBnIbHe BnKOpuCTaHHa
- OCHOBHI KOMNOHEHTN
- Pnpctpoi6e3nekn
- Yeaza: He6e3ne4Ho!
- YCTAHOBKA (MAJ.2)
- 36mnpaHH
- Y6a2a: He6e3ne4Ho!
- BCTaHOBHeHH NOBOpToHnHaCaKn
- OBCJNUYROBYAHHRA(MAJ.5)
- Yeasa: He6e3ne4Ho!
- YCYHEHH HECIPABHOCTEIN
Brand : MAKITA
Model : HW131
Category : Pressure washer