HZ3750E - Electric heater HONEYWELL - Free user manual and instructions
Find the device manual for free HZ3750E HONEYWELL in PDF.
| Product type | Fan heater |
| Brand | Honeywell |
| Model | HZ3750E |
| Heating power | 1800 W (max) / 1100 W (eco mode) |
| Power supply | 220-240 V, 50/60 Hz |
| Rated current | 12.5 A |
| Dimensions (approx.) | 30 cm × 25 cm × 40 cm |
| Weight (approx.) | 3 kg |
| Temperature range | 7 °C to 27 °C |
| Timer | 1, 2, 4 or 8 hours |
| Oscillation function | Yes, on/off by button |
| Thermostat | Mechanically adjustable |
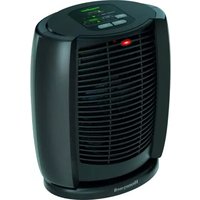
| Heat indicator | Safeguard™ system (black/red) |
| Safety sensor | Safety Sentinel™ (auto shut-off if obstruction) |
| Overheat protection | Automatic shut-off in case of excessive temperature |
| Anti-tilt protection | Yes, automatic shut-off if tipped over |
| Electrical class | Class II (double insulation, no earth) |
| Usage | Indoor only, on firm floor |
| Maintenance | Clean grills with a vacuum cleaner |
| Included accessories | User manual |
Frequently Asked Questions - HZ3750E HONEYWELL
User questions about HZ3750E HONEYWELL
0 question about this device. Answer the ones you know or ask your own.
Ask a new question about this device
Download the instructions for your Electric heater in PDF format for free! Find your manual HZ3750E - HONEYWELL and take your electronic device back in hand. On this page are published all the documents necessary for the use of your device. HZ3750E by HONEYWELL.
USER MANUAL HZ3750E HONEYWELL
INNEHALLSFÖRTECKNING SVENSKA
INNHOldSFOrTEGNELSE NOASK
INDHOLDSFORTEGNESELL DANSK
SISALLYSLUETTELO SUOMI
SPISTRESCIPOL&KI
TARTALOMJEGYZEK MA@YAR
OBSAH CESHY
SADRZAJ HRVATSKI
VSEBINA SLOYENSKO
SISUKORD EES
TURINYS 61 LIETUVIU
SATURA RADITAJS LABIESU
FIHRIST TUKKCE
CODEPXAHNE 70 PYCKN
NEPIEXOMENA 74 EAAHNIKA
81
HZ-370E/HZ-385E/HZ-3750E
HZ-370E
HZ-385E
HZ-3750E
HZ-370E
HZ-370E
HZ-385E/HZ-3750E
HZ-385E/HZ-3750E
HZ-385E
IMPORTANT SAFETY INFORMATION
Before starting to use the heater, read through all the instructions and keep this user manual in a safe place for future reference.
- Extreme care is essential when the heater is used in the vicinity of children or frail persons and when the heater is running without supervision.
- Do not use the heater outdoors.
- Only operate the fan heater when it is in an upright position.
- Unwind the power cord completely. An incompletely unwound power cord can lead to overheating and cause a fire. Do not touch the power cord with wet hands. Make sure that no objects are resting on the power cord or can come in contact with hot parts. Position the power cord so that nobody can trip over it and the power plug is easily accessible. Do not locate the power cord under carpets, rugs or similar fittings.
- Do not use an extension cord, a multi-way connector or a continuously variable speed controller. This can cause overheating, fire or electric shock.
- Connect the heater only to a single-phase power socket with the current as stated on the type plate of the appliance. The heater has double electric insulation (Class II) and does not therefore need to be earthed.
- Always switch the heater off with the thermostat switch and disconnect the power plug from the socket when the heater is not in use, or before you move, handle or clean it. Do not tug at the power cord to pull the plug out. Only handle the heater with dry hands.
- Do not use the heater anywhere near easily inflammable gases or substances such as solvents, lacqueurs, glues, etc. Some of the parts inside the heater are hot and could melt or throw sparks.
- Do not position the heater immediately below a power socket.
- Do not use the heater in the immediate surroundings of a bath, a shower or a swimming pool. Do not locate the heater where it could fall into a bathtub or other water container.
- Do not use the heater in any kind of vehicle (e.g. portacabins, lifts, caravans, cars, sheds) or similar enclosed spaces.
- The use of a heater in small, enclosed spaces requires particular caution, especially if the heater does not have a thermostat. We recommend you to control the room temperature frequently.
- Caution: The heater gets very hot when it running. Keep burnable materials such as cushions, bedding, furniture, paper, curtains and clothing at least 100cm away from the heater. To prevent burns, do not allow bare skin
to come in contact with hot surfaces. Use the transport handle to transport the appliance.
- Keep the heater clean. Make sure that the air intake and outlet vents are open before starting to use the heater. Do not allow any objects to get into the air intake and outlet vents.
- WARNING: In order to avoid overheating, do not cover the heater (Symbol [S] the heater). This can lead to overheating, fire or electric shock. Do not use the heater on soft elastic surfaces such as beds, as the air intake and outlet vents could become blocked.
- Do not plunge the heater into water or any other liquids and do not pour water or any other liquids over the appliance or into the air intake and outlet vents.
- Clean the heater regularly by following the cleaning instructions.
- The heater may only be used according to the instructions in this user manual. Non-observation of these instructions could result in injuries, a fire, an electric shock or faults in the appliance.
- The appliance is intended only for private use indoors and not designed for commercial use.
- If the power cord of the heater is damaged, it must be replaced by a manufacturer-approved service centre or by similarly qualified persons, so as to avoid damage.
- Do not use this heater if it is damaged or shows signs of damage, if it has fallen over, or does not function properly. Pull the plug out of the power socket.
- This heater uses 12.5 Ampere short-term when in operation. To avoid the electric circuit becoming overloaded, do not connect the heater with a circuit to which other appliances are already connected.
- Although it is normal for the power plug to feel warm to the touch, a loose connection between power socket and power plug can cause overheating and faults in the socket. Contact a qualified electrician to get a loose or worn out socket replaced.
- The power output of this heater can vary and the temperature can get hot enough to burn unprotected skin. Use of this heater is not recommended for persons with reduced sensitivity to heat or capacity of reaction, so that burns may be avoided.
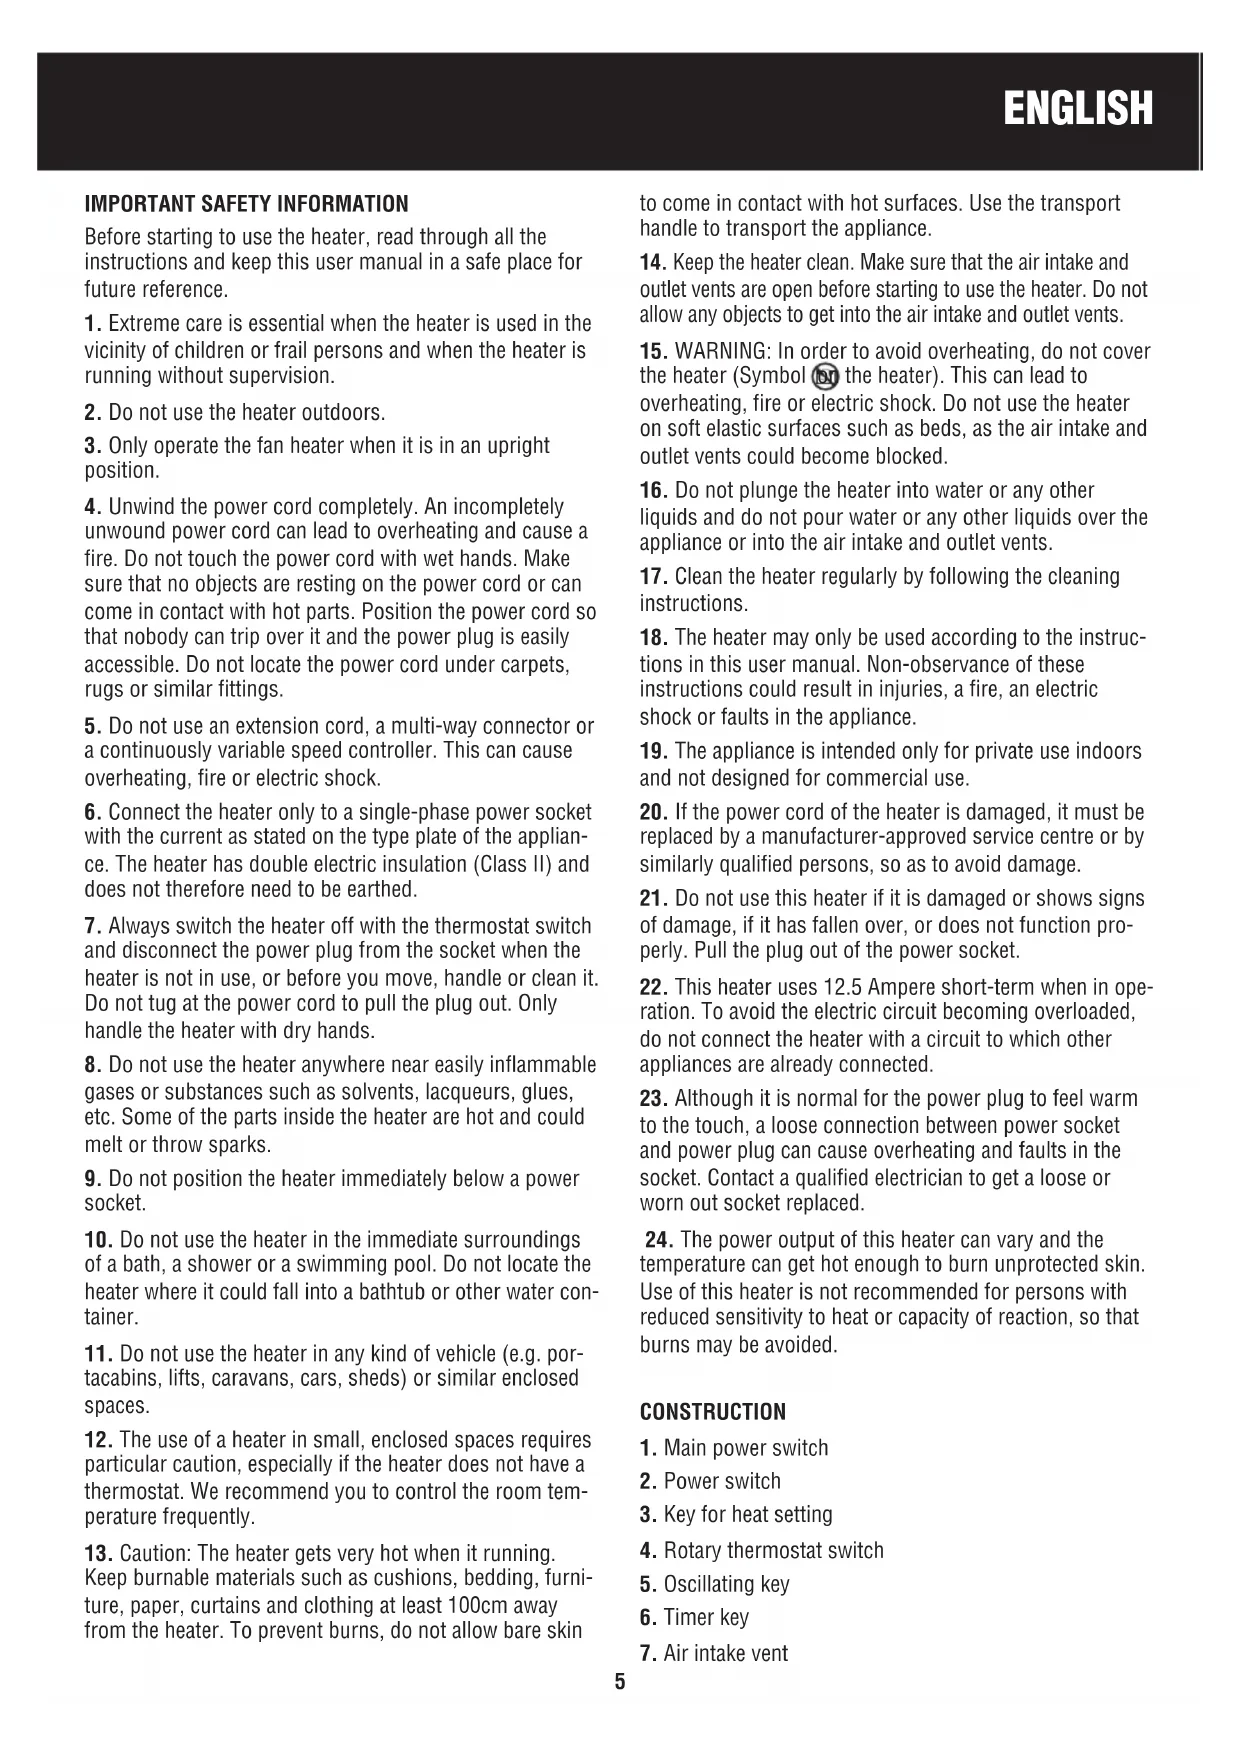
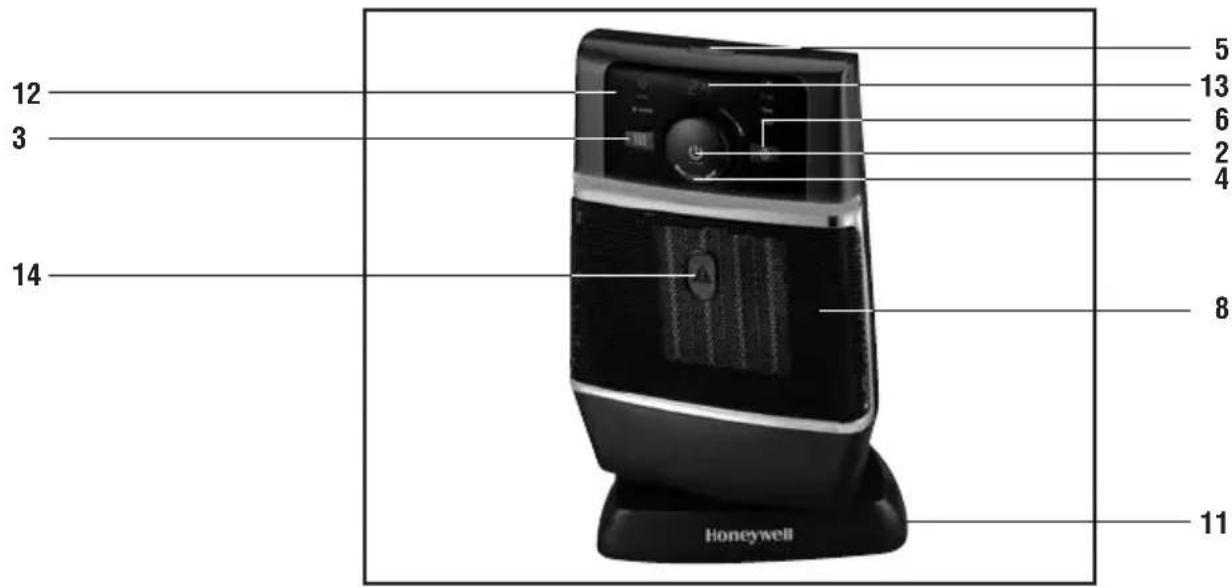
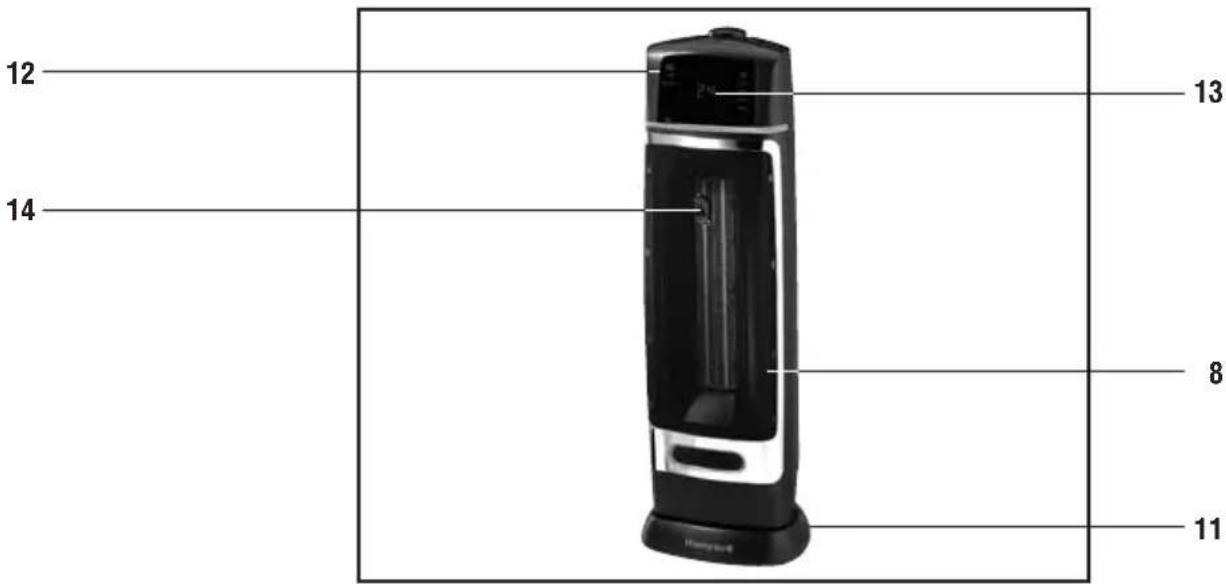
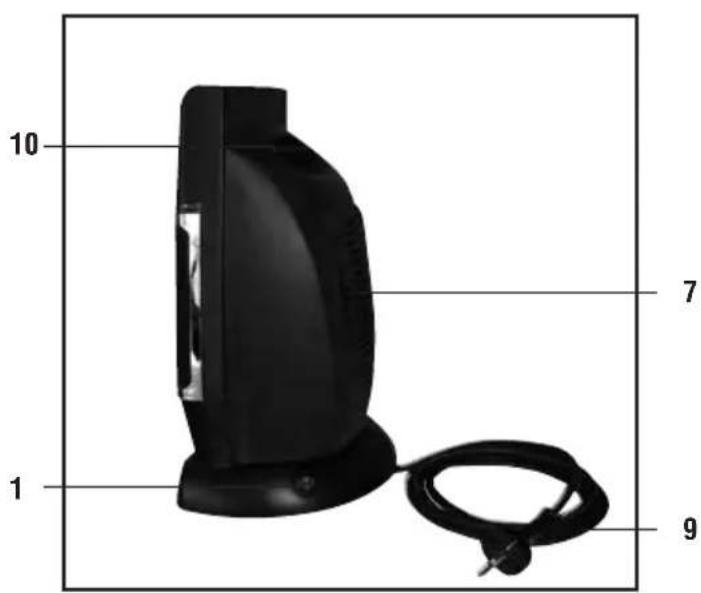
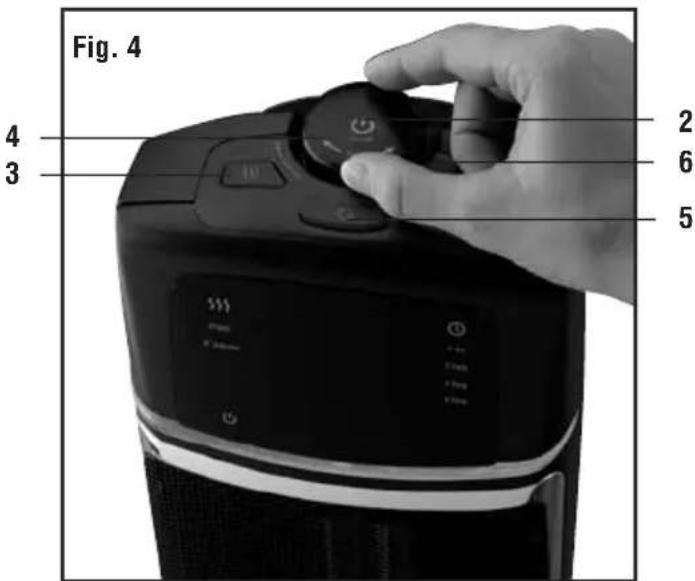
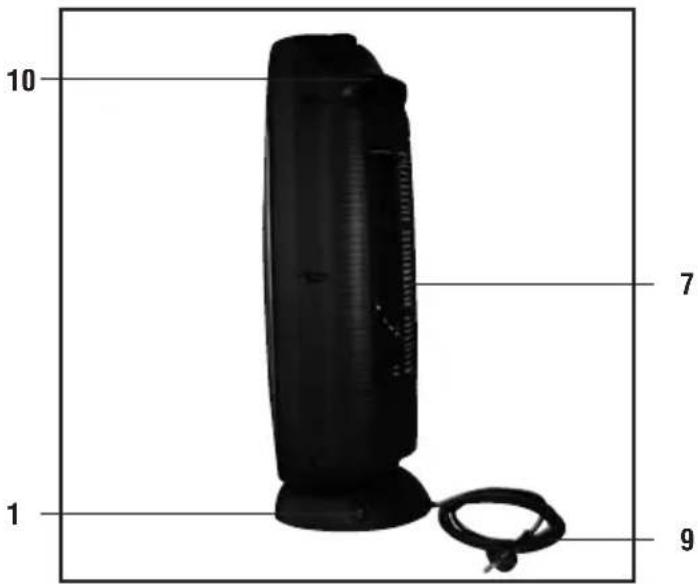
CONSTRUCTION
- Main power switch
- Power switch
- Key for heat setting
- Rotary thermostat switch
- Oscillating key
- Timer key
- Air intake vent
ENGLISH
- Air outlet vent
- Power cord with power plug
- Transport handle
- Base
- Display
- Temperature display
- Safeguard System marker
- Safety sensor Safety SentinelTM
- Sensor warning lamp
- Sensor key
FIRST TIME OF USE
- Before starting to use the heater, read through all the instructions.
- Unpack the heater and the power cord. Remove all the packaging materials and dispose of them for recycling.
USERINSTRUCTIONS
- Place the heater only on a firm, even surface where the heater cannot fall over, fall down or be knocked over.
- Make sure that the main power switch (1) is on 0 so that the heater is switched off. Insert the power plug into the power socket. Do not touch the power cord with wet hands.
- Make sure that the air intake (7) and outlet (8) vents are not covered and that no objects have got inside. The air intake and outlet vents must always be free.
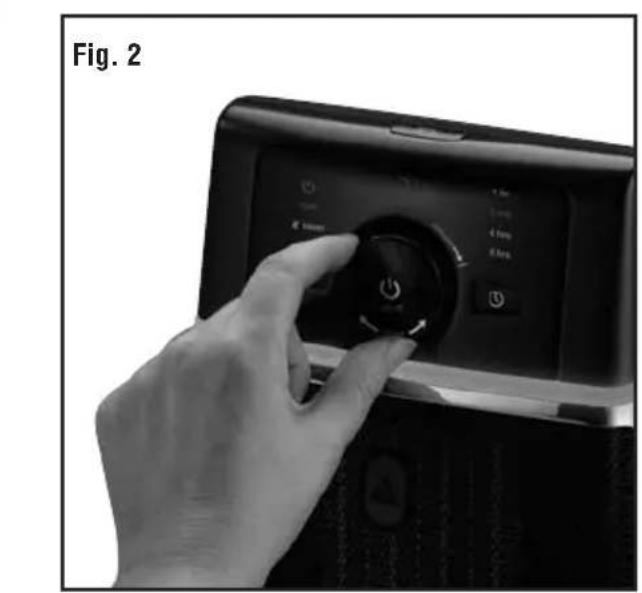
- Press the power key (2) to start the heating operation. The heater is now operating continuously at the highest heating setting. On the display (12) and „max“ are lit up.
- By pressing the heat setting key (4) several times you can change the heating performance from 1800 Watts to the energy-saving mode. Now the heater will operate continuously at 1100 Watts. Appears on the display (12) and, max goes off. Press the key again to set the heater back to 1800 Watts continuous running. saver goes off on the display (12) and, max lights up.
Please note: As long as no temperature has been selected with the rotary thermostat switch (4), the appliance will operate continuously.
- Turn the rotary thermostat switch (4) clockwise to raise the temperature. If you turn it anti-clockwise, you lower the temperature. The desired temperature can be selected between about 7^ and 27^ .
First the preset value of 24^ appears on the temperature display (13). You can then select the desired temperature of between about 7^ and 27^ .
- As soon as the desired temperature is programmed, the current room temperature appears on the display (12).
- The heating switches off shortly after the programmed room temperature has been reached and the temperature display (13) flashes.
- As soon as the room temperature drops below the programmed value, the heater automatically starts operating and will continue heating until the room temperature has reached the programmed value.
- Press the oscillating key 45) to switch the oscillation on. Switch the oscillation off by pressing the oscillating key again.
Programming the timer
- The heater is equipped with a „TIMER“ function. This function switches the heater off at the end of the programmed running time. 1,2,4 or 8 hours running time can be selected.
- Press the timer key (5)
1x = 1 hour. ,1hr^ appears on the display (12).
2x = 2 hours. 2hr^ appears on the display.
3x = 4 hours. 4hr^ appears on the display.
4x = 8 hours. ^ 8hr^ appears on the display.
The heater switches off automatically after the programmed time period.
3. When a temperature setting has been selected before the timer programming, the heater switches on and off automatically.
SafeguardTM System
This heater is equipped with a Safeguard™ System (14) which is located at the front on the air outlet vent (8). When the appliance is heating, the Safeguard marker changes colour from black to red. This signalizes that the heater is hot and must not be touched until it has been switched off and the marker has turned completely black again.
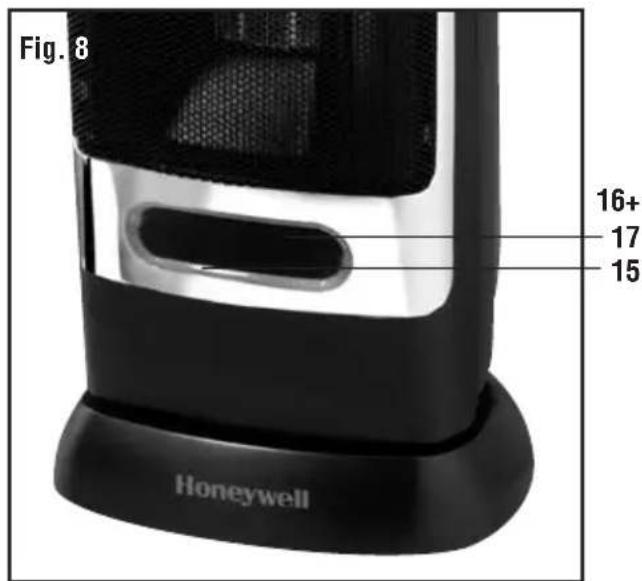
Auto-Off Sensor (only for HZ-385E)
The heater is equipped with a safety sensor Safety SentinelTM (15). If an object is perceived to be too near the heater, the warning light (16) at the side of the sensor flashes to warn about a blockage. If the object is not removed, the sensor switches the heater off after a few seconds. As soon as the object has been removed, the heater switches itself back on after a few seconds delay.
To deactivate this function, press the sensor key (17). To reactivate the function, press the sensor key again.
Overheating shut-off for the heater
- The heater is equipped with overheating shut-off which switches the heater off automatically when the temperature inside the appliance exceeds the normal running temperature. This protective device applies only to the appliance itself and has no influence on room temperature regulation.
- The appliance will not function if the overheating shutoff is activated.
- Turn the power switch (2) to O and the thermostat switch (4) to the lowest position. Pull the power plug out of the socket.
- Now allow the heater to cool at least until the Safeguard marker is completely black.
- Remove any objects from inside or in front of the air intake (7) or outlet (8) vents, or use a vacuum cleaner to clean the openings which caused the faulty running or overheating. If heavy dust deposits are also visible inside the heater, please get the appliance cleaned at a service centre.
- Resume using the heater as described under „User instructions".
Further safety features
- This heater is equipped with a safety fuse which switches the heater off when it is operating at an above normal temperature.
- The heater is equipped with tilt protection, If the heater is not standing upright or tilts over, the tilt protection automatically switches the heater off.
CLEANING, MAINTENANCE, DISPOSAL
We recommend you to clean the heater regularly. Follow the instructions for cleaning and maintenance, so as not to impair the functioning of the heater.
Cleaning
- Before you start with the cleaning, switch the heater off at the main power switch (1) and pull the power plug out of the socket. Allow the heater to cool at least until the Safeguard marker is completely black again.
- Clean the air intake (7) and outlet (8) vents with a vacuum cleaner to remove dust from the motor and heating element.
- Clean the outside of the heater with a soft, dry cloth. Do not use water, wax, polish, or chemical cleaners.
Disposal
This symbol on the product or its packaging indicates that the appliance cannot be treated as normal domestic trash, but must be handed in at a collection point for recycling electric and electronic appliances.
Your contribution to the correct disposal of this product protects the environment and the health of your fellow men. Health and the environment are endangered by incorrect disposal.
Further information about the recycling of this product can be obtained from your local town hall, your refuse collection service, or in the store at which you bought the product.
This regulation is valid only in EU member states.
CONDITION OF PURCHASE
As condition of purchase the purchaser assumes responsibility for the correct use and care of this KAZ product according to these user instructions. The purchaser or user must himself or herself decide when and for how long this KAZ product is in use.
WARNING: IF PROBLEMS ARE WITH THIS KAZ PRODUCT, PLEASE OBSERVE THE INSTRUCTIONS IN THE GUARANTEE CONDITIONS. DO NOT ATTEMPT TO OPEN OR REPAIR THE KAZ PRODUCT YOURSELF, AS THIS COULD LEAD TO TERMINATION OF THE GUARANTEE AND CAUSE DAMAGE TO PERSONS AND PROPERTY.
Technical modifications reserved
DEUTSCH
Auto-Off sensor (endast for HZ-385E)
PUHDISTUS, HUOLTO, JATEHUOLTO
OLULISED OHUTUSJUHISED
AaBdEe! Pu Gaa (Sluuau) uuuuuuuuuuuuuuuuuuuuuuuuuuuuuuuuuuuuuuuuuuuuuuuuuuuuuuuuuuuuuuuuuuuuuuuuuuuuuuuuuuuuuuuuuuuuuuuuuuuuuuuuuuuuuuuuuuuuuuuuuuuuuuuuuuuuuuuuuuuuuuuuuuuuuuuuuuuuuuuuuuuuuuuuuuuuuuuuuuuuuuuuuuuuuuuuuUU
alol ojog 2gul lglol 2gai
(E385 jie bia)
(15) aaii jiaaia jia jyj
jaiill (16) jaiil o jai!
gaaa gaa aagaae aee 6
"Jll
5
1800 10
1800 1100
1800 12
1800 13
1800 14
1800 15
1800 16
1800 17
1800 18
1800 19
1800 20
1800 21
1800 22
1800 23
1800 24
1800 25
1800 26
1800 27
1800 28
1800 29
1800 30
1800 31
1800 32
1800 33
1800 34
1800 35
1800 36
1800 37
1800 38
1800 39
1800 40
1800 41
1800 42
1800 43
1800 44
1800 45
1800 46
1800 47
1800 48
1800 49
1800 50
1800 51
1800 52
1800 53
1800 54
1800 55
1800 56
1800 57
1800 58
1800 59
1800 60
1800 61
1800 62
1800 63
1800 64
Cagall a jy
.1
aaii 2
.1 1
(6) 2
(12) 1
"hr1" .2
"hr2" .2
4" hr
8" .4
"hr
.5
.3
aaiy jiy 11 aill (II aill) g
jia 210 Jx jao lai aieill jz eabi ly 7
y loie waeall jno waiell laids wuwlglj
( 1 + u) + ·s + ( 1 + z) + ( 1 + z) u + z^2 =
oaiy 2. jill yiaie aibii gl a
1 1
iiis jiey 1
1j 8
alilal Jia 1ga jua gau Jauu u
aill jie. aai log aaiu ul al gai ciS
aljal aigilagaiislaol aljal
1
jao jao o jao aiaai jao gao y 9
S = S1 + S2 + S_3
plas g jgall plalll jgs Jaaui 10
aay jSuy JSA g aasill jggsy
.04e 15g
jggi jiai jia 11
elall (cllll lccj Jlll jie)
jgl (jilsl 2gll l jlaa
aalil jslal
jajai plaii iie jall jia jaliy.12
a
S木弟形 COBD = S COD + S_ BDO

KAZ Hausgeräte GmbH
Westerhaar 54
D-58739 Wickede
Phone: +49 2377 9289-0
www.kaz.com
The Honeywell trademark is used by
Kaz, Inc. under licence from Honeywell
Intellectual Properties, Inc.
HZ-370E/HZ-385E/HZ-3750E-OM//0//2006-07-13