
NIKOLATESLA PRIME S+ - Induction hob ELICA - Free user manual and instructions
Find the device manual for free NIKOLATESLA PRIME S+ ELICA in PDF.



| Product type | Induction hob with integrated hood |
| Brand | ELICA |
| Model | NIKOLATESLA PRIME S+ |
| Number of cooking zones | 4 zones: front left, front right, rear left, rear right |
| Power levels | 9 levels (1-9) + Power Booster (P) |
| Maximum total power | 7.4 kW (adjustable via Power Limitation: 7.4 kW, 4.5 kW, 3.1 kW) |
| Electrical supply | 230 V ~ 50 Hz (permanent connection via omnipolar switch) |
| Cooking functions | Power Booster, Automatic Heat Up, Temperature Manager (keep warm), Timer for zones and independent, Pause, Key Lock |
| Extraction functions | 4 speeds + Power Booster (5 min), automatic operation, filter saturation indicator |
| Extraction type | Suction (external evacuation) or filter (internal recycling with charcoal filters) |
| Safety | Pan detection, automatic shut-off, child safety (Key Lock), residual heat indication (H), overheating protection |
| Control panel | Touch controls with digital display |
| Cookware compatibility | Flat ferromagnetic bottoms (diameter adapted to each zone) |
| Hob maintenance | Clean after each use with a soft cloth and specific product, avoid abrasives and steam cleaners |
| Grease filter maintenance | Monthly cleaning by hand or in dishwasher (gentle cycle, low temperature) |
| Charcoal filter maintenance | Thermal regeneration every 2-3 months (200°C, 45 min) or replacement after 5 years |
| Filter saturation indicator | Programmable indicator: grease filter flashing, charcoal filter steady |
| Power Limitation | Maximum power limitation (7.4 / 4.5 / 3.1 kW) adjustable during connection |
| Window Kit compatible | Yes (optional) to stop extraction if window closed |
| Safety standards | EN/CEI 60335-1, EN/CEI 60335-2-6, EN/CEI 60335-2-31, EN/CEI 62233, EN 55014, etc. |
| Recess dimensions | Worktop thickness 2-6 cm (TOP installation) or 2.5-6 cm (FLUSH) |
| Weight | Not specified (estimated ~15 kg) |
Frequently Asked Questions - NIKOLATESLA PRIME S+ ELICA
User questions about NIKOLATESLA PRIME S+ ELICA
0 question about this device. Answer the ones you know or ask your own.
Ask a new question about this device
Download the instructions for your Induction hob in PDF format for free! Find your manual NIKOLATESLA PRIME S+ - ELICA and take your electronic device back in hand. On this page are published all the documents necessary for the use of your device. NIKOLATESLA PRIME S+ by ELICA.
USER MANUAL NIKOLATESLA PRIME S+ ELICA
Residual Heat Indicator
- Temperature Manager (Warming Function)
Strictly observe the instructions in this manual. All liability is declined for any problems, damage or fires caused by failure to comply with the instructions in this manual. The device is intended for domestic use only, to cook food and extract the fumes generated by cooking. No other use is allowed (e.g. heating rooms). The manufacturer declines any liability for inappropriate use or incorrect control settings.
The device may have different aesthetic features with respect to the illustrations in this handbook, however the operating, maintenance and installation instructions remain the same.
- Read the instructions carefully: they contain important information on installation, operation and safety.
- Do not make electrical changes to the device.
- Before installing the device, make sure that none of the components are damaged. Otherwise, contact the dealer and do not continue with the installation.
- Check that the device is intact before proceeding with installation. Otherwise, contact the dealer and do not continue with the installation.

At the parts marked with this symbol can be purchased separately from specialised dealers.

: the parts marked with this symbol are optional essories supplied only with some models and can be purchased from the websites www.elica.com and www.shop.elica.com.
1. SAFETY AND REGULATIONS

GENERAL SAFETY
Please note! Pay strict attention to the following instructions: - The device must be disconnected from the mains before carrying out any installation work. - Installation or maintenance must be performed by a qualified technician, in compliance with the manufacturer's instructions and local safety regulations. Do not repair or replace any part of the product unless specifically stated in the operating manual. - By law, the product must be earthed. - The power cable must be long enough to allow the product, built into the cabinet, to be connected to the mains. - In order for the installation to comply with current safety regulations, an approved omnipolar switch is required that guarantees complete disconnection from the mains in overvoltage category III, in accordance with the installation rules. - Do not use power strips or extension cords. - Once installation is complete, the electrical components must no longer be accessible by the user. - The product and its accessible parts get hot during use. Be careful not to touch the heating elements. - Ensure that children do not play with the product; keep children at a safe distance and supervise them as the accessible parts may become very hot during use. - For people with pacemakers and active implants, it is important to check,
Prior to using the induction hob, ensure that their pacemaker is compatible with the product. Do not touch the heating elements of the product during and after use. Avoid contact with kitchen towels or other flammable materials until all components of the product have sufficiently cooled; fire hazard. Do not place flammable materials on or near the product. Overheated fats and oils easily catch fire. Supervise the cooking of fatty or oily food. If the surface is cracked, switch the product off immediately to prevent the risk of an electric shock. The product is not intended to be operated with an external timer or a separate remote control system. Unattended cooking on a hob with oil or fat can be dangerous and may cause a fire. The cooking process must be supervised. A short cooking process must be constantly monitored. NEVER attempt to put fires out using water. Instead, turn off the product and smother the flames, for example with a lid or a fire blanket. Fire hazard: do not place objects on the cooking surfaces. Do not use steam cleaners; risk of electric shock. Do not place metal objects, such as knives, forks, spoons or lids on the hob because they could become hot. Before connecting the product to the mains: check the rating plate (on the bottom of the product) to ensure that the voltage and power correspond to the mains supply and that the power socket is suitable. If in doubt, consult a qualified electrician.
Important: After use, turn off the hob using its control device and do not rely on the pot detector. Prevent liquids from boiling over; therefore, turn the heat down when boiling or heating liquids. Do not leave the heating elements turned on with empty pots and pans, or without any cookware. Switch off the relevant cooking zone when you have finished cooking. Never use aluminium foil for cooking and never place products packaged in aluminium directly on the hob. The aluminium would melt and irreparably damage your product. Never heat a tin or can containing foods without opening it first: it might explode! This warning also applies to all other types of hobs. High power levels such as the Booster function should not be used to heat certain liquids, such as oil for frying. Excessive heat may be dangerous. In these cases, we recommend the use of a lower power level. The cookware must be placed directly on the hob and must be centred. Under no circumstances may any other objects be placed between the pot and the hob. If the temperature becomes high, the product automatically decreases the power level of the cooking zones. Before doing any cleaning or maintenance work, disconnect the product from the mains by disconnecting the plug or turning off the mains switch. For all installation and maintenance operations, always use work gloves. The product can be used by children over the age of 8 and by people with reduced physical, sensory or mental capabilities or without experience or the necessary knowledge, as long as they are properly supervised or have been instructed on how to safely use the product and understand the inherent dangers. Children must be supervised to ensure they do not play with the product. Cleaning and maintenance must never be performed by children unless they are
properly supervised. The room must be sufficiently ventilated when the product is used at the same time as other appliances that run on gas or other fuels. The product must be cleaned frequently both inside and out (AT LEAST ONCE A MONTH); always follow the instructions given in the maintenance manual. Failure to comply with the rules for product cleaning and the cleaning/replacement of filters may create a fire hazard. Flambé cooking is strictly prohibited. Using a naked flame may damage the filters and cause a fire hazard, and must therefore be avoided under all circumstances. Extra care must be taken when frying to prevent the oil from overheating and catching fire. Please note! The accessible parts of the device may become hot when the hob is switched on. Please note! Do not connect the product to the mains until the installation is complete. The regulations laid down by local authorities must be strictly followed with regard to the technical and safety measures to be adopted for fume extraction. The extracted air must not be conveyed through the same ducts used to extract the fumes generated by the combustion of gas or other types of fuels. Never use the product without the grille properly installed! Only use the fastening screws supplied with the product for installation, or if not supplied, purchase the correct type of screws. Use screws of the right length, as indicated in the installation guide. When this product is used together with other devices powered with nonelectrical energy, the negative pressure of the room must not exceed 4 Pa (4 x 10⁻⁵ bar). This manual must be stored for future consultation at any time. If sold, transferred or moved, it must remain with the product.
- Range hoods and other cooking fume extractors may adversely affect the safe operation of appliances burning gas or other fuels (including those in other rooms) due to back flow of combustion gases. These gases can potentially result in carbon monoxide poisoning. After installation of a range hood or other cooking fume extractor, the operation of flued gas appliances should be tested by a competent person to ensure that back flow of combustion gases does not occur.
ELECTRICAL CONNECTION SAFETY
- Disconnect the product from the mains. - The installation must be carried out by professionally qualified personnel with knowledge of the regulations in force for installation and safety. - The manufacturer disclaims all liability for persons, animals or property if the guidelines provided in this chapter are not followed. - The power cable must be long enough to allow removal of the hob from the worktop. - Check that the voltage on the rating plate on the bottom of the product corresponds to that of the domestic environment where it will be installed. - Do not use extension cords. - The earth cable must be 2cm longer than the other cables. - If the product is not equipped with a power cable, use one with a minimum conductor diameter of 2.5mm2 for power up to 7200 Watt; for higher power levels, the diameter must be 4mm2 . - The temperature must not reach 50°C above room temperature anywhere along the cable. - The product is
intended to be permanently connected to the mains, therefore, make the connection to the mains using an approved omnipolar switch that guarantees complete disconnection from the mains in category III overvoltage conditions, and which is readily accessible after the installation.
- Please note! The interconnection cable must be replaced by the authorised customer service representative or by a person with similar qualifications.
- Please note! Before reconnecting the circuit to the mains power supply, make sure that it is working correctly, always check that the power cable is correctly installed.
POWER LIMITATION: the product is equipped with a Power Limitation function, which allows a maximum power limit to be set (kW).
The setting must be made when the product is connected to the mains or when the mains power itself is restored (within the following 2 minutes). Size the electrical system protection according to the selected Power Limitation level. For the Power Limitation setting sequence, see the Operation section of this manual.
WINDOWS KIT: The product can also be used in conjunction with a Window sensor KIT (not supplied by the manufacturer). If the Window sensor KIT is installed (only if used in DUCT-OUT mode), air extraction will halt every time the window in the room, on which the KIT is applied, is closed. The KIT must be electrically connected to the device by qualified and specialised technical personnel. The KIT must be certified separately in accordance with the safety standards for the component and its use with the device. Installation must be carried out in accordance with current regulations for domestic systems.
PLEASE NOTE: the wiring of the KIT to be connected to the product must be part of a certified safety extra-low voltage (SELV) circuit. The manufacturer of this device disclaims all liability for any inconvenience, damage or fires caused by defects and/or problems associated with the malfunction and/or incorrect installation of the KIT.
INSTALLATION SAFETY
- The electrical and mechanical installation must be performed by qualified personnel.
- Before starting the installation: After unpacking the product, check that it has not been damaged during transport. In case of problems, contact your dealer or Customer Service before proceeding with the installation. Check that the purchased product is the right size for the installation location. Check for accessories inside the packaging (placed there for ease of transport, such as bags containing screws, the warranty certificate, etc.). Remove and keep them safe. Also check that there is a power socket near the installation area. Preparing the cabinet for installation:
- The product cannot be installed above cooling appliances, dishwashers, heaters, ovens, washing machines, and dryers. Create the cut-outs in the cabinet
before inserting the hob and carefully remove shavings or sawdust.
- The product is designed to be built into a worktop with a thickness of 2-6 cm in the case of TOP installation; 2.5-6 cm in the case of FLUSH installation.
The minimum distance between the hob and the wall must be at least 5 cm in front, at least 4 cm on the sides, and at least 50 cm from overhead wall units.
NB: The recommended distances are given as examples: when planning the spaces, the indications of the kitchen manufacturer must be observed.
- To optimise the recirculating installation, it is recommended to create a slot in the plinth, in which to insert a commercial grille.
- Important: use a single component adhesive sealant (S) that can withstand high temperatures up to 250°C. Before installation, the surfaces that need to be glued must be thoroughly cleaned, removing all substances that may compromise adhesion (e.g. release agents, preservatives, grease, oils, powders, old adhesive residue, etc.). The adhesive must be evenly spread along the entire perimeter of the frame. After gluing, leave the adhesive to dry for about 24 hours.
- Please note! Failure to install screws and fasteners in accordance with these instructions may result in electrical hazards.
- Note: for correct installation of the product, it is recommended to tape the pipes using an adhesive with the following characteristics: soft elastic PVC film, with acrylic-based adhesive; complies with DIN EN 60454 regulations; flame retardant; excellent resistance against wear; resistant to temperature fluctuations; can be used at low temperatures.
END-OF-LIFE DISPOSAL
This device is marked in compliance with the European Directive 2012/19/EC - UK SI 2013 No.3113, Waste Electrical and Electronic Equipment (WEEE).
Make sure that this product is disposed of correctly. The user helps prevent potential negative consequences for the environment and for health. The symbol on the product or accompanying documentation indicates that this product should not be treated as household waste but should be handed over at a suitable collection point for the recycling of electrical and electronic equipment. Dispose of it in accordance with local regulations for waste disposal. For further information about the treatment, recovery and recycling of this product, please contact your local authority, the collection service for household waste or the shop from where the product was purchased.
REGULATIONS
Device designed, tested and developed in compliance with regulations on:
- Safety: EN/IEC 60335-1; EN/IEC 60335-2-6, EN/IEC 60335-2-31, EN/IEC 62233; Performance: EN/IEC 61591; ISO 5167-1; ISO 5167-3; ISO 5168; EN/IEC 60704-1; EN/
IEC 60704-2-13; EN/IEC 60704-3; ISO 3741; EN 50564; IEC 62301. EN 60350-2; EMC: EN 55014-1; CISPR 14-1; EN 55014-2; CISPR 14-2; EN/IEC 61000-3-3; EN/IEC 61000-3-12.
RECOMMENDATIONS FOR USE
Recommendations for correct use in order to reduce the impact on the environment: When cooking begins, the device should be turned on at minimum speed, and left on for a few minutes even after cooking is complete. Increase the speed only if there is a large quantity of fumes and steam, using the Booster function only in extreme cases. To keep the odour reduction system running efficiently, replace the carbon filter/s when necessary. To ensure the high performance of the grease filter, clean it when necessary. To improve efficiency and minimise noise, use the maximum duct diameter indicated in this manual.
2. USE
USING THE HOB
The induction cooking system is based on the physical phenomenon of magnetic induction. The main characteristic of this system is the direct transfer of energy from the generator to the pot.
Benefits: When compared to electric hobs, your induction hob is: Safer: lower temperature on the glass surface. Faster: shorter food heating times. More accurate: the hob immediately reacts to your commands. More efficient: 90% of the absorbed energy is transformed into heat. Moreover, once the pot is removed from the hob, heat transmission is immediately interrupted, avoiding unnecessary heat loss.
USE OF COOKWARE
Cookware

Only use pots bearing this symbol.
Important:
To avoid permanent damage to the hob surface, do not use:
- cookware with a base that is not perfectly flat; metal cookware with an enamelled base;
- cookware with a rough base, to avoid scratching the hob surface;
- Never place hot pots and pans on the surface of the hob's control panel.
- Not all induction pots work efficiently due to the base only partially consisting of ferromagnetic material! When purchasing pots or pans ensure that:
- the base is made entirely from ferromagnetic material. If this is not the case, heat transmission and uniformity will be less efficient, and the temperatures of the pot/pan surface may not be suitable for cooking.
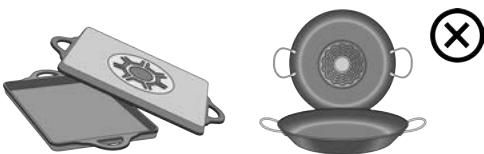
- The base does not contain aluminium: the cookware does not heat and may not be recognised by the inductors.
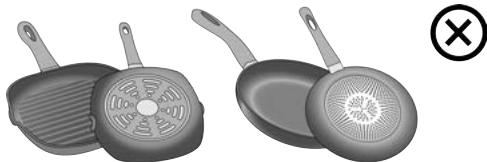
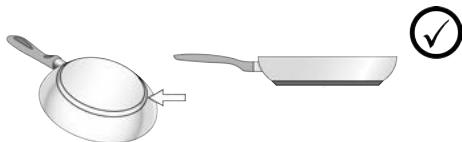
- Bases that are not flat or have rough surfaces.
- These lower the contact surface area between the inductor and the cookware, reducing efficiency and harming the cooking experience.
Pre-existing cookware
You can check if the pot material is magnetic simply by using a magnet. Pots are not suitable if they are not magnetically detectable. The indications from the previous paragraph also apply here.
- Recommended pot bottom diameters
IMPORTANT: if the pots are not of the correct size, the cooking zones will not switch on. To see the minimum pot diameters for each individual zone, consult the illustrated section of this manual.
Energy saving
Use pots and pans with a bottom diameter equal to that of the cooking zone; Use only pots and pans with flat bottoms; - Where possible, keep the lid on pots during cooking; Cook vegetables, potatoes, etc. with a minimal amount of water to reduce the cooking time; Use the pressure cooker, as it further reduces energy consumption and the cooking time; Place the pot in the centre of the cooking zone drawn on the hob.
USING THE EXTRACTOR FAN
The extraction system can be used in the duct-out version with external evacuation, or in the recirculating version with filtering and internal recirculation.
Consult the website www.elica.com and www.shop.elica.com to view the full range of available kits for the various installations in both the recirculating and duct-out version.
Duct-Out Version:
Vapours are exhausted outside via a series of pipes (to be
purchased separately). Connect the product to wall-mounted exhaust pipes and holes with a diameter equivalent to the air outlet (connecting flange). For more information on the pipes and their dimensions, see the page relating to accessories in the installation manual - Duct-Out version. The use of pipes and outlet holes in the wall with a smaller diameter will reduce the extraction performance and drastically increase the noise level. All responsibility in this regard is therefore denied.
For maximum extraction efficiency: We recommend a maximum pipe route length of 7 linear metres. We recommend using no more than two 90° bends along the entire 7 linear metres. Avoid drastic changes in the ducting diameter, seeking to maintain a diameter of Ø150 mm (or a rectangular section of 222×89 mm).
The extracted air will be filtered in special grease filters and odour filters before being sent back into the room. The product is supplied with all parts necessary for standard installation, with the air outlet positioned in the front part of the plinth. The product is equipped with a set of odour filters. For more information, see the page relating to accessories for the recirculating version (in the illustrated part of this manual).
The extracted air will be filtered in special grease filters and odour filters before being sent back into the room. The product is supplied with all parts necessary for standard installation, with the air outlet positioned in the front part of the plinth. The product is equipped with a set of odour filters. For more information, see the page relating to accessories for the recirculating version (in the illustrated part of this manual).
CONTROL PANEL
T. Function
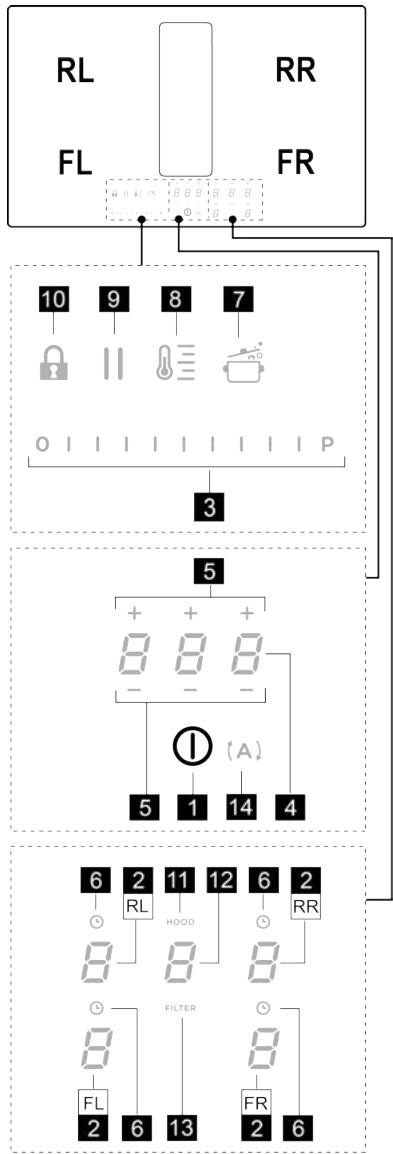
THINGS TO KNOW BEFORE STARTING
| 1 | ON/OFF of the hob / hob extractor fan |
| 2 | Selection of the cooking zones / Cooking zone display |
| 3 | Increase/decrease cooking power level and extraction speed (power) |
| Display the cooking power level and extraction speed (power) | |
| 4 | Activate "STAND ALONE" timer |
| Display: "STAND ALONE" timer / Cooking Zones Timer. | |
| 5 | Increase/Decrease "STAND ALONE" Timer time / Cooking Zones timer |
| 6 | Activation of Cooking Zones Timer |
| Indicator of Cooking Zones Timer active | |
| 7 | Automatic Heat Up Activation. |
| 8 | Temperature Manager activation (Warming Function) |
| 9 | Pause |
| 10 | Key Lock |
| 11 | Indicator Extractor active |
| Activation of Filter Saturation Indicator | |
| 12 | Extractor Selection/Activation |
| Extractor Display | |
| Display of Carbon/ceramic filter - Grease filter saturation | |
| 13 | Reset Filter Saturation |
| 14 | Activation of extractor automatic function |
All functions of this hob are designed to comply with the most stringent safety regulations. For this reason:
All functions of this hob are designed to comply with the most stringent safety regulations. For this reason:
- Some functions will not be activated, or will be automatically deactivated, in the absence of pots on the burners or when they are poorly positioned.
- In other cases the activated functions will be automatically deactivated after a few seconds, if the specific function requires a further setting that has not been selected (e.g.: "Turning the hob on" without "Selecting the cooking zone" and the "Operating temperature", or the "Lock Function" or the "Timer" function).
Wait for the display to turn off before approaching the cooking zone.
Please note! In the case (for example) of prolonged use, the cooking zone may not immediately shut down because
it is in the cooling phase; the symbol will appear on the cooking zone display to indicate that this phase is under way. Wait for the display to turn off before approaching the cooking zone.
COOKING ZONE DISPLAY
The following is shown on the cooking zone displays:
| Function | Value |
| Cooking zone on | □ |
| Power Level | I...9-P |
| Residual Heat Indicator | H |
| Pot Detector | U |
| Temperature Manager Function active | V |
| Pause function | H |
| Automatic Heat UP function | R |
CHARACTERISTICS OF THE HOB
Safe Activation
The product is activated only in the presence of pots on the cooking zone: the heating process does not start or is interrupted if there are no pots, or if these are removed.
- Pot Detector
The product automatically detects the presence of pots on the cooking zones.
- Safety Shut Down
For safety reasons, each cooking zone has a maximum operating time, which depends on the power level set.
Residual Heat Indicator
When switching off one or more cooking zones, the residual heat is indicated with a specific visual signal on the
display of the corresponding zone by the symbol
USING THE HOB
Note: Before activating any functions, the desired zone must be activated
Power-on
Briefly press (touch) ON/OFF (1) hob / extractor fan:
the symbol ① lights up; If you continue to press: all the available functions will become visible for a few seconds, after which only the main ones will remain active; the other ones can be used, and will be activated, later, while using the device.
IMPORTANT: all the available functions will be illuminated with light intensity, which will become more intense only when they are activated.
Press again to turn off
Note: This function has priority over the others.
- Selecting the cooking zones
Briefly press (touch) the Selection/Display (2) area corresponding to the desired cooking zone.
Power Level
The hob features 9 power levels. Touch and slide your fingers along the Selection bar (3):
to the right to increase the power level;
to the left to decrease the power level.
The power level set will be displayed in the Selection/
Display area (2)
Power Booster
The product features a supplementary power level (after level 3), which remains active for 5 minutes, after which the temperature returns to the previously set value.
Touch and slide your fingers along the Selection bar (3)
(beyond level) and activate the Power Booster. The Power Booster level is indicated in the Selection / Display area (2) with the symbol
- Cooking Zone Timer
The Cooking Zone Timer function is a countdown that can be set, even simultaneously, on each cooking zone. At the end of the period set, the cooking zones switch off automatically and the user is notified with a dedicated acoustic signal.
Activation of the cooking zone timer function
- Touch (press) the Selection/Display area (2) (power level other than zero)
- Press (6) relating to the cooking zone
- Use the symbols — + (5) to set the duration of the Timer, which is shown in the Zone/Display (4); while setting, the symbol L (6) flashes.
Note: wait 10 seconds without pressing any other command, so that the Cooking Zone Timer will start.
Note: by pressing and holding (L) again, the cooking zone Timer is reset.
If desired, repeat the operation for several cooking zones:
Each cooking zone can have a different Timer set; in the display (4) the countdown of the cooking zone selected at that moment will appear; if no zone is selected, press the Display (4) to view the STAND-ALONE Timer countdown. The countdown display mode is the same as for the STAND-ALONE Timer (see STAND-ALONE Timer paragraph in the WEB version of this manual).
When the timer has finished the countdown, an acoustic signal sounds and the cooking zone switches off.
To switch off the Timer:
- select the cooking zone (2)
- set the duration of the Timer to 0.00, using - + (5) .
Power Limitation
The Power Limitation function allows the product to be used while limiting its maximum absorption, adjusting the absorbed power in all active cooking zones, ensuring that the total absorbed power of the hob does not exceed the set maximum absorption level.
Note: the setting must be made with the hob switched off, without pressing the ① ON/OFF (1) button, when the hob is connected to the mains, or reconnected to the mains, within the next 2 minutes.
To set the Power Limitation:
- press (A) (which will flash, only for the first 2 minutes after the product has been switched on)
- while continuing to hold down (A), press, one at a time, all the Selection/Display areas (2) of the cooking zones in a counter-clockwise direction starting from the front left zone (FR); a short acoustic signal will be emitted with each press and when all the Displays (2) have been pressed, it will be possible to release the key:
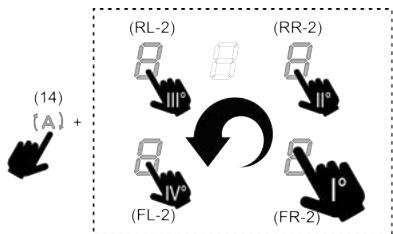
at this point, the Display (2) of the rear left zone (RL) will show, in alternating sequence, the symbols and , indicating that the setting can be made. - select the Display (RL-2) then slide along the Selection bar (3), until the Display shows the symbols and ; The Display (FL-2) will show the current setting with the values in the table:
| Displayed value | Power (Kw) |
| 0 | 7.4 Kw (default setting) |
| 1 | 4.5 Kw |
| 2 | 3.1 Kw |
To change the Power Limitation setting:
- press the Display (FL-2) then slide along the Selection bar (3), to
set the new setting. To save the selection made, press the
ON/OFF (1) button for 2 seconds; an extended audible signal will be emitted to confirm the setting.
Key Lock
The Key Lock allows you to lock the settings of the hob to prevent accidental tampering with the same, while leaving the set functions enabled.
Activation:
- press (10) Repeat the operation to deactivate.
Note: if any other function is pressed while the Key Lock is
active, the symbol will flash to indicate that the function is in use and must be deactivated if necessary in order to use the hob.
Automatic Heat UP
The Automatic Heat Up function allows the set power to be reached more quickly; with this function it is possible to cook food faster without the risk of burning it, insofar as the temperature does not exceed the set level. This function is
available for power levels from 1 to 8.
Activation:
with the cooking zone on, press (7), the Display (2) will show a flashing, alternating with the power set in the cooking zone.
By increasing the power level of the cooking zone: the Automatic Heat Up function remains active, with the new temperature setting;
By decreasing the power level of the cooking zone: the Automatic Heat Up function is deactivated.
Note: by selecting another cooking zone at the same time, the symbol (7) will go back to being illuminated with light intensity, and it will be possible to proceed, also for this zone, with the activation of the function; in any case, the function remains active in the zone in which it has already been set, as indicated in the Display (2).
- Pause
The Pause function allows active functions on the hob to be suspended, bringing the cooking power to zero.
Activation:
- press (9), the symbol / will flash on the display (2)
To deactivate the function:
- press (9) the Selection bar (3) will light up
- press/slide on the Selection Bar (3) to deactivate the function.
Note: deactivation restores the conditions of the hob before the pause; the hob continues to work with the same settings previously set.
Note: if after 10 minutes, the Pause Function is not deactivated, the hob will turn off automatically.
Note: the Pause Function does not affect the extraction.
- "STAND ALONE" Timer
The Timer function is a countdown independent of the cooking zones (and the extraction zone).
The Timer is activated by pressing the Zone/Display (4).
Use the symbols + (5) to set the duration of the Timer, which is shown in the Zone/Display (4).
Note: wait 10 seconds without pressing any other command, so that the countdown starts.
The Timer can be set up to a maximum of 1(h) and 59(min.) The Zone/Display (4) will show the remaining time; an acoustic signal will be emitted at the end of the countdown.
Note: When the remaining time is less than 10 minutes, a fixed dot will appear in the timer after the first number.
| Displayed value | Remaining time |
| 35 | 1h and 35 min |
| 35 | 1min. and 35 sec. |
To switch off the Timer:
- select Zone/Display (4)
- set the duration of the Timer to Zero 0.00, using - + (5)
- Temperature Manager (Warming Function)
Temperature Manager is a control function that maintains heat at a constant temperature, at an optimized power level; ideal for keeping ready-cooked foods warm. The Temperature Manager function is activated the first time the key (8) is pressed.
The symbol appears in the display (2) of the zone that is working in the Temperature Manager.
Note: by selecting another cooking zone at the same time, the symbol (8) will go back to being illuminated with light intensity, and it will be possible to proceed, also for this zone, with the activation of the function; in any case, the function remains active in the zone in which it has already been set, as indicated in the Display (2).
- Press (8) again to deactivate and switch off, until the level shown in the Display (2) is brought to .
Note: if there are several zones operating in Temperature Manager (Warming Function) mode, select the desired zone first using the Selection zone (2); the function can also be deactivated using the Selection bar (3), by bringing the Power Level to .
USING THE EXTRACTOR
- Switching the extraction system on:
- Switch on the hob as indicated in the "Power-on" chapter on "using the hob";
- Extraction speed (power):
The extractor has 4 speed (power) levels from to Touch and slide your fingers along the Selection bar (3): to the right to increase the power level, to the left to decrease the power level.
Note: The set power level will be displayed in the Selection/Display area (12).
Power Booster
The extractor is equipped with 1 additional extraction level called Power Booster; it is timed and it lasts 5 minutes.
To select it, touch and slide your fingers along the Selection bar (3) (beyond the level); this flashing symbol will be displayed:
Note: after the five minutes, the power will go back to the previously set level.
Automatic mode
The hood will turn on at the most suitable speed, adapting the extraction capacity to the maximum cooking level used in the cooking zones.
When the cooking zones are switched off, the hood adapts its extraction speed, decreasing it gradually, to eliminate residual vapours and odours.
To activate this function:
Press (A) (14);
Repeat the operation to deactivate.
Note: if, during automatic operation, the speeds from to are selected using the Selection bar (3), automatic operation is interrupted; if, on the other hand, the Power Booster is selected, automatic operation will resume at the end of the timer and, in the meantime, the symbol (A) keeps flashing.
Note: if the hob automatically shuts down with Automatic mode active, the extractor fan will automatically turn off gradually.
- Filter saturation indicator
The hood indicates when filter maintenance is needed:
For the carbon/ceramic odour filters, FILTER (13) lights up For the grease filter, FILTER (13) lights up and flashes
Note: this function is disabled by default (see how to enable it in the paragraph "Activation of filter saturation indicator")
- Reset filter saturation
After performing maintenance on the filters (grease and/or carbon/ceramic) press and hold FILTER (13); it will turn off and the indicator counter will restart.
- Activation of filter saturation indicator
Note: This indicator is normally deactivated.
To activate it, proceed as follows:
- Switch on the hob ①; with the extraction motor and cooking zones off, press the Selection zone (12).
- Press and hold HOOD (11) until the Display (12) shows
the letters F and G flashing alternately.
E = carbon/ceramic odour filters; D = grease filters;
CARBON/CERAMIC ODOUR FILTERS
- Press the Display (12) when the letter F appears.
- Press FILTER (13) fixed light.
- Press and hold HOOD (11) again to confirm the activation of the carbon/ceramic
odour filter.
GREASE FILTER
- Press the Display (12) when the letter D appears.
- Press FILTER (13) flashing light.
- Press and hold HOOD (11) again to confirm the activation of the grease filter indication.
POWER TABLE
| Power level | Cooking type | Use (based on cooking experience and habits) | |
| Max power | P | Heat quickly | raises the temperature of food in a short space of time to boiling point for water, or to quickly heat cooking liquids |
| B.9 | Fry - boil | browning, starting cooking, fry frozen products, boil quickly | |
| High power | B.8 | Brown - fry - boil - grill | browning, fast rolling boil, cooking and grilling (for brief periods, 5-10 minutes) |
| B.7 | Brown - cook - stew - fry - grill | browning, slow rolling boil, cooking and grilling (for medium periods, 10-20 minutes), pre-heat accessories | |
| Medium power | 4.5 | Cook - stew - fry - grill | stewing, light rolling boil, cooking (for long periods), dressing pasta |
| 3.6 | Cooking - simmering - thickening - creaming | longer cooking (rice, sauscs, roasts, fish) with accompany- ing liquids (e.g. water, wine, stock, milk), dressing pasta | |
| 2.3 | Cooking - simmering - thickening - creaming | longer cooking (volumes less than one litre: rice, sauscs, roasts, fish) with accompanying liquids (e.g. water, wine, stock, milk) | |
| Low power | 1.2 | Melt - thaw - keep warm - stir | melting butter, gently melting chocolate, defrosting small products |
| 1 | Melt - thaw - keep warm - stir | keeping small portions of just-cooked food warm or main- taining dishes at serving temperature and creaming risot-tos | |
| OFF | 0 | Support surface | Hob in stand-by or off (possible presence of residual heat from the end of cooking, signalled by H-L-O) |
4. MAINTENANCE
Please note! Before any cleaning or maintenance, make sure the cooking zones are switched off and the heat indicator has turned off.

For product maintenance, see the images at the end of the installation marked by this symbol.
HOB MAINTENANCE
- Cleaning the induction hob
The hob must be cleaned after each use.
Important:
- Do not use abrasive sponges, scouring pads. Their use, over time, may ruin the glass.
- Do not use irritant chemical detergents such as oven sprays or stain removers. DO NOT USE STEAM JET CLEANERS!!!
After each use, leave the hob to cool and clean it to remove deposits and stains caused by food residue. Sugar or food with a high sugar content damage the hob and must be removed immediately. Salt, sugar and sand may scratch the glass surface. Use a soft cloth, paper towel or specific products to clean the hob (follow the Manufacturer's instructions).
Cleaning the liquid collection channel:
In the event large quantities of liquids accidentally spill out of the pots, they can be drained using the drain valve on the bottom part of the product so as to eliminate any
Residue and ensure maximum hygiene levels.
For a more complete and in-depth clean, the bottom collection channel can be completely removed.

Cleaning the metal grille:
The grille must be washed by hand with hot water and neutral detergent, then dried thoroughly to prevent oxidation.
For cleaning, use ONLY a cloth moistened with neutral liquid detergents.
DO NOT USE CLEANING UTENSILS OR TOOLS!
Avoid the use of products containing abrasives. DO NOT USE ALCOHOL!

Grease filter maintenance:
Traps grease particles generated by cooking.
Must be cleaned once a month (or when indicated by the
filter saturation indication system), with non-aggressive detergents, either by hand or in the dishwasher at low temperatures and in a short cycle. When cleaned in the dishwasher, the metal grease filter may discolour, but its filtering characteristics remain unchanged.
Ceramic activated carbon filter maintenance (For Recirculating Version only):
Traps unpleasant odours generated by cooking. The product comes with a set of odour filters.
The saturation of the odour filters can occur after somewhat prolonged use depending on the type of cooking and how regularly the grease filter is cleaned. The odour filters can be thermally regenerated every 2/3 months in an oven pre-heated to 200°C for 45 minutes. The correct regeneration of the filter ensures that it can constantly filter efficiently for 5 years.
Please note! Do not place the filters on the floor of the oven but rather in a tray, positioned at an intermediate height.
5. ASSISTANCE
TROUBLESHOOTING TABLE
| Informative code | Description | Possible causes | Solution |
| E·● | The command zone switches off due to an excessively high temperature | The temperature inside the electronic parts is too high | Wait for the hob to cool before reusing it |
| E·● | Container unsuitable | Loss of magnetic properties | Remove the pot |
| E·● | Communication problems between the user interface and induction module | No power supply to the module; the power cable has not been connected correctly or it is faulty | Disconnect the hob from the electrical network and check the connection |
| For all other error signals | Call customer service and report the error code | ||
CUSTOMER SERVICE
Before contacting Customer Service
- Check that the problem cannot be solved by consulting the points in "Troubleshooting".
- Switch the device off and on again to see if the problem resolves itself.
If the fault persists after the above checks, contact the nearest Customer Service centre.
DE
- Residual Heat Indicator
- Temperature Manager (Warming Function)
Residual Heat Indicator
- selector Zone/Display (4)
- Activering indicator verzadiging filters
- Temperature Manager (Warming Function)
ANOPPIYH IPOIONTOE TEO TEAO THE ZQHE TOY
This appliance complies with the requirements of the European Directive 2012/19/EU and UK SI 2013 No. 3113 on Waste Electrical and Electronic Equipment (WEEE).
It is confirmed that the disposal of this product is carried out correctly. The user contributes to the prevention of potential negative consequences for the environment and health. The symbol on the product or on the accompanying documents indicates that the product in question must not be treated as household waste but must be handed over to an appropriate collection point for the recycling of electrical and electronic equipment. The disposal of the product must be carried out in accordance with local regulations for waste disposal. For more detailed information on the treatment, recovery, and recycling of this product, please contact your local city office, the household waste disposal service, or the store where you purchased the equipment.
REGULATIONS
This is an appliance that has been designed, tested, and manufactured in accordance with the following regulations:
- Safety: EN/IEC 60335-1, EN/IEC 60335-2-6, EN/IEC 60335-2-31, EN/IEC 62233. - Performance: EN/IEC 61591, ISO 5167-1, ISO 5167, ISO 5168, EN/IEC 60704-1, EN/IEC 60704-2-13, EN/IEC 60704-3, ISO 3741, EN 50564, IEC 62301. EN 60350-2. EN 55014-1, CISPR 14-1, EN 55014-2, CISPR 14-2, EN/IEC 61000-3-3, EN/IEC 61000-3-12.
INSTRUCTIONS FOR USE
2. USE
USE OF THE COOKING SURFACE
The operation of the appliance is based on the physical phenomenon of magnetic induction. The transfer of energy to the pan occurs directly.
Advantages: Compared to traditional electric hobs, the induction hob is: More efficient: lower temperature on the glass surface. Faster: shorter times for heating the pan. More precise: the hob responds immediately to your commands. More economical: 90% of the energy consumed is converted into heat. Furthermore, when the pan is removed from the hob, the energy supply is interrupted immediately, achieving energy savings.
USE OF COOKWARE
ηµγ ρi

CLEANING THE APPLIANCE
Cleaning the appliance:
For the cleaning [of the appliance] use ONLY a mild detergent and a soft cloth.
DO NOT USE ABRASIVE TOOLS OR SHARP OBJECTS FOR CLEANING [THE APPLIANCE]!
The use of solvents or flammable liquids [is prohibited] DO NOT USE ALCOHOL OR SPIRITS!
If the appliance is very dirty:
Remove the residues coming from cooking.
THINGS YOU SHOULD KNOW BEFORE YOU START
Temperature Manager (Warming Function)
DISPLAY FOR COOKING ZONES
On the displays for the different cooking zones, the following is shown:
| funksjon | Verdi |
| Kokesenen er på | Ø |
| Power Level (effektivå) | 1...8-P |
| Residual Heat Indicator (restvarmeindikator) | H |
| Pot Detector (Kjeleddetektor) | U |
| Temperature Manager (Temperaturkontroll) aktiv | U |
| Pausefunksjon | II |
| Funksjon Automatic Heat UP (Automatisk oppvarming) | R |
HOB FEATURES
- Safe Activation (safe start-up)
The product is activated only when pots/pans are placed on the zones. The heating phase will not start (or will be interrupted) if there are no pots on the hob.
Pot Detector
The product automatically detects pots when they are placed in one of the zones.
- Safety Shut Down
- Filter saturation indicator
The cooker hood sounds an alarm every time a filter change is required: the charcoal/ceramic odor filter (13) lights up.
MAINTENANCE OF THE HOB
MAINTENANCE OF THE EXTRACTOR HOOD
- Temperature Manager (Warming Function)
MAINTENANCE OF THE COOKING HOB
Key Lock (button lock)
Key Lock (button lock) allows you to lock the hob settings to prevent accidental changes, keeping the set functions active.
Activation:
- Press (10) and repeat the operation to deactivate.
Note: if another function is pressed during Key Lock (button lock),
ACTIVE, THE SYMBOL, THE TEMPERATURE, THE FUNCTION IS USED. IT MUST BE DEACTIVATED TO ALLOW ACTION ON THE HOB.
Automatic Heat Up (Automatic Heating)
The Automatic Heat Up function (Automatic Heating) allows you to reach the set power level more quickly; with this function you can reach the desired temperature faster, but without the risk of burning, as the temperature does not exceed the set level. This function is
intended for heating the hob from 0 to 100%
Activation:
- With the cooking zone on, press (7); on the display (2) the symbol will appear, which adjusts with the power set in the cooking zone.
INCREASING THE POWER OF THE COOKING ZONE: The Automatic Heat Up function (Automatic Heating) remains active, the set temperature is maintained;
Decreasing the power of the cooking zone: the Automatic Heat Up function (Automatic Heating) is deactivated.
Note: if you select another cooking zone at the same time,
the symbol (7) will light up again with a weak light, and in this way you can see that the function is active for that zone; the function remains active in the zone where it was set, as shown on the display (2).
- Pause
The Pause function allows you to pause any active function of the hob, without having to turn off the cooking power.
Activation:
- Press (9); the symbol appears on the display (2)
To deactivate the function:
Press (9) or the selector (3) lights up
- Press the Select button (3) to deactivate the function.
Note: Deactivation is conditional. If the program is running, it will continue to work with the previous settings.
Note: If after 10 minutes the Pause function is not deactivated, the program will switch off automatically.
Note: The Pause function has no effect on the aspiration.
- Timer "STAND ALONE"
The Timer function is an independent device for delayed display of the cooking zones (and of the aspiration zone).
The timers are activated by pressing the corresponding zone/display (4).
Use the + (5) symbol to set the timer duration, which is visualized in the zone/display (4).
Note: Wait 10 seconds without pressing any other command until the delayed display starts.
The timer can be set up to a maximum of 1 hour and 59 minutes in the zone/display (4), where the remaining time will be visualized. At the end of the countdown, an acoustic signal will be emitted.
Note: When the countdown reaches less than 10 minutes, the timer will show a flashing red dot after the time.
Visualization of the remaining time
1:35
- 1:35 min.
1.35
It is set on the timer:
- Set the suction power with the dial (4).
Turn on the appliance as described in the "Turning on" section of "Using the appliance for cooking";
- Suction speed (power):
The extractor is equipped with 4 speed (power) levels from
Touch and slide your finger along the length of the control strip (3): to the right to increase the power level, to the left to decrease the power level.
power.
Note: The set power level is visualized in the display zone (12).
Power Booster (power booster)
The extractor is equipped with 1 additional suction level, called Power Booster, which has a preset time and a duration of 5 minutes.
To select it, touch and slide your finger along the control strip (3) (or the level), until this symbol is visualized.
Note: When the timer time expires, the power returns to the previously set level.
- Operation in automatic mode
The extractor turns on at the lowest speed, according to the suction recommendations at the maximum cooking level, produced in the cooking zone.
The vacuum cleaner is switched off, the vacuum cleaner stops at its current speed of suction gradually, so that noise and other residues are eliminated.
To activate this function:
Press (A) 14);
Repeat the operation to deactivate.
Note: if during automatic operation the speed is selected from the selection button (3)
the speeds from A to D, the automatic function is interrupted; if Power Booster is selected, the automatic function resumes after the specified time has elapsed, immediately
the symbol (A) remains lit.
Note: when switching off the vacuum cleaner, the automatic function is deactivated, the switching off of the vacuum cleaner is done automatically, gradually.
- Indicator for filter cleaning
The vacuum cleaner shows when it is necessary to clean the filters:
Cleaning the metal filter:
The filter must be cleaned by hand with warm water and neutral detergent, carefully, to avoid oxidation.
VACUUM CLEANER MAINTENANCE
- Cleaning the vacuum cleaner:
For cleaning, use ONLY a cloth dampened with neutral detergent and water.
HE IN3I0JI3BAIte INHCTPYMEHTN 3A IIOYNCCTBAHETO!
U368BaTe ynoTppe6aTa Ha a6pa3nBn pOdykTn. HE U3PON3BAITE CnPT!
XAIopdIbpxaHe HaΦnITbp 3a Ma3HHN:
3aIbpxa qacntuNTe Ma3HnHa, npon3xoKdaun OT
TOTBEHETO.
Tp6Ba Da 6bDe nouchTeEN eINH PtT Ha Meceu (nN KOrato CnCTemata 3a CnHAnIm3npaHe Ha 3anyUbaHe Ha fHNTpe CnHAnIm3upa Ta3n Heo6xOdmocT, C He arpecBnH NoCHCTBaU npenapatn, pTuHO nIN B MnaInHa MaunHa Ha HNCN Temnapatyn Ha KpaTbK zKnbl. PpN m3MBAHeTO B MnJIHa MaunHa MetaHnTf FnITbp PnOTIB Ma3HNH MoKeJa Ce OBe3uBeTn, Ho HerOBT E FmIITnpaUc BoiCTBa H NkAkbB CnyuaH NMa da ce IpPomeHr.
XB NoidpIbXka FInITbp cakTIBeH BbIeH - KepamuHn (Camo 3a FInITprpaTa Bepcna):
3aIbPka HnepnraTHNte Mnp3Mn, ppon3xoKdaun OT roTbeHTo. PpOdykTBt e cHa6deH C KOMnJIeKT fnnTPn 3a Mnp3Mn.
3anyuBaHeTo Ha mInTPnTe 3a MmPn3Mn HacTbNba CneEd EHa 3NaUHTeHNO pODoBtKInTeHn yNoTpE6a, CnopeD Tnna KxHy N cYeCTOTATA Ha NoCnCTBaHE Ha fInTbpa 3a Ma3HNH. FInTPnTe 3a MmPn3Mn, Morat da 6bDaT perEHepnpaHn TepMnHO HA BcEKN 2/3 Meceua B npedBaNPaHn HAprrata fpyha Na 200°C 3a 45 MNHyTN. PabapnHTo perEHepnpaHre rapantmpa eHda eFektnBHOCT Ha HenpeKbChato fInTPnPaHne 3a 5rOHNH.
BhMaHne! He noCTabRte fIITPnTE Ha IbHOTo Ha cyPhaT, a rNoCTabRte B Taba, KaTo Ra NoCTaBtE Ha MeXdHHBa BVcOuHa.
5. OBCJIyXBAHE
TbPCEHE HA HEN3IPABHOCTN
| Информazioniон ков | Описане | Възmosхин причими | Реценье |
| E•2 | 3оната с командс полочь воради пекаленвиска вTemпература | Вътpeшнata temпетаразуна ha eilektroнгichte komпоненти e пекаленвиска | Изчakайтейлota да с охлади п徴дду ro Изралзвate otново |
| E•3 | Съдьт 3а ratvehe ne Heюxdхаяц | Плncа на магнистни сбоства | Остдане сьда 3a ratvehe |
| E•5 | Пробlemы в komун��ацята можду по tradevelпckий interрфеси и inhдукцюнney мodyл | He stira[elektriческо 3axpaHbaNe до мodyл; Кабелт за захсанвache не сьъразан правлино ил e deфektent | Прекльшete зхсанванeto Кьм плота и поверete врьзкatinga |
| 3a BCNUKIN Dpyru nCyrHANZAZUIN 3a rpeшka | Сържete ce sbc сервиза за тexнческо обсунжвaneи и поочete кodia на отумен�а ratveisha | ||
TEXHnuecko OBCJnyXBAHE
Ipei da ce cbpkeTe cbc cepBn3a 3a texHueecko o6cnyKbaHe:
1.YBepete Ce,Ye He CTE B CbCTOHnE Da pa3peWHTe CAMN Ip0bIeMa Ha ba3aTa Ha INΦopMaizrA, NmecTeHa B pa3deJa "YctahOBraHe Ha nobPeDIn". 2.ИЗкючeteи Вькючete OTOHO BO ypeDA,3a DA CE yBepITE,Ye HEN3npabHOCCTTA e OCTpAneHa.
If you have any questions about checking the correctness of all our products, please contact the nearest service center for technical maintenance.
Please read before installation
(RR-2) (FL-2) (FR-2)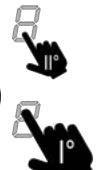
- The appliance must not be installed above cooling devices, dishwashers,
washing machines, dryers, or dishwashers. Perform all work before moving the furniture and carefully remove the packaging from the work surface.
- The appliance is designed for installation in a worktop with a thickness of 2-6 cm when installed on top, and 2.5-6 cm when installed flush. The minimum distance between the hob and the wall must be at least 5 cm from the rear side, at least 4 cm from the sides, and at least 50 cm from the upper wall cabinets. Note: Recommended distances for ventilation: when designing the space, it is necessary to follow the instructions of the furniture manufacturer. - To optimize the installation of the filtering version, it is recommended to make a hole in the plinth, into which a grille should be inserted, which is available in the trade. Important: Use a single-component silicone sealant (S), resistant to temperatures up to 250°C. Before installation, the surfaces to be glued must be thoroughly cleaned, removing all substances that may prevent their adhesion (e.g., anti-adhesives, concentrates, lubricants, oils, residues of glue, etc.). The adhesive must be evenly distributed over the entire perimeter of the frame. After gluing, allow the adhesive to dry for approximately 24 hours. Attention! Failure to follow these instructions when installing the screws and fixing accessories may lead to risks associated with electricity.
- Note: For correct installation of the appliance, it is recommended to use a tubular adhesive tape, which has the following characteristics: an elastic film made of soft PVC, with an adhesive layer based on acrylate, conforming to standard DIN EN 60454; good flame resistance; excellent aging resistance; resistance to temperature fluctuations; resistance to low temperatures.
DISPOSAL AT END OF SERVICE LIFE
This appliance is marked with the classification symbol in accordance with Directive 2012/19/EC - UK SI 2013 No.3113, on waste electrical and electronic equipment (WEEE).
Make sure that this product is disposed of properly. The user helps prevent possible negative consequences for the environment and health. This symbol on the product or on the accompanying documentation indicates that this device must not be disposed of as household waste. It should be handed over to the appropriate collection point, which deals with the recycling of
electrical and electronic equipment. Dispose of it in accordance with local regulations for waste processing. For further information on handling this product, recycling, and disposal, you should contact the appropriate local authority, the household waste collection service, or the store where the appliance was purchased.
REGULATORY DOCUMENTS
The equipment has been designed, tested, and manufactured in accordance with the following standards:
- Safety: EN/IEC 60335-1; EN/IEC 60335-2-6, EN/IEC 60335-2-31, EN/IEC 62233; - Performance: EN/IEC 61591; ISO 5167-1; ISO 5167-3; ISO 5168; EN/IEC 60704-1; EN/IEC 60704-2-13; EN/IEC 60704-3; ISO 3741; EN 50564; IEC 62301. EN 60350-2; - Electromagnetic compatibility: EN 55014-1; CISPR 14-1; EN 55014-2; CISPR 14-2; EN/IEC 61000-3-3; EN/IEC 61000-3-12.
To avoid irreversible damage to the control panel surface, do not use cookware:
With uneven base - metal with enamelled base; with rough base - to avoid scratching the panel; - Never place hot pots and pans on the control panel surface. - Not all cookware suitable for induction hobs is sufficiently suitable for operation because their base is not completely made of ferromagnetic materials! When buying cookware, check that: - The base is completely made of ferromagnetic materials. Otherwise, the efficiency and uniformity of heat transfer decreases, and the surface temperature of the cookware may be uneven.
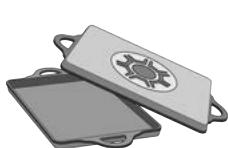
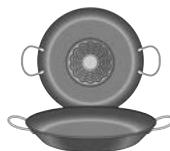

- The base does not contain aluminium: the cookware will not be heated by the induction hobs, or they will not detect it at all.
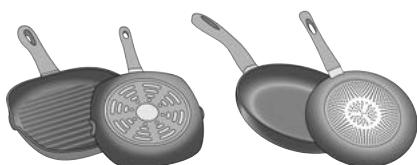

- The base is not uneven and with a rough surface. - This reduces the contact surface between the induction hob and the cookware, reducing heating efficiency and worsening cooking results.
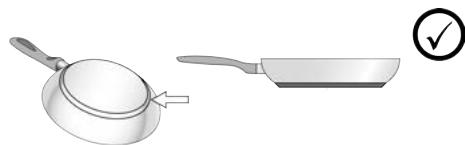
Capacities made earlier
You can check whether the material of the cookware has magnetic properties using a simple magnet. The cookware is not suitable for use if the magnet does not react to it. In this case, they have
indications of the previous paragraph.
3. OPERATION OF THE DEVICE
CONTROL PANEL

To the right to increase the power level;
To the left to decrease the power level.
The set power level will appear in the selection/display area (2)
Press (8) once to turn off, until the level shown on the display (2) becomes
Note: if the temperature control function (heating function) operates in several zones, first select the desired zone using the zone selection (2). The function can also be turned off using the selection panel (3), setting the power level to
Using the extractor hood
Switching on the extraction system:
Switch on the extractor hood as described in the chapter "Switching on" in the section "Using the extractor hood".
- Adjusting the suction speed (power):
The extractor hood has 4 speed (power) levels.
Turn the knob and move it with your fingers along the selection range (3): to the right to increase the power level, to the left to decrease the power level.
Note: The set power level will be displayed in the selection/display area (12).
POWER LEVEL TABLE
CARE OF THE COOKER HOOD SURFACE
Cleaning the functional surface
The cooker hood should be cleaned after each use.
Important:
Do not use abrasive sponges or scrapers. Their use may, over time, damage the glass.
Do not apply abrasive chemical agents, such as oven cleaners or rust removers.
- DO NOT USE STEAM CLEANING DEVICES!!
After each use, wipe the surfaces with a damp cloth and remove any food residue. Sugars and products with high sugar content can damage the enamel surface and must be removed immediately. Salt, sugar, and sand can scratch the glass surface. Use a soft cloth, paper towels, or special products for enamel surfaces (follow the manufacturer's instructions).
● X' Drain the container for collecting liquid:
If strongly acidic liquids are spilled, the drain valve located at the bottom of the device can be used to remove any residue and to perform rinsing while maintaining the maximum level of cleanliness.
For thorough cleaning, it is possible to remove the lower container.
× × Cleaning the metal filter:
The filter should be washed in hot water with a neutral detergent and carefully dried to avoid oxidation.
Care of the extractor hood
Cleaning the extractor hood:
For cleaning, use only a soft cloth moistened with a neutral detergent.
Do not use tools or any accessories for cleaning!
Avoid abrasive agents. Do not use alcohol!
Care of the grease filter:
It serves to capture grease particles that splash during cooking.
Cleaning should be done once a month (or when the filter clogging system activates) with hot detergents, by hand or in a dishwasher at low temperature in a short cycle. In a dishwasher, the metal grease filter may discolor, but its filtering characteristics will not change.
Care of the filter with activated carbon - ceramic (only for recirculation version):
Designed to eliminate unpleasant odors generated during cooking. This product is equipped with a set of deodorizing filters.
Saturation of deodorizing filters occurs after prolonged use, depending on the type of hood and the cleaning intensity of the filter. Deodorizing filters can be regenerated thermally every 2-3 months in a preheated oven at 200°C for 45 minutes. Proper regeneration guarantees consistent filtration efficiency for 5 years.
Warning! Do not place filters on the bottom of the oven, but place them on the rack, which must be inserted in the middle position.
5. TECHNICAL SUPPORT
TROUBLESHOOTING TABLE
TECHNICAL SUPPORT SERVICE
Before contacting technical support
- Make sure that you cannot fix the problem yourself using the information in the "Troubleshooting" section.
- Turn the device off and on to make sure the problem is resolved.
If after the above checks the problem is not resolved, contact the nearest service center.
UK
It is necessary to follow the instructions given in this manual. The manufacturer is not responsible for possible malfunctions, damage, or injuries that may occur during the use of the device in violation of the instructions given in this manual. The device is intended for household use and for use in preparing food and steaming. Do not use it for other purposes (e.g., for drying items). The manufacturer is not responsible for improper use or improper maintenance of the device.
The device may have a different appearance than that shown in the illustrations in this manual, but the instructions for use, maintenance, and installation remain the same.
- Carefully read the instructions: they contain important information on installation, use, and safety. It is forbidden to make changes to the electrical part of the device. Before installation, make sure there are no damaged components. If there are, contact the seller and do not proceed with installation.
- Before installation, make sure there are no damaged components. If there are, contact the seller and do not proceed with installation.

Details, marked with the symbol, can be purchased as separate specialized accessories.

Details, marked with the symbol, are available as optional accessories, which are supplied only in certain models and can be purchased on the websites www.elica.com and www.shop.elica.com.
1. SAFETY AND REGULATORY DOCUMENTS

GENERAL SAFETY RULES
Warning! Important: Follow the following instructions carefully. · Before any cleaning or maintenance operation, disconnect the appliance from the power supply. · Installation or maintenance must be carried out by a qualified technician, in accordance with the manufacturer's instructions and in compliance with current safety regulations. Do not repair or replace any part of the appliance unless expressly indicated in the user manual. · Disposal of the appliance is mandatory in accordance with legislation. The appliance must be fully disconnected so that it can be disconnected from the mains by pulling the plug. - To ensure that the installation complies with current safety regulations, it is necessary to install a suitable switch that guarantees complete disconnection from the mains in
the appliance, in overvoltage category III, in compliance with installation rules. Do not use the appliance if it is damaged. After installation, the user must have access to the electrical components of the appliance. The appliance and its accessible parts become hot during use. - Be careful not to touch the heating elements. Keep children under 8 years of age away unless they are constantly supervised, as accessible parts may become hot during use. Users with pacemakers or active implants must ensure before using the induction surface that it does not interfere with the normal operation of such devices. During and after use, do not touch the heating elements of the appliance. Avoid contact with pans and other easily flammable materials until they have cooled sufficiently; there is a risk of fire. Do not place flammable materials on the appliance or near it. Fats and oils can catch fire if overheated. Control the cooking of foods rich in fats and oils. If a fire occurs on the surface, switch off the appliance to avoid electric shock. The appliance is not intended for use with an external timer or a separate remote control system. Cooking with fats or oils on the hob without supervision can be dangerous and may lead to fire. If you need to cook with fats or oils, you must supervise constantly. Never try to extinguish a fire with water. Switch off the appliance and cover the flame, for example with a lid or a fire blanket. Danger of fire: Do not place objects on hot surfaces. Do not use steam cleaners, risk of electric shock. Do not place metal objects such as knives, forks, spoons, and lids on the surface, as they may become hot. Before connecting the appliance to the electrical mains: check the data plate (on the lower part of the appliance, which bears the voltage and frequency) to ensure it corresponds to the mains values and the electrical outlet. In case of doubt, contact a qualified electrician.
Warning: Before cooking on the surface for the first time, do not place the cookware on the detector. Indicate the size of the pan; for this, during cooking or heating, the pan size changes the temperature. Do not place metal elements with the induction cookware or without cookware. When the pan is ready, turn on the appropriate configuration. During cooking, never use aluminum foil and never place the product, packaged in foil. Aluminum foil can be damaged and cause a fire hazard. Do not reheat canned food or canned goods with the cookware, open them first: they may explode! This warning also applies to all
other types of induction surfaces. Using high power, for example the Booster function, is not recommended for reheating ready-made dishes, but rather for heating liquids. Large bodies may be deformed. In such cases, it is recommended to use medium power. The cookware should be placed directly on the induction surface. Never place other objects between the cookware and the induction surface. In case of high temperatures, the cookware automatically changes the power of the configuration. Before performing any operations with the appliance for maintenance, unplug it from the electrical outlet, pull out the plug, or turn off the general circuit breaker of your home. When performing all operations for installation and maintenance, use protective gloves. The appliance can be used by children aged at least 8 years and by persons with reduced physical, sensory or mental capabilities, or lack of experience and knowledge, if they have been given supervision or instruction concerning use of the appliance in a safe way and understand the hazards involved. Children shall not play with the appliance. Cleaning and user maintenance shall not be made by children without supervision. The appliance must be used in accordance with the instructions for use 1020000000000000000000000000000000000000000000000000000000000000000000000000000000000000000000000000000
Keep this manual so that you can refer to it at any time. In case of sale, transfer or relocation, make sure the manual is handed over with the appliance.
CONNECTION TO THE ELECTRICAL OUTLET
Installation must be carried out by qualified personnel familiar with the installation and safety standards. Any damage caused by improper handling, misuse, or use with incompatible devices is the responsibility of the user. The power cable must be long enough to ensure a safe distance from the work surface. Check that the voltage indicated on the nameplate on the back of the device matches the mains voltage where it will be installed. Do not use extension cords. The power cable must be at least 2 cm away from other cables. If the device is not supplied with a power cable, use a cable with a cross-section of 2.5 mm² for power up to 7200 W; for higher power, the cross-section must be 4 mm². In any case, the cable must not be exposed to temperatures more than 50 °C above the ambient temperature. The device is intended for permanent connection to the electrical grid, so it must be connected through a standard plug or a fixed connection to ensure complete disconnection from the grid in case of overvoltage category II, easily accessible after installation.
- Warning! All work on the power cable must be carried out by an authorized service center or a person with appropriate qualifications.
- Warning! Before connecting the device to the grid and checking the correct operation, make sure that the power cable is properly connected.
POWER LIMITATION: The device is equipped with the Power Limitation function, which allows setting a maximum power threshold (W) that must be set during the initial connection of the device to the electrical grid or after a repeated connection of the same grid (within a few minutes). Select the electrical protection characteristics according to the selected power limitation level. For the Power Limitation setting procedure, read the Operation section in this manual.
WINDOW CONTACT KIT: The device is designed to be used with the window contact kit (not supplied by the manufacturer). Install the window contact kit (if you intend to use the surface in cooling mode), the cooling operation will not be activated if the window is open, and
when the kit is installed, it will be locked. Electrical connections must be made by qualified and specialized technical personnel. The kit must be installed separately and in accordance with the safety standards applicable to the components and its use with the device. Installation must be carried out in accordance with the rules in force for household installations.
WARNING: The cables of the kit, which are connected to the device, must be part of the control circuit, safely separated from the mains voltage (SELV). The device manufacturer does not bear any responsibility for any problems, damages, or malfunctions caused by incorrect installation or improper use of the kit.
Installation and connection must be carried out by a qualified technician. Before installing the appliance: Check the packaging and the appliance for any damage incurred during transport; if any problems are found, contact the dealer or after-sales service before installing. Make sure the purchased appliance fits the size of the installation recess. Make sure there are no flammable materials inside the packaging (e.g., bags with screws, warranty card) (for transport), remove them and keep them if necessary. Also make sure that the place of installation has an electrical outlet. - Furniture preparation for built-in installation: The appliance must not be installed on refrigerators, dishwashers, ovens, hoods, washing machines, or dryers. Perform all cut-out work in the furniture before installing the appliance on the work surface, and carefully remove shavings or sawdust. - Designed for installation in a work surface 2-6 cm thick, in the case of surface installation, and 2.5-6 cm in the case of built-in installation. The minimum distance between the work surface and the hob must be at least 5 cm at the front, at least 4 cm on the sides, and at least 50 cm to the upper shelves. NB: Recommended distances are indicative: during design, follow the manufacturer's instructions. - To optimize installation, you can make a hole in the base, where you can place a grid, which is available for purchase. Important: Use a single-component adhesive (S) that can withstand temperatures up to 250°C. Before installation, clean the surfaces that will be glued and remove any residues.
that may cause allergies (e.g., anti-allergic, preservatives, oils, paints, solvents, old glue residues, etc.). The adhesive must be spread evenly around the entire perimeter of the frame. After gluing, let the adhesive dry for about 24 hours.
- Warning! Incorrect installation of the hob and built-in products, not in accordance with these instructions, may lead to danger of electric shock.
- Note: For correct installation, it is advisable to use a suitable adhesive tape, for example: a heat-resistant adhesive tape made of soft PVC, which must comply with DIN EN 60454. Due to temperature fluctuations, it is possible to use it at low temperatures.
DISPOSAL OF THE APPLIANCE AT THE END OF ITS SERVICE LIFE
This appliance is marked with the classification symbol in accordance with Directive 2012/19/EC - UK SI 2013 No.3113 on waste electrical and electronic equipment (WEEE).
The product must be used only for its intended purpose. The user must follow the possible negative consequences for health and the environment. The symbol on the product itself or in the accompanying documents indicates that this product must not be disposed of with other household waste. Please dispose of it separately at the appropriate electrical and electronic equipment collection point for recycling. Follow local rules for waste disposal. For more detailed information on the rules for handling such products, their disposal and recycling, contact your local authority, waste disposal service or the store where you purchased the product.
REGULATORY DOCUMENTS
The products are designed, tested and manufactured in accordance with the following standards:
- Safety: EN/IEC 60335-1; EN/IEC 60335-2-6, EN/IEC 60335-2-31, EN/IEC 62233; - Performance characteristics: EN/IEC 61591; ISO 5167-1; ISO 5167-3; ISO 5168; EN/IEC 60704-1; EN/IEC 60704-2-13; EN/IEC 60704-3; ISO 3741; EN 50564; IEC 62301. EN 60350-2; - Electromagnetic compatibility: EN 55014-1; CISPR 14-1; EN 55014-2; CISPR 14-2; EN/IEC 61000-3-3; EN/IEC 61000-3-12.
RECOMMENDATIONS FOR USE
For efficient use and to protect the environment: At the beginning of cooking, turn the appliance on at the minimum speed and leave it on for a few minutes after cooking is finished. Increase the speed only in case of large amounts of steam and vapor, using
the booster function only in special cases. Clean or replace the grease filters regularly to reduce fire hazard. For efficient operation of the charcoal filter, replace it when necessary. To optimize efficiency and reduce noise, use the maximum diameter of the duct system as indicated in this manual.
2. USE
USE OF THE HOB SURFACE
The induction cooking system is based on the physical phenomenon of magnetic induction. The main feature of these systems is the direct transfer of energy from the generator to the pan.
Advantages: On traditional electric surfaces, induction surfaces: Safety: The surface temperature is lower. Speed: Faster heating. Precision: The surface reacts instantly to your commands. Efficiency: 90% of the energy consumed is converted into heat. Moreover, when you remove the pan from the surface, the heating stops immediately, avoiding unnecessary heat dissipation.
USE OF COOKWARE FOR COOKING
You can check whether the pan material has magnetic properties with a simple magnet. Pans without magnetism are not suitable for use. In this case, they have the indications of the previous paragraph.
- Recommended pan diameters
IMPORTANT: If the pans are not of the correct sizes, the cooking zones will not switch on. To determine the minimum pan diameter for cooking in each specific zone, see the illustrated part of this manual.
Use pots and pans with a flat bottom whose diameter is equal to or greater than the diameter of the cooking zone. Use only pots and pans with a flat bottom. - The possibility of using pots with a hook is not provided. Peel vegetables, potatoes, etc. in small quantities so that they can be cooked quickly. Using a pressure cooker increases energy consumption and cooking time. Place the pot in the center of the cooking zone, marked on the surface.
USE OF THE EXTRACTOR HOOD
The extraction system can be used in extraction mode with external exhaust or in filtration mode with internal recirculation.
See the websites www.elica.com and www.shop.elica.com to discover the new range of kits for the various versions of the systems, both filtering and extraction.
Extraction version:
The hood is equipped with an upper outlet for the discharge of fumes through the air exhaust pipes (not supplied). Connect the outlet to the exhaust pipes and to the holes in
the wall, which must have a diameter equal to the diameter of the outlet (flange). For more details on the pipes and their dimensions, see the accessories section. The installation and assembly instructions are provided with the hood. Use of pipes and reduction fittings with a smaller diameter will lead to a decrease in extraction efficiency and a sharp increase in noise. In any case, the manufacturer is not responsible for any damage.
To ensure maximum efficiency of the hood: - The recommended length of the pipes is 7 linear meters. - It is recommended to use a maximum of 4 bends of 90° over the total length of 7 linear meters. - Avoid sudden changes in the cross-section of the duct, especially at the outlet, which should have a cross-section equivalent to 150 mm (or rectangular with dimensions 222 x 89 mm).

For safety reasons, each burner has a maximum operating time that depends on the installed power level. - Residual Heat Indicator (indicator of residual heat)
After switching off the cooking zones, the presence of residual heat is indicated by a special signal
on the display of the cooking zone in the form of the symbol H.
USE OF THE HOB SURFACE
Warning: To activate a function, you must first activate the desired burner.
SWITCHING ON
Touch and hold ON/OFF (switch) (1) on the control surface/display: press and hold
Symbol ①. While continuing to press: all available functions will be displayed on the display, after which they will remain active for a while; they can be used, and they will be active differently than when the device is used.
IMPORTANT: All available functions will be illuminated with a dim light, which becomes more intense only when they are activated.
Press the button once more to confirm
Note: This function has priority over all others.
Select configuration
Touch and hold (press) the selection/display zone (2) corresponding to the desired configuration.
Power Level
Control surface for 9 power levels. Touch and drag your finger over the selection area (3):
To the right to increase power. To the left to decrease power.
The set power level will be displayed in the selection/display zone (2).
Power Booster
Select
Touch and drag your finger over the selection area (3) (above level 3) and activate the Power Booster (Power Booster) level. The Power Booster level
is displayed in the selection/display zone (2) with a symbol.
Taimep KOHpopok
AknBauiJyHkuiTiTer konDopok
- TopKhiTbCra (HATnCHiTb) 30Hy Bu6ip/Ducnnei (2) (piBeHb nOtJxHOcti, BiDMHHN BiD HyIa)
·HaTnchHtB (6), 00 BiDnOBiJaE KOHΦoju
BukopncToByTe CmBoIu 5) 06 BCTaHOBIIT TpVBANIcTb BIJIkiy TaIMepa, Jka BiOobpaKaeTbcB 30HI/DnCnPei (4); niD qac
BCTAHOBJIeHHCIMBOJ (6)6JIIMMaC.
PnIMrKa:3aueKaaiTe 10 ckyH,He HataNcKaHOnJxOJHOi IHooI KOMaHnI, Uo6 3anyCTNBc TaMep KOHΦopok.
PnmuItka: kIO 3HOBy HATNCHyTN i yTpIMyBaTn (6) TaMep KOHcOpKn CKNuAeTbcra.
Pn6gaxaHni, noBtOpiTb onepauio dny deKilbkoX KOHOpok:
HaTnCiHbIe pa3 (8), 106 BiKJIIOuHTn Ta BIMKHyTN, nOKn Ha Dcnpnei (2) He 6yJe BiOobpaJatncs pibHeB.
PnmuTka: kuo B pexmmi Temperature Manager (Warming Function) npaioe KilbKa 30h, cnoatky Bu6epitb Notpi6Hy 30hy 3a DonomoroHO 30Hn Bu6opy (2). FyHKIO TOKOK MOXHA BIMKHUTN 3a DonomoroHO PaHeni Bu6opy (3), DoBIBuPiBHe NOTuyXHOcti do
BVKOPNCTAHN BYTJKKN
BbIMKHeHHHcTeM BNTaXKn:
- YbIMKHiTb BapInbHy NoBepXHIO, Jk 3a3NaeHo B po3dini «BbIMKHeHnry» «BbOKOpIstHaH NBaPInbHoI nobepxHi
WBnDkictb BCMOKtYBaHHa (NOTyXHCTb):
Upper level of power (capacity) of use in mode 1
Press and hold the button to select (3): right, to increase the power level, left, to decrease the power level.
Note: The set power level is displayed in the selection/display zone (12).
Power Booster (power boost)
The device has an additional power level, called Power Booster. It depends on the time and lasts for 75 minutes.
To select it, press and hold the button with the selection buttons (3) (upper level), until the symbol P appears.
Note: After releasing the reverse button, the power returns to the previously set level.
- Automatic operation
The device automatically adjusts the optimal speed, reducing the power consumption to the maximum level of preparation, which is used on the burners.
When the burners are switched on, the
free speed of operation, gradually changing it, thus eliminating steam and odors.
To activate the function:
Press (A) (14).
Note: After automatic operation with the selection buttons (3), the speed is selected up to A, and automatic operation stops. If the Power Booster mode is selected, automatic operation is performed after the completion of the time, and the symbol (A) continues to blink.
Note: In the case of extraction of the variable surface with automatic function enabled, the extraction of vapors is performed automatically, gradually.
Hydraulic filter replacement
The display indicates when it is necessary to perform filter maintenance:
For carbon/ceramic filters for odor extraction: replace the FILTER indicator (13);
For the grease filter: the FILTER indicator (13) starts blinking.
Note: the function is activated by default (see paragraph "Activation of the filter replacement indicator")
Replacing the filter replacement indicator
After filter maintenance (grease filters and/or carbon/ceramic filters), press and hold the FILTER button (13). It will turn off, resetting the indicator.
Turning off the filter replacement indicator
Note: the indicator turns off automatically. To activate it again, do the following:
Turn off the hood using the extractor switch (①) or the hood switch, then press and hold the selection button (12) - press and hold HOOD (11) until the display (12) shows the letters that will be flashing. = Carbon/ceramic filter for odor extraction; = Grease filter.
CARBON/CERAMIC FILTERS FOR ODOR EXTRACTION
Press on the display (12), when the letters appear - press FILTER (13), the number 100 appears. Press and hold HOOD (11) again to confirm the activation of the carbon/ceramic filter indicator for
odor extraction.
GREASE FILTER
·Press on the display (12), when the letters appear - press FILTER (13), the number 100 appears.
3HOBy HATINCHiTb i YtpmMyTe HOOD (11), 0o6 niITBVerpDnTu AKTINBaCIO IHNKAtOpa fInbTp Ta nIgONJIHHAH3anaxy.
TABJIUPI PIBHIB NOTYXHOCTI
| Ровенnotухноcti | Тунолория вариня | З actocyвань (вухожду 3 досbriefу та habичok rotувань) | |
| МасnotухнICTb | 8 | швдke posirpivahня | пд'им Temпегатугі ожіnpotrayом короткого поюду сacydoшвдкого зakлань в рasi bodи absoшвдкогotposirpivahня рizhiх kuniinapnix pizin |
| 8.9 | ЖарNTи - кИ'ЯтNTи | пдрums'яненny, поа��ok rotувань, karipinna поюктibшвдкого заморожвань, shvindke кин'ячени | |
| Висoka notухнICTb | 7.8 | Пдрums'яненny - обсмaxedуань - кИ'ЯтIHн- рпilь | пдсмaxedуань, пдтимka intehtcibhoro кинiiнь, варBOi karipinna як на рtrini (нehaodro, 5-10 xvinuH) |
| 6.8 | Пдрums'яненny - варBO - тушковань - обсmedуань - рпilь | пдсмaxedуань, пдтимka песльного кинiiнь, karipinna як на рtrini (cepehdni trpvbalocti, 10-20 xvinuH), nonepedneic nizirpiibanny prniladry | |
| Середна notухнICTb | 8.5 | ВарNTи - тушковань - пджарюbatи - рпilь | тшκувань, пдтимka сCLAбкого кинiiнь, варBO (trpvalane), дуже nobilhe tulykubvanha pactи |
| 3.9 | ВарNTи - кИ'ЯтNTи Ha nobilhomy BoRHi - згuzувати - дуже nobilhe Tuykubanry | trpvabili ВарWA (псс, coysc i пдзвки, чeyehа, рба) BКунларнix рidinax (hanp., bOda, bInho, bByohm, MONOKO), TOMlinna мakapоннix вробig | |
| 3.3 | ВарNTи - кИ'ЯтNTи Ha nobilhomy BoRHi - згuzувати - дуже nobilhe Tuykubanry | trpvabili rotувань (ob'smmenше odhoro litра: рсс, coysc, пдзвки, чeyehа, рбa) BКунларнix рidinax (hanp., bOda, bInho, bByohm, MONOKO) | |
| НиськnotухнICTb | 1.2 | Розтлени - розморожуань -пдтимka тетлим - ТOMлIHнь 3dojabahnm Macla/Berzkib | розтлени Масla, DeilekaTHe ТОленишоколаду, розморожени Малорozмірнхх yapovbxnpoduk'tib |
| 7 | Poztlenen - розморожуань -пдтимka тетлим - ТOMлIHнь 3dojabahnm Macla/Berzkib | пдтимka тетла в Невелкives поцях тьыкшци doprirotoBaHoiì Žki, пдтимka тетмepatypri nocudy docepibovkn, TOMlinna i dobredeHnДdo konduzi pi3otto | |
| ВIMK | 0 | Onopna noberpxnhy | Варльна поBERpxnhy в р锗имi rotobnocti (stand-by) aboВIMKнесна (MOxMЛВа NaRABИCTь залишкового тетлпсяяпсяяззakihchennя rotувань, по цу сгнhalizye indinkauza H-L-O) |
4. TEXO6CnyrOByBAHHJ
Ybara! Ppeo noyatkom 6ynd-koI onepaui 3 uinuHnna 60 TeXOBcIyROByBaHH, nepeKOHaiTeC, oKOHopKn BmKHei i 00 NaMnOka-iHnKaTOp TenHa He CbITnTbcra.
Дядогладу 3a Вирбом ДИВ.Збрахжнь B KINci yctahOBkIn,пОЗнЧЕHи CIMMСМВОЛOM.
Доглд 3A BAPINbHOIO NOVEPXHEIO
OuunenHnIyKuiHoi nobepxhi
BapnlbHy naHelb cIid uNCTnT niCna KOKHoro BnKOpNCtahnn.
Baxjlnbo:
- He BnKOpNCtOByTe a6pa3aHbHi 3ac06n, MetaNeBi ry6Kn. Ix BnKOpNCtAHnHa 3 Yacom MOKe NOuKOdTu CkNo.
- He 3actocobyte noopa3hi ximiu hi mnHi 3ac6n, taki kcnpei nI nee a6o 3ac6n dN BvBeHnHn pIam.
HE BKNOPUCTOBYITE IAPOBI OCHNKKI!!!
Iicn KOKHNO BIKOPNCtHa, 3aJIuTne NOBepxHO OXIOJQyBaTcN Ta IPOUCTITb II, UO6 BINaIITN HAKIN Ta PJIAMN, UO 3'BAINCS BID 3aIIuKIBIXI. LjKOp Ta npOdykTN 3 BICOKM BMICTOM LyKpy NIOKODKyOTB BAPInbHy
noBepxHIO,ix notpio6HO heraHIO BuaJAIaTn.CiB,zyKOp i nicoK MOxyTB noDprnataN CKJIHy NOBepxHIO. BnKOpncIbOyTe M'kyTKaHNy,napeoBi pyuHmKn dny kXHi a60 cneiaJbHI zaco6n dny ouHsEHHNoBepxHi (doTpmyBatncBa3ibOK Bnpo6Hnka).
3atpmye qactoukn kmpy bid npirotoybaHHia
The filter should be washed (if necessary) using a mild detergent, either by hand or in a dishwasher at a low temperature in a short cycle. When washing in a dishwasher, the grease filter may discolor, but its functional properties remain unchanged.
Check the filter with activated carbon (only for versions with a filter):
It is designed to absorb odors caused by cooking. This filter is included in the set of filters for odor absorption.
The service life of the odor filter depends on the intensity of use. The filter for odor absorption can be regenerated thermally in the following way: every 2-3 months, heat it in an oven at 200 °C for 45 minutes. Regular regeneration guarantees effective filtering for 5 years.
Attention! Do not place the filter on the bottom of the oven; place it on a rack at medium height.
5. MAINTENANCE
TROUBLESHOOTING
CUSTOMER SERVICE
Before contacting customer service:
- Check if you can solve the problem yourself by referring to the instructions in the "Troubleshooting" section.
- Turn the appliance off and on again to make sure the problem is resolved.
If after the above checks the problem persists, contact the nearest customer service center.
This appliance is marked according to the European Directive 2012/19/EU on Waste Electrical and Electronic Equipment (WEEE). By ensuring this product is disposed of correctly, you will help prevent potential negative consequences for the environment and human health, which could otherwise be caused by inappropriate waste handling of this product. The symbol on the product indicates that this product may not be treated as household waste. Instead, it shall be handed over to the applicable collection point for the recycling of electrical and electronic equipment.
This appliance is not intended for use by persons (including children) with reduced physical, sensory or mental capabilities, or lack of experience and knowledge, unless they have been given supervision or instruction concerning use of the appliance by a person responsible for their safety.
- HycaynapdbI MyKnT OkbHb3: OHa opHaTyfa, icke Kocyra XaHe Kayinci3iikKe KaTbICTbMaHb3dbI aKnapa 6epinei. KpybIyfbFa 3JKeTpNIk e3repICTekacamaHbI3. KpybIfblHbOpatnac6yphH,OhblEwh6ip6enirHH 3aKbIMdaImaHaBHaKe3XeTki3iH3.BolmacaDinepre xabapnacbin,OpatydbToKtaTbHb3. OpHatnac 6ypbH KpybIfblHbIH 3aKbIMdaH6aFaHbHa Ke3 Jxetki3iH3.BoImaca dIepre xa6apnacbl, opHaTybl TOKTaBhl3.

0cb TaHbAmeH 6enrineHRe H6nweKTepei MAMaHaHaDbipBfA HINepnepDeH 6eneK catbn anyFa 6oanaIb.
*6yI TaHbAmEH 6enrIneHren 6nueKTeP Te KcBip MoelbdepMeH 6ipre Xetki3iJeTIN KocbIMua KepeK JapaKTap 60bn Ta6blnabJxHe onapdbj www.elica.com XeHE www.shop.elica.com caITTapbIHAN catbn anyFa 6oJa.
1. TEXHnKAJIbIK KAYINCI3IKe EPEXJIEJIPEI
JAKINbIKAYINC3IK EPEXEJIIEPI
Eckepin3! Keneci HcyKaynapbKaTaH caKaTah3: Ke3 KeIReH opHaty Kymbcihopatnac 6ypbH KypbInfBpo3eKtadaan AxbipatbIyBKepek. OPhatyhHeMece KHeNdeyDi eHdipyuHiH NcKaynapbHa XHe He xepriNkTI Kayinci3ik epExeJepine CcHKec BnIKi MAMAH opbHdaBj Kepek. PAnDanaHyckaybIbHda Baca7a KOpCetiImne, 6en eHimHIn Ew6ip BeNilir HxHeDeyre He aybictbpyfa 6oMaMdbi. 3aH BoMbHa 6ynEhIM Xepre TybIKtanby Tnic. Kopnyc iWine KipictipInrER bN eHmdi po3eKtkaFocy MyMkih BonybU yuH Kyat Kabeni XekTkiKiTI y3bH 6OByTnic. OPhaty KymbcIctapbl KonDaHbCTAfl Kayinci3ik epExeJepine CcKec Kenyi UuH, MOtaxe epExeJepine CcKec, Kephey lI CanATTan AcbIn KetKeH Ke3e 3NeKtp KyaTbHbTH ToJIbK AxbipatbIyBuHa KeniNdk 6ebetIH, KOnDaHyFa pyKcat EtInren KEN nnonpBl
The battery compartment cover must be opened. Before opening, the batteries must be removed from the compartment. After opening, the electrical connections should be checked for proper contact. During operation, the batteries may become hot. Do not install the protective elements. It is forbidden to touch the contacts; during operation, the batteries may become hot, so do not touch them with bare hands. Persons with pacemakers or other implants should consult a doctor before using the device. During operation, keep the protective elements away from the device. Do not use the device with damaged or leaking batteries; if the device is not used for a long time, remove the batteries. Do not use the device near flammable materials or in explosive atmospheres. If the device is dropped or damaged, turn it off immediately to avoid electric shock. This device is intended for household use only. Do not use the device to vacuum burning or smoldering objects. The vacuuming process may generate heat. The vacuuming process may cause static electricity. The motor may generate heat during operation. Do not block the air vents or the exhaust. Do not insert any objects into the openings. Power source: Do not use the device without the filter. Do not use the device without the filter, as this may cause electric shock. Do not use metal objects such as needles, wires, or staples to clean the filter; use a soft brush instead. The cover must be closed: to prevent dust from entering the motor, the cover must be properly closed. If the cover is not closed, do not use the device.
After use, unplug the device and clean the filter. Do not immerse the device in water; if the filter is wet or damp, dry it. Do not use the device without the protective elements. After vacuuming, empty the dust container. For vacuuming, use only the original filter and do not use the filter without the original accessories. The filter can be cleaned with a soft brush. Do not use the device without the filter, as this may damage the motor. The device is suitable for all types of plugs. Booster
The functions of the device are described in this section. The device must not be used for purposes other than those described. If used for other purposes, the device may be damaged. In such cases, the warranty will be void. The device should be operated only by trained personnel. If the temperature is high, the device's automatic mode will be activated. Before cleaning or maintenance, disconnect the device from the power supply. Always keep the device out of reach of children and unauthorized persons. Do not allow children to operate the device without supervision. If the device is used simultaneously with other devices, follow the instructions carefully. Always keep the device clean (at least once a week); do not block the ventilation openings. The device can be stored in a dry place, away from direct sunlight. Do not immerse the device in water or other liquids; if this happens, dry it thoroughly. If the device is not working properly, do not attempt to repair it yourself; contact a qualified technician. Do not use the device with damaged cords or plugs. If the device is not in use, unplug it from the power supply. When using the device, follow the safety instructions provided in this manual. If the device is used with other equipment, ensure that the total power consumption does not exceed the specified limit (4 x 10⁻⁵ bar). This device is intended for indoor use only.
Keep the device away from heat sources. Do not expose it to direct sunlight or moisture.
ELECTRICAL SAFETY
- This device must be installed by qualified personnel. Installation and maintenance must be carried out in accordance with the manufacturer's instructions and applicable safety regulations. In this regard, untrained persons, children, or those with limited physical, sensory, or mental capabilities should not operate the device. The device must be connected to the power supply through an appropriate circuit breaker. The device's grounding must be checked as shown in the diagram. The cross-section of the grounding conductor must be at least 2 cm. If this device is not equipped with a circuit breaker, a minimum conductor cross-section of 2.5 mm² is required for 7200 W; for higher power ratings, the cross-section must be 4 mm². The temperature of the cable must not exceed 50°C. This device is intended for continuous operation; therefore, it must be installed in a location that allows for proper ventilation and easy access for maintenance.
Warning! Before connecting the cable, ensure that the power is disconnected and that there is no risk of electric shock. - Warning! Do not touch the electrical connections while the device is energized; always disconnect the power cable before servicing.
POWER LIMIT: This device is equipped with a power limiting function that can be set to the maximum power (kW) for the installation.
The device can be operated in parallel or independently (within 2 minutes) for parameter setting. The power limiting function must be set according to the electrical installation's protection requirements. For power limiting parameters, refer to the manufacturer's instructions.
WINDOW CONTACTS: The device can be used with window contacts (not included). If window contacts are installed (only in DUCT-OUT mode), the device will stop heating when the window is opened. This function requires proper electrical installation and technical setup. It is intended for use with compatible components and their installation.
It must be certified according to safety standards. Installation work must be carried out by qualified personnel in accordance with local regulations.
NOTE: The device contains a safety extra-low voltage (SELV) circuit that is isolated from the mains. The installer must not connect any external voltage or load to this circuit, as it may cause damage or malfunction.
INSTALLATION SAFETY
- The device must be installed in accordance with the manufacturer's instructions. Before installation: check that the device has not been damaged during transport and that all accessories are present; install it away from heat sources and flammable materials; ensure adequate ventilation; do not install in areas with high humidity or where it may be exposed to water splashes. The device must be installed by qualified personnel only.
Installing the housing:
- Do not install the device near flammable gases, liquids, dust, or in areas with high humidity or where it may be exposed to water splashes. Before installation, ensure that the mounting surface is strong enough to support the device and its accessories.
- The device must be installed at a height of 2-6 cm from the floor; if installed above a heat source, maintain a distance of 2.5-6 cm from the surface.
The distance between the device and the wall must be at least 5 cm, and between devices at least 4 cm. The distance from the ceiling must be at least 50 cm.
Please note: the device must be installed in a location where it is not exposed to direct sunlight or heat sources. For proper operation, the device must be installed on a flat, stable surface. The device must be kept away from flammable materials (e.g., paper, cloth, curtains, etc.). The ambient temperature must not exceed 250°C. Before installation, remove all packaging materials and clean the device. Do not install the device in areas where it may be exposed to water or moisture.
After installation, wait at least 24 hours before using the device.
If the device is installed in a bathroom or shower area, it must be placed in a location where it cannot be splashed with water. The electrical connection must be made by a qualified electrician. For installation, use cables that comply with DIN EN 60454 standards. The device must be protected against overheating and must be installed in a well-ventilated area. The device must not be installed in areas where the temperature may exceed the maximum allowable temperature. The device must be connected to a power supply with the correct voltage and frequency.
DISPOSAL
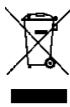
This product must not be disposed of as household waste. It must be disposed of in accordance with the European Directive 2012/19/EU on Waste Electrical and Electronic Equipment (WEEE) and the UK SI 2013 No. 3113 regulations.
This device is intended for use in household and similar applications such as: staff kitchen areas in shops, offices and other working environments; farm houses; by clients in hotels, motels and other residential type environments; bed and breakfast type environments. It is not intended for use by persons (including children) with reduced physical, sensory or mental capabilities, or lack of experience and knowledge, unless they have been given supervision or instruction concerning use of the appliance by a person responsible for their safety. Children should be supervised to ensure that they do not play with the appliance. If the supply cord is damaged, it must be replaced by the manufacturer, its service agent or similarly qualified persons in order to avoid a hazard.
PROCEDURES
The following procedures must be followed for installation and connection:
- Safety: EN/IEC 60335-1; EN/IEC 60335-2-6, EN/IEC 60335-2-31, EN/IEC 62233; Performance: EN/IEC 61591; ISO 5167-1; ISO 5167-3; ISO 5168; EN/IEC 60704-1; EN/IEC 60704-2-13; EN/IEC 60704-3; ISO 3741; EN 50564; IEC 62301. EN 60350-2; • EMC: EN 55014-1; CISPR 14-1; EN 55014-2; CISPR 14-2; EN/IEC 61000-3-3; EN/IEC 61000-3-12.
CORRECT USE
To reduce the impact of cooking fumes, follow these instructions: When you start cooking, set the hood to a low speed and increase it only after the food has been cooking for a while. Use the high speed (Booster) function only when necessary, such as when frying or grilling. To ensure the hood works efficiently, clean or replace the grease filter(s) regularly. For best performance, use the maximum duct diameter specified in this manual.
2. Use
USE
The induction hob is based on magnetic induction principle. The heat is generated directly in the pan by the induction coil.
Warnings: If the hob is connected to an electrical supply, the induction hob: Safety: The temperature of the glass surface is high. Do not touch. Do not place objects on it. Danger: Do not place metal objects on the hob. The induction hob: The pan must be placed on the cooking zone. The pan must be suitable for induction. After cooking, the hob will remain hot for a while; do not touch it.
CONTROLS
- controls

Only this
has
extractor
KoJaHbIb13.
MaHbI3aIbI:
ПИТа БétиЕ Зakым KeIMeyi YUH, Мынанapfa Tыьм CanbHaDJI:
- Tybi Teric emec bɪdɪcɪtəp; -Ty6i3MaIbDaHaHMetaIIbIbIcTap;
- nicipy naheiniHbetiHe cb3at Tycney ywiH ty6i Kejdip 6ydbip bIbictap;
- bICTbIK KcctpEndepjxKHe TaBanapblnIHTaHbIH 6ackay naheiniH 6tine KOfora 6oMaDbI.
- INdkyuaybik Kcctpnelepin 6apbIbIb TmIMdi eMec, eTKeHi OlandbH TY6i TEK JxapTbIaN JpeppomarHnTTIK MATEpnaanDan TypaB! Kcctpnelep MeN TabanapdbI catbn anFaHda, MaHbIb IeckepiH3: T6iToIbIbImeHpeppomarHnTTk MaTePnaIaNah TpyaIb. ΘuTnece, kblny 6epy xane 6ipKeNikn TmIdiniri a3 6oana,b an KcctpeLdH/TabaHbH 6tki Tempeatypacbi TaMaK Nicipy uWih XeKtiNikC3 6Oly MymKiH
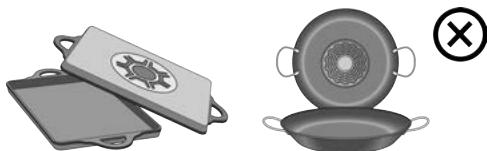
TBy6iHne aIHomnHbOImaybKepe,AnTnece bIbIC Kbl36aBdJIxHe OHbINHykTopnap TaHbIMaybMyMkiH.
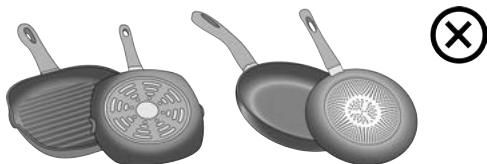
Tybitericemechemeckeiip-6ydbypbibictap. - Onapиндунктор мен bidiьс apacbIHndaftb6aINhaBIC 6etiniH ayanbHn aazItabl, TmIMdiNikTI TEmHeTeTei
KHe nicipy canacbH naaapnatabl.
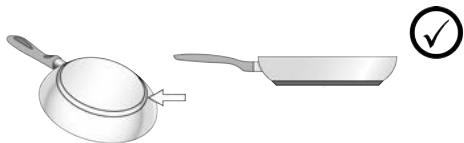
AaIbH aIa daIbHdIaHaB bIdbc
Koctpeleni MATEPnAbI MaHHTTI eKehIH TEkcepy yuHJ KaI fAHa MaHHTTI naDanaHa anacbI3. Kctpelenepre MaHHT Xa6bIcnaca, Onap JapamaiB1. AndbHfI tapaydaft KepeTkiWTeP ocbfahn da KaTbICTb I eckepinyi Tnic.
- bldic actbihin Dpybc nanaMetpi
MAHbl3DbI:erepKcctprnepdybic eJwEmde 6oJMAca,nicipy6eNikTepi icke KocbImaDbI. Op6ip JKe6eBolkTIN MHNImaNbDi DNAmetPnpin OcbI HcckaylbkTa6epiInrtenicti CypTepeH KapaHbI3.
KyaT YHEmdey
The diameter of the exhaust pipe and the table are given; the pipe can be connected to the exhaust pipe and the table. If possible, during installation, the exhaust pipe should be connected. When installing, the exhaust pipe and the cardboard, etc., should be connected to the water outlet; the exhaust pipe should be connected, and the accessories and the exhaust pipe should be installed in one place; the table should be installed without the exhaust pipe.
INSTALLATION OF THE EXHAUST PIPE
This exhaust pipe can be installed in the flue or directly outside, and it can be installed in both ways.
For the installation of this exhaust pipe, to see the full range of accessories suitable for the flue, please visit the websites www.elica.com and www.shop.elica.com.
Flue installation:
These are installed on the flue (if the flue is not present). The diameter of the exhaust pipe (the flue pipe) must be installed on the flue, and the exhaust pipe must be installed. The exhaust pipe and its accessories must be installed in accordance with the instructions for the installation of the flue. The exhaust pipe and the flue must be installed with a diameter of 7 meters. The installation must be done in accordance with the instructions for the installation of the flue.
The maximum length of the exhaust pipe is: the exhaust pipe must be at least 7 meters. The total length of the exhaust pipe must not exceed 90 meters.
If the exhaust pipe is longer than 7 meters, it must be installed with a diameter of 150 mm (or 222 x 89 mm) to avoid reducing the diameter of the flue.

Recirculation installation:
The exhaust pipe must be installed with the accessories and the flue. They must be installed in accordance with the standard, and the exhaust pipe must be installed with the flue. For the installation of the exhaust pipe with the flue, the instructions for the installation of the flue must be followed (see the instructions for the installation of the flue).
3. USE
CONTROL PANEL
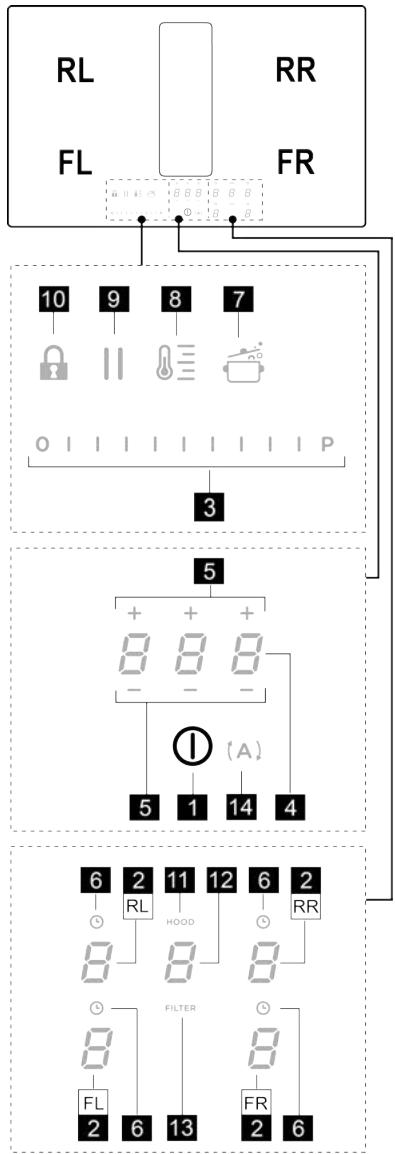
Selecting the cooking mode
Select the cooking mode by pressing the button (2) (the button).
The button
Install the 9 kW power meter. Connect the wires and your load:
For the power meter to work, connect it accordingly.
To disconnect the power meter, follow the opposite.
The installed power meter is for measurement/display purposes.
(2) Display
Power meter
If the load current exceeds the rated current of the power meter
(for 3 meters in parallel), then use the appropriate temperature sensors.
Connect the wires (3) to the load (as shown in the diagram), and the power meter will display the measurement/display (2) accordingly.
Timer settings
The "Timer settings" function allows you to set a single timer for one operation. After the set time, the timers will automatically switch off and give a signal.
Timer settings reset function
-Measurement/display (2) (if the power meter is not connected) will be zero.
·Timer settings (6) will be zero.
To set the timer, press 1+ (5) and hold, then use the arrows (4).
6enirHneKepiHei; con Ke3e (6) 6enrici KblnbIbIKtan TpaDbI.
Ecken: 6aca e6bip npemn 6aan 10 ckynd Kytih3, ocblnaa nicipy aMafblhT TaMepi icke KocblnaDbI.
EckepTne: (6) Tymecin TaBb 6acbl, YcTan TpycaHb3, con Nicipy aMaFbIHbH TaMepe KaTa opHaTbIaDbI.
Erep KaJacaHb13, ocbI epeKeTti 6ipHee nicipy aMmaFbHa KaItaJaHb13:
Taimepdi ap6ip nicipy aImaftbHa 6eNeK opHatyfa 6oana; (4) dinCneIe nicipy aImaftbHbH Kepi cHaftb con Ke3de naJa 6oana; erep eUdbip aMaK TaDAnMaFah 6oNca, (4) "STAND-ALONE" (BeNeK) TaimepinH Kepi caHaftbH Kepy yuHn DcCnpei (4) 6acbl3. Kepi cAhaKTb Kcpcty pexmi STANDALONE (BeNeK) Taimep cnAaKtB (ocbl HcyckayblkTbH BE5 HcyckacbHaftb STAND-ALONE Timer (BeNeK TaMep) Taaybin KaapbH3).
Taimep Kepy cahaydbia aKaTaFaH Ke3e, DbIbIcTbI CnIHAn 1bIfaDbI XHe Nicipy aHaMbI eWeJI.
Taimepdi ewhipy yuih:
(2) nicipy aMmaFbIh TaHdaHaB3
TaiMePy3aKtBIfbIH 0.00 MAnHiHe - + (5) KEMeRImEH OPhATbHbI3.
KyaattbIwekTey
"KyaTbIwekTey" cyHKunraCb KypblfBhlh KyaTbIMakcImanDbI TyTbHybIH weKeTey, 6apblk 6encHdi nicipa aMaKaTAPbIHda TyTbHbNAtbIH KyaTbI petTey, nicipa naHeJIHH Jannbl TyTbHbNAtbIH KyaTb 6enriHeHRe MAKcImanDbI TyTbHY deHreHHeH acnblHbIfbHaKeinDik petiHde naJaIaNahyFa MyMkiHdk 6epedi.
Eckptne: 6yn npametnp nicipy naheni ewhipnyi, 6ipak po3eTKaFA Kocybl Ke3de HEmecpe po3eTKaFA KaTa
KocbIfAH COH 2 MNHY TkKeHHe KeyIH ON/OFF (1) (Kocy/ewipy) TyMeciH bacy apKbIbI opHaTbIybl Tnic. Kyat WeKteYIH opHATy yuH:
(A) TYMeciH 6acIbHbI (OJ Kypblfbl icke KocblfHa coH anFaIKb2 MmHT 60JIbXbIbJIb(KTanDbI)
(A) Tymecin 6acbin tybin, nicipy aMaKTapbHt H TaHday/KepeSy aMaKTapbHt (2) 6apbIbHt Bip-6iplen carat tinihe Kapcbi 6aftta 6acbin 5bIfbHt3, 6acyb anbHfbo OH xak aMaKTan (FR) bactahla; ap6ip 6acyda dbicbtb CnHai 5bIfadbl, an 6apbnk dncnneep (2) 6acbinfah Ke3de, Tymehi xi6epyre 6oana:
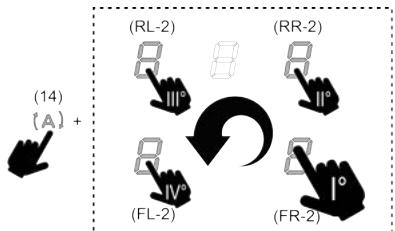
The right (RL) and left (2) displays show the parameters of the device being adjusted.
The settings are changed in the menu and displayed on the display.
- (RL-2) (right button 2) is used to select the display and adjust the parameters of the selected display (3) accordingly; the display (FL-2) (left button 2) is used to select the parameters of the corresponding display:
To change the parameters:
- Press the (FL-2) (left button) to select the display (3) to be adjusted.
The parameters of the device are displayed. To change the selected value, press the ON/OFF (1) (On/Off) button; to confirm the setting, press the same button again.
- Device settings
Before using the device, it is possible to adjust the parameters of the device to the required values using the menu.
To turn off:
Press and hold button (10) for 3 seconds.
Note: If the device is turned off while a function is active, the function will be interrupted and the device will return to standby mode. To restart, press the button again.
- Automatic heating
The Automatic Heat Up function allows the device to quickly reach the set temperature; this function is useful for rapid heating without manual adjustment. The device temperature will be maintained automatically. This function is suitable for devices with a temperature range. To turn off:
·Press button (7) during operation to turn off the automatic heating function and return to manual temperature control.
When the device temperature is below the set value: "Automatic heating" function will be activated.
The device automatically turns off the heating element after the set time.
Expert: together with the main washing, the first wash
at the end of the set time (7), the button lights up and the device is ready for use; in case of need, this function can be activated again by pressing (2) and holding it until the indicator lights up.
Pause
The pause function pauses the main functions during washing, allowing you to add laundry.
Additional rinse:
Press button (2) until the indicator lights up
The function is activated.
Press button (2) until the indicator lights up
Press and hold button (3) to activate the function.
Expert: after activation, the device will pause for a short time; the pause time can be adjusted by the parameter settings.
Expert: if the pause function is not activated after 10 minutes, the device will automatically turn off.
Expert: the pause function does not affect the drying process.
"BOLEK" timer
Timer for cooking (with sound signal) — 60 minutes timer.
Timer is used for cooking/dispensing (4) base.
To set the timer, turn the (4) dial/dispenser — (5) the indicators will appear.
Note: before first use, wash the base with warm water, then dry it.
The timer can be set for a maximum of 1 hour 59 minutes. When the (4) dial is turned, the remaining time is displayed.
Note: if the remaining time is less than 10 minutes, the timer will sound a short beep at the end.
CLEANING AND MAINTENANCE
Cleaning the appliance: - Before cleaning, unplug the appliance from the "Unplug" section; Wipe the surface (dust):
The appliance has 4 rubber feet (legs) on the bottom.
Press the button (3) to release the feet: turn the foot clockwise to lock, and counterclockwise to unlock.
Note: The feet are not removable for cleaning (12) times.
Foot lock
The appliance has a "foot lock" feature: it is connected to the feet; it can be activated within 5 minutes.
To activate, press the button (3) on the feet (from the bottom);
then turn the feet to lock them in place.
Expert: 6ec MNHyTTaH COH Kyat 6ypbIH opHaTbIHaH DeHreIRe opanaBl.
- Automatic modes
The maximum pressure for the pressure switch is set by the pressure switch setting screw.
When the pressure switch is activated, the pressure drops below the set value, and the pump turns on for water and liquid.
This function is disabled:
(A) (14) The main switch is off;
The outlet is disconnected.
Expert: If the automatic mode is on and the pressure drops below the set value (3), the automatic mode stops; if, after a while, the pressure rises above the set value, the automatic mode resumes.
Expert: If the pressure switch is activated during the automatic mode, the pump will stop after a delay.
Water level indicator
The indicator lights up when the tank is full:
For clean/ceramic water: FILTER (13) is the filter channel
For wastewater: FILTER (13) is the filter channel and the indicator
Expert: This function is activated by the parameter (see the section "Water level indicator" for details)
Water level indicator is on
Cyrillic (MaJ XeHe/Hemece KEmip/KepaMnka) TexHnKaIbIK KbI3MeT KePcTeKHe COH, FILTER (13) TyMecin BacIn TpyBbIb3;On eWedeI De, INHnKaTop caHaFbIbI KaIta BaCTaIaNbl.
Cyrillic: replace the filter indicator with a new one.
Eckptne: BynnHnDnkaTOp eAeTTe eWipnyi 60anaBly.
Ohbl icke kocy yuih 6aFaplamay yuiH, MbHaapanpbl opblHaHbI3:
- Replace the old filter ①
- While the motor is running and the filter is being replaced, press the (12) button.
HOOD (11) TyMecin Dnncnne (12) Ke3ekne HxblbIbIKtaIbIH XHe apinTepi KepiHreHwe 6acbln typbHbI3.
E = kemip / kepamnikainccy 3 rinepi; U = maincy 3 rinepi
KΘMIP/KEPAMIKA MIC CY3ΓΙΝΕΡΙ
Fka3yibKeipinreKe3deDcnnnei (12) 6acbHb3 TpaKbI JxahraH FILTER (13) Wamblb 6acbIb3. Kemip/kepamka niC cyricihH 6eNcHdpinreHH pactay yuHOOID (11) (TyTH COFBU) TYMEcIH TaFbI
6aCbIhbl3.
MAI CY3ΓICI
ka3yblKeipinreHKe3deDinCnnei (12)6acbHb3 XbInbInbIKTaFaH FILTER (13) 6aMbInb6acbHb3. - MaJ cy3ricHH INHnKATOpbIHbH 6eNceHdpInTeHH pactay yuHOOID (11) TYMecIH TaFb6acBih3.
KYAT KECTECI
| Куат Deнгей | Пису турí | Пайданану (тамak дайындay тэжирбци менидөтөріпіе саиланьісты) | |
| Мakсимумiyat | P | Te3 Кыздыру | Тамak Temnéратурасын Кызka укыт iшінде су кайнayНүкесін Deийн көтэрдіnomece Тамak сүйыктіынTe3 Кыздырады |
| 8.9 | Кызу - кайнау | Кызару, Nicipy diь pactay, Kaырьлган taramdapдыКузу, Te3 кайнау | |
| Жоларыiyat | 7.8 | Кызару - Кызу - Кайнау - otkaКakтay | Кызару, Te3 кайнау, Nicipy жэne otka ка'tay (5-10Minhyттыk Кызka укыт iшінде) |
| 6.8 | Кызару - Nicipy - Бүкъру - Кызу - otka Ка'tay | Кызару, Saу кайнау, Nicipy жэne otka кa'tay (10-20Minhyттыk ортаа укыт iшінде), Косымда Кчралдыan'dынana Kaizdbyру | |
| Ортоаiyat | 5.5 | Пису - Бүкъру - Кызу - otka Ка'tay | Бүкъру, aazan ka'mahty, Nicipy (узak укыт), мakapонТуздырБы |
| 3.9 | Пису - Saу кайнау - Коколату - көнір'ty | Узak Nicipy (куріш, coystap, Кызьлган et, saык),сүйыктіыктap (Mbicalny, cy,шapan, copna, cty), makapонТуздырБы | |
| 2.3 | Пису - Saу кайнау - Коколату - көнір'ty | Узak Nicipy (бip питдан as3 көнемер: куріш, coystap,Кызьлган et, saык),сүйыктіыктap (Mbicalny, cy,шapan, copna, cty) | |
| Тименriiyat | 1.2 | Еprit - Хібіті - Кызыкійde са'tay - apanaactыру | сарымды epity, Уolkona'dы яайлел epity, уafынЧимderdiхізіы |
| 7 | Еprit - Хібіtі - Кызыкійde са'tay - apanaactыру | Жані пісян Taramhын, kiшке Нөліктэрпін КызінDE yctay Hemece taram'dы усынfyа boлatableн Tempepa'typada yctan tpy jхene Крем-pизотto | |
| ШIPY | 0 | Беткі бәлікke кал'day кэрсету | Плита К耗у Немец eшірі рechимідide solа'dы (H-L-Oapылы синнан Беріл'tin Тамak Nicipyden KeiH Kanlby MUMKIN Kall'dk Kbɪ3y) |
4. TEXHnKApIbIK KbI3MET KΘPCETY

HOOD MAINTENANCE
- Cleaning the hood
Power Level
The cooking hob has 9 power levels. Touch and slide your fingers along the Selection Bar (3):
to the right to increase the power level; to the left to decrease the power level.
The set power level will be displayed in the Selection/Display area (2).
Power Booster
Level (power level) at
USE OF THE EXTRACTOR HOOD
- Switching on the suction system:
- Switch on the cooking hob as indicated in the chapter "Switching on" in "Using the cooking hob";
Suction speed (power):
The extractor hood has 4 speed (power) levels from to.
Touch and slide your fingers along the Selection Bar (3): to the right to increase the power level, to the left to decrease the power level.
Note: The set power level will be displayed in the Selection/Display area (12)
Power Booster
The hood is equipped with 1 additional suction level called Power Booster; it is time-limited and lasts 5 minutes.
To select it, touch and slide your fingers along the Selection Bar (3) (over the levels), this symbol flashes.
Note: after the time limit expires, the power returns to the previously set level.
- Automatic operation
TROUBLESHOOTING TABLE
| Informazioni kod | Opis | Moguči uzroci | Rešenje |
| E·C | Kontrolna ploča se gasi zbog previsoke temperature | Unutrašnja temperatura električih delova je previsoka | Sačekajte da se ploča ohladi pre ponovne upotrebe |
| E·F | Neodgovarajuća posuda | Gubitak magnetskih osobina | Sklonite posuda |
| E·G | Problemi komunikacije izmedu korisničkog interfejsa i indukcijskog modula | Elektrčna struja ne dolazi do modulo; kabl za napajanjenosti pravilno povezan ili je neispravan | Odspojite ploču od mreže i proverite kabal |
| Za sve ostale poruke o greškama | Nazovite službu za tehnčku podršku i prijavite kod kvara | ||
CUSTOMER SERVICE
Before contacting Customer Service: 1. Check if you can solve the problem yourself based on the points described in "Troubleshooting". 2. Turn the product off and on again to check if the problem persists.
If after the above checks the problem still persists, contact the nearest Customer Service.
Strictly follow the instructions in this manual.
- Residual Heat Indicator
- Temperature Manager (Warming Function)
Temperature Manager is a monitoring function that allows you to keep food warm at a constant temperature and with an optimal power level, ideal for keeping prepared dishes warm. The Temperature Manager function is activated with the first press of button 8. On the display (2) of the cooking zone with the Temperature Manager function, a symbol appears
Power Level
The hob has 9 power levels. Touch and slide your fingers along the Selection bar (3):
to the right to increase the power level;
to the left to decrease the power level.
Power Booster
The product is equipped with an additional power level (overboost), which remains active for 5 minutes, after which the power returns to the previous level.
Touch and slide your fingers along the Selection bar (3) (past level 5) to activate the Power Booster. The Power Booster level is indicated in the Selection/Display area (2) with the symbol
Cooking zone timer
The cooking zone timer function is a countdown that can be set, even simultaneously, on each cooking zone. At the end of the set time, the cooking zones automatically switch off and the user is alerted by a special acoustic signal.
Power level on
USE OF THE HOOD
Power Booster
The extractor is equipped with 1 additional suction level called Power Booster. This is time-limited and lasts 5 minutes.
To select it, touch and slide your finger along the Selection bar (3) (past the level), this flashing symbol appears.
Note: at the end of the timed period, the power returns to the previously set level.
Automatic operation
The hood turns on at the most appropriate speed, adjusting the suction capacity to the maximum cooking level used on the cooking zones.
When the cooking zones are turned off, the hood adjusts its suction speed and gradually reduces it to remove residual odors and steam.
Press again to turn off
Key Lock
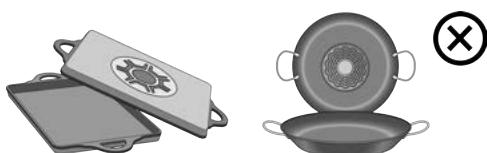
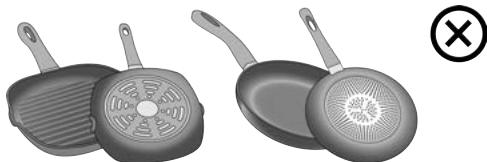
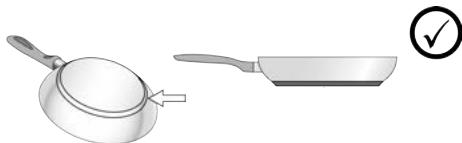
CE/19/2012 3113, UK SI 2013

(WEEE)
:
EN/IEC 60335-2-6, EN/IEC 60335-1:
EN/IEC 61591, IEC 60335-2-31, EN/IEC 62233
EN/IEC 60704-1, ISO 5168, ISO 5167-3, ISO 5167-1
EN 50564, ISO 3741, EN/IEC 60704-3, IEC 60704-2-13
EN 62301, EN 60350-2
EN/IEC CISPR 14-2, EN 55014-2, CISPR 14-1, 55014-1
EN/IEC 61000-3-12, 61000-3-3
1 1
p1
chuaal 1
aill ylll lal yllb lcly gall pbl aaii jai bll jaiy I gail liaydyl s jiaell aell
all
jla jyll yll lall yll yll p la lla: cullall jai iil yll yll bll lll pblal jai jll 126 s jao jai jai jai jai jai jai jai jai jai jai jai jai jai jai jai jai jai jai jai jai jai jai jai jai jai jai jai jai jai jai jai jai jai jai jai jai jai jai jai jai jai jai jai jai jai jai jai jai jai jai jai
.
1
jlll lly 1 jlll baiil jla! jaiil alii jaliin jkai jia jia jia jia jia jia jia jia jia jia jia jia jia jia jia jia jia jia jia jia jia jia jia jia jia jia jia jia jia jia jia jia jia jia jia jia jia jia jia jia jia jia jia jia jia jia jia jia jia jia jial
:alaiy a jall
#
j 1000000000000000000000000000000000000000000000000000000000000000000000000
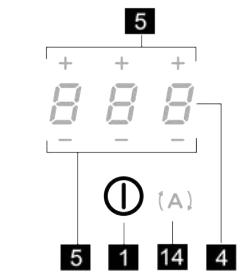
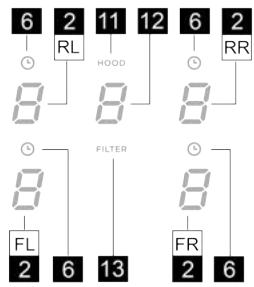
T
| الله الله | الله الله |
| O | الله الله |
| I...9-P | (Power Level)الله الله |
| H | Residual Heat Indicator |
| Y | (Pot Detector)الله |
| U | Temperature)الله الله |
| H | Pausa محيىالله |
| R | الله الله |
Safe Activation
(Pot Detector)
Safety Shut Down
(Pot Detector)

(Timer)
(3) Connect the RL-2 connector to terminal 8, and connect the FL-2 connector to terminal C.
Timer setting
(4) Connect the input/output wires.
(5) Set the adjustment to 0.00 and calibrate the zero point.
(continuous)
Set the upper limit and lower limit, then adjust the output.
(2) 11
(3)
08 13 15 16 17 18 19 20 21 22 23 24 25 26 27 28 29 30 31 32 33 34 35 36 37 38 39 40 41 42 43 44 45 46 47 48 49 50 51 52 53 54 55 56 57 58 59 60
Set the alarm output and the alarm delay time, and set the alarm output and the alarm delay time to 10 seconds.
A. a - b - c - d FILTER (13)
HOOD (11)
Filter (13)
FILTER (13)
E.
A
Therefore, 12 divided by 24 equals 7 and 5/8.

1
Therefore, p does not divide a.
KIT0121015 223x59x72mm KIT0161453
KIT0173527 222x89x500mm KIT0120991 222x89x1000mm KIT0121012 218x55x500mm KIT0121013 218x55x1000mm
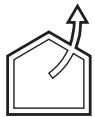

www.elica.com
www.shop.elica.com
KIT0185767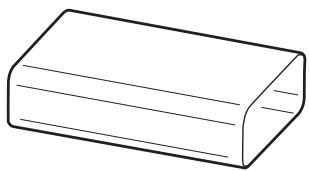
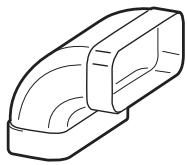

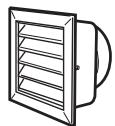
KIT0121010
190x190
0147mm
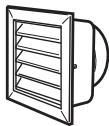
KIT0121009
INT 216x82mm EXT 290x160mm
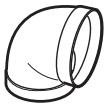
KIT0121006 90°
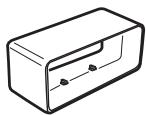
KIT0121001 227x94x80mm
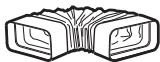
KIT0126810 227x94mm
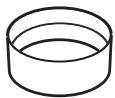
KIT0121003 0158 59mm
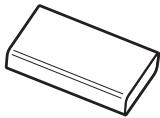
KIT0173527 222x89x500mm KIT0120991 222x89x1000mm
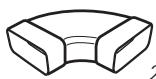
KIT0121004 90° 227x288x94mm
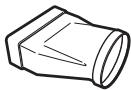
KIT0121008 227x94 0153mm
KIT012096 Ø150 - 500mm KIT0121000 Ø150 - 1000mm
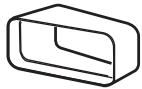
KIT0121002 15° 227x94mm
KIT0121005 90° 227x94mm

KIT0121007 227x94 0146mm
FRONT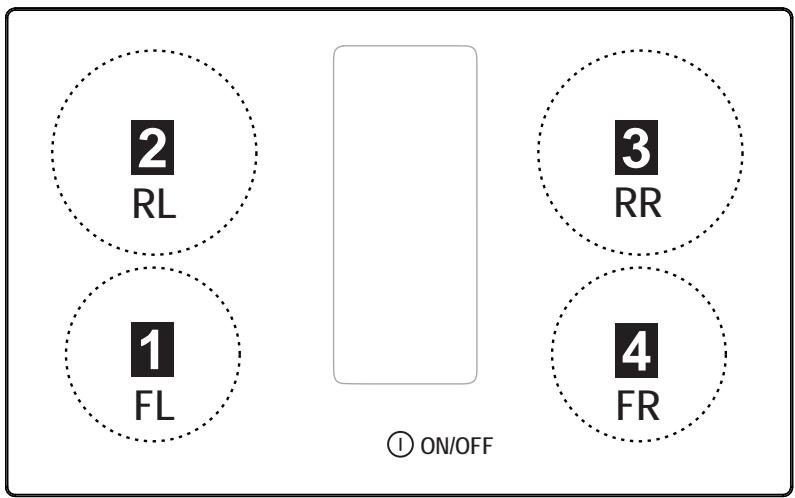
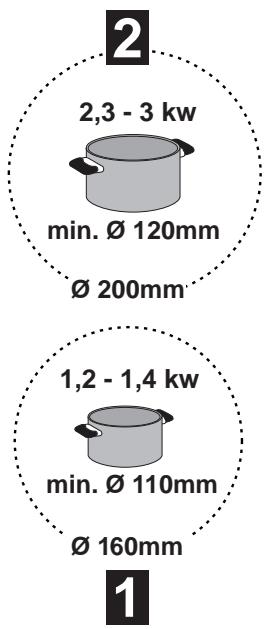
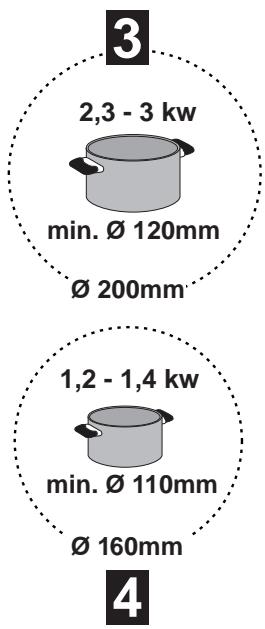

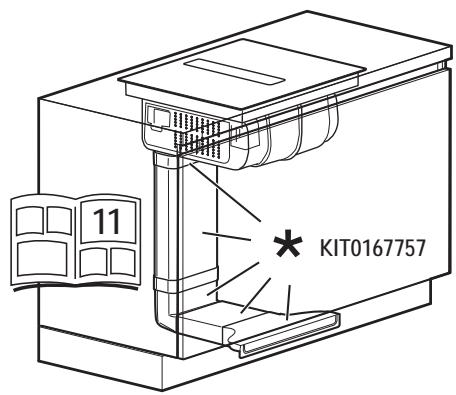
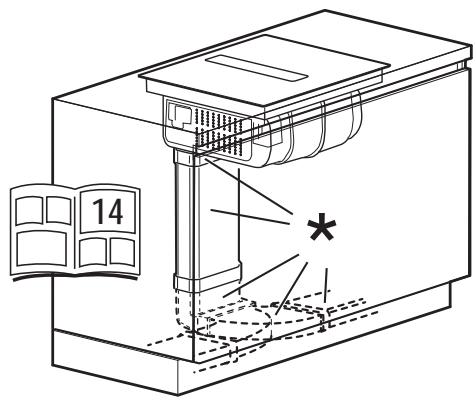
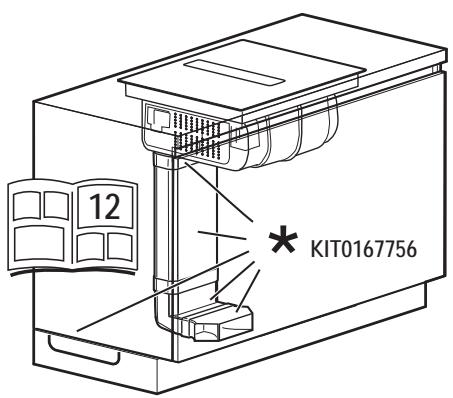
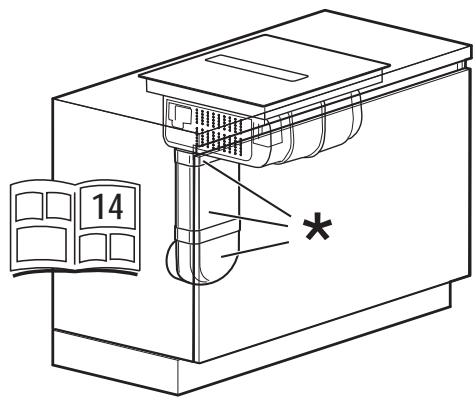
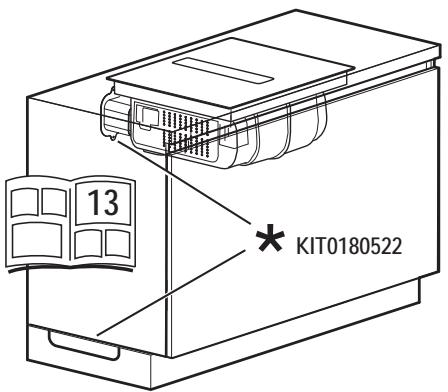
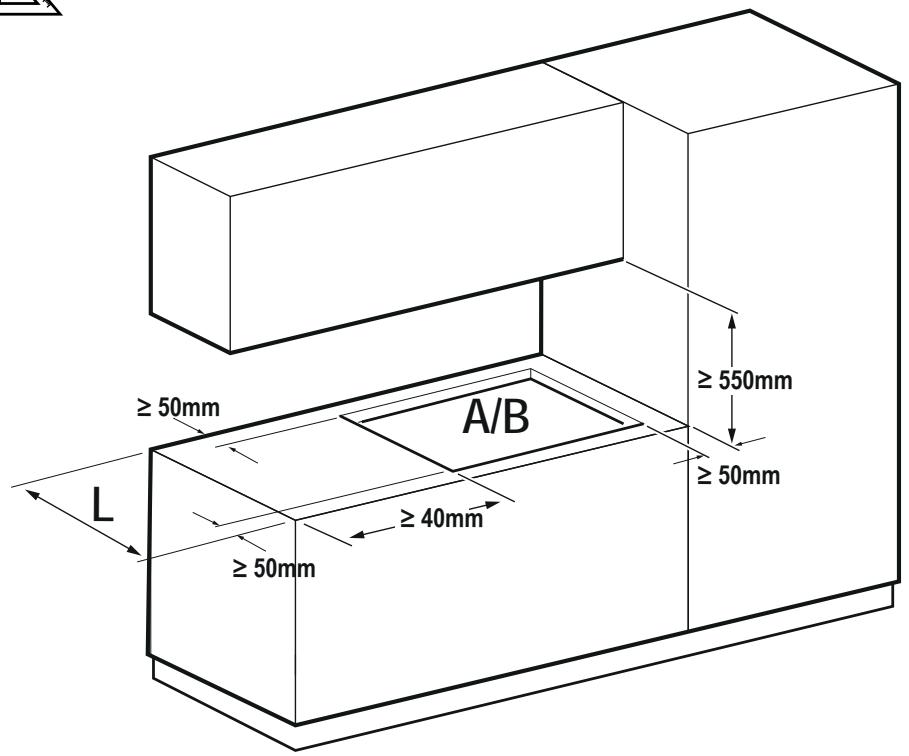
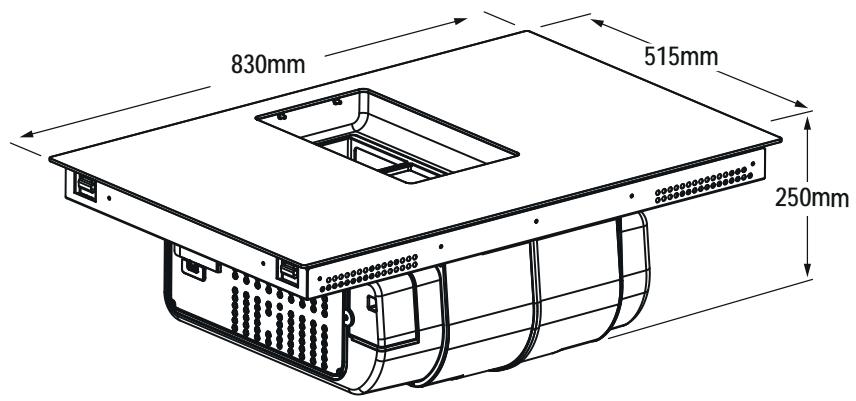
inst.A
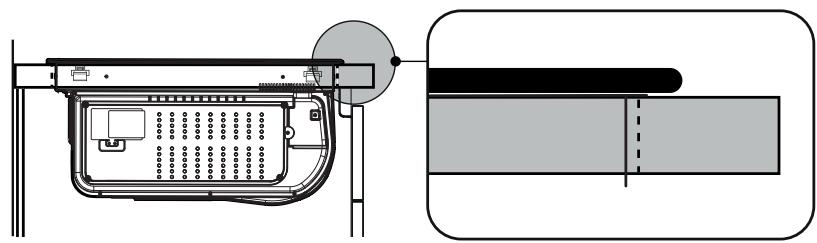
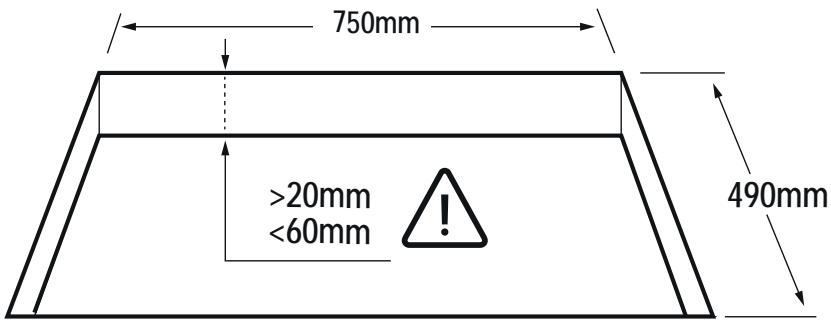
inst.B
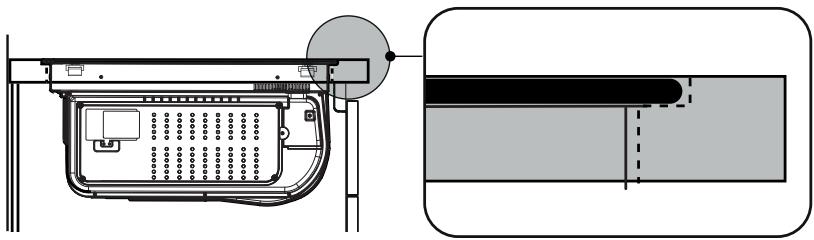
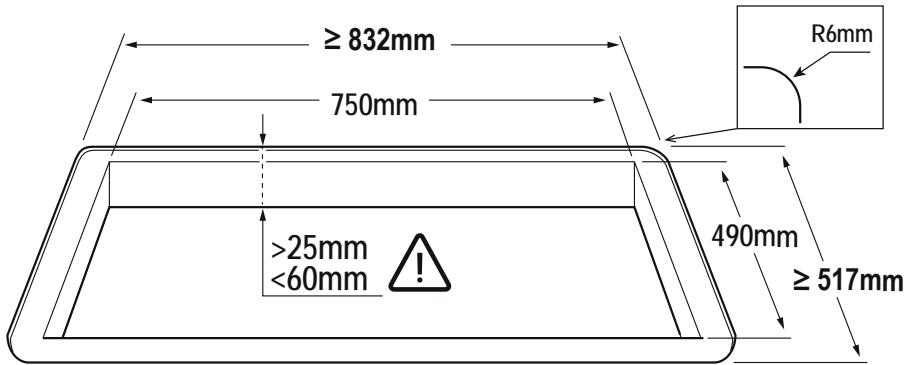
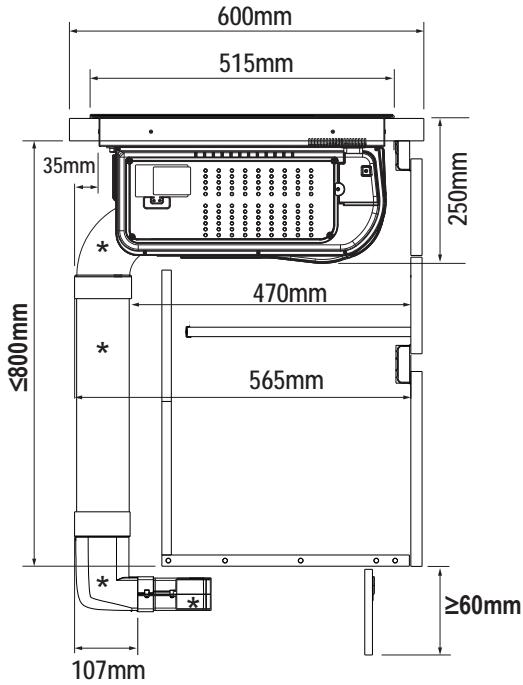
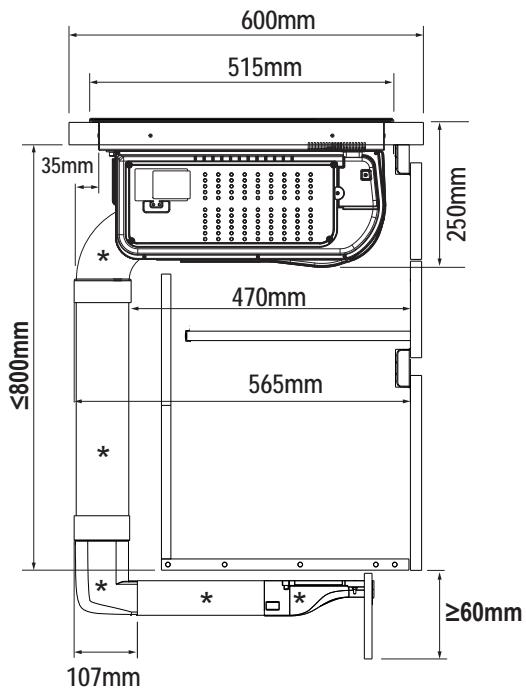

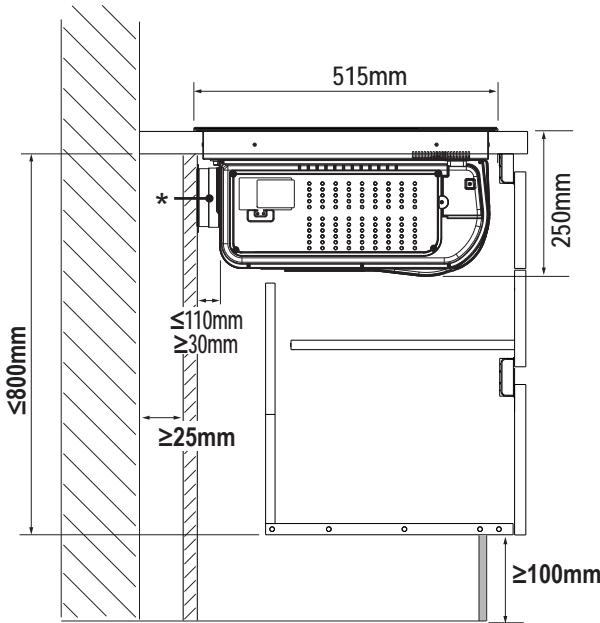
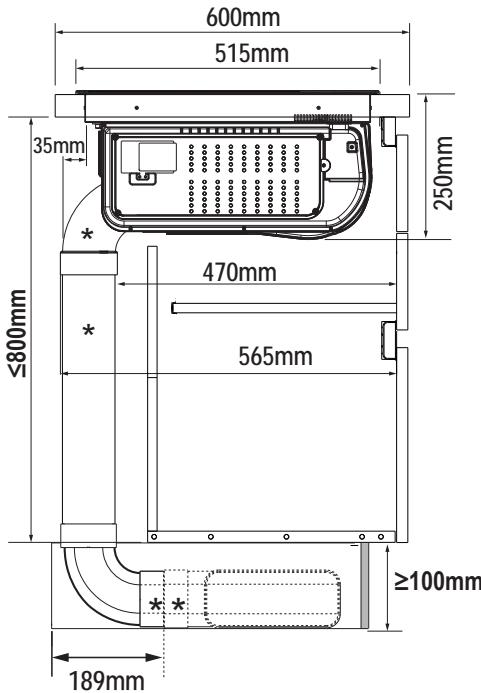
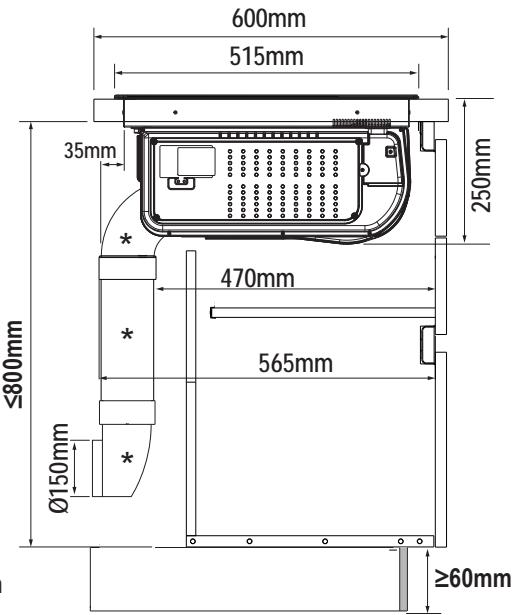

KIT WINDOW

V-Hz
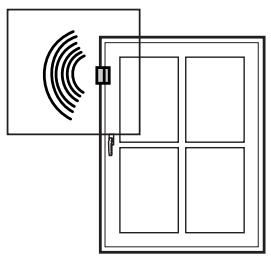
OFF
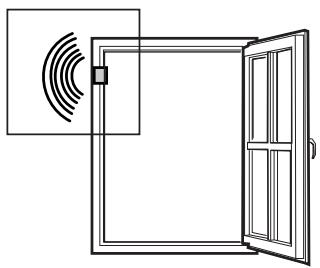
ON
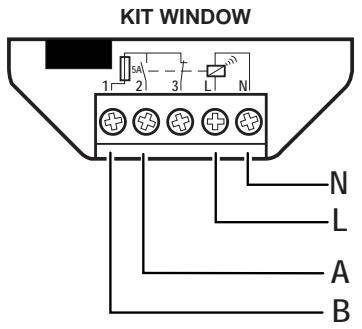
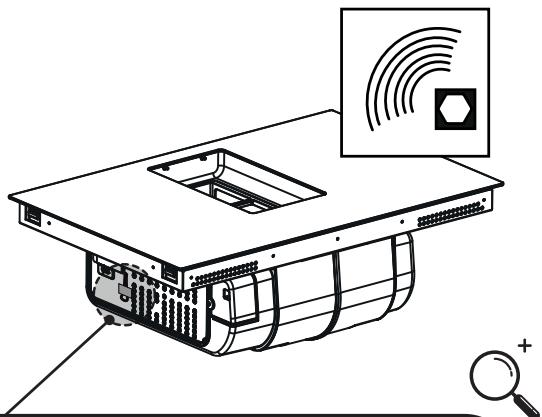
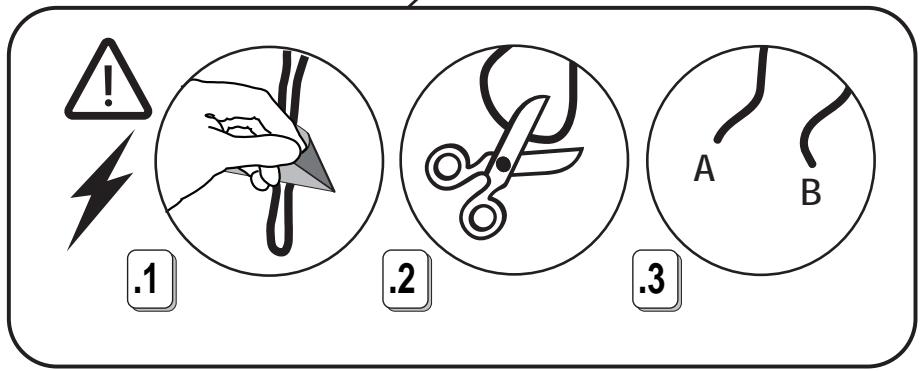

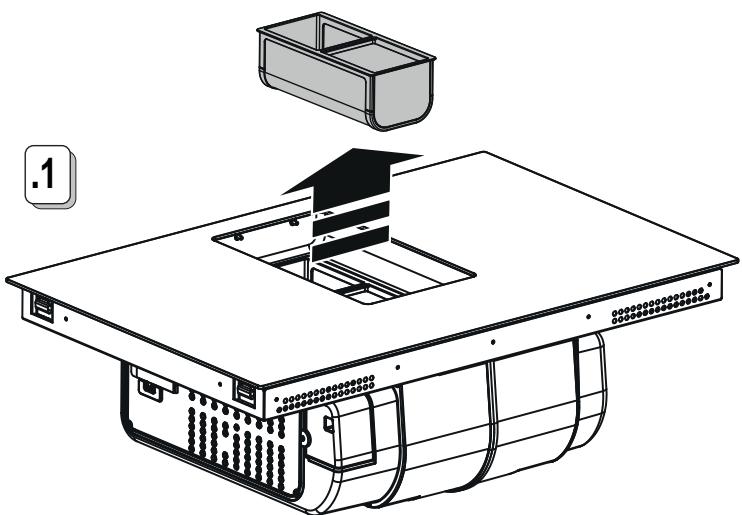
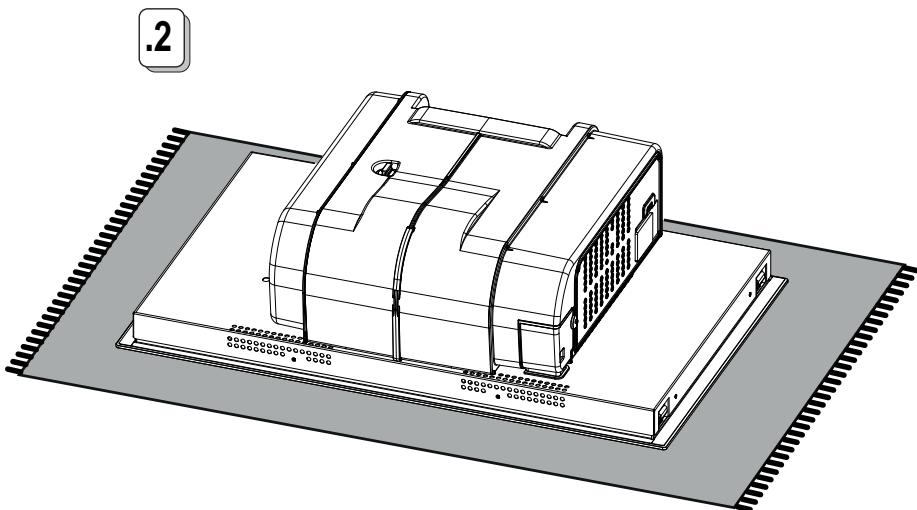
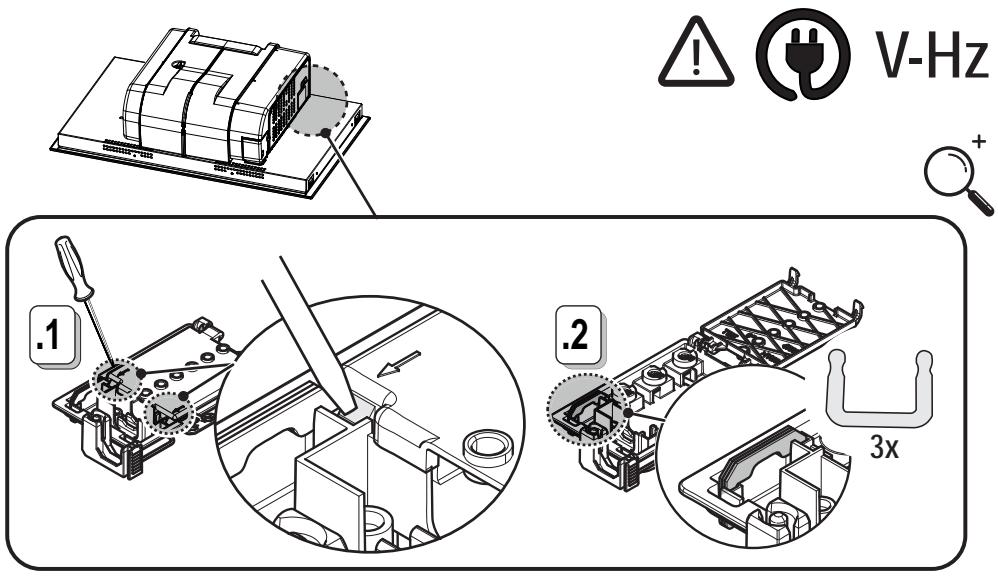
220V-240V ~
50Hz/60Hz
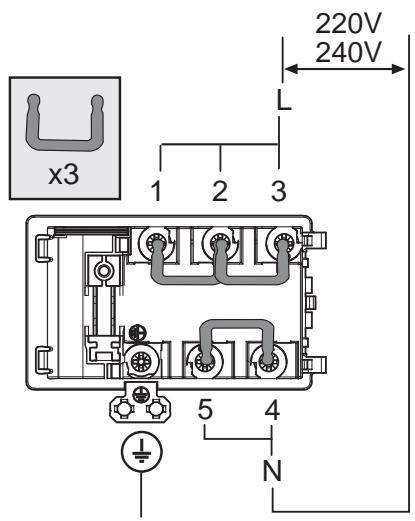
380V-415V ~ 2N~
50Hz/60Hz
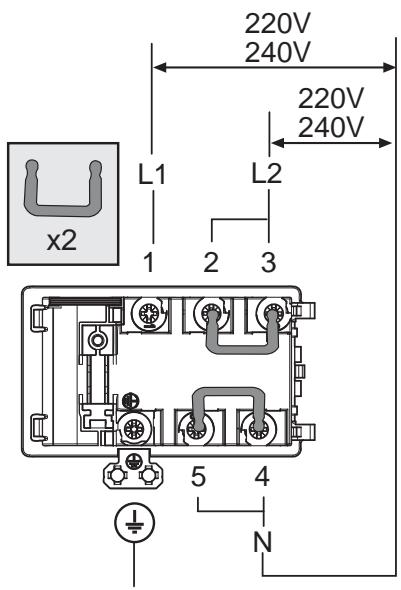
380V-415V~ 3N~
50Hz/60Hz
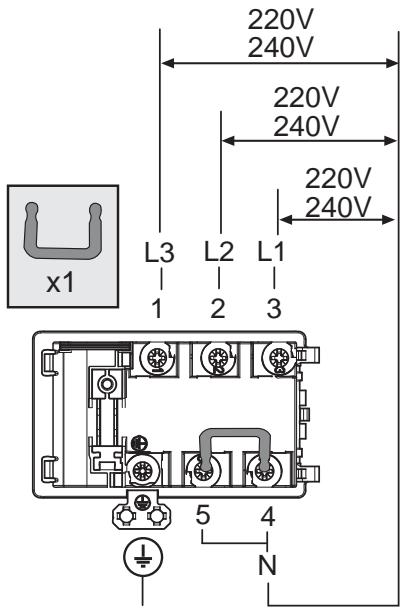
220V- 240V ~ 2N 2L
50Hz/60Hz
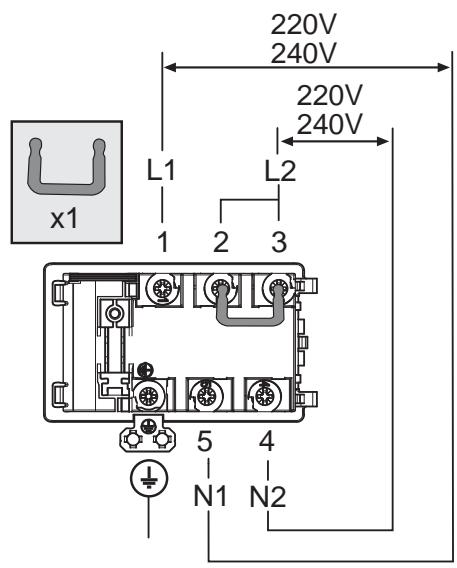
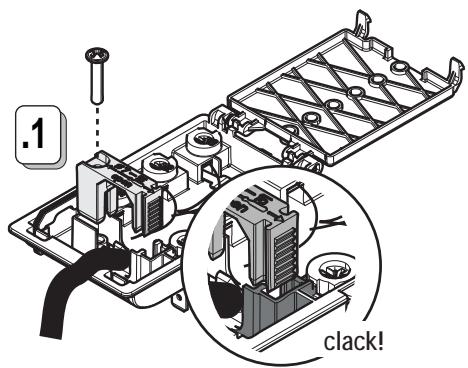


V-Hz
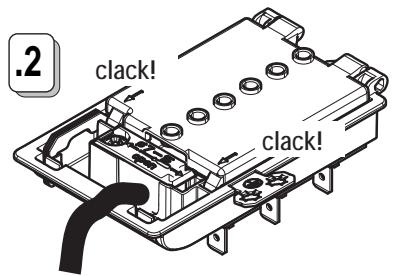
7.1
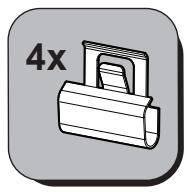
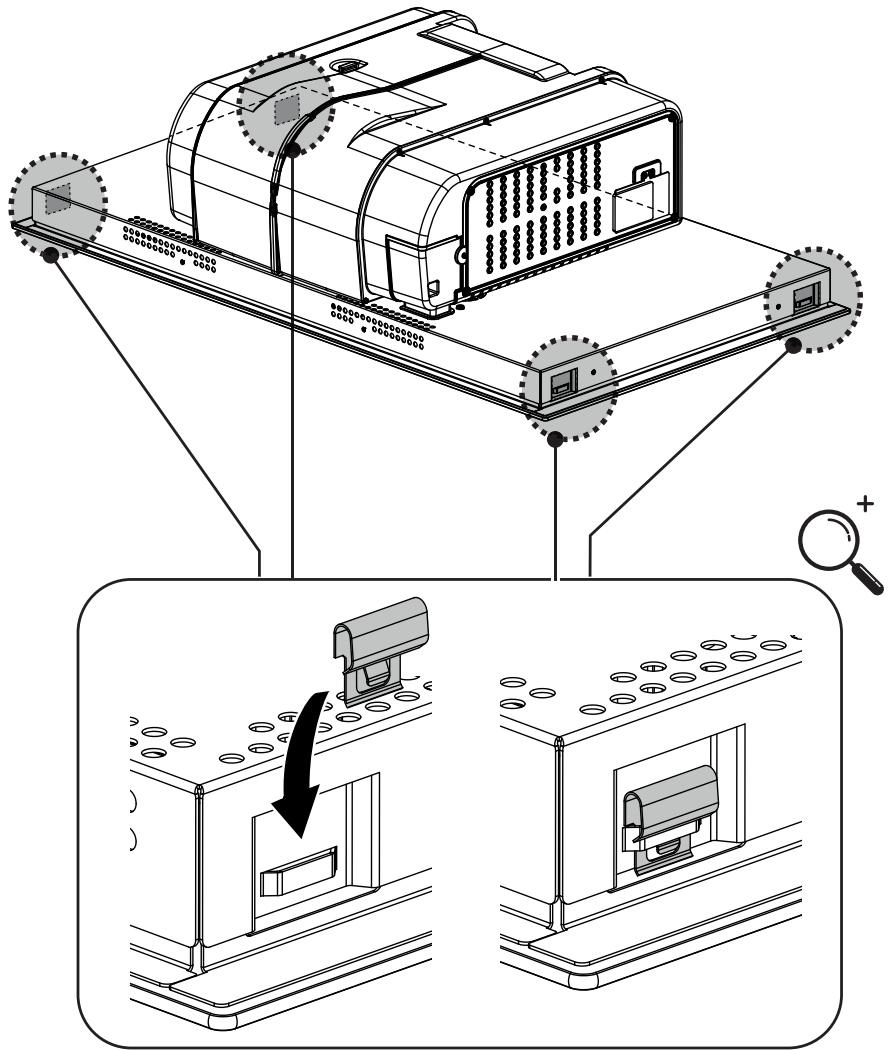
inst.A
inst.B
inst.A
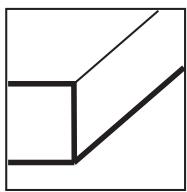
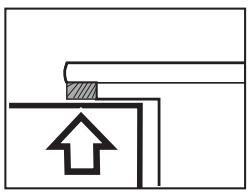
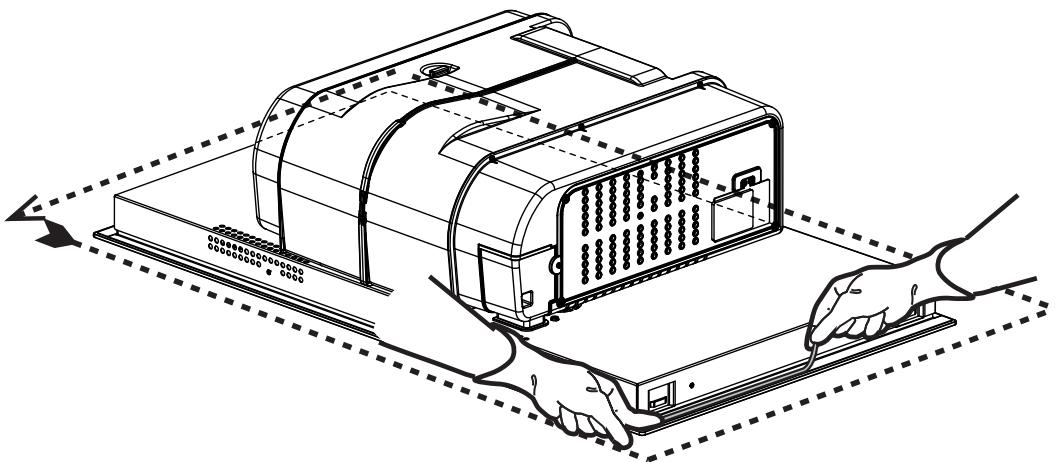
inst.B
10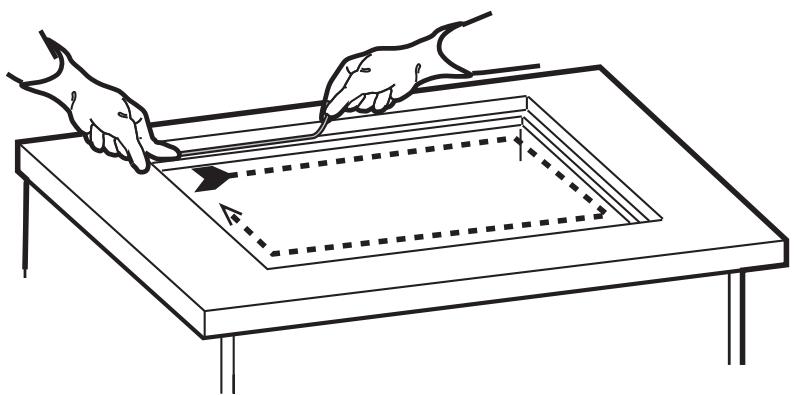
10.1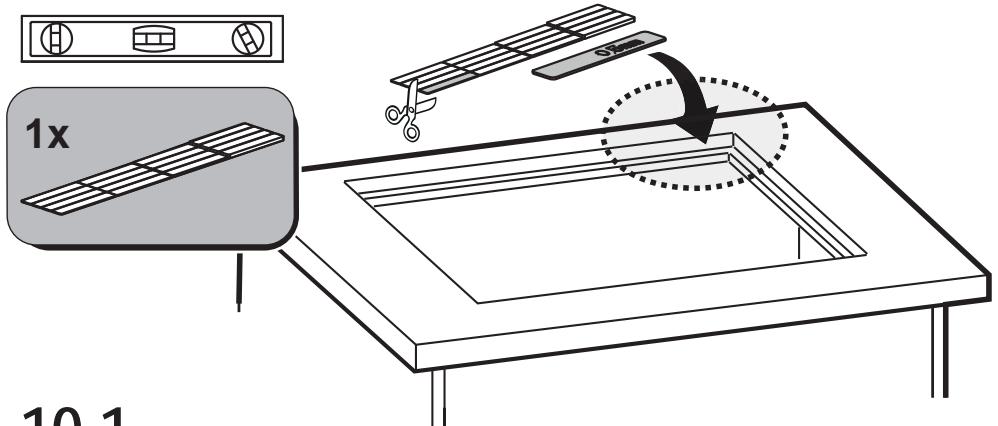
10.2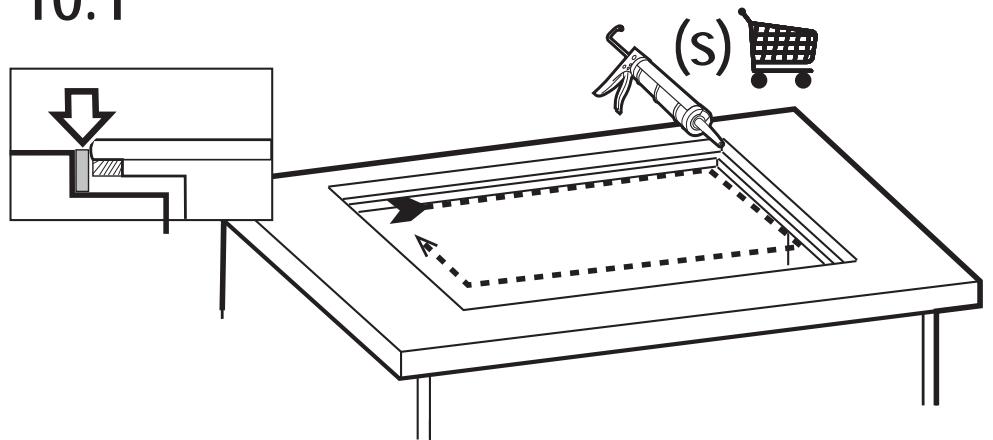
KIT0167757
!L≤650mm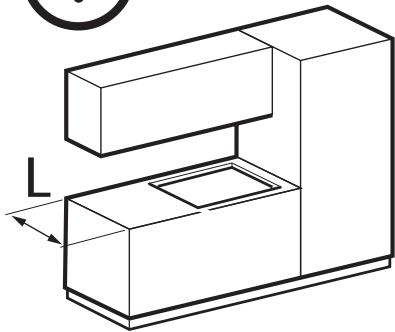
11
11.1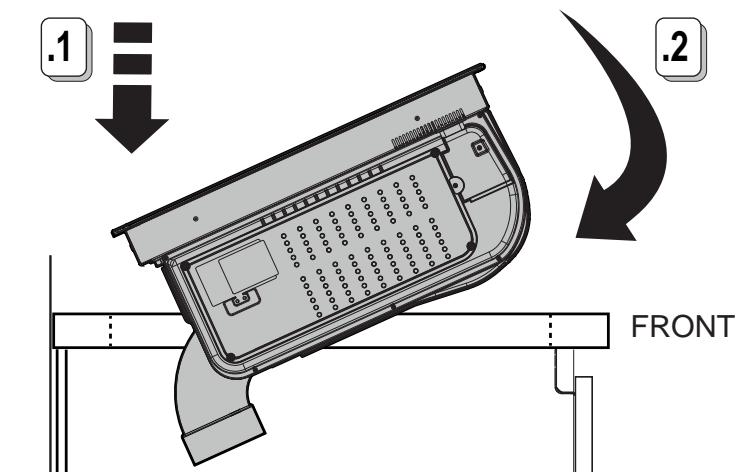
KIT0167757
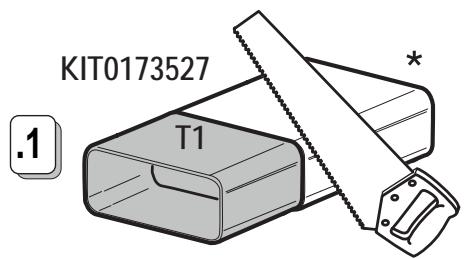
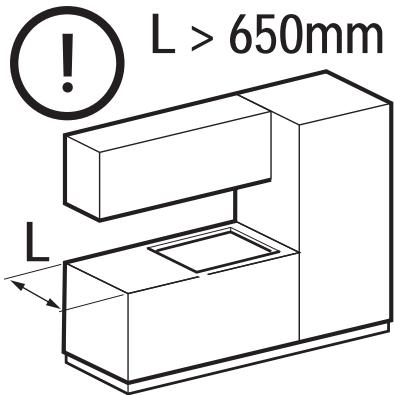
11.2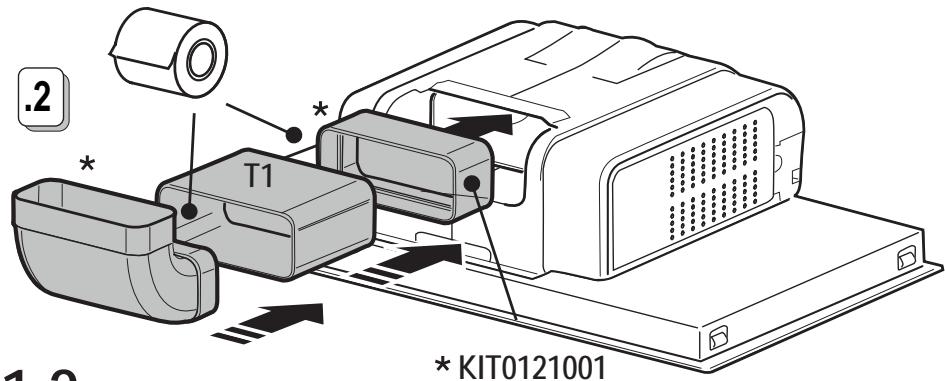
11.3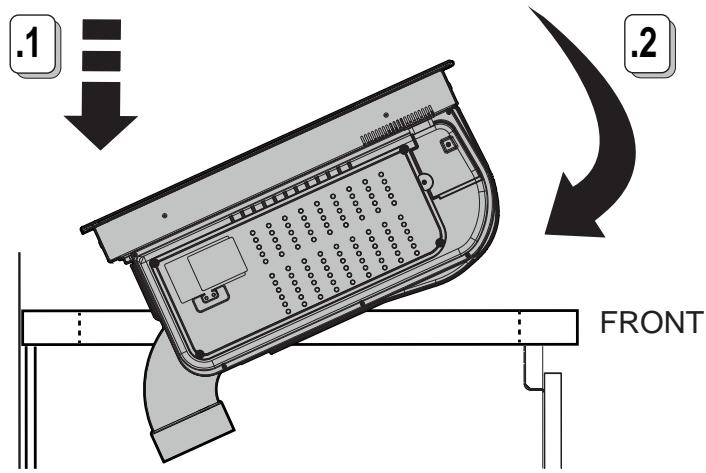
11.4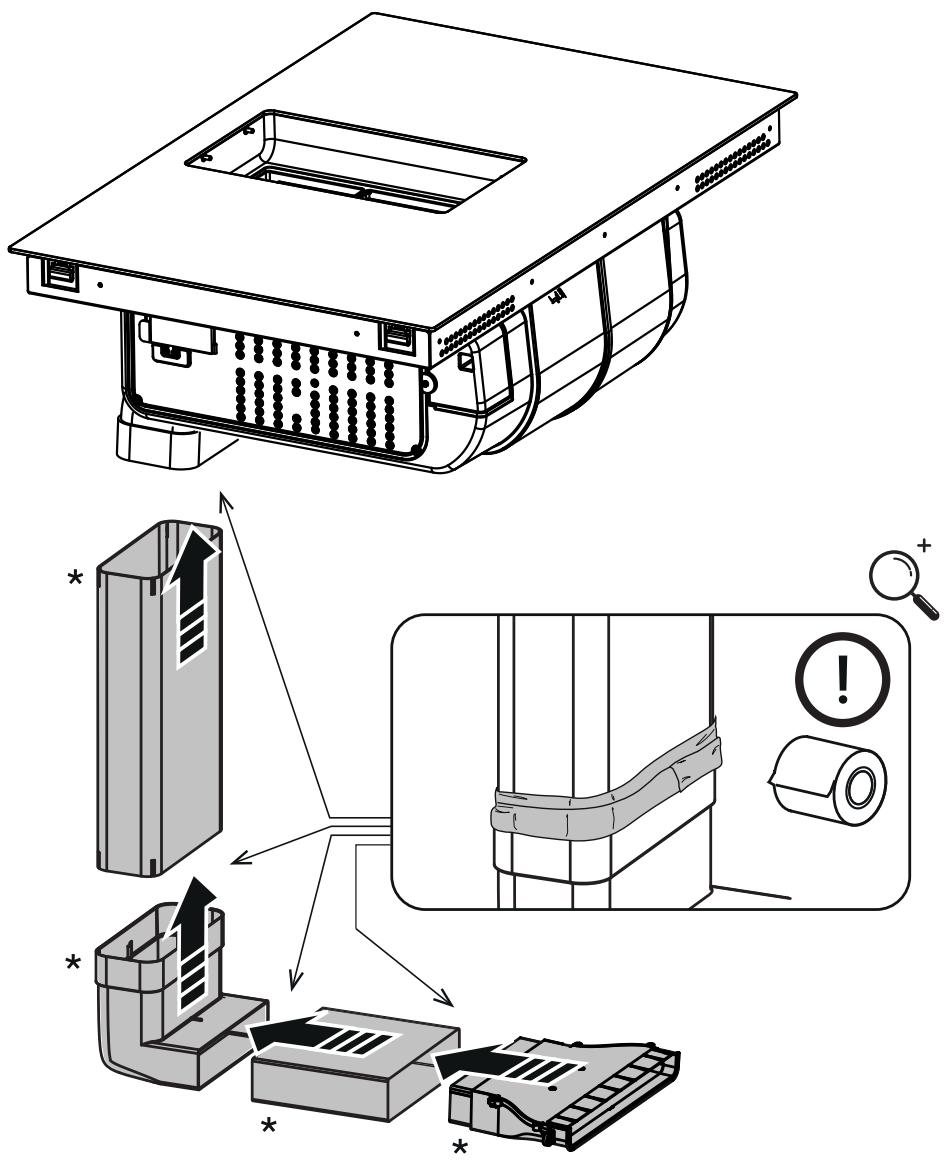
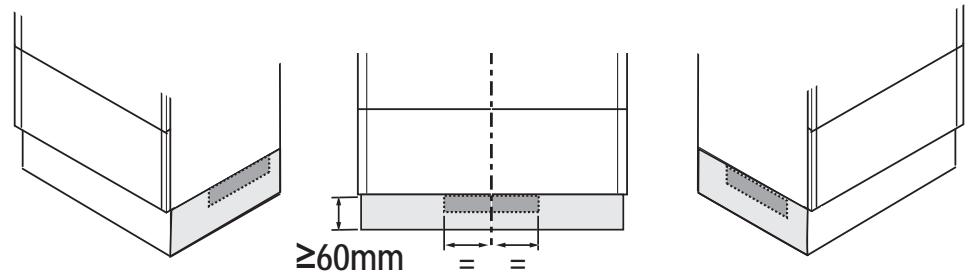
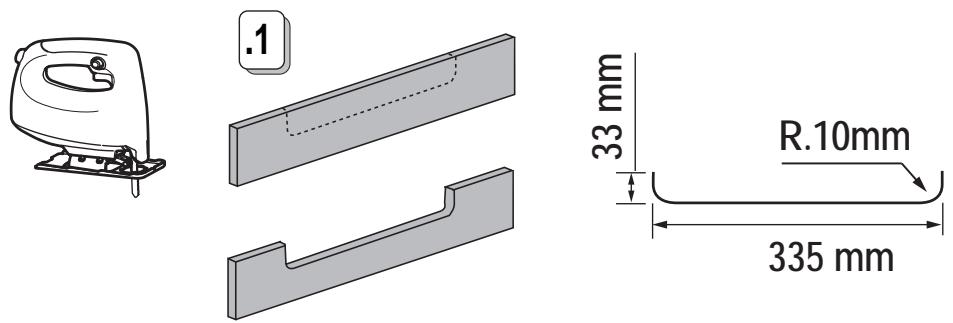
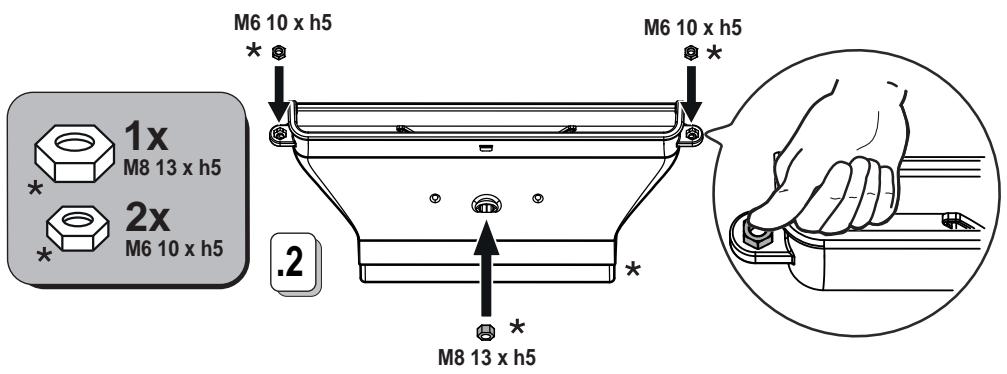
KIT0167757


www.elica.com
www.shop.elica.com

2x
M6x20mm
*
X = ≤ 1 8, 5 mm
X = gt; 1 8, 5 mm X = ≤ 2 2. 5 mm
X = ≤ 1 8, 5 mm
.1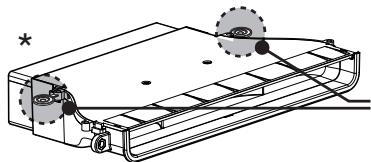
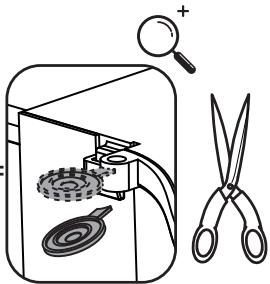
.2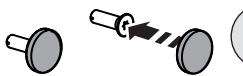

.3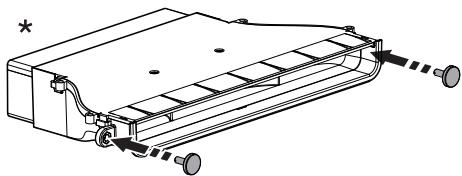
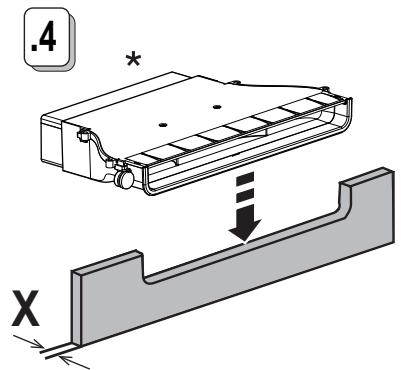
11.6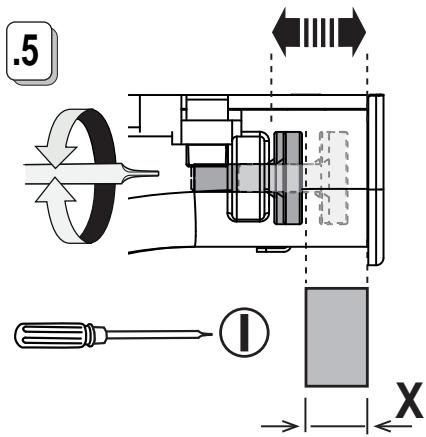
X ≥ 18.5 mm < 22.5 mm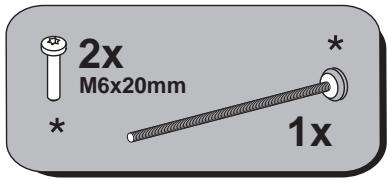
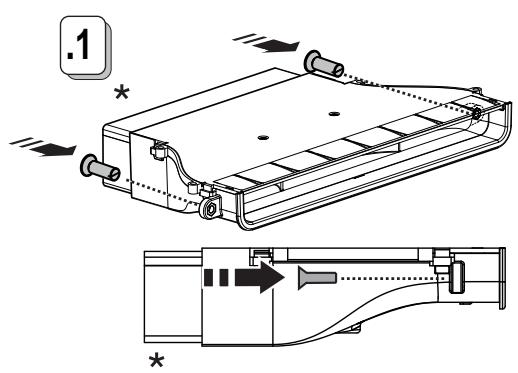
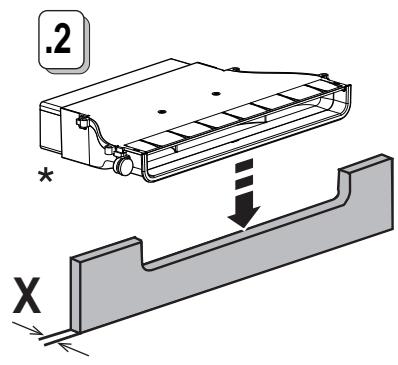
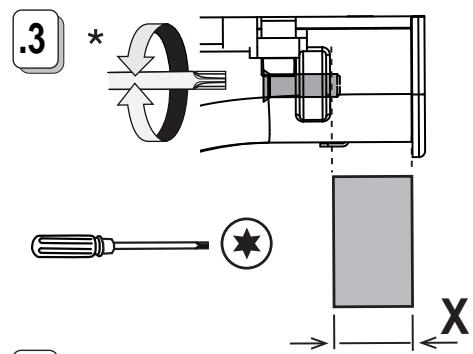
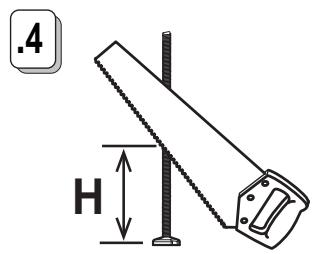
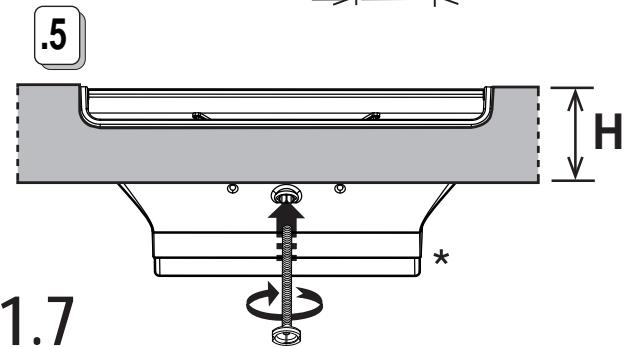
11.7
12
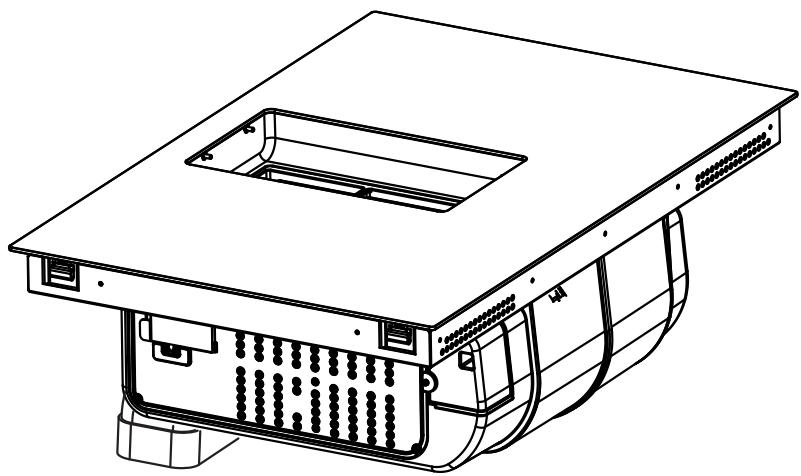
12.1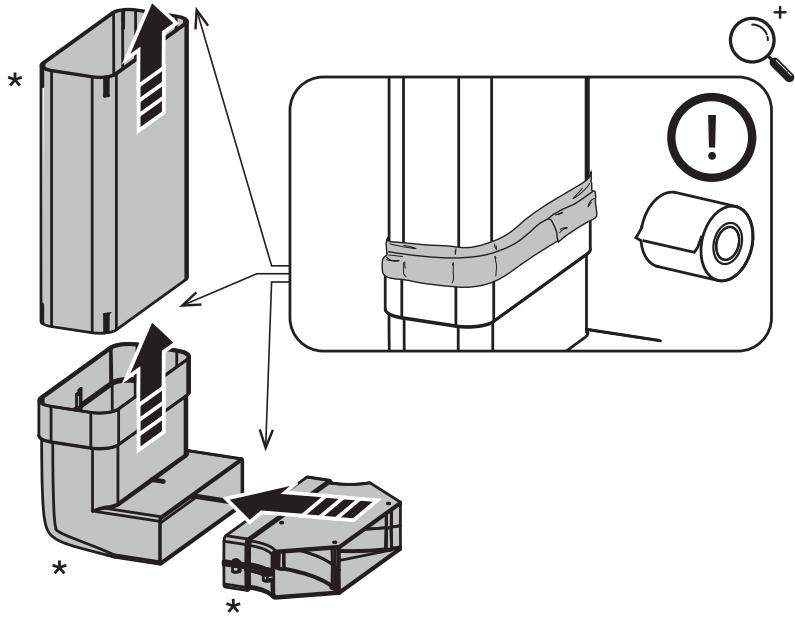
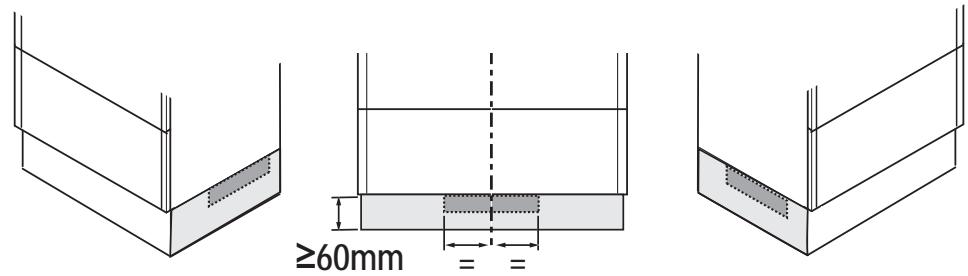
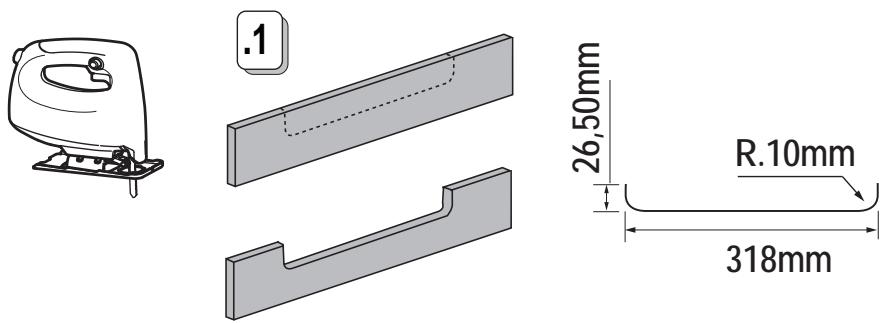
12.2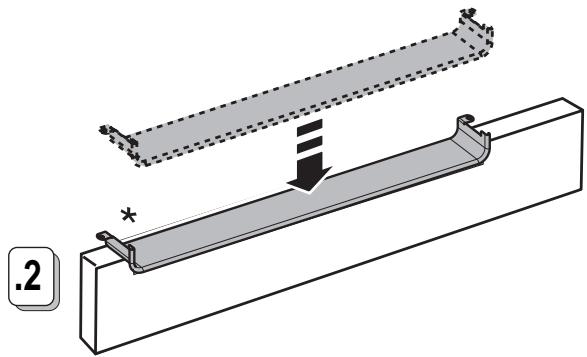
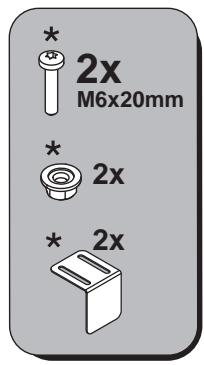
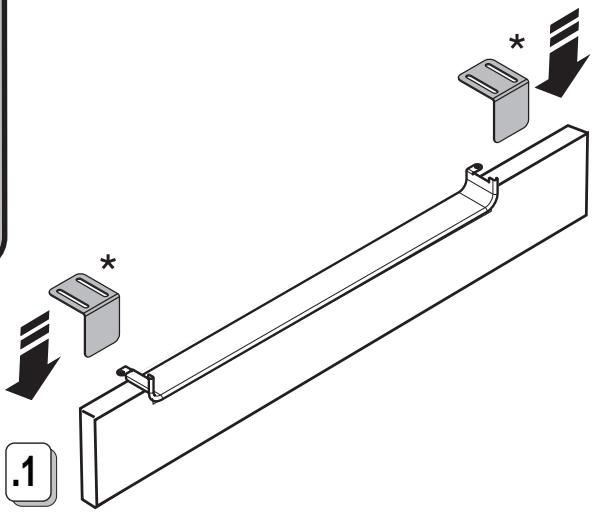
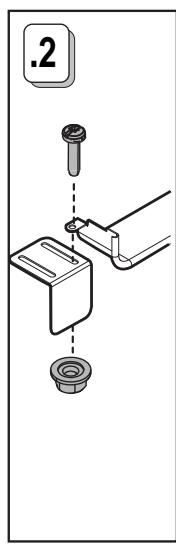
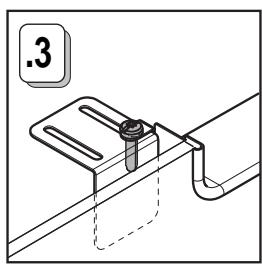
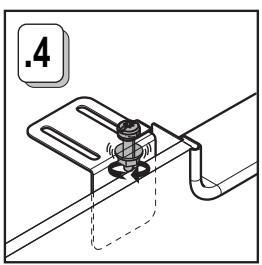
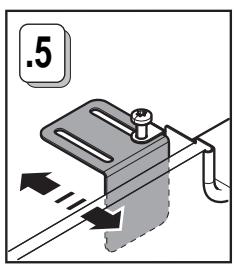
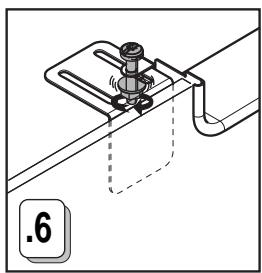
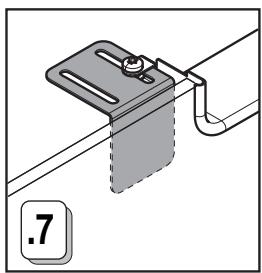
12.3
KIT0180522


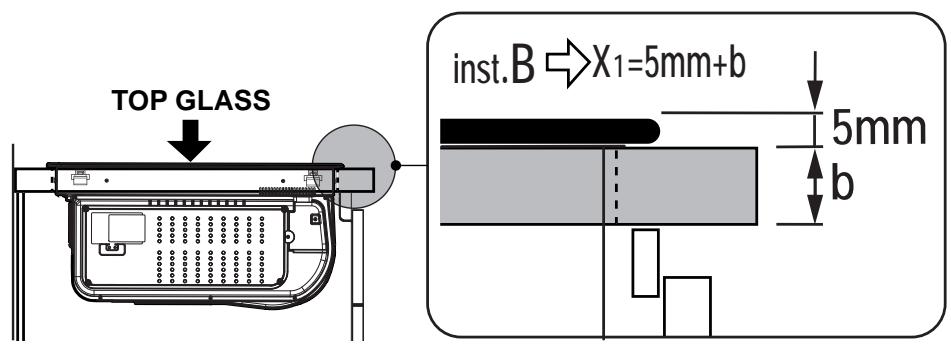
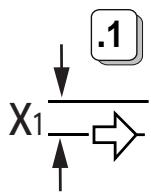
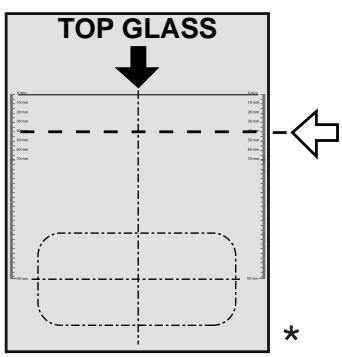
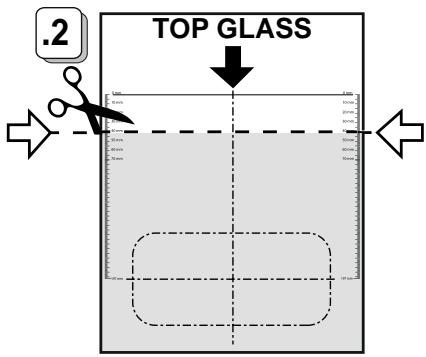
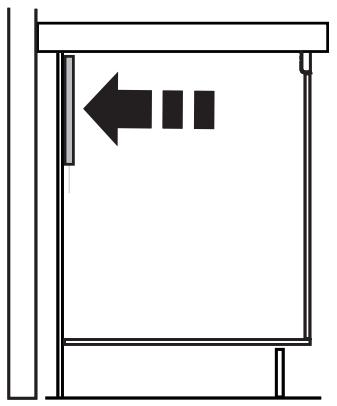
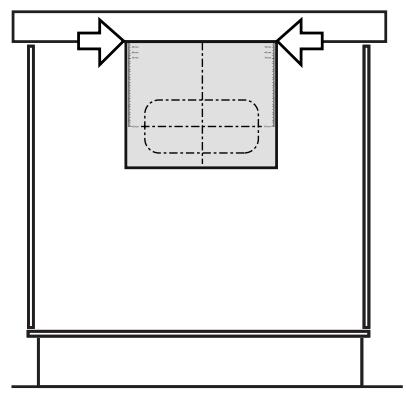
13.1 13.2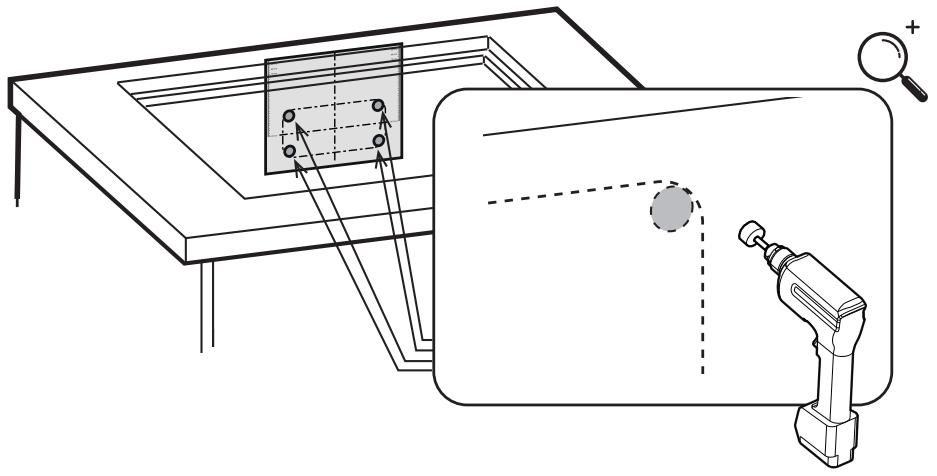
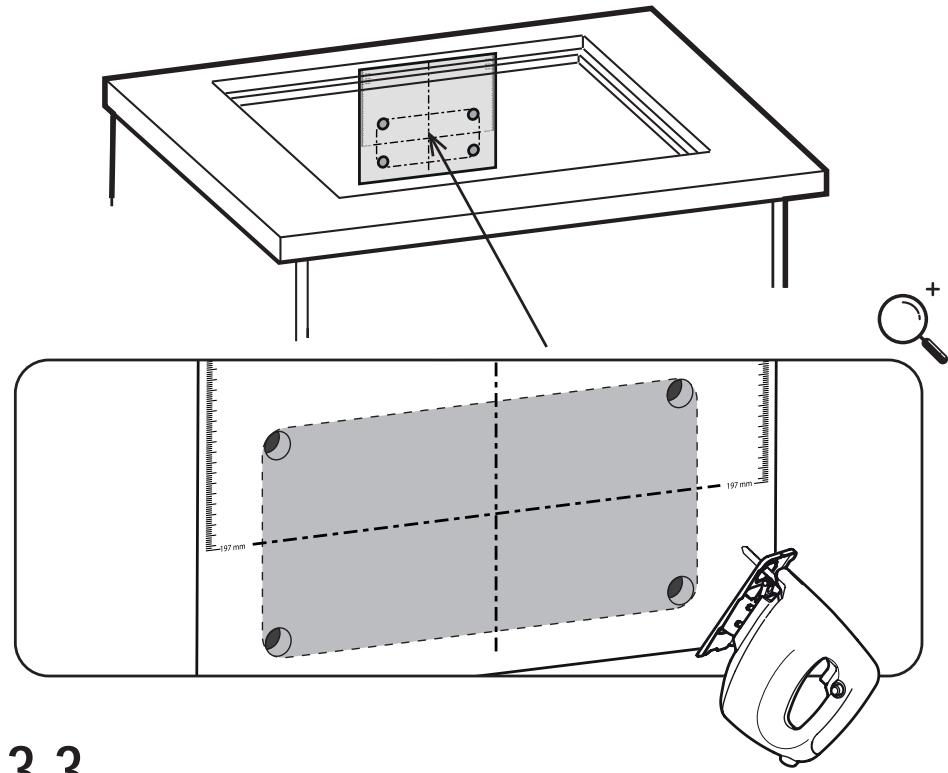
13.3
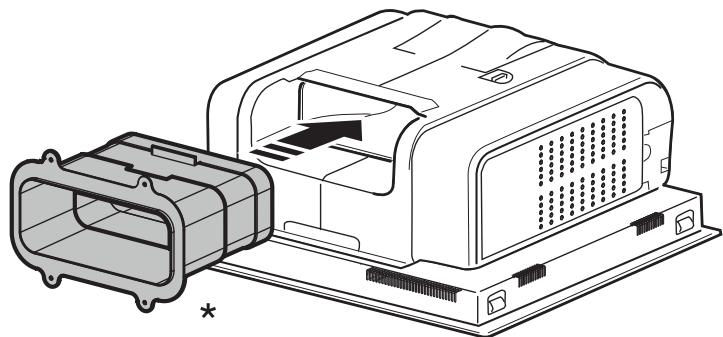
13.4
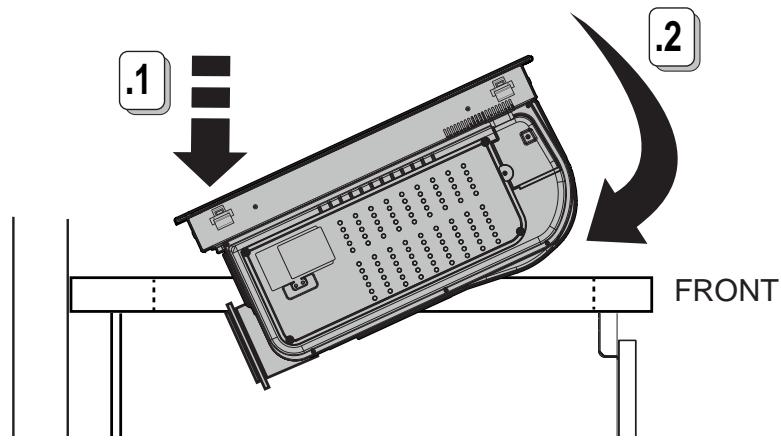
13.5
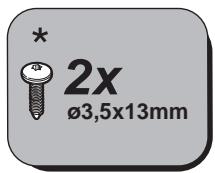
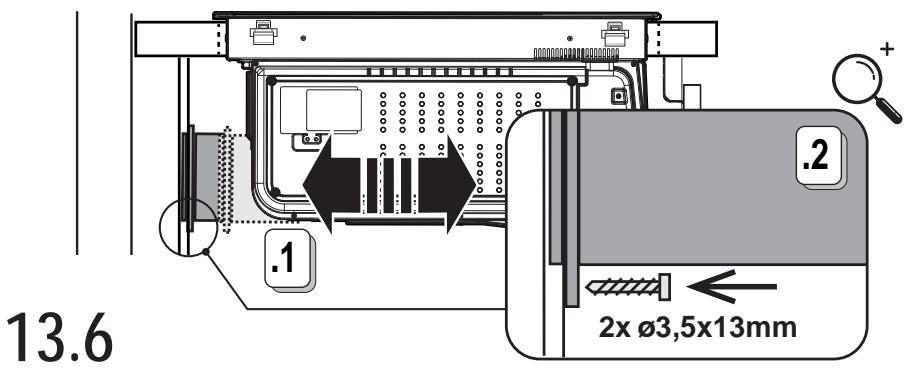
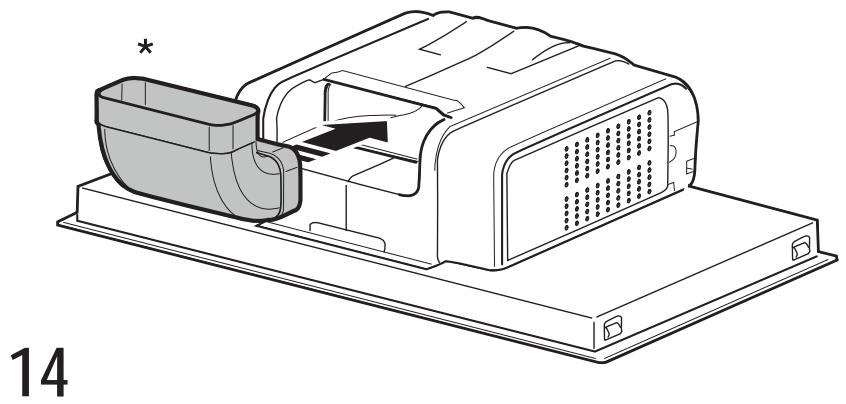
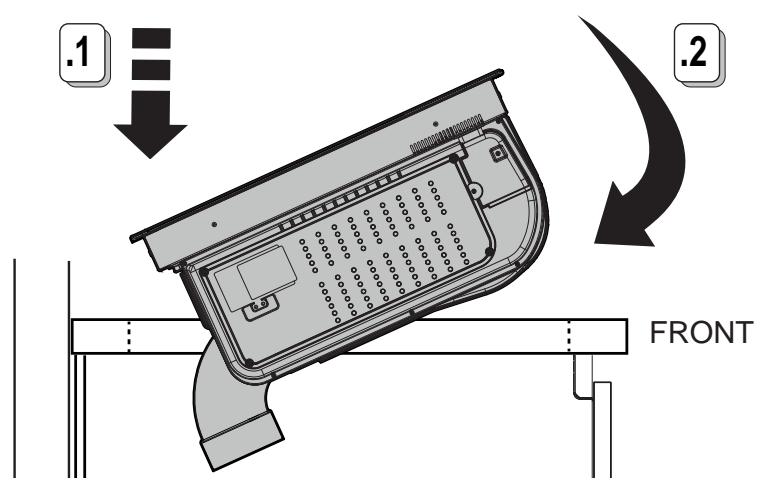
14.1
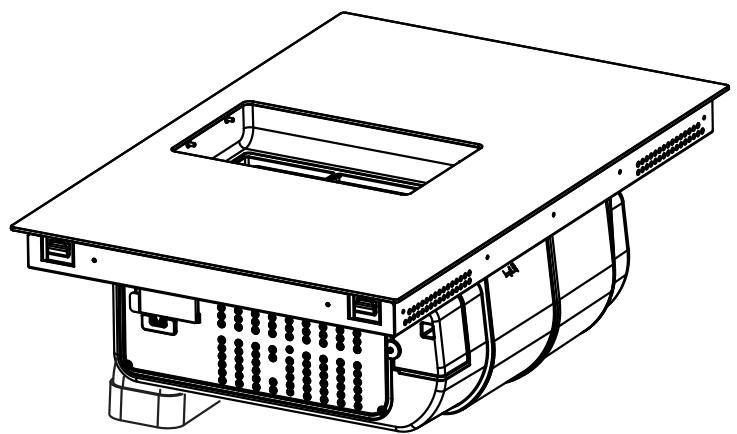
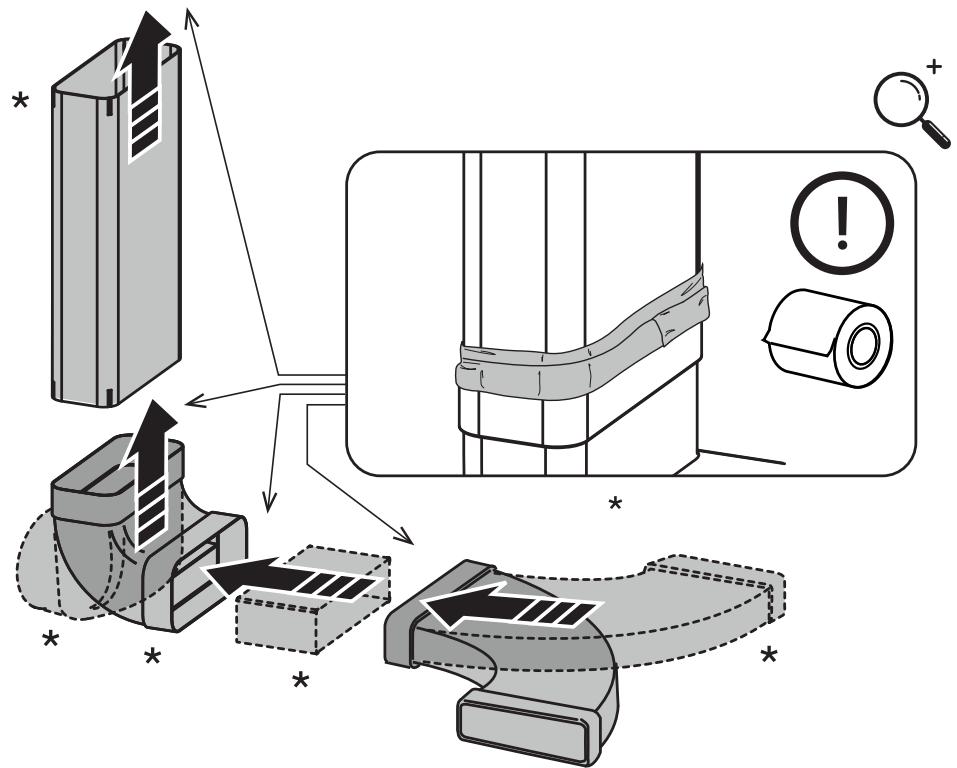
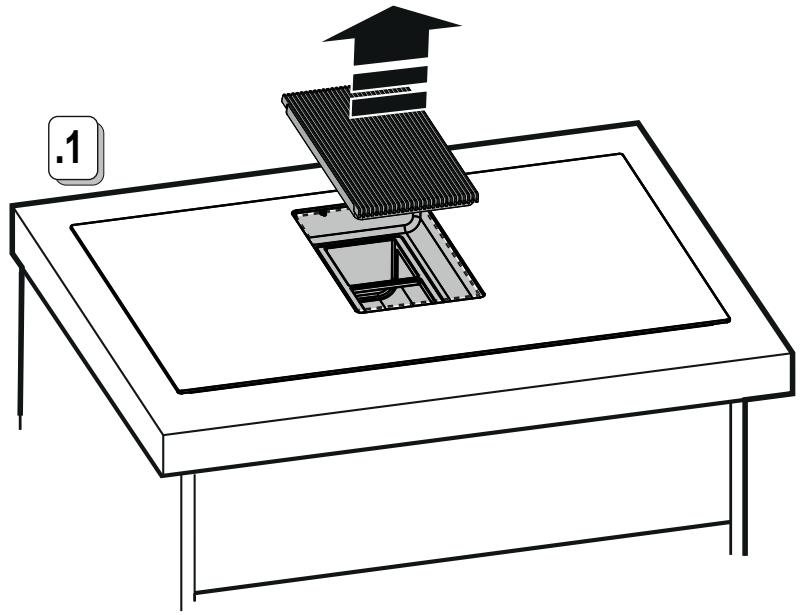
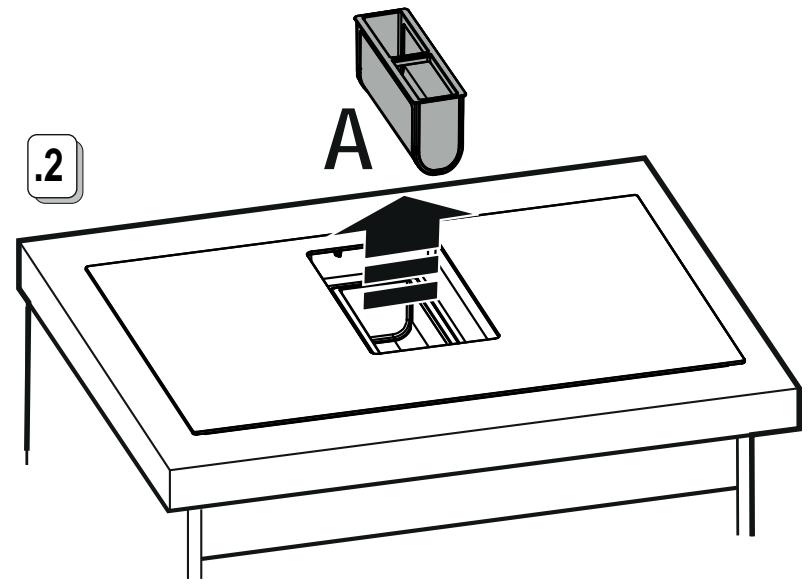
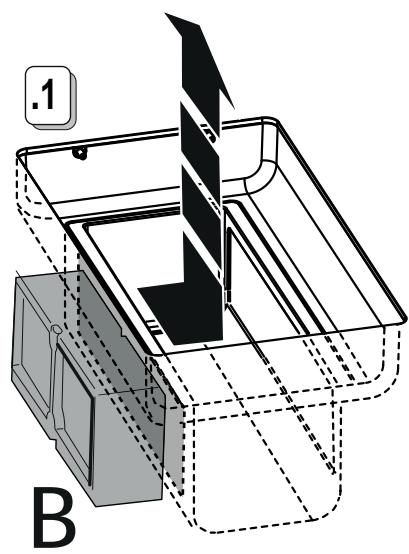
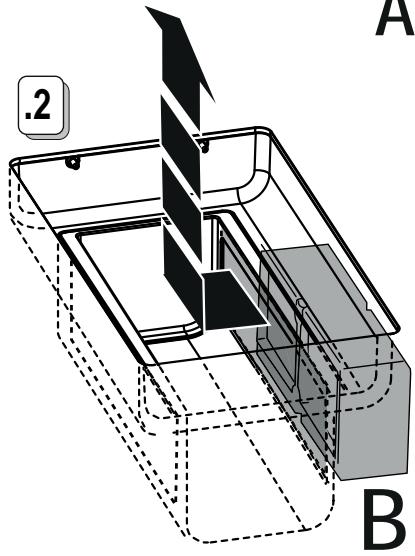
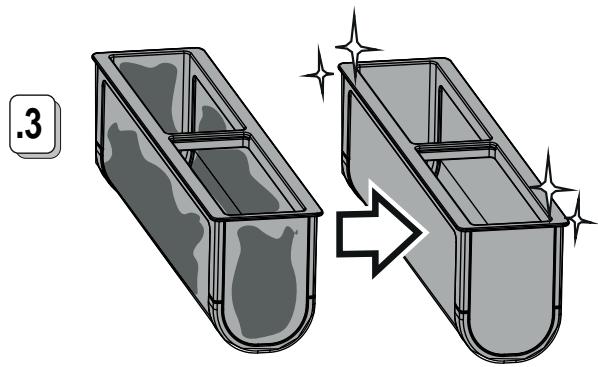
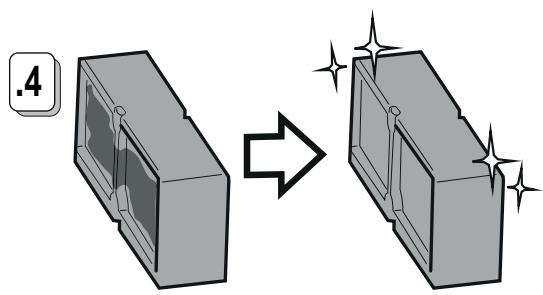

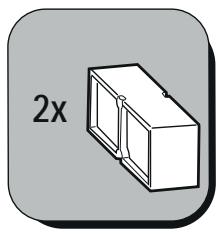
A-B
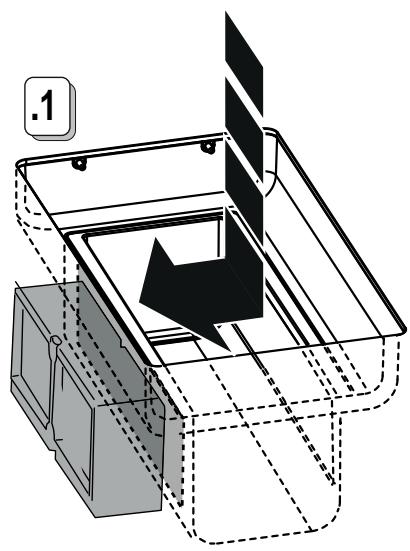
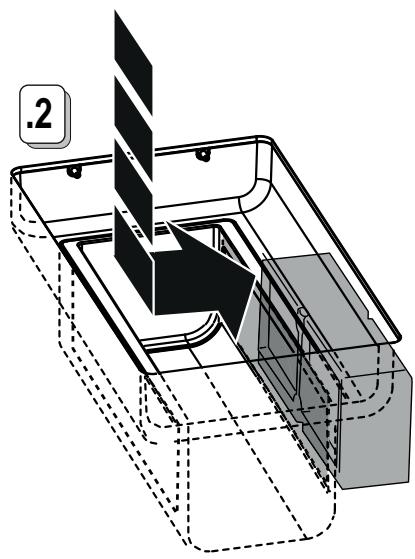
15.2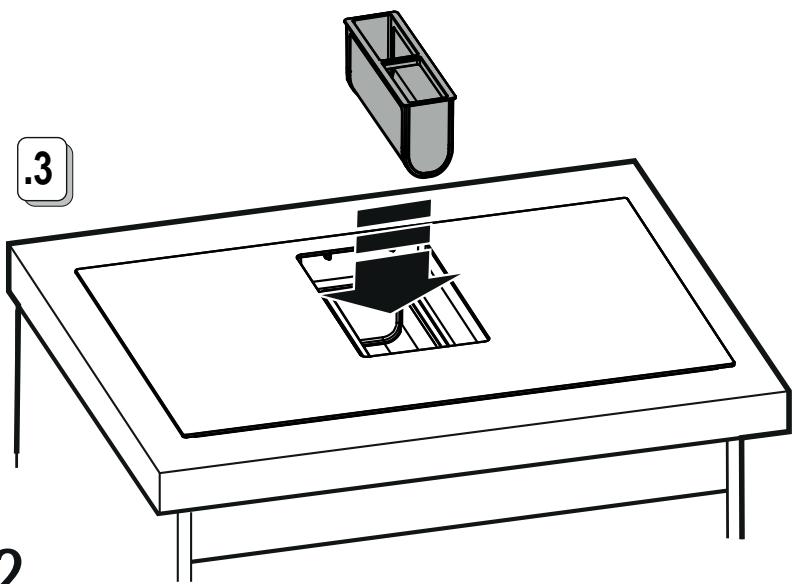

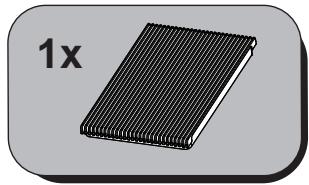
A-B
15.3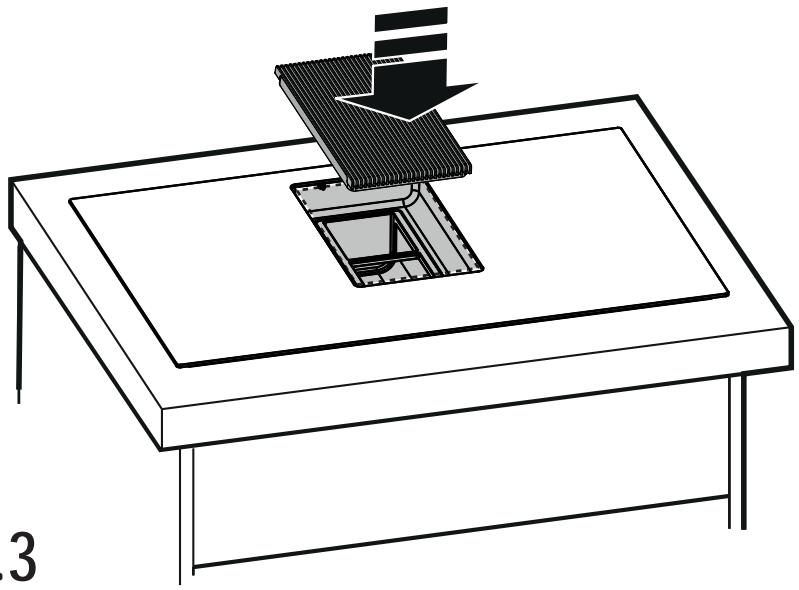
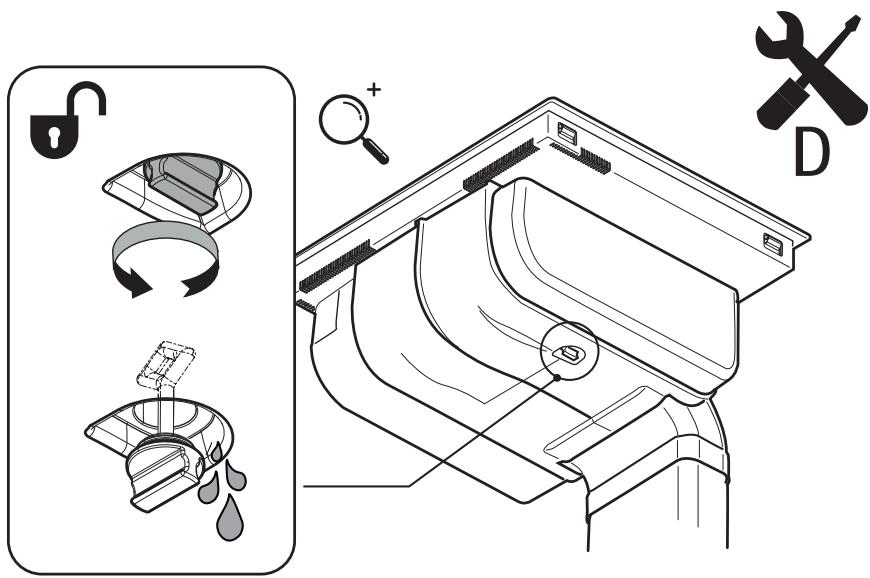

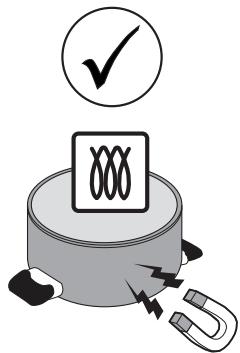
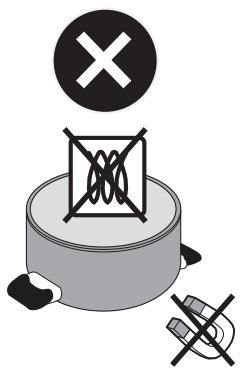
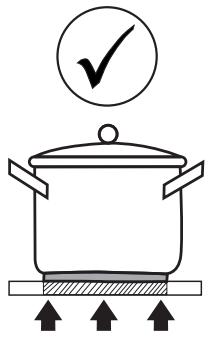
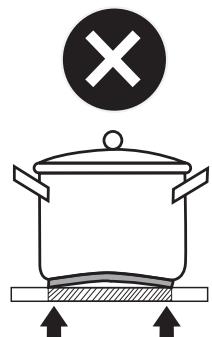
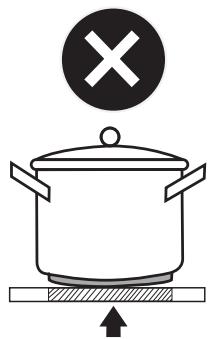



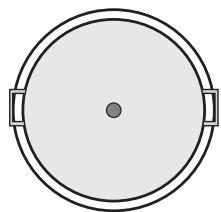
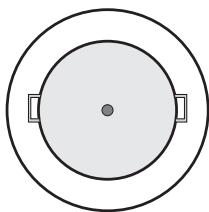
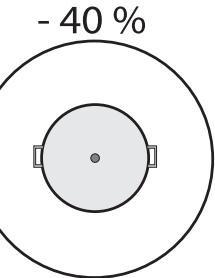
The versatility of features that range from lighting, to suction and cooking, helps create products that were born to amaze.
High-quality materials, careful attention to detail, strong passion for design each in their core essence play a leading role in our products capable of transmitting emotions.
Elica, aria nuova

FRAME AND
DISCOVER
- RESIDUAL HEAT INDICATOR
- TEMPERATURE MANAGER (WARMING FUNCTION)
- SAFETY AND REGULATIONS
- GENERAL SAFETY
- ELECTRICAL CONNECTION SAFETY
- INSTALLATION SAFETY
- END-OF-LIFE DISPOSAL
- REGULATIONS
- RECOMMENDATIONS FOR USE
- USE
- USING THE HOB
- USE OF COOKWARE
- ONLY USE POTS BEARING THIS SYMBOL
- IMPORTANT
- PRE-EXISTING COOKWARE
- RECOMMENDED POT BOTTOM DIAMETERS
- ENERGY SAVING
- USING THE EXTRACTOR FAN
- DUCT-OUT VERSION
- THE EXTRACTED AIR WILL BE FILTERED IN SPECIAL GREASE FILTERS AND ODOUR FILTERS BEFORE BEING SENT BACK INTO THE ROOM. THE PRODUCT IS SUPPLIED WITH ALL PARTS NECESSARY FOR STANDARD INSTALLATION, WITH THE AIR OUTLET POSITIONED IN THE FRONT PART OF THE PLINTH. THE PRODUCT IS EQUIPPED WITH A SET OF ODOUR FILTERS. FOR MORE INFORMATION, SEE THE PAGE RELATING TO ACCESSORIES FOR THE RECIRCULATING VERSION (IN THE ILLUSTRATED PART OF THIS MANUAL)
- CONTROL PANEL
- FUNCTION
- ALL FUNCTIONS OF THIS HOB ARE DESIGNED TO COMPLY WITH THE MOST STRINGENT SAFETY REGULATIONS. FOR THIS REASON
- COOKING ZONE DISPLAY
- CHARACTERISTICS OF THE HOB
- SAFE ACTIVATION
- POT DETECTOR
- SAFETY SHUT DOWN
- POWER-ON
- SELECTING THE COOKING ZONES
- POWER LEVEL
- DISPLAY AREA (2)
- POWER BOOSTER
- COOKING ZONE TIMER
- POWER LIMITATION
- AUTOMATIC HEAT UP
- PAUSE
- STAND ALONE" TIMER
- USING THE EXTRACTOR
- AUTOMATIC MODE
- FILTER SATURATION INDICATOR
- RESET FILTER SATURATION
- ACTIVATION OF FILTER SATURATION INDICATOR
- CARBON/CERAMIC ODOUR FILTERS
- GREASE FILTER
- MAINTENANCE
- HOB MAINTENANCE
- CLEANING THE METAL GRILLE
- DO NOT USE CLEANING UTENSILS OR TOOLS
- GREASE FILTER MAINTENANCE
- ASSISTANCE
- CUSTOMER SERVICE
- DE
- ANOPPIYH IPOIONTOE TEO TEAO THE ZQHE TOY
- INSTRUCTIONS FOR USE
- USE OF THE COOKING SURFACE
- CLEANING THE APPLIANCE
- DO NOT USE ABRASIVE TOOLS OR SHARP OBJECTS FOR CLEANING [THE APPLIANCE]
- IF THE APPLIANCE IS VERY DIRTY
- THINGS YOU SHOULD KNOW BEFORE YOU START
- DISPLAY FOR COOKING ZONES
- HOB FEATURES
- SAFE ACTIVATION (SAFE START-UP)
- MAINTENANCE OF THE HOB
- MAINTENANCE OF THE EXTRACTOR HOOD
- MAINTENANCE OF THE COOKING HOB
- KEY LOCK (BUTTON LOCK)
- AUTOMATIC HEAT UP (AUTOMATIC HEATING)
- TIMER "STAND ALONE
- VISUALIZATION OF THE REMAINING TIME
- SUCTION SPEED (POWER)
- POWER BOOSTER (POWER BOOSTER)
- OPERATION IN AUTOMATIC MODE
- INDICATOR FOR FILTER CLEANING
- VACUUM CLEANER MAINTENANCE
- TOTBEHETO
- OBCJIYXBAHE
- TEXHNUECKO OBCJNYXBAHE
- PLEASE READ BEFORE INSTALLATION
- DISPOSAL AT END OF SERVICE LIFE
- REGULATORY DOCUMENTS
- CAPACITIES MADE EARLIER
- OPERATION OF THE DEVICE
- USING THE EXTRACTOR HOOD
- SWITCHING ON THE EXTRACTION SYSTEM
- ADJUSTING THE SUCTION SPEED (POWER)
- CARE OF THE COOKER HOOD SURFACE
- CLEANING THE FUNCTIONAL SURFACE
- DO NOT USE STEAM CLEANING DEVICES
- ● X' DRAIN THE CONTAINER FOR COLLECTING LIQUID
- × × CLEANING THE METAL FILTER
- CARE OF THE EXTRACTOR HOOD
- CLEANING THE EXTRACTOR HOOD
- DO NOT USE TOOLS OR ANY ACCESSORIES FOR CLEANING
- CARE OF THE GREASE FILTER
- CARE OF THE FILTER WITH ACTIVATED CARBON - CERAMIC (ONLY FOR RECIRCULATION VERSION)
- TECHNICAL SUPPORT
- TROUBLESHOOTING TABLE
- TECHNICAL SUPPORT SERVICE
- UK
- SAFETY AND REGULATORY DOCUMENTS
- GENERAL SAFETY RULES
- CONNECTION TO THE ELECTRICAL OUTLET
- DISPOSAL OF THE APPLIANCE AT THE END OF ITS SERVICE LIFE
- USE OF THE HOB SURFACE
- USE OF COOKWARE FOR COOKING
- RECOMMENDED PAN DIAMETERS
- USE OF THE EXTRACTOR HOOD
- EXTRACTION VERSION
- SELECT CONFIGURATION
- TAIMEP KOHPOPOK
- PN6GAXAHNI, NOBTOPITB ONEPAUIO DNY DEKILBKOX KOHOPOK
- BVKOPNCTAHN BYTJKKN
- BBIMKHEHHHCTEM BNTAXKN
- WBNDKICTB BCMOKTYBAHHA (NOTYXHCTB)
- POWER BOOSTER (POWER BOOST)
- AUTOMATIC OPERATION
- HYDRAULIC FILTER REPLACEMENT
- REPLACING THE FILTER REPLACEMENT INDICATOR
- TURNING OFF THE FILTER REPLACEMENT INDICATOR
- CARBON/CERAMIC FILTERS FOR ODOR EXTRACTION
- TEXO6CNYROBYBAHHJ
- ДОГЛД 3A BAPINBHOIO NOVEPXHEIO
- BAXJLNBO
- HE BKNOPUCTOBYITE IAPOBI OCHNKKI
- ATPMYE QACTOUKN KMPY BID NPIROTOYBAHHIA
- CHECK THE FILTER WITH ACTIVATED CARBON (ONLY FOR VERSIONS WITH A FILTER)
- TEXHNKAJIBIK KAYINCI3IKE EPEXJIEJIPEI
- JAKINBIKAYINC3IK EPEXEJIIEPI
- ELECTRICAL SAFETY
- INSTALLING THE HOUSING
- DISPOSAL
- PROCEDURES
- CORRECT USE
- CONTROLS
- MAHBI3AIBI
- AAIBH AIA DAIBHDIAHAB BIDBC
- BLDIC ACTBIHIN DPYBC NANAMETPI
- KYAT YHEMDEY
- INSTALLATION OF THE EXHAUST PIPE
- FLUE INSTALLATION
- RECIRCULATION INSTALLATION
- DEVICE SETTINGS
- AUTOMATIC HEATING
- BOLEK" TIMER
- CLEANING AND MAINTENANCE
- KΘMIP/KEPAMIKA MIC CY3ΓΙΝΕΡΙ
- MAI CY3ΓICI
- TEXHNKAPIBIK KBI3MET KΘPCETY
- HOOD MAINTENANCE
- SWITCHING ON THE SUCTION SYSTEM
- STRICTLY FOLLOW THE INSTRUCTIONS IN THIS MANUAL
- USE OF THE HOOD
- KEY LOCK
- ALAIY A JALL
- (POT DETECTOR)
- E
- A
- KIT
Brand : ELICA
Model : NIKOLATESLA PRIME S+
Category : Induction hob