
PRF0038443C - Basket ELICA - Free user manual and instructions
Find the device manual for free PRF0038443C ELICA in PDF.
| Product type | Extractor/filter hood |
| Brand | ELICA |
| Model | PRF0038443C |
| Use | Extracting with external evacuation or filtering with internal recirculation |
| Minimum safety distance (electric) | 45 cm |
| Minimum safety distance (gas/mixed) | 65 cm |
| Motor speeds | 4 speeds (1, 2, 3, intensive) with timer |
| Lighting | LED (replacement by approved service) |
| Grease filter | Metal, dishwasher safe, monthly cleaning |
| Charcoal filter (recirculation) | Change every 4 months, not washable |
| Grease filter saturation indicator | After 40 hours of operation (indicator 1 flashes) |
| Charcoal filter saturation indicator | After 160 hours of operation (indicator 2 flashes) |
| Timer function | Automatic shut-off after 20 min (speed 1), 15 min (speed 2), 10 min (speed 3), 5 min (speed 4) |
| Panel material | Removable for cleaning, neutral detergent |
| Safety | Disconnect before maintenance, use gloves, do not flambé under the hood |
| Spare parts | Contact authorized technical support service |
| Recycling | Complies with WEEE (Directive 2012/19/EC) |
Frequently Asked Questions - PRF0038443C ELICA
User questions about PRF0038443C ELICA
0 question about this device. Answer the ones you know or ask your own.
Ask a new question about this device
Download the instructions for your Basket in PDF format for free! Find your manual PRF0038443C - ELICA and take your electronic device back in hand. On this page are published all the documents necessary for the use of your device. PRF0038443C by ELICA.
USER MANUAL PRF0038443C ELICA
EN Instruction on mounting and use
RU IHHCTpykuzno MOHTaJy N 3KcIpyataznn
UK IHCtpyKciia 3 MOHTaKy i ekcnIlyaTaucii
KK MoTataKday MeH naIdaIaHy HycKaybl
EN - Instruction on mounting and use
Closely follow the instructions set out in this manual. All responsibility, for any eventual inconveniences, damages or fires caused by not complying with the instructions in this manual, is declined. This appliance is intended to be used in household and similar application such as: - staff kitchen areas in shop, offices and other working environments; - farm houses; - by clients in hotels, motels and other residential type environments; - bed and breakfast type environments.
The hood can look different to that illustrated in the drawings in this booklet. The instructions for use, maintenance and installation, however, remain the same.
It is important to conserve this booklet for consultation at any moment. In the case of sale, cession or move, make sure it is together with the product.
- Read the instructions carefully: there is important information about installation, use and safety.
- Do not carry out electrical or mechanical variations on the product or on the discharge conduits.
- Before proceeding with the installation of the appliance verify that there are no damaged all components. Otherwise contact your dealer and do not proceed with the installation.
Note: The parts marked with the symbol ( ^ * ) " are optional accessories supplied only with some models or otherwise not supplied, but available for purchase.
Caution
- Before any cleaning or maintenance operation, disconnect hood from the mains by removing the plug or disconnecting the mains electrical supply.
- Always wear work gloves for all installation and maintenance operations.
- This appliance can be used by children aged from 8 years and above and persons with reduced physical, sensory or mental capabilities or lack of experience and knowledge if they have been given supervision or instruction concerning use of the appliance in a safe way and understand the hazards involved.
Children shall not be allowed to tamper with the controls or play with the appliance. - Cleaning and user maintenance shall
not be made by children without supervision.
- The premises where the appliance is installed must be sufficiently ventilated, when the kitchen hood is used together with other gas combustion devices or other fuels.
- The hood must be regularly cleaned on both the inside and outside (AT LEAST ONCE A MONTH).
- This must be completed in accordance with the maintenance instructions provided. Failure to follow the instructions provided regarding the cleaning of the hood and filters will lead to the risk of fires.
- Do not flambe under the range hood.
- For lamp replacement use only lamp type indicated in the Maintenance/Replacing lamps section of this manual.
The use of exposed flames is detrimental to the filters and may cause a fire risk, and must therefore be avoided in all circumstances.
Any frying must be done with care in order to make sure that the oil does not overheat and ignite.
CAUTION: Accessible parts of the hood may become hot when used with cooking appliances.
- Do not connect the appliance to the mains until the installation is fully complete.
- With regards to the technical and safety measures to be adopted for fume discharging it is important to closely follow the regulations provided by the local authorities.
- The air must not be discharged into a flue that is used for exhausting fumes from appliance burning gas or other fuels.
-
Do not use or leave the hood without the lamp correctly mounted due to the possible risk of electric shocks.
-
Never use the hood without effectively mounted grids.
- The hood must NEVER be used as a support surface unless specifically indicated.
- Use only the fixing screws supplied with the product for installation or, if not supplied, purchase the correct screws type.
- Use the correct length for the screws which are identified in the Installation Guide.
- In case of doubt, consult an authorized service assistance center or similar qualified person.
WARNING!
- Failure to install the screws or fixing device in accordance with these instructions may result in electrical hazards.
-
Do not use with a programmer, timer, separate remote control system or any other device that switches on automatically.
-
This appliance is marked according to the European directive 2012/19/EC on Waste Electrical and Electronic Equipment (WEEE).
- By ensuring this product is disposed of correctly, you will help prevent potential negative consequences for the environment and human health, which could otherwise be caused by inappropriate waste handling of this product.

- The symbol on the product, or on the documents accompanying the product, indicates that this appliance may not be treated as household waste. Instead it should be taken to the appropriate collection point for the recycling of electrical and electronic equipment. Disposal must be carried out in accordance with local environmental regulations for waste disposal.
- For further detailed information regarding the process, collection and recycling of this product, please contact the appropriate department of your local authorities or the local department for household waste or the shop where you purchased this product.
Appliance designed, tested and manufactured according to:
- Safety: EN/IEC 60335-1; EN/IEC 60335-2-31, EN/IEC 62233.
Performance: EN/IEC 61591; ISO 5167-1; ISO 5167-3; ISO 5168; EN/IEC 60704-1; EN/IEC 60704-2-13; EN/IEC 60704-3; ISO 3741; EN 50564; IEC 62301. - EMC: EN 55014-1; CISPR 14-1; EN 55014-2; CISPR 14-2; EN/IEC 61000-3-2; EN/IEC 61000-3-3. Suggestions for a correct use in order to reduce the environmental impact: Switch ON the hood at minimum speed when you start cooking and kept it running for few minutes after cooking is finished. Increase the speed only in case of large amount of smoke and vapor and use boost speed(s) only in extreme situations. Replace the charcoal filter(s) when necessary to maintain a good odor reduction efficiency. Clean the grease filter(s) when necessary to maintain a good grease filter efficiency. Use the maximum diameter of the ducting system
indicated in this manual to optimize efficiency and minimize noise.
Use
The hood is conceived for the suction of cooking fumes and steam and is destined only for domestic use.
The hood is designed to be used either for exhausting or filter version.

Extraction version
In this case the fumes are conveyed outside of the building by means of a special pipe connected with the connection ring located on top of the hood.

CAUTION!
The exhausting pipe is not supplied and must be purchased apart.
Diameter of the exhausting pipe must be equal to that of the connection ring.

CAUTION!
If the hood is supplied with active charcoal filter, then it must be removed.
Connect the hood and discharge holes on the walls with a diameter equivalent to the air outlet (connection flange).
Using the tubes and discharge holes on walls with smaller dimensions will cause a diminution of the suction performance and a drastic increase in noise.
Any responsibility in the matter is therefore declined.
Use a duct of the minimum indispensable length.
! Use a duct with as few elbows as possible (maximum elbow angle: 90^ ).
Avoid drastic changes in the duct cross-section.

Filtration version
The aspirated air will be degreased and deodorised before being fed back into the room.
In order to use the hood in this version, you have to install a system of additional filtering based on activated charcoal.
Installation
The minimum distance between the supporting surface for the cooking equipment on the hob and the lowest part of the range hood must be not less than 45cm from electric cookers and 65cm from gas or mixed cookers.
If the instructions for installation for the gas hob specify a greater distance, this must be adhered to.

Electrical connection
The mains power supply must correspond to the rating indicated on the plate situated inside the hood. If provided with a plug connect the hood to a socket in compliance with current regulations and positioned in an accessible area, after installation. If it not fitted with a plug (direct mains connection)
or if the plug is not located in an accessible area, after installation, apply a double pole switch in accordance with standards which assures the complete disconnection of the mains under conditions relating to over-current category III, in accordance with installation instructions.
WARNING!
Before re-connecting the hood circuit to the mains supply and checking the efficient function, always check that the mains cable is correctly assembled.
The hood is provided with a special power cable ; if the cable is damaged, request a new one from Technical Service.
Mounting
Before beginning installation:
- Check that the product purchased is of a suitable size for the chosen installation area.
- Remove the charcoal (*) filter/s if supplied (see also relative paragraph). This/these is/are to be mounted only if you want lo use the hood in the filtering version.
- Check (for transport reasons) that there is no other supplied material inside the hood (e.g. packets with screws (), guarantees (), etc.), eventually removing them and keeping them.
Expansion wall plugs are provided to secure the hood to most types of walls/ceilings. However, a qualified technician must verify suitability of the materials in accordance with the type of wall/ceiling. The wall/ceiling must be strong enough to take the weight of the hood.
Do not tile, grout or silicone this appliance to the wall. Surface mounting only.
In the case of the presence of panels and/or walls and/or lateral wall units check that there is sufficient space to install the hood and that access to the command panel is easy.
Only for some models
An aesthetic flue can be purchased as an optional accessory. Check with the authorized dealer whether the model in your possession envisages this possibility.
We advise installing the hood after having purchased the flue to check with certainty the most suitable installation.
Fig. 5-14-15-16-17
Operation


T1. Lights ON/OFF
T2. Speed decrease
Press "T2" button to decrease the speed from 4 (intensive) to 1.
Press "T2" button during operation at speed 1, the hood sets to OFF.
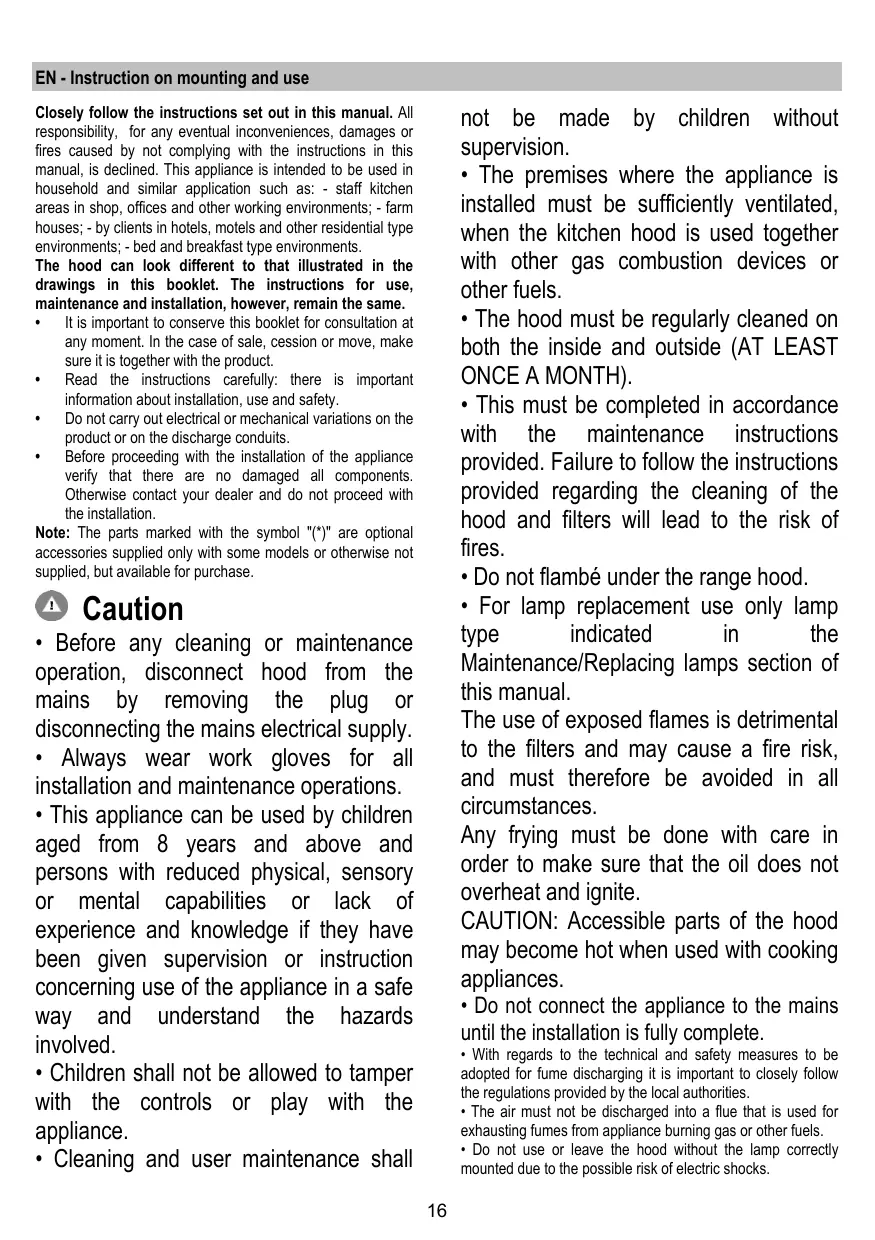
T3 Speed increase
Press T3 button and the hood sets from OFF to speed 1. Press the button (hood ON) to increase the speed of the motor from 1 to 4 (intensive).
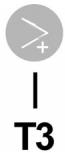
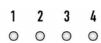
The respective LED goes on for each speed.
Speed 1 - LED 1
Speed 2 - LED 2
Speed 3 - LED 3
Speed 4 (Intensive) - LED 4 (flashing)
The intensive speed is timed. Standard timing is 5' , at the end of which the hood sets to speed 2.
To deactivate the function before time is up press T2 button, the hood sets to speed 3.
T4 Speed timing
Speed timing is activated by pressing T4 button, when timing is up the hood switches off.
Timing is divided as follows:
Speed 1 - 20 minutes (LED 1 flashing)
Speed 2 - 15 minutes (LED 2 flashing)
Speed 3 - 10 minutes (LED 3 flashing)
Speed 4 (Intensive) - 5 minutes (LED 4 flashing)
During timed operation press T2 button and the hood quits the timed mode and decreases the speed.
Press T3 button and the hood quits the timed mode and increases the speed.
Press T4 button and the hood quits the timed mode maintaining the set speed.
Grease filter signal
After 40 hours of operation LED 1 flashes.
When such signal appears the grease filter installed needs to be washed.
To reset the signal, keep T4 button pressed for 5^
The hood gives out a "BEEP" and LED 1 stops flashing.
Charcoal filter signal
After 160 hours of operation LED 2 flashes.
When such signal appears the charcoal filter installed must be replaced.
To reset the signal, keep T4 button pressed for 5^
The hood gives out a "BEEP" and LED 2 stops flashing.
In case of contemporaneous signalling of both filters, LEDs 1 and 2 flash alternatively.
To reset, carry out the procedure described above for 2 times.
The first time it resets the charcoal filter signal, the second time it resets the grease filter signal.
The charcoal filter signal is not active in the standard mode.
In case the hood is used in filter version it is necessary to enable the charcoal filter signal.
Activating charcoal filter signal:
Set the hood to OFF and press T4 button for 5".
Once the button has been pressed, the LEDs related to the filter signals currently active light up.
The hood gives out a "BEEP" and LED 2 flashes for 2^n .
LEDs 1 and 2 remain on for about 2^ before the hood goes back to OFF.
Deactivating charcoal filter signal:
Set the hood to OFF and press T4 button for 5".
Once the button has been pressed, the LEDs related to the filter signals currently active light up.
The hood gives out a "BEEP" and LED 2 switches off.
LED 1 remain on for about 2^n before the hood goes back to OFF.
Maintenance
Cleaning
Clean using ONLY a cloth dampened with neutral liquid detergent. DO NOT CLEAN WITH TOOLS OR
INSTRUMENTS. Do not use abrasive products. DO NOT USE ALCOHOL!
Panel
Fig. 8-9_22-23
Maintenance of the panel
Dismantling:
-
Slide the panel upwards (for a distance of approximately 2cm);
-
Pull the panel towards yourself
Cleaning:
the panel should be cleaned with the same frequency as the fat filters, using a cloth soaked in neutral liquid detergents.
Avoid the use of products containing abrasives. DO NOT USE ALCOHOL!
Montage:
Proceed in the reverse direction for dismantling.
Attention! Always check that the panel is fixed in its place well.
Grease filter
Fig. 10-21
Traps cooking grease particles.
This must be cleaned once a month (or when the filter saturation indication system - if envisaged on the model in possession - indicates this necessity) using non aggressive detergents, either by hand or in the dishwasher, which must
be set to a low temperature and a short cycle.
When washed in a dishwasher, the grease filter may discolor slightly, but this does not affect its filtering capacity.
To remove the grease filter, pull the spring release handle.
Charcoal filter (filter version only)
Fig. 20
The saturation of the charcoal filter occurs after more or less prolonged use, depending on the type of cooking and the regularity of cleaning of the grease filter.
In any case it is necessary to replace the cartridge at least every four mounths (or when the filter saturation indication system - if envisaged on the model in possession - indicates this necessity). The charcoal filter may NOT be washed or regenerated.
Circular carbon filter
Apply one on each side as cover to both the shield grids of the motor impeller, then turn clockwise.
For the disassembly, turn counter-clockwise.
Replacing lamps
Fig. 24
The hood is equipped with a lighting system based on LED technology.
The LEDs guarantee an optimum lighting, a duration up to 10 times as long as the traditional lamps and allow to save 90% electrical energy.
To replace lights, contact authorised spare part center.
Activation signal filleau charbon:
O aToppoPnTnpa 80 aG eIbOToiInoE1e Eva nXnTko Onua "BEEP" kai to led 2 80 aBnEi.
To led 1 a trapaeivei avaumévo yia 2^n πriv o attropopqntnpac va eTavEeIe Ie Ε Ε Ε ON OFF.
Euvtnpnon
Kaθαρισμος
Tia Tov Kaqapiu o xpoiiooIe ANOKAEIZKIA eva upoTravi e oubetepa uyap aToppuavtka. MHN XPHSIMOIOIEITE EPAAEIA H MEZA KAOAPIMOY!
AToOpuyETe Tn XpOa NcIAVtIKwv MEOwv. MH XPHSIMOIOEITE AAKOOA!
NivaKac
Eik. 8-9 22-23
SuvtnpnoTou taTAtAo
Aroouvapouoynon:
- Kávte va olaioθησει to taμπλo πpós ta επανω (via μia δiδρομή περίπου 2 εκατοστύν);
TpaBnETo raanAo npOs to eoos
Kaθαρισμός:
To taumIo TpEeIa KaOApicetai Me tNv ibia OuxVOnTa Me tv OTOIA yiveTaN OuvtnPnON Tuv qIATpuY ia Ta IiIN. Tio Kov kaapiao Xpnaiouroinote eva UPO TAVI e oudetepa Uypa aToppuavtika.Atoquyete n xphon Aeviavtikuw MEOUV.
MH XPHESIMOIOIEITE AAKOOA
ΣYNAPMOΛΟΓΗΣΗ:
Signal for kolfilter
ANVAND INTE ALKOHOL!
Montering :
Signal for skittent fetffilter
Etter 40 brukstimer blinker led-lys 1.
Nár dette signalet slás pá, trenger det installerte fettfilteret á vaskes.
Hold knapp T4 inntrykt i 5 sekunder for á tilbaskestille signaledom skittent fetffilter.
Ventilatoren avgir et "BIP", og led-lys 1 slutter Å blinke.
Signal for skittent kullfilter
Etter 160 brukstimer blinker led-lys 2.
Nár dette signalet slás på, skal det installerte kullfilteret skiftes ut.
Hold knapp T4 inntrykt i 5 sekunder for a tilbakestille signalet.
Ventilatoren avgir et "BIP", og led-lys 2 slutter Å blinke.
Dersom det skulle gis signal for begge filtrene samtidig, vil led-lysene 1 og 2 blinke vekselvis.
Pred zahajenim instalace:
Okružno uhońy filter
PnIroTBaHHeTo Ha PbXeHN XpaHn Tp6Ba Da Ce N3BbPbBa PoJ H6JIIODeHne, TbKATO CROpeSeHOTO OJNO MOKe Da CE B3PNaMeHN.
BHIMAHHE: Korato roTbapcknT pabotn, doCTbHnhte qactn Ha acnpaTopa Morat da ce HaropeuT.
He Cbbp3BaIte ypeda KbM eJ.Mpekata DoKATO He CTe PpNKJIouHInNOKOHaTeJIHO C MOtaja.
- ξο ce Αθας Σο texmνecknte pa3meρινη Mepknte 3a 6beonachocct, KONTO Tp86ba Da npednpneMetete 3a OTbεxdaHTo Na dmHnTe rαoBe 有Babh, Bn npenopbVbame da ce npidpbXaTE CTpKNTHO KbM npabunata, npedvduBn PerIaMeHTNTE HA KOMNETEHNTNE MeCTH BlaactN.
- AcnnpunpaHnT Bb3dyx He Tp46Ba da ce HacoCb KaBm Tpb6oNpOBODHTe, KOINTe cN3NOJ3BAT 3a OTBeXdaHe Ha dmHnITE ra3OBe, OTdEJIaIe nC npu N3NOJ3BaHeto Ha ypeDi pa60TeUc rA3 ININ Dpyr BVDROPBO.
- He n3noI3BaIte I ne octabIte acnupatopa 6e3 npabINHO MOHTIpaHNI JAMNcK INopaIe EBeHTyaleH pICK OT TOKOB yap.
- Hikora He n3noJ3BaIe acnnpatopa 6e3 npabINHO MOHTIPAHA peWetka!
- AcnpaTopbT He Tpr6Ba HNKOTA da ce n3n03Ba KaTo OonopeH NlOT OCBeH aKo TOBa He e CneuaJIHo yKa3aHO.
-Пи мontха ИЗпалbaite само Фнкррашиte БOLTobe, KОТTO ca DoctaBeHn 3aEDHc C ypeDA nIN aKO HЯмtaKINBA, 3akynete NOxOJdAun 6oLTobe. - I3noJI3BaIte 6oJITOBe c noJxOJaIa JbJIKNHa, KaKTo e nocOeHo B HapbYHnka 3a NHCTaIIpaIe.
- Пин Налчne Ha CBmHEnry, моля CBbpxKeTe ce c OTopn3nupanH cepBn3 3a TeXnuecko obcIyKBaHe nII KBaIINФицран nepcoHaI.
BHIMAHHE!
- HenctaIpaHTo Ha 6oJIToBete mexaHn3MnTe 3aФHKcIpaHe B CbOTBeCTBne C HactOuIte HNCTpyKUIM MOKe Da DoBeDe Do pCKOBe O t eJeKTpuYecko ECTECTBO.
- He n3no3BaIte c nporpaMaTOp, taMep, OTdEnHO nCTaHcIOHNO ynpabJIeHne IIN KAKBOTO n da e dpyro yCTPOIcTBO, KOETo ce AKTNBIPA aBTOMATUHO.
To3n ypei OTROBAPHa H3NCKBaHnraTa Ha :
- Ebponeckata DnpekTmba 2012/19/EC
- Waste Electrical and Electronic Equipment (WEEE).
YBepraBaiKn Ce, Ye To3n YpeIe 6bJe pezIKImpan no nOIOOBabaunr 3a TOBa HauHn, Bne DOnpHacrte 3a OAn3BaHETo HA OKONHaTc Cpea N BaWTo 3dpaBe.

CmBbIbT BbPx ypea nIN B npDpykBaAuaata ro DOKyMeHTaunia NocOuBa,Ye To3n npDyKTHe Tpr6Ba da 6bde CnTHa 3a Domauhen OTNaBk, a Tpr6Ba da 6bde npEDAen B CNEUaHNO pEHa3NaHeHNTe 3a TOBA NYHKTOBE 3a peUKNipAne Ha eJekTpncEA n EJekTKPOHHa TEXHnka. PnpDpKaaTe Ce KbM MeCTHNe HOpMaTHNB 3a npepa6OTKa HA OTNaBtu. 3a No-NoPb6Ha INΦopMaZnaBB BpB3ka c PnpDAbaHTo, CbIPaHTo n PeUKNipAneHo HA To3n PpOkyKT Bn CbBETBame Da ce ObpHete KbM KOMPeTeHTNITE MeCHN CnyKb, CnyKbnte 3a CbIPaHae Ha DomauHN OTNaDbuM IN Mma3nHbT, B KOITo CTe 3akynnnn To3n en. eyed.
YpeBt e npoeKtnpaH, TectBaH n npo3BeJeH B CbOTBETCTBNE C:
- Бezonaachost: EN/IEC 60335-1; EN/IEC 60335-2-31, EN/IEC 62233.
- PaobTHi xapaKTepeNCTnKn: EN/IEC 61591; ISO 5167-1; ISO 5167-3; ISO 5168; EN/IEC 60704-1; EN/IEC 60704-2-13; EN/IEC 60704-3; ISO 3741; EN 50564; IEC 62301.
- EMC -Ельктомагнithа съBMecTHMOCT:EN 55014-1; CISPR 14-1;EN 55014-2;CISPR 14-2;EN/IEC 61000-3-2; EN/IEC 61000-3-3.
IpeJIOXeHn 3a npabHnHa yOnTpe6a, 3a da ce HamaJIb B3JeCTBnTo BBypX OKOJIHATA cpeA: BKnIOUe (ON) acNIPAtoPA Ha MNHMaIIHa cKOpOCT, KORATO 3anoHHeTa da rotBnTE I RO OCTabe Tda pa6OTn HAKoLKO MHNyTHn CneI pNkIHcUHOBe HA rotBEHTo. YBeINuHabaTE cKOpOCTTa cAMo B CUYaHr Ha rIONMO KOINueCTBO DmI N napi N3noTBAITE yBeJIneHHTe cKOpOCTn cAMo B EKCTPemH N CNYaHn. CMeHnTe FInITbpa/FeINTPtNE CakTNBeH BBytHen, KORATO e Heo6xOdIMo, 3a Da NoDlbPxAte Do6pa eFKeTbHOCT Ha HamaJIaBaHe Ha MmPIm3MaTa. POnCTBaTe FInITbpa/FeINTPtNE 3a Ma3HNH, KORATO e Heo6xOdIMo, 3a Da NoDlbPxAte Do6pa eFKeTbHOCT Ha FInITbpa 3a Ma3HNHtme. N3No13BaTe MAcCmuaHn JnAmEbP Ha CNCTeMATA 3a OTBExKaHNe Ha B3dYxa, NocOHEN B TOBa pKOBODCTBO 3a ONTMn3npaHe Ha eFKeTbHOCTTA n 3a HamaJIaBaHe Ha Wyma.
Ynotpe6a
AcnpaTobTe npoeKtnpaH 3a acnpuPAne Ha DmHa n napata, KOTo Ce OTdEJaT npn roTbeH, n e npedHa3HaueH cAmo 3a 6ntOBA yNtpe6a.
AcnpaTobt mma cneHTo ppeHa3NaueHHe: BCMyKbA nOTBeJda HABhNINΦnITpnpa Bb3dYxa, KaTO eHOBPeMeHHO C TOBa r peuNKJInpa.

Bercna c acnpaunia
Napata ce OTBeJda HabbN NocpeDCTBOM Bb3dYxOboHa Tpb6a CbBy3aHa CbC CbeDNHTeHnIg fpaHe.

BHIMAHNE!
Bb3dyxOboJnata Tpb6a He e BkIIOueHa KbM akcecoapnte n Tp86Ba da 6bde 3aKypeHa OTdeJIHO.
B Te3n Cnyan fmpMaTa He Noema HnKaKBa OTROBOPHOCT.
I N3no3BaIte Tp6a C Heo6xOdImata DblnHa.
!N3noJ3BaIe TpB6a C Bb3MOxHO HaM-MaIKO TpB6Hn KOJIeHa (CMakCIMaJIeHbTbI Na H3BmBka:90°).
He npomehraaTe p3Kc ceueHneTo Ha tpb6nte!

Bercnca c pfntpupahe
AcnpnpanrBb3dyx ce npcehctBa nOCBXkaba npen da Bne3 OTHOB B 06pIeHHe N omeuHHeTo.3a Da n3no3BaTE acnpaTopa B To3n BapnAHT Ha pa6ota Tp6Ba DA IHCTanlmpaTe DOnBnHnTHeHa FInTPnpaCa CnCTema Ha 6a3ata HA FInTPnC A KtINBEH BvRtnE.
MOHTIPAhe
MIMHMAJIHOTo pa3CTOJHHe MEXdy NOBpXHOCCTTa, Ha KOJTO ce NoCTABRT CbIOBte 3a rotBeHe Hn-HNCKata YacT Ha kYXHEnCKn acnIparOp, Tpr6Ba Da 6bDe He No-MaIKo OT 45cm B cnyaH a ENEKTPueckn neKn HneNo-MaIKo OT 65cm, B cnyaH na Ra3OBn nIN KOM6HNpaHn neKn.
Ako B INCHTpykUInTe Ha ra3OBuYpeI 3a roTBeHe e nocOeHo NO-TOJIAMo pa3CTOAHne, TO Tp8Ba Da ce Ima npEdn.

En.Bpb3ka
HansehenetoB en.Mpekata Tpa6ba da OTROBAPnHa
HapexeHTo, KOe e NocOeHO Bbpy EtnKeta C daHHnTe 3a acnnpaTopa, noCTabEn OT bTpeuHata My cTpaHa. AKe e ChAbDen C uenCeN CBpXeTe acnnpaTopa KbM KOnTaKT, CbOTBeCTBaUH Na DeIcTBaUHTe HOpMN HAMpuAe Ce Ha JecHO DoCTbHNO MCTO DOpN i CNeL npNKIOHuaHe HA MOtaxa. AKe He e ChAbDen C uenCeN (DInpeKTHo CbP3BaHe KbM MpeXaTa), nII uenCeJIbT He e Ha DoCTbHNO MCTO CneL npNKIOHVAHe HA MOtaxa, IN3NoJ3BaTE DByIPOIoCeH npKbcay CNopeD HOPMtE, Taka Ye Da CE OCNyprn PbIHO n3KIOUHBAHe HA MPexKaT Prn CBpbXHApExeHl III, B CbOTBeCTBnE C pAbmIATA 3a MoHTnPaHe.

BHIMAHNE!
Ipei Da CbpxTe OTHOBO acnnpaTopa KbM MpejTa N da npOBepITE daHfYHKUOnHpa npabINHO, npOBepete daJI KabeJIbT e MOHTpah KaKTO TpA6Ba.
Acnipatobt e cahbden cbc cneuaen Kaeb 3a 3axpaHbahe; B cnyai, ye Kaebt 6bde yBpehen o6bphte ce KbI rapaunOHnna cepBn3 3a da nOyHnte HOB.
MOHTAX
IpeiJa npicTbnte KbM MoTaJaxa::
- Ybepete ce, Ye 3aKypeHnT oBac npOdyKT oTROBaPn no pa3MePNHa n36paHTo MxCTo 3a HnCTaInpaHe.
- OtrtpaHete fnnIbpa/fnIITpnte c aKTHEN BblrH (pa3bnpa ce, ako n36panHRT OT Bac moen pa3nONarca TaB). 3a da n38bpWHT TOBA npocneTe onepaunITE B CbOTBeTHNaparpa. MoTnPaTe fnnITPte OTHOBc CAMO Bclnya, ye Xe JenaTaTe da m30nJ3BaTe acnPapatoBbB BapnAHT Ha fnnITpnpaua BepCna.
- YBepete ce, Ye no BpeMe Ha TpaHcnpTa BB BbTpeuHaT auct Ha acnnpaTopa He ca nonaHaJI Npe6Hn PpEdmTe, KATO HApPImep PInkCeta CBHTOBe, rapaHcIOHH KapTu n dp.; Ako HAmepTe TaKINBa OTCTpaHete rN n rN 3ana3eTe.
Pn BCE TOBA, Bn npenopbYBaMe Da ce nocBbETBaTe c KbaJInΦmUpaH texHnK, 3a Da CTE cnpyHn, Ye DoCTABeHNte akcecoapn Ca noDxOJaIz 3a CEJIa. CTeHata, CbOTBeTHo TABAHbT, Tp86Ba Da 6bDat IOCTaMbHc OtaBmHn 3a Da N3dbPkat Ha HATOBAPBaHTo.
Пин haHnHyeTo Ha nHaJIeN, CTeH N/INIc TpaHnHyHn шkafoBe yBepTe Ce, Ye pa3nOJIarate C DOCTaTbUHO MRCTO 3a Da INCTaJInpaTe acNIpATOpa, N Ye ИМATE BnHArN Be3nPpeNTcbEN DOCTbN Do KOMaHdHOTo Ta6No.
Cama 3a HraKoH MoJeJIH
Kato IOnIbJIHHTeJIeH AkCEcoap KbM HRAKOH MoDEJIH
CbIeCTByBA B3MOxKHoCT 3a 3aKYIIyBaHe Ha eCTeTHeH
IIaHeJI. IIpoBepTe 3aeJHO c OTOpH3npaHH
INCTprh6yTop JaJIH 3a H6paHH oT Bac MoDeJI e
IpeBnIeHa Ta3H OIIuH.
CbBeTbame Bn Ia HNCTaJIHpate acINHpata cJIeI KaTO cTe 3aKyIIHIn eCTeTHUHHI NaHeI 3a Ia H36epTe HAIyJaUHHaBapHaHT Ha MOHTnpaHe.
ФИ.5-14-15-16-17
HaHH HaynoTpe6a


T1. BkIIOUBAHe/M3KlIOUBAHe (ON/OFF) OcBeTneHnE
T2. HamaJIbaHe Ha ckOpocTtA
Пин haNTSCKaHе Ha 6yToH "T2" ckOpocTTa HAMAnJaBa n acnIpaTopbT npemHaBa OT 4-Ta ckOpoc (HHTeH3NBHa) Ha 1-BA.
Пи натуckache Ha 6byToN "T2"прпakтвира Na-Ва ckорoc acnupatopbI npemHaba B no3nua OFF.
T3 YBeJIuYaBaHe Ha CKOpocTtA
Пин haNTSCaHе Ha byToH T3 acnipaTOpbT npemHaBa OT no3uŋA OFF Ha 1-BA ckopocT.
Пинатиckeпа He 6уToHa (пр ВключЕн acnnpaTOp) HapactBa ckopocTt Ha MOTopa N acnnpaTOpbT npemHHaba OT 1-BA Ha 4-ta ckopocT (uHTeH3nBHa).
Ha BcKa CKOpocT OTROBapraaHnueH CBeToDIO.
CkopoCT No 1-CBETOIOIOI 1
Ckopoct No 2-CBETOIOI O2
Ckopoct N93-CBETOIOIO3
CkopoCT N4 (nHTeH3nBHa)-CBTeOIOID 4 (npemrBa)
InTeH3nBHaTa cKoPoCT e COnpeJeHeO BpeMeTpaeHe.
Ctanhaptnnrt INItepbaHa pa6oTa e 5' cnei n3TNUaHETO Ha KOnTO acnnpatOpbT npemnhaba Ha 2-pacKoPocCT.
3a da De3akTINBIPATE fynHKUra TnpEi Da n3Teue ONpeIeHOTOBpeme HATNCHETe 6yTOH T2, acnipatopbT ue npemHe Ha 3-Ta ckOpoCT.
T4 Bpemetpahe Ha ckopoctTa
3aadeHnT INTePbA nC 3aedeCTBa npn HAtncKaHe Ha 6ytoh T4, Cnei N3tUaHe Ha ONpeJeHTo Bpeme acnpatopbT ce nKIOuBA.
BpeMeTpaEHeTo Ha OTdEnHInTe cKOpOcTe n cneIHOto:
Ckopoct Ng 1-20 mHyTu (cBeToOnoI 1 npemIrBa)
Ckopoct N2-15MmHytn (cBetoJIOo 2 npemrBa)
Ckopoct N3-10 mHyTu (cBeToOno3 npemrBa)
CkopoCT No 4 (HHTeH3NBHa) -5 MHyTu (CBeToJIOd 4 npemnrga)
B cTaHdapTeH peKIM Ha pa60Ta HnDnKaTOpbT 3a 3aMbpcBaHe Ha φπΠ Tbpa C aKTINBeH BblneH He e aKTINBipaH.
Ako Bb3HaMepeBaTe Da N3No3BaTe acnpaTopa BbB BapnHT HaФnITpnpaUa Bercna e Heo6xOIMo Da AKTNbIpate INdkaTopa 3a 3AmbpcBaHe NaФnITbpa C aKtINBeH BbTJIeH.
AknBupane Ha nHnDnKaTopa 3a 3aMbpcBaHe Ha cnllTbpca c AknTBeh BbyIen:
ИЗклuktе acnnpatopa (no3mna OFF),HaTnche 6byToH T4 n 3aIpbxTe B npOdbJIkeHne Ha 5".
Bedhara cneHa tncKaHe Ha 6yToHa ige CBeHAT CBeTODIOITE, KOITTO NOCOUBaAKTINBpuHInTe B MOMHTA INHdkatOpn 3a dnnptte.
AcnipatopbT 1ue n3dae 3ByKOB cnHnAn "BnPi" n CBeToaIOd No 2 ue npemrBa B npOdbIxKeHne Ha 2".
CBeToDIOuN No 1 n No 2 ue octaHAT BkInoue H Oe 2", cneI KoTo aCnnpaTOpBt Ue Ce BbPHe B IOn3nua OFF.
Ie3aKTHBnpahe Ha INHnKaTopa 3a 3aMbpcBaHe HaФнТьрсаKTHBEN BbIJIeH:
I3KJIIOUeTe aCnnpaTopa (no3nua OFF),HaTcHete 6yToH T4 n 3aJpBxTe B npOdbJIxKeHne Ha 5".
Bednara cnei Hatackane Ha 6ytoHa 7e CBeHAT CBToDIOIDTE, KOITNO NOCOUBaAKTINBIPAHNTe B MOMHTa INHdkaTOpN3aФHPTPte.
Acnipatobt ige n3dae 3ByKOB cnHnI"6II" n CBeToDIOd No 2 ue n3rache.
CBeToIOIO N 1 ue octane BkIIOue H Oe 2", cne I Koeto acnnpaTopbT ue ce BbPhe B nO3nui OFF.
NoDpBxkKa
TouncBaHe
3a nouchBaheTo n3noJI3BaIte EINHCTBEHO Kbpna, HABJXHeHa C HeYtPAnH TeHN NoUcTBAu npenapatn. HE I3NoJI3BAIte INHCTPYMEHTN IIN PIPBOPN 3A IOUcHCTBAHE!
I368BaTe npenapatn, KOINTcBbPjAt abpa3nBnHuactu. HE N3PON3BAITE CINPT!
Панел
Φn8.8-9 22-23
IopdpbXkaHa naheJa
ДемоHTиранe:
-Пипльзнete паелнаgarе (ha pa3ctoHne npi6nnteHno 2cm.);
-DbnHeteKbMc6eCnnaHena
Почистван:
AcnnpauonnoHHnT naheI CE nooCTBa cbcbuaata YecToTa Ha noocntBaHe naHnTba 3a Ma3HNHn. 3a ceTn n3NoTBAte HablaJxHeHa Kbpna n HeyTpAnH noocTBAu nPepapatn.
I36raBaiTe ynoTpe6aTa Ha npOdykTu CbDbpkaun
a6pa3nBn Yacntu! HE IIOUHCTBAHTE CbC CnIPT!
MOHTnPahe:
I3nIhHe OpeaunTe Ha demoHTnpahe B o6paTeH peI.
BhImaHHe! YbepTe ce, Ye naHeIbTe eo6pe fKnCnpaH.
ΦnTbP 3a Ma3HHH
Фur.10-21
ФиltbpyT 3aIbpxa Ma3HnTe Yactu, OToJIeHN npri rotBeHe.
Ja ce nouchta BeHbX MeeUHO IIN KOraTO INdkaTOpbT 3a npEacnIahe Ha cnITPte ro nok3Ba (pa3bnpa ce B Cnyaai, ye MoJeBt, KOItO cTe 3akynin e ChabdeH CTakbb INdkaTOp).
I3noI3baIe He MHOrO CnHNI MmRnH npenapaTu I noHCTBaIe PbUHO NIN B CbDOMaIIHa MaIIHa, HO Ha Hncka Tempepatya I KpaTbK peXIM Ha I3MnBaHe.
PnMHeHaMeTaNHnФmTTbp3aMa3HNHnTE BcDOMNJIHATA MaUNHa eBb3MOXHOToI da Ce 06e3UBeM, HO TOBa IIO HNKaKbB CnyaH He HAMJIraBA Bb3MOXHOCTnTe My 3aФmTNpnpaHe.
3a da paarIIO6Nte pnnTbpa 3a Ma3HNHnTe, dpbnHeTe dpbkKaTa C npyKnHeMexAHm3bM.
ФИNTbP cakTINBeH BbIeH (cAmO 3a ФИNTpnpauaBepcn)
Фur.20
ФИNTbPbT C aKINBEH BByIeN CE 3aNyUba pIn6JIu3nTeHNO CNeI dIbIbI nepIOd Ha I3NoI3BaHe B 3aBcIMMoCT OT HauHHa roTBeH e NT OToBA KOnKO YecTO NOUYCTBaTe FfNTbPa .
BbB BCEKn CnyaH e Heo6xOIMO da noIMeHrte fInIbpa c aKTINBEH BbTHe H a BCEKn Yetnpi MecceLa IIN KORATO INdikatopbt 3a 3acNIaHa H fNITPnTe (pa3bnpa ce aKO BaAMrT MoJel pAnonara c TaKbB) NOKa3Ba, Ye e Heo6xOIMO.
He ce mne HnTo MoKe Da ce n3non3Ba nobTOpHO.
KpbblnФntbpcakTINBeH Bbrnen
Iocabete no edin hФntbOp BCa Ka ctpana, taKa Ye da ce nOKprrdBeTe npednazn pewetkn Ha paobTHOTo KOJIeNo Ha MOTopa, Cnei KoETo 3aBbptTe NO NOCoka Ha YacOBHKnOBaTa CTpeNka.
Pn demontaka 3aBbptete B nocoka obaTHa Ha yacobHnikOBata Ctpenka.
IopmHa Ha en. KpyuKn
Φnr.24
AcnipatopbT pa3noIaracocBteNTeHa cncTeMa cbcCBETOIOI.
CBETODIOIDITE rapaHTnpat ONTMMJHO OCBETNeHne,do 10 nbtn no-CINHO OT TpaDNUHNNTE JAMN IN NO3BOJIABAT 90% IKOHOMNA HA eNEKTPOEHePnI.
3aДаюменилamпгte,MOЛЯ CBbpxeTe cOTOpn3IpaHna cepBn3a pe3epBnЧаCTN.
He IopKIOUaTb np6Op K 3JIeKtpnuecko CETn Do Tex nop, NOKa YCTaHOBka PONHOCTbIO He 3aKOHYeHa.
To yto kacaetc Taexnuecknx Mep m Mep 6e30nacnoctn B npimenehenm do c6poca napob ctporo npindejxBaTcra TORO yTO npedycmatnpBaetcno HOpMaM IOKaJIbHbIX KOMNETHTbIX opraHOB.
BcacbBaembBo3dyHneDOnJKeH BByncKaTbCBA Tpy6, nCnObl3yEmyIOIaBbIbpcOB DblMOB npnbopam, pa6oTaioUmmHa ra3e NIN dpYnx TOnPiBax.
- He nCnOJIb3OBAbI nIIM OCTaBJIbIb BbITJgKy 6e3 IaMNoeK npaBInIbHO yCTaHOBJIeHHbIX C pNCKOM nIpyHITb ydap 3NeKTpUneCKIM TOKOM.
- HnKOrJa He nCNoJb3ObaTb BbITaXKy 6e3 npabInbHO yctahOBHeHHpeIeTK!
- BbITJXKa HNOKTgA He DoIgXHa IcNoJIb3ObaTbC, KaK OnOpHaa NoBepXHOCTb, ecn ToJIbKO He yKa3aHO HAue.
- IcnoIb3OBAt b ToJIbKO BnHTbl dIy fHKCuPobAHnB B KOMnJIeKTe C npOyKTOM dIy yCTaHOBKn UIN, eCNI HET B KOMnJIeKTe, npIOObpctu BnHTbl npaBnIbHOrO Tnna.
- IcnoIb30BaT npaBnIbHyO dInHy BnHTOB, yka3aHHyO B pykoBOCTBe NO yCTaHOBKe.
B Cnyuae comHeHn, KOHCyIbTIpOBAbTaCBA TOpINpOBaHHOM ceHTpe no 06cJyXnBaHmIO nIN CKBaJIncuPpOBaHHbIM nepCOHaIOM.
BHIMAHHE!
- Heyctanobka COOTBeTCTByHOUxN BINTOB n npncnoc6bHeHn DnA qNKcnpoBaHnB CooTBeTCTBnC 3TmM INHCTpyKzIaM MOKET pNBeCTN K pNCKAM 3JIeKTPnueckoTO npOCXOXDeHn.
He nCnoJb3yIte yctpoiCTBO C npOrpamMaTOpOM, TaMepom, OTdeJIbHbIM NylbTom DnCTaHcNHOHHoY npabIeHn IIN NIObIM DpymU yCTpoiCTBOM, KOTOpoe BkIHOaETcAABtOMaTHueCKN.
Danhoe n3delen IpomapknpoBaHO B COOTBETCTBnC Ebponeckoi DnpeKTHBoY 2012/19/EC no ytniIn3aunn 3NeKTpueckoro n3NeKTPOHnHO o6opyDoBaHna (WEEE).
OeceueyB npabnlbHyu ytnlna3auNo daHnro n3denn, Bbl nomoxete npedTbpaNTb NOteHuaNBhle HeraTnBhle nocclectBnI dN OKpykaHOe cpebl 3doPobBa YelOBeka.

Cnmbol Ha camom n3dennn nInn cOnpOBoJnteJIbHOJ DOKyMentaun yKa3bIbaet, YTO npu yTuIN3aUN DaHHORo n3dennn C HmN HeIb38 O6paatbcs KaK C ObbyHbIMn 6bIbBIMn OTXdAMn BMeCTO 3Toro, ERO cNeDyET cDaBaTb B COOTBcTCTByUOuN PyHK TnpEKM N3neKtpueeCKTO
3neKtpoHHOrO 06opydoBaHnI ytniHa.
CdaHa HcNOM DoJXHa Ipon3BOJntbCBA COOTBETCTBn C MEcTHbIMN PpaBnIaMn No yTIN3aUIn OTXoIOB.
3a 6oJIe neIopOBHOn HnFOpMaJneO npabInax oxbpaJeHHN C TAKIMN I3dJIINM, INx yTNIIN3aUN NpepebaOTKn ObaaauTeCB B MeCTHBe OprAHB bNaCTN, B CnyKbNo yTNIIN3aUN OTXODOB INN B MaraINH, B KOTOPOM Bb npINO6peJI daHNOE IN3dJIe.
UcTpoIcTO pa3pa6oTaHO, nCnblTaHO n 3roToBneHO B COOTBETCTBN C:
- Be3oNaChocTb: EN/IEC 60335-1; EN/IEC 60335-2-31, EN/IEC 62233.
- 3KcNJIpyaTauOHHbIe XapaKTepnCTnKn: EN/IEC 61591; ISO 5167-1; ISO 5167-3; ISO 5168; EN/IEC 60704-1; EN/IEC 60704-2-13; EN/IEC 60704-3; ISO 3741; EN 50564; IEC 62301.
EMC:EN55014-1; CISPR 14-1; EN55014-2; CISPR 14-2; EN/IEC61000-3-2; EN/IEC61000-3-3. PpeIIOJxHnE nI npaBnBHO NcONb3OBAHn B CEJIAX CHNKeHnB O3dIeCTBn HA OKpyKaHOuO Cpey: BkIIOHTe BByTgHXoKoNNAK Ha MInHMaNBHO CKOpOCTN, KOrDa HauHnaTe TOTOBnB, N OCTaBte erO paBOTaB B TeueHne HeCKoBkMx MNHT oocNE TORK, KAK 3aKOHNTe TOTOBnB. YBeNiuMbAte CKOpOCTb TOlbKO B Cnyae Bo5bUoro KOnNUeCTBa DbMa napa, n Pnp6eRaeN KcNObL3OBAHnO NOBbIeHNbIX CKOpOCTe ToLBKO B 3KCTpeMaNbHbIX Cntuaqnx. 3aMeHnTe yOrbHbIyΦINbTp(b), KOrDa 3TO Heo6XoIMo, dI NaNDepjxHnXopoWee 3ΦΦeKTHBHOCTN yMeHbSeHn3Anaxob.Ouichiatae XkpOBoBie/BieΦbTp(b), KOrDa 3TO Heo6XoIMo, dI NaNDepjxHnXopoWee 3ΦΦeKTHBOCTN XkpOBo FOINbTPa. IVcNoIb3yIte MaKcIMaNBbIy DnAmETP CNCTEmbBo3DyXOBOD, Yka3AHhBI B DaHHOM pyKOBOCTBE, dIra ONTIIMN3aUN 3ΦΦeKTHBHOCTN MmHNIM3aUN yPOBnH yUma.
Ponb3ObaHne
BbIyKka CnykNT Dnla BCaCbBaHnDbIma n npapa npnpnroTOBHeHm NiUu N npedHa3NaHe ToIbKO dIb6bIbOBOrIO NCNoJIb3OBaHnA.
BbIyKa cKoHCTpyuPoBaHa dIpa60Tb I B pexMe OTODa BO3Dxa Hapyu nn peuCkyJauu BO3Dxa.

IcnoJIb3ObaHnE cpeXnme OToBa BO3Dyxa
B 3TOM peximme nCnapeHnna BbIOaTcH npayku Ype3 rI6kn Tpy6OpnoBD, noDcoEINHeHnK K coeHNHTeblHOMy KOJIbU.
BHIMAHHE!
BbIbOHa TaPy6a He BXoJIT B KOMPiKeT I DoJIxHa 6bItb npIo6peTeHa OTdJIbHo.
CnHaHn3aunj KnpoBOro nIbItpa
Pocne 40 yacob pa6oTbI hauHet Mrratb CBeToIOd 1.
Korda noraBnTcA daHna CnHnHaI3aunr MeTaIInueckn 0nIbTp Heo6xOIMNO mOBItb.
BbItIaKa npOn3BeDeT cnHnAIN "BEEP" n CBeToAno1 1 ppeKpaTm Mrratb.
CnHann3aun yrolbHoro qnlbtpa
Pocne 160 yacob paobtby hauhet Mrratb cBeToND2.
Korda noaBnTcAanHna CnHaN3aun yOrnbHbIΦnIbTp Heo6xOIM0 3aMeHHTb.
BbItjKa npOn3BeTeT cnHan "BEEP" n CBeToAno 2 npeKpaTt Mrgatb.
Ecn OndHOBpeMeHHo BkIIOuAeTcN CnHaJIIN3aUIMn 06OxX
fInbTPOB, Ha DnCnIe HauHyT NO Ouepei MmRaTb
CBToDnOdb1 n2.
YTo6bI C6pOcNtB CnHaNIN3aCInHO, BbIOnHInTe 2 pa3a BblSeONHCanHHy npocEpy.
3a nepBb pa3 cbpaCbIbAeTcN CnHaNIm3auny yOrIbHoro
fInbTpca 3a BToPoi pa3 cbpaCbIbAeTcN CnHaNIm3auny
metaIInueckoro fInbTpca.
B cTahapTHOM pexime cnHann3auny yroIbHoro qnIbItpa
HeakTINBnpoBaHa.
EcInn NcOnIb3yetyTc BbITJxKb B NcNIOJIHeHne CpeuIrpKJIpyNei BO3dyxa, Heo6XoDmO aKTbIpuBaTbcHraJIaI3aIyUyToJIbHO rIbTp.
AknBaunCnHnHaN3aun yOrnbHoro nIbTpa:
BbIKJIOUHTb BbITaKky (OFF) n Depkatb Haxkatoi KhoNky T4 Na IpOraKeHm 5".
Pn Haxatnn KhoNk Cpayy BbICBETTc CBeTOIOblCnHnIaun,JeCTByUOxN Ha daHhB MoMeT fHnlbTPOB.
BbIgka npOn3BeTeT cnHan "BEEP" n CbTeOJIoD 2 6ydet Mrratb Ha npTojKeHn 2".
CBeToIIObI 1 n 2 octaHTcB KIIIOueHHbIMn Ha npOTJxHmN OKoI O 2" nepeT TEM, KAK bItjKka BbIKHOHTcR (OFF).
OTKlnoueHne cHraHn3aun yroIbHoro pfnlbtpa:
BbIKJIOUHTb BbITaKky (OFF) n depkaTb hKaToi KhoNkTy T4 Ha npOraKeHm 5".
Pn Haxatni KhoNknpa3y BbICBETTc8 CBToDIObl CnHahJIn3aun,JeICTByOuXNa daHbIMOMeHTfNbTPOB.
BbIgKpa npo3BeDc nHnal "BEEP" n CBeToIOo 2 BblIOHHTcra.
CBeToDnObl 1 octaHetcB KInUeHHbIM Ha npotJxHeHN OKoI O2" nepeTTEM, KaK bByTjXkBaBIOHOTcR (OFF).
yxo
OuInCTka
ДлгочнскИнспьзутETOLьКСецmaльнуТряnkCMOЧЕнHyО HeTРаьHbIM XJIDKM MoIOM CpeDCTBOM. HE
HNCIOb3yIe HNKAKNE INCHPTMENTbl IJIa
OuCTKn. He npIMeHnTe cpeIcTbA, codepKaUne a6pa3nBhIbe MaTePnAbl. HE NPIMeHnTE CnIPT!
PanaheJIb
Pnc.8-9 22-23
06cIyKbAHne naHeJI
DEmoHTaK:
-ПOTЯн'tь пан'tь Вьрх (Ha paclctoHne Okono 2cm);
-NotraHnTe camy naHeIb.
UncTka:
PAnHeB YUcHTTCa TOn Jx HeaCToTOn UTo H XInpOBoi FmIbTp, nPoTepeTbe ee CanPeTko CMOueHHO HeITpaIbHbIM XnIDKIM MOIOUIM CpeCTBOM.
He nCnOJIb3OBaTb npOdykTbI, coeApJzAunme abpa3nBhIe BeuecTeBa. HE NcIOnJIb3OBaTb CnINT!
MOHTAX :
BbInonHnTb onepaunu B o6paTHOM nopRdKe demontaxy.
BHMaHHe! BcERda npOBepaTb, YTO6bl NaHEnb 6blJa XopoIIO 3aKpeNJIeHa Ha CBOEM MecTe.
ΦильТрьЗадержКинра
Pnc.10-21
YdepKnBaetactnblJnpa,ncXoJauneOTnIInTbI.
ФильтслдуETИСТЛБ exMeecryHо (ИИКогДа сСТЕм ИИнДИКАЗМИН capbIeHЯ ФильтpoB, ecIN OHa ИмeetcB В Башей мОдELI, yka3bIbaET Ha dAnHyTO Heo6xOdIMocTb ) HearpeccsBbIMMOUzIMm CpeDCTBaMn, BpyHyIO IIN B NocyDmoEuyHoi MaUNHe npN Hn3K0I Temnepatype n
3KOHOMNCHOM LUKKNE MblTb.
PnMbIbE B NocydomoueHm MaunHe MoKET MMeTb MeCTO HeKOTOpoe OecBcEeHBaHne FInbTa 3aJePckn Jknpa, Ho ero FInbTpUOaJ xapAKeTpncTka ocTaetc a6cOnHO THEN3MEOHHo
Ppnaad cnpoeKToBaHO, Bnnpo6yBaHO i BnroTOBHeO 3riHNO 3:
- Be3neka: EN/IEC 60335-1; EN/IEC 60335-2-31, EN/IEC 62233.
- Eknnyatauihi kocti: EN/IEC 61591; ISO 5167-1; ISO 5167-3; ISO 5168; EN/IEC 60704-1; EN/IEC 60704-2-13; EN/IEC 60704-3; ISO 3741; EN 50564; IEC 62301.
EMC:EN 55014-1; CISPR 14-1; EN 55014-2; CISPR 14-2; EN/IEC 61000-3-2; EN/IEC 61000-3-3. Iopadn nnpaBnboHoi eKcnnyatau Ta dna 3nHexeHHa BnNBy Ha cepeoBniue: BmkaIte BnTkXy Ha mHiMaIbHy WbDkictb Npeed noatKom nprirotBuHa Hki, i 3aIIuAite ii npaObaTu Ha deKilbKa XBNINPi cIaKiueHenn nprirotBuHa. 36InbUyTe WBdKCTb TInbKy y pa3i BeNkoi KJIbKOci DMy i npay Ta BnKOpNCtBuYte HaNDy TBInky Kpainix BnAaKax. DnpiTpmAmHH BcKOei eFeKTNbHOCTi BnDaHEna 3anaxi, 3a Heo6xHocti, BnKOnHyte ZamiHy ByrInbHoro(-nx) fiNbtpy(-IB). DnpiTpmAmHH BcKOei eFeKTNbHOCTi fInbTy JxRiB, 3a Heo6xHocti, BnKOnHyte YnCTKY fiNbtpy(-IB) xRiB. BnOpNCtBuYte MAcKImaIbHy diAmeTp CnCTEmM NOBtPOBODi, IIO BKA3AHy y IHCTpyKUii dJe ONTmIsaui eFeKTNBHOCTTi a Minimisaui
BukopncTaHHa
BntaKHH KOBnak CnpoeKTOBaHnn DnB BCMOKTyBaHHaDMy Ta npay, 0o yTbOpOeTbcN iD qac npuroToBaHH aXi Ta npnaHaeHH nIeNe nObyToBOrO BnKOpNCtAHn..
Bntjka po3po6JIeHa dI pyo6OTn BpeXIMi BCMOKTyBaHH, BnBOJHn NOBITpr Ha3OBHI a60 B fiNbTpyOCHMy peXIMi 3 peuPKyIJIueIO nobITpr.

BapiaHT BiBedeHn
Iapn BvBODaTbCn Ha3OBHc Hpee3 BvBiDHy Tpy6 3akpinHey DoФlaHua 3'cDHaHHN.
YBAGA!
BvbiHa TpyBa He noctaAeTbC a Tomy Heo6XiHIO II npiDbaTu Okpem.
JiAmETBnBIDHOI Tpy6n NobHEn BiNObiDatn DiAMETpy 3eHyBaJIbHOrO KInbIa.
YBAGA!
Ykpo BNTaKHN KOBnak Mae ByrIbHi pInbtpn, To ix Tpe6a 3HrtN.
Пд' endat noHactinhoBvBIDHO Tpyb Ta BvBIDHoro OTbOpy 3 OndaKOBIM diaMetpOM BxOxy nobitpr (3'edhyoyniФlaheu).
BukopnctaHna HactiHHnx BvBiDnHex Tpy6 Ta OTbopib 3 MeHIM DiAMetpom npBBeDo 3MeHWeHHe epeKTHBOCTI BCMOKTyBaHHa Ta 3Haune 36ilbWeHHa pIBH yMy.
Tomy Mm 3Himaem 3 Ce6e 6yNb-ky BiINOBiJaIbHiCtB no Bnuecka3aHOMy.
! BnKOpNCtOByTe haiKopoTsiBNTJHNI KAHan.
! BnKOpNCTOByTe BnTJxHNI KaHaJI 3 NaMeHIoHO KInbKiCTIO NOBOPOTIB (MAKcMaJIbHNI KYT NOBOPOTy: 90^
! YHnKaIeTe pi3Knx 3mIH nlooi ipepei3y BNTJxHoROKaHaNo.

Bapiant 3 pfinbtpauicio
BTRHyTe NOIbITp3HExHnIOeTcBa Ta OUYuETcBa Ta 3HOBy NOBepTaCTbCBA pNIMUeHN. IINr TORO, U6B BIKOPNCTOBYATNI KOBNAK yCbOMy pEXNMI, Heo6XiDNO BCTAHOBNTI DOaTkoBY CNTEMY fInbTPIB 3aKTINBOBHAM ByrllJNM.
Inctanlaia
BjDCTaHb HNkhBoi BiDuctnH BNTJxKn Do nocydy Ha kXoHHI pNIti Ma 6TyH He MeHwe 45cm, y BnApKy eKeTpuHHx PJIHT, ta 65 cm, y BnApKy r3OBHX Ta KOMbiHOBAHIN XIPT.
Heo6xioH npimatn do ybaru BicntaH, kki Bka3yOHTbC B iHCTpykuii 3 iHCTaIauii rata0BOi PInTu.

Пд'сданьdoеелктромерекi
Hanpyra B eneKtpomepexi Mac BiNobidaTn BkazahHm
XapakTepeNtKam Ha etKeTu, Ra 3haxoDnBcR BcePeHHi
BVraKnn. RaIb KOMnEeKT BXoNTb BVnka NiIeEdnHaB R
enektpomepexy, To cnI niIeEdnTu BVtnkY DO pO3ETK, IIO
BiNDOBlae ICHyOuHM HOpMa Ta 3hAxoNTbCBA DocTyHOMy
MICi, zo MOkha BVKnOHaTI NicIa IHctanJIi. RaIoo J BNkA
HE BXoNTb B KOMnEeKT (PnIeM NIDeHNHBA
eNeKtpomepexy), aIo BOzEgKa He 3haxoDnBcR B doCTynHOMy
MICi, TAKOIXIICNA IHCTanJIi, TO cnI d BMOnHTyBaTIr HAIEKHN
DBOx-NONIOCHN BIMNKau, kIKM 3a63eNEHTb NobHe
BiKDIOUeHNN BId MEpeKx BYMObx nepeHAnpyr lll Kateropii,
B NOBHIN BiNDOBIDHOCTI 3 npabINaMI INCTanJIi.

YBARA!
nepe TmK 3HOBy NIKJIOUHTN BNTJCKy DO eNEKTPOMepeksi nepeBipNTn npabINbHicTb pOBoTn, 3aBXn KOnTHpONHe Tc06 uHyp MepeXi 6yB 3MOHTOBAH INBPO.
Bntjxnn KOBnak Mae cneJIaIbHnn npoBID XNBnEHN; y BnnaKny NIOkOJKeHHn pOBOy, 3AmOBTe Ioro y CnyX6i texHiHO O6cNoYroBaHN.
InCTanuaia
IpeepnoaTOMMOHTaxy:
- IpeBipTe 06 po3mipn prnD6aHOro Bamn BInpo6y niXoDnIOn Do BV6paHOrO Micra NOro MOnTaKy.
3HimItb ByitbHn Bihtpn kIIO BIn/BOH npCytHi (DINBNTcB taKoB BiNIOBIDHN po3di).ΦIbTp/n 3HOBy BCTaHOBIIIOYbCe kIIO Bu XOHTe BIKOPNCTOBaTn KOBNak B peKIMPeuNPKyIaJI. - IpeBipnTn 06 BCEpEnHi KOBnaka He 3aIiuaNoC npEpmTeB, NOMUeHnx Tyn Ha Yac NOro TpaHcnpOptyBaHn (HaPnKlnad, NaKetNkIB 3 uypyamn, IInCTIB rapantii i T.n.) , kAIO BOH n E, BIMtB ix i
36epexiTb.
B KOMNIIeKT BITRAKKI BXOJrTB UpyuIN DnI KpINNeHn, po3paxOBaHI ha 6inbUcIb TIniB CTIn/CTen. Ipote Heo6XiDIO 3BepHyTnCIO KO KbanicipikoBHO TExHkA DnI nepeBipKn npdathOci MATEpiAnIB B 3aJeXHoCTi BiD TIny CTIn Hc CTeni. CtHa/CTeI NOBHH6TyN DoCTaTHb MiChmM, Uo6 BHTPIMATN Bary BITRAKKI.
Ksio 60kOBI naHJI ta/abO CTINK, Ta/abO HAcHNI nepeBipTe, 6yIO DOCTaTHBO MICZI IN BCTAHOBJIeHHBnTAKN Ta 6oMxHa 6yo 63 nepeuKOd iCTaTNCdo naHJI ynpablinH.
Jnwe dIeKnx MoedeNei
JkdoatkoBn akcecyap MoKHa npu6aTn DeKopatNBHKOPO6,nepeBipTN y fipMOBIi TOPROBTOUcIu N B MOeJI, kY BN pnpu6aHIn, nepe6bauactcbra Taka MOKJINBicTB.
PaIIMO BCTAHOBHOBATN BVTRKky nICrToro, yk BN npu6baJI KOp06, 1o6 hAIINHO BV3NaHTn Hai6InbW niIXOJaU ihCTaJIaIIO.
Man. 5-14-15-16-17
Функци氧HyBaHHa

T1
T2

1 2 3 4
O O O O

T3

T4
T1. ON/OFF Cbitno
T2.3MeHueHHaWbNdkOcti
HaTnCKyOuH Na KhoNkIy "T2", OTpIMaEMO 3MeHSeHnHn WbUdkOci, BiD WbUdkOci 4 (iHTeHCMBHO) Do WbUdkOci 1.
HaTnCKyUH Na KhoNky "T2" nID uac po6oTH Ha WbUdkocTi 1, BHTXkA nepeIe B pexM OFF.
T3 36ilbweHHraWbndkocti
HaTmCKyUH Na KHOJky T3 BNTaKka nepeJe 3 peKIMy OFF Ha WbUdKicTb 1.
HaTmCKyUOHa KHOJKy (BNTJXKa y cTaHi ON) 36IbUyEYcBa WbNdkiCtB DnBryHa BiD WbNdkoCTi 1 do WbNdkoCTi 4 (IHTeHCNBHA).
KoXHHI WbNIOKcTi BiINOBiJaE YBIMKHeHnBi IINOBiDHorO CBITNOIOy.
WBnKicb1-CBtioio1
WBnKicb 2-CBtIOJIOJ2
UWnKicb3-cBtioJIOa3
Ubnkictb 4 (iTeHcBnBa) -CBITIOJIOd 4 (Mnae)
IHTEHCBHBYBUNDKICTbMOKHA3anporpamyBaTHBacI. CtaHdapTHe nporpamyBaHHN -5'nicra 3akihueHHy bTOOaCy BVTRXKA nepeJeHa WBNDKICTb2.
ДяТOrO ⅢбВIDКЛIOUCHITN ue pexIM paHlIe 3aIporpamOBaHOrO yacy, HATNCiHb Ha KhoNkY T2, BHTJxKa nepeJeHa WbUdKiCtB 3.
T4 PporpamyBaHHaBnKoCTi Haac
IiiknOHTnporpaYBaHHHaac
HaTnCHiTb Ha KhoNkIy T4, no 3aKiHueHHIO BCTaHOJIeHORO YAcY BuTЯKKa BmMKHETbcr.
IporpamyBaHnHa dac po3nojIneHe HacTyHm YINHom:
Ubnikctb 1-20 xBnHn (cBtIOiO I Mrae)
3atpmye xnpoBI cnonyehn, 10 BnHnKaOTb nID yac npiroTsyBaHH iKi.
PONHHeN YUCTNTICnOdHn pa3 B MICAuB (a60 KOIN CmCTema IHDnKauiI nepeoNBHeHHaФJIbTIPB, JxuO e y Bauii MoDeni, BKA3ye Ha daHy Heo6XiHcTB), 3 BKNOpNCtHaHRM HearpECBHNX MMIOHX 3aoc6BpyuHY a60 B NocyDMOnOH MuAunHi npn Hn3bKi TEMnepatyi I KOPOTKOMY LkNl.
Pn MNTI B NocydomNoui MaunH MoKe MaTn Mice DeKe 3He6apBHeHn FInbTpY,npote Ioro FInbtpuyOchi XapakTepeCTKn 3aJIuAOTbcr He3MiHHMn.
ДлЯЗнгТЯпьту 3атримки луруnotогнь ha cebe npужнHy руку BiДчелпеняпьту.
ByrilbHm fIbTp (TilbKn B pexnmi peunpkylauii) Man. 20
HacuHicb ByrInbHoro fipbtpy nepeBipReTc nicIa 6Ibaw a0e MeHs DoBOrO BnKOpNCTAHnB B 3aJexKHOCTi BiD Tmny pnt Ta perynpHoCTi YUneeHH JxIpOnorlnHaUOro
φínbtpy. y 6ydb-яkomy Bnnaikky Heo6xidno 3amHraTn
karptndk npinhaMnHi cepe3 KOxHi QOTpN MiCraI (a60 KOJI NcStema iHnkaQi HacnueHoCTi φiNbTpB - JAKIo Taka
nepe6bauheHa bawij MoedeI - Bka3ye Ha Taky Heo6xIdHictb)
HE niDnlae MmTIOu NoHOBLeHHO.
KpynnBvrlbHnΦiltp
PnKnactn pInbTp n no 0nbDi CTOpOnn IJn NOkpnTTa3axnCHnx pNsiTOK potopa DnBHyna, nicJyoro NOBepHytn pInbTp 3a roDHHNKOBHO CTpiKIO.
ДяЗHA附T-NOBEPHyTN pInbTp npOTn rOdiHHNKOBoi CTPIIK.
3aHaJaMa
Man. 24
Bintjcka 6bnadnha CnCTeMOIOOCBITNEHHa OCHOBI texHONorii diOJB (LED).
IIOIN 3a6e3neuyoT oNTnMaJIbHe OCBITIeHHra, TpBaNlICTb ix B 10 pa3 Bmua BiJ 3BvayHnx lamNooyKa Ta daOt b 90% ekOHOMII eIeKTPoeHeprii.
ДяЗамилamнКоТakTyBaTn abTopn3OBaHn cepBicHn ceHTp 3anachnx YactMH.
JaBnIaaybI acnantbI naIaNanhy 6apbcihda 6yn Hycayda 6enrileHren KOndany wapTtapbIH caKTamaFaHHbH Kecipinen 60nfAH ONkbIbIK ePT nEH 3akIM yuiH xayan 6epMeiDi. Copfblw TEK KaHa Ynde naIaNanahyfa 60natbIHd aen IxO6bnAnHfA.
KaKnak ocbi KITanwada Kepcetinreh cypeTepen e3rewe 6oBIn Kepinyi Mymkin. DereHmEn, KonJaHy, texHnkaJIbIK KbI3MeT Kepcety XHe Ophaty Hxckaynapbl 6ipJeN 6oJabl.
Ke3keIreH yaKbTTa 6yn HycKayMeH naJaHaHy yuHn akTaHaN MaHbI3dI. ByhIM catbJnFaH, TanCbIPfAH HeMece XoBnIFAH Ke3de ON OHBMEN 6ipre KaIraHbHa Ke3 KeTki3iH3.
HcyaydbmykTOKbHb3:OHda6yamdbI KOHdbpy,naiDaJahy KHe Kaybinc3dkxehiHdeMaHb3dbMeJIMet6ap.
BvibHbIH 3NeKTPoHdbIK Hemece MexaHnKaIbIK KOHCTpyKUyraCbIHda Hemece copfbiWeHTINJIaYraNbIK KaHaJdapbIHda eKhAhdai Da e3repicTeP JakacamaHbI3.
OphaTydbOpbHdAmac 6pbHb6epiReh 6apNbIK KypamdaactapDbH 3aKbIMdaImaFaHbIH TeKcepiH3 Hemece opHaTydb JaIrafTbIpMac 6pybH DeJaIra xa6abpNaCbHbI3.
EckenTre: (^*) TaH6acbI 6ap 6JIikTeP TK Kei6ip yInepmeh 6epineTIN (6aca KaFdaJnapDa 6epimTIN), 6ipak catbn anyfa 6oJatbH KocbIMsa akceccyapnap 6Obn TaBJaNb.

Hycaynap
Ke3 KeIReH Ta3aJay HEmecTexHnKaIbIK Kbl3MeT KepCetYxMbICTapbIH opbIHdAmac 6ypbIH aShaHbI ShbIFapy HEmec XeJIiIK Kyat Ke3IH axbIpaTy apKblblcOpfbIUtBtI 3JeKtp XeJIicHeH axbIpaTbIHbI3.
OpHaTy XaHe TexHnKaIbIK Kbl3MeT KepeTy XyMbICTapbIH Kypri3reH Ke3e epaabIM XyMbIC Kofra6bIH KniHi3.
-Бул Крьлгынь 8ЖаСТаБь
ЖэHe Oдан Унkeнбалanap,ДeHe,
ce3y HeMece aKbI-N-Ои
Ka6iNeTTEpi SheKteyJI TynFaIap
Hemece Təxipn6eci MeH 6iNIMi
JOK TyINaNap OHbl Kayinci3
JOJMeH NaIdaIaHaYfA KaTbICTbl Hycay aJIbI, bIKTMaJI KayiInTePdi YfBlnFaH XaFdaNda XeHe 6akblayda 6oJFaHda NaIdaIaHa aIaNbl.
BaIaIapDbIH 6acKapy
3JIeMeHTTePiH e3reptYiHe XaHe
KpybIINfBIMeH OINHaybHa XOJ
6epMey KepeK.
Ta3aay XHe 36eTihwe TexHnKaJIbIK Kbl3MeT KOpceTy XyMbICTapbIH 6aIaNapDbIH 6aKblaycbl 6yprizyHe 60ImaIbI.
- Acy copfblbI baca ra3 kafy KypblfblnapbImeH HeMece baca OTbIHapMeH naJaHaNbIFaH Ke3De, Kypblfbl OPhaTbIFFaH 6JIme JkETKIJIKTI Typde JeJNeTeiNyI KaKet.
CopfbIbI iWIneH De, cbiptbHaN da JyneI Type (KEM DEFEHDE AIBHA BIP PET) Ta3aJay Kepek, əpdaBIM TexHnKaJIbIK Kbl3MeT KOpceTy HcCKayIbIFbIHDa 6epiIreH HcCKayIapDbI OpbIHDaHbI3.
CopfbIbTBiH Ta3aJAY CTaHdapTTapbIH XHe cy3rInepdi aImactbipy XHe Ta3aJAY BoBbIHwa epxeJepdi
- yctaH6ay HəTnxkeiHne ept TybIHdaybl MymkH.TamaKTbl Tikeleu copfblu aCTbIHda KaHdbpyfa KaTaH TblbIM caIbHaDbI.
-ШаMDыaybICTbipy yushi TEK Ocbi
HvCKayIbIKTbIH «TexHnKaIbIK
Kbl3MeT Kepcety/ShaMapdabl
aybICTbipy> 6eImiHde
KepcetilreH ShAM TpyiH
PaiDaIaHbIHbI3.
Ausbik KaIbIHDbI naJaIaHcy3riJep ysiH 3nH XHe ePTKayin H TybHdaTybl MymKiH,COHdbIKTaH OfAH eWkaWah KOJIbepMey KepeK.
MaIdbIH 7aMaHaTbIC Kbl3bIN Hemece XaHbIN KeTneyiH KaMTaMaCbI3 eTy yWih, TaMaKTbI a6aJIan KybIpyKaJcET.
CAK BOJbIHbI3: CopfblWtBIn
KoJxKeTImdi 6eJIikTepi TaMaK
DaIbIHday KypblJFblJaPbI
NaIdaIaHbIJFaH Ke3De KbI3bIN
KeTyi MymKiH.
-
Ophaty TOJIbIK aIaKTaJIMaBbIHwa KypblfblbI 3JIeKTp JxEJIciHe KocpHaHbI3.
-
BydbH 乌bIyBaHa KapcbI KOndaHbJaTaBtH texHnkaBik KHe Kayinci3ik WaapanapabH ecepe otbipIn, JepriJikTi BuNik OpraHdapbl BeKiTKeH epexeIepdi MyKnT opBnDay MaHb3dbI.
Ocbk KpbJfBhlh Tyik apKbIb6aftTay
Kyneicn ra3 Hemece 6acka OTbHdb XafaTbH
KpbIbIapdAn hblKan 6bnapDb Iblfapy CnKtBb
6aca Da MaKaCATTApDa naJaIaNbHbNAtbH Ke3
KeIreH KOJaNbICTaBfXeNDeTy KyeecHe XaNfay
Kaxket. 3JeKtp TorbIHbCory KayNihe BaIaNbHcTb
ShAmbl Dpybc 6ekTIImere CopfblStb
naIdaNaHbH3 KHe KaIbIpMaHbI3.
TopnapbTnictTyprde6eKitImereH copfbltbeuKaWan naDanaHaB3.
AphaIb KepcetIImMeHHse, copfblTbELKAAUH TIpeK 6eTI petIHne naJaIaHa6bHa3. - Tek opnaty yuin eHimmen biPre bepinren bekitybpaHdaIapbIn naJaIaHbIbI3, erep bepinmece,6yaHdaHbIN Tnicti TypH catbIn anbHbI3.
ByapahdapanapdbiH opnaty HcyKayblfbiHaKepceTinreH dypbic y3bHdbfbiH naJdaNaHbIbI3.
KymHdHaCahB3, 0kiJETTI Kbi3MeT KepcTey 6oBbIHwa XepDem KepcTeY opTaIbIFbHa HemeCe Tnicti MaMaHaDHaFAn TyIraFaXa6apNaCbIH3.
ECKEPTY!
-Бураздаларди Неме Беку Крьлгссн Oсы hyckaynapra caikec opHaTNay 3NeKtpnik KayinTepre ekenyi MymkiH.
- BaFapnAmayuBIme, TaMepMeH, 6eKe KaUbIKTaH 6ackapy KJyIecimEHemeC aBTOMaTTbI TypJe KocblaTbIH Ke3 KeJIreH 6acka KypblfBIme KOJdaHaBbI3.
3JNeKtpnik JxHe 3JNeKtpOnHbIK acnTapdb KaTaNandaFa acbpy XeHiNderi 2012/19/EC EbponaBbIK DnpeKtNBke (WEEE) caiKeC bepinren eHIM TaHbanaHdbI.
BepinreH eHmDi dypbc KaTaNanDara acbpydb KaMTamaccb3 etUmeH, C3 KopuHaH optFa kHe aadam DeHCayNbIfHa Kepi acepi Tnri3y di 6oNdbpMayra KEmekTececic3.

Acnantarbl Hemece KOndama Kykattarbl TaHbacbl Bepinren acnantbl KaTaNadaa acbipyda aetteri TpMbICTbIK KaNbIK petIHnde nirepyre BoImaihBihKepcetei. ObIH opbHa 3neKTPIK XaHE 3neKTPOHdbIK acnantapbl KaTa naIadara acbipyra apHaJIaH Ka6blday NHTHe tancbiyKepek.
Bsyta tancbipy acnantb Kaeta naJaRa acbipy XeHInderi XepriniKti epexenepre caikec sbifrapblnyt NiC.
BHydai eHIMdepri naIaIaNHy, KaIta naIadara acbipy epexenepi xeHnDe TOblk AknapaTTbI KepriliKiTc ekimwiNik opBnApaBHaH, KaDblKapbl KaIta naIdara acbipy Kb3MetiHeH Hemece 6epirIne hImDi C3 catbn anfah dyKeHen ana anlaacbI3.
KypbIbIbI KeNecinepre caJ K06aJIaHfA H, CbIHANFaH XHe Xacan sbIrapbIJraH:
Kayinci:EN/IEC60335-1;EN/IEC60335-2- 31,EN/IEC62233.
- ΘΗΠάνικ: EN/IEC 61591; ISO 5167-1; ISO 5167-3; ISO 5168; EN/IEC 60704-1; EN/IEC 60704-2-13; EN/IEC 60704-3; ISO 3741; EN 50564; IEC 62301.
EMC: EN 55014-1; CISPR 14-1; EN 55014-2; CISPR 14-2; EN/IEC 61000-3-2; EN/IEC 61000-3-3.
Kopuaf anpTaF acepiaaayuHnypbic naandaany TpaBHyckaynap:
3ipnyi bactaHaJa KaKaNtBle H a3 KbldAmdbkneH KocbHbI3 XHe 3iipney AAKTANFaHnKeIH bpa3 MHyT BoBb JxMblc icTeiH3. KbldAmdbkTa TE kTyTihHbXe6yDbH YKKeH MeJIwepi XaFdaBHaDA pATbIPbH3 XHe KUweMy T KbldAmdbfBn(KTapbH) TEK Wekti XaFdaHnapa naJdaNaHbHb3. XaKcbI XaFbMbCb3 Niicti a3aity TImdInirin CaKtay yuH KaaKet
60nfaHda kemip cy3ricih(lepH) aybIcTbIpbHbI3.
XKaCbM ma cy3rici TmIMdiNirIH caTay yuHIN kaKet
60nfaHda ma cy3ricih(lepH) aybIcTbIPbHbI3.
TmIMdiNikTI OHTaIIaNbIpy XeHE uSyBu bapbHwa
a3aYTuH ocBlyhckaybIkra KepceTIInre ETKi3y
KyuEciH eH YJKeH dNaMeTpH naJaHaNbHbI3.
PaiDanaHy
CopfblTamaK 3eipnerHe naIa 60nA tblH TytIH MeH 6yblCopbl anyfa XHE TEK TyPbICTbIK MaKcaTTa KOnlaHyFa apHaHaF.
CopfblcIpaay6pflb6ap TaTpY keJdtki peHne, Hemece iK KaTaNany cy3ri piHne naJaHaHyra apHaHan.

Copy Hyckacbl
By cbipTka biipiktipuyi pfnaheUke KocblfAH copfbll Kybipapkblnbwifapbnaab.

ECKEPTY!
Copfblu Ky6bipdbH dnaMeTp i 6ipiKtpyuui caKHaHbH dnaMeTpimEn TeHdec 60ny Kepek.

ECKEPTY!
Copfbll Ky6bIpbI copfbll XnHaKtMaCbImeH KTeK3iImMeiDi, OHb 6eNEk catbn any KepeK.
CopfbltBkabfpadaBf copfblKy6bIpnapbMeH aya bIfapatbH TecikTepde, con dnaMetpderi TecikTepre Kocblh3 (biiktipuyi pfnaheu).
Kabipraaba copbIu Kx6bipnapbi MeH KeMdey
DnAmetprderi Teciknt naDanahy, copy KyatbH HaWapnatbIn,
rypinDeYH KyweTei.
! KaKeTTI MmHmMaJIbI U3blHdbIKTaFbI TYTikTi KOJdaHbIHbI3.
!BapbHwa KEN MINIMI Bap TYtKi KOJaHbIHb3 (NIIMHI, MAKcMamJbI bSypbUbI:90°).
! TytkiTH KENDEHeH KIMacbIHda Ty6ereNti e3repictepdi 6oIdbipMaHbI3.

Cy3y Hyckacbl
On yuiship kEmip cyrici KaKet, Ohbl eDetteri caTyshilapdAn anyfa 60ana.
Cy3ri 1b4apbnfah ayabHb JxofapfbI bIbIfc TOpbl apKbIbI b6meme KaTata biepy anda Ohbl Mau MeH NICTepdhen TaapaTbIa.
KoHdbipy
CopfbIbTbIH TEmHri KbIpbMeH bIDbc acbHaDaBfI tipeiyiJka3bIKbIFbIHbIH apa KaMbIKbIFbI JNeKtp nnITacbl yWih 45cm
, an ra3 hemece biipiktipinreH pntanap ywiH 65cm deH KEM 60nMaybTmic.
ErepHcyka ra3 pntacbIn opHaTyfa aptbIbpaK apa Kaibtk6enrineHren 6onca, onbi eckepiH3.

3JIeKtp Kocynapbl
KeninH KepHeyi acnantbH iHHe opHanackaTakTaWadaBenrIneHReh TexHnKaNbIK depeKeTpde KepeHeye caikec Kenyi kepek. Erep copfblu BNkAmeh Ka6bktanfaH 60nc, opHaTbIraHHaN KeiH De icTeyre 60NaTbH, KonJXeTePNIK XepDe 60nybl Tlc, icten TyPhaH epexenepre Caikec anMaIbI-caMnbl bHTencBte CopfbltB Kocblb3. Erep copfblw BNkAmeh Ka6bktanmaFah 60nca (Kenire Typa Kocblny), Hemece aImalbl-calmbl WTeNCeb OPaTbIraHHaN KeiH De kon XeTePNIK XepDe 60maca, OHda OpaTu HyckaybHa CaiKec 3- dapexeeriACKbH KepHeydi 60lbpMaHbIN JxHe JxJIHiH TOblk Aushybln KaMTamaccb3 etetIH Tnici ekinONIOCTIK axbipATkbITb NaDaNAHbHb3.

ECKEPTY!
Kopek JekicHe CopfbltBuH 3neKtpnIK KjYnciH Kocy aIbHda Kopek Ka6eni Dypbc MOHTaJaIFaHbHa Ke3 KeTki3iH3.
Cybyy KaIIaIbI apHaIbI Hep 6epyui cyIMXeJIImeH Ka6blKTanFaH. CbIMxeni 6y3blfAH KaFdaIJa Ohbl ayICTbIpy yuHn Tnicti Kbi3Met KepeTy optaIbIKTapbHa6apblHb3.
Bekitty
Ophatydbb6actay andbihda:
- ΘΗΜΗΙΝ ΕΑΙΣΕΜΙ ΜρΗΤΑ ΜρΗβι ΜχΙH Ανρυίς ἐκεθιν ἀντης.
- BeIceHdi Kemip cy3ric(HepiH) (KaMTbIJFaH 60nca) (6aca kepdi kapaHbI3) anblHbI3. KaKNaKTbIH cy3ri HcCKacbIH naJaHaHfBbI3 KeNce, OHbl/OlapDbI any KepeK.
IwHne 6bpaHdAnap, KeninDik KapTacbl, T.6. cnKaTbI 6ap cAmKeIep CnKaTbI KaKnak iwiHderi KocaJIbI KypaIaIapbl (coHa oHaJ TaBImaIaNay yuH opHaNactblpblraH) TekcepH3. Onapbl aIbIn, Kayinc3 opbHda caKTaHbI3.
Csy3ri KeNTereH Ka6bIprA/Te6e TypneipHe caikec keNETIH 6ekiTkiUtePmeH (fHKcatOpnapMeH) KaMTaMaCbI3dAnDhBpIbnFa. AnaJa, MaTeepnAnDap 6epInre Ka6bIprA/Te6e Typei CcaKeCTirHe Ke3 XeKTIy yuH 6iiKiTm MaMaHra KJOnlbIbHb3.Csy3rCaNMaBfH KeTepe anatbHdai Ka6bIprA/Te6e XeKTIiKITM MblTb 6OlybKepek.
PanaJIbdep XeHe/Hemec KeabipraIap XeHe/Hemec 6yHipnIK Ka6bipranap 6ap 6oJFaH KaJaIaDa, copfbltbl opHaTyfa KaKetTI opblHHbIH KTeKIIiKTi 6OlybIH XeHe npMeHep naHeliHE Kon KTeKl3y OHai OPbIHdAaTbIHbIN TEKcepiH3.
Tek 6enrini 6ip ynrinep yuin
KocbMwaaKepeK-kaPak petiHde KePkEmdIeH Mpyka catbIn anyFa 60aIabl. KineTT dInep apkblc i3 weHeTih YTIHI H cbl MYMKIDIKTI KaMTNTbHbIH TEKCEPIH3. DeJIme-dAn OPhaTbIaNbIbIbHa NaKtbl Ke3 KeTki3y YuHIn, MyPkaHbCatbIN anfAHc coH fAha COpFbIITbOphATyDb IycblAmlb3.
Fig. 5-14-15-16-17
PaiDanaHy


T1. ⅢamapdbI KOCY/ΘUIPY
T2. Kbɪnʌmʌbɪkʌt bɪ a3aɪt y
KbIJaamBkTb 4-TeH (KapKbIHdbI) 1-Te DeiH a3aHTy yuiH «T2» TViMeciH baCbIHbI3.
1-ksIJaMdbkTa Kymbic icTereHne T2 TYMeCIN 6acbl3, coHa copfbuO lIPyJI KyiHe opHaTbna.
T3 XbIJaMaDbIKbI apTbIpy
T3 TYmecin 6accabH3, copfblu ΘUIPyI1 KyIeH 1- KblamdbIKKa opHaTbIaBl.
Motop JxblJdAmdbfB1h 1-DeH 4-Ke (KapKbIbIb) apTbipy yuiH (coPbIuTbKOcY) TymeciH bacIbI3.
Caikec kapbik dnoobI eP kblamdbkta kanaDbI.
1-KbIaMdbKta-1-KapbIKnOdbI
YaKbITbOpHaTbINFaH XyMbIC 6apbcbIHda T2 TyMeciH 6acCaHb3, COpfblW yaKbITbIb OpaTy peXIMiHeH sbIFbIn, XbIaMaMbIKTbA3aHTabI.
T3 Tymecin 6accahb3, copfbu yaKbTTbOphaty pexMMHeH bIbn, XbldAmdbkTbApTbIpaIbI.
T4 Tymecin Baccahb3, copfbll opHaTbIHaH XblnDAMDbIKtBcAKTan, yaKbITbI opHaTy peXMIHeH sbIFaDbI.
OcbHdainCnHnna60nFaHa,opHaTbInFaHMaCy3rici KyyKaXeT.
CnHaJIbI bICbipy yuiH, T4 TYmeciH 5" 6abIn typbHbI3.
Copfblu "DblbIbICTbIK CnIHAI" bepezi Xane 1-xapbIK IIOdbI JxblbIbIKaydbI TOKTATAbl.
Kemip cyricinH cnrhaJI
160 cafattbIK kymbictan KeiH 2-kapbIK nioDbI kHaadbl.
OcbHdainCnHnI naHa 60JFaHda,opHaTbInFaH KEMip cy3ricahaybcItbykaxet.
CnHaJIbI bICbipy yuiH, T4 TYmeciH 5" 6abIn typbHbI3.
Copfblu "DblbIbICTbIK CnIHAN" 6epei Xahe 2-kapbIK IIOdbI XblnbIbKTaydbI TOKtatabl.
Cy3rineepin ekeyi bip yakltta cnHan 6epren Ke3e,1-ww He 2-wwapk DnOdTapk Ke3ek-Ke3ek KaHaDbI.
bIcbipy yuiin kofapbda cinnattanfah hycKaynapdb2 pet opblHaHb3.
Bipinui pete KEMIP cy3ricHH CnHnbl, an ekihui pete MaJ cy3ricHH CnHnbl bIcIpbIaIbI.
Kemip cy3ricihin cHrahlbI cTahdapTbI peXIMme 6eNceHdi eMeC.
Copfbltbyc3i peHne naIanaHaHaHa, KEMip cy3ricHi CnHbH Kocy KaKeT.
Kemip cy3ricihin CnHnaIbH 6eIceHdpy:
CopfbluTbI ΘUIPyJI KyniHe opHaTbIn, T4 TYMeciH 5" pet 6acblb3.
Tymeni6ip pet 6ackaHa, aFbIMda Kocybl cy3ri CnHAnapbHa KaTbICTb JApbk DNIOdTapbl KaHaDbI.
Copfblu "DlbIbIcTbIK CnIHAI" 6epei XeHe 2-kaPbIK IIOdbI 2-pet XaHaIbI.
Copfbl ΘIIPYI KyHne opaIraHa deiH, 1-wei 2-ww KapbIK dnoDtapbl WamAmeh 2" KaHbI Tpyadbl.
Kemip cy3ricinH cnHnBIn eWipy:
Copfbltby ΘUIPyI I KyIHe opHaTbI, T4 TYMeciH 5" pet 6acblb3.
Tymeni6ip pet 6ackaHa, aFbIMda Kocybl cy3ri CnHAnapbHa KaTbICTb Jxapbl DNIOdTapbl JhaHaBl.
Copfblu "DlbIbIcTbIK CnIHAI" bepei XeHe 2-kaPbIK IIOdbI XaHyDbI TOKTaTaDbI.
Copfblu ΘUIPYIkyiHpe opanraHa deiH, 1-ui xapbIK IIOdbI waamMeH 2"XaHbIn TpyaDbI.
TexHnKaJIbIK KbI3MeT KOpceTy
Tazanay
TataayuH IN TEK 6eHTapan Jkyfblw 3aTneH cyanHaH anpnaBly uSybepeKTI naJdanaHbIHbI3. KYPblfblHbI HEMECA T3ALAY KYPALbIH PAADANAHbAHbI3! A6pa3nJaBk Kocnacb6ap 3aTbI naJdaNahBaHbI3.CINPTTI PAADANAHbAHbI3!
PanaHeJIb
8-9_22-23-cypet
PanahebreTexHnKanbIK KbI3MeT KepceTy
BənwekTey:
Ohu valjatombega version
-tommake paneeli enda poole.
Puhastamine
- atrums - led 1
- atrums - led 2
- atrums - led 3
- atrums (intensivais) - led 4 (mirgujooss)
23-22 9-8 jSs 23-22 9-8 aai
y (ON 1234567890) 21234567890
.(a.240)4ac 1ac 1ac 1ac 1ac 1ac 1ac 1ac 1ac 1ac 1ac 1ac 1ac 1ac 1ac 1ac 1ac 1ac 1ac 1ac 1ac 1ac 1ac 1ac 1ac 1ac 1ac 1ac 1ac 1ac 1ac 1ac 1ac 1ac 1
$$ 1 \text {a l l} - 1 \text {i s a l l} $$
$$ 2 \text {l l l} - 2 \text {i s} $$
$$ 3 \text {a l l} - 3 \text {a r a l l} $$
$$ (\dot {a} \dot {a} \dot {a}) 4 \frac {1}{2} \dot {1} \dot {1} \dot {1} - (\dot {a} \dot {a} \dot {a}) 4 \dot {a} \dot {a} \dot {a} $$
5 5 5 5
Clll lbc bcll 1y j Lj a bll Jbnl .3acnllblal
$$ \therefore \text {a c} _ {\text {i n}} \text {c u g} _ {\text {j}}. T 4 $$
biT4Liall 1e biolil aerll ci jbi
$$ \therefore \mathrm {a g a l l} \mathrm {c a l l} \mathrm {i c} \mathrm {b l a s s} $$
$$ \therefore \lim _ {w \to 0} \frac {\sin {w}}{w ^ {2}} $$
$$ (\mathrm {s i g m a} 1 \mathrm {d u l l}) \mathrm {a d j a c t} 2 0 - 1 \mathrm {d e r} $$
$$ (\text {j a m b d a 2} \quad \text {d i f f}) \text {a s} \text {i s} 1 5 - 2 \text {i s} \text {d i f f} $$
$$ (\text {i} \text {a} \text {a} 3 \text {d} \text {d} \text {d}) \text {s} \text {d} \text {d} 1 0 - 3 \text {d} \text {d} \text {d} $$
$$ (1 2 a + 4 \frac {1}{2} \text {l i l}) \frac {1}{2} \text {l i} 5 - (a b c) 4 a c \text {l i l} $$
j0blal 2T2 10all 1e baiyally cagall jie wll elil acjwll jiaei iigcagall abill
eai jy ci jzall bail jnblil 3 1aill a biull
bailg bail g 10
$$ \therefore a b \geq 2 a c \geq 2 a c $$
$$ \therefore \text {g a l l} $$
$$ . 1 \text {d i s t i n g} \text {j a r e} \text {j a r e} \text {j a r e} \text {j a r e} \text {j a r e} \text {j a r e} \text {j a r e} \text {j a r e} \text {j a r e} \text {j a r e} \text {j a r e} \text {j a r e} \text {j a r e} \text {\Delta} 4 0 $$
$$ \therefore \text {i n t e r n a l} j \neq \text {i n t e r n a l} i \Rightarrow \text {i n t e r n a l} j \Rightarrow \text {i n t e r n a l} i \Rightarrow \text {i n t e r n a l} j \Rightarrow \text {i n t e r n a l} i \Rightarrow \text {i n t e r n a l} j \Rightarrow \text {i n t e r n a l} i \Rightarrow \text {i n t e r n a l} j \Rightarrow \text {i n t e r n o u l o s} i $$
$$ \therefore \text {i n} 5 \text {a d} T 4 \text {j i l b a i l j u r i t i o n} $$
1 11111111111111111111111
$$ . \dot {u} \dot {s} \dot {o} s $$
$$ \therefore \mathrm {s i g m a} \mathrm {s i g m a} \mathrm {s i g m a} $$
$$ 2 \text {d i s t i n g} \text {j y} \text {i f} \text {i f} \text {i f} \text {i f} \text {i f} \text {i f} \text {i f} \text {i f} \text {i f} \text {i f} \text {i f} \text {i f} \text {i f} \text {i f} \text {i f} \text {i f} \text {i f} \text {\Delta 1 6 0} $$
$$ \therefore \text {c u r l} \int_ {D} f (x) d x = \int_ {D} f (x) d x = \int_ {D} f (x) d x = \int_ {D} f (x) d x $$
$$ \therefore \int_ {a} ^ {b} 5 d t T 4 j l b i a n j (l l b u e d) $$
2 1111111111111111111
$$ . \dot {2} \dot {2} \dot {2} \dot {2} \dot {2} $$
111 1
$$ \therefore \text {L i l l} 2 1 $$
sslll lly 1 1 1 1 1 1 1 1 1 1 1
$$ \therefore \therefore y = 0. 5 c m $$
a 1
$$ \therefore \Delta A D E \cong \Delta A D E \cong \Delta B D E $$
J 1
Jssssssssssssssssssssssssssssssssssssssssssssssssssssss
$$ \therefore \Delta = 2 0 $$
$$ \therefore \text {i g} _ {\text {的}} \text {i g} _ {\text {的}} $$
Cieidglejuiyblaiip OFFglcblll
$$ \therefore \text {5} \text {T 4} $$
sll l, y sll l lal a bla t o 1 1 1 1 1 1 1 1 1 1 1 1 1 1 1 1 1 1 1 1 1 1 1 1 1 1 1 1
a11bl 111111111111111111111111
aaiiaaae
auiia 1i i jai yj ai gii jii a
jgllll l1 bill 100000000000000000000000000000000000000000000000000000000000000000000
J 1 J 1 J 1 J 1 J 1 J 1 J 1 J 1 J 1 J 1 J 1 J 1 J 1 J 1 J 1 J 1 J 1 J 1 J 1 J 1 J 1 J 1 J 1 J 1 J 1 J 1 J 1 J 1 J 1 J 1 J 1 J 1 J 1 J 1 J
1
a 1
ai a j = f( xi)
Sai jg jg jg jg jg jg jg jg jg
j
y j 1021/19/EC
jll jlll lill (WEEE) 1y 1y 1y 1y 1y 1y 1y 1y 1y 1y 1y 1y 1y 1y 1y 1y 1y 1y 1y 1y 1y 1y 1y 1y 1y
a

aie gai iie 1iiaaiie 1ie jaiy jai y iai 1i aie 1i iai 1i iai 1i iai 1i iai 1i iai 1i iai 1i iai 1i iai 1i iai 1i iai 1i iai 1i iai 1i iai 1i iai 1i iai 1i iai 1i iai 1i iai 1i iai 1i iai 1i i ai 1i ai 1i ai 1i ai 1i ai 1i ai 1i ai 1i ai
jgl 14 a c y j
cilllgllljio jililjai jililjai jilil
:
EN/IEC 60335-2- EN/IEC 60335-1:
.EN/IEC62233,31
EN/IEC 61591; ISO 5167-1; ISO
5167-3; ISO 5168; EN/IEC 60704-1; EN/IEC
60704-2-13; EN/IEC 60704-3; ISO 3741; EN
50564; IEC 62301.
EN 55014-1; CISPR: (吉 吉 吉 吉 吉 吉 吉 吉 吉 吉 吉 吉 吉 吉 吉 吉 吉 吉 吉 吉 吉 3 - 2) EN/IEC 61000-
12i gilll plabll sb Lly Lgios
bIa
J 1
iililyu wsi g o jolllg jzall
Jdall
y jll
i
1
J 1
jll jll jll
C. uai 羽 ball 2. go pfuli wul ic a iii
aiai 1
y
1.5 jill iLac o Lalai el gii 21 21
aLwllg aolly balaal llg ailll 1
Ld 1
124 a 1000 1000 1000 1000 1000 1000 1000
- jjN j
gill jj 100
.5
Jaiil
1
y
J 1
cull 1
g Lai j gill a aal ll bbl c l y
S ( 1 - x) = x
aalaaai aiee ai aeai jss
a laal
j 1 j 1 j 1 j 1 j 1 j 1 j 1 j 1 j 1 j 1 j 1 j 1 j 1 j 1 j 1 j 1 j 1 j 1 j 1 j 1 j 1 j 1 j 1 j 1 j 1 j 1 j 1 j 1 j 1 j 1 j 1 j 1 j 1 j 1 j
1
e 1 1 1 1 1 1 1 1 1 1 1 1 1 1 1 1 1 1 1 1 1 1 1 1 1 1 1 1 1 1 1 1 1 1
j 10
jill jw aolc 10g 2j:clalil gjla 1.
g E g J 1 1 1 1 1 1 1 1 1 1 1 1 1 1 1 1 1 1 1
j j 1
S四边形 AOBC = S ABC + S_ AOB
