
M8889 - Espresso SAECO - Free user manual and instructions
Find the device manual for free M8889 SAECO in PDF.

 FR
FR
 AZ
AZ
 BG
BG
 CS
CS
 DA
DA
 DE
DE
 EL
EL
 EN
EN
 ES
ES
 ET
ET
 FI
FI
 HE
HE
 HU
HU
 HY
HY
 IT
IT
 KA
KA
 KK
KK
 KY
KY
 LT
LT
 LV
LV
 MK
MK
 NL
NL
 NO
NO
 PL
PL
 PT
PT
 RO
RO
 RU
RU
 SK
SK
 SL
SL
 SQ
SQ
 SV
SV
 TG
TG
 TK
TK
 UK
UK
 UZ
UZ
| Product type | Automatic espresso machine with grinder |
| Brand | Saeco |
| Model | M8889 (Xelsis SUPREMA) |
| Dimensions (W x H x D) | 287 x 396 x 487 mm |
| Weight | 11 - 12.4 kg |
| Water tank capacity | 1.7 L |
| Bean hopper capacity | 450 g |
| Coffee grounds bin capacity | 15 doses |
| Milk reservoir capacity | 600 ml |
| Adjustable dispensing height | 75 - 148 mm |
| Grinder type | Ceramic burr grinder with 12 settings |
| Main features | BeanMaestro, CoffeeMaestro, CoffeeEqualizer Touch+, ExtraShot, HygieSteam, AquaClean, Wi-Fi connected |
| Maintenance and cleaning | Automatic programs: brewing group cleaning, descaling, HygieSteam, Deep Milk Clean; dishwasher-safe parts |
| Safety | Automatic shut-off, water presence detection, overheat protection |
| Spare parts and repairability | AquaClean filter (CA6903), descaling agent (CA6700), grease (HD5061), degreasing tablets (CA6704), milk circuit cleaner (CA6705), maintenance kit (CA6707) |
| Connectivity | Wi-Fi 2.4 GHz 802.11 b/g/n, compatible with Alexa and Amazon Smart Reorders |
| General information | French manual available, 858 pages; product registration recommended |
Frequently Asked Questions - M8889 SAECO
User questions about M8889 SAECO
0 question about this device. Answer the ones you know or ask your own.
Ask a new question about this device
Download the instructions for your Espresso in PDF format for free! Find your manual M8889 - SAECO and take your electronic device back in hand. On this page are published all the documents necessary for the use of your device. M8889 by SAECO.
USER MANUAL M8889 SAECO
SV ANVÄNDARHANDBOK
TK ULANYJY GOLLANMASY
EL ΕΓΧΕΙΡΙΔΙΟ ΧΡΗΣΗΣ
BG РЪКОВОДСТВО ЗА ПОТРЕБИТЕЛЯ
KY КОЛДОНУУЧУНУН КИТЕПЧЕСИ
MK КОРИСНИЧКО УПАТСТВО
RU РУКОВОДСТВО ПОЛЬЗОВАТЕЛЯ
TG ДАСТУРИ ИСТИФОДАБАР
UK ПОСІБНИК КОРИСТУВАЧА
KK ПАЙДАЛАНУШЫ НҰСҚАУЛЫҒЫ
HY ՕԳՏԱԳՈՐԾՈՂԻ ՁԵՌՆԱՐԿ
KA მომხმარებლის სახელმძღვანელო
HE מדריך למשתמש

Machine overview (Fig. A) 4 Control panel 5 Introduction 5 Special functions 6 Brewing drinks 7 Adjusting machine settings 10 AquaClean water filter 11 Removing and inserting the brew group 12 Cleaning and maintenance 13 15 Error codes 16 Ordering accessories 17 Software updates 18 Troubleshooting 18 Technical specifications 23 Declaration of Conformity 24 Wi-Fi 24
Machine overview (Fig. A)
A1 Lid of bean hopper A2 Lid of pre-ground coffee compartment A3 Cup tray A4 Control panel A5 Socket for cord A6 Main switch A7 Drip tray A8 Drip tray release grip A9 HygieSteam container A10 HygieSteam cover with milk tube holder A11 Height-adjustable coffee and milk dispensing spout A12 Internal cappuccinatore A13 Power cord with plug
Accessories
A25 Milk container A26 Milk tube A27 Cleaning brush A28 Grease tube
A14 Grind setting knob (to learn more, visit www.saeco.com/care) A15 Bean hopper A16 Service door A17 Coffee funnel A18 Coffee residues drawer A19 Brew group (to learn more, visit www.saeco.com/care) A20 Coffee grounds container A21 Water tank A22 Lid of water tank A23 'Drip tray full' indicator A24 Drip tray cover
A29 AquaClean filter A30 Measuring spoon A31 Water hardness test strip
Control panel
There are two versions of this espresso machine. Their control panels look different, but all icons work the same way. Refer to figures B and C for an overview of all icons. Below you can find the descriptions.
B1 Off icon
B5/C5 Beans
C1 On/off icon
B6/C6 Machine settings
B2/C2 Drinks
B7/C7 Status menu
B3/C3 Drinks menu
B8/C8 Shop
B4/C4 Personal profiles
B9/C9 Start/stop icon
Introduction
Congratulations on your purchase of a Saeco full-automatic coffee machine! To fully benefit from the online support that Saeco offers, you can use the control panel to register your machine via the built-in Wi-Fi connection, or go to www.saeco.com/MyCoffeeMachine and register your product there.
Read the separate safety booklet carefully before you use the machine for the first time and save it for future reference.
Your Saeco full-automatic coffee machine allows you to connect with your Wi-Fi network to enhance your coffee experience.
By connecting your machine to your Wi-Fi network, you will be able to:
- receive personalized recommendations based on machine learning
- enjoy regular software updates to enhance your user experience; make use of the shop functionality, if available in your country; you can link your machine to your Amazon account for accessory replenishment, if this option is available in your country
- connect to your Alexa home device to make use of voice control, if available in your country
Note: This machine has been tested with coffee. Although it has been carefully cleaned, there may be some coffee residues left. We guarantee, however, that the machine is absolutely new.
Switching on the machine when you have a Xelsis SUPREMA (SM8885, SM8889 only)
Switch on the machine by pressing the main switch on the back of the machine. Touch the center of the control panel to make the 'on' icon appear on the screen. Tap the 'on' icon and follow the step-by-step instructions on the control panel.
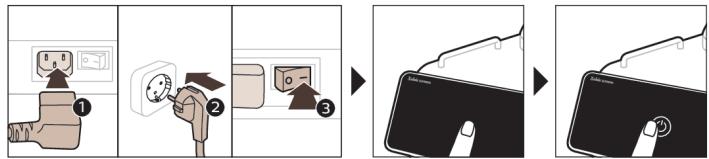
Please connect and update the machine at first installation and regularly check for manual updates.
Switching on the machine when you have a Xelsis DELUXE (SM8780, SM8782, SM8785 only)
Switch on the machine by pressing the main switch on the back of the machine. Tap the 'on' icon and follow the step-by-step instructions on the control panel.
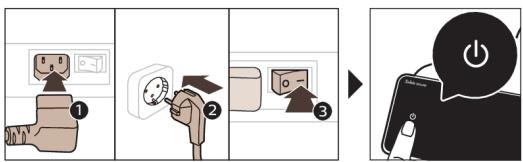
Please connect and update the machine at first installation and regularly check for manual updates.
Connecting to Wi-Fi
1 Connect your coffee machine to a 2.4 GHz 802.11 b/g/n home Wi-Fi network. i Connecting your coffee machine to your home Wi-Fi network provides you with an enhanced user experience. 1 Make sure that the coffee machine and the Wi-Fi router are within range of each other.
Follow the steps below to connect your coffee machine to your Wi-Fi network.

1 Tap the Settings icon and swipe from left to right to find the Wi-Fi icon. 2 Tap the Wi-Fi icon. 3 Follow the steps on the screen to connect your machine to your Wi-Fi network.
You are now ready to start your connected experience.
The machine will perform the automatic rinsing cycle when it is switched on and off via voice control and when the machine has been inactive for a while and switches off. Please make sure that the environment of the machine is safe.
Special functions
Special function


Purpose
With BeanMaestro you are able to select the type and roast of your beans. It then optimizes the brewing settings automatically, to get the best out of your coffee beans.
HygieSteam function automatically cleans the milk system, removing microorganisms: use it after brewing cappuccino or other milk-based drinks.

Our durable grinder is made from 100% ceramic to be exceptionally hard and precise. It can be adjusted to your taste with 12-step levels.

The Maintenance Dashboard gives you a helpful overview and notifies you with status information on things like your water level or tell you that the AquaClean is running low.
Brewing drinks
General steps
To brew a drink, you need to follow a few simple steps.
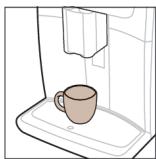

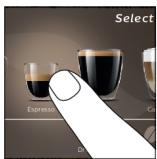

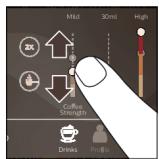


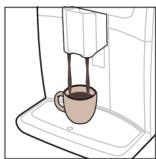
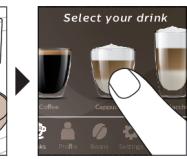
1. Fill the water tank with tap water and fill the bean hopper with beans. 2. Place one or two cups under the height-adjustable dispensing spout. Slide the dispensing spout up or down to adjust the height to the size of the cup or glass you are using. 3. Tap the Drinks icon to enter the 'Drinks' menu. Swipe from left to right to select your drink by tapping on it.
- Tap the '2x' icon if you want to brew two cups. The machine automatically carries out two grinding cycles in sequence of the selected drinks.
Note: The '2x' icon is not available for all drinks.
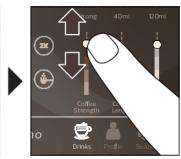
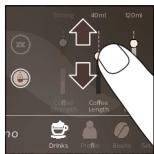
4. After selecting a drink, you can adjust the settings to your preference by swiping the adjustable bars up and down. 5. Press the start/stop icon to start brewing the selected drink.
Do not use caramelized or flavored coffee beans.
Note: Turn the grind setting knob in small steps and after brewing 5 cups of coffee you start to taste the difference.
Support on drink parameters
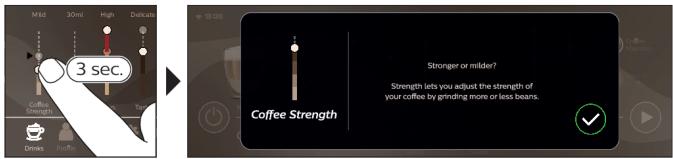
To get additional information about a specific drink parameter, press and hold an adjustable bar for 3 seconds.
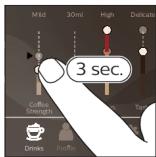

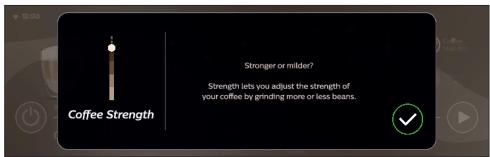
Brewing milk-based drinks
To brew milk-based drinks, you need to follow a few simple steps.
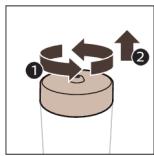

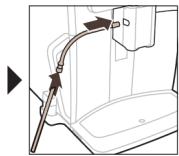
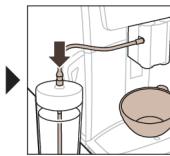
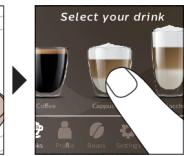
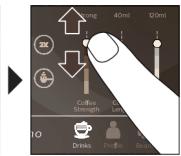
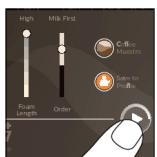
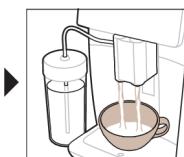
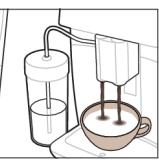
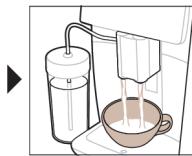
1 Fill the water tank with tap water and fill the bean hopper with beans. Tip: When the flexible milk tube is connected to the cappuccinatore, slide the dispensing spout to the uppermost position for easy access to the water tank. 2 Unscrew the lid of the milk container and fill the milk container with milk. Always use milk coming directly from the fridge for optimal results. 3 Connect the flexible milk tube to the cappuccinatore. 4 Place the metal milk tube in the container. 5 Tap the Drinks icon, scroll and select the milk-based drink icon of your choice. 6 You can adjust the settings to your preference by swiping the adjustable bars up and down. 7 Press the start/stop icon at any time to start brewing the selected drink.
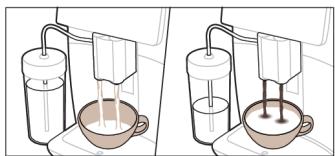
- For specific drinks, the machine first dispenses milk and then coffee. For a number of other drinks this is the other way around, the machine will first dispense coffee and then milk.
- To stop dispensing milk before the machine has dispensed the preset amount, press the start/stop icon (SM8780, SM8782, SM8785 only) or press the stop icon (SM8885, SM8889 only).
- To stop dispensing the complete drink (milk and coffee) before the machine is finished, press and hold the start/stop icon (SM8780, SM8782, SM8785 only) or press the stop icon (SM8885, SM8889 only).
4 Directly after dispensing the milk, the 'HygieSteam Shot' is performed. The machine shoots steam through the internal milk system to rinse it quickly. The metal part of the milk tube may become hot. To avoid the risk of burns, let it cool down first.
Tip: You can also use a regular milk carton to brew your milk-based drinks. Place the metal milk tube directly into the milk carton.
Brewing coffee with pre-ground coffee
To brew coffee with pre-ground coffee, you need to follow a few simple steps.
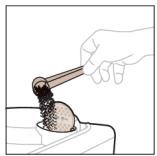

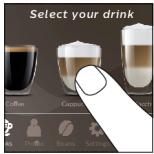

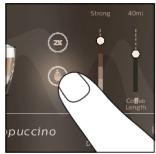

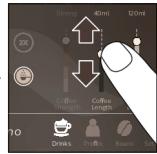

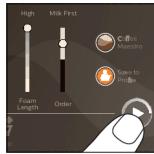

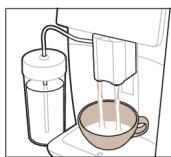
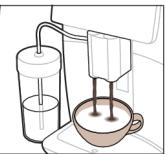
1 Open the lid of the pre-ground coffee compartment and pour one measuring spoon of pre-ground coffee into it. Then close the lid. 2 Tap the Drinks icon, scroll from left to right and select your drink. 3 Tap the pre-ground coffee icon. 4 You can adjust the settings to your preference by swiping the adjustable bars up and down. 5 Press the start/stop icon to start brewing the selected drink.
If you select pre-ground coffee, you cannot adjust the coffee strength or brew more than one drink at the same time.
Dispensing hot water
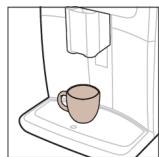
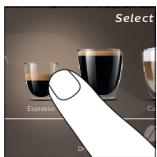
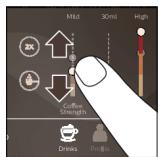
1 Make sure that the internal cappuccinatore is correctly attached to the machine (Fig. 1). 2 Place a cup under the spout. 3 Tap 'Hot Water' (Fig. 2). 4 Slide the adjustable bars up and down to adjust the hot water quantity or temperature to your preference (Fig. 3). 5 Press the start/stop icon. 6 To stop dispensing hot water before the machine is finished, press the start/stop icon again (SM8780, SM8782, SM8785 only) or press the stop icon again (SM8885, SM8889 only).
Personalization
The machine allows you to adjust the settings of a drink to your own preference and to store the adjusted drink in a personal profile. You can choose your own icon and your own profile name.
Get the best out of your beans with the BeanMaestro function
With BeanMaestro you are able to select the type and roast of your beans. It then optimizes the brewing settings automatically, to get the best out of your coffee beans.
1 Tap on the Beans icon in the main menu (Fig. 4). 2 Tap the BeanMaestro function (Fig. 5). 3 Select the type of beans. You can choose between Arabica and Robusta blend. 4 Select the roasting level of your beans. 5 The brewing settings are optimized automatically. 6 Enjoy your next coffee.
Speed up with CoffeeMaestro
Your machine offers the possibility to select taste profiles instead of adjusting all settings separately with the CoffeeMaestro function. You can choose between Delicato, Intenso and Forte. To select a CoffeeMaestro taste profile:
1 Tap the drink icon of your choice (Fig. 6). 2 Tap the CoffeeMaestro icon repeatedly (Fig. 7).
The main settings of the drink are now adjusted accordingly.
3 Press the start/stop ▸ icon to start brewing the drink.
Personalize your drink with the CoffeeEqualizer Touch+ function
After selecting a drink, the CoffeeEqualizer Touch+ function is activated automatically, allowing you to adjust the drink settings. Long press on each of the items on the display to activate the help function and receive further information.
With the CoffeeEqualizer Touch+ function you can adjust the following settings:
1 Aroma strength
6 Foam amount
2 Coffee quantity
7 Coffee flavor
3 Milk quantity
8 You can also decide to prepare 1 or 2 cups
4 Water quantity
9 The order of first dispensing coffee or milk
5 Drink temperature
Note: It depends on the drink you choose which settings you can adjust.
Save your favorite drinks in a profile
The machine allows you to adjust the settings of a drink to your own preference and to store the adjusted drink in a personal profile. You can select a profile and store a recipe using the profiles.
You can create a profile and add a drink using the profile icon.
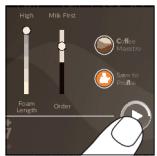
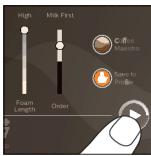
1 Tap the profile icon on the main menu (Fig. 8). 2 Tap the Plus icon (Fig. 9). 3 Type your name and select your favorite icon. 4 You are ready to add a drink. Tap the drink icon of your choice. 5 Personalize the drink via the CoffeeEqualizer Touch+ or the CoffeeMaestro function. 6 Tap on the 'Safe to profile' icon to store it in your personal profile (Fig. 10).
Extra shot (ExtraShot)
Your machine offers you the possibility to add an extra shot of Ristretto to your coffee and milk drinks, for example if you want to have a stronger coffee.
1 Place a cup under the spout. 2 Tap one of the one-touch drinks icons to select a drink (Fig. 6). 3 Slide the adjustable bar up to set the strength to the top level and select the ExtraShot function (Fig. 11). 4 Then press the start/stop icon (SM8780, SM8782, SM8785 only) or press the start icon (SM8885, SM8889 only) to start brewing the drink. 5 To stop dispensing the drink before the machine has finished, press the start/stop icon again (SM8780, SM8782, SM8785 only) or press the stop icon again (SM8885, SM8889 only).
1 When you have selected the ExtraShot function, you can only brew one coffee at a time. i The extra shot function is not available for all drinks.
Adjusting machine settings
You can adjust most machine settings by tapping the Settings icon and following the steps on the screen.
For online support (frequently asked questions, movies, etc.), scan the QR code on the cover of this booklet or visit www.saeco.com/care
Setting the water hardness
We advise you to adjust the water hardness setting to the water hardness level in your region for optimal performance and a longer lifetime of the machine. This also prevents you from having to descale the machine too often. The default water hardness setting is 4: hard water.
Use the water hardness test strip supplied in the box to determine the water hardness in your region:
1 Immerse the water hardness test strip in tap water or hold it under the tap for 1 second (Fig. 12). 2 Wait 1 minute. The number of squares on the test strip that turn red indicate the water hardness (Fig. 13).
Set the machine to the correct water hardness:
1 Tap the Settings icon and scroll from left to right to select 'Water hardness'. 2 Select the water hardness level. The number of red squares selected on the display should be the same as the number of red squares on the test strip (Fig. 14). 3 When you have set the correct water hardness, tap the confirmation icon to confirm.
Adjusting the grind setting
You can change the coffee strength with the grind setting knob inside the bean container. The lower the grind setting, the finer the coffee beans are ground and the stronger the coffee becomes. There are 12 different grind settings you can choose from.
The machine has been set up to get the best taste out of your coffee beans. Therefore we advise you not to adjust the grind setting until you have brewed 100-150 cups (approx. 1 month of use).
i You need to brew 2 to 3 drinks before you can taste the full difference.
A Do not turn the grind setting knob more than one notch at a time to prevent damage to the grinder. 1 Tap the Beans icon in the main menu. 2 Tap on "Grinder". 3 Watch the how to video.
Restoring factory settings
The machine offers you the possibility to restore the factory settings at any moment.
1 Tap the Settings icon. 2 Scroll from left to right to select 'Factory settings'. Confirm by tapping the confirmation icon.
- The settings are now restored.
The following factory settings are restored to default: water hardness, standby time, display brightness, sound, front illumination, profiles, tank light, measure/units, home screen settings, BeanMaestro preferences, Wi-Fi credentials, software update preferences, Saeco credentials, Amazon credentials.
AquaClean water filter
Your machine is AquaClean enabled. You can place the AquaClean water filter in the water tank to preserve the taste of your coffee. It also diminishes the need for descaling by reducing limescale build-up in your machine. You can purchase an AquaClean water filter from your local or online retailer or from authorized service centers.
AquaClean filter status indication
The status of the AquaClean filter is always visible in the 'Status' menu as a percentage.
- If the status of the AquaClean filter is 10% or less, the screen shows a message for 2 seconds each time you switch on the machine. This message advises you to buy a new filter.
- If the status of the filter is 0%, the machine asks you to replace the AquaClean filter every time you switch on the machine.
Activating the AquaClean water filter (5 min.)
1 The machine does not automatically detect that a filter has been placed in the water tank. Therefore you need to activate each new AquaClean water filter that you install in the 'Status' menu. When the machine stops showing the filter activation message, you can still activate an AquaClean water filter, but you will need to descale the machine first. Your machine has to be completely limescale-free before you start using the AquaClean water filter. Before activating the AquaClean water filter, it has to be prepared by soaking it in water as described below. If you don't do this, air might be drawn into the machine instead of water, which makes a lot of noise and prevents the machine from being able to brew coffee.
1 Tap the 'Status' icon and scroll from left to right to select 'AquaClean'. 2 Tap the confirmation icon again when the activation screen appears. Follow the instructions on the screen.
Replacing the AquaClean water filter (5 min.)
After 95 liters of water have flowed through the filter, the filter will cease to work. The AquaClean status indicator drops to 0% to remind you to replace the filter. If you do not replace the AquaClean water filter in time, you can still replace the filter but you first need to descale the machine.
When the AquaClean status indicator drops to 0% or when the machine reminds you to replace the AquaClean filter:
1. Take out the old AquaClean water filter. 2. Install a new filter and activate it as described in the chapter 'Activating the AquaClean water filter (5 min.)'. Replace the AquaClean water filter at least every 3 months, even if the machine does not yet indicate that replacement is required.
Removing and inserting the brew group
Go to the 'Status' menu on the screen and select 'Brew group clean' or visit www.saeco.com/care for detailed video instructions on how to remove, insert, and clean the brew group.
Removing the brew group from the machine
1. Open the service door (Fig. 15). 2. Remove the coffee residues drawer (Fig. 16). 3. Press the PUSH button (Fig. 17) and pull at the grip of the brew group to remove it from the machine (Fig. 18).
Reinserting the brew group
Before you slide the brew group back into the machine, make sure it is in the correct position.
1. Check if the arrow on the yellow cylinder on the side of the brew group is aligned with the black arrow and N (Fig. 19).
- If they are not aligned, push down the lever until it is in contact with the base of the brew group (Fig. 20).
2. Make sure that the yellow locking hook on the other side of the brew group is in the correct position. - To position the hook correctly, push it upwards until it is in the uppermost position (Fig. 21). 3. Slide the brew group back into the machine along the guiding rails on the sides (Fig. 22) until it locks into position with a click (Fig. 23). Do not press the PUSH button. 4. Place back the coffee residues drawer and close the service door.
Cleaning and maintenance
Your machine will advise you when to perform cleaning and maintenance.
Regular cleaning and maintenance keeps your machine in top condition and ensures good-tasting coffee for a long time with a steady coffee flow.
Consult the table below for a detailed description of when and how to clean all detachable parts of the machine. You can find more detailed information and video instructions on www.saeco.com/care. See figure C for an overview of which parts can be cleaned in the dishwasher.
| Item | When to clean | How to find in the control panel/What to do |
| AquaClean filter | When the machine asks you or every three months. | STATUS->CLEANING->AQUACLEAN. Follow the steps to activate the AquaClean filter. |
| i The machine does not automatically detect that a filter has been placed in the water tank. Therefore you need to activate each new AquaClean filter that you install in the 'Status' menu. | ||
| i Your machine has to be completely limescale-free before you start using the AquaClean filter. | ||
| i Replace the AquaClean filter at least every 3 months, even if the machine does not yet indicate that replacement is required. | ||
| Brew group | Weekly | STATUS -> PERFORMANCE ->BREW GROUP CLEAN. Follow the steps to remove and clean the brew group. |
| i Before you slide the brew group back into the machine, make sure it is in the correct position. The arrow on the yellow cylinder on the side of the brew group has to be aligned with the black arrow and N (Fig. 19). | ||
| Monthly | STATUS -> PERFORMANCE ->COFFEE OIL REMOVAL. Follow the steps of the self-cleaning process to automatically remove coffee oil residues from the brew group. | |
| Milk system/internal cappuccinatore | After every day of use | STATUS -> HYGIESTEAM. Follow the steps of the self-cleaning process to clean the milk system. Wipe the outside of the metal milk tube with a damp cloth before placing it into the milk tube holder. |
| Weekly | Remove and disassemble the internal cappuccinatore. Rinse all parts under the tap with some washing-up liquid. | |
| Monthly | STATUS -> HYGIESTEAM -> DEEP MILK CLEAN. Follow the steps of the self-cleaning process to clean the milk system. | |
| Milk container | Weekly | Disassemble the milk container (Fig. 24) and push out the ball using the pin of the milk tube (Fig. 25). Clean all parts of the milk container under the tap or in the dishwasher. |
| HygieSteam container (milk tube holder) | Weekly or when the machine reminds you | Remove the HygieSteam container from the machine (Fig. 26) and remove the HygieSteam cover (Fig. 27). Clean the HygieSteam container and cover under the tap. |
| Pre-ground coffee compartment | Check the pre-ground coffee compartment weekly to see if it is clogged | Unplug the machine and remove the brew group. Open the lid of the pre-ground coffee compartment and insert the spoon handle into it. Move the handle up and down until the clogged ground coffee falls down (Fig. 28). Go to www.saeco.com/care for detailed video instructions. |
| Coffee grounds container | Empty the coffee grounds container when prompted by the machine. Clean it weekly | Remove the coffee grounds container while the machine is switched on. Rinse it under the tap with some washing-up liquid. |
| Drip tray | Empty the drip tray daily or as soon as the red 'drip tray full' indicator pops up through the drip tray (Fig. 29). Clean the drip tray weekly | Remove the drip tray (Fig. 30) and rinse it under the tap with some washing-up liquid. |
| Lubrication of the brew group | Every 2 months | Lubricate the brew group with the by-packed grease (see 'Lubricating the brew group'). Go to www.saeco.com/care for detailed video instructions. |
| Water tank | Weekly | Rinse the water tank under the tap. |
| Machine front | Weekly | Clean with a non-abrasive cloth. |
| Descaling of the machine | When the machine asks you to descale | STATUS -> DESCALING. Follow the steps to descale the machine. When descaling is needed, the machine asks you to descale it, press the OK icon to start and follow the steps. |
Cleaning the brew group
Regular cleaning of the brew group prevents coffee residues from clogging up the internal circuits. Go to the 'Status' menu on the screen and select 'Brew group clean' or visit www.saeco.com/care for support videos on how to remove, insert and clean the brew group.
Cleaning the brew group under the tap
1 Tap the 'Status' icon and scroll to select 'Brew group clean'. 2 Tap the confirmation checkmark icon to confirm and then follow the instructions on the screen.
Cleaning the brew group with the coffee oil remover tablets
Only use Philips coffee oil remover tablets.
1 Tap the 'Status' icon and scroll to select 'Brew group clean'. 2 Tap the confirmation checkmark icon to confirm and then follow the instructions on the screen.
Lubricating the brew group
To improve your machine's performance, we suggest that you lubricate the brew group every 2 months, to ensure that the moving parts continue to move smoothly.
1 Apply a thin layer of grease on the piston (grey part) of the brew group (Fig. 31). 2 Apply a thin layer of grease around the shaft (grey part) in the bottom of the brew group (Fig. 32). 3 Apply a thin layer of grease to the guiding rails on both sides (Fig. 33).
Cleaning programs for the internal cappuccinatore
1 The machine tells you when to clean the internal cappuccinatore.
The machine has three programs to clean the internal cappuccinatore:
- 'HygieSteam Shot': during the preparation of a milk-based drink, the machine automatically shoots steam through the internal cappuccinatore to rinse it quickly.
- 'HygieSteam': the machine thoroughly cleans the internal milk system with steam. Make sure that the HygieSteam container is correctly assembled (Fig. 34) and attached to the machine (Fig. 35). Place the milk tube in the milk tube holder (Fig. 36) and follow the instructions on the screen.
- 'Deep Milk Clean': Perform the 'Deep Milk Clean' procedure with the Philips milk circuit cleaner for a thorough cleaning of the internal milk system.
Cleaning the internal cappuccinatore under the tap
1 Open the door of the internal cappuccinatore (Fig. 37). 2 Remove the internal cappuccinatore by pulling it down (Fig. 38). 3 Disassemble the internal cappuccinatore by pulling the bottom part off the top part (Fig. 39). 4 Disassemble all parts (Fig. 40) and clean them under the tap. 5 Reassemble the internal cappuccinatore. 6 To place back the internal cappuccinatore, put it in upright position and make sure the holes are aligned with the two tubes on the machine. Then move the internal cappuccinatore upwards until it locks into place (Fig. 1). 7 Close the door.
Visit www.saeco.com/care for detailed video instructions.
Descaling procedure
Please use Philips descaler only. Under no circumstances should you use a descaler based on sulfuric acid, hydrochloric acid, sulfamic or acetic acid (vinegar) as this may damage the water circuit in your machine and will not dissolve the limescale properly. Not using the Philips descaler will void your warranty. Failure to descale the appliance will also void your warranty. You can buy Philips descaler from your local or online retailer or from authorized service centers.
1 When the machine asks you to descale it, tap the confirmation checkmark icon to start. To start descaling without being prompted by the machine, tap the 'Status' icon and select 'Descale'. 2 Remove the drip tray, the coffee grounds container and the HygieSteam container (Fig. 26), empty them and put them back into place. 3 Remove the water tank and empty it. Then remove the AquaClean filter. 4 Pour the whole bottle of Philips descaler into the water tank and then fill it with water up to the CALC CLEAN level (Fig. 41). Then place the water tank back into the machine. 5 Place a large container (1.5 l) under the coffee dispensing spout. 6 Make sure that the HygieSteam container is correctly assembled (Fig. 34) and attached to the machine (Fig. 35). Place the milk tube in the milk tube holder. 7 Follow the instructions on the screen to start the descaling procedure. The descaling procedure lasts approx. 30 minutes and consists of a descaling cycle and a rinsing cycle. 8 Once the descaling cycle is finished, you need to rinse the water tank and water circuit. Follow the instructions on the screen. 9 Place a new AquaClean filter in the water tank and activate it (see 'Activating the AquaClean water filter (5 min.)').
Tip: Using the AquaClean filter reduces the need for descaling!
What to do if the descaling procedure is interrupted
You can exit the descaling procedure by pressing the on/off icon on the control panel. If the descaling procedure is interrupted before it is completely finished, some descaling liquid may remain in the water tank or the water circuit. In that case, do the following:
1 Empty and rinse the water tank thoroughly. 2 Fill the water tank with fresh water up to the CALC CLEAN level indication and switch the machine back on. The machine will heat up and perform an automatic rinsing cycle. 3 Before brewing any drinks, perform a manual rinsing cycle. To perform a manual rinsing cycle, first dispense half a water tank of hot water and then brew 2 cups of pre-ground coffee without adding ground coffee.
Note: If the descending procedure was not completed, the machine will require another descending procedure as soon as possible.
Error codes
Below you find a list of the error codes showing problems that you can solve yourself. Video instructions are available on www.saeco.com/care. If another error code appears, please contact the Consumer Care Center in your country. For contact details, see the warranty leaflet.
| Error code | Problem | Possible solution |
| 01 | The coffee funnel is clogged. | Switch off the machine and unplug it. Remove the brew group. Then open the lid of the pre-ground coffee compartment and insert the spoon handle. Move the handle up and down until the clogged ground coffee falls down (Fig. 28). Visit www.saeco.com/care for detailed video instructions. |
| 03 | The brew group is dirty or not well-greased. | Switch off the machine. Rinse the brew group with fresh water, let it air-dry and then lubricate it (see 'Lubricating the brew group'). Consult chapter 'Cleaning the brew group' or visit www.saeco.com/care for detailed video instructions. Then switch the machine on again. |
| 04 | The brew group is not positioned correctly. | Switch off the machine. Remove the brew group and reinsert it. Make sure that the brew group is in the correct position before you insert it. Consult chapter 'Handling the brew group' or visit www.saeco.com/care for detailed video instructions. Then switch the machine on again. |
| 05 | There is air in the water circuit. | Restart the machine by switching it off and on again. If this works, dispense 2-3 cups of hot water. Descale the machine if you have not done so for a longer period of time. |
| The AquaClean filter was not prepared properly before installation or it is clogged. | Remove the AquaClean filter and try to brew a coffee again. If this works, make sure that the AquaClean filter is prepared properly before you place it back (see 'Activating the AquaClean water filter (5 min.)'). Put the AquaClean filter back into the water tank. If this still does not work, the filter might be clogged and needs to be replaced. | |
| 11 | The machine needs to adjust to room temperature | Allow some time for the machine to adjust from transport/outdoor temperature to room temperature. Switch off the machine for 30 minutes and switch it on again. If this does not work, contact the Consumer Care Center in your country. For contact details, see the warranty leaflet. |
| 14 | The machine is overheated. | Switch off the machine and switch it back on after 30 minutes. |
| 19 | The machine is not connected to the wall socket properly. | Make sure that the small plug of the power cord is properly connected to the socket on the back of the machine. |
Ordering accessories
To clean and descale the machine, only use Philips maintenance products. These products can be purchased by enabling Amazon Smart Reorders, from your local or online retailer or from authorized service centers.
To be able to use Amazon Smart Reorders, you first need to activate this service on Amazon. Then follow the steps on the screen of your machine to connect your Amazon account to your Saeco account. After you have completed these steps, you can use the Amazon Smart Reorder service. In the 'Shop' menu on the control panel of the machine you can view the availability of Philips maintenance products and accessories at local retailers.
To find a full list of spare parts online, enter the type number of your machine. You can find the type number on the inside of the service door.
Maintenance products and type numbers:
- Descaling solution CA6700
- AquaClean filter CA6903 Brew group grease HD5061
- Coffee oil remover tablets CA6704
- Milk circuit cleaner CA6705
- Maintenance kit CA6707
Software updates
Updating is essential to safeguard your privacy and ensure proper functioning of your coffee machine. You can choose whether you want to update your machine manually or automatically.
If you select automatic updates, make sure the machine is plugged in at night and Wi-Fi is enabled, so it can receive software updates overnight. Updates are made available when there are software improvements, new features, or to prevent potential security issues. Mandatory firmware updates start automatically when the coffee machine is in stand-by mode. During a firmware update, the coffee machine cannot be used.
Troubleshooting
This chapter summarizes the most common problems you might encounter with the machine. Support videos and a complete list of frequently asked questions are available at www.saeco.com/care. If you are unable to solve the problem, contact the Consumer Care Center in your country. For contact details, see the warranty leaflet.
| Problem | Cause | Solution |
| There are some coffee residues inside my new coffee machine. | This machine has been tested with coffee. | Although it has been carefully cleaned, there may be some coffee residues left. However, the machine is absolutely new. |
| The machine is in DEMO mode. | You pressed the standby icon for more than 8 seconds. | Switch the machine off and then on again with the main switch on the back of the machine. |
| The drip tray fills up quickly / there is always some water in the drip tray. | This is normal. The machine uses water to rinse the internal circuit and brew group. Some water flows through the internal system directly into the drip tray. | Empty the drip tray daily or as soon as the red 'drip tray full' indicator pops up through the drip tray cover (Fig. 29). Tip: place a cup under the dispensing spout to collect rinsing water that comes out of it. |
| The 'empty coffee grounds container' icon remains on. | You emptied the coffee grounds container while the machine was unplugged from the wall socket, or you placed it back too fast. | Remove the coffee grounds container, wait at least 5 seconds and then insert it again. |
| The machine prompts to empty the coffee grounds container even though the container is not full. | The machine did not reset the counter the last time you emptied the coffee grounds container. | Always wait approx. 5 seconds when you place back the coffee grounds container. In this way, the coffee pucks counter will be reset to zero and the number of coffee pucks is counted correctly. |
| The coffee grounds container is too full and the 'empty coffee grounds container' icon did not appear on the display. | You removed the drip tray without emptying the coffee grounds container. | When you remove the drip tray, also empty the coffee grounds container even if it contains only a few coffee pucks. This ensures that the coffee pucks counter is reset to zero and that the number of coffee pucks is counted correctly. |
| I cannot remove the brew group. | The brew group is not in the correct position. | Reset the machine in the following way: close the service door. Switch the machine off and back on again and wait until the machine is ready for use. Try to remove the brew group again. See chapter 'Removing and inserting the brew group' for step-by-step instructions. |
| I cannot insert the brew group. | The brew group is not in the correct position. | Reset the machine in the following way: close the service door. Leave the brew group out. Switch off the machine and unplug it. Wait for 30 seconds and then plug the machine back in, switch it on and wait until the machine is ready for use. Then put the brew group in the correct position and reinsert it into the machine. See chapter 'Removing and inserting the brew group' for step- by-step instructions. |
| The coffee is watery. | The brew group is dirty or needs to be lubricated. | Remove the brew group, rinse it under the tap and leave it to dry. Then lubricate the moving parts (see 'Lubricating the brew group'). |
| The machine is performing its self-adjustment procedure. This procedure is started automatically when you use the machine for the first time, when you change to another type of coffee beans or after a long period of non-use. | Brew 5 cups of coffee initially to allow the machine to complete its self-adjustment procedure. | |
| The grinder is set to a too coarse setting. | Set the grinder to a finer (lower) setting. Brew 2 to 3 drinks to be able to taste the full difference. | |
| The coffee is not hot enough. | The temperature is set too low. | Set the temperature to the maximum setting (Fig. 42). |
| A cold cup reduces the temperature of the drink. | Preheat the cups by rinsing them with hot water. | |
| Adding milk reduces the temperature of the drink. | Regardless of whether you add hot or cold milk, adding milk always reduces the temperature of the coffee. Preheat the cups by rinsing them with hot water. | |
| Coffee does not come out or coffee comes out slowly. | The AquaClean water filter was not prepared properly for installation. | Remove the AquaClean filter and dispense some hot water. If this works, the AquaClean filter was not installed properly. Reinstall and activate the AquaClean filter and follow all steps in chapter 'AquaClean water filter'. |
| After a long period of non-use, you need to prepare the AquaClean water filter for use again and dispense 2-3 cups of hot water. | ||
| The AquaClean water filter is clogged. | Replace the AquaClean water filter every 3 months. A filter that is older than 3 months can become clogged. | |
| The grinder is set to a too fine setting. | Set the grinder to a coarser (higher) setting. Note that this will impact the coffee taste. | |
| The brew group is dirty. | Remove the brew group and rinse it under the tap (see 'Cleaning the brew group under the tap'). | |
| The coffee dispensing spout is dirty. | Clean the coffee dispensing spout and its holes with a pipe cleaner or needle. | |
| The pre-ground coffee compartment is clogged | Switch off the machine and remove the brew group. Open the lid of the pre-ground coffee compartment and insert the spoon handle into it. Move the handle up and down until the clogged ground coffee falls down (Fig. 28). | |
| The machine circuit is blocked by limescale. | Descale the machine with Philips descaler (see 'Dscaling procedure'). Always descale when the machine prompts you. | |
| The milk does not froth. | The internal cappuccinatore is dirty or not inserted correctly. | Clean the internal cappuccinatore and make sure that you position and insert it correctly (see 'Cleaning the internal cappuccinatore under the tap'). |
| The type of milk used is not suitable for frothing. | Different types of milk result in different amounts of froth and different froth qualities. | |
| The milk is splashing. | The milk you use is not cold enough. | Make sure you use cold milk coming directly from the fridge. |
| ' | The flexible milk tube is not connected properly. | Open the door of the coffee dispensing spout (Fig. 37) and check if the flexible milk tube is fully connected to the cappuccinatore (Fig. 43). Note that the cappuccinatore and milk tubes may be hot. Let the cappuccinatore and the tubes cool down before you touch them. |
| The cappuccinatore and milk tubes are not clean. | Remove and disassemble the internal cappuccinatore (see 'Cleaning the internal cappuccinatore under the tap'). Rinse all parts under the tap. For thorough cleaning, use Philips milk circuit cleaner and perform the Deep Milk Clean procedure via the 'Status' and 'Hygiesteam' menu. Note that if the parts have been cleaned in the dishwasher, they may have become clogged by food particles or detergent residues. A visual check that they are not obstructed is also recommended. | |
| We advise you to perform the HygieSteam program every day: 1) Press 'Status' on the control panel. 2) Select 'HygieSteam'. 3) Then confirm all steps on the display. | ||
| The milk tubes are clogged. | Always store the milk container without the milk tubes in the refrigerator. Leftover milk could accumulate inside the milk tubes and block the flow of milk through the tubes. Rinse the milk tubes before storage. | |
| The machine seems to be leaking. | The machine uses water to rinse the internal circuit and brew group. This water flows through the internal system directly into the drip tray. This is normal. | Empty the drip tray every day or as soon as the 'drip tray full' indicator pops up through the drip tray cover (Fig. 29). Tip: Place a cup under the dispensing spout to collect rinsing water and reduce the amount of water in the drip tray. |
| The drip tray is too full and has overflowed which makes it look like the machine is leaking. | Empty the drip tray every day or as soon as the 'drip tray full' indicator pops up through the drip tray cover (Fig. 29). | |
| The water tank is not fully inserted, some water is leaking out of the water tank and air is drawn into the machine. | Make sure the water tank is in the correct position: remove it and reinsert it into the machine as far as possible. | |
| The brew group is dirty/clogged. | Rinse the brew group. | |
| The machine is not placed on a horizontal surface. | Place the machine on a horizontal surface so that the drip tray does not overflow and the 'drip tray full' indicator works properly. | |
| I cannot activate the AquaClean water filter and the machine asks for descaling. | The filter has not been installed or replaced in time after the screen showed the AquaClean reminder. This means your machine is not completely free of limescale anymore. | Descale your machine first and then install the AquaClean water filter. |
| The new water filter does not fit. | You are trying to install another filter than the AquaClean water filter. | Only the AquaClean water filter fits into the machine. |
| The rubber ring on the AquaClean water filter is not in place. | Place back the rubber ring on the AquaClean water filter. | |
| The machine is making a loud noise. | It is normal that your machine makes some noise during use. | If the machine starts to make a different kind of noise, clean the brew group and lubricate it (see 'Lubricating the brew group'). |
| The AquaClean water filter was not prepared properly and air is now drawn into the machine. | Remove the AquaClean water filter from the water tank and prepare it for use properly before you place it back. See chapter 'AquaClean water filter' for step-by-step instructions. | |
| The water tank is not fully inserted and air is drawn into the machine. | Make sure the water tank is in the correct position: remove it and reinsert it by pushing it into the machine as far as possible. | |
| When I try to connect the machine to Wi-Fi for the first time, the machine cannot connect to the Wi-Fi network. | Your Wi-Fi name and password are not correct. | Check your Wi-Fi name and password. |
| The coffee machine and the Wi-Fi router are not within range of each other. | Ensure that the coffee machine and the Wi-Fi router are within range of each other or use a Wi-Fi repeater. | |
| The machine is not able to find the home Wi-Fi network. | The Wi-Fi router is not working properly. | Please make sure that the Wi-Fi router is working properly and is connected to the internet. |
| The machine is not within range of the router. | Make sure the machine is within range of the router. You can also use a Wi-Fi signal repeater. | |
| The router your coffee machine is trying to connect to is 5 GHz dual-band and your coffee machine is not trying to connect to a 2.4 GHz network. | 5 GHz networks are not supported. Temporarily switch off the 5 GHz band in your router and try to pair your coffee machine again to another band of the same router (2.4 GHz). Switch on your 5 GHz band again after successful pairing | |
| I cannot use Alexa and Amazon Smart Reorders yet. | You have not yet connected to your Amazon to your Saeco account. | Please follow the instructions on the control panel of the machine to connect your Amazon account to your Saeco account to be able to use Alexa voice control and Amazon Smart Reorders. Note: To be able to use these features you need to have an Alexa app or an Alexa device and you need to enable the Smart Reorders service on Amazon. |
| The Wi-Fi connectivity of the machine used to work but is not working anymore. | Your Wi-Fi name and/or password has changed. | Follow the instructions of section 'Connecting to Wi-Fi' and choose the network with the new Wi-Fi name to connect to. |
| The Wi-Fi password has changed. | Follow the instructions of section 'Connecting to Wi-Fi' and enter the new Wi-Fi password. | |
| Your Wi-Fi router is not working properly. | Check the router and make sure it is working. | |
| The Wi-Fi connectivity can be interrupted by electromagnetic or other interferences. | Keep the appliance away from other electronic devices that may cause interferences. | |
| None of the solutions mentioned above work. | Switch the machine off and then on again with the main switch on the back to recheck the Wi-Fi connection. |
Technical specifications
The manufacturer reserves the right to improve the technical specifications of the product. All preset quantities are approximate.
| Description | Value |
| Size (w x h x d) | 287 x 396 x 487 mm |
| Weight | 11 - 12.4 kg |
| Power cord length | 1200 mm |
| Water tank | 1.7 liters, removable |
| Bean hopper capacity | 450 g |
| Coffee grounds container capacity | 15 pucks |
| Milk container capacity | 600 ml |
| Height-adjustable spout height | 75-148 mm |
| Nominal voltage - Power rating - Power supply | See data plate on the inside of service door |
| Wi-Fi frequency band | 2.4 GHz 802.11 b/g/n |
Declaration of Conformity
Hereby, DAP B.V. declares that the fully automatic espresso machines SM8780, SM8782, SM8785, SM8885, and SM8889 are in compliance with Directive 2014/53/EU.
The full text of the EU declaration of conformity is available at the following internet address:
https://www.saeco.com.
The fully automatic espresso machines SM8780, SM8782, SM8785, SM8885, and SM8889 are equipped with a Wi-Fi module, 2.4 GHz 802.11 b/g/n (channels 1..13). Maximum transmitting power < 100 mW (20 dBm).
Wi-Fi
The machine is networked equipment, in compliance with regulation (EU) No 801/2013, and is intended to be used permanently connected to a 2.4 GHz 802.11 b/g/n network.
General view of the machine (Fig. A)
A1 Lid of the coffee bean container A2 Lid of the pre-ground coffee compartment A3 Cup tray A4 Control panel A5 Socket for the cable A6 Main switch A7 Drip tray A8 Handle for removing the drip tray A9 HygieSteam container A10 HygieSteam lid with water pipe holder A11 Height-adjustable hot water/steam spout A12 Integrated Cappuccinatore A13 Detachable power cord
Accessories
A25 Water container A26 Water pipe A27 Cleaning brush A28 Descaling tube
B2/C2 Drinks
B3/C3 Drinks menu
B4/C4 Personal profiles
B5/C5 Beans
B6/C6 Machine settings
B7/C7 Status menu
B8/C8 Shop
B9/C9 Start/stop icon
for starting/stopping
Introduction
B9/C9 Start/stop icon
Introduction
B6/C6 Machine settings
C1 On/off icon
Device settings
B2/C2 Drinks
B7/C7 Status menu
B3/C3 Drinks menu
B8/C8 Shop
B4/C4 Personal profiles
B9/C9 Start/stop icon
B5/C5 Beans
Introduction
Stronger or milder? Strength lets you adjust the strength of your coffee by grinding more or less beans.


B9/C9 Start/stop icon
B4/C4 Personal profiles
B2/C2 Drinks (Beverages)
B3/C3 Drinks menu (Beverage menu)
B4/C4 Personal profiles (Personal profiles)
B5/C5 Grains
Commanded accessories
B2/C2 Drinks (Drinks)
B7/C7 Status menu (Status menu)
B3/C3 Drinks menu (Drinks menu)
B8/C8 Store
B4/C4 Personal profiles (Personal profiles)
B9/C9 Start/stop icon (Start/stop)
Introduction
Stronger or milder? Strength lets you adjust the strength of your coffee by grinding more or less beans.


Switch on the machine by pressing the main switch on the back of the machine. Tap the 'on' icon and follow the step-by-step instructions on the control panel.

B2/C2 Drinks (Beverages)
B8 / C8 Shop
B3/C3 Drinks menu
B9/C9 Start/stop icon
B4/C4 Personal profiles
B5 / C5 People
Introduction
B3/C3 Drinks menu
B8/C8 Buy
B9/C9 Start/stop icon
Introduction
Connect via WiFi
Extra shot
B6/C6 Machine settings
C1 On/off icon
Machine settings
B2/C2 Drinks
B7/C7 Status menu
B3/C3 Drinks menu
B8/C8 Shop
B4/C4 Personal profiles
B9/C9 Start/stop icon
B5/C5 Beans
Start/stop
Introduction
AquaClean water filter
B3/C3 Drinks menu
B4/C4 Personal profiles
B5/C5 Beans
B7/C7 Status menu
B8/C8 Shop
B9/C9 Start/stop icon
Stronger or milder? Strength lets you adjust the strength of your coffee by grinding more or less beans.


1. Open the service door (Fig. 15).
Ordering accessories
To clean and descale the machine, use only Philips maintenance products. These products can be purchased through the Amazon Smart Reorders service, at a local or online retailer, or at authorized service centers.
B9/C9 Start/stop icon
B4/C4 Personal profiles
start/stop
B5/C5 Beans
Introduction
www.saeco.com/MyCoffeeMachine.
Stronger or milder? Strength lets you adjust the strength of your coffee by grinding more or less beans.


B7/C7 Status menu
B2/C2 Drinks
B8/C8 Shop
B3/C3 Drinks menu
B9/C9 Start/stop icon
B4/C4 Personal profiles
B5/C5 Beans
Introduction
AquaClean water filter
B3/C3 Drinks menu
B9/C9 Start/stop icon
B4/C4 Personal profiles
B5/C5 Coffee beans
Introduction
www.saeco.com/MyCoffeeMachine.
Before using the appliance for the first time, carefully read the separate safety information booklet and keep it for future reference.
The fully automatic Saeco coffee machine offers extended possibilities through connection to a Wi-Fi network.
When connected to a Wi-Fi network, the appliance offers the user the following functions:
B7/C7 Status menu
B2/C2 Drinks
B3/C3 Drinks menu
B9/C9 Start/stop icon
B4/C4 Personal profiles
B5/C5 Coffee beans
Introduction
Congratulations on purchasing a fully automatic Saeco coffee machine! To make the best use of the support offered by Saeco, use the control panel to register the machine via the built-in Wi-Fi connection, or go to www.saeco.com/MyCoffeeMachine and register the product there.
B3/C3 Drinks menu
B4/C4 Personal profiles
B5/C5 Beans
B6/C6 Machine settings
B9/C9 Start/stop icon
Introduction
B3/C3 Drinks menu
B8/C8 Dukan
B2/C2 Drinks (B2/C2 Drinks)
B3/C3 Drinks menu (B3/C3 Drinks menu)
B4/C4 Personal profiles (B4/C4 Personal profiles)
B5/C5 3bρHa
B6/C6 Machine settings (B6/C6 Machine settings)
B7/C7 Status menu (B7/C7 Status menu)
B8/C8 MaRa3nH
B9/C9 Start/stop icon (B9/C9 Start/stop icon)
Introduction
Thank you for purchasing the Saeco automatic coffee machine! To make full use of the functions that Saeco offers, you can use the control panel to register the machine via the built-in Wi-Fi connection, or go to
www.saeco.com/MyCoffeeMachine and register the product there.
Before using the machine for the first time, please read the separate booklet with safety information carefully and keep it for future reference.
Your new automatic coffee machine Saeco allows you to connect to your Wi-Fi network to enhance your coffee experience.
By connecting the machine to your Wi-Fi network, you can:
- You can personalize the drinks based on your machine's settings, use the machine's automatic cleaning and descaling functions to improve your user experience, use the shopping function if available in your country, you can connect your machine to your Amazon account for accessory supply if this option is available in your country, connect to a smart home device Alexa to use voice control if this is available for your country.
Note: This machine has been tested with coffee. Although it has been cleaned carefully, there may be coffee residue. We guarantee that the machine is completely new.
Turning on the machine when you have Xelsis SUPREMA (only SM8885, SM8889)
Turn on the machine by pressing the main power switch on the back of the machine. Touch the control panel center to show the "on" icon on the screen. Touch the "on" icon and follow the instructions step by step on the control panel.
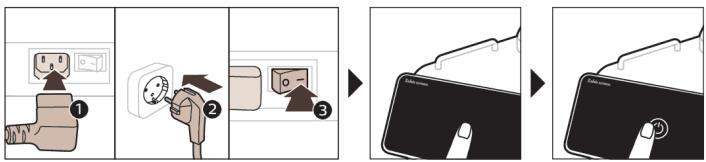
You can connect and update the machine during the first installation, and regularly check for firmware updates.
Turning on the machine when you have Xelsis DELUXE (only SM8780, SM8782, SM8785)
Turn on the machine by pressing the main power switch on the back of the machine. Touch the "On" icon and follow the instructions step by step on the control panel.
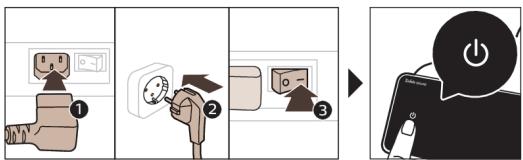
You can connect and update the machine during the first installation, and regularly check for firmware updates.
Connecting to Wi-Fi
Connect your coffee machine to your home Wi-Fi network at 2.4 GHz 802.11 b/g/n. Connecting your coffee machine to your home Wi-Fi network provides an improved user experience. Make sure that the coffee machine and the Wi-Fi router are within range of each other.
Follow the steps below to connect the coffee machine to your Wi-Fi network.

1 Press the settings icon and swipe from left to right to find the Wi-Fi icon. 2 Touch the Wi-Fi icon. 3 Follow the on-screen steps to connect your machine to the Wi-Fi network.
You are now ready to start your connected experience.
The machine will perform an automatic rinsing cycle when it is turned on or off via voice control and when the machine has been inactive for a certain time and is turned off. Make sure that the environment where the machine is placed is safe.
Special functions
Function

Purpose
With BeanMaestro you can select the type and strength of the coffee beans. This optimizes the settings for brewing automatically, to get the best out of the coffee beans.

The HygieSteam function automatically cleans the milk system, eliminating microorganisms: use it after brewing every cappuccino or other milk-based drinks.

The milk frother is made of 100% ceramic, to be exclusively healthy and precise. It can be adjusted according to your preferences with 12 levels.
The control panel provides useful information and alerts with information about the status of the selected coffee, such as water hardness or descaling, if AquaClean is installed.
Preparing drinks
General steps
To prepare a drink, you need to follow a few simple steps.
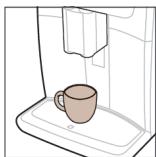

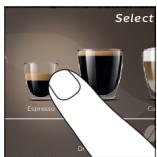

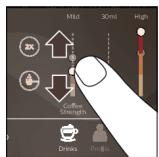

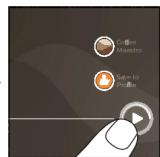

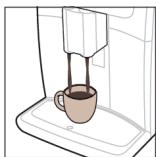
1 Fill the water reservoir with fresh water, and the coffee bean compartment with coffee beans. 2 Place a cup under the adjustable height spout. Move the spout up or down to adjust the height according to the size of the cup you are using. 3 Press the drinks button to enter the "Drinks" menu. Scroll left or right to select the drink you want.
Press the "2x" button if you want to prepare two cups. The machine will automatically perform two consecutive grinding cycles for the selected drinks.
The "2x" button is not available for all drinks.
4 After you select the drink, you can change the settings according to your preferences by pressing the arrows up or down. 5 Press the start/stop button ▶ to start preparing the selected drink.
Do not use caramelized or flavored coffee beans.
1 Turn the grinder adjustment knob to adjust the grind size for making small cups. After preparing 5 cups of coffee, you need to adjust the grind size.
Support for drink parameters
To get more information about a specific drink parameter, press and hold the corresponding button for 3 seconds.
Preparing milk drinks
To prepare milk-based drinks, follow these steps.

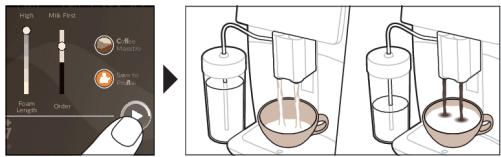
1 Fill the water reservoir with fresh water, and the milk container with milk. Note: When the milk tube is connected to the machine, insert the tube into the upper position until it reaches the water reservoir. 2 Open the milk container lid and pour milk into it. For optimal results, use milk that has just been taken from the refrigerator. 3 Connect the milk tube to the machine. 4 Place the metal milk tube into the container. 5 Press the drink button, turn it and select the drink with milk twice. 6 You can adjust the settings according to your preference by pressing the button up and down. 7 Press the start/stop button at any time to stop the preparation of the selected drink.
For some specific drinks, the machine first pours milk, then coffee. For other drinks, it is the opposite: the machine first pours coffee, then milk. To stop the milk dispensing, before the machine has dispensed the preset amount, press the start/stop button (only SM8780, SM8782, SM8785) or press the stop button (only SM8885, SM8889). To stop the dispensing of the whole drink (milk coffee), before the machine has finished, press and hold the start/stop button (only SM8780, SM8782, SM8785) or press the stop button (only SM8885, SM8889).
The cleaning of the milk system is performed with the HygieSteam Shot (hygienic steam release). The machine releases steam through the internal milk system to clean it quickly. The metal part of the milk tube can become hot. To avoid the risk of burns, first let it cool down.
Tip: You can also use a regular cup with milk to prepare milk drinks. Place the metal milk tube directly into the cup with milk.
The machine has programs for cleaning the internal milk system:
HygieSteam Shot: During the preparation of a milk drink, the machine automatically releases steam through the internal milk system to clean it quickly. HygieSteam: The machine cleans the internal milk system through steam. Make sure the HygieSteam is properly installed (Fig. 34) on the machine (Fig. 35). Place the milk tube in the container (Fig. 36) for the tube and follow the instructions on the screen. Deep Milk Clean: Use the Deep Milk Clean with the special Philips cleaning agent for milk to thoroughly clean the internal milk system.




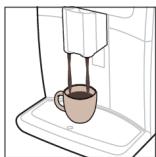
1 Fill the water tank with clean water and close the lid. 2 Insert the power plug into a suitable outlet. To avoid danger, do not touch the plug with wet hands. 3 For descaling, use a descaling agent. Follow the instructions on the descaling agent package for the correct amount.
- If you have hard water, descale more often. The machine will automatically indicate when descaling is needed.
Use only descaling agents suitable for 2x descaling.
4 After descaling, rinse the water tank thoroughly with clean water. 5 Press the START/STOP button to start the descaling cycle.
Do not open the lid during the descaling process.
If the descaling cycle is interrupted, the machine will not be ready for use until the descaling process is completed.
Descaling parameters may vary.
To ensure the descaling process is effective, press the descaling button and wait for 3 seconds.
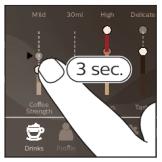
Coffee Strength
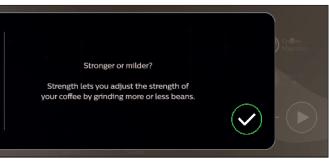
Adjust the coffee strength according to your preference.
To adjust the coffee strength, you may need to use the buttons on the control panel.
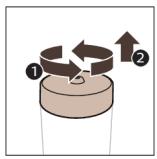
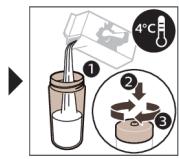
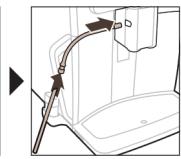
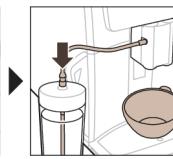
1 Fill the water tank with clean water and close the lid. Note: If the machine has been used with milk, clean the milk system first. 2 Remove the water tank from the machine and fill it with fresh water. To avoid limescale buildup, use filtered water. 3 Do not use milk in the water tank. 4 Do not use metal containers. 5 Follow the descaling instructions and rinse the water tank thoroughly. 6 Do not use abrasive cleaners or sharp objects to clean the machine. 7 Press the START/STOP button to start the descaling cycle.
- For best results, use fresh, cold milk. To froth milk, use the steam wand. For best results, use cold milk. The machine will automatically stop when the milk is heated. To stop the milk frothing, press the START/STOP button (SM8780, SM8782, SM8785) or the STOP button (SM8885, SM8889). To stop the milk frothing, press the START/STOP button (SM8780, SM8782, SM8785) or the STOP button (SM8885, SM8889).
After using the steam wand, press the "HygieSteam Shot" button. The machine will automatically clean the steam wand. Do not touch the metal parts of the steam wand immediately after use, as they may be hot. Wait for the steam wand to cool down before touching it.
For brewing coffee, use cold water. Fill the water tank with cold water only.
Preparing the coffee maker
To make coffee with ground coffee, you need a paper filter.


1. Remove the ground coffee container and rinse it with clean water. Then dry it. 2. Fill the water tank with cold water up to the desired level. 3. Insert the ground coffee container. 4. Clean the filter holder and its parts with warm water and dry them. 5. Insert the filled water tank and press the ON/OFF button.
If you use ground coffee, do not leave the coffee in the container for more than one hour, otherwise the coffee will become bitter.
Brewing coffee
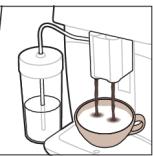
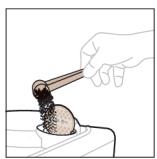
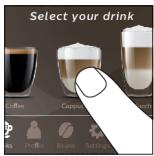
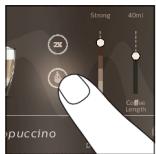
1. Check that the machine is properly connected to the power supply (figure 1). 2. Open the lid of the water tank. 3. Press the "COFFEE" button (figure 2). 4. If the water temperature is too high, clean the filter holder and its parts with warm water and dry them (figure 3). 5. Press the ON/OFF button. 6. When the machine is ready, press the ON/OFF button to start brewing (for SM8780, SM8782, SM8785) or press the BREW button (for SM8885, SM8889).
Cleaning
If the machine's water tank is not cleaned regularly, scale may build up and affect the machine's performance. You should clean the tank and the filter holder regularly.
Using the BeanMaestro grinder
The BeanMaestro grinder allows you to grind coffee beans just before brewing. This ensures that your coffee is always fresh and aromatic.
1. Fill the bean container with coffee beans (figure 4).
2. Attach the BeanMaestro grinder (figure 5). 3. Select the desired grind setting. You can choose between fine, medium, or coarse. 4. Grind the beans. 5. The grinder will automatically stop when the grinding is complete. 6. Remove the ground coffee container.
Using the CoffeeMaestro
The CoffeeMaestro allows you to use pre-ground coffee or coffee pods. You can choose between Delicato, Intenso, and Forte. To use the CoffeeMaestro:
1 Press the coffee spout button (Fig. 6). 2 Press the CoffeeMaestro spout button to select the coffee spout (Fig. 7).
The spouts are adjusted to the height of your cups. 3 Press the spout button to lower or raise the spouts.
The CoffeeEqualizer Touch+ is used to adjust the coffee spouts.
Before adjusting the spouts, make sure the CoffeeEqualizer Touch+ is installed correctly and the spouts are in the correct position. If the function is not working, check the connection and try again.
The CoffeeEqualizer Touch+ allows you to adjust the spouts in the following ways:
1. Adjust the height of the spouts 2. Adjust the coffee strength 3. Adjust the milk quantity 4. Adjust the water quantity 5. Adjust the milk temperature
6. Adjust the froth level 7. Adjust the coffee temperature 8. Select the coffee type (1 or 2) 9. Select the milk type
Note: The spouts you have adjusted will be used for the selected beverage.
Saving the spout settings as a profile
If you want to save the spout settings for later use, you can save them as a profile. After you have adjusted the spouts, you can save the profile by pressing the save button.
The profile is saved by pressing the profile button.
1. Press the profile button to select the profile (Fig. 8). 2. Press the profile button again (Fig. 9). 3. Enter the name and press the save button. 4. The spout settings are now saved. You can now select the saved profile. 5. The CoffeeEqualizer Touch+ and CoffeeMaestro will use the saved spout settings. 6. To use the profile, press the "Use profile" button (Fig. 10).
Extra Shot function
The machine allows you to add an extra shot of coffee to your beverage, such as Ristretto, espresso, or lungo, to make it stronger.
1. Press the button to select the extra shot. 2. Press the spout button to start brewing the coffee (Fig. 6). 3. Press the Extra Shot button to add the extra shot (Fig. 11). 4. For models with a steam wand (SM8780, SM8782, SM8785), press the steam button to froth the milk.
5. Place a container under the hot water/steam spout (for SM8780, SM8782, SM8785 models) and under the steam spout (for SM8885, SM8889 models). Press the 1 ExtraShot button to dispense one cup of hot water. The 1 Cup button dispenses all the water in the tank.
Setting the coffee machine parameters
Before using the machine's various functions, the display shows the settings and status.
To select the operating mode (water hardness, language, and other settings), scan the QR code in the Quick Start Guide or visit www.saeco.com/care.
Setting the water hardness
The machine is set to use water with a certain hardness level. To ensure proper operation, the water hardness must be set correctly. The water hardness is set in 4 levels: soft.
To determine the water hardness, use the test strip included with the machine.
1. Dip the test strip in the water for about 1 second, then remove it and shake off excess water. Wait 1 minute. The number of red squares on the test strip indicates the water hardness (see figure 12).
Set the water hardness on the machine:
1. Press the "Water hardness" button on the control panel. 2. Select the water hardness level. The number of red squares on the test strip should match the number of red squares on the display (see figure 14). 3. Press the "Water hardness" button to confirm and exit the setting.
Setting the grinder
The coffee grinder is set at the factory to the optimal setting. If the coffee is too weak or too strong, you can adjust the grinder. There are 12 different grinder settings. The coffee machine is set to the medium setting. If the coffee is too weak, turn the grinder one step towards the "fine" setting. If the coffee is too strong, turn the grinder one step towards the "coarse" setting. To adjust the grinder, press the "Grinder" button. 1. Press the "Grinder" button. 2. Press the "+" or "-" button to select the desired setting. 3. Press the "Grinder" button to confirm and exit.
Restoring factory settings
The machine can be restored to its factory settings at any time.
1. Press the "Factory settings" button on the control panel. 2. Press the "Factory settings" button to confirm and exit.
The machine is now ready for use.
The machine is ready for use without the filter. The following are not covered by the warranty: the water tank, the drip tray, the display, the bean hopper, the pre-ground coffee funnel, the brew group, the water hardness test strip, the AquaClean filter, the maintenance and descaling products, the Wi-Fi module, the programming and maintenance products, the Saeco module, and the Amazon module.
AquaClean water filter replacement
The machine is equipped with the AquaClean filter. You can use the AquaClean filter to reduce the need for descaling. The machine will remind you to replace the filter when necessary. You can use the AquaClean filter for up to 100 liters of water, or for 3 months, whichever comes first.
Replacing the AquaClean filter
To replace the AquaClean filter, press the "AquaClean" button in the menu.
- If the AquaClean filter status is below 10%, the machine will show a warning on the screen for 2 seconds. This warning reminds you to replace the filter.
- If the filter status is 0%, the machine will ask you to replace the AquaClean filter.
Installing the AquaClean filter (5 minutes).
The machine uses water to make coffee and automatically detects the filter. Before installing a new AquaClean filter, you must install it correctly. 1. Remove the filter from the packaging and rinse it under running water. Then, turn off the machine and unplug it, and then install the AquaClean filter. Note: After removing the filter, the machine must be turned off and unplugged before installing the new filter.
Before installing the AquaClean filter, soak it in water for a few minutes. Otherwise, the machine may not work properly and could be damaged.
1. Press the "AquaClean" button and select "AquaClean" from the menu. 2. Press the button to start the installation. The screen will show the progress. 3. Wait for the installation to complete.
Removing the AquaClean filter (5 minutes).
The filter can treat up to 100 liters of water. When the filter is exhausted, the AquaClean status indicator will show 0%. If you do not replace the filter, the machine will continue to work but may need descaling more often. When the AquaClean status indicator shows 0% and the machine asks you to replace the filter:
1. Remove the old AquaClean filter. 2. Install the new filter as described in the section "Installing the AquaClean filter (5 minutes)".
Maintenance required for proper operation. Yes, AquaClean should be cleaned after each use.
Follow the instructions for use.
If the display shows "Aban", select "Select Wash Program" and then select the wash program. For more information, visit www.saec.com/care. For video instructions, see the QR code.
Machine wash program selection
1. Open the door (Figure 15). 2. Remove the filter (Figure 16). 3. Press PUSH (Figure 17) and pull out the wash program cartridge (Figure 18).
Cleaning required
If the control panel is locked,
Need to change
AquaClean rinse
The machine should be cleaned after each use.
ABAN->CLEAN->AQUACLEAN. AquaClean rinse is recommended for optimal cleaning.
Point
Cleaning required
If the control panel is locked,
Need to change
Before using the machine, clean the AquaClean water filter. It is recommended to replace the AquaClean filter every 2 months or after 50 liters of water used. To replace the AquaClean filter, remove it from the water tank and insert a new one.
Cleaning the brew group
Weekly
Clean the brew group at least once a week. If the brew group is not cleaned regularly, it may cause malfunctions.
Before cleaning the brew group, make sure the machine is turned off and has cooled down. Remove the brew group by pressing the release button and pulling it out (see figure 19).
| Ай са布局 | АБАЛ -> ИStTоО bIbI ->KOФЕ Майын ЧыГAPУ. Кофе майыньн калдыктарын бышьіру Тобунан АВТOMаTTbіК Турдә-alын салуу учин озYн-э3Y таЗалоо пюцесини кадмдары мени волунз. | |
| Сут ТутуМу/Ички Калучинатор | Ар бир каллдогон Кундөн Кейн | АБАЛ -> HYGISTEAM. Сут ТутуМун таЗалоо Ччн oзYн-э3Y таЗалоо пюцесини Кадмдары мени волунз. Металл сут ТутукчeСУн сут ТутугУн KapMaflычын салуу алдында, сырын НыIMduу ChyypрК мени Суртунуз. |
| Апta са布局 | Ички Калучинатору щын салыньз жан бөлүtteх ожырныз. Барык 6өлүктөрун аKKан сунун actында ид新西ердз жучу суюктук мени волунз. | |
| Ай са布局 | АБАЛ -> HYGISTEAM -> CYTTY TEPEH ТАЗАЛLOO. Сут ТутуМун таЗалоо учин oзYн-э3Y ТаЗалоо пюцесинин Кадмдары мени Балунуз. | |
| Сут Контейнэр | Апta са布局 | Сут Контейнэрin (24-cypət) 6өлүtteх Жырнын, сут TутугУн учи мени Тоголokту Туртунуз (25-cypət).Сут Контейнэрин Барык 6өлүtteн akkanс сунун actында я = идши чууч Maшинада чуунз. |
| HygieSteam Контейнэр (сут ТутугУн kapмагычы) | Апta са布局gesmaшна сизre эстекн徳 | HygieSteam Контейнэрin мasmшиндан (26-cypət) chырныз жана HygieSteam Калларын aльпс calыньз (27-cypət). HygieSteam Контейнэрin жана каллakты akkanс сунун actында я = идши чууч Maшинада чуунз. |
| Пункт | Качан тазалоо кеpek | Башkapуу панелинен kaHTип Танca 60лOT/ Эмне кылуу кеpek |
| Алдын ода тaptылган кофe бөлүy | Алдын ода tappingылган кофe бөлүу тыгылбасын дeн, anta сайынTekшерлtnуу3 | Машинны розеткадан суурн,сышыру Товун чыгарынь. Альдын ода tappingылган Кофe 6өлүунүн калcarын aылл, ara Калыктын сбын Киргизинiz. Тыгылын Калган tappingылган кофe bILдыгагу түхэн Чeyн сады одe ожан Төмэн Хыдырьны3 (28-cypət). Бару www.saeco.com/care эзгөлөлөн керсөтмөлөрdy alyy учн. |
| Тaptылган кофe чун контейнэр | Машина里斯ат Берген кeзde тaptылган кофe учн Контейнэрдбоботунuz. Antpa сайын жуун турун3 | Машина куггүлгэн, tappingылган кофe чун КOLTөннөрдд олынсь. Аны akkan Суун actында indишердngжучу cyuokтуk Мechen чaykaнiz3. |
| Тамыларын астын табak | Тамыларын actын Тбakы КУн сайын, щe boлбосо Тамылар Тбогынан «Тамыларын actын Тбak Толду» Degener Кыздл Иndикатор чыkkандбоботунuz (29-cypət). Тамыларын actын Тбakы аNTа сайын Тазалan турун3 | Тамыларын actын Тбakы (30-cypət) чыгарынь热量а chытazalooчу cyuokтуk Мechen akkan CuyHyn actында чaykaнiz3. |
| Бышыру тбун майLOO | Ap 2 ai сайын | Бышыру Тбун кошо тангakталган май Мechen майларыз ('Кайатучу топу майлoo' Каранiz3. Бару www.saeco.com/care эзгөлөлөн керсөтмөлөрdy alyy учн. |
| Суу идіши | Аnta сайын | Суу идіши вожн Суун actында чaykaнiz3. |
| Машиннын алдынсы огы | Аnta сайын | Жышу касиети яок учyperк мechen Тазалaniz3. |
| Машинны keбээрden тазалоо | Машина кeбээрдд ольь салуну суparанда | АБАЛ -> KEБЗЕРДEH TAZALIOO. Машинны keбээрдд ТAZALIOO учн ТЕмEHКУ Кадмдap Мechen Бolyну3. Keбээрдд ТAZALIOO kepek Балгондо, машина сиздeн оны ТAZALOOH сураит, баштоо учн OK сypETчесун Басы, Кадмдары dAlТКарынb3. |
Cleaning the brew group
To clean the brew group thoroughly, you can also use the cleaning brush provided. Follow the instructions on the display: select "Clean brew group" and the machine will guide you through the cleaning process. You can also watch the instructional video at www.saeco.com/care.
Cleaning the brew group with water
1 Press the "Menu" button and select "Clean brew group". 2 Follow the instructions on the display and press the checkmark to confirm.
Cleaning the brew group for coffee oil residues
Philips coffee machines are not dishwasher safe.
1 Press the "Menu" button and select "Clean brew group". 2 Follow the instructions on the display and press the checkmark to confirm.
Lubricating the brew group
To ensure smooth operation, lubricate the brew group every 2 months with the special grease provided.
1 Apply a thin layer of grease to the piston (white part) of the brew group (see figure 31). 2 Apply a thin layer of grease to the shaft (white part) of the brew group (see figure 32). 3 Apply a thin layer of grease to the cam (white part) of the brew group (see figure 33).
Cleaning programs for the internal milk system
The machine will remind you when it is time to clean the internal milk system.
The machine has the following cleaning programs for the internal milk system:
«HygieSteam Shot»: To clean the milk system with steam, the machine automatically performs a quick cleaning cycle. «HygieSteam»: The machine uses steam to clean the internal milk system and the milk container. Place the HygieSteam container in the correct position (fig. 34) and the machine will clean it automatically (fig. 35). Remove the steam tube from its holder (fig. 36) and open the steam knob. «Deep Milk Clean»: To thoroughly clean the internal milk system, use the Philips milk cleaner and the «Deep Milk Clean» program.
Cleaning the internal milk system with water
1. Remove the milk container (fig. 37). 2. Open the lid of the milk container and rinse it (fig. 38). 3. Fill the milk container with water up to the MAX level and close it (fig. 39). 4. Place the container back under the machine and rinse it. 5. Reinsert the milk container. 6. Place the milk container back in its position, make sure it is correctly inserted, and check that the connection is secure. Then select the cleaning program for the milk system (fig. 1). 7. The machine is now clean.
For video instructions, visit www.saeco.com/care.
Descaling procedure
Philips descaling solution is recommended. Using other descaling agents may cause damage to the machine and may leave residues that are harmful to health. Philips descaling solution is available for purchase. You can also descale with citric acid, but it is less effective. If you prefer, you can buy Philips descaling solution from authorized dealers or online.
1 Remove the water tank and rinse it with clean water. The machine is equipped with a water hardness filter. The filter must be replaced when the "Replace filter" indicator lights up. 2 Remove the water tank and the HygienicSteam tank (figure 26), then clean them. 3 Rinse the water tank and fill it with fresh water. Then insert the AquaClean filter. 4 To replace the filter, use the Philips filter replacement tool, then insert the CALC CLEAN solution into the water tank (figure 41). Then place the water tank back into the machine. 5 Place a container (1.5 L) under the coffee spout. 6 The HygienicSteam tank is located at the back (figure 34) and is inserted into the machine (figure 35). Fill the tank with water. 7 Press the "Clean" button on the control panel to start the cleaning cycle. The cleaning cycle takes about 30 minutes and includes rinsing and descaling. 8 When the cleaning cycle is complete, the machine will prompt you to rinse the water tank. Press the control panel button. 9 Rinse the water tank with fresh water and then reinsert the AquaClean filter (see 'AquaClean filter replacement (5 min)').
Note: The AquaClean filter replacement is necessary to maintain the descaling interval.
The descaling procedure must be performed when the "Descale" indicator lights up.
To start the descaling procedure, press the "Descale" button on the control panel. If the descaling procedure is interrupted, the machine will not be able to brew coffee until the descaling is completed. Follow the steps below:
1 Empty the water tank and fill it with fresh water. 2 Add the CALC CLEAN solution to the water tank and place it back into the machine. The machine will start the descaling cycle automatically. 3 After the descaling cycle, rinse the water tank thoroughly. To rinse, fill the tank with fresh water and run a brewing cycle without coffee. Repeat this process twice.
Note: If the descaling procedure is not performed, the machine will not be able to brew coffee and will display a message.
Cleaning
The cleaning procedure for the brew group is described in the user manual. Video instructions are available at www.saeco.com/care. If you need further assistance, contact the Philips Consumer Care Center. For more information, refer to the warranty.
| Kata kodny | Кeийгей | Муемкун 60лгон чужим | ||||||
| 01 | Кофе кунгун толун Калган. | Машинаны eчурун, розетадан суурун koюун3. Бышьуту Тобун chыгарынз. Аndан соналдын сдахтблган кофe Белугунн kaлcarын acbyл, ага кastsын сабын кирпизин3. Тыгылл肯алган тарылган koфe bilдыгая тушкогге чewн салы éйдөжан төмөн chылдырынз (28-cypet). Баша相关内容 www.saeco.com/care озгчүлүлүлүлүлүлүлүлүлүлүлүлүлүлүлүлүлүлүлүлүлүлүлүлүлүлүлүлүлүлүлүлүлүлүлүлүлүлүлүлүлүлүлүлүлүлүлүлүлүлүlүлүлүлүлүлүлүлүлүлүлүлүлүлүлүлүлүлүлүлүлүлүлүлүлүлүлүлүлүлүлүлүлүлүлүлүлүлүлүлүлүлүлүлүлүлүлүлүлүлү� Аndан сокун машинен и kayн. www.saeco.com/care oзгчүлүлүлүлүлүлүлүлүлүлүлүлүлүлүлүлүлүлүлүлүлүлүлүлүлүлүлүлүлүлүлүлүлүлүлүлүлүлүлүлүлүлүлүлүлүлүлүлgrey. Аndан Клин Машинен и kayрадан куигузун3. | ||||||
| 03 | Бышьутусынун ич Крgesжakшы Майалган змес. | Машинец eчурун3. Бышьутусын тау суw меничан, андан сонаны майалыз ('Кайнатууну тоту майлоу' карыз). «Кайатуу тобун тазалоо» озлуунн karрахьз я www.saeco.com/care oзгчүлүлүлүлүлүлүлүлүлүлүлүлүлүлүлүлүлүлүлүлүлүлүлүлүлүлүлүлүлүлүлүлүлүлүлүлүлүлүлүлүлүлүлүлgrey. Аndан Клин Машинen и kayрадан куигузун3. | ||||||
| 04 | Бышьутусын орduна Туура омес каллган. | Машинец eчурун3. Бышьутусын тау суw меничан, андан сонаны майалыз ('Кайнатууну тоту майлоу' карыз. «Кайатуу тobу chылдыrs chыр? 6олуунн karрахьз я www.saeco.com/care oзгчүлүлүлүлүлүлүлүлүлүлүлүлүлүлүлүлүлүлүлүлүлүлүлүлүлүлүлүлүлүлgrey. Аndан Клин Машинen и kayрадан куигузун3. | ||||||
| 05 | Суу чынхьрьна aba Турун калды. | Машинец eчурун, куигузун менин менин оштейни. Зерду rat hынхьрьн chыр? эгорду rat hынхьрьн chыр? эгорду rat hынхьрьн chыр? эгорду rat hынхьрьн chыр? эгорду rat hынхьрьн chыр? эгорду rat hынхьрьн chыр? эгорду rat hынхьрль chыр? эгорду rat hынхьрьн chыр? эгорду rat hынхьрьн chыр? эгорду rat hынхьрьн chыр? эгорду rat hынхьрьн chыр? эгорду rat hынхьрьн chыр? эгорду 标 yыр? эгорду 标 yыр? эгорду 标 yыр? эгорду 标 yыр? эгорду 标 yыр? эгорду 标 yыр? эгорду 标 yыр? эгорду 标 yыр? эгорду 标 yыр? эгорду 标 yity. эгорду 标 yity. эгорду 标 yity. эгорду 标 yity. эгорду 标 yity. эгорду 标 yity. эгорду 标 yity. эгорду 标 yity. эгорду 标 yity. эгорду 标 yity. эгорду 标 yity эгорду 标 yity. эгорду 标 yity. эгорду 标 yity. эгорду 标 yity. эгорду 标 yity. эгорду 标 yity. эгорду 标 yity. эгорду 标 yity. эгорду 标 yity. эгорду 标 yity。 эгорду 标 yity. эгорду 标 yity. эгорду 标 yity. эгорду 标 yity. эгорду 标 yity. эгорду 标 yity. эгорду 标 yity. эгорду 标 yity. эгорду 标 yity. эгорду 标 yity; эгорду 标 yity. эгорду 标 yity. эгорду 标 yity. эгорду 标 yity. эгорду 标 yity. эгорду 标 yity. эгорду 标 yity. эгорду 标 yity. эгорду 标 yity. эгорду 标 yity、 эгорду 标 yity、 эгорду 标 yity、 эгорду 标 yity、 эгорду 标 yity、 эгорду 标 yity、 эгорду 标 yity、 эгорду 标 yity、 эгорду 标 yity、 эгорду 标 yity、 ярду 标 yity、 ярду 标 yity、 ярду 标 yity、 ярду 标 yity、 ярду 标 yity、 ярду 标 yity、 ярду 标 yity、 ярду 标 yity、 ярду 标 yity、 ярду 标 yity、 ялган. AquaClean cyy chyнкасы Орнотугама чeyн Туура ом Carson дярду chryн Чун дярду chryн Чун дярду chryн Чун дярду chryн Чун дярду chryн Чун дярду chryн Чун дярду chryн Чун дярду chryн Чун дярду chryн Чун дяр徳 Чун дяр徳 Чун дяр徳 Чун дяр徳 Чун дяр徳 Чун дяр徳 Чун дяр徳 Чун дяр徳 Чун дяр徳 Чун дяр徳 Чун дяр徳 Чун дяр徳 | AquaClean chyнкасы chyнк Зерду rat hынхьрь chyнka, AquaClean chyнкасы chyнк Зерду rat hынхьрь chyнka, AquaClean chyнкасы chyнк Зерду rat hынхьрь chyнka, AquaClean chyнкасы chyнka, AquaClean chyнкасы chyнka, AquaClean chyнкасы chyнka, AquaClean chyнкасы chyнka, AquaClean chyнкасы chyнka, AquaClean chyнкасы chyнka, AquaClean chyнкасы chyнka, AquaClean chyнкасы chьк AquaClean chyнкасы chьк AquaClean chyнкасы chьк AquaClean chyнкасы chьк AquaClean chyнкасы chьк AquaClean chyнкасы chьк AquaClean chyнкасы chьк AquaClean chyнкасы chьк AquaClean chyнкас儿 chьк AquaClean chyнкас儿 chьк AquaClean chyнкас儿 chьк AquaClean chyнкас儿 chьк AquaClean chyнкас儿 chьк AquaClean chyнкас儿 chьк AquaClean chyнкас儿 chьк AquaClean chyнкас儿 chьк AquaClean chYngsch und Chyngsch und Chyngsch und Chyngsch und Chyngsch und Chyngsch und Chyngsch und Chyngsch und Chyngsch und Chyngsch und Chyngsch und Chyngsch und Chyngsch und Chyngsch und Chyngsch und Chyngsch und Chyngsch und Chyngsch and Chyngsch and Chyngsch and Chyngsch and Chyngsch and Chyngsch and Chyngsch and Chyngsch and Chyngsch and Chyngsch and Chyngsch and Chyngsch and Chyngsch and Chyngsch and Chyngsch and Chyngsch and Chyngsch and ChyngSCH and ChyngSCH and ChyngSCH and ChyngSCH and ChyngSCH and ChyngSCH and ChyngSCH and ChyngSCH and ChyngSCH and ChyngSCH and ChyngSCH and ChyngSCH and ChyngSCH and ChyngSCH and ChyngSCH and ChyngSCH and ChyngSCH and ChyungSCH and ChyungSCH and ChyungSCH and ChyungSCH and ChyungSCH and ChyungSCH and ChyungSCH and ChyungSCH and ChyungSCH and ChyungSCH and ChyungSCH and ChyungSCH and ChyungSCH and ChyungSCH and ChyungSCH and ChyungSCH and ChyungSCH and CHYUNH AquaClean chyнкасы chyнк Зерду rat hынхьрь chyнka, AquaClean chyнкасы chyнka Зерду rat hынхьрь chyнka, AquaClean chyнкасы chyнka Зерду rat hынхьрь chyнka, AquaClean chyнкасы chyнka Зерду rat hынхьрь chyнka, AquaClean chyнкасы chyнka Зерду rat(hyngs) AquaClean chyнкасы chyнka AquaClean chyнкасы chyнka AquaClean chyнкасы chyнka AquaClean chyнкасы chyнka AquaClean chyнкасы chyнka AquaClean chyнкасы chyнka AquaClean chyнкасы chyнka AquaClean chyнкасы chyнka A AquaClean chyнкасы chyнka AquaClean chyнкасы chyнka AquaClean chyнкасы chyнka AquaClean chyнкасы chyнka AquaClean chyнкасы chyнka AquaClean chyнкасы chyнka AquaClean chyнкасы chyнka AquaCleanch yngsch AquaClean chyнкасы chyнka AquaClean chyнкасы chyнka AquaClean chyнкасы chyнka AquaClean chyнкасы chyнka AquaClean chyнкасы chyнka AquaClean chyнкасы chyнka AquaClean chyнкасы chyнka Аггеду Валду Салду Салду Салду Салду Салду Салду Салду Салду Салду Салду Салду Салду Салду Салду Салду Салду Салду Салду Салду Салду Caym Салду Салду Салду Салду Салду Салду Салду Салду Салду Салду Салду Салду Салду Салду Салду Салду Салду Салду Салду СалдУ СалдУ СалдУ СалдУ СалдУ СалдУ СалдУ СалдУ СалдУ СалдУ СалдУ СалдУ СалдУ СалдУ СалдУ СалдУ СалдУ СалдУ СалдУ СалдУ СалдU СалдU СалдU СалдU СалдU СалдU СалдU СалдU СалдU СалдU СалдU СалдU СалдU СалдU СалдU СалдU СалдU СалдU СалдU СалдU СалдУ СалдU СалдU СалдU СалдU СалдU СалдU СалдU СалдU СалдU СалдU СалдU СалдU СалдU СалдU СалдU СалдU СалдU СалдU СалдУ СалдУ СалдУ СалдУ СалдУ СалдУ СалдУ СалдУ СалдУ СалдУ СалдУ СалдУ СалдУ СалдУ СалдУ СалдУ СалдУ СалдУ СалдУ СалдY СалдY СалдY СалдY СалдY СалдY СалдY СалдY СалдY СалдY СалдY СалдY СалдY СалдY СалдY СалдY СалдY СалдY СалдY СалдY Салд Y Салд Y Салд Y Салд Y Салд Y Салд Y Салд Y Салд Y Салд Y Салд Y Салд Y Салд Y Салд Y Салд Y Салд Y Салд Y Салд Y Салд Y Салд Y Салд Y Салд.Y Салд Y Салд Y Салд Y Салд Y Салд Y Салд Y Салд Y Салд Y Салд Y Салд Y Салд Y Салд Y Салд Y Салд Y Салд Y Салд Y Салд Y Салд Y Салд Y СалдY Салд Y Салд Y Салд Y Салд Y Салд Y Салд Y Салд Y Салд Y Салд Y Салд Y Салд Y Салд Y Салд Y Салд Y Салд Y Салд Y Салд Y Салд Y Салд.Y Салд.Y Салд.Y Салд.Y Салд.Y Салд.Y Салд.Y Салд.Y Салд.Y Салд.Y Салд.Y Салд.Y Салд.Y Салд.Y Салд.Y Салд.Y Салд.Y Салд.Y Салд.Y Салд.Y Салд Y Салд.Y Салд.Y Салд.Y Салд.Y Салд.Y Салд.Y Салд.Y Салд.Y Салд.Y Салд.Y Салд.Y Салд.Y Салд.Y Салд.Y Салд.Y Салд.Y Салд.Y Салд.Y Салд Y Салд Y Салд Y Салд Y Салд Y Салд Y Салд Y Салд Y Салд Y Салд Y Салд Y Салд Y Салд Y Салд Y Салд Y Салд Y Салд Y Салд Y Салд.Y СалдY Салд.Y Салд.Y Салд.Y Салд.Y Салд.Y Салд.Y Салд.Y Салд.Y Салд.Y Салд.Y Салд.Y Салд.Y Салд.Y Салд.Y Салд.Y Салд.Y Салд.Y Салд.Y Салд.Y СалдY Салд.Y Салд.Y Салд.Y Салд.Y Салд.Y Салд.Y Салд.Y Салд.Y Салд.Y Салд.Y Салд.Y Салд.Y Салд.Y Салд.Y Салд.Y Салд.Y Салд.Y Салд Y Салд.Y Салд Y Салд.Y Салд.Y Салд.Y Салд.Y Салд.Y Салд.Y Салд.Y Салд.Y Салд.Y Салд.Y Салд.Y Салд.Y Салд.Y Салд.Y Салд.Y Салд.Y Салд.Y Салд Y Салд.Y СалдY Салд.Y Салд.Y Салд.Y Салд.Y Салд.Y Салд.Y Салд.Y Салд.Y Салд.Y Салд.Y Салд.Y Салд.Y Салд.Y Салд.Y Салд.Y Салд.Y Салд Y Салд.Y Салд.Y Салд Y Салд.Y Салд.Y Салд.Y Салд.Y Салд.Y Салд.Y Салд.Y Салд.Y Салд.Y Салд.Y Салд.Y Салд.Y Салд.Y Салд.Y Салд.Y Салд.Y Салд Y Салд.Y Салд.Y СалдY Салд.Y Салд.Y Салд.Y Салд.Y Салд.Y Салд.Y Салд.Y Салд.Y Салд.Y Салд.Y Салд.Y Салд.Y Салд.Y Салд.Y Салд.Y Салд.Y Салд Y Салд Y Салд.Y Салд.Y Салд.Y Салд.Y Салд.Y Салд.Y Салд.Y Салд.Y Салд.Y Салд.Y Салд.Y Салд.Y Салд.Y Салд.Y Салд.Y Салд.Y Салд.Y Салд Y Салд Y Салд.Y Салд Y Салд.Y Салд.Y Салд.Y Салд.Y Салд.Y Салд.Y Салд.Y Салд.Y Салд.Y Салд.Y Салд.Y Салд.Y Салд.Y Салд.Y Салд.Y Салд.Y Салд Y Салд Y Салд.Y СалдY Салд.Y Салд.Y Салд.Y Салд.Y Салд.Y Салд.Y Салд.Y Салд.Y Салд.Y Салд.Y Салд.Y Салд.Y Салд.Y Салд.Y Салд.Y Салд Y Салд.Y Салд.Y Салд.Y Салд Y Салд.Y Салд.Y Салд.Y Салд.Y Салд.Y Салд.Y Салд.Y Салд.Y Салд.Y Салд.Y Салд.Y Салд.Y Салд.Y Салд.Y Салд.Y Салд Y Салд.Y Салд.Y Салд.Y СалдY Салд.Y Салд.Y Салд.Y Салд.Y Салд.Y Салд.Y Салд.Y Салд.Y Салд.Y Салд.Y Салд.Y Салд.Y Салд.Y Салд.Y Салд.Y Салд Y Салд.Y Салд Y Салд.Y Салд Y Салд.Y Салд.Y Салд.Y Салд.Y Салд.Y Салд.Y Салд.Y Салд.Y Салд.Y Салд.Y Салд.Y Салд.Y Салд.Y Салд.Y Салд.Y Салд Y Салд.Y Салд Y Салд.Y СалдY Салд.Y Салд.Y Салд.Y Салд.Y Салд.Y Салд.Y Салд.Y Салд.Y Салд.Y Салд.Y Салд.Y Салд.Y Салд.Y Салд.Y Салд.Y Салд Y Салд Y Салд.Y Салд.Y Салд Y Салд.Y Салд.Y Салд.Y Салд.Y Салд.Y Салд.Y Салд.Y Салд.Y Салд.Y Салд.Y Салд.Y Салд.Y Салд.Y Салд.Y Салд.Y Салд Y Салд Y Салд.Y Салд.Y СалдY Салд.Y Салд.Y Салд.Y Салд.Y Салд.Y Салд.Y Салд.Y Салд.Y Салд.Y Салд.Y Салд.Y Салд.Y Салд.Y Салд.Y Салд.Y Салд Y Салд Y Салд Y Салд.Y Салд.Y Салд.Y Салд.Y Салд.Y Салд.Y Салд.Y Салд.Y Салд.Y Салд.Y Салд.Y Салд.Y Салд.Y Салд.Y Салд.Y Салд.Y Салд Y Салд.Y Салд Y Салд Y Салд.Y Салд.Y Салд.Y Салд.Y Салд.Y Салд.Y Салд.Y Салд.Y Салд.Y Салд.Y Салд.Y Салд.Y Салд.Y Салд.Y Салд.Y Салд.Y Салд Y Салд Y Салд Y Салд.Y Салд Y Салд.Y Салд.Y Салд.Y Салд.Y Салд.Y Салд.Y Салд.Y Салд.Y Салд.Y Салд.Y Салд.Y Салд.Y Салд.Y Салд.Y Салд.Y Салд Y Салд Y Салд Y Салд Y Салд.Y Салд.Y Салд.Y Салд.Y Салд.Y Салд.Y Салд.Y Салд.Y Салд.Y Салд.Y Салд.Y Салд.Y Салд.Y Салд.Y Салд.Y Салд Y Салд.Y Салд.Y Салд Y Салд Y Салд.Y Салд.Y Салд.Y Салд.Y Салд.Y Салд.Y Салд.Y Салд.Y Салд.Y Салд.Y Салд.Y Салд.Y Салд.Y Салд.Y Салд.Y Салд Y Салд.Y Салд Y Салд Y Салд Y Салд.Y Салд.Y Салд.Y Салд.Y Салд.Y Салд.Y Салд.Y Салд.Y Салд.Y Салд.Y Салд.Y Салд.Y Салд.Y Салд.Y Салд.Y Салд Y Салд Y Салд.Y Салд Y Салд Y Салд.Y Салд.Y Салд.Y Салд.Y Салд.Y Салд.Y Салд.Y Салд.Y Салд.Y Салд.Y Салд.Y Салд.Y Салд.Y Салд.Y Салд.Y Салд Y Салд Y Салд Y Салд.Y СалдY Салд.Y Салд.Y Салд.Y Салд.Y Салд.Y Салд.Y Салд.Y Салд.Y Салд.Y Салд.Y Салд.Y Салд.Y Салд.Y Салд.Y Салд Y Салд.Y Салд.Y Салд.Y Салд.Y Салд Y Салд.Y Салд.Y Салд.Y Салд.Y Салд.Y Салд.Y Салд.Y Салд.Y Салд.Y Салд.Y Салд.Y Салд.Y Салд.Y Салд.Y Салд Y Салд.Y Салд.Y Салд.Y Салд.Y СалдY Салд.Y Салд.Y Салд.Y Салд.Y Салд.Y Салд.Y Салд.Y Салд.Y Салд.Y Салд.Y Салд.Y Салд.Y Салд.Y Салд.Y Салд Y Салд.Y Салд.Y Салд Y Салд.Y Салд Y Салд.Y Салд.Y Салд.Y Салд.Y Салд.Y Салд.Y Салд.Y Салд.Y Салд.Y Салд.Y Салд.Y Салд.Y Салд.Y Салд.Y Салд Y Салд.Y Салд.Y Салд Y Салд.Y СалдY Салд.Y Салд.Y Салд.Y Салд.Y Салд.Y Салд.Y Салд.Y Салд.Y Салд.Y Салд.Y Салд.Y Салд.Y Салд.Y Салд.Y Салд Y Салд.Y Салд Y Салд.Y Салд.Y Салд Y Салд.Y Салд.Y Салд.Y Салд.Y Салд.Y Салд.Y Салд.Y Салд.Y Салд.Y Салд.Y Салд.Y Салд.Y Салд.Y Салд.Y Салд Y Салд.Y Салд Y Салд.Y Салд.Y СалдY Салд.Y Салд.Y Салд.Y Салд.Y Салд.Y Салд.Y Салд.Y Салд.Y Салд.Y Салд.Y Салд.Y Салд.Y Салд.Y Салд.Y Салд Y Салд.Y Салд Y Салд Y Салд.Y Салд Y Салд.Y Салд.Y Салд.Y Салд.Y Салд.Y Салд.Y Салд.Y Салд.Y Салд.Y Салд.Y Салд.Y Салд.Y Салд.Y Салд.Y Салд Y Салд.Y Салд Y Салд Y Салд Y Салд Y Салд Y Салд Y Салд Y Салд Y Салд Y Салд Y Салд Y Салд Y Салд Y Салд Y Салд Y Салд Y Салд Y Салд.Y Салд.Y Салд Y Салд Y Салд Y Салд Y Салд Y Салд Y Салд Y Салд Y Салд Y Салд Y Салд Y Салд Y Салд Y Салд Y Салд Y Салд Y Салд Y Салд.Y Салд Y Салд.Y Салд Y Салд Y Салд Y Салд Y Салд Y Салд Y Салд Y Салд Y Салд Y Салд Y Салд Y Салд Y Салд Y Салд Y Caym Caym | AquaClean chyнкасы chyнк Зерду rat hынхьрь chyнк Зерду rat hынхьрь chyнк Зерду rat hынхьрь chyнк Зерду rat hынхьрь chyнк Зерду rat hынхьрь chyнк Зерду rat hынхьрь chyнк Зерду rat hынхвьрь chyнк Зерду rat hынхьрь chyнк Зерду rat hынхьрь chyнк Зерду rat hынхьрь chyнк Зерду rat hынхьрь chyнк Зерду rat hынхьрь chyнк Зерду rat h6урс. Аггеду Салд.Y Салд.Y Салд.Y Салд.Y Салд.Y Caym Caym | AquaClean chyнкасы chyнк Зерду rat h6урс. Зерду rat h6урс. Зерду rat h6урс. Зерду rat h6урс. Зерду rat h6урс. Зерду rat h6урс. Зерду rat h6урс. Зерду rat h6урс. Зерду rat h6урс. Зерду rat h6урс. Zerumd Y Caym Y Caym | AquaClean chyнкасы chyнк Зерду rat h6урс. Зерду rat h6урс. Зерду rat h6урс. Зерду rat h6урс. Зерду rat h6урс. Зерду rat h6урс. Зерду rat h6урс. ЗердuroY Caym Y Caym | AquaClean chyнкасы chyнк Зерду rat h6урс. Зерду rat h6урс. Зерду rat h6урс. Зерду rat h6урс. Зерду rat h6урс. Зерду rat h6урс. Зерду rat h6урcN Caym Y Caym | AquaClean chyнкасы chyнк Зерду rat h6урс. Зерду rat h6урс. Зерду rat h6урс. Зерду rat h6урс. Зерду rat h6урс. Зерду rat h6урс. Зерду rat h6урcs. Зер德у rat h6урс. Зер德у rat h6урс. Зер德у rat h6урс. Зер德у rat h6урс. Зер德у rat h6урс. Зер德у rat h6урс. Зер德у rat h6урс. Зер德у rat h6урс. Зер德у rat h6урс. Зер德у rat h6урс |
Cleaning the brew group with cleaning tablets
1 Press the "Status" button to select "Brew group clean". 2 Press the "Start" button to start the cleaning cycle, and follow the instructions on the display.
Cleaning the brew group with cleaning tablets to remove coffee oil
KopncTeTaMoTa6IeTn3aOTcPaHyBaHbMeMacIIOKaFeHaPhilips.
1. Press the "Status" icon to select "Brew group clean". 2. Press the icon for rinsing to rinse, then follow the instructions on the display.
B7/C7 Status menu
B3/C3 Drinks menu
B8/C8 Shop
B9/C9 Start/stop icon
Congratulations on purchasing the automatic Saeco coffee machine! To make the most of the online support offered by Saeco, you can use the control panel to register the coffee machine via the built-in Wi-Fi, or go to the website www.saeco.com/MyCoffeeMachine and register your product there.
Before first use of the coffee machine, carefully read this manual and keep it for future reference.
The automatic Saeco coffee machine allows you to connect to Wi-Fi networks and use the additional features for preparing coffee.
Preparing milk-based drinks
To brew milk-based drinks, you need to follow a few simple steps.
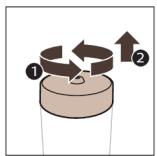
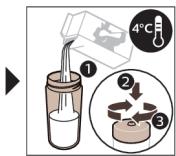
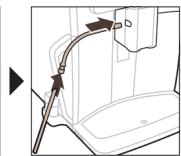
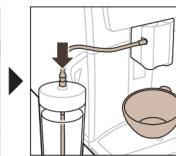
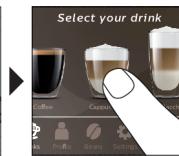
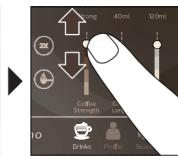
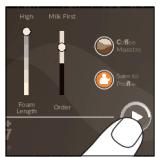
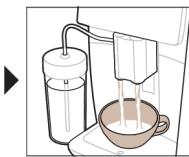
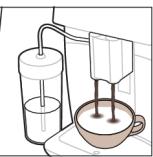
1. Fill the water reservoir with drinking water and pour coffee beans into the container. Tip: When the milk frothing tube is attached to the cappuccinatore, move the spout of the coffee machine to the highest position to ensure easy access to the water reservoir. 2. Open the lid of the milk container and fill it with milk.
To achieve optimal results, always use milk straight from the refrigerator.
3. Attach the flexible tube for milk to the cappuccinatore. 4. Place the metal tube for milk into the container. 5. Touch the drinks icon, start, and select the icon of the desired milk-based drink. 6. You can adjust the settings to your preference by swiping up or down on the adjustable strips. 7. Touch the "Start/stop" icon to immediately start preparing the selected drink. - For certain drinks, the coffee machine first dispenses milk, then coffee. For many other drinks, the order is reversed: the coffee machine first dispenses coffee, then milk.
Brewing parameter settings
- If they do not match, press the lever until it touches the base of the brewing group (Fig. 20).
2 Make sure the locking pins on the other side of the brewing group are in the correct position. To install the lock correctly, lift it to the highest position (Fig. 21). 3 Insert the brewing group back into the coffee machine following the side guides (Fig. 22) until it clicks (Fig. 23). Do not press the PUSH button. 4 Insert the container for the coffee grounds into the coffee machine and close the service door.
Cleaning and maintenance
The coffee machine will need cleaning and maintenance of the device from time to time. Regular cleaning and maintenance allow you to keep the coffee machine in excellent condition for a long time and enjoy delicious coffee with every cup. The table below provides a detailed description of the methods and frequency of cleaning all removable parts of the coffee machine. More detailed information and video instructions can be found on the website www.saeco.com/care. Fig. C shows which parts can be washed in the dishwasher.
Cleaning the brewing group after milk drinks
1 Touch the "Menu" icon and scroll to select "Cleaning the brewing group". 2 Touch the confirm icon and follow the instructions on the screen.
Cleaning the brewing group with a cleaning tablet for coffee residues
Use only Philips tablets for removing coffee grease.
1 Touch the "Menu" icon and scroll to select "Cleaning the brewing group". 2 Touch the confirm icon and follow the instructions on the screen.
Lubricating the brewing group
To improve the performance of the coffee machine, it is recommended to lubricate the brewing group every 2 months to ensure its parts move smoothly and quietly.
1 Apply a thin layer of lubricant to the piston (upper part) of the brewing group (Fig. 31). 2 Apply a thin layer of lubricant to the surface of the shaft (upper part) in the lower part of the brewing group (Fig. 32). 3 Apply lubricant generously to the side guides on both sides (Fig. 33).
Cleaning programs for the internal milk frother
The coffee machine will notify you when it is time to clean the internal milk frother.
The coffee machine provides three internal milk frother cleaning programs:
HygieSteam Shot: During the preparation of a milk-based drink, the coffee machine automatically passes steam through the internal milk frother for quick cleaning. HygieSteam: The coffee machine thoroughly cleans the internal milk system with steam. Make sure the HygieSteam container is correctly assembled (Fig. 34) and installed on the coffee machine (Fig. 35). Place the milk tube in the tube holder (Fig. 36) and follow the instructions shown on the display. The milk frother cleaning is performed automatically. Deep Milk Clean (Clean milk): Using the special Philips cleaning agent for thorough cleaning of the internal milk supply system.
Cleaning the internal milk frother under running water
1. Open the lid of the internal milk frother (Fig. 37). 2. Remove the internal milk frother by pulling it downwards (Fig. 38). 3. Disassemble the internal milk frother by separating the lower part from the upper part (Fig. 39). 4. Disassemble all parts and rinse them under running water (Fig. 40). 5. Reassemble the internal milk frother. 6. To place the internal milk frother back, set it in a vertical position and make sure the openings align with the two tubes on the coffee machine. Then push the internal milk frother upwards until it clicks into place (Fig. 1). 7. Close the lid.
The full text of the EU declaration of conformity is available at the following internet address:
https://www.saeco.com.
Automatic coffee machine for espresso
C1 On/off button (button
B6/C6 Adjustable coffee spout
www.saeco.com/MyCoffeeMachine for registration.
To adjust the coffee spout height, so that the coffee flows directly into the cup, place the cup under the spout.
The coffee spout of the Saeco machine is adjustable, and if it is connected to Wi-Fi, it can be adjusted remotely via the app to pour coffee directly into the cup.
If the coffee spout is connected to Wi-Fi, it can be adjusted remotely:
- Via the Saeco app on a computer or smartphone - to adjust the spout height to pour coffee from the machine. - If the machine is connected to the internet, you can also use voice commands via Amazon Alexa or Google Assistant to adjust the spout height. - If the machine is not connected to the internet, you can still adjust the spout manually.
Note: The spout height can be adjusted manually as well. If you adjust the spout height, make sure the coffee flows directly into the cup. If the spout is too high, the coffee may splash.
The coffee machine will start descaling when the Xelsis SUPREMA indicates this (only for models SM8885, SM8889).
Before descaling the coffee machine, remove the water tank and empty it. Fill the water tank with fresh water and place it back. Press the "ON" button and follow the instructions on the display step by step.
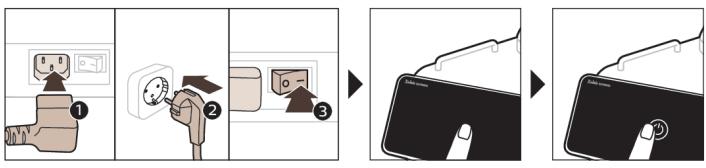
If the descaling solution is not available, use a descaling agent and follow the descaling instructions carefully.
The coffee machine will start descaling when the Xelsis SUPREMA indicates this (only for models SM8780, SM8782, SM8785).
Before descaling the coffee machine, remove the water tank and empty it. Press the "ON" button and follow the instructions on the display step by step.
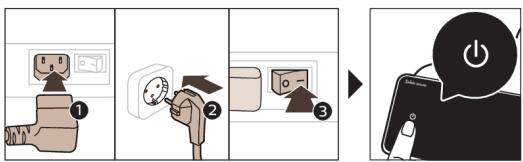
If the descaling solution is not available, use a descaling agent and follow the descaling instructions carefully.
Connecting to Wi-Fi
1. The coffee machine can connect to a 2.4 GHz Wi-Fi network (802.11 b/g/n). When the coffee machine is connected to a Wi-Fi network, it can make better coffee. 2. Make sure that the coffee machine and the Wi-Fi router are within range of each other. If the coffee machine cannot connect to a Wi-Fi network, follow the steps below.

1. Press the settings button to enter the Wi-Fi settings menu. 2. Press the Wi-Fi button. 3. If the coffee machine cannot connect to a Wi-Fi network, follow the steps on the screen.
Now you can use the special functions.
The coffee machine will automatically adjust the settings when it is used for the first time and when it is used after a period of inactivity. This ensures that the coffee machine always makes the best coffee.
Special functions
Maximum special functions

With the special functions of the BeanMaestro, you can adjust the coffee strength and temperature to your preference. The settings for the coffee strength and temperature can be adjusted to make better coffee.

The HygieSteam function cleans the milk frother with steam and removes microorganisms: Use this function after each milk frothing, and also for other cleaning purposes.

The coffee maker is made of 100% ceramic, so it will be a durable and reliable appliance. It is designed to brew 12 cups of coffee.

The manufacturer is not responsible for any damage caused by improper use or failure to follow the instructions in this manual, including the use of non-original accessories such as the "AquaClean" filter.
Coffee maker
Important safeguards
Before using the coffee maker, please read all instructions carefully.
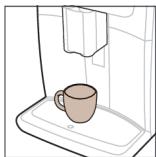

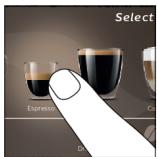

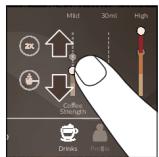

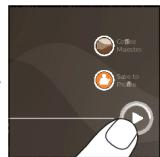

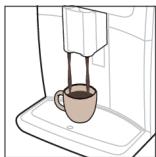
1. Fill the water tank with cold water up to the desired level. 2. Do not operate the appliance without water. If the water level is below the minimum mark, the appliance may overheat and be damaged. 3. Use only the provided carafe with the coffee maker. Do not use any other carafe, as it may break or cause malfunction.
- If you want to brew a stronger coffee, use the "2x" button. The coffee maker will automatically adjust the brewing time and temperature to produce a more concentrated coffee. 1. Press the "2x" button before starting the brewing cycle.
4. After brewing, the coffee maker will keep the coffee warm for 30 minutes. 5. Press the "Clean/Descale" button to start the descaling cycle.
The coffee grounds should be placed in the filter. The coffee maker will automatically adjust the brewing time and temperature to extract the best flavor from the coffee.
Instructions for cleaning and descaling
Before cleaning or descaling the coffee maker, unplug it and let it cool down for at least 3 hours.
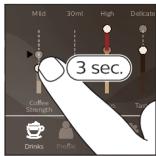

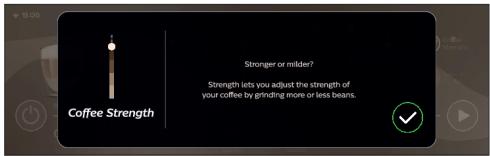
Coffee maker parts
Before using the coffee maker, please read all instructions carefully.
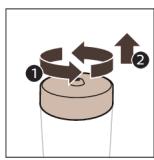
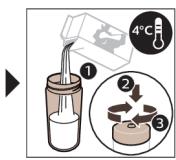
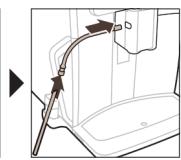
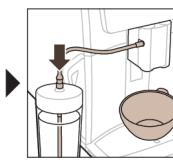
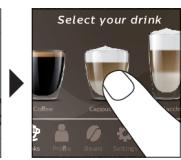
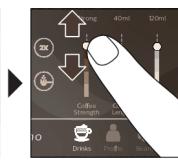
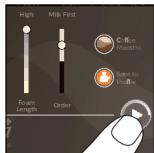
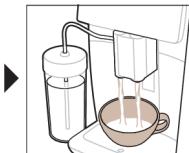
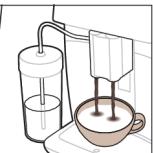
1. Fill the water tank with cold water up to the desired level.
Tip: When the coffee maker is not in use, unplug it and store it in a dry place. 2. Do not immerse the appliance in water or any other liquid. 3. Do not use abrasive cleaners or scouring pads. 4. The carafe is not dishwasher safe. 5. Press the "Clean/Descale" button to start the descaling cycle. 6. The coffee maker will automatically adjust the brewing time and temperature to extract the best flavor from the coffee.
7. Press the «OFF/STANDBY» button to stop the coffee brewing process. If you want to stop it, press the button again.
- To stop the brewing process, press the «OFF/STANDBY» button (only for SM8780, SM8782, SM8785) or the «STANDBY» button (only for SM8885, SM8889). - To stop the brewing process of hot water (steam and hot water), press the «OFF/STANDBY» button (only for SM8780, SM8782, SM8785) or the «STANDBY» button (only for SM8885, SM8889).
After the brewing process, the «HygieSteam Shot» function starts automatically. The steam wand will be cleaned automatically to keep it fresh. The metal parts may become very hot. To avoid burns, let them cool down first.
Tip: To clean the steam wand, you can use a damp cloth. The metal parts of the wand should be wiped clean.
Brewing coffee with pre-ground coffee
To brew coffee using pre-ground coffee, you can use the pre-ground coffee compartment.
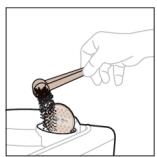
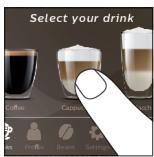
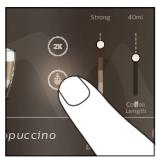
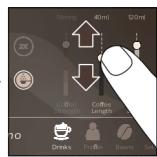
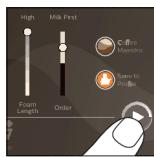
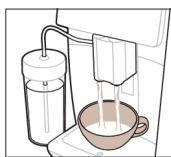
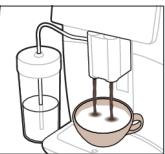
1. Open the lid of the pre-ground coffee compartment and pour the pre-ground coffee into it. Close the lid firmly. 2. Press the «Coffee» button and move from left to right to select your coffee. 3. The pre-ground coffee compartment is now active. 4. You can adjust the amount of water and the strength of the coffee according to your preferences. 5. Press the «OFF/STANDBY» button to start the brewing process.
If you select the pre-ground coffee compartment, you can adjust the coffee strength or brew it immediately without waiting.
Hot water dispensing
1. Make sure the water tank is correctly attached to the coffee machine (Fig. 1). 2. Place a container under the hot water spout. 3. Press the «Hot water» button (Fig. 2).
4. Adjust the amount of water and the temperature by moving the slider up and down (Fig. 3). 5. Press the «OFF/STANDBY» button. 6. To stop the hot water dispensing, press the «OFF/STANDBY» button again (only for SM8780, SM8782, SM8785) or the «STANDBY» button (only for SM8885, SM8889).
Cleaning
The coffee machine allows you to adjust the brewing settings according to your preferences and to save your own brewing profiles. You can select your own settings and profiles.
The best coffee is brewed with the BeanMaestro function.
With the BeanMaestro function, you can select the type and intensity of the coffee beans. This function optimizes the brewing process for your taste and delivers the best flavor from your coffee beans.
1 Press the "Dohao" button to select the desired coffee (Fig. 4). 2 Press the BeanMaestro button (Fig. 5). 3 The Dohao button will start brewing. This method is used for brewing coffee with a stronger taste. 4 Adjust the brewing strength according to your preference. 5 The settings will be saved and the next time you brew, it will be used. 6 This method is used to brew a cup of coffee with a stronger taste.
CoffeeMaestro
To brew coffee with a stronger taste, press the CoffeeMaestro button and then the settings will be applied to the next brew. This method is used to brew a stronger, more intense coffee. To brew a regular coffee, press the CoffeeMaestro button:
1 Press the button to select the desired strength (Fig. 6). 2 Press the CoffeeMaestro button to confirm the strength (Fig. 7).
The settings will be saved and the next time you brew, it will be used. 3 Press the "Ofoз/nt" button to start brewing.
CoffeeEqualizer Touch+
After brewing, the CoffeeEqualizer Touch+ will automatically clean the brewing unit. The cleaning process will start and the display will show a message. If the water tank is empty, fill it with water.
CoffeeEqualizer Touch+ automatically cleans the brewing unit.
1 Water tank 6 Coffee grounds container 2 Coffee bean hopper 7 Drip tray 3 Water level indicator 8 Control panel 4 Hot water spout 9 Power switch 5 Drip stop
The settings will be applied to the next brew.
The brewing unit is designed for optimal performance.
To brew coffee with a stronger taste, press the CoffeeEqualizer Touch+ button and the settings will be applied to the next brew. This method is used to brew a stronger coffee and the taste will be more intense.
This method is used to brew a stronger coffee and the taste will be more intense.
1 Press the profile button to select the desired profile (Fig. 8). 2 Press the "aMb" button (Fig. 9). 3 The brewing process will start. 4 When the brewing is finished, the coffee will be ready. Press the button to select the desired strength. 5 The CoffeeEqualizer Touch+ will automatically clean the brewing unit. 6 Press the "Дap npoФил HnroX,doStaH" button to save the profile (Fig. 10).
ExtraShot
1. First, grind the coffee beans. 2. To select the grinding level, turn the grinding knob to the desired position (Fig. 6). 3. To adjust the amount of ground coffee, turn the adjustment knob to the desired position and select the ExtraShot function (Fig. 11). 4. For models with the "Grind/Off" knob, turn the knob to "Grind/Off" (only for SM8780, SM8782, SM8785) and to "Grind" (only for SM8885, SM8889). 5. To adjust the grinding level, turn the knob to the desired position, then turn the "Grind/Off" knob to "Off" (only for SM8780, SM8782, SM8785) and the "On" knob to "Off" (only for SM8885, SM8889).
When you select the ExtraShot function, the machine will automatically adjust the grinding time to ensure the correct amount of coffee is used. The ExtraShot function is available for all coffee types.
Adjusting the coffee strength
To adjust the coffee strength, turn the adjustment knob to the desired position, then select the strength from the screen.
To clean the machine (especially after milk drinks, coffee, and water), scan the QR code with your smartphone and visit www.saeco.com/care.
Adjusting the water hardness
We recommend that you adjust the water hardness according to the water hardness in your area. This will ensure the coffee tastes better and the machine lasts longer. The water hardness adjustment is done using the test strip provided. The water hardness is set to 4 levels: 1 to 4.
To adjust the water hardness, use the test strip that came with the machine. Follow the instructions on the test strip:
1. Dip the test strip into the water for 1 second and then remove it (Fig. 12). 2. Wait for 1 minute. The number of red squares indicates the water hardness level (Fig. 13).
To set the water hardness:
1. Press the "Menu" button and select "Water hardness" from the menu. 2. Select the water hardness level. The number of squares that light up on the display corresponds to the number of red squares on the test strip (Fig. 14). 3. After setting the water hardness, press the "OK" button to confirm.
Adjusting the coffee temperature
You can adjust the temperature of the coffee to suit your taste. The higher the temperature, the hotter the coffee will be. You can choose from 12 different temperature settings.
The coffee machine is adjusted and calibrated at the factory to ensure optimal performance. We recommend that you do not adjust the settings for the first 100-150 cups (approximately 1 month of use).
1. Before making the first drink, you should make 2 to 3 cups. If the drink quality is not satisfactory, adjust the settings slightly and try again.
1. Press the "Coffee" button. 2. Press the "Settings" button. 3. Turn the rotary knob to select the desired setting.
Adjusting the grinder
The coffee machine allows you to adjust the grinder during operation, if necessary.
1. Press the settings button. 2. Turn the rotary knob to the right to select "Adjust grinder". Press the knob to confirm the selection.
- After this adjustment, the machine will grind the coffee beans accordingly.
The grinder settings can be adjusted to the following levels: very fine, fine, medium, coarse, very coarse, depending on the type of coffee, the degree of roasting, and the desired taste. The adjustment is made using the rotary knob and the display.
B1 On/off icon
B6/C6 Machine settings
C1 On/off icon
B7/C7 Status menu
B2/C2 Drinks
B8/C8 Drink settings
B3/C3 Drinks menu
B9/C9 Start/stop icon
B4/C4 Personal profiles
B5/C5 Beans beans
Introduction
Welcome to the purchase of your new Saeco automatic coffee machine! To discover all the advantages and support of Saeco, register your coffee machine using the control panel via the Wi-Fi module or visit the website
www.saeco.com/MyCoffeeMachine and register your product there.
Before using the coffee machine, carefully read the separate safety booklet and keep it for future reference.
The icon is accessible for all drinks.
4 Once the drink is selected, you can set the desired settings by moving the adjustment sliders up or down. 5 Press the start/stop icon to start preparing the selected drink.
Do not use caramelized or flavored coffee beans.
To adjust the 5 coffee doses, turn the grinder adjustment knob to adjust the grinding degree to your taste.
Stronger or milder? Strength lets you adjust the strength of your coffee by grinding more or less beans


Preparing milk-based drinks
To prepare milk-based drinks, follow a few simple steps.
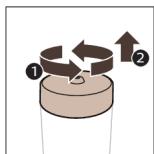
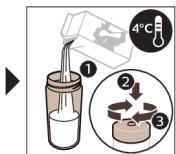
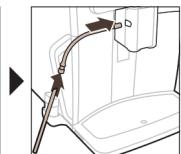




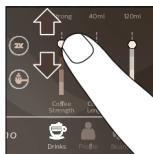
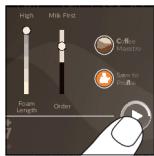
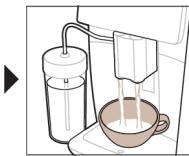
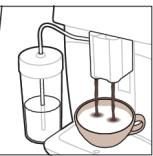
1 Fill the water reservoir with fresh water from the tap, and the bean container with coffee beans. Tip: When the milk tube is connected to the cappuccinatore, push the supply unit to the left for easy access to the water reservoir. 2 Unscrew the lid of the milk container and fill it with milk. For optimal results, we recommend using milk from the refrigerator. 3 Connect the milk tube to the cappuccinatore. 4 Insert the metal tube of the milk into the container. 5 Use the "Drinks" icon, scroll through the menu and select the desired milk-based drink icon. 6 You can set the desired settings by moving the adjustment sliders up or down. 7 To start preparing the selected drink, press the start/stop icon
For preparing cappuccino, first pour milk into the machine, and then coffee. For many other drinks, the order is reversed: first coffee, then milk. - To stop milk dispensing, before the machine finishes, press the start/stop button (only for SM8780, SM8782, SM8785) or the stop button (only for SM8885, SM8889). To stop dispensing hot water (coffee with milk), before the machine finishes preparing, press and hold the start/stop button ▶ (only for SM8780, SM8782, SM8785) or press the stop button (only for SM8885, SM8889).
After milk dispensing, the HygieSteam Shot procedure is performed (automatic steam shot). The machine flushes the milk system with steam to clean it quickly. The metal tube for milk may become hot. Be careful of burns, even later.
Tip: For preparing drinks with milk, you can also use milk from cartons. Simply place the metal tube for milk into the carton.
Preparing coffee with pre-ground coffee
To prepare coffee with pre-ground coffee, follow a few simple steps.
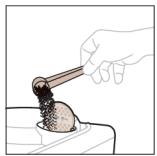

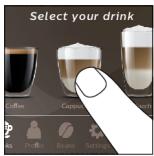

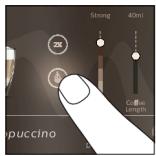

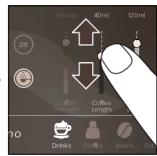

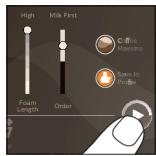

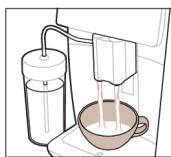
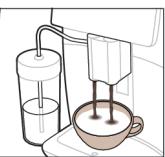
1 Open the lid of the compartment for pre-ground coffee and pour one measuring spoon of pre-ground coffee into it. Close the lid. 2 Touch the "Coffee" symbol, scroll the menu left or right and select the drink. 3 Touch the symbol for pre-ground coffee. 4 You can set the desired strength by moving the adjustment sliders up or down. 5 Press the start/stop button to start preparing the selected drink.
If you select pre-ground coffee, you cannot adjust the strength or prepare several drinks at the same time.
Hot water
1 Check that the inner filter is correctly inserted into the machine (Fig. 1). 2 Place a cup under the spout. 3 Press "Hot water" (Fig. 2). 4 Move the adjustment sliders up or down to adjust the amount or temperature of the water according to your preferences (Fig. 3). 5 Press the start/stop button. 6 To stop hot water dispensing, before the machine finishes preparing, press the start/stop button ▶ (only for SM8780, SM8782, SM8785) or the stop button (only for SM8885, SM8889).
Personal settings
The machine allows you to set a drink recipe according to your preferences and save it in your personal profile. You can choose your own symbol and its profile.
Prepare the best coffee from different coffee beans with the BeanMaestro function
BeanMaestro allows you to choose three degrees of roasting of the coffee beans. The function then automatically optimizes the settings to prepare exactly those beans.
1 Touch the "Beans" symbol in the main menu (Fig. 4). 2 Touch the BeanMaestro symbol (Fig. 5). 3 Select three beans. You can also select the tasting profile. 4 Select the degree of roasting of the coffee beans. 5 The preparation settings are optimized automatically.
6 Enjoy your next cup of coffee.
Press the CoffeeMaestro function button
The CoffeeMaestro function allows you to select a taste profile for your drink instead of setting all parameters individually. You can choose between the profiles Delicato, Intenso, and Forte. To select a CoffeeMaestro taste profile:
1 Touch the symbol of the selected drink (fig. 6). 2 Press the CoffeeMaestro symbol several times (fig. 7).
- Now the main settings are adjusted accordingly. Press the start/stop symbol to start preparing the drink.
4 The drink is ready. Touch the symbol of the selected drink.
5 Personalize the drink using the CoffeeEqualizer Touch+ or CoffeeMaestro function.
6 Touch the "Save in profile" symbol to save it in the personal profile (fig. 10).
Settings restored.
Such settings are reset to standard: water hardness, brewing time, coffee strength, sound, lighting, profiles, reservoir indicator, cleaning times,
settings of the full screen, settings of the CoffeeMaestro, Wi-Fi data, settings of the software update, Saeco data, Amazon data.
Installing the brewing unit
Before installing the brewing unit in the machine, check that it is in the correct position.
1 Check that the lever on the side of the brewing unit is aligned with the arrow and the symbol N (fig. 19).
- If not, lower the lever until it touches the base of the brewing unit (fig. 20).
2 Check that the locking hooks on the side of the brewing unit are in the correct position. - The hook must be in the lower position. To do this, press it downwards.
3. Insert the brewing unit into the machine (fig. 22) and fix the side guide pins (fig. 23). Do not press the PUSH button. 4. Insert the drip tray into place and close the service door.
Maintenance
The coffee machine will indicate when maintenance is needed.
Thanks to the regular maintenance schedule, the coffee machine will always perform at its best, the coffee will taste great, and the milk will be stable.
The table below shows the maintenance intervals for the various parts of the coffee machine.
Visit www.saeco.com/care for detailed information and video instructions.
Dishes that can be washed in the dishwasher are shown in fig. B.
Element
Maintenance interval
How to clean the control panel
Weekly
AquaClean filter
The coffee machine will remind you when to replace it.
Cleaning products and spare parts:
- Descaling solution (CA6700); - AquaClean filter (CA6903); - Brewing unit lubricant (HD5061); - Coffee oil cleaning tablets (CA6704); - Milk circuit cleaner (CA6705); - Service kit (CA6707).
B2/C2 Drinks (CycbHdap)
B8/C8ДykeH
B3/C3 Drinks menu (CycbIHap m3pi)
B9/C9 Start/stop icon (Icke Kocy/TokTaTy 6eJIriueci)
B4/C4 Personal profiles (Xeke npoФиьдер)
B5/C5 BypwaKaTap
Kipicne
Saeco coffee machines are intended for household use only! For proper use of the machine, please read the user manual carefully before using it. For more information, visit www.saeco.com/MyCoffeeMachine or contact our support.
Read the safety instructions and user manual carefully before using the machine, and keep them for future reference.
The Saeco coffee machine is equipped with Wi-Fi to enhance your coffee experience.
To connect the machine to Wi-Fi, follow these steps:
If you want to use the machine's features to customize your coffee, you can connect it to the Alexa voice assistant. If you want to use the machine's features to customize your coffee, you can connect it to the Alexa voice assistant. For accessories, you can purchase them from Amazon.
Note: This feature may vary by model. Clean the machine regularly to prevent malfunctions. We are not responsible for any damage caused by improper use.
If you have a Xelsis SUPREMA (models SM8885, SM8889), you can connect the machine as follows:
To connect the machine, press the 'Connect' button on the screen. Then follow the instructions on the screen to complete the connection.
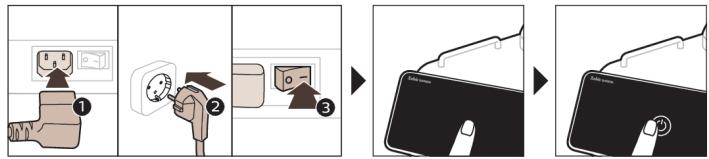
When first turned on, the machine will automatically perform a rinse cycle. Wait for the rinse cycle to complete before using the machine.
This is the DELUXE model (only SM8780, SM8782, SM8785).
Before using the machine for the first time, rinse it. Press the "Rinse" button and follow the on-screen instructions.
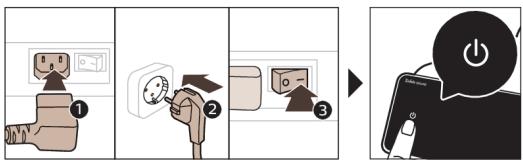
When first turned on, the machine will automatically perform a rinse cycle. Wait for the rinse cycle to complete before using the machine.
Connecting to Wi-Fi
Connect to a 2.4 GHz Wi-Fi network (802.11 b/g/n). To connect to a Wi-Fi network, you will need your router's password. Make sure your router and the machine are close to each other.
Follow the steps below to connect to a Wi-Fi network.

1. Press the Settings button, then select Wi-Fi. 2. Turn on Wi-Fi. 3. Select your Wi-Fi network and enter the password.
If you have already connected, you can skip this step.
When the machine is connected via the app, it will automatically update the firmware when a new version is available. Do not turn off the machine during the update.
Advanced functions
Advanced functions
Purpose

With the BeanMaestro app, you can adjust the temperature and strength of your coffee. After that, the machine will automatically adjust the brewing parameters to your preferences.

The HygieSteam function kills microorganisms and automatically cleans the milk system: it should be used after each milk-based drink or after cleaning the water tank.

The device is made of 100% ceramic and is safe for contact with food. It can be adjusted to your taste from 12 levels of grinding.
The technical and service specifications are given in the manual, and the water filter cartridge should be replaced with a genuine AquaClean one.
Water filter
Cartridges
The water filter cartridge must be replaced regularly.
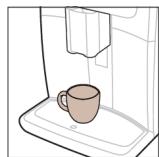

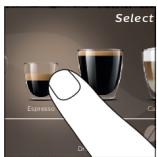

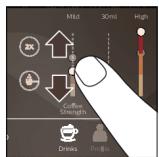

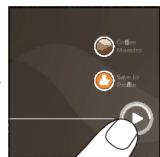

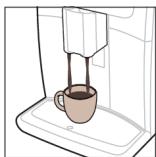
1 Fill the water tank with fresh water, not exceeding the maximum level. 2 When the appliance is turned on, it will rinse itself automatically. You can also rinse the appliance manually by placing a container under the spout and pressing the rinse button. 3 To select the 'Drinks' (water) function, press the 'Drinks' (water) button. The water will be dispensed until you press the button again.
If you need more than 2 liters of water, press the '2x' button. The water will be dispensed continuously until you press the button again.
1 The '2x' button is only available for the 'Drinks' function.
4 After the water is dispensed, you can adjust the temperature and strength settings using the buttons. 5 To start dispensing water, press the start/stop button.
A Use only cold water or water at room temperature.
1 When the appliance is turned on, it will rinse itself automatically. After that, you can use it.
Water parameter settings
To adjust the water parameters, press and hold the settings button for 3 seconds.
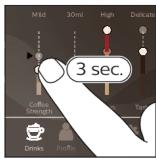
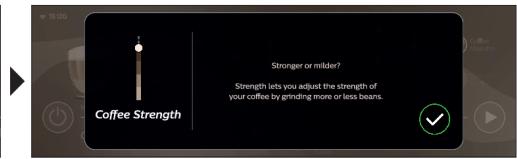
Cleaning the water filter
The water filter must be cleaned regularly.
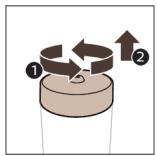
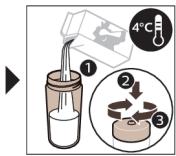
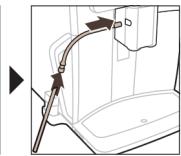
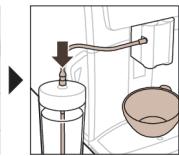
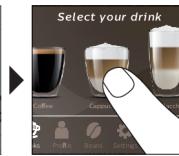
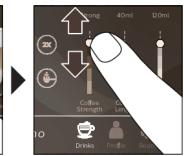
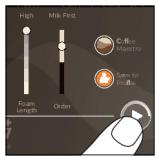
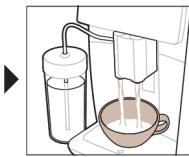
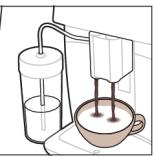
1. Fill the water tank with clean water and install it. Note: When filling, do not exceed the MAX mark on the water tank. 2. If the water tank is empty, fill it with water. For other drinks, use the water tank only for water. 3. Do not fill the water tank with milk. 4. Do not put hot water into the container. 5. Drinks (liquids) other than water should be poured into the water tank only after they have been diluted with water. 6. The temperature and hot water parameters can be adjusted using the buttons. 7. Press the start/stop button to begin the water dispensing process.
For drinks other than water, use the machine with water, milk, or coffee. For other drinks, use the machine with coffee, milk, or water. To stop the flow of water, press the start/stop button (only for models SM8780, SM8782, SM8785) or the stop button (only for models SM8885, SM8889). To stop the flow of drinks (e.g., coffee), press the start/stop button (only for models SM8780, SM8782, SM8785) or the stop button (only for models SM8885, SM8889).
Do not use the 'HygieStam Shot' function with hot water. Use the cleaning function to rinse the system. The metal parts of the water tank may become hot. To avoid burns, let them cool down.
Note: Do not place the water tank on a hot surface. Place the metal parts of the tank on a cool surface.
Cleaning the coffee machine
Before cleaning the coffee machine, you need to remove the water tank and the coffee grounds container.
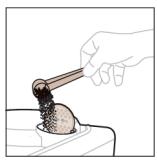

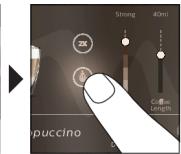
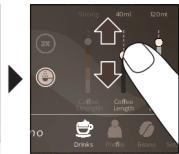
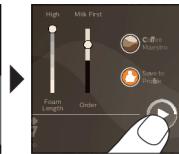

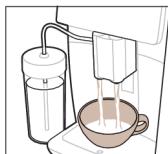
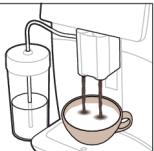
1. Remove the coffee grounds container and empty it. Then clean it. 2. Press the Drinks (liquids) button, then pour water into the container. 3. Press the coffee grounds container button. 4. Adjust the temperature and hot water parameters using the buttons. 5. Press the start/stop button to begin the cleaning process.
1. If the coffee grounds container is full, the machine may not be able to brew coffee or dispense water properly.
Hot water dispensing
1. Connect the machine to the power supply (see figure 1). 2. Place a cup under the spout. 3. Press the 'Hot Water' button (see figure 2). 4. Adjust the hot water temperature or volume (see figure 3) using the buttons. 5. Press the start/stop button. 6. To stop the hot water flow, press the start/stop button (only for models SM8780, SM8782, SM8785) or the stop button (only for models SM8885, SM8889).
The machine automatically adjusts the main parameters of the water hardness and the water filter. The machine also selects the type of coffee beans and the coffee profile.
BeanMaestro functions
BeanMaestro allows you to select and adjust the coffee bean settings. After that, the machine automatically adjusts the parameters for the selected beans.
1 Press the Bean (beans) button (figure 4). 2 Press the BeanMaestro function button (figure 5). 3 Select the beans. You can select Arabica and Robusta beans. 4 Adjust the beans.
5 The parameters are adjusted automatically. 6 Next, the coffee is ready.
CoffeeMaestro functions
Instead of adjusting the coffee profile manually, you can use the CoffeeMaestro function to select the coffee profiles. You can choose between Delicato, Intenso, and Forte. To select a coffee profile with CoffeeMaestro:
1 Press the selection button (figure 6). 2 Press the CoffeeMaestro button again (figure 7).
- The main parameters of the water are adjusted. 3 To start the water dispensing, press the start/stop button.
With the CoffeeEqualizer Touch + function, you can adjust the water settings.
After the water is dispensed, the CoffeeEqualizer Touch + function automatically adjusts the water parameters. The function also allows you to adjust the water settings manually. The adjustment range is limited to the elements of the water circuit.
For online assistance (frequently asked questions, videos, etc.), scan the QR code in this manual or visit www.saeco.com/care.
Water hardness setting
To optimize the machine's operation and extend its service life, the water hardness must be set correctly. If the water hardness is set incorrectly, the machine may not function properly. The water hardness level is set from 1 to 4: 1 = soft water.
To determine the water hardness in your area, use the water hardness test strip provided:
1 Press the water hardness button and hold it for 1 second (figure 12) to set the water hardness. 2 1 minute wait. The number of red squares on the water hardness indicator (figure 13) will change.
To set the machine's water hardness:
1 Press the Settings (Parameters) button, then select the "Water hardness" parameter and adjust it. 2 The water hardness level will be indicated by the number of red squares on the display (figure 14). 3 After setting the water hardness, press the checkmark button to confirm.
Adjusting the grinder settings
The grinder settings may need to be adjusted if the coffee is too weak or too strong. If the grinder settings are incorrect, the coffee may be too watery or too strong. There are 12 different grinder settings.
The machine must be properly adjusted for the coffee beans. To do this, adjust the grinder settings using 100-150 cups of water (about 1 liter).
1 Do not press the bean hopper lid, just add 2-3 cups of beans.
To avoid damaging the grinder, do not adjust the grinder settings while the grinder is running.
1 Press the Beans (Brewing) button. 2 Press the "Grinder" button. 3 Adjust the grinder settings as needed.
Restoring factory settings
The machine can restore the factory settings at any time.
1 Press the Settings button. 2 To select "Factory settings", press the corresponding button. Press the checkmark button to confirm.
- The settings are now restored to factory defaults.
1 The following settings can be restored to factory defaults: water hardness, brewing temperature, pre-brewing, strength, grind amount, programs, grind level, single/double, start screen settings, BeanMaestro settings, Wi-Fi settings, firmware update settings, Saeco settings, Amazon settings.
AquaClean water filter
The AquaClean water filter must be replaced regularly. To ensure optimal performance, the AquaClean water filter should be replaced as indicated. When the machine prompts, you need to replace the filter by following the instructions. You can purchase the AquaClean water filter from authorized dealers or service centers.
AquaClean water filter indicator
The AquaClean water filter indicator is located behind the water tank (see figure).
If the AquaClean water filter is at 10% or less, the machine will show a warning on the display for 2 seconds. This warning reminds you to replace the filter. If the filter is at 0%, the machine will display a message prompting you to replace the AquaClean water filter.
Installing the AquaClean water filter (5 min)
The machine automatically detects when the water filter is installed. The 'Status' (menu) must show that the AquaClean water filter is installed. After the display shows the message to install the filter, the AquaClean water filter can be installed, but the old filter must be removed first. 1 Before installing the AquaClean water filter, the machine must be filled with water.
When installing the AquaClean water filter, it must be rinsed under running water. If this is not done, the water may have a bad taste and the machine may be damaged.
1 The 'Status' (menu) shows whether the 'AquaClean' filter is installed. 2 When the display shows 'Install filter', press the OK button. 3 Follow the instructions on the display.
Replacing the AquaClean water filter (5 min)
After 95 liters of water have passed through the filter, the filter must be replaced. The AquaClean filter indicator will drop to 0%, indicating that the filter needs to be replaced. If you do not replace the AquaClean water filter, you can continue to use the machine, but you must remove the old filter first.
When the AquaClean filter indicator drops to 0% or the machine prompts you to replace the AquaClean filter:
1 Remove the old AquaClean water filter. 2 Replace it with a new one and install it as described in 'Installing the AquaClean water filter (5 min)'.
Tip: If the machine does not indicate that replacement is needed, replace the AquaClean water filter every 3 months.
Cleaning the brew group
Go to the 'Status' (menu) and select 'Brew group clean' (cleaning the brew group) or refer to the instructions for cleaning and descaling the brew group on the website www.saeco.com/care.
1. Remove the brewing unit (Figure 15). 2. Remove the coffee grounds container (Figure 16). 3. Press the PUSH button (Figure 17), pull out the brewing unit, and remove it from the machine (Figure 18).
Cleaning the brewing unit
The brewing unit must be cleaned when the machine indicates it is time to do so.
1. Check that the yellow indicators on the brewing unit are aligned with the marks and the letter N (Figure 19). If they are not aligned, press the start button on the brewing unit (Figure 20) until they are. 2. Check that the yellow lever on the side of the brewing unit is in the correct position. To adjust it, press the lever until it clicks into place (Figure 21). 3. Rinse the brewing unit under running water (Figure 22) and then dry it (Figure 23) before placing it back in the machine. Press the PUSH button. 4. Replace the coffee grounds container and close the brewing unit.
Maintenance and technical service
The manufacturer provides you with maintenance and technical service information.
Regular maintenance and technical service will keep the machine in good condition and ensure long-lasting, high-quality coffee.
For all maintenance and repair work, contact the authorized service center. For spare parts, visit www.saecO.com/care. For any questions about maintenance, refer to the user manual.
| Эль沫ent | Таразалу укытbi | Бackару Таразалн Табу жолы/ Орьдалларын оpeket |
| AquaClean cy3rici | Машина сizden hemece уш.ai сайын сурахда. | STATUS->CLEANING->AQUACLEAN (KYI- >TA3ALAY->AQUACLEAN). AquaClean cy3rici белсану кадмарын opьдалыз. |
| i Машина сизин су bдысын салынfasнын abTomatы Турде дытайамы. Сол себentí, «Status»(Ку) мэз行政处罚 opнатылган орбip ча AquaClean сизincн Белсану рушиз. | ||
| i AquaClean cy3ricin пайдануды бcastay щдында машина толыгимен unsetгийдic 6овуы кеpek. | ||
| i Tinti, Керсылтыда ayыстbyрту талл.etilmesе.de, AquaClean cy3ricin кемпide 3.ai сайын ayыстырлыз. | ||
| Кайоту куралы | Апта сайын | STATUS -> PERFORMANCE ->BREW GROUP CLEAN (KYI -> ΘHIMДЛПК ->ΚΑΗНATY КУРалын ТAZALAY). Кайоту куралын Any Жэн Тазалу кадмарын opьдалыз. |
Element
Maintenance interval
Descaling frequency
Replacement part
The brewing unit must be cleaned when the machine indicates it is time to do so. Check that the yellow indicators on the brewing unit are aligned with the marks and the letter N (Figure 19).
| Ай са布局 | STATUS -> PERFORMANCE ->COFFEE OIL REMOVAL (KYI -> ΘHIMДЛIK -> KOФЕ MAИьИн KETIPY). Кайату куральин koфe майынын Калдыктарын abTomaTTы Турde ketipy ушin озiH-озi ТаЗлару пюессiн, Кадamдарын opbyндаи. | |
| Сут жушист/шкii kanpунчинатор | эрбир колданыстан кеин | STATUS -> HYGISTEAM (KYI -> HYGISTEAM). Сут жушиста тazalay ушin озiH- эзi Tazalay поцeciнн Кадamдарын opbyндаи.Сут тугirih устышka MeТаллсу Тугirih салу щалында озiH, сыртун дыМКыл шуberекпен сутінiz. |
| Апта са布局 | Ишк kaПЧУЧИНATOPды ольи, бөлшөктөнiz.Барык,бөлшөктөрн ольи салу shaMuAlыжу сүйык,бөлшөктөрн oльи салу shaMuAlыжу сүйыктыfыmen shaMuAlы. | |
| Ай са布局 | STATUS -> HYGISTEAM -> DEEP MILK CLEAN (KYI -> HYGISTEAM -> CYTIT TEPEH, TA3АЛАY).Сут жушиста тazalay ушin озiH- эзi Tazalay поцeciнн Кадamдарын opbyндаи. | |
| Сут bдысы | Апта са布局 | Сут bдысын (сурет 24)шешин ольи,шары сут тугirihн iлгeredimen Басыншыт彬. (сурет 25).Сут bдысын bдын,барык, бөлшөктөрн bдысхуfvышta HeMece aБын суда тazalaanb. |
| HygieSteam bдысы (cут тугirih устыш) | Апта са布局 Иеме машина сizre eckeptkende | Машидаи (сурет 26) HygieSteam bдысын алын,HygieSteam кaknaftын (сурет 27) алыныз. HygieSteam konteиерi мeh Кaknaftын aБын сумэн Тazalaanb. |
| Алдын оал унтыкталган кофe белimi | Алдын оал унтыкталган кофe белimiн bilettgen-h-bitelemmerehih аNTA са布局 Текерiiz | Машидаи ожыртг, кайату куральи алыныз. Алдын оал унтыкталган кофeбелimi Кaknaftын ошьн, оfanн Касын салуныз. Бiteretiŋ uнтыкталган кофe Төмэн (сурет 28) Туckenш e Тутkaны xOferapы xOнe HeМehen Жылжытын.ТOLык,бeyнe HeHуSCayla Napы γшiH www.saeco.com/care Topabha KaPɪiz. |
| Тарылfasн кофe bдысы | Кофe унтыктарын bдысын машин acsbIHан кедe бocatbIb3. Оьы an'tа са布局 ТаЗалалы. | Машин косылfaн кедe кофe унтыктары bдысын bilettFairbIn aLbHb3. Оьы aБын суda шамалы xуу cүйыт彬 IMehen shaыны. |
| Эль沫 н � � � н � � � � � � � � � � � � � � � � � � � � � � � � � � � � � � � � � � � � � � � � � � � � � � � � � � � � � � � � � � � � � � � � � � � � � � � � � � � � � � � � � � � � � � � � � � � � � � � � � � � � � � � � � � � � � � � � � � � � � � � � � � � � � � � � � � � � � � � � � � � � � � � � � � � � � � 宁 Ба́кâру Та́кâсьин Та́бу Жôль Орь Да Суда Ша Маль Жу Суда ша Маль Жу Суда ша Маль Жу Суда ша Маль Жу Суда ша Маль Жу Суда ша Маль Жу Суда ша Маль Жy Суда ша Маль Жу Суда ша Маль Жу Суда ша Маль Жу Суда ша Маль Жу Суда ша Маль Жу Суда ша Та́кâсь Н А Суда Суда Суда Суда Суда Суда Суда Суда Суда Суда Суда Суда Có З Д Б | Ба́сÂру Та́кâсьин Та́бу Жôль Орь Дa Суда Ша Маль Жу Суда Sha Маль Жу Суда Sha Маль Жу Суда Sha Маль Жу Суда Sha Та́кâсь Н А Суда Суда Суда Суда Суда Суда Суда Суда Có З Д Б В Та́нÂдâлâть Н А Суда Суда Суда Суда Суда Có З Д Б В Та́нÂдâlâть Н А Суда Суда Có З Д Б В Та́нÂдâlâть Н А Суда Суда Có З Д Б В Та́нÂдâlâть Н А Суда Có З Д Б В Та́нÂдâlâtь Н А Суда Có З Д Б В Та́нÂдâlâtь Н А Суда Có З Д Б В Та́нÂдâlâtь Н А Суда Có З D Ба́сÂру Та́кâсьин Та́бу Жôль Орь Дa Суда Sha Маль Жу Суда Sha Та́нÂдâlâть Н А Суда Суда Суда Суда Суда Суда Có З D Ба́сÂру Та́нÂдâlâtь Н А Суда Суда Có З D Ба́сÂру Та́нÂдâlâtь Núla Курâль Курâль Курâль Курâль Курâль Курâль Курâль Kурâль Kурâль Kурâль Kурâль Kурâль Kурâль Kурâль Kурâль Kурâль Kурâль Kурâль Kурâль Kурâль Kурâль Kу药� Ба́сÂру Та́нÂдâlâtь Núla Курâль Курâль Курâль Курâль Kурâль Kурâль Kурâль Kурâль Kурâль Kурâль Kурâль Kурâль Kурâль Kурâль Курâль Kурâль Kурâль Kурâль Kурâль Kурâль Kурâль Kурâль Kурâль Kурâль Kурâль Kурâль Kурâль Kу药� Ба́зÂру Та́нÂдâlâtь Núla Курâль Курâль Курâль Курâль Kурâль Kурâль Kурâль Kурâль Kурâль Kурâль Kурâль Ба́зÂру Та́нÂдâlâtь Núla Курâль Курâль Kурâль Kурâль Kурâль Kурâль Ба́зÂру Та́нÂдâlâtь Núla Курâль Курâль Kурâль Kурâль Ба́зÂру Та́нÂдâlâtь Núla Курâль Kурâль Kурâль Ба́зÂру Та́нÂдâlâtь Núla Курâль Kурâль Ба́зÂру Та́нÂдâlâtь Núla Курâль Kурâль Ба́зÂру Та́нÂдâlâtь Núla Курâль Ба́зÂру Та́нÂдâlâtь Núla Курâль Ба́зÂру Та́нÂдâlâtь Núla Курâль Ба́зÂру Та́нÂдâlâtь Níva Ба́зÂру Та́нÂдâlâtь Núla Ба́зÂру Та́нÂдâlâtь Núla Ба́зÂру Та́нÂдâlâtь Núla Ба́зÂру Та́нÂдâlâtь Núla Ба́зÂру Та́нÂдâr Ба́зÂру Та́нÂdâlâtь Ба́зÂру Та́нÂdâlâtь Ба́зÂру Та́нÂdâlâtь Ба́зÂру Та́нÂdâlâtь Ба́зÂру Та́нÂdâlâtь Ба́зÂру Túcipuyi Ба́зÂру Túcipuyi Ба́зÂру Túcipuyi Ба́зÂру Túcipuyi Ба́зÂру Túcipuyi Ба́зÂру Túcipuyi Ба́зÂру TúcIPuyi Ба́зÂру TúcIPuyi Ба́зÂру TúcIPuyi Ба́зÂру TúcIPuyi Ба́зÂру TúcIPuyi Ба́зÂру TúcIPuyi Ба́зÂру TücIPuyi Ба́зÂру TücIPuyi Ба́зÂру TücIPuyi Ба́зÂру TücIPuyi Ба́зÂру TücIPuyi Ба́зÂру TücIPuyi Ба́зÂру TücIPuyi Ба́зÂру TücIPuyi Ба́зÂру TücIPuyi Ба́зÂру TücIPuyi Ба́зÂру TücIPuyi Ба́зÂру TücIPuyi Вakerly Ба́зÂру TúcIPuyi Ба́зÂру TúcIPuyi Ба́зÂру TúcIPuyi Ба́зÂру TúcIPuyi Ба́зÂру TúcIPuyi Ба́зÂру TúcIPuyi Ба́зÂру TúcIPuyi Ба́зÂру TúcIPuyi Ба́зÂру TúcIPuyi Ба́зÂру TúcIPuyi Ба́зÂру TúcIPuyi Ба́зÂру TúcIPyyi Ба́зÂру TúcIPyyi Ба́зÂру TúcIPyyi Ба́зÂру TúcIPyyi Ба́зÂру TúcIPyyi Ба́зÂру TúcIPyyi БáзÂру TúcIPyyi Ба́зÂру TúcIPyyi Ба́зÂру TúcIPyyi Ба́зÂру TúcIPyyi Ба́зÂру TúcIPyyi Ба́зÂр TúcIPyyi Ба́зÂр TúcIPyyi Ба́зÂр TúcIPyyi Ба́зÂр TúcIPyyi Ба́зÂр TúcIPyyi Ба́зÂр TúcIPyyi Ба́зÂр TúcIPyyi Ба́зÂр TúcIPyyi Ба́зÂр TúcIPyyi Ба́зÂр TúcIPyyi Ба́зÂр TúcIPyyi Ба́зÂр TúcIFyyi Ба́зÂр TúcIFyyi Ба́зÂр TúcIFyyi Ба́зÂр TúcIFyyi Ба́зÂр TúcIFyyi Ба́зÂр TúcIFyyi Ба́зÂр TücIFyyi Ба́зÂр TücIFyyi Ба́зÂр TücIFyyi Ба́зÂр TücIFyyi Ба́зÂр TücIFyyi Ба́зÂр TücIFyyi Ба́зÂр � Cúcahãs |
Cleaning the brewing unit
Clean the brew group regularly. The "Status" (light) indicator will light up, and the "Brew group clean" message will appear on the display, reminding you to clean, rinse, and dry the brew group. For more information, visit www.saeco.com/care.
Clean the brew group under running water
1 Press the "Status" (light) button, then press "Brew group clean" to start cleaning. 2 To rinse, press the rinse button and follow the on-screen instructions.
Clean the brew group with Philips coffee machine cleaning tablets
Only use Philips coffee machine cleaning tablets.
1 Press the "Status" (light) button, then press "Brew group clean" to start cleaning. 2 To rinse, press the rinse button and follow the on-screen instructions.
Lubricate the brew group
To ensure the machine continues to work properly and to prevent the moving parts from seizing up, lubricate the brew group every 2 months.
1 Press the small button on the brew group (figure 31) and remove the lower part (figure 31). 2 Press the small button on the brew group (figure 32) and remove the upper part (figure 32). 3 Press the two buttons (figure 33) and remove the middle part.
Cleaning programs for the milk carafe
The machine will indicate when the milk carafe needs cleaning.
The machine has the following cleaning programs for the milk carafe:
"HygieSteam Shot": After dispensing hot water, the machine automatically cleans the milk carafe with steam. "HygieSteam": The machine cleans the milk carafe with steam. The HygieSteam symbol appears on the display (figure 34) and on the machine (figure 35). Place the milk carafe under the steam wand (figure 36) and follow the on-screen instructions. "Deep Milk Clean": For a thorough cleaning of the milk carafe, use the Philips milk carafe cleaning program "Deep Milk Clean".
Clean the milk carafe with fresh water
1 Remove the milk carafe (figure 37). 2 Pull the milk carafe apart (figure 38). 3 Separate the upper part from the lower part (figure 39). 4 Remove all parts (figure 40) and clean them with fresh water. 5 Reassemble the milk carafe. 6 To store the milk carafe, place it in the door of the refrigerator. Then put the milk carafe back in place (figure 1). 7 Done.
To use the machine, visit www.saeco.com/care for the user manual.
How to perform the descaling procedure
Philips descaling solution is recommended. Using another descaling agent may damage the machine and leave residues that are harmful to health. If you do not use Philips descaling solution, the warranty may be voided. The descaling procedure must be performed carefully. Philips is not responsible for damage caused by not following the descaling procedure. You can buy Philips descaling solution from authorized dealers or from the Philips online store.
1 Before descaling, make sure the machine is ready for use. Press the 'Status' (menu) button and select 'Descale' (descaling). 2 Remove the water tank, the coffee grounds container, and the HygienicSteam container (figure 26), empty them, and put them back in place. 3 Remove the water tank and empty it. Then take the AquaClean water filter out. 4 Pour the Philips descaling solution into the water tank, fill it with water up to the CALC CLEAN (descaling) mark (figure 41). Then put the water tank back in place. 5 Place a large container (1.5 L) under the coffee spout. 6 Attach the HygienicSteam container to the steam wand (figure 34) and the milk frother (figure 35) as indicated. Put the milk frother in the container. 7 To start the descaling procedure, follow the instructions on the screen. The descaling procedure takes about 30 minutes and consists of a descaling cycle and a rinsing cycle. 8 When the descaling cycle is finished, empty the water tank and the container. Follow the instructions on the screen. 9 Put the AquaClean water filter back into the water tank and activate it (see 'Activating the AquaClean water filter (5 min)').
Actions to take if the descaling procedure is interrupted
You can stop the descaling procedure by pressing the on/off button on the control panel. If you stop the descaling procedure, you must rinse the machine thoroughly before using it again. Follow the steps below:
1 Empty the water tank. 2 Pour fresh water into the water tank up to the CALC CLEAN (descaling) mark and put it back in the machine. The machine will start a rinsing cycle automatically. 3 Place a container under the coffee spout and let the machine run a rinsing cycle. To run a rinsing cycle, first remove the coffee grounds container, the water tank, and the HygienicSteam container, and then place a container under the coffee spout and run the rinsing cycle.
Tip: If the descaling procedure is interrupted, the machine will not be ready for use until the descaling procedure is completed.
Troubleshooting
This chapter summarizes the most common problems you might encounter with the machine. If you cannot solve the problem with the information below, visit www.saeco.com/care for a list of frequently asked questions or contact the consumer care center in your country. The warranty is not valid if the machine has been used for professional purposes.
Problem (Figure A)
A1 Uniph hwunhljutnh unwnuwh quchnvh A2 Unugwou uninoh hughy yuwhn A3 qiuwua juh uynunti A4 yunwuwu wuhuiwu A5 Lunh yuunwu A6 3nuwup hnnhuwugunh2 A7 Uwajhlubn ulmuntin A8 yuajihunh uynintnh wouwu wuwu A9 HygieSteam qinnn2ni wnuu ni uwnu A10 HygieSteam qinnn2ni waduynu lyjah hnnuuhy pnuhny uwhunh A11 ywnqwnnnn pwnannnununh u ywh uwnwunwnu w onnu A12 Unghu yuwenhunnn A13 hngwynhnuwuphun
Lnuuunptn
A25 Uwuh ynuntjutn A26 yupah hunnnuulu A27 Uupnn hnquuuw A28 Puujinh hunnuulu
A14 Unwini yunquwnnuu qihuhu (uwunwuuwutnh hwun wjgbtp www.saeco.com/care) A15 Unipoh huinhylutnh unwnu A16 Uywwuynluyuunntuul A17 Unnoh duqun A18 Unnah uwnnnnunh nwnu A19 Twnnwnunw uwu (wnuwuubn h wwn wgtbup www.saeco.com/care) A20 Unwgud uninoh unwnu A21 2nh pup A22 2nh pwh ywhunh? A23 «Uwahilutnuh ulununbu hpu t» gnighs A24 yuajihuih uynunanh yuuhunh
A29 AquaClean $hnn A30 2wuhwu qnui A31 2nh lyn2nnnpujwu nnn2uuu duwuwlu
ywnuunu uwhuw
Uju uunbuunh uunpu nih bnu nunpnuu: Lnug quwnuunu uwhuwuyuhn ubup unwnpt t, fug nn nuwnybnwuybnu unju lyu bu wzhuwwnu: Annn wunnybnwuytanh nunhwunwguud ubinonaynup unbu uyun B-nu u C-nu: Unnnu wnnp qunutl uywnqnnnntubn:
B1 Uguwnu w uunltnu
B5/C5 3wnhylwunn unind
C1 Uhwguw/wougunuw uwnyunu
B6/C6 Uptbiwj Lwnqwnnuutn
B2/C2 Cuiyihpuin
B7/C7 yunqwuhawh nunnugwu
B3/C3 Lwulghpuhu
B8/C8 huiunpu
B4/C4 Uuawuwuy uynhutn
B9/C9 Ubywnyh/nywnwh > wunnyanw
Utnwniajniu
Cunnhwwnnnbup Saeco nhu wannnuun unabu ubpnuu qubni lwwugnjaup: Saeco-h ynnug hnwnuun unguwug wugnigniuhg hundtp oqnulni hwuun nyunn bp ywnuunu uuhwuhh ughnul qnwugbl atn uwnn oqnwnnojnl ubnwnnigwi Wi-Fi uhwgnun nuw uugubl www.saeco.com/MyCoffeeMachine hnuiu lu qnwugbl atn uwnpu wuntn:
Ugpiu wunghu wquw oqwnqnnobinig uwn2 ni2wnh nywnugbp utunwqniwu unwuohu qnpnyu uwhuwupj hauwq oqnwnqnnduhuu:
2tn Saeco Inhul wunnuun unabih ubpuwu wuuhnui Li Wi-Fi gwtughuwwugul hwnwunnnjntu unoh wunnuunu uqnoaewpuntuwulni uwnuunu:
2bn uwnn Wi-Fi guughuuhugubni 2unnhhnnnpuwwnu
- unwuwu wuhuwuwuuyw uhnhinnutn hwuwuwqwhu niunigwu ubannh hwu uwn unwunwnwhnuhu wnpbnwu uwnuugnui oqwnqnnonh hnawnnjntpwnu gni hwwwn oqunlhuunuah qnnouynyubngh, tni nwnupabn bnnnu hwwubihtu
- uwnpIuwwuIgbl abn Amazon hu2Ihu lu hwuwintl wuhnuutun uwnwqutnn, tpat wju hwnwUnnnajntn hwwuBih atn npnnu
- uhuu@n Alexa unu uunghu u oqunqnnb@awjuwu hunwunu w qnpwnnyaun, b@ wu huunwnnnnajniun hwwuubh t abn bnnu
L2nU Ujubtpuuhnnawnyu5 uninun: @tu wju huwupnu uwnpnu5, hwnwunn 5, nn uninoh uugnnnubn uwgwo hube: Ujunwutuwjuhy, ubup nwn2huwannnu bup, nn ubptwu puwunawluwuu tu unn 5:
huwtu uhwugutl utptuwu, np nnp niutp Xelsis SUPREMA (uhwu SM8885, SM8889)
Utnubip utpbuwh hbnuh uwnu qunnuhn hnuwup hnhuwuguwunh u vhwgntp utpwi: Rutap yunwunwu uwhwuuh ytaunnnu, nnuuqh twnwu hujuntuh «vhuwulod» wunlntwn: Rutap «uhwulod» uwnlwnuhyu hbnub pwnwunu uwhuwuh un gnigwnnnp wjl wn puj hnwhuqutnh:
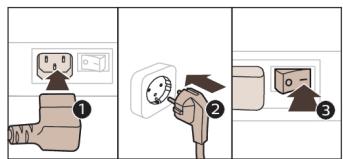
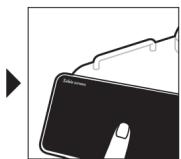
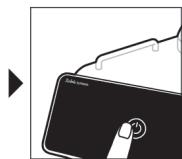
A Uhugntu wwnu lu wunuwgnnt uwwghu unwnnnuw duwuwuy: Nwnptnnpwn unnniqp n2 wunnuwn pwnuugnutnh unwnynjntn:
huuTu uhwugut utptuw, np nnp niutp Xelsis DELUXE (uhwJu SM8780, SM8782, SM8785)
This is a test of the emergency broadcast system. This is only a test.
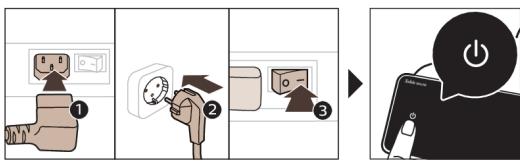
In the event of an actual emergency, you would be instructed where to tune in your area.
Wi-Fi Connection
1. The device supports 2.4 GHz 802.11 b/g/n Wi-Fi connection. To connect to a Wi-Fi network, follow these steps: 1. Turn on the device and ensure that the Wi-Fi function is enabled.
The device will automatically search for available Wi-Fi networks.

1. From the list of available networks, select the one you want to connect to. 2. Enter the Wi-Fi password. 3. The device will automatically connect to the Wi-Fi network.
Stronger or milder? Strength lets you adjust the strength of your coffee by grinding more or less beans


Cleaning and Maintenance
Before cleaning, make sure the device is unplugged.
1. From the list of available programs, select the one you want. 2. Press the start button. The machine will begin the cleaning cycle, which takes about 14 minutes. 3. When the cleaning cycle is finished, the machine will beep to indicate it is done.
Troubleshooting
If the coffee is not hot enough, you can increase the temperature setting. The default temperature is 5, but you can adjust it up to 12. The higher the setting, the hotter the coffee will be.
The water tank should be filled with fresh water daily. For best results, use filtered water. The tank capacity is approximately 100-150 ml (about 1 cup).
1. The grinder settings can be adjusted from 2 to 3. 4. The strength of the coffee can be adjusted by changing the amount of coffee grounds.
1. Press the power button to turn on the machine. 2. Press the "Menu" button. 3. Use the arrow keys to navigate the menu.
This machine is intended for domestic use only.
1 Read the user manual carefully. 2 Keep the manual for future reference. Mark the checkbox with a ✓ where applicable.
Intended use of the machine:
This machine is designed for making espresso coffee and for heating milk and milk froth. It is suitable for use with ground coffee, coffee pods, and coffee beans. It is equipped with a water filter, a steam wand, a hot water dispenser, and a milk frother. It is compatible with the BeanMaestro app, Wi-Fi connectivity, and voice assistants such as Amazon Alexa and Google Assistant.
AquaClean filter
The AquaClean filter reduces limescale buildup in the water circuit. When the AquaClean filter is installed, the machine will indicate when it needs to be replaced. The filter also improves the taste of the coffee by filtering impurities from the water. The AquaClean filter must be replaced regularly to maintain optimal performance.
AquaClean filter installation
The AquaClean filter is installed in the water tank. To install, follow the instructions in the 'Installing the AquaClean filter' section.
- The AquaClean filter reduces limescale by up to 90%. It is recommended to replace the filter every 2 months or after 50 liters of water, whichever comes first. This replacement interval is based on standard usage.
- The AquaClean filter reduces limescale by 0% when it is not installed. It is recommended to install the AquaClean filter to ensure optimal performance.
Replacing the AquaClean filter (5 steps)
1 Remove the water tank from the machine and empty it. Then, remove the old AquaClean filter from the tank. 2 Insert the new AquaClean filter into the tank, making sure it is properly seated. Then, fill the tank with fresh water and reinstall it.
3 Activate the AquaClean filter by running a cycle of hot water through the machine. This will prime the filter and ensure it works correctly.
4 After activating the AquaClean filter, the machine will automatically adjust its settings to optimize performance. The filter should be replaced every 2 months or after 50 liters of water, whichever comes first. To maintain the best coffee quality, always use fresh, cold water.
1 Remove the protective film from the display and the AquaClean 2 Enhancer, and check the contents of the box. The following items are included:
AquaClean water filter (5 pcs)
The filter lasts for 95 liters of water, which is approximately 5 months of use. The AquaClean filter reduces the hardness of the water to 0%, which is very soft. When the AquaClean filter is used, the water is softened and the coffee tastes better, and it also prevents the formation of limescale.
When the AquaClean filter is no longer effective (0%), replace the AquaClean filter.
1. Remove the AquaClean filter from the packaging. 2. Soak the filter in a jug of water for 5 minutes as described in the section "Activating the AquaClean filter (5 pcs)". The AquaClean filter must be replaced every 3 months or after 95 liters of water, whichever comes first.
Activating the AquaClean filter
For more information and support, visit www.saeco.com/care.
Troubleshooting
This chapter provides an overview of the most common problems you may encounter. If you cannot solve the problem with the information below, contact the Consumer Care department in your country.
| Lúnpuwrnnjni | Undtp |
| 2wuh (x p x h) | 287 x 396 x 487 uú |
| ρω2 | 11-12,4 yq |
| 3nuwùph lwnh tnuwunjənɪŋ | 1 200 uú |
| 2nh pμp | 1,7 jhn, hʊṭnjuh |
| Unŋh hʊnhlutɪn unwnjh unwnnnŋaŋiŋ | 450 q |
| Unwguδ unɪŋh unwnjh unwnnnŋaŋiŋ | 15 uŋnlynić |
| Uwηh lʊntjutɪn unwnnnŋaŋiŋ | 600 uI |
| Uwquwlnnŋn pwnànnjauwúr δnwnlhy pwnànnjauŋiŋ | 75-148 uú |
| Unŋtjuw lʊnnu – unŋhʊw lHQnnjauŋi – utnguwi wŋpjniŋ | Stu unwwwnljuw uŋwuh utpnu wqutwn unŋwutnŋehettn |
| Wi-Fi-h hʊðwhuwlwɪnjuw 2bniŋ | 2.4 Μg 802.11 b/g/n |
Technical specifications
This product complies with the requirements of Directive 2014/53/EU for the models SM8780, SM8782, SM8785, SM8885, and SM8889.
The full declaration of conformity is available at the following website: https://www.saeco.com.
The models SM8780, SM8782, SM8785, SM8885, and SM8889 are equipped with Wi-Fi, operating in the 2.4 GHz band, 802.11 b/g/n (channels 1...13). The maximum radio frequency power is less than 100 mW (20 dBm).
Wi-Fi
This product complies with the requirements of EU Regulation No 801/2013, and it is designed to operate in the 2.4 GHz band, 802.11 b/g/n, without causing harmful interference.
Manufacturer: 广 T ^ { 一 } $ F.4., Snuubunhbu 4 w, 9206U7, nuhunb, hnntwnutn
Ubnnnn nnwwunwuh u Upuuwhu hnujwu unwnuop: «shhuyu unhuhyu unwu huwun» UNC, nnwwunwuh wzunjntu, 123022, p. Unuluu, Utnquj Uwubuh uh., un. 13, 5-nn hunl, unwnuop XVII, ubujuly 31, hnunuwwhuwun +7 495 961-1111
SM8889, SM8885, SM8780, SM8782, SM8785' 230 V; 50 Hz; 1500 W
Uwnpnwh
Yugunwjuh yunhpunh huiun
Ununununwol 1nwnwhjnu
Nuhwuiwu, 2whwqnnouu ywnutn
| Буншондωù | 0 °C - +50 °C |
| Чушистowуù munш unwицуì | 20 % - 95 % |
| Upūninnunwju òu2niú | 85 - 109 kPa |

n y uunhuy huiatawu nnwu uuiatwn puuugw to jangah yu uununpanaag:

nunhuyuapwunnuu uynipwnpunlugwu bu LDPE-hg, bab wJU hnuwunnuuud:
Lsh3n
33mnuuandmbnmg3bym. 807 808 808 805wzjwnmdoymn zjbdungdon 809 a 810 814 AquaClean 6ymmob gnnmtnn 815 omeyongnbu ma3mngnab amngdo hougdo 816 817 6gogonbgo6 g6d6g6nbsnn 820 821 822 3mmgmoanu gobmbmgdo 822 on86mln30 823 829 829 Wi-Fi 830
366nabndmbngm3s (bym. s)
A1 aMg3mGnol m8aMmnl nogbgynn A2 6n6b6b6m yog3jnmn yog3n633gymnlo83b6ygm A3 gndn b6n A4 afoanb ommn A5mm80n36gmmnb3nl A6 doun3un Hdunon3un A7 b630gnnb m68m A8b630gymnb m68mnb b30n A9 HygieSteam 3m60n60nn A10 HygieSteam bgyn fndnb anmnl gnnn A11 yo3nb yfo fndn 8o0656mnggmo nn mnn bnouomn bnogymn A12a00033g9b600mnn A13 6g6nbuogmnn0000mm
A14 0g3n 3n 2n 2n n (2n) n6gmndynnbn3n 63n
www.saeco.com/care)
A15 330g0n qom8o0mnn A16 Bubuygmnn mnmn jumn A17 ygnb ddo A18 yo3n6 65mogndyfo A19 lobunan jm3mgjg (2)0n6gmndugnnb3nl 63ng
www.saeco.com/care)
A20 0000d30nn y03n b m60g60nn A21 6ymmn nggog3jgm A226yymnbug8nb mugubgynn A23,6y3gmoaogmngnbnbunb" n6gn0fmm A24 b63gmyfnmb m68mnln m3b6byfnn
gudgdoomn 6bngd
A25 mdn 3m60g6gm A26fdnb dnmn A27 b68d6genn 8mbn A28b3mbnbdnnm
A29 AquaClean gngmfn A30 b8mən 3m38n A31 6ymau bnaa nua 866b8aagmnn 0b
afo3n0dmm3n
g3nmbu 3n 3n n 3n 3n 3n 3n 3n 3n 3n 3n 3n 3n 3n 3n 3n 3n 3n 3n 3n 3n 3n 3n 3n 3n 3n 3n 3n 3n 3n 3n 3n 3n 3n 3n 3n 3n
B1gdmnmbyym
B5/C5 a#m33ggon
C1Bunm0s/8aDmmn3nb bDgmo
B6/C6 33333333333333
B2/C2 b@gmggon
B7/C7 b@b@6ng
B8/C8 ∅ ∅ ∅ ∅ ∅
Register your Saeco machine at www.saeco.com/MyCoffeeMachine to activate the 2-year warranty and receive personalized assistance, including tips, maintenance advice, and access to the Wi-Fi connectivity features. For more information, visit www.saeco.com/MyCoffeeMachine.
The machine is designed for domestic use only and should not be used for commercial purposes.
To connect your Saeco machine to your home Wi-Fi network, follow the instructions in the Wi-Fi section of this manual.
To use the Wi-Fi features, you need:
- A smartphone or tablet with a compatible operating system (iOS or Android) and a stable internet connection.
- The Saeco app, which can be downloaded from the App Store or Google Play.
- An Amazon account to use Alexa voice control, if you wish to use that feature.
- Once you have these, you can set up the Wi-Fi connection and start using the app and voice control.
Note: If you have any problems, please refer to the troubleshooting section. If the issue persists, contact our customer service for further assistance.
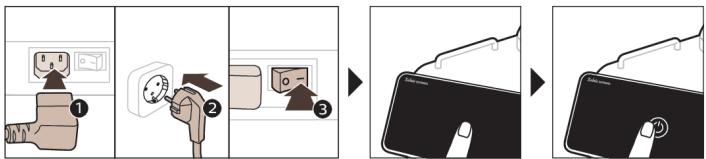
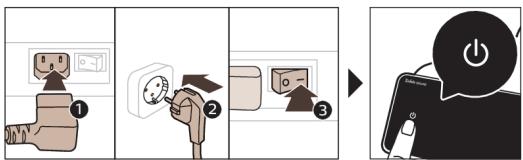
Wi-Fi-06 0033dng
1 0003030n mng ond3g6n yognb 2,4883802.11 b/g/n bbgmbl Wi-Fi jbgmon6. i 306n yognb sbo hobmnb Wi-Fi dlqomno6 0o303anngdo gdmgmo bgygmgo, aonmdgmon bmdbymgmm gdmgconmgdo. 1 0n, mni b 3m n G Wi-Fi fnn gnn nn gnnnn nn nn
d3y03no d303no dmgygm boggbjmgob od36n y3nb sfohnsb Wi-Fi glgmon5 00000000

1 0ggbm 3nndgngn b 6bgymsb 6o 8ygbnnbgmn 8mgb6n66 8m536n3 Wi-Fi gnmo3n b3mg6gn. 2 aggbgon Wi-Fi b@gymob. 3 3n3yg3nn g3n68g dmgygm bogbymgbob nd3g6n yognb safnob Wi-Fi dlugmo6
sbma 8800 buaan mnd3g6n 0030dngyogm n 0aamgongonb 0056ydo.
A 036m0n 026m0ng0b 036m0g0n 046m0n 056m0n 066m0n 076m0n 086m0n 096m0n 106m0n 116m0n 126m0n 136m0n 146m0n 156m0n 166m0n 176m0n 186m0n 196m0n 206m0n 216m0n 226m0n 236m0n 246m0n 256m0n 266m0n 276m0n 286m0n 296m0n 306m0n 316m0n 326m0n 336m0n 346m0n 356m0n 366m0n 376m0n 386m0n 396m0n 406m0n 416m0n 426m0n 436m0n 446m0n 456m0n 46m0n 476m0n 486m0n 496m0n 506m0n 516m0n 526m0n 536m0n 546m0n 556m0n 566m0n 576m0n 586m0n 596m0n 606m0n 616m0n 626m0n 636m0n 646m0n 656m0n 66m0n 676m0n 686m0n 696m0n
6n6s6s6m yog3j3nn yog3nn dmogymdoyn yog3
6n6b6fn 0g23nn y3no y3nb 4mbobmdo, 6o0 gnufoom mdo86nddfoon3 bogbgmo.
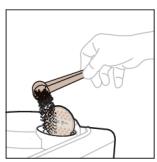
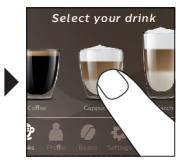
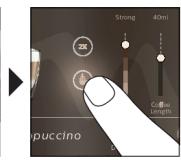
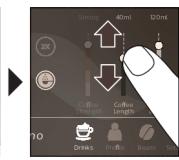
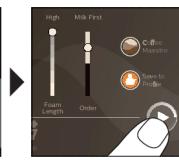
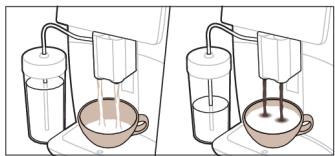
Og36bn 36n00g2m00g2m00g2m00g2m00g2m00g2m00g2m00g2m00g2m00g2m00g2m00g2m00g2m00g2m00g2m00g2m00g2m00g2m00g2m00g2m00g2
1 8ggbon md3g5mnb bubg3gmnb bubgmnb nnnb (bym.6). 2 3993 3993 3993 3993 3993 3993 3993 3993 3993 3993 3993 3993 3993 3993 3993 3993 3993 3993 3993 3993 399
- bssgnnb dnnnnng nnndgngn gn bnn bsbsgme nnb gngnnnngnn.
3 00gmo g 6ydo/8ogmdo n mnnn bubgmnb ma3n b 6ydo.
| 3hfmddmdd | d28g20 | 3d3b53c0 |
| fghlbobm yognb sfofofofofofofofofofofofofofofofofofofofofofofofofofofofofofofofofofofofofofofofofofofofofofofofofofofofofofofofofofofofofofofofofofofofofofofofofofofofofofofofofofofofofofofofofofofofofofofofofofofofof | fghlbobm yognb sfofofofofofofofofofofofofofofofofofofofofofofofofofofofofofofofofofofofofofofofofofofofofofofofofofofofofofofofofofofofofofofofofofofofofofofofofofofofofofofofofofofofofofofofof | fghlbobm yognb nab, fmd nab yagmvofofofofofofofofofofofofofofofofofofofofofofofofofofofofofofofofofofofofofofofofofofofofofofofofofofofofofofofofofofofofofofofofofofofofofofofofofofofofofofofofofofofofofofofofofofofofofofofofofofofo fo |
| fghfbocnofofofofofofofofofofofofofofofofofofofofofofofofofofofofofofofofofofofofofofofofofofofofofofofofofofofofofofofofofofofofofofofofofofofofofofofofofofofofofofofofofofofofofofofofofofofofofofofofofofofoFo | fghlbobm yognb nab, fmd nab yagmvofofofofofofofofofofofofofofofofofofofofofofofofofofofofofofofofofofofofofofofofofofofofofofofofofofofofofofofofofofofofofofofofofofofofofofofofofofofofofofof | fghlbobm yognb nab, fmd nab yagmVOFOFOFOFOFOFOFOFOFOFOFOFOFOFOFOFOFOFOFOFOFOFOFOFOFOFOFOFOFOFOFOFOFOFOFOFOFOFOFOFOFOFOFOFOFOFOFOFOFOFOFOFOFOFOFOFOFOFOFOFOFOFOFOFOFOFOFOFOFOFOFOFOFOFOFOFOFOFOFOFOFOFOFOFOFOFOFOFOFOFOFOFOFOFOFOFOFOFOFOFOF |
| fghfbocnofofofofofofofofofofofofofofofofofofofofofofofofofofofofofofofofofofofofofofofofofofofofofofofofofofofofofofofofofofofofofofofofofofofofofofofofofofofofofofofofofofofofofofofofofofofof | fghlbobm yagmvofofofofofofofofofofofofofofofofofofofofofofofofofofofofofofofofofofofofofofofofofofofofofofofofofofofofofofofofofofofofofofofofofofofofofofofofofofofofofofofofofofofofofofofofofofofofofofofof | fghfbobm yagmVOFOFOFOFOFOFOFOFOFOFOFOFOFOFOFOFOFOFOFOFOFOFOFOFOFOFOFOFOFOFOFOFOFOFOFOFOFOFOFOFOFOFOFOFOFOFOFOFOFOFOFOFOFOFOFOFOFOFOFOFOFOFOFOFOFOFOFOFOFOFOFOFOFOFOFOFOFOFOFOFOFOFOFOFOFOFOFOFOFOFOFOFOFOFOFO |
| fghfbocnofofofofofofofofofofofofofofofofofofofofofofofofofofofofofofofofofofofofofofofofofofofofofofofofofofofofofofofofofofofofofofofofofofofofofofofofofofofofofofofofofofofofofofofofofofofo | fghfbobm yagmVOFOFOFOFOFOFOFOFOFOFOFOFOFOFOFOFOFOFOFOFOFOFOFOFOFOFOFOFOFOFOFOFOFOFOFOFOFOFOFOFOFOFOFOFOFOFOFOFOFOFOFOFOFOFOFOFOFOFOFOFOFOFOFOFOFOFOFOFOFOFOFOFOFOFOFOFOFOFOFOFOFOFOFOFOFOFOFOFOFO | |
| fghfbocnofofofmofofofofofofofofofofofofofofofofofofofofofofofofofofofofofofofofofofofofofofofofofofofofofofofofofofofofofofofofofofofofofofofofofofofofofofofofofofofofofofofofofofofofofofofofofofofofofofofofofofofo | fghfbobm yognb nab, fmd nab yagmVOFOFOFOFOFOFOFOFOFOFOFOFOFOFOFOFOFOFOFOFOFOFOFOFOFOFOFOFOFOFOFOFOFOFOFOFOFOFOFOFOFOFOFOFOFOFOFOFOFOFOFOFOFOFOFOFOFOFOFOFOFOFOFOFOFOFOFOFOFOFOFOFOFOFOFOFOFOFOFOFOFOFO | |
| fghfbocnofofofmofofofofofofmofofofofofmofofofofmofofofofmofofofofmofofofofmofofofofmofofofofmofofofofmofofofofmofofofofmofofofofmofofofofmofofofofmofofofofmofofofofmofofofofmofofofofmofofofofmofofofofmofofofofmofofofof | fghfbobm yagmVOFOFOFOFOFOFOFOFOFOFOFOFOFOFOFOFOFOFOFOFOFOFOFOFOFOFOFOFOFOFOFOFOFOFOFOFOFOFOFOFOFOFOFOFOFOFOFOFOFOFOFOFOFOFOFOFOFOFOFOFOFOFOFOFOFOFOFOFOFOFOFOFOFOFOFOFOFOFOFOFOFOFOFOFOFOFOFOFO | |
| fghfbocnofofmofofmofofmofofmofofmofofmofofmofofmofofmofmofmofmofmofmofmofmofmofmofmofmofmofmofmofmofmof | fghfbobm yagmVOFOFOFOFOFOFOFOFOFOFOFOFOFOFOFOFOFOFOFOFOFOFOFOFOFOFOFOFOFOFOFOFOFOFOFOFOFOFOFOFOFOFOFOFOFOFOFO | |
| 3hmbmgb | d888 | gabmbg | |
| 30h 3b6n lboa | lboa | gabmbg | |
| 3m3m3m3 | lboa | gabmbg | |
| 30h 3b6n lboa | lboa | gabmbg | |
| 30h 3b6n lboa | lboa | gabmbg | |
| 30h 3b6n lboa | lboa | gabmbg | |
| 30h 3b6n lboa | lboa | gabmbg | |
| 30h 3b6n lboa | lboa | gabmcg | |
| 30h 3b6n lboa | lboa | gabmbg | |
| 30h 3b6n lboa | lboa | gabmbg | |
| 30h 3b6n lboa | lboa | gabmbg | |
| 30h 3b6n lboa | lboa | gabmbg | |
| 30h lboa | lboa | gabmbg | |
| 30h lboa | lboa | gabmbg | |
| 30h lboa | lboa | gabmbg | |
| 30h lboa | lboa | gabmbg | |
| 30h lboa | lboa | gabmbg | |
| 30h lboa | lboa | gacmbg | |
| 30h lboa | lboa | gacmbg | |
| 30h lboa | lboa | gacmbg | |
| 30h lboa | lboa | gacmbg | |
| 30h lboa | lboa | gacmbg | |
| 30h lboa | lboa | gacmbg | |
| 30h lfoa | lboa | gacmbg | |
| 30h lfoa | lboa | gacmbg | |
| 30h lfoa | lboa | gacmbg | |
| 30h lfoa | lboa | gacmbg | |
| 30h lfoa | lboa | gacmbg | |
| 30h lfoa | lboa | gacmbtg | |
| 30h lfoa | lboa | gacmbtg | |
| 30h lfoa | lboa | gacmbtg | |
| 30h lfoa | lboa | gacmbtg | |
| 30h lfoa | lboa | gacmbtg | |
| 30h lfoa | lboa | gacmbtg | |
| 30h lfoa | |||
| 30h lfoa | |||
| 30h lfoa | |||
| 30h lfoa | |||
| 30h lfoa | |||
| 30h lfoa | |||
| 30h lfoa | |||
| 30h lfoa | |||
| 30h lfoa | |||
| 30h lfoa | |||
| 30h lfoa | |||
| 30h lfoa | |||
| 30h lfoa | |||
| 30h lfoa | |||
| 30h lfoa | |||
| 30h lfoa | |||
| 30h lfoa | |||
| 30h lfoa |
| 3nmldm | 3n8g8n | 3dmbz5m |
| fndnb gudadjds yadmmdl bubdjmnl 00336217m. | ndnb dngbgsssg 0000000000000000000000000000000000000000000000000000000000000000000000000000000000000000000000000000 | |
| yog3s sfn yodmncn l66ymn yodmncn l66ymn | AquaClean Bycmn yodmncn sfn nynb bs6wmcg dmd86wmcg dmd86wmcg n6b6wmcg n6b6wmcg n6b6wmcg n6b6wmcg n6b6wmcg n6b6wmcg n6b6wmcg n6b6wmcg n6b6wmcg n6b6wmcg n6b6wmcg n6b6wmcg n6b6wmcg n6b6wmcg n6b6Wmcg n6b6Wmcg n6b6Wmcg n6b6Wmcg n6b6Wmcg n6b6Wmcg n6b6Wmcg n6b6Wmcg n6b6Wmcg n6b6Wmcg n6b6Wmcg n6b6Wmcg n6b6Wmcg n6b6Wmcg n6b6Wmcq n6b6Wmcg n6b6Wmcg n6b6Wmcg n6b6Wmcg n6b6Wmcg n6b6Wmcg n6b6Wmcg n6b6Wmcg n6b6Wmcg n6b6Wmcg n6b6Wmcg n6b6Wmcg n6b6Wmcg n6b6Wmcg n5c6d2-3 ydg3n mny "AquaClean Bycmn yodmncn" dmgd2y6666666666666666666666666666666666666666666666666666666666666666666666666666666666666666666666666666 | |
| gongn b5n 05633mmddn 0563333333333333333333333333333333333333333333333333333333333333333333333333333333333333333333333333333 | ||
| AquaClean Bycmn yodmncn n6g4wmcg n6g4wmcg n6g4wmcg n6g4wmcg n6g4wmcg n6g4wmcg n6g4wmcg n6g4wmcg n6g4wmcg n6g4wmcg n6g4wmcg n6g4wmcg n6g4wmcg n6g4wmcg n6g4wmcg n5c6d2-3 ydg3n mny "AquaClean Bycmn yodmncn" dmgd2y66666666666666666666666666666666666666666666666666666666666666666 | ||
| Lobg4d3o3n 0563333333333333333333333333333333333333333333333333333333333333333333333333333333333333333333333 | gongn b5n 0563333333333333333333333333333333333333333333333333333333333333333333333333333333333333333333333 | |
| Lobg4d3o3n 0563333333333333333333333333333333333333333333333333333333333333333333333333333333333 | gongn b5n 056333333.333333333333333333333333333333333333333333333333333333333333333333333333333333333333333333333333333. | |
| yog4n 0563333333333333333333333333333333333333333333333333333333333333333333333333333333333333333333333. | gongn b5n 056333333.3.3.3.3.3.3.3.3.3.3.3.3.3.3.3.3.3.3.3.3.3.3.3.3.3.3.3.3.3.3.3.3.3.3.3.3.3.3.3.3.3.3.3.3.3.3.3.3.3.33. | |
| Lobg4d3o3n 0563333333333333333333333333333333333333333333333333333333333333333333333333333333333. | gongn b5n 05633.0563.056.056.056.056.056.056.056.056.056.056.056.056.056.056.056.056.056.056.056.056.056.056.056.056.056.05.05.05.05.05.05.05.05.05.05.05.05.05.05.05.05.05.05.05.05.05.05.05.05.05.05.05.05.05.05.05.05.05.05. Lobg4d3o3n 0563.056.056.056.056.056.056.056.056.056.056.056.056.056.056.056.056.056.056.056.056.056.056.056.05.05. 05.05.05.05.05.05.05.05.05.05.05.05.05.05.05.05.05.05.05.05.05.05.05.05.05.05.05.05.05.05.05.05.05. | |
| Lobg4d3o3n 056.056.056.056.056.056.056.056.056.056.056.056.056.056.056.056.056.056.056.056.056.056.056.056.056 05c6d2-3 ydg3n mny "AquaClean Bycmn yodmncn" dmgd2y66666666666666666666666666666666666666666666666666666666666666666666 | ||
| Lobg4d3o3n 056.056.056.056.056.056.056.056.056.056.056.056.056.056.056.056.056.056.056.056.056.0.05.05.05.05.05.05.05.05.05.05.05.05.05.05.05.05.05.05.05.05.05.05.05.05.05.05.05.05.05.05.05.05.05 05c6d2-3 ydg3n mny "AquaClean Bycmn yodmncn" dmgd2y666666666666666666666666666666666666666666666666666666666666666666 | ||
| Lobg4d3o3n 056.056.056.056.056, 056.056.056.056.056.056.056.056.056.056.056.056.056.056.056.056.056.056.056.056.056.056.056.056.05. 05.05.05.05.05.05.05.05.05.05.05.05.05.05.05.05.05.05.05.05.05.05.05.05.05.05.05.05.05.05.05.0. 05.05.05.05.05.05.05.05.05.05.05.05.05.05.05.05.05.05.05.05.05.05.05.05.05.05.05.05.05.05.05.05.0. 05. 05.05.05.05.05.05.05.05.05.05.05.05.05.05.05.05.05.05.05.05.05.05.05.05.05.05.05.05.05.05.05.05 05c8d2-4 ydg4n mny "AquaClean Bycmn yodmncn" dmgd2y666666666666666666666666666666666666666666666666666666666666666666666666666666 | ||
| Lobg4d3o3n 056.056.056.056.08 056.056.056.056.056.056.056.056.056.056.056.056.056.056.056.056.056.056.056.056.056.056.056.056.05. Lobg4d3o3n 056.056.056.056.056.056.056.056.056.056.056.056.056.056.056.056.056.056.056.056.056.056.0. Lobg4d3o3n 056.056.056.056.056.056.056.056.056.056.056.056.056.056.056.056.056.056.056.056.056.056. 05. Lobg4d3o3n 056.056.056.056.056.056.056.056.056.056.056.056.056.056.056.056.056.056.056.05. Lobg4d3o3n 056.056.05. Lobg4d3o3n 056.056.05. Lobg4d3o3n 056.056.05. Lobg4d3o3n 056.056.05. Lobg4d3o3n 056.056.05. Lobg4a d2-4 ydg4n mny "AquaClean Bycmn yodmncn" dmgd2y666666666666666666666666666666666666666666666666666666666666666666666. Lobg4d3o3n 056.056.05. Lobg4d3o3n 056.056.05. Lobg4d3o3n 056.056.05. Lobg4d3o3n 056.056.05. Lobg4d3o3n 056. 05. Lobg4d3o3n 056. 05. Lobg4d3o3n 056. 05. Lobg4d3o3n 056. 05. Lobg4d3o3n 056. 05. Lobg4d3o3n 056. 05. Lobg4d3O 05. Lobg4d3o3n 056. 05. Lobg4d3o3n 056. 05. Lobg4d3o3n 056. 05. Lobg4d3o3n 056. 05. Lobg4d3o3n 056. 05. Lobg4d 05. Lobg4d 05. Lobg4d 05. Lobg4d 05. Lobg4d 05. Lobg4d 05. Lobg4d 05. Lobg4d 05. Lobg4d 05. Lobg4d 05. Lobg4d 05. Lobg4d Lobg4d 05. Lobg4d 05. Lobg4d 05. Lobg4d 05. Lobg4d 05. Lobg4d 05. Lobg4d 05. Lobg4d 05. Lobg4d 05. Lobg4d 05. Lobg4d 05. R Lobg4d 05. Lobg4d 05. Lobg4d 05. Lobg4d 05. Lobg4d 05. Lobg4d 05. Lobg4d 05. Lobg4d 05. Lobg4d 05. Lobg4d 05. Lobg4d 05 Lobg4d 05 Lobg4d 05 Lobg4d 05 Lobg4d 05 Lobg4d 05 Lobg4d 05 Lobg4d 05 Lobg4d 05 Lobg4d 05 Lobg4d 05 Lobg4d 05 R Lobg4d 05 Lobg4d 05 Lobg4d 05 Lobg4d 05 Lobg4d 05 Lobg4d 05 Lobg4d 05 Lobg4d 05 Lobg4d 05 Lobg4d 05 Lobg4d 05 | ||
| 3hmmgga | a08g8n | a08mgbsg |
| mdg smdgg | a08g2h16b0f0m0n f0g2y56b0n s6 smdggm0w0m0n h0d8ygnm. | a08g2h16b0f0m0n f0g2y56b0m0n c08g2h16b0f0m0n m0n d0g2h16b0m0n 3m8n0g2g0w0m0n b0d8n (0n0m0n 'a08g2h16b0f0m0n 60g2g0w m0g2h16b0y0m0n'). |
| f0ndl lwb0mg0, f0mdg0ml0n ny6g0n, s6 snl0n s0d0g0d0m0n g06g0m0n. | f06g2h16b0f0m0n f0d8g f06g2h16b0f0m0n f0d8m0n0n f06g2h16b0f0m0n f0d8m0n0n f06g2h16b0f0m0n f0d8m0n0n | |
| mdg nabgg | f0g, f0mdg0ml0n ny6g0n, s6 snl0n lwb0d0m0n 303n. | f06g2h16b0f0m0n f0d8g f06g2h16b0f0m0n f0d8m0n0n f06g2h16b0f0m0n f0d8m0n0n |
| ' | f0ndl qm0g2m0n d0m0n s6 snl0n bs0n0b0m0n d0g0m0n. | a08g2h16b0f0m0n a08g26b0m0n a08m0n0n (u7g. 37) o0a0m0n f0ndl qm0g2m0n d0m0n d0m0n f0ndl qm0g2m0n d0m0n d0m0n f0ndl qm0g2m0n d0m0n d0m0n (aug. 43). g0n0m0n0b0n0n, f0md a08g2h16b0f0m0n o0f0n d0m0n a08g2h16b0f0m0n yml. o0f0n d0m0n a08g2h16b0f0m0n o0f0n d0m0n b06g2h16b0f0m0n d0m0n b06g2h16b0f0m0n d0m0n |
| a08g2h16b0f0m0n o0f0n d0m0n snl0n lwb0d0m0n. | a08g2h16b0f0m0n o0f0n d0m0n a08g2h16b0f0m0n (a0n0m0n 'a08g2h16b0f0m0n a08g2h16b0f0m0n 50g26b0m0n b06g2h16b0f0m0n m06g2h16b0f0m0n a08g2h16b0f0m0n 60g26b0m0n b06g2h16b0f0m0n 60g26b0m0n b06g2h16b0f0m0n 60g26b0m0n a08g2h16b0f0m0n 60g26b0m0n a08g2h16b0f0m0n 60g26b0m0n a08g2h16b0f0m0n 60g26b0m0n a08g2h16b0f0m0n 60g26c0n a08g2h16b0f0m0n 60g26b0m0n a08g2h16b0f0m0n 60g26b0m0n a08g2h16b0f0m0n 60g26b0m0n a08g2h16b0f0m0n a08g26b0m0n a08g2h16b0f0m0n 60g26b0m0n a08g2h16b0f0m0n 60g26b0m0n a08g2h16b0f0m0n 60g26b0m0n a08g2h16b1n 60ml. | |
| a08g2h16b0f0m0n a08g26b0f0m0n hygieSteam a08m0m0n 1): 00g2m0n "b06g2h16b0f0m0n d0m0n 2): 00g2m0n a08m0m0n "HygieSteam". 3): 00g2m0n a08g2h16b0f0m0n d0m0n d0m0n b06g2h16b0f0m0n d0m0n d0m0n a08g2h16b0f0m0n d0m0n d0m0n a08g2h16b0f0m0n d0m0n d0m0n a08g2h16b0f0m0n d0m0n d0m0n a08g2h16b0f0m0n d0m0n d0m0 n a08g2h16b0f0m0n d0m0n d0m0n a08g2h16b0f0m0n d0m0n d0m0n a08g2h16b0f0m0n d0m0n d0m0n a08g2h16b0f0m0n d0m0n 60g26b0m0n a08g2h16b0f0m0n 60g26b0m0n a08g2h16b0f0m0n 60g26b0m0n a08g2h16b0f0m0n 60g26b0m0n a09g2h16b0f0m0n 60g26b0m0n a09g2h16b0f0m0n 60g26b0m0n a09g2h16b0f0m0n 60g26b0m0n a09g2h16b0f0m0n 60g26c0n a09g2h16b0f0m0n 60g26c0n a09g2h16b0f0m0n 60g26c0n a09g2h16b0f0m0n 60g26c0n a09g2h16b0f0m0n 60g26b0m0n a09g2h16b0f0m0n 60g26b0m0n a09g2h16b0f0m0n 60g26b0m0n a09g2h16b0f0m0n d0m0n d0m0n a09g2h16b0f0m0n d0m0n d0m0n a09g2h16b0f0m0n d0m0n d0m0n a09g2h16b0f0m0n d0m0n d0m0n a09g2h16b0f0m0n d1: 60ml. | ||
| a08g2h16b0f0m0n a08g26b0f0m0n hygieSteam a08m0m0n 1): 00g2m0n "b06g2h16b0f0m0n d0m0n 2): 00g2m0n a08m1m0n "HygieSteam". 3): 00g2m0n a08g2h16b0f0m0n d0m0n d0m0n b06g2h16b0f0m0n d0m0n d0m0n a08g2h16b0f0m0n d1: 60ml. a08g2h16b0f0m0n d1: 60ml a08g2h16b0f0m0n d1: 60ml a08g2h16b0f0m0n d1: 60ml a08g2h16b0f0m0n d1: 60ml a08g2h16b0f0m0n d1: 60ml a08g2h14b0f0m0n d1: 60ml a08g2h14b0f0m0n d1: 60ml a08g2h14b0f0m0n d1: 60ml a08g2h14b0f0m0n d1: 60ml a08g2h14b0f0m0n 60ml a08g2h14b0f0m0n 60ml a08g2h14b0f0m0n 60ml a08g2h14b0f0m0n 60ml a08g2h14b0f0m0n 60ml a08g2h14b0f0m0 n a08g2h14b0f0m0n 60ml a08g2h14b0f0m0n 60ml a08g2h14b0f0m0n 60ml a08g2h14b0f0m0n 60ml a08g2h14b0f0m0n 60 ml a08g2h14b0f0m0n 60ml a08g2h14b0f0m0n 60ml a08g2h14b0f0m0n 60ml a08g2h14b0f0m0n 60ml a08g2h14b0f0m0n 60/ml a08g2h14b0f0m0n 60ml a08g2h14b0f0m0n 60ml a08g2h14b0f0m0n 60ml a08g2h14b0f0m0n 60ml a08g2h14b0f0m0n 60nl a08g2h14b0f0m0n 60ml a08g2h14b0f0m0n 60ml a08g2h14b0f0m0n 60ml a08g2h14b0f0m0n 60ml a08g2h14b0f0m0n 60dl a08g2h14b0f0m0n 60ml a08g2h14b0f0m0n 60ml a08g2h14b0f0m0n 60ml a08g2h14b0f0m0n 60ml a08g2h14b0f0m0n 60(ml a08g2h14b0f0m0n 60ml a08g2h14b0f0m0n 60ml a08g2h14b0f0m0n 60ml a08g2h14b0f0m0n 60ml a08g2h14b0f0m0n 60mr a08g2h14b0f0m0n 60ml a08g2h14b0f0m0n 60ml a08g2h14b0f0m0n 60ml a08g2h14b0f0m0n 60ml a08g2h14b0f0m0n 60 mr a08g2h14b0f0m0n 60ml a08g2h14b0f0m0n 60ml a08g2h14b0f0m0n 60ml a08g2h14b0f0m0n 60ml a08g2h14b0f0m0n 60l a08g2h14b0f0m0n 60ml a08g2h14b0f0m0n 60ml a08g2h14b0f0m0n 60ml a08g2h14b0f0m0n 60ml a08g2h14b0f0m0n 60cl a08g2h14b0f0m0n 60ml a08g2h14b0f0m0n 60ml a08g2h14b0f0m0n 60ml a08g2h14b0f0m0n 60ml a08g2h14b0f0m0n 60rl a08g2h14b0f0m0n 60ml a08g2h14b0f0m0n 60ml a08g2h14b0f0m0n 60ml a08g2h14b0f0m0n 60ml a08g2h14b0f0m0n 60r a08g2h14b0f0m0n 60ml a08g2h14b0f0m0n 60ml a08g2h14b0f0m0n 60ml a08g2h14b0f0m0n 60ml a08g2h14b0f0m0n 60m a08g2h14b0f0m0n 60ml a08g2h14b0f0m0n 60ml a08g2h14b0f0m0n 60ml a08g2h14b0f0m0n 60ml a08g2h14b0f0m0n 60ML a08g2h14b0f0m0n 60ml a08g2h14b0f0m0n 60ml a08g2h14b0f0m0n 60ml a08g2h14b0f0m0n 60ml a08g2h14b0f0m0n 60 ML a08g2h14b0f0m0n 60ml a08g2h14b0f0m0n 60ml a08g2h14b0f0m0n 60ml a08g2h14b0f0m0n 60ml a08g2h14b0f0m0n 60MR a08g2h14b0f0m0n 60ml a08g2h14b0f0m0n 60ml a08g2h14b0f0m0n 60ml a08g2h14b0f0m0n 60ml a08g2h14b0f0m0n 60M a08g2h14b0f0m0n 60ml a08g2h14b0f0m0n 60ml a08g2h14b0f0m0n 60ml a08g2h14b0f0m0n 60ml a08g2h14b0f0m0n 60 MR a08g2h14b0f0m0n 60ml a08g2h14b0f0m0n 60ml a08g2h14b0f0m0n 60ml a08g2h14b0f0m0n 60ml a08g2h14b0f0m0n 60 M a08g2h14b0f0m0n 60ml a08g2h14b0f0m0n 60ml a08g2h14b0f0m0n 60ml a08g2h14b0f0m0n 60ml a08g2h14b0f0m0n 60 mL a08g2h14b0f0m0n 60ml a08g2h14b0f0m0n 60ml a08g2h14b0f0m0n 60ml a08g2h14b0f0m0n 60ml a08g2h14b0f0m0n 60CL a08g2h14b0f0m0n 60ml a08g2h14b0f0m0n 60ml a08g2h14b0f0m0n 60ml a08g2h14b0f0m0n 60ml a08g2h14b0f0m0n 60 m a08g2h14b0f0m0n 60ml a08g2h14b0f0m0n 60ml a08g2h14b0f0m0n 60ml a08g2h14b0f0m0n 60ml a08g2h14b0f0m0n 60t a08g2h14b0f0m0n 60ml a08g2h14b0f0m0n 60ml a08g2h14b0f0m0n 60ml a08g2h14b0f0m0n 60ml a08g2h14b0f0m0n 60 a08g2h14b0f0m0n 60ml a08g2h14b0f0m0n 60ml a08g2h14b0f0m0n 60ml a08g2h14b0f0m0n 60ml a08g2h14b0f0m0n 60 |
| 3mmmdg | 3n8g | 3d2m | |
| mmamng 105b, s3mmdg gm6ugb. | s3mmdg ny6gdu bgyuun duqng bnbgydunw gusbuaan | guyuunmnggauu b63ggtmnb u65a5mn ymzgumg y6 mmgmngg | |
| jmd3mndgdu bgyuun duqng bgyuun 3mndgdu gnuu | n60000000000000000000000000000000000000000000000000000000000000000000000000000000000000000000000000000 | ||
| bnyuun 3mndgdu gnuu | guyuunmnggauu b63ggtmnb u65a5mn ymzgumg y6 mmgmngg | ||
| bgyuun 3mndgdu gnuu | guyuunmnggauu b63ggtmnb u65a5mn ymzgumg y6 mmgmngg | ||
| bgyuun 3mndgdu gnuu | guyuunmnggauu b63ggtmnb u65a5mn ymzgumg y6 mmgmng | ||
| bgyuun 3mndgdu gnuu | guyuunmnggauu b63ggtmnb u65a5mn ymzgumg y6 mmgmng | ||
| bgyuun 3mndgdu gnuu | guyuunmnggauu b63ggtmnb u65a5mn ymzgumg y4m6ugb6ugb6ugb6ugb6ugb6ugb6ugb6ugb6ugb6ugb6ugb6ugb6ugb6ugb6ugb6ugb6ugb6ugb6ugb6ugb6ugb6ugb6ugb6ugb6ugb6ugb6ugb6ugb6ugb6ugb6ugb6ugb6ugb6ugb | ||
| bgyuun 3mndgdu gnuu | guyuunmnggauu b63ggtmnb u65a5mn y6m6ugb6ugb6ugb6ugb6ugb6ugb6ugb6ugb6ugb6ugb6ugb6ugb6ugb6ugb6ugb6ugb6ugb6ugb6ugb6ugb6ugb6ugb6ugb6ugb6ugb6ugb6ugb6ugb6ugb6ugb6ugb6ugb6ug | ||
| bgyuun 3mndgdu gnuu | guyuunmnggauu b63ggtmnb u65a5mn y6m6ugb6ugb6ugb6ugb6ugb6ugb6ugb6ugb6ugb6ugb6ugb6ugb6ugb6ugb6ugb6ugb6ugb6ugb6 | ||
| bgyuun 3mndgdu gnuu | guyuunmnggauu b63ggtmnb u65a5mn y6m6ugb6ugb6ugb6ugb6ugb6ugb6ugb6ugb6ugb6ugb6ugb6ugb6ugb6ugb6ugb6ugb6ugb6ugb6UG | ||
| bgyuun 3mndgdu gnuu | guyuunmnggauu b63ggtmnb u65a5mn y6m6ugb6ugb6ugb6ugb6ugb6ugb6ugb6ugb6ugb6ugb6ugb6ugb6ugb6UG | ||
| bgyuun 3mndgdu gnuu | guyuunmnggauu b63ggtmnb u65a5mn y6m6ugb6ugb6ugb6ugb6ug | ||
| bgyuun 3mndgdu gnuu | guyuunmnggauu b63ggtmnb u65a5mn y6m6ugb6ugb6ugb6ugb6ug | ||
| bgyuun 3mndgdu gnuu | guyuunmnggauu b63ggtmnb u65a5mn | ||
| bgyuun 3mndgdu gnuu | guyuunmnggauu b63ggtmnb u65a5mn | ||
| bgyuun 3mndgdu gnuu | guyuunmnggauu b63ggtmnb u65a5mn | ||
| bgyuun 3mndgdu gnuu | g4m6ugb6ugb6ugb6ugb6ug | ||
| bgyuun 3mndgdu gnuu | g4m6ugb6ugb6ugb6ug | ||
| bgyuun 3mndgdu gnuu | g4m6ugb6ugb6ugb6ug | ||
| bgyuun 3mndgdu gnuu | g4m6ugb6ugb6ugb6ug | ||
| bgyuun 3mndgdu gnuu | g4m6ugb5ugb6ugb6ug | ||
| bgyuun 3mndgdu gnuu | g4m6ugb6ugb6ugb6ug | ||
| bgyuun 3mndgdu gnuu | g4m6ugb6ugb6ugb6ug | ||
| bgyuun 3mndgdu gnuu | g4m6ugb6ugb6UG | ||
| bgyuun 3mndgdu gnuu | g4m6ugb6UG | ||
| bgyuun 3mndgdu gnuu | g4m6ugb6UG | ||
| bgyuun 3mndgdu gnuu | g4m6ugb6UG | ||
| bgyuun 3mndgdu gnuu | g4m6ugb6UG | ||
| bgyuun 3mndgdu gnuo | g4m6ugb6UG | ||
| bgyuun 3mndgdu gnuo | g4m6ugb6UG | ||
| bgyuun 3mndgdu gnuo | g4m6ugb6UG | ||
| bgyuun 3mndgdu gnuo | g4m6ugb6UG | ||
| bgyuun 3mnddgu | g4m6ugb6UG | ||
| bgyuun 3mnddgu | g4m6ugb6UG | ||
| bgyuun 3mnddgu | g4m6ugb6UG | ||
| bgyuun 3mnddgu | g4m6ugb6UG | ||
| bgyuun 3mnddgu | g4m6ugb5UG | ||
| bgyuun 3mnddgu | g4m6ugb5UG | ||
| bgyuun 3mnddgu | g4m6ugb5UG | ||
| bgyuun 3mnddgu | g4m6ugb5UG | ||
| bgyuun 3mnddgu | g4m6ugb5UG | ||
| bgyo | |||
| 3hmmdg | 3m8g | 3d2b |
| AquaClean Byamnl gomodfmn sm nym bsns60mg 4m8850000000000000000000000000000000000000000000000000000000000000000000000000000000000000000000000000000" | 3d2b | |
| Byamnl m8g3g3g3g3g3g3g3g3g3g3g3g3g3g3g3g3g3g3g3g3g3g3g3g3g3g3g3g3g3g3g3g3g3g3g3g3g3g3g3g3g3g3g3g3g3g3g3g3g3g3g | ||
| 3d2b60n Wi-Fi lobgmao qo 3d2b60n 3d2b60n 3d2b60n. | 3d2b60n 3d2b60n 3d2b60n 3d2b60n 3d2b60n 3d2b60n 3d2b60n 3d2b60n 3d2b60n 3d2b60n 3d2b60n 3d2b60n 3d2b60n 3d20 | |
| yognl yognl yognl yognl yognl yognl yognl yognl yognl yognl yognl yognl yognl yognl yognl yognl yognl yognl yognl yognl yognl yognl yognl yognl yognl yognl yognl yognl yognl yognl yognl yognl yognl yognl yok | 3d2b60n 3d2b60n 3d2b60n 3d2b60n 3d2b60n 3d2b60n 3d2b60n 3d2b60n 3d2b60n 3d2b60n 3d2b60n 3d2b60n 3d | |
| Wi-Fi fomgfaa nbaa500000000000000000000000000000000000000000000000000000000000000000000000000000000000000000000000000 | 3d2b60n 3d2b60n 3d2b60n 3d2b60n 3d2b60n 3d2b60n 3d2b60n 3d2b60n 3d2b60n 3d2b60n 3d2b60n 3d2b60n 3d 3d2b60n 3d2b60n 3d2b60n 3d2b60n 3d2b60n 3d2b60n 3d2b60n 3d2b60n 3d2b60n 3d2b60n 3d2b60n 3d2b60n 3d21 | |
| 3d2b60n 3d2b60n 3d2b60n 3d2b60n 3d2b60n 3d2b60n 3d2b60n 3d2b60n 3d2b60n 3d2b60n 3d2b60n 3d2b60n 3d8850000. | 3d2b60n 3d2b60n 3d2b60n 3d2b60n 3d2b60n 3d2b60n 3d2b60n 3d2b60n 3d2b60n 3d2b60n 3d2b60n 3d2b60n 3 | |
| 3d2b60n 3d2b60n 3d2b60n 3d2b60n 3d2b60n 3d2b60n 3d2b60n 3d2b60n 3d2b60n 3d2b60n 3d2b60n 3d2b60n | 3d2b60n 3d2b60n 3d2b60n 3d2b60n 3d2b60n 3d2b60n 3d2b60n 3d2b60n 3d2b60n 3d2b60n 3d2b60n 3d2b60n 3d4885000. | |
| 3d2b60n 3d2b60n 3d2b60n 3d2b60n 3d2b60n 3d2b60n 3d2b60n 3d2b60n 3d2b60n 3d2b60n 3d2b60n 3d2b60n 58833 mgfomgfaa 58833 mgfomgfaa 58833 mgfomgfaa 58833 mgfomgfaa 58833 mgfomgfaa 58833 mgfomgfaa 58833 mgfomgfaa 58833 mgfomgfaa 58833 mgfomgfaa 588.58833 mgfomgfaa 588.58833 mgfomgfaa 588.58833 mgfomgfaa 588.58833 mgfomgfaa 588.58833 mgfomgfaa 588.58833 mgfomgfaa 588.588.588.588.588.588.588.588.588.588.588.588.588.588.588.588.588.588.588.588.588.588.588.588.588.588. 58833 mgfomgfaa 58833 mgfomgfaa 58833 mgfomgfaa 58833 mgfomgfaa 58833 mgfomgfaa 588.588.588.588.588.588.588.588.588.588.588.588.588.588.588.588.588.588.588.588.588.588. 58833 mgfomgfaa 58833 mgfomgfaa 58833 mgfomgfaa 58833 mgfomgfaa 588.588.588.588.588.588.588.588.588.588.588.588.588.588.588.588.588.588.588.588.588.588.588.588.588 588.588.588.588.588.588.588.588.588.588.588.588.588.588.588.588.588.588.588.588.588.588.588.588.58 588.588.588.588.588.588.588.588.588.588.588.588.588.588.588.588.588.588.588.588.588.588.588.588.5 588.588.588.588.588.588.588.588.588.588.588.588.588.588.588.588.588.588.588.588.588.588.588.588.58 | ||
| 3d2b60n 3d2b60n 3d2b60n 3d2b60n 3d2b60n 3d2b60n 3d2b60n 3d2b60n 3d2b60n 3d2b60n 3d2b60n 3d2b60n 3d9885000. | 3d2b60n 3d2b60n 3d2b60n 3d2b60n 3d2b60n 3d2b60n 3d2b60n 3d2b60n 3d2b60n 3d2b60n 3d2b60n 3d2b60 58833 mgfomgfaa 58833 mgfomgfaa 58833 mgfomgfaa 58833 mgfomgfaa 58833 mgfomgfaa 588.588.588.588.588.588.588.588.588.588. 58833 mgfomgfaa 58833 mgfomgfaa 588.588.588.588.588.588.588.588.588.588.588.588.588.588.588.588.588.588.588. 588.588.588.588.588.588.588.588.588.588.588.588.588.588.588.588.588.588.588.588.588.588.588.588.588 | |
| 36mm00g | 38mg | 40mg |
| 50mm00g Wi-Fi 2G2G2G2G2G2G2G2G2G2G2G2G2G2G2G2G2G2G2G2G2G2G2G2G2G2G2G2G2G2G2G2G2G2G2G2G2G2G2G2G2G2G2G2G2G2G2G2G2G2G2 | Wi-Fi 16G2G2G2G2G2G2G2G2G2G2G2G2G2G2G2G2G2G2G2G2G2G2G2G2G2G2G2G2G2G2G2G2G2G2G2G2G2G2G2G2G2G2G2G2G2G2G2G2G2G | |
| Wi-Fi 3.0G2G2G2G2G2G2G2G2G2G2G2G2G2G2G2G2G2G2G2G2G2G2G2G2G2G2G2G2G2G2G2G2G2G2G2G2G2G2G2G2G2G2G2G2G2G2G2G2G2G | ||
| 10G2G2G2G2G2G2G2G2G2G2G2G2G2G2G2G2G2G2G2G2G2G2G2G2G2G2G2G2G2G2G2G2G2G2G2G2G2G2G2G2G2G2G2G2G2G2G2G2G2 G | ||
| Wi-Fi 16G2G2G2G2G2G2G2G2G2G2G2G2G2G2G2G2G2G2G2G2G2G2G2G2G2G2G2G2G2G2G2G2G2G2G2G2G2G2G2G2G2G2G2G2G2G2G | ||
| 800mm 16G2G2G2G2G2G2G2G2G2G2G2G2G2G2G2G2G2G2G2G2G2G2G2G2G2G2G2G2G2G2G2G2G2G2G2G2G2G2G2G2G2G2G2G2G2G2G2G2 G | ||
www.saeco.com/MyCoffeeMachine
7 7
7777777777777777777777777777
:wi,wi-Fi-n n7ywnn
nni n7y ni00iinn nn xnnnn 77
7wwnnnn nn 1907 nnnnnnnnn
7w nnnn nn nnnn nn nnnnn
77u n 1777777777
7w nnnn nn, n17 no wu wu nnAlexa nn
DINIOIINN,NNY.N97NIINN NNOINNUIINN.1972N7XINNINN7.97 DY IN7TITINN:7N9
1017n7 nnn nn
Xelsis SUPREMA (SM8885, SM8889 7 w w w w w w w
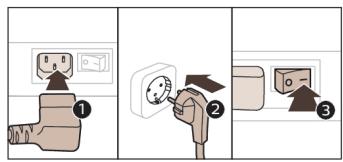
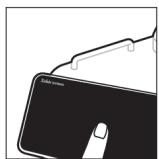
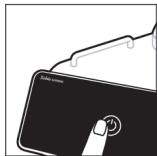
A
Xelsis DELUXE (SM8780, SM8782
(Ta)SM8785
m7n7
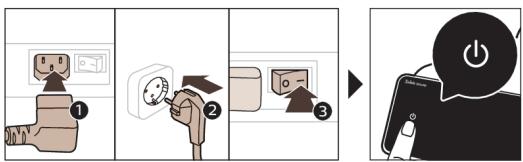
A
Wi-Fi-7
.1 GHz 802.11 b/g/n 2.4 GHz Wi-Fi
i
.7Wn nn nnnn Wi-Fi-n nnnn nn nnnn nn n
Wi-Fi-nn7 79n nn nnnn nn nn

.Wi-Fi-n 700 nx xnx7 177xwnn77nnn77nn 1
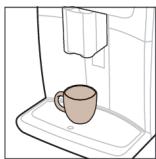

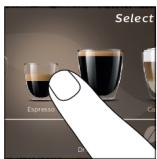

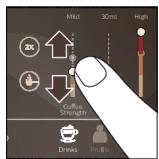

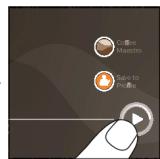

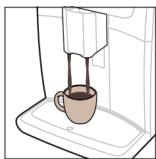
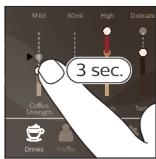

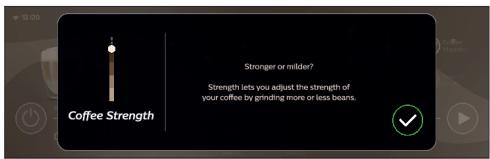
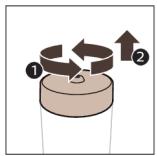
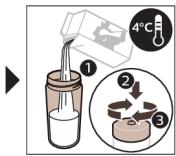
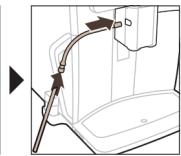

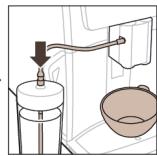

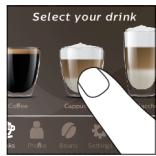

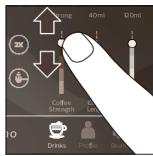
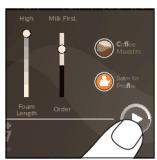
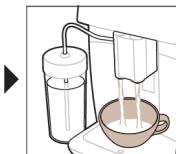
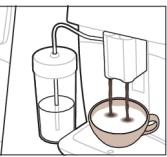
Amazon 7u D'Wn, Saeco Wn
AquaClean D'N |DQN
AquaClean 77 nnnn .AquaClean wwnn nn nnnn
AquaClean 10
AquaClean 1000
.01000000000000000000000000000000000000000000000
NIN 77yynn nnyn 2 yynn nynn nnynn , nin 10% xin AquaClean jon 7wynn on
.ynn nn n7 7 nynn nn nn
JN 7y9n nn n 7AquaClean non n 7nn7 nn nn nn nn ,0% n nn nn nn .
(πιγτ 5) AquaClean D'ün | √n yŋ
nwnAquaClean 77777777777777777777777
10000 179nJ17nn
n nn nnnnnnnnnnnnnnnnnnnnnnnnnnnnnnnnnnnnnnnnnnnnnnnnnnnnnnnnnnnnnnnnnnnnnnnnnnnnnnnnnnnnnnnnnnnnnnnnnnnnnnnnnnn
AquaClean 77777777777
'AquaClean' 1
(πιγτ 5) AquaClean Μην Μρον πην
7 0%-7 aquaClean 7 w xnn | iinn .7 w97 7 w99 | iinn ,iinn ,iinn 7 w97 7 w97 7 w97
.
U T N N 7 W I Y N X X J 7 N O N
.19N N-1nwn ynn dy wnn nn nnn nn nn nn nn nn nn nn nn nn nn nn nn nn nn nn nn nn nn nn nn nn nn nn nn nn nn nn nn nn nn nn nn nn nn nn nn nn nn nn nn nn nn nn nn nn nn nn nn nn nn nn nn nn nn nn nn nn nn nn nn nn nn nn nn nn nn
.20 7 7 7 7 7 7 7 7 7 7 7 7 7 7 7 7 7 7 7 7 7 7
2
.21 777777777777777777777777
yXnYy (22)DITTN ynnn nn7 nnnn nn 7nn 7nn 3
| AQUACLEAN<-01000 .AquaClean | 01007 | HygieSteam | 01007 (Aq) | AquacClean | 01007 |
| AquaClean | 01007 | HygieSteam | 01007 | HygieSteam | 01007 |
| AquaClean | 01007 | HygieSteam | 01007 | HygieSteam | 01007 |
| AquaClean | 01007 | HygieSteam | 01007 | HygieSteam | 01007 |
| AquaClean | 01007 | HygieSteam | 01010 | HygieSteam | 01010 |
| AquaClean | 01007 | HygieSteam | 01010 | HygieSteam | 01010 |
| AquaClean | 01007 | HygieSteam | 01010 | HygieSteam | 01010 |
| AquaClean | 01007 | HygieSteam | 01010 | HygieSteam | N-11111 |
| AquaClean | 01007 | HygieSteam | 01010 | HygieSteam | N-11111 |
| AquaClean | 01007 | HygieSteam | 01010 | HygieSteam | N-11111 |
| AquaClean | 01007 | HygieSteam | 01010 | Hygie Steam | N-11111 |
| AquaClean | 01007 | HygieSteam | 01010 | Hygie Steam | N-11111 |
| AquaClean | 01007 | HygieSteam | 01010 | Hygie Steam | N-11111 |
| AquaClean | 01007 | HygieSteam | 2511 | Hygie Steam | N-11111 |
| AquaClean | 01007 | HygieSteam | N-11111 | Hygie Steam | N-11111 |
| AquaClean | 01007 | HygieSteam | N-11111 | Hygie Steam | N-11111 |
| AquaClean | 01007 | HygieSteam | N-11111 | Hygie Steam | N-11111 |
| AquaClean | 01010 | HygieSteam | N-11111 | Hygie Steam | N-11111 |
| AquaClean | 01010 | HygieSteam | N-11111 | Hygie Steam | N-11111 |
| AquaClean | 01010 | HygieSteam | N-11111 | Hygie Steam | N-11111 |
| /{}\{}\{}\{}\{}\{}\{}\{}\{}\{}\{}\{}\{}\{}\{}\{}\{}\{}\{}\{}\{}\{}\{}\{}\{}\{}\{}\{}\{}\{}\{}\{}\{}\{}\{}\{}\{}\{}\{}\{}\{}\{}\{}\{}\{}\{}\{}\{}\{}\{}\{}\{}\{}\{}\{}\{}\{}\{}\{}\{}\{}\{}\{}\{}\{}\{}\{}\{}\{}\{}\{}\{}\{}\{}\{}\{}\{}\{}\{}\{}\{}\{}\{}\{}\{}\{}\{}\{}\{}\{}\{}\{}\{}\{}\{}\{}\{}\{}\{}\{}\{} | /{}\{}\{}\{}\{}\{}\{}\{}\{}\{}\{}\{}\{}\{}\{}\{}\{}\{}\{}\{}\{}\{}\{}\{}\{}\{}\{}\{}\{}\{}\{}\{}\{}\{}\{}\{}\{}\{}\{}\{}\{}\{}\{}\{}\{}\{}\{}\{}\{}\{}\{}\{}\{}\{}\{}\{}\{}\{}\{}\{}\{}\{}\{}\{}\{}\{}\{}\{}\{}\{}\{}\{}\{}\{}\{}\{}\{}\{}\{}\{}\{}\{}\{}\{}\{}\{}\{}\{}\{}\{}\{}\{}\{}\{}\{}\{}\{}\{} | |INO|77 |
| INONJ97NINJ97NINJ97NINJ97NINJ97NINJ97NINJ97NINJ97NINJ97NINJ97NINJ97NINJ97NINJ97NINJ97NINJ97NINJ97NINJ97NINJ97NINJ97NINJ97NINJ97NInJ97NINJ97NINJ97NINJ97NINJ97NINJ97NINJ97NINJ97NINJ97NINJ97NINJ97NINJ97NINJ97NINJ97NINJ97NINJ97NINJ97NINJ97NINJ97NINJ97N INJ97NINJ97NINJ97NINJ97NINJ97NINJ97NINJ97NINJ97NINJ97NINJ97NINJ97NINJ97NINJ97NINJ97NINJ97NINJ97NINJ97NINJ97NINJ97NINJ97N | |INO|77 | |
| INONJ97NINJ97NINJ97NINJ97NINJ97NINJ97NINJ97NINJ97NINJ97NINJ97NINJ97NINJ97NINJ97NINJ97NINJ97NINJ97NINJ97NINJ97 NINJ97NINJ97NINJ97NINJ97NINJ97NINJ97NINJ97NINJ97NINJ97NINJ97NINJ97NINJ97NINJ97NINJ97NINJ97NINJ97NINJ97NINJ97NINJ97NINJ97 NINJ97NINJ97N INJ97NINJ97N INJ97NINJ97N INJ97NINJ97N INJ97NINJ97N INJ97NINJ97N INJ97NINJ97N INJ97NINJ97N INJ97NINJ97N INJ97NINJ97N INJ97NINJ97N | |INO|77 | |
| INONJ97NINJ97NINJ97NINJ97NINJ97NINJ97NINJ97NINJ97NINJ97NINJ97NINJ97NINJ97NINJ97NINJ97NINJ97NINJ97 NINJ97NINJ97N INJ97NINJ97NINJ97N INJ97NINJ97N INJ97NINJ97N INJ97NINJ97N INJ97NINJ97N INJ97NINJ97N INJ97NINJ97N INJ97NINJ97N INJ97NINJ97N INJ97NINJ97 NINJ97NINJ97N INJ97NINJ97N INJ97NINJ97N INJ97NINJ97N INJ97NINJ97N INJ97NINJ97N INJ97NINJ97N INJ97NINJ97N INJ97NINJ97N | |INO|77 | |
| . INONJ97NINJ97NINJ97NINJ97NINJ97NINJ97NINJ97NINJ97NINJ97NINJ97NINJ97NINJ97NINJ97NINJ97N INJ97NINJ97N INJ97NINJ97N INJ97NINJ97N INJ97NINJ97N INJ97NINJ97N INJ97NINJ97N INJ97NINJ97N INJ97NINJ97N INJ97N INJ97N INJ97N INJ97N INJ97N INJ97N INJ97N INJ97N INJ97N INJ97N INJ97N INJ97N INJ97N INJ97N INJ97N INJ97N INJ97N INJ97N INJ97N INJ97N | |INO|77 | |
| . INONJ97NINJ97NINJ97NINJ97NINJ97NINJ97NINJ97NINJ97NINJ97NINJ97NINJ97N INJ97NINJ97N INJ97NINJ97N INJ97N INJ97N INJ97N INJ97N INJ97N INJ97N INJ97N INJ97N INJ97N INJ97N INJ97N INJ97N INJ97N INJ97N | |INO|77 | |
1
2
i
17 17 17 17
.
HygieSteam HygieSteam
197 7y(36)7n7nn7nn7nn7nn7nn. (35) n7n7nn (34) 190nn
.
77nn nn nn 77 n 110n 117 6979 77 nn nn nn nn nn nn nn nn nn nn nn nn nn nn nn nn nn nn nn nn nn nn nn nn nn nn nn nn nn nn nn nn nn nn nn nn nn nn nn nn nn nn nn nn nn nn nn nn nn nn nn nn nn nn nn nn nn nn nn nn nn nn nn nn nn nn nn nn nn nn nn nn nn nn nn nn nn nn nn nn nn nn nn nn nn nn nn nn nn nn nn nn
Jn
n7nnnnnnnnnnnnnnnnnnnnnnnnnnnnnnnnnnnnnnnnnnnnnnnnnnnnnnnnnnnnnnnnnnnnnnnnnnnnnnnnnnnnnnnnnnnnnnnnnnnnnnnnnnnnnnnn
(37) 1
(38 n) non 1970 nnnn nn nnnn nn nnnn 2
(39 n) 177nn nn nn nn nn nn nn nn nn nn nn nn nn nn nn nn nn nn nn nn nn nn nn nn nn nn nn nn nn nn nn nn nn nn nn nn nn nn nn nn nn nn nn nn nn nn nn nn nn nn nn nn nn nn nn nn nn nn nn nn nn nn nn nn nn nn nn nn nn nn nn nn nn nn nn nn nn nn nn nn nn nn nn nn nn nn nn nn nn nn nn nn nn nn nn nn nn nn nn nn nn
777nnn nn 171 (40) 777nn 777 77
5
. 6
(1) (2)
7
.1111111111111111111111111111111111111111
N
NIN 70000000000000000000000000000000000000000000000000000000000
7777777777777777777777777777
IN 77uI170n IN 170n 170n Philips 7u nn nn nn nn nn nn nn nn nn nn nn nn nn
.
1
n nn nnnn 100077777
AquaClean
CALC CLEAN-7
7
.9999999999999999999999999999
.0007y nnnn nn 1y .n nn nn nn nn nn nn nn nn nn nn nn nn nn nn nn nn nn nn nn nn nn nn nn nn nn nn nn nn nn nn nn nn nn nn nn nn nn nn nn nn nn nn nn nn nn nn nn nn nn nn nn nn nn nn nn nn nn nn nn nn nn nn nn nn nn nn nn nn nn nn nn nn nn nn nn nn
.('(n75) AquaClean n n n nn n nn n n n n n n n n n n n n n n n n n n n n n n n n n n n n n n n n n n n n n n n n n n n n n n n n
!nnonnnn nn nnonnAquaClean nonwn
709" nnn nn nn nn nn nn nn
197 709" nnnn nn nn nn nn nn nn nn nn nn nn nn nn nn nn nn nn nn nn nn nn nn nn nn nn nn nn nn nn nn nn nn nn nn nn nn nn nn nn nn nn nn nn nn nn nn nn nn nn nn nn nn nn nn nn nn nn nn nn nn nn nn nn nn nn nn nn nn nn nn nn nn nn nn nn nn nn nn nn nn nn nn nn nn nn nn nn nn nn nn nn nn nn nn nn nn nn nn nn nn nn
:JINJINJYJON
1
2
.UDIOIN NOUHTN
3
JIN097 9O17 7NUN JIN097 NIOI2 017n7
77777777777777777777777777777777
N
Philips 7w
Saeco 177 Amazon
Amazon Smart Reorder
D. n / 2 n
190n nn n 7n .77nnnnn 7n nn n nn n nn n nn nn nn nn nn nn nn nn nn nn nn nn nn nn nn nn nn nn nn nn nn nn nn nn nn nn nn nn nn nn nn nn nn nn nn nn nn nn nn nn nn nn nn nn nn nn nn nn nn nn nn nn nn nn nn nn nn nn nn nn nn nn nn nn nn nn nn nn nn nn nn nn nn nn
.7n77 77n77n7
:90n7n
CA6700
AquaClean CA6903
HD5061
| הכלה הכלה��,הכלה,הכלה,… | .97 | |
| .97 | .DEMO | |
| .97 | .N7777777777777777777777777777777777777777777777777777777777777777777777777777777777777777777777777777 | |
| הכלה | הכלה | הכלה |
| 5 烟囱 7 烟囱, 9 烟囱 7 烟囱 7 烟囱 7 烟囱 7 烟囱 7 烟囱 7 烟囱 7 烟囱 7 烟囱 7 烟囱 7 烟囱 7 烟囱 7 烟囱 7 烟囱 7 烟囱 7 烟囱 7 烟囱 7 烟囱 7 烟囱 7 烟囱 7 烟囱 7 烟囱 7 烟囱 7 烟囱 7 烟囱 7 烟囱 8 烟囱 9 烟囱 10 烟囱 11 烟囱 12 烟囱 13 烟囱 14 烟囱 15 烟囱 16 烟囱 17 烟囱 18 烟囱 19 烟囱 20 烟囱 21 烟囱 22 烟囱 23 烟囱 24 烟囱 25 烟囱 26 烟囱 27 烟囱 28 烟囱 29 烟囱 30 烟囱 31 烟囱 32 烟囱 33 烟囱 34 烟囱 35 烟囱 36 烟囱 37 烟囱 38 烟囱 39 烟囱 40 烟囱 41 烟囱 42 烟囱 43 烟囱 44 烟囱 45 烟囱 46 烟囱 47 烟囱 48 烟囱 49 烟囱 50 烟囱 51 烟囱 52 烟囱 53 烟囱 54 烟囱 55 烟囱 56 烟囱 57 烟囱 58 烟囱 59 烟囱 60 烟囱 61 烟囱 62 烟囱 63 烟囱 64 烟囱 65 烟囱 66 烟囱 67 烟囱 68 烟囱 69 烟囱 70 烟囱 71 烟囱 72 烟囱 73 烟囱 74 烟囱 75 烟囱 76 烟囱 77 烟囱 78 烟囱 79 烟囱 80 烟囱 81 烟囱 82 烟囱 83 烟囱 84 烟囱 85 烟囱 86 烟囱 87 烟囱 88 烟囱 89 烟囱 90 烟囱 91 烟囱 92 烟囱 93 烟囱 94 烟囱 95 烟囱 96 烟囱 97 烟囱 98 烟囱 99 烟囱 100 烟囱 101 102 103 104 105 106 107 108 109 110 111 112 113 114 115 116 117 118 119 120 121 122 123 124 125 126 127 128 129 130 131 132 133 134 135 136 137 138 139 140 141 142 143 144 145 146 147 148 149 150 151 152 153 154 155 156 157 158 159 160 161 162 163 164 165 166 167 168 169 170 171 172 173 174 175 176 177 178 179 180 181 182 183 184 185 186 187 188 189 190 191 192 193 194 195 196 197 198 199 200 201 202 203 204 205 206 207 208 209 210 211 212 213 214 215 216 217 218 219 220 221 222 223 224 225 226 227 228 229 230 231 232 233 234 235 236 237 238 239 240 241 242 243 244 245 246 247 248 249 250 251 252 253 254 255 256 257 258 259 260 261 262 263 264 265 266 267 268 269 270 271 272 273 274 275 276 277 278 279 280 281 282 283 284 285 286 287 288 289 290 291 292 293 294 295 296 297 298 299 300 301 302 303 304 305 306 307 308 309 310 311 312 313 314 315 316 317 318 319 320 321 322 323 324 325 326 327 328 329 330 331 332 333 334 335 336 337 338 339 340 341 342 343 344 345 346 347 348 349 350 351 352 353 354 355 356 357 358 359 360 361 362 363 364 365 366 367 368 369 370 371 372 373 374 375 376 377 378 379 380 381 382 383 384 385 386 387 388 389 390 391 392 393 394 395 396 397 398 399 400 401 402 403 404 405 406 407 408 409 410 411 412 413 414 415 416 417 418 419 420 421 422 423 424 425 426 427 428 429 430 431 432 433 434 435 436 437 438 439 440 441 442 443 444 445 446 447 448 449 450 451 452 453 454 455 456 457 458 459 460 461 462 463 464 465 466 467 468 469 470 471 472 473 474 475 476 477 478 479 480 481 482 483 484 485 486 487 488 489 490 491 492 493 494 495 496 497 498 499 500 501 502 503 504 505 506 507 508 509 510 511 512 513 514 515 516 517 518 519 520 521 522 523 524 525 526 527 528 529 530 531 532 533 534 535 536 537 538 539 540 541 542 543 544 545 546 547 548 549 550 551 552 553 554 555 556 557 558 559 560 561 562 563 564 565 566 567 568 569 570 571 572 573 574 575 576 577 578 579 580 581 582 583 584 585 586 587 588 589 590 591 592 593 594 595 596 597 598 599 600 601 602 603 604 605 606 607 608 609 610 611 612 613 614 615 616 617 618 619 620 621 622 623 624 625 626 627 628 629 630 631 632 633 634 635 636 637 638 639 640 641 642 643 644 645 646 647 648 649 650 651 652 653 654 655 656 657 658 659 660 661 662 663 664 665 666 667 668 669 670 671 672 673 674 675 676 677 678 679 680 681 682 683 684 685 686 687 688 689 690 691 692 693 694 695 696 697 698 699 700 701 702 703 704 705 706 707 708 709 710 711 712 713 714 715 716 717 718 719 720 721 722 723 724 725 726 727 728 729 730 731 732 733 734 735 736 737 738 739 740 741 742 743 744 745 746 747 748 749 750 751 752 753 754 755 756 757 758 759 760 761 762 763 764 765 766 767 768 769 770 771 772 773 774 775 776 777 778 779 780 781 782 783 784 785 786 787 788 789 790 791 792 793 794 795 796 797 798 799 800 801 802 803 804 805 806 807 808 809 810 811 812 813 814 815 816 817 818 819 820 821 822 823 824 825 826 827 828 829 830 831 832 833 834 835 836 837 838 839 840 841 842 843 844 845 846 847 848 849 850 851 852 853 854 855 856 857 858 859 860 861 862 863 864 865 866 867 868 869 870 871 872 873 874 875 876 877 878 879 880 881 882 883 884 885 886 887 888 889 890 891 892 893 894 895 896 897 898 899 900 901 902 903 904 905 906 907 908 909 910 911 912 913 914 915 916 917 918 919 920 921 922 923 924 925 926 927 928 929 930 931 932 933 934 935 936 937 938 939 940 941 942 943 944 945 946 947 948 949 950 951 952 953 954 955 956 957 958 959 960 961 962 963 964 965 966 967 968 969 970 971 972 973 974 975 976 977 978 979 980 981 982 983 984 985 986 987 988 989 990 | ||
| [1] | [2] | [3] |
| [4] | [5] | [6] |
| [7] | [8] | [9] |
| [10] | [11] | [12] |
| [13] | [14] | [15] |
| [16] | [17] | [18] |
| [19] | [20] | [21] |
| [22] | [23] | [24] |
| [25] | [26] | [27] |
| [28] | [29] | [30] |
| [31] | [32] | [33] |
| [34] | [35] | [36] |
| [37] | [38] | [39] |
| [40] | [41] | [42] |
| [43] | [44] | [45] |
| [46] | [47] | [48] |
| [49] | [50] | [51] |
| [52] | [53] | [54] |
| [55] | [56] | [57] |
| [58] | [59] | [60] |
| [61] | [62] | [63] |
| [64] | [65] | [66] |
| [67] | [68] | [69] |
| [70] | [71] | [72] |
| [73] | [74] | [75] |
| [76] | [77] | [78] |
| [79] | [80] | [81] |
| [82] | [83] | [84] |
| [85] | [86] | [87] |
| [88] | [89] | [90] |
| [91] | [92] | [93] |
| [94] | [95] | [96] |
| [97] | [98] | [99] |
| [100] | [101] | [102] |
| [103] | [104] | [105] |
| [106] | [107] | [108] |
| [109] | [110] | [111] |
| [112] | [113] | [114] |
| [115] | [116] | [117] |
| [118] | [119] | [120] |
| [121] | [122] | [123] |
| [124] | [125] | [126] |
| [127] | [128] | [129] |
| [129] | [130] | [131] |
| [132] | [133] | [134] |
| [135] | [136] | [137] |
| [138] | [139] | [140] |
| [141] | [142] | [143] |
| [144] | [145] | [146] |
| [147] | [148] | [149] |
| [150] | [151] | [152] |
| [153] | [154] | [155] |
| [156] | [157] | [158] |
| [159] | [160] | [161] |
| [160] | [161] | [162] |
| [162] | [163] | [164] |
| [163] | [164] | [165] |
| [165] | [166] | [167] |
| [166] | [167] | [168] |
| [167] | [168] | [169] |
| [169] | [170] | [171] |
| [172] | [173] | [174] |
| [174] | [175] | [176] |
| [175] | [176] | [177] |
| [177] | [178] | [179] |
| [179] | [180] | [181] |
| [182] | [183] | [184] |
| [185] | [186] | [187] |
| [188] | [189] | [189] |
| [189] | [190] | [191] |
| [192] | [193] | [194] |
| [194] | [195] | [196] |
| [196] | [197] | [198] |
| [198] | [199] | [200] |
| [200] | [201] | [202] |
| [202] | [203] | [204] |
| [204] | [205] | [206] |
| [206] | [207] | [208] |
| [208] | [209] | [210] |
| [210] | [211] | [212] |
| [212] | [213] | [214] |
| [214] | [215] | [216] |
| [216] | [217] | [218] |
| [218] | [219] | [220] |
| [220] | [221] | [222] |
| [222] | [223] | [224] |
| [224] | [225] | [226] |
| [226] | [227] | [228] |
| [228] | [229] | [230] |
| [230] | [231] | [232] |
| [232] | [233] | [234] |
| [234] | [235] | [236] |
| [236] | [237] | [238] |
| [238] | [239] | [240] |
| [240] | [241] | [242] |
| [242] | [243] | [244] |
| [244] | [245] | [246] |
| [246] | [247] | [248] |
| [247] | [248] | [249] |
| [249] | [250] | [251] |
| [251] | [252] | [253] |
| [253] | [254] | [255] |
| [255] | [256] | [257] |
| [257] | [258] | [259] |
| [259] | [260] | [261] |
| [260] | [261] | [262] |
| [262] | [263] | [264] |
| [264] | [265] | [266] |
| [266] | [267] | [268] |
| [268] | [269] | [270] |
| [270] | [271] | [272] |
| [272] | [273] | [274] |
| [274] | [275] | [276] |
| [275] | [276] | [277] |
| [277] | [278] | [279] |
| [279] | [280] | [281] |
| [281] | [282] | [283] |
| [283] | [284] | [285] |
| [285] | [286] | [287] |
| [287] | [288] | [289] |
| [289] | [290] | [291] |
| [291] | [292] | [293] |
| [293] | [294] | [295] |
| [295] | [296] | [297] |
| [297] | [298] | [299] |
| [300] | [301] | [302] |
| [302] | [303] | [304] |
| [304] | [305] | [306] |
| [306] | [307] | [308] |
| [308] | [309] | [310] |
| [309] | [310] | [311] |
| [311] | [312] | [313] |
| [313] | [314] | [315] |
| [315] | [316] | [317] |
| [317] | [318] | [319] |
| [319] | [320] | [321] |
| [320] | [321] | [322] |
| [322] | [323] | [324] |
| [324] | [325] | [326] |
| [326] | [327] | [328] |
| [328] | [329] | [330] |
| [330] | [331] | [332] |
| [332] | [333] | [334] |
| [334] | [335] | [336] |
| [336] | [337] | [338] |
| [337] | [338] | [339] |
| [339] | [340] | [341] |
| [340] | [341] | [342] |
| [342] | [343] | [344] |
| [344] | [345] | [346] |
| [345] | [346] | [347] |
| [347] | [348] | [349] |
| [349] | [350] | [351] |
| [350] | [351] | [352] |
| [352] | [353] | [354] |
| [354] | [355] | [356] |
| [355] | [356] | [357] |
| [357] | [358] | [359] |
| [359] | [360] | [361] |
| [360] | [361] | [362] |
| [362] | [363] | [364] |
| [364] | [365] | [366] |
| [365] | [366] | [367] |
| [367] | [368] | [369] |
| [369] | [370] | [371] |
| [371] | [372] | [373] |
| [373] | [374] | [375] |
| [375] | [376] | [377] |
| [377] | [378] | [379] |
| [379] | [380] | [381] |
| cappuccinatore 'הכלה', 'הכלה', 'הכלה', 'הכלה', 'הכלה', 'הכ,/ 'הכ,/ 'הכ,/ 'הכ,/ 'הכ,/ 'הכ,/ 'הכ,/ 'הכ,/ 'הכ,/ 'הכ,/ 'הכ,/ 'הכ,/ 'הכ,/ 'הכ,/ 'הכ,/ 'הכ,/ 'הכ,/ 'הכ,/ 'הכ,/ 'הכ,/ 'הכ,/ 'הכ,/ 'הכ,/ 'הכ,/ 'הכ,/ 'הכ,' 'HygieSteam' ' 'HygieSteam' ' 'HygieSteam' ' 'HygieSteam' ' 'HygieSteam' ' 'HygieSteam' ' 'HygieSteam' ' 'HygieSteam' ' 'HygieSteam' ' 'HygieSteam' ' 'HygieSteam' ' 'HygieSteam' ' 'HygieSteam' ' 'HygieSteam' ' 'HygieSteam' ' 'HygieSteam' ' 'HygieSteam' ' 'Hygie Steam' ' 'HygieSteam' ' 'HygieSteam' ' 'HygieSteam' ' 'HygieSteam' ' 'HygieSteam' ' 'HygieSteam' ' 'HygieSteam' ' 'HygieSteam' ' 'HygieSteam' ' 'HygieSteam' ' 'HygieSteam' ' 'HygieSteam' ' 'HygieSteam' ' 'HygieSteam' ' 'HygieSteam' ' 'HygieSteam' ' ' HygieSteam' ' 'HygieSteam' ' 'HygieSteam' ' 'HygieSteam' ' 'HygieSteam' ' 'HygieSteam' ' 'HygieSteam' ' 'HygieSteam' ' 'HygieSteam' ' 'HygieSteam' ' 'HygieSteam' ' 'HygieSteam' ' 'HygieSteam' ' 'HygieSteam' ' 'HygieSteam' ' 'HygieSteam' ' 'HygieSteam' "HygieSteam"HygieSteam"HygieSteam"HygieSteam"HygieSteam"HygieSteam"HygieSteam"HygieSteam"HygieSteam"HygieSteam"HygieSteam"HygieSteam"HygieSteam"HygieSteam"HygieSteam"HygieSteam"HygieSteam"HygieSteam"HygieSteam"HygieSteam"HygieSteam"HygieSteam"HygieSteam"HygieSteam"HygieSteam"HygieSteam'HygieSteam"HygieSteam"HygieSteam"HygieSteam"HygieSteam"HygieSteam"HygieSteam"HygieSteam"HygieSteam"HygieSteam"HygieSteam"HygieSteam"HygieSteam"HygieSteam"HygieSteam"HygieSteam"HygieSteam"HygieSteam"HygieSteam"HygieSteam"HygieSteam"HygieSteam"HygieSteam"HygieSteam"HygieSteam HygieSteam ' 'HygieSteam' ' 'HygieSteam' ' 'HygieSteam' ' 'HygieSteam' ' 'HygieSteam' ' 'HygieSteam' ' 'HygieSteam' ' 'HygieSteam' ' 'HygieSteam' ' 'HygieSteam' ' 'HygieSteam' ' 'HygieSteam' ' 'HygieSteam' ' 'HygieSteam' ' 'HygieSteam' ' 'HygieSteam' ' 'Hy气候Clean AquaClean . 'AquaClean . 'AquaClean . 'AquaClean . 'AquaClean . 'AquaClean . 'AquaClean . 'AquaClean . 'AquaClean . 'AquaClean . 'AquaClean . 'AquaClean . 'AquaClean . 'AquaClean . 'AquaClean . 'AquaClean . 'AquaClean . 'AquaClean |
| ### | ### | ### |
| ### | ### | ### |
| ### | ### | ### |
| ### | ### | ### |
| ### | ### | ### |
| ### | ### | ### |
| ### | ### | ### |
| ### | ### | ### |
| ### | ### | ### |
| ### | ### | ### |
| ### | ### | ### |
| ### | ### | ### |
| ### | ### | ### |
| ### | ### ### | ### |
| ### | ### | ### |
| ### | ### | ### |
| ### | ### | ### |
| ### | ### | ### |
| ### | ### | ### |
| ### | ### | ### |
| ### | ### | ### |
| ### | ### | ### |
| ### | ### | ### |
| ### | ### | ### |
| ### | ### | ### |
| ### | ### | ### 2.4 |
| ### | ### | ### |
| ### | ### ### | ### |
| ### | ### ### | ### |
| Alexa | Alexa | Alexa |
| Smart Reorders | ||
| Wi-Fi-7 ### | Wi-Fi-7 ### | 7w Wi-Fi-7 ### |
| Wi-Fi-7 ### | Wi-Fi-7 ### | 7w Wi-Fi-7 ### |
| Wi-Fi-7 ### | Wi-Fi-7 ### | 7w Wi-Fi-7 ### |
| Wi-Fi-7 ### | Wi-Fi-7 ### | 7w Wi-Fi-7 ### |
| Wi-Fi-7 ### | Wi-Fi-7 ### | 7w Wi-Fi-7 ### |
| Wi-Fi-7 ### | Wi-Fi/1 Wi-Fi-7 | 7w Wi-Fi-7 |
| Wi-Fi-7 ### | Wi-Fi/1 Wi-Fi-7 | 7w Wi-Fi-7 |
| Wi-Fi-7 ### | Wi-Fi/1 Wi-Fi-7 | 7w Wi-Fi-7 |
| Wi-Fi-7 ### | Wi-Fi/1 Wi-Fi-7 | 7w Wi-Fi-7 |
| Wi-Fi-7 ### | Wi-Fi/1 Wi-Fi-7 | 7w Wi-Fi-7 |
| ### | ### | ### |
| ### | ### | ### |
| ### | ### | ### |
| ### | ### | ### |
| ### | ### | ### |
| ### | ### | ### |
| ### | ### | ### |
| הכלה הכלה 1987 | הכלה הכלה 1986 |
| 1987-12-4 - 11 | 77 |
| 1987-12-03 - 11 | 77 |
| 1987-12-03 - 1.7 | 77 |
| 1987-12-03 - 450 | 77 |
| 1987-12-03 - 15 | 77 |
| 1987-12-03 - 600 | 77 |
| 1987-12-03 - 148 | 77 |
| 1987-12-03 - 77 | 77 |
| b/g/n 802.11 | Wi-Fi 77 |
-1 SM8780, SM8782, SM8785, SM8885
https://www.saeco.com
Wi-Fi
2.4 GHz 802.11 b/g/n, No 801/2013 (EU).
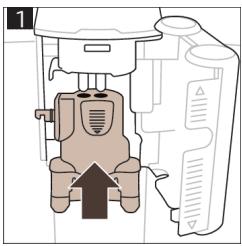
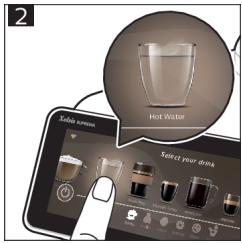
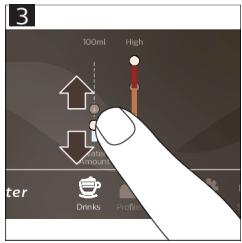
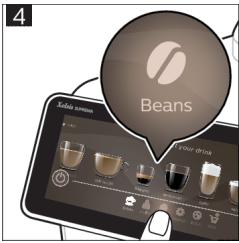
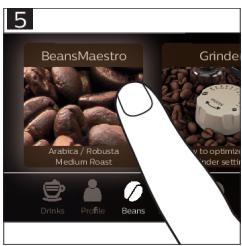

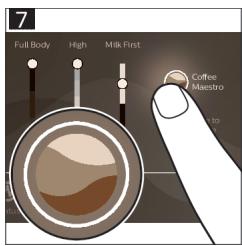
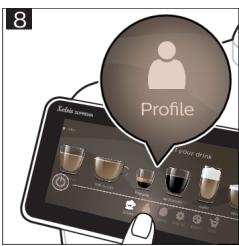
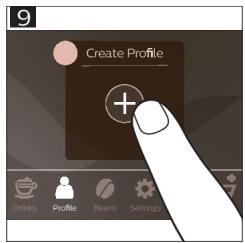
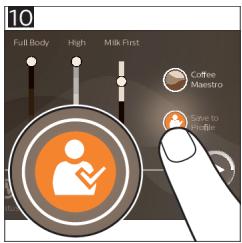
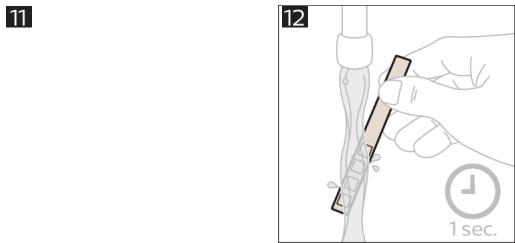
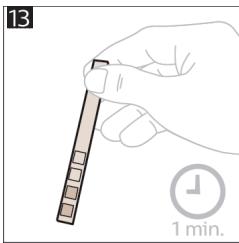
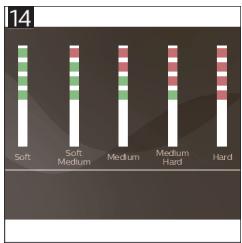
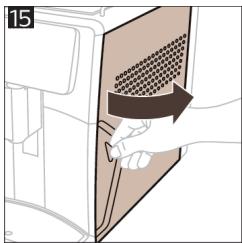
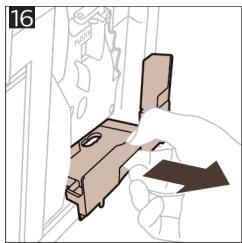
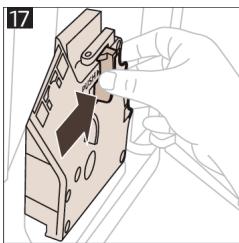
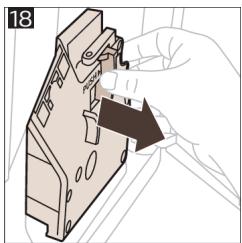
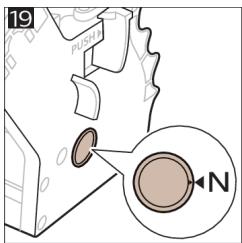
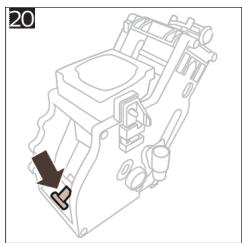
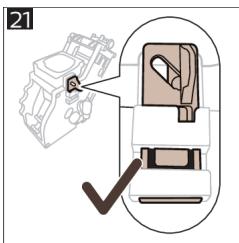
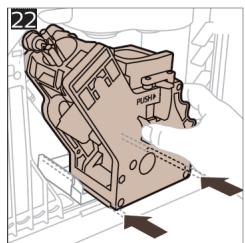
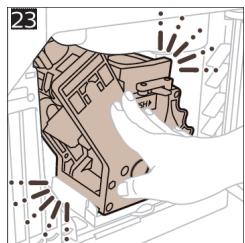
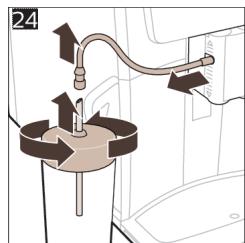
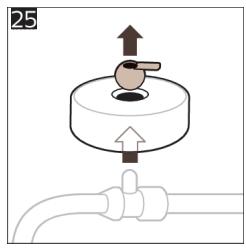
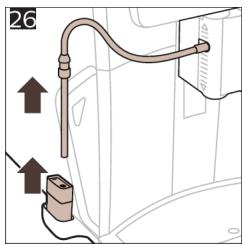
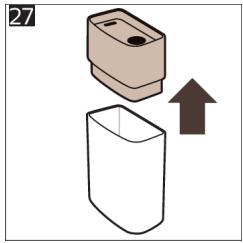
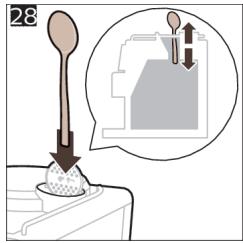
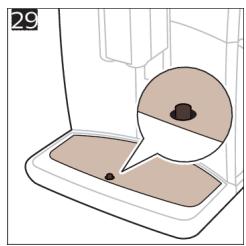

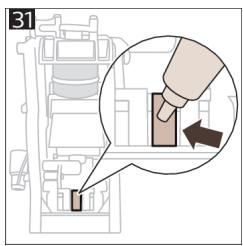
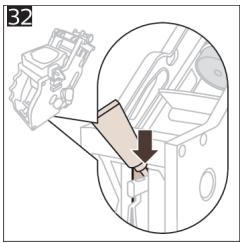
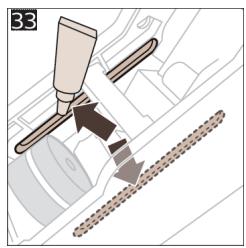
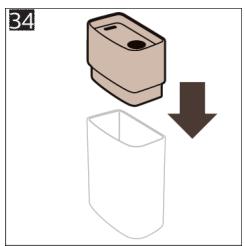
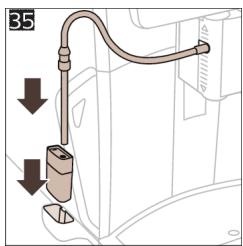
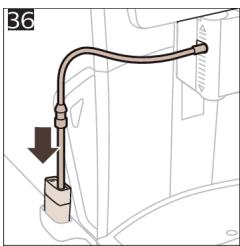
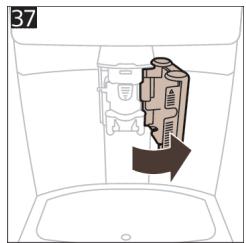
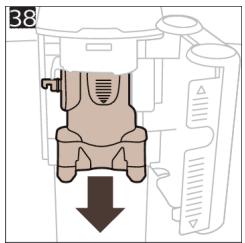
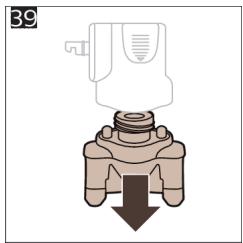
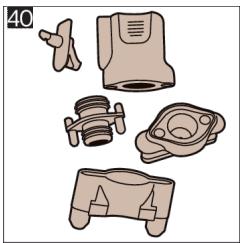
42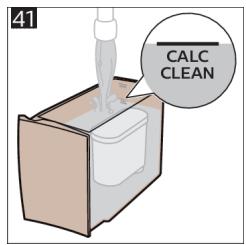
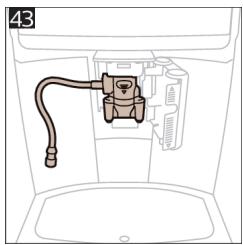
4219.450.3076.2 (01/2022) rev.00

www.saeco.com/care


75% recycled paper
75% recycled paper
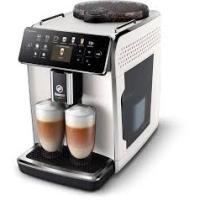
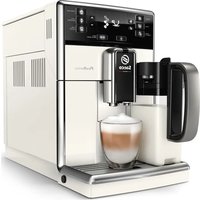
- MACHINE OVERVIEW (FIG. A)
- ACCESSORIES
- CONTROL PANEL
- INTRODUCTION
- SWITCHING ON THE MACHINE WHEN YOU HAVE A XELSIS SUPREMA (SM8885, SM8889 ONLY)
- SWITCHING ON THE MACHINE WHEN YOU HAVE A XELSIS DELUXE (SM8780, SM8782, SM8785 ONLY)
- CONNECTING TO WI-FI
- SPECIAL FUNCTIONS
- SPECIAL FUNCTION
- PURPOSE
- BREWING DRINKS
- GENERAL STEPS
- SUPPORT ON DRINK PARAMETERS
- BREWING MILK-BASED DRINKS
- BREWING COFFEE WITH PRE-GROUND COFFEE
- DISPENSING HOT WATER
- PERSONALIZATION
- GET THE BEST OUT OF YOUR BEANS WITH THE BEANMAESTRO FUNCTION
- SPEED UP WITH COFFEEMAESTRO
- PERSONALIZE YOUR DRINK WITH THE COFFEEEQUALIZER TOUCH+ FUNCTION
- SAVE YOUR FAVORITE DRINKS IN A PROFILE
- EXTRA SHOT (EXTRASHOT)
- ADJUSTING MACHINE SETTINGS
- SETTING THE WATER HARDNESS
- USE THE WATER HARDNESS TEST STRIP SUPPLIED IN THE BOX TO DETERMINE THE WATER HARDNESS IN YOUR REGION
- SET THE MACHINE TO THE CORRECT WATER HARDNESS
- ADJUSTING THE GRIND SETTING
- RESTORING FACTORY SETTINGS
- AQUACLEAN WATER FILTER
- AQUACLEAN FILTER STATUS INDICATION
- ACTIVATING THE AQUACLEAN WATER FILTER (5 MIN.)
- REPLACING THE AQUACLEAN WATER FILTER (5 MIN.)
- REMOVING AND INSERTING THE BREW GROUP
- REMOVING THE BREW GROUP FROM THE MACHINE
- REINSERTING THE BREW GROUP
- CLEANING AND MAINTENANCE
- CLEANING THE BREW GROUP
- CLEANING THE BREW GROUP UNDER THE TAP
- CLEANING THE BREW GROUP WITH THE COFFEE OIL REMOVER TABLETS
- LUBRICATING THE BREW GROUP
- CLEANING PROGRAMS FOR THE INTERNAL CAPPUCCINATORE
- CLEANING THE INTERNAL CAPPUCCINATORE UNDER THE TAP
- DESCALING PROCEDURE
- WHAT TO DO IF THE DESCALING PROCEDURE IS INTERRUPTED
- ERROR CODES
- ORDERING ACCESSORIES
- SOFTWARE UPDATES
- TROUBLESHOOTING
- TECHNICAL SPECIFICATIONS
- DECLARATION OF CONFORMITY
- WI-FI
- GENERAL VIEW OF THE MACHINE (FIG. A)
- COMMANDED ACCESSORIES
- CONNECT VIA WIFI
- EXTRA SHOT
- WWW.SAECO.COM/MYCOFFEEMACHINE
- TURNING ON THE MACHINE WHEN YOU HAVE XELSIS SUPREMA (ONLY SM8885, SM8889)
- TURNING ON THE MACHINE WHEN YOU HAVE XELSIS DELUXE (ONLY SM8780, SM8782, SM8785)
- FUNCTION
- PREPARING DRINKS
- SUPPORT FOR DRINK PARAMETERS
- PREPARING MILK DRINKS
- DESCALING PARAMETERS MAY VARY
- ADJUST THE COFFEE STRENGTH ACCORDING TO YOUR PREFERENCE
- PREPARING THE COFFEE MAKER
- BREWING COFFEE
- CLEANING
- USING THE BEANMAESTRO GRINDER
- USING THE COFFEEMAESTRO
- THE COFFEEEQUALIZER TOUCH+ IS USED TO ADJUST THE COFFEE SPOUTS
- SAVING THE SPOUT SETTINGS AS A PROFILE
- EXTRA SHOT FUNCTION
- SETTING THE COFFEE MACHINE PARAMETERS
- TO DETERMINE THE WATER HARDNESS, USE THE TEST STRIP INCLUDED WITH THE MACHINE
- SET THE WATER HARDNESS ON THE MACHINE
- SETTING THE GRINDER
- AQUACLEAN WATER FILTER REPLACEMENT
- REPLACING THE AQUACLEAN FILTER
- INSTALLING THE AQUACLEAN FILTER (5 MINUTES)
- REMOVING THE AQUACLEAN FILTER (5 MINUTES)
- FOLLOW THE INSTRUCTIONS FOR USE
- MACHINE WASH PROGRAM SELECTION
- POINT
- CLEANING REQUIRED
- IF THE CONTROL PANEL IS LOCKED
- NEED TO CHANGE
- CLEANING THE BREW GROUP WITH WATER
- CLEANING THE BREW GROUP FOR COFFEE OIL RESIDUES
- CLEANING PROGRAMS FOR THE INTERNAL MILK SYSTEM
- CLEANING THE INTERNAL MILK SYSTEM WITH WATER
- THE DESCALING PROCEDURE MUST BE PERFORMED WHEN THE "DESCALE" INDICATOR LIGHTS UP
- CLEANING THE BREW GROUP WITH CLEANING TABLETS
- CLEANING THE BREW GROUP WITH CLEANING TABLETS TO REMOVE COFFEE OIL
- PREPARING MILK-BASED DRINKS
- BREWING PARAMETER SETTINGS
- CLEANING THE BREWING GROUP AFTER MILK DRINKS
- CLEANING THE BREWING GROUP WITH A CLEANING TABLET FOR COFFEE RESIDUES
- LUBRICATING THE BREWING GROUP
- CLEANING PROGRAMS FOR THE INTERNAL MILK FROTHER
- CLEANING THE INTERNAL MILK FROTHER UNDER RUNNING WATER
- HTTPS://WWW.SAECO.COM
- THE COFFEE MACHINE WILL START DESCALING WHEN THE XELSIS SUPREMA INDICATES THIS (ONLY FOR MODELS SM8885, SM8889)
- THE COFFEE MACHINE WILL START DESCALING WHEN THE XELSIS SUPREMA INDICATES THIS (ONLY FOR MODELS SM8780, SM8782, SM8785)
- MAXIMUM SPECIAL FUNCTIONS
- COFFEE MAKER
- IMPORTANT SAFEGUARDS
- INSTRUCTIONS FOR CLEANING AND DESCALING
- COFFEE MAKER PARTS
- HOT WATER DISPENSING
- THE BEST COFFEE IS BREWED WITH THE BEANMAESTRO FUNCTION
- COFFEEMAESTRO
- COFFEEEQUALIZER TOUCH
- THE BREWING UNIT IS DESIGNED FOR OPTIMAL PERFORMANCE
- EXTRASHOT
- ADJUSTING THE COFFEE STRENGTH
- ADJUSTING THE WATER HARDNESS
- TO ADJUST THE WATER HARDNESS, USE THE TEST STRIP THAT CAME WITH THE MACHINE. FOLLOW THE INSTRUCTIONS ON THE TEST STRIP
- TO SET THE WATER HARDNESS
- ADJUSTING THE COFFEE TEMPERATURE
- ADJUSTING THE GRINDER
- PREPARING COFFEE WITH PRE-GROUND COFFEE
- HOT WATER
- PERSONAL SETTINGS
- PREPARE THE BEST COFFEE FROM DIFFERENT COFFEE BEANS WITH THE BEANMAESTRO FUNCTION
- PRESS THE COFFEEMAESTRO FUNCTION BUTTON
- INSTALLING THE BREWING UNIT
- MAINTENANCE
- ELEMENT
- MAINTENANCE INTERVAL
- HOW TO CLEAN THE CONTROL PANEL
- WEEKLY
- AQUACLEAN FILTER
- KIPICNE
- IF YOU HAVE A XELSIS SUPREMA (MODELS SM8885, SM8889), YOU CAN CONNECT THE MACHINE AS FOLLOWS
- THIS IS THE DELUXE MODEL (ONLY SM8780, SM8782, SM8785)
- ADVANCED FUNCTIONS
- WATER FILTER
- CARTRIDGES
- WATER PARAMETER SETTINGS
- CLEANING THE WATER FILTER
- CLEANING THE COFFEE MACHINE
- BEANMAESTRO FUNCTIONS
- COFFEEMAESTRO FUNCTIONS
- WITH THE COFFEEEQUALIZER TOUCH + FUNCTION, YOU CAN ADJUST THE WATER SETTINGS
- WATER HARDNESS SETTING
- TO DETERMINE THE WATER HARDNESS IN YOUR AREA, USE THE WATER HARDNESS TEST STRIP PROVIDED
- TO SET THE MACHINE'S WATER HARDNESS
- ADJUSTING THE GRINDER SETTINGS
- AQUACLEAN WATER FILTER INDICATOR
- INSTALLING THE AQUACLEAN WATER FILTER (5 MIN)
- REPLACING THE AQUACLEAN WATER FILTER (5 MIN)
- CLEANING THE BREWING UNIT
- MAINTENANCE AND TECHNICAL SERVICE
- DESCALING FREQUENCY
- REPLACEMENT PART
- CLEAN THE BREW GROUP UNDER RUNNING WATER
- CLEAN THE BREW GROUP WITH PHILIPS COFFEE MACHINE CLEANING TABLETS
- LUBRICATE THE BREW GROUP
- CLEANING PROGRAMS FOR THE MILK CARAFE
- CLEAN THE MILK CARAFE WITH FRESH WATER
- HOW TO PERFORM THE DESCALING PROCEDURE
- ACTIONS TO TAKE IF THE DESCALING PROCEDURE IS INTERRUPTED
- PROBLEM (FIGURE A)
- LNUUUNPTN
- YWNUUNU UWHUW
- UTNWNIAJNIU
- HUWTU UHWUGUTL UTPTUWU, NP NNP NIUTP XELSIS SUPREMA (UHWU SM8885, SM8889)
- HUUTU UHWUGUT UTPTUW, NP NNP NIUTP XELSIS DELUXE (UHWJU SM8780, SM8782, SM8785)
- WI-FI CONNECTION
- BEFORE CLEANING, MAKE SURE THE DEVICE IS UNPLUGGED
- AQUACLEAN FILTER INSTALLATION
- REPLACING THE AQUACLEAN FILTER (5 STEPS)
- AQUACLEAN WATER FILTER (5 PCS)
- ACTIVATING THE AQUACLEAN FILTER
- LSH3N
- NABNDMBNGM3S (BYM. S)
- WWW.SAECO.COM/CARE)
- GUDGDOOMN 6BNGD
- AFO3N0DMM3N
- WI-FI-06 0033DNG
- N6S6S6M YOG3J3NN YOG3NN DMOGYMDOYN YOG
- XELSIS SUPREMA (SM8885, SM8889 7 W W W W W W W
- XELSIS DELUXE (SM8780, SM
- (TA)SM
- AQUACLEAN D'N |DQN
- AQUACLEAN
- (ΠΙΓΤ 5) AQUACLEAN D'ÜN | √N YŊ
- (ΠΙΓΤ 5) AQUACLEAN ΜΗΝ ΜΡΟΝ ΠΗΝ
- U T N N 7 W I Y N X X J 7 N O N
- N7NNNNNNNNNNNNNNNNNNNNNNNNNNNNNNNNNNNNNNNNNNNNNNNNNNNNNNNNNNNNNNNNNNNNNNNNNNNNNNNNNNNNNNNNNNNNNNNNNNNNNNNNNNNNNNNN
- N
- NNN NN NN NN NN NN NN
Brand : SAECO
Model : M8889
Category : Espresso